Baked Asian Chicken Wings are seasoned with spice rub, baked, then glazed with a sticky soy/Sriracha/sesame sauce before serving as an appetizer or main dish! 
Okay… seriously… these baked Asian chicken wings are wonderful! They have GREAT flavor, thanks to the spices used AND the delicious Asian-inspired sauce they are coated in. YUM!
I have loved traditional hot buffalo wings for a long time, but I’m telling you… sticky Asian wings are a force to be reckoned with! Chicken wings are seasoned, baked, then broiled for crispness, then coated in a yummy sauce, and served.
Believe it or not, baked Asian chicken wings are also very easy to make. Here’s how to make these lip-smackin’ appetizers:
Scroll Down For A Printable Recipe Card At The Bottom Of The Page
Make A Spice Rub For The Wings
Mix the ingredients for the spice rub together in a small bowl. The ingredients in the spice rub are ground ginger, baking powder, garlic powder, onion powder, salt, pepper, and cayenne pepper.
Set the seasoning mixture aside. See? So far, it’s not too hard at all!

Prepare The Wings For Baking
Lay the chicken wing pieces on several layers of paper towel and pat them dry. Place the dried chicken wings into a large mixing bowl (or freezer bag), and sprinkle with the dry spice rub. If you are doubling the recipe, make sure to do this step in two batches.
Toss the chicken several times until all the wings have been evenly coated on all sides with the spices.

Cover a baking sheet with foil and spray with a non-stick baking spray. Lay the seasoned chicken wings out on the foil, in a single layer, with a bit of space between each one.
Baked Asian Chicken Wings are then cooked (on the middle rack) in a preheated 400° F. oven. Bake the wings for 45-50 minutes, until they are nice and golden brown.

Prepare The Sauce
While the chicken wings are cooking, prepare the Asian-inspired sauce that will cover the wings, once they are done.
Whisk together soy sauce, dry sherry (or Japanese sweet rice wine/mirin), water, sesame seed oil, grated ginger, Sriracha sauce, minced garlic cloves, salt, pepper and cornstarch in a small bowl.
Set the bowl of Asian sauce aside, while you make a simple syrup (which will be added to the sauce later).

Make A Simple Syrup For The Sauce
A few minutes before the wings are done, you will need to make a sticky simple syrup that will be added to the Asian sauce. To do this, place water and sugar in a large skillet. Stir to combine.
Bring this mixture to a boil on medium heat, and once boiling, let it cook for one minute, stirring often. IMPORTANT: Make sure to only cook it for ONE minute, otherwise it might harden up!
Finishing The Asian Sauce
Once the syrup has cooked for one minute, immediately add the reserved Asian sauce into the skillet. Stir to combine and cook this sauce on low heat for about 2 minutes, stirring often, until it has thickened.

Broil Wings After Baking, To Desired Crispness
As soon as the baked Asian chicken wings are done baking, turn on the broiler element for the oven. Move the chicken wings on the baking sheet up in oven until they are about 6-8 inches from the broiler.
Let the wings broil until they become crispy but make sure to keep your eye on them so they won’t burn. Turn the wings over and crisp up the other side under the broiler, then remove from oven.
This step will only take a few minutes total! Remove the pan of wings from oven once they’re done.
Prepare Baked Asian Chicken Wings For Serving
Place the baked and broiled chicken wings into a large bowl. Pour the warm Asian sauce over the top, then toss gently, to fully coat the wings with the sauce.
The photo on the left (below) is how the chicken looks after broiling. The pic on the right (below) is how the baked Asian chicken wings look, once the yummy sauce had been added to coat them!

Now all that is left to do is to serve the wings! Place the baked Asian chicken wings onto a serving platter and sprinkle lightly with sesame seeds.
You can also add some fresh cilantro (optional) if you want, for extra color! This topping is optional.

That’s it! This recipe, as written below, will make a dozen YUMMY baked Asian chicken wings, but can be easily doubled!
We enjoyed these wings this time while watching the super bowl, along with a separate, delicious batch of Buffalo Honey Hot Wings!

Hope you have an opportunity to make these delicious appetizers for a family get together, a party, or just a “lay on the couch in sweatpants and watch sports all afternoon” day.
I really think you (and those you love) will enjoy these scrumptious chicken wings because they taste wonderful!
Thank you for stopping by, and I invite you to come back again soon for more family-friendly recipes. Take care, may God bless you, and have a wonderful day.
Looking For More APPETIZER Recipes?
You can find ALL of my recipes in the Recipe Index, which is located at the top of the page. I have a nice variety of appetizer recipes to choose from, including:
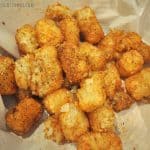
- Cajun Tater Tots with Dipping Sauce
- Crunchy Homemade Onion Rings
- Classic Bruschetta
- Guinness Baked Cheese Dip
- Roasted Red Pepper Hummus
Want More Recipes? Get My FREE Newsletter!
I publish a newsletter 2 times per month (1st and 15th) with lots of recipes, tips, etc.
Would you like to join our growing list of subscribers?
There is a Newsletter subscription box on the top right (or bottom) of each blog post, depending on the device you use.
You can submit your e-mail address there, to be added to my mailing list.
Find Me On Social Media:
Facebook page: The Grateful Girl Cooks!
Pinterest: The Grateful Girl Cooks!
Instagram: jbatthegratefulgirlcooks

Recipe Adapted From: http://carlsbadcravings.com/recipe/baked-sticky-general-tsos-chicken-wings/
↓↓ PRINTABLE RECIPE BELOW ↓↓

- 24 chicken wings , skin on, rinsed and patted dry
- Sesame seeds, to garnish when serving wings
- 2 Tablespoons baking powder
- 2 Tablespoons ground ginger
- 1 teaspoon (EACH) salt, garlic powder and onion powder
- 1/2 teaspoon black pepper
- 1/4 teaspoon cayenne pepper
- 1/3 cup low sodium soy sauce
- 1/3 cup dry sherry
- 1/3 cup water
- 1 Tablespoon sesame seed oil
- 3/4 teaspoon Sriracha sauce (or Asian hot chili sauce) , can double amt. if you like the heat
- 1½ Tablespoons ginger, freshly grated
- 3 garlic cloves , minced
- 1/4 teaspoon salt
- black pepper (a pinch)
- 1 Tablespoon corn starch
- 1/2 cup granulated sugar
- 2 Tablespoons water
Preheat oven to 400° F. Mix ingredients for spice rub in a small bowl, then set aside.
Lay chicken wings on several layers of paper towels; pat them dry. Place wings into a large mixing bowl (or freezer bag), and sprinkle with spice rub. If you are doubling the recipe, make sure to do this step in two batches. Toss the chicken several times until all wings have been evenly coated on all sides.
Cover a baking sheet with foil; spray with non-stick baking spray. Lay seasoned wings out on the foil, in a single layer, with space between each one. Bake at 400° F. on the middle rack in oven for 45-50 minutes, until nice and golden brown.
While wings are cooking, prepare the Asian sauce that will cover the wings, once done. Whisk together soy sauce, dry sherry, water, sesame seed oil, grated ginger, Sriracha sauce, minced garlic cloves, salt, pepper and cornstarch in a small bowl. Set the sauce aside, while you make a simple syrup.
A few minutes before wings are done, make a sticky simple syrup that will be added to the Asian sauce. To do this, place water and sugar in a large skillet. Stir to combine. Bring this to a boil on medium heat; once boiling, let it cook for one minute, stirring often. IMPORTANT: Make sure to only cook it for ONE minute, otherwise it might harden up! Once it has cooked for one minute, immediately add the reserved Asian sauce. Stir to combine, and cook on low heat for about 2 minutes, stirring often, until it has thickened.
As soon as the wings are done baking, turn on the broiler element for the oven. Move the chicken wings on the baking sheet up in oven until they are about 6-8 inches away from the broiler. Let the wings broil until they become crispy, but keep your eye on them so they don't burn. Turn the wings over and crisp up the other side under the broiler. This step will only take a few minutes total! Remove from oven, once done.
Place hot chicken wings into a large bowl. Pour warm Asian sauce over the top, then toss gently to fully coat the wings with sauce. Transfer wings onto a serving platter, and sprinkle lightly with sesame seeds. You can also add some fresh cilantro (optional) if you want, for extra color! Serve, and enjoy!
Here’s one more to pin on your Pinterest boards! 


! They're a little bit sweet, and a little bit spicy! / The Grateful Girl Cooks!")


! They're a little bit sweet, and a little bit spicy! / The Grateful Girl Cooks!")
, served with a seasoned Ranch/Sour Cream dipping sauce and BBQ sauce, are the perfect appetizer to munch on at any dinner, get together or party! / The Grateful Girl Cooks!")


, served with a seasoned Ranch/Sour Cream dipping sauce and BBQ sauce, are the perfect appetizer to munch on at any dinner, get together or party! / The Grateful Girl Cooks!")


