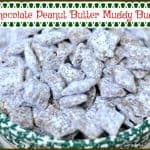
Chocolate Peanut Butter Muddy Buddies are powdered sugar dusted chocolate peanut butter crispy treats you will love! They’re yummy snacks or holiday gifts!
Chocolate Peanut Butter Muddy Buddies are a fun little snack during the holidays… or anytime, for that matter. Perfect for snacking OR giving to friends as a food gift… they are sure to make someone smile!
I love these decadent little snacks… with a crunch and the taste of chocolate and peanut butter, they are perfect for serving at a party, or sitting in front of the TV watching a football game! Best part… they are so easy to make!
Scroll Down For A Printable Recipe Card At The Bottom Of The Page
How To Make Chocolate Peanut Butter Muddy Buddies
Measure out the Chex cereal into a LARGE bowl. I used corn and rice for this recipe.

Melt chocolate chips, peanut butter and butter in a microwavable bowl on High for 1 minute. Remove and stir until creamy smooth. If necessary, microwave an additional 15 seconds, then stir until smooth. Do NOT overcook or chocolate will burn.
Mine was smooth after first minute of cooking and stirring well. Once totally smooth, add the vanilla extract. Stir. Pour the chocolate mixture over the cereal. Stir well, to fully coat all the cereal.


Time To Coat The Muddy Buddies
Once all cereal has been coated with chocolate, place HALF the mixture into a separate clean LARGE bowl. Add HALF the powdered sugar, and stir to fully coat. When done, remove the chocolate peanut butter muddy buddies to wax paper. Repeat this process with the other half of the cereal and powdered sugar.

Let The Chocolate Peanut Butter Muddy Buddies Cool
Spread the chocolate peanut butter muddy buddies out on wax paper and let them cool completely, before serving.

Store the Muddy Buddies in an airtight covered container in refrigerator for up to 2 weeks. Try to stay out of them, cause they are ADDICTING! It’s also fun to divide the mix up into fancy covered containers or jars and give this simple gift to friends over the holidays.

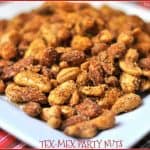
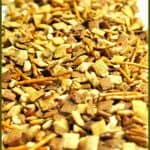
If you’re looking for another recipe using Chex cereal I hope you will check out my Chex Mix Munchies! They are another great snack, made in the microwave!
Have a wonderful day! I sincerely hope you can find time during this busy time of year to quietly reflect on the true meaning of Christmas. You are deeply loved by the One who created you, and sent His only Son to earth that first Christmas to draw us all back to Him.
Looking For More Snack Recipes?
You can find all of my recipes in the Recipe Index, located at the top of the page. I have some wonderful snack recipes you might enjoy, including:
Interested In More Recipes?
Thank you for visiting this website. I appreciate you using some of your valuable time to do so. If you’re interested, I publish a newsletter 2 times per month (1st and 15th) with all the latest recipes, and other fun info. I would be honored to have you join our growing list of subscribers, so you never miss a great recipe!
There is a Newsletter subscription box on the top right side (or bottom) of each blog post, depending on the device you use, where you can easily submit your e-mail address (only) to be included in my mailing list.
You Can Also Find Me On Social Media:
Facebook page: The Grateful Girl Cooks!
Pinterest: The Grateful Girl Cooks!
Instagram: jbatthegratefulgirlcooks

Recipe Adapted From: The cookbook titled : “Betty Crocker Christmas Cookbook”, Page 278, Wiley Publishing, Inc., Copyright 2010, General Mills.
- 9 cups Chex cereal (any variety- I used half corn and half rice)
- 1 cup semi-sweet chocolate chips
- 1/2 cup peanut butter
- 1/4 cup butter
- 1 teaspoon vanilla extract
- 1 1/2 cups powdered sugar
- Place the cereal into a large bowl. Set the bowl aside.
- Place the chocolate chips, peanut butter and butter into a microwaveable bowl. Cook this uncovered on the HIGH setting for 1 minute. Remove from microwave, and stir well. It is ready when all ingredients become smooth. If necessary, place back in microwave for15 additional seconds, then stir again until mixture is smooth.
- Stir vanilla extract into melted chocolate peanut butter mixture. Pour this mixture over the cereal. Stir well, until all is coated with chocolate. Once coated, pour HALF the cereal into a separate large clean bowl. Add HALF the powdered sugar. Stir well, until completely coated.
- Remove powdered sugar coated cereal to wax paper. Repeat process with other half of cereal and powdered sugar. Spread finished cereal on wax paper, until cool. This is the method I used.
- (Note: If desired, you can place all the cereal and powdered sugar in a 2 gallon plastic storage bag, and shake until covered).
- Store muddy buddies in a sealed, airtight container in refrigerator for up to 2 weeks
Here’s one more to pin on your Pinterest boards!


 / The Grateful Girl Cooks!")
 / The Grateful Girl Cooks!")
 / The Grateful Girl Cooks!")
 / The Grateful Girl Cooks!")
 / The Grateful Girl Cooks!")
 / The Grateful Girl Cooks!")
