Kung Pao Zoodles is a low calorie (under 300), low carb dish using spiralized zucchini noodles, cooked in a sweet/spicy Asian sauce, and it can be made with or without chicken.

I’ve got to be honest here… this recipe totally surprised me! I purchased a spiralizer recently, to essentially make “noodles” out of a lot of different vegetables. I’d been wanting one for a while and finally bought a fairly inexpensive one ($29).
Scroll Down For A Printable Recipe Card At The Bottom Of The Page
What If You Don’t Have A Spiralizer?
If you do not have access to a Spiralizer, it IS possible to make zucchini noodles by hand. The best video I’ve seen to describe how to do this is on YouTube, which demonstrates three easy ways to make your own “zoodles” (with box grater, vegetable peeler, or mandoline). I recommend watching it!
Here’s the link to the short video, from Kelly Senyei at “Just A Taste”: https://www.youtube.com/watch?v=ETgPaDQh9S4 . This was the first recipe I made using it, and my expectations were fairly low for what Kung Pao Zoodles would taste like. Zoodles is a word commonly used to describe Zucchini Noodles!
Whoa! I’m NOT KIDDING… I totally LOVED this dish! This dish can also be a healthy/delicious meatless meal, by simply omitting the chicken breast. It only took a couple minutes to turn two medium sized zucchini into gorgeous pasta like strands of veggie goodness!
Once the “zoodles” were cooked in the amazingly easy Asian inspired sauce, this dish made me GIDDY with excitement with my first bite!
This recipe for Kung Pao Zoodles is very easy to prepare. If there is one tip I can give you, it is to HAVE EVERYTHING PREPPED AND READY TO GO BEFORE BEGINNING COOKING! The dish comes together very quickly once started, so be prepared!
How Do I Make Kung Pao Zoodles?
Cut ends off both zucchinis, then spiralize them into spaghetti-like noodles, catching them as they come out into a medium sized bowl.
If using a Spiralizer, cut the noodles with kitchen shears into 7- or 8-inch strips (cut long zoodles right in the bowl a couple of times- snip, snip!). Set aside.

Stir or whisk Asian sauce ingredients together in a small bowl (soy or tamari sauce, balsamic vinegar, hoisin sauce, water, sriracha, sugar and cornstarch). Set sauce aside.

If Preparing Kung Pao Zoodles WITH Chicken:
If you will be adding chicken to this dish, season the chicken lightly with salt and black pepper. Heat vegetable oil over medium high heat in a skillet.
Place the chicken cubes in the skillet and cook until lightly browned on all sides and cooked through. Remove the chicken from skillet and set aside (or drain on paper towel).

Prepare The Rest of This Dish
Turn the heat down to medium and add sesame oil, minced garlic and grated fresh ginger to skillet. Stir and cook for 30-45 seconds, being careful to not let the garlic burn.

Add chopped red peppers, then stir in the Asian sauce. Bring sauce to a quick boil, then turn heat down to LOW, and cook for a minute or so until the sauce is bubbling and has thickened.

Add zucchini noodles (zoodles) to skillet. Stir while cooking until the zoodles are coated with sauce. Cook for two minutes, stirring often.
As the zucchini noodles cook, they will release water, which will help to blend the sauce together with the noodles.


Time To Eat Some Kung Pao Zoodles!
When done, add the cooked chicken pieces (if using) to the skillet, and stir to combine. I found using tongs worked great at getting everything mixed together.
Divide the Kung Pao zoodles between two serving bowls, and garnish each serving with chopped dry roasted peanuts and sliced green onions.

Serve these delicious Kung Pao zoodles and enjoy! I absolutely LOVED this dish because there is so much yummy flavor!
This meal is filling (as each serving is about 2 cups), it tastes amazing, and it so low in calories! Winner, winner… ZOODLE dinner!


I really hope you will try making these Kung Pao Zoodles! If you prefer a more traditional version of Kung Pao Chicken, I hope you will check out that recipe, as well.
Looking For More SPIRALIZED FOOD Recipes?
You can find ALL my recipes in the Recipe Index, located at the top of the page. I have a few delicious zoodle recipes, including:
- Thai Turkey Meatballs and Zoodles
- Spiralized Carrot Salad in Lemon Ginger Dressing
- Sweet Chili Sesame Shrimp Zoodles
Want More Recipes? Get My FREE Newsletter!
I publish a newsletter 2 times per month (1st and 15th) with lots of recipes, tips, etc.
Would you like to join our growing list of subscribers?
There is a Newsletter subscription box on the top right (or bottom) of each blog post, depending on the device you use.
You can submit your e-mail address there, to be added to my mailing list.
Find Me On Social Media:
Facebook page: The Grateful Girl Cooks!
Pinterest: The Grateful Girl Cooks!
Instagram: jbatthegratefulgirlcooks

Recipe Source: http://recipestotry.ca/kung-pao-chicken-with-zucchini/
↓↓ PRINTABLE RECIPE BELOW ↓↓

- 2 medium zucchini , ends trimmed
- 1 teaspoon vegetable or canola oil **if adding chicken
- 6 ounces boneless, skinless chicken breast **cut in 1/2 inch cubes (if adding chicken)
- 1 pinch salt and pepper , to taste
- 1/2 medium red bell pepper , cut into 1/2" pieces
- 1 teaspoon sesame oil
- 1 teaspoon freshly ground ginger
- 2 cloves garlic , minced
- 2 Tablespoons finely chopped dry roasted peanuts (for garnish)
- 2 Tablespoons thinly sliced green onions (for garnish)
- 1½ Tablespoons reduced sodium soy sauce (tamari for gluten free)
- 1 teaspoon hoisin sauce
- 1 Tablespoon balsamic vinegar
- 2½ Tablespoons water
- 1/2 Tablespoon Sriracha sauce
- 2 teaspoons granulated sugar
- 2 teaspoons cornstarch
Cut ends off both zucchini, then spiralize them into spaghetti-like noodles,. Cut noodles with kitchen shears into 8 inch strips. Set aside.
- Stir or whisk Asian sauce ingredients together in a small bowl (soy or tamari sauce, balsamic vinegar, hoisin sauce, water, sriracha, sugar and cornstarch). Set sauce aside.
If adding chicken to this dish, season lightly with salt and black pepper. Heat vegetable oil over medium high heat. Place chicken cubes into large skillet; cook until lightly browned on all sides and cooked through. Remove chicken from skillet and set aside (drain on paper towel).
Turn heat down to medium and add sesame oil, minced garlic and grated fresh ginger to skillet. Stir and cook for 30-45 seconds, being careful to not let garlic burn. Add chopped red peppers, then stir in Asian sauce. Bring sauce to a boil, then turn heat to LOW, and cook for a minute or so until sauce is bubbling and has thickened. Add zucchini noodles to skillet. Stir while cooking until zoodles are coated with sauce. Cook for two minutes, stirring often. As the zucchini noodles cook, they will release water, which will help to blend the sauce together with the noodles. When done, add cooked chicken pieces (if using), and stir to combine. I found using tongs worked great at getting everything mixed together.
To serve, divide Kung Pao zoodles between two serving bowls, and garnish with chopped peanuts and sliced green onions. Serve hot, and enjoy!
NOTE: Caloric calculation of 281 per serving includes chicken and vegetable oil to cook it in. If preparing this recipe as a MEATLESS meal, the calorie count would be approximately 167 calories per (2 cup) serving.
**Weight Watchers - Points+ = 7 points (with chicken).
Here’s one more to pin on your Pinterest boards! 


, a meatless casserole, with cheese tortellini, sauce, zucchini, spinach, & mozzarella! / The Grateful Girl Cooks!")


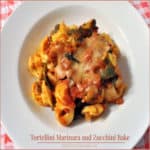
, a meatless casserole, with cheese tortellini, sauce, zucchini, spinach, & mozzarella! / The Grateful Girl Cooks!")


