Category: Meatless Meals

Eggplant Parmesan

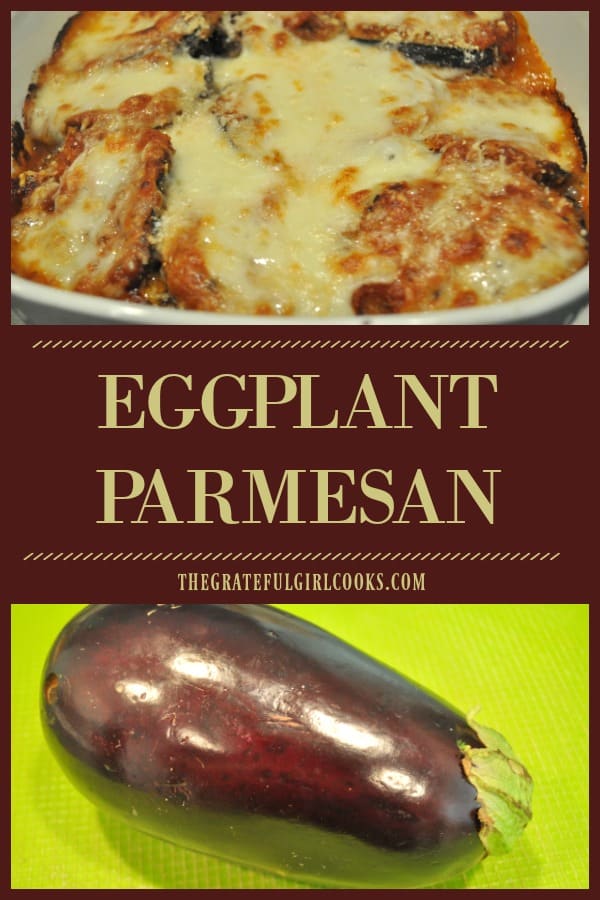
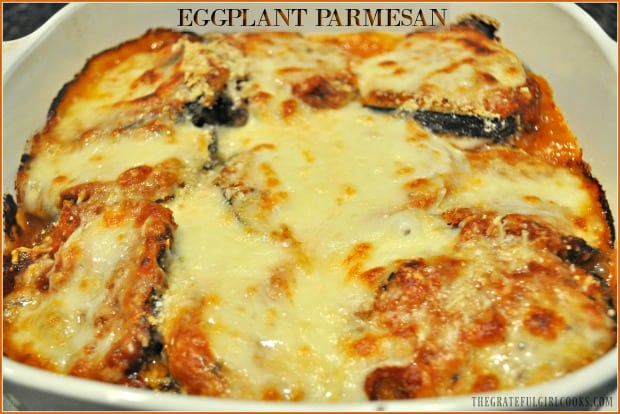
Eggplant Parmesan is a classic Italian meatless dish, with breaded eggplant slices baked with marinara sauce, mozzarella and Parmesan cheeses.

Do you enjoy eggplant parmesan?  Lots of people love this classic Italian dish, and today I am going to show you how you can make it at home! You can read some interesting information about this dish’s origins here.

I found the original recipe on Pinterest, and made this meatless dish for my husband and I several months ago. Every now and then I love to make meatless dishes, and thought this one sounded really good, so I bought a gorgeous eggplant at our local Farmer’s Market.

Eggplant Parmesan has layers of lightly breaded eggplant slices, topped with marinara sauce, Parmesan and mozzarella cheeses. The eggplant slices are lightly browned, then layered in casserole dish with the sauce and the cheeses.

Eggplant parmesan is baked until cooked through, and all that gooey cheese is melted throughout. Here’s how to make this dish:

Scroll Down For A Printable Recipe Card At The Bottom Of The Page

How To Make Eggplant Parmesan

The first thing you will need to do is let excess water drain from the fresh eggplant. This step helps to reduce “sogginess” in the eggplant slices, by pulling out moisture before cooking.

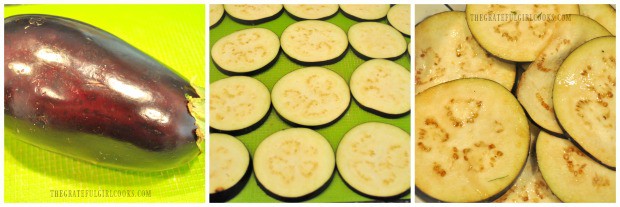
Cut a large eggplant into 1/2″ thick slices.  Salt BOTH sides of each slice. Put the salted eggplant slices in a large colander in the sink, or over a bowl.

Let the eggplant slices sit and “drain” or “sweat out” the liquid for 45 minutes. Once done draining, lightly brush off the excess salt.

Eggplant is sliced, then liquid is drained out of it before cooking Eggplant Parmesan.

Preparing The Eggplant To Make Eggplant Parmesan

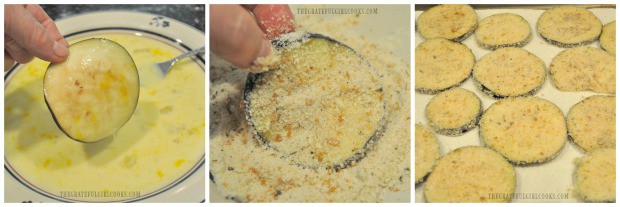
Preheat your oven to 375°F, and place two (shallow) plates on the kitchen counter. Spread the Italian seasoned breadcrumbs out, on one plate. Place the 3 slightly beaten eggs and milk on the other plate. Lightly whisk the eggs and milk together, until blended.

Dip each eggplant slice (one at a time) into the egg/milk mixture, making sure to cover both sides. Let excess liquid drip back onto plate. Dip the eggplant into the breadcrumbs, until both sides are covered, letting excess drop back onto plate.

Continue this step until all eggplant slices are breaded. Place breaded eggplant onto a paper towel covered 9×13 baking sheet in a single layer.

Eggplant slices are dipped in egg, then seasoned breadcrumbs, to make eggplant parmesan,

Browning The Eggplant

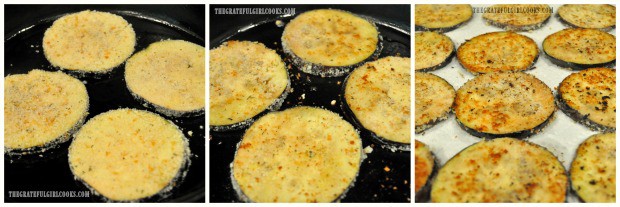
Put one Tablespoon of oil into a large skillet. Heat the skillet on medium high heat until hot, but not smoking.  Once the skillet and oil are hot, add a few slices of eggplant at a time to the skillet. I was able to cook 4 at a time.

Cook eggplant on both sides, until they are lightly browned. Once browned, transfer them from the skillet to a paper towel lined baking sheet. Continue this step for all the slices, adding one Tablespoon oil for each group of eggplant slices that are browned.

Eggplant slices are cooked on both sides to prepare them to make eggplant parmesan,

Assembling The Eggplant Parmesan Casserole

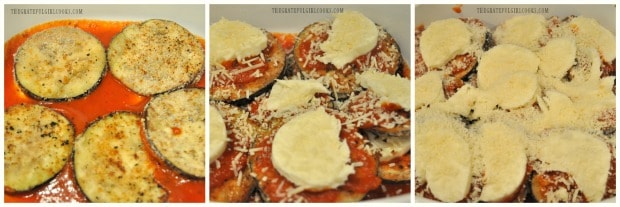
Now you are ready to assemble the eggplant parmesan! Spread 1 cup of marinara sauce on the bottom of a casserole dish. The first layer to go in is the eggplant slices. I used a 2.5 quart casserole dish, so I was able to get about 4 eggplant slices in each layer.

Once you have a layer of eggplant slices, add a spoonful of marinara sauce to the top of each slice. Don’t drown the layers in sauce! Top the sauce with a layer of mozzarella and parmesan cheeses. This time I used shredded Parmesan cheese, and  slices of mozzarella cheese into my dish, but you can just as easily substitute grated mozzarella (instead of slices), if desired.

Repeat this process for a couple more layers (or until you run out of eggplant!). Make sure to reserve some of the parmesan and mozzarella cheeses to top the entire dish of eggplant parmesan, before baking.

Eggplant parmesan has layers of sauce, eggplant, and cheeses,

Baking Eggplant Parmesan

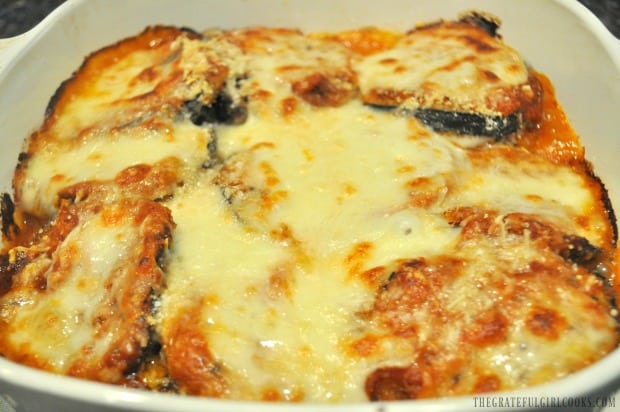
Bake the eggplant parmesan for approximately 20-25 minutes at 375°F.  When done, all that yummy cheese on top should be melted, golden brown and bubbly! Mine was done at 25 minutes.

NOTE: If you want the cheese to be more golden brown in color, you can always put it under the oven broiler for a couple minutes, if desired. Remember to keep a close eye on it, if you do this step! Nobody wants burned cheese on top, right?

Remove eggplant parmesan from oven, and let it sit for a couple minutes (to let the cheese solidify a bit). The only thing left to do is slice up a piece, serve it hot, and enjoy this classic Italian dish! You can also garnish the casserole with fresh, chopped basil, if desired.

Eggplant parmesan, freshly baked, with gooey melted cheese on top.

I hope you enjoy this dish! For me, it’s always fun to experiment in the kitchen, and try new recipes.  If you enjoy eggplant, be sure to check out my recipe for Baby Eggplant Mozzarella Bites! They’re delicious, too!

Have a wonderful day, please come back again soon, and thanks for stopping by!

Looking For More MEATLESS Meal Recipes?

You can find all my recipes in the Recipe Index, located at the top of the page. A few meatless favorites include:

Want More Recipes? Get My FREE Newsletter!

I publish a newsletter 2 times per month (1st and 15th) with lots of recipes, tips, etc..
Would you like to join our growing list of subscribers?

There is a Newsletter subscription box on the top right (or bottom) of each blog post, depending on the device you use.
You can submit your e-mail address there, to be added to my mailing list.

Find Me On Social Media:

Facebook page: The Grateful Girl Cooks!
Pinterest:
The Grateful Girl Cooks!
Instagram:
jbatthegratefulgirlcooks

Author's signature

Original recipe source: https://www.tablefortwoblog.com/eggplant-parmesan/

↓↓ PRINTABLE RECIPE BELOW ↓↓
0 from 0 votes
Eggplant Parmesan
Prep Time
1 hr 10 mins
Cook Time
20 mins
Total Time
1 hr 30 mins
 
Eggplant Parmesan is a classic Italian meatless dish, with breaded eggplant slices layered and baked with marinara sauce, mozzarella and Parmesan cheeses.
Category: Meatless Entree
Cuisine: Italian
Keyword: eggplant parmesan
Servings: 4
Calories Per Serving: 624 kcal
Author: JB @ The Grateful Girl Cooks!
Ingredients
  • 1 large eggplant , cut in 1/2" slices
  • 2 Tablespoons salt
  • cups Italian seasoned breadcrumbs
  • 3 large eggs , lightly beaten
  • 1/2 cup milk
  • 4 Tablespoons olive oil , or vegetable oil
  • 3 cups marinara sauce
  • 2 cups mozzarella , shredded or slices
  • 1 cup parmesan cheese , shredded
Instructions
  1. Cut a large eggplant into 1/2" thick slices.  Salt BOTH sides of each slice. Put the salted slices in a large colander in the sink, or over a bowl. Let the eggplant sit and "drain" or "sweat out" the liquid for 45 minutes. Once done draining, lightly brush off excess salt.

  2. Preheat oven to 375°F.  Place two (shallow) plates on kitchen counter. Spread Italian breadcrumbs on one plate. Place eggs and milk on the other plate. Lightly whisk eggs and milk together. Dip each eggplant slice (one at a time) into egg/milk mixture, covering both sides. Let excess liquid drip back onto plate. Dip eggplant into breadcrumbs until both sides are covered, letting excess drop back onto plate. Continue this step until all eggplant slices are breaded. Place breaded eggplant onto a paper towel covered 9x13 baking sheet in a single layer.

  3. Put 1 Tablespoon oil into a large skillet. Heat the skillet on medium high heat until hot, but not smoking.  Once skillet and oil are hot, add a few slices of eggplant at a time to the skillet. Cook eggplant on both sides, until lightly browned. Once browned, transfer them from the skillet to a paper towel lined baking sheet. Repeat this step for all slices, adding one Tablespoon oil for each group of eggplant slices that are browned.

  4. Spread 1 cup of marinara sauce on bottom of casserole dish. The first layer is eggplant slices (I used a 2.5 quart casserole dish, and was able to get about 4 eggplant slices per layer). Onto that layer, add a little marinara sauce to the top of each piece (approx. 1/4 cup). Top the sauce with a layer of shredded mozzarella and parmesan cheeses. Repeat this process for two more layers (or until you run out of eggplant). Make sure to reserve some of the parmesan and mozzarella cheeses to top the dish off with, before baking.

  5. Bake, uncovered, for 20-25 minutes at 375°F.  When done, the cheese on top should be melted, golden brown and bubbly!  Note: If you want the cheese to be more golden brown in color, you can always put it under the oven broiler for a couple minutes, if desired. Remember to keep a close eye on it, if you do this step!  Remove eggplant parmesan from oven, and let it sit for a couple minutes (to let the cheese solidify a bit). The only thing left to do is slice up a piece, and serve it hot! Enjoy!

Recipe Notes

Note that 45 minutes of the prep time listed is INACTIVE time (while zucchini drains).

You can also garnish the finished eggplant parmesan with chopped, fresh basil, if desired.
Nutrition Facts
Eggplant Parmesan
Amount Per Serving (1 g)
Calories 624 Calories from Fat 324
% Daily Value*
Fat 36g55%
Saturated Fat 14g88%
Cholesterol 64mg21%
Sodium 5817mg253%
Potassium 817mg23%
Carbohydrates 44g15%
Fiber 4g17%
Sugar 12g13%
Protein 31g62%
Vitamin A 1505IU30%
Vitamin C 14.1mg17%
Calcium 719mg72%
Iron 4.6mg26%
* Percent Daily Values are based on a 2000 calorie diet.

Here’s one more to pin on your Pinterest boards!Eggplant Parmesan is a classic Italian meatless dish, with breaded eggplant slices layered and baked with marinara sauce, mozzarella and Parmesan cheeses.

Kung Pao Zoodles

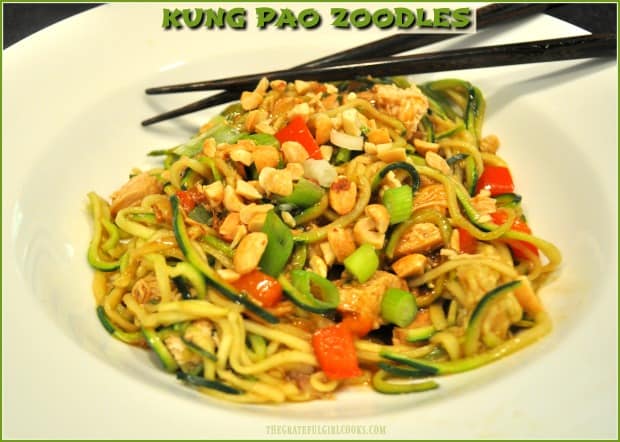
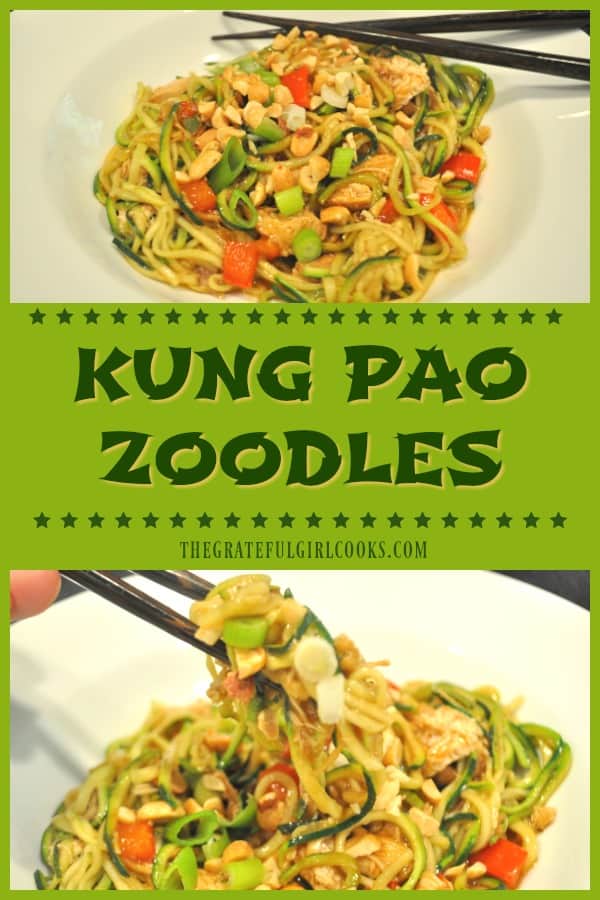
Kung Pao Zoodles is a low calorie (under 300), low carb dish using spiralized zucchini noodles, cooked in a sweet/spicy Asian sauce, and it can be made with or without chicken.
Kung Pao Zoodles is a low calorie (under 300), low carb dish using spiralized zucchini noodles, cooked in a sweet/spicy Asian sauce, w/or without chicken.

I’ve got to be honest here… this recipe totally surprised me! I purchased a spiralizer recently, to essentially make “noodles” out of a lot of different vegetables. I’d been wanting one for a while, and finally bought a fairly inexpensive one ($29).

Scroll Down For A Printable Recipe Card At The Bottom Of The Page

What If I Do Not Have A Spiralizer?

If you do not have access to a Spiralizer, it IS possible to make zucchini noodles by hand. The best video I’ve seen to describe how to do this is on YouTube, which demonstrates three easy ways to make your own “zoodles” (with box grater, vegetable peeler, or mandoline). I recommend watching it! Here’s the link to the short video, from Kelly Senyei at “Just A Taste”: https://www.youtube.com/watch?v=ETgPaDQh9S4 This was the first recipe I made using it, and my expectations were fairly low for what Kung Pao Zoodles would taste like. Zoodles is a word commonly used to describe Zucchini Noodles!

Whoa! I’m NOT KIDDING… I totally LOVED this dish!  This dish can also be a healthy/delicious meatless meal, by simply omitting the chicken breast.  It only took a couple minutes to turn two medium sized zucchini into gorgeous pasta like strands of veggie goodness!  Once cooked with the amazingly easy Asian inspired sauce, this dish made me GIDDY with excitement with my first bite!

This recipe for Kung Pao Zoodles is very easy to prepare. If there is one tip I can give you, it is to HAVE EVERYTHING PREPPED AND READY TO GO BEFORE BEGINNING COOKING! The dish comes together very quickly once started, so be prepared!

How Do I Make Kung Pao Zoodles?

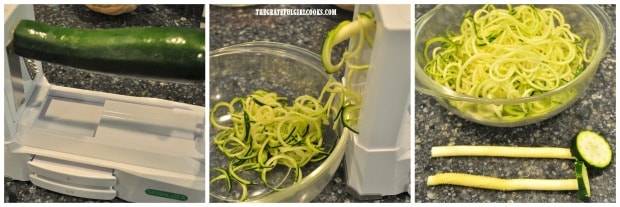
Cut ends off both zucchini, then spiralize them into spaghetti-like noodles, catching them as they come out into a medium sized bowl. If using a Spiralizer, cut the noodles with kitchen shears into 7 or 8 inch strips (cut long zoodles right in the bowl a couple of times- snip, snip!). Set aside.

Zucchini being spiralized into noodles to make Kung Pao zoodles.

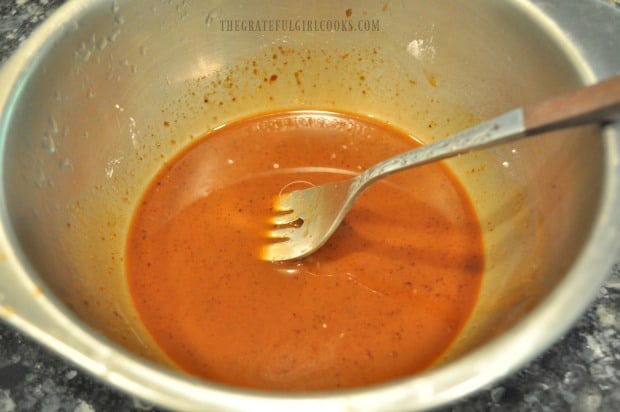
Stir or whisk Asian sauce ingredients together in a small bowl (soy or tamari sauce, balsamic vinegar, hoisin sauce, water, sriracha, sugar and cornstarch). Set sauce aside.

Asian sauce is mixed in bowl for Kung Pao Zoodles.

If You Are Preparing Kung Pao Zoodles WITH Chicken:

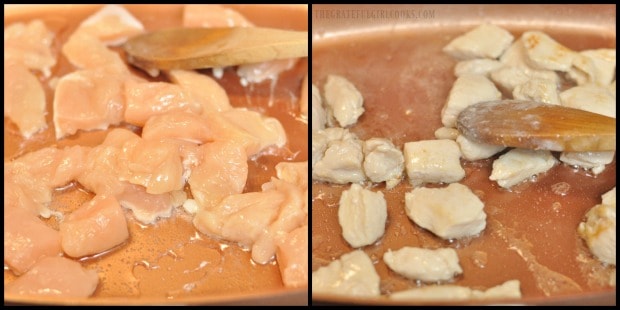
If adding chicken to this dish, season lightly with salt and black pepper. Heat vegetable oil over medium high heat. Place chicken cubes into large skillet; cook until lightly browned on all sides and cooked through. Remove chicken from skillet and set aside (or drain on paper towel).

Chicken breast cubes are cooked for Kung Pao Zoodle dish.

Prepare The Rest of This Dish

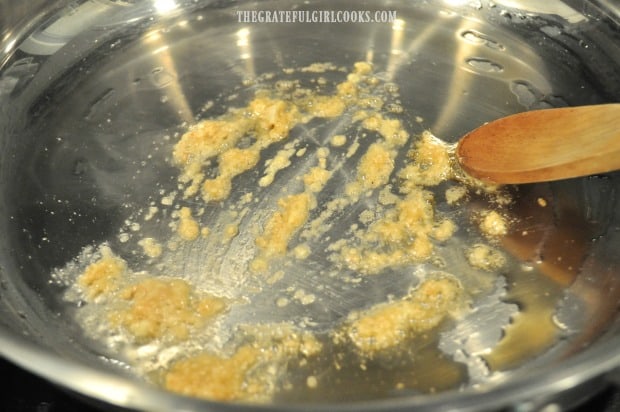
Turn the heat down to medium and add sesame oil, minced garlic and grated fresh ginger to skillet. Stir and cook for 30-45 seconds, being careful to not let the garlic burn.

Sesame oil, garlic and ginger cooking for kung pao zoodles.

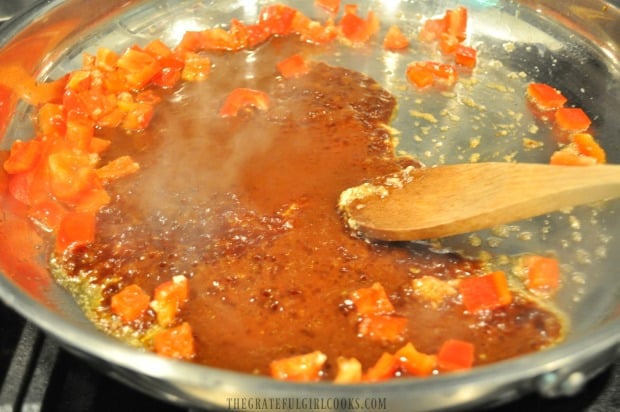
Add chopped red peppers, then stir in the Asian sauce. Bring sauce to a quick boil, then turn heat down to LOW, and cook for a minute or so until sauce is bubbling and has thickened.

Asian sauce and red bell peppers are added to skillet for kung pao sauce.

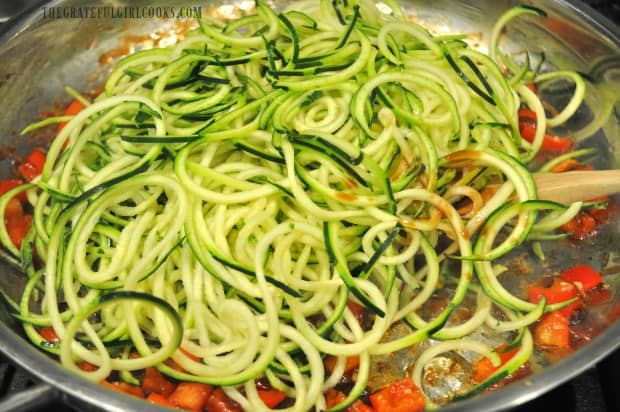
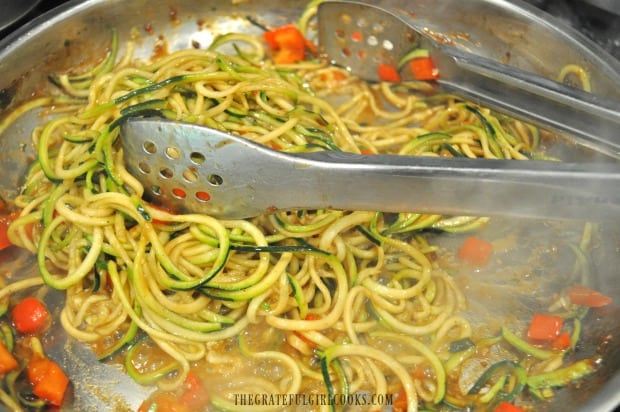
Add zucchini noodles (zoodles) to skillet.  Stir while cooking until the zoodles are coated with sauce.  Cook for two minutes, stirring often. As the zucchini noodles cook, they will release water, which will help to blend the sauce together with the noodles.

Zucchini noodles (zoodles) are added to skillet.

Zoodles (zucchini noodles) are cooked in the Kung Pao sauce.

Time To Eat Some Kung Pao Zoodles!

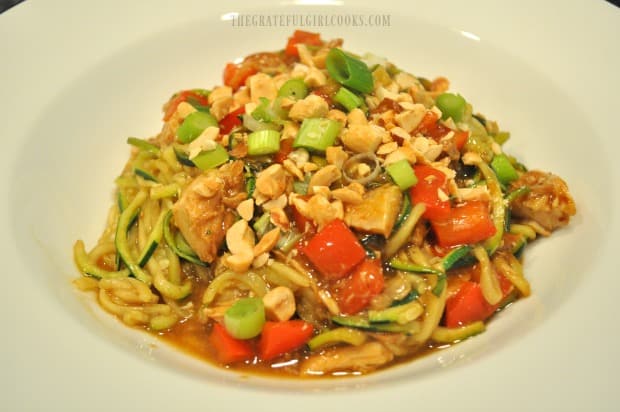
When done, add the cooked chicken pieces (if using) to the skillet, and stir to combine. I found using tongs worked great at getting everything mixed together. Divide Kung Pao zoodles between two serving bowls, and garnish each with chopped dry roasted peanuts and sliced green onions.

Bowl of Kung Pao Zoodles garnished with chopped peanuts and green onions.

Serve these delicious Kung Pao zoodles and enjoy! I absolutely LOVED this dish…there is so much yummy flavor! This meal is filling (as each serving is about 2 cups), it tastes amazing, and it so low in calories! Winner, winner… ZOODLE dinner!

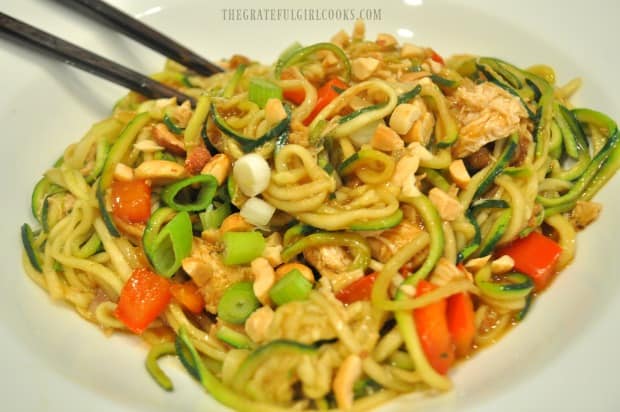
Kung Pao Zoodles with a pair of chopsticks... ready to serve!

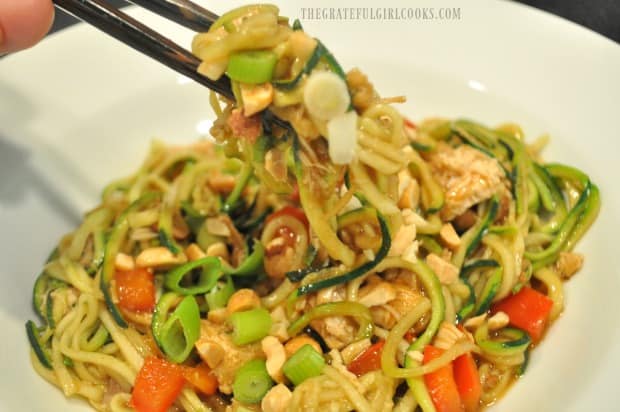
Chopsticks lifting up a bite of Kung Pao Zoodles!

I really hope you will try making these Kung Pao Zoodles!  If you prefer the more traditional version of Kung Pao Chicken, I hope you will check out that recipe, as well.

Looking For More SPIRALIZED FOOD Recipes?

You can find ALL my recipes in the Recipe Index, located at the top of the page. I have a few delicious zoodle recipes, including:

Interested In More Recipes?

Thank you for visiting this website. I appreciate you using some of your valuable time to do soIf you’re interested, I publish a newsletter 2 times per month (1st and 15th) with all the latest recipes, and other fun info. I would be honored to have you join our growing list of subscribers, so you never miss a great recipe!
There is a Newsletter subscription box on the top right side (or bottom) of each blog post, depending on the device you use, where you can easily submit your e-mail address (only) to be included in my mailing list.

You Can Also Find Me On Social Media:

Facebook page: The Grateful Girl Cooks!
Pinterest:
The Grateful Girl Cooks!
Instagram:
jbatthegratefulgirlcooks

Author's signature

Recipe Source: http://recipestotry.ca/kung-pao-chicken-with-zucchini/

0 from 0 votes
Kung Pao Zoodles
Prep Time
10 mins
Cook Time
10 mins
Total Time
20 mins
 
Kung Pao Zoodles is a low calorie (under 300), low carb dish using spiralized zucchini noodles, cooked in a sweet/spicy Asian sauce, w/or without chicken.
Category: Dinner
Cuisine: Asian
Keyword: kung pao zoodles
Servings: 2 (approx. 2 cups per serving)
Calories Per Serving: 281 kcal
Author: JB @ The Grateful Girl Cooks!
Ingredients
For Zoodles:
  • 2 medium zucchini , ends trimmed
  • 1 teaspoon vegetable or canola oil **if adding chicken
  • 6 ounces boneless, skinless chicken breast **cut in 1/2 inch cubes (if adding chicken)
  • 1 pinch salt and pepper , to taste
  • 1/2 medium red bell pepper , cut into 1/2" pieces
  • 1 teaspoon sesame oil
  • 1 teaspoon freshly ground ginger
  • 2 cloves garlic , minced
  • 2 Tablespoons finely chopped dry roasted peanuts (for garnish)
  • 2 Tablespoons thinly sliced green onions (for garnish)
For Asian Sauce:
  • Tablespoons reduced sodium soy sauce (tamari for gluten free)
  • 1 teaspoon hoisin sauce
  • 1 Tablespoon balsamic vinegar
  • Tablespoons water
  • 1/2 Tablespoon Sriracha sauce
  • 2 teaspoons granulated sugar
  • 2 teaspoons cornstarch
Instructions
  1. Cut ends off both zucchini, then spiralize them into spaghetti-like noodles,. Cut noodles with kitchen shears into 8 inch strips. Set aside.

  2. Stir or whisk Asian sauce ingredients together in a small bowl (soy or tamari sauce, balsamic vinegar, hoisin sauce, water, sriracha, sugar and cornstarch). Set sauce aside.
  3. If adding chicken to this dish, season lightly with salt and black pepper. Heat vegetable oil over medium high heat. Place chicken cubes into large skillet; cook until lightly browned on all sides and cooked through. Remove chicken from skillet and set aside (drain on paper towel).

  4. Turn heat down to medium and add sesame oil, minced garlic and grated fresh ginger to skillet. Stir and cook for 30-45 seconds, being careful to not let garlic burn. Add chopped red peppers, then stir in Asian sauce. Bring sauce to a boil, then turn heat to LOW, and cook for a minute or so until sauce is bubbling and has thickened.  Add zucchini noodles to skillet.  Stir while cooking until zoodles are coated with sauce.  Cook for two minutes, stirring often. As the zucchini noodles cook, they will release water, which will help to blend the sauce together with the noodles. When done, add cooked chicken pieces (if using), and stir to combine. I found using tongs worked great at getting everything mixed together.

  5. To serve, divide Kung Pao zoodles between two serving bowls, and garnish with chopped peanuts and sliced green onions. Serve hot, and enjoy!

Recipe Notes

NOTE: Caloric calculation of 281 per serving includes chicken and vegetable oil to cook it in.  If preparing this recipe as a MEATLESS meal, the calorie count would be approximately 167 calories per (2 cup) serving.

**Weight Watchers - Points+ = 7 points (with chicken).

Nutrition Facts
Kung Pao Zoodles
Amount Per Serving (1 g)
Calories 281 Calories from Fat 108
% Daily Value*
Fat 12g18%
Saturated Fat 3g19%
Cholesterol 54mg18%
Sodium 724mg31%
Potassium 976mg28%
Carbohydrates 20g7%
Fiber 3g13%
Sugar 12g13%
Protein 24g48%
Vitamin A 1410IU28%
Vitamin C 78.6mg95%
Calcium 42mg4%
Iron 1.6mg9%
* Percent Daily Values are based on a 2000 calorie diet.

Here’s one more to pin on your Pinterest boards!Kung Pao Zoodles is a low calorie (under 300), low carb dish using spiralized zucchini noodles, cooked in a sweet/spicy Asian sauce, w/or without chicken.

Easy Chile Relleno Casserole

This easy chile relleno casserole (vegetarian) has all the wonderful Southwest flavors of the traditional dish, but is baked not fried, and it’s DELICIOUS!
This scrumptious chile relleno casserole is easy to make, is vegetarian, and has all the Southwest flavors of the traditional dish, but is baked, not fried!

I received this wonderful, meatless chile relleno casserole recipe over 20 years ago from my friend Lanita, who I sang with in a church choir.  She’s an amazing, strong woman, and I love her dearly! I’ve made her recipe for this dish several times over the years, but hadn’t made in quite a while.

So, I decided to make it once again, tweaked her original recipe ever so slightly, made it, devoured it, and am sharing how you can make it, too! Now I’ve made it countless times, and we love it!

Scroll Down For A Printable Recipe Card At the Bottom Of The Page

The Origins of Chile Rellenos

Did you know that the words “chile relleno” actually mean “stuffed chile” in Spanish?  This popular dish had its origins in Puebla, Mexico, and showed up in recipe form over 150 years ago.  If you enjoy Tex-Mex food or enjoy eating chile rellenos at your favorite Mexican food spot, I’m confident you will enjoy this twist on the original in this delicious layered casserole.

This easy to prepare dish has lots of mild flavor from whole green chiles and gooey melted cheese, and all the taste commonly found in the original dish, but guess what? It is BAKED, not FRIED, so there’s much less prep work (and calories), and it’s in casserole form! Did I mention how simple it is to prepare?

So How Do I Make This Casserole?

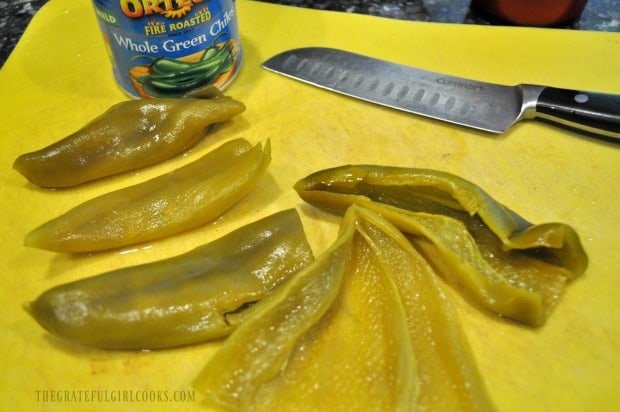
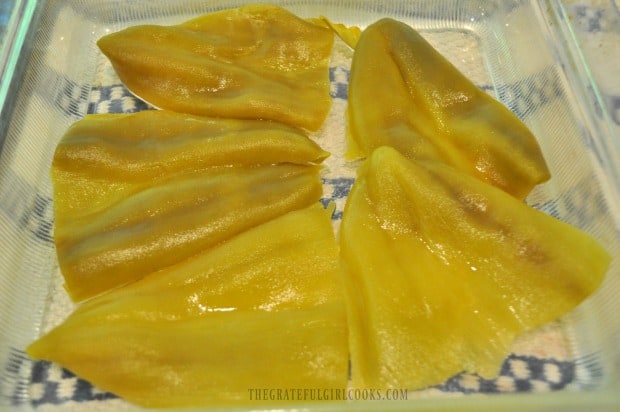
Start by spraying a 9×9 inch baking dish (bottom and sides) with non-stick spray. Slice whole canned green chiles open; rinse out any seeds, then drain. Using HALF of the chiles, place a first layer of chiles (spread open) on the bottom of an 9×9 inch baking dish.

Slicing and cleaning whole green chiles for casserole

Whole green chiles on bottom of glass baking dish

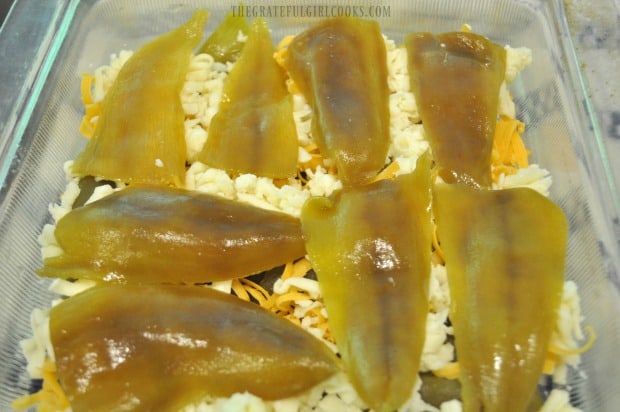
Sprinkle the chiles with HALF of the grated jack and cheddar cheeses, then add another layer of the remaining green chiles on top of the cheese.

Layers of green chiles and grated cheese for relleno casserole

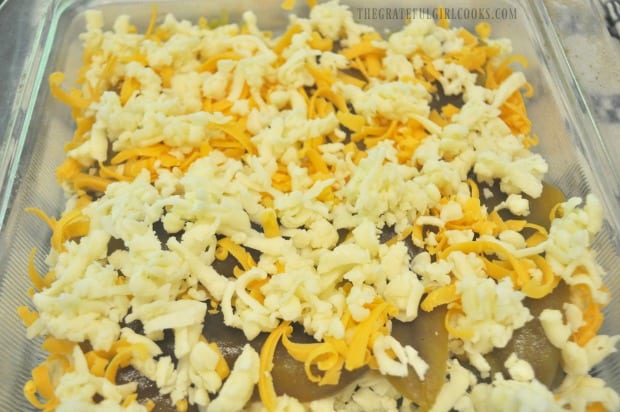
Top with the remaining jack and cheddar cheeses.

Grated jack and cheddar cheese on top of green chiles in glass baking dish

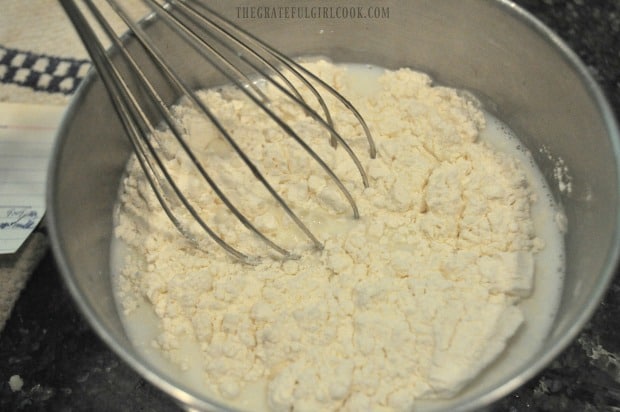
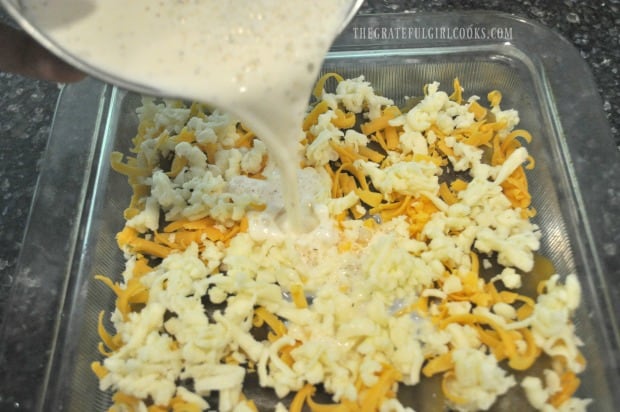
In a small bowl, whisk together eggs, flour, milk and salt until fully blended.  Pour this mixture over the casserole, distributing evenly.

Mixing flour, milk and salt for casserole

Pouring milk/flour mixture over chile relleno casserole before baking

Time To Bake The Easy Chili Relleno Casserole

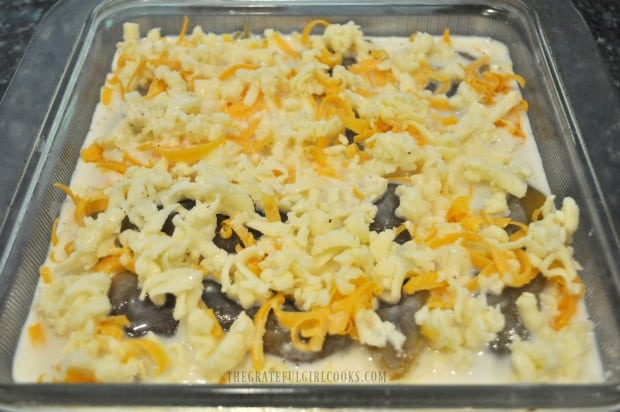
This is what the casserole looks like when it is ready to bake.  Bake the casserole at 350 degrees for 30-35 minutes (uncovered), until it’s golden brown on top. I baked mine for a total of 35 minutes.

Casserole with green chiles and cheese is ready to go into oven

When done, the casserole should be golden brown in color on top.  Remove dish from oven and transfer to a wire rack. Let it cool and firm up for a few minutes, then slice the casserole with a sharp knife into 6 equal sized pieces, serve and enjoy!  See how simple it is to prepare?

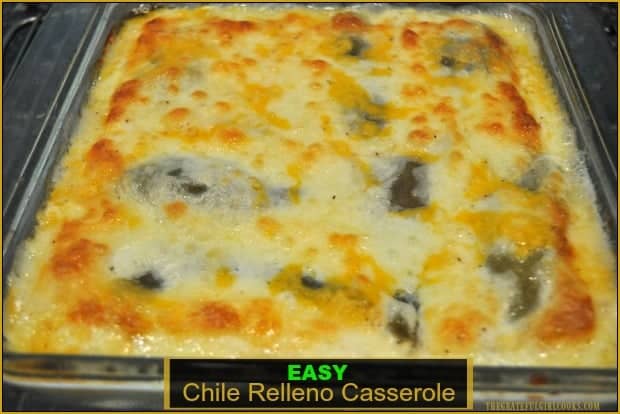
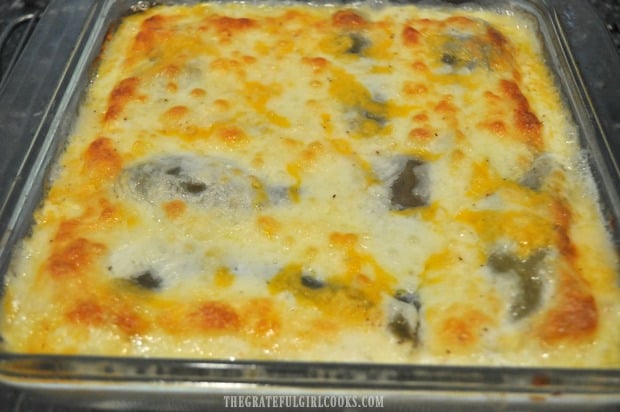
Easy chile relleno casserole, hot out of the oven!

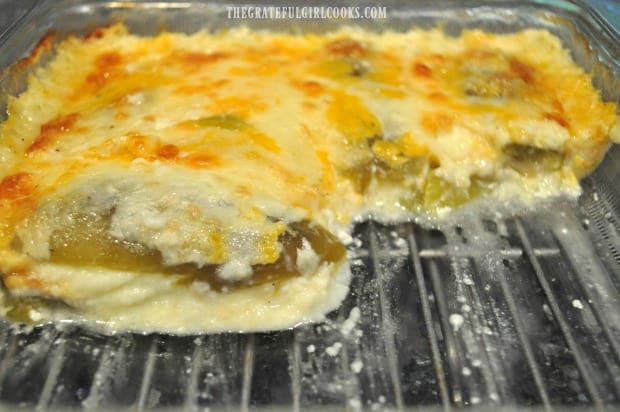
I took a photo after dinner so you could see what the INSIDE of the casserole looks like (after hungry humans had their fill).  See those chiles peeking out from under the cheese? Ooh- I’m telling you, this is one great tasting MEATLESS casserole! Truth is… it’s not only good for lunch or dinner… it’s even good for breakfast… yep!

A close up look at the inside of chili relleno casserole after baking

I hope you enjoy this recipe.  I have a similar recipe for a layered casserole on this blog that uses tortillas, green chiles and chicken, if you are interested in looking at that one. It’s called Layered Chicken Enchilada Casserole, and it also tastes fantastic.

Looking For More Southwestern-Style Recipes?

You can find ALL of my recipes in the Recipe Index, which is located at the top of the page. I have some delicious Southwest/Mexican-style recipes you might enjoy, including:

Interested In More Recipes?

Thank you for visiting this website. I appreciate you using some of your valuable time to do soIf you’re interested, I publish a newsletter 2 times per month (1st and 15th) with all the latest recipes, and other fun info. I would be honored to have you join our growing list of subscribers, so you never miss a great recipe! 

There is a Newsletter subscription box on the top right side (or bottom) of each blog post, depending on the device you use, where you can easily submit your e-mail address (only) to be included in my mailing list.

You Can Also Find Me On Social Media:

Facebook page: The Grateful Girl Cooks!
Pinterest:
The Grateful Girl Cooks!
Instagram:
jbatthegratefulgirlcooks

Hope to have you visit again soon. Have a GREAT day!

Author's signature

Recipe Adapted From: My sweet friend, Lanita Moen

0 from 0 votes
Easy Chile Relleno Casserole
Prep Time
10 mins
Cook Time
35 mins
Total Time
45 mins
 

This scrumptious chile relleno casserole is easy to make, is vegetarian, and has all the Southwest flavors of the traditional dish, but it is is baked, not fried!

Category: Dinner
Cuisine: Mexican, Southwestern
Keyword: chile, relleno
Servings: 6 servings
Calories Per Serving: 385 kcal
Author: JB @ The Grateful Girl Cooks!
Ingredients
  • 14 ounces whole green chiles , canned (2 -7 ounce cans)
  • 3/4 pound jack cheese , grated
  • 1 cup cheddar cheese , grated
  • 2 eggs
  • 1/2 cup all purpose flour
  • cups milk
  • 1 teaspoon salt
  • 1/2 teaspoon black pepper
Instructions
  1. Spray a 9x9 inch baking dish with non-stick spray. Slice whole canned green chiles wide open; rinse out any seeds, then drain. Arrange half of the chiles  in the bottom of the dish.

  2. Sprinkle chiles with HALF of the grated jack and cheddar cheeses.  Add remaining green chiles in another layer on top of the cheese. Top with remaining jack and cheddar cheeses.

  3. In a small bowl, whisk together eggs, flour, milk and salt until fully blended.  Pour this mixture over the casserole, distributing evenly.
  4. Bake casserole (uncovered) at 350 degrees for 30-35 minutes, until golden brown on top.  Remove dish from oven and transfer to a wire rack.  Let it cool and firm up for a few minutes, then slice casserole with sharp knife into 6 equal sized pieces, serve (a spatula works great) and enjoy!

Nutrition Facts
Easy Chile Relleno Casserole
Amount Per Serving (1 serving)
Calories 385 Calories from Fat 225
% Daily Value*
Fat 25g38%
Saturated Fat 15g94%
Cholesterol 127mg42%
Sodium 1118mg49%
Potassium 259mg7%
Carbohydrates 14g5%
Fiber 1g4%
Sugar 3g3%
Protein 23g46%
Vitamin A 905IU18%
Vitamin C 22.6mg27%
Calcium 665mg67%
Iron 2.2mg12%
* Percent Daily Values are based on a 2000 calorie diet.

Here’s one more to pin on your Pinterest boards!

This scrumptious chile relleno casserole is easy to make, is vegetarian, and has all the Southwest flavors of the traditional dish, but is baked, not fried!

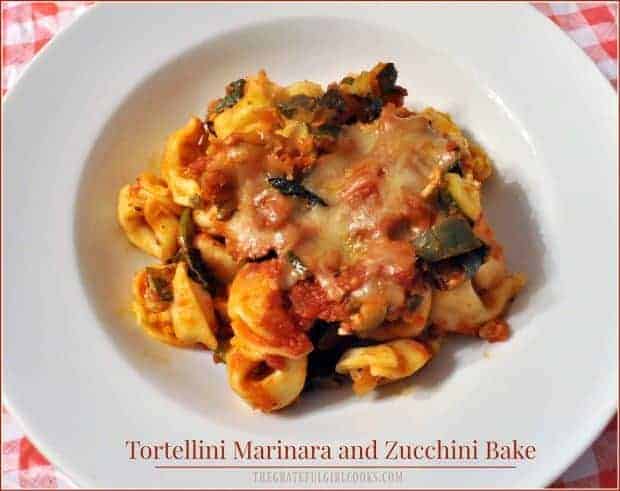
Tortellini Marinara and Zucchini Bake

Enjoy Tortellini Marinara Zucchini Bake (Wt. Watchers), a meatless casserole, with cheese tortellini, sauce, zucchini, spinach, & mozzarella!

You’re gonna enjoy this Italian, layered, vegetarian baked casserole, with cheese tortellini, marinara sauce, zucchini, onions and baby spinach, topped with mozzarella cheese! It’s a flavorful, meatless (you won’t miss it), lightened up dinner, (under 400 calories), for the win!

I found this recipe last Fall on the Weight Watchers website, thought it sounded good, and decided to give it a try.  I tweaked the recipe a bit, to serve 4 instead of 8, added a couple ingredients and changed the cooking method. The casserole is baked, but if you prefer, instructions for using a slow cooker (and frozen tortellini) are available below, in the printable recipe notes.

We enjoyed our meal very much (lots of Italian flavor in the marinara sauce, cheese tortellini, and yummy fresh veggies in this meal!), and wanted to share the recipe with you. Here’s how to make this dish:

Scroll Down For A Printable Recipe Card At The Bottom Of The Page

Cook the Veggies

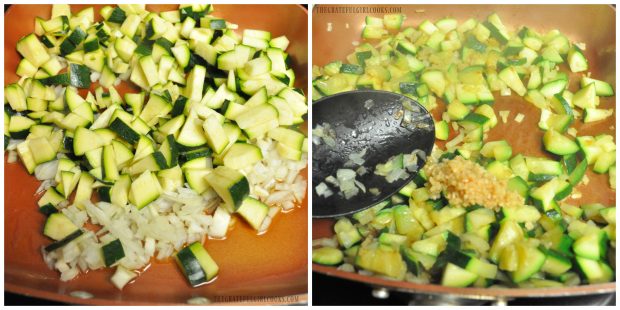
Diced fresh zucchini and chopped onions are cooked in olive oil on medium high heat for about 5 minutes (the veggies will be very lightly browned).  Minced garlic is added to the skillet, stirred in, and cooked for another minute.

Zucchini, onion and garlic cooked for tortellini sauce

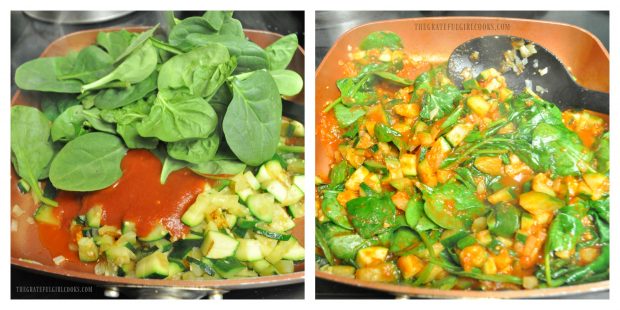
Add fresh baby spinach leaves, 1 cup of marinara sauce, and seasonings to the skillet. Stir well.  The spinach can be added in small batches. It looks like a LOT of spinach going in the skillet, but it will definitely wilt down!

Cove the skillet and simmer the veggies for 2-3 minutes, until the spinach has fully wilted.  At this point, you can add additional salt and pepper, if you wish, to suit your taste.

Fresh spinach is added to zucchini marinara sauce to wilt down

Assemble The Tortellini Marinara Zucchini Bake

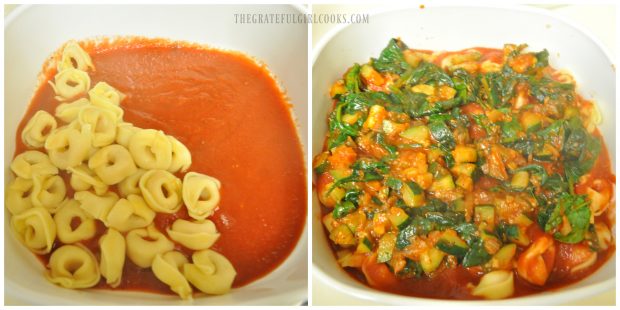
I use a 2 quart casserole dish for the casserole (for 4 servings).  To assemble this meal, build it in layers.  Spoon 1/2 cup of marinara sauce over bottom of dish.  Add HALF of the cooked cheese tortellini to cover the sauce (photo shows only half of the sauce covered). Top the tortellini with HALF of the veggie mixture.

Layer of tortellini added to baking dish, then zucchini and spinach sauce.Add the rest of the tortellini to top of the veggies.  Top with the rest of the veggie mixture. For the final layer, pour 1/2 cup of reserved marinara sauce over top of veggies, then sprinkle with grated mozzarella  and Parmesan cheese.

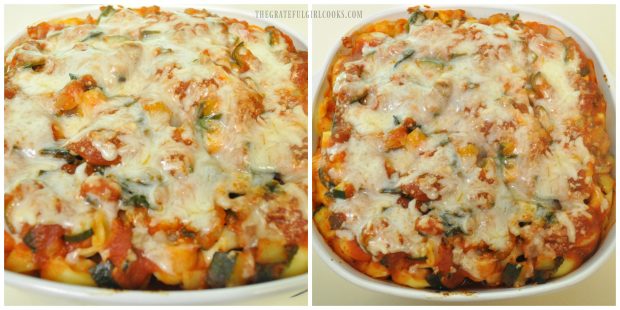
Tortellini with marinara, veggies, and grated cheese on top, ready to bake

Bake The Casserole

Cover the dish loosely with aluminum foil (try not to let the foil touch the top of the cheese, if possible).  Bake in a 350 degree oven for 20 minutes, then remove foil and bake for 10 more minutes, or until cheese is melted and bubbly.

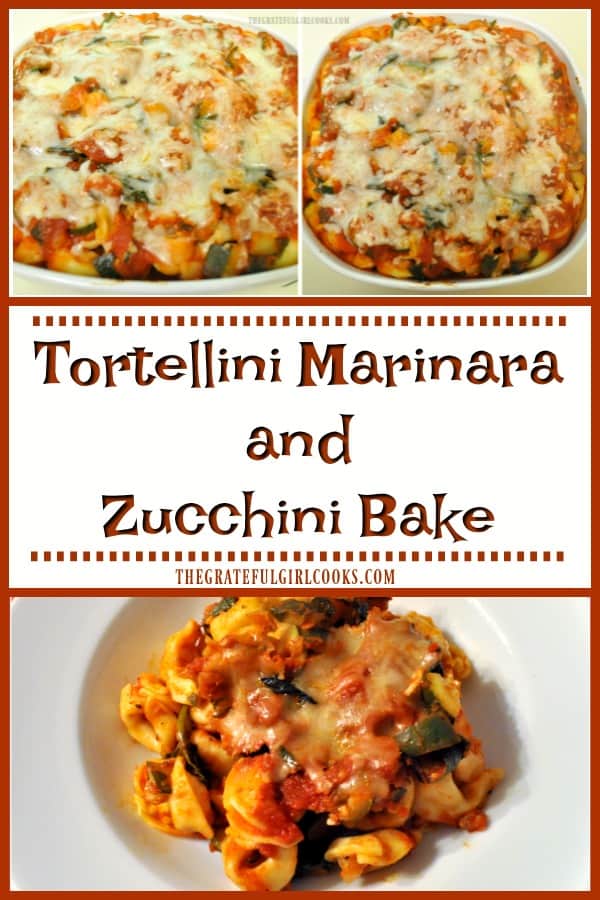
Remove casserole from oven. Here’s what the casserole looked like when ready to serve. Looks pretty good, huh? Smells good, too!

Tortellini, marinara, and zucchini baked casserole out of oven

Time To EAT!

All that’s left to do is grab a big spoon or spatula, and serve this delicious pasta dish up, while hot!

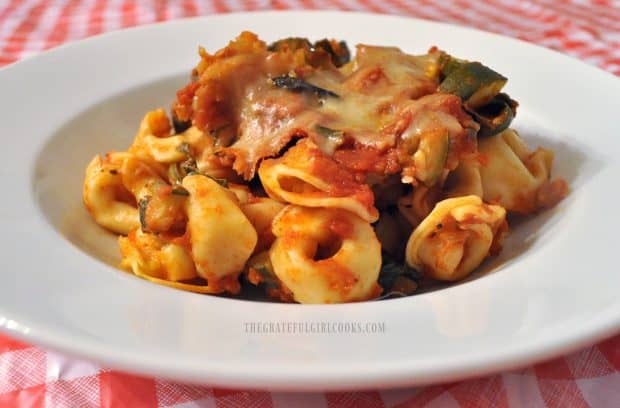
Tortellini and zucchini baked casserole in white serving bowl

Cheese tortellini, marinara sauce and zucchini, in white serving bowl.

Hope you will consider trying this tasty, filling Italian pasta and vegetable dish (don’t think you’ll even miss not having meat in it).  Have a wonderful day. Thank you for stopping by, and I hope you will come back soon.

Looking For More TORTELLINI Recipes?

You can find ALL my recipes in the Recipe Index, which is located at the top of the page. I have some delicious pasta recipes there, including these using tortellini:

Interested In More Recipes?

Thank you for visiting this website. I appreciate you using some of your valuable time to do soIf you’re interested, I publish a newsletter 2 times per month (1st and 15th) with all the latest recipes, and other fun info. I would be honored to have you join our growing list of subscribers, so you never miss a great recipe!
There is a Newsletter subscription box on the top right side (or bottom) of each blog post, depending on the device you use, where you can easily submit your e-mail address (only) to be included in my mailing list.

You Can Also Find Me On Social Media:

Facebook page: The Grateful Girl Cooks!
Pinterest:
The Grateful Girl Cooks!
Instagram:
jbatthegratefulgirlcooks

Author's signature

Recipe Adapted From: https://cmx.weightwatchers.com/nui/explore/details2/WWRECIPE:59ce95dd03c03049fd3f55db

↓↓ PRINTABLE RECIPE BELOW ↓↓

0 from 0 votes
Tortellini Marinara and Zucchini Bake
Prep Time
20 mins
Cook Time
30 mins
Total Time
50 mins
 
Enjoy this Weight Watchers Italian (vegetarian) casserole, with cheese tortellini, marinara sauce, zucchini, and baby spinach, topped with mozzarella cheese!
Category: Dinner
Cuisine: Italian
Keyword: tortellini
Servings: 4 servings
Calories Per Serving: 385 kcal
Author: JB @ The Grateful Girl Cooks!
Ingredients
  • 1 teaspoon olive oil (extra virgin)
  • 3 zucchini (uncooked, small)
  • 1/2 onion (chopped)
  • teaspoons minced garlic
  • 2 cups marinara sauce , divided (store bought)
  • 4 cups fresh baby spinach
  • 1/4 teaspoon salt
  • 1/4 teaspoon black pepper
  • 1/4 teaspoon crushed red pepper flakes
  • 3 cups cheese tortellini (without sauce-cooked and drained)
  • 1/2 cup part-skim mozzarella cheese , shredded
  • 1/4 cup Parmesan cheese (+ additional for garnish, if desired)
Instructions
  1. Cook tortellini according to package instructions. Once cooked, drain and rinse with cold water. Set aside. TIP: I found it easy (and a timesaver) to cook the tortellini at the same time the zucchini/sauce mixture was cooking.

  2. Heat olive oil in large skillet on medium high heat.  Add diced zucchini and chopped onions, stir often, and cook on medium high heat for about 5 minutes (the veggies will be very lightly browned).  Add the minced garlic to the skillet, stir to combine, and cook for another minute (be careful to stir and not let the garlic burn, or it will taste bitter).

  3. Add baby spinach leaves, 1 cup (reserve the rest) of marinara sauce, red pepper flakes, salt and pepper to the skillet. Stir well, to combine. TIP: The spinach can be added in small batches... it looks like a LOT of spinach going in the skillet, but it will definitely wilt down!  Once it has wilted, add more to skillet. Once all spinach has been added, cover the skillet, and simmer on low heat for 2-3 minutes, until the spinach has fully wilted.  At this point, additional salt and pepper can be added, to suit your taste.

  4. Layer the casserole this way:  Spoon 1/2 cup of the reserved marinara sauce over bottom of dish.  Add HALF of the cooked/drained tortellini on top of the sauce. Cover the tortellini with HALF of the veggie/sauce mixture. Cover that with the rest of the tortellini.  Cover that with the rest of the veggie mixture. Pour remaining 1/2 cup of marinara sauce over top of veggies, then sprinkle with grated mozzarella  and Parmesan cheese.

  5. Cover the dish loosely with aluminum foil (try not to let the foil touch the top of the cheese, if possible).  Bake in a 350 degree oven for 20 minutes, then remove foil and bake for 10 more minutes, or until cheese is melted and bubbly.  Remove casserole from oven. Serve, and enjoy!

Recipe Notes

TIP: If desired, recipe can be made using FROZEN tortellini (packaged without sauce) in a SLOW COOKER, following same process as detailed above (except for pre-cooking the tortellini). Tortellini can be layered in while still frozen. Casserole should be cooked on LOW (covered) until tortellini are tender and fully heated through, (approximately 5 hours). I have not personally tried this, but Weight Watchers recipe utilized this cooking method.

Nutrition Facts
Tortellini Marinara and Zucchini Bake
Amount Per Serving (1 serving (1½ cups))
Calories 385 Calories from Fat 108
% Daily Value*
Fat 12g18%
Saturated Fat 4g25%
Cholesterol 43mg14%
Sodium 1357mg59%
Potassium 988mg28%
Carbohydrates 49g16%
Fiber 7g29%
Sugar 12g13%
Protein 22g44%
Vitamin A 3790IU76%
Vitamin C 44.7mg54%
Calcium 368mg37%
Iron 4.7mg26%
* Percent Daily Values are based on a 2000 calorie diet.

Here’s one more to pin on your Pinterest boards!Enjoy Tortellini Marinara Zucchini Bake (Wt. Watchers), a meatless casserole, with cheese tortellini, sauce, zucchini, spinach, & mozzarella!

Mediterranean Quinoa Salad

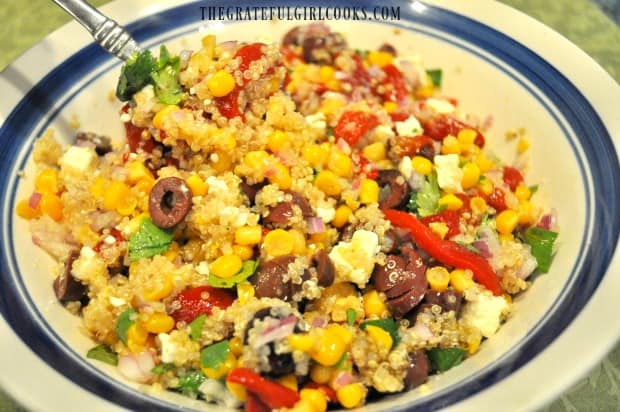
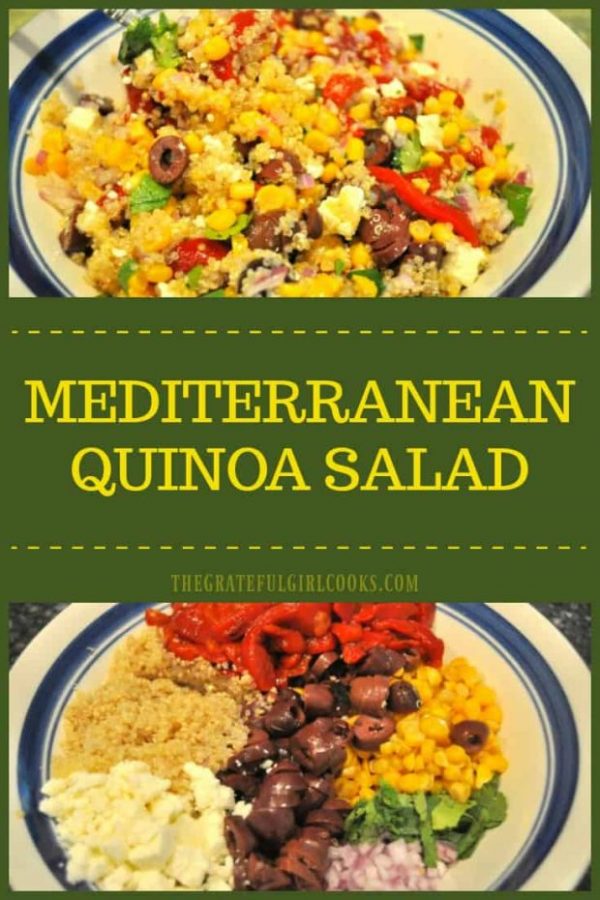
You’ll enjoy Mediterranean Quinoa Salad, with traditional Greek flavors of kalamata olives, feta cheese, roasted red peppers, and a simple dressing!You'll enjoy this Mediterranean Quinoa Salad, with traditional Greek flavors of kalamata olives, feta cheese, roasted red peppers, and a simple dressing!

I’ve been enjoying cooking with quinoa recently. Did you know that quinoa is believed to have originated in the northwest part of South America?

Cooked quinoa provides healthy nutrients similar to what is typically found in rice and wheat, contains proteins and fiber, and is gluten-free. It is commonly referred to as a superfood, and is so easy to prepare!

If you enjoy quinoa, I’m confident you’ll like this delicious salad! By the way, if you’re interested in using quinoa for breakfast, be sure to check out my recipe for Apricot Almond Breakfast Quinoa! Anyways, here’s how to make this Mediterranean Quinoa Salad.

Scroll Down For A Printable Recipe Card At The Bottom Of The Page

Cook The Quinoa

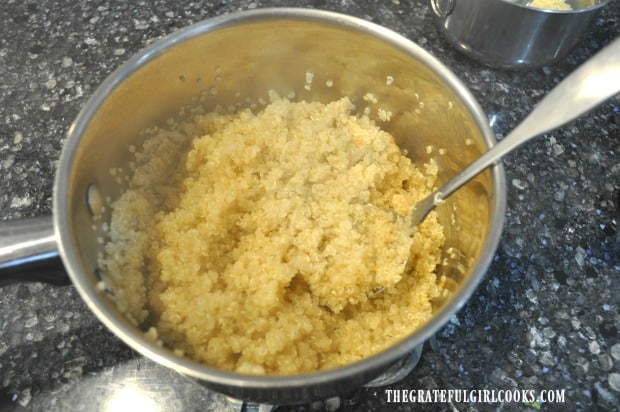
To make this delicious dish, you will first need to cook the quinoa (according to package instructions) in lightly salted boiling water until done.

Fluff the cooked quinoa with a fork once done. Set it aside until it has cooled down to room temperature.

Cooked quinoa in metal saucepan

Make The Salad Dressing

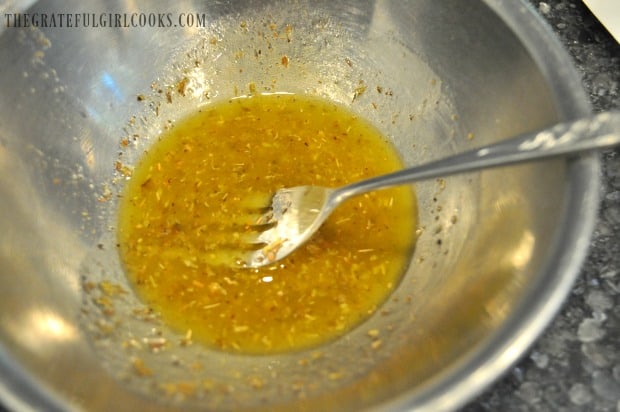
While the quinoa is cooking, make the simple salad dressing for the Mediterranean quinoa salad. Add the ingredients (olive oil, red wine vinegar, oregano, salt and pepper) to a small bowl.

Mix these ingredients well using a fork, until fully combined. Set dressing aside until ready to top the salad.

Salad dressing for quinoa in small metal bowl

Assemble The Mediterranean Quinoa Salad

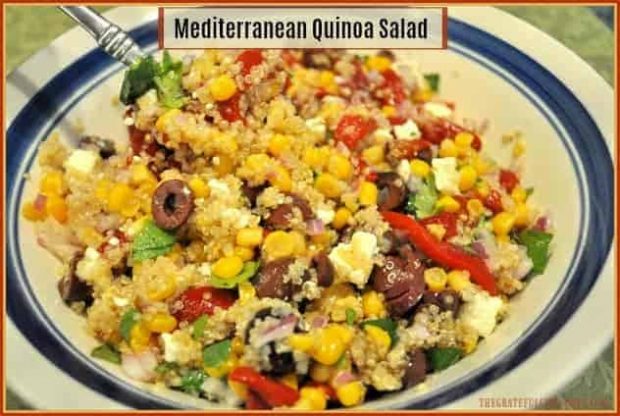
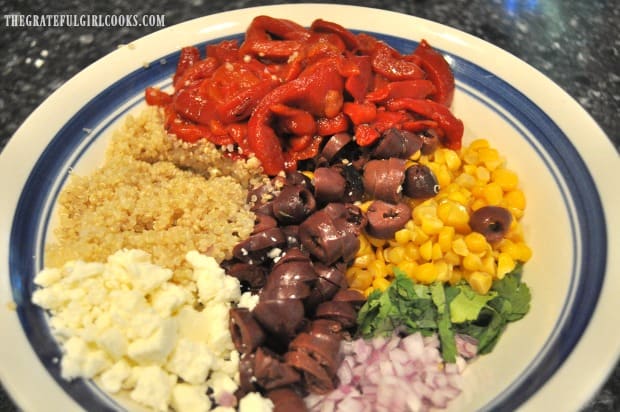
Place all the salad ingredients into a large mixing or serving bowl.  Isn’t it colorful? The salad has quinoa, roasted red peppers, corn, cilantro, red onion, feta cheese and kalamata olives.

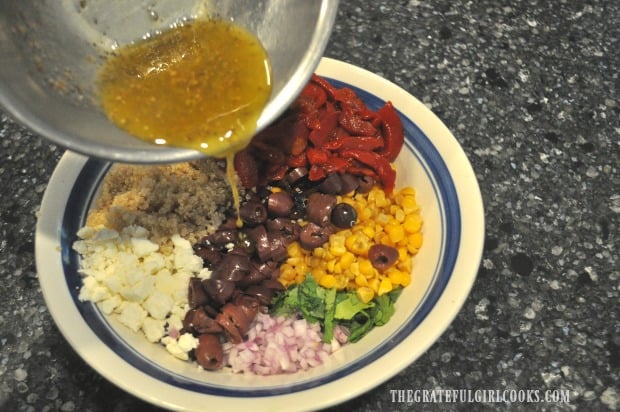
Give the salad dressing a quick stir and pour over the salad ingredients.  Gently mix the Mediterranean quinoa salad together so the dressing coats everything well.

Quinoa, feta, olives, corn, etc. in salad bowl

Pouring salad dressing over veggies in salad bowl

Time To EAT!

Once the salad has been mixed, it’s ready to serve! See how easy that was? And it REALLY tastes great!

Mixing salad ingredients with a fork in a white bowl

Mediterranean Quinoa Salad is a fantastic side dish for a variety of meals. We enjoyed it with pan-seared creole salmon, and a small spinach salad, and it tasted wonderful! 

This would also be a tasty light lunch, as well, and just for the record, the leftovers were just as good the next day!

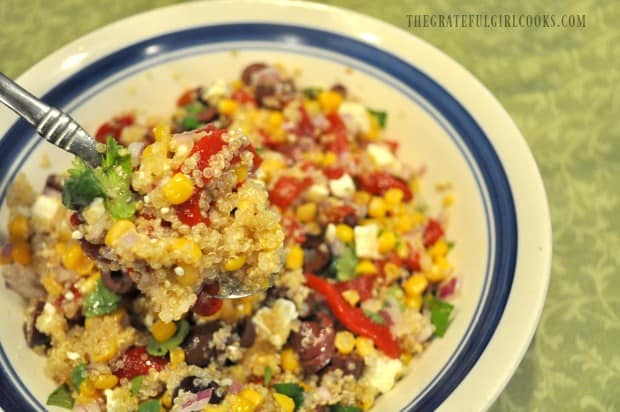
Spoonful of salad over bowl

If you enjoy quinoa, you might also enjoy my recipes for Southwest Quinoa Salad, Quinoa Enchilada Casserole (meatless), or a delicious Shrimp, Quinoa & Veggie Bowl.

Hope you will consider trying this recipe, and as always, I hope you will enjoy it! Don’t forget to check out ALL my recipes in the Recipe Index, located at the top of the page.

Take care, and may God bless you and surround you with His love today and always!

Want More Recipes? Get My FREE Newsletter!

I publish a newsletter 2 times per month (1st and 15th) with lots of recipes, tips, etc..
Would you like to join our growing list of subscribers?

There is a Newsletter subscription box on the top right (or bottom) of each blog post, depending on the device you use.
You can submit your e-mail address there, to be added to my mailing list.

Find Me On Social Media:

Facebook page: The Grateful Girl Cooks!
Pinterest:
The Grateful Girl Cooks!
Instagram:
jbatthegratefulgirlcooks

Author's signature

Recipe Source: https://cooktoria.com/recipe/mediterranean-quinoa-salad/

↓↓ PRINTABLE RECIPE BELOW ↓↓

0 from 0 votes
Mediterranean Quinoa Salad
Prep Time
10 mins
Cook Time
15 mins
Total Time
25 mins
 

This simple Quinoa Salad is filled with Mediterranean flavors! Easy to prepare, this is a fantastic tasting salad or side dish to serve for lunch or dinner!

Category: Salad/Side Dish
Cuisine: Mediterranean
Keyword: Mediterranean quinoa salad
Servings: 4 Servings
Calories Per Serving: 295 kcal
Author: JB @ The Grateful Girl Cooks!
Ingredients
For Salad:
  • 1/2 cup quinoa , uncooked
  • 1 cup kalamata olives , pitted, sliced
  • 1 cup corn kernels , fresh or canned
  • 1 cup roasted red peppers , sliced
  • 2/3 cup feta cheese , fat free
  • 1/2 cup red onion , diced
  • 1/2 cup cilantro , chopped
For Salad Dressing:
  • 2 Tablespoons olive oil , extra virgin
  • 2 teaspoons red wine vinegar
  • 1 teaspoon dried oregano
  • 1/4 teaspoon salt and pepper , to taste
Instructions
  1. Cook quinoa in lightly salted water according to package instructions (approx 12-15 minutes).  When done, drain, then set aside to let quinoa cool.

  2. Mix salad dressing ingredients together in a small bowl until fully blended.

  3. Place all salad ingredients in a large mixing bowl. Pour salad dressing over the top. Mix all ingredients gently until dressing has been incorporated into salad. Serve, and enjoy!

Nutrition Facts
Mediterranean Quinoa Salad
Amount Per Serving (1 g)
Calories 295 Calories from Fat 171
% Daily Value*
Fat 19g29%
Saturated Fat 5g31%
Cholesterol 22mg7%
Sodium 1507mg66%
Potassium 267mg8%
Carbohydrates 24g8%
Fiber 3g13%
Sugar 2g2%
Protein 8g16%
Vitamin A 575IU12%
Vitamin C 17.5mg21%
Calcium 165mg17%
Iron 1.8mg10%
* Percent Daily Values are based on a 2000 calorie diet.

Here’s one more for your Pinterest boardsYou'll enjoy Mediterranean Quinoa Salad, with traditional Greek flavors of kalamata olives, feta cheese, roasted red peppers, and a simple dressing!

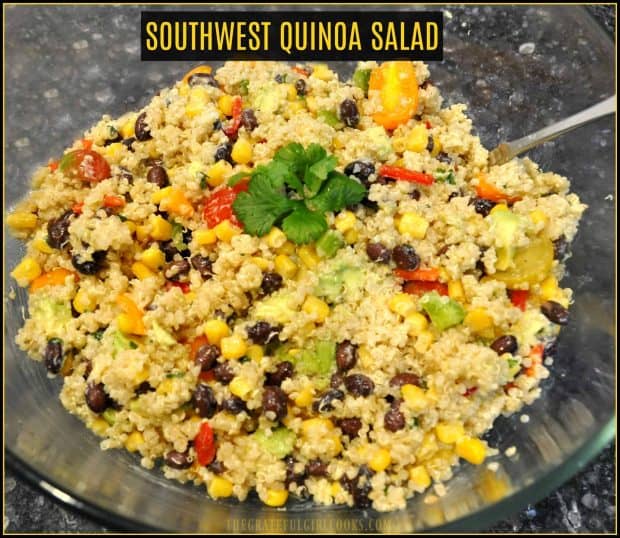
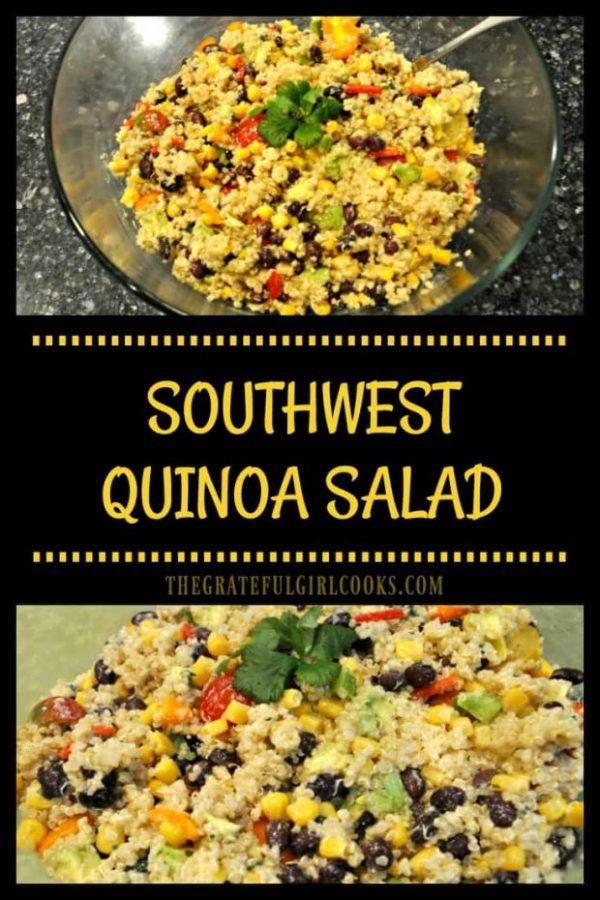
Southwest Quinoa Salad

Southwest Quinoa Salad is a healthy side or vegetarian dish featuring quinoa, tomatoes, corn, beans, peppers, avocado, and a flavorful cilantro lime dressing!
Happy New Year! If you’re like many others, you’ve started the year with a determination to eat healthier or lose some weight! This Southwest Quinoa Salad is a delicious, healthy recipe solution for you! It features quinoa, black beans, tomatoes, corn, bell peppers, and avocado, topped with a scrumptious cilantro lime dressing! YUM!

This is my first official blog post of 2018, and I’m so grateful to be able to share this recipe with you from our newly remodeled kitchen.  I don’t know about you, but we managed to eat quite a bit of Christmas goodies and take-out over the holidays (due to my husband and I loving sweets AND having no kitchen to cook in for the past 2 months).

Now we have begun the year determined to make wiser choices.  Say hello to this quinoa salad. It’s a flavor-filled healthy “meatless” dish is perfect as a light side dish or a quick lunch!

Scroll Down For A Printable Recipe Cad At The Bottom Of The Page

Here’s How To Make Southwest Quinoa Salad

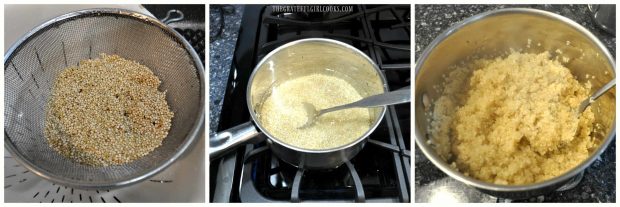
Put the uncooked quinoa in a fine mesh strainer and rinse with water (this helps clean the  quinoa). Place the rinsed quinoa, water and salt in a saucepan; bring the mixture to a boil over high heat.

When it comes to a boil, reduce heat to medium-low and put a lid on the pan. Cook quinoa for approximately 17-20 minutes (or until all liquid has been absorbed). Remove pan from heat, set aside, and let quinoa cool down to room temperature.

Southwest Quinoa Salad / The Grateful Girl Cooks!

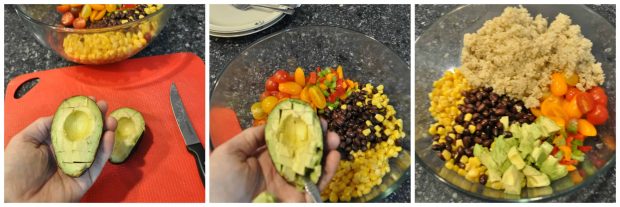
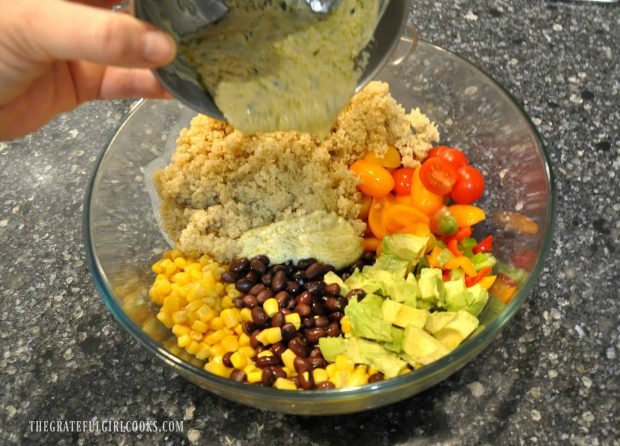
Place cherry tomatoes, corn, black beans, bell peppers, avocado and room temperature quinoa into a large salad bowl. Set aside. TIP: An easy tip for cubing an avocado is to cut it in half, remove pit, then use a knife to slice grid lines into avocado lengthwise, then horizontally, without cutting through peel. Once cut, slide a large spoon around the inside of the peel, and the avocado cubes should fall out!

Southwest Quinoa Salad / The Grateful Girl Cooks!

Make The Cilantro Lime Salad Dressing

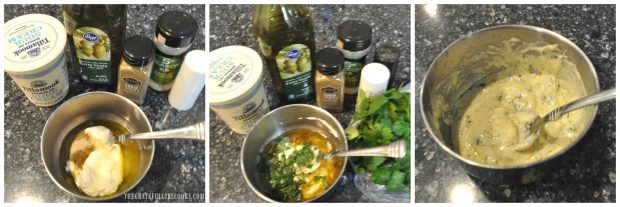
To make the simple cilantro lime dressing, whisk together olive oil, light sour cream, lime zest and juice, garlic powder, cumin, salt, pepper and cilantro in a small bowl . Be sure to mix well.

Southwest Quinoa Salad / The Grateful Girl Cooks!

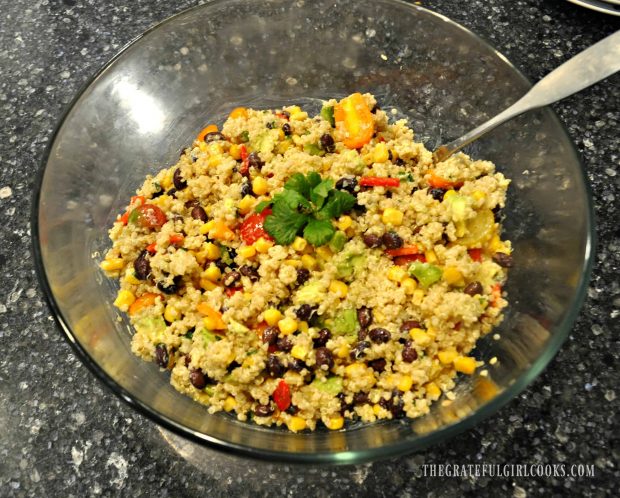
Pour all of the dressing over salad, and stir well, to combine all ingredients thoroughly. The quinoa will absorb all the delicious Southwestern flavors from the dressing and will really make this dish shine!

Southwest Quinoa Salad / The Grateful Girl Cooks!

Southwest Quinoa Salad Is Ready To Enjoy!

Garnish the Southwest quinoa salad with a sprig of fresh cilantro, and serve it as a side dish. Since it is so filling, this salad (even without meat), would be a quick vegetarian meal or “take to work” packed lunch! The salad tastes good served at room temperature OR chilled!

Southwest Quinoa Salad / The Grateful Girl Cooks!

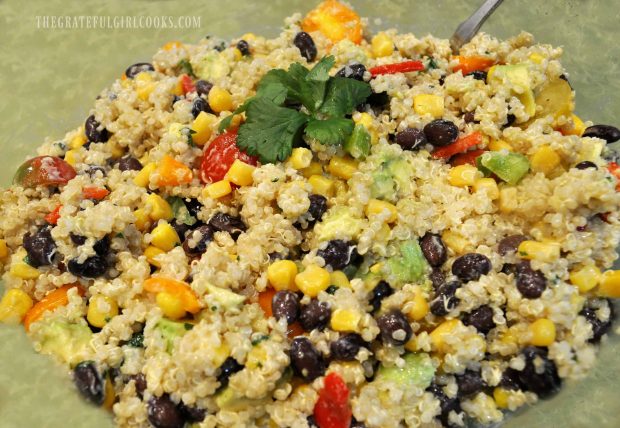
Here’s a close up of some Southwest Quinoa Salad goodness. Yum!  I love the fact that it not only tastes wonderful, but is quite colorful and good for you!

Southwest Quinoa Salad / The Grateful Girl Cooks!

New Beginnings

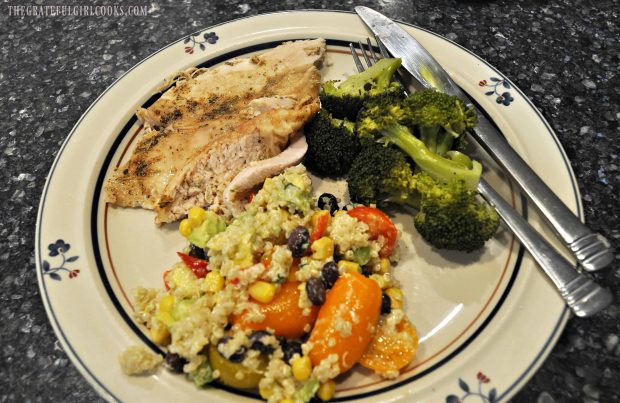
I served this Southwest Quinoa Salad with roasted turkey breast and steamed broccoli, for a healthy New Years Day dinner! My husband and I really enjoyed it, and it was FUN to prepare my first recipe for 2018 in our newly remodeled kitchen.

This was after 2 months of not being able to cook in there! Yay for our new, updated kitchen, appliances and counter tops! We still  have some work to do, but I’ve begun cooking in my kitchen once again. Yay!

Southwest Quinoa Salad / The Grateful Girl Cooks!

I want to wish you again a Happy New Year from our home to yours!  The arrival of a new year brings with it an infinite number of opportunities to encourage and serve others. Opportunities will also arise to grow as a person, create great memories, and cook delicious meals for yourself and those you love!

Hope you will join me in rising to the occasion, and as always, thank you for visiting The Grateful Girl Cooks. I appreciate each one of you. Have a great day!

Looking For More Recipes That Use QUINOA?

You can find ALL my recipes in the Recipe Index, located at the top of the page. I have some delicious recipes that feature quinoa you might enjoy, including:

Interested In More Recipes?

Thank you for visiting this website. I appreciate you using some of your valuable time to do soIf you’re interested, I publish a newsletter 2 times per month (1st and 15th) with all the latest recipes, and other fun info. I would be honored to have you join our growing list of subscribers, so you never miss a great recipe!
There is a Newsletter subscription box on the top right side (or bottom) of each blog post, depending on the device you use, where you can easily submit your e-mail address (only) to be included in my mailing list.

You Can Also Find Me On Social Media:

Facebook page: The Grateful Girl Cooks!
Pinterest:
The Grateful Girl Cooks!
Instagram:
jbatthegratefulgirlcooks

Southwest Quinoa Salad / The Grateful Girl Cooks!

Recipe Source: http://togetherasfamily.com/2017/05/fiesta-quinoa-salad/

0 from 0 votes
Southwest Quinoa Salad
Prep Time
8 mins
Cook Time
17 mins
Total Time
25 mins
 
Southwest Quinoa Salad is a healthy side or vegetarian dish featuring quinoa, tomatoes, corn, beans, peppers, avocado, and a flavorful cilantro lime dressing!
Category: Salad
Cuisine: Southwest
Keyword: Southwest quinoa salad
Servings: 8 side servings
Calories Per Serving: 218 kcal
Author: JB @ The Grateful Girl Cooks!
Ingredients
For Salad:
  • cups uncooked quinoa
  • cups water
  • 1/2 teaspoon salt
  • 1 cup halved cherry tomatoes
  • 1 can corn , drained (standard sized can)
  • 1 can black beans , drained and rinsed
  • 1 orange bell pepper , chopped (I used a combination of red, orange and green)
  • 1 avocado , peeled and cubed
For Cilantro Lime Dressing:
  • 1/4 cup olive oil
  • 1/4 cup reduced fat sour cream (can substitute plain non-fat yogurt)
  • Zest and juice from 1 lime
  • 1 teaspoon garlic powder
  • 1 teaspoon ground cumin
  • 1/2 teaspoon salt
  • 1/4 teaspoon black pepper
  • 1/3 cup chopped cilantro
Instructions
  1. Put the uncooked quinoa in a fine mesh strainer and rinse with water (this helps clean quinoa). Place the rinsed quinoa, water and salt in a saucepan; bring the mixture to a boil over high heat. When it comes to a boil, reduce heat to medium-low and put a lid on the pan. Cook quinoa for approximately 17-20 minutes (or until all liquid has been absorbed). Remove pan from heat, set aside, and let quinoa cool down to room temperature.
  2. Place cherry tomatoes, corn, black beans, bell peppers, avocado and cooled quinoa into a large salad bowl.
  3. To make cilantro lime dressing, in a small bowl whisk together olive oil, light sour cream, lime zest and juice, garlic powder, cumin, salt, pepper and cilantro. Be sure to mix well. Pour all of the dressing over salad, and stir well to combine all ingredients thoroughly. Serve as a side dish or as a healthy meatless meal, and enjoy! (Store leftovers in a covered container in refrigerator).
Nutrition Facts
Southwest Quinoa Salad
Amount Per Serving (1 serving)
Calories 218 Calories from Fat 108
% Daily Value*
Fat 12g18%
Saturated Fat 2g13%
Cholesterol 2mg1%
Sodium 307mg13%
Potassium 367mg10%
Carbohydrates 21g7%
Fiber 4g17%
Sugar 1g1%
Protein 4g8%
Vitamin A 660IU13%
Vitamin C 25.9mg31%
Calcium 32mg3%
Iron 1.7mg9%
* Percent Daily Values are based on a 2000 calorie diet.

Here’s one more to pin on your Pinterest boards!Southwest Quinoa Salad is a healthy side or vegetarian dish featuring quinoa, tomatoes, corn, beans, peppers, avocado, and a flavorful cilantro lime dressing!

Easy Stovetop Macaroni and Cheese

Easy Stovetop Macaroni and cheese is a creamy, delicious, family-friendly comfort food – quick and easy to make in 15 minutes!
Easy Stovetop Macaroni and cheese is a creamy, delicious, family-friendly comfort food - quick and easy to make in 15 minutes!

A friend of ours had surgery recently and I was grateful for the opportunity to take her family dinner once she returned home from the hospital.  My husband grilled some chicken and one of the side dishes I made was this easy macaroni and cheese. I really hoped her two children would enjoy this creamy, cheesy side dish!

A second batch was made for my husband and I because it tasted so GOOD (Yep… I sampled it when I made it for my friends… quality-control)!  The recipe is incredibly simple to make, and if you enjoy satisfying comfort foods, you’ll enjoy this mac and cheese.

My theory is that you can never go wrong with a basic cheese sauce and pasta! Creamy, cheesy, satisfying and delicious are words used to describe this family-friendly recipe for macaroni and cheese! Here’s how easy it is to make this simple dish!

Scroll Down For A Printable Recipe Card At The Bottom Of The Page

How To Make Easy Stovetop Macaroni and Cheese

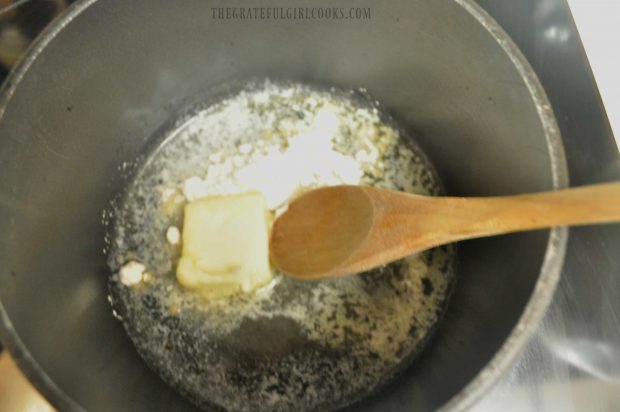
Cook elbow macaroni (or other small shaped pasta) according to package directions.  While pasta is cooking, in a separate sauce pan, melt butter and stir in flour, salt, onion and garlic powders until well blended.

Melting butter to begin making sauce for macaroni and cheese.

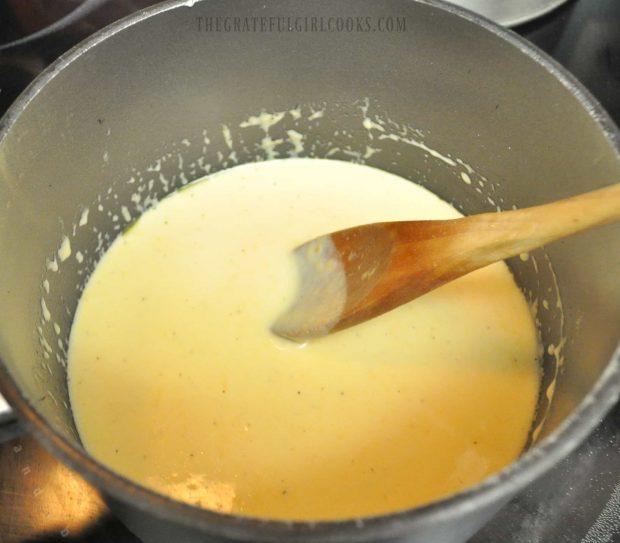
Add milk to pan. Cook on medium-high heat, stirring (or whisking) often, until the mixture comes to a boil.  Turn heat down to low, and continue to simmer (stirring often), until the sauce has thickened. This should take about 2 minutes.

Once sauce has thickened, remove pan from heat. Immediately stir in the grated cheddar cheese and a couple dashes of hot pepper sauce (or more if you like the heat). Stir until cheese has completely melted.

Cooking sauce for macaroni and cheese.

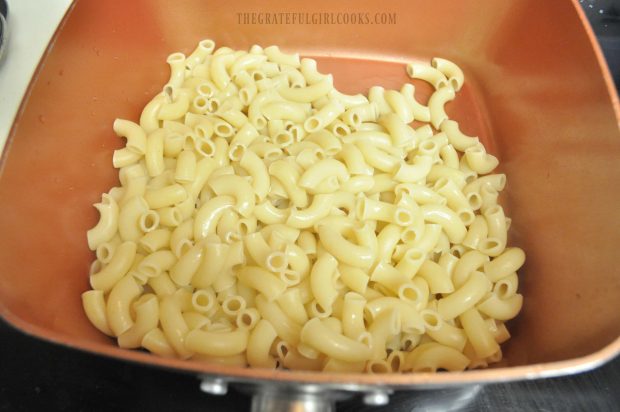
When the pasta has finished cooking, drain, then immediately place hot pasta back into the pan you used to cook it.

Macaroni noodles are cooked before adding cheese sauce.

Time to Add the Sauce

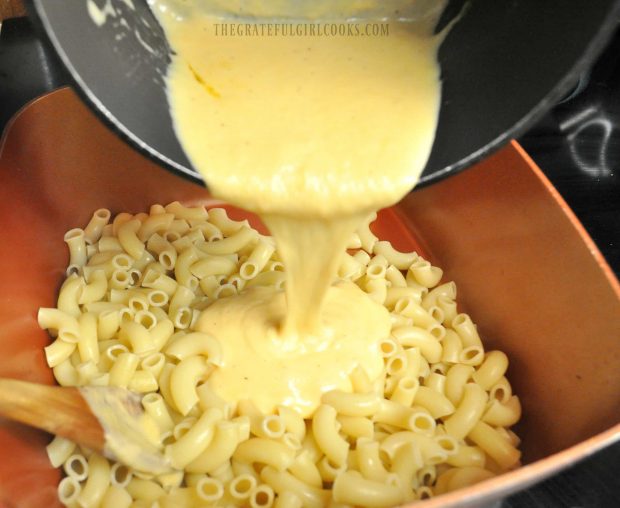
Pour hot, thickened cheese sauce over the hot drained pasta, and stir well to combine.

Cheese sauce is poured over hot macaroni in pan.

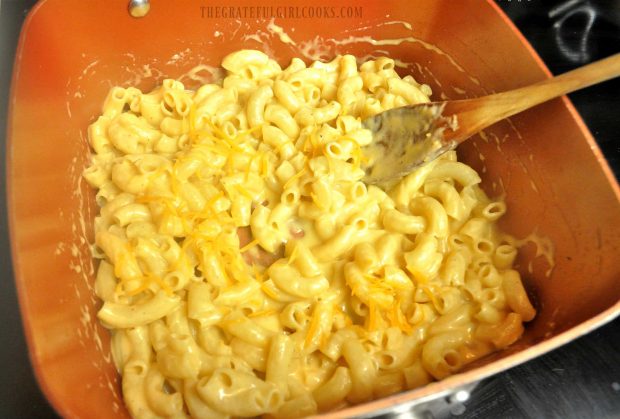
Taste test…add additional salt (and pepper), if desired.  I added an extra handful of cheddar cheese at this point, as well (but that is completely optional… we are big cheese lovers!). Stir well to make sure the easy stovetop macaroni and cheese is fully coated with the yummy sauce.
Macaroni and cheese is stirred well, to coat everything with sauce.

That’s all there is to it!  Serve the macaroni and cheese while it is hot… and enjoy a bowl of this creamy, satisfying comfort food! If you like mac and cheese, perhaps you would also be interested in a Pasta, Ham and Gruyere Cheese Casserole (baked), or a Cheesy Ham, Spinach and Macaroni Bake.

NOTE: The leftovers are really good, too. Store in an air-tight container in refrigerator. Before you reheat, you might need to add a tiny bit of milk and stir, to “re-vitalize” it!

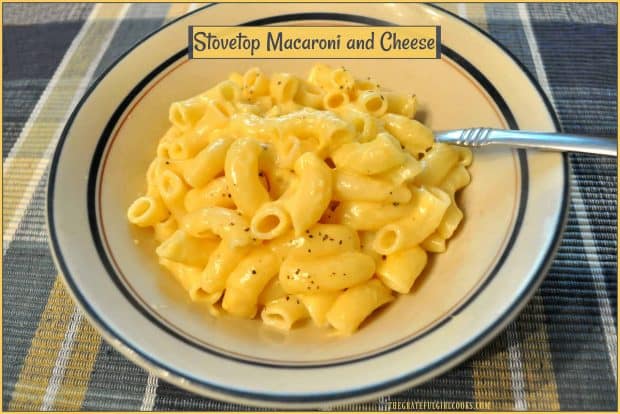
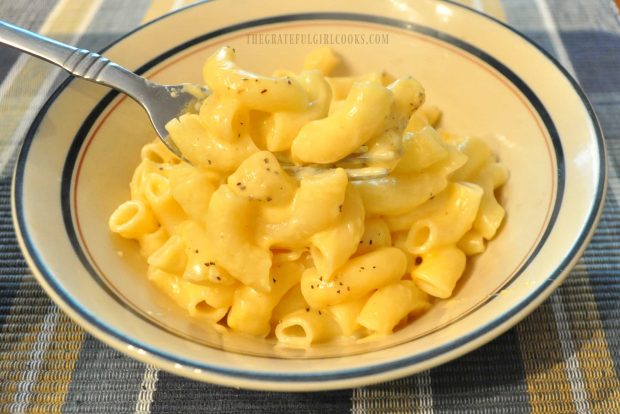
Easy Stovetop Macaroni and Cheese served hot, in a bowl.

I hope you can see how EASY it is to make this side dish OR main dish in no time at all!  If you cook the pasta at the same time you’re making the sauce, the whole “cheesy” meal can be ready in about 15 minutes… perfect for a main course, a side dish, or a quick lunch!

I hope you will consider giving this recipe a try!  Be sure to check out ALL my recipes in the Recipe Index, which is located at the top of the page. Have a great day.

Interested In More Recipes?

   Thank you for visiting this website. I appreciate you using some of your valuable time to do soIf you’re interested, I publish a newsletter 2 times per month (1st and 15th) with all the latest recipes, and other fun info. I would be honored to have you join our growing list of subscribers, so you never miss a great recipe!
   There is a Newsletter subscription box on the top right side (or bottom) of each blog post, depending on the device you use, where you can easily submit your e-mail address (only) to be included in my mailing list.

You Can Also Find Me On Social Media:

Facebook page: The Grateful Girl Cooks!
Pinterest:
The Grateful Girl Cooks!
Instagram:
jbatthegratefulgirlcooks

Author's signature

0 from 0 votes
Easy Stovetop Macaroni and Cheese
Prep Time
15 mins
Cook Time
0 mins
Total Time
15 mins
 

Easy Stovetop Macaroni and cheese is a creamy, delicious, family-friendly comfort food - quick and easy to make in 15 minutes!

Category: Entree
Cuisine: American
Keyword: macaroni and cheese
Servings: 6 small servings
Calories Per Serving: 449 kcal
Author: JB @ The Grateful Girl Cooks!
Ingredients
  • 3 cups uncooked elbow macaroni
  • 1 Tablespoon butter
  • 1/4 cup all purpose flour
  • 3/4 teaspoon salt
  • 1/2 teaspoon onion powder
  • 1/4 teaspoon garlic powder
  • 2 cups low-fat milk
  • cups shredded sharp cheddar cheese
  • couple dashes of hot pepper sauce (approx 1/8 teaspoon)
Instructions
  1. Cook elbow macaroni (or other small shaped pasta) according to package directions.
  2. While pasta is cooking, in a separate sauce pan, melt butter; stir in flour, salt, onion and garlic powders until well blended. Add milk to pan. Cook on medium-high heat, stirring (or whisking) often, until mixture comes to a boil. Turn heat down to low; continue to simmer (stirring often), until sauce has thickened. This should take about 2 minutes. Once sauce has thickened, remove pan from heat. Immediately stir in grated cheese and a couple dashes of hot pepper sauce (or more if you like the heat). Stir until cheese has completely melted.
  3. When pasta has finished cooking, drain, then immediately place pasta back into the pan you used to cook it. Pour the hot, thickened cheese sauce over the hot drained pasta, and stir well to combine. Taste test...add additional salt, if desired. I added an extra handful of cheddar cheese at this point, as well (but that is optional. Stir well to make sure pasta is fully coated with cheese sauce. Serve the macaroni and cheese while it's hot... and enjoy!
Recipe Notes

Serving size is about a cup. If you wish to make this dish lower in calories, consider substituting fat-free skim milk and low-fat cheddar cheese for the ingredients listed.

Nutrition Facts
Easy Stovetop Macaroni and Cheese
Amount Per Serving (1 serving)
Calories 449 Calories from Fat 117
% Daily Value*
Fat 13g20%
Saturated Fat 8g50%
Cholesterol 40mg13%
Sodium 524mg23%
Potassium 293mg8%
Carbohydrates 60g20%
Fiber 2g8%
Sugar 6g7%
Protein 19g38%
Vitamin A 420IU8%
Vitamin C 0.2mg0%
Calcium 313mg31%
Iron 1.4mg8%
* Percent Daily Values are based on a 2000 calorie diet.

Here’s one more to pin on your Pinterest boards!Easy Stovetop Macaroni and cheese is a creamy, delicious, family-friendly comfort food - quick and easy to make in 15 minutes!

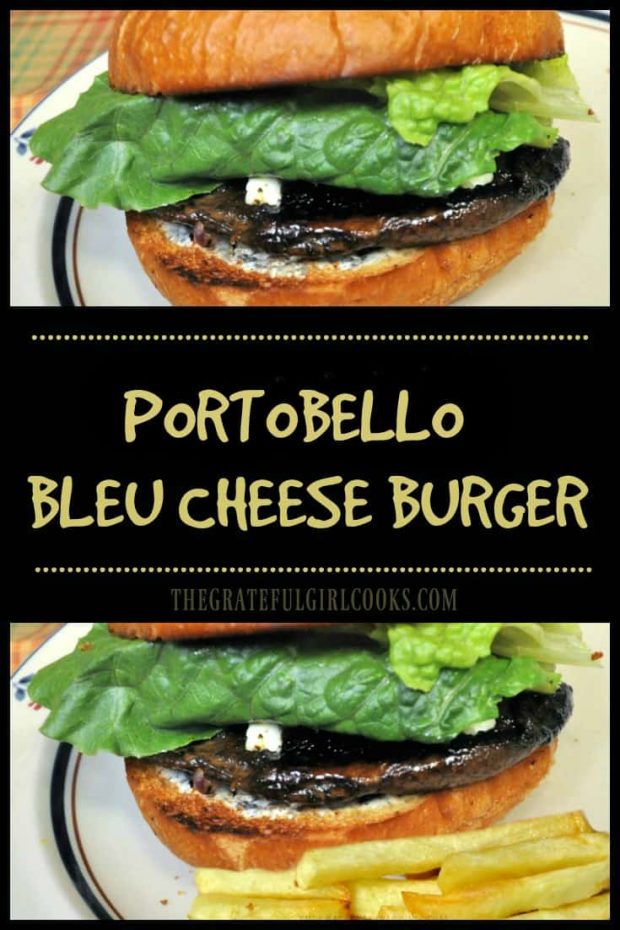
Portobello Bleu Cheese Burger

Looking for a flavorful “meatless” burger? Try this marinated Portobello Bleu Cheese Burger, with grilled onions, bleu cheese, and creamy Dijon sauce!Looking for a flavorful "meatless" burger? Try this marinated Portobello Bleu Cheese Burger, with grilled onions, bleu cheese, and creamy Dijon sauce!

You’ve gotta try this delicious Portobello Bleu Cheese Burger! The “meatless” sandwich is easy to make, and tastes wonderful.  Your “Meatless Mondays” will never be the same, with this recipe in your toolbox!!

Now I have to start this blog post by saying that I have never had a portobello burger before. Ever. I’ve had my fair share of of meatless burgers, like black bean  (thanks to one of our sons who is a vegetarian), but never a burger patty made out of a huge portobello mushroom. I love portobello mushrooms, and yes, they are known for their “meaty” taste, but until I tried this recipe, the concept had eluded me. Until now.

I found the recipe on Pinterest for the basic burger part of the recipe, then tweaked the recipe a bit to let me marinate the mushroom before cooking, which gave it additional flavor! I’m a traditional beef burger girl all the way, but was open to trying a meatless version.  The result? A tasty burger, which my husband and I really enjoyed!  Even if you’re not a vegetarian, you will probably enjoy this flavor-filled sandwich.

Scroll Down For A Printable Recipe Card At The Bottom Of The Page

Make The Sauce For The Portobello Bleu Cheese Burger

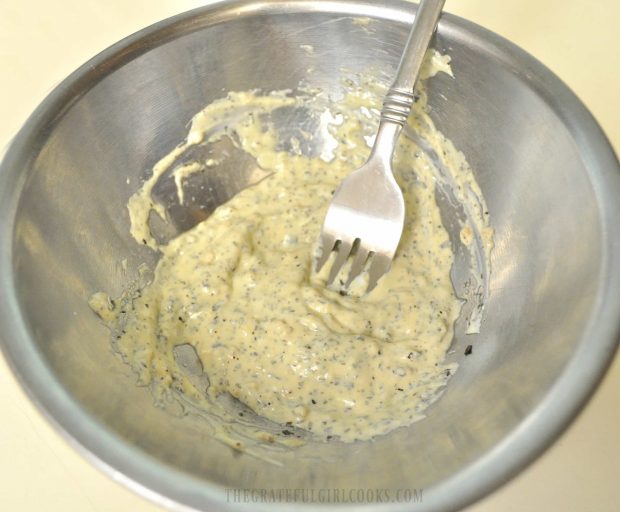
The first thing you will need to do is make a sauce for the finished burgers.  In a small bowl, combine plain Greek yogurt, olive oil, minced garlic cloves, dijon mustard, dried basil, parsley and salt. Mix the ingredients well, then cover the bowl and refrigerate the portobello bleu cheese burger sauce until you’re ready to use it. Easy!

Mixing up the dijon sauce for a portobello bleu cheese burger.

Prepare The Mushrooms

Wipe mushrooms clean with a damp cloth. Remove stems and gills from underside of mushroom. Clean the gills out by carefully running a small spoon around the underside of the mushroom. Discard the stems and gills, because you won’t need them!

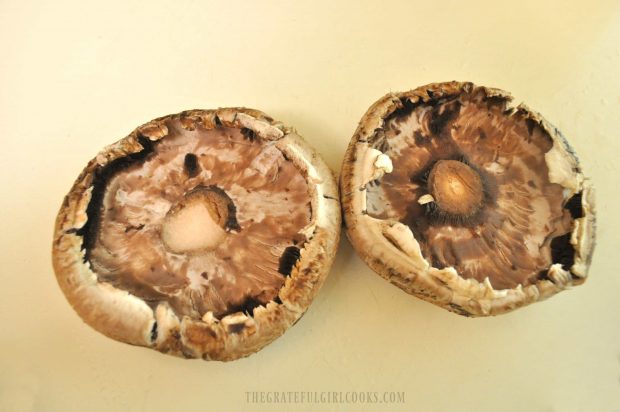
This is what the portobello mushroom caps looked like before they were marinated. Each mushroom is about 4 inches wide (which is perfect size for a standard hamburger bun)!

Two large portobello mushrooms for burgers, ready to marinate.

Make The Marinade For The Portobello Mushrooms

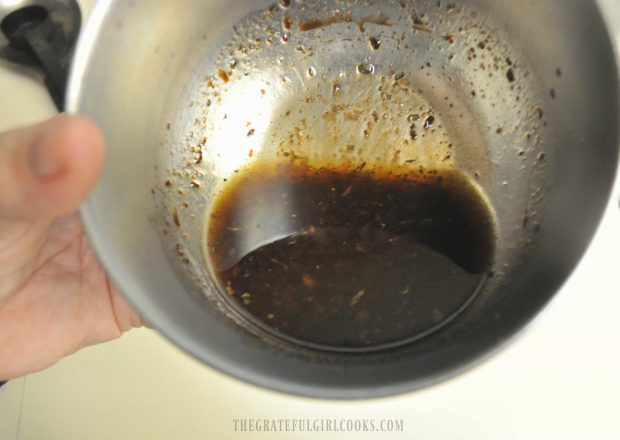
Make a simple marinade for the mushrooms by mixing together olive oil, balsamic vinegar, dried basil, garlic powder, onion powder, and a pinch of salt. Pour the marinade over prepared portobello mushrooms, turning to cover, and let them sit in the marinade for 20 minutes (with mushroom top face down in the marinade most of the time).

The marinade is ready for the portobello mushrooms.

Cook The Portobello Mushrooms

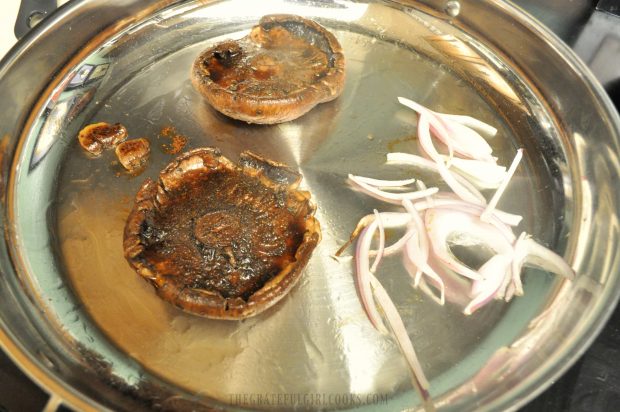
Heat a large skillet on medium-high.  Lightly brush the skillet with olive oil. Add the marinated mushrooms and red onion slices to the hot skillet. Cook the mushrooms for approximately 4 minutes per side, until they are tender and they begin to release their juices.  Cook the onions until they are tender and lightly browned.

Marinated portobello mushrooms and some red onion slices are cooked for burgers.

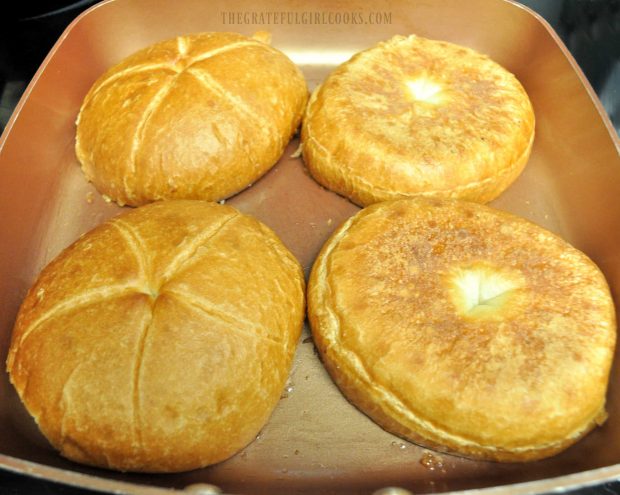
While the mushrooms cook, split and lightly butter each half of the hamburger buns. Grill them, butter side down in a skillet, until toasted and lightly browned.

Buns are lightly toasted in skillet for portobello bleu cheese burgers.

Assemble The Portobello Bleu Cheese Burger

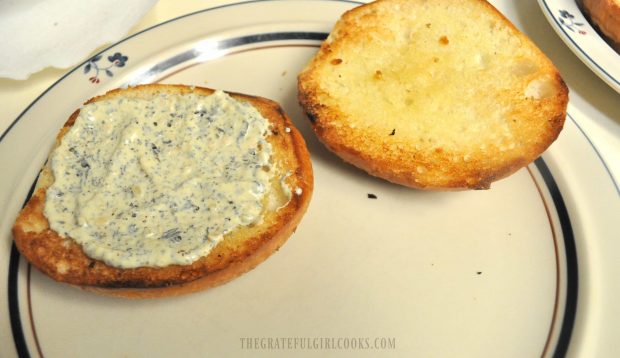
To assemble each portobello bleu cheese burger, spread a Tablespoon of the herb sauce on the bottom side of a toasted bun.

Dijon sauce is spread on toasted bun for the portobello bleu cheese burger.

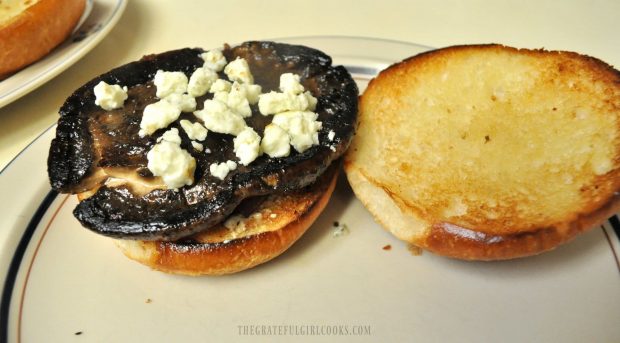
Top the bun with the cooked red onion. Place the cooked mushroom on top of the onions with the top (smooth side) down.

Cooked portobello mushroom and blue cheese crumbles are added to hamburger bun.

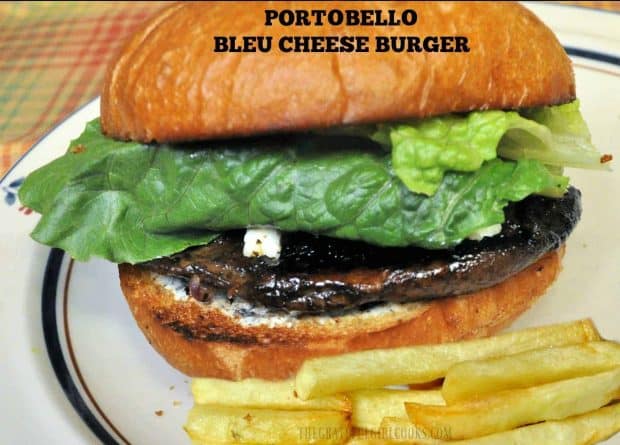
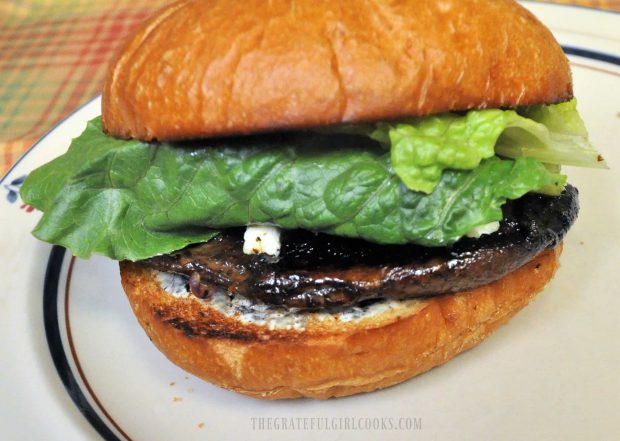
Sprinkle with some of the bleu cheese crumbles, then cover with a lettuce leaf. Cover the top with the bun, and this delicious portobello bleu cheese burger is ready to eat!

The portobello bleu cheese burger is covered with lettuce and top bun, and is ready to eat!

Hope you enjoy this delicious portobello bleu cheese burger. It is a tasty alternative to a traditional beef burger!  We really enjoyed it and were pleasantly surprised by it’s great flavor! Have a great day.

Looking For More MEATLESS Meals?

You can find all of my recipes in the Recipe Index, located at the top of the page. A few favorites include:

Interested In More Recipes?

Thank you for visiting this website. I appreciate you using some of your valuable time to do soIf you’re interested, I publish a newsletter 2 times per month (1st and 15th) with all the latest recipes, and other fun info. I would be honored to have you join our growing list of subscribers, so you never miss a great recipe!
There is a Newsletter subscription box on the top right side (or bottom) of each blog post, depending on the device you use, where you can easily submit your e-mail address (only) to be included in my mailing list.

You Can Also Find Me On Social Media:

Facebook page: The Grateful Girl Cooks!
Pinterest:
The Grateful Girl Cooks!
Instagram:
jbatthegratefulgirlcooks

Author's signature

Recipe Adapted From: https://www.cleaneatingmag.com/recipes/grilled-portobello-burgers-with-blue-cheese-creamy-dijon

↓↓ PRINTABLE RECIPE BELOW ↓↓

0 from 0 votes
Portobello Bleu Cheese Burger
Prep Time
25 mins
Cook Time
10 mins
Total Time
35 mins
 
Looking for a flavorful "meatless" burger? Try this marinated Portobello Bleu Cheese Burger, with grilled onions, bleu cheese, and creamy Dijon sauce!
Category: Dinner, Vegetarian
Cuisine: American
Keyword: portobello bleu cheese burger
Servings: 2 burgers
Calories Per Serving: 532 kcal
Author: JB @ The Grateful Girl Cooks!
Ingredients
  • 2 large portobello mushrooms (wiped clean, stems and gills removed)
  • 2 slices red onion
  • Tablespoons olive oil
  • 2 kaiser rolls (or hamburger buns)
  • Butter (for toasting buns)
  • 1/4 cup bleu cheese (crumbled)
  • 2 Romaine lettuce leaves
For Mushroom Marinade:
  • 2 Tablespoons olive oil
  • 2 Tablespoons balsamic vinegar
  • 1/8 teaspoon onion powder
  • 1/4 teaspoon garlic powder
  • 1/4 teaspoon dried basil
For Burger Sauce:
  • 1 Tablespoon plain Greek yogurt
  • 1 teaspoon Dijon mustard
  • 1/2 Tablespoon olive oil
  • cloves garlic , minced
  • 1 teaspoon dried basil
  • Pinch of salt
Instructions
  1. Make the sauce for the finished burgers. In a small bowl, combine plain Greek yogurt, olive oil, minced garlic cloves, dijon mustard, dried basil and salt. Mix well, then refrigerate (covered) until ready to use.
  2. Wipe mushrooms clean with a damp cloth. Remove stems and gills from underside of mushroom. Clean the gills out by carefully running a small spoon around the underside of the mushroom. Discard gills. Make marinade for mushrooms by mixing together olive oil, balsamic vinegar, dried basil, garlic powder and a pinch of salt. Pour marinade over prepared portobello mushrooms, turning to cover; let them sit in marinade for 20 minutes (with mushroom top face down in marinade most of the time).
  3. Heat a skillet on medium-high. Lightly brush skillet with the olive oil. Add mushrooms and red onion slices to hot skillet. Cook mushrooms 4 minutes per side, until tender. Cook onions until tender and lightly browned.
  4. While mushrooms cook, split and lightly butter each cut side of hamburger buns. Grill them, butter side down in a skillet, until toasted and lightly browned.
  5. To assemble burgers, spread a Tablespoon of the dijon sauce on the bottom side of a toasted bun. Top with cooked red onion, then put the cooked mushroom on top of onions with the top (smooth side) down. Sprinkle with bleu cheese crumbles, then cover with lettuce leaf. Top with bun, and it's ready to eat!
Nutrition Facts
Portobello Bleu Cheese Burger
Amount Per Serving (1 burger)
Calories 532 Calories from Fat 360
% Daily Value*
Fat 40g62%
Saturated Fat 11g69%
Cholesterol 28mg9%
Sodium 547mg24%
Potassium 511mg15%
Carbohydrates 31g10%
Fiber 3g13%
Sugar 8g9%
Protein 11g22%
Vitamin A 2745IU55%
Vitamin C 3.4mg4%
Calcium 192mg19%
Iron 2.7mg15%
* Percent Daily Values are based on a 2000 calorie diet.

Here’s one more to pin on your Pinterest boards!Looking for a flavorful "meatless" burger? Try this marinated Portobello Bleu Cheese Burger, with grilled onions, bleu cheese, and creamy Dijon sauce!

Veggie Lasagna Rollups

Veggie Lasagna Rollups are a simple, but delicious meatless dish. Noodles are filled with 4 cheeses, veggies, rolled and topped with marinara sauce.Veggie Lasagna Rollups are a simple, but delicious meatless dish. Noodles are filled with 4 cheeses, veggies, rolled and topped with marinara sauce.

I am occasionally on the lookout for ideas for “meatless” meals, since one of our sons is a vegetarian.  It’s fun finding new recipes we can enjoy together when he comes for dinner. Recently I came up with this simple recipe for Veggie Lasagna Rollups, after raiding my pantry and refrigerator for ingredients.

The recipe I came up with has lots of veggies and cheeses inside a rolled up lasagna noodle, then top with an Italian flavored pasta sauce, and bake. Veggie lasagna rollups sounded simple enough, and the recipe I ended up with had lots of flavor and tasted great!

Scroll Down For A Printable Recipe Card At The Bottom Of The Page

Here’s How To Make Veggie Lasagna Rollups

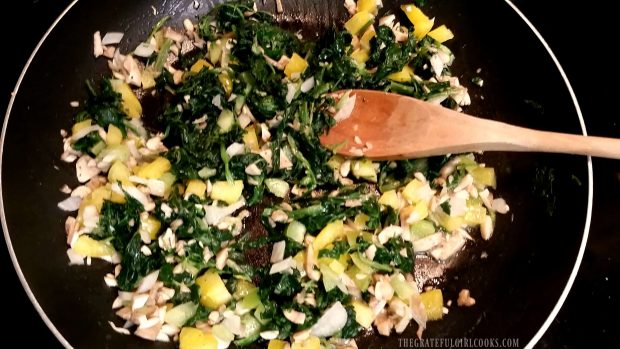
Melt butter in large skillet. Add chopped veggies (yellow and green bell peppers, onion, spinach, and mushrooms). Saute until crisp-tender, then set the skillet aside.

Chopped vegetables are cooked to add to veggie lasagna rollups.

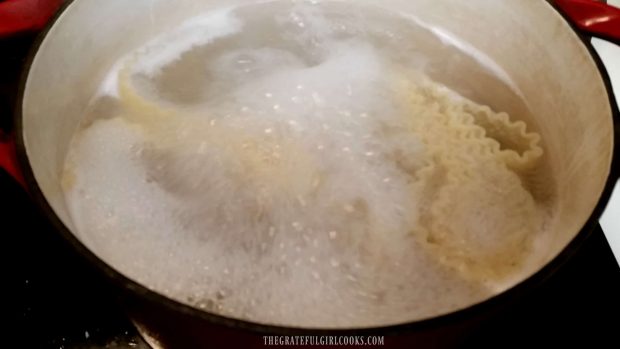
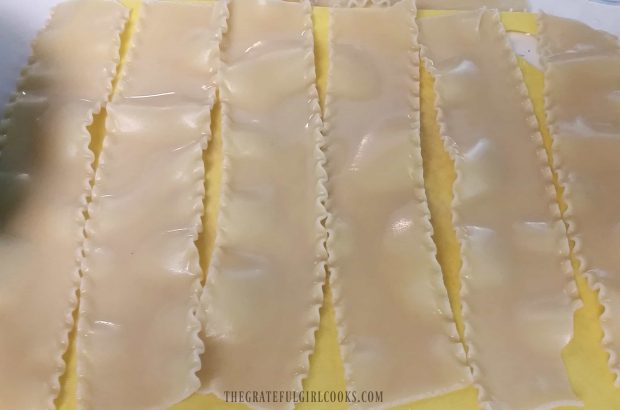
Cook the lasagna noodles according to package instructions. When done cooking, remove noodles carefully and drain, then lay pasta flat on work surface and blot dry with a paper towel.

Lasagna noodles for veggie lasagna rollups are cooked according to package directions.

Cooked lasagna noodles are drained then laid in strips.

Filling The Veggie Lasagna Rollups

In a bowl, stir together cream cheese, ricotta, Parmesan cheese, and garlic powder until fairly smooth. Reserve and set aside 1/4 of the cheese mixture to add to the top of the lasagna noodles prior to baking.

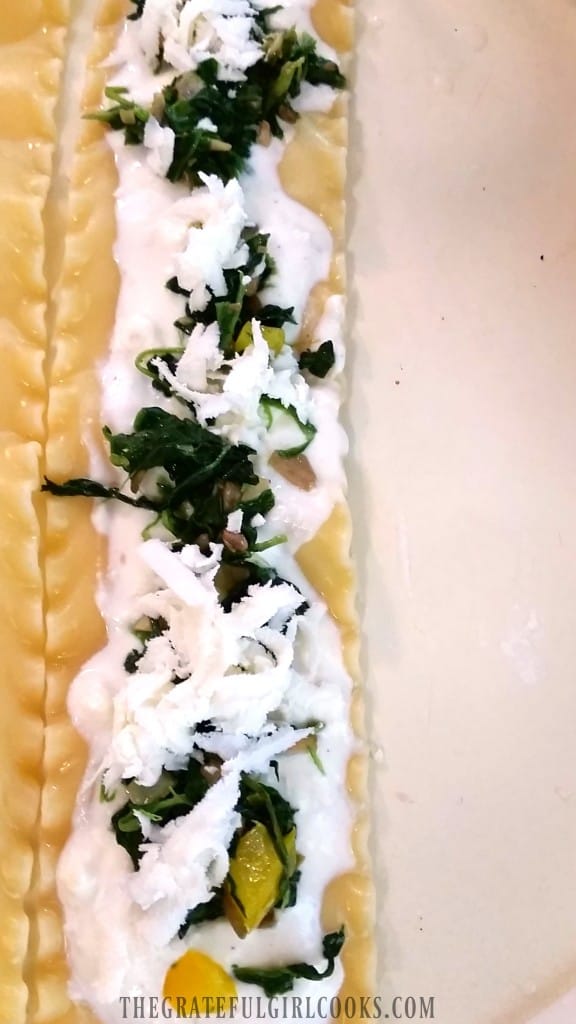
Spoon a layer of remaining cheese mixture down the middle of each noodle, lengthwise. Try to leave about a half inch on either side of noodle clear. Once the noodles have a cheese layer, evenly divide the cooked veggies down each noodle.  Top with a bit of grated Mozzarella cheese.  Repeat the process for each lasagna noodle.

Filling for veggie lasagna rollups is placed onto each lasagna noodle.

Prepare The Rollups For Baking

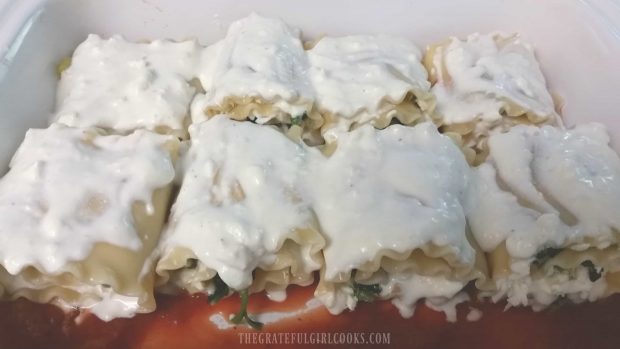
Spread Italian pasta sauce on the bottom of a large baking dish (enough to lightly cover bottom of dish).  Roll each one of the lasagna noodles up, beginning at the short end. Place lasagna rollups seam side down in the baking dish. Spoon reserved cheese mixture over tops of lasagna rollups.

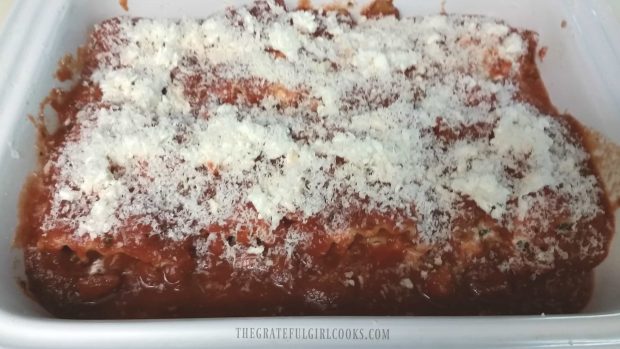
Veggie Lasagna Rollups are rolled, then placed on sauce, and topped with more sauce.

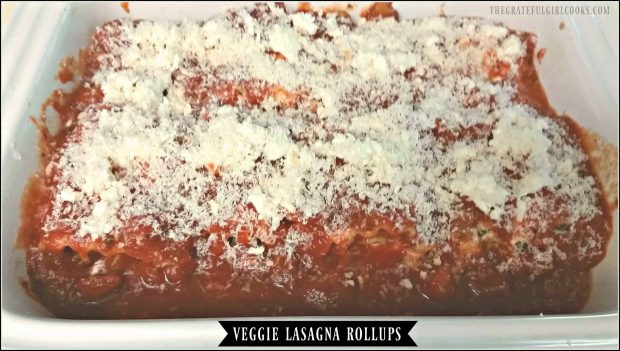
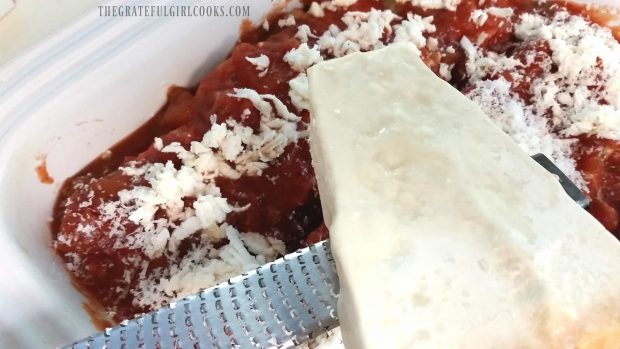
Pour pasta sauce over tops and sides of rollups until covered (I used a can of Italian spaghetti sauce for simplicity). Top the sauce with additional grated Mozzarella cheese and grated Parmesan cheese.

Veggie Lasagna Rollups are covered with marinara sauce and grated Parmesan cheese.

Bake The Veggie Lasagna Rollups

Bake the lasagna rollups in a preheated 350 degree oven for approximately 20-25 minutes, or until cheese and sauce are bubbly, and the rollups are fully heated through.

Veggie Lasagna Rollups are baked in oven before serving.
Time To EAT!

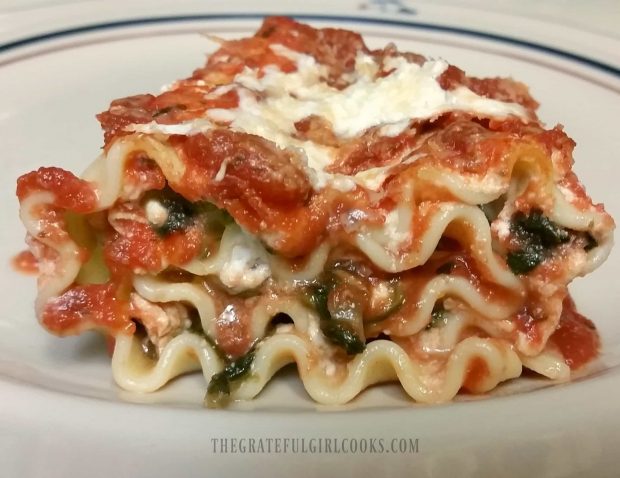
Remove the baking pan from the oven. Let it cool for just a minute, then carefully lift each rollup out of dish with a spatula and place onto individual serving plates.  Here’s a sideview of what it looked like once cooked and on the plate.

It’s a simple, meatless yet tasty veggie and cheese filled Italian lasagna treat.  The recipe makes 8 veggie lasagna rollups. Depending on how hungry you are, you can either get 4 servings (2 per person) or 8 servings (1 per person).

Each of the Veggie Lasagna Rollups are served hot, on a plate.

Hope you will consider trying this recipe for veggie lasagna rollups. Make it your own by adding any other veggies of your choice to the mix, as well. If you want to add meat, simply brown some crumbled Italian sausage and add to the veggie mixture. Use whatever works best for you!  Have a great day, friends.

Looking For More MEATLESS Recipes?

You can find ALL my recipes in the Recipe Index, located at the top of the page. I have some delicious meatless dishes you might be interested in, including:

Interested In More Recipes?

Thank you for visiting this website. I appreciate you using some of your valuable time to do soIf you’re interested, I publish a newsletter 2 times per month (1st and 15th) with all the latest recipes, and other fun info. I would be honored to have you join our growing list of subscribers, so you never miss a great recipe! 

There is a Newsletter subscription box on the top right side (or bottom) of each blog post, depending on the device you use, where you can easily submit your e-mail address (only) to be included in my mailing list.

You Can Also Find Me On Social Media:

Facebook page: The Grateful Girl Cooks!
Pinterest:
The Grateful Girl Cooks!
Instagram:
jbatthegratefulgirlcooks

Author's signature

↓↓ PRINTABLE RECIPE BELOW ↓↓

0 from 0 votes
Veggie Lasagna Rollups
Prep Time
25 mins
Cook Time
25 mins
Total Time
50 mins
 

Veggie Lasagna Rollups are a simple, but delicious meatless dish. Noodles are filled with 4 cheeses, veggies, rolled and topped with marinara sauce.

Category: Entree
Cuisine: Italian
Keyword: veggie lasagna rollups
Servings: 8 rollups
Calories Per Serving: 419 kcal
Author: JB @ The Grateful Girl Cooks!
Ingredients
  • 4 ounces cream cheese (at room temp)
  • 16 ounces ricotta cheese
  • 1/2 cup grated Parmesan cheese
  • 1 teaspoon garlic powder
  • 2 Tablespoons butter
  • 1 cup yellow bell pepper , chopped
  • 1 cup green bell pepper , chopped
  • 1 cup yellow onion , chopped
  • 1 small package frozen spinach , thawed and drained really well
  • 7-8 mushrooms , chopped
  • 8 uncooked lasagna noodles
  • cups grated mozzarella cheese
  • 2 cups spaghetti sauce (prepared canned marinara)
  • Additional grated mozzarella and Parmesan (for sprinkling on top of rollups before baking)
Instructions
  1. Melt butter in large skillet. Add chopped veggies (yellow and green bell peppers, onion, spinach, and mushrooms). Saute until crisp-tender. Set skillet aside.
  2. Cook lasagna noodles according to package instructions. When done, remove noodles carefully and drain; lay pasta flat on work surface and blot dry with a paper towel.
  3. In a bowl, stir together cream cheese, ricotta, Parmesan cheese, and garlic powder until fairly smooth. Reserve and set aside 1/4 of cheese mixture to add to top of lasagna noodles prior to baking. Spoon a layer of remaining cheese mixture down the middle of each noodle, lengthwise, leaving about a half inch clear around edges of noodle.
  4. Evenly distribute cooked veggies down each noodle. Top with a bit of grated Mozzarella cheese. Repeat process for each lasagna noodle.
  5. Spread Italian pasta sauce on bottom of a large baking dish (enough to lightly cover bottom of dish). Roll each of the lasagna noodles up, beginning at short end. Place seam side down in baking dish. Spoon reserved cream cheese mixture over top of each rollup.
  6. Pour marinara sauce over tops and sides of rollups until covered. Top with additional grated Mozzarella cheese and Parmesan cheese (as much as you wish).
  7. Bake in preheated 350 degree oven for approximately 20-25 minutes, or until cheese and sauce are bubbly, and dish is heated through.
  8. Remove dish from oven. Let cool for 1-2 minutes, then carefully lift each rollup out of dish with a spatula and place onto individual serving plates.
Recipe Notes

The recipe makes 8 rollups, so depending on how hungry you are, you can either get 4 servings (2 per person) or 8 servings (1 per person).
Fresh baby spinach can be substituted for frozen (I was using what I had on hand).

Nutrition Facts
Veggie Lasagna Rollups
Amount Per Serving (1 rollup)
Calories 419 Calories from Fat 189
% Daily Value*
Fat 21g32%
Saturated Fat 12g75%
Cholesterol 70mg23%
Sodium 785mg34%
Potassium 560mg16%
Carbohydrates 33g11%
Fiber 2g8%
Sugar 6g7%
Protein 24g48%
Vitamin A 1055IU21%
Vitamin C 55.3mg67%
Calcium 495mg50%
Iron 1.7mg9%
* Percent Daily Values are based on a 2000 calorie diet.

Here’s one more to pin on your Pinterest boards!Veggie Lasagna Rollups are a simple, but delicious meatless dish. Noodles are filled with 4 cheeses, veggies, rolled and topped with marinara sauce.


Save

Save

Save

Save

Save

Save

Save

Save

Save

Save

Save

Save

Save

Save

Save

Save

Save

Save

Save

Save

Save

Save

Save

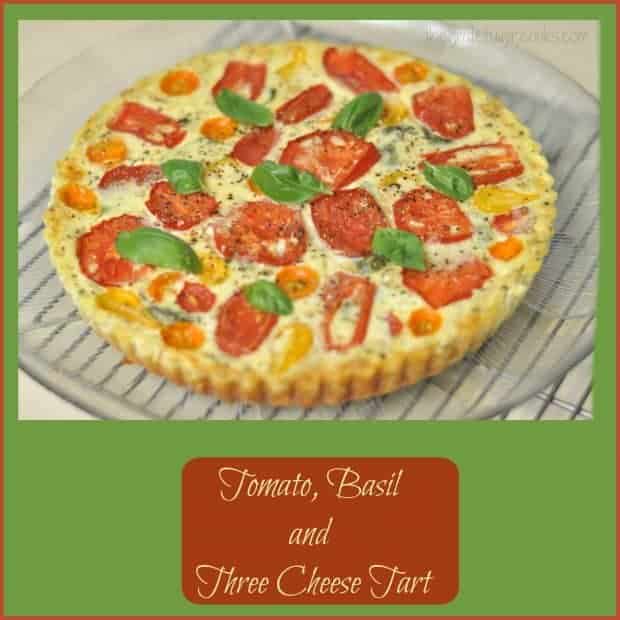
Tomato, Basil and Three Cheese Tart

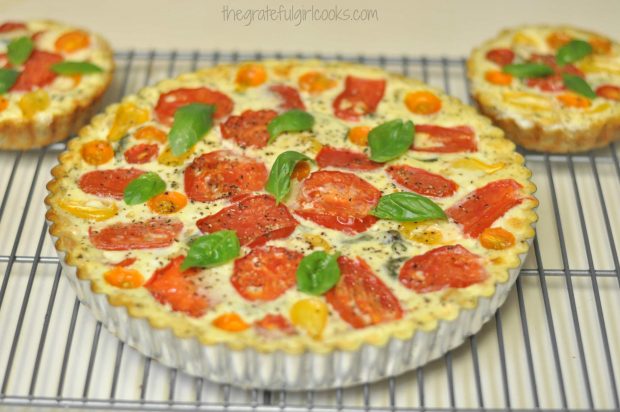
Tomato Basil Three Cheese Tart has a flaky crust, tomatoes, Ricotta, Parmesan, Mozzarella cheese, Italian spices, and is perfect for breakfast, lunch OR dinner!
I found this recipe for a “quiche-like tart” on Pinterest from one of my favorite bloggers, tweaked the recipe very slightly, and enjoyed the results very much!  The recipe features a delectable (pat in the pan) crust.

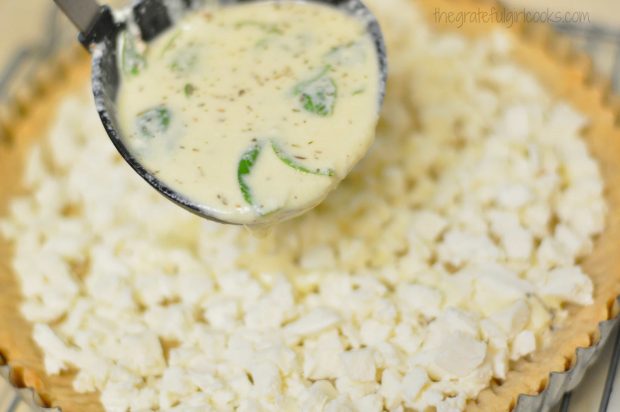
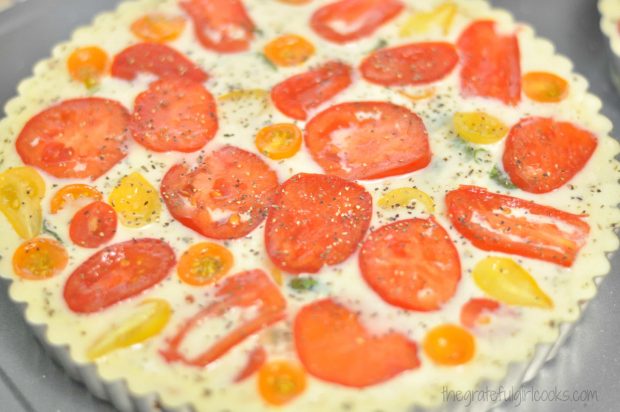
It is flavored with quiche-style filling, fresh mozzarella cheese, Parmesan cheese, and Ricotta cheese, plus fresh basil leaves and Italian spices. This beautiful tart is beautifully “crowned” with beautiful tomato slices for a pop of flavor and color!

Believe it or not, the tomato basil three cheese tart was not too hard to make, either! This dish is perfect for breakfast, lunch OR dinner. I think it would be fabulous to serve at a brunch! Here’s how to make it.

Scroll Down For A Printable Recipe Card At The Bottom Of The Page

How To Make This Tomato Basil Three Cheese Tart

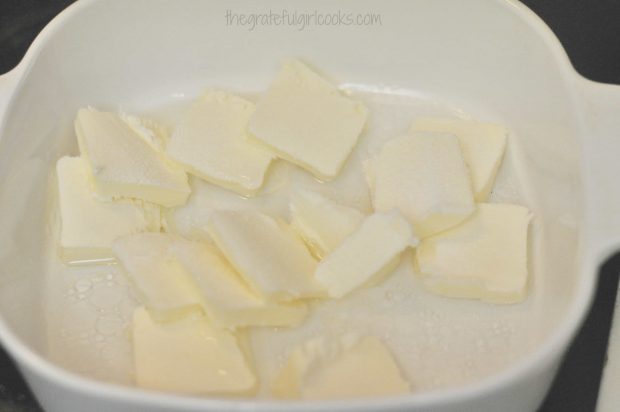
Preheat your oven to 410 degrees F.  Place butter, oil, water, sugar and salt in an oven-proof bowl. Place bowl in preheated oven; cook for 15 minutes. Remove hot bowl from oven.

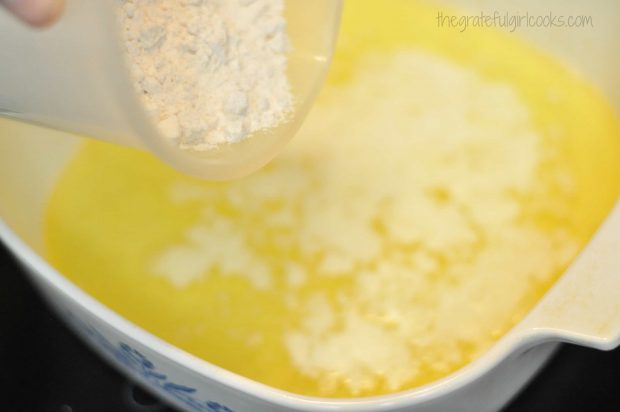
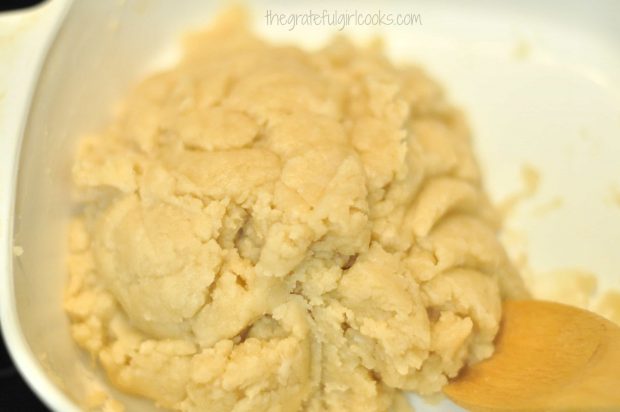
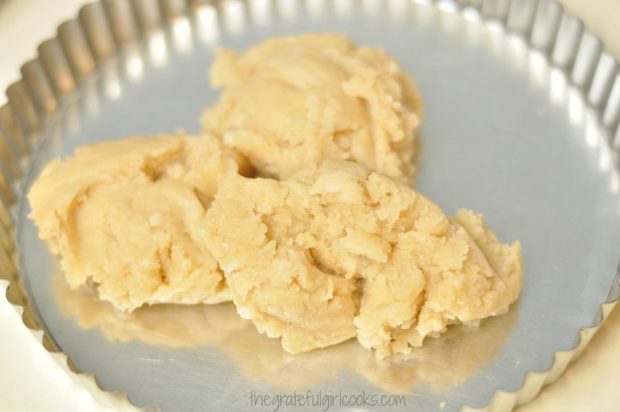
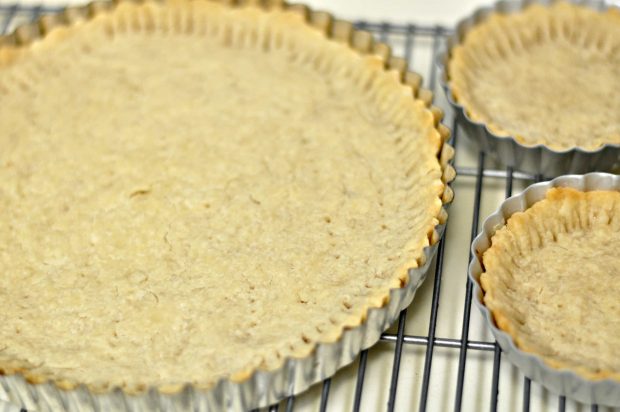
Add flour into the hot butter mixture. Stir this until the dough comes together and can be formed into a ball. Place the dough ball into a 10 or 11 inch tart pan (with a removable bottom).

Tomato, Basil and Three Cheese Tart / The Grateful Girl Cooks!

Tomato, Basil and Three Cheese Tart / The Grateful Girl Cooks!

Tomato, Basil and Three Cheese Tart / The Grateful Girl Cooks!
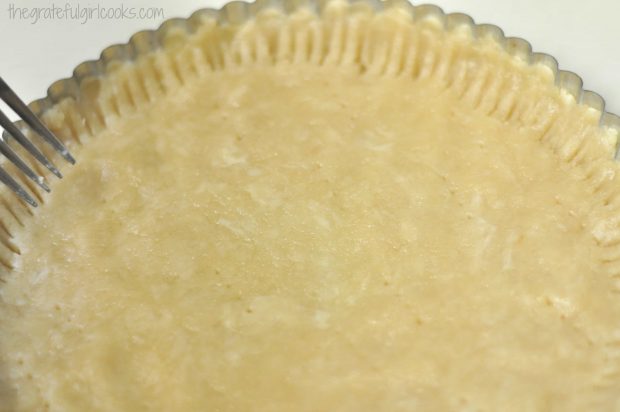
Once dough has cooled enough to handle, press the dough into the tart pan and up the sides to form a crust. (Hint from original recipe author: save a tiny bit of dough which can be used to repair any cracks in crust after baking).  Pierce the crust all over with the tines of a fork.

Bake The Crust

Press the sides of the crust in the pan to help reinforce the crust. I used a fork to do this. Bake crust at 410 degrees for 15 minutes (until golden in color).  Remove crust from oven. If any cracks occurred, use the tiny bit of dough to do a quick repair job. Let crust cool.  Reduce oven temperature to 375 F. Place a long baking sheet into the heated oven (for later).

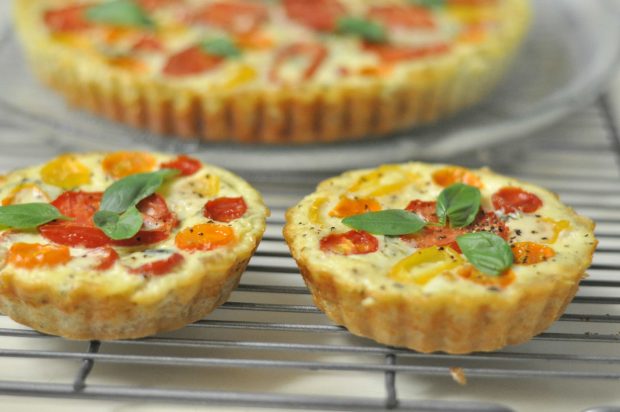
NOTE*** — I only had a 9 inch tart pan, so as you can see from my photos, I used the extra crust for two little tarts as well, then just divided the filling between the tarts. (The smaller crusts took a bit less time to cook).

Tomato, Basil and Three Cheese Tart / The Grateful Girl Cooks!

Tomato, Basil and Three Cheese Tart / The Grateful Girl Cooks!

Tomato, Basil and Three Cheese Tart / The Grateful Girl Cooks!

Prepare Filling For The Tomato Basil Three Cheese Tart

While you are baking crust or waiting for crust to cool down, combine the eggs, ricotta, Parmesan, half and half, Italian seasoning and salt in a medium bowl. Stir well to mix; once combined, add the small basil leaves and stir together. Set aside.

Tomato, Basil and Three Cheese Tart / The Grateful Girl Cooks!

Slice tomatoes (1/4 inch slices). Place slices on top of several paper towel to let them drain a bit.  While the tart is in the oven baking, lightly brush the tops of each tomato slice with a bit of olive oil

Tomato, Basil and Three Cheese Tart / The Grateful Girl Cooks!

Once the tart crust has cooled completely, add the grated fresh mozzarella cheese and spread to cover bottom of crust. Pour the egg mixture over the top of the mozzarella cheese.

Tomato, Basil and Three Cheese Tart / The Grateful Girl Cooks!

Tomato, Basil and Three Cheese Tart / The Grateful Girl Cooks!

Bake The Tart

Place the tart onto the heated baking sheet (in the oven) and bake on the pan for 10 minutes at 375 F. Remove tomato basil three cheese tart from oven after 10 minutes; arrange the tomato slices on top of the tart. Sprinkle tomato slices with salt and black pepper.

Place the tart back in the oven and continue to bake for an additional 15-20 minutes (mine took 20), until just set. When you slightly wiggle the tart pan, the filling should no longer “jiggle” back and forth. Remove the tart pan to a wire rack and let cool for at least 10 minutes before serving.

Tomato, Basil and Three Cheese Tart / The Grateful Girl Cooks!

Aren’t They Pretty?

This is how they looked when they first came out of the oven. I already had taken the tart pan off the small ones, as they had cooked and cooled enough before the large tart was done. Aren’t they gorgeous???

Tomato, Basil and Three Cheese Tart / The Grateful Girl Cooks!

I kinda like the little bitty ones… they would be perfect to serve at a brunch!

https://www.thegratefulgirlcooks.com/tomato-basil-three-cheese-tart/

Time To EAT!

This tomato basil three cheese tart can be served hot (after it rest for 10 minutes), or at room temperature. Either way is wonderful. Wrap the leftovers well, and they will keep for several days, if refrigerated.
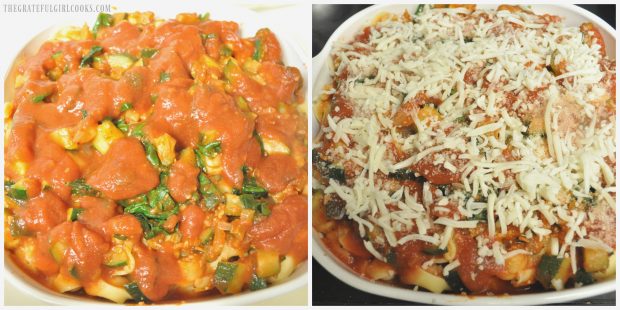
Tomato, Basil and Three Cheese Tart / The Grateful Girl Cooks!

I hope you will consider making this delicious tomato basil three cheese tart.  An added benefit was being able to use fresh tomatoes and basil from our garden to make this tart! It was wonderful to have the leftovers hanging around in our refrigerator for a few days. Then it was so easy to grab a quick slice for breakfast or lunch!
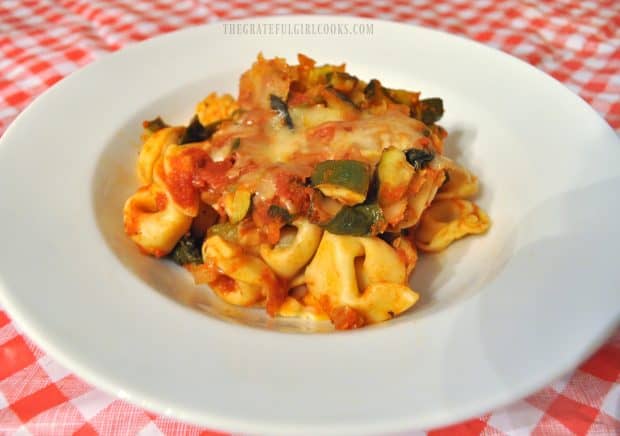
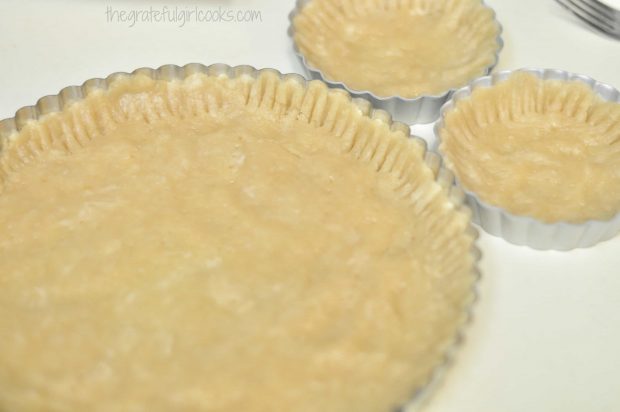
In Other News!

Have a blessed day… in other news – we got a new Pembroke welsh corgi puppy yesterday, so I am up to my eyeballs in “PUPPY” stuff. So tired, yet so very thankful for our new furry bundle of JOY (even if he doesn’t seem too sure about his new living arrangements)!

Cooper is our new corgi puppy!

Sure hope you enjoy this tomato basil three cheese tart! We sure did! Thanks for stopping by, and have a wonderful day.

Looking For More Quiche-Like Recipes Like This?

You can find all my recipes in the Recipe Index, located at the top of the page. I have several quiche recipes similar to this one that you might enjoy, including:

Interested In More Recipes?

Thank you for visiting this website. I appreciate you using some of your valuable time to do soIf you’re interested, I publish a newsletter 2 times per month (1st and 15th) with all the latest recipes, and other fun info. I would be honored to have you join our growing list of subscribers, so you never miss a great recipe!
There is a Newsletter subscription box on the top right side (or bottom) of each blog post, depending on the device you use, where you can easily submit your e-mail address (only) to be included in my mailing list.

You Can Also Find Me On Social Media:
Facebook page: The Grateful Girl Cooks!
Pinterest: The Grateful Girl Cooks!
Instagram: jbatthegratefulgirlcooks

Author's signature

Recipe Adapted From: http://thecafesucrefarine.com/2016/06/tomato-basil-fresh-mozzarella-tart/

↓↓ PRINTABLE RECIPE BELOW ↓↓

0 from 0 votes
Tomato, Basil and Three Cheese Tart
Prep Time
35 mins
Cook Time
30 mins
Total Time
1 hr 5 mins
 
Tomato Basil Three Cheese Tart has a flaky crust, tomatoes, Ricotta, Parmesan, Mozzarella cheese, Italian spices, and is perfect for breakfast, lunch OR dinner!
Category: Brunch, Entree
Cuisine: American
Keyword: tomato basil three cheese tart
Servings: 8 servings
Calories Per Serving: 552 kcal
Author: JB @ The Grateful Girl Cooks!
Ingredients
For crust:
  • 6 ounces butter
  • 2 Tablespoons oil (non-flavored oil)
  • 6 Tablespoons water
  • 1 teaspoon sugar
  • 1/2 teaspoon salt
  • 2 cups all purpose flour , plus 2 Tablespoons
For tart filling:
  • 4 large eggs (room temp)
  • 1 cup ricotta cheese (room temp)
  • 1/3 cup Parmesan cheese (grated)
  • 1 cup half and half
  • 1 teaspoon Italian seasoning (dried)
  • 1/2 teaspoon salt
  • 1/4 cup small , fresh basil leaves
  • 10-15 small colorful tomatoes (I used a combo of Romas and various color cherry tomatoes)
  • 8 ounces fresh mozzarella cheese , grated
  • Olive oil (to lightly brush on tomato slices prior to baking)
  • Salt and pepper , to sprinkle on tart before final bake
Instructions
To make the crust:
  1. Preheat your oven to 410 degrees F. Place the butter, oil, water, sugar and salt in an oven-proof bowl. Place bowl in preheated oven; cook for 15 minutes. Remove hot bowl from oven.
  2. Add flour into the hot butter mixture. Stir this until the dough comes together and can be formed into a ball. Place the dough ball into a 10 or 11 inch tart pan (with a removable bottom). Once dough has cooled enough to handle, press the dough into the tart pan and up the sides to form a crust. (Hint from original recipe author: save a tiny bit of dough which can be used to repair cracked crust after baking).
  3. Pierce the crust all over with the tines of a fork. Press the sides of the crust in the pan to help reinforce the crust. I used the fork to do this. Bake at 410 degrees for 15 minutes (golden in color).
  4. Remove crust from oven. If any cracks occurred, use the tiny bit of dough to do a quick repair job. Let crust cool. Reduce oven temperature to 375 F. Put a long sheet pan into the oven to heat up.
  5. While you are waiting for crust to cool down, combine the eggs, ricotta, Parmesan, half and half, Italian seasoning and salt in a medium bowl. Stir well to mix; once combined, add the small basil leaves and stir together. Set aside.
  6. Slice tomatoes (1/4 inch slices). Place slices on top of several paper towel to let them drain a bit.
  7. Once the tart crust has cooled completely, add the grated fresh mozzarella cheese and spread to cover bottom of crust. Pour the egg mixture over the top of the mozzarella cheese. Place the tart onto the heated baking sheet (in the oven) and bake on the pan for 10 minutes at 375 F.
  8. While the tart is in the oven baking, lightly brush the tops of each tomato slice with a bit of olive oil.
  9. Remove tart from oven after 10 minutes; arrange the tomato slices on top of the tart. Sprinkle tomato slices with salt and black pepper. Place the tart back in the oven and continue to bake for an additional 15-20 minutes (mine took 20), until just set. (When you slightly wiggle the tart pan, the filling no longer "jiggles" back and forth). Remove the tart pan to a wire rack and let cool for at least 10 minutes before serving. The tart is also delicious when served at room temperature!
Recipe Notes

Note: FYI- Original recipe called for 1/2 cup small fresh basil leaves. I made the tart the first time with that measurement, but I found I actually prefer LESS basil flavor in the tart, so have adjusted the quantity down to 1/4 cup small basil leaves for my version.

Nutrition Facts
Tomato, Basil and Three Cheese Tart
Amount Per Serving (1 slice)
Calories 552 Calories from Fat 342
% Daily Value*
Fat 38g58%
Saturated Fat 23g144%
Cholesterol 179mg60%
Sodium 765mg33%
Potassium 526mg15%
Carbohydrates 33g11%
Fiber 2g8%
Sugar 5g6%
Protein 19g38%
Vitamin A 2440IU49%
Vitamin C 21.5mg26%
Calcium 331mg33%
Iron 2.6mg14%
* Percent Daily Values are based on a 2000 calorie diet.

Here’s one more to pin on your Pinterest boards!Tomato Basil Three Cheese Tart has a flaky crust, tomatoes, Ricotta, Parmesan, Mozzarella cheese, Italian spices, and is perfect for breakfast, lunch OR dinner!

Save

Save

Save

Save

Save

Save

Save

Save