It’s easy to make a small batch of homemade egg noodles (3 ingredients) for a side dish (hot, buttered) or to add to homemade soup.

Did you know it is really easy to make homemade egg noodles using only a few ingredients? Yes… it’s true. Today I want to show you how to make egg noodles from scratch in the comfort of your own kitchen.
The recipe I am sharing is for a small batch of homemade noodles (4 servings), which is the perfect amount for us. We can enjoy this amount as a side dish (hot, buttered and lightly seasoned) to accompany some of our meals.
This small batch of noodles is also the perfect amount to add to a big pot of homemade soup!
I know it is very convenient to buy egg noodles at the grocery store, but I really LOVE knowing how to make them from scratch, too! Here’s how to make homemade egg noodles.
Scroll Down For A Printable Recipe Card At The Bottom Of The Page
Prepare The Dough for The Egg Noodles
In a large bowl or on a flat work surface, combine all-purpose flour and salt. Make a large mound out of the mixture, shore up the sides and then create a deep “well” in the center.

Add two large eggs into the “well”. Use a fork to slowly mix the eggs into the flour mixture, adding flour a little bit at a time until the eggs are fully mixed in.

Continue mixing until the dough comes together into a slightly firm, shaggy mound of dough. Place some flour on your hands and knead the dough until it comes together in a large ball.
Add a little more flour, if necessary, to bind it together. TIP: Don’t overmix the dough or it can cause the dough to become tough, which will make it harder to roll out.


Let The Dough Rest, Then Roll Out
Divide the dough in half into two equal sized balls. Let the dough balls rest (uncovered) for about 10 minutes. Lightly flour a flat work surface or cutting board.

Use a lightly floured rolling pin to roll out one ball of dough at a time. Try to roll the dough very thin (approximately ¼” thick), for best results.

Slice The Dough Into Thin Strips
Once the dough is rolled out, use a pizza cutter or a sharp knife to slice the dough into strips, about ½” – ¾” wide. At this point, the fresh noodles can be cooked immediately.
If you want to freeze some of the noodles for another use, lightly dust the noodles with flour. Lay the noodles on cookie sheets in a single layer, then flash freeze them.
Once frozen, place them (loosely packed) in an airtight freezer container or in large freezer bags and store in a freezer.

You can also choose to dry the egg noodles (completely) on wire racks (or pasta racks) for storage. The noodles must be completely dry all the way through before storing them.
NOTE: Personally speaking, I have had the best results cooking the noodles FRESH or FLASH FREEZING them for future use.

Cook The Noodles
To cook the homemade egg noodles, bring a large pan of water to a rolling boil. Add the fresh noodles and allow them to cook for 3-6 minutes (or more). See note below.
When done, the egg noodles should be tender to the bite but not too soft or mushy! Taste a bite then cook longer, if necessary.
NOTE: The thickness of the noodles you’ve made will determine the length of time they will need to fully cook.
TIP: If you are cooking frozen egg noodles, simply add them (still frozen) to the boiling water. You do not need to thaw them out at all!

Serve And Enjoy Homemade Egg Noodles
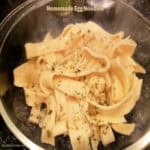
When the noodles are finished cooking, if we are having them as a side dish, I drain them, put them in a serving bowl, and immediately add butter.
The hot noodles will melt the butter, and then I add dried parsley then season with salt and garlic powder, to taste. Serve immediately while hot!
If you will be adding them to a soup, add the noodles toward the end of the cooking time (so they don’t overcook) and cook them until they become tender to the bite.

We enjoy homemade egg noodles served with a variety of main dishes. This time we served them along with classic turkey croquettes and added some roasted Brussel sprouts on the side.

I hope you have the opportunity to try this simple recipe for homemade egg noodles and trust you’ll enjoy making them from scratch like I do!
Thanks for stopping by, and I invite you to come back again soon for more family-friendly recipes! Take care, may God bless you, and have a wonderful day.
Looking For More SIDE DISH Recipes?
You can find ALL of my recipes in the Recipe Index, which is located at the top of the page. I have lots of fantastic side dish recipes to choose from, including:
- Southwest Quinoa Salad
- Orzo With Parmesan
- Cranberry Orange Israeli Couscous
- Vegetarian Spicy Noodles in Peanut Sauce
- Easy Homemade Rice Pilaf
Want More Recipes? Get My FREE Newsletter!
I publish a newsletter 2 times per month (1st and 15th) with lots of recipes, tips, etc.
Would you like to join our growing list of subscribers?
There is a Newsletter subscription box on the top right (or bottom) of each blog post, depending on the device you use.
You can submit your e-mail address there, to be added to my mailing list.
Find Me On Social Media:
Facebook page: The Grateful Girl Cooks!
Pinterest: The Grateful Girl Cooks!
Instagram: jbatthegratefulgirlcooks

↓↓ PRINTABLE RECIPE BELOW ↓↓
It's easy to make a small batch of homemade egg noodles (3 ingredients) for a side dish (hot, buttered) or to add to homemade soup.
In a large bowl or on a flat work surface, combine flour and salt. Make a large mound out of the mixture, shore up the sides and create a deep "well" in the center. Add eggs to the "well". Use a fork to slowly mix eggs into flour mixture, adding flour in a little at a time until ingredients create a slightly firm, shaggy mound of dough.
Place some flour on your hands; knead dough until it comes together in a large ball. Add more flour, if necessary, to bind it together. TIP: Don't overmix dough or it can become tough, which makes it harder to roll out.
Divide dough in half into two equal-sized balls. Let dough rest (uncovered) for 10 minutes. Lightly flour work surface or cutting board. Use a lightly floured rolling pin to roll out 1 ball of dough at a time. Roll dough very thin (approx. ¼" thick), for best results. Repeat with remaining dough ball.
Once dough is rolled out, use a pizza cutter or sharp knife to slice dough into strips, ½" - ¾" wide. At this point, fresh noodles can be cooked immediately.
To cook noodles, bring a large pan of water to a rolling boil. Add fresh noodles; cook 3-6 minutes (or more). When done, noodles should be tender to the bite but not too soft or mushy! Taste a bite then cook longer, if necessary. NOTE: The thickness of the noodles will determine length of time they need to fully cook. TIP: If cooking frozen egg noodles, add them (still frozen) to the boiling water. You do not need to thaw them out at all!
NOTE: If serving as a side dish, combine cooked, drained, hot egg noodles with butter and seasonings of choice (garlic powder, dried parsley, salt and pepper, etc.) to suit your taste. If adding noodles to soup, add to simmering soup toward the end of the cooking time (for time indicated) so noodles don't overcook.
Here’s one more to pin on your Pinterest boards.


 is a simple, delicious Asian-inspired meal that can be ready in about 30 minutes! / The Grateful Girl Cooks!")


 is a simple, delicious Asian-inspired meal that can be ready in about 30 minutes! / The Grateful Girl Cooks!")


, a meatless casserole, with cheese tortellini, sauce, zucchini, spinach, & mozzarella! / The Grateful Girl Cooks!")


, a meatless casserole, with cheese tortellini, sauce, zucchini, spinach, & mozzarella! / The Grateful Girl Cooks!")


