Month: January 2020

Asian Chicken Thigh Skillet

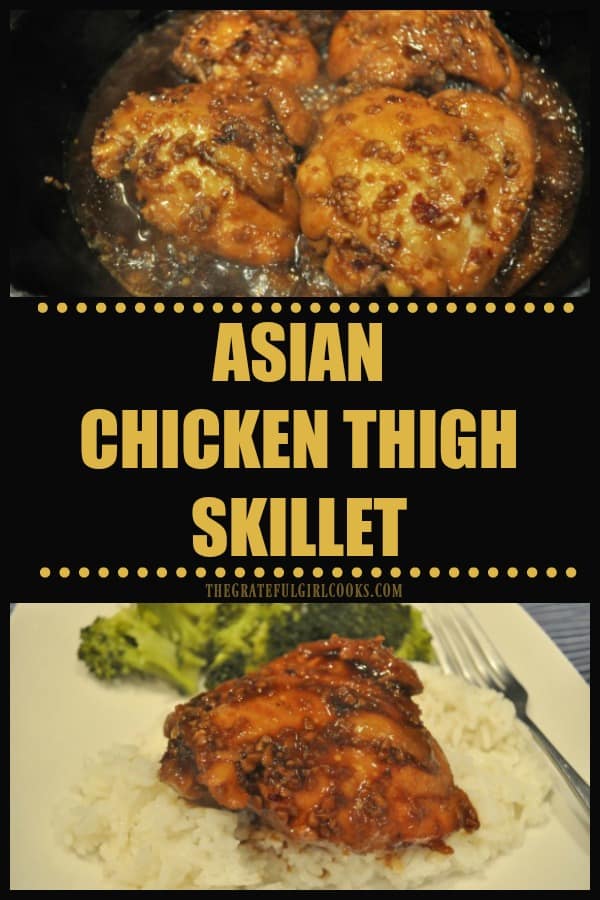
Asian Chicken Thigh Skillet is a delicious, EASY dish to make. Chicken thighs are pan-seared, then covered and cooked in a simple Asian garlic sauce!
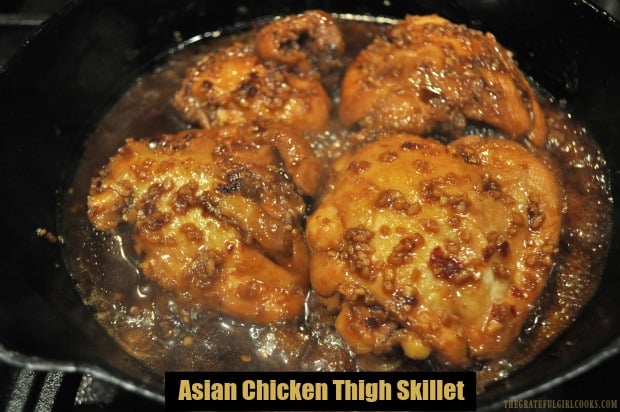

If you’re looking for a simple, yet DELICIOUS way to cook chicken thighs, may I suggest this dish? It truly is a simple dish to make, and is packed with flavor!

Skinless chicken thighs (bone-in or no-bone) are pan seared, then are cooked for a short time in a 4-ingredient Asian sauce, along with minced garlic and red pepper flakes. The result is perfectly cooked chicken thighs, covered in an amazing tasting sauce, and then served on a bed of rice!

The Asian Chicken Thigh Skillet only takes about half an hour to make, and requires very few ingredients. **NOTE: The recipe calls for using SIX chicken thighs, but as you will see, I only made four thighs, so my photos will reflect that!

Scroll Down For A Printable Recipe Card At The Bottom Of The Page

Make The Asian Sauce

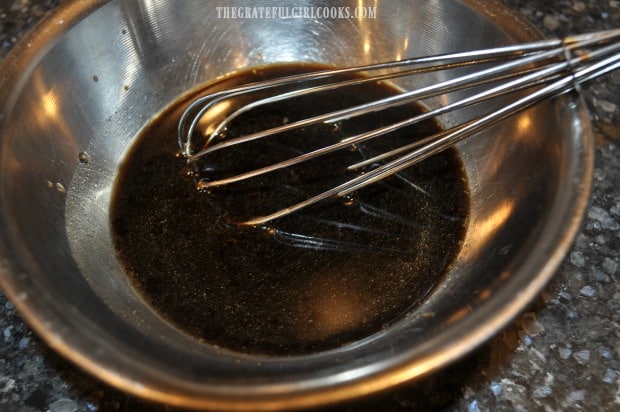
The first thing you will need to do is make a quick, Asian-inspired sauce. Easy! Simply mix together soy sauce, vinegar, honey and ground ginger in a small bowl. Once fully combined, set the bowl of Asian sauce aside.

A sauce is made with soy sauce, vinegar, honey and ground ginger.

Brown The Chicken Thighs

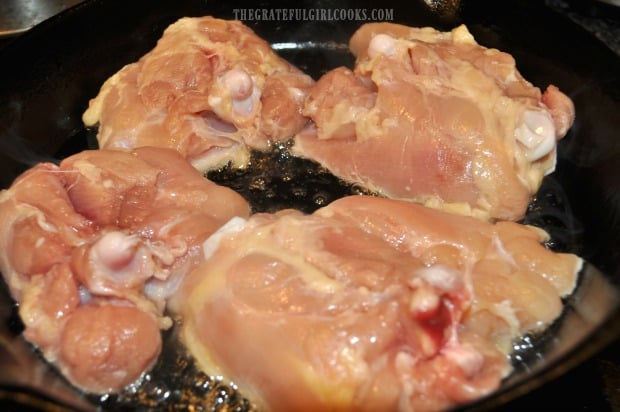
The next step is to brown the chicken thighs! To do this, first heat the oil on medium-high heat in a large skillet. I used a cast iron skillet, but it really doesn’t matter. Once the oil is very hot, but NOT smoking, carefully add the skinless chicken thighs to the hot oil.

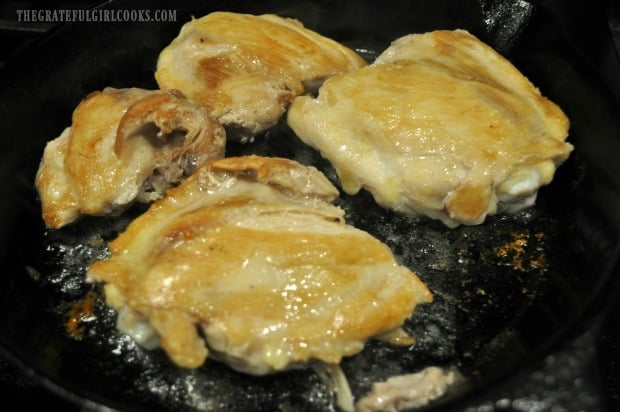
Let the chicken cook (without disturbing) for 5 minutes, and then carefully turn each piece to the other side. The chicken thighs should be lightly browned before turning them over. Continue to cook for 5 more minutes on the second side.

Skinless chicken thighs are browned in hot oil in skillet.The chicken thighs are flipped over once browned.

Add Seasonings And Sauce To The Asian Chicken Thigh Skillet

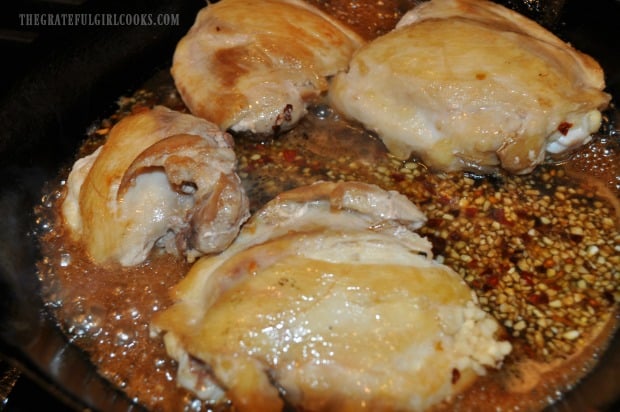
At this point, you need to add the minced garlic and red pepper flakes to the skillet, and stir, to combine. Continue to cook for about 2 minutes, stirring often, to keep the garlic from burning.

Garlic, red pepper flakes and sauce are added to the Asian Chicken Thigh Skillet.

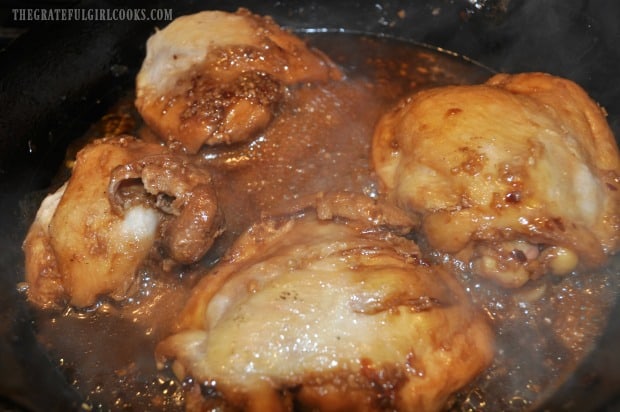
Pour the Asian sauce you previously set aside into the skillet. Stir well, to combine. Cover the skillet, turn the heat down to medium and let the chicken cook, undisturbed, for 15 minutes.

Asian Chicken Thigh Skillet is covered to let meat cook in sauce for 15 minutes.

Time To Finish The Asian Chicken Thigh Skillet!

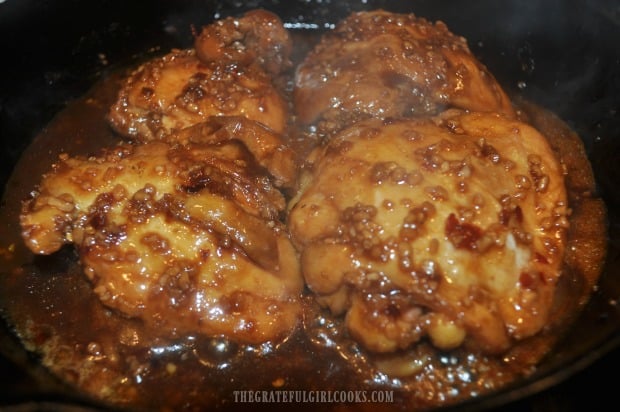
After the 15 minutes of covered cooking time, carefully remove the cover on the skillet. Let the chicken and sauce cook uncovered for about 2 minutes, stirring occasionally. While cooking, spoon the sauce on top of each piece of chicken several times.

The sauce will slightly thicken as it cooks, and the chicken will become beautifully browned, thanks to the flavor-filled sauce. When done, the chicken should have an internal temperature of 165°F, and then it is ready to serve!

Some of the Asian sauce is spooned on top of chicken thighs before serving.

Time To Enjoy This Asian Chicken Thigh Skillet!

Once the chicken is cooked through to the proper temperature, and the sauce has slightly thickened, it is time to eat!

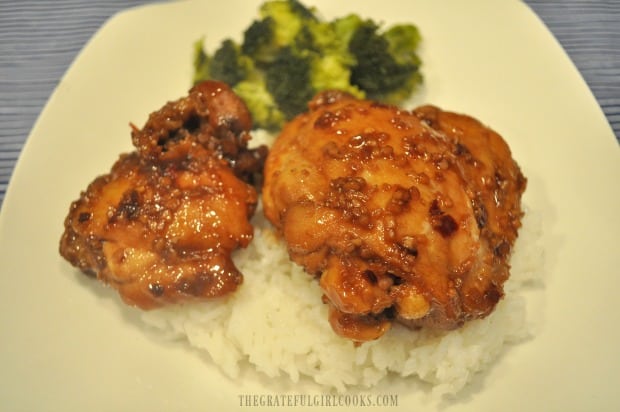
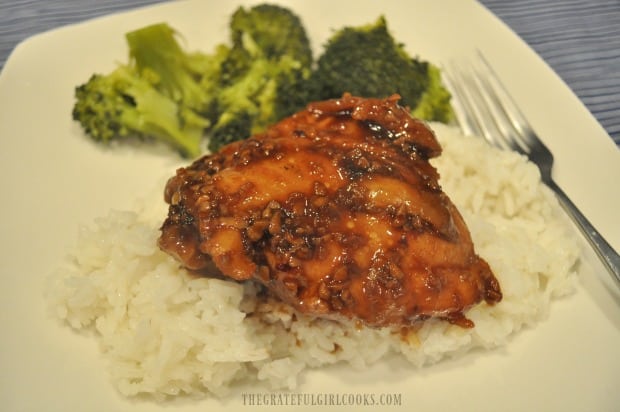
We enjoy this chicken best when served on top of some steamed rice! Spoon some of the sauce over each piece of chicken when serving, for an added flavor boost! Can you see all that minced garlic on top of the chicken? That’s some GOOD flavor there, friends!

Finished Asian chicken thigh skillet dish is served on top of steamed rice.Chicken thigh with sauce is served on steamed rice, with broccoli on the side.

I really hope you will consider trying this simple recipe for Asian Chicken Thigh Skillet! We truly enjoy this meal, and trust you will, too! Have a wonderful day, and thank you for visiting!

Looking For Other CHICKEN Recipes?

You can find all of my recipes in the Recipe Index, located at the top of the page. I have many chicken recipes, including:

Interested In More Recipes?

Thank you for visiting this website. I appreciate you using some of your valuable time to do soIf you’re interested, I publish a newsletter 2 times per month (1st and 15th) with all the latest recipes, and other fun info. I would be honored to have you join our growing list of subscribers, so you never miss a great recipe!
There is a Newsletter subscription box on the top right side (or bottom) of each blog post, depending on the device you use, where you can easily submit your e-mail address (only) to be included in my mailing list.

You Can Also Find Me On Social Media:
Facebook page: The Grateful Girl Cooks!
Pinterest: The Grateful Girl Cooks!
Instagram: jbatthegratefulgirlcooks

Author's signature

Original recipe source: unknown (recipe found written on a 3×5 card from many, many years ago)
3 from 1 vote
Asian Chicken Thigh Skillet
Prep Time
15 mins
Cook Time
17 mins
Total Time
32 mins
 

Asian Chicken Thigh Skillet is a delicious, EASY dish to make. Chicken thighs are pan-seared, then covered and cooked in a simple Asian garlic sauce!

Category: Entree
Cuisine: Asian
Keyword: Asian chicken thigh skillet
Servings: 6
Calories Per Serving: 325 kcal
Author: JB @ The Grateful Girl Cooks!
Ingredients
  • 6 medium chicken thighs , skin removed
  • ¼ cup vinegar
  • 3 Tablespoons soy sauce
  • 2 Tablespoon honey
  • 2 Tablespoons peanut oil (or veg. oil)
  • 10 cloves garlic , coarsely chopped
  • 1 teaspoon dried red pepper flakes
  • cooked rice (optional-for serving)
Instructions
  1. In a small bowl, mix together soy sauce, vinegar, honey and ground ginger. Set aside.

  2. Heat oil on medium-high heat in a large skillet. Once oil is very hot, but NOT smoking, carefully add skinless chicken thighs. Let cook (without disturbing) for 5 minutes, and then carefully turn them to the other side. The chicken thighs should be lightly browned before turning them over. Continue to cook 5 more minutes on second side.

  3. Add minced garlic and red pepper flakes to skillet, and stir, to combine. Cook for 1-2 minutes, stirring often, to keep garlic from burning. Pour reserved sauce into skillet. Stir well, to combine. Cover skillet, turn heat down to medium and let chicken cook, undisturbed, for 15 minutes.

  4. After 15 minutes, carefully remove cover from skillet. Let chicken and sauce cook uncovered for 2 minutes, stirring occasionally. While cooking, spoon sauce over top of chicken thighs several times. Sauce will slightly thicken as it cooks, and will become beautifully browned, thanks to the flavor-filled sauce. When done, chicken should have an internal temperature of 165°F, and then it is ready to serve! Serve over steamed rice, spoon some sauce over the top of the chicken, and enjoy!

Nutrition Facts
Asian Chicken Thigh Skillet
Amount Per Serving (1 thigh)
Calories 325 Calories from Fat 216
% Daily Value*
Fat 24g37%
Saturated Fat 6g38%
Cholesterol 111mg37%
Sodium 360mg16%
Potassium 273mg8%
Carbohydrates 9g3%
Fiber 1g4%
Sugar 6g7%
Protein 19g38%
Vitamin A 187IU4%
Vitamin C 2mg2%
Calcium 18mg2%
Iron 1mg6%
* Percent Daily Values are based on a 2000 calorie diet.

Here’s one more to pin on your Pinterest boards!Asian Chicken Thigh Skillet is a delicious, EASY dish to make. Chicken thighs are pan-seared, then covered and cooked in a simple Asian garlic sauce!


Air Fryer Italian Meatballs

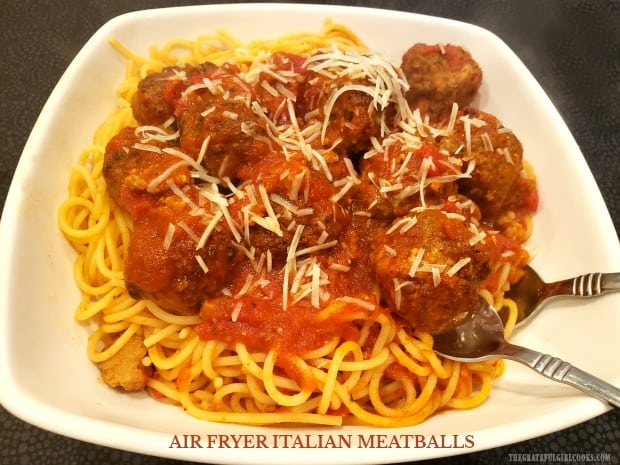
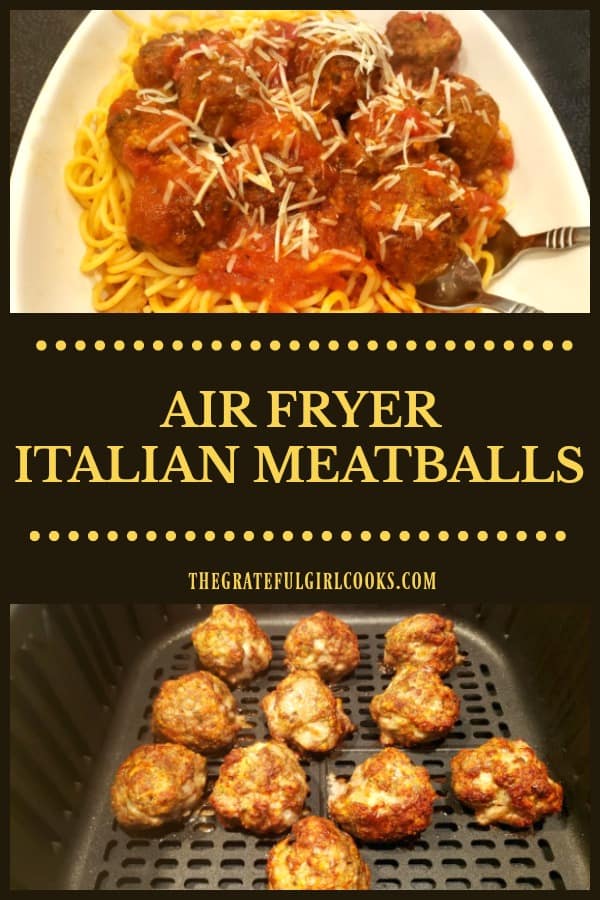
It’s so EASY to make delicious Air Fryer Italian Meatballs, to add to a favorite sauce for pasta, or to make a yummy meatball sandwich!
It's so EASY to make delicious Air Fryer Italian Meatballs, to add to a favorite sauce for pasta, or to make a yummy meatball sandwich!

If you have an air fryer, then you know how many foods can be cooked or “fried” in them, without using a lot of oil. Normally I fry my meatballs for spaghetti in oil, in a large skillet on the stove, but wanted to give the old air fryer a go at it, too!

Using an air fryer has become a fun challenge for me, ever since I used birthday gift cards to purchase one last year. My husband and I have sure enjoyed using ours and trying new recipes. We appreciate this appliance that cooks with highly heated air rather than using a lot of oil to prepare food.

So… this time I made meatballs! The result was delicious tasting air fryer Italian meatballs, which were added to homemade spaghetti sauce, and then combined with hot cooked pasta! The process for making the meatballs was practically effortless, and I would whole-heartedly make them this way again!. Here’s how to make Italian meatballs in an air fryer.

Scroll Down For A Printable Recipe Card At The Bottom Of The Page

Prepare The Meatballs

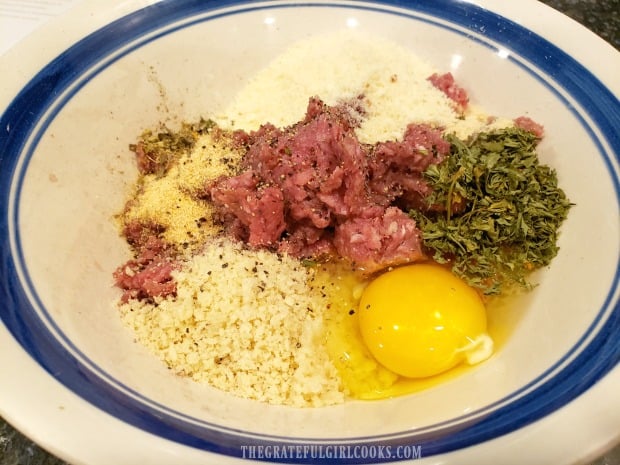
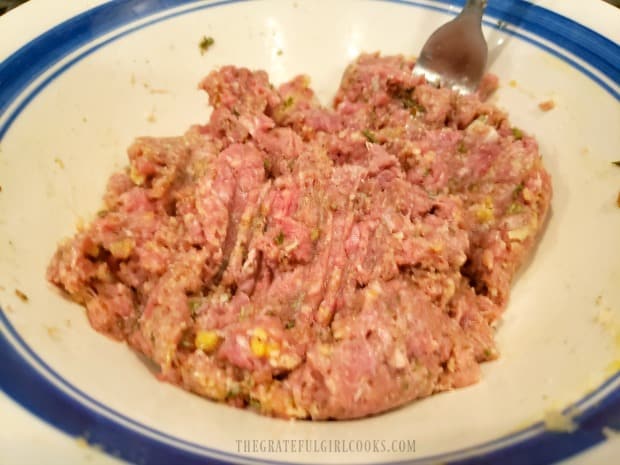
This step is simple. Simply combine ground beef, breadcrumbs, egg, milk, spices (including salt and pepper), and Parmesan cheese in a medium sized bowl.

Ingredients for meatballs, ready to be combined in large bowl.The meat mixture is fully combined and ready to form into meatballs.

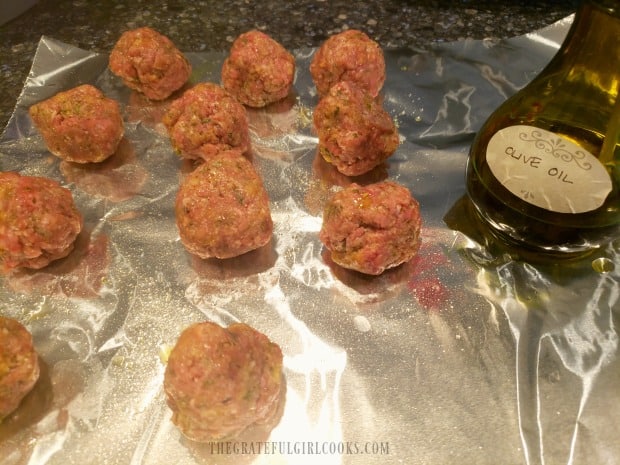
Measure out heaping Tablespoons of the meat mixture and roll each portion between the palms of you hands to form meatballs. Place them on aluminum foil or wax paper, and then lightly spritz them with non-stick baking spray or oil on top and bottom.

The air fryer Italian meatballs recipe calls for only a half pound of ground beef, so the recipe (as written below), should yield about 11-12 medium-sized meatballs, which yields approximately 3 servings.

Place the meatballs in the refrigerator for 10 minutes before cooking. Begin preheating your air fryer towards the end of the refrigeration time.

Meatballs are spritzed with cooking spray or oil before cooking.

Time To Cook the Air Fryer Italian Meatballs!

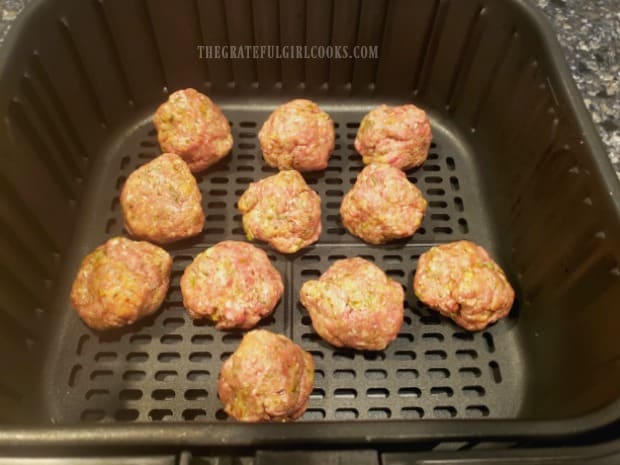
Okay, now you should have 11-12 lightly sprayed (and lightly chilled meatballs), right? Right! Preheat your air fryer to 400°F. Once the air fryer is pre-heated, place the meatballs into the basket, leaving a bit of space between each one.

I have a Cosori 5.8 quart air fryer, so all the meatballs fit nicely in the basket. If you are making a double portion, you may have to cook the air fryer Italian meatballs in two batches.

Air fryer Italian meatballs in the fryer, ready to be cooked.

Cooking Meatballs In An Air Fryer

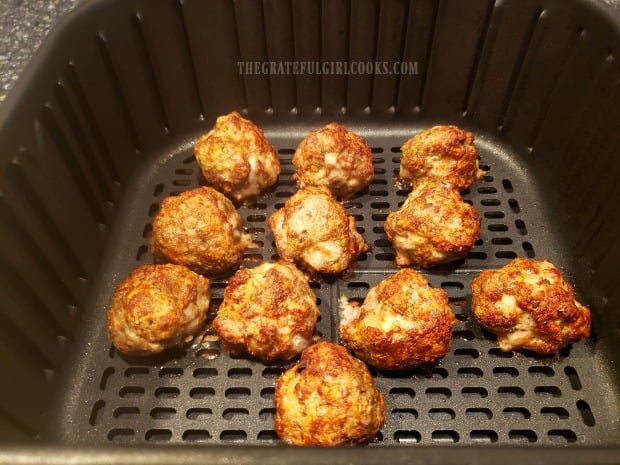
Cook the meatballs at 400°F. for approximately 8 minutes in the air fryer. Half way through the cooking time, gently flip the meatballs to the other side using tongs. I found this was so much easier than turning meatballs in a skillet where they sometimes stick to the oiled pan, regardless!

Since some air fryers tend to run really HOT, plan to check on the meatballs around the 7 minute mark, to ensure you don’t overcook them. Mine cooked perfectly in 8 minutes, but it is always best to keep an eye on them.

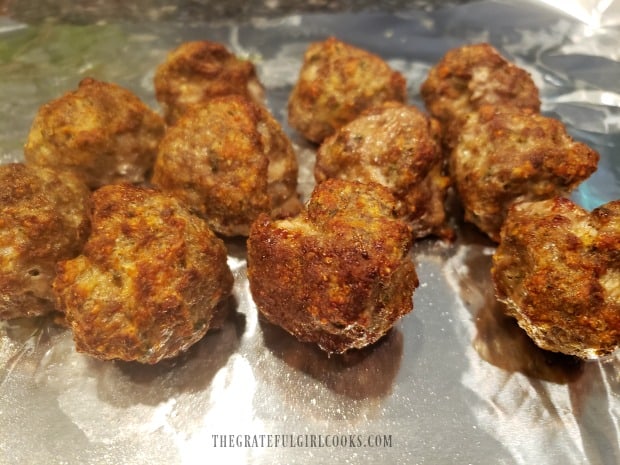
The cooked air fryer Italian meatballs are crispy and browned when done.Meatballs have been removed from fryer, and are ready to add to sauce.

Okay, They Are Fully Cooked – Now What?

You can eat the meatballs as soon as they are fully cooked, just the way they are. BUT… I think they are best added to a pot of spaghetti or marinara sauce!

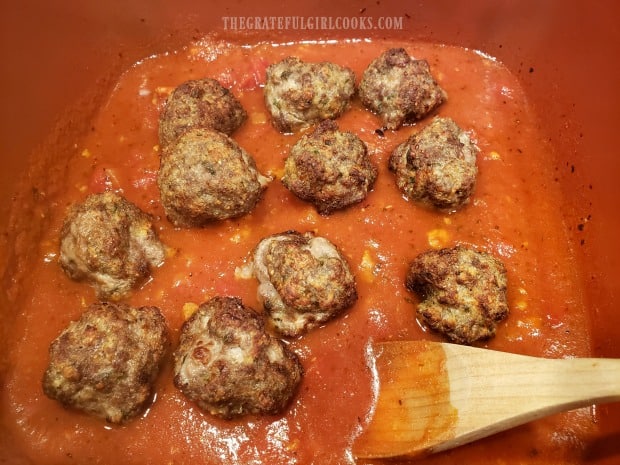
Just toss them into the pan, and spoon the sauce over the meatballs. Heat the sauce and meatballs through before serving.

Spaghetti sauce is heated, along with the air fryer cooked meatballs.

When done, add the meatballs and sauce to cooked pasta OR make a wonderful tasting meatball sandwich! Honestly, the meatballs aren’t hard at all to make! Using an air fryer to cook them let me work on other parts of the meal (hands free) while they were cooking!

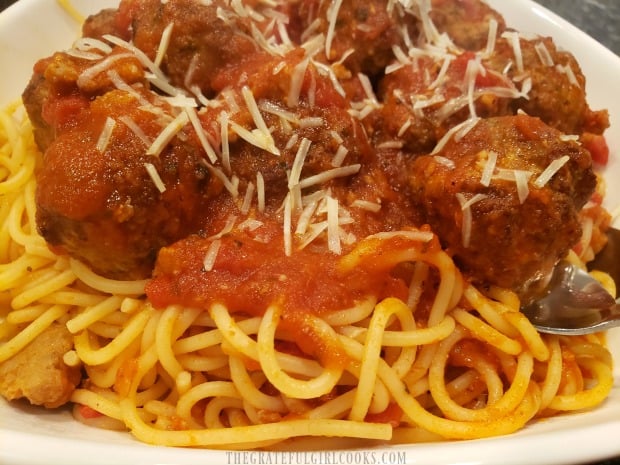
The air fryer Italian meatballs have good flavor (thanks to garlic powder, Parmesan, onion powder and oregano), and will be a wonderful addition to your meal! Throw some extra Parmesan cheese on top and dig In!

Air fryer Italian meatballs are served along with pasta and sauce!

I hope you will have an opportunity to try this recipe. We are really enjoying our air fryer, and are grateful for the many food items that can be prepared in it. Hope you have a wonderful day!

Looking For More AIR FRYER Recipes?

You can find all of my recipes in the Recipe Index, located at the top of the page. A few Air Fryer recipes include:

Interested In More Recipes?

Thank you for visiting this website. I appreciate you using some of your valuable time to do soIf you’re interested, I publish a newsletter 2 times per month (1st and 15th) with all the latest recipes, and other fun info. I would be honored to have you join our growing list of subscribers, so you never miss a great recipe!
There is a Newsletter subscription box on the top right side (or bottom) of each blog post, depending on the device you use, where you can easily submit your e-mail address (only) to be included in my mailing list.

You Can Also Find Me On Social Media:
Facebook page: The Grateful Girl Cooks!
Pinterest: The Grateful Girl Cooks!
Instagram: jbatthegratefulgirlcooks

Author's signature

Original recipe source:  The “Cosori Air Fryer Recipes” owner’s recipe book that came with the purchase of my air fryer. Page 22

0 from 0 votes
Air Fryer Italian Meatballs
Prep Time
15 mins
Cook Time
8 mins
Total Time
23 mins
 

It's so EASY to make delicious Air Fryer Italian Meatballs, to add to a favorite sauce for pasta, or to make a yummy meatball sandwich!

Category: Entree
Cuisine: Italian
Keyword: Air fryer Italian meatballs
Servings: 3 (3-4 meatballs per person)
Calories Per Serving: 246 kcal
Author: JB @ The Grateful Girl Cooks!
Ingredients
  • ½ pound ground beef (75/25 recommended)
  • ¼ cup panko breadcrumbs
  • 1 large egg
  • cup milk
  • 3 Tablespoons grated Parmesan cheese
  • 1 Tablespoon dried parsley
  • 2 teaspoons dried oregano
  • 1 teaspoon garlic powder
  • 1 teaspoon onion powder
  • ¼ teaspoon salt and pepper (¼ tsp. each)
  • non-stick cooking spray
Instructions
  1. Combine ground beef, breadcrumbs, egg, milk, salt, pepper, spices, and Parmesan cheese in a medium sized bowl. Mix until all ingredients are incorporated.

  2. Measure out heaping Tablespoons of the meat mixture and roll each portion between the palms of you hands to form meatballs. Place them on aluminum foil or wax paper, and then lightly spritz them with non-stick baking spray or oil on top and bottom. The mixture should make about 11-12 medium-sized meatballs, which yields approximately 3 servings. Place the meatballs in the refrigerator for 10 minutes before cooking. Begin preheating your air fryer towards the end of the refrigeration time.

  3. Preheat air fryer to 400°F. Once pre-heated, place meatballs into basket, leaving space between each one. If you are making a double portion, you may have to cook the meatballs in two batches. Cook the meatballs at 400°F. for approximately 8 minutes in the air fryer. Half way through cooking time, gently turn meatballs to other side using tongs. Check on meatballs around the 7 minute mark, to ensure you don't overcook them.

  4. Once meatballs are done, they're ready to eat. Eat them as is, or add them to a pot of spaghetti sauce to combine with cooked pasta, or make a meatball sandwich! Enjoy!

Nutrition Facts
Air Fryer Italian Meatballs
Amount Per Serving (1 (approx. 3-4 meatballs))
Calories 246 Calories from Fat 135
% Daily Value*
Fat 15g23%
Saturated Fat 6g38%
Cholesterol 127mg42%
Sodium 392mg17%
Potassium 310mg9%
Carbohydrates 7g2%
Fiber 1g4%
Sugar 1g1%
Protein 20g40%
Vitamin A 187IU4%
Vitamin C 1mg1%
Calcium 128mg13%
Iron 3mg17%
* Percent Daily Values are based on a 2000 calorie diet.

Here’s one more to pin on your Pinterest boards!It's so EASY to make delicious Air Fryer Italian Meatballs, to add to a favorite sauce for pasta, or to make a yummy meatball sandwich!

Mocha Chocolate Chip Cookies

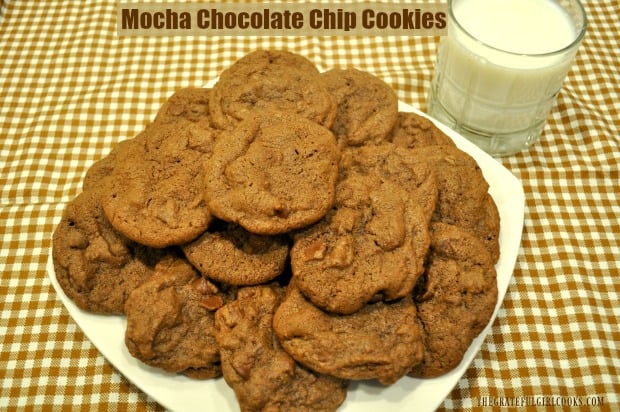
Make 4 dozen Mocha Chocolate Chip Cookies in no time at all! These delicious treats are easy to make, chewy, and have a hint of coffee liqueur flavor!

Do you like cookies? I’m pretty sure just about everyone that breathes loves a good cookie! Recently I hauled out one of my old cookie cookbooks (published 22 years ago!), and made a “new to us” recipe for mocha chocolate chip cookies. Wow… are they ever GOOD!

Many years ago there were “Mrs. Field” Cookie stores in practically every large shopping mall. There was just something about grabbing a freshly baked cookie while out on a shopping run that was hard to resist! Well, thanks to my old Mrs. Fields Cookie cookbook, I can make these yummy mocha chocolate chip cookies conveniently AT MY HOME!

The “mocha” flavor is not a smack you in the face kinda flavor… it’s more subtle! The cookies get that little bit of mocha flavor from pairing a small amount of instant coffee with a little bit of coffee liqueur! When that is added to the chocolate cocoa powder in the cookie dough, you’ve got a winning combination!

The recipe doesn’t take too long to make, either! Prep time is about 15 minutes, and the cookies take about 20 minutes to bake. Before ya know it, you’ve made 4 dozen DELICIOUS mocha chocolate chip cookies!

Scroll Down For A Printable Recipe Card At The Bottom Of The Page

Prepare The Cookie Dough

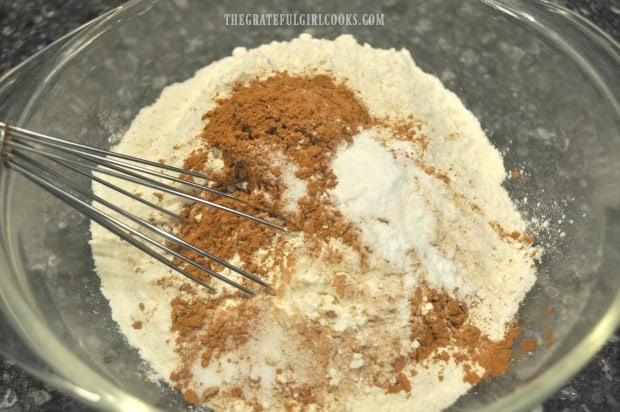
Before starting the dough, remember to preheat your oven to 300°F. Measure the flour, cocoa powder, salt and baking soda into a medium sized bowl. Whisk to combine these dry ingredients, and then set the bowl aside.

Flour, cocoa powder, baking soda and salt are combined in large bowl.

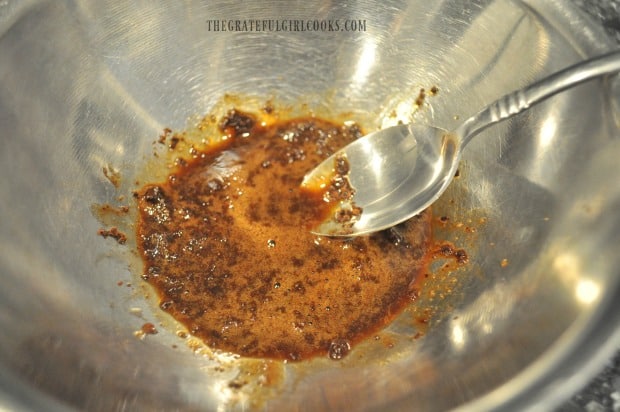
In a SEPARATE small bowl, dissolve the instant coffee powder (or crystals) in the coffee liqueur (or STRONG coffee, if not using liqueur). Set the bowl aside.

Instant coffee powder is dissolved in coffee liqueur before adding to cookie dough.

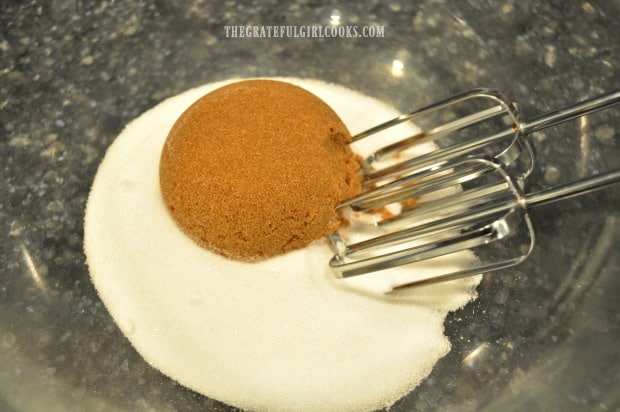
Measure the granulated and dark brown sugars into a large mixing bowl. Blend these sugars together using an electric mixer on medium speed until combined.

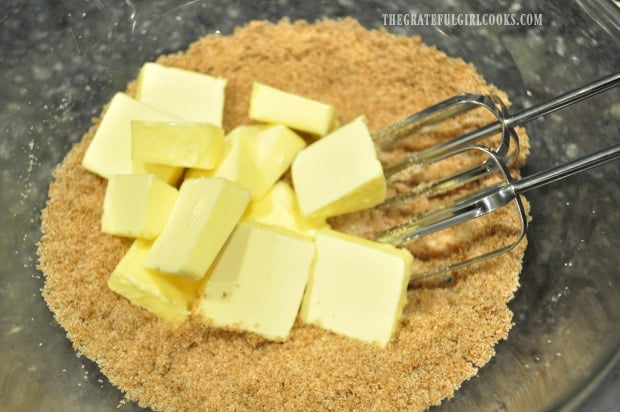
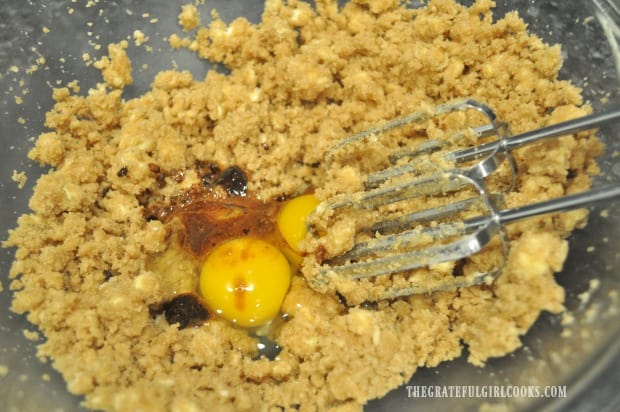
Add the softened butter and beat until this mixture is thoroughly combined. It will be kind of grainy and paste-like, but just keep on beating this mixture until combined. Now add two eggs and the dissolved coffee mixture to the bowl, and continue to beat (still on medium speed) until all ingredients are combined.

Granulated and brown sugars are mixed together.Butter is mixed into the brown and granulated sugars in bowl.Eggs, and dissolved coffee powder are added to the cookie dough.

Add The Reserved Dry Ingredients To The Cookie Dough

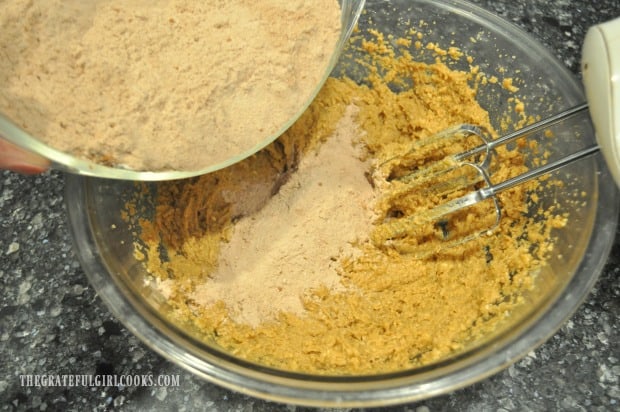
Slowly add the flour mix to the dough for the mocha chocolate chip cookies a little bit at a time, beating on LOW speed as you add it. Continue beating on low until all the flour has been added.

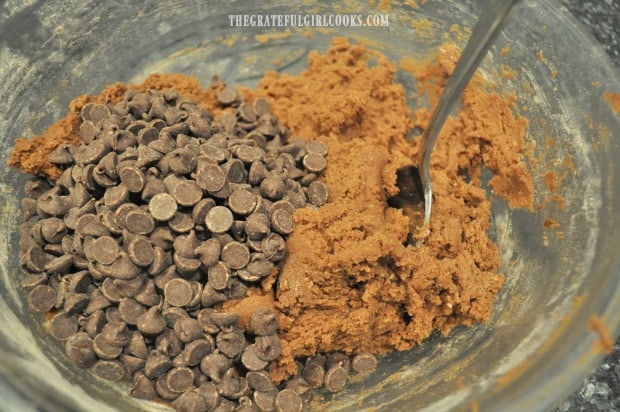
TIP: This cookie dough will be VERY thick. You may wish to switch to a large spoon (and STIR) when about half of the flour mix has been added, because this is a really thick batter! Once all the flour has been incorporated, stir in the chocolate chips until combined.

Dry ingredients are added to the batter for the mocha chocolate chip cookies.Chocolate chips are added to the cookie dough, and stirred to combine.

Time To Bake Some Mocha Chocolate Chip Cookies!

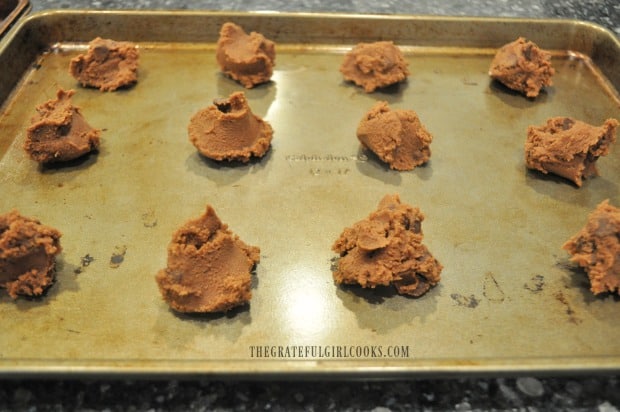
Now that the cookie dough is ready, it’s time to bake some cookies! Drop the cookie dough using rounded Tablespoons onto ungreased cookie sheets. You will want to leave a couple inches in between each ball of dough!

Bake the mocha chocolate chip cookies for 20-22 minutes at 300°F. Check them at 20 minutes (mine were done then!), and when done remove the baking sheets from the oven. Let the cookies rest for about a minute, then transfer them with a spatula to a wire rack to finish cooling.

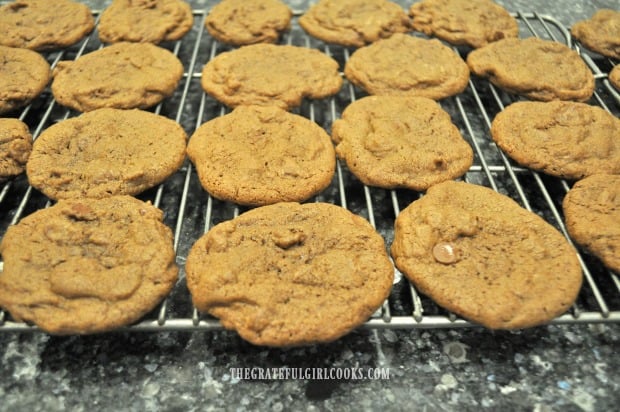
Mocha chocolate chip cookies are scooped out onto baking sheet for cooking.The cookies bake for about 20 minutes, then cool on a wire rack.

YUM – Time To Enjoy a Cookie Or Two!

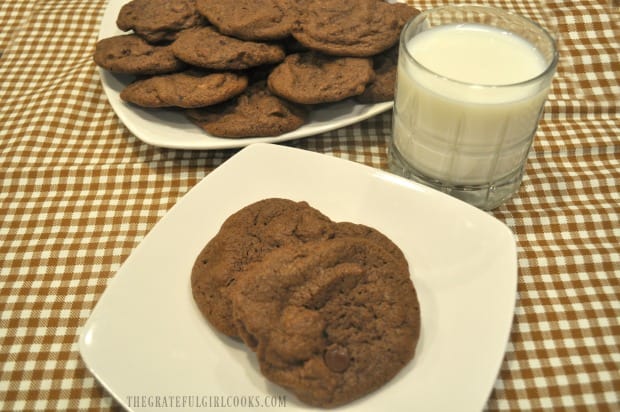
Now all that is left to do is pour yourself a small glass of cold milk, grab a cookie or two, and enjoy a delicious treat! Hey- why not go crazy, and put your feet up, too? You deserve a break! The cookies are chewy, and taste wonderful! I really do think you (and those you love) will enjoy these cookies, thanks to the recipe from good old Mrs. Fields!
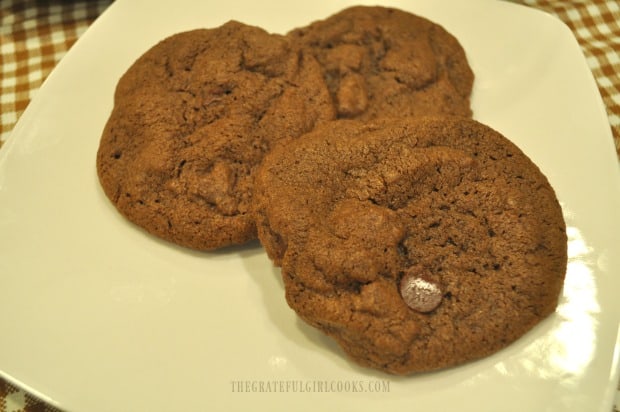
A glass of cold milk is served with the mocha chocolate chip cookies.Three mocha chocolate chip cookies on a white plate.

Thanks for visiting! I hope you enjoy these yummy mocha chocolate chip cookies as much as we did! They really are good, and any leftovers freeze well! Have a wonderful day… I hope you come back soon!

Looking For More Cookie Recipes?

You can find all of my cookie recipes in the Recipe Index, located at the top of the page. A few favorites include:

Interested In More Recipes?

Thank you for visiting this website. I appreciate you using some of your valuable time to do soIf you’re interested, I publish a newsletter 2 times per month (1st and 15th) with all the latest recipes, and other fun info. I would be honored to have you join our growing list of subscribers, so you never miss a great recipe!
There is a Newsletter subscription box on the top right side (or bottom) of each blog post, depending on the device you use, where you can easily submit your e-mail address (only) to be included in my mailing list.

You Can Also Find Me On Social Media:
Facebook page: The Grateful Girl Cooks!
Pinterest: The Grateful Girl Cooks!
Instagram: jbatthegratefulgirlcooks

Author's signature

Recipe adapted from the cookbook: “Mrs. Fields Best Ever Cookie Book!”, published by Mrs. Fields Development Corporation via Time-Life Custom Publishing, 1998, page 21.

0 from 0 votes
Mocha Chocolate Chip Cookies
Prep Time
15 mins
Cook Time
20 mins
Total Time
35 mins
 

Make 4 dozen Mocha Chocolate Chip Cookies in no time at all! These delicious treats are easy to make, chewy, and have a hint of coffee liqueur flavor!

Category: Desssert
Cuisine: American
Keyword: mocha chocolate chip cookies
Servings: 48 cookies
Calories Per Serving: 136 kcal
Author: JB @ The Grateful Girl Cooks!
Ingredients
  • cups all purpose flour
  • cup unsweetened cocoa powder
  • ¼ teaspoon salt
  • ½ teaspoon baking soda
  • 2 teaspoons instant coffee crystals (powder)
  • 1 Tablespoon coffee liqueur (I used Kahlua) (can substitute STRONG coffee)
  • 1 cup granulated sugar
  • ¾ cup (packed) dark brown sugar
  • 1 cup salted butter, softened (2 sticks)
  • 2 large eggs
  • 2 cups semi-sweet chocolate chips
Instructions
  1. Preheat oven to 300°F. Place flour, cocoa powder, salt and baking soda into a medium bowl. Whisk to combine; set bowl aside.

  2. In separate small bowl, dissolve instant coffee crystals in coffee liqueur (or STRONG coffee, if not using liqueur). Set bowl aside.

  3. Measure granulated and dark brown sugars into a large mixing bowl. Blend using an electric mixer on medium speed until combined. Add softened butter; beat until combined. It will be grainy. Add eggs and dissolved coffee mixture, and beat (on medium speed) until combined.

  4. Add flour mix to the dough a little at a time, beating on LOW speed as you add it. Continue beating mixture on low until all flour has been added. Cookie dough will be VERY thick. TIP: Switch to a large spoon (and stir) when about half of the flour mix has been added, because this is a really thick batter! Once all flour has been incorporated, stir in chocolate chips.

  5. Drop cookie dough by rounded Tablespoons onto ungreased cookie sheets. Leave a couple inches between each cookie! Bake for 20-22 minutes at 300°F. Check them at 20 minutes, and when done, remove from oven. Let cookies rest for a minute, then transfer with a spatula to a wire rack to finish cooling. Enjoy!

Nutrition Facts
Mocha Chocolate Chip Cookies
Amount Per Serving (1 cookie)
Calories 136 Calories from Fat 63
% Daily Value*
Fat 7g11%
Saturated Fat 4g25%
Cholesterol 19mg6%
Sodium 63mg3%
Potassium 69mg2%
Carbohydrates 17g6%
Fiber 1g4%
Sugar 10g11%
Protein 2g4%
Vitamin A 135IU3%
Calcium 12mg1%
Iron 1mg6%
* Percent Daily Values are based on a 2000 calorie diet.

Here’s one more to post on your Pinterest boards!Make 4 dozen Mocha Chocolate Chip Cookies in no time at all! These delicious treats are easy to make, chewy, and have a hint of coffee liqueur flavor!

Poultry Seasoning Mix

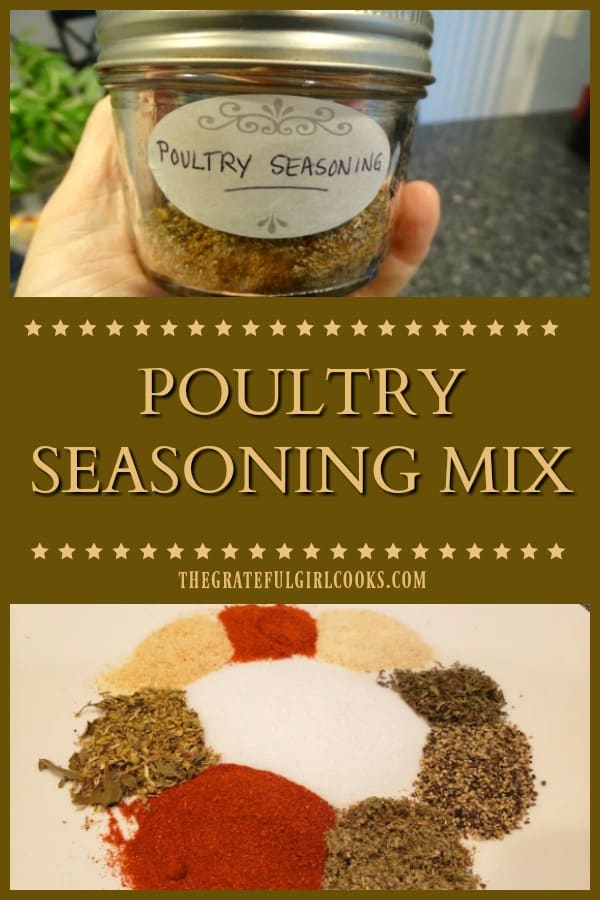
Make your own homemade poultry seasoning mix from scratch in under 5 minutes with this quick and easy recipe!

Recently I added one more homemade spice mix to my ever growing spice cabinet. This time I brought together several common spices, and mixed them all together, to make homemade poultry seasoning mix!

I tend to keep a lot of spices around to use in the many recipes I make for our family (and for this blog). Sometimes we run out of certain spice mixes, so I like to know how to quickly whip up a batch when necessary.

Scroll Down for a Printable Recipe Card At The Bottom Of The Page

What Spices Are In This Seasoning Mix?

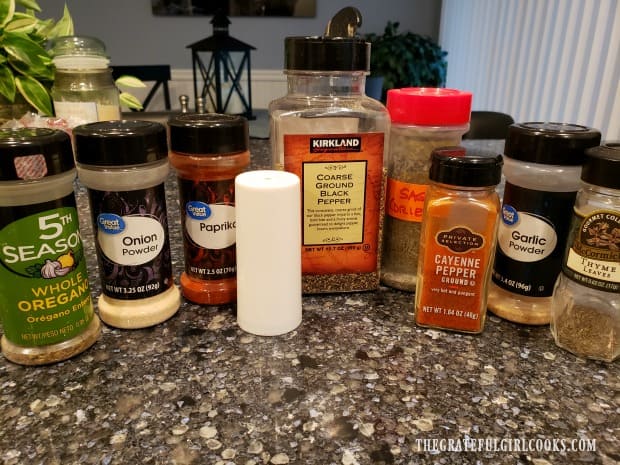
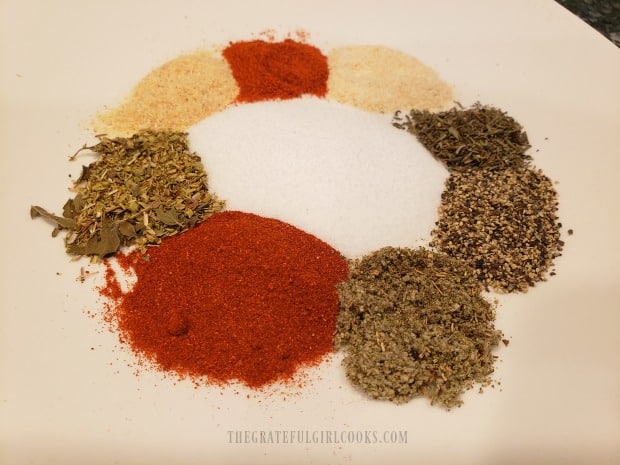
Making poultry spice mix is totally simple!  Here are the “cast of characters”! Oregano, onion powder, paprika, salt, ground black pepper, sage, cayenne pepper (optional), garlic powder and thyme are the spices used. The cayenne pepper is optional, but I recommend it, if you have some handy!

The ingredients used to make homemade poultry seasoning mix.

Measure and Mix Ingredients Together For The Poultry Seasoning Mix

Measure out the spices into a small bowl. Here they are (below), just looking pretty! They are showing off their individual colors before they are all mixed together in one big pile!

Poultry seasoning ingredients measured out on a white plate.

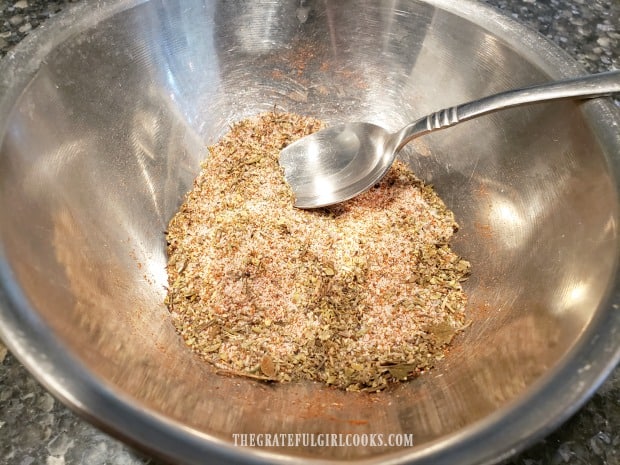
Anyways, mix the spices together until they are fully combined. TA DA! You have just made your very own poultry spice mix!

The recipe, as shown below on the printable recipe card, makes a total of 8 teaspoons of spice mix. You can easily double or triple the recipe, based on your need for this spice mix! I use it often, especially in my delicious recipe for Really GOOD Meatloaf (yes it has poultry seasoning it!)

All the ingredients for this seasoning mix are stirred together until blended.

How To Store Poultry Seasoning Mix

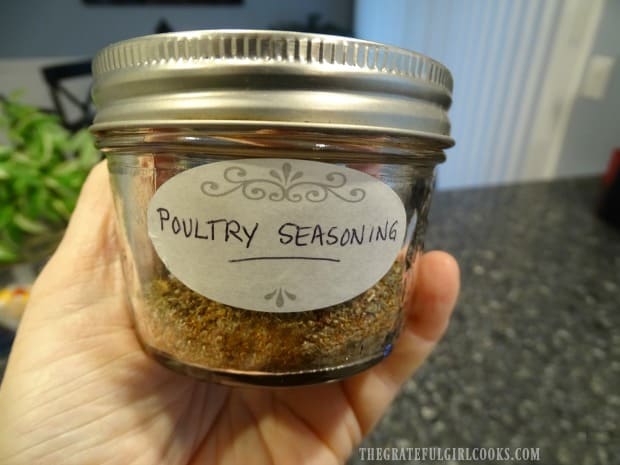
Once the spices are thoroughly combined, pour the mix into an airtight, sealed container. I usually try to use a small canning jar for my homemade spice mixes. Spices keep best in a dark place, or in the pantry or cupboard, away from sunlight.

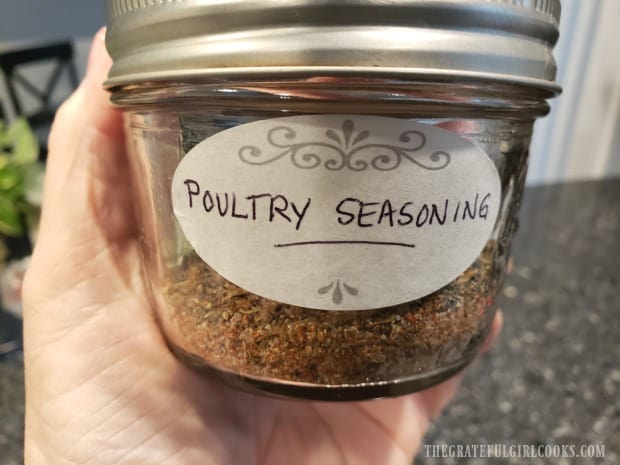
An airtight jar or container holds the poultry seasoning mix for storage.

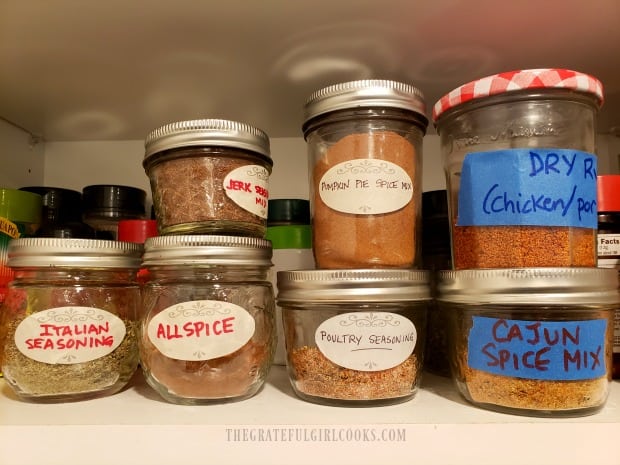
In the photo below, you can see other homemade spice mixes in our pantry. These are recipes are also on my blog. They include Italian Seasoning, Jerk Seasoning, Allspice, Pumpkin Pie Spice Mix, Dry Rub (for chicken/pork), and Homemade Cajun Seasoning. I also have a recipe for homemade taco seasoning mix that is wonderful!

Hope you will check out those recipes, as well. I can’t tell you how many times I have used these in various recipes, since making them! Every single one of them was made using spices I already had, so it saved me from going out and buying the mixes at the grocery store! YAY!

A few of the other homemade spice mixes in my pantry.

I hope you have the opportunity to try making your own spice mixes. It’s so easy, anyone can do it! Hope you have a fantastic day, and thanks for reading! Be sure to check out ALL of my recipes in the Recipe Index, located at the top of the page.

Interested In More Recipes?

Thank you for visiting this website. I appreciate you using some of your valuable time to do soIf you’re interested, I publish a newsletter 2 times per month (1st and 15th) with all the latest recipes, and other fun info. I would be honored to have you join our growing list of subscribers, so you never miss a great recipe!
There is a Newsletter subscription box on the top right side (or bottom) of each blog post, depending on the device you use, where you can easily submit your e-mail address (only) to be included in my mailing list.

You Can Also Find Me On Social Media:
Facebook page: The Grateful Girl Cooks!
Pinterest: The Grateful Girl Cooks!
Instagram: jbatthegratefulgirlcooks

Author's signature

Original recipe source: Raschell at misshomemade.com/poultryseasoningrecipe.html

0 from 0 votes
Poultry Seasoning Mix
Prep Time
5 mins
Cook Time
0 mins
Total Time
5 mins
 

Make your own homemade poultry seasoning mix from scratch in under 5 minutes with this quick and easy recipe!

Category: Condiments
Cuisine: American
Keyword: poultry seasoning mix
Servings: 8 teaspoons
Calories Per Serving: 3 kcal
Author: JB @ The Grateful Girl Cooks!
Ingredients
  • 1 Tablespoon salt
  • 1 teaspoon paprika
  • ½ teaspoon oregano
  • ½ teaspoon garlic powder
  • ½ teaspoon ground black pepper
  • ½ teaspoon ground thyme
  • ½ teaspoon ground sage
  • ½ teaspoon onion powder
  • ½ teaspoon cayenne pepper , optional, but I used
Instructions
  1. Measure all ingredients into a small bowl. Stir well, to fully combine.

  2. Store poultry seasoning in an airtight, sealed container in pantry (or other dark place). Use as needed.

Nutrition Facts
Poultry Seasoning Mix
Amount Per Serving (1 teaspoon)
Calories 3 Calories from Fat 9
% Daily Value*
Fat 1g2%
Saturated Fat 1g6%
Sodium 873mg38%
Potassium 6mg0%
Carbohydrates 1g0%
Fiber 1g4%
Sugar 1g1%
Protein 1g2%
Vitamin A 175IU4%
Vitamin C 1mg1%
Calcium 2mg0%
Iron 1mg6%
* Percent Daily Values are based on a 2000 calorie diet.

Here’s one more to pin on your Pinterest boards!Make your own homemade poultry seasoning mix from scratch in under 5 minutes with this quick and easy recipe!

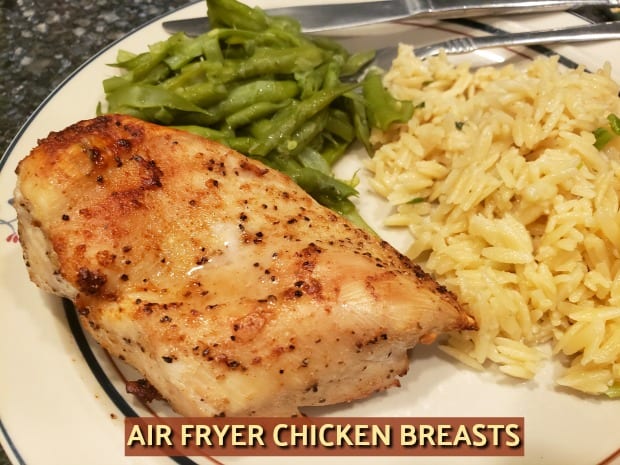
Air Fryer Chicken Breasts

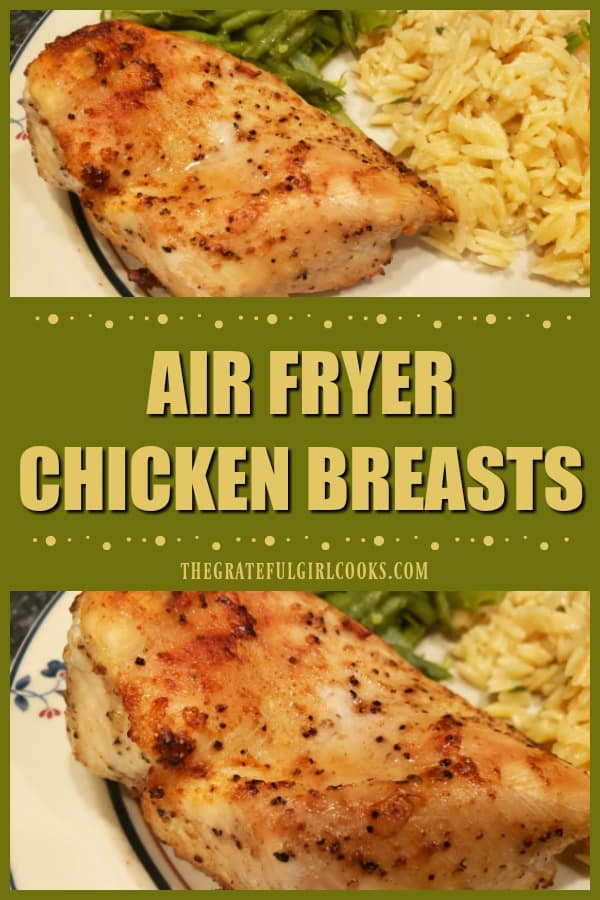
Simple spices and butter provide wonderful flavor for these easy air fryer chicken breasts! Use your air fryer to make this tasty main dish quickly!

This past summer I received a Cosori air fryer for my birthday. It’s fun to cook foods with hot air, and with only a minimum amount of oil! I’ve been having fun with it ever since, trying out recipes for both main dishes, muffins, side dishes and desserts!

I’ve already posted a few delicious air fryer recipes, including:

Last month I made air fryer chicken breasts.  I knew I wanted to experiment with our family favorite sauce we use for grilling chicken breasts outside, but wanted to re-create it using my air fryer! Guess what? It turned out fabulous, so I want to share the recipe for this EASY dish.

Scroll Down For A Printable Recipe Card At the Bottom Of The Page

Make The Basting Sauce For The Chicken Breasts

The basting sauce recipe for the chicken breasts came from my Mom. It was how we ate our grilled chicken while growing up. We use it all summer long when we grill chicken on our BBQ, and have used the same recipe for almost 50 years. I thought it would be a perfect seasoning for these air fryer chicken breasts! And it WAS!

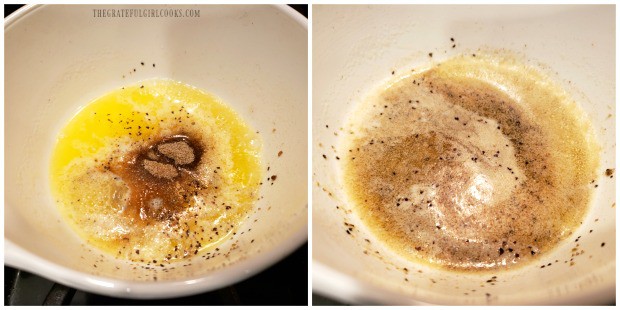
To make the sauce, combine the seasonings (garlic powder, celery salt, seasoning salt and coarse black pepper) with melted butter. Stir, until fully combined. Easy, right?

Sauce for chicken is made with combining melted butter and a few common spices.

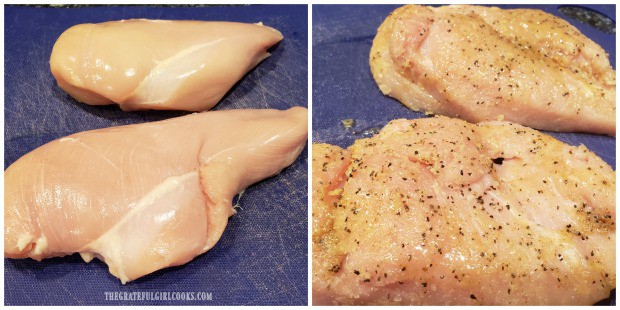
Brush the sauce over 1 side of the boneless, skinless chicken breasts.

Seasoning sauce is brushed over one side of the chicken breasts.

Ready To Cook Air Fryer Chicken Breasts!

Preheat your air fryer to 370° (this usually takes about 3-4 minutes). TIP: To save time, preheat the air fryer while making the sauce and basting the chicken.

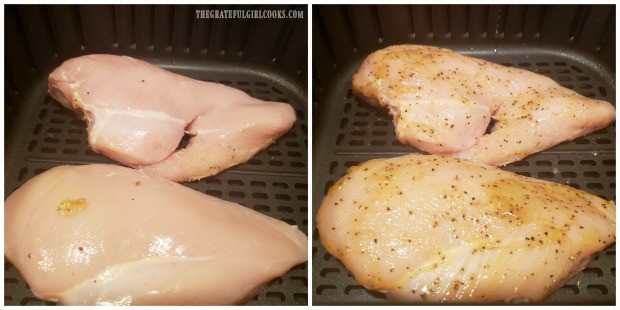
Place the chicken breasts, with the sauce side down in the basket of the preheated air fryer. Now brush the remaining sauce over the top of the chicken.

The chicken is placed in preheated air fryer, and other side is basted with sauce.

Cook the chicken breasts in the air fryer for 4 minutes, and then pause the air fryer and flip the chicken to the other side. Continue cooking for 4-5 additional minutes, or until chicken is golden brown, cooked through and is at a safe internal temperature of 165° F.

Your cooking time may vary a little bit, due to two factors: the size and weight of the chicken breasts you are using, and the ambient temps with air fryers. Because air fryer temperatures can vary, make sure to check the chicken while cooking to make sure you know when it is done.

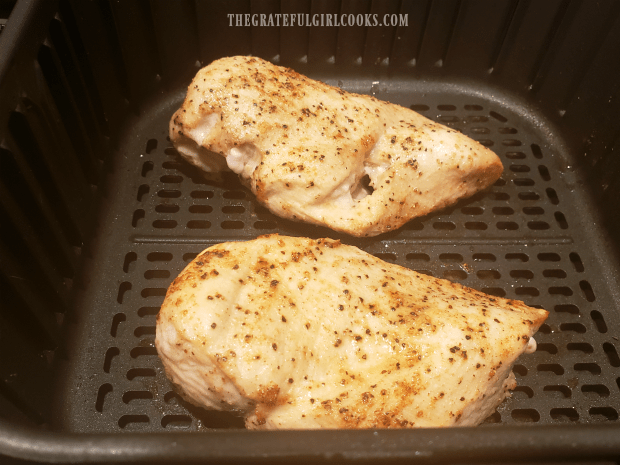
The photo below shows the chicken breasts about halfway through the cooking time. You can see that the pieces are already beginning to brown.

Halfway through cooking time, air fryer chicken breasts are turning golden brown.

When the air fryer chicken breasts are finished cooking, carefully remove them from the hot basket, and serve immediately! BOOM! See how easy that was?

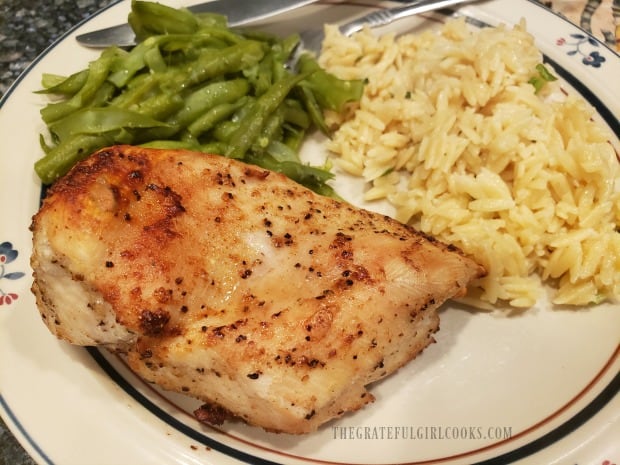
Now it’s time to enjoy one of the air fryer chicken breasts with some home canned green beans, and some orzo with Parmesan on the side. YUM! It was a good dinner!

Air fryer chicken breasts were served with orzo and green beans.

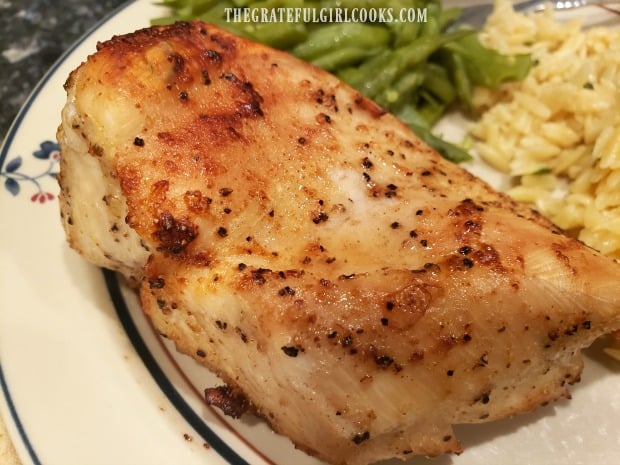
The air fryer chicken breasts were fully cooked and juicy inside, had a bit of a browned, crunchy crust on them, and had GREAT flavor! They were soooo good!

One of the air fryer chicken breasts in a close up photo.

If you have an air fryer, then I hope you will enjoy this quick and easy chicken recipe! Have a great day, friends! Why not look for ways throughout the day to be an encourager, because there are LOTS of hurting, lonely people around. Won’t you join me in trying to make a difference? Have a great day.

Looking For More CHICKEN Recipes?

You can find all of my chicken recipes in the Recipe Index, located at the top of the page. I have lots of them… including:

Interested In More Recipes?

Thank you for visiting this website. I appreciate you using some of your valuable time to do soIf you’re interested, I publish a newsletter 2 times per month (1st and 15th) with all the latest recipes, and other fun info. I would be honored to have you join our growing list of subscribers, so you never miss a great recipe!
There is a Newsletter subscription box on the top right side (or bottom) of each blog post, depending on the device you use, where you can easily submit your e-mail address (only) to be included in my mailing list.

You Can Also Find Me On Social Media:
Facebook page: The Grateful Girl Cooks!
Pinterest: The Grateful Girl Cooks!
Instagram: jbatthegratefulgirlcooks

Author's signature

Recipe source: my brain, and my mom’s recipe for basting sauce

0 from 0 votes
Air Fryer Chicken Breasts
Prep Time
5 mins
Cook Time
8 mins
Total Time
13 mins
 

Simple spices and butter provide wonderful flavor for these easy air fryer chicken breasts! Use your air fryer to make this tasty main dish quickly!

Category: Entree, Main Course
Cuisine: American
Keyword: air fryer chicken breasts
Servings: 2
Calories Per Serving: 295 kcal
Author: JB @ The Grateful Girl Cooks!
Ingredients
  • 12 ounces chicken breasts
  • 2 Tablespoons butter , melted
  • teaspoon garlic powder
  • teaspoon celery salt
  • teaspoon seasoning salt
  • teaspoon coarse ground black pepper
Instructions
  1. Preheat your air fryer to 370° (this usually takes about 4-5 minutes). TIP: To save time, mix the sauce and baste the chicken while the air fryer preheats.

  2. Combine garlic powder, celery salt, seasoning salt and coarse black pepper in a small bowl with the melted butter. Stir, until fully combined.

  3. Brush half of the sauce over 1 side of the boneless, skinless chicken breasts. When air fryer is at temperature, place chicken breasts, sauce side down in the basket of the air fryer. Brush remaining sauce over the top of the chicken.

  4. Cook at 370° F. for 4 minutes; pause the air fryer and turn chicken to the other side. Continue cooking for 4-5 more minutes, or until chicken is golden brown, cooked through and has an internal temperature of 165° F. When done, remove chicken, serve, and enjoy!

    NOTE: Your cooking time may vary, due to two factors: the size and weight of the chicken breasts you are using, and the ambient temps with air fryers. Because air fryer temperatures can vary, be sure to check the chicken while cooking to make sure you know when it is done.

Nutrition Facts
Air Fryer Chicken Breasts
Amount Per Serving (1 chicken breast)
Calories 295 Calories from Fat 144
% Daily Value*
Fat 16g25%
Saturated Fat 8g50%
Cholesterol 139mg46%
Sodium 588mg26%
Potassium 629mg18%
Carbohydrates 1g0%
Sugar 1g1%
Protein 36g72%
Vitamin A 401IU8%
Vitamin C 2mg2%
Calcium 9mg1%
Iron 1mg6%
* Percent Daily Values are based on a 2000 calorie diet.

Here’s one more to pin on your Pinterest boards!Simple spices and butter provide wonderful flavor for these easy air fryer chicken breasts! Use your air fryer to make this tasty main dish quickly!

Traeger Grill Smoked Trout

Traeger Grill Smoked Trout is a great recipe for cooking smoked, fresh trout! Butterflied trout are soaked in a brine before smoking, for peak flavor!

We sure have been having fun trying recipes on our Traeger grill! Our most recent adventure involved brining and smoking trout that we received from a very nice, generous neighbor!

I found the original recipe on the Traeger app, and thought it sounded wonderful, so off I went into the kitchen to check this recipe out! WOW! This was some good tasting smoked trout! My husband (a trout-lovin’ guy) said it was some of the best trout he has ever had!

With very minimal prep work, and a “hands off” smoking time on the grill, this recipe was also SUPER EASY! Brine the fish, then smoke it on the pellet grill. BOOM! Yummy smoked trout! Here’s how to make Traeger smoked trout:

Scroll Down For A Printable Recipe Card At The Bottom Of The Page

Prepare The BRINE Mixture

Salting meats as a way to preserve food has been around for many, many years. Throughout history voyagers, travelers or armies used to preserve their meats in salt so they could survive on long voyages or trips, even with a lack of refrigeration.

Nowadays brining is a “thing”. When you brine meats, it’s typically done using a salt, water, and seasoning combination, but using far less salt than our ancestors. Brining infuses meats with lots of flavor, and can also help tenderize the meat, in a fairly short amount of time.

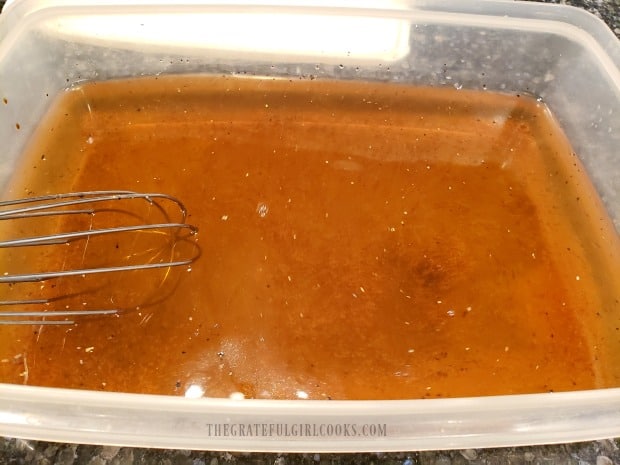
To make THIS brine for Traeger smoked trout, place water, salt, brown sugar, black pepper and soy sauce in a LARGE covered container. Whisk the ingredients together until sugar has dissolved. THIS will be your brine!

Ingredients for the brine are whisked together before adding trout.

Prepare The Trout

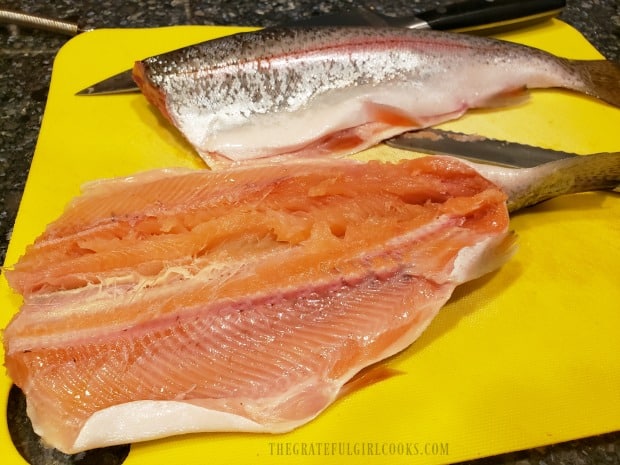
The trout will need to be cleaned and gutted, with the head removed. Butterfly cut each trout almost all the way down to the tail, and then spread it out. You want the trout to be able to lie flat while being smoked on the grill.

NOTE: The recipe as written (in the printable recipe card at the bottom of this post) is for 4 trout. Since it was only my husband and I eating, I smoked only TWO trout, but used the regular amount of brine.

Trout are cleaned, gutted, and butterflied before brining and smoking.

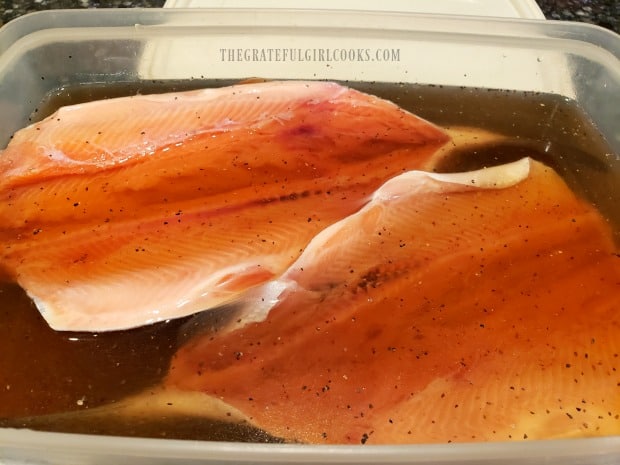
Place the butterflied trout into the brine, and position in the brine so that it is covered. You might find it easy to weigh the fish down with a heavy plate, to keep it under the brine. Cover the container, and then let the trout brine in the liquid for 60 minutes in the refrigerator. Turn the trout over, halfway through the brining time.

The butterflied trout are soaked in brine for one hour before smoking on the grill.

Dry The Brined Trout And Then Get Them On The Traeger

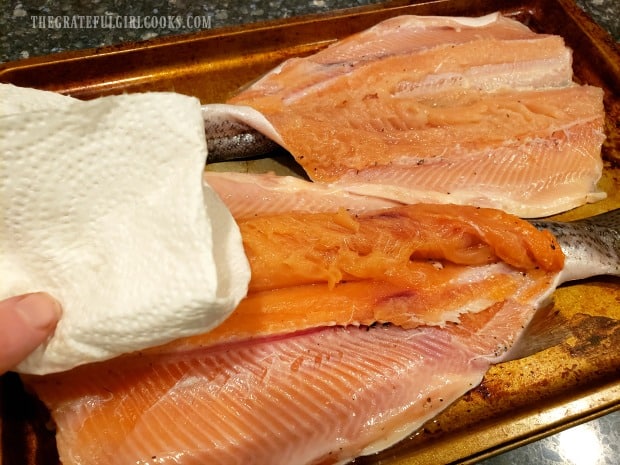
Once the fish has brined for 1 hour, remove each fish from the brine and pat dry with a paper towel. Get both sides as dry as possible before you put them onto the grill.

Each trout is patted dry before putting it on the grill for smoking.

Preparing Traeger Smoked Trout Is EASY!

Fill your pellet hopper with fresh pellets (we used mesquite). Start your Traeger by turning it on and waiting 4-5 minutes (with the lid open) until it is smoking, and a fire has been fully established. Turn the temperature gauge to 225°F., and let the grill preheat (with the lid closed). This might take anywhere from 10-15 minutes.

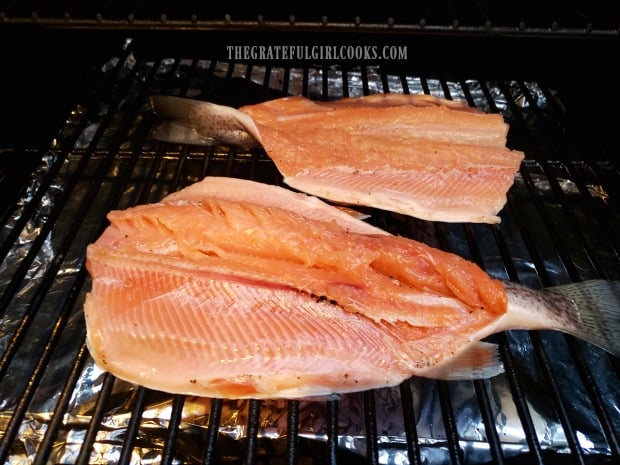
Once pre-heated, quickly brush vegetable oil over the grill grates with a pastry brush. This helps to help prevent the fish skin from sticking to the grill. Place the patted dry trout directly onto the oiled grill grate, with the skin side down. Close the lid on the grill.

Traeger grill smoked trout is cooked skin side down on the grill.

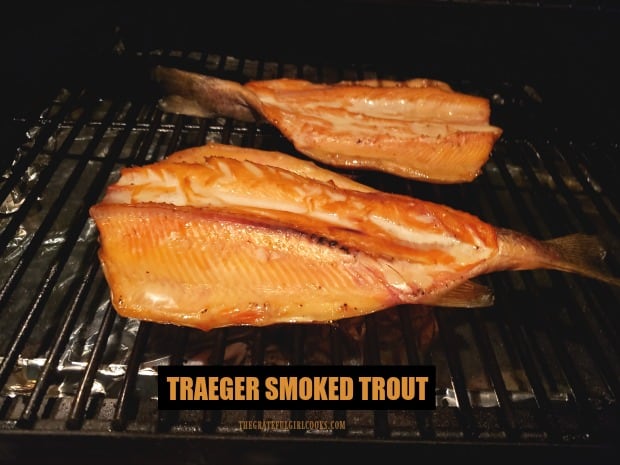
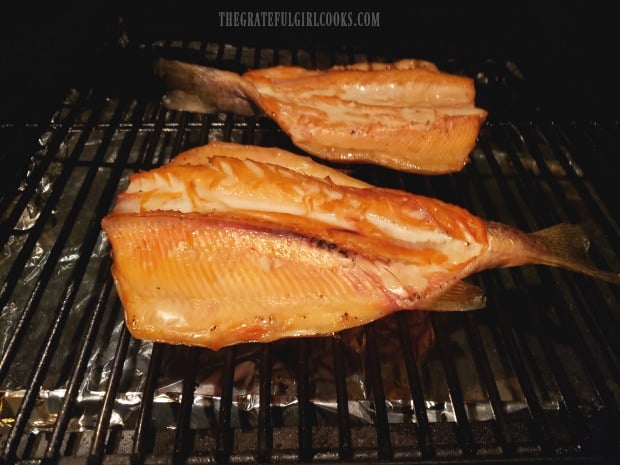
Smoke the trout for 1½ – 2 hours until the fish starts to flake and the fish turns slightly opaque in color. You don’t even need to mess with them once they are on the grill. NOTE: Cooking times can vary a bit, due to ambient temps of each smoker, and the thickness of the trout. The length of time will obviously depend on the thickness of the trout you are using. Ours were done in 1½ hours! See how beautiful they looked? Oooh…

When done, Traeger smoked trout is beginning to flake and is opaque in color.

Time To EAT Some Traeger Grill Smoked Trout!

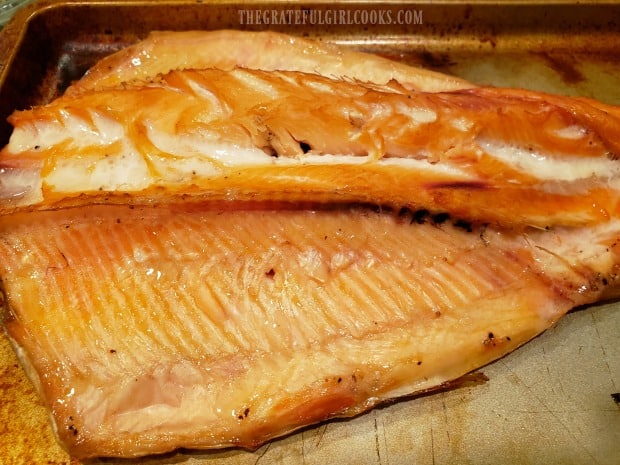
Remove the trout from the Traeger once they are fully cooked, and transfer them to a baking sheet and bring them indoors! They smell really good about this time. De-bone each fish, and then serve this tasty Traeger grill smoked trout. You can serve this smoked fish hot or cold, however you prefer it. It has GREAT flavor!

Here is one Traeger grill smoked trout, fully cooked, and ready to de-bone and eat!

Thanks for reading. I sure do sincerely hope you enjoy this recipe for Traeger grill smoked trout. My husband is already asking for me to make it again… ha ha! Lucky for us, our sweet neighbor just gave us even MORE frozen trout this week. Yippee!

Looking For More TRAEGER Recipes?

You can find all of my recipes in the Recipe Index, located at the top of the page. A few of my Traeger recipes you might enjoy checking out include:

Interested In More Recipes?

Thank you for visiting this website. I appreciate you using some of your valuable time to do soIf you’re interested, I publish a newsletter 2 times per month (1st and 15th) with all the latest recipes, and other fun info. I would be honored to have you join our growing list of subscribers, so you never miss a great recipe!
There is a Newsletter subscription box on the top right side (or bottom) of each blog post, depending on the device you use, where you can easily submit your e-mail address (only) to be included in my mailing list.

You Can Also Find Me On Social Media:
Facebook page: The Grateful Girl Cooks!
Pinterest: The Grateful Girl Cooks!
Instagram: jbatthegratefulgirlcooks

Author's signature

Recipe adapted from: https://www.traegergrills.com/recipes/seafood/smoked-trout

↓↓ PRINTABLE RECIPE BELOW ↓↓

4 from 1 vote
Traeger Grill Smoked Trout
Prep Time
5 mins
Cook Time
1 hr 30 mins
Brining Time (inactive)
1 hr
Total Time
2 hrs 35 mins
 

Traeger Grill Smoked Trout is a great recipe for cooking smoked, fresh trout! Butterflied trout are soaked in a brine before smoking, for peak flavor!

Category: Entree-Seafood
Cuisine: American
Keyword: Traeger grill smoked trout
Servings: 4
Calories Per Serving: 392 kcal
Author: JB @ The Grateful Girl Cooks!
Ingredients
  • 4 medium trout (approx. 8 ounces per fish) , cleaned and head removed
For Brine:
  • ½ gallon water
  • cup salt
  • ¼ cup brown sugar (light or dark)
  • ½ Tablespoon black pepper
  • 1 Tablespoon soy sauce
Instructions
  1. To make brine: Place water, salt, brown sugar, black pepper and soy sauce in a LARGE covered container. Whisk ingredients together until sugar has dissolved.

Brine The Trout:
  1. Remove fish head. Clean and gut each trout. Butterfly cut each trout almost all the way to the tail, and then spread it out. Do not slice all the way through the bottom skin. You want the trout to be able to lie flat when smoking. Place the butterflied trout into the brine; make sure each fish is covered. You might need to weigh the fish down with a heavy plate, to keep them under the brine. Cover container, and let fish brine in liquid for 60 minutes in refrigerator. Once fish has brined for 1 hour, remove fish from brine and pat dry with a paper towel. Get fish as dry as possible before you put them onto the grill.

Smoking The Trout:
  1. Start Traeger by turning it on and waiting 4-5 minutes (with lid open) until it is smoking, and a fire has been established. Turn temperature gauge to 225°F., and let grill preheat (with lid closed). This might take anywhere from 10-15 minutes. Once pre-heated, quickly brush vegetable oil over the grill grates with a pastry brush. This helps to help prevent the fish skin from sticking to the grill. Place trout directly onto oiled grill grate, skin side down. Close the lid. Smoke trout for 1½ - 2 hours until the fish starts to flake and turns slightly opaque in color. You don't need to mess with them once they are on the grill. Remove trout once they are fully cooked; transfer to a baking sheet. De-bone each fish, and then serve. You can serve the trout hot or cold, however you prefer it.

    NOTE: Cooking times can vary a bit, due to the ambient temps of each smoker, and thickness of the trout.

Nutrition Facts
Traeger Grill Smoked Trout
Amount Per Serving (1 trout (whole))
Calories 392 Calories from Fat 135
% Daily Value*
Fat 15g23%
Saturated Fat 3g19%
Cholesterol 132mg44%
Sodium 3816mg166%
Potassium 847mg24%
Carbohydrates 14g5%
Fiber 1g4%
Sugar 13g14%
Protein 47g94%
Vitamin A 129IU3%
Vitamin C 1mg1%
Calcium 126mg13%
Iron 4mg22%
* Percent Daily Values are based on a 2000 calorie diet.

Here’s one more to pin on your Pinterest boards!Traeger Grill Smoked Trout is a great recipe for cooking smoked, fresh trout! Butterflied trout are soaked in a brine before smoking, for peak flavor!