Category: Air Fryer Recipes

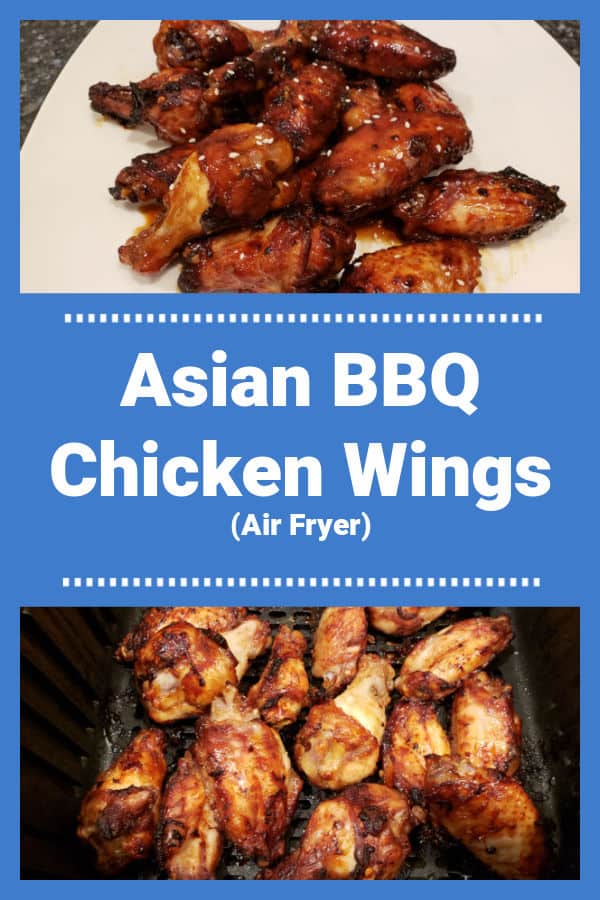
Asian BBQ Chicken Wings (Air Fryer)

Asian BBQ Chicken Wings are marinated in soy sauce, lime juice, garlic, brown sugar, & curry powder, then cooked until crispy in an air fryer!
Asian BBQ Chicken Wings are marinated in soy sauce, lime juice, garlic, brown sugar, curry powder, then cooked until crispy in an air fryer!

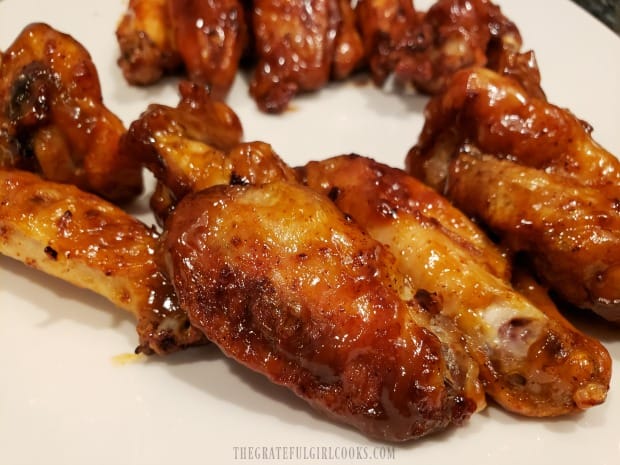
If you enjoy flavor-filled chicken wings, this is a GREAT recipe! Cooked in an air fryer (using HOT air), these wings will be wonderfully yummy and crispy! The wings are first marinated in a delicious made-from-scratch (easy) Asian BBQ sauce, then cooked. The marinade is cooked until it forms a thick sauce, which is then poured over the cooked wings for serving. Oh my goodness.. they are sooo good!

NO AIR FRYER? If you do not have an air fryer, you can bake these chicken wings! Follow instructions for this recipe until the cooking time. For baking instructions, see my note in the printable recipe card (located at the bottom of the page) for details.

These Asian BBQ chicken wings have now become one of my favorite ways to enjoy this “snack”, “appetizer” or “meal”. The flavor is amazing, and my husband and I love them! I found the original recipe in an old cookbook of mine called “The Best Of Cooking Light”. The original recipe was for baked chicken thighs, but I adapted the recipe for wings and the use of an air fryer. Here’s how to make them:

Scroll Down For A Printable Recipe Card At The Bottom Of The Page

Make The Asian-Inspired Sauce To Marinate The Wings

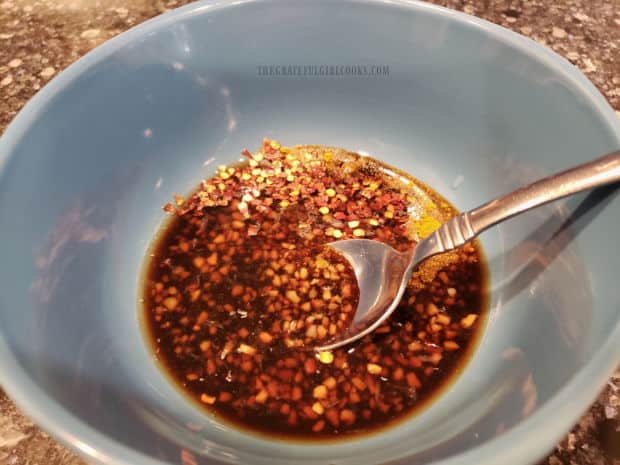
Making the Asian BBQ sauce for the wings is super easy! Place brown sugar, soy sauce, fresh lime juice, minced garlic, curry powder, and crushed red pepper flakes in a small bowl. Stir these ingredients well, until they have been fully combined.

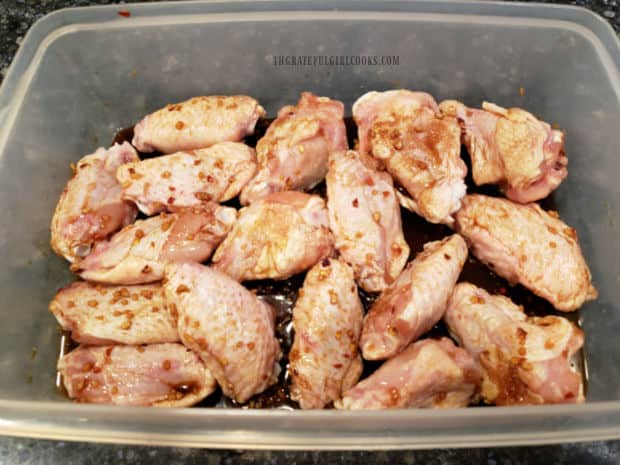
This is the marinating sauce for the chicken wings. See how easy that was? Place the chicken wings in a large re-sealable plastic bag OR in a shallow large container with a tight-fitting lid. Pour the sauce over the wings, and toss to coat them well. Seal or cover the bag/container, and marinate wings in the fridge for 4-6 hours (or overnight). Turn the wings occasionally to ensure they stay coated with marinade.

Marinade ingredients (for chicken wings) are mixed in a small bowl.Chicken wings are covered with the marinade, then refrigerated for 4-6 hours.

After Marinating Is Done, Cook the Asian BBQ Sauce

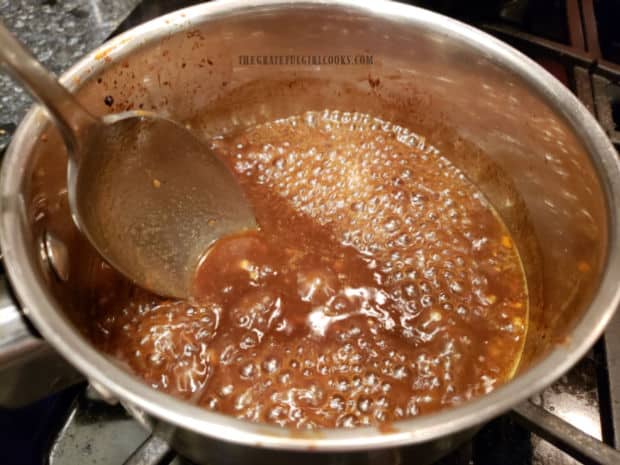
Once the chicken wings have been marinated, remove the wings from the bag or container and SAVE THE MARINADE. Pour the marinade into a saucepan, where it will be cooked to safely “kill off” any harmful bacteria (from contact with raw chicken) and to thicken it into a sauce to cover the chicken wings once they are cooked.

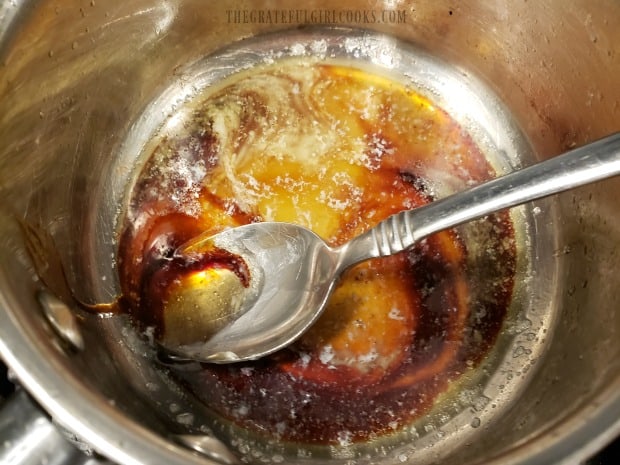
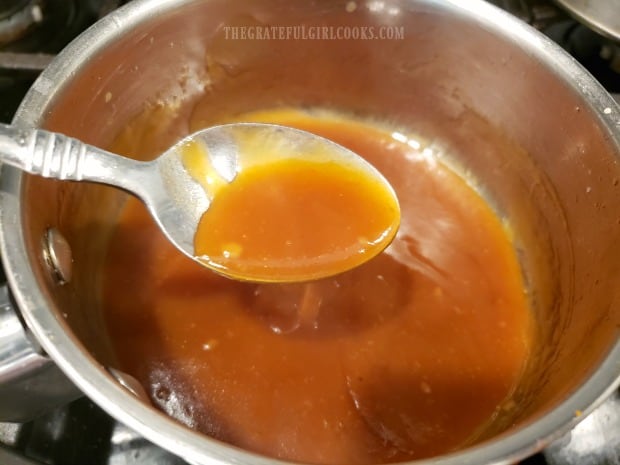
Bring the sauce to a full boil, and then cook on medium heat for 2 minutes, stirring often. As the liquid reduces slightly, the sauce will thicken. Set aside until chicken wings have been cooked. You can quickly reheat it before adding to the chicken, if desired.

The reserved marinade is brought to a boil and cooked, to thicken sauce.

Cooking The Asian BBQ Chicken Wings In An Air Fryer

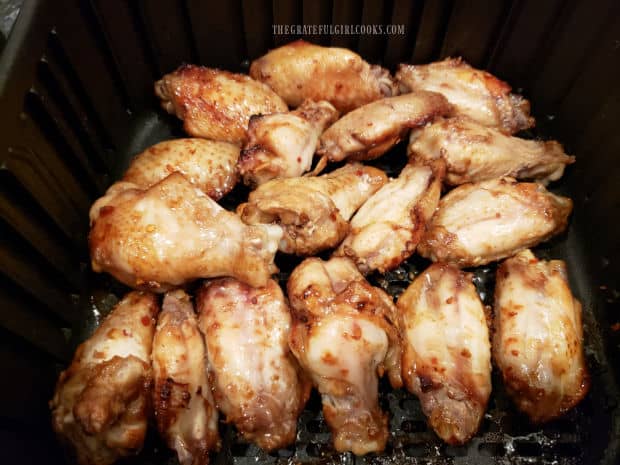
After the chicken wings have marinated 4-6 hours, they are ready to cook. Place the wings into the basket of your air fryer, trying not to overcrowd them, if possible (for best browning). You may need to cook these in two batches, if necessary.

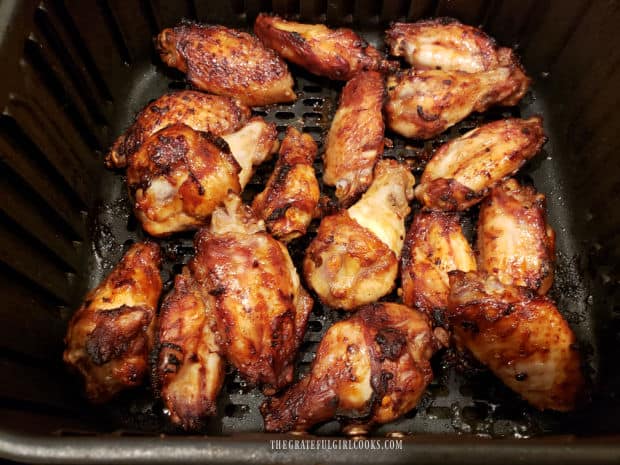
Cook the Asian BBQ chicken wings at  380°F. for 12 minutes, then flip them to the other side and cook 12 more minutes. Increase the temperature of the air fryer to 400°F.and cook 3-4 more minutes.


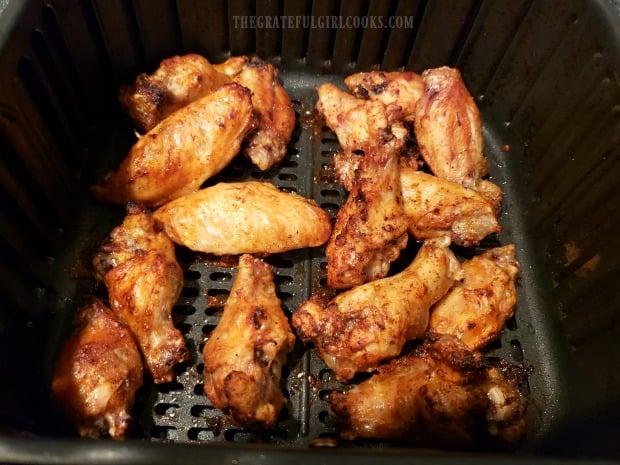
The marinated chicken wings are cooked in an air fryer.When halfway done, Asian BBQ chicken wings are flipped over to finish cooking.

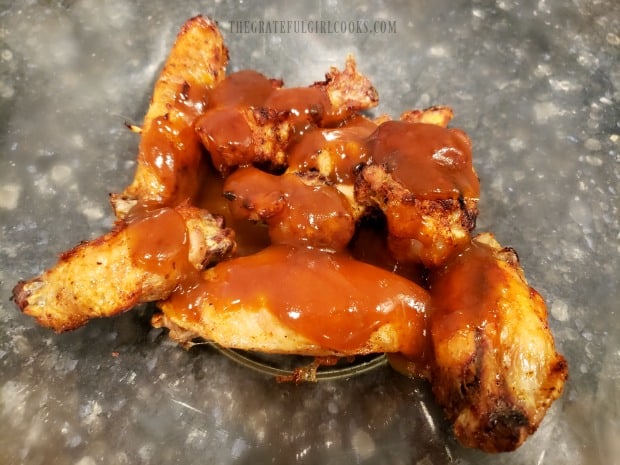
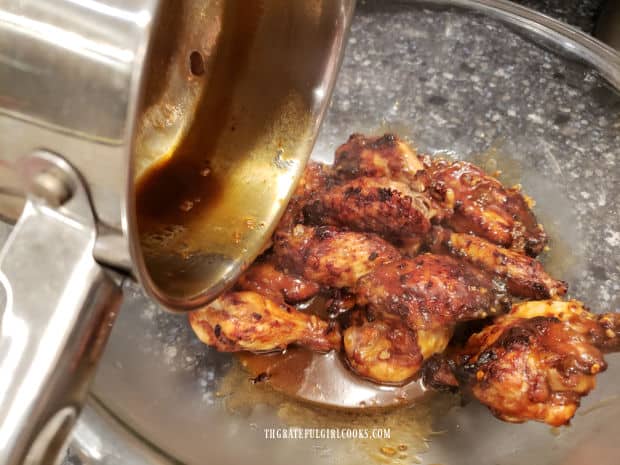
Once the chicken wings are fully cooked, transfer them to a large bowl. Immediately pour the Asian BBQ sauce over them, and toss to fully coat with the sauce.

Asian BBQ chicken wings are coated and tossed in sauce before serving.

Time To Eat!

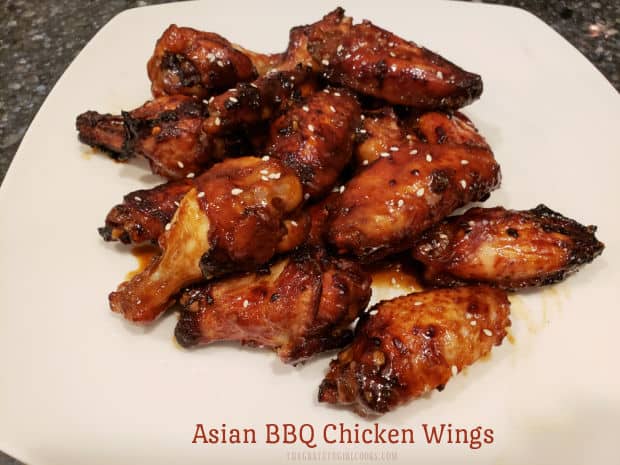
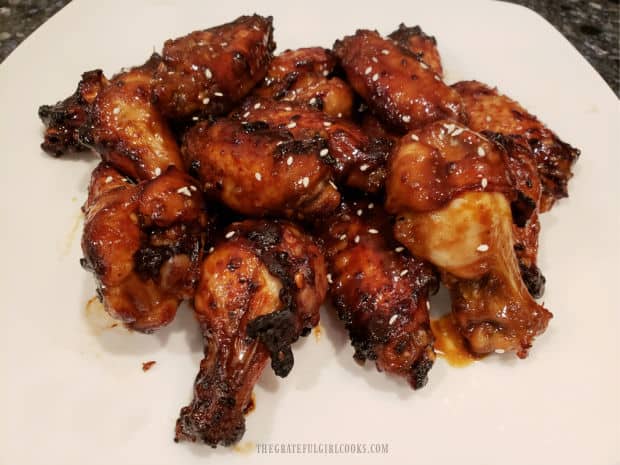
Once the wings are coated with the sauce, it’s time to serve them. If desired, sprinkle the wings with sliced green onions and/or sesame seeds before serving (optional). I usually just sprinkle them with sesame seeds.

Be sure to serve them with several napkins, because these bad boys are sticky and messy good! There is so much flavor, we eat them without any sauce for dipping… you really don’t need any! YUM!

Sprinkled with sesame seeds, the Asian BBQ chicken wings are ready to eat.

I hope you enjoy these Asian BBQ Chicken Wings. We sure do. Thanks for stopping by today, and trust you will come back again soon for more delicious recipes. Take care, and have a GREAT day!

Looking For More Air Fryer Recipes?

You can find all of my blog’s recipes in the Recipe Index, located at the top of the page. I have quite a few air fryer recipes you might enjoy, including:

Interested In More Recipes?

Thank you for visiting this website. I appreciate you using some of your valuable time to do soIf you’re interested, I publish a newsletter 2 times per month (1st and 15th) with all the latest recipes, and other fun info. I would be honored to have you join our growing list of subscribers, so you never miss a great recipe!
There is a Newsletter subscription box on the top right side (or bottom) of each blog post, depending on the device you use, where you can easily submit your e-mail address (only) to be included in my mailing list.

You Can Also Find Me On Social Media:

Facebook page: The Grateful Girl Cooks!
Pinterest:
The Grateful Girl Cooks!
Instagram:
jbatthegratefulgirlcooks

Author's signature

Recipe Adapted From: The cookbook “The Best Of Cooking Light”, page 219, published by Oxmoor House, Inc. in 2004

0 from 0 votes
Asian BBQ Chicken Wings
Prep Time
5 mins
Cook Time
27 mins
Inactive Marinating Time
4 hrs
Total Time
4 hrs 32 mins
 

Asian BBQ Chicken Wings are marinated in soy sauce, lime juice, garlic, brown sugar, curry powder, then cooked until crispy in an air fryer!

Category: Appetizer, Main Dish, Snack
Cuisine: Asian
Keyword: Asian BBQ chicken wings
Servings: 3 (6 wings per serving)
Calories Per Serving: 541 kcal
Author: JB @ The Grateful Girl Cooks!
Ingredients
  • ¼ cup packed brown sugar
  • ¼ cup low-sodium soy sauce
  • 1 Tablespoon fresh squeezed lime juice
  • 3 large garlic cloves , minced
  • ½ teaspoon crushed red pepper flakes
  • ¼ teaspoon curry powder
  • pounds chicken wings (approx. 18-20 wings)
  • sesame seeds and/or sliced green onions for garnish , optional
Instructions
  1. Place brown sugar, soy sauce, lime juice, garlic, curry powder, and crushed red pepper flakes in a small bowl. Stir well, until fully combined.

  2. Place chicken wings in large re-sealable plastic bag OR in a shallow container with tight-fitting lid. Pour sauce over wings; toss to coat; seal bag or container. Marinate wings in fridge 4-6 hours (or overnight). Turn wings occasionally so they stay coated with marinade.

  3. Remove marinated wings from container and SAVE THE MARINADE. Pour the marinade into a saucepan. Bring sauce to a full boil; cook on medium heat for a full 2 minutes, stirring often. It is essential you fully cook the sauce to "kill off" any bacteria from it's exposure to raw chicken. As liquid reduces slightly, sauce will thicken. Set aside sauce until wings have cooked. You can quickly reheat sauce before adding to the chicken, if desired.
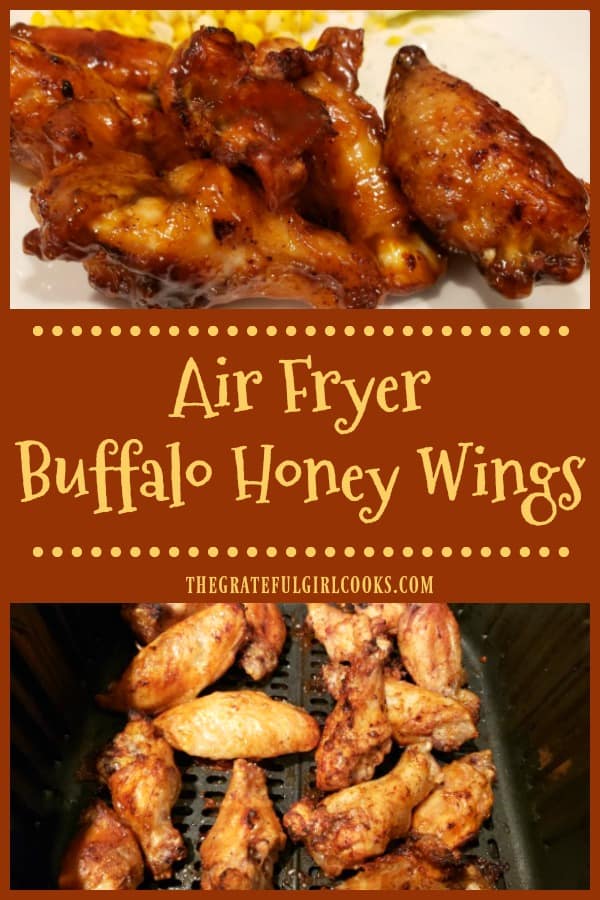
  4. After wings have marinated, they're ready to cook. Place wings into basket of air fryer, trying not to overcrowd them, if possible (for best browning), in batches, if necessary. Cook at 380°F. for 12 minutes, flip them to other side and cook 12 more minutes. Increase temperature of air fryer to 400°F. and cook 3-4 more minutes.

  5. Transfer wings to large bowl. Immediately pour sauce over them; toss to coat with sauce. Sprinkle with sliced green onions and/or sesame seeds, if desired; serve and enjoy!

Recipe Notes

NOTE: If baking, cook at 400 degrees F for 35-40 minutes. When done, place them under the broiler (about 8" below heating element) to further brown them, if desired.

Nutrition Facts
Asian BBQ Chicken Wings
Amount Per Serving (1 (6 wings))
Calories 541 Calories from Fat 297
% Daily Value*
Fat 33g51%
Saturated Fat 9g56%
Trans Fat 1g
Cholesterol 157mg52%
Sodium 869mg38%
Potassium 408mg12%
Carbohydrates 21g7%
Fiber 1g4%
Sugar 18g20%
Protein 39g78%
Vitamin A 403IU8%
Vitamin C 4mg5%
Calcium 51mg5%
Iron 3mg17%
* Percent Daily Values are based on a 2000 calorie diet.

Here’s one more to pin on your Pinterest boards!Asian BBQ Chicken Wings are marinated in soy sauce, lime juice, garlic, brown sugar, curry powder, then cooked until crispy in an air fryer!

Chili-Lime Tortilla Chips (Air Fryer)

Make a quick batch of crunchy Chili-Lime Tortilla Chips in an air fryer! Corn tortillas, lime juice, oil, and a few spices are all you need!

Do you enjoy finding new recipes? I always love the search, and am thrilled when that search produces a recipe you will use again and again.

A few months ago I stumbled upon a recipe online for making homemade tortilla chips in an air fryer! It sounded really interesting to me, so I made chili-lime tortilla chips (with a slight tweak or two), and they didn’t take much time at all!

These tortilla chips are totally EASY to make, have great flavor, and are absolutely crispy (just how they should be, right?). Here’s how you can make them fairly quickly, using an air fryer:

Scroll Down For A Printable Recipe Card At The Bottom Of The Page

Make The Seasoning For the Chips

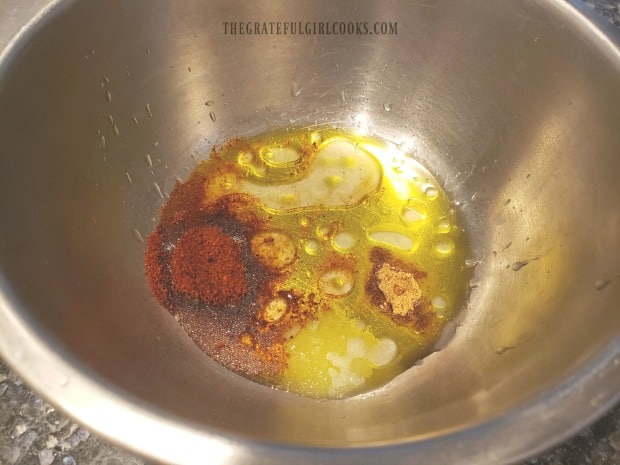
The first thing you will need to do is mix together the simple seasoning sauce that will be used to coat the tortilla chips. The sauce is made using extra-virgin olive oil, fresh lime juice, chili powder, salt, and ground cumin.

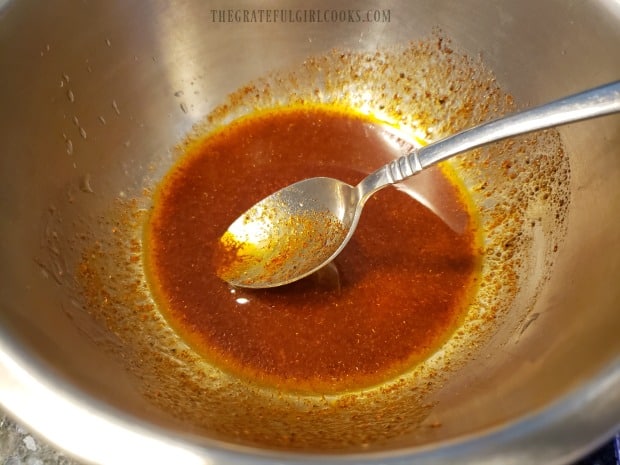
Place these ingredients in a small bowl, and whisk or stir until the ingredients are fully blended together.

Olive oil, lime juice and spices are combined to make sauce for tortilla chips.Chili-Lime Sauce is ready to brush onto tortilla chips for cooking.

Prepare The Corn Tortillas Before Air-Frying

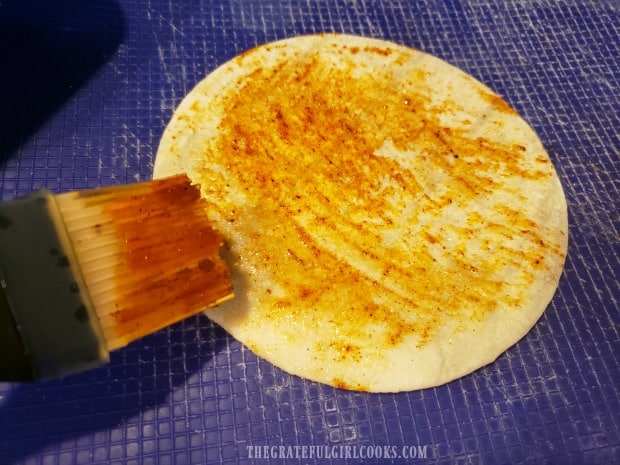
For this recipe, I use six, 5″ corn tortillas. Use a pastry brush to lightly brush the sauce onto both sides of each tortilla. Once that has been done, evenly stack all six seasoned tortillas directly on top of each other.

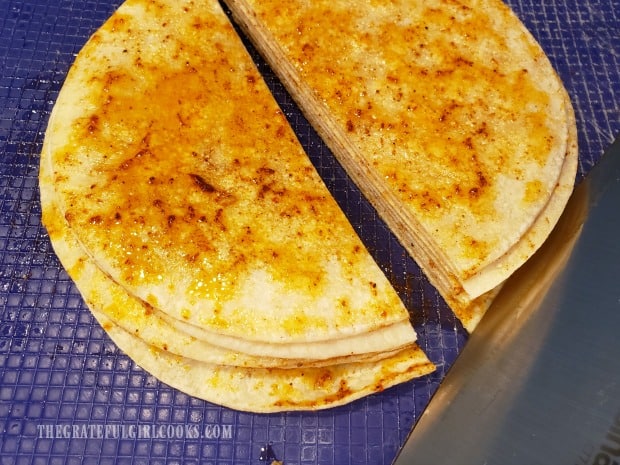
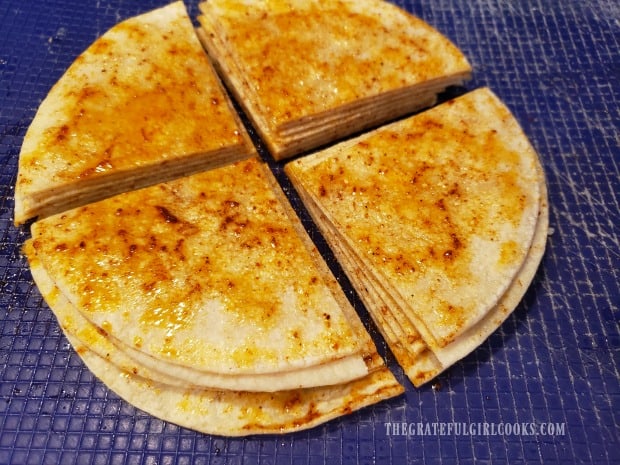
Use a sharp knife to carefully slice the stack of tortillas in half, then cut each half stack in half. Got it? The stack of seasoned tortillas will be cut into four quarters of equal size.

Each corn tortilla is brushed with the spicy sauce before cooking.A stack of seasoned tortillas is cut in half.Tortillas are cut into quarters before placing them into an air fryer.

Cooking Chili-Lime Tortilla Chips In An Air Fryer

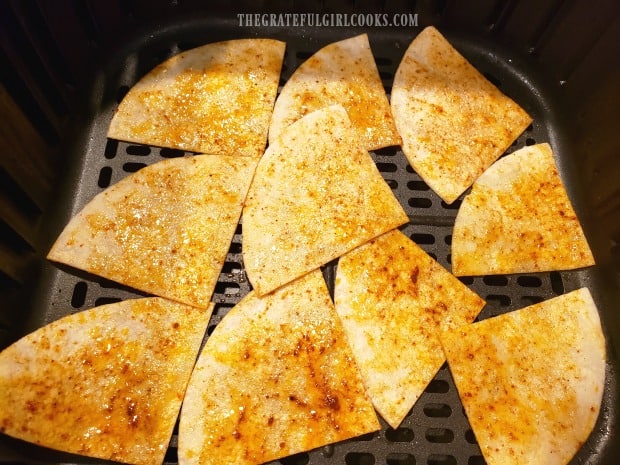
Now it’s time to cook the chili-lime tortilla chips! Preheat your air fryer to 350°F. Once heated, place the tortilla quarters in the basket of the air fryer in a single layer.

You will need to cook the chips in batches, because they need to have room for the hot air to circulate around them, to ensure they become crunchy. 

Cook them at 350°F. for between 6-8 minutes. Different air fryer machines tend to vary in temperatures and the heat they produce, so it is best to keep an eye on the chips as they cook. This will help make sure they don’t burn. I would say definitely check them at the 5 minute mark, and then go from there, a little at a time, until they are lightly browned.

Once done, remove the chili-lime tortilla chips from the air fryer and transfer to a wire rack to cool. The tortilla chips become more crunchy as they cool. Start another batch right away while the air fryer is still hot, and continue until all chips are cooked. 

Cooking Chili-Lime Tortilla Chips in air fryer one batch at a time.

Time To Enjoy Some Chili-Lime Tortilla Chips!

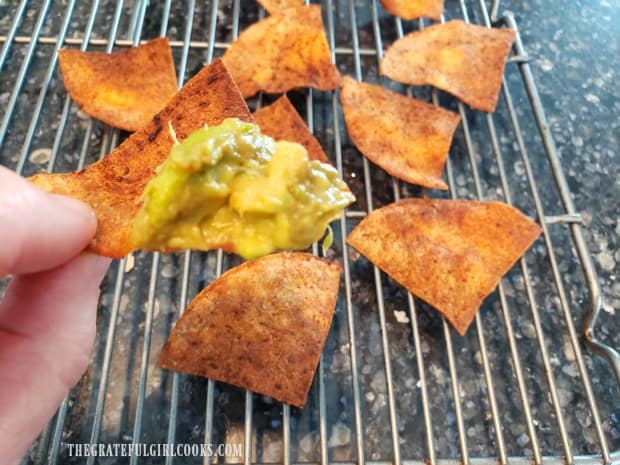
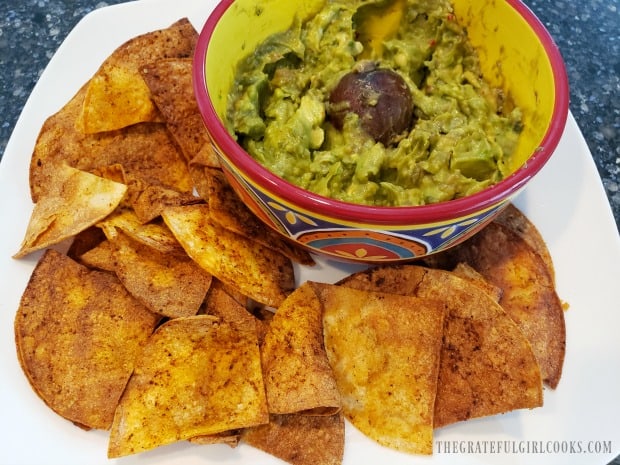
Once the chili-lime tortilla chips have fully cooled down to room temperature, they’re ready to eat! The chips are crunchy, and taste really good, especially when served with salsa or guacamole.

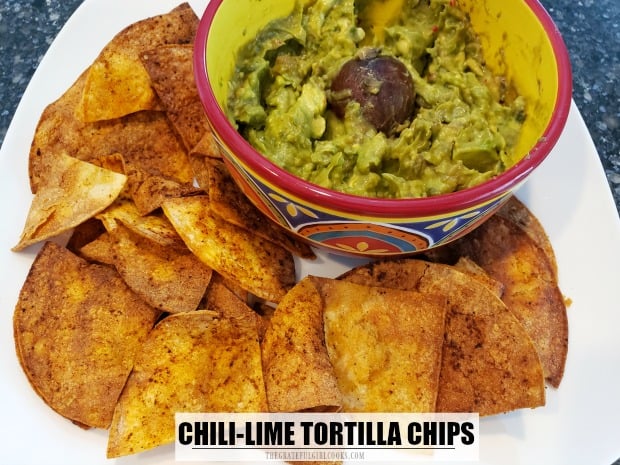
You can see in the photo below that they are crisp enough to hold the guacamole I whipped up the first time I made these chips!

Store any leftover chips in an airtight bag or container. They will be at their peak of crispiness and freshness for about 5-6 days, if stored properly. Because this recipe makes a fairly small batch, we never seem to have too many leftovers… ha ha!

Each seasoned, air fried chip is crunchy and ready for dipping!A plate of air fried chili-lime tortilla chips, served with guacamole.

I sincerely hope you enjoy this recipe for air fryer chili-lime tortilla chips. We sure have enjoyed it! TIP: If you are not a fan of seasoned tortilla chips, you can simply brush the tortillas with olive oil and a sprinkling of salt, for a more traditional tortilla chip.

Thank you for stopping by. I hope you have a wonderful day, and sincerely trust you will come back soon to explore more delicious recipes.

Looking For More AIR FRYER Recipes?

You can find all of my recipes in the Recipe Index, located at the top of the page. I have quite a few delicious air fryer recipes, including:

Want More Recipes? Get My FREE Newsletter!

I publish a newsletter 2 times per month (1st and 15th) with lots of recipes, tips, etc..
Would you like to join our growing list of subscribers?

There is a Newsletter subscription box on the top right (or bottom) of each blog post, depending on the device you use.
You can submit your e-mail address there, to be added to my mailing list.

Find Me On Social Media:

Facebook page: The Grateful Girl Cooks!
Pinterest:
The Grateful Girl Cooks!
Instagram:
jbatthegratefulgirlcooks

Author's signature

Recipe adapted from: Leanne at: crumbtopbaking.com/air-fryer-tortilla-chips/

↓↓ PRINTABLE RECIPE BELOW ↓↓

0 from 0 votes
Chili-Lime Tortilla Chips
Prep Time
5 mins
Cook Time
6 mins
Total Time
11 mins
 

Make a quick batch of crunchy Chili-Lime Tortilla Chips in an air fryer! Corn tortillas, lime juice, oil, and a few spices are all you need!

Category: Appetizer/Snack
Cuisine: American
Keyword: chili-lime tortilla chips
Servings: 4 (6 chips per serving)
Calories Per Serving: 118 kcal
Author: JB @ The Grateful Girl Cooks!
Ingredients
  • 6 5 inch corn tortillas
  • 1 Tablespoon extra virgin olive oil
  • ½ Tablespoon fresh lime juice
  • 1 teaspoon chili powder
  • ¼ teaspoon ground cumin
  • ¼ teaspoon salt
Instructions
  1. Place olive oil, lime juice, chili powder, salt and ground cumin in a small bowl; whisk or stir until the ingredients are fully blended together.

  2. Use a pastry brush to lightly brush sauce onto both sides of each tortilla. Once that has been done, stack all six tortillas on top of each other. Using a sharp knife, carefully slice the stack of tortillas in half, then cut each half stack in half. The stack of seasoned tortillas will be cut into four quarters of equal size.

  3. Preheat air fryer to 350°F. Place the tortilla quarters in the basket of the air fryer in a single layer. NOTE: Cook chips in batches, because they need room for hot air to circulate around them, to ensure they become crunchy. Cook at 350°F. for 6-8 minutes. Air fryers tend to vary in temperature and heat they produce, so keep an eye on chips as they cook, to make sure they don't burn. Check them at the 5 minute mark, and then go from there, a little at a time, until lightly browned.

  4. Once done, remove tortilla chips from air fryer; transfer to a wire rack to cool. The tortilla chips become more crunchy as they cool. Start another batch right away while the air fryer is still hot; continue until all chips are cooked. Store any leftovers in airtight bag or container for up to 5-6 days. Enjoy!

Nutrition Facts
Chili-Lime Tortilla Chips
Amount Per Serving (6 chips)
Calories 118 Calories from Fat 45
% Daily Value*
Fat 5g8%
Saturated Fat 1g6%
Sodium 171mg7%
Potassium 82mg2%
Carbohydrates 18g6%
Fiber 3g13%
Sugar 1g1%
Protein 2g4%
Vitamin A 148IU3%
Vitamin C 1mg1%
Calcium 32mg3%
Iron 1mg6%
* Percent Daily Values are based on a 2000 calorie diet.

Here’s one more to pin on your Pinterest boards!Make a quick batch of crunchy Chili-Lime Tortilla Chips in an air fryer! Corn tortillas, lime juice, oil, and a few spices are all you need!

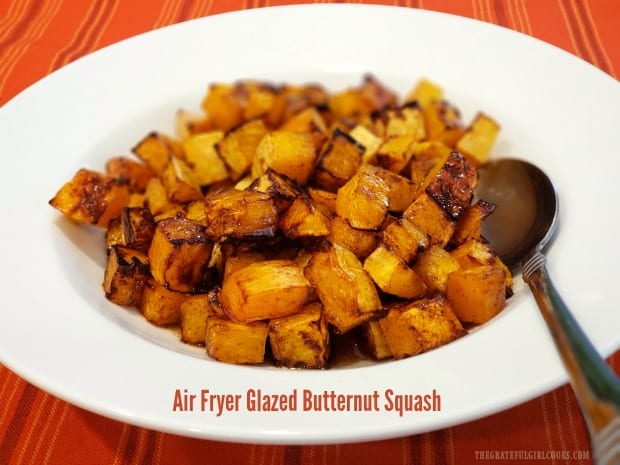
Air Fryer Glazed Butternut Squash

Air Fryer Glazed Butternut Squash is an easy veggie dish, with air fried squash cubes covered in a butter, maple syrup and cinnamon glaze.

If you have an air fryer and are looking for a great veggie side dish, I would love to recommend this air fryer glazed butternut squash to you. It’s been fun trying so many recipes using the air fryer I got last year.

For this recipe I tweaked one of my recipes for BAKING maple cinnamon butternut squash, and adapted it (through trial and error) for use in an air fryer. This recipe is the result of my experiments. And boy… is it GOOD! Slightly caramelized on the outside, and creamy soft on the inside, this is a delicious, slightly sweet, butternut squash side dish. Here’s how to make it:

Scroll Down For A Printable Recipe Card At The Bottom Of The Page

Prepare The Butternut Squash

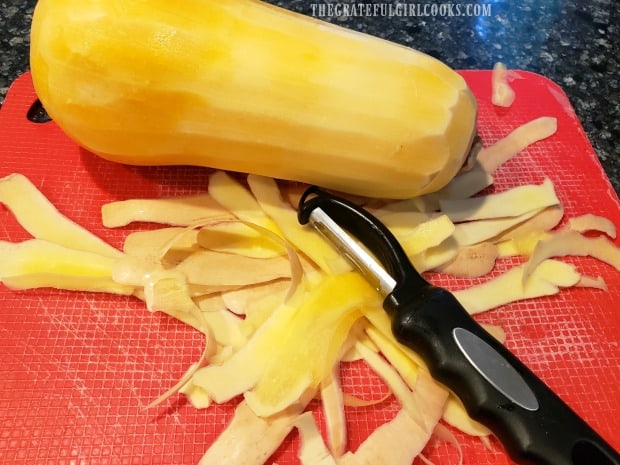
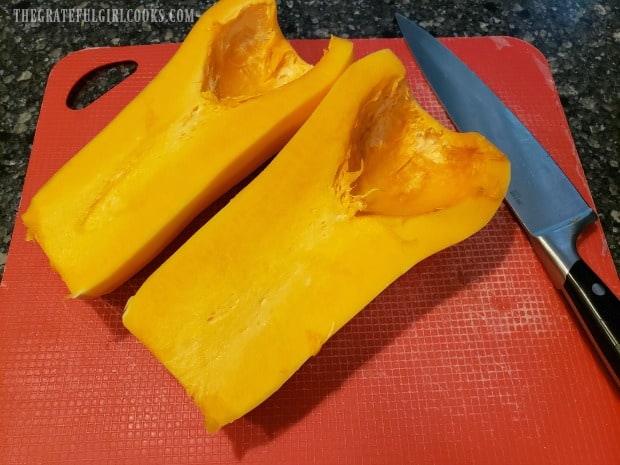
Use a vegetable peeler or a sharp knife, and peel the butternut squash. Cut off a slice of both ends, and discard. Slice the squash lengthwise, and then scoop out all the seeds (discard).

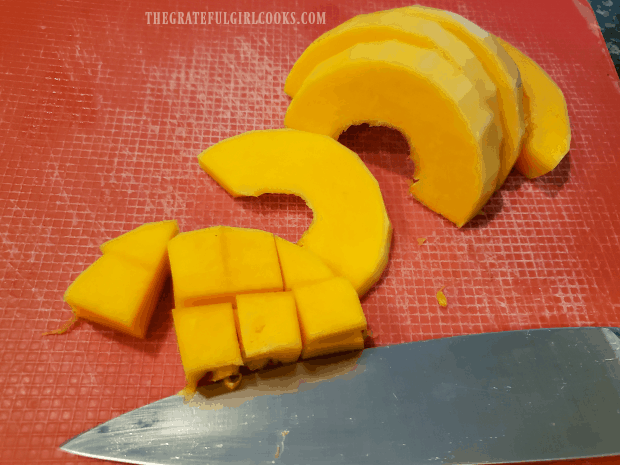
Slice each half squash into 1″ thick crescent-shaped slices, and then cut each slice into bite-sized cubes (about 1½” square). Place all the squash cubes into a large mixing bowl.

A vegetable peeler is used to peel the butternut squash.A butternut squash is sliced in half lengthwise, then seeds are removed.Crescent-shaped slices of the butternut squash are then cut into cubes.

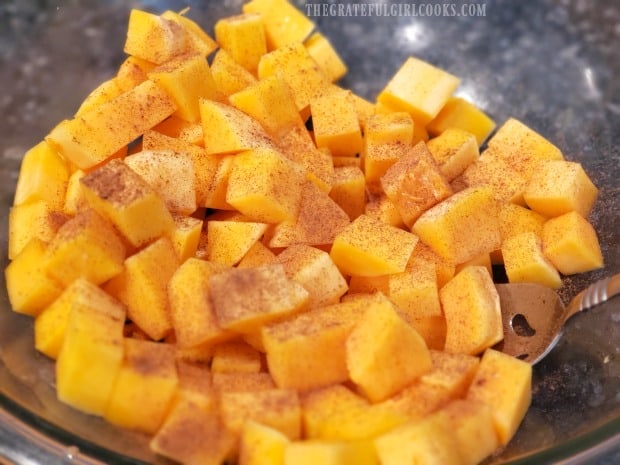
Drizzle extra virgin olive oil on the squash cubes, and then sprinkle with ground cinnamon. Stir well, to fully coat the squash with the oil and cinnamon.

Cinnamon and olive oil are sprinkled onto the squash, then stirred in to coat.

Cooking Air Fryer Glazed Butternut Squash

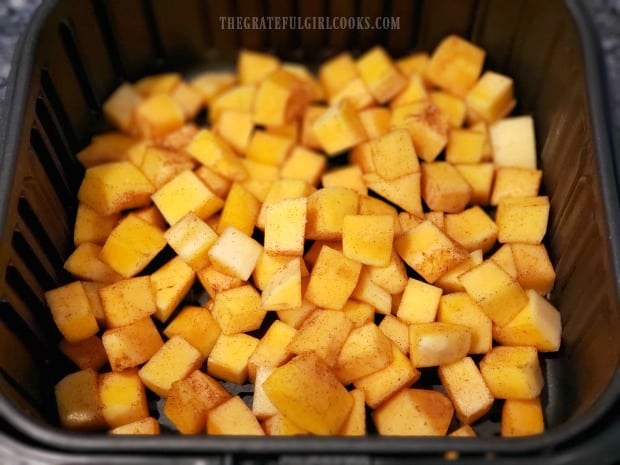
Now it’s time to cook the butternut squash! Preheat your air fryer to 400°F. This will take a couple minutes. When ready, place the squash cubes in the basket of the air fryer, spreading them out in a single layer as much as possible. 

The air frying process is fairly simple. Basically you will cook, shake the basket, cook, shake the basket, cook, shake the basket and then cook until soft. Got that? The occasional “shaking” allows the squash to get browned on all sides from all that “bumping” around.

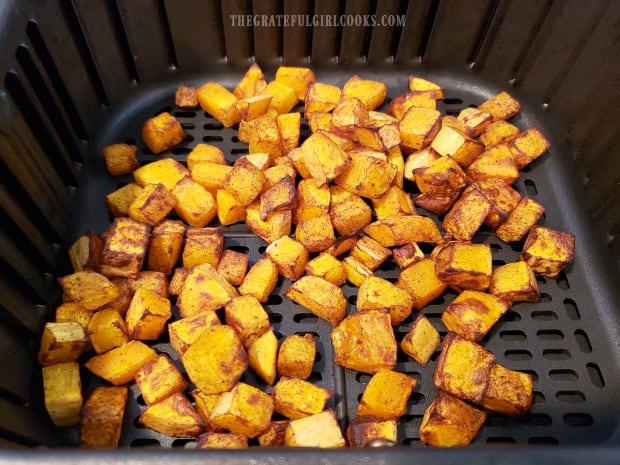
Once done, the squash will have reduced in size as it cooked, will be slightly caramelized on the outside, and soft on the inside. You can give one a taste test to make sure it is cooked through.

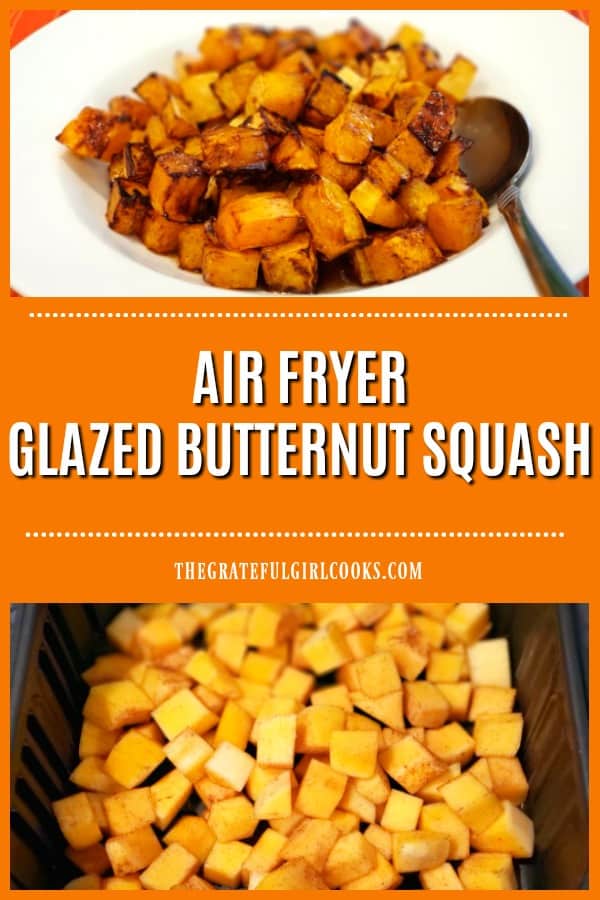
Air fryer basket with cubes of butternut squash, ready to cook.When done, the squash has reduced in size, and is caramelized on the outside.

Time To Glaze And Serve!

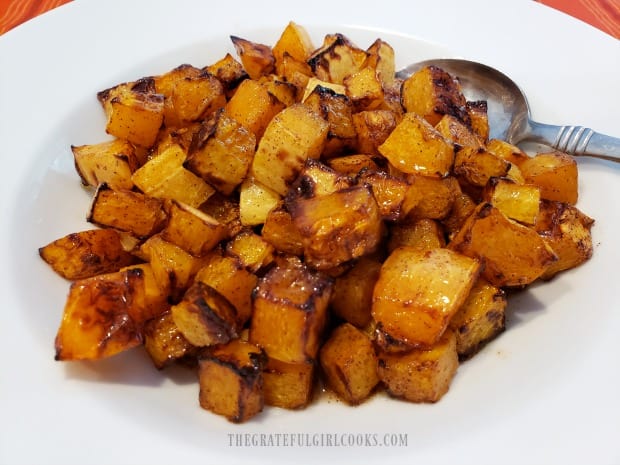
Immediately pour the hot butternut squash into a large bowl. Add melted butter, pure maple syrup and a pinch or two more of ground cinnamon. Stir well, to ensure all the squash gets coated with this glaze.

Transfer to a serving plate or bowl, and serve the air fryer glazed butternut squash while HOT! The buttery cinnamon maple flavors give the squash just a bit of delicious sweetness that kids and adults will love! Serve alongside your favorite chicken, pork or beef dish, and enjoy!

Air fryer glazed butternut squash, served in white bowl.

Thank you for stopping by, and trust you will come back for a visit again soon. I hope you have the opportunity to try this air fryer glazed butternut squash. It’s really good, and I’m confident you and those you love will really enjoy it. Have a GREAT day, and may God bless you.

Looking For More Butternut Squash Recipes?

You can find all of my veggie recipes in the Recipe Index, located at the top of the page. I have several delicious butternut squash recipes you might be interested in, including:

Interested In More Recipes?

Thank you for visiting this website. I appreciate you using some of your valuable time to do soIf you’re interested, I publish a newsletter 2 times per month (1st and 15th) with all the latest recipes, and other fun info. I would be honored to have you join our growing list of subscribers, so you never miss a great recipe!
There is a Newsletter subscription box on the top right side (or bottom) of each blog post, depending on the device you use, where you can easily submit your e-mail address (only) to be included in my mailing list.

You Can Also Find Me On Social Media:

Facebook page: The Grateful Girl Cooks!
Pinterest:
The Grateful Girl Cooks!
Instagram:
jbatthegratefulgirlcooks

Author's signature

0 from 0 votes
Air Fryer Glazed Butternut Squash
Prep Time
10 mins
Cook Time
20 mins
Total Time
30 mins
 

Air Fryer Glazed Butternut Squash is an easy veggie dish, with air fried squash cubes covered in a butter, maple syrup and cinnamon glaze.

Category: Side Dish, Vegetable Dish
Cuisine: American
Keyword: air fryer glazed butternut squash
Servings: 4
Calories Per Serving: 134 kcal
Author: JB @ The Grateful Girl Cooks!
Ingredients
  • 1 medium butternut squash
  • 2 teaspoons extra virgin olive oil
  • ½ teaspoon ground cinnamon
  • 2 teaspoons butter melted
  • 1 Tablespoon pure maple syrup
  • 1 pinch ground cinnamon
Instructions
  1. Use a vegetable peeler or sharp knife to peel butternut squash. Cut off a slice at both ends, and ends. Slice squash lengthwise; scoop out seeds (discard). Slice each half into 1½" thick crescent-shaped slices, then cut each slice into bite-sized cubes (about 1½" square).

  2. Place squash into a large mixing bowl. Drizzle with olive oil, and then sprinkle with cinnamon. Stir well, to fully coat squash with oil and cinnamon.

  3. Preheat air fryer to 400°F. When ready, place squash cubes in the basket of the air fryer, spreading them in a single layer as much as possible. 

  4. Cook 5 minutes. Shake the basket to move the squash around. Cook 5 minutes. Shake again. Cook 5 minutes. Shake again. Cook for 3-5 more minutes until the squash is caramelized on the outside and is soft to the bite on the inside (taste test). When done, remove basket from air fryer.

  5. Immediately pour squash into a large bowl. Add melted butter, maple syrup and 1-2 pinches of ground cinnamon. Stir well, to ensure squash gets coated with glaze. Transfer to a serving plate or bowl, and serve HOT! Enjoy.

Nutrition Facts
Air Fryer Glazed Butternut Squash
Amount Per Serving
Calories 134 Calories from Fat 36
% Daily Value*
Fat 4g6%
Saturated Fat 2g13%
Cholesterol 5mg2%
Sodium 26mg1%
Potassium 671mg19%
Carbohydrates 26g9%
Fiber 4g17%
Sugar 7g8%
Protein 2g4%
Vitamin A 19994IU400%
Vitamin C 39mg47%
Calcium 95mg10%
Iron 1mg6%
* Percent Daily Values are based on a 2000 calorie diet.

Here’s one more to pin on your Pinterest boards!Air Fryer Glazed Butternut Squash is an easy veggie dish, with air fried squash cubes covered in a butter, maple syrup and cinnamon glaze.

Air Fryer Cheesy Pan Pizza

Make a delicious Air Fryer Cheesy Pan Pizza for lunch/dinner. Use canned biscuit dough for crust & Mozzarella/Parmesan cheeses, pizza sauce & spices!

Do you have an air fryer? We are still enjoying experimenting with different recipes using the air fryer I got last year with a gift card. One of the quick meals I came up with (while experimenting) is this recipe for Air Fryer Cheesy Pan Pizza.  Guess what? To make it extra easy, you use refrigerated, canned biscuit dough to form the pan pizza crust! YEP!

Pizza Making Experiments

We love pizza, and occasionally use different methods to make it. I’ve made BBQ Chicken TORTILLA Pizzas, Pizzas Cooked On The BBQ, and of course, traditional pepperoni pizza! I’ve even made Apple Pie Dessert Pizza! But this one, using biscuit dough, once I thought of it, sounded like something I wanted to try.

We had a can of biscuits hanging out in the refrigerator, so I started thinking about the ingredients in the dough. Finally I decided to make a deep dish pizza crust with it, just to try it. The recipe I came up with uses 4 biscuits total, and yields two cute little 6″ pan pizzas, with hardly any effort. Perfect, and VERY convenient! Now we can eat them any time for a quick lunch or dinner. Here’s how to make ’em:

Scroll Down for A Printable Recipe Card At The Bottom Of The Page

Make The “Easy” Pizza Crust

NOTE:  This recipe makes two individual pizzas, so remember to divide the ingredients between two, and repeat this process for each pizza. My air fryer could only cook one 6″ pizza at a time, so I cooked them in two batches.

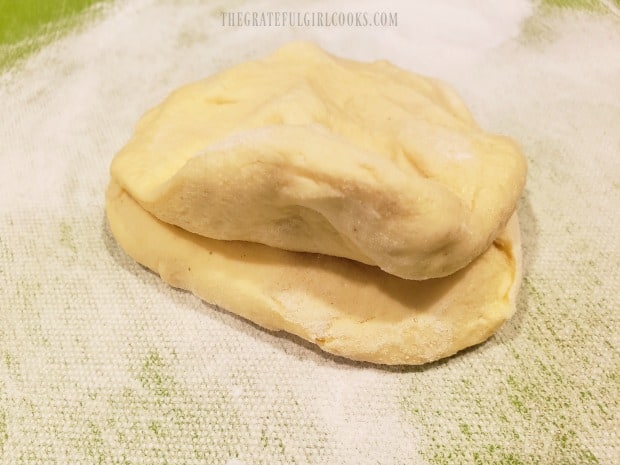
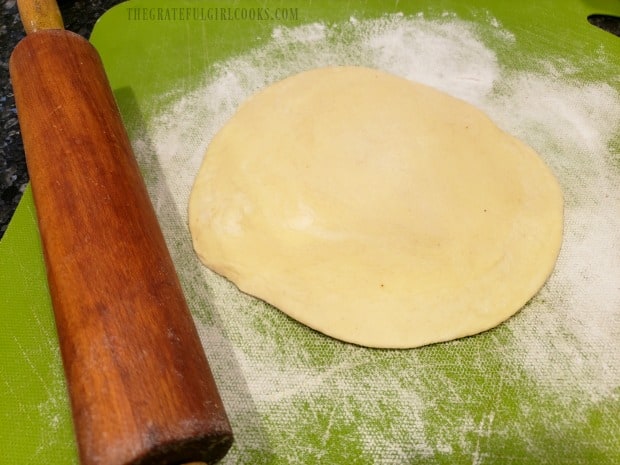
Place the dough for two biscuits onto a lightly floured surface, stacked on top of each other. Use a rolling pin, and roll the dough out into a 6″ circle. This will be the crust for your pizza. Easy peasy.

Two canned, refrigerated biscuits are used for the pizza crust dough.The biscuit dough is rolled out into a 6" circle for the pizza pan.

Prepare The Air Fryer Cheesy Pan Pizza

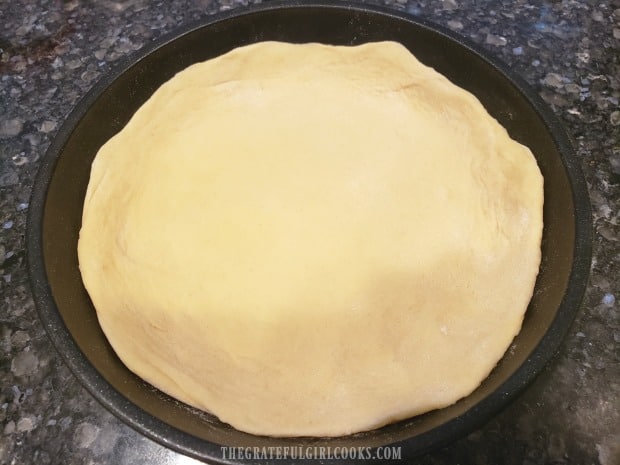
Lightly spray a 6″ oven-safe, rimmed round baking pan with non-stick spray (mine was in an air fryer accessory kit). Place the crust into the pan. Stretch and gently pull the dough to cover the bottom of the pan, and about an inch up the sides of the pan.

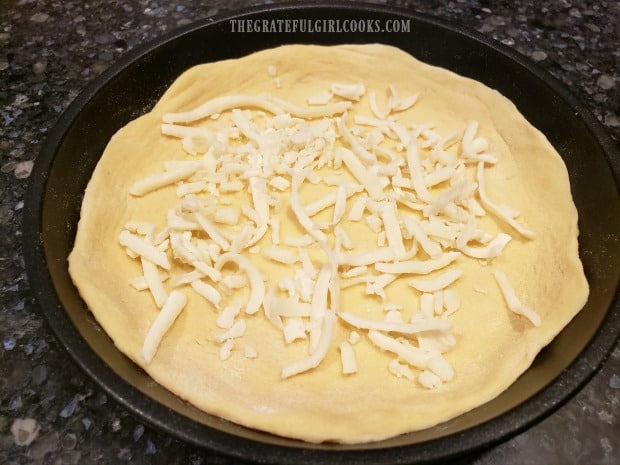
Sprinkle a small handful of the mozzarella cheese over the dough. The cheese (as it melts) will help form a barrier, so the bottom crust does not get soggy from the pizza sauce.

Place the dough into a 6" oven-proof pan, pulling dough up sides of pan to form rim.Sprinkle the bottom of the crust with some of the grated mozzarella cheese.

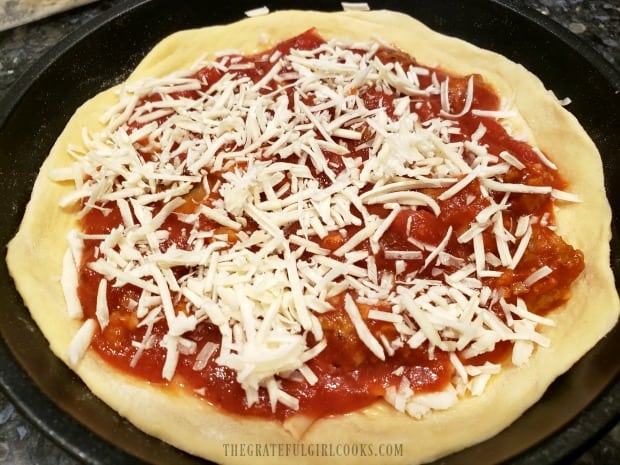
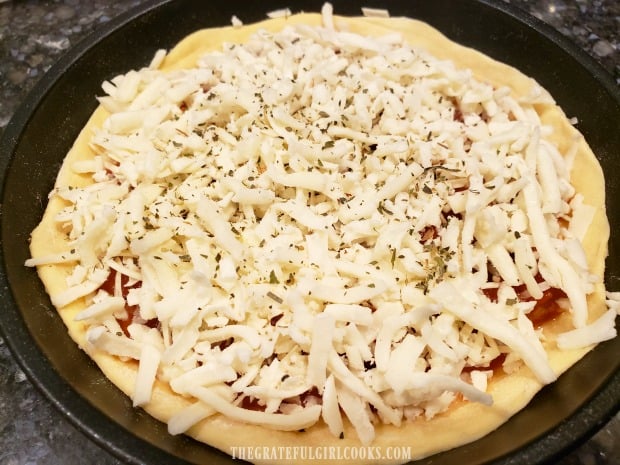
Now spoon the pizza (or spaghetti) sauce over the cheese, and top with shredded Parmesan cheese. Add grated mozzarella cheese, and sprinkle lightly with Italian seasoning (I make my own). The last step is to either lightly spray or drizzle olive oil over the top of the pizza.

Spoon sauce over pizza, then top with grated Parmesan.Top with mozzarella cheese, Italian seasoning and a drizzle/spray of olive oil.

Time To Cook Your Air Fryer Cheesy Pan Pizza

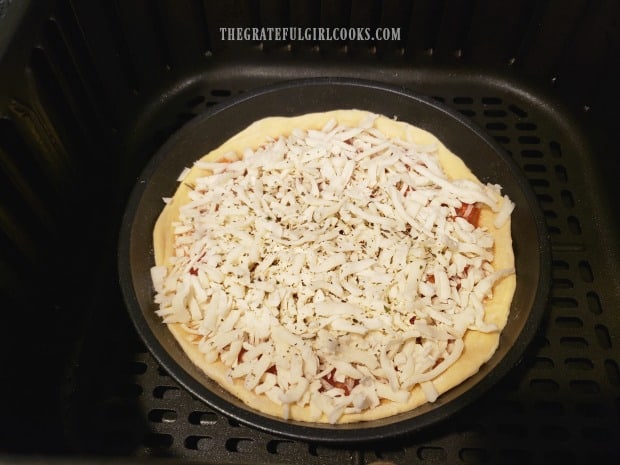
Now your air fryer cheesy pan pizza is ready to cook! Place the pan pizza into a preheated 380°F air fryer, and cook the pizza for 5 minutes. After 5 minutes, open the air fryer- carefully and quickly remove the pizza from the pan, and place it back in the air fryer (minus pan).

The pizza should have firmed up enough to hold its shape, and will be stable enough (without the pan) to continue cooking, so the bottom crust browns nicely and firms up. Pop the pizza back into the air fryer (directly on basket grate), and cook for an additional 3-4 minutes.

Cook the air fryer pizza for 5 minutes, before removing pizza from pan.The pizza is removed from pan and finishes cooking in the air fryer.

How Do I Know If It Is Done?

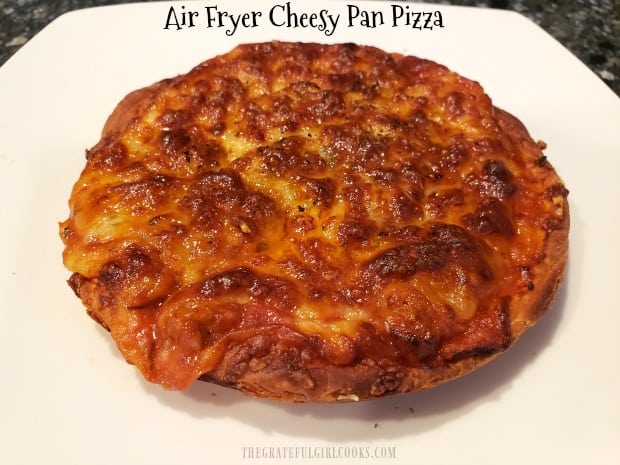
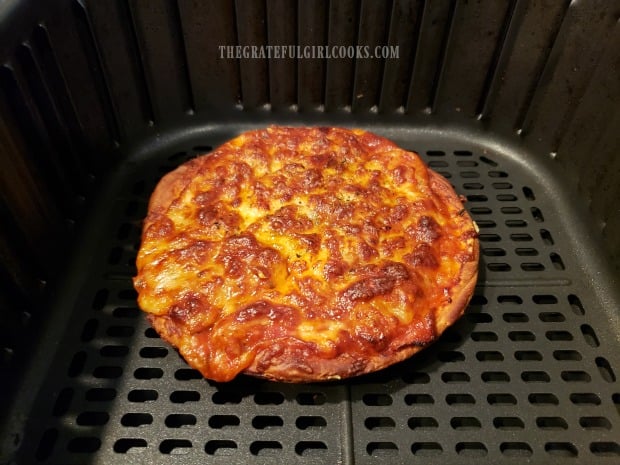
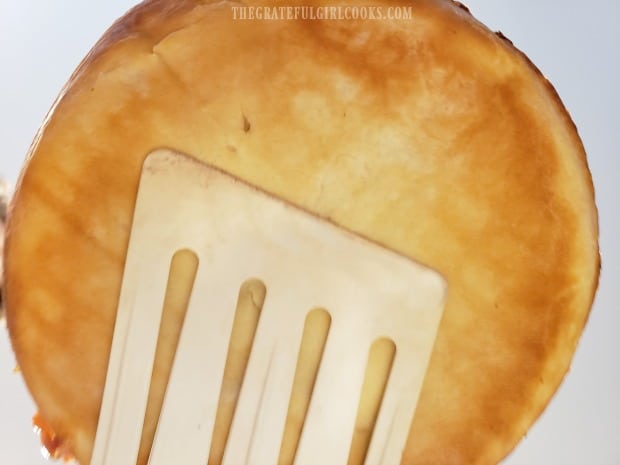
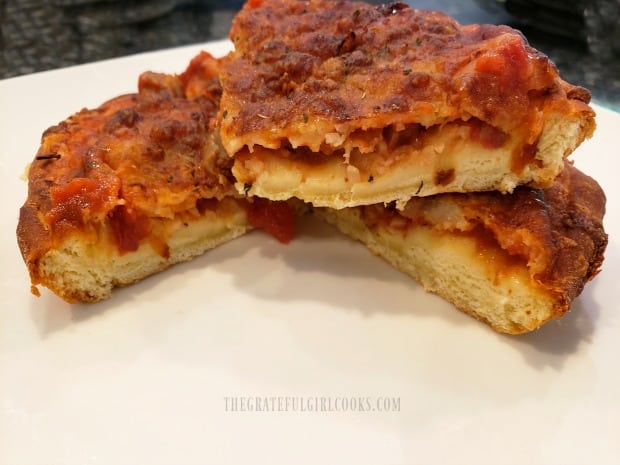
When done, the cheese should be bubbly and melted, and the pizza will be fully heated through. Take a quick peek at the bottom crust of your pizza – it should be browned, crispy and firm. The photo below shows how golden brown and firm the crust should be, too.

Transfer your air fryer cheesy pan pizza to a cutting board, let it sit for one minute, then slice it into 4 small pieces with a pizza cutter or sharp knife. Repeat process for the remaining pizza. Serve hot, and enjoy.

The bottom crust gets nice and golden brown when cooked in the air fryer.Slices of the air fryer cheesy pan pizza, on a plate, ready to eat.

I hope you will consider trying these little miniature pan pizzas. They really are good, and not too difficult at all to make. Thanks for stopping by, and have a great day.

Looking For More AIR FRYER Recipes?

You can find all of my air fryer recipes in the Recipe Index, which is located at the top of the page. I have several you might enjoy, including:

Interested In More Recipes?

Thank you for visiting this website. I appreciate you using some of your valuable time to do soIf you’re interested, I publish a newsletter 2 times per month (1st and 15th) with all the latest recipes, and other fun info. I would be honored to have you join our growing list of subscribers, so you never miss a great recipe!
There is a Newsletter subscription box on the top right side (or bottom) of each blog post, depending on the device you use, where you can easily submit your e-mail address (only) to be included in my mailing list.

You Can Also Find Me On Social Media:
Facebook page: The Grateful Girl Cooks!
Pinterest: The Grateful Girl Cooks!
Instagram: jbatthegratefulgirlcooks

Author's signature

0 from 0 votes
Air Fryer Cheesy Pan Pizza
Prep Time
6 mins
Cook Time
9 mins
Total Time
15 mins
 

Make a delicious Air Fryer Cheesy Pan Pizza for lunch/dinner. Use canned biscuit dough for crust & Mozzarella/Parmesan cheeses, pizza sauce & spices!

Category: Entree, Lunch, Snack
Cuisine: Italian
Keyword: air fryer cheesy pan pizza
Servings: 2 pizzas
Calories Per Serving: 492 kcal
Author: JB @ The Grateful Girl Cooks!
Ingredients
  • 4 refrigerated, canned biscuits (dough)
  • 1 cup mozzarella cheese , divided
  • 4-5 Tablespoons spaghetti or pizza sauce , divided
  • ½ cup grated Parmesan cheese , divided
  • ½ teaspoon Italian seasoning
  • 2 teaspoons olive oil , (approx.) to spray or drizzle
Instructions
REPEAT THIS PROCESS FOR EACH PIZZA
  1. Place 2 biscuit dough rounds onto a lightly floured surface, stacked on top of each other. Roll the dough out into a 6" circle using rolling pin. Lightly spray a 6" oven-safe, rimmed round baking pan with non-stick spray. Place dough circle into pan. Stretch and gently pull dough to cover bottom of pan, and about 1" inch up the sides of pan.

  2. Sprinkle ¼ cup mozzarella cheese over dough. Spoon 2 T. pizza sauce over cheese, then sprinkle with ¼ cup Parmesan cheese. Add ¼ cup grated mozzarella cheese, and sprinkle lightly with ¼ teaspoon Italian seasoning. Lightly spray or drizzle olive oil over top of pizza.

  3. Place pan pizza into basket of a preheated 380°F air fryer; cook for 5 minutes. After 5 minutes, open air fryer- carefully/quickly remove pizza from pan; place pizza back in air fryer directly onto basket grate (minus pan). Pizza should be firm enough to hold its shape, and will be stable enough (without pan) to continue cooking, so bottom crust browns nicely and firms up. Cook for an additional 3-4 minutes, until cooked through, cheese is bubbly, and the bottom crust is browned and firm.

  4. Remove pizza from air fryer once done; transfer to a cutting board. Let rest for one minute, then slice into 4 wedges, serve and enjoy! Repeat process for remaining pizza.

Nutrition Facts
Air Fryer Cheesy Pan Pizza
Amount Per Serving (1 pizza)
Calories 492 Calories from Fat 261
% Daily Value*
Fat 29g45%
Saturated Fat 12g75%
Cholesterol 59mg20%
Sodium 1398mg61%
Potassium 299mg9%
Carbohydrates 31g10%
Fiber 1g4%
Sugar 4g4%
Protein 27g54%
Vitamin A 618IU12%
Vitamin C 2mg2%
Calcium 754mg75%
Iron 3mg17%
* Percent Daily Values are based on a 2000 calorie diet.

Here’s one more to pin on your Pinterest boards!Make a delicious Air Fryer Cheesy Pan Pizza for lunch/dinner. Use canned biscuit dough for crust & Mozzarella/Parmesan cheeses, pizza sauce & spices!

Air Fryer Bacon Cheeseburger

Learn how easy it is to make a juicy good Air Fryer Bacon Cheeseburger, using this appliance. Can’t get outside to grill? Use an air fryer instead!
Learn how easy it is to make a juicy good Air Fryer Bacon Cheeseburger, using this appliance. Can't get outside to grill? Use an air fryer instead!

When it’s raining outside and we can’t grill burgers on our BBQ, we make ’em in our air fryer! My husband and I have made air fryer bacon cheeseburgers quite a few times now, and guess what? They’re really GOOD! They are also very easy to prepare with super heated hot air.

Now that we have this recipe in our air fryer cooking tool belt, even the weather can’t stop us from enjoying a great burger whenever we want one. Here’s how we make ’em:

Scroll Down For A Printable Recipe Card At The Bottom Of The Page

Toast The Buns (optional)

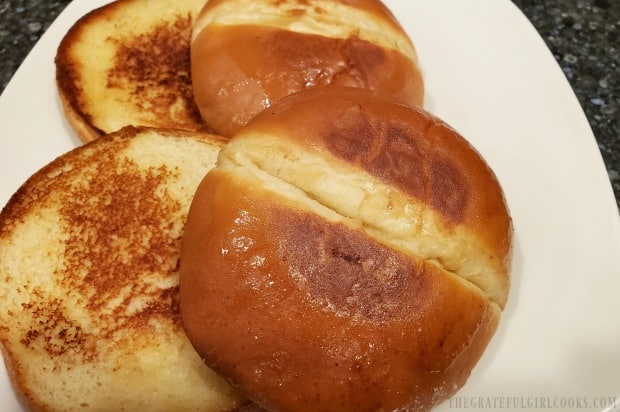
Before cooking the hamburger patties, if you would like to toast the hamburger buns, simply lightly spread each half with butter and cook on low heat in a large skillet until golden brown. We love them toasted, which helps keep the buns from getting too soggy. Set the buns aside once toasted. This is completely optional, but it makes an air fryer bacon cheeseburger even better, in our humble opinion.

Hamburger buns, after being lightly toasted with butter in a skillet

Season The Hamburger Patties

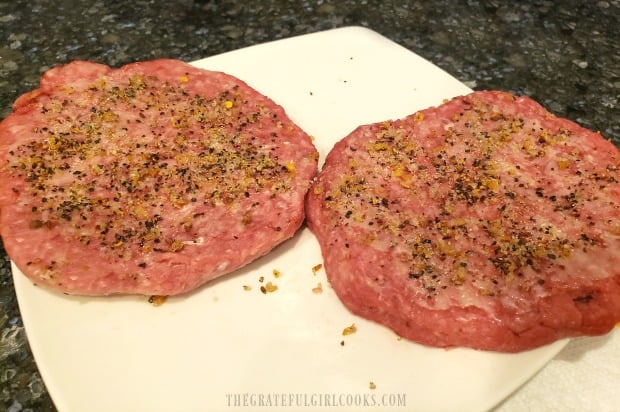
We used 1/4 pound ground beef patties. To season the hamburger patties for air fryer cooking, lightly brush each patty on one side with melted butter and a tiny bit of liquid smoke flavoring. The liquid smoke is optional, but we find it really helps provide a smoky taste to the meat (like outside grilling does). Lightly sprinkle the patties on one side with salt and Montreal steak seasoning. You can substitute your own favorite seasonings, if desired, to suit your personal taste.

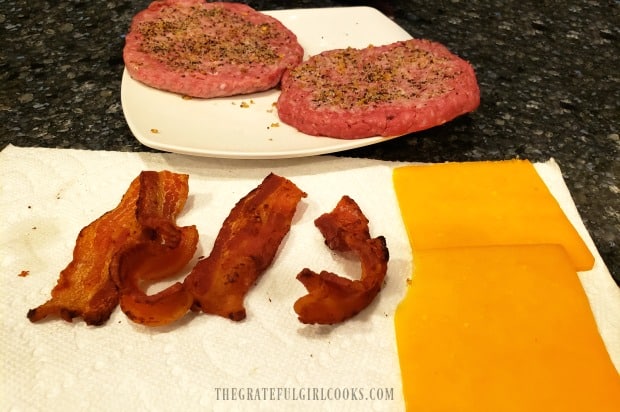
Have the slices of cheddar (or American) cheese AND the precooked bacon nearby. Did you know you can even cook bacon in an air fryer? Yes you can… and it is fabulous! For each cheeseburger I use a strip of precooked bacon that has been cut in half. You will add these right at the end of the air frying time, so will need them nearby, ready to go!

Hamburger patties are seasoned with spices, butter, and liquid smoke before cooking.Pre-cooked bacon and cheddar cheese slices ready to add to cooked burgers.

Cooking An Air Fryer Bacon Cheeseburger

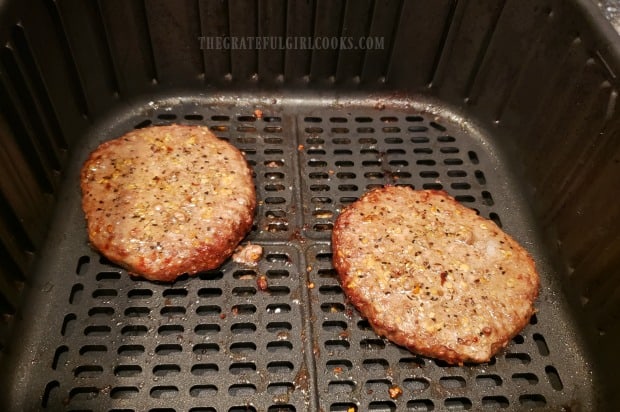
Preheat your air fryer to 360°F. This will take 3-4 minutes typically. Place the patties in the air fryer basket, seasoned side down. Cook for 5 minutes, then turn the patties over, and continue cooking for 2 more minutes. Our burgers were medium-well once done.

NOTE: Because air fryer temps for different models of air fryers, your cooking time may be a tiny bit less or a tiny bit longer. Check for your preferred done-ness. Once done, TURN OFF THE AIR FRYER (and quickly do the next step)!

Burgers are cooked in air fryer, then flipped and cooked some more.


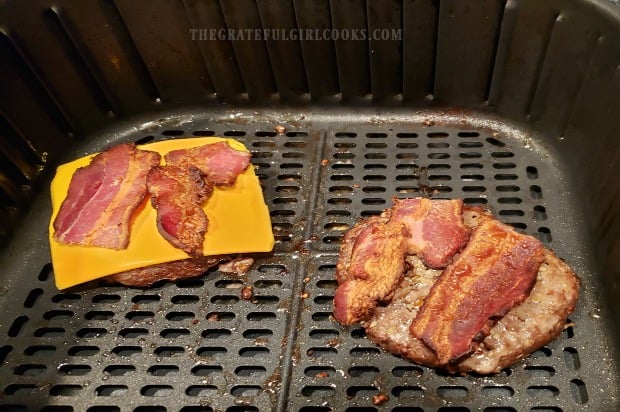
Once the air fryer is turned off (but still really HOT), immediately place a slice of cheese onto each burger patty. Lay the bacon strips on top of the cheese (2 halves per burger). Close the air fryer and let the patties sit, in the still hot (but powered off) air fryer. After 2 minutes, remove the burger patties from the air fryer.

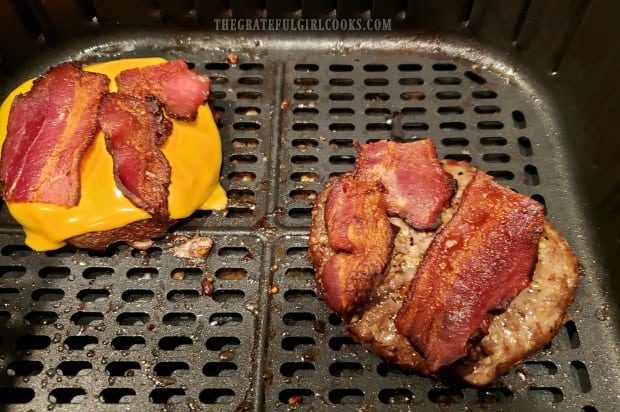
The heat will have melted the cheese and re-heated the bacon. My husband decided at the last moment to leave the cheese off his air fryer bacon cheeseburger (how dare he!), and ate the cheese by itself, instead. Jeepers.

Bacon slices, cheddar cheese added to air fryer bacon cheeseburger.Cheese has melted and bacon is hot. Time to build a burger.

Build Your Air Fryer Bacon Cheeseburger and Eat!

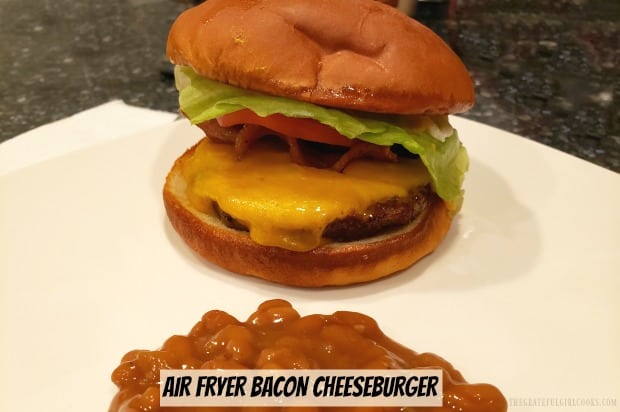
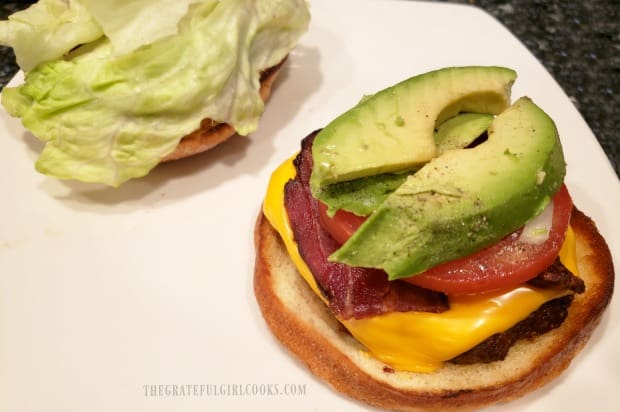
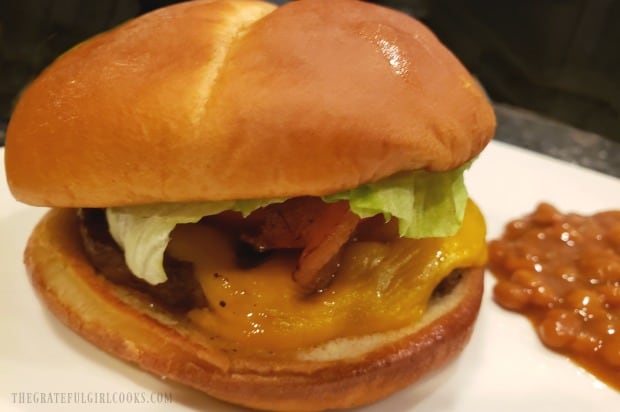
Place the burger patties onto toasted (or untoasted) buns. Add your favorite condiments, along with lettuce tomato, and pickles. We LOVE our air fryer bacon cheeseburgers with fresh avocado slices, too. YUM. Serve, and enjoy these delicious burgers.

Air fryer bacon cheeseburger is assembled before eating.A juicy, hot air fryer bacon cheeseburger, ready to devour.

We’ve made these air fryer burgers quite a few times, since we get our fair share of rain here in Oregon. We love to grill burgers outside on our Weber BBQ, but also love making them in our handy air fryer when rainy or snowy weather prohibits it!

Hope you give this air fryer bacon cheeseburger recipe a try, and trust you will enjoy it as much as we do. Take care, and have a great day.

Looking For More AIR FRYER recipes?

You can find all of my recipes in the Recipe Index, located at the top of the page. I have several delicious air fryer recipes, including:

Interested In More Recipes?

Thank you for visiting this website. I appreciate you using some of your valuable time to do soIf you’re interested, I publish a newsletter 2 times per month (1st and 15th) with all the latest recipes, and other fun info. I would be honored to have you join our growing list of subscribers, so you never miss a great recipe!
There is a Newsletter subscription box on the top right side (or bottom) of each blog post, depending on the device you use, where you can easily submit your e-mail address (only) to be included in my mailing list.

You Can Also Find Me On Social Media:
Facebook page: The Grateful Girl Cooks!
Pinterest: The Grateful Girl Cooks!
Instagram: jbatthegratefulgirlcooks

Author's signature

5 from 1 vote
Air Fryer Bacon Cheeseburger
Prep Time
5 mins
Cook Time
7 mins
Total Time
12 mins
 

Learn how easy it is to make a juicy good Air Fryer Bacon Cheeseburger, using this appliance. Can't get outside to grill? Use an air fryer instead!

Category: Dinner, Entree, Lunch
Cuisine: American
Keyword: air fryer bacon cheeseburger
Servings: 2
Calories Per Serving: 399 kcal
Author: JB @ The Grateful Girl Cooks!
Ingredients
  • 2 medium hamburger buns , pan-toasted with melted butter (if using toasted buns)
  • 2 slices bacon, pre-cooked
  • 2 slices cheddar cheese (or American)
  • ½ pound ground beef burger patties ,two patties - 1/4 pound each
  • 1 teaspoon butter, melted
  • ½ teaspoon liquid smoke flavoring, divided (optional)
  • salt and Montreal steak seasoning to taste , or preferred seasonings
  • Condiments and Burger Toppings, as desired
Instructions
  1. Before cooking hamburger patties, if you'd like to toast the hamburger buns, simply spread each half lightly with softened butter. Cook on low heat (butter side down) in a large skillet until golden brown. Set aside.

  2. Season hamburger patties by lightly brushing each on one side with melted butter and a tiny bit of liquid smoke flavoring. Lightly sprinkle patties with salt and Montreal steak seasoning. You can substitute your favorite seasonings, if desired, to suit your personal taste. Have cheese slices AND precooked bacon nearby. You will quickly add these at the end of the air frying time, so you'll need them close.

  3. Preheat air fryer to 360°F. This takes 3-4 minutes. Place patties in air fryer basket, seasoned side down. Cook for 5 minutes, then turn patties over, and continue cooking for 2 more minutes. NOTE: Because air fryer temps vary quite a bit, your cooking time may be a bit less or a bit longer. Once done, TURN OFF THE AIR FRYER! Immediately place a slice of cheese onto each burger patty. Lay bacon strips on top of the cheese (2 halves per burger). Close the air fryer and let the patties sit in the hot (but powered off) air fryer. After 2 minutes, remove the patties from the air fryer. The residual heat will have melted the cheese and heated the bacon.

  4. Place burger patties onto prepared buns, and garnish with your preferred condiments and toppings. Serve, and enjoy!

Recipe Notes

Caloric calculation was made using untoasted hamburger buns, lean ground beef, bacon and cheese for the burgers. No additional condiments or burger toppings were calculated as they may vary, by personal choice.

Nutrition Facts
Air Fryer Bacon Cheeseburger
Amount Per Serving (1 burger (without condiments))
Calories 399 Calories from Fat 162
% Daily Value*
Fat 18g28%
Saturated Fat 9g56%
Cholesterol 101mg34%
Sodium 553mg24%
Potassium 487mg14%
Carbohydrates 22g7%
Fiber 1g4%
Sugar 3g3%
Protein 36g72%
Vitamin A 233IU5%
Vitamin C 1mg1%
Calcium 207mg21%
Iron 4mg22%
* Percent Daily Values are based on a 2000 calorie diet.

Here’s one more to pin on your Pinterest boards!Learn how easy it is to make a juicy good Air Fryer Bacon Cheeseburger, using this appliance. Can't get outside to grill? Use an air fryer instead!

Blueberry French Toast Cups

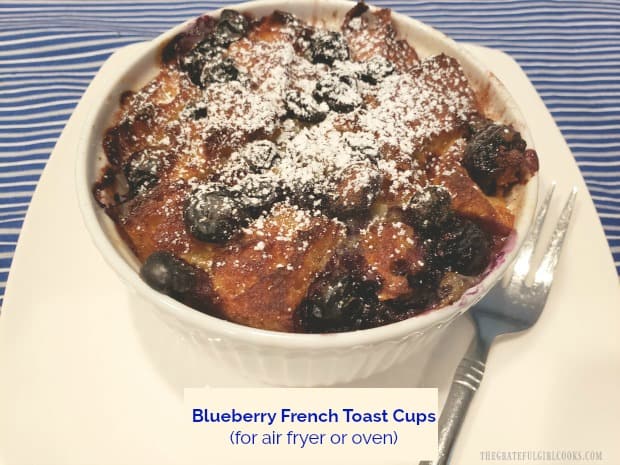
Blueberry French Toast Cups are delicious, single serving breakfast treats that are easy to make, and can be cooked in an air fryer OR in an oven.
If you enjoy the taste of French toast, then I am confident you will also enjoy these blueberry French toast cups! This version of the classic uses overnight-soaked bread cubes in an egg mixture (with lemon zest, maple syrup, cinnamon and vanilla).
With this overnight refrigeration, the bread cubes really soak up some flavor before being cooked in an air fryer OR in a traditional oven. So… yes, you will need to make this recipe up the night BEFORE you want to enjoy it, but the prep time is minimal!

Then, when you wake up the next morning, all you have to do is cook it! BOOM. A wonderful “mini” French toast breakfast for two awaits, filled with juicy blueberries, and served with your choice of powdered sugar and/or maple syrup.

I created this dish after experimenting with (and being inspired by) my recipes for classic French toast and Blueberry and Cream-Cheese Stuffed French Toast. Then I adapted the recipe I came up with, to allow it to be cooked in an oven OR an air fryer.

It turns out like a cute individual serving of French toast “casserole”, and it sure is yummy. Here’s how to make this dish for two:

Scroll Down For A Printable Recipe Card At The Bottom Of The Page

Preparing The Ingredients

The first thing you will need to do is prepare the ingredients for their overnight “soak”. Generously butter the bottom and sides of 2 oven-safe ramekins. The ramekins I use are a standard size, which is about 4½ wide by 2″ tall.

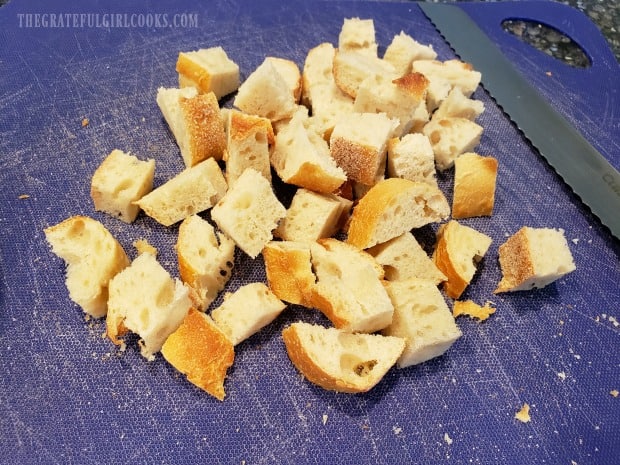
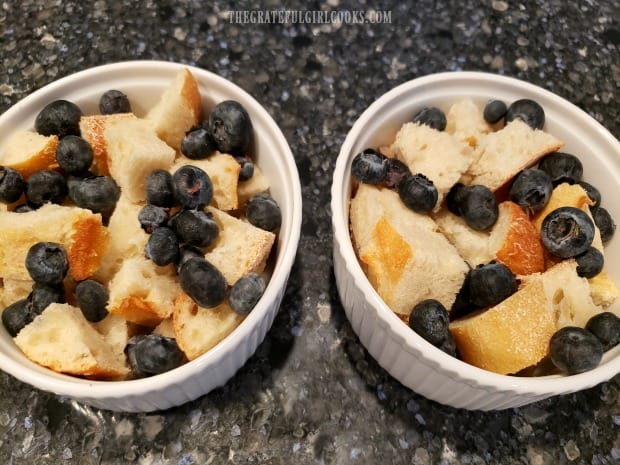
Cut some (one to two day old- i.e. “stale”) French bread into bite-sized pieces, leaving the crusts ON the bread. Divide the cubes of bread between the 2 ramekins, and then evenly divide and add the fresh blueberries to each dish.

IMPORTANT: The reason for using stale, or one or two day-old bread is that it has hardened somewhat, which will allow it to soak in an egg mixture overnight without it becoming so soggy (as with fresh bread) that it falls apart into MUSH.

Day old french bread is cut into cubes for this recipe.Bread cubes and fresh blueberries are placed into well-buttered ramekins.

Prepare The Egg Mixture

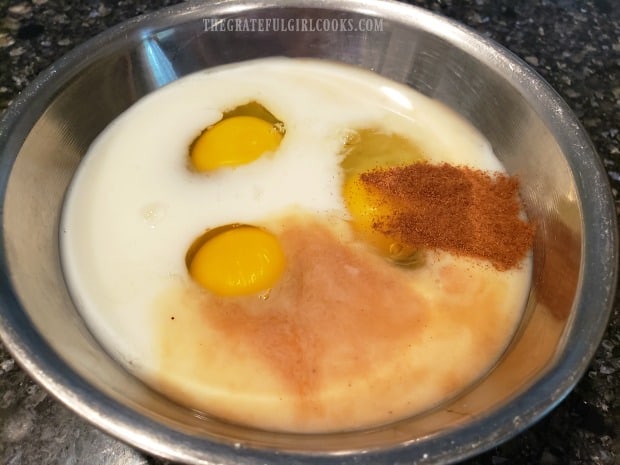
In a medium bowl, place the eggs, vanilla, milk, maple syrup, cinnamon, and lemon zest. Whisk together (with fork or wire whisk) until well blended.

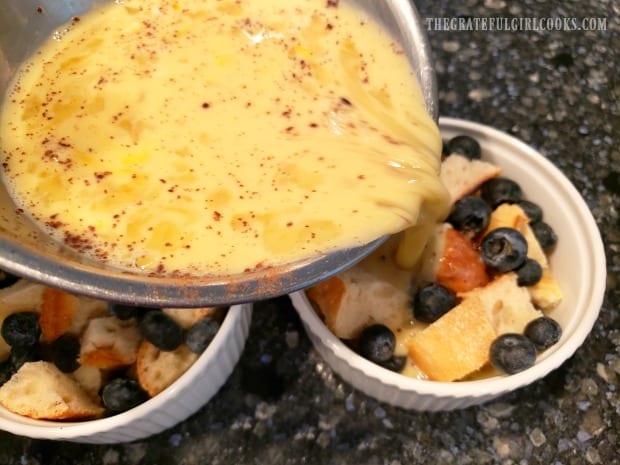
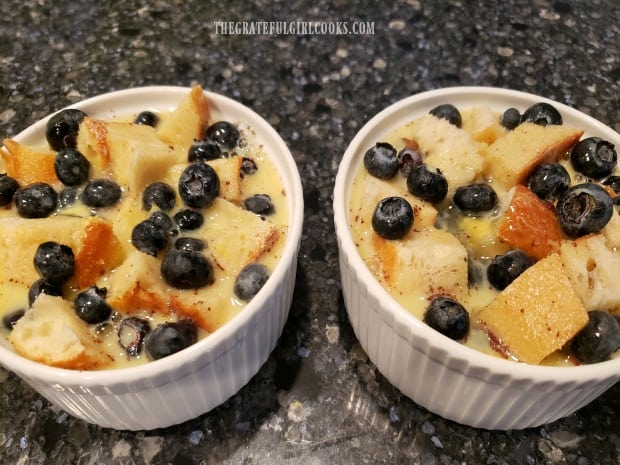
Pour the egg mixture into the ramekins, evenly dividing between the two dishes. The mixture should come to almost the top of the ramekins.

Eggs, milk, cinnamon, vanilla and maple syrup are mixed together for the batter.The egg mixture is poured over the blueberry french toast cups.

Let Rest Overnight In Refrigerator

Use a spoon or fork to lightly press the bread cubes down into the egg mixture. You will want as many of the bread cubes covered with the liquid as possible.

Cover the ramekins with plastic wrap, and place them in the refrigerator overnight (at least 6 hours). The bread cubes will soak up a lot of the egg mixture overnight.

Remove the ramekins from the fridge about 15 minutes to take some of the chill off before cooking. Remove plastic wrap, and press the bread cubes back down into any remaining liquid.

The ramekins are covered then refrigerated overnight to soak up egg mixture.

Cooking Blueberry French Toast Cups In An Air Fryer OR Oven

Now you’re ready to cook the blueberry French toast cups! They can be cooked in an air fryer, or in a traditional oven. My photos reflect the air fryer version. Here is how to cook the French toast cups, using either method:
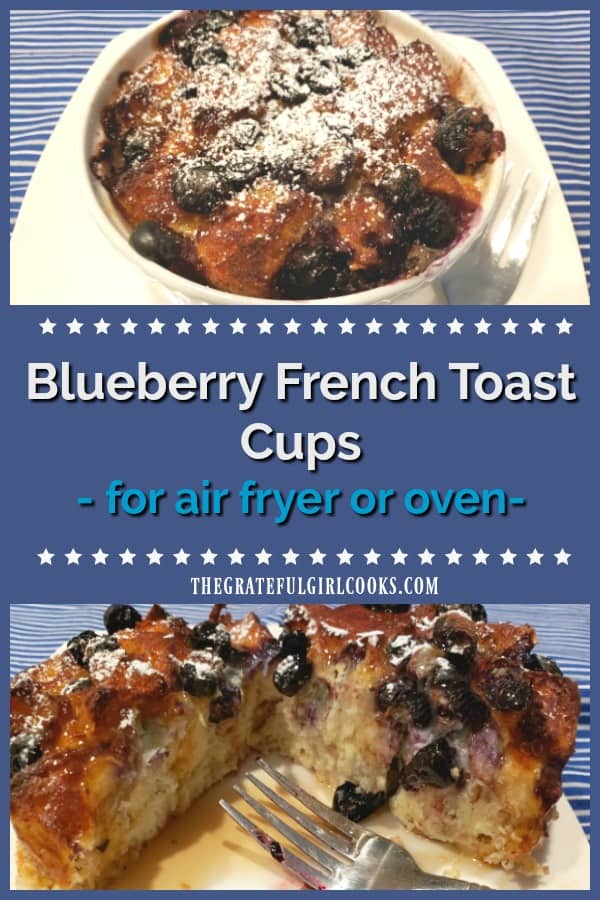
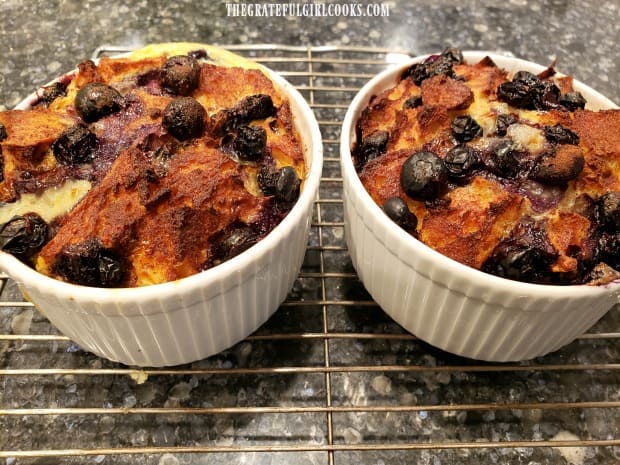
To Cook In An Air Fryer: Preheat air fryer to 350° F. Place both of the ramekins carefully into air fryer basket, being careful not to spill. Cook for 13 minutes, then reduce the temperature to 250°A, and cook for 3 more minutes, or until a toothpick inserted into the middle comes out free of “batter”. The French toast cups should be nice and golden brown on top.

IMPORTANT: Since air fryer AND oven temps can vary with different manufacturers, be sure to check on your blueberry French toast cups occasionally toward the end of the cooking time, to ensure they do not overcook.

To Cook In An Oven: Preheat oven to 375°F. Bake both of the ramekins for approximately 30 minutes. or until a toothpick inserted into the middle comes out free of “batter”. The French toast cups should be nice and golden brown on top.

Blueberry french toast cups are lightly browned after cooking in an air fryer.

Serving Blueberry French Toast Cups

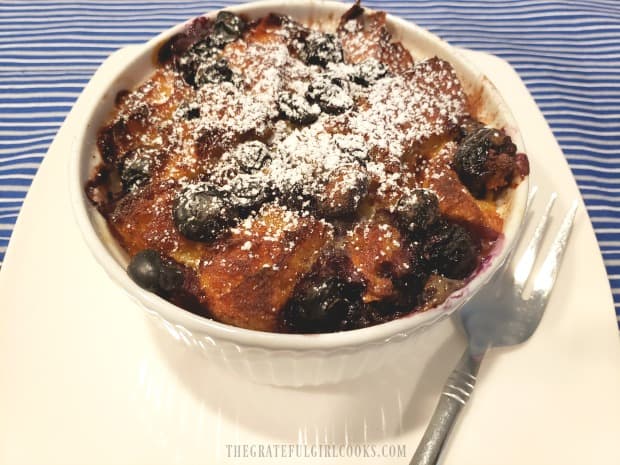
Once the blueberry French toast cups are finished cooking (either method), transfer the ramekins to a wire rack to cool. Sift powdered sugar over the top of each ramekin before serving.

We think they taste best when they have had time to cool a bit, and like to eat them while still warm, but not blazing hot!

My husband likes to eat his right out of the ramekin, with only sifted powdered sugar. I prefer to slide a butter knife around the edges of the ramekin and remove the French toast cup from the ramekin.

Then I place the French toast cup on a plate, and add maple syrup! YUMMO. Both ways to serve it are shown below.

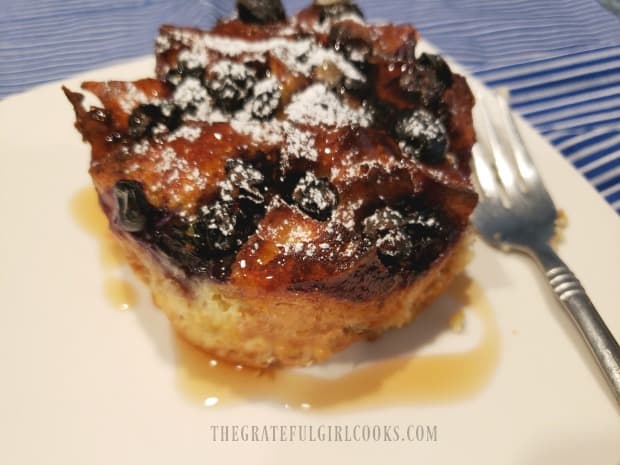
Powdered sugar is sifted over the top of the french toast cup before serving.The blueberry french toast cup (with syrup) has been removed from the ramekin.

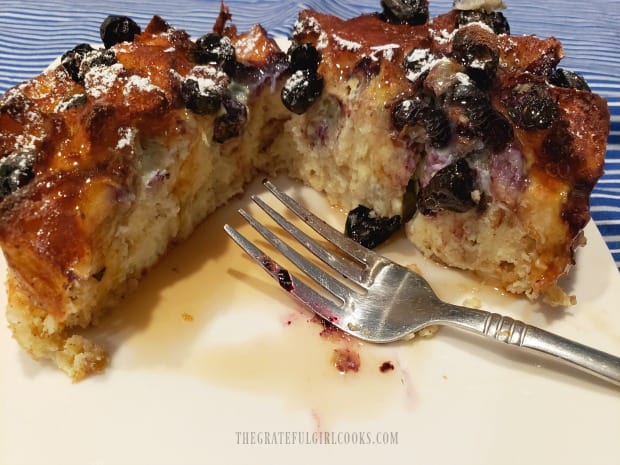
Here’s a peek at the inside of one of the blueberry French toast cups, before I devoured it. The inside was cooked all the way through, and there were an abundance of juicy, warm blueberries. This was a wonderful breakfast treat we both enjoyed.

The inside of the french toast cup is filled with juicy blueberries!

I hope you have the opportunity to try this recipe. All you have to remember is to prepare it the evening before you want to enjoy it.

A little bit of pre-planning never hurts, and then all you have to do in the morning is cook it and enjoy it! Thanks for stopping by. Take care and have a wonderful day.

Looking For More BREAKFAST Recipes?

You can find all of my breakfast recipes in the Recipe Index, located at the top of the page. I have quite a variety, including:

Want More Recipes? Get My FREE Newsletter!

I publish a newsletter 2 times per month (1st and 15th) with lots of recipes, tips, etc..
Would you like to join our growing list of subscribers?

There is a Newsletter subscription box on the top right (or bottom) of each blog post, depending on the device you use.
You can submit your e-mail address there, to be added to my mailing list.

Find Me On Social Media:

Facebook page: The Grateful Girl Cooks!
Pinterest:
The Grateful Girl Cooks!
Instagram:
jbatthegratefulgirlcooks

Author's signature

↓↓ PRINTABLE RECIPE BELOW ↓↓


0 from 0 votes
Blueberry French Toast Cups
Prep Time
5 mins
Cook Time
16 mins
Total Time
21 mins
 

Blueberry French Toast Cups are delicious, single serving breakfast treats that are easy to make, and can be cooked in an air fryer OR in an oven.

Category: Breakfast
Cuisine: American
Keyword: blueberry french toast cups
Servings: 2
Calories Per Serving: 431 kcal
Author: JB @ The Grateful Girl Cooks!
Ingredients
  • 2 teaspoons butter , softened (to butter ramekins)
  • 2 cups stale Italian bread , cut into bite sized cubes
  • 3 large eggs
  • 1 cup milk
  • 2 Tablespoons maple syrup , can substitute pancake syrup if necessary
  • 1 teaspoon vanilla extract
  • ¼ teaspoon ground cinnamon
  • ½ lemon (zest from) , only use the lemon zest
  • ½ cup fresh blueberries
  • powdered sugar and maple syrup , as desired for serving
Instructions
  1. Generously butter bottom/sides of 2 oven-safe ramekins. Cut 1-2 day-old french bread into bite-sized pieces, leaving crusts ON. Divide bread cubes between 2 ramekins; then add blueberries.

  2. In a medium bowl, whisk eggs, vanilla, milk, maple syrup, cinnamon and lemon zest until mixed well. Pour egg mixture evenly into ramekins, dividing between both. Mixture should come to almost the top of dish. Use a spoon/fork to lightly press the bread cubes down into egg mixture to cover as much of the bread cubes as possible.

  3. Cover ramekins with plastic wrap. Chill in refrigerator overnight (at least 6 hours). Remove from fridge for 10-15 minutes before cooking, to take some chill off. Remove plastic wrap. Press bread cubes back down into any remaining liquid.

  4. To Cook In An Air Fryer: Preheat air fryer to 350° F. Place both ramekins carefully into air fryer basket, being careful not to spill. Cook for 13 minutes; reduce temperature to 250°F, Cook 3 more minutes, or until a toothpick inserted into the middle comes out free of "batter". They should be nicely browned on top.

    IMPORTANT: Since air fryer AND oven temps can vary, be sure to check on your French toast cups occasionally, so they do not undercook OR overcook.

    To Cook In An Oven: Preheat oven to 375°F. Bake both ramekins for approximately 30 minutes. or until a toothpick inserted into the middle comes out free of "batter". The French toast cups should be nicely browned on top.

  5. Transfer ramekins to a wire rack to cool for 10-12 minutes. Sift powdered sugar over the top before serving. Serve with maple syrup, if desired.

Recipe Notes

NOTE: Caloric calculation does not include powdered sugar or maple syrup, which are optional and used for serving.

Nutrition Facts
Blueberry French Toast Cups
Amount Per Serving (1 g)
Calories 431 Calories from Fat 198
% Daily Value*
Fat 22g34%
Saturated Fat 11g69%
Cholesterol 296mg99%
Sodium 300mg13%
Potassium 415mg12%
Carbohydrates 41g14%
Fiber 2g8%
Sugar 31g34%
Protein 16g32%
Vitamin A 761IU15%
Vitamin C 6mg7%
Calcium 211mg21%
Iron 2mg11%
* Percent Daily Values are based on a 2000 calorie diet.

Here’s one more to pin on your Pinterest boards!Blueberry French Toast Cups are delicious, single serving breakfast treats that are easy to make, and can be cooked in an air fryer OR in an oven.

Air Fryer French Fries

Grab 2 russet potatoes and your air fryer, and get ready to make some delicious, crispy air fryer french fries to munch on with your favorite meal!

I don’t know about you, but we sure love french fries! I love ’em dipped in ketchup, my husband dips them in BBQ sauce, and one of our sons enjoys them dunked in ranch dressing!

Normally I deep fry homemade french fries in hot oil, but we also enjoy making air fryer french fries. When we air fry them, they are cooked in super hot air, and require a lot less oil to crisp them up! Less calories, but equally delicious. They’re also very easy to make. Here’s how to make them:

NOTE: The key to this recipe is this: Remember to allow an extra 30 minutes before cooking to soak the potatoes in water to remove excess starch. The fries themselves don’t take much time to cook, but pre-soaking them will yield the best results!

Scroll Down For A Printable Recipe Card At The Bottom Of The Page

Prepare The Potatoes

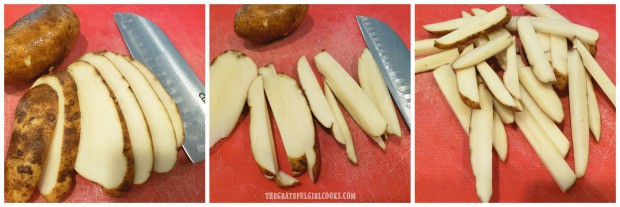
We like the taste of air fryer french fries with the peel left ON the potatoes, but that is your choice. To prepare the potatoes, take 2 medium russet potatoes, and scrub them really well, to remove any dirt. Slice the potatoes lengthwise into 1/2″ slices, then cut each slice into fry sized “sticks” (as shown below).

Raw potatoes are cleaned, then sliced into fry shapes before cooking.

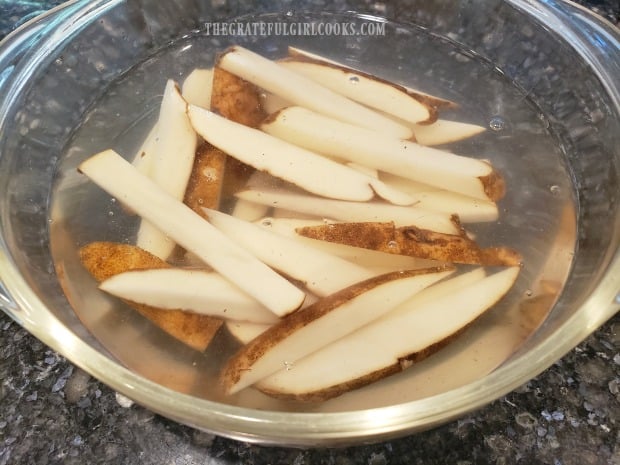
Potatoes have a lot of starch in them, so it is best to remove some of that starch before cooking. This will help the potatoes get crispy when cooked. Place the raw potatoes into a large bowl. Cover them with water, and let them soak for 30 minutes.

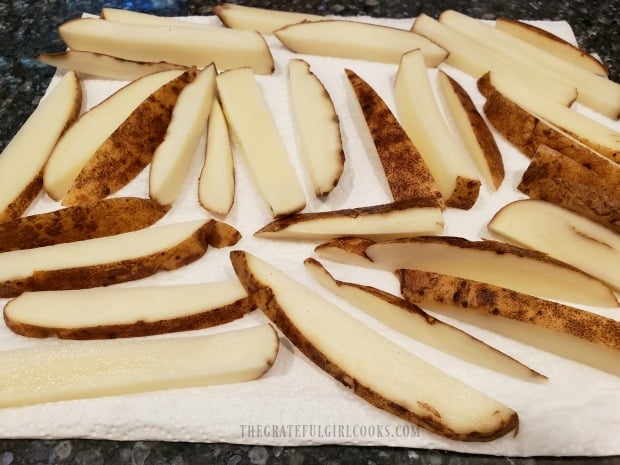
After 30 minutes, drain the water off of the potatoes, and give them a rinse. Lots of starch has now been removed from the potatoes. Place the potatoes onto paper towels and pat them dry. Now we’re ready to go!

French fries are soaked in water for 30 minutes before draining and cooking.The fries are patted dry before oil and seasoning are added.

Season The Air Fryer French Fries

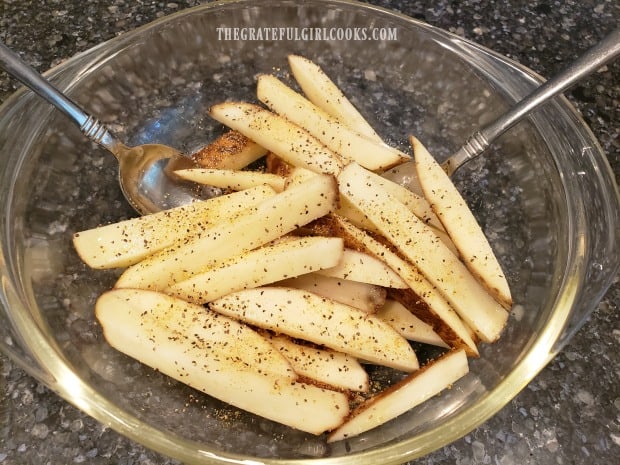
Before you season the potatoes, turn on the air fryer and preheat it to 380°F. While it preheats, place the dry potatoes into a large bowl. Drizzle them with vegetable oil (or your choice of oil) . Gently toss to coat them with oil, and then season with salt and pepper. Add any other seasonings you want at this point (garlic powder, seasoning salt, etc.). Stir to combine.

Fries are seasoned with oil, salt and pepper before cooking.

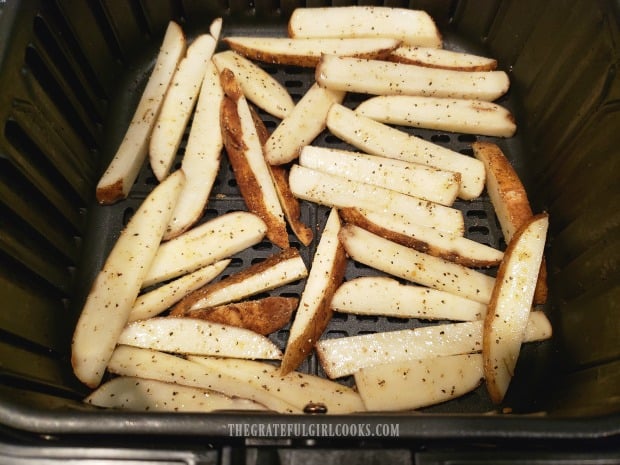
Once the air fryer has preheated, place the seasoned potato fries in the basket of your air fryer. Try to place them in a single layer, for the best results. This will allow the super hot air to circulate around the fries, which is how they cook well.

The air fryer basket holds a single layer of seasoned fries.

Cook The Air Fryer French Fries

Cook the air fryer french fries at 380°F for 5 minutes. Pause the machine, and give the fries a good shake. Cook another 5 minutes, and then shake them once again. If “shaking” isn’t your thing, move them around a bit using tongs. Try to put them back into a single layer after each “shake”. Now they’ve cooked for 10 minutes.

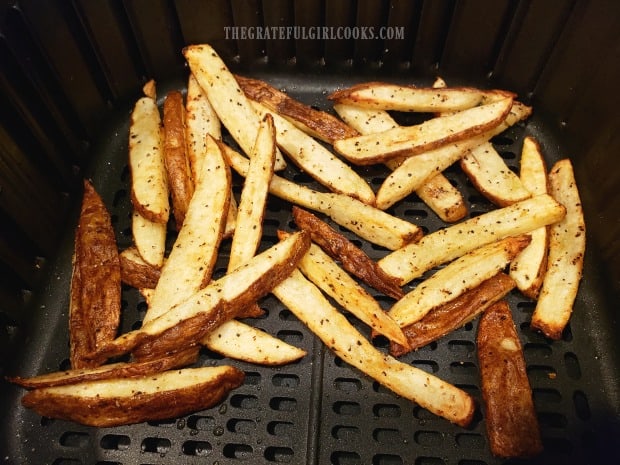
Air fryers tend to have temperature variances, so keep an eye on them from this point on. Cook the fries for 3-4 more minutes. Check them to see if they have reached a desired crispness. If not, pop ’em back in for a couple more minutes. By now they should be done. The final cooking time will also depend on the thickness of your fries.

Air fryer french fries in basket of machine after cooking.

Serve The Air Fryer French Fries

Once the fries have fully cooked, they should be golden brown, slightly crispy on the outside, and soft on the inside. Serve with a dipping sauce of your choice, and dig in! They really are quite simple to make, and taste delicious.

If making a large quantity, repeat the process with the rest of the potatoes, while the air fryer is still hot! Hope you enjoy these fries… we sure do.

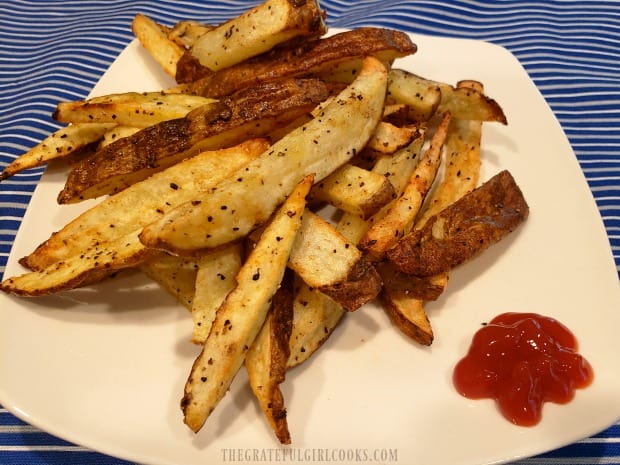
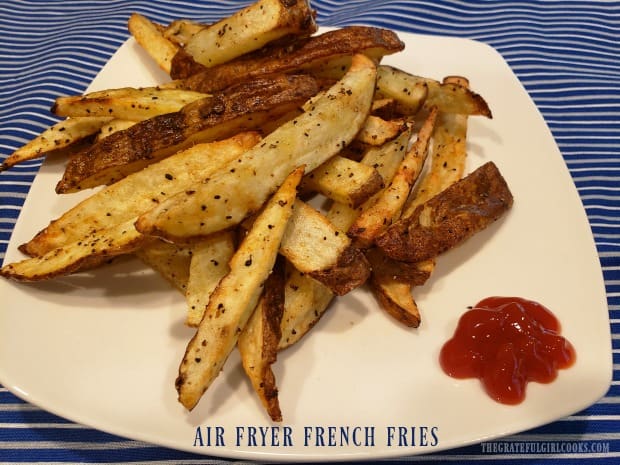
A plate full of air fryer french fries, and dipping ketchup on the side.

Thanks for stopping by. I appreciate you taking the time to do so, and hope you will consider making air fryer french fries for those you love. Take care, and have a great day.

Looking For More AIR FRYER Recipes?

You can find all of my recipes in the Recipe Index, located at the top of the page. A few favorite Air Fryer recipes include:

Interested In More Recipes?

Thank you for visiting this website. I appreciate you using some of your valuable time to do soIf you’re interested, I publish a newsletter 2 times per month (1st and 15th) with all the latest recipes, and other fun info. I would be honored to have you join our growing list of subscribers, so you never miss a great recipe!
There is a Newsletter subscription box on the top right side (or bottom) of each blog post, depending on the device you use, where you can easily submit your e-mail address (only) to be included in my mailing list.

You Can Also Find Me On Social Media:
Facebook page: The Grateful Girl Cooks!
Pinterest: The Grateful Girl Cooks!
Instagram: jbatthegratefulgirlcooks

Author's signature

Recipe adapted from: The recipe booklet that came with my Cosori air fryer.

0 from 0 votes
Air Fryer French Fries
Prep Time
5 mins
Cook Time
14 mins
Soaking Time (inactive)
30 mins
Total Time
49 mins
 

Grab 2 russet potatoes and your air fryer, and get ready to make some delicious, crispy air fryer french fries to munch on with your favorite meal!

Category: Appetizer/Snack, Side Dish, Vegetable Dish
Cuisine: American
Keyword: air fryer french fries
Servings: 3
Calories Per Serving: 193 kcal
Author: JB @ The Grateful Girl Cooks!
Ingredients
  • 2 medium russet potatoes
  • 2 Tablespoons vegetable oil , or oil of choice
  • ½ teaspoon salt , or more to suit your taste
  • ¼ teaspoon black pepper , or more to suit your taste
Instructions
  1. Scrub potato skins well, to remove any dirt. Slice potatoes lengthwise into 1/2" slices, then cut each slice into fry sized "sticks". Place raw potatoes into a large bowl, cover with water, and let them soak for 30 minutes (this removes a lot of starch). After 30 minutes, drain water , then give potatoes a rinse. Pat potatoes dry with paper towels.

  2. Preheat air fryer to 380°F. Place dry potatoes into a large bowl. Drizzle with 2 Tablespoons oil. Gently toss to coat, and then season with salt/pepper, and stir to combine. **Add any additional seasonings you want (garlic powder, seasoning salt, etc.). Once the air fryer has preheated, place seasoned fries in basket of air fryer, in a single layer, for best results.

  3. Cook at 380°F for 5 minutes. Pause machine, and give fries a good shake. Cook for an additional 5 minutes, and then shake once again or move them around a bit using tongs, keeping them in a single layer after each "shake". Because air fryers tend to have temperature variances, set the timer and cook for 3-4 more minutes. Check to see if they've reached your desired crispness. If not, pop 'em back in for a couple more minutes. By that time they should be done (final cooking time will also depend on the thickness of your fries!). Taste, and add more salt/pepper, if desired. Remove, and serve with your favorite dipping sauce. Enjoy!

Nutrition Facts
Air Fryer French Fries
Amount Per Serving (1 (1/3 of total))
Calories 193 Calories from Fat 81
% Daily Value*
Fat 9g14%
Saturated Fat 8g50%
Sodium 395mg17%
Potassium 592mg17%
Carbohydrates 26g9%
Fiber 2g8%
Sugar 1g1%
Protein 3g6%
Vitamin C 8mg10%
Calcium 18mg2%
Iron 1mg6%
* Percent Daily Values are based on a 2000 calorie diet.

Here’s one more to pin on your Pinterest boards!Grab 2 russet potatoes and your air fryer, and get ready to make some delicious, crispy air fryer french fries to munch on with your favorite meal!

Air Fryer Bacon

Have an air fryer? Learn how easy it is to make crispy air fryer bacon in just a few minutes, using this method of cooking it with super-heated air!

I don’t know about you, but we LOVE bacon! Really, really love bacon. Amen! For most of our married life, I’ve cooked bacon slices in a large skillet on our stove top.

I’ve also cooked bacon in the oven (see how to do this in my blog post here).

With the addition of an air fryer (thanks to birthday gift cards), now we’ve started cooking bacon in our Cosori air fryer. It’s easy. Here’s how to make air fryer bacon.

Scroll Down For A Printable Recipe Card At The Bottom Of The Page

Get Ready, Get Set… Go!

Preheat your air fryer to 400°F. This will take a 2-3 minutes to bring the air fryer to temperature. While the machine is preheating, separate the strips of bacon.

Bacon strips are separated before loading into the air fryer.

Time To Cook Some Air Fryer Bacon!

Lay the strips of bacon in the basket of the air fryer. I have had the best results when I keep the bacon strips in a single layer, so that is what I recommend.

You might have to cook the bacon in batches, if you are making a large amount.

I typically use a thick cut of bacon, so if using very thin slices, keep a close eye on your air fryer bacon, to make sure you don’t overcook it!

Thin slices will take less time to cook, so remember that, once they start cooking, and adjust times as necessary!

The bacon strips are laid side by side in the basket of the air fryer to cook.

Cook the air fryer bacon at 400°F for 10 minutes. Halfway through the cooking time, turn the bacon strips to the other side, and then continue cooking.

NOTE: Since air fryers tend to vary quite a bit, temperature-wise, I recommend checking the bacon occasionally, to ensure it cooks thoroughly, but doesn’t overcook!

The thick slices of bacon I used were done in 10 minutes of total cooking time (5 minutes per side).

Ten minutes at 400 degrees is the setting used to cook thick bacon slices.

The photo below shows what the air fryer bacon looked like after 5 minutes. This is right after I turned the bacon over to cook the other side.

You can see how browned it already is, after 5 minutes. Again, remember that your bacon might cook cooler or hotter, depending on the type of air fryer you use.

Checking on the bacon at the half way mark through cooking.

Time To Eat Some Air Fryer BACON!

When the bacon has finished cooking, transfer the slices to paper towels. The paper towels will help to absorb any accumulated bacon grease.

After that is done, these crisp pieces of yummy bacon are ready to enjoy! Don’t they look good? Well guess what? They WERE Good!

We enjoyed the bacon with some scrambled eggs, and a biscuit! It was nice to be able to scramble the eggs, without having to cook bacon in a skillet at the same time!

The finished air fryer bacon on paper towels to absorb any grease.

Making bacon in an air fryer is really easy, and I hope you will consider trying it, also! Take care, thanks for stopping by, and I sincerely hope you have a great day.

Looking For More AIR FRYER Recipes?

You can find all of my recipes in the Recipe Index, located at the top of the page. I have several air fryer recipes, including:

Want More Recipes? Get My FREE Newsletter!

I publish a newsletter 2 times per month (1st and 15th) with lots of recipes, tips, etc..
Would you like to join our growing list of subscribers?

There is a Newsletter subscription box on the top right (or bottom) of each blog post, depending on the device you use.
You can submit your e-mail address there, to be added to my mailing list.

Find Me On Social Media:

Facebook page: The Grateful Girl Cooks!
Pinterest:
The Grateful Girl Cooks!
Instagram:
jbatthegratefulgirlcooks

Author's signature

↓↓ PRINTABLE RECIPE BELOW ↓↓

0 from 0 votes
Air Fryer Bacon
Prep Time
4 mins
Cook Time
10 mins
Total Time
14 mins
 

Have an air fryer? Learn how easy it is to make crispy air fryer bacon in just a few minutes, using this method of cooking it with super-heated air!

Category: Breakfast, Brunch, Side Dish
Cuisine: American
Keyword: air fryer bacon
Servings: 6 slices
Calories Per Serving: 92 kcal
Author: JB @ The Grateful Girl Cooks!
Ingredients
  • 6 slices bacon , preferably thick cut bacon
Instructions
  1. Preheat air fryer to 400°F. This will take about 2-3 minutes. While machine preheats, separate strips of bacon.

  2. Lay bacon strips in basket of air fryer. Try to keep them in a single layer. You might have to cook bacon in batches, if you're making a large amount. If using thin slices, keep a close eye on it, to make sure you don't overcook it! Thin slices will take less time to cook, so adjust time as necessary!

  3. Cook air fryer bacon at 400°F for 10 minutes total. Halfway through cooking time, turn bacon strips to other side, and continue cooking. NOTE: Since air fryers tend to vary quite a bit temperature-wise, I recommend checking bacon occasionally, to ensure it cooks thoroughly, but doesn't overcook! When finished cooking, transfer bacon slices to paper towels, to absorb any accumulated bacon grease. Serve, and enjoy!

Nutrition Facts
Air Fryer Bacon
Amount Per Serving (1 g)
Calories 92 Calories from Fat 81
% Daily Value*
Fat 9g14%
Saturated Fat 3g19%
Cholesterol 15mg5%
Sodium 146mg6%
Potassium 44mg1%
Carbohydrates 1g0%
Protein 3g6%
Iron 1mg6%
* Percent Daily Values are based on a 2000 calorie diet.

Here’s one more to pin on your Pinterest boards!Have an air fryer? Learn how easy it is to make crispy air fryer bacon in just a few minutes, using this method of cooking it with super-heated air!

Air Fryer Brownies

Hungry for dessert? Why not whip up a fast batch of air fryer brownies? This simple recipe makes 8 small, yummy brownie wedges using an air fryer!

I don’t know about you, but BROWNIES are always a big hit in our home. My own recipe for brownies is our all-time favorite! Hands down the absolute BEST way to make traditional made from scratch baked brownies, in my humble opinion!

Recently, I came across a recipe online for air fryer brownies that I really wanted to try. It’s been fun experimenting with recipes using our Cosori air fryer, a cool appliance that cooks or “fries” food with highly super heated air. These brownies are easily created from scratch, and so I decided to make them as a surprise for my hubby.

My husband Ken loves his brownies without frosting, so I decided to make him his very own batch of unfrosted air fryer brownies! The recipe makes 8 small wedge servings, and tasted great, so he was in heaven while they lasted!

Scroll Down For A Printable Recipe Card At The Bottom Of The Page

Prepare The Pan

The air fryer brownies are cooked in a 7″ baking pan. I ordered a Cosori Set of 6 air fryer accessories on Amazon last year, that is compatible with many types and sizes of air fryers. The baking pan I use came from this set. **NO, I am not an affiliate, just telling you where I got the pan!

Generously coat the bottom and half way up the sides of a 7″ baking pan with butter. You want the pan well-buttered, so the brownies will easily release from the pan once done. Once the pan is buttered, set it aside and preheat your air fryer to 330°F.  

A 7" round pan is coated with butter before adding brownie batter.

Make The Batter

Making the batter is super easy! If you can stir, you can make it! To save time, make the batter while the air fryer is preheating!

Measure flour, sugar, cocoa powder, melted butter, eggs, oil, vanilla, salt and baking powder into a large mixing bowl. Stir well, to combine. Once these ingredients are fully mixed, the batter is ready! EASY!

Ingredients for air fryer brownies are mixed together to make a batter.The brownie batter is very thick once mixed.

Cooking The Brownies

Evenly spread the brownie batter in the well-buttered baking pan. Try to make the top of the batter as smooth as you can.

Cook the brownies in a preheated 330°F air fryer for 15 minutes, or until done (see below).

The pan full of brownie batter is placed into an air fryer to cook.

How Do I Know If The Brownies Are DONE?

Since various brands of air fryers tend to vary widely in temperature rates, it is best to check the brownies before the end of the cooking time.  I start checking them to see if they’re done at the 13 minute mark, to make sure they don’t overcook.

Pause the machine, and insert a toothpick into the middle of the brownies. If the toothpick comes out mostly free of batter (clean), you will know the brownies are done. If not, pop them back into the air fryer for another minute, then check again. Better to check them often, then end up with dried out brownies, right? RIGHT!

A toothpick is inserted into middle of brownies to ensure they are done.

Remove The Brownies From The Pan

Once the brownies have cooled to room temperature, CAREFULLY remove them from the baking pan by inverting the pan onto a serving platter. If you buttered the pan really well, they should come out very easily! Flip the brownies over for serving.

The air fryer brownies are removed from the air fryer and baking pan.

Time To Serve The Air Fryer Brownies!

When the brownies have cooled to room temperature, sift powdered sugar lightly over the top surface. This is an optional step, but makes it look nice, especially if you will not be frosting them! I added a thinly sliced (but not cut all the way through) large strawberry for some color. P.S. If you want to frost them, try my recipe for creamy brownie frosting!

Slice the air fryer brownies into 8 equal sized wedges. Serve with whipped cream and/or a little scoop of ice cream and chocolate syrup for an eye-pleasing, tasty treat!

Garnished with sifted powdered sugar and a strawberry, they're ready to slice.Air fryer brownies are cut in wedges and served with ice cream, etc.

I really hope you enjoy making these yummy brownies in your handy dandy air fryer! Thanks for stopping by, and have a great day!

Looking For More AIR FRYER Recipes?

You can find all of my recipes in the Recipe Index, located at the top of the page. A few Air Fryer recipes you might enjoy include:

Interested In More Recipes?

Thank you for visiting this website. I appreciate you using some of your valuable time to do soIf you’re interested, I publish a newsletter 2 times per month (1st and 15th) with all the latest recipes, and other fun info. I would be honored to have you join our growing list of subscribers, so you never miss a great recipe!
There is a Newsletter subscription box on the top right side (or bottom) of each blog post, depending on the device you use, where you can easily submit your e-mail address (only) to be included in my mailing list.

You Can Also Find Me On Social Media:
Facebook page: The Grateful Girl Cooks!
Pinterest: The Grateful Girl Cooks!
Instagram: jbatthegratefulgirlcooks

Author's signature

Original recipe source: Tanya, at: myforkinglife.com/air-fryer-brownies/

0 from 0 votes
Air Fryer Brownies
Prep Time
5 mins
Cook Time
15 mins
Total Time
20 mins
 

Hungry for dessert? Why not whip up a fast batch of air fryer brownies? This simple recipe makes 8 small, yummy brownie wedges using an air fryer!

Category: Dessert
Cuisine: American
Keyword: air fryer brownies
Servings: 8
Calories Per Serving: 197 kcal
Author: JB @ The Grateful Girl Cooks!
Ingredients
  • Butter, to generously grease baking pan (approx. 1 Tablespoon)
Brownie Batter:
  • ½ cup all purpose flour
  • ¾ cup granulated sugar
  • 6 Tablespoons unsweetened cocoa powder
  • ¼ cup butter , melted
  • 2 large eggs
  • 1 Tablespoon vegetable oil
  • ½ teaspoon vanilla extract
  • ¼ teaspoon salt
  • ¼ teaspoon baking powder
  • sifted powdered sugar for garnish (OPTIONAL)
Instructions
  1. Generously coat the bottom and half way up the sides of a 7" baking pan with butter. You want pan well-buttered, so brownies will easily release from pan once done. Once pan is buttered, set it aside and preheat air fryer to 330°F.

  2. While air fryer is preheating, make the brownie batter. Measure flour, sugar, cocoa powder, melted butter, eggs, oil, vanilla, salt and baking powder into a large mixing bowl. Stir well, to fully combine.

  3. Evenly spread batter in buttered baking pan. Try to make the top of the batter as smooth as you can. Cook in preheated 330°F air fryer for 15 minutes, or until done. Different brands of air fryers tend to vary widely in temperature rates, so check the brownies before the end of the cooking time. I recommend checking them at the 13 minute mark, to make sure they don't overcook. Pause the machine; insert a toothpick into the middle of the brownies. If toothpick comes out mostly free of batter (clean), you will know the brownies are done. If not, pop them back into the air fryer for another minute, then check again.

  4. When done, transfer pan to a wire rack to cool. Once brownies have cooled, CAREFULLY remove them from pan by inverting the pan onto a serving platter. If desired, sift powdered sugar over the top or apply frosting once brownies are at room temperature. Slice into 8 wedges, serve, and enjoy!

Nutrition Facts
Air Fryer Brownies
Amount Per Serving (1 (1/8th of total))
Calories 197 Calories from Fat 81
% Daily Value*
Fat 9g14%
Saturated Fat 6g38%
Cholesterol 68mg23%
Sodium 145mg6%
Potassium 98mg3%
Carbohydrates 27g9%
Fiber 1g4%
Sugar 19g21%
Protein 3g6%
Vitamin A 254IU5%
Calcium 20mg2%
Iron 1mg6%
* Percent Daily Values are based on a 2000 calorie diet.

Here’s one more to pin on your Pinterest boards!Hungry for dessert? Why not whip up a fast batch of air fryer brownies? This simple recipe makes 8 small, yummy brownie wedges using an air fryer!

Air Fryer Sweet Potatoes

It’s EASY to make absolutely delicious air fryer sweet potatoes! Topped with cinnamon, brown sugar, and butter, this filling veggie tastes amazing!
It's EASY to make absolutely delicious air fryer sweet potatoes! Topped with cinnamon, brown sugar, and butter, this filling veggie tastes amazing!

Do you enjoy sweet potatoes? We’ve been enjoying them recently, especially since I began cooking them in our Cosori air fryer. Sweet potatoes are incredibly high in Vitamin A, and loaded with beta carotene and fiber, so they’re not only filling, but delicious, too!

Sweet potatoes taste wonderful just the way they are… plainly cooked and unadorned. BUT we like to “spruce ’em up” with a couple of “add-ons” (butter, cinnamon and brown sugar) after they cook for even more great flavor! YUM!

My Grandma And Her Sweet Potatoes!

When I think about sweet potatoes, I ALWAYS think of my Grandma Viola. My grandma lived in Texas until her death, but used to come spend a couple months at a time at my parents home in California in her later years.

I remember my mom telling me that my elderly Grandma would eat a baked sweet potato or yam every night for dinner. She did that because she’d take out her dentures each evening, so a baked sweet potato would be soft enough to eat “without her teeth”. Ha Ha! True story!

Scroll Down For A Printable Recipe Card At the Bottom Of The Page

Preparing Air Fryer Sweet Potatoes For Cooking

Making sweet potatoes in an air fryer is SUPER EASY and a bit quicker than baking them! NOTE: See the NOTES section of the printable recipe card below for instructions for baking them, if you do not have access to an air fryer.

Pick out sweet potatoes that are medium-sized, and both similar in weight. I made two, since I was only making them for my husband and myself. Scrub the potatoes very well, to remove any dirt. Once you’ve finished washing them, pat them dry with paper towels or a dish towel.

The sweet potatoes are washed, dried, and pieced with a fork before cooking.

Preheat your air fryer to 390°F. This typically takes 4-5 minutes. While the machine is preheating, lightly spritz or rub each sweet potato with vegetable or olive oil on all sides. Pierce the potatoes in several places (top and bottom) with a fork, because this helps them not to burst open during cooking!

When the air fryer is finished preheating, place the oiled and fork-pierced sweet potatoes into the basket.

Each sweet potato is rubbed or spritzed with oil lightly, before cooking.

Time To Cook Air Fryer Sweet Potatoes!

Cook the air fryer sweet potatoes at a temperature of 390°F for 30-35 minutes. Your cooking time may vary, due to differing weights of potatoes used. Each of the potatoes shown weighed about 9 ounces, and ended up taking 35 minutes to fully cook. If using larger or smaller potatoes, your cooking time will need to be altered slightly to adapt.

Check them at the 30 minute mark by pausing the machine and inserting a butter knife into the middle of the potatoes. When the knife meets no resistance, and the sweet potatoes are soft, they are fully cooked. If not quite done, place them back in the air fryer and continue cooking until ready.

Cook air fryer sweet potatoes at 390°F for 30 minutes, then check for doneness.

Once The Sweet Potatoes Are Fully Cooked

Once the potatoes are fully cooked, the skins will have darkened considerably, and be slightly crispy on the outside. Some of the juices may have also oozed out of the fork-punctures. Transfer the HOT potatoes directly to your serving plates.

When done, the skin on the sweet potatoes is very crisp and darkened in color.

Slice the sweet potatoes from top to bottom, and squeeze both ends of the potato to fluff up the insides.

Cut the sweet potato open, and fluff the insides with a fork.

Add 1 teaspoon butter and 1 heaping teaspoon brown sugar to each of the air fryer sweet potatoes, and then sprinkle lightly with cinnamon. Mix the toppings into the fluffed sweet potato, and then dig in! They are SO GOOD!

Two of the air fryer sweet potatoes, filled with butter, cinnamon and brown sugar.Mix the butter, brown sugar and cinnamon into the sweet potato and serve.

I hope you enjoy this recipe for air fryer sweet potatoes! We sure do. Have a wonderful day, friends, and thank you for taking the time to visit. Come back soon!

Looking For More AIR FRYER Recipes?

You can find all of my Air Fryer recipes in the Recipe Index, located at the top of the page. I have several, including:

Interested In More Recipes?

Thank you for visiting this website. I appreciate you using some of your valuable time to do soIf you’re interested, I publish a newsletter 2 times per month (1st and 15th) with all the latest recipes, and other fun info. I would be honored to have you join our growing list of subscribers, so you never miss a great recipe!
There is a Newsletter subscription box on the top right side (or bottom) of each blog post, depending on the device you use, where you can easily submit your e-mail address (only) to be included in my mailing list.

You Can Also Find Me On Social Media:
Facebook page: The Grateful Girl Cooks!
Pinterest: The Grateful Girl Cooks!
Instagram: jbatthegratefulgirlcooks

Author's signature

0 from 0 votes
Air Fryer Sweet Potatotes
Prep Time
5 mins
Cook Time
30 mins
Total Time
35 mins
 

It's EASY to make absolutely delicious air fryer sweet potatoes! Topped with cinnamon, brown sugar, and butter, this filling veggie tastes amazing!

Category: Vegetable Dish
Cuisine: American
Keyword: air fryer sweet potatoes
Servings: 2
Calories Per Serving: 288 kcal
Author: JB @ The Grateful Girl Cooks!
Ingredients
For Potatoes:
  • 18 ounces sweet potatoes , approx. 9 ounces each
  • vegetable oil or olive oil , to rub on sweet potato skin before cooking
To Serve:
  • 2 teaspoons butter , or more to taste
  • 2 teaspoons brown sugar , a heaping teaspoon
  • cinnamon , a light sprinkling over each potato
Instructions
  1. Pick sweet potatoes that are medium-sized, and similar in weight. Scrub potatoes well, to remove any dirt. Pat them dry with paper towels or a dish towel.

  2. Preheat air fryer to 390°F. Lightly spritz or rub each sweet potato with vegetable or olive oil on all sides. Pierce potatoes in several places (top and bottom) with a fork. When machine is preheated, place sweet potatoes into air fryer basket.

  3. Cook at 390°F for 30-35 minutes. Your cooking time may vary, due to differing weights of potatoes used. Check them at the 30 minute mark. Insert a butter knife into the middle of the potatoes. If knife meets no resistance, they are fully cooked. If not done, place them back in the air fryer and continue cooking until ready. Transfer potatoes to serving plates.

To Serve:
  1. Slice potatoes open lengthwise, and squeeze both ends of the potato to fluff up the insides. Add 1 teaspoon butter and 1 heaping teaspoon brown sugar to each potato, and then sprinkle lightly with cinnamon. Mix the toppings into the fluffed sweet potato, and then dig in! Enjoy!

Recipe Notes

Caloric calculations and cooking time for this recipe were made using one 9 ounce sweet potato per serving. Please note: As the weight of potatoes can vary widely, calories per serving and cooking times will tend to vary, as well.

NO AIR FRYER? NO PROBLEM! Follow all directions, but place prepared sweet potatoes on a foil or parchment paper-lined baking sheet. Bake at 425°F for between 45-60 minutes, time dependent on the weight of the potatoes.

Nutrition Facts
Air Fryer Sweet Potatotes
Amount Per Serving (1 potato + toppings)
Calories 288 Calories from Fat 54
% Daily Value*
Fat 6g9%
Saturated Fat 4g25%
Cholesterol 11mg4%
Sodium 177mg8%
Potassium 860mg25%
Carbohydrates 55g18%
Fiber 8g33%
Sugar 15g17%
Protein 4g8%
Vitamin A 36322IU726%
Vitamin C 6mg7%
Calcium 77mg8%
Iron 2mg11%
* Percent Daily Values are based on a 2000 calorie diet.

Here’s one more to pin on your Pinterest boards!It's EASY to make absolutely delicious air fryer sweet potatoes! Topped with cinnamon, brown sugar, and butter, this filling veggie tastes amazing!