Category: Cakes

Pound Cake With Lemon Cream and Blueberry Sauce

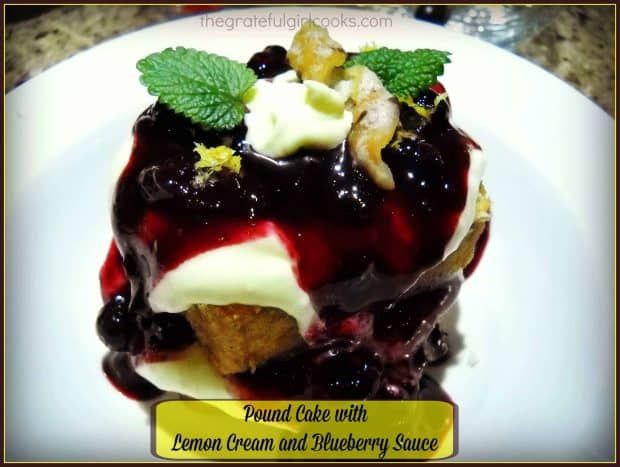
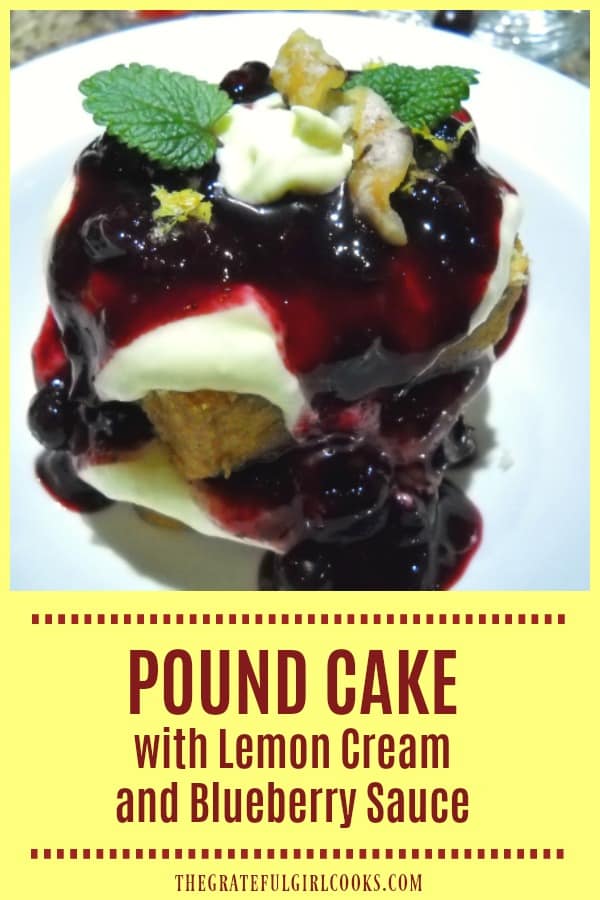
A few years ago my husband and I were invited to some dear friends’ home for dinner. Our hostess asked me to bring dessert. I decided to “make something on the fly”, without a recipe, and this Pound Cake With Lemon Cream and Blueberry Sauce is the result!Pound Cake with Lemon Cream and Blueberry Sauce / The Grateful Girl Cooks!
Layers of pound cake, creamy lemon cream cheese filling, and blueberry pie filling were my “weapons of choice” when I made this. I love the flavor combo of lemons and blueberries!  Because I assembled this dessert at our friends home, I did not get any additional photos, so the picture you see above is IT.  BUT… here’s how I made this delicious dessert, which makes 4 servings.

I took a store-bought pound cake (in LOAF form), and cut it into 8 equal sized slices. I put one slice on each dessert plate. I spooned some of the lemon cream cheese topping over each slice, followed by a generous spoonful of blueberry pie filling.

I put another slice of pound cake on top of the blueberry pie filling (but turned this slice a quarter turn). I added another generous spoonful of lemon cream cheese topping, followed by another spoonful of blueberry pie filling.

I made sure with each spoonful that the filling ran over the sides of the pound cake (to make it look nice!). I garnished it with a couple of mint leaves and candied lemon peel (here’s my recipe: http://www.thegratefulgirlcooks.com/candied-citrus-peels/).

It was a very easy dessert to assemble… and we all agreed it was delicious! The recipe was made even easier (and quicker) by using store-bought pound cake and blueberry pie filling, which helped make this a real time-saver! All I had to do was make the lemon topping, and the rest was SIMPLE!  Hope you will give this easy dessert a try! It’s a piece of CAKE!

Interested In More Recipes?

Thank you for visiting this website. I appreciate you using some of your valuable time to do soIf you’re interested, I publish a newsletter 2 times per month (1st and 15th) with all the latest recipes, and other fun info. I would be honored to have you join our growing list of subscribers, so you never miss a great recipe! 

There is a Newsletter subscription box on the top right side (or bottom) of each blog post, depending on the device you use, where you can easily submit your e-mail address (only) to be included in my mailing list.

You Can Also Find Me On Social Media:

Facebook page: The Grateful Girl Cooks!
Pinterest:
The Grateful Girl Cooks!
Instagram:
jbatthegratefulgirlcooks

Pound Cake with Lemon Cream and Blueberry Sauce / The Grateful Girl Cooks!

0 from 0 votes
Pound Cake With Lemon Cream and Blueberry Sauce
Prep Time
15 mins
Cook Time
0 mins
Total Time
15 mins
 
Layers of pound cake covered in lemon cream cheese filling with blueberry topping makes a wonderful "easy to prepare" dessert.
Category: Dessert
Cuisine: American
Keyword: pound cake
Servings: 4 servings
Calories Per Serving: 917 kcal
Author: JB @ The Grateful Girl Cooks!
Ingredients
  • 16 ounces cream cheese (room temp)
  • 1 ¼ cups powdered sugar
  • 1/4 teaspoon vanilla extract
  • 1/4 teaspoon lemon extract
  • 8 ounces Cool Whip , thawed
  • 1 Tablespoon lemon zest
  • 10,75 ounces Pound Cake (in loaf form)
  • 2 cups blueberry pie filling
  • 8 leaves Mint leaves for garnish (optional)
  • 8 pieces Candied Lemon Peel for garnish (optional)
Instructions
  1. In a large mixing bowl, beat the cream cheese, powdered sugar, vanilla and lemon extracts until smooth. Gently fold in Cool Whip until mixture is creamy and well combined.
  2. Slice pound cake loaf into 8 equal sized slices. Place 1 slice of pound cake onto 4 dessert plates. Spoon a generous amount of lemon cream cheese filling over each slice, letting some run over the edges. Spoon blueberry pie filling generously over cream cheese topping.

  3. Place a second slice of pound cake on top of the blueberry sauce, at a 90 degree quarter turn. Repeat layer of lemon cream cheese topping, then blueberry pie filling. Make sure some of the topping runs over the side.

  4. Garnish the dessert with mint leaves and candied lemon peels, if desired. (Totally optional!) Serve and enjoy!

Nutrition Facts
Pound Cake With Lemon Cream and Blueberry Sauce
Amount Per Serving (1 g)
Calories 917 Calories from Fat 198
% Daily Value*
Fat 22g34%
Saturated Fat 12g75%
Cholesterol 148mg49%
Sodium 998mg43%
Potassium 567mg16%
Carbohydrates 165g55%
Fiber 4g17%
Sugar 129g143%
Protein 15g30%
Vitamin A 870IU17%
Vitamin C 2.9mg4%
Calcium 318mg32%
Iron 3.3mg18%
* Percent Daily Values are based on a 2000 calorie diet.

Here’s one more to pin on your Pinterest boards!Pound Cake with Lemon Cream and Blueberry Sauce / The Grateful Girl Cooks!


Save

Save

Save

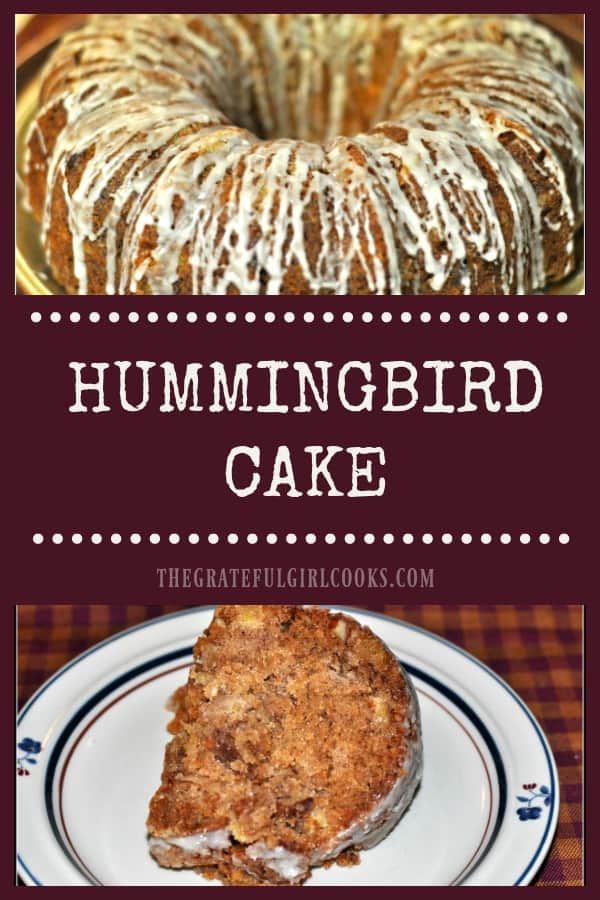
Hummingbird Cake

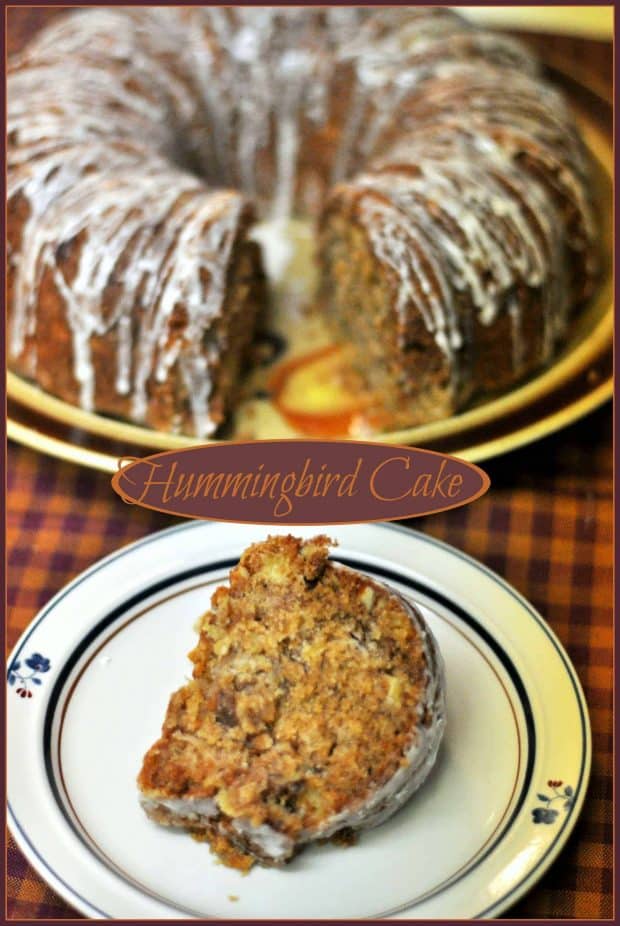
This easy to prepare hummingbird cake is perfect for breakfast, brunch or dessert. With pineapple, bananas, nuts, and coconut, it’s a moist, delicious treat!Hummingbird Cake / The Grateful Girl Cooks!

If you’re looking for a completely easy to prepare and delicious “cake” to serve at your upcoming Easter brunch, or just looking for a new dessert recipe…then I have the recipe for YOU! This Hummingbird Cake can easily double as a coffeecake OR as a dessert cake!

I have been making this cake for over 30 years. Many many years ago I wrote the recipe down on a 3×5 card, but didn’t write down WHERE I found the original recipe (oops).

Scroll Down for A Printable Recipe Card At The Bottom Of The Page

*PUBLIC SERVICE ANNOUNCEMENT:

No hummingbirds were harmed in the making of this cake. Just in case you were wondering! Don’t even have a single clue why it is called a hummingbird cake.

That said… hummingbird cake is a wonderful, moist cake, filled with pineapple, bananas, coconut and nuts. Not too sweet… it’s just right! It’s a perfect cake for grabbing a slice to eat for breakfast, afternoon tea, OR dessert! It’s so good by itself that it doesn’t even need frosting!

Hummingbird Cake Is EASY To Make!

The recipe is simple! If you can stir, then you can make this. It can be made in ONE BOWL, and the only requirement is that you mix the ingredients by hand! Super easy to make, and absolutely delicious! Hummingbird cake would be a perfect dish to fix for any holiday brunch or get together, AND it can feed a small village. The hummingbird cake yields 12-15 servings, depending on thickness of slices.

How To Make Hummingbird Cake

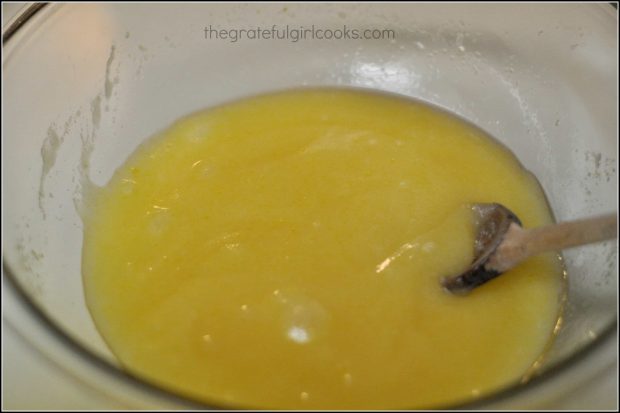
Mix together the oil, sugar, eggs and vanilla in a large bowl. This is a thick batter, so there’s no need to get out an electric mixer. Just stir! Hummingbird cake has a thick batter, but it’s easy to mix up.

Oil and eggs mixed in bowl, for hummingbird cake
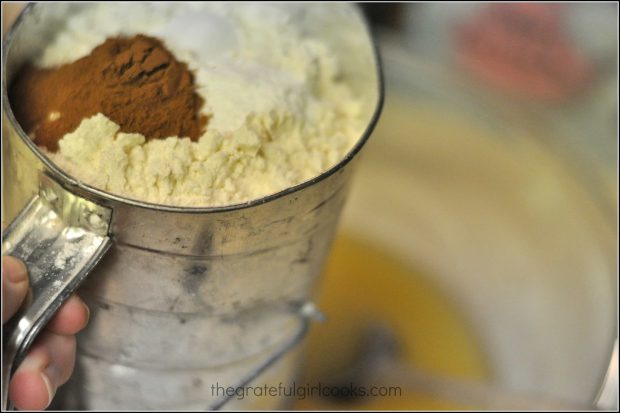
Now sift in the dry ingredients (flour, cinnamon, baking soda and salt). Stir well to combine.

Flour and spices sifted into bowl
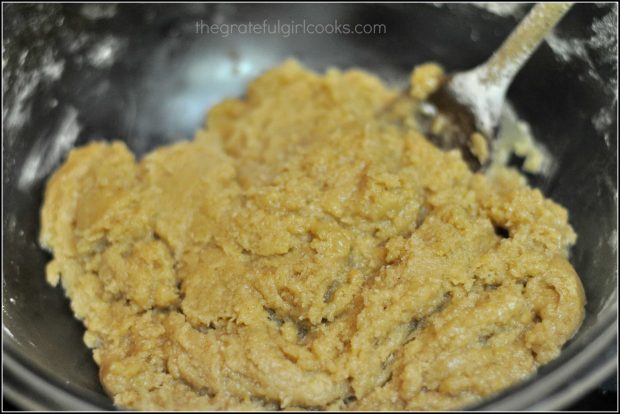
The batter will be very thick (that’s why you stir the batter), and will look like this:

Thick Batter for cake, in bowl
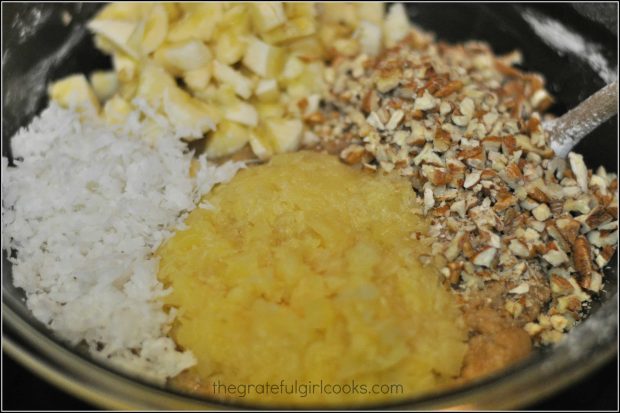
Drain the crushed pineapple, and chop the bananas and nuts. Add them, along with flaked coconut to the cake batter. Thoroughly mix all the ingredients together.

Pineapple, coconut, nuts and banana added to cake batter
Time To Bake The Cake

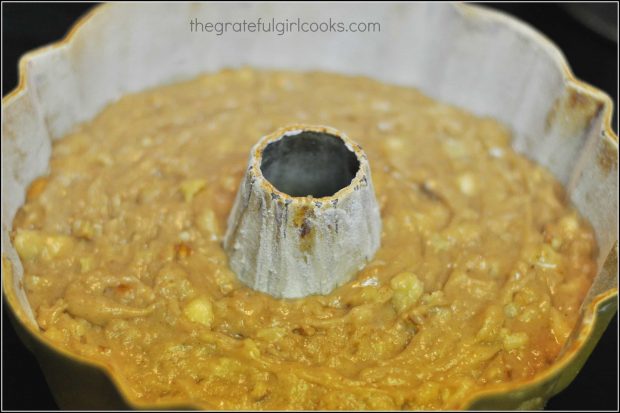
Grease and flour a standard sized bundt pan very well. Spoon the cake batter into the bundt pan, then level the batter around the pan. Bake the cake in a preheated 300°F oven for 90 minutes. Once the hummingbird cake is done, let the cake cool (in the pan) for about 10 minutes.

Hummingbird cake batter in bundt pan, ready to bake
To Remove Hummingbird Cake From Pan

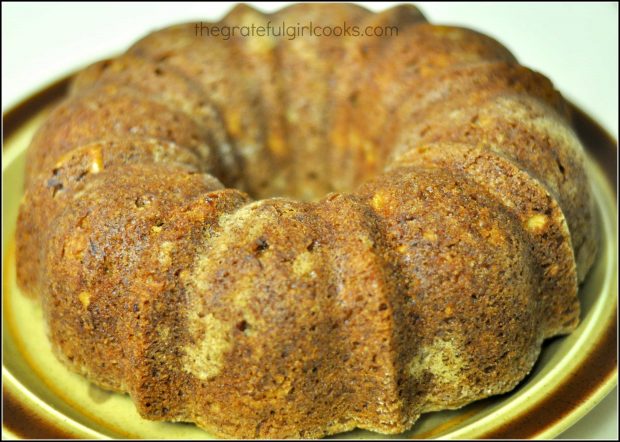
Carefully invert the cake onto a serving plate. Put the serving plate on top of the bundt pan. Hold both the serving plate and the bundt pan securely together, using both hands. Carefully flip cake over. The hummingbird cake should remove easily from pan, if you greased and floured your pan well before baking. It should look like this, once removed from bundt pan:

Baked cake on serving platter
Make The Glaze

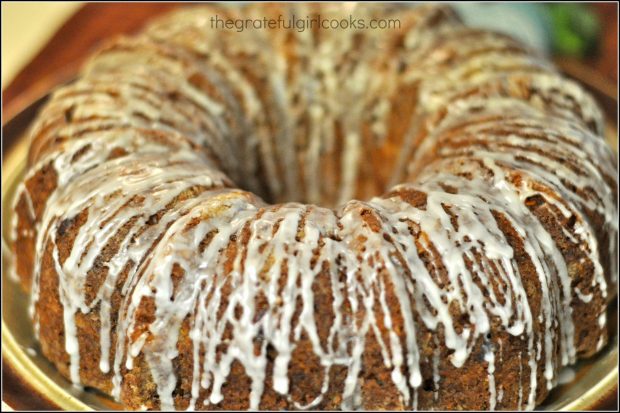
The hummingbird cake is perfect for serving just like this! However… if you want it to LOOK prettier, let the cake cool completely. Make a simple glaze for the cake while it cools. Mix together the powdered sugar, vanilla and water in a small bowl, until you have a glaze. You can drizzle the glaze decoratively over the top of the cake, shown in the photo below.

Finished hummingbird cake with decorative icing
There you have it… Hummingbird Cake!  Let the cake cool completely and then slice a piece. The cake is perfect for a breakfast, brunch, dessert, snack, or ANY time, for that matter!

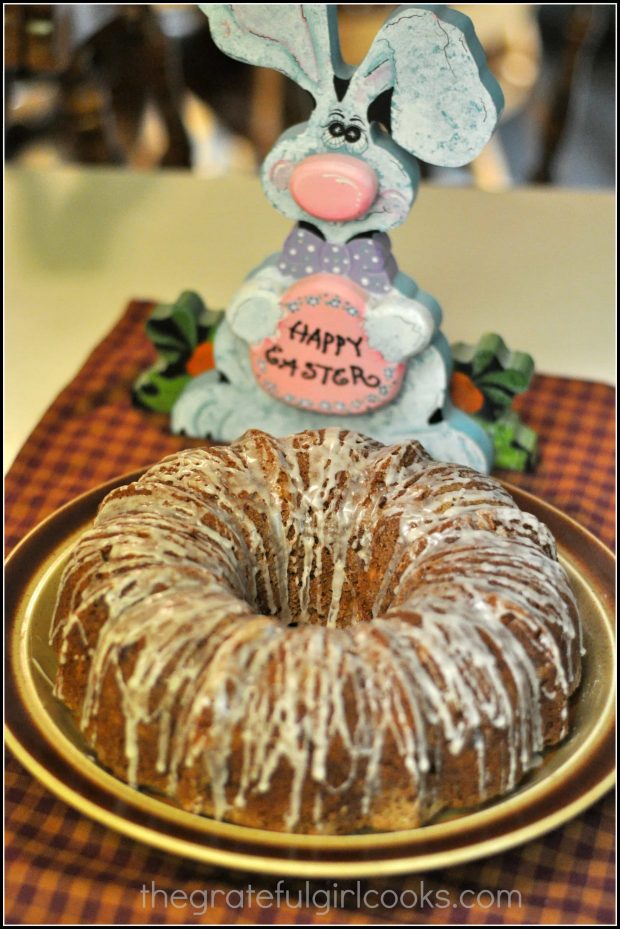
Hummingbird Cake on platter, with Easter bunny behind it
Time to EAT!

The hummingbird cake is moist, and filled with flavor, without a lot of hard work. How perfect is that?

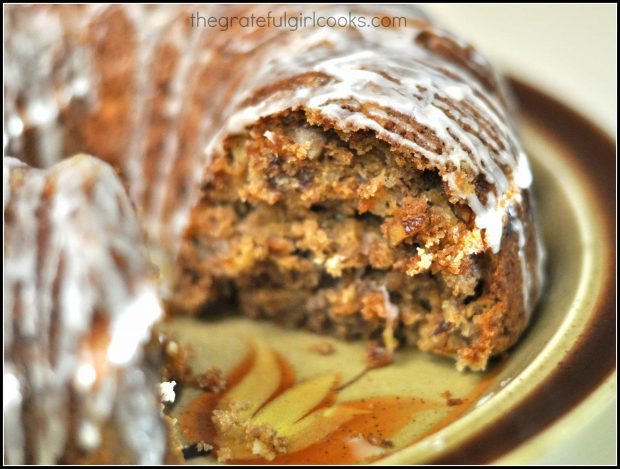
Close up look at inside of cake
Pour yourself a cup of coffee or tea, slice a piece of this delicious hummingbird cake. I hope you love it.

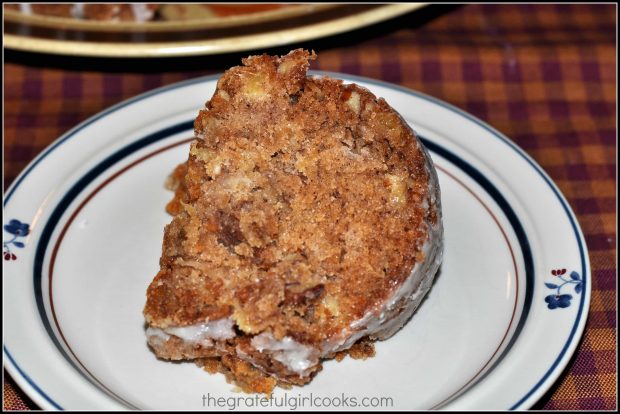
One slice of hummingbird cake on a plate

Hope you have a wonderful day! I trust you will enjoy this delicious recipe, and share it with those you love. Enjoy!

Looking for More COFFEECAKE Recipes?

You can find ALL my recipes in the Recipe Index, located at the top of the page. If you enjoy coffeecakes like we do, be sure and check out my other recipes, including:

Interested In More Recipes?

Thank you for visiting this website. I appreciate you using some of your valuable time to do soIf you’re interested, I publish a newsletter 2 times per month (1st and 15th) with all the latest recipes, and other fun info. I would be honored to have you join our growing list of subscribers, so you never miss a great recipe!
There is a Newsletter subscription box on the top right side (or bottom) of each blog post, depending on the device you use, where you can easily submit your e-mail address (only) to be included in my mailing list.

You Can Also Find Me On Social Media:

Facebook page: The Grateful Girl Cooks!
Pinterest:
The Grateful Girl Cooks!
Instagram:
jbatthegratefulgirlcooks

Author's signatureOriginal Recipe Source: Unknown (had the recipe on 3×5 card for over 30 years)

0 from 0 votes
Hummingbird Cake
Prep Time
15 mins
Cook Time
1 hr 30 mins
Total Time
1 hr 45 mins
 

This easy to prepare hummingbird cake is perfect for breakfast, brunch or dessert. With pineapple, bananas, nuts, and coconut, it's a moist, delicious treat!

Category: Breakfast, Brunch, Dessert or Coffeecake
Cuisine: American
Keyword: hummingbird cake
Servings: 12 servings
Calories Per Serving: 448 kcal
Author: JB @ The Grateful Girl Cooks!
Ingredients
For cake:
  • 1 1/2 cups vegetable oil
  • 2 eggs
  • 2 cups granulated sugar
  • 1 teaspoon vanilla extract
  • 3 cups all purpose flour
  • 1 teaspoon cinnamon
  • 1 teaspoon baking soda
  • 1/2 teaspoon salt
  • 1 (8 ounce) can crushed pineapple (drained)
  • 1 cup chopped pecans or walnuts
  • 2 bananas , chopped
  • 1/2 cup shredded coconut
For glaze:
  • 1 1/2 cups powdered sugar
  • 1/2 teaspoon vanilla extract
  • water (add a few drops at a time until glaze is "drizzle-able)
Instructions
  1. Preheat oven to 300 degrees. NOTE: Mix all ingredients for this recipe by hand, because this is a very THICK batter.

  2. In a large bowl, mix the oil, sugar, eggs, and vanilla, until combined.

  3. Sift the dry ingredients (flour, cinnamon, baking soda and salt) into the mixing bowl with the oil/sugar mixture. Stir well, to thoroughly combine. Add drained crushed pineapple, chopped bananas (small chunks), nuts, and coconut. Stir well until all ingredients are fully incorporated into batter.

  4. Generously grease and flour a large bundt pan. Spoon in the batter, making sure to level off the batter around the pan. Bake at 300 degrees for 90 minutes. Remove cake pan to a wire rack to cool for 10 minutes. Carefully invert the cake onto serving platter. Let cool.

  5. Prepare glaze by mixing the powdered sugar and vanilla in a small bowl. Add a few drops of water at a time, stirring until glaze is "drizzle-able". Drizzle the glaze decoratively over the top of the cake. Let glaze firm up, then serve cake at room temperature. Enjoy!

Recipe Notes

The cake only takes about 15 minutes active time to prepare and get into the oven. The rest of the baking time is inactive time. Go do something fun!

Nutrition Facts
Hummingbird Cake
Amount Per Serving (1 slice)
Calories 448 Calories from Fat 99
% Daily Value*
Fat 11g17%
Saturated Fat 4g25%
Cholesterol 27mg9%
Sodium 210mg9%
Potassium 193mg6%
Carbohydrates 82g27%
Fiber 2g8%
Sugar 55g61%
Protein 6g12%
Vitamin A 60IU1%
Vitamin C 3.6mg4%
Calcium 24mg2%
Iron 2.1mg12%
* Percent Daily Values are based on a 2000 calorie diet.

Here’s one more to pin on your Pinterest boards!This easy to prepare hummingbird cake is perfect for breakfast, brunch or dessert. With pineapple, bananas, nuts, and coconut, it's a moist, delicious treat!


Save

Save

Save

Save

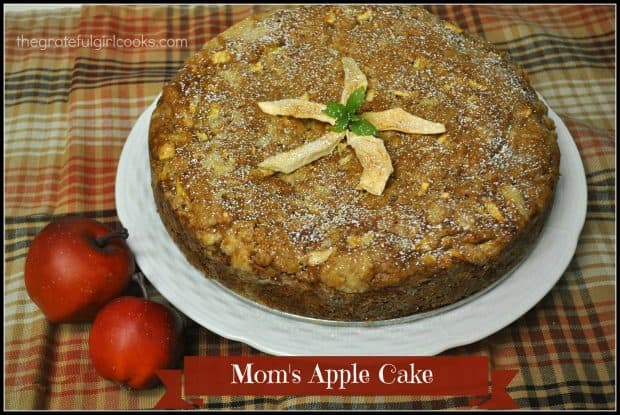
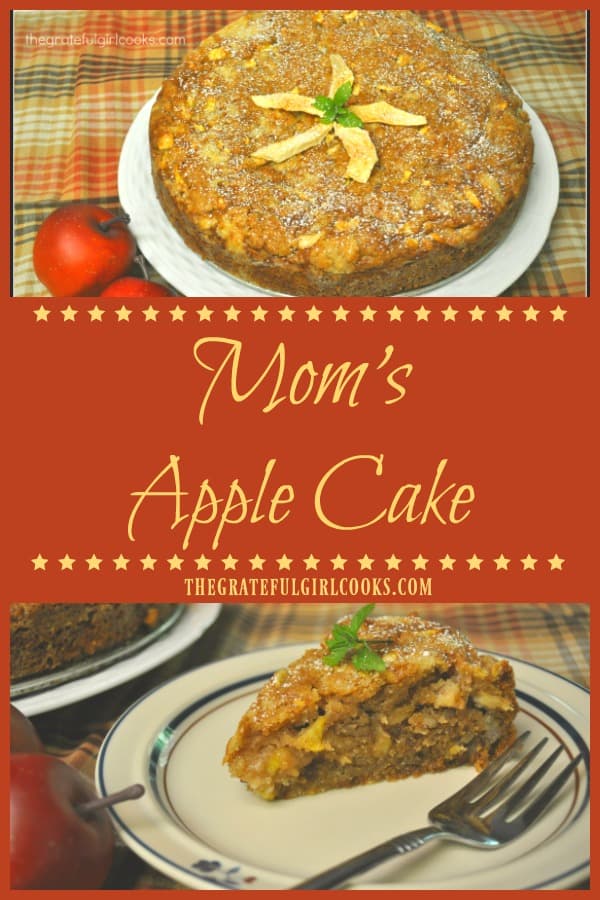
Mom’s Apple Cake

Mom’s Apple Cake is a classic family dessert OR coffeecake, with fresh baking apples, cinnamon and pecans (or walnuts). Easy to prepare, and tastes delicious!Mom's Apple Cake is a classic family dessert OR coffeecake, with fresh baking apples, cinnamon and pecans (or walnuts). Easy to prepare, and tastes delicious!
I’m gonna let you in on a little secret….shhh… don’t tell. My Mom’s Apple Cake is amazing! Seriously. It’s packed with fresh apples and cinnamon, and is so moist, you don’t need to “fancy it up” with any extra frosting. It’s absolutely perfect just the way it is, for dessert OR as a coffeecake!

Scroll Down for A Printable Recipe Card At The Bottom Of The Page

Our Family History With This Apple Cake

My mom used to make this cake for our family as I was growing up, and this simple recipe has been in my collection for over 35 years. I don’t know where she got the original recipe, but I DO KNOW that it is absolutely delicious, and is perfect anytime, but especially in the Fall!

The recipe is super simple to make, and you probably already have the ingredients in your home. My mom always makes this cake in a 13×9 inch cake pan (I’ve made it this way for decades). This time I tried making it in a spring form pan and 2 miniature spring form pans (just as an experiment). They turned out PERFECT!

Result…ALWAYS fantastic, no matter WHAT you bake it in. This is a great dessert cake, but is equally good in the morning with a cup of good coffee. Well, someone had to try it for breakfast…*cough, cough*…I don’t mind “taking one for the team”). Here’s a few pics taken while making this yummy apple cake.

Making Mom’s Apple Cake

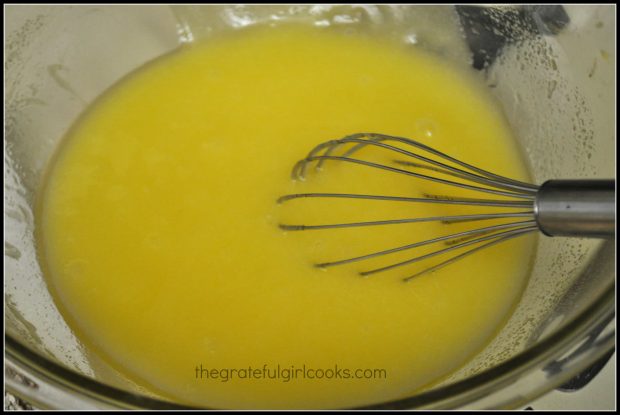
Mix the eggs, oil and sugar together in a large bowl. A whisk works very well!

Eggs, sugar and oil are mixed together to make batter for apple cake.

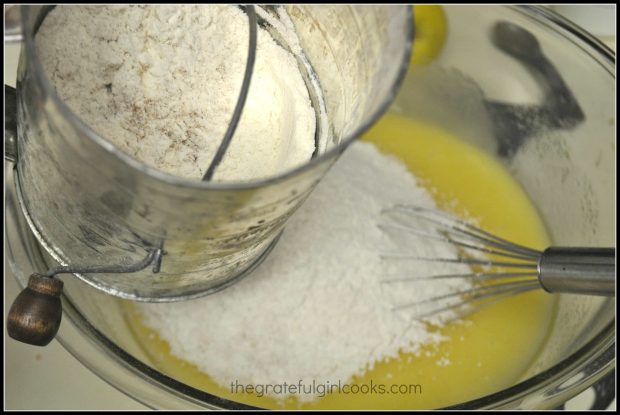
Add the sifted dry ingredients to the liquid ingredients in the bowl. EASY!

Dry ingredients are sifted into the cake batter.

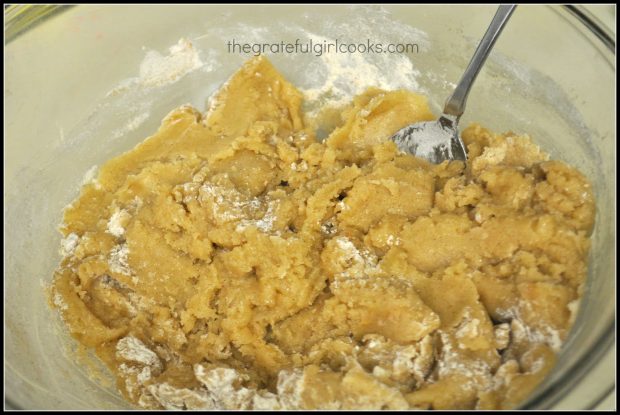
The apple cake dough is a very thick dough. You will want to mix it up well, by hand.

The batter for Mom's apple cake is very thick.

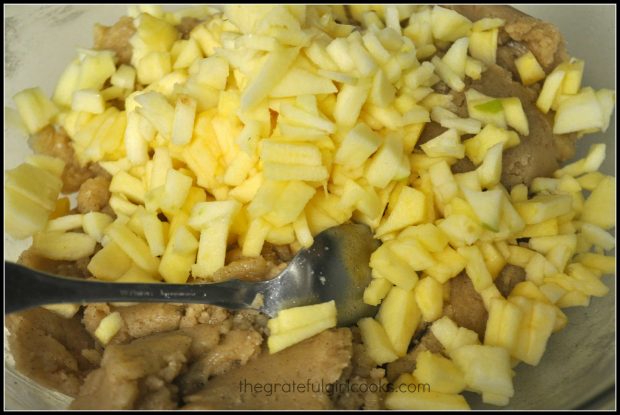
Add the vanilla, peeled and chopped apples and nuts, and mix them into the dough. Keep stirring that thick batter until all ingredients are fully incorporated.

Apples, nuts and vanilla are added to the thick cake batter.

Time To Bake Mom’s Apple Cake!

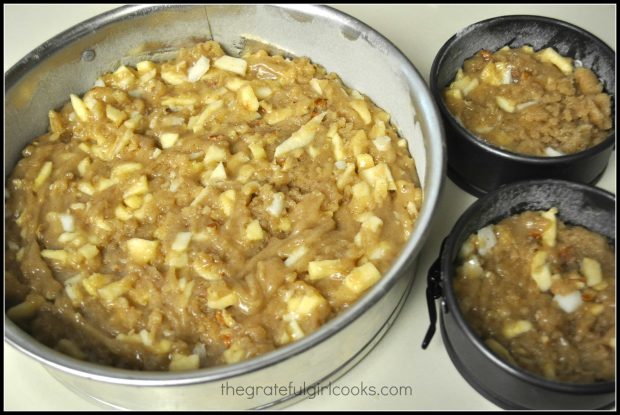
Spread the cake batter into your prepared pan(s), and then bake until done (approximately 55 minutes). I used a little of the cake batter to make two small individual cakes at the same time! NOTE: Mom’s apple cake can also be made in a standard sized 13×9 inch baking pan.

The cake batter is spread into prepared baking pans.

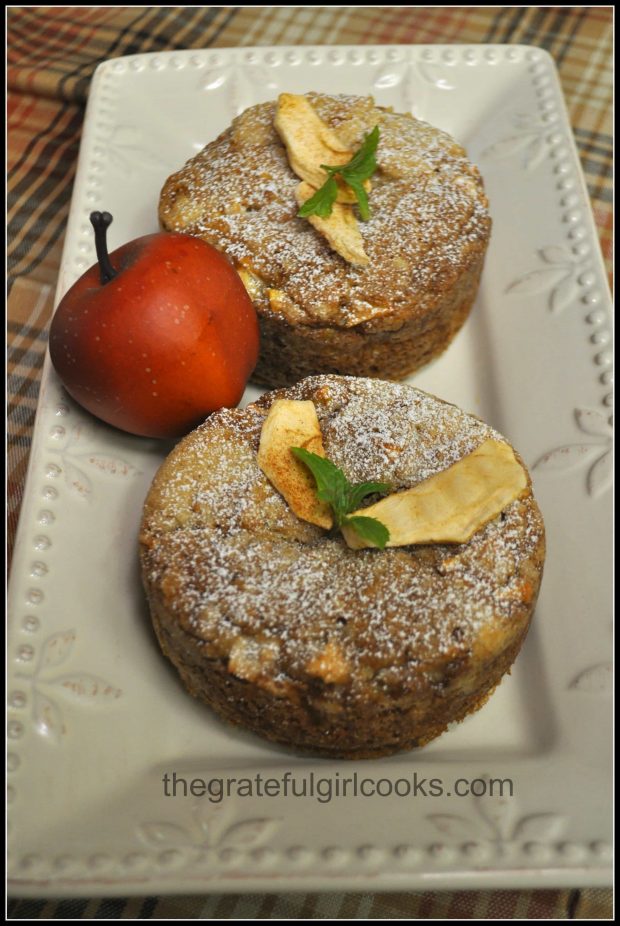
Look how cute the miniature cakes turned out! I’m giving these little apple cakes to some of our friends!
Made tiny versions of the apple cake to give to friends.

Time To Serve Mom’s Apple Cake!

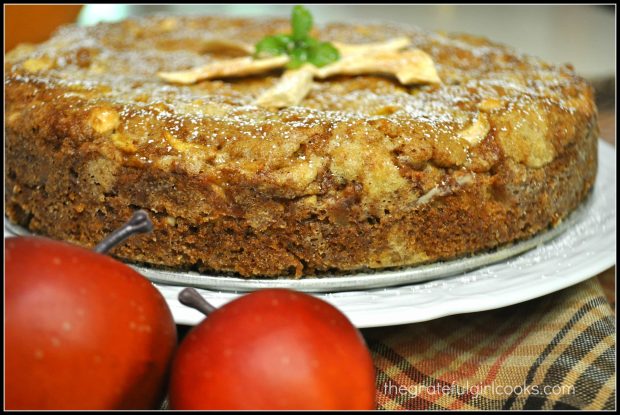
Yum… all I need now is some coffee to go with a nice slice of Mom’s Apple Cake! Once the cake has cooled, lightly sift powdered sugar over the top. You can also garnish it with mint sprigs and dried apple slices, if desired.

A side view of Mom's apple cake.

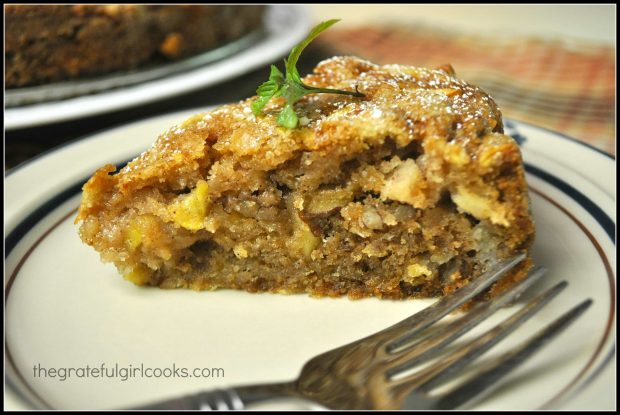
Here is a nice slice of cake, ready to serve. Wow – this slice of Mom’s apple cake looks so good! See all the apple chunks? YUM!

A piece of Mom's apple cake, on a plate, ready to eat!

Sure hope you’ll try this apple cake. It is absolutely FANTASTIC, and I know you’re gonna LOVE it! Thanks, Mom, for another great childhood recipe!

If You Enjoy Mom’s Apple Cake, You Will Like These Cake Recipes, Too!

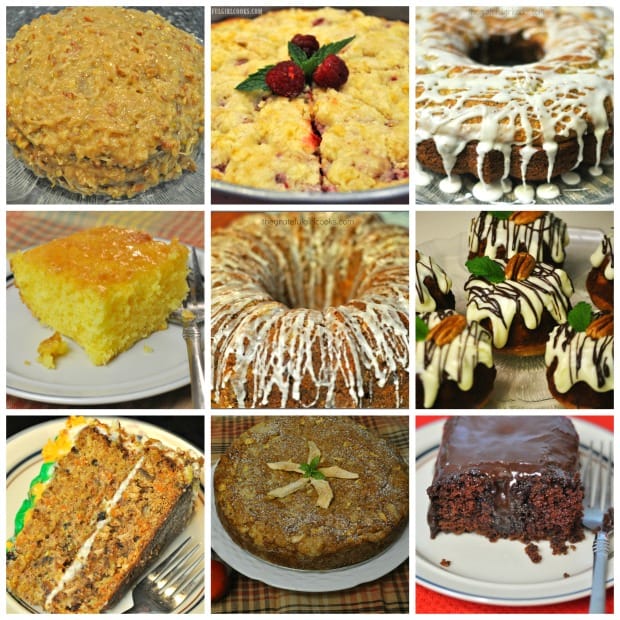
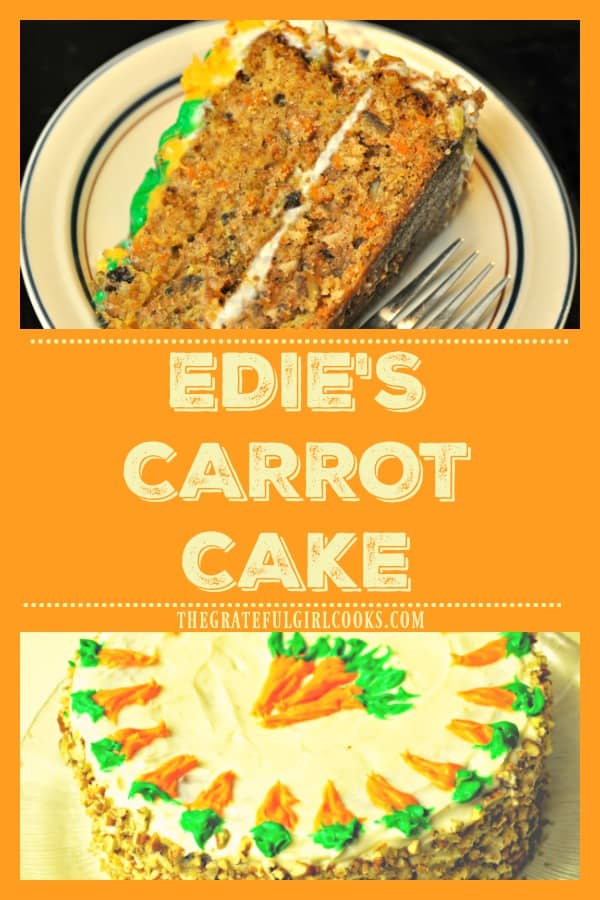
If you enjoy baking or simply EATING cake, be sure to check out my other cake recipes on this blog, including German Chocolate, Raspberry Lemon, Poppyseed, Lemon, Hummingbird, Gingerbread, Carrot and Mom’s Easy Chocolate Cake. You can find ALL my recipes in the Recipe Index, located at the top of the page.

Collage of cakes with recipes on "The Grateful Girl Cooks!" blog.

Interested In More Recipes?

Thank you for visiting this website. I appreciate you using some of your valuable time to do soIf you’re interested, I publish a newsletter 2 times per month (1st and 15th) with all the latest recipes, and other fun info. I would be honored to have you join our growing list of subscribers, so you never miss a great recipe!
There is a Newsletter subscription box on the top right side (or bottom) of each blog post, depending on the device you use, where you can easily submit your e-mail address (only) to be included in my mailing list.

You Can Also Find Me On Social Media:

Facebook page: The Grateful Girl Cooks!
Pinterest:
The Grateful Girl Cooks!
Instagram:
jbatthegratefulgirlcooks

Author's signature

↓↓ PRINTABLE RECIPE BELOW ↓↓

0 from 0 votes
Mom's Apple Cake
Prep Time
15 mins
Cook Time
55 mins
Total Time
1 hr 10 mins
 
Mom's Apple Cake is a classic family dessert OR coffeecake, with fresh baking apples, cinnamon and pecans (or walnuts). Easy to prepare, and tastes delicious!
Category: Dessert
Cuisine: American
Keyword: Mom's apple cake
Servings: 12 slices
Calories Per Serving: 354 kcal
Author: JB @ The Grateful Girl Cooks!
Ingredients
  • 3 cups all purpose flour
  • 1 teaspoon salt
  • 1 teaspoon soda
  • 1 teaspoon cinnamon
  • 2 eggs
  • 2 cups granulated sugar
  • 1 1/4 cups vegetable oil
  • 1 teaspoon vanilla
  • 3 cups chopped apple (approximately 4-5 I usually use Granny Smith, but any apples will do)
  • 1 cup chopped walnuts or pecans
Instructions
  1. Preheat oven to 350 degrees.
  2. In a large mixing bowl, beat eggs, oil and sugar together by hand until well blended. Add sifted dry ingredients. Stir until well blended. Dough will be stiff... just keep on stirring! Add vanilla, chopped apples and nuts. Stir well until thoroughly combined. Dough will be stiff.

  3. Grease and flour a Springform pan, plus two miniature springform pans (or use a greased and floured 13x9 inch baking pan). Spread batter evenly in baking pan.

  4. Bake at 350 degrees for 55 minutes (for regular sized springform pan) *SEE NOTES SECTION FOR BAKING TIMES, IF USING OTHER TYPES OF BAKING PANS*
Recipe Notes

*BAKING TIMES:
1 regular-sized Springform pan = 55 minutes 
Miniature Springform pans = 40 minutes
13 x 9 inch cake pan = 1 hour

Nutrition Facts
Mom's Apple Cake
Amount Per Serving (1 (one 12th of total))
Calories 354 Calories from Fat 81
% Daily Value*
Fat 9g14%
Saturated Fat 2g13%
Cholesterol 27mg9%
Sodium 205mg9%
Potassium 119mg3%
Carbohydrates 63g21%
Fiber 2g8%
Sugar 36g40%
Protein 5g10%
Vitamin A 55IU1%
Vitamin C 1.6mg2%
Calcium 22mg2%
Iron 1.9mg11%
* Percent Daily Values are based on a 2000 calorie diet.

Here’s one more to pin on your Pinterest boards!Mom's Apple Cake is a classic family dessert OR coffeecake, with fresh baking apples, cinnamon and pecans (or walnuts). Easy to prepare, and tastes delicious!


Save

Save

Save

Save

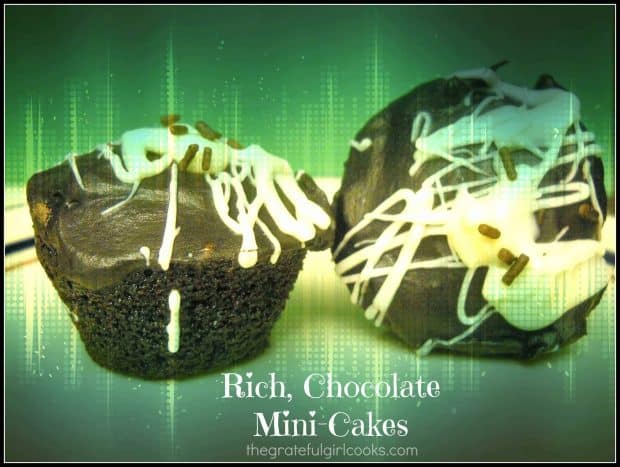
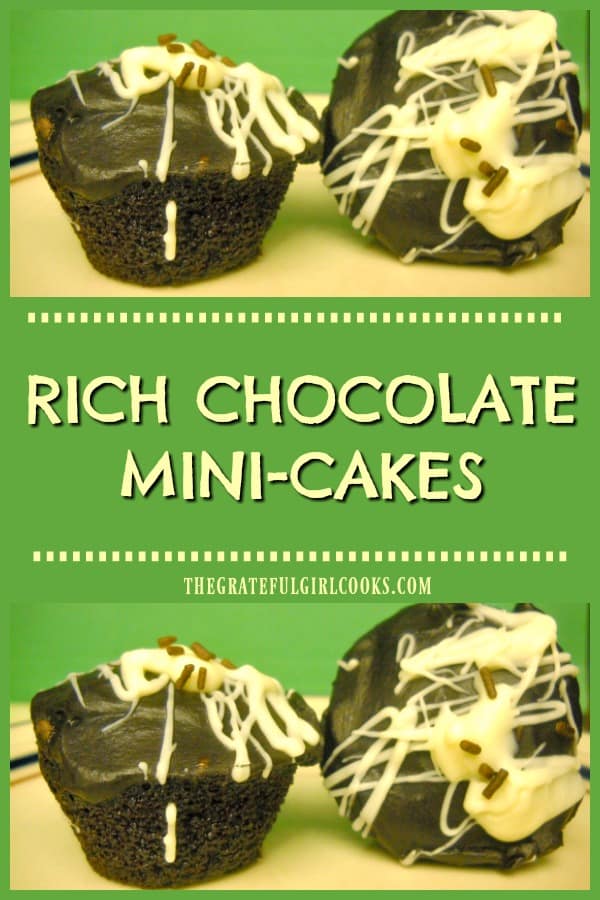
Rich Chocolate Mini-Cakes

Made in mini-muffin pans, you will LOVE these fudgy, rich chocolate mini-cakes, drizzled with white chocolate icing. Recipe makes 24 decadent treats!Made in mini-muffin pans, you will LOVE these fudgy, rich chocolate mini-cakes, drizzled with white chocolate icing. Recipe makes 24 decadent treats!

Sweet, dense, fudgy, amazingly delicious! These are just a few of the words I would use to describe these Rich Chocolate Mini-Cakes! I found this recipe online at Hershey’s Kitchens several years ago, and am sure glad I did!

Recently I made these for a chocolate-themed dinner party with friends. I was responsible for bringing several chocolate-based treats, and this is one of the “small bite” desserts I made. I don’t have photos of them while I prepared them, but they are easy enough to make with the instructions below.

Scroll Down For A Printable Recipe Card At The Bottom Of The Page

Why We Love These Rich Chocolate Mini-Cakes

These miniature “chocolatey” cakes are rich and decadent. They are made in miniature muffin tins, so this recipe makes 24 mini-cakes. Each cake may be fairly small in size, but they make up for it in FLAVOR! They are unbelievably moist, dense, and completely, ridiculously, “chocolately”!

The rich chocolate mini-cakes were a cinch to make and were perfect, small bite treats to add to the dessert tray offerings. Everyone loved them, and I recommend them, without hesitation. Hope you will give them a try… you won’t be disappointed!

Looking For More CHOCOLATE Recipes?

You can find ALL my recipes in the Recipe Index, located at the top of the page. I have some wonderful chocolate desserts you’ll enjoy, including:

Interested In More Recipes?

Thank you for visiting this website. I appreciate you using some of your valuable time to do soIf you’re interested, I publish a newsletter 2 times per month (1st and 15th) with all the latest recipes, and other fun info. I would be honored to have you join our growing list of subscribers, so you never miss a great recipe! 

There is a Newsletter subscription box on the top right side (or bottom) of each blog post, depending on the device you use, where you can easily submit your e-mail address (only) to be included in my mailing list.

You Can Also Find Me On Social Media:

Facebook page: The Grateful Girl Cooks!
Pinterest:
The Grateful Girl Cooks!
Instagram:
jbatthegratefulgirlcooks

Author's signatureOriginal Recipe Source: https://www.hersheys.com/recipes/recipe-details.aspx?id=5190

↓↓ PRINTABLE RECIPE BELOW ↓↓

0 from 0 votes
Rich, Chocolate Mini-Cakes
Prep Time
15 mins
Cook Time
12 mins
Total Time
27 mins
 

Made in mini-muffin pans, you will LOVE these fudgy, rich chocolate mini-cakes, drizzled with white chocolate icing. Recipe makes 24 decadent treats!

Category: Dessert
Cuisine: American
Keyword: chocolate mini-cakes
Servings: 24 mini-cakes
Calories Per Serving: 98 kcal
Author: JB @ The Grateful Girl Cooks!
Ingredients
For mini-cakes:
  • 2/3 cup all purpose flour
  • 1/2 cup granulated sugar
  • 3 Tablespoons cocoa
  • 1/2 teaspoon baking powder
  • 1/4 teaspoon baking soda
  • 1/4 teaspoon salt
  • 1/2 cup water
  • 3 Tablespoons vegetable oil
  • 1 teaspoon vanilla extract
For Chocolate Glaze:
  • 2 Tablespoons butter
  • 2 Tablespoons cocoa
  • 2 Tablespoons water
  • 1 cup powdered sugar
  • 1/2 teaspoon vanilla extract
For White Drizzle:
  • 1/2 cup white chocolate chips
  • 1 Tablespoon vegetable shortening (do NOT use butter, margarine or oil!)
Instructions
  1. Preheat oven to 350 degrees. Lightly grease or spray miniature muffin cups (1 3/4 inches in diameter). Set aside.
  2. To Make the Mini-Cakes:
  3. In a large bowl, mix together the flour, sugar, cocoa, baking powder, baking soda and salt. Add the water, oil and vanilla to the dry ingredients. Mix ingredients together until well blended. The batter will be fairly thin, so don't worry. Carefully spoon the batter into the greased muffin cups (these can be made in two batches if you only have one muffin pan). Fill each muffin cup 2/3 of the way full.
  4. Bake at 350 degrees for 12-14 minutes or until the top springs back when you gently touch it in the middle. When done, remove the muffin pan to a wire rack to cool. Let them cool for 3-4 minutes, then remove cakes from the muffin pan. (If making in two batches, clean pan, re-grease it and repeat previous directions for rest of the batter).
  5. Make sure cakes cool completely before glazing.
  6. To Make the Chocolate Glaze:
  7. Melt the 2 Tablespoons of butter in a saucepan on low heat. Stir in the 2 Tablespoons water and 2 Tablespoons cocoa. Cook, stirring constantly until smooth, and slightly thickened, but do not let mixture come to a boil. Remove the pan from heat and let it cool slightly. Add the powdered sugar and vanilla in gradually. Whisk the sauce as you add the sugar until mixture is smooth and lumps are gone.
  8. Carefully spread the chocolate glaze over the tops of each cooled mini-cake. Place frosted cakes on a wax-paper or parchment lined baking sheet. Refrigerate cakes for 10-15 minutes to let the glaze "set" and firm up. While the cakes are refrigerating, prepare the white drizzle.
  9. To Make The White Drizzle:
  10. Place 1/2 cup white chocolate chips and 1 Tablespoon of shortening into a microwave-safe bowl. Microwave on MEDIUM (50%) power for 30 seconds. Remove and stir until smooth. If it is necessary, microwave the chips an additional 10-15 seconds, just until the chips can be stirred and become smooth. Let cool slightly. Drizzle this onto the mini-cakes.
  11. Let drizzle firm up a bit, then serve and enjoy!
Nutrition Facts
Rich, Chocolate Mini-Cakes
Amount Per Serving (1 g)
Calories 98 Calories from Fat 36
% Daily Value*
Fat 4g6%
Saturated Fat 2g13%
Cholesterol 3mg1%
Sodium 47mg2%
Potassium 29mg1%
Carbohydrates 14g5%
Sugar 11g12%
Vitamin A 30IU1%
Calcium 12mg1%
Iron 0.2mg1%
* Percent Daily Values are based on a 2000 calorie diet.

Here’s one more to pin on your Pinterest boards!Made in mini-muffin pans, you will LOVE these fudgy, rich chocolate mini-cakes, drizzled with white chocolate icing. Recipe makes 24 decadent treats!


Save

Save

Mom’s Chocolate Buttercream Frosting

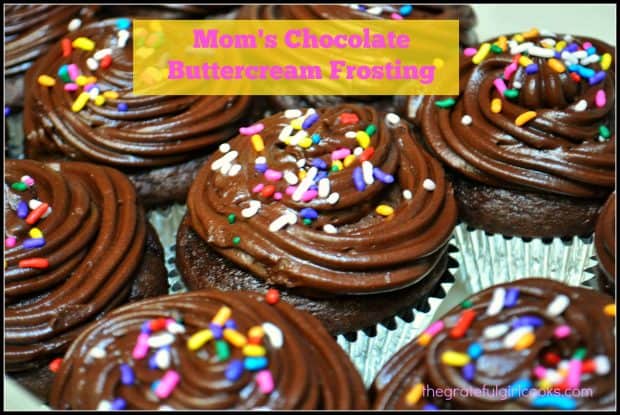
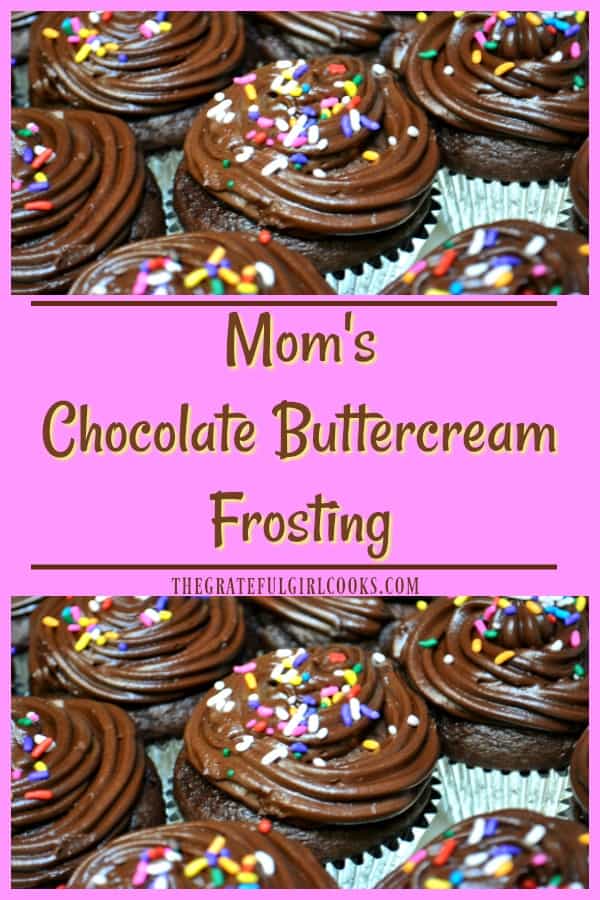
It’s easy to make a delicious, thick chocolate buttercream frosting from scratch that will add a touch of YUM to cakes, brownies, and cupcakes!It's easy to make a delicious, thick chocolate buttercream frosting from scratch that will add a touch of YUM to cakes, brownies, and cupcakes!

I love to bake cakes and cupcakes…this is hands down my favorite frosting!  This chocolate buttercream frosting is wonderfully creamy and delicious, and is easy to make from scratch!

Scroll Down For A Printable Recipe Card At The Bottom Of The Page

Chocolate Buttercream Frosting Just Like My Mom Made It!

When I was growing up, one of our family’s favorite desserts was when my Mom would go into our kitchen after dinner and whip up a “from scratch” chocolate cake.  She would frost it with her creamy chocolate buttercream frosting, and we would dig in! Well, this is her recipe for the frosting.

I’ve made it many times over the years when I need an easy chocolate buttercream frosting to cover a cake, brownies or cupcakes!

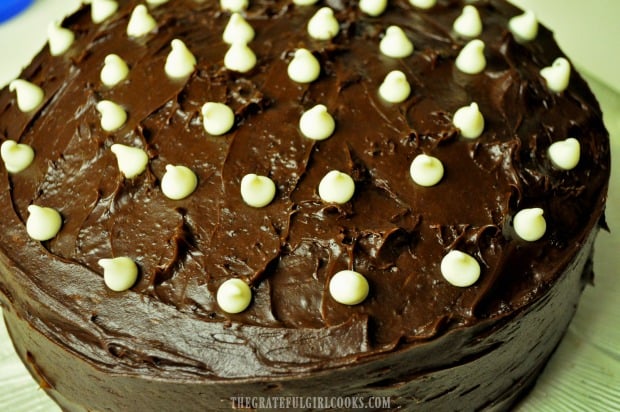
Here is the chocolate buttercream frosting on a cake.

It’s always more tasty and inexpensive when you make it from scratch with a few common ingredients (probably already in your pantry).

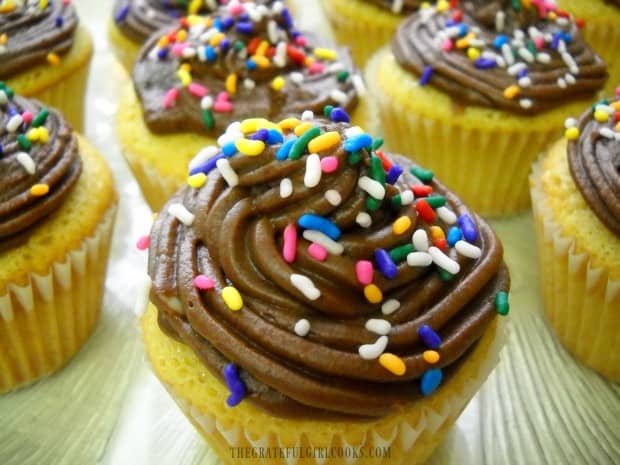
Mom's chocolate buttercream frosting on yellow cupcakes.

The recipe makes enough to cover a bunch of cupcakes, a 13×9 sheet cake, or a two layer cake. It is full of chocolate flavor, very creamy and delicious! Hope you enjoy it!

If you enjoy homemade cake frosting, be sure to check out my recipe for German Chocolate Cake, which FEATURES a phenomenal coconut frosting! By the way, You can find ALL my recipes in the Recipe Index, located at the top of the page. Have a great day.

Interested In More Recipes?

Thank you for visiting this website. I appreciate you using some of your valuable time to do soIf you’re interested, I publish a newsletter 2 times per month (1st and 15th) with all the latest recipes, and other fun info. I would be honored to have you join our growing list of subscribers, so you never miss a great recipe!
There is a Newsletter subscription box on the top right side (or bottom) of each blog post, depending on the device you use, where you can easily submit your e-mail address (only) to be included in my mailing list.

You Can Also Find Me On Social Media:

Facebook page: The Grateful Girl Cooks!
Pinterest:
The Grateful Girl Cooks!
Instagram:
jbatthegratefulgirlcooks

 Have a GREAT day!

Author's signatureRecipe Source: My Mom

↓↓ PRINTABLE RECIPE BELOW ↓↓

0 from 0 votes
Mom's Chocolate Buttercream Frosting
Prep Time
5 mins
Cook Time
3 mins
Total Time
8 mins
 
It's easy to make a delicious, thick chocolate buttercream frosting from scratch that will add a touch of YUM to cakes, brownies, and cupcakes!
Category: Dessert
Cuisine: American
Keyword: chocolate buttercream frosting
Servings: 24 Enough for 24 cupcakes or one layer cake
Calories Per Serving: 84 kcal
Author: JB @ The Grateful Girl Cooks!
Ingredients
  • 6 Tablespoons butter
  • 4 Tablespoons cocoa powder
  • 1 dash salt
  • 1 teaspoon vanilla extract
  • 12 ounces powdered sugar (3/4 of a 16 oz. box)
  • 1/4 cup milk plus more if needed
Instructions
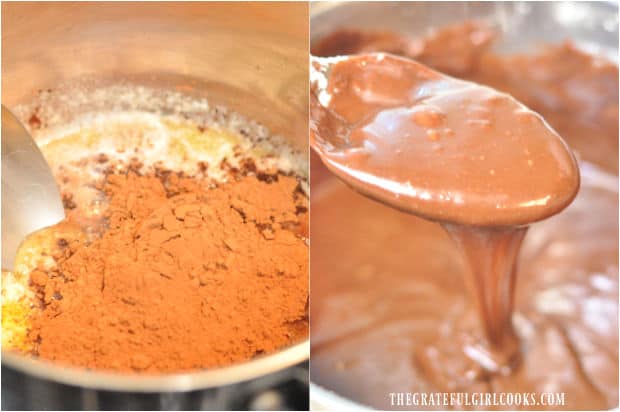
  1. Place butter in a small saucepan over low heat and heat until melted. Remove pan from heat.
  2. Add cocoa powder to melted butter and mix until combined. Add salt, vanilla, and milk; mix well.

  3. Slowly add the powdered sugar; beat until thoroughly combined. If the frosting is too thin for your liking, add additional powdered sugar (a little at a time). If frosting is too thick, add a little bit of milk (a little at a time).

  4. Frost cake or cupcakes and enjoy!
Recipe Notes

Recipe Source: My Mom

Nutrition Facts
Mom's Chocolate Buttercream Frosting
Amount Per Serving (1 (frosting for one cupcake)
Calories 84 Calories from Fat 27
% Daily Value*
Fat 3g5%
Saturated Fat 1g6%
Cholesterol 7mg2%
Sodium 28mg1%
Potassium 16mg0%
Carbohydrates 14g5%
Sugar 14g16%
Vitamin A 90IU2%
Calcium 5mg1%
Iron 0.1mg1%
* Percent Daily Values are based on a 2000 calorie diet.

Here’s one more to pin on your Pinterest boards!It's easy to make a delicious, thick chocolate buttercream frosting from scratch that will add a touch of YUM to cakes, brownies, and cupcakes!


Save

Save