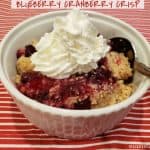
Blueberry Cranberry Crisp, with sweet blueberries, tangy cranberries and a buttery streusel topping is an easy to make, delicious dessert!

Fruit cobblers and crisps are a delicious way to enjoy dessert (and fruit)! They can be enjoyed year round thanks in part to many flash-frozen fruits that are available in grocery stores. This recipe for blueberry cranberry crisp can be made with either fresh or frozen fruit, which is great news!
I always try to keep a bag of blueberries and a bag of cranberries in my freezer, so they can be easily used in any recipe that calls for them, year-round.
Today I want to share this super simple dessert recipe a fruit crisp that I’m positive you’re gonna enjoy! It’s delicious, and hardly takes any time or effort at all to make. Here’s how to make it:
Scroll Down For A Printable Recipe Card At The Bottom Of The Page
Prepare The Fruit Filling
Before beginning, preheat your oven to 350°F, and lightly spray or grease an 8″ x 8″ baking dish. Now it’s time to make the fruit filling for the crisp! It’s EASY!
Place blueberries, cranberries, sugar, flour, lemon juice and a dash of salt in a large mixing bowl. Gently stir these ingredients until fully combined.
NOTE: You can use frozen OR fresh blueberries and cranberries. If using frozen berries, just toss ’em frozen into the bowl, cause they will thaw quickly! Once combined, pour them into the lightly greased or sprayed baking dish. See how easy that was?


Make The Streusel Topping
Now it’s time to make the buttery streusel topping for the fruit crisp. Place flour, brown sugar, COLD butter chunks, ground cinnamon and old fashioned rolled oats in a medium sized bowl.
Use a pastry blender (shown in photo), two forks, or your fingers to cut the cold butter into the crumb topping. Continue until the butter is about the size of peas, and is fully incorporated into a crumbly mixture.
NOTE: You can also do this step in a food processor, if desired. Pulse off and on until the mixture is crumbly.


Time To Bake The Blueberry Cranberry Crisp
Evenly spread the crumb streusel topping over the surface of the fruit filling. Place the blueberry cranberry crisp on the middle rack of the preheated oven. Bake at 350°F. for approximately 32-35 minutes.
When done, the fruit juices will be bubbly around the edges, and the top of the crisp will be golden brown. Remove the pan from the oven, and transfer it to a wire rack. Let the blueberry cranberry crisp cool down for approximately 5 minutes before serving.


Serve The Blueberry Cranberry Crisp
Serve the blueberry cranberry crisp warm or at room temperature, whichever way you prefer. Top each portion with a nice scoop of ice cream, or give it a dollop or spray of sweet whipped cream.
Grab a spoon, dig in, and enjoy this simple, tasty dessert. The blueberries are nice and sweet, and the cranberries are sweet, but with a bit of tang to balance it out.


I hope you enjoy this recipe. It really is so easy to make, and has great flavor! Thanks for stopping by. I appreciate it, and hope you will come back soon. Have a great day!
Looking For More Crisp or Cobbler Recipes?
You can find all of my crisp/coble recipes in the Recipe Index, which is located at the top of the page. I have quite a few, including:
Want More Recipes? Get My FREE Newsletter!
I publish a newsletter 2 times per month (1st and 15th) with lots of recipes, tips, etc..
Would you like to join our growing list of subscribers?
There is a Newsletter subscription box on the top right (or bottom) of each blog post, depending on the device you use.
You can submit your e-mail address there, to be added to my mailing list.
Find Me On Social Media:
Facebook page: The Grateful Girl Cooks!
Pinterest: The Grateful Girl Cooks!
Instagram: jbatthegratefulgirlcooks

Recipe Adapted from the cookbook “What’s For Dinner?”, by Maryana Vollstedt, published by Chronicle books, 1997, page 259.
↓↓ PRINTABLE RECIPE BELOW ↓↓
Blueberry Cranberry Crisp, with sweet blueberries, tangy cranberries and a buttery streusel topping is an easy to make, delicious dessert!
- 2 cups blueberries fresh OR frozen
- 2 cups cranberries fresh OR frozen
- ¾ cup granulated sugar
- ¼ cup all purpose flour
- 2 Tablespoons fresh squeezed lemon juice
- 1 dash salt
- ½ cup all purpose flour
- ¼ cup old fashioned rolled oats
- ¼ cup cold butter 1/2 stick, cut in chunks
- ¼ cup brown sugar light or dark
- ¼ teaspoon ground cinnamon
Preheat oven to 350°F. Lightly spray or grease an 8" x 8" baking dish.
Place blueberries, cranberries, sugar, flour, lemon juice and dash of salt in a large bowl. Gently stir until combined. NOTE: You can use frozen OR fresh blueberries and cranberries. If using frozen berries, toss 'em frozen into bowl- they thaw quickly! Once combined, pour fruit filling into prepared baking dish.
Place flour, brown sugar, COLD butter chunks, ground cinnamon and oats in a medium bowl. Use a pastry blender, two forks, or your fingers to cut the cold butter into the crumb topping. Continue until the butter is about the size of peas. NOTE: You can also do this step in a food processor. Pulse on and off until mixture is crumbly.
Evenly spread crumb topping over fruit filling. Bake at 350°F. on middle rack for 32-35 minutes. When done, fruit juices will be bubbly around the edges, and top will be golden brown. Remove pan from oven; transfer to a wire rack. Let blueberry cranberry crisp cool for 5 minutes before serving.
Serve warm or at room temperature, whatever you prefer. Top each portion with a scoop of ice cream, or whipped cream. Enjoy!
Here’s one more to pin on your Pinterest boards!


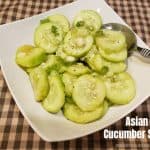

 to accompany a favorite soup or chili. / The Grateful Girl Cooks!")


 to accompany a favorite soup or chili. / The Grateful Girl Cooks!")


 and maple syrup is an easy, filling, delicious breakfast everyone will enjoy! / The Grateful Girl Cooks!")


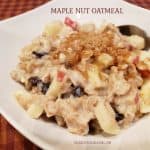
 and maple syrup is an easy, filling, delicious breakfast everyone will enjoy! / The Grateful Girl Cooks!")