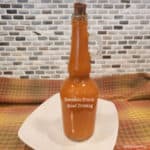
Hot Cocoa Bombs are a yummy, fun way to enjoy hot chocolate! Hot cocoa mix and mini marshmallows appear when hot milk or water is added!

Hot cocoa bombs are a fun new trending beverage novelty. You not only get a hot steaming cup of delicious hot chocolate, but you get to enjoy the “show” as a round chocolate sphere melts and releases surprise hot cocoa mix and mini marshmallows inside. Kids of all ages will love this fun, yummy treat, especially in the cold dreariness of winter.
Only a few ingredients are necessary to make these fun treats, including silicon sphere molds, which you can purchase very inexpensively online. The method of making hot cocoa bombs is not too difficult, and the finished product makes a fun hot beverage OR a lovely gift for someone you care for! Let me show you how to make six basic hot cocoa bombs:
Scroll Down For A Printable Recipe Card At The Bottom Of The Page
Start By Melting The Chocolate
The chocolate I use is chocolate candy “wafers”, which you can find in grocery stores or in certain craft stores (in baking section). You can use milk chocolate, dark chocolate, or even mint chocolate wafers. I used milk chocolate candy wafers that I bought for $2.99 at Hobby Lobby (12 oz. pkg.).
Place about half of the package in a microwave safe large bowl, and melt, according to the manufacturer’s directions. Stir after heating. The wafers will eventually melt all the way, and will be very smooth after stirring. Chocolate coating should be completely smooth for the silicon shell molds.
Making these hot cocoa bombs will use almost the entire package for two coats of chocolate on the “shells”, plus a few left for garnish at the end. You will use about half for the first coating, and melt more to use for the second coating. It’s very simple to do!


Making The Chocolate Spheres
To make the hot cocoa bombs, you will need 12 large (about 2″ wide) silicon sphere molds. I ordered mine on Amazon in a 2-pack (about $10), which is great for making 6 hot cocoa bombs at a time. Once you have the silicon molds, you can reuse them over and over! Silicon molds are very flexible, so place them on top of a sturdy baking sheet to hold them firmly.
Coat one half shell at a time. Spoon a generous Tablespoon of the melted chocolate into one of the spheres. Use the back of a large spoon to pull the melted chocolate up the sides of the sphere. Continue pulling the chocolate up to the very top edge with the back of the spoon until the entire sphere is coated with chocolate. Continue with this until all twelve spheres have one full coating of chocolate.
Use a sharp knife to remove any chocolate from the top of the mold, because you want nice, clean rims on each sphere. Place the molds in a refrigerator for 5 minutes until chocolate is firm. Remove and repeat the process a second time, until all spheres have TWO full coats of melted chocolate to ensure a solid sphere, less likely to crack. Refrigerate again until firm!


The Chocolate Shells Have Firmed Up… Now What?
Once the chocolate spheres are completely set up and firm, it’s time to remove them from the mold. Lift up one set of six at a time and carefully pull the mold away slightly from the edges around the top of each sphere. Push from the bottom up on each mold, releasing one half shell at a time. Place the half shell onto wax or parchment paper, and continue until all half shells have been removed.
Try not to touch the chocolate spheres too much, because you don’t want fingerprints all over and you don’t want to melt the chocolate! Okay? Okay! Some folks recommend wearing plastic gloves, but I think you’ll be okay without them.


Filling And Sealing The Hot Cocoa Bombs
Now it’s time to fill up the hot cocoa bombs with… you guessed it… hot cocoa mix. Use a hot chocolate mix, and add the amount the package says to use for one cup. I added 3 Tablespoons of mix to each of six chocolate half shells. On top of that I added between 8-10 miniature marshmallows. NOTE: Other toppings can be added, including caramel bits, crushed peppermint candies, small mint chocolates, etc.
You should now have six filled half shells and six empty chocolate half shells. Perfect! The next step will be to attach the empty chocolate half shell onto the top of a filled half shell easily.


You will need to slightly melt the chocolate rim of an unfilled half shell. The best way I have found to do this is to heat a microwave-safe plate in the microwave on high for 1 minute. As soon as it’s heated, remove the plate. Hold a half shell, rim side down, and lightly place the rim edge onto the hot plate. Gently turn left and right for a couple seconds until the chocolate slightly melts/softens.
Immediately (and gently) fit it on top of one of the cocoa mix-filled half shells, remembering not to leave lots of fingerprints on the shell. The melted chocolate rim will bond with the edge of the cocoa-filled sphere half, and once firm, the two halves will be successfully attached. Repeat with remaining spheres.


Give Them A Little Pizazz!
If you would like to pretty the hot cocoa bombs up just a bit, wait until they have firmed up completely. Place each one into a pretty cupcake paper liner, then drizzle additional melted chocolate (white or milk/dark) on top, and lightly dust with colored sprinkles, if desired. Let sit until the chocolate drizzle is completely firm.
For Christmas this year, I placed one decorated hot cocoa bomb each into a small, flat-bottomed cellophane bag, and then tied each bag with festive Christmas ribbon. I loved giving them as gifts to our sons and their girlfriends so they could enjoy them, too. I attached the directions for using, and added the cocoa bombs to a large container filled with more of my homemade Christmas treats! They looked soooo cute hanging out with all the other Christmas goodies!

Time To Enjoy The Hot Cocoa Bombs!
When you are ready to enjoy the hot cocoa bombs, place one into a mug that is wide enough to accommodate the size of the cocoa bomb. Pour 8 ounces of steaming hot milk (or boiling water) carefully over each the hot cocoa bombs. NOTE: I prefer to use hot milk, because it makes the hot cocoa even more decadent, creamy and tasty!
Make sure you can see what happens next! The really hot liquid will melt through the top of the hot cocoa bombs, which releases the hot cocoa mix, mini marshmallows, and melts the chocolate shell! Give the hot cocoa bombs a good stir, to fully incorporate the hot cocoa mix and the melted chocolate into the drink. Now it’s time to enjoy drinking your hot cocoa bombs!


I hope you have the opportunity to try this fun way to make hot chocolate! It’s a “unique” presentation that is fun for kids of all ages to enjoy! Thank you for stopping by today, and I hope you will come back soon for more family friendly recipes. Have a great day, and may God bless you today… and always!
Looking For More HOT BEVERAGE Recipes?
You can find ALL of my recipes in the Recipe Index, which is located at the top of the page. I have some delicious hot beverage recipes you may enjoy, including:
Interested In More Recipes?
Thank you for visiting this website. I appreciate you using some of your valuable time to do so. If you’re interested, I publish a newsletter 2 times per month (1st and 15th) with all the latest recipes, and other fun info. I would be honored to have you join our growing list of subscribers, so you never miss a great recipe!
There is a Newsletter subscription box on the top right side (or bottom) of each blog post, depending on the device you use, where you can easily submit your e-mail address (only) to be included in my mailing list.
You Can Also Find Me On Social Media:
Facebook page: The Grateful Girl Cooks!
Pinterest: The Grateful Girl Cooks!
Instagram: jbatthegratefulgirlcooks

↓↓ PRINTABLE RECIPE BELOW ↓↓

Hot Cocoa Bombs are a yummy, fun way to enjoy hot chocolate! Hot cocoa mix and mini marshmallows appear when hot milk or water is added!
- 12 ounces chocolate candy wafers
- 18 Tablespoons hot chocolate mix , divided
- 48 miniature marshmallows
Place about half the chocolate candy wafers in a large, microwave safe bowl, Melt and stir, according to pkg. directions, until chocolate is completely smooth.
Place silicon molds on a sturdy baking sheet to hold them firmly. Coat one half shell at a time with melted chocolate coating. Spoon generous Tablespoon of chocolate into ½ sphere. Use the back of a large spoon to pull chocolate up the sides. Continue pulling chocolate up to top edge until sphere is fully coated. Continue with this until all twelve spheres have one full coating of chocolate. Use knife to remove chocolate from top of the mold, because you need clean rims. Place molds in refrigerator for 5 minutes or until chocolate is firm. Remove; repeat process a second time, until all spheres have TWO coats of melted chocolate. Refrigerate again until firm!
Lift up one silicon mold at a time and carefully pull mold away slightly from edges around top of each sphere. Push from the bottom up on each mold, releasing one half shell at a time. Place half shell onto wax or parchment paper. Continue until all half shells have been removed. Don't touch chocolate spheres too much, because of fingerprints and you don't want melted chocolate!
Place hot cocoa mix in each of 6 half-shells in the amount given for one cup (approx. 3 T.). Add 8-10 miniature marshmallows. NOTE: Other toppings can be added, including caramel bits, crushed peppermint candies, small mint chocolates, etc. You should have 6 filled half shells and 6 empty half shells.
Heat a microwave-safe plate in microwave on high for 1 minute. Remove plate. Hold an empty half shell, rim side down; gently place rim edge onto hot plate. Gently turn left and right for 2-3 seconds until chocolate edge slightly melts/softens. Immediately (and gently) fit it on top of one of the cocoa mix-filled half shells. Melted chocolate rim will bond with rim of cocoa-filled half, and once firm, the two halves will be successfully attached. Repeat with remaining spheres.
Place each sphere into cupcake paper liner. Drizzle top with additional melted chocolate; and top with colored sprinkles. Let sit until chocolate is firm.
To serve, place one into a mug wide enough to accommodate cocoa bomb. Pour 8 ounces of steaming hot milk (or boiling water) carefully over cocoa bomb.
Watch- the hot liquid will melt the top of the hot cocoa bomb, which releases hot cocoa mix,, marshmallows, and melts the chocolate shell! Give it all a good stir, to fully blend cocoa mix and melted chocolate into the drink. Enjoy!
NOTE: Caloric calculation was made without adding any calories for milk used to activate the hot cocoa bomb. Caloric count may vary, depending on type of liquid used (non-fat, 1%, 2%, etc.).
Here’s one more to pin on your Pinterest boards!