It’s easy to make homemade Hoisin sauce, a key ingredient in many Asian dishes. Why buy it? Make it in your own kitchen, with only a few ingredients!
Have you ever tried to cook a Chinese dish and need Hoisin Sauce as one of the ingredients, but don’t have any in the pantry? I’ve been in that situation before, so today I want to share with you how easy it is to make your own Homemade Hoisin Sauce!
Authentic hoisin sauce is made using soybeans or soybean paste… but… (go figure) I don’t usually have those items hanging around my home. This recipe for homemade hoisin sauce is an incredibly close substitute in taste to store-bought (and made without soybeans). I’ve used it many times in my recipes, with great results!
Scroll Down For A Printable Recipe Card At The Bottom Of The Page

I usually buy a “name brand” Hoisin sauce at the grocery store. However, sometimes (especially when cooking a stir fry or another Asian recipe), I find I need just a bit of hoisin sauce, and I’ve run out (even though I THOUGHT I had some in the fridge). That’s why I searched for, and found a recipe online for how to make your own hoisin sauce. It’s very convenient to make a small batch of homemade hoisin sauce, without having to run to the store at the last minute!
Hoisin sauce is one of the ingredients needed to make Hoisin Asian Meatballs or my Mixed Salad with Hoisin Vinaigrette and Crisp Panko Chicken. It’s quite handy to have homemade hoisin sauce in the fridge when I need it!
What Ingredients Do You Need To Make Homemade Hoisin Sauce?
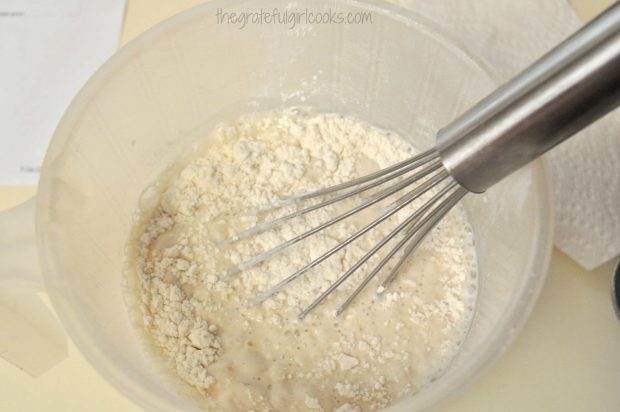
Here’s the ingredients necessary to make this homemade hoisin sauce. You will need soy sauce, water, molasses, creamy peanut butter, rice (or white wine) vinegar, garlic powder, hot sauce, and cornstarch.

How Is Homemade Hoisin Sauce Made?
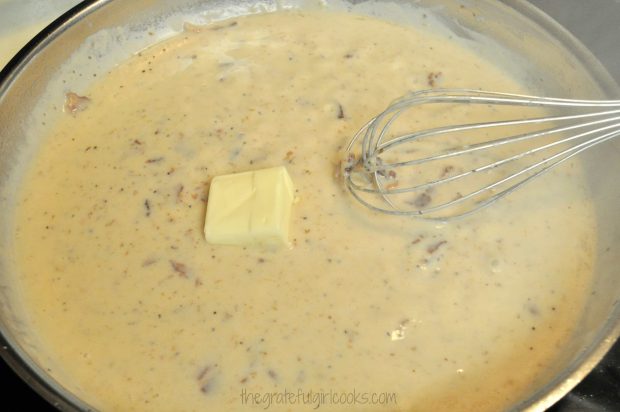
To make the hoisin sauce, put all the ingredients EXCEPT CORNSTARCH into a small pan. Heat the ingredients using medium heat, until the peanut butter and the molasses dissolve, and the sauce is smooth.
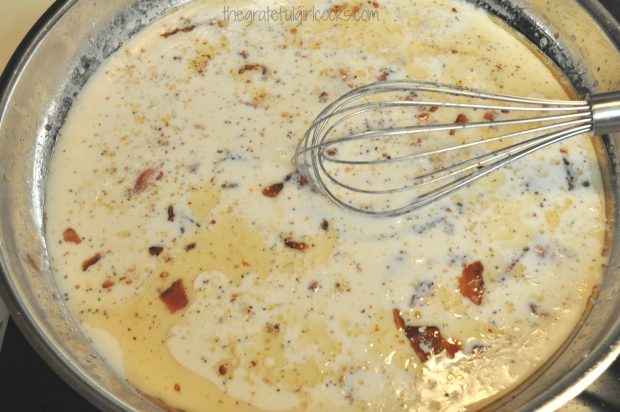
Turn up the heat on your stove top to medium-high heat. Add cornstarch, and whisk ingredients together until all lumps are gone. Once the sauce is smooth, turn heat to a simmer, and continue cooking for 1-2 minutes, until the sauce has thickened a bit.

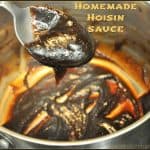
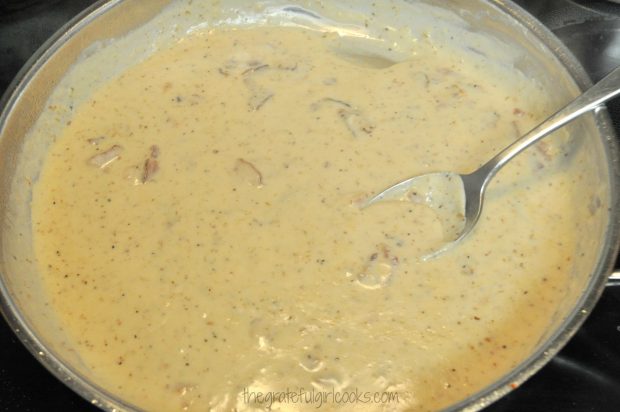
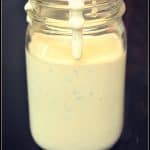
The photo below shows what the homemade hoisin sauce looks like, after it has thickened. The recipe, as written, will yield about 1/2 cup of hoisin sauce.
How To Store Homemade Hoisin Sauce
Be sure to store the hoisin sauce in a covered airtight container in the refrigerator. If sealed properly, the sauce should stay fresh for up to 2 weeks. TIP: Once refrigerated, the sauce may thicken even more, so when you get ready to use it, stir it real good before using.

That’s it! See how easy it is to make your own hoisin sauce? I love learning how to re-create store bought food items in the comfort of my own kitchen. Knowing how to make items like this homemade hoisin sauce has come in handy more than once! It’s also saved me countless trips to the grocery store “for just one more thing”.
Have a fantastic day, friends! Hope you will remember this recipe when you need homemade hoisin sauce for a great Asian meal you are preparing!
Looking For More Unique SAUCE Recipes?
You can find ALL my recipes in the Recipe Index, located at the top of the page. I have a variety of sauce recipes you might be interested in, including:
- Easy Homemade Enchilada Sauce
- Homemade Hot Fudge Sauce
- Homemade Lemon Curd
- Mom’s Grilled Chicken Basting Sauce
Interested In More Recipes?
Thank you for visiting this website. I appreciate you using some of your valuable time to do so. If you’re interested, I publish a newsletter 2 times per month (1st and 15th) with all the latest recipes, and other fun info. I would be honored to have you join our growing list of subscribers, so you never miss a great recipe!
There is a Newsletter subscription box on the top right side (or bottom) of each blog post, depending on the device you use, where you can easily submit your e-mail address (only) to be included in my mailing list.
You Can Also Find Me On Social Media:
Facebook page: The Grateful Girl Cooks!
Pinterest: The Grateful Girl Cooks!
Instagram: jbatthegratefulgirlcooks

Recipe Source: http://www.curiouscuisiniere.com/hoisin-sauce/
- 3 Tablespoons soy sauce
- 1 Tablespoon water
- 2 Tablespoons molasses
- 1 Tablespoon peanut butter (creamy)
- 1 Tablespoon garlic powder
- 1 Tablespoon Rice Wine Vinegar (may substitute white wine vinegar)
- 1/2 teaspoon garlic powder
- 1/4 teaspoon hot sauce (I used srriracha)
- 2 teaspoons cornstarch
- To make the sauce, put all ingredients EXCEPT CORNSTARCH into a small pan. Heat the ingredients using medium heat, until the peanut butter and molasses dissolve, and sauce is smooth.
- Turn up the heat on your stove to medium-high heat. Add cornstarch to sauce; whisk ingredients together until all lumps are gone. Once sauce is smooth, turn heat to a simmer, and continue cooking for 1-2 minutes, until the sauce has thickened a bit.
- Sauce can be used immediately on meats or veggies. Store in airtight covered container in refrigerator. When ready to use after refrigeration, give it a good stir, use and enjoy this sauce in a variety of meals.
Here’s one more to pin on your Pinterest boards!


 is an easy to prepare fruit sauce that can be used as a decorative garnish and flavor enhancer for many desserts! / The Grateful Girl Cooks!")


 is an easy to prepare fruit sauce that can be used as a decorative garnish and flavor enhancer for many desserts! / The Grateful Girl Cooks!")
 / The Grateful Girl Cooks!")


 / The Grateful Girl Cooks!")


 is a 3-ingredient dessert sauce that's easy to make, and perfect for topping cheesecake, ice cream, cakes, or pancakes./ The Grateful Girl Cooks!")


 is a 3-ingredient dessert sauce that's easy to make, and perfect for topping cheesecake, ice cream, cakes, or pancakes. / The Grateful Girl Cooks!")


