Month: December 2016

Merry Christmas 2016

We wish you a merry Christmas 2016, from our little part of the great Pacific northwest!Merry Christmas 2016 / The Grateful Girl Cooks!

In the middle of the hustle and bustle of the holiday season, I’m taking a two week break from blogging to enjoy my family, and celebrate the birth of Jesus.  My life has been forever changed because of God’s mercy, grace and unconditional love. I am so very GRATEFUL.  My hope and prayer is that this Christmas season holds special meaning for you, as well.

Thank you to all who have visited this blog this year. I am very thankful for you, and sincerely wish each of you a Merry Christmas 2016, Happy Hanukkah, and Happy New Year from the bottom of my heart!

May your celebrations be blessed with the love of friends and family. That the most special “gift” we could ever hope to have.

I look forward to discovering, cooking, and then sharing many delicious new recipes with you in the coming year. 

Merry Christmas 2016 / The Grateful Girl Cooks!
From our family and our home in Oregon to yours… Merry Christmas 2016, and Happy New Year!

Interested In More Recipes?

Thank you for visiting this website. I appreciate you using some of your valuable time to do soIf you’re interested, I publish a newsletter 2 times per month (1st and 15th) with all the latest recipes, and other fun info. I would be honored to have you join our growing list of subscribers, so you never miss a great recipe!

There is a Newsletter subscription box on the top right side (or bottom) of each blog post, depending on the device you use, where you can easily submit your e-mail address (only) to be included in my mailing list.

You Can Also Find Me On Social Media:
Facebook page: The Grateful Girl Cooks!
Pinterest: The Grateful Girl Cooks!
Instagram: jbatthegratefulgirlcooks

Author's signature


Save

Save

Save

Save

Save

Save

Save

Save

Save

Save

Save

Save

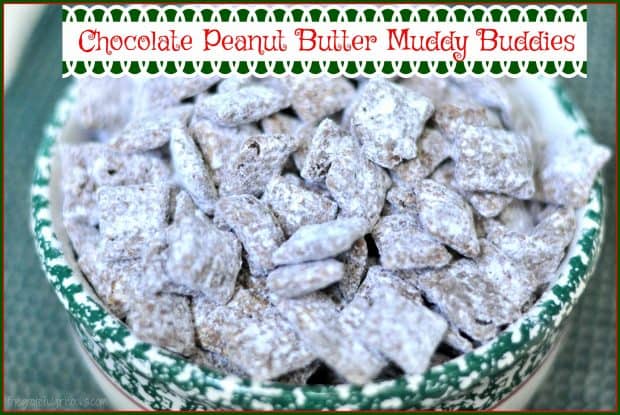
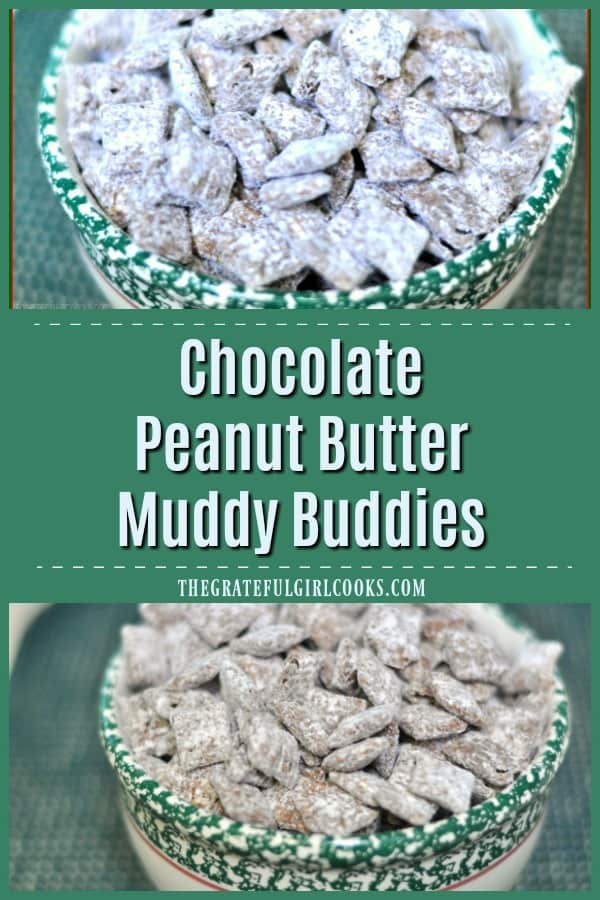
Chocolate Peanut Butter Muddy Buddies

Chocolate Peanut Butter Muddy Buddies are powdered sugar dusted chocolate peanut butter crispy treats you will love! They’re yummy snacks or holiday gifts!Chocolate Peanut Butter Muddy Buddies are powdered sugar dusted chocolate peanut butter crispy treats you will love! They're yummy snacks or holiday gifts!
Chocolate Peanut Butter Muddy Buddies are a fun little snack during the holidays… or anytime, for that matter. Perfect for snacking OR giving to friends as a food gift… they are sure to make someone smile!

I love these decadent little snacks… with a crunch and the taste of chocolate and peanut butter, they are perfect for serving at a party, or sitting in front of the TV watching a football game!  Best part… they are so easy to make!

Scroll Down For A Printable Recipe Card At The Bottom Of The Page

How To Make Chocolate Peanut Butter Muddy Buddies

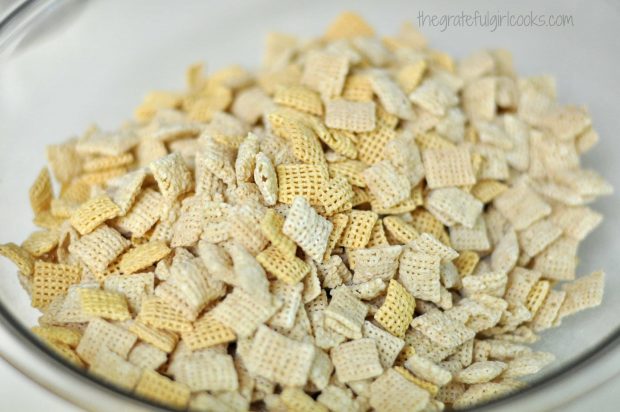
Measure out the Chex cereal into a LARGE bowl. I used corn and rice for this recipe.

The different crispy cereals for muddy buddies are placed into a large bowl.

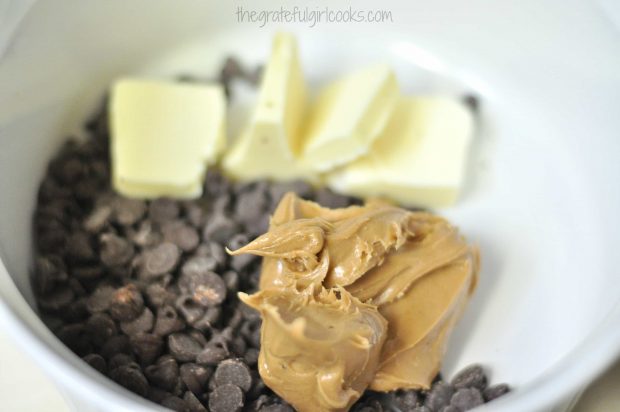
Melt chocolate chips, peanut butter and butter in a microwavable bowl on High for 1 minute. Remove and stir until creamy smooth. If necessary, microwave an additional 15 seconds, then stir until smooth. Do NOT overcook or chocolate will burn.

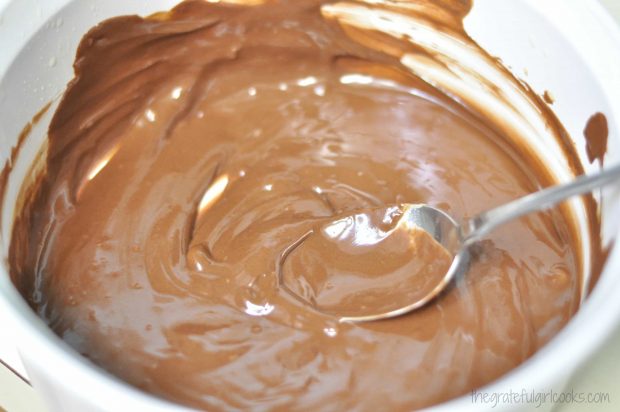
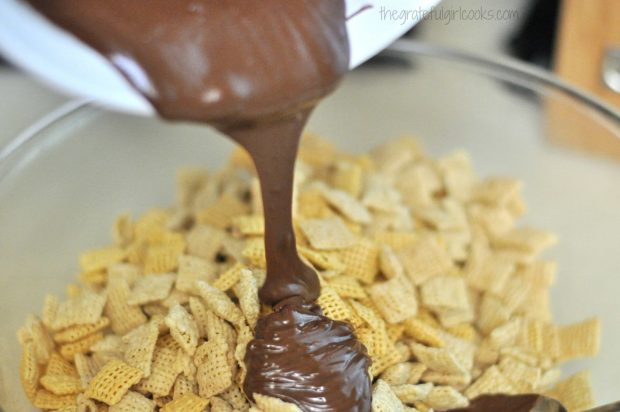
Mine was smooth after first minute of cooking and stirring well.  Once totally smooth, add the vanilla extract. Stir.  Pour the chocolate mixture over the cereal. Stir well, to fully coat all the cereal.

Chocolate, peanut butter and butter are placed in bowl in microwave to melt.

Chocolate Peanut Butter Muddy Buddies mixture is melted and ready to add to cereal.

Chocolate Peanut Butter Muddy Buddies sauce is poured over crispy cereal.

Time To Coat The Muddy Buddies

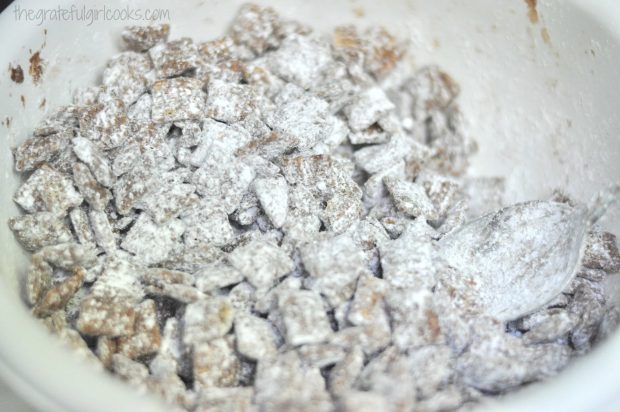
Once all cereal has been coated with chocolate, place HALF the mixture into a separate clean LARGE bowl.  Add HALF the powdered sugar, and stir to fully coat. When done, remove the chocolate peanut butter muddy buddies to wax paper. Repeat this process with the other half of the cereal and powdered sugar.

Chocolate Peanut Butter Muddy Buddies are coated with powdered sugar in bowl.

Let The Chocolate Peanut Butter Muddy Buddies Cool

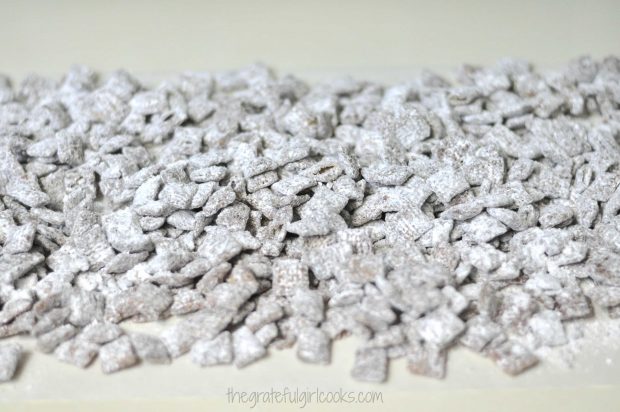
Spread the chocolate peanut butter muddy buddies out on wax paper and let them cool completely, before serving.

Chocolate Peanut Butter Muddy Buddies are laid on wax paper, to dry.

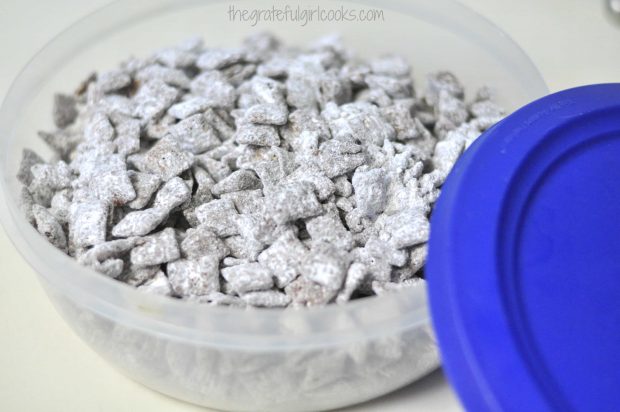
Store the Muddy Buddies in an airtight covered container in refrigerator for up to 2 weeks.  Try to stay out of them, cause they are ADDICTING! It’s also fun to divide the mix up into fancy covered containers or jars and give this simple gift to friends over the holidays.

Chocolate Peanut Butter Muddy Buddies should be stored in airtight container.

If you’re looking for another recipe using Chex cereal I hope you will check out my Chex Mix Munchies!  They are another great snack, made in the microwave!

Have a wonderful day! I sincerely hope you can find time during this busy time of year to quietly reflect on the true meaning of Christmas. You are deeply loved by the One who created you, and sent His only Son to earth that first Christmas to draw us all back to Him.

Looking For More Snack Recipes?

You can find all of my recipes in the Recipe Index, located at the top of the page. I have some wonderful snack recipes you might enjoy, including:

Interested In More Recipes?

Thank you for visiting this website. I appreciate you using some of your valuable time to do soIf you’re interested, I publish a newsletter 2 times per month (1st and 15th) with all the latest recipes, and other fun info. I would be honored to have you join our growing list of subscribers, so you never miss a great recipe!
There is a Newsletter subscription box on the top right side (or bottom) of each blog post, depending on the device you use, where you can easily submit your e-mail address (only) to be included in my mailing list.

You Can Also Find Me On Social Media:
Facebook page: The Grateful Girl Cooks!
Pinterest: The Grateful Girl Cooks!
Instagram: jbatthegratefulgirlcooks

Author's signature

Recipe Adapted From: The cookbook titled : “Betty Crocker Christmas Cookbook”, Page 278, Wiley Publishing, Inc., Copyright 2010, General Mills.

0 from 0 votes
Chocolate Peanut Butter Muddy Buddies
Prep Time
10 mins
Cook Time
0 mins
Total Time
10 mins
 
Chocolate Peanut Butter Muddy Buddies are powdered sugar dusted chocolate peanut butter crispy treats you will love! They're yummy snacks or holiday gifts!
Category: Snack
Cuisine: American
Keyword: muddy buddies
Servings: 36 (approx. 9 cups total)
Calories Per Serving: 134 kcal
Author: JB @ The Grateful Girl Cooks!
Ingredients
  • 9 cups Chex cereal (any variety- I used half corn and half rice)
  • 1 cup semi-sweet chocolate chips
  • 1/2 cup peanut butter
  • 1/4 cup butter
  • 1 teaspoon vanilla extract
  • 1 1/2 cups powdered sugar
Instructions
  1. Place the cereal into a large bowl. Set the bowl aside.
  2. Place the chocolate chips, peanut butter and butter into a microwaveable bowl. Cook this uncovered on the HIGH setting for 1 minute. Remove from microwave, and stir well. It is ready when all ingredients become smooth. If necessary, place back in microwave for15 additional seconds, then stir again until mixture is smooth.
  3. Stir vanilla extract into melted chocolate peanut butter mixture. Pour this mixture over the cereal. Stir well, until all is coated with chocolate. Once coated, pour HALF the cereal into a separate large clean bowl. Add HALF the powdered sugar. Stir well, until completely coated.
  4. Remove powdered sugar coated cereal to wax paper. Repeat process with other half of cereal and powdered sugar. Spread finished cereal on wax paper, until cool. This is the method I used.
  5. (Note: If desired, you can place all the cereal and powdered sugar in a 2 gallon plastic storage bag, and shake until covered).
  6. Store muddy buddies in a sealed, airtight container in refrigerator for up to 2 weeks
Nutrition Facts
Chocolate Peanut Butter Muddy Buddies
Amount Per Serving (1 (1/4 cup serving))
Calories 134 Calories from Fat 45
% Daily Value*
Fat 5g8%
Saturated Fat 2g13%
Cholesterol 3mg1%
Sodium 116mg5%
Potassium 108mg3%
Carbohydrates 21g7%
Fiber 2g8%
Sugar 8g9%
Protein 2g4%
Vitamin A 205IU4%
Vitamin C 2mg2%
Calcium 38mg4%
Iron 5.1mg28%
* Percent Daily Values are based on a 2000 calorie diet.

Here’s one more to pin on your Pinterest boards!Chocolate Peanut Butter Muddy Buddies are powdered sugar dusted chocolate peanut butter crispy treats you will love! They're yummy snacks or holiday gifts!


Save

Save

Save

Save

Save

Save

Save

Save

Save

Save

Save

Save

Save

Save

Save

Save

Alice Springs Chicken (Outback Steakhouse Copycat)

Alice Springs Chicken is pan-seared chicken with bacon, mushrooms, and melted cheeses, in a honey-mustard sauce. This copycat recipe is delicious!Alice Springs Chicken is pan-seared chicken with bacon, mushrooms, and melted cheeses, in a honey-mustard sauce. This copycat restaurant recipe is delicious!
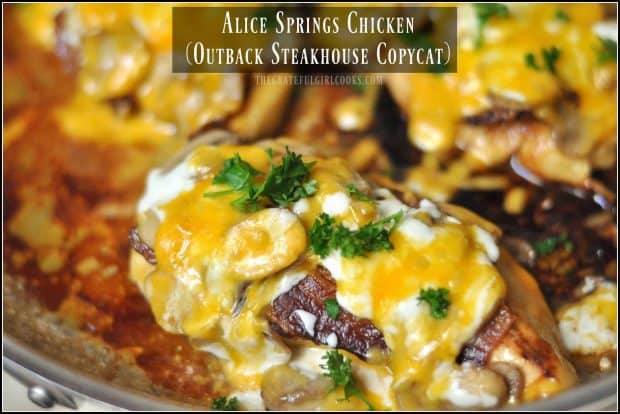
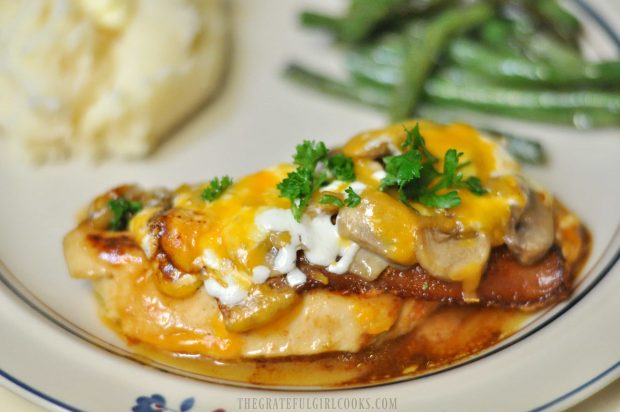
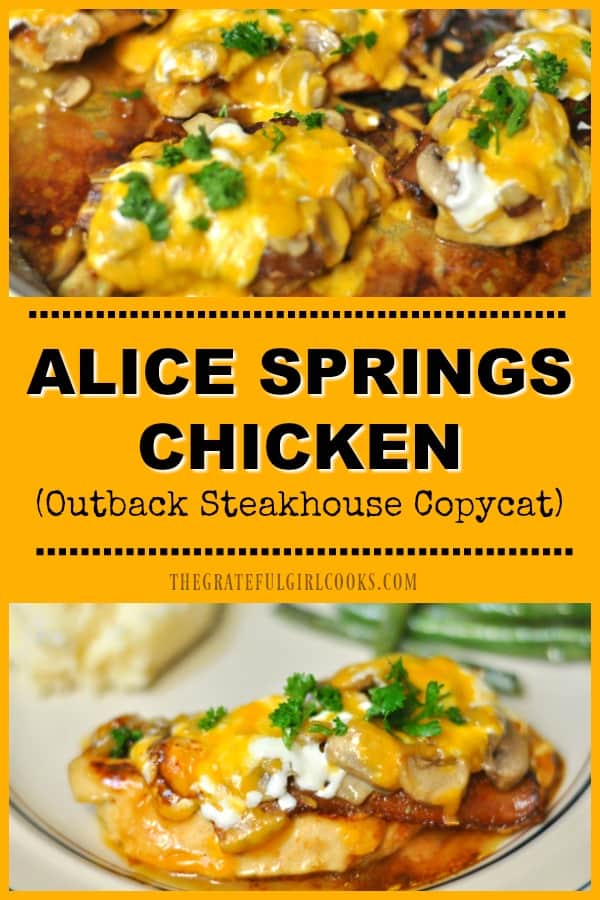
Do chicken breasts, covered with bacon, mushrooms, Jack and Cheddar cheese in a honey mustard sauce sound good? If so, you will enjoy this Alice Springs Chicken (Outback Steakhouse Copycat) recipe, a popular menu item at this nationally known restaurant.

I found the recipe for Alice Springs Chicken in a cookbook I have had for years, which features kitchen clones from famous restaurants, and decided to make this one.  It really tastes wonderful! The recipe itself is very easy to prepare, and the end result is fantastic! Here’s how to make this dish at home:

Scroll Down For A Printable Recipe Card At The Bottom Of Page

Make Sauce To Marinate Chicken

Combine Dijon mustard, honey, oil, and lemon juice in a small bowl. Blend well with a fork until combined.  Place chicken breasts in a resealable plastic food storage bag.

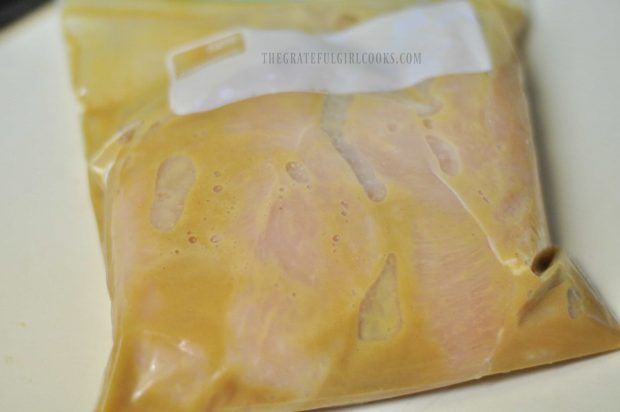
Pour about 2/3 of the sauce over the chicken. Make sure chicken gets coated with sauce, then place in refrigerator and let marinate for 2 hours.  Cover and refrigerate the remaining 1/3 of the sauce until time to serve the meal.
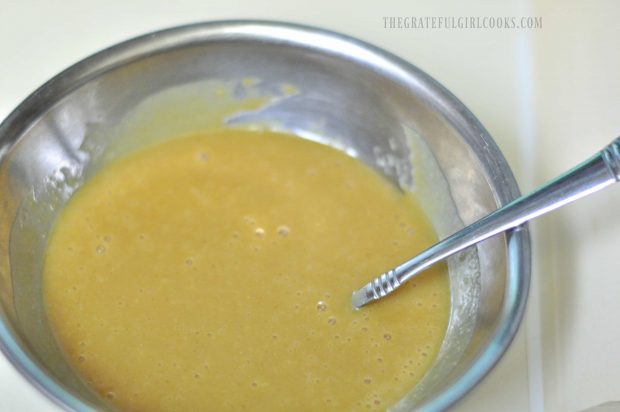
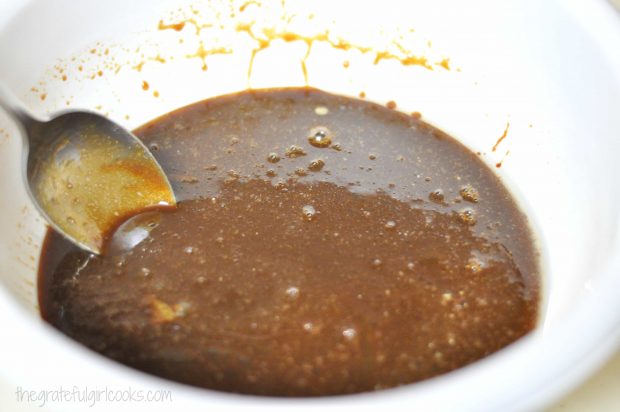
Dijon mustard sauce in bowl

Chicken marinating in plastic bag

In a small skillet, sauté sliced mushrooms in butter until cooked through (approx. 4-5 minutes). Set aside.
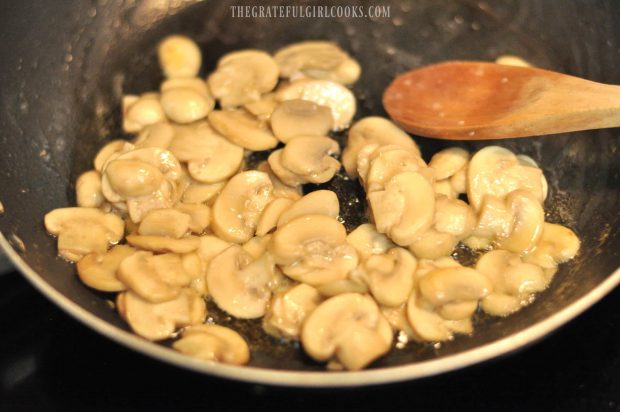
Mushrooms cooking in skillet

Time To Cook The Chicken

Heat oil in a large OVENPROOF skillet (If you don’t have an ovenproof skillet, sear the chicken breasts as directed in regular skillet, then transfer them to a baking dish). When oil is hot, add the chicken breasts.

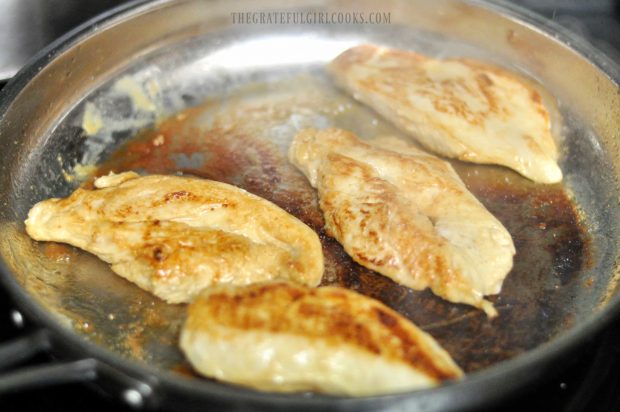
Cook them for 3-4 minutes per side. until golden brown. Once done, move the skillet off the heat, but leave chicken in skillet (unless transferring to baking dish).

***Here’s my TIP... make SURE the chicken breasts are thin. I took 2 really thick chicken breasts and sliced them horizontally when I made this dish. The very first time I made this recipe, I was cooking this for 6 people and used a couple large/thick chicken breasts in the mix.

Even with the pan-searing AND the baking time in the recipe, the really thick ones did not fully cook all the way through (about 85 percent), so I had to take their plates back and microwave the chicken for our good friends who were over for dinner. Ugh. That sure was embarrassing.  We laughed about it, but I was mortified!  Have not ever repeated THAT mistake since, thankfully!
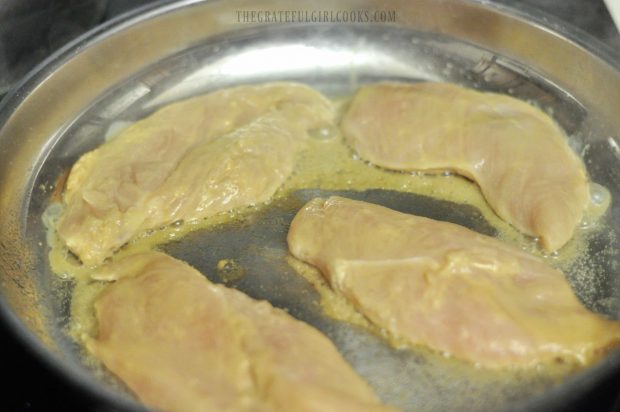
Chicken breasts cooking in skillet

Pan-seared chicken browned on one side in skillet

Assembling The Alice Springs Chicken

Brush each chicken breast with a bit of the reserved honey mustard sauce. Do NOT use the sauce the chicken was marinated in!). Sprinkle the chicken with salt, pepper, and paprika. Place two pieces of bacon on top of each chicken breast (can cut to fit).

Evenly place cooked mushrooms on top of the bacon, then cover with Jack cheese, followed by cheddar cheese (about 1/4 cup of each type of cheese onto each piece of chicken).
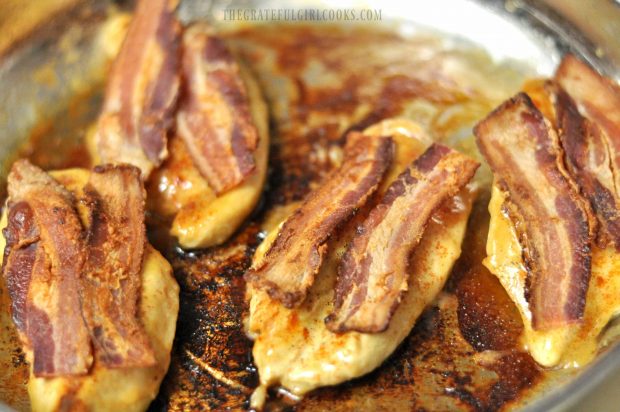
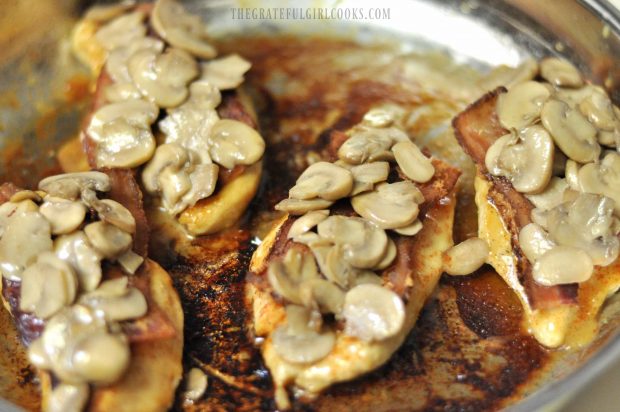
Bacon strips on top of cooked chicken breasts in skillet

Cooked mushrooms on top of bacon and chicken

Grated cheddar cheese on top of bacon, mushrooms and chicken

Cook the chicken breasts, uncovered,  in a preheated 375 degree oven for 9-10 minutes. When done, the cheese should be fully melted and should have begun to bubble.

Garnish And SERVE!

Remove the hot skillet from the oven. Top each chicken breast with a sprinkle of fresh chopped parsley.

Melted cheese on top of cooked dish

Serve the reserved honey mustard sauce in a bowl on the side, OR place a spoonful onto the dinner plate and place the chicken on top of the sauce (that’s how I serve it!).

Serve while hot, and enjoy this delicious restaurant-cloned Alice Springs Chicken dish! 

Alice Springs Chicken on a dinner plate, ready to eat.

At times it’s fun and economical to be able to re-create popular restaurant menu items in the comfort of your own kitchen. Sure hope you will consider trying this one for Alice Springs Chicken… and sincerely hope you and your loved ones enjoy it!  Have a wonderful day.

Looking For More CHICKEN Recipes?

You can find all of my chicken recipes in the Recipe Index, located at the top of the page. I have a LOT of them you’re gonna love, including:

Interested In More Recipes?

Thank you for visiting this website. I appreciate you using some of your valuable time to do soIf you’re interested, I publish a newsletter 2 times per month (1st and 15th) with all the latest recipes, and other fun info. I would be honored to have you join our growing list of subscribers, so you never miss a great recipe!
There is a Newsletter subscription box on the top right side (or bottom) of each blog post, depending on the device you use, where you can easily submit your e-mail address (only) to be included in my mailing list.

You Can Also Find Me On Social Media:

Facebook page: The Grateful Girl Cooks!
Pinterest:
The Grateful Girl Cooks!
Instagram:
jbatthegratefulgirlcooks

Author's signature

Recipe Source: The book “Top Secret Restaurant Recipes”, by Todd Wilbur. Pages 200-202.  Published by The Penguin Group. Published 1997

0 from 0 votes
Alice Springs Chicken (Outback Steakhouse Copycat)
Prep Time
2 hrs
Cook Time
10 mins
Total Time
2 hrs 10 mins
 
Alice Springs Chicken is pan-seared chicken with bacon, mushrooms, and melted cheeses, in a honey-mustard sauce. This copycat restaurant recipe is delicious!
Category: Entree
Cuisine: American
Keyword: Alice springs chicken
Servings: 4 servings
Calories Per Serving: 785 kcal
Author: JB @ The Grateful Girl Cooks!
Ingredients
For the Honey Mustard Marinade:
  • 1/2 cup Dijon mustard
  • 1/2 cup honey
  • 1 1/2 teaspoons vegetable oil
  • 1/2 teaspoon lemon juice
For Chicken:
  • 4 chicken breasts , boneless, skinless (or slice 2 thick breasts in half horizontally lengthwise)
  • 1 Tablespoon vegetable oil
  • 2 cups sliced button mushrooms (approx. 10-12 mushrooms)
  • 2 Tablespoons butter
  • Salt , Pepper, Paprika (to lightly season chicken with)
  • 8 slices bacon , cooked
  • 1 cup grated Jack cheese
  • 1 cup grated Cheddar cheese
  • 2 teaspoons fresh parsley , finely chopped
Instructions
  1. Combine Dijon mustard, honey, oil, and lemon juice in small bowl. Blend well with fork until combined. Place chicken breasts in a resealable plastic food storage bag, Pour 2/3 of the sauce over chicken. Make sure chicken gets coated with sauce, then place bag in refrigerator; marinate for 2 hours. Cover and refrigerate remaining sauce until later.
  2. In a small skillet, sauté sliced mushrooms in butter until cooked (approx. 4-5 minutes). Set aside.
  3. Heat oil in large OVENPROOF skillet (If you don't have an ovenproof skillet, sear chicken breasts in regular skillet, then transfer to baking dish). When oil is hot, add chicken breasts. Cook for 3-4 minutes per side. until golden brown. Once done, remove skillet off the heat, but leave chicken in skillet (unless transferring to baking dish).
  4. Brush each chicken breast with a bit of reserved honey mustard sauce. Do NOT use the sauce the chicken was marinated in!). Sprinkle chicken with salt, pepper, and paprika. Place two pieces of bacon on top of each chicken breast. Evenly spoon cooked mushrooms on top of the bacon, then cover with Jack cheese, followed by cheddar cheese (about 1/4 cup of each type of cheese onto each piece of chicken).
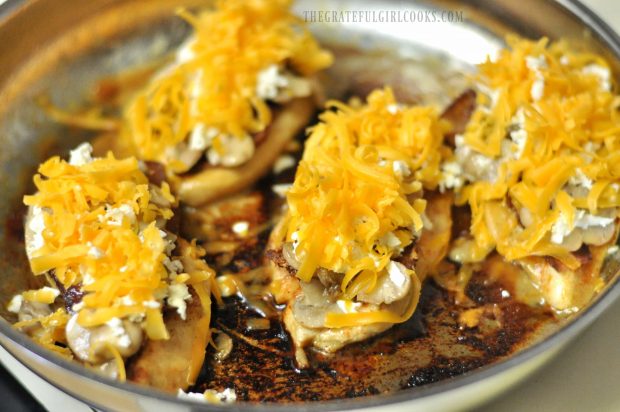
  5. Cook chicken, uncovered, in a preheated 375 degree oven for 9-10 minutes. When done, cheese should be fully melted and should have begun to bubble. Remove skillet from oven. Top each chicken breast with a sprinkle of fresh chopped parsley.
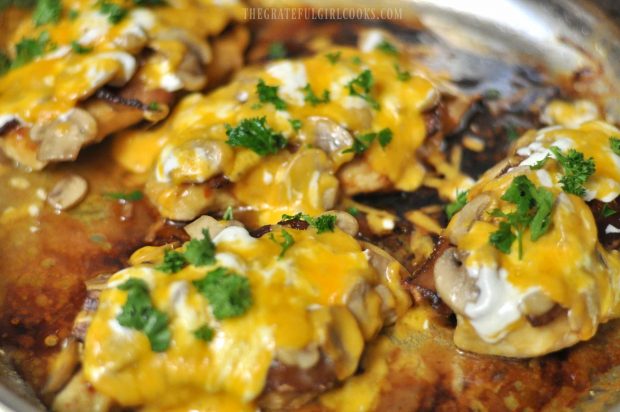
  6. Serve with reserved sauce on the side, or place a spoonful of sauce onto dinner plate, top with chicken. Enjoy!
Recipe Notes

PREP TIME reflects 2 hours for marinating chicken breasts.
Recipe Source: The book "Top Secret Restaurant Recipes", by Todd Wilbur. Pages 200-202.  Published by The Penguin Group. Published 1997

Nutrition Facts
Alice Springs Chicken (Outback Steakhouse Copycat)
Amount Per Serving (1 serving)
Calories 785 Calories from Fat 450
% Daily Value*
Fat 50g77%
Saturated Fat 25g156%
Cholesterol 171mg57%
Sodium 1156mg50%
Potassium 773mg22%
Carbohydrates 39g13%
Fiber 1g4%
Sugar 36g40%
Protein 46g92%
Vitamin A 745IU15%
Vitamin C 3.3mg4%
Calcium 441mg44%
Iron 1.9mg11%
* Percent Daily Values are based on a 2000 calorie diet.

Here’s one more to pin on your Pinterest boards!Alice Springs Chicken is pan-seared chicken with bacon, mushrooms, and melted cheeses, in a honey-mustard sauce. This copycat restaurant recipe is delicious!


Save

Save

Save

Save

Save

Save

Save

Save

Save

Save

Save

Save

Save

Save

Save

Save

Save

Gingerbread Muffins

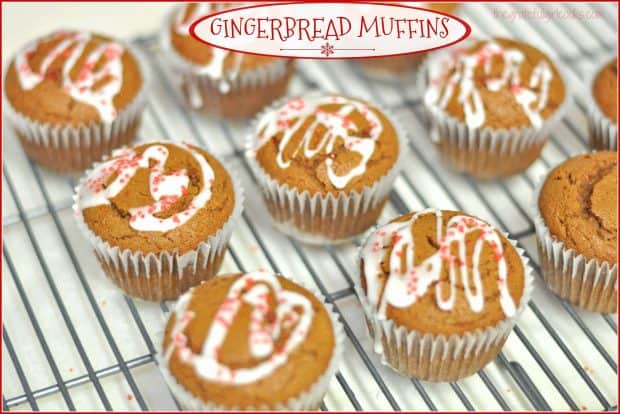
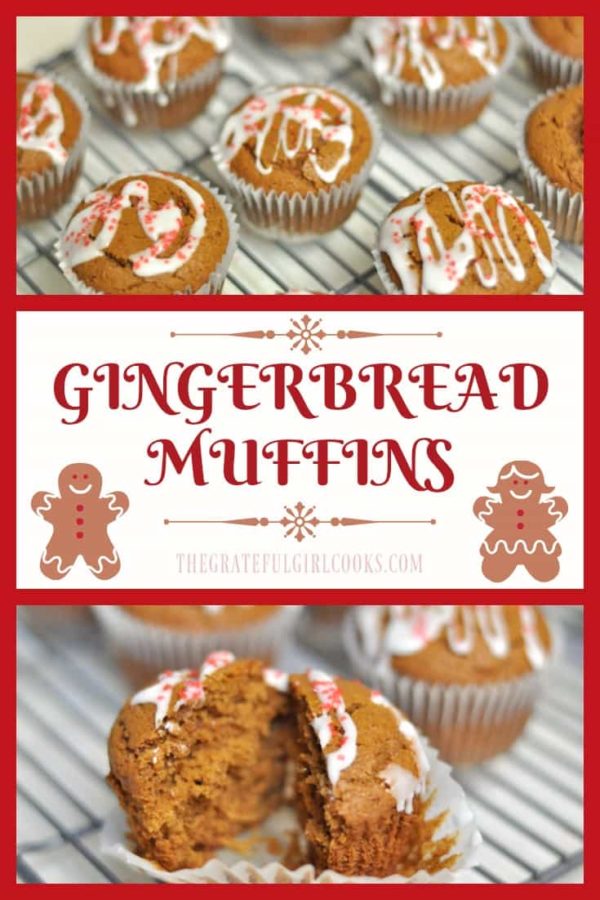
Need a little holiday inspiration? How about serving these delicious and festive looking Gingerbread Muffins for breakfast during the holidays? They are quick AND easy to make!Serve these delicious and festive Gingerbread Muffins for breakfast during the holidays! They are quick, easy to make, and taste wonderful!
I found the recipe in a cookbook that my friend Debbie gave me several years ago. I was browsing through the cookbook getting recipe ideas, but when I saw how easy these muffins were to make, I ran downstairs and whipped some up for our breakfast!  They tasted fantastic (I think my hubby ate THREE of them- they were that good!

The recipe is absolutely simple to make. If you can stir and pour batter into muffin tins, YOU can make these!!! The muffins have a wonderful gingerbread flavor and have a nice “rise” to them. Here’s how you make them:

Scroll Down For A Printable Recipe Card At The Bottom Of The Page

Prepare The Batter for The Gingerbread Muffins

Preheat oven to 400 degrees, and prepare 12 cup standard sized muffin tin by spraying the bottom only, OR by placing paper baking cups into each muffin cup.  Beat together brown sugar, molasses, milk, oil and one egg in a large bowl. You can easily use a spoon for this.

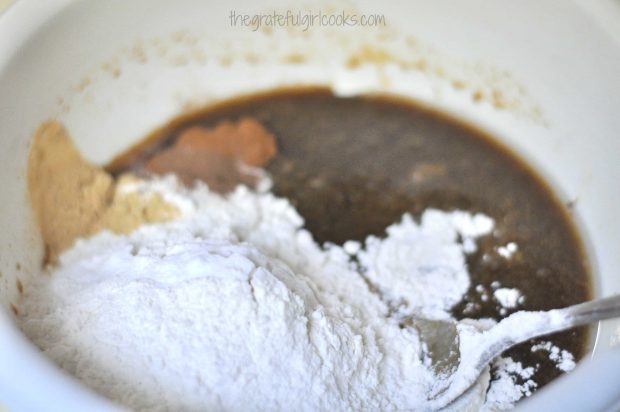
Batter is mixed together for gingerbread muffins.

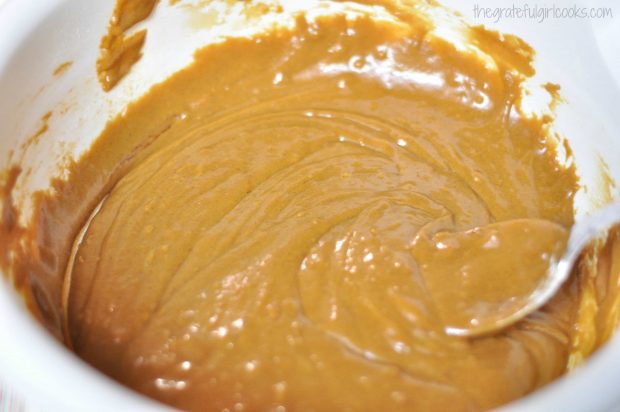
Add remaining ingredients (flour, baking powder, ginger, salt, baking soda, cinnamon and ground allspice to the batter. Stir to mix ingredients only until flour is incorporated and moistened. Do not over stir.

Dry ingredients are added to gingerbread muffin batter in bowl.

Gingerbread muffin batter is reading to put into muffin cups to bake.

Fill the Muffin Cups Then Bake

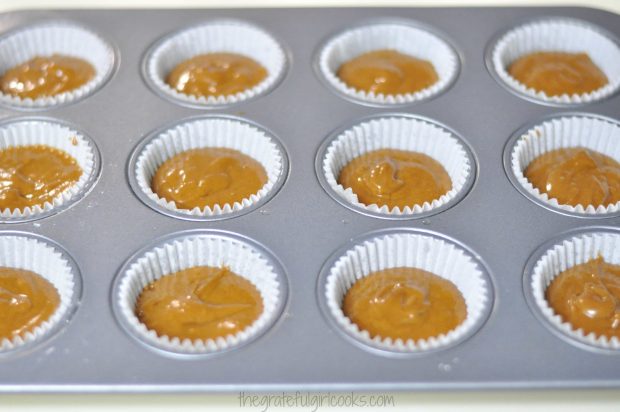
Spoon the batter evenly into prepared muffin cups. Each muffin cup should only be filled HALF full with the batter.

Batter for gingerbread muffins is divided into muffin holders.

Bake muffins at 400 degrees for 18-20 minutes, or until a toothpick inserted into the center of a muffin comes out clean. Check muffins at 18 minutes. Mine only took 18 minutes, so I was glad I checked them. This is necessary because oven temps. vary quite a bit!

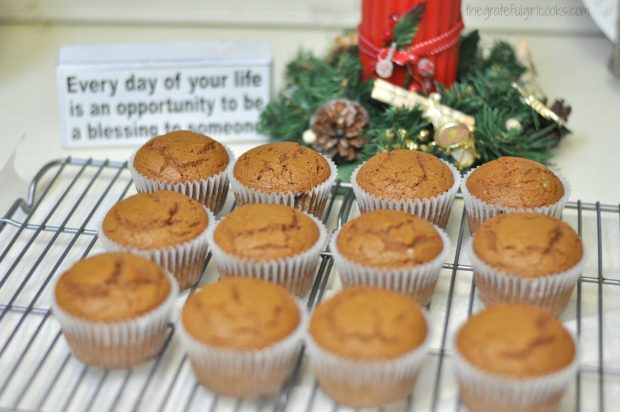
Once done, immediately remove the gingerbread muffins from the baking pan, and place them on a wire rack to cool.  Once cooled, they are ready to eat… as is, OR you can fancy them up (can’t help myself!).

Gingerbread muffins out of oven, cooling on wire rack.

Making Icing To Decorate The Gingerbread Muffins

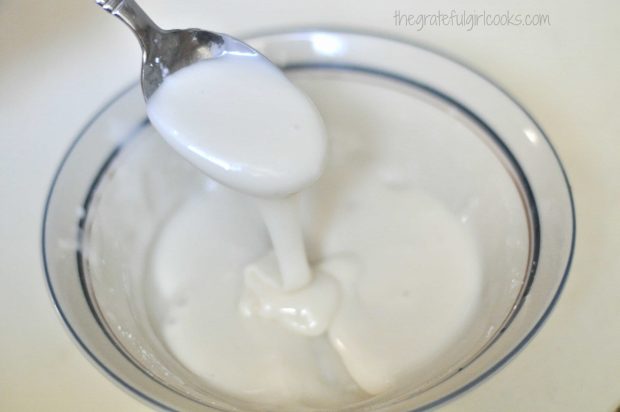
If you want to “fancy them up” a bit, while muffins are cooling off stir together a mixture of powdered sugar, vanilla, and water until the icing is thick enough to drizzle over tops of muffins. I had some red sparkly sugar in my pantry, so I also lightly sprinkled the icing with red sugar after drizzling it on. (Multi-colored sprinkles would add a fun touch, too!).

Powdered sugar icing is mixed to drizzle on gingerbread muffins.

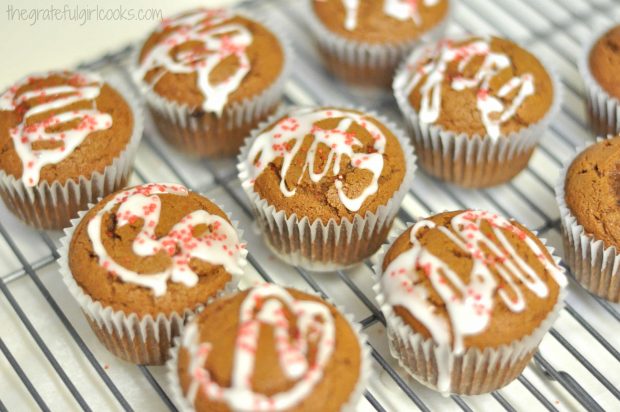
Gingerbread muffins are drizzled with powdered sugar icing and red sprinkles.

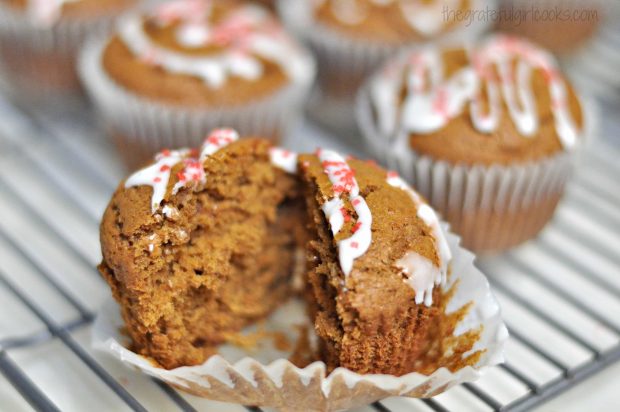
Let the icing firm up just a bit, then the gingerbread muffins are ready to eat!  Here’s a peek at the inside of one before it got gobbled up!  My husband enjoyed his warm muffins with a tiny touch of butter, which he said made them perfect!

One of the gingerbread muffins is cut in half to see inside.

It’s such an easy recipe to make and it was kind of fun to have GINGERBREAD muffins for breakfast, right in the middle of the Christmas holidays!  Hope you enjoy them.  I sincerely hope you are finding JOY in this season. Merry Christmas!

Looking For More GINGERBREAD-INSPIRED Recipes?

You can find all of my recipes in the Recipe Index, which is located at the top of the page. I have lots of delicious GINGERBREAD-INSPIRED recipes, including:

Thank you for visiting this website. I appreciate you using some of your valuable time to do soIf you’re interested, I publish a newsletter 2 times per month (1st and 15th) with all the latest recipes, and other fun info. I would be honored to have you join our growing list of subscribers, so you never miss a great recipe! There is a Newsletter subscription box on the top right side (or bottom) of each blog post, depending on the device you use, where you can easily submit your e-mail address (only) to be included in my mailing list.

You can also follow me on social media:

Facebook page: The Grateful Girl Cooks!
Pinterest:
The Grateful Girl Cooks!
Instagram:
jbatthegratefulgirlcooks

Author's signature

Recipe Adapted From:The cookbook titled : “Betty Crocker Christmas Cookbook”, Page 158, Wiley Publishing, Inc., Copyright 2010, General Mills.

0 from 0 votes
Gingerbread Muffins
Prep Time
10 mins
Cook Time
18 mins
Total Time
28 mins
 
Serve these delicious and festive Gingerbread Muffins for breakfast during the holidays! They are quick, easy to make, and taste wonderful!
Category: Breakfast
Cuisine: American
Keyword: gingerbread muffins
Servings: 12
Calories Per Serving: 255 kcal
Author: JB @ The Grateful Girl Cooks!
Ingredients
For Muffin Batter:
  • 1/4 cup brown sugar (packed)
  • 1/2 cup molasses
  • 1/3 cup milk
  • 1/3 cup vegetable oil
  • 1 egg
  • 2 cups all purpose flour
  • 1 teaspoon baking powder
  • 1 teaspoon ground ginger
  • 1/2 teaspoon salt
  • 1/2 teaspoon baking soda
  • 1/2 teaspoon ground cinnamon
  • 1/4 teaspoon ground allspice
For Decorative Icing (to drizzle on finished muffins):
  • 1 1/2 cups powdered sugar
  • 1/2 teaspoon vanilla extract
  • Few drops of water (a little at a time until desired thickness is reached)
Instructions
  1. Preheat oven to 400 degrees F. spray the bottoms (only) of a 12 standard sized muffin cups with non-stick spray OR insert paper muffin baking cups into each cup.
  2. Mix the the brown sugar, molasses, oil, milk, and egg together in a large bowl with a spoon. Mix well.
  3. Stir in the remaining ingredients (flour, baking powder, ginger, salt, baking soda, cinnamon and allspice). Stir only until all ingredients are mixed in together... do not overmix.
  4. Divide and spoon batter evenly into prepared muffin cups (only fill HALFWAY).
  5. Bake muffins at 400 degrees F for 18-20 minutes, or until a toothpick inserted into the center of muffin comes out clean. It's best to check them at the 18 minute mark, as oven temperatures vary.
  6. When done, immediately remove muffins from baking pan to a wire rack to cool. Once they have cooled down they are ready to serve warm (unless you wish to add a decorative drizzle).
  7. If you wish to drizzle icing over the top of finished muffins, place powdered sugar and vanilla in small bowl. Stir in a few drops of water, stirring as you go. Continue adding a drop or two of water and stirring, until icing is thick enough to drizzle on top of muffins. Wait until muffins are completely cool before drizzling icing on top. Lightly dust with colored sugar or sprinkles, if desired. Let icing firm up on muffins, then serve! Enjoy!
Nutrition Facts
Gingerbread Muffins
Amount Per Serving (1 muffin)
Calories 255 Calories from Fat 54
% Daily Value*
Fat 6g9%
Saturated Fat 5g31%
Cholesterol 14mg5%
Sodium 158mg7%
Potassium 281mg8%
Carbohydrates 46g15%
Sugar 30g33%
Protein 2g4%
Vitamin A 30IU1%
Calcium 60mg6%
Iron 1.8mg10%
* Percent Daily Values are based on a 2000 calorie diet.

Here’s one more to pin on your Pinterest boards!Serve these delicious and festive Gingerbread Muffins for breakfast during the holidays! They are quick, easy to make, and taste wonderful!
 

Save

Save

Save

Save

Save

Save

Save

Save

Save

Save

Save
Save
Save
Tex-Mex Party Nuts

Tex-Mex party nuts are slightly sweet and slightly spicy! These Southwest flavor-inspired roasted mixed nuts will be a big hit at your next party!Tex-Mex party nuts are slightly sweet and slightly spicy! These Southwest flavor-inspired roasted mixed nuts will be a big hit at your next party!
If you are looking for a delicious appetizer for your next party (or just want a unique snack), you should give these Tex-Mex Party Nuts a try! Slightly sweet, slightly spicy and totally addicting, they will be a big hit, AND they’re EASY to prepare!

I found the recipe in a cookbook a friend of mine gave me several years ago for Christmas. After pouring over the book, I was delighted to find this recipe.

I was anxious to try it, so I patiently waited until my husband bought an “industrial strength size” jar of mixed nuts at Costco! Then I smuggled enough nuts out of the jar to make this recipe.

Wow- I am sure glad I did! These snacks are amazing, they’re easy to make with a few simple household spices, in only a few minutes!

Scroll Down For A Printable Recipe Card At The Bottom Of The Page

How To Make Tex-Mex Party Nuts

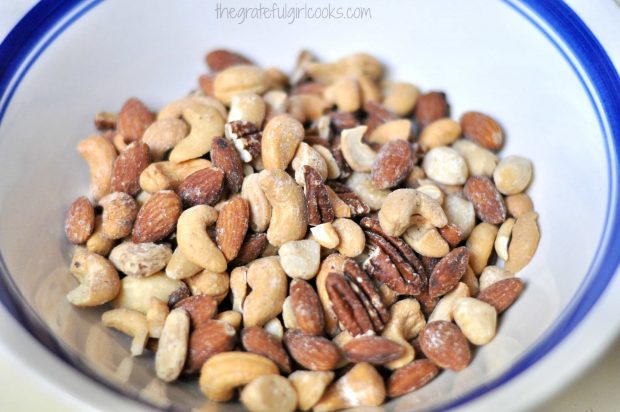
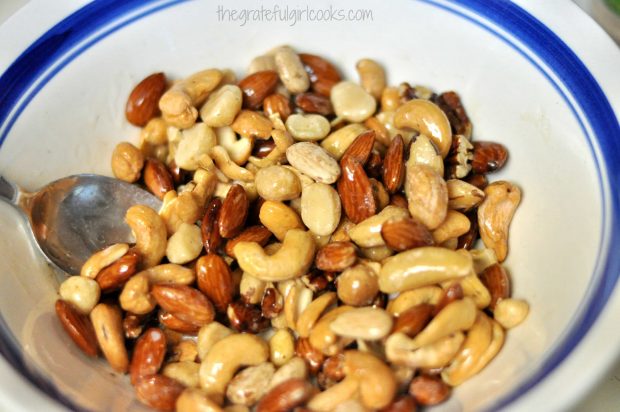
Measure the mixed nuts into a large bowl. Add melted butter, and stir the ingredients well, until the nuts are fully coated.

A large bowl of roasted mixed nuts in a bowl.

Mixed nuts are coated with melted butter before adding spices.

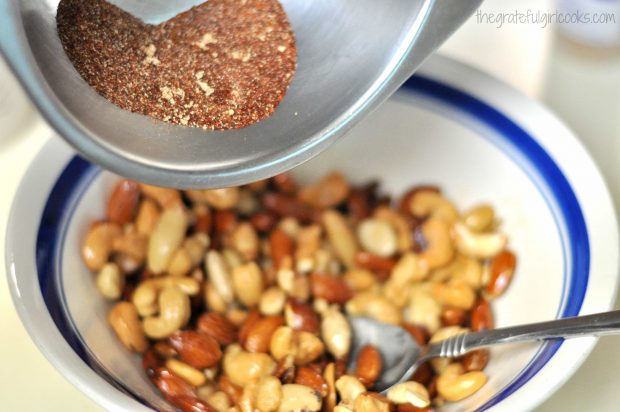
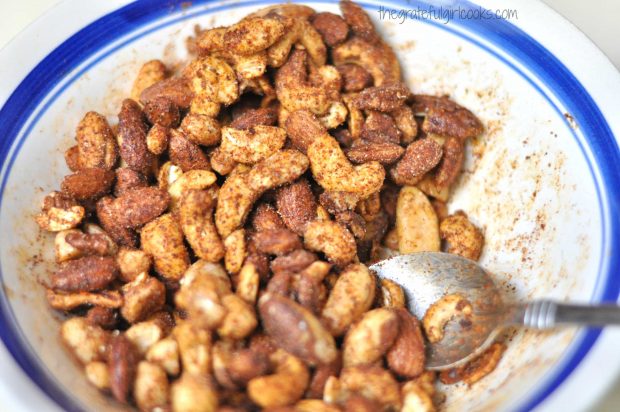
In a separate small bowl, mix together the spices EXCEPT for the granulated sugar (save that for later!). Sprinkle the spice mix over the mixed nuts, and stir to fully coat.

Spice mixture is poured into bowl of butter roasted nuts.

A mixture of spices are stirred into the mixed nuts before baking.

Time To Bake The Tex-Mex Party Nuts

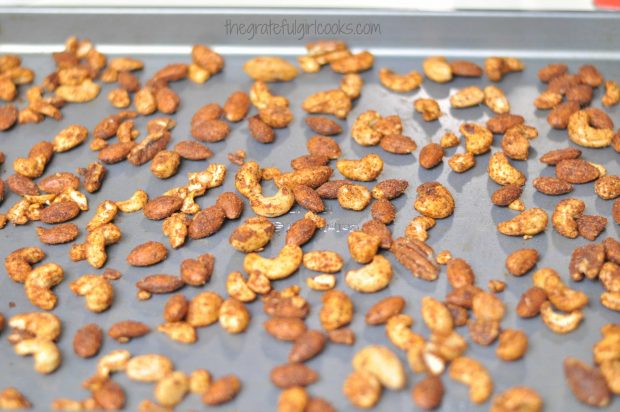
Spread the spiced nuts onto a 15x10x1 inch baking pan. Place the seasoned nuts in a single layer, so the nuts can evenly cook.

Bake them uncovered, in a 300°F. oven for 10 minutes. When they’re done baking, immediately pour the hot spiced nuts into a medium bowl.

All the mixed nuts are baked in single layer on a large pan.

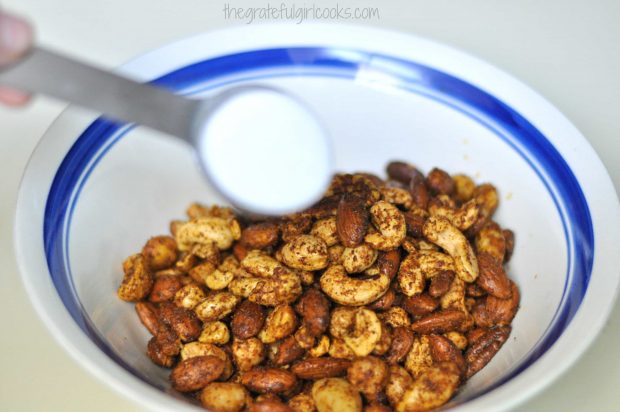
Sprinkle the nuts with granulated sugar while they are still HOT from the oven. Stir the sugar in well, to make sure the nuts are fully coated.

Roasted nuts are sprinkled with sugar just as soon as they are out of oven.

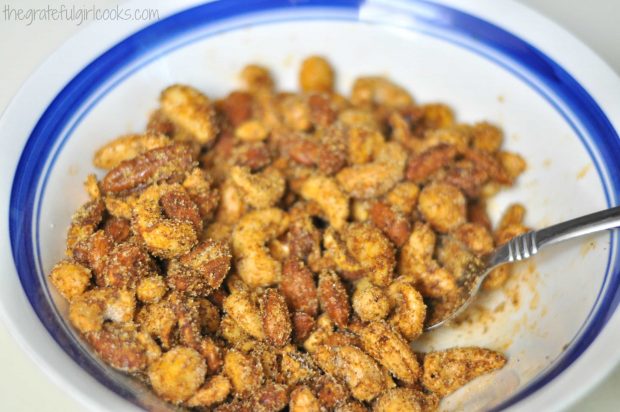
Mixed seasoned and roasted nuts are coated with spices and sugar, and are ready to serve.

Time to Eat!

Let the nuts cool completely, then serve these absolutely DELICIOUS Tex-Mex party nuts on a pretty plate or in a serving bowl.

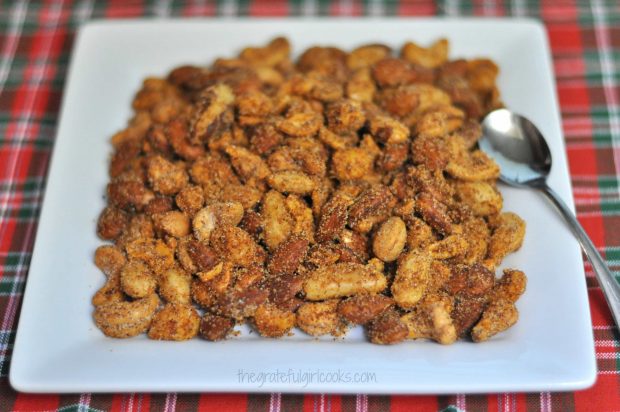
This simple appetizer will be gone in a flash, because they are so GOOD! Make sure to leave a spoon on the plate so your guests can scoop them up!

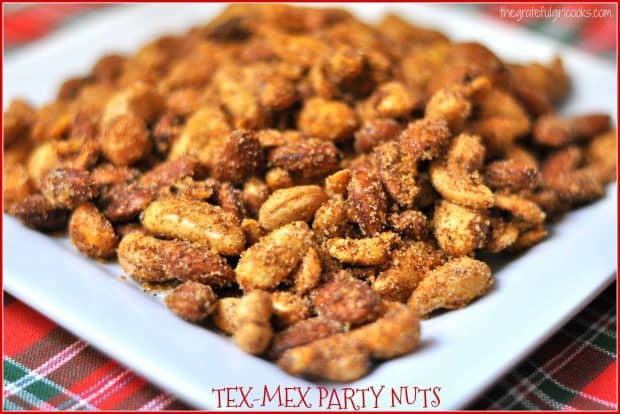
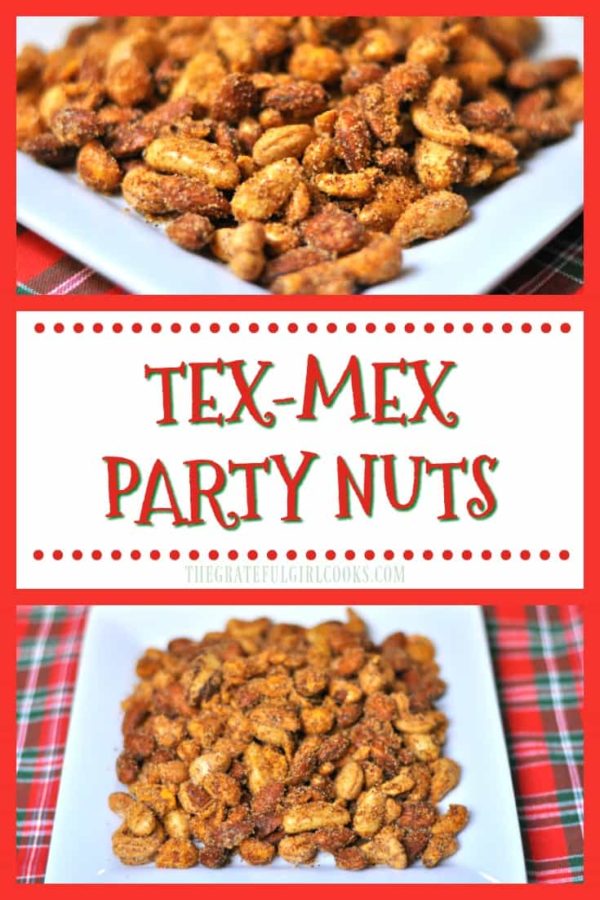
Tex-Mex Party Nuts served as an appetizer snack, on a white plate.

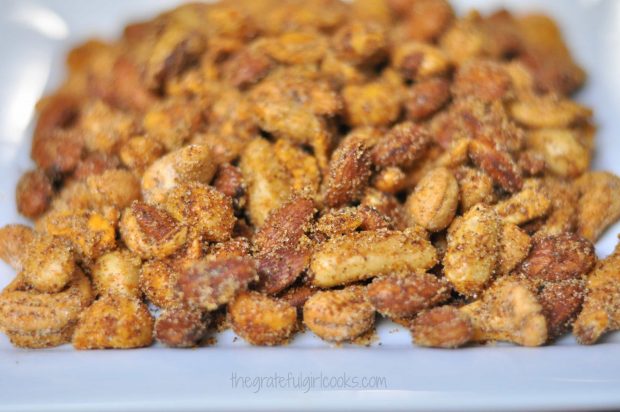
Close up photo of Tex-Mex party nuts on white plate.

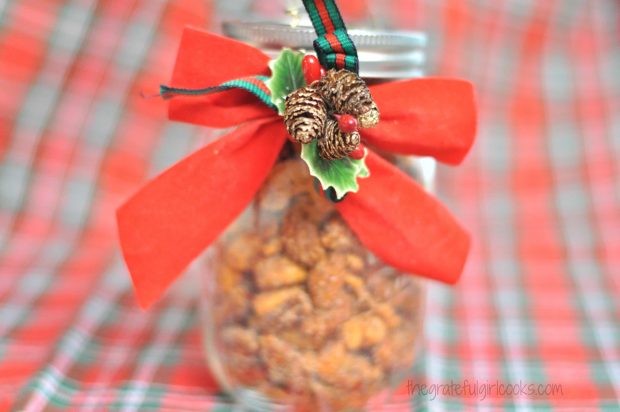
The Tex-Mex Party Nuts also make a lovely food gift during the holidays. Simply place the Tex-Mex Party Nuts in a canning jar or container, then decorate, and enjoy giving them as a gift to a friend!

Other delicious items for gift-giving are Ranch Pretzel Bites, Maple Cinnamon Spiced Nuts, or Spiced Tea Mix. Each of them will be appreciated and enjoyed.

You might also consider giving candied citrus peels or candied orange, cinnamon & clove spiced pecans! They also make great food gifts for holidays or other special occasions.

Tex-Mex Party Nuts can be placed in a decorated jar and given as a holiday gift.

The first time I made these Tex-Mex party nuts I was afraid (before trying them) that they might be TOO spicy, but was pleasantly surprised to find out they were NOT!  They have a perfect combo of slightly sweet and slightly spicy ingredients!

Tex-Mex Party Nuts will keep for up to 3 weeks, if they’re stored in an airtight covered container at room temperature.  This recipe can be EASILY doubled or tripled. 

I hope you will give them a try, because they are quite tasty! If you enjoy these roasted nuts, you will probably also like my yummy Coconut Candied Cashews! They are DELICIOUS!

Thanks for stopping by, and I hope you will come back soon for more delicious recipes. Don’t forget- you can find ALL of my recipes in the Recipe Index, located at the top of the page. Have a GREAT day!

Want More Recipes? Get My FREE Newsletter!

I publish a newsletter 2 times per month (1st and 15th) with lots of recipes, tips, etc..
Would you like to join our growing list of subscribers?

There is a Newsletter subscription box on the top right (or bottom) of each blog post, depending on the device you use.
You can submit your e-mail address there, to be added to my mailing list.

Find Me On Social Media:

Facebook page: The Grateful Girl Cooks!
Pinterest:
The Grateful Girl Cooks!
Instagram:
jbatthegratefulgirlcooks

Author's signature

Recipe Adapted From:  “Betty Crocker Christmas Cookbook”, Page 272, Wiley Publishing, Inc., Copyright 2010, General Mills.

↓↓ PRINTABLE RECIPE BELOW ↓↓

0 from 0 votes
Tex-Mex Party Nuts
Prep Time
5 mins
Cook Time
10 mins
Total Time
15 mins
 

Tex-Mex party nuts are slightly sweet and slightly spicy! These Southwest flavor-inspired roasted mixed nuts will be a big hit at your next party!

Category: Appetizer
Cuisine: Southwest
Keyword: Tex Mex party nuts
Servings: 8 servings (1/4 cup each)
Calories Per Serving: 247 kcal
Author: JB @ The Grateful Girl Cooks!
Ingredients
  • 2 cups salted mixed nuts
  • Tablespoons butter , melted
  • 2 teaspoons chili powder
  • ½ teaspoon garlic powder
  • ½ teaspoon onion powder
  • ¼ teaspoon ground cinnamon
  • ¼ teaspoon ground red cayenne pepper
  • --------------------------------------------------------
  • 2 Tablespoons granulated sugar (set aside)
Instructions
  1. Preheat oven to 300 degrees F.
  2. Place mixed nuts in a medium sized bowl. Add melted butter and stir until the nuts are fully coated.
  3. In a small bowl, place all spices EXCEPT for the granulated sugar. Mix together. Sprinkle spice mix over the buttered mixed nuts, and stir until coated.
  4. Place nuts onto a 10 x15 x 1 inch baking pan in a single layer. Bake the nuts uncovered for 10 minutes. The nuts should be fully roasted. Remove nuts from oven and immediately place them into a bowl.
  5. Sprinkle the nuts with the granulated sugar while the nuts are still HOT. Stir to coat. Let the nuts cool completely, then serve. (If storing, the nuts will keep for about 3 weeks in a covered airtight container at room temperature).

Nutrition Facts
Tex-Mex Party Nuts
Amount Per Serving (0.25 cup)
Calories 247 Calories from Fat 180
% Daily Value*
Fat 20g31%
Saturated Fat 3g19%
Cholesterol 5mg2%
Sodium 31mg1%
Potassium 224mg6%
Carbohydrates 12g4%
Fiber 3g13%
Sugar 3g3%
Protein 6g12%
Vitamin A 240IU5%
Vitamin C 0.2mg0%
Calcium 27mg3%
Iron 1.4mg8%
* Percent Daily Values are based on a 2000 calorie diet.

Here’s one more to pin on your Pinterest boards!Tex-Mex party nuts are slightly sweet and slightly spicy! These Southwest flavor-inspired roasted mixed nuts will be a big hit at your next party!


Save

Save

Save

Save

Save

Save

Save
Save
Save
Save
Save
Save
Save

Shrimp And Penne Pasta Alfredo

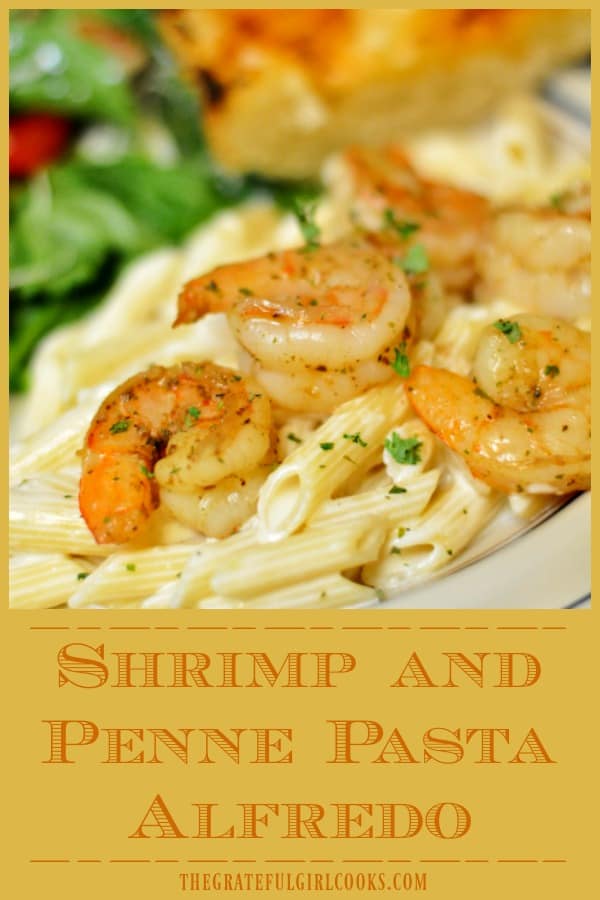
Shrimp Penne Pasta Alfredo features lightly seasoned, pan-seared shrimp served on a bed of pasta in a creamy Parmesan alfredo sauce. This dish is easy and delicious!Shrimp Penne Pasta Alfredo features lightly seasoned, pan-seared shrimp served on a bed of pasta in a creamy Parmesan alfredo sauce. Easy and delicious!
We really love this shrimp pasta meal!  It tastes WONDERFUL! Guess what? Shrimp and Penne Pasta Alfredo is not only delicious to eat, it’s EASY to prepare in UNDER 30 minutes!! Over 30 years ago a friend in Southern California named Lona told me how to make a quick alfredo sauce. I’ve made alfredo sauce that exact same way ever since.

This recipe for shrimp penne pasta alfredo, (w/ penne pasta AND pan-seared shrimp) is just one of the variations I have made through the years.  The shrimp in this dish is lightly sprinkled with Cajun spices, but you can easily substitute your own Italian spices, if desired.

The alfredo sauce takes only minutes to prepare while the pasta is cooking, so the entire dish can be ready to go in under 30 minutes! Trust me- shrimp penne pasta alfredo is EASY to prepare, and is quite yummy.

Scroll Down For A Printable Recipe Card At The Bottom Of The Page

How To Make Shrimp Penne Pasta Alfredo

Bring large pot of water to boil. Cook the penne pasta according to the package directions. While the pasta is cooking, lightly sprinkle Cajun seasoning onto peeled, deveined large shrimp (21-25 per pound). NOTE: You can substitute seasoning of your choice, such as garlic powder, Italian seasoning, etc., if you want.

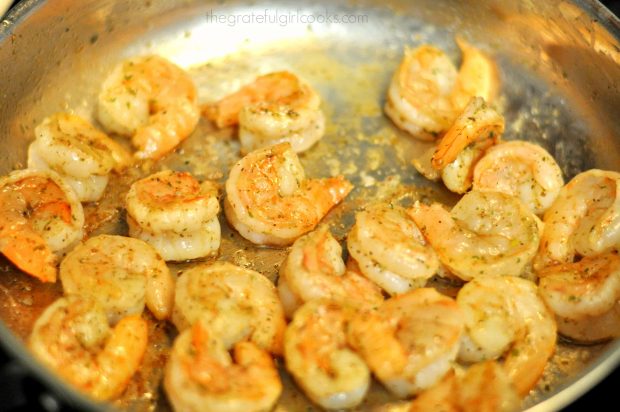
In a large skillet, heat the olive oil on medium heat.  Once oil is hot (but not smoking), add shrimp. Cook the shrimp about 2 minutes per side, until pink and fully cooked. When done, remove shrimp from skillet and keep it warm.

Shrimp is pan-seared in skillet for Shrimp Penne Pasta Alfredo.

Making The Alfredo Sauce

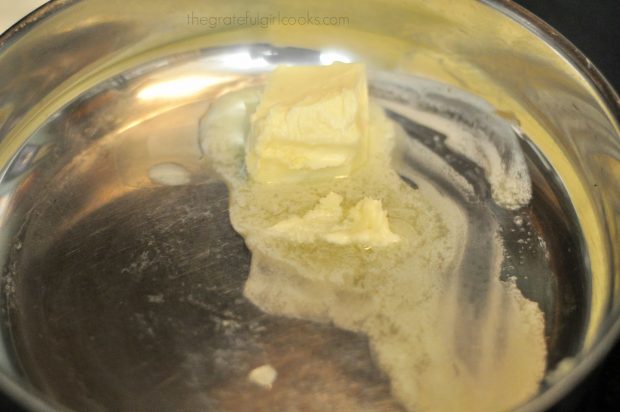
To save time, make the alfredo sauce while the pasta is cooking. Start the sauce by melting a stick of butter (1/2 cup) in a large skillet.

Butter is melted to make sauce for Shrimp Penne Pasta Alfredo.

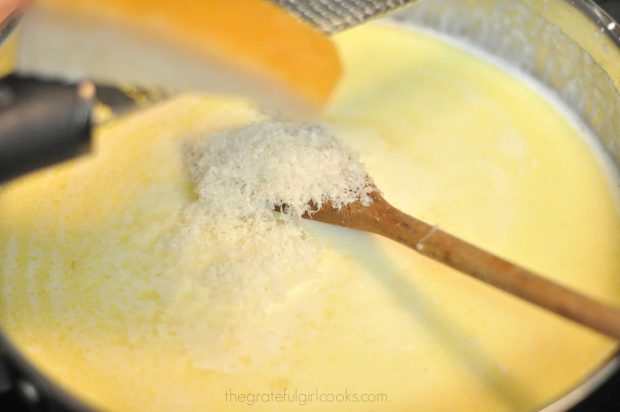
Add 1½ cups heavy whipping cream to the melted butter. Stir to combine the butter and whipping cream. Grate 1½ cups of fresh Parmesan cheese directly into the sauce (you can add more Parmesan, if desired).

Whisk the sauce well to combine ingredients.  Cook the alfredo sauce on medium-low heat (stirring constantly) until the Parmesan cheese has melted, sauce has thickened, and is hot. Do not let sauce come to a boil. Taste test the sauce; season with a tiny bit of garlic powder, salt and pepper, if desired. 

Grated, fresh Parmesan cheese is added to sauce for Shrimp Penne Pasta Alfredo.

Add Cooked Pasta To The Alfredo Sauce

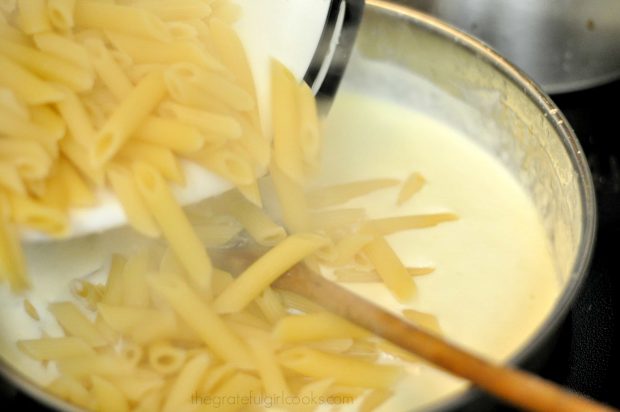
When the penne pasta is finished cooking, drain it well, and then add it to the skillet with the thickened, hot Alfredo sauce.

Hot, cooked pasta is added to sauce for Shrimp Penne Pasta Alfredo.

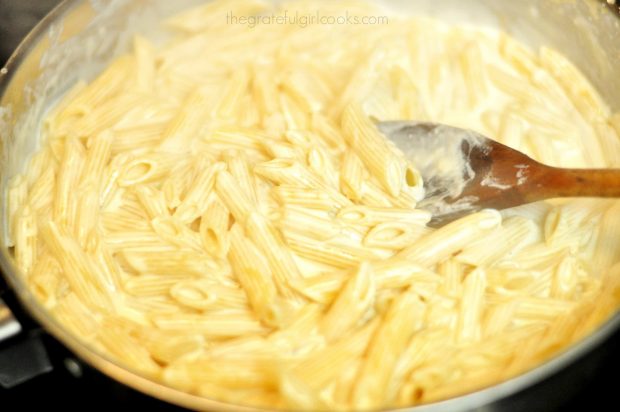
Stir again, to fully mix pasta and sauce. Heat on low until the sauce and pasta are hot and fully mixed together.

Penne pasta is coated with Alfredo sauce before adding shrimp.

Serve Shrimp Penne Pasta Alfredo

Place a portion of the hot penne pasta alfredo onto each individual serving plate. Top each portion with several of the pan-seared shrimp. Garnish the dish with dried parsley and additional grated Parmesan cheese (if desired). Serve the shrimp penne pasta alfredo immediately, while hot.

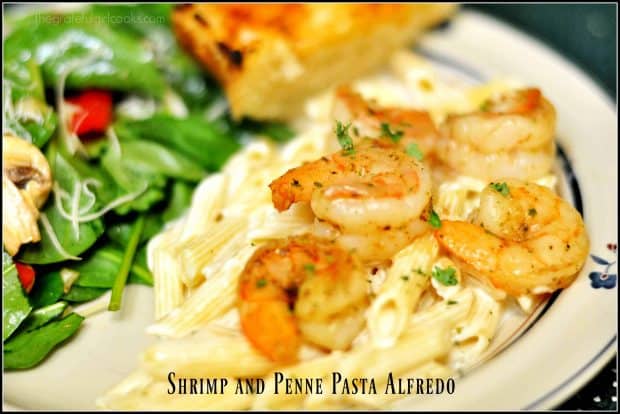
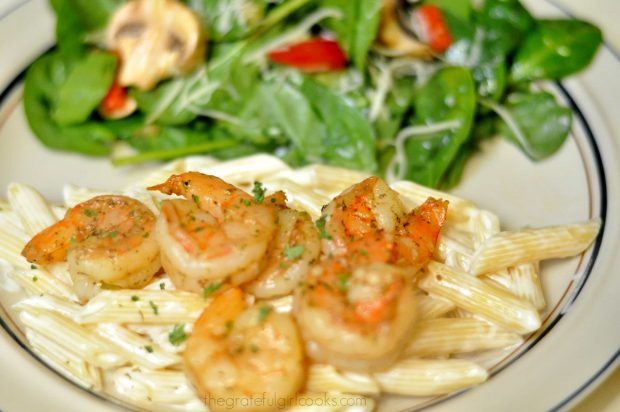
Shrimp Penne Pasta Alfredo is served on plate, with green salad.

See how easy it is to make this meal? In hardly any time at all, you’ve made a delicious shrimp penne pasta alfredo dinner! Hope you will consider making this delicious meal for yourself and those you love!  Blessings~

Looking For More Shrimp Recipes?

You can find all my shrimp recipes in the Recipe Index, located at the top of the page. A few favorites include:

Interested In More Recipes?

Thank you for visiting this website. I appreciate you using some of your valuable time to do soIf you’re interested, I publish a newsletter 2 times per month (1st and 15th) with all the latest recipes, and other fun info. I would be honored to have you join our growing list of subscribers, so you never miss a great recipe!
There is a Newsletter subscription box on the top right side (or bottom) of each blog post, depending on the device you use, where you can easily submit your e-mail address (only) to be included in my mailing list.

You Can Also Find Me On Social Media:

Facebook page: The Grateful Girl Cooks!
Pinterest:
The Grateful Girl Cooks!
Instagram:
jbatthegratefulgirlcooks

Author's signature

5 from 1 vote
Shrimp And Penne Pasta Alfredo
Prep Time
10 mins
Cook Time
15 mins
Total Time
25 mins
 
Shrimp Penne Pasta Alfredo features lightly seasoned, pan-seared shrimp served on a bed of pasta in a creamy Parmesan alfredo sauce. Easy and delicious!
Category: Entree
Cuisine: Italian
Keyword: shrimp penne pasta alfredo
Servings: 4 servings
Calories Per Serving: 664 kcal
Author: JB @ The Grateful Girl Cooks!
Ingredients
  • 1 pound shrimp (21-25 count per pound), shelled/deveined
  • Cajun seasoning (or seasoning of your choice: garlic powder, Italian seasoning, etc.)
  • 1 Tablespoon olive oil
  • 1 stick butter (1/2 cup)
  • cups heavy whipping cream
  • Approximately 1½ cups grated Parmesan cheese (add more to taste, if desired)
  • Season lightly with garlic powder , salt & black pepper, to taste
  • 1/2 pound penne pasta , cooked per package instructions
  • Dried parsley and/or additional grated Parmesan cheese for garnish (if desired)
Instructions
  1. Prepare penne pasta according to package instructions. While pasta is cooking, prepare the sauce and the shrimp.
To Make Alfredo Sauce:
  1. Melt butter in medium skillet. Once melted, pour in heavy whipping cream. Stir to combine. Cook on medium-low until heated through (but not boiling). Add grated Parmesan cheese to saucepan. Stir well, to combine. Continue cooking until cheese melts, and mixture thickens (but is NOT boiling). Taste and add additional Parmesan cheese (you can't get too much!) for thicker sauce and additional flavor. Season very lightly with garlic powder, salt and pepper. Keep sauce warm while you prepare the shrimp (or can cook both at the same time if multi-tasking).
To cook shrimp:
  1. Heat olive oil on medium-high heat in large skillet.
  2. Lightly sprinkle shelled/deveined shrimp with Cajun seasoning. Stir to combine. When oil in skillet is hot, add shrimp. Cook shrimp for about 2 minutes per side, until pink and cooked through. Set aside and keep warm.
To Serve:
  1. When pasta is done, drain. Add drained penne to skillet with hot Alfredo sauce , and mix well to fully coat pasta with sauce. Place a serving of hot pasta on individual plates. Top with 4-5 cooked shrimp.
  2. Garnish with dried parsley and additional Parmesan cheese, if desired. Serve and enjoy!
Recipe Notes

Fresh grated Parmesan is the best choice, but if all you have available is the "Green Container" shaker can of Parmesan cheese, by all means use it!

Nutrition Facts
Shrimp And Penne Pasta Alfredo
Amount Per Serving (1 serving)
Calories 664 Calories from Fat 351
% Daily Value*
Fat 39g60%
Saturated Fat 21g131%
Cholesterol 408mg136%
Sodium 920mg40%
Potassium 284mg8%
Carbohydrates 44g15%
Fiber 1g4%
Sugar 1g1%
Protein 32g64%
Vitamin A 1310IU26%
Vitamin C 5.2mg6%
Calcium 234mg23%
Iron 3.2mg18%
* Percent Daily Values are based on a 2000 calorie diet.

Here’s one more to pin on your Pinterest boards!Shrimp Penne Pasta Alfredo features lightly seasoned, pan-seared shrimp served on a bed of pasta in a creamy Parmesan alfredo sauce. Easy and delicious!


Save

Save

Save

Save

Save

Save

Save

Save

Save

Save

Save

Save

Save

Save

Save

Save

Save
Save

Save

Save
Save

Save

Save
Save