Category: Copycat Recipes

Santa Fe Chicken Sandwich (copycat)

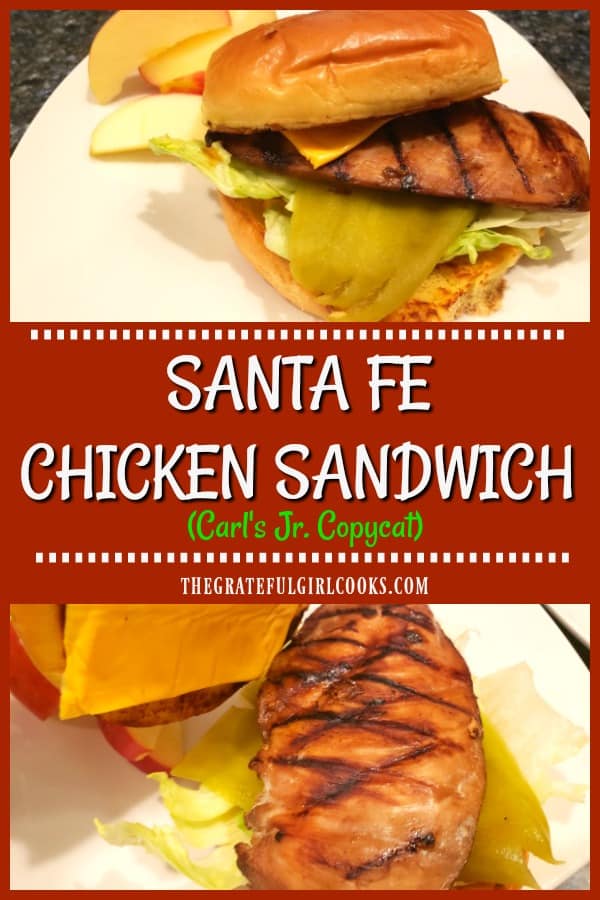
Enjoy a tasty copycat Carl’s Jr. Santa Fe Chicken Sandwich. Marinated chicken, cheese, Southwest sauce, green chile, & lettuce on a toasted bun. YUM!
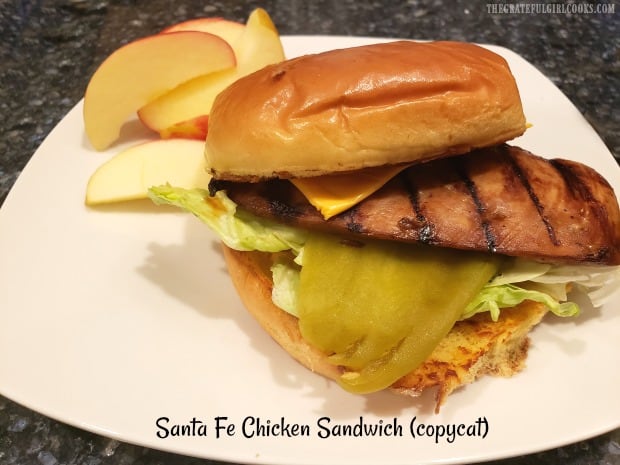
Enjoy a tasty copycat Carl's Jr. Santa Fe Chicken Sandwich. Marinated chicken, cheese, Southwest sauce, green chile & lettuce on a toasted bun. YUM!

Well… we’ve entered another week of “stay-at-home”, due to current coronavirus guidelines. I made my husband and I delicious chicken sandwiches for dinner last week, using a recipe I was given many years ago.

The recipe is a copycat for one of Carl’s Jr. restaurants chicken sandwiches, which we used to order! Honestly, I’m not even sure if they still have this sandwich on their menu. All I know is… it’s GOOD, and we really enjoy these sandwiches!

I knew I had 99% of the ingredients in our kitchen, so I decided to make these sandwiches again (it’s been a while!). The recipe calls for teriyaki sauce (and that was the ONE thing I was out of)! Since we are trying NOT to go to the grocery store too much (social distancing), I used my recipe for homemade teriyaki marinade (easy) to marinate the chicken! Problem solved. HOORAY!

The sandwiches were (as always) a big hit, so I’m sharing the recipe here, so you can enjoy it, too. Here’s how to make Santa Fe Chicken Sandwiches:

Scroll Down For A Printable Recipe Card At The Bottom Of The Page

First – Marinate The Chicken

The recipe (as written in printable recipe below) makes 4 sandwiches, but since I was only making them for my husband and I, my photos reflect the fixings for TWO! Place boneless, skinless chicken breasts into a resealable plastic bag or container (with a lid).

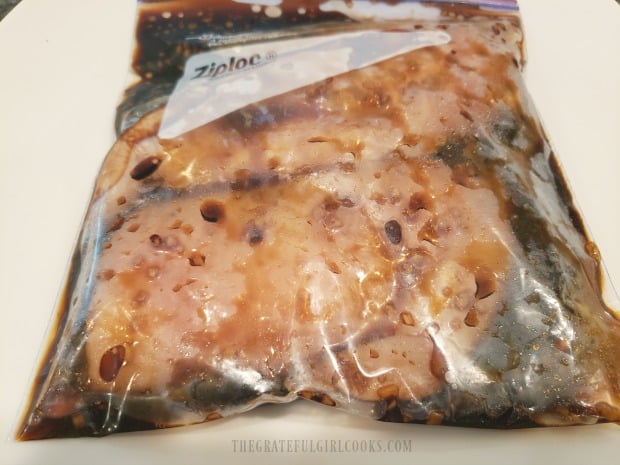
Add teriyaki sauce to the chicken, and turn to fully cover the chicken with the sauce. Let the chicken marinate (covered or sealed) in the refrigerator for thirty minutes, so the flavors can permeate the meat. Use the time the chicken is marinating to prepare other parts of the recipe.

Boneless, skinless chicken breasts are marinated in teriyaki sauce.

Prepare The Southwestern Sauce – EASY!

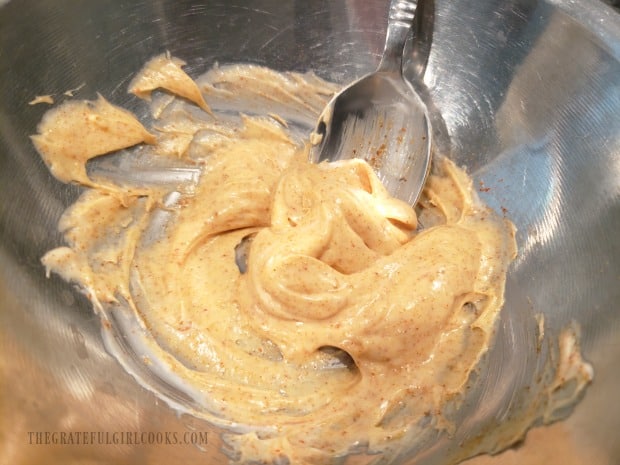
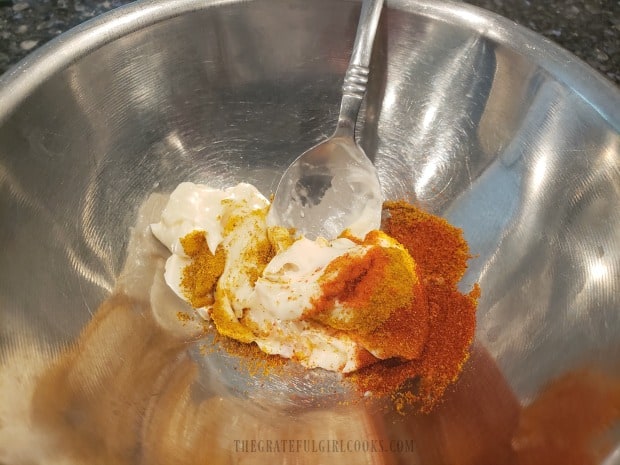
Making the Southwestern sauce for the sandwich is incredibly simple.  Measure the mayonnaise, cayenne pepper, paprika, onion powder, salt, pepper, and curry powder into a small bowl.

Stir well, until the ingredients are fully incorporated. Set the bowl aside. This will be the sauce you put on the sandwich! See how EASY that was?

Southwest-inspired spices are mixed together with mayonnaise to make sauce.The sauce for the sandwich is mixed, and is ready to spread on.

Prepare The Canned Green Chiles- EASY!

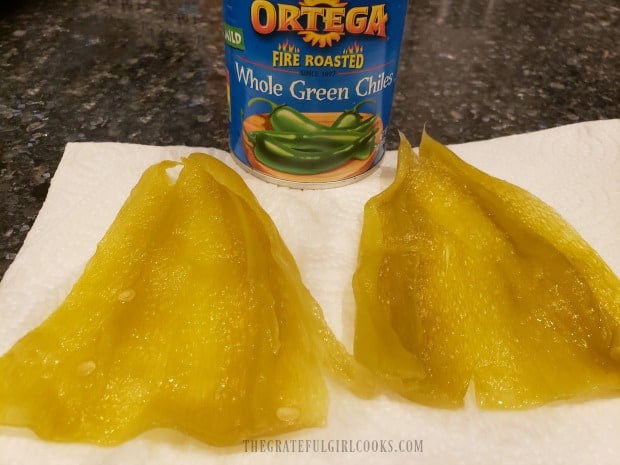
Open and drain the green chiles. Below you can see the type of chiles I used. There should be 4 whole ones in the can. Carefully slice them open, and remove the seeds with a butter knife or spoon. Each sandwich requires one of these mild chiles. Pat the chiles dry with a paper towel. Now you can set them aside until you’re ready to build the sandwiches.

Whole green chiles are split open and seeds are removed before adding to sandwich.

Cook The Marinated Chicken

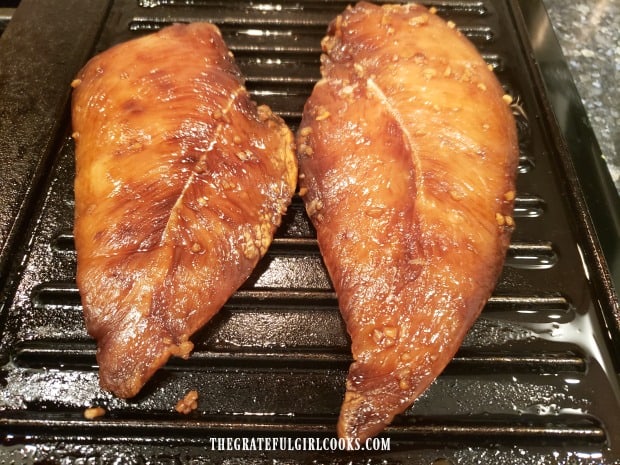
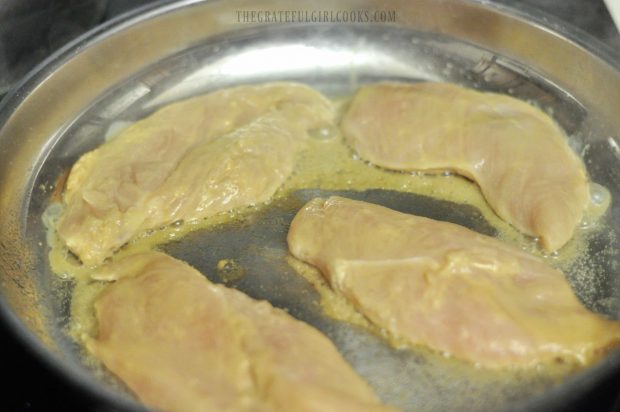
Once the chicken breasts have marinated for 30 minutes, remove them from the container (or bag), and let the excess sauce drip off the chicken. Discard the sauce. Grill the chicken on an outdoor grill, or in a lightly oiled pan or indoor grill on medium-high heat. I use a cast iron grill on my stove top to cook the chicken (see photo below).

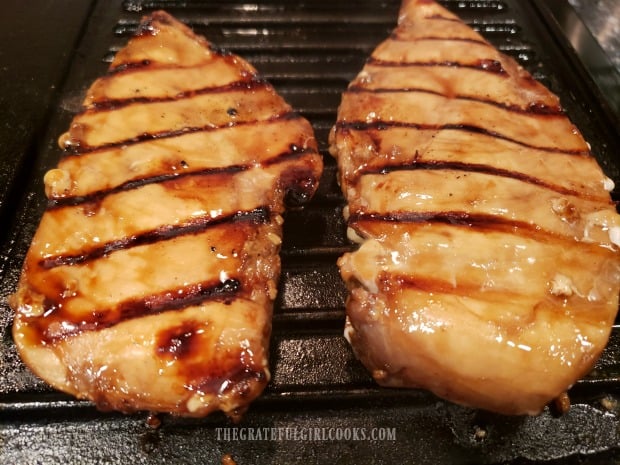
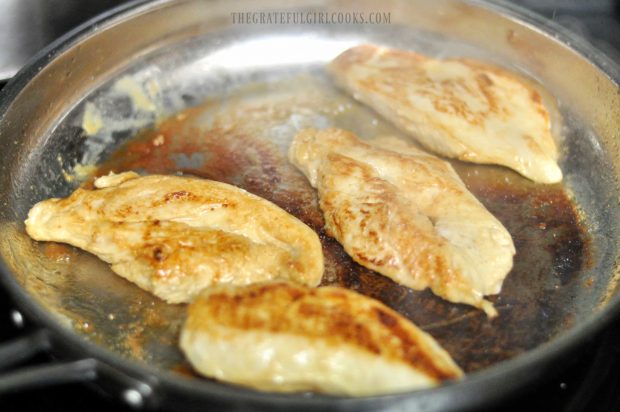
When the chicken is nicely browned on the bottom after 6-7 minutes, carefully turn the chicken over, and continue grilling the other side for an additional 6-7 minutes. The time it will take to cook the chicken will vary, depending on the thickness of the chicken you use, of course. When done, the chicken should be cooked all the way through (internal temp of 165°F.), and be nicely browned on all sides.

Marinated chicken breasts are grilled for the sandwich.The marinated chicken breasts are grilled on both sides until done.

Time To Build Your Santa Fe Chicken Sandwich!

Okay… now it’s time to put the sandwiches together. Lightly toast the hamburger buns. I’ve found the easiest way is to lay them open on a lightly buttered skillet or griddle, and let them “toast” on low heat for a minute or two.

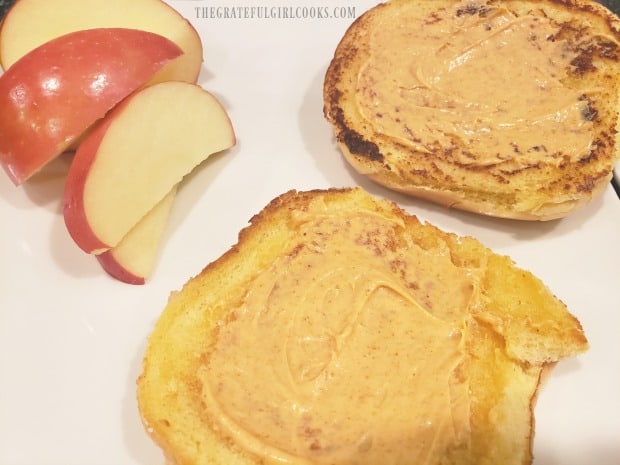
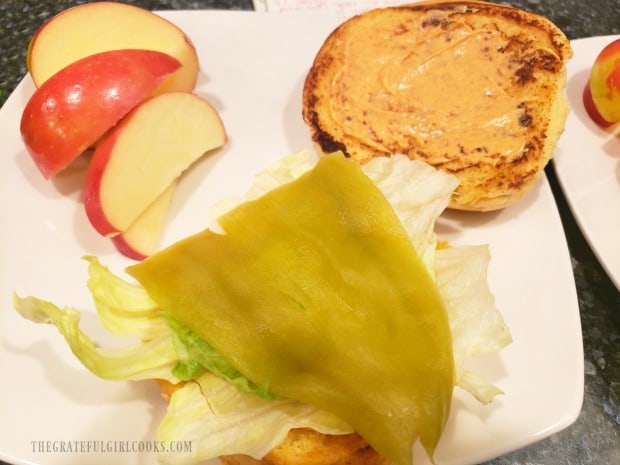
Spread the Southwestern sauce onto both sides of each of the toasted buns. Place a lettuce leaf on the bottom bun, and then top it with one of the green chiles.

Southwestern sauce is spread on both top and bottom of toasted bun.Lettuce and a whole green chile is added to the toasted buns with sauce.

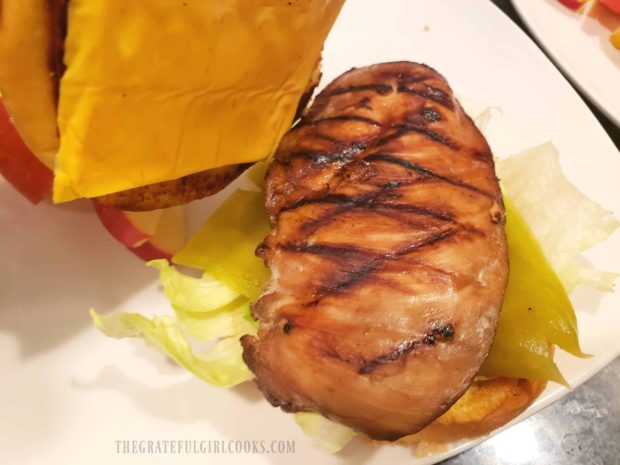
Now lay the warm marinated, grilled chicken breast on top of the chile. Add a slice of American cheese (or thin cheddar, if using) to the top bun, and place it on the chicken.

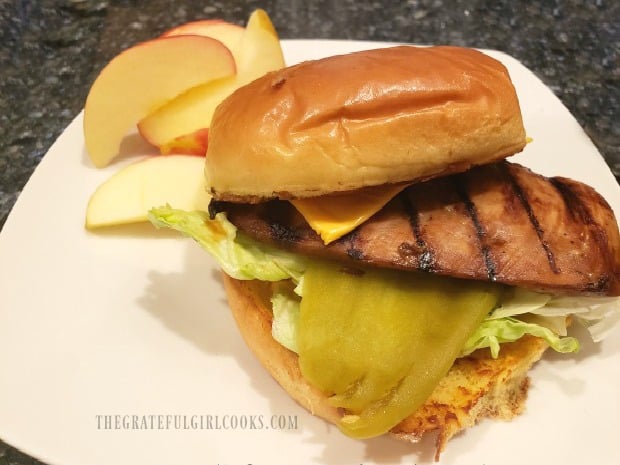
Now your Santa Fe Chicken Sandwich is completely ready to enjoy! The heat from the toasted bun and the chicken will help to slightly melt the cheese, too!

Repeat the steps for each Santa Fe Chicken Sandwich. All that is left for you to do after that is serve and enjoy these delicious, flavorful chicken sandwiches. Hope you enjoy them… we sure do!

Marinated grilled chicken and cheese are added to the Santa Fe Chicken Sandwich.

A Santa Fe Chicken Sandwich is served on a plate, with sliced apples on the side.

Thank you for stopping by. The printable recipe is shown below, in case you would like to make these at home. Stay safe, and be an encouraging friend and family member to those around you who might be hurting.

God bless you, and I sincerely hope you have a GREAT day. There is ALWAYS something to be thankful for, right?

Looking For Other SANDWICH Recipes?

You can find all of my recipes in the Recipe Index, located at the top of the page. I have several sandwich recipes there, including:

Want More Recipes? Get My FREE Newsletter!

I publish a newsletter 2 times per month (1st and 15th) with lots of recipes, tips, etc..
Would you like to join our growing list of subscribers?

There is a Newsletter subscription box on the top right (or bottom) of each blog post, depending on the device you use.
You can submit your e-mail address there, to be added to my mailing list.

Find Me On Social Media:

Facebook page: The Grateful Girl Cooks!
Pinterest:
The Grateful Girl Cooks!
Instagram:
jbatthegratefulgirlcooks

Author's signature

Original recipe source: unknown (I received it many years ago from a friend and wrote it down- original source unknown)

↓↓ PRINTABLE RECIPE BELOW ↓↓
0 from 0 votes
Santa Fe Chicken Sandwich
Prep Time
5 mins
Cook Time
14 mins
Marinating Time (Inactive-included in total time)
30 mins
Total Time
49 mins
 

Enjoy a tasty copycat Carl's Jr. Santa Fe Chicken Sandwich. Marinated chicken, cheese, Southwest sauce, green chile & lettuce on a toasted bun. YUM!

Category: Dinner, Lunch, Sandwich
Cuisine: Southwestern
Keyword: Santa Fe Chicken Sandwich
Servings: 4 sandwiches
Calories Per Serving: 441 kcal
Author: JB @ The Grateful Girl Cooks!
Ingredients
For Chicken:
  • 4 medium chicken breasts (boneless, skinless) (the thinner, the better!)
For Teriyaki Marinade: (can also use purchased teriyaki sauce or marinade instead of making homemade sauce)
  • ½ cup low sodium soy sauce
  • 2 Tablespoons honey
  • 2 Tablespoons water
  • 1 Tablespoon brown sugar light or dark
  • 2 cloves garlic minced
  • 1 teaspoon fresh ginger finely grated
  • 1 teaspoon apple cider vinegar
For Southwest Sauce:
  • ¼ cup mayonnaise (regular or light)
  • ¼ teaspoon sweet paprika
  • ¼ teaspoon onion powder
  • ¼ teaspoon curry powder
  • teaspoon cayenne pepper
  • 1 pinch kosher salt
  • 1 pinch ground black pepper
For Sandwich:
  • 4 hamburger buns lightly toasted
  • 4 lettuce leaves
  • 7.5 ounces canned whole green chiles (1 can has about 4 chiles)
  • 4 slices American cheese or thin sliced cheddar
Instructions
  1. MAKE TERIYAKI SAUCE: Combine teriyaki marinade ingredients in medium bowl; whisk together until combined.

  2. MARINATE CHICKEN: Place boneless, skinless chicken breasts into resealable plastic bag or a container (with lid). Add teriyaki sauce; turn to fully cover chicken with sauce. Let chicken marinate in refrigerator for 30 minutes.

  3. PREP #1-MAKE SAUCE: Measure mayonnaise, cayenne pepper, paprika, onion powder, salt, pepper and curry powder into a small bowl. Stir well, then set bowl aside. PREP #2-PREPARE CHILES: Open can; drain green chiles. Carefully slice chiles open. Remove seeds. Pat chiles dry with a paper towel. Set aside.

  4. COOK CHICKEN: After marinating 30 minutes, remove chicken breasts from bag (or container); let excess sauce drip off the chicken. Discard sauce. Cook chicken on an outdoor grill, or in a lightly oiled pan or on indoor grill pan on medium-high heat. Cook for approximately 6-7 minutes. Turn chicken over; continue grilling other side for an additional 6-7 minutes. The time it takes to cook depends on the thickness of chicken you use, of course. When done, chicken should be cooked all the way through (internal temp of 145-150°F), and be nicely browned on all sides. Remove from pan or grill. Keep chicken warm.

  5. TOAST THE BUNS: Lightly toast the hamburger buns. Easiest way is to split and lay them open on a lightly buttered skillet. Let them "toast" for 1-2 minutes on low heat, until golden brown.

  6. TO BUILD EACH SANDWICH: Spread sauce onto both sides of each toasted bun. Place lettuce leaf on bottom bun; add a green chile, followed by the chicken breast. Add a slice of American (or cheddar) cheese to the top bun, and place it on the chicken. Repeat with other sandwiches, serve warm, and enjoy!

Recipe Notes

Caloric calculation was made using light mayonnaise and 1/4th of the marinade's total calories, as marinade is only used to flavor meat and total amount of marinade is not fully consumed.
Nutrition Facts
Santa Fe Chicken Sandwich
Amount Per Serving (1 sandwich)
Calories 441 Calories from Fat 135
% Daily Value*
Fat 15g23%
Saturated Fat 5g31%
Trans Fat 0.3g
Polyunsaturated Fat 3g
Monounsaturated Fat 4g
Cholesterol 96mg32%
Sodium 2187mg95%
Potassium 748mg21%
Carbohydrates 41g14%
Fiber 2g8%
Sugar 16g18%
Protein 36g72%
Vitamin A 2176IU44%
Vitamin C 25mg30%
Calcium 333mg33%
Iron 4mg22%
* Percent Daily Values are based on a 2000 calorie diet.

Here’s one more to pin on your Pinterest boards!Enjoy a tasty copycat Carl's Jr. Santa Fe Chicken Sandwich. Marinated chicken, cheese, Southwest sauce, green chile & lettuce on a toasted bun. YUM!

P.F. Chang’s Spicy Green Beans (copycat)

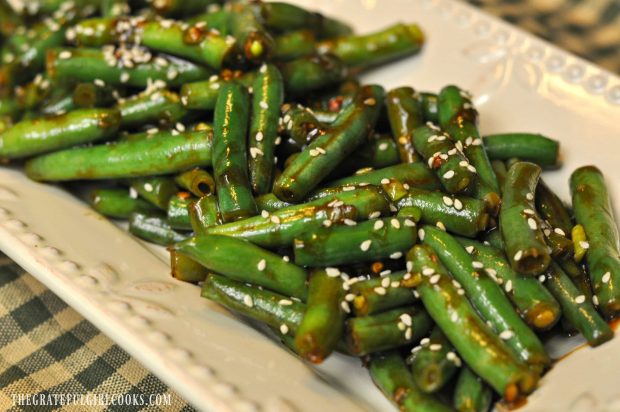
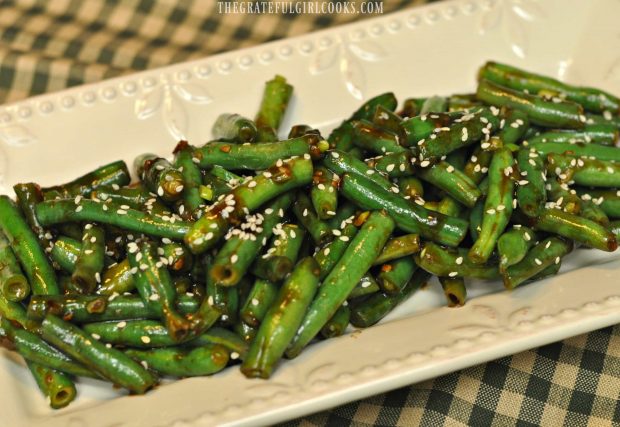
P.F. Chang’s spicy green beans are fresh green beans cooked in a flavorful Asian sauce, in this delicious restaurant copycat recipe!P.F. Chang's spicy green beans are fresh green beans cooked in a flavorful Asian sauce, in this delicious restaurant copycat recipe!

Looking for a tasty new way to serve those yummy summer green beans you get from the grocery store, Farmer’s Market or your own garden?  How about this delicious, quick and easy recipe for P.F. Chang’s Spicy Green Beans (copycat)?

I’ve grown my own green beans for years now, so I’m always on the lookout for new ways to cook and serve them.  I found this “copycat” recipe for spicy green beans on Pinterest, and decided to give it a try. You will be surprised how GOOD these green beans are!  The addition of an Asian pan sauce makes them “practically perfect in every way” (to coin a phrase from Mary Poppins).

Scroll Down For A Printable Recipe Card At The Bottom Of The Page

Are These Spicy Green Beans Difficult To Make?

Are these spicy green beans difficult to make? Absolutely NOT! All in all, the beans take only 5-6 minutes to cook… really!  The “hardest” thing you will have to do is snip the ends off the beans… ha ha! Here’s how to make delicious P.F. Chang’s Spicy Green Beans from the comfort of your own home:

Make The Asian Sauce

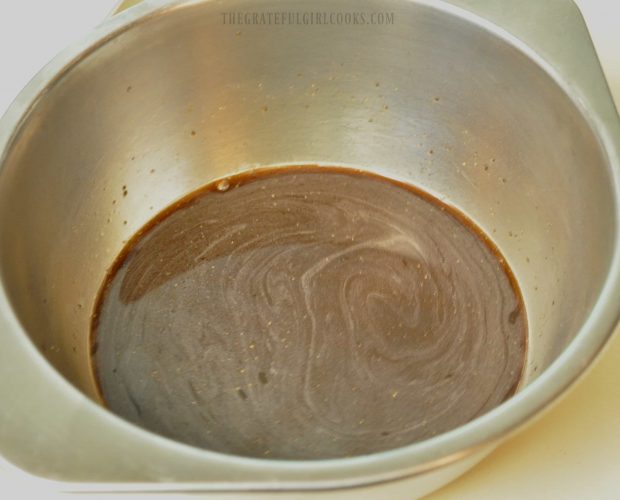
First make the Asian sauce by mixing the ingredients together in a small bowl, and then set aside until ready to put it in use. See how EASY that was?

An Asian inspired sauce is mixed in small bowl to add to green beans.
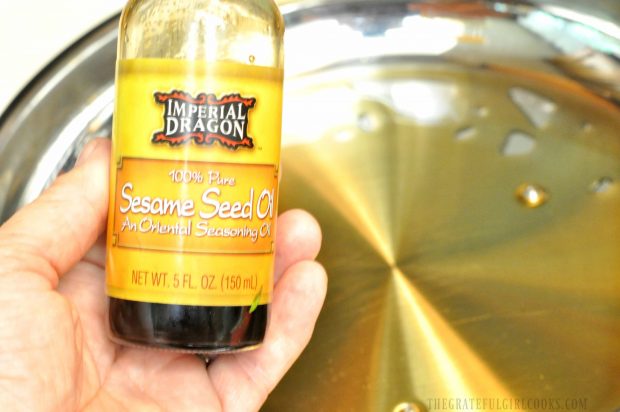
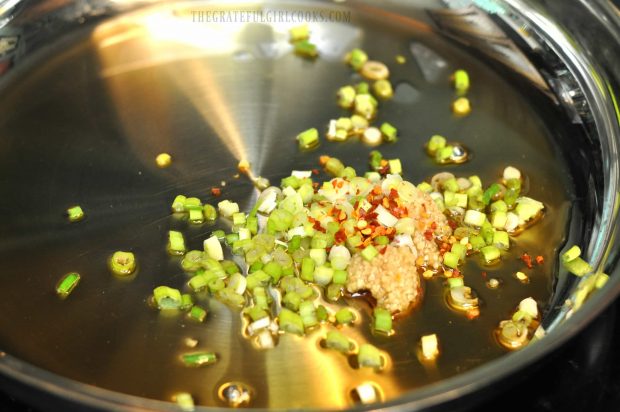
Pour the sesame oil into a large skillet or wok. NOTE: You can buy sesame oil in the Asian food section of most supermarkets. Turn the heat to medium high for about 30 seconds, and when the oil is hot, add the chopped green onions, minced garlic, and red pepper flakes.

Stir well, and cook for 30 seconds, stirring constantly. Be careful NOT to burn the garlic.

Sesame oil is used to add flavor to the cooked veggies in this dish.

Green onions, garlic and red pepper flakes are cooked in a skillet with sesame oil.
Time To Add The Fresh Green Beans!

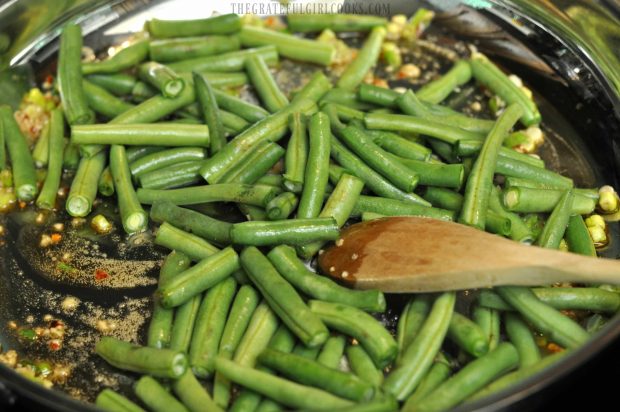
Add the green beans to the skillet. Stir them constantly, and continue to cook them for 3-4 minutes, until they are almost fully cooked. The beans will turn a deeper green color as they cook.
Green beans are added to the skillet.

Add The Sauce To The Spicy Green Beans

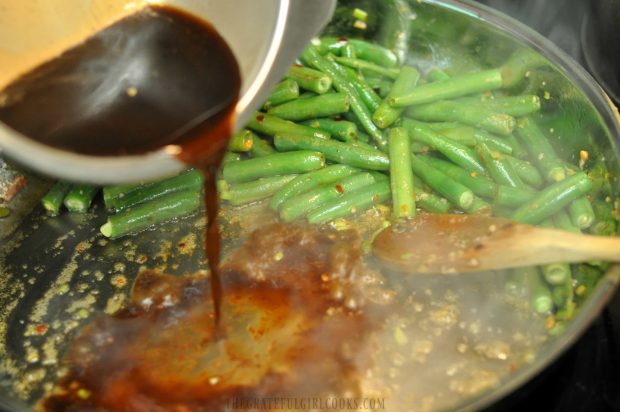
When the green beans are done cooking, move them over to one side of the skillet. Give the Asian sauce a good stir, and then add it to the skillet. Stir well, and cook the sauce for 30 seconds (still on medium-high heat). Let the sauce come to a boil, then turn the heat to LOW. The sauce will thicken very slightly as it cooks.

Adding the Asian sauce to the spicy green beans in skillet.
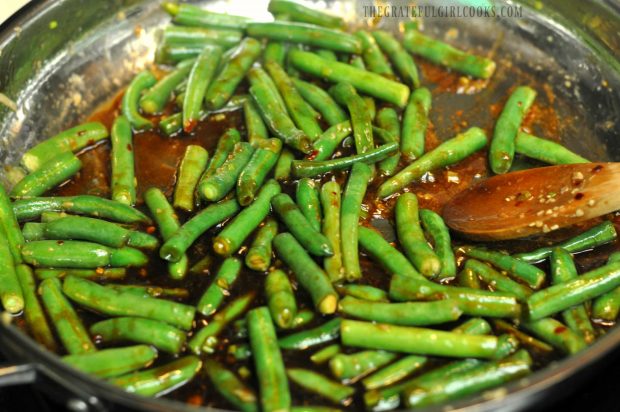
Stir the sauce into the green beans to fully coat them.  Cook the spicy green beans and sauce for another 30 seconds, and then remove the skillet from the heat.

Spicy green beans finish cooking in the Asian sauce.

P.F. Chang’s Spicy Green Beans Are Ready To Serve!

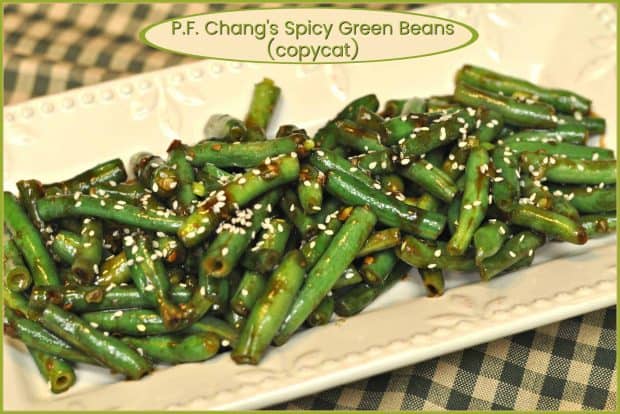
Place the hot green beans and sauce onto serving plate or into a bowl, and garnish with sesame seeds (if using). Serve the spicy green beans while hot, and ENJOY!

The spicy green beans are sprinkled with sesame seeds and served.
Sesame seeds garnish the serving plate covered with P.F. Chang's Spicy Green Beans.
We enjoyed trying this recipe for spicy green beans. They are NOT too spicy at all, and have fantastic flavor!  I used only 1 pound of green beans, so if you are using 2 pounds of beans the quantity will be much larger than shown in my photos!

Hope you will consider trying this recipe. I trust you will find it just as delicious as we did! Have a great day, and please come back again soon!

Looking For More VEGETABLE SIDE DISHES?

You can find all of my vegetable dishes in the Recipe Index, located at the top of the page. A few recipes you might enjoy include:

Interested In More Recipes?

Thank you for visiting this website. I appreciate you using some of your valuable time to do soIf you’re interested, I publish a newsletter 2 times per month (1st and 15th) with all the latest recipes, and other fun info. I would be honored to have you join our growing list of subscribers, so you never miss a great recipe!
There is a Newsletter subscription box on the top right side (or bottom) of each blog post, depending on the device you use, where you can easily submit your e-mail address (only) to be included in my mailing list.

You Can Also Find Me On Social Media:
Facebook page: The Grateful Girl Cooks!
Pinterest: The Grateful Girl Cooks!
Instagram: jbatthegratefulgirlcooks

Author's signature

Recipe Source: http://domesticsuperhero.com/copycat-pf-changs-spicy-green-beans/

0 from 0 votes
P.F. Chang's Spicy Green Beans
Prep Time
10 mins
Cook Time
5 mins
Total Time
15 mins
 
P.F. Chang's spicy green beans are fresh green beans cooked in a flavorful Asian sauce, in this delicious restaurant copycat recipe!
Category: Side Dish, Vegetable Dish
Cuisine: Asian
Keyword: spicy green beans
Servings: 6 servings
Calories Per Serving: 75 kcal
Author: JB @ The Grateful Girl Cooks!
Ingredients
For Beans:
  • 1-2 pounds fresh green beans , ends trimmed and beans cut into 2 inch pieces
  • 2 green onions , chopped thin
  • 1 teaspoon red pepper flakes
  • 4 garlic cloves , minced
  • 2 Tablespoons sesame oil
For Asian Sauce:
  • 1/8 teaspoon salt
  • 1/8 teaspoon black pepper
  • 2 Tablespoons low sodium soy sauce
  • 1 Tablespoon rice vinegar
  • 1 teaspoon white granulated sugar
  • 1/4 cup water
  • Sesame Seeds , for garnish (optional)
Instructions
  1. Make the Asian sauce by mixing ingredients in a small bowl. Set the bowl aside until ready to use.
  2. Put sesame oil into a large skillet or wok. Turn heat to medium high for 30 seconds. To the hot oil add chopped green onions, minced garlic, and red pepper flakes. Stir well and cook for 30 seconds, stirring constantly and being careful NOT to burn the garlic.
  3. Add the green beans to the skillet. Stir constantly and cook for 3-4 minutes, until they are just about fully cooked. The beans will turn a deeper green color as they cook. When beans are done, move them over to one side of the skillet. Give the Asian sauce a good stir and add it to the skillet. Stir well, and cook the sauce for 30 seconds (still on medium-high heat); let the sauce come to a boil, then turn the heat to LOW. The sauce will thicken slightly. Stir the sauce into the green beans to coat. Cook beans and sauce for another 30 seconds, then remove skillet from heat.
  4. Place the hot green beans and sauce onto serving plate or in a bowl, and garnish with sesame seeds (if using). Serve the green beans while hot... and ENJOY!
Nutrition Facts
P.F. Chang's Spicy Green Beans
Amount Per Serving (1 serving)
Calories 75 Calories from Fat 36
% Daily Value*
Fat 4g6%
Sodium 237mg10%
Potassium 194mg6%
Carbohydrates 7g2%
Fiber 2g8%
Sugar 3g3%
Protein 1g2%
Vitamin A 660IU13%
Vitamin C 10.6mg13%
Calcium 34mg3%
Iron 1mg6%
* Percent Daily Values are based on a 2000 calorie diet.

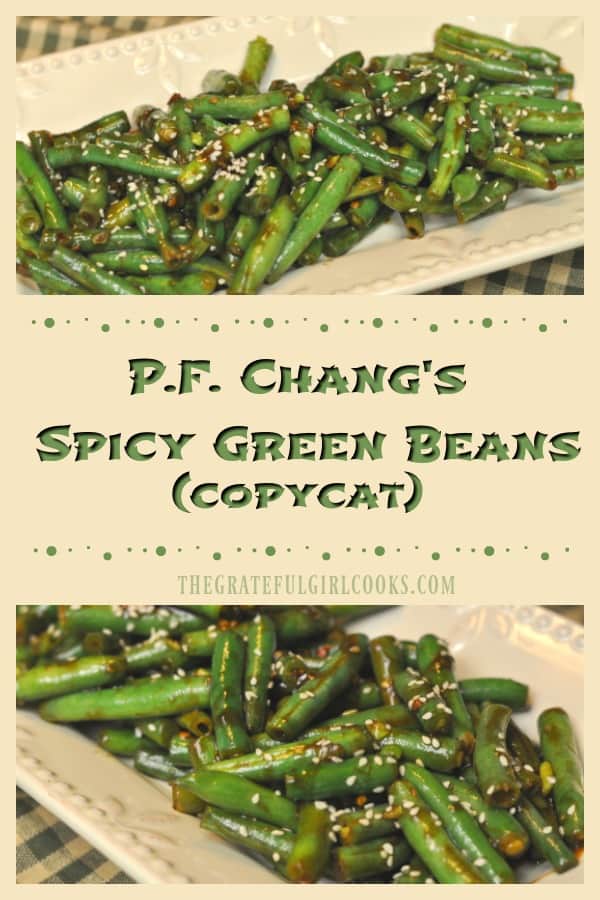
Here’s one more to pin to your Pinterest boards!P.F. Chang's spicy green beans are fresh green beans cooked in a flavorful Asian sauce, in this delicious restaurant copycat recipe!

Save

Save

Save

Save

Save

Save

Save

Save

Save

Save

Save

Save

Save

Save

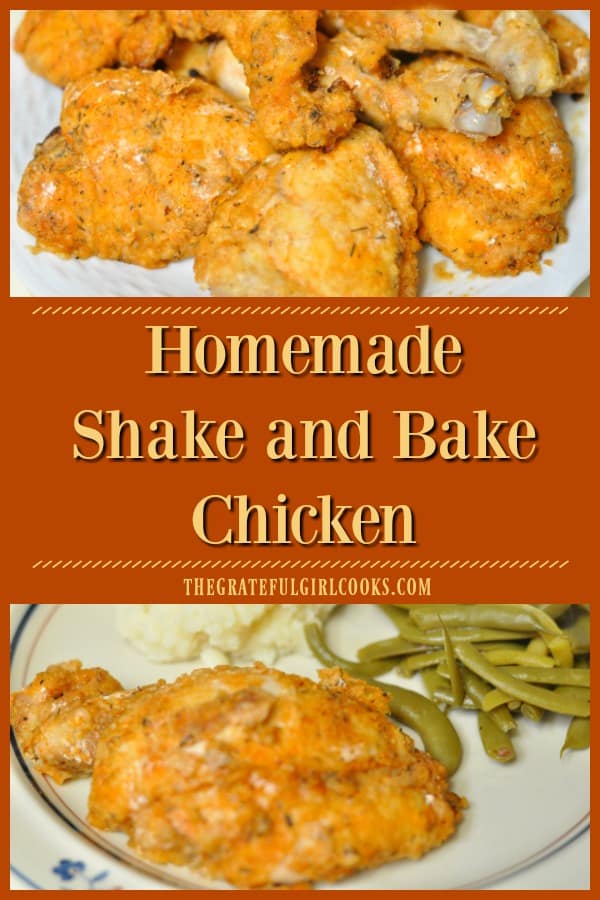
Homemade Shake And Bake Chicken

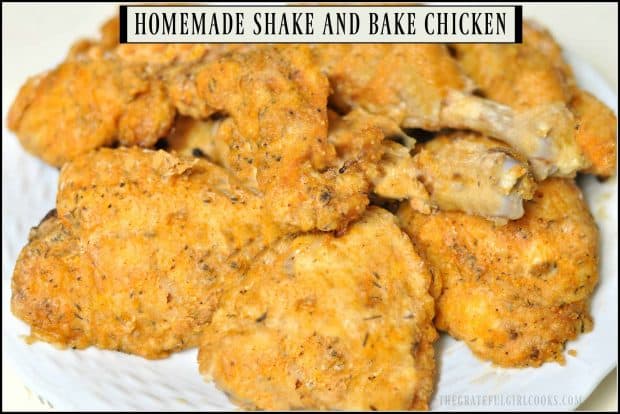
Homemade Shake and Bake Chicken is an EASY, flavorful chicken entree using a quick copycat spice mixture. Chicken pieces are coated with spices, then baked!Homemade Shake and Bake Chicken is an EASY, flavorful chicken entree using a quick copycat spice mixture. Chicken pieces are coated with spices, then baked!

Anyone remember the catch-phrase “It’s Shake n’ Bake… and I helped!”?  I sure remember those TV commercials for shake and bake chicken. Years ago, I used this mixture for baked chicken.

Today I’d like to share with you a copycat version of how to easily make your own Homemade Shake and Bake Chicken! This copycat recipe for the spice mixture uses ingredients you probably already have in your kitchen! The original shake and bake chicken mix was a packet you could buy to help season chicken or pork.  All you needed to do was shake it on the chicken, then bake it! Talk about convenience!

Well, why not make it yourself, and save some money?  The spice mix is so easy to throw together, the chicken pieces are coated with it, then it’s baked until done. That’s it!

Scroll Down For A Printable Recipe Card At The Bottom Of The Page

Make The Spice Mix

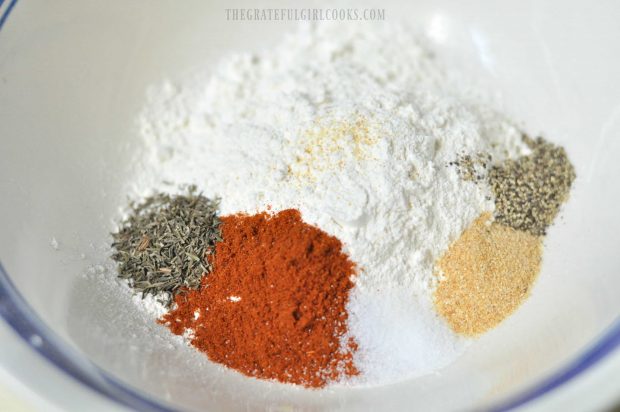
To make the spice mix, flour, paprika, salt, garlic powder, thyme, and black pepper are mixed in a small bowl  until combined. The shake and bake chicken mix, as written, will coat 8 pieces of chicken. Once mixed, place the spice mixture in a gallon sized, resealable bag.
Spices are mixed together in bowl, for shake and bake chicken.

Prepare Homemade Shake And Bake Chicken For Cooking

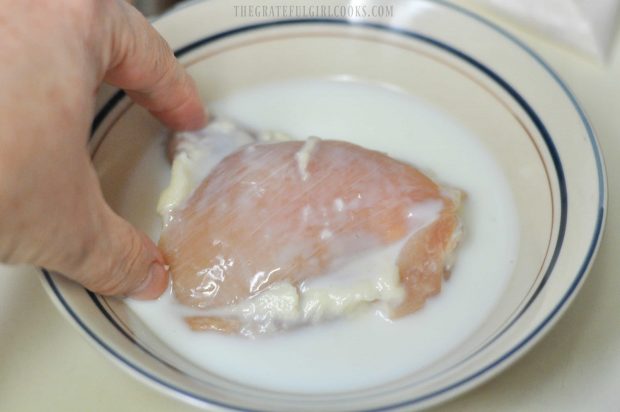
Take the skin off the chicken (optional, but healthier). When I make the shake and bake chicken for these photos, I used chicken thighs and legs. Dip each of the chicken pieces, one at a time, in milk. Cover all sides with the milk.

Shake and bake chicken is first dipped in milk.

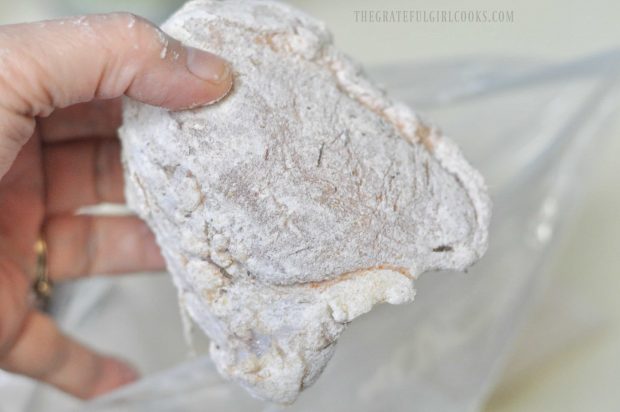
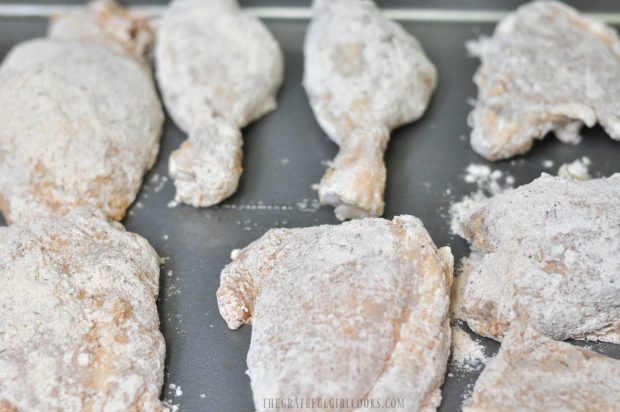
After dipping the chicken piece in milk, shake the excess off.  Place the chicken (one piece at a time) into the large resealable bag with the spice mix. Close and shake until the piece of chicken is coated on all sides. Repeat this process for each piece of chicken.

Shake and bake chicken is then tossed in the dry spice mixture to cover.

Spray a 13×9 inch baking sheet with non-stick spray. Place each of the coated shake and bake chicken pieces onto the pan. Be sure to leave a bit of space between each of the pieces.

Pieces of shake and bake chicken are placed onto baking sheet.

Time To Cook the Shake And Bake Chicken!

Cook the shake and bake chicken in a preheated 375 degree oven for 40 minutes. Large chicken breasts will need to cook a little bit longer to be fully cooked through.

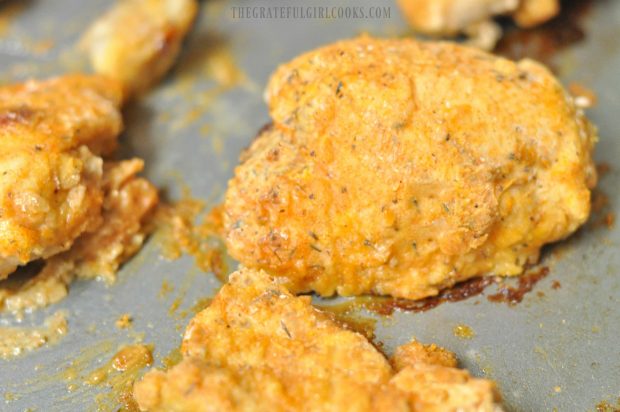
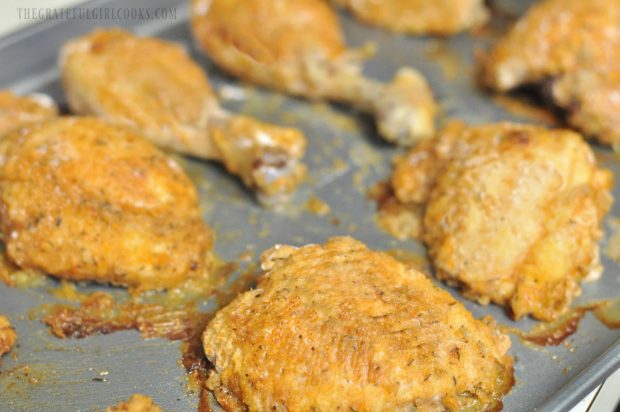
Shake and bake chicken turns a golden brown color while baking.

Shake and bake chicken has finished cooking and is served, hot from the oven!

When the chicken is finished cooking, remove the pan from oven.  If any of the spice mix is still “dry” on top of the shake and bake chicken, simply brush some of the pan drippings onto the mix. This should wet the spice mix enough for a uniform look.

Serve, and enjoy this delicious shake and bake chicken with a side dish you enjoy!  It’s a completely SIMPLE and flavorful way to serve those you love a tasty dinner without a lot of fuss! Have a wonderful day, and may God bless you!

Looking For More CHICKEN Recipes?

You can find all my recipes in the Recipe Index, located at the top of the page. I have LOTS of delicious chicken recipes, including:

Interested In More Recipes?

Thank you for visiting this website. I appreciate you using some of your valuable time to do soIf you’re interested, I publish a newsletter 2 times per month (1st and 15th) with all the latest recipes, and other fun info. I would be honored to have you join our growing list of subscribers, so you never miss a great recipe!
There is a Newsletter subscription box on the top right side (or bottom) of each blog post, depending on the device you use, where you can easily submit your e-mail address (only) to be included in my mailing list.

You Can Also Find Me On Social Media:

Facebook page: The Grateful Girl Cooks!
Pinterest:
The Grateful Girl Cooks!
Instagram:
jbatthegratefulgirlcooks

Author's signature

Recipe Source: unknown (found on 3×5 index card written on years and years ago)

0 from 0 votes
Homemade Shake And Bake Chicken
Prep Time
5 mins
Cook Time
40 mins
Total Time
45 mins
 
Homemade Shake and Bake Chicken is an EASY, flavorful chicken entree using a quick copycat spice mixture. Chicken pieces are coated with spices, then baked!
Category: Entree
Cuisine: American
Keyword: shake and bake chicken
Servings: 8 servings
Calories Per Serving: 60 kcal
Author: JB @ The Grateful Girl Cooks!
Ingredients
For Spice Mixture:
  • 1 cup all purpose flour
  • 2 teaspoons paprika
  • 1 teaspoon salt
  • 1/2 teaspoon black pepper
  • 1 teaspoon garlic powder
  • 1 teaspoon dried thyme
For Chicken:
  • 8 pieces chicken (thighs and legs)
  • 1/2 cup milk
Instructions
  1. Preheat oven to 375 degrees F.
  2. Combine spice mix ingredients; stir well. Place into a plastic, gallon sized resealable bag.
  3. Dip one piece of chicken in milk at a time, and fully coat on all sides. Let excess drip off.
  4. Place piece of chicken into resealable bag with spice mix. Close top of bag and shake until chicken piece is completely coated. Place coated chicken onto a 13x9 inch baking sheet that has been sprayed with non-stick spray.
  5. Repeat process for rest of chicken, leaving a bit of space between each piece on baking sheet.
  6. Bake chicken at 375 degrees for 40 minutes (a bit longer if using chicken breasts-bone in). When done, remove from oven, and serve immediately.
Recipe Notes

NOTE: Caloric calculation is only for spice mix, since there are different pieces of chicken that may be used, all with differing caloric counts.

Nutrition Facts
Homemade Shake And Bake Chicken
Amount Per Serving (1 portion spice mix)
Calories 60
% Daily Value*
Sodium 291mg13%
Potassium 32mg1%
Carbohydrates 12g4%
Protein 1g2%
Vitamin A 245IU5%
Calcium 5mg1%
Iron 1mg6%
* Percent Daily Values are based on a 2000 calorie diet.

Here’s one more to pin on your Pinterest boards!Homemade Shake and Bake Chicken is an EASY, flavorful chicken entree using a quick copycat spice mixture. Chicken pieces are coated with spices, then baked!


Save

Save

Save

Save

Save

Save

Save

Save

Save

Save

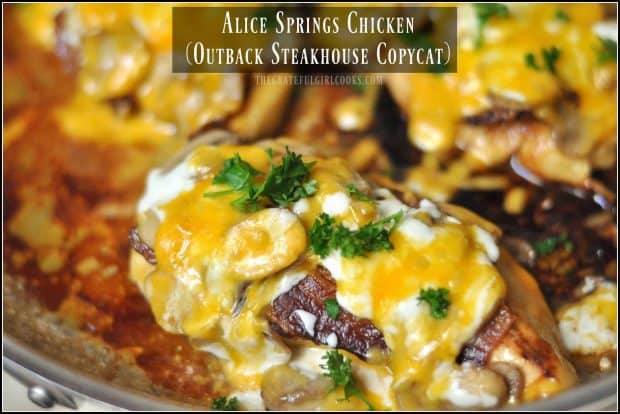
Alice Springs Chicken (Outback Steakhouse Copycat)

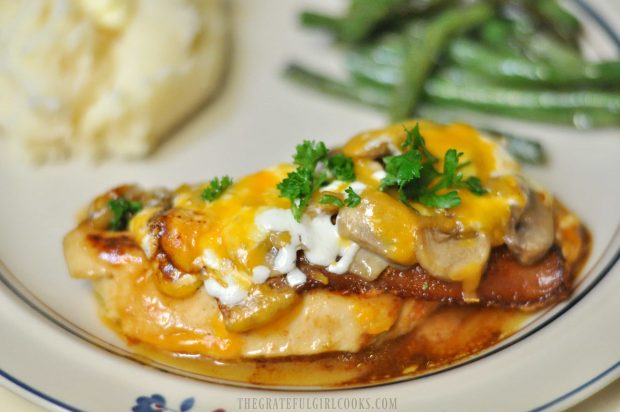
Alice Springs Chicken is pan-seared chicken with bacon, mushrooms, and melted cheeses, in a honey-mustard sauce. This copycat recipe is delicious!Alice Springs Chicken is pan-seared chicken with bacon, mushrooms, and melted cheeses, in a honey-mustard sauce. This copycat restaurant recipe is delicious!

Do chicken breasts, covered with bacon, mushrooms, Jack and Cheddar cheese in a honey mustard sauce sound good? If so, you will enjoy this Alice Springs Chicken (Outback Steakhouse Copycat) recipe, a popular menu item at this nationally known restaurant.

I found the recipe for Alice Springs Chicken in a cookbook I have had for years, which features kitchen clones from famous restaurants, and decided to make this one.  It really tastes wonderful! The recipe itself is very easy to prepare, and the end result is fantastic! Here’s how to make this dish at home:

Scroll Down For A Printable Recipe Card At The Bottom Of Page

Make Sauce To Marinate Chicken

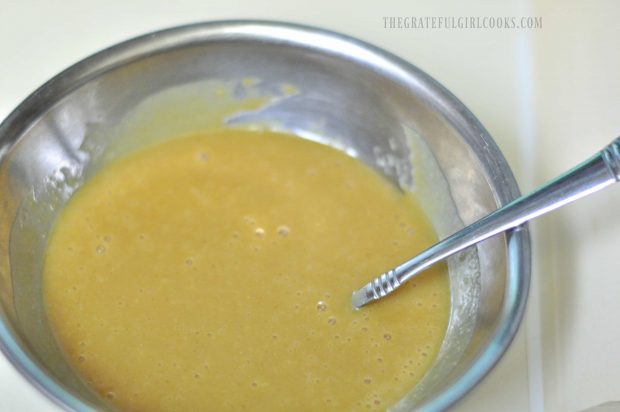
Combine Dijon mustard, honey, oil, and lemon juice in a small bowl. Blend well with a fork until combined.  Place chicken breasts in a resealable plastic food storage bag.

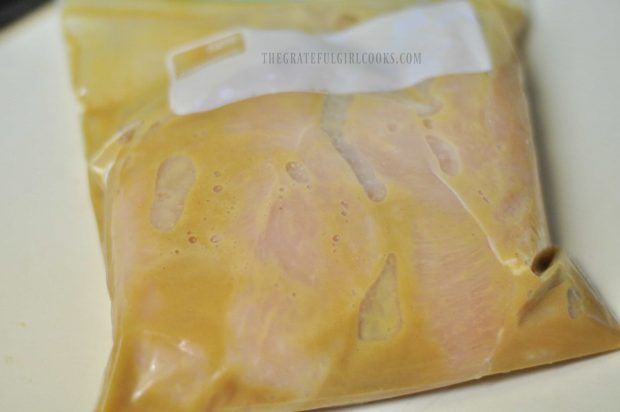
Pour about 2/3 of the sauce over the chicken. Make sure chicken gets coated with sauce, then place in refrigerator and let marinate for 2 hours.  Cover and refrigerate the remaining 1/3 of the sauce until time to serve the meal.

Dijon mustard sauce in bowl

Chicken marinating in plastic bag

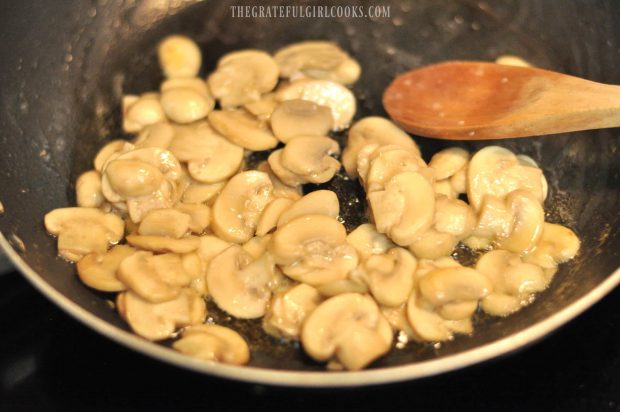
In a small skillet, sauté sliced mushrooms in butter until cooked through (approx. 4-5 minutes). Set aside.

Mushrooms cooking in skillet

Time To Cook The Chicken

Heat oil in a large OVENPROOF skillet (If you don’t have an ovenproof skillet, sear the chicken breasts as directed in regular skillet, then transfer them to a baking dish). When oil is hot, add the chicken breasts.

Cook them for 3-4 minutes per side. until golden brown. Once done, move the skillet off the heat, but leave chicken in skillet (unless transferring to baking dish).

***Here’s my TIP... make SURE the chicken breasts are thin. I took 2 really thick chicken breasts and sliced them horizontally when I made this dish. The very first time I made this recipe, I was cooking this for 6 people and used a couple large/thick chicken breasts in the mix.

Even with the pan-searing AND the baking time in the recipe, the really thick ones did not fully cook all the way through (about 85 percent), so I had to take their plates back and microwave the chicken for our good friends who were over for dinner. Ugh. That sure was embarrassing.  We laughed about it, but I was mortified!  Have not ever repeated THAT mistake since, thankfully!

Chicken breasts cooking in skillet

Pan-seared chicken browned on one side in skillet

Assembling The Alice Springs Chicken

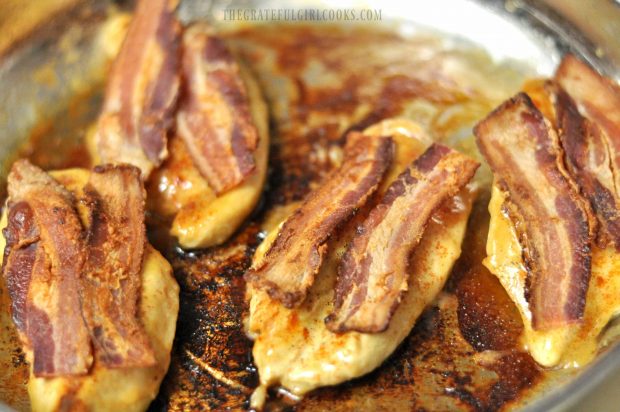
Brush each chicken breast with a bit of the reserved honey mustard sauce. Do NOT use the sauce the chicken was marinated in!). Sprinkle the chicken with salt, pepper, and paprika. Place two pieces of bacon on top of each chicken breast (can cut to fit).

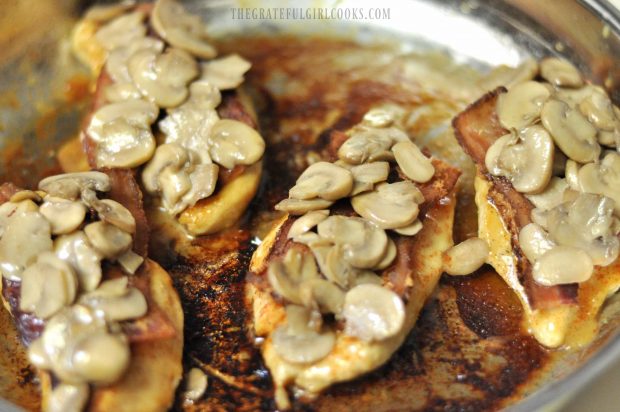
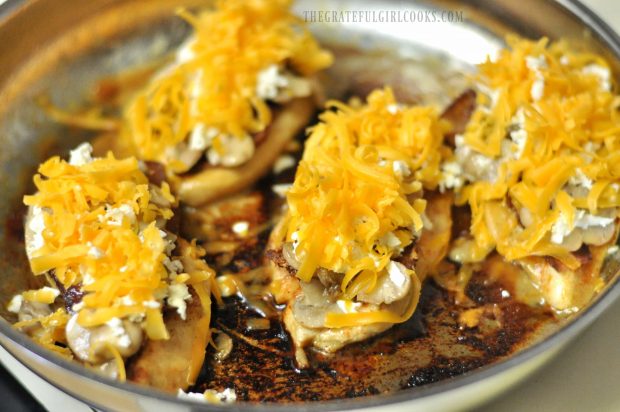
Evenly place cooked mushrooms on top of the bacon, then cover with Jack cheese, followed by cheddar cheese (about 1/4 cup of each type of cheese onto each piece of chicken).

Bacon strips on top of cooked chicken breasts in skillet

Cooked mushrooms on top of bacon and chicken

Grated cheddar cheese on top of bacon, mushrooms and chicken

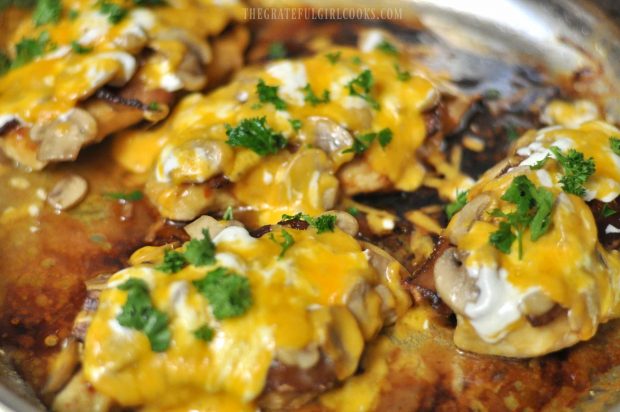
Cook the chicken breasts, uncovered,  in a preheated 375 degree oven for 9-10 minutes. When done, the cheese should be fully melted and should have begun to bubble.

Garnish And SERVE!

Remove the hot skillet from the oven. Top each chicken breast with a sprinkle of fresh chopped parsley.

Melted cheese on top of cooked dish

Serve the reserved honey mustard sauce in a bowl on the side, OR place a spoonful onto the dinner plate and place the chicken on top of the sauce (that’s how I serve it!).

Serve while hot, and enjoy this delicious restaurant-cloned Alice Springs Chicken dish! 

Alice Springs Chicken on a dinner plate, ready to eat.

At times it’s fun and economical to be able to re-create popular restaurant menu items in the comfort of your own kitchen. Sure hope you will consider trying this one for Alice Springs Chicken… and sincerely hope you and your loved ones enjoy it!  Have a wonderful day.

Looking For More CHICKEN Recipes?

You can find all of my chicken recipes in the Recipe Index, located at the top of the page. I have a LOT of them you’re gonna love, including:

Interested In More Recipes?

Thank you for visiting this website. I appreciate you using some of your valuable time to do soIf you’re interested, I publish a newsletter 2 times per month (1st and 15th) with all the latest recipes, and other fun info. I would be honored to have you join our growing list of subscribers, so you never miss a great recipe!
There is a Newsletter subscription box on the top right side (or bottom) of each blog post, depending on the device you use, where you can easily submit your e-mail address (only) to be included in my mailing list.

You Can Also Find Me On Social Media:

Facebook page: The Grateful Girl Cooks!
Pinterest:
The Grateful Girl Cooks!
Instagram:
jbatthegratefulgirlcooks

Author's signature

Recipe Source: The book “Top Secret Restaurant Recipes”, by Todd Wilbur. Pages 200-202.  Published by The Penguin Group. Published 1997

0 from 0 votes
Alice Springs Chicken (Outback Steakhouse Copycat)
Prep Time
2 hrs
Cook Time
10 mins
Total Time
2 hrs 10 mins
 
Alice Springs Chicken is pan-seared chicken with bacon, mushrooms, and melted cheeses, in a honey-mustard sauce. This copycat restaurant recipe is delicious!
Category: Entree
Cuisine: American
Keyword: Alice springs chicken
Servings: 4 servings
Calories Per Serving: 785 kcal
Author: JB @ The Grateful Girl Cooks!
Ingredients
For the Honey Mustard Marinade:
  • 1/2 cup Dijon mustard
  • 1/2 cup honey
  • 1 1/2 teaspoons vegetable oil
  • 1/2 teaspoon lemon juice
For Chicken:
  • 4 chicken breasts , boneless, skinless (or slice 2 thick breasts in half horizontally lengthwise)
  • 1 Tablespoon vegetable oil
  • 2 cups sliced button mushrooms (approx. 10-12 mushrooms)
  • 2 Tablespoons butter
  • Salt , Pepper, Paprika (to lightly season chicken with)
  • 8 slices bacon , cooked
  • 1 cup grated Jack cheese
  • 1 cup grated Cheddar cheese
  • 2 teaspoons fresh parsley , finely chopped
Instructions
  1. Combine Dijon mustard, honey, oil, and lemon juice in small bowl. Blend well with fork until combined. Place chicken breasts in a resealable plastic food storage bag, Pour 2/3 of the sauce over chicken. Make sure chicken gets coated with sauce, then place bag in refrigerator; marinate for 2 hours. Cover and refrigerate remaining sauce until later.
  2. In a small skillet, sauté sliced mushrooms in butter until cooked (approx. 4-5 minutes). Set aside.
  3. Heat oil in large OVENPROOF skillet (If you don't have an ovenproof skillet, sear chicken breasts in regular skillet, then transfer to baking dish). When oil is hot, add chicken breasts. Cook for 3-4 minutes per side. until golden brown. Once done, remove skillet off the heat, but leave chicken in skillet (unless transferring to baking dish).
  4. Brush each chicken breast with a bit of reserved honey mustard sauce. Do NOT use the sauce the chicken was marinated in!). Sprinkle chicken with salt, pepper, and paprika. Place two pieces of bacon on top of each chicken breast. Evenly spoon cooked mushrooms on top of the bacon, then cover with Jack cheese, followed by cheddar cheese (about 1/4 cup of each type of cheese onto each piece of chicken).
  5. Cook chicken, uncovered, in a preheated 375 degree oven for 9-10 minutes. When done, cheese should be fully melted and should have begun to bubble. Remove skillet from oven. Top each chicken breast with a sprinkle of fresh chopped parsley.
  6. Serve with reserved sauce on the side, or place a spoonful of sauce onto dinner plate, top with chicken. Enjoy!
Recipe Notes

PREP TIME reflects 2 hours for marinating chicken breasts.
Recipe Source: The book "Top Secret Restaurant Recipes", by Todd Wilbur. Pages 200-202.  Published by The Penguin Group. Published 1997

Nutrition Facts
Alice Springs Chicken (Outback Steakhouse Copycat)
Amount Per Serving (1 serving)
Calories 785 Calories from Fat 450
% Daily Value*
Fat 50g77%
Saturated Fat 25g156%
Cholesterol 171mg57%
Sodium 1156mg50%
Potassium 773mg22%
Carbohydrates 39g13%
Fiber 1g4%
Sugar 36g40%
Protein 46g92%
Vitamin A 745IU15%
Vitamin C 3.3mg4%
Calcium 441mg44%
Iron 1.9mg11%
* Percent Daily Values are based on a 2000 calorie diet.

Here’s one more to pin on your Pinterest boards!Alice Springs Chicken is pan-seared chicken with bacon, mushrooms, and melted cheeses, in a honey-mustard sauce. This copycat restaurant recipe is delicious!


Save

Save

Save

Save

Save

Save

Save

Save

Save

Save

Save

Save

Save

Save

Save

Save

Save

Olive Garden Chicken Gnocchi Soup

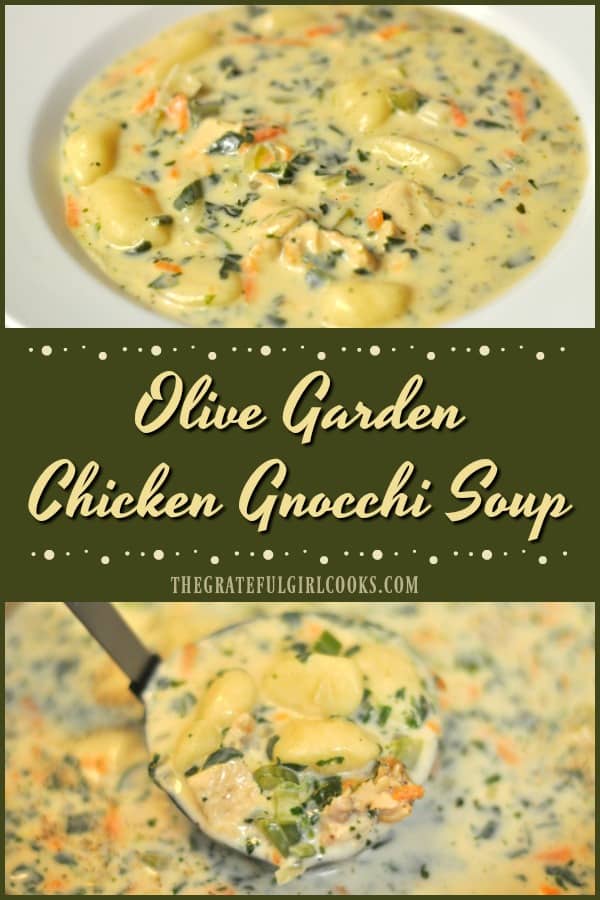
This delicious, copycat version of Olive Garden’s beloved thick and creamy chicken gnocchi soup is easy to make in 30 minutes, for lunch or dinner!This delicious, copycat version of Olive Garden's beloved thick and creamy chicken gnocchi soup is easy to make in 30 minutes... for lunch or dinner!
Last year a friend from out of state was staying in our home for several days. My friend Patti and I went to a local restaurant, where I tasted an amazing soup… Olive Garden Chicken Gnocchi Soup!  It was so good I’ve been on a quest ever since, to find a great recipe to duplicate it.

I think I found a great recipe on Pinterest. The soup tastes amazingly similar to the restaurant version, and it is crazy delicious! Did I mention it only takes 25-30 minutes from start to finish to make, as well? Yep.  EASY and delicious – now that’s my kind of meal! Here’s how you make this main course soup:

Scroll Down For A Printable Recipe Card At The Bottom Of The Page

How To Make Olive Garden Chicken Gnocchi Soup

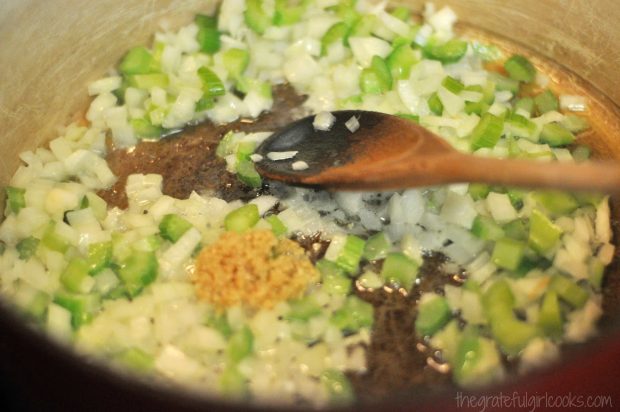
Add butter and olive oil to a large soup pot. Turn heat to medium-high heat, and melt butter. Add diced onion and celery and sauté for 3-4 minutes, stirring occasionally, until onions are translucent and tender. During the last minute, add the minced garlic and continue cooking, stirring to prevent garlic from burning.

Cooking onion, celery and garlic for gnocchi soup

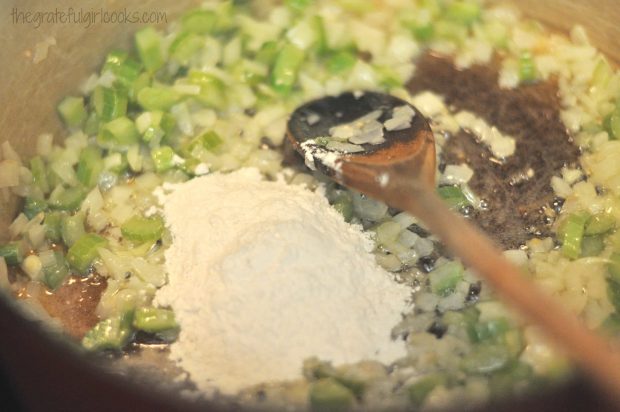
Once onions and celery are tender, add the flour to the pan.  Stir to combine all the ingredients.  This makes a “roux” which helps to thicken the soup. Cook the roux for an additional minute, stirring well.

Flour added to onion and celery to thicken chicken gnocchi soup

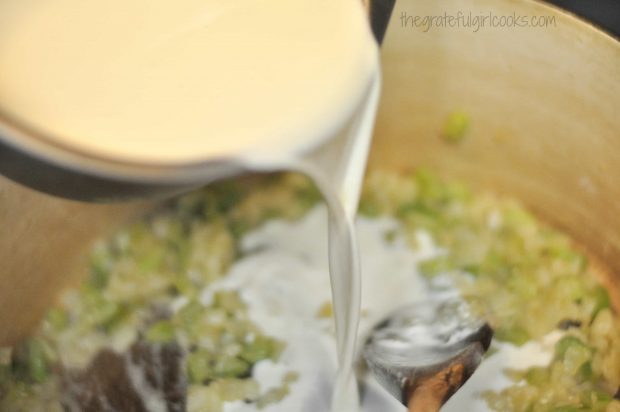
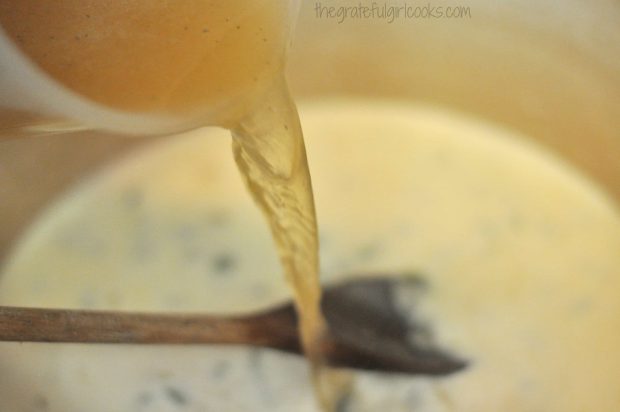
Add the half and half and the chicken broth to the soup pot, and stir well, to fully combine ingredients.

Half n' half added to chicken gnocchi soup

Chicken broth added to soup

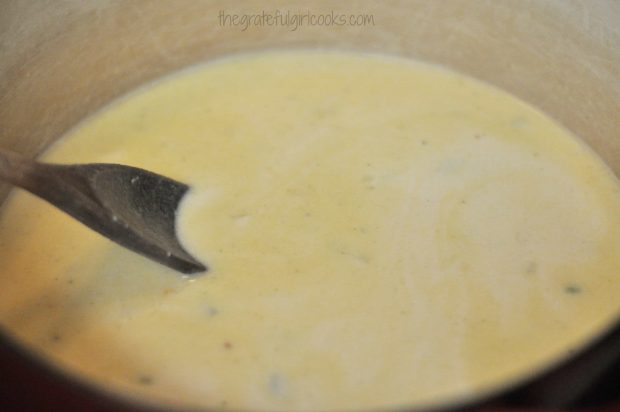
The chicken gnocchi soup will look like the photo below. Continue to cook, stirring frequently until the soup begins to thicken.

Finish Making The Chicken Gnocchi Soup

Once the soup has begun to thicken, add the shredded carrots, chopped spinach, fresh thyme leaves, diced chicken breast, and potato gnocchi. Stir well, to fully blend all these ingredients into the chicken gnocchi soup.

Soup base for chicken gnocchi soup, cooking in large saucepan.

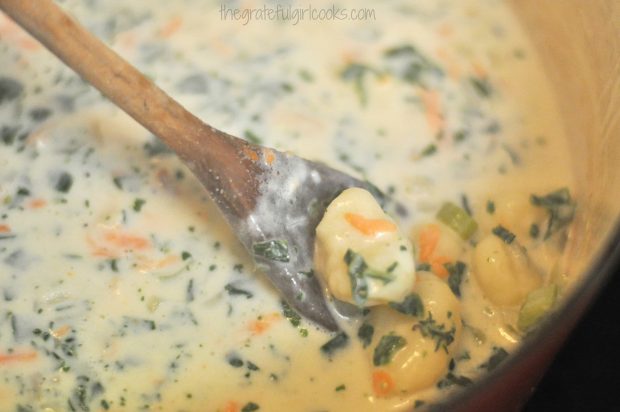
Continue to cook the soup on medium heat until soup is heated through, and the potato gnocchi is fully cooked (between 5 and 10 minutes). The soup will thicken up a bit more, too. See that good looking gnocchi? YUM.

Gnocchi from soup, with spinach and carrots, on wooden spoon

Serve The Olive Garden Chicken Gnocchi Soup

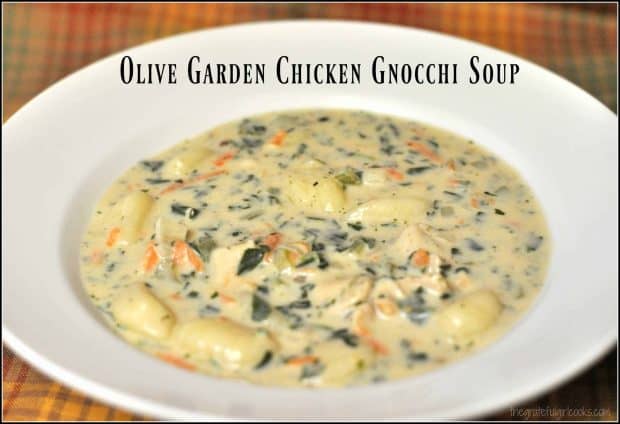
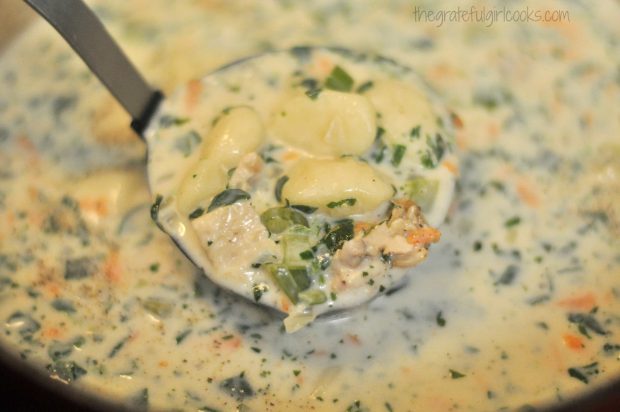
Once the chicken gnocchi soup is finished cooking, give it a taste test. Season with salt and ground black pepper, to taste.  See the bites of gnocchi, chicken, spinach and shredded carrots in the photo below? This is a meal in a bowl, friends!

Ladle full of homemade Olive Garden Chicken Gnocchi Soup

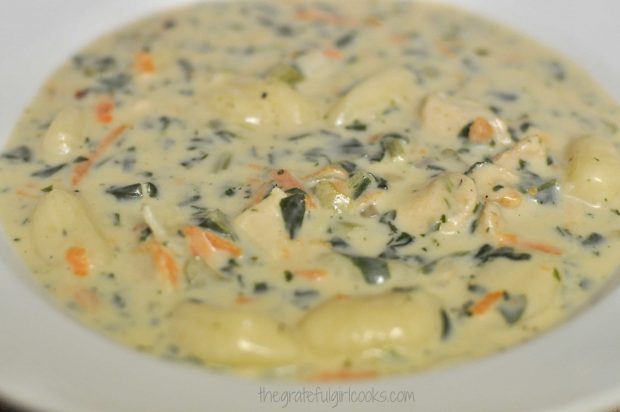
Ladle the creamy soup into serving bowls, and serve this chicken gnocchi soup while HOT! I think you’re gonna love this soup… we sure did! The potato gnocchi in the soup taste like little dumplings!

Soup, with chicken and gnocchi, is served in white bowl

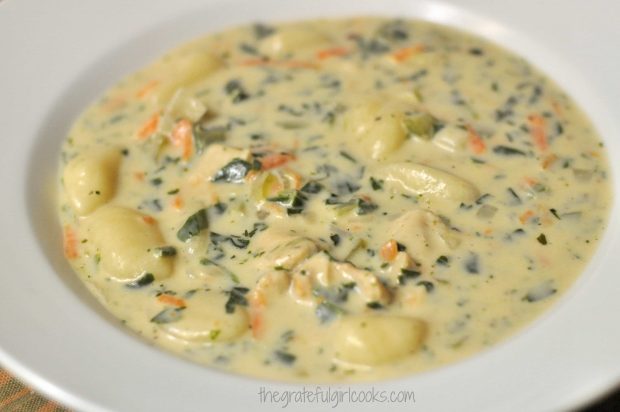
We ate our Olive Garden chicken gnocchi soup with thick slices of crusty French bread. French bread tasted GREAT dipped in the soup to “sop up” some of that delicious creamy broth!

Thick, creamy gnocchi soup in white bowl

Sure hope you will consider making this absolutely delicious and filling chicken gnocchi soup. It’s quick and easy to prepare on a busy day, but is so filling and super delicious! The leftovers were just as good, as well! Have a great day, and thanks for taking the time to check out this recipe. Hope you enjoy it.

Looking For More GNOCCHI Recipes?

You can find all my recipes in the Recipe Index, located at the top of the page. I have some delicious gnocchi recipes you might be interested in, including:

Interested In More Recipes?

Thank you for visiting this website. I appreciate you using some of your valuable time to do soIf you’re interested, I publish a newsletter 2 times per month (1st and 15th) with all the latest recipes, and other fun info. I would be honored to have you join our growing list of subscribers, so you never miss a great recipe!
There is a Newsletter subscription box on the top right side (or bottom) of each blog post, depending on the device you use, where you can easily submit your e-mail address (only) to be included in my mailing list.

You Can Also Find Me On Social Media:
Facebook page: The Grateful Girl Cooks!
Pinterest: The Grateful Girl Cooks!
Instagram: jbatthegratefulgirlcooks

Author's signature

Recipe Source: http://therecipecritic.com/2016/09/creamy-chicken-gnocchi-soup-olive-garden-copycat/

0 from 0 votes
Olive Garden Chicken Gnocchi Soup
Prep Time
10 mins
Cook Time
20 mins
Total Time
30 mins
 
This delicious, copycat version of Olive Garden's beloved thick and creamy chicken gnocchi soup is easy to make in 30 minutes... for lunch or dinner!
Category: Soup
Cuisine: Italian
Keyword: chicken gnocchi soup
Servings: 6 servings
Calories Per Serving: 383 kcal
Author: JB @ The Grateful Girl Cooks!
Ingredients
  • 3 Tablespoons butter
  • 1 Tablespoon olive oil
  • 1 cup brown onion , diced
  • 1/2 cup celery , diced
  • 2 garlic cloves , minced
  • 1/4 cup all-purpose flour
  • 2 cups half and half
  • 1 can (14 ounces) chicken broth (**See NOTES section below for tip)
  • 1 cup shredded carrots
  • 1 cup fresh spinach leaves , chopped (may substitute frozen, chopped spinach-drained well)
  • 1 Tablespoon fresh thyme leaves
  • 1 cup cooked chicken breast , diced
  • 1 package (16 ounces) potato gnocchi (found in pasta aisle)
  • Salt and ground black pepper , to taste
Instructions
  1. Place the butter and olive oil in a large soup pot. Melt butter on medium-high heat. Add diced onion and celery. Sauté until onions are translucent and tender (about 3-4 minutes), stirring occasionally. During the last minute, add the minced garlic.
  2. Add flour to the pan, stir well, to combine (this makes a "roux"). Continue to cook this for an additional minute.
  3. Add the half and half, then the chicken broth to the soup pot. Mix well, to combine, and continue to cook, stirring frequently until the soup begins to thicken.
  4. Once soup has begun to thicken, add shredded carrots, chopped spinach, fresh thyme leaves, diced chicken and gnocchi. Simmer on low for 5-10 minutes, until soup is heated and thickened, and gnocchi have fully cooked. Taste and season with salt and pepper, if desired.
  5. Serve hot... and enjoy!
Recipe Notes

If you prefer a thinner soup, simply add an additional can of chicken broth to soup. (I like it thick and creamy, so only used one can!)

Nutrition Facts
Olive Garden Chicken Gnocchi Soup
Amount Per Serving (1 serving)
Calories 383 Calories from Fat 171
% Daily Value*
Fat 19g29%
Saturated Fat 10g63%
Cholesterol 64mg21%
Sodium 625mg27%
Potassium 381mg11%
Carbohydrates 40g13%
Fiber 3g13%
Sugar 2g2%
Protein 14g28%
Vitamin A 4585IU92%
Vitamin C 12.5mg15%
Calcium 137mg14%
Iron 3.9mg22%
* Percent Daily Values are based on a 2000 calorie diet.

Here’s one more to pin on your Pinterest boards!This delicious, copycat version of Olive Garden's beloved thick and creamy chicken gnocchi soup is easy to make in 30 minutes... for lunch or dinner!

Save

Save

Save

Save

Save

Save

Save

Save

Save

Save

Save

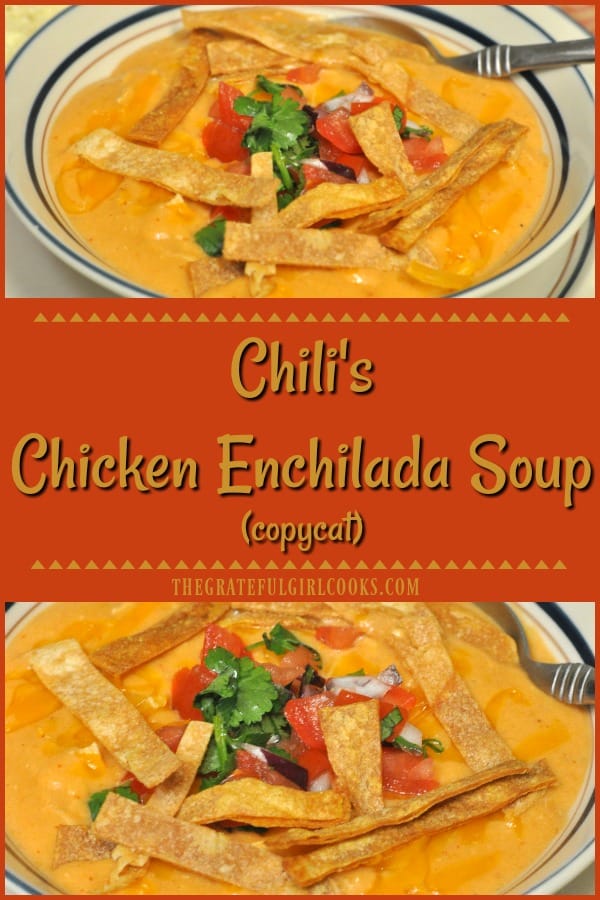
Chili’s Chicken Enchilada Soup (copycat)

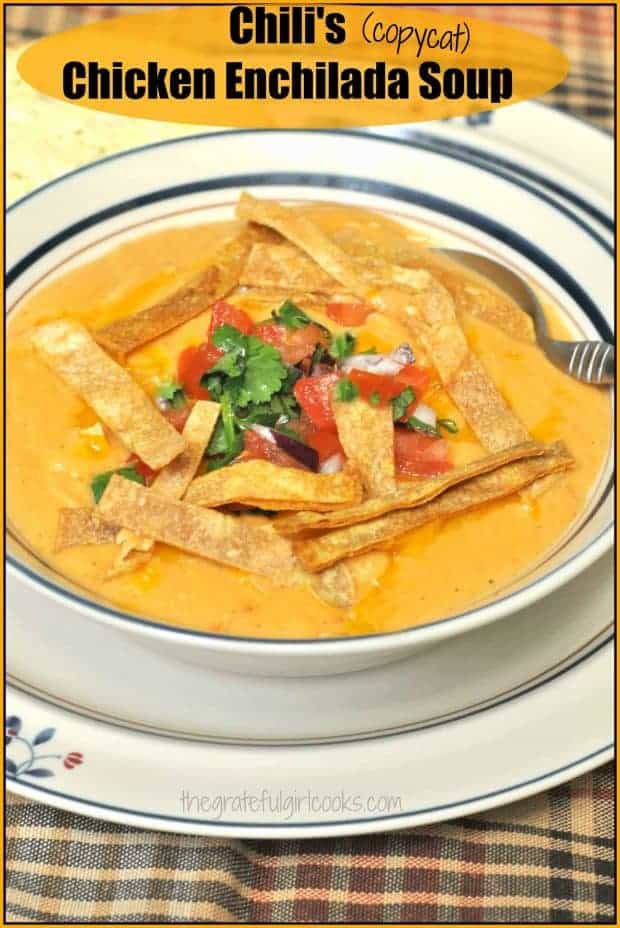
Enjoy a taste of the Southwest, with this delicious Chili’s Chicken Enchilada Soup recipe (copycat), with pico de gallo and tortilla strips!Enjoy a taste of the Southwest, with this delicious Chili's Chicken Enchilada Soup recipe (copycat), with pico de gallo and tortilla strips!
If you enjoy the flavor of chicken enchiladas, chances are pretty good you will love this copycat recipe of this famous restaurant’s much requested item… Chili’s Chicken Enchilada Soup! It’s so good… all that cheesy, chicken enchilada goodness in a big bowl of soup!

I found this soup recipe in one of my cookbooks I’ve had for a long time. This Chili’s chicken enchilada soup is thick and cheesy, and packed with chicken. Because of the addition of masa harina, enchilada sauce and spices, this soup tastes just like a good ol’ chicken enchilada!

Scroll Down For A Printable Recipe Card At The Bottom Of The Page

How To Make A Copycat Version Of Chili’s Chicken Enchilada Soup

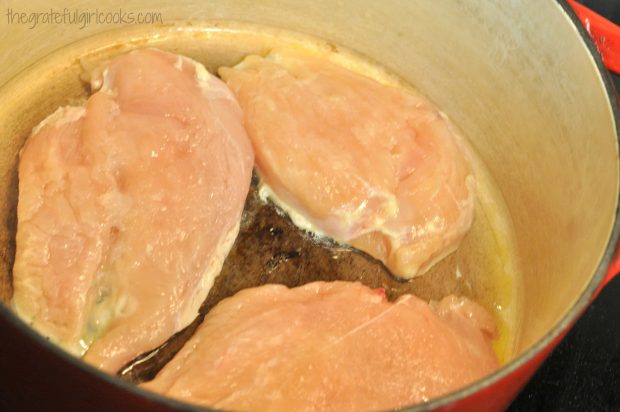
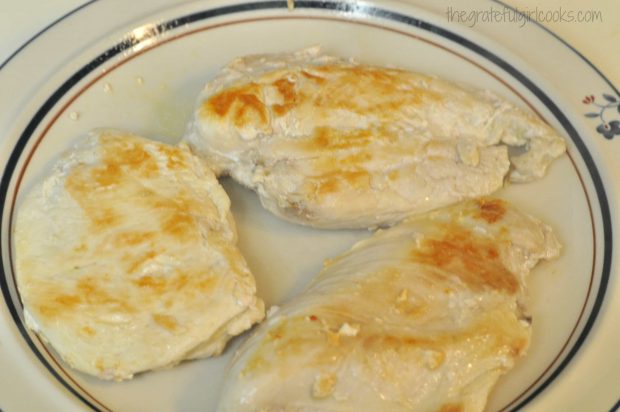
Here’s what you do to make this delicious soup:  Add boneless, skinless chicken breasts to hot oil in a large pan, and cook each side for 4-5 minutes, until browned.

Chicken breasts cooking in large saucepan

Remove the browned chicken from the pan. Set the chicken aside, to cool.

Browned, cooked chicken breasts on plate

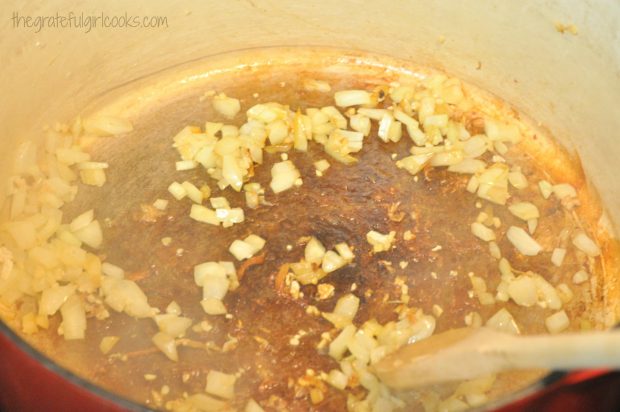
Add chopped onion into the pan. Cook the onions on medium heat for a couple minutes. Add minced garlic for the last 30 seconds. Stir the garlic well, for only 30 seconds, to keep garlic from burning (and becoming bitter). Immediately add the chicken broth to the pan.

Chopped onions and garlic, cooking to add to soup

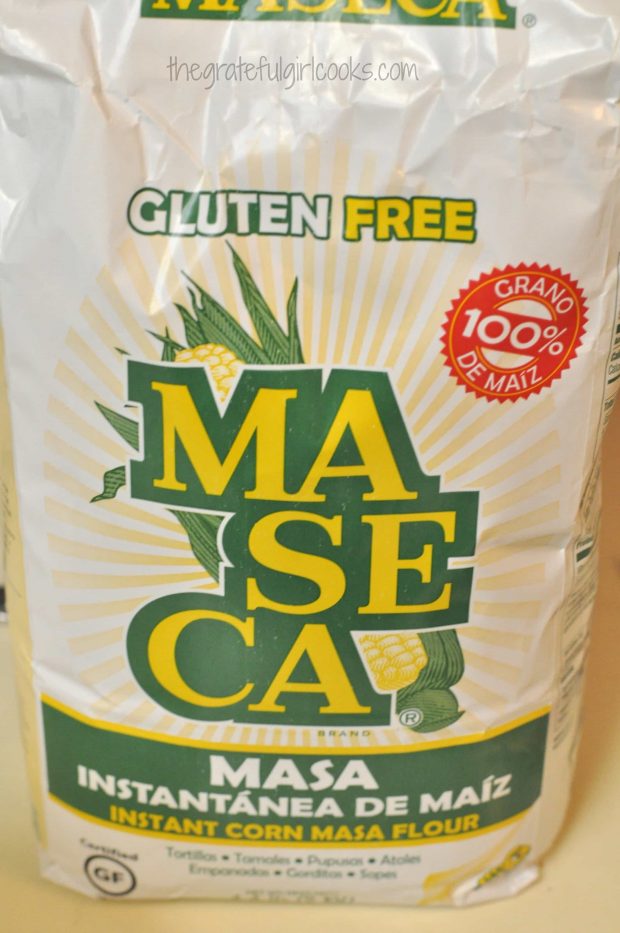
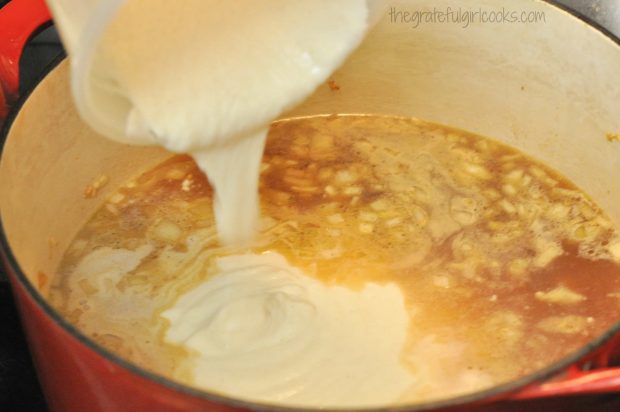
In a separate bowl, mix 2 cups of water with Masa Harina (found in Mexican food section in grocery store). Whisk this mixture until it is well blended and smooth. Add the water/Masa Harina mixture to the onion/garlic broth, and stir (or whisk) well, to combine.

Bag of masa harina for chicken enchilada soup

Masa harina and chicken broth added to chicken enchilada soup mixture in saucepan.

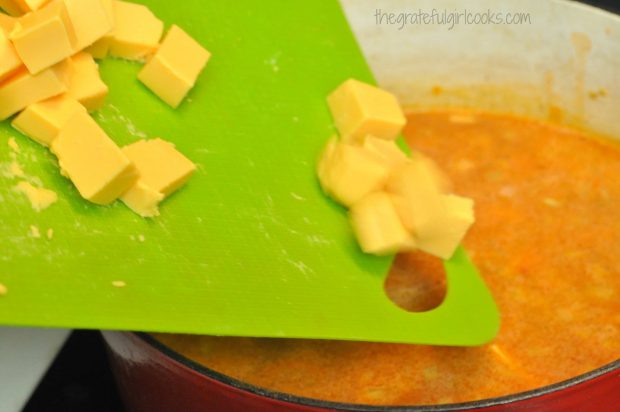
Add 1 additional cup of water, enchilada sauce, cheese cubes, and spices to the soup. Stir to combine. Bring the Chili’s chicken enchilada soup to a boil over medium heat, stirring often until the cheese has completely melted.

Cheese cubes added to chicken enchilada soup in pan.

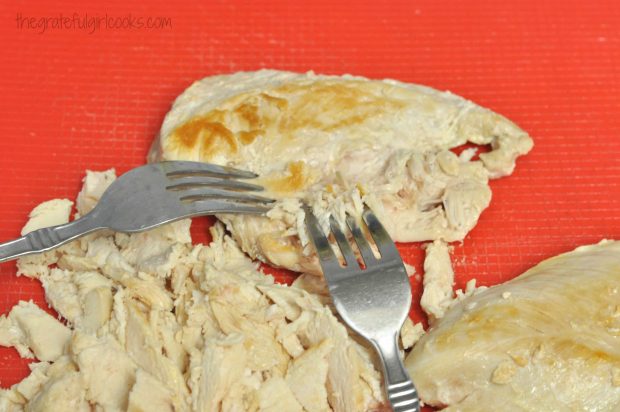
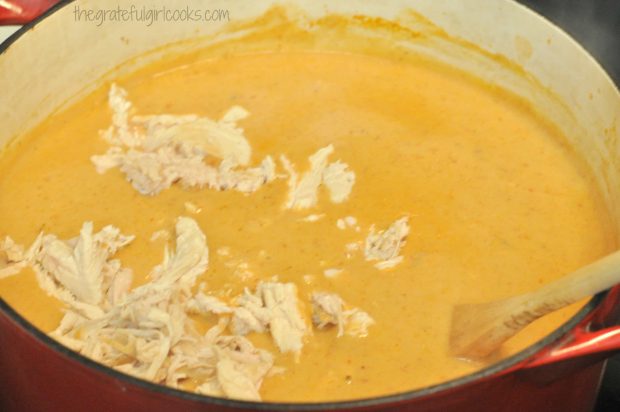
Shred the cooled, reserved chicken into small pieces. I use two forks to do this, because the chicken shreds well, when pulled by two forks. Add all of the shredded chicken to the Chili’s chicken enchilada soup.

Shredding chicken breasts with 2 forks for chicken enchilada soup.

Adding shredded chicken to Chili's chicken enchilada soup in large saucepan.

Reduce heat, and simmer soup on low heat for 30-40 minutes. Chili’s chicken enchilada soup will thicken quite a bit as it cooks.

Preparing Tortilla Strips To Garnish Chili’s Chicken Enchilada Soup

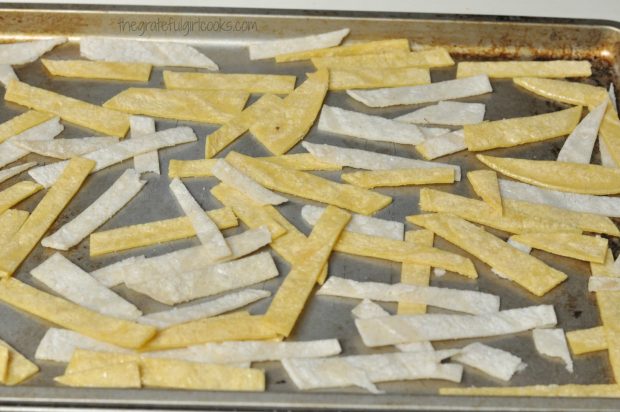
While the soup is simmering, prepare the corn tortilla strips. These will be used later to garnish the soup! To do this, cut 3-4 corn tortillas in half, then into thin strips.

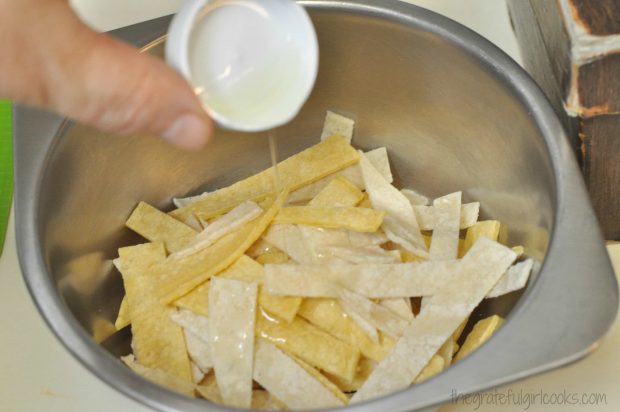
Coat the strips with a Tablespoon or two of vegetable oil. Gently mix the tortilla strips and oil, to coat, then spread them out in a single layer on a baking sheet.

Oil being added to sliced tortilla strips before baking, for chicken enchilada soup garnish

Bake the tortilla strips at 375° for 6-8 minutes, then flip the strips over. Bake the other side of the strips for 6-8 minutes, until they are crispy and light brown in color.

When done, set them aside to cool completely.

Tortilla strips for Chili's chicken enchilada soup are baked on cookie sheet until crispy.

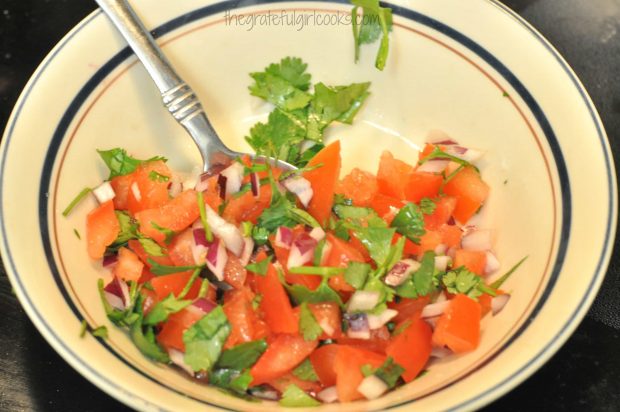
Make a quick pico de gallo while the tortilla strips are baking in oven. Chop and mix the pico de gallo ingredients in a small bowl.

The pico de gallo contains chopped tomatoes, red onion, cilantro, lime juice, salt and pepper. It will be used to garnish Chili’s chicken enchilada soup before serving.

Pico de gallo is mixed together, to garnish Chili's chicken enchilada soup.

Serving Chili’s Chicken Enchilada Soup

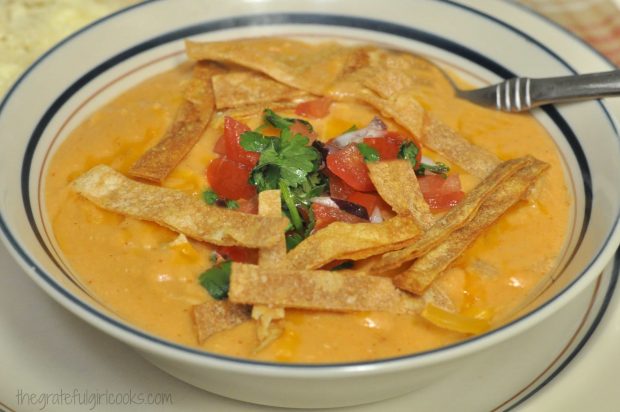
When the Chili’s chicken enchilada soup is done, ladle it into individual bowls. Top each bowl of soup with pico de gallo, and baked tortilla strips.

You can also add grated cheddar cheese or sour cream too, if desired.

Chili's Chicken Enchilada Soup served in a bowl.

While I think we will agree that this is probably not the “healthiest soup”, it really is delicious, and tastes just like a yummy chicken enchilada. Every once in awhile, that’s a GOOD thing!

Hope you will consider trying this recipe! It’s really tasty, and besides that, all those people requesting it at Chili’s can’t be wrong. Agreed?

Take care, have a great day, and please come back again soon for more family-friendly recipes!

Looking for More SOUP Recipes?

You can find all of my recipes in the Recipe Index, which is located at the top of the page. I have lot of absolutely delicious soup recipes, including:

Want More Recipes? Get My FREE Newsletter!

I publish a newsletter 2 times per month (1st and 15th) with lots of recipes, tips, etc..
Would you like to join our growing list of subscribers?

There is a Newsletter subscription box on the top right (or bottom) of each blog post, depending on the device you use.
You can submit your e-mail address there, to be added to my mailing list.

Find Me On Social Media:

Facebook page: The Grateful Girl Cooks!
Pinterest:
The Grateful Girl Cooks!
Instagram:
jbatthegratefulgirlcooks

Author's signature

Original Recipe Source: “Top Secret Restaurant Recipes 2”, by Todd Wilbur, Published by Penguin Group, 2007, pages 118-119.

5 from 1 vote
Chili's Chicken Enchilada Soup (copycat)
Prep Time
25 mins
Cook Time
35 mins
Total Time
1 hr
 

Enjoy a taste of the Southwest for lunch or dinner with this delicious Chili's Chicken Enchilada Soup recipe (copycat), with pico de gallo and tortilla strips!

Category: Soup
Cuisine: Southwest
Keyword: Chili's chicken enchilada soup
Servings: 10 servings
Calories Per Serving: 248 kcal
Author: JB @ The Grateful Girl Cooks!
Ingredients
For Soup:
  • 1 Tablespoon vegetable oil
  • 3 chicken breasts (skinless/boneless)
  • 1/2 cup diced onion
  • 1 clove minced garlic
  • 4 cups chicken broth
  • 1 cup Masa Harina (found in Mexican food section of grocery store)
  • 3 cups water
  • 1 cup red enchilada sauce
  • 16 ounces Velveeta Cheese (small box), diced into cubes
  • 1 teaspoon salt
  • 1 teaspoon chili powder
  • 1/2 teaspoon ground cumin
For Tortilla Garnish:
  • 3-4 corn tortillas
  • 1 Tablespoon vegetable oil
For Pico de Gallo:
  • 1 medium tomato , diced
  • 1 heaping Tablespoon minced red onion
  • 1 Tablespoon lime juice
  • 1 handful cilantro (approx. 3 Tablespoons), chopped
  • Salt and Pepper , to taste
Instructions
To prepare soup:
  1. Add vegetable oil to a large pan. Heat on medium heat. When oil is hot, add chicken breasts to pot; cook chicken for 4-5 minutes per side, until they are light brown. Remove from pan; set aside.
  2. Add chopped onion to pan. Cook over medium heat for two minutes,; add the minced garlic for the last 30 seconds (so it won't burn and become bitter). Add chicken broth to the onions.
  3. In bowl or large mixing cup, mix the masa harina with 2 cups of water. Mix well, to combine, then add to chicken broth and onion mixture in pan. Whisk well, to combine.
  4. Add remaining water, enchilada sauce, cheese cubes, and spices to the pan. Cook, and bring it all to a boil.
  5. Shred the chicken into small pieces (I use two forks to do this); add chicken to soup. Reduce the heat and let soup simmer for 30-40 minutes, stirring often to prevent scorching on the bottom of pan. Soup will thicken as it cooks. Prepare tortilla strips and pico de gallo while soup cooks. When done, ladle soup into serving bowls, and garnish with pico de gallo and tortilla strips.
To Make Tortilla Strips:
  1. Cut tortillas in half, then cut into thin strips. Coat strips with vegetable oil, then bake at 375 degrees for 5-6 minutes on each side (flipping midway through baking), until light brown and crispy.
To Make Pico de Gallo:
  1. Combine ingredients in small bowl. Mix well. Taste test; add additional salt/pepper, if desired.
Recipe Notes

Original Recipe Source: "Top Secret Restaurant Recipes 2", by Todd Wilbur, Published by Penguin Group, 2007, pages 118-119.

Nutrition Facts
Chili's Chicken Enchilada Soup (copycat)
Amount Per Serving (1 serving)
Calories 248 Calories from Fat 81
% Daily Value*
Fat 9g14%
Saturated Fat 5g31%
Cholesterol 40mg13%
Sodium 1552mg67%
Potassium 462mg13%
Carbohydrates 22g7%
Fiber 2g8%
Sugar 6g7%
Protein 18g36%
Vitamin A 815IU16%
Vitamin C 11.1mg13%
Calcium 295mg30%
Iron 1.6mg9%
* Percent Daily Values are based on a 2000 calorie diet.

Here’s one more to pin on your Pinterest boards!Enjoy a taste of the Southwest, with this delicious Chili's Chicken Enchilada Soup recipe (copycat), with pico de gallo and tortilla strips!

Save

Save

Save

Save

Save

Save

Orange Julius (copycat)

You’ll enjoy this Orange Julius copycat recipe for the famous cold, creamy, frothy orange drink! EASY and quick to make smoothie, with only a few ingredients!You'll enjoy this Orange Julius copycat recipe for the famous cold, creamy, frothy orange drink! EASY and quick to make smoothie, with only a few ingredients!

When I was growing up, a treat my parents would buy for us occasionally was an Orange Julius, at the local mall. Did you ever have these cold drinks while growing up?

I loved this ice cold, thick, frothy orange drink… it was a great “smoothie” way back before smoothies became the rage! This Orange Julius (copycat) version I found online comes pretty close in taste to the original, and makes 4 generous servings!

Scroll Down For A Printable Recipe Card At The Bottom Of The Page

The History Behind Orange Julius

I discovered from searching it’s history that the original Orange Julius drink was created by a small business owner named Julius Freed in 1926. He opened an orange juice stand in Los Angeles, California.

A friend of his (who happened to be a chemist) suggested a way to make the orange juice more frothy and thick, and once Mr. Freed began making drinks that way, sales at his little “juice bar” skyrocketed. The rest is history!

What Exactly IS An Orange Julius Made With?

This recipe uses orange juice and low-fat milk as the base for this creamy beverage, so it is low in calories.  The orange juice and milk are easily mixed with a few other simple ingredients (including ice) in a blender for an easy and quick, frothy and refreshing cold beverage.

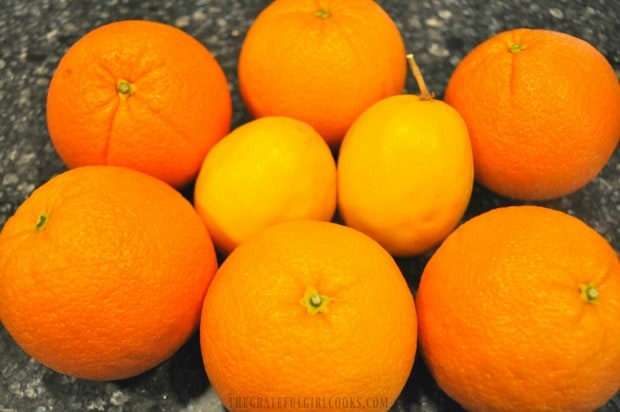
Oranges are used to make this copycat orange julius smoothie.

There are many copycat versions online for Orange Julius drinks. Apparently the original recipe for the powdered thickening compound is still a secret to this day. Many published recipes use egg products (raw, pasteurized or egg substitute) to make this drink. This particular recipe for an orange julius uses no egg products at all, but is delicious, just the same!

Other Smoothie Recipes

If you enjoy cold smoothies like this orange julius, you might also want to check out my other smoothie recipes! All of my recipes can be found in the Recipe Index, located at the top of the page.

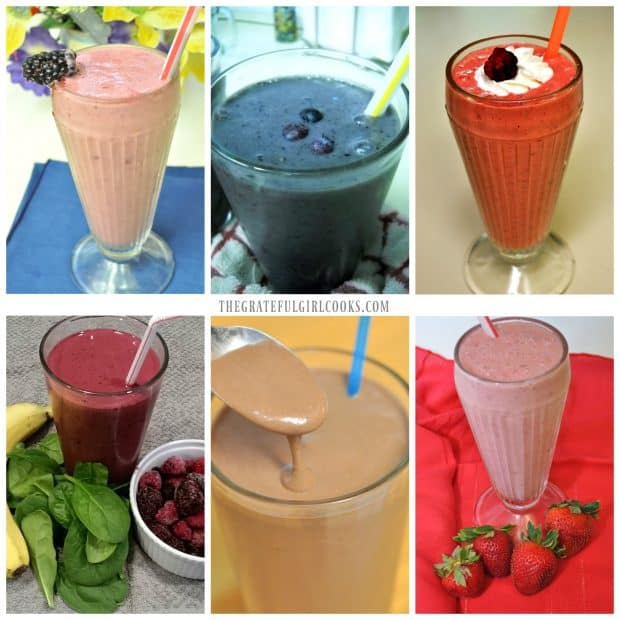
A few favorites (all pictured below) are:

I love smoothies ANY TIME of the year, but especially during the long HOT summer months!  I hope you will give this Orange Julius recipe (or any of the others mentioned) a try! I think you will LOVE it!

Collage of 6 fruit smoothies for Orange Julius (copycat) recipe post

The recipe (as written) makes approximately 4, eight ounce Orange Julius servings. This drink is perfect for a breakfast or anytime “treat” for you and your family or friends! Hope you enjoy this cold, citrus flavored smoothie. It’s so easy to make, and tastes so delicious!

Thanks for stopping by, and I hope you will come back again soon for more yummy recipes. Don’t forget, you can find ALL of my recipes in the Recipe Index, which is located at the top of the page.

Interested In More Recipes?

Thank you for visiting this website. I appreciate you using some of your valuable time to do soIf you’re interested, I publish a newsletter 2 times per month (1st and 15th) with all the latest recipes, and other fun info. I would be honored to have you join our growing list of subscribers, so you never miss a great recipe!
There is a Newsletter subscription box on the top right side (or bottom) of each blog post, depending on the device you use, where you can easily submit your e-mail address (only) to be included in my mailing list.

You Can Also Find Me On Social Media:

Facebook page: The Grateful Girl Cooks!
Pinterest:
The Grateful Girl Cooks!
Instagram:
jbatthegratefulgirlcooks

Have a GREAT day!

Author's signature

Recipe Source: http://www.lynnskitchenadventures.com/2010/06/copycat-orange-julius.html

0 from 0 votes
Orange Julius (copycat)
Prep Time
5 mins
Cook Time
0 mins
Total Time
5 mins
 
You'll enjoy this Orange Julius copycat recipe for the famous cold, creamy, frothy orange drink! EASY and quick to make smoothie, with only a few simple ingredients!
Category: Beverage
Cuisine: American
Keyword: orange julius
Servings: 4 servings (8 ounces each)
Calories Per Serving: 161 kcal
Author: JB @ The Grateful Girl Cooks!
Ingredients
  • 2 cups orange juice fresh squeezed (or commercial)
  • 1 cup milk
  • 1 teaspoon vanilla extract
  • 1/4 cup granulated sugar
  • 1/4 cup powdered sugar
  • 1 1/2 cups ice cubes
Instructions
  1. Place all ingredients in blender and blend on high until all ingredients are fully incorporated and mixture is smooth, thick and frothy!
  2. Pour yourself a glass, garnish with a thin orange slice, if desired... and enjoy!

Nutrition Facts
Orange Julius (copycat)
Amount Per Serving (1 serving)
Calories 161
% Daily Value*
Cholesterol 2mg1%
Sodium 27mg1%
Potassium 336mg10%
Carbohydrates 35g12%
Sugar 33g37%
Protein 2g4%
Vitamin A 365IU7%
Vitamin C 62mg75%
Calcium 87mg9%
Iron 0.3mg2%
* Percent Daily Values are based on a 2000 calorie diet.

Here’s one more to pin on your Pinterest boards!You'll enjoy this Orange Julius copycat recipe for the famous cold, creamy, frothy orange drink! EASY and quick to make smoothie, with only a few ingredients!


Save

Save

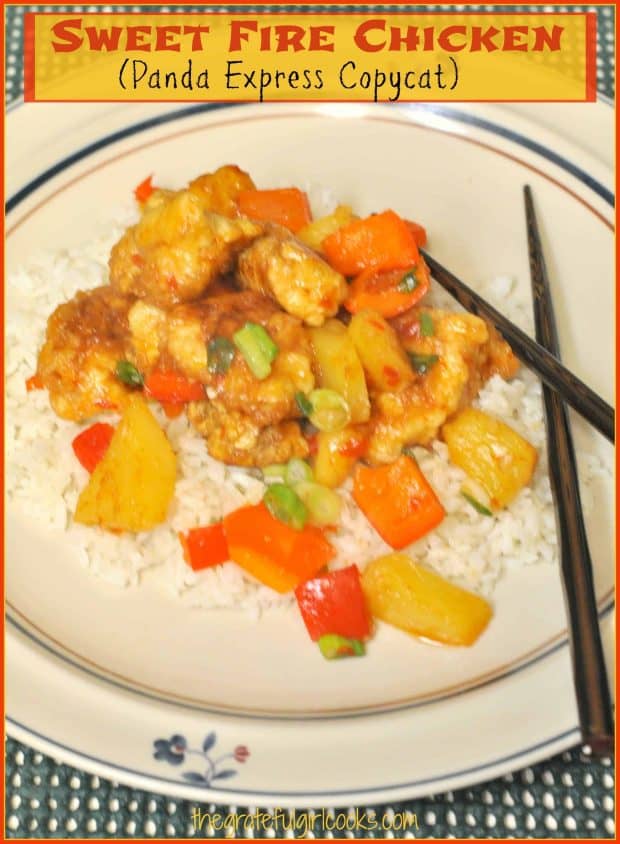
Sweet Fire Chicken (Panda Express Copycat)

It’s easy to make Sweet Fire Chicken (Panda Express copycat) at home, with chicken breast, bell peppers and pineapple in a sweet Thai chili sauce. It's easy to make Sweet Fire Chicken (Panda Express copycat) at home, with chicken breast, bell peppers and pineapple in a sweet Thai chili sauce.

We recently had a day of snow, followed by 2 days of ICE here in Portland, which made trips to the grocery store nearly impossible. While searching my cupboards, I realized we had all the ingredients for a copycat version of Sweet Fire Chicken from Panda Express, so I made it for my husband and myself.  It was fantastic (which made the whole “iced in” thing not so bad)!

This sweet fire chicken dinner was absolutely delicious! A little sweet, and a little spicy! Even though we were “house-bound”, it was just as good (if not better) than getting takeout! Yummy good! It was a very easy recipe to prepare (even if my fingers got a bit messy during the process!) Here’s how you make this dish:

Scroll Down For A Printable Recipe Card At The Bottom Of The Page

How To Make Sweet Fire Chicken

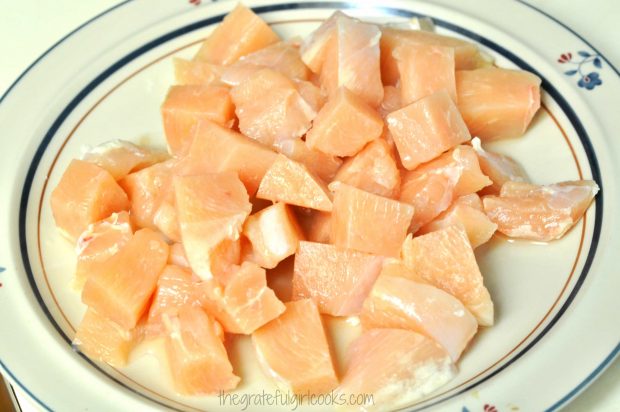
Cut up boneless skinless chicken breasts into bite sized cubes.  I used two large chicken breasts for 4 servings.

Chicken breasts for sweet fire chicken are cut into cubes before cooking.

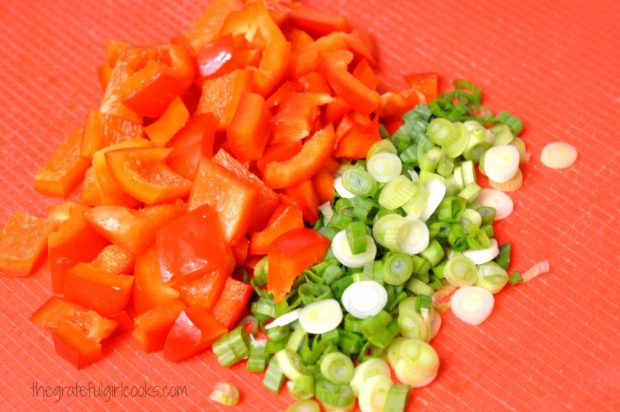
Chop and slice the red pepper and green onions, and then set them aside until you are ready to use.

Red bell peppers and green onions are chopped to add to the sweet fire chicken.

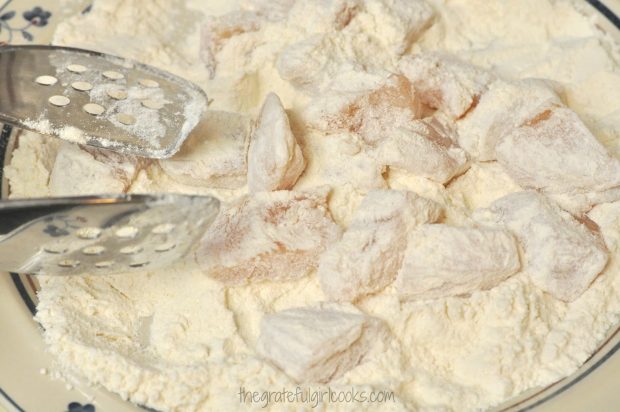
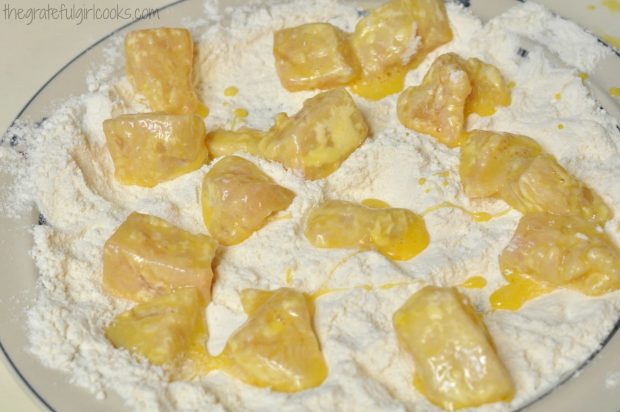
Dredge all of the chicken pieces in flour, making sure to to coat all sides.

Chicken breast cubes are dredged in flour before cooking them for sweet fire chicken.

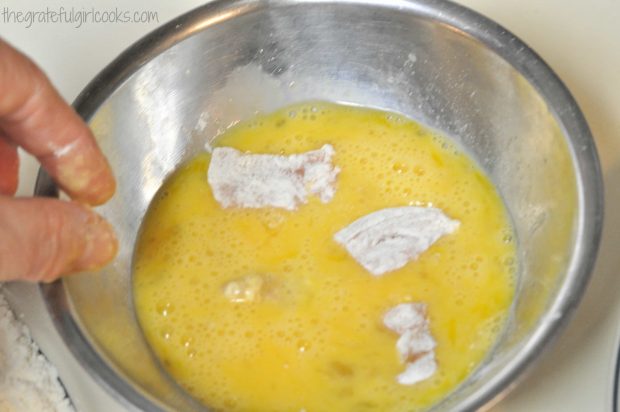
Dip the flour coated chicken pieces in beaten eggs. THIS is the “kind of messy” part! I started with tongs, then switched to using my fingers for this step. Once the flour coated pieces of chicken has been dipped in the egg mixture, dredge them again in the flour mixture. Got it? Flour. Egg. Flour. Amen.

Flour coated chicken (for sweet fire chicken) is dipped in egg mixture before cooking.

The chicken (for sweet fire chicken) is dredged in flour for a second time, before cooking.

Cooking The Sweet Fire Chicken

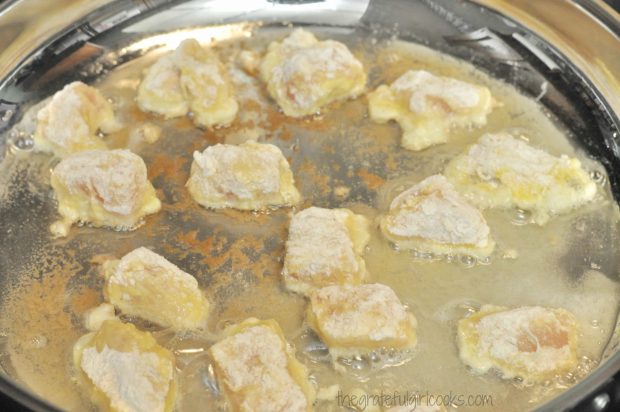
Cook the chicken in batches. Cook about 2 minutes per side until brown and crispy. Try to not let the pieces touch each other (or they will bond and cook together).

Chicken pieces (for sweet fire chicken) are cooked in hot oil in a large skillet in batches.

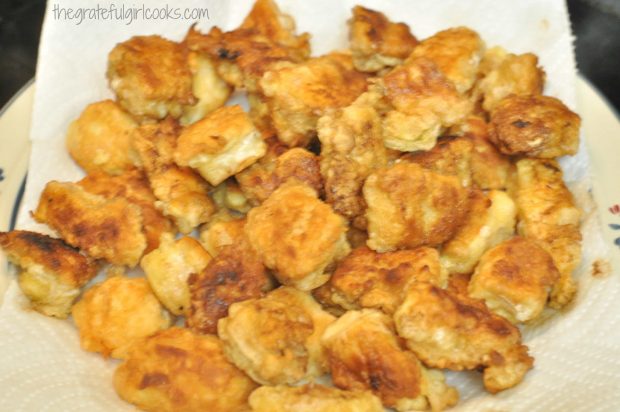
When done, place cooked chicken pieces on paper towels to drain. Repeat this step until all of the chicken is cooked.

Cooked chicken (for sweet fire chicken) is drained on paper towels after cooking.

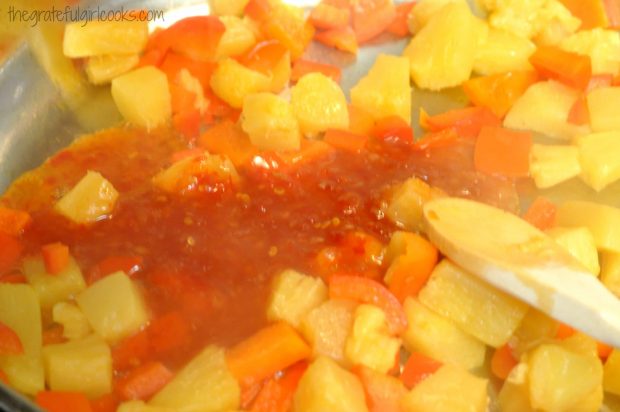
Clean out the skillet, then heat the olive oil in it. Cook the red bell pepper and pineapple for 3-4 minutes, stirring occasionally.  Add the Thai sweet chili sauce to the skillet, and stir to combine.

Red bell pepper, pineapple and sweet chili sauce are heated for the sweet fire chicken sauce.

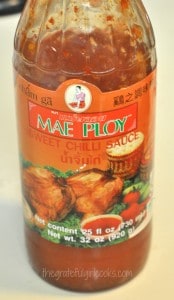
This is the sweet chili sauce I used for the sweet fire chicken. It can be found in most grocery stores Asian Food specialty sections.

Mae Ploy sweet chili sauce was used in this recipe for sweet fire chicken.

Ready To Serve The Sweet Fire Chicken

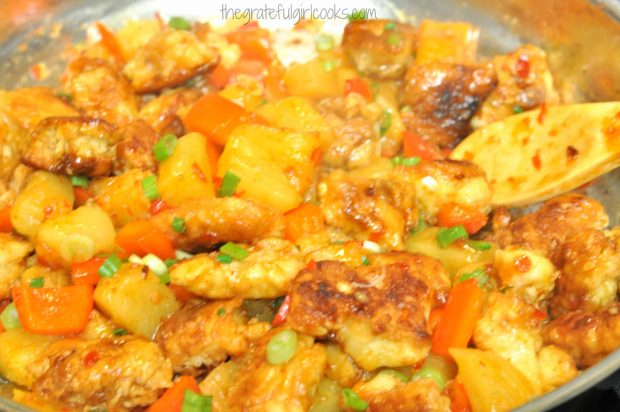
Add in the pieces of chicken and gently stir, to coat the chicken, bell pepper and pineapple with the sauce. Heat through and garnish with sliced green onions. Remove the sweet fire chicken from the heat, and serve!

Browned chicken is added to the sauce in skillet, to make sweet fire chicken.

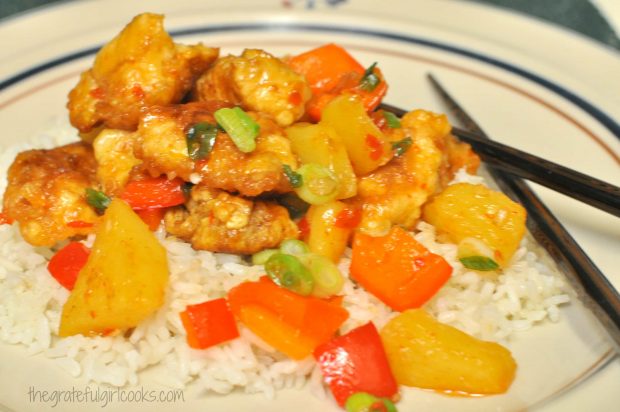
Serve the sweet fire chicken with rice or noodles, and ENJOY! It tastes wonderful (and it’s really not too spicy… honest!). The flavors are wonderful!

Sweet fire chicken is served on top of white rice.

The recipe makes 4 generous servings of sweet fire chicken. The dish is easy to prepare, economical, and tastes DELICIOUS! Who needs take-out when you can make it yourself? Sure hope you will give this recipe a try. Have a great day. Be a positive influence today, in a world that’s hurting in so many ways.

Looking For More ASIAN-INSPIRED Recipes?

You can find all of my recipes in the Recipe Index, located at the top of the page. A few favorites include:

Interested In More Recipes?

Thank you for visiting this website. I appreciate you using some of your valuable time to do soIf you’re interested, I publish a newsletter 2 times per month (1st and 15th) with all the latest recipes, and other fun info. I would be honored to have you join our growing list of subscribers, so you never miss a great recipe! 

There is a Newsletter subscription box on the top right side (or bottom) of each blog post, depending on the device you use, where you can easily submit your e-mail address (only) to be included in my mailing list.

You Can Also Find Me On Social Media:

Facebook page: The Grateful Girl Cooks!
Pinterest:
The Grateful Girl Cooks!
Instagram:
jbatthegratefulgirlcooks

Author's signatureRecipe Source: Chungah An, at http://damndelicious.net/2014/08/02/panda-express-sweet-fire-chicken-copycat/

↓↓ PRINTABLE RECIPE BELOW ↓↓

0 from 0 votes
Sweet Fire Chicken (Panda Express Copycat)
Prep Time
15 mins
Cook Time
15 mins
Total Time
30 mins
 

It's easy to make Sweet Fire Chicken (Panda Express copycat) at home, with chicken breast, bell peppers and pineapple in a sweet Thai chili sauce.

Category: Entree
Cuisine: Asian
Keyword: sweet fire chicken
Servings: 4 servings
Calories Per Serving: 565 kcal
Author: JB @ The Grateful Girl Cooks!
Ingredients
For chicken:
  • 1/2 cup vegetable oil
  • 1 pound boneless , skinless chicken breasts (I use 2 large), (cut into one inch cubes)
  • 1 cup all purpose flour
  • 2 large eggs , beaten
For sauce, etc:
  • 1 Tablespoon olive oil
  • 1 red bell pepper , chopped into one inch pieces
  • 1 1/2 cups pineapple chunks (fresh or canned/drained)
  • 1/2 cup Thai Sweet Chili Sauce (note: I added 1/4 cup more!)
  • 2 green onions , sliced thinly
Instructions
  1. Dredge chicken chunks (a few at a time) into flour, coating all sides. Place each floured piece into beaten egg mixture (a few at a time), then back into the flour again, coating all sides. Repeat until all chicken is coated and ready to cook.
  2. Heat vegetable oil on medium-high in a large skillet. When oil is hot, add the chicken pieces in batches (try to not let the pieces touch). Cook for about 2 minutes per side until golden brown. Remove cooked chicken to a paper towel covered plate, and repeat process until all chicken is cooked.
  3. In a large skillet (if using same skillet, clean it first), heat the olive oil on medium-high heat. Add chopped red bell pepper chunks and pineapple chunks. Cook these for 3-4 minutes (this will help soften the peppers).
  4. Add Thai chili sauce. Add chicken pieces. Stir gently, to fully combine ingredients and coat with sauce. Cook for 1-2 minutes, until heated through.,
  5. Garnish with green onion slices, and serve while hot on a bed or rice or noodles! Enjoy!
Nutrition Facts
Sweet Fire Chicken (Panda Express Copycat)
Amount Per Serving (1 serving)
Calories 565 Calories from Fat 144
% Daily Value*
Fat 16g25%
Saturated Fat 7g44%
Cholesterol 154mg51%
Sodium 463mg20%
Potassium 825mg24%
Carbohydrates 73g24%
Fiber 4g17%
Sugar 45g50%
Protein 31g62%
Vitamin A 1250IU25%
Vitamin C 60.5mg73%
Calcium 61mg6%
Iron 3.1mg17%
* Percent Daily Values are based on a 2000 calorie diet.

Here’s one more to pin on your Pinterest boards!It's easy to make Sweet Fire Chicken (Panda Express copycat) at home, with chicken breast, bell peppers and pineapple in a sweet Thai chili sauce.


Save

Save

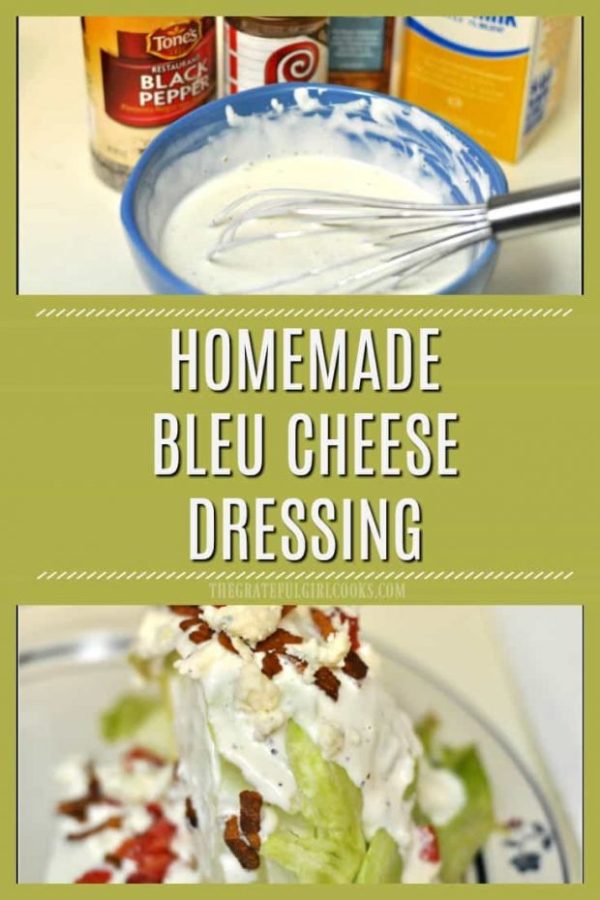
Homemade Bleu Cheese Dressing

Make delicious, thick and creamy bleu cheese salad dressing from scratch, with only a few ingredients! This is a Morton’s Steakhouse copycat recipe, and it tastes GREAT.Make delicious, thick and creamy bleu cheese salad dressing from scratch, with only a few ingredients! This is a Morton's Steakhouse copycat recipe.

Do you like Bleu Cheese Dressing? We sure do. A couple of months ago I made this recipe for the very first time. It was so simple to make… and tasted terrific, so I thought I would share the “how to’s” with you today!

Not sure about you, but I’m always glad to be able to make something delicious from scratch, and not be dependent on “having” to go to the store to buy a pre-processed item. I really do like knowing what is in my salad dressing, for example.

Recently I made bleu cheese dressing from scratch, and used it to top a BLT Wedge Salad that I made for my husband and myself. It was FANTASTIC, and I mean the dressing AND the salad!

Scroll Down For A Printable Recipe Card At The Bottom Of The Page

Make The Salad Dressing Ahead Of Time!

You will need to make up this salad dressing a few hours before you want to serve it, so the flavors have time to fully develop in the refrigerator. The BLT Wedge Salad was so good (and so was this dressing), we actually had it a couple nights in a row.

I then used the dressing for several other mixed green salads in the coming week, so this one batch totally “went the distance” for us! If you like bleu cheese dressing like we do (I think LOVE is a better word here), then you’ll enjoy this simple recipe.

How To Make Bleu Cheese Dressing

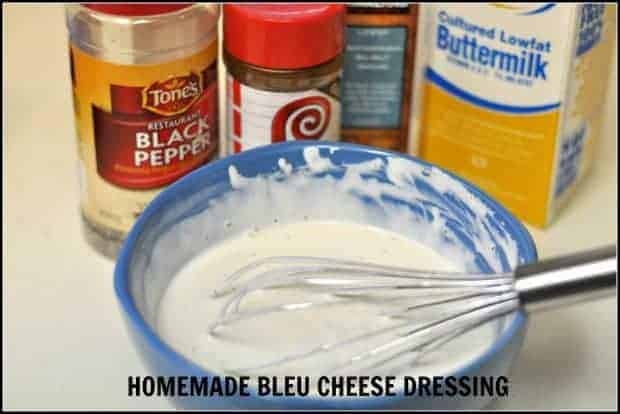
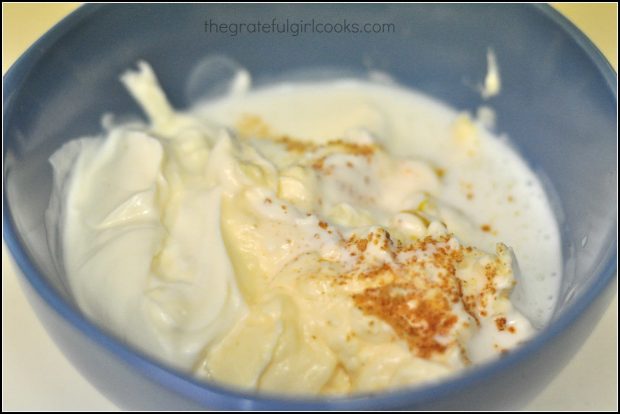
In a medium sized-bowl, whisk together mayonnaise, sour cream, buttermilk, Worcestershire sauce, minced garlic, and seasoning salt. Season this mixture with salt and pepper.

the ingredients for bleu cheese salad dressing are placed into a medium blue bowl.
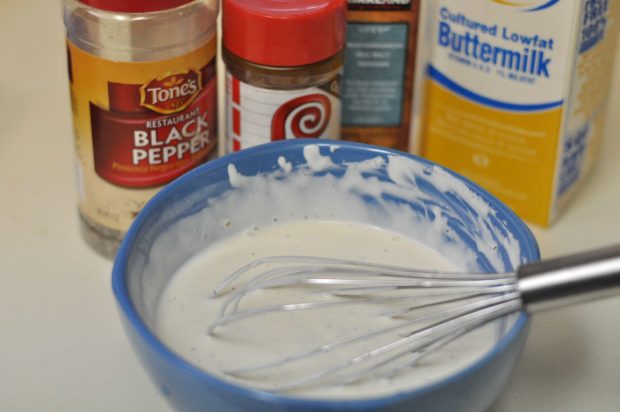
After you whisk the ingredients for bleu cheese dressing together, it will look like this. See how easy it is so far to make homemade salad dressing?

Ingredients for bleu cheese dressing are whisked together in blue bowl.
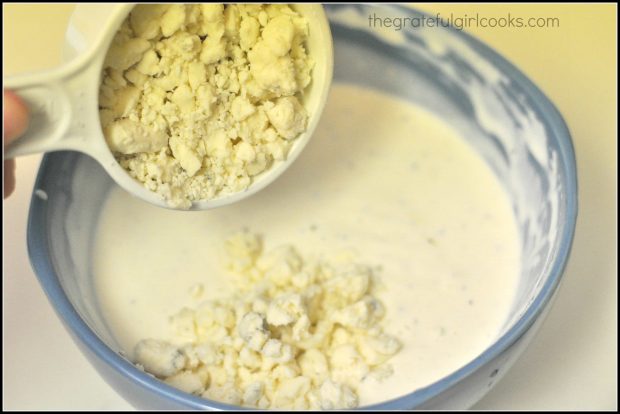
Now it is time to add in the GOOD stuff! Gently fold in the bleu cheese crumbles, and stir to combine. You’re gonna want nice little pieces of bleu cheese to stay intact in the bleu cheese dressing, so don’t completely obliterate them. Be gentle. Thank You.

Bleu cheese crumbles are added to the homemade salad dressing in bowl.
Cover the bleu cheese dressing with plastic wrap, and refrigerate for a few hours, so the flavors can have time to mingle, and fully develop. BOOM! You just made this salad dressing!

To Serve Bleu Cheese Dressing Once Chilled

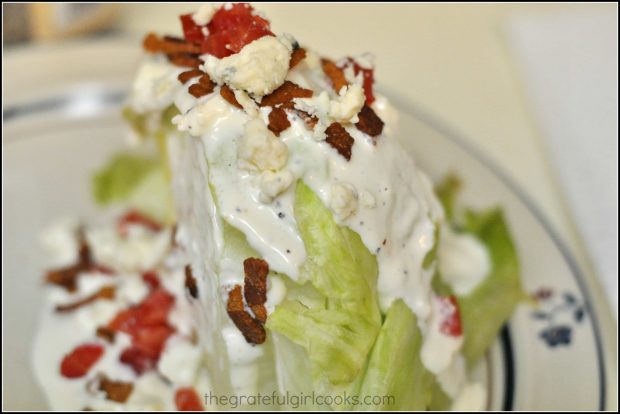
Once the bleu cheese salad dressing is very cold, transfer it to an empty bottle (for easy pouring). When you’re ready to serve, pour over the green salad of your choice, and enjoy! We really enjoyed this bleu cheese dressing on my homemade wedge salad! Boy, oh boy… was it GOOD! This salad dressing will taste wonderful on any type of mixed green salad!

Homemade bleu cheese dressing is drizzled on on a BLT Wedge Salad.

Really do hope you will consider trying this EASY recipe! You may never want to purchase store-bought again! Have a wonderful day, and please come back soon for more yummy recipes.

Looking For More SALAD DRESSING Recipes?

All of my recipes can be found in the Recipe Index, located at the top of the page. I have quite a few homemade salad dressings to choose from, including:

Interested In More Recipes?

Thank you for visiting this website. I appreciate you using some of your valuable time to do soIf you’re interested, I publish a newsletter 2 times per month (1st and 15th) with all the latest recipes, and other fun info. I would be honored to have you join our growing list of subscribers, so you never miss a great recipe! 

There is a Newsletter subscription box on the top right side (or bottom) of each blog post, depending on the device you use, where you can easily submit your e-mail address (only) to be included in my mailing list.

You Can Also Find Me On Social Media:

Facebook page: The Grateful Girl Cooks!
Pinterest:
The Grateful Girl Cooks!
Instagram:
jbatthegratefulgirlcooks

Author's signature

Recipe Source: http://pattycakescooking.blogspot.com.au/2012/01/mortons-steak-house-iceberg-blue-cheese.html

0 from 0 votes
Homemade Bleu Cheese Dressing
Prep Time
5 mins
Cook Time
0 mins
Total Time
5 mins
 
Make delicious, thick and creamy bleu cheese salad dressing from scratch, with only a few ingredients! This is a Morton's Steakhouse copycat recipe.
Category: Salad Dressing
Cuisine: American
Keyword: bleu cheese dressing
Servings: 24 servings (1.5 cups-approx. 1 Tablespoon each)
Calories Per Serving: 74 kcal
Author: JB @ The Grateful Girl Cooks!
Ingredients
  • 1 cup real mayonnaise
  • 1/2 cup sour cream + 1 Tablespoon
  • 2 Tablespoons buttermilk (more if needed, for desired consistency)
  • 1/4 teaspoon Worcestershire sauce
  • 3/4 teaspoon minced garlic
  • 1/4 teaspoon seasoning salt
  • Salt and pepper (to taste)
  • 1/2 cup crumbled bleu cheese
Instructions
  1. In a medium sized bowl, whisk together the mayonnaise, sour cream, buttermilk, Worcestershire sauce, minced garlic, and seasoning salt.
  2. Season the dressing with salt and pepper, to taste.
  3. Gently fold in the bleu cheese crumbles; stir to combine (leaving the crumbles intact).
  4. If you prefer a thinner dressing, add a bit more buttermilk, then stir to combine.
  5. Cover bowl with plastic wrap. Refrigerate dressing for several hours before serving, to allow the flavors to fully develop.
  6. Serve over your favorite green salad... and enjoy!
Nutrition Facts
Homemade Bleu Cheese Dressing
Amount Per Serving (1 Tablespoon)
Calories 74 Calories from Fat 63
% Daily Value*
Fat 7g11%
Saturated Fat 1g6%
Cholesterol 6mg2%
Sodium 124mg5%
Potassium 10mg0%
Vitamin A 30IU1%
Calcium 17mg2%
* Percent Daily Values are based on a 2000 calorie diet.

Here’s one more to pin on your Pinterest boards!Make delicious, thick & creamy bleu cheese salad dressing from scratch, with only a few ingredients! This is a Morton's Steakhouse copycat recipe.

Save

Save

Save

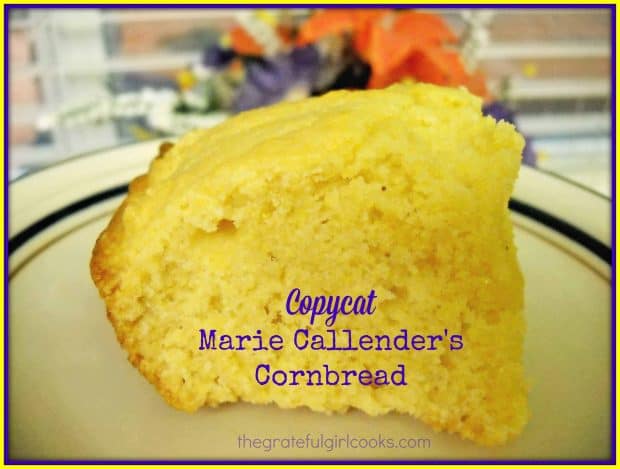
Copycat Marie Callender’s Cornbread

It’s EASY and quick to make and bake this copycat version of Marie Callender’s restaurants famous cornbread! Perfect side dish for soup, salad, or main course.It's EASY and quick to make and bake this copycat version of Marie Callender's restaurants famous cornbread! Perfect side dish for soup, salad, or main course.

I received this recipe for a copycat version of Marie Callender’s Cornbread almost 20 years ago.  My friend Sharon, from our church, gave me this recipe. I have no idea where she got the recipe, BUT I DO KNOW that it’s an excellent recipe for cornbread, AND tastes very similar to the cornbread served by the restaurant chain.

This cornbread rises very high, is slightly sweet, and absolutely delicious, just like the original! YUM! My husband and I enjoyed this cornbread last evening with our dinner… I like to drizzle it with honey; he likes to drizzle it with molasses. Either way… it’s GOOD and really easy to prepare!

We LOVE this bread, and I have made it many times over the years… it doesn’t take too long to make, and it’s very simple. Here’s a few pics during the process so you can see just how EASY it is to make homemade delicious cornbread.

Scroll Down For A Printable Recipe Card At The Bottom Of The Page

How To Make The Cornbread

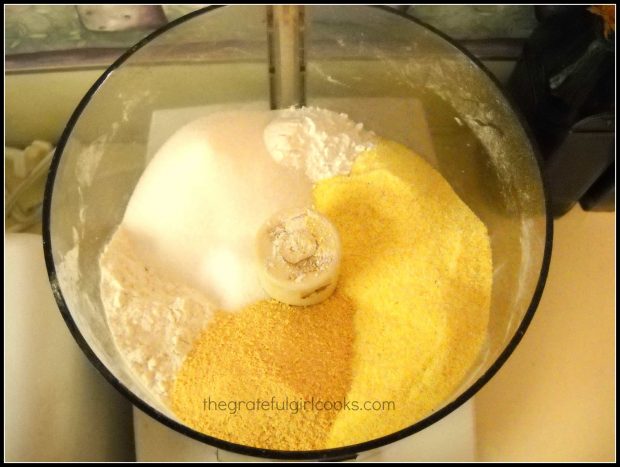
Ingredients can either be blended in a food processor or can be mixed by hand. If using food processor, process dry ingredients until blended. Drizzle in oil or add shortening, if using, processing until mixture is crumbly. When the mixture is crumbly, transfer it to a mixing bowl.

Mixing dry ingredients for cornbread in food processor.

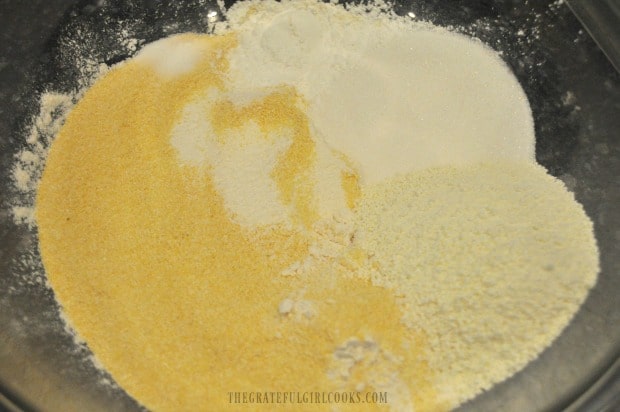
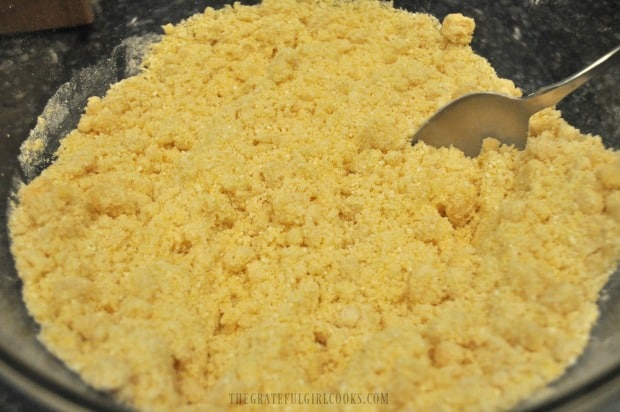
If you do not have access to a food processor, t’s easy to mix up the cornbread batter by hand. Place dry ingredients into mixing bowl. Mix in the oil with a fork OR cut in the shortening with a pastry blender until mixture is crumbly.

Ingredients for cornbread in bowl for hand mixing.

Oil or shortening has been added and now cornbread ingredients are crumbly.

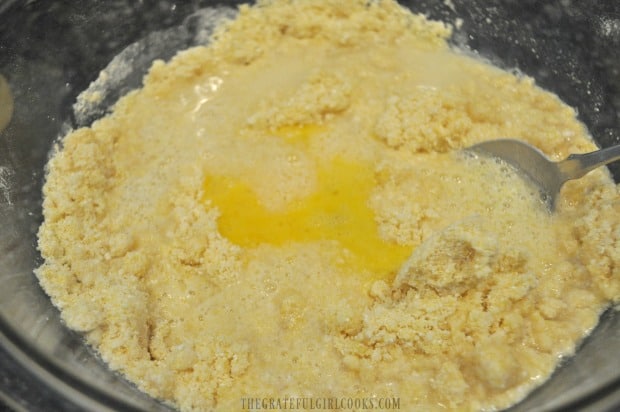
Add eggs to the crumbly cornbread mixture. Stir Ingredients only until moistened. Don’t over-mix the batter.

Eggs are added to dry ingredients and combined to make cornbread batter.

Time To Bake the Cornbread

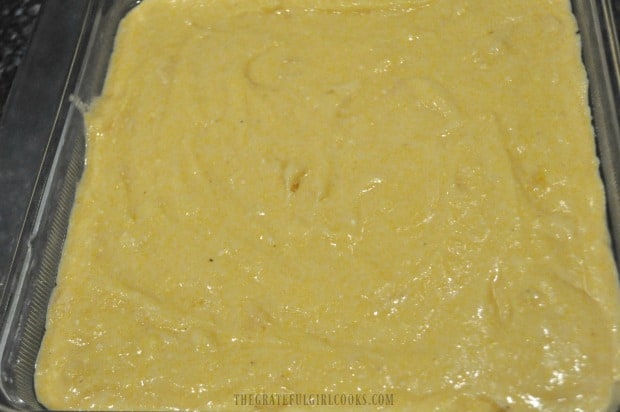
Pour the batter into a greased 9×9 baking pan, and then it’s ready to go into the oven! Bake the cornbread at 425 degrees F for approximately 20 minutes,  until the cornbread is light golden brown on top.

Cornbread batter is poured into a 9x9 inch baking dish.

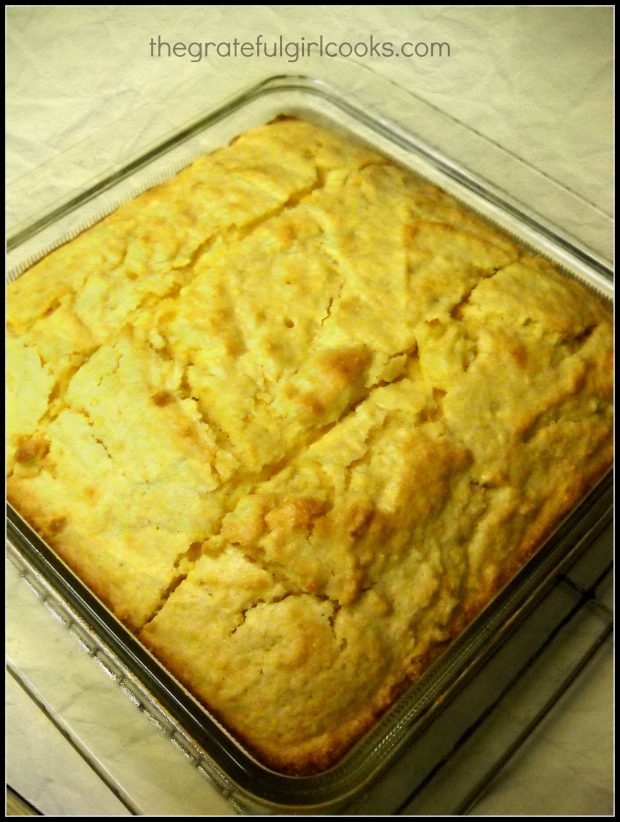
Test for doneness by inserting a toothpick into the middle of the pan. If toothpick comes back out without wet batter on it, the cornbread should be done.  Once the cornbread is removed from the oven, cut it into 9 equal sized 3″ pieces. It is ready to serve!

Golden brown baked cornbread is cut into 9 pieces.

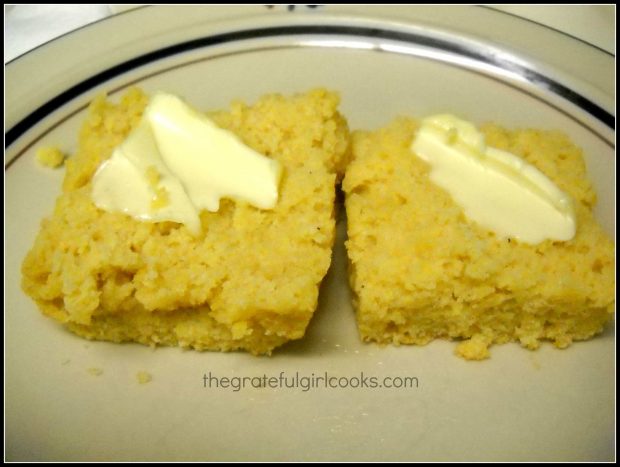
Here is a piece of the cornbread, split in half and adorned with butter, for a close-up view!

Cornbread is cut in half, and topped with butter for eating.

This is a perfect cornbread to serve alongside a big, hot, bowl of soup… (Mom’s Old-Fashioned Chili is a favorite of ours), a salad, or Pinto Beans And Ham . Really good, really easy… got it? Hope you’ll give it a try… I think you will love it!

Looking For More BREAD Recipes?

You can find all of my recipes in the Recipe Index, located at the top of the page. I have a nice variety of bread recipes you might want to try, including:

Interested In More Recipes?

Thank you for visiting this website. I appreciate you using some of your valuable time to do soIf you’re interested, I publish a newsletter 2 times per month (1st and 15th) with all the latest recipes, and other fun info. I would be honored to have you join our growing list of subscribers, so you never miss a great recipe!
There is a Newsletter subscription box on the top right side (or bottom) of each blog post, depending on the device you use, where you can easily submit your e-mail address (only) to be included in my mailing list.

You Can Also Find Me On Social Media:

Facebook page: The Grateful Girl Cooks!
Pinterest:
The Grateful Girl Cooks!
Instagram:
jbatthegratefulgirlcooks

Have a wonderful day!

Author's signature

Recipe Source: Sharon Fredeen

↓↓ PRINTABLE RECIPE BELOW ↓↓

4.67 from 3 votes
Copycat Marie Callender's Cornbread
Prep Time
10 mins
Cook Time
20 mins
Total Time
30 mins
 
Slightly sweet, and sky-high, this copycat version of a famous restaurant's cornbread is perfect alongside your favorite soup or salad!
Category: Bread
Cuisine: American
Keyword: cornbread
Servings: 9 servings
Calories Per Serving: 400 kcal
Author: JB @ The Grateful Girl Cooks!
Ingredients
  • 2 cups all-purpose flour
  • 1 cup yellow corn meal
  • 3/4 cup granulated sugar
  • 1/3 cup dry milk powder
  • 3 teaspoons baking powder
  • 1 teaspoon salt
  • 2/3 cup vegetable oil or shortening (I use oil)
  • 2 eggs , slightly beaten
  • 1 cup water
Instructions
  1. In a large bowl or food processor base, combine the flour, corn meal, sugar, dry milk powder, baking powder, and salt. Cut in the oil or shortening with a pastry blender, or process until mixture becomes small crumbs.
  2. Remove from processor, if using, and place ingredients in large bowl.
  3. Stir in eggs and water until mixture is just blended. Do not over-mix the batter.
  4. Grease a 9x9 inch square pan. Pour batter into pan and spread until it is evenly distributed.
  5. Bake at 425 degrees for 20 minutes (or longer), or until a toothpick inserted comes out clean.
  6. Cornbread will turn a very light golden brown on top.
  7. Remove cornbread pan to a wire rack to cool slightly. Cut into 9 pieces, serve, and enjoy!
Recipe Notes

If using an 8x8 inch square pan, remember you will need a longer cook time!

Nutrition Facts
Copycat Marie Callender's Cornbread
Amount Per Serving (1 piece)
Calories 400 Calories from Fat 153
% Daily Value*
Fat 17g26%
Saturated Fat 4g25%
Cholesterol 37mg12%
Sodium 302mg13%
Potassium 319mg9%
Carbohydrates 53g18%
Fiber 2g8%
Sugar 19g21%
Protein 7g14%
Vitamin A 155IU3%
Vitamin C 0.3mg0%
Calcium 127mg13%
Iron 2.1mg12%
* Percent Daily Values are based on a 2000 calorie diet.

Here’s one more to pin on your Pinterest boards!It's EASY and quick to make and bake this copycat version of Marie Callender's restaurants famous cornbread! Perfect side dish for soup, salad, or main course.


Save

Save