Asian BBQ Chicken Wings are marinated in soy sauce, lime juice, garlic, brown sugar, & curry powder, then cooked until crispy in an air fryer!

If you enjoy flavor-filled chicken wings, this is a GREAT recipe! Cooked in an air fryer (using HOT air), these wings will be wonderfully yummy and crispy! The wings are first marinated in a delicious made-from-scratch (easy) Asian BBQ sauce, then cooked. The marinade is cooked until it forms a thick sauce, which is then poured over the cooked wings for serving. Oh my goodness.. they are sooo good!
NO AIR FRYER? If you do not have an air fryer, you can bake these chicken wings! Follow instructions for this recipe until the cooking time. For baking instructions, see my note in the printable recipe card (located at the bottom of the page) for details.
These Asian BBQ chicken wings have now become one of my favorite ways to enjoy this “snack”, “appetizer” or “meal”. The flavor is amazing, and my husband and I love them! I found the original recipe in an old cookbook of mine called “The Best Of Cooking Light”. The original recipe was for baked chicken thighs, but I adapted the recipe for wings and the use of an air fryer. Here’s how to make them:
Scroll Down For A Printable Recipe Card At The Bottom Of The Page
Make The Asian-Inspired Sauce To Marinate The Wings
Making the Asian BBQ sauce for the wings is super easy! Place brown sugar, soy sauce, fresh lime juice, minced garlic, curry powder, and crushed red pepper flakes in a small bowl. Stir these ingredients well, until they have been fully combined.
This is the marinating sauce for the chicken wings. See how easy that was? Place the chicken wings in a large re-sealable plastic bag OR in a shallow large container with a tight-fitting lid. Pour the sauce over the wings, and toss to coat them well. Seal or cover the bag/container, and marinate wings in the fridge for 4-6 hours (or overnight). Turn the wings occasionally to ensure they stay coated with marinade.


After Marinating Is Done, Cook the Asian BBQ Sauce
Once the chicken wings have been marinated, remove the wings from the bag or container and SAVE THE MARINADE. Pour the marinade into a saucepan, where it will be cooked to safely “kill off” any harmful bacteria (from contact with raw chicken) and to thicken it into a sauce to cover the chicken wings once they are cooked.
Bring the sauce to a full boil, and then cook on medium heat for 2 minutes, stirring often. As the liquid reduces slightly, the sauce will thicken. Set aside until chicken wings have been cooked. You can quickly reheat it before adding to the chicken, if desired.

Cooking The Asian BBQ Chicken Wings In An Air Fryer
After the chicken wings have marinated 4-6 hours, they are ready to cook. Place the wings into the basket of your air fryer, trying not to overcrowd them, if possible (for best browning). You may need to cook these in two batches, if necessary.
Cook the Asian BBQ chicken wings at 380°F. for 12 minutes, then flip them to the other side and cook 12 more minutes. Increase the temperature of the air fryer to 400°F.and cook 3-4 more minutes.


Once the chicken wings are fully cooked, transfer them to a large bowl. Immediately pour the Asian BBQ sauce over them, and toss to fully coat with the sauce.

Time To Eat!
Once the wings are coated with the sauce, it’s time to serve them. If desired, sprinkle the wings with sliced green onions and/or sesame seeds before serving (optional). I usually just sprinkle them with sesame seeds.
Be sure to serve them with several napkins, because these bad boys are sticky and messy good! There is so much flavor, we eat them without any sauce for dipping… you really don’t need any! YUM!

I hope you enjoy these Asian BBQ Chicken Wings. We sure do. Thanks for stopping by today, and trust you will come back again soon for more delicious recipes. Take care, and have a GREAT day!
Looking For More Air Fryer Recipes?
You can find all of my blog’s recipes in the Recipe Index, located at the top of the page. I have quite a few air fryer recipes you might enjoy, including:
- Air Fryer Chicken Chimichangas
- Blackberry Air Fryer Handpies
- Air Fryer Buffalo Honey Wings
- Chili-Lime Tortilla Chips
- Air Fryer Glazed Butternut Squash
Interested In More Recipes?
Thank you for visiting this website. I appreciate you using some of your valuable time to do so. If you’re interested, I publish a newsletter 2 times per month (1st and 15th) with all the latest recipes, and other fun info. I would be honored to have you join our growing list of subscribers, so you never miss a great recipe!
There is a Newsletter subscription box on the top right side (or bottom) of each blog post, depending on the device you use, where you can easily submit your e-mail address (only) to be included in my mailing list.
You Can Also Find Me On Social Media:
Facebook page: The Grateful Girl Cooks!
Pinterest: The Grateful Girl Cooks!
Instagram: jbatthegratefulgirlcooks

Recipe Adapted From: The cookbook “The Best Of Cooking Light”, page 219, published by Oxmoor House, Inc. in 2004

Asian BBQ Chicken Wings are marinated in soy sauce, lime juice, garlic, brown sugar, curry powder, then cooked until crispy in an air fryer!
- ¼ cup packed brown sugar
- ¼ cup low-sodium soy sauce
- 1 Tablespoon fresh squeezed lime juice
- 3 large garlic cloves , minced
- ½ teaspoon crushed red pepper flakes
- ¼ teaspoon curry powder
- 2½ pounds chicken wings (approx. 18-20 wings)
- sesame seeds and/or sliced green onions for garnish , optional
Place brown sugar, soy sauce, lime juice, garlic, curry powder, and crushed red pepper flakes in a small bowl. Stir well, until fully combined.
Place chicken wings in large re-sealable plastic bag OR in a shallow container with tight-fitting lid. Pour sauce over wings; toss to coat; seal bag or container. Marinate wings in fridge 4-6 hours (or overnight). Turn wings occasionally so they stay coated with marinade.
Remove marinated wings from container and SAVE THE MARINADE. Pour the marinade into a saucepan. Bring sauce to a full boil; cook on medium heat for a full 2 minutes, stirring often. It is essential you fully cook the sauce to "kill off" any bacteria from it's exposure to raw chicken. As liquid reduces slightly, sauce will thicken. Set aside sauce until wings have cooked. You can quickly reheat sauce before adding to the chicken, if desired.
After wings have marinated, they're ready to cook. Place wings into basket of air fryer, trying not to overcrowd them, if possible (for best browning), in batches, if necessary. Cook at 380°F. for 12 minutes, flip them to other side and cook 12 more minutes. Increase temperature of air fryer to 400°F. and cook 3-4 more minutes.
Transfer wings to large bowl. Immediately pour sauce over them; toss to coat with sauce. Sprinkle with sliced green onions and/or sesame seeds, if desired; serve and enjoy!
NOTE: If baking, cook at 400 degrees F for 35-40 minutes. When done, place them under the broiler (about 8" below heating element) to further brown them, if desired.
Here’s one more to pin on your Pinterest boards!


 in under 30 minutes for a yummy breakfast or snack! / The Grateful Girl Cooks!")


 in under 30 minutes for a yummy breakfast or snack! / The Grateful Girl Cooks!")


 delicious dish. Chicken pieces are covered in a simple, flavorful sauce, and baked until done. / The Grateful Girl Cooks!")


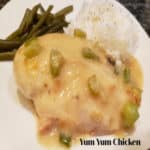
 delicious dish. Chicken pieces are covered in a simple, flavorful sauce, and baked until done. / The Grateful Girl Cooks!")