Month: October 2023

Little Pecan Pies For Two

Little Pecan Pies For Two are a delicious, rich-tasting dessert! Each mini pie can serve 2 people, or 1 person (if you don’t mind calories)!
Little Pecan Pies For Two are a delicious, rich-tasting dessert! Each mini pie can serve 2 people, or 1 person (if you don't mind calories)!

Do you love pecan pie, but don’t need to have an ENTIRE PIE sitting around the house, tempting you every single day until it’s gone?

Perhaps you’re single or are a couple, and don’t want a whole pie, but just crave a little taste of delicious pecan pie? These little pecan pies for two might be the recipe you’re looking for!

My husband and I enjoy them, because we can split a small one for a nice dessert. That way we don’t eat enough pecan pie to induce a sugar coma (ha ha), but have enough to satisfy both of us.

Growing up I did not like pecan pie, because it is so rich and decadently sweet. It just so happens I’m married to a guy that LOVES pecan pie, so occasionally I make them now, to make him happy (especially at Thanksgiving). I have now grown to actually enjoy them. Who knew?

Here’s how to make these cute little pecan pies.

Scroll Down For A Printable Recipe Card At The Bottom Of The Page

Make The Dough For The Crust

Stir together all purpose flour and salt in a large mixing bowl. Use a hand held pastry blender to cut in vegetable shortening until the dough is crumbly and the shortening is reduced to the size of peas.

Gradually add 4 teaspoons of very cold water into the dough, mixing by hand as you add it, until you can shape the dough into a cohesive ball with your hands.

Have a food processor? If you have access to a food processor, it will take a little less time for this step. Pulse flour, salt and shortening together until “pea-sized”, then allow COLD water to drizzle in while pulsing, until mixture comes together in a ball.

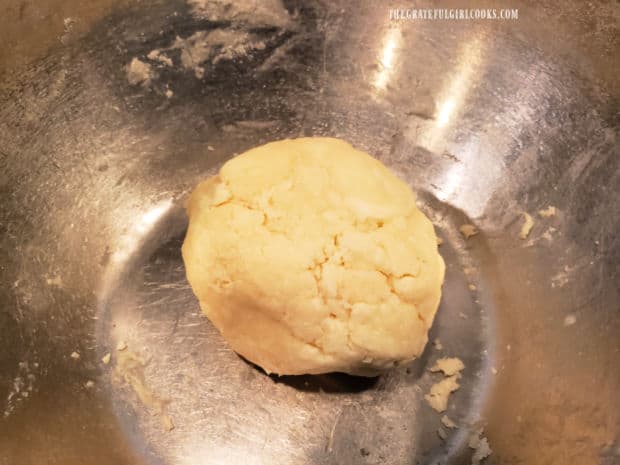
Tightly wrap the dough ball and refrigerate it for 30 minutes. While the dough chills, make the pie filling.

A pastry blender is used to cut vegetable shortening into flour/salt mixture.Pie crust dough is shaped into a ball, then wrapped and refrigerated.

Make The Pie Filling

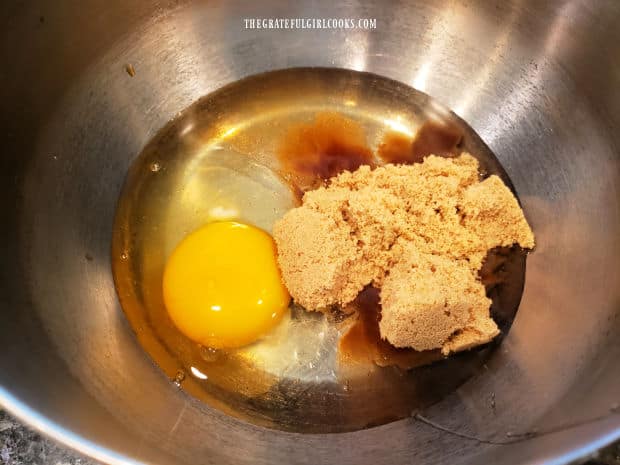
It is really easy to make the filling for these little pies. Place one egg, corn syrup, brown sugar, and vanilla extract in a medium-sized mixing bowl.

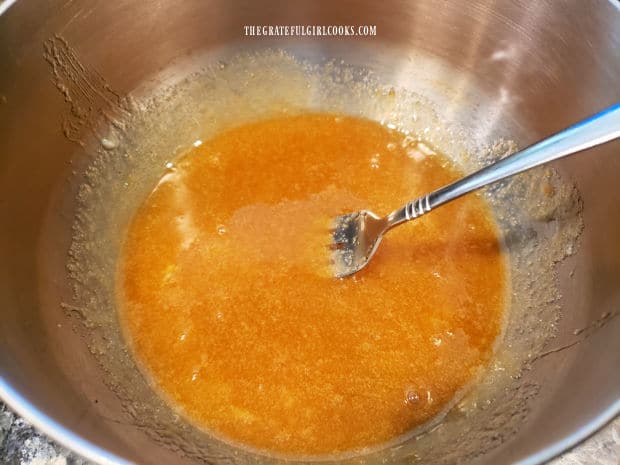
Use a fork and mix these ingredients very well, until they’re fully combined. This is the filling for the little pecan pies for two. You will add the pecans (separately) later.

Egg, brown sugar, corn syrup and vanilla for pie filling are in a bowl.Mixed with a fork, the pie filling is combined and ready to fill pie crusts.

Using Miniature Tart Pans

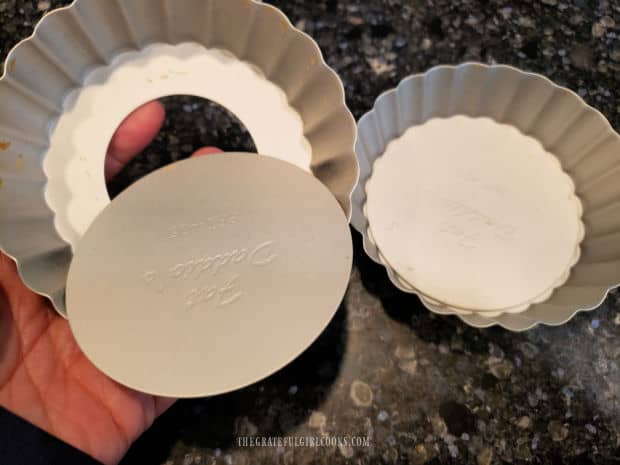
For this recipe I typically use two, 4½” tart pans with a removable bottom, which I’ve shown below. After baking and cooling, the bottom metal plate can be pressed up from the bottom, separating the tart from the pan for serving.

You can also use two miniature pie pans (same approximate size) to make this recipe. I’ve done both, but typically use the tart pans as my first choice.

Miniature tart pans with removable bottom plates are used for this dessert.

Time To Make The Pie Crusts

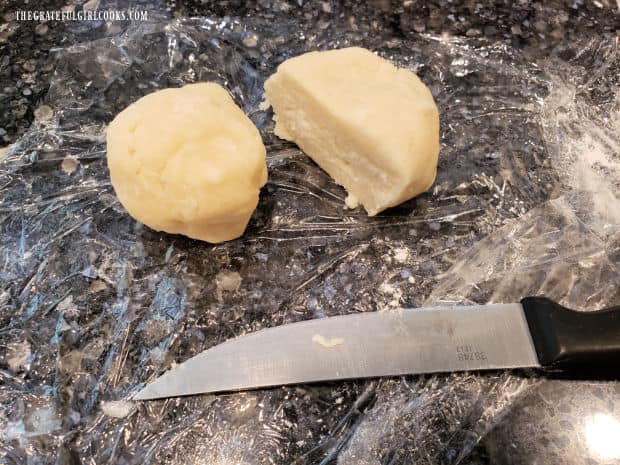
Remove the chilled pie crust dough from the refrigerator. Divide the dough in half, then roll each piece into a 6″ circle on a lightly floured surface.

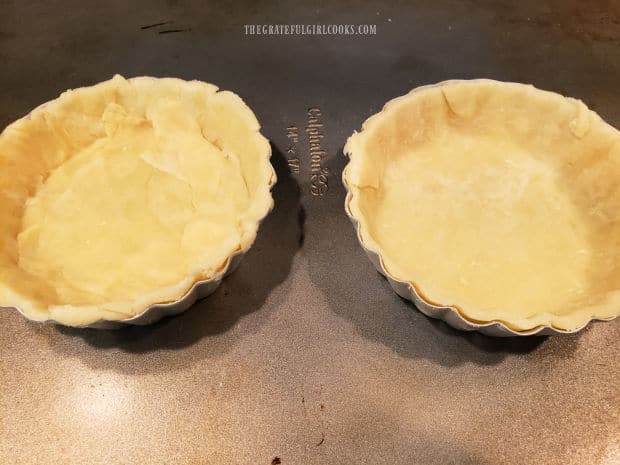
Place the pastry dough into two 4½” tart pans or into two miniature pie pans about the same size. Patch any tears in the crust.

If using a tart pan, trim the edges of the dough to fit the top rim of the pan, and press the dough lightly into the crimped edges. If using a miniature pie pan, crimp the top edges, to form the crust.

Chilled dough is cut into two pieces to form crust.Two little tart pans, filled with the chilled pie dough.

Fill And Bake The Miniature Pies

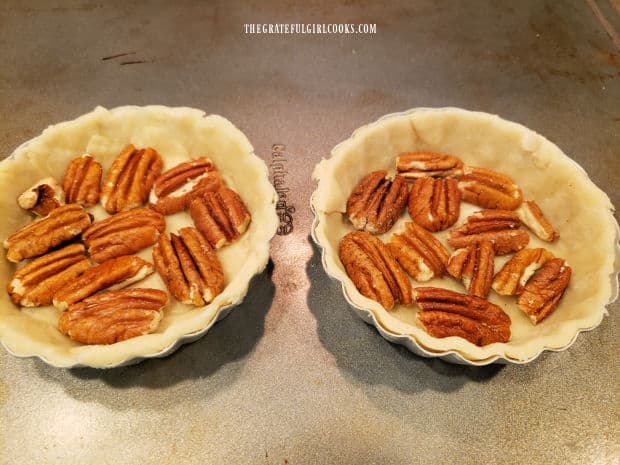
Divide the pecan halves on the bottom of each pie crust, covering as much of the bottom crust as possible.

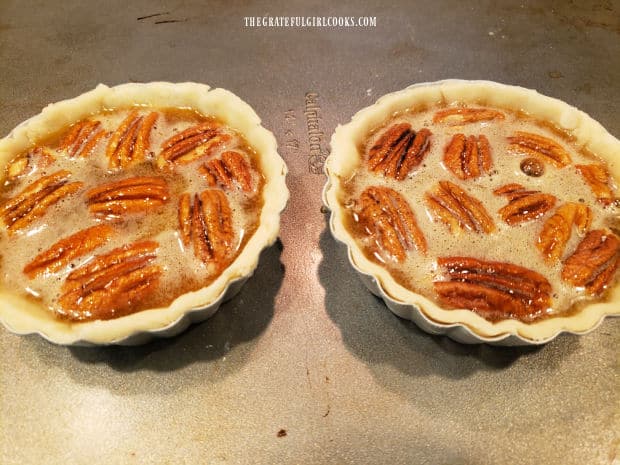
Carefully pour (or spoon) the pie filling over the pecans and into the pie crust, until it’s almost to the top. The pecans will rise in the pan as the filling is added. NOTE: You might have a small amount of pie filling left over. 

Pecan halves are added to the pie dough crust.Pie filling is poured over the pecans in the pie crusts.

Cool, Then Serve The Little Pecan Pies For Two

Place the pies on a large baking sheet, and place them into a preheated 375°F. oven, being careful to not spill the filling!

Bake for 35-40 minutes or until a knife inserted into the top comes out clean. The little pies should be nicely browned on the top, and the crust should have very slightly pulled away from the edges.

Cool the little pecan pies for two on a wire rack for at least 15 minutes before removing them out of the tart pans (if using).

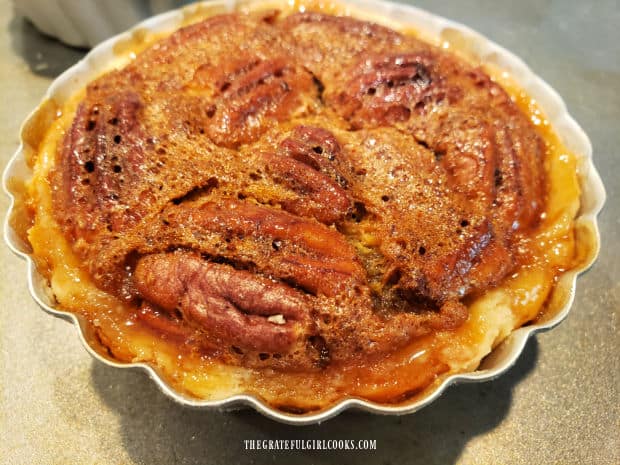
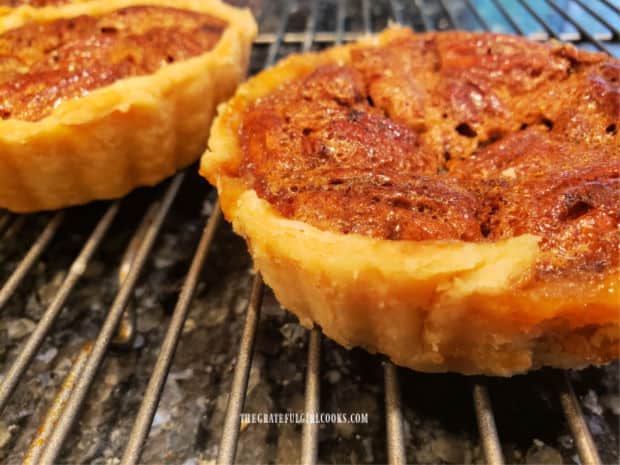
One of the little pecan pies for two, cooling, after baking for 35 minutes.Transferred out of the tart pans, little pecan pies for two cool on a wire rack.

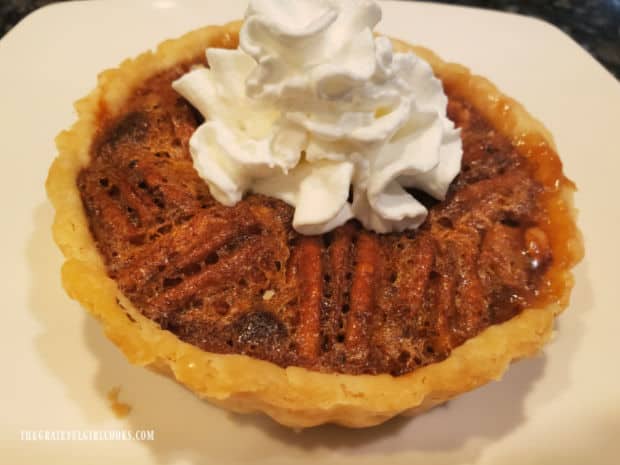
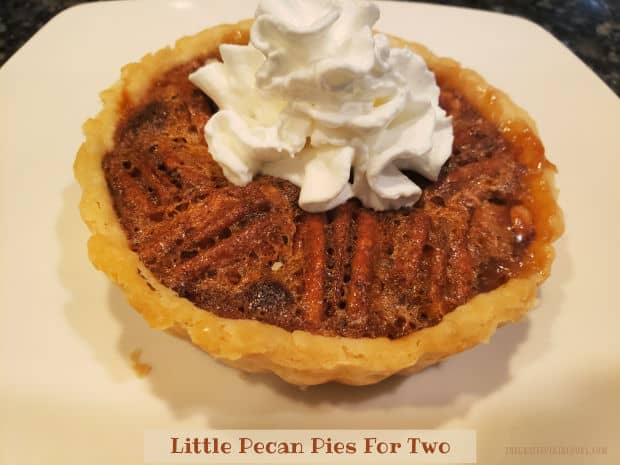
Top each of the pies with whipped cream (optional, but yummy!), and serve. Pecan pies are very sweet and rich tasting, so my husband and I typically split one between the two of us. A little bit goes far!

If you want YOUR OWN little bitty pecan pie (and the calories that go with it), then by ALL MEANS… dig in! I know you’ll enjoy every single bite!

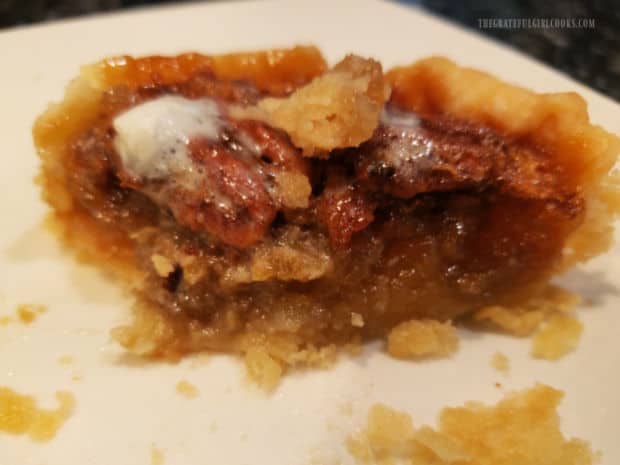
Little pecan pies for two, served on a white plate, with whipped cream on top.The inside of the miniature pecan pies is thick, sweet, and decadent.

I hope you have the opportunity to make these cute little dessert pies, and am confident you’ll enjoy them. They’re delicious!

Thanks for stopping by, and please come back again soon for more family-friendly recipes. Take care, may God bless you, and have a GREAT day!

Looking For More DESSERT Recipes?

You can find ALL of my recipes in the Recipe Index, which is located at the top of the page. I have lots of delicious desserts to choose from, including:

Want More Recipes? Get My FREE Newsletter!

I publish a newsletter 2 times per month (1st and 15th) with lots of recipes, tips, etc..
Would you like to join our growing list of subscribers?

There is a Newsletter subscription box on the top right (or bottom) of each blog post, depending on the device you use.
You can submit your e-mail address there, to be added to my mailing list.

Find Me On Social Media:

Facebook page: The Grateful Girl Cooks!
Pinterest:
The Grateful Girl Cooks!
Instagram:
jbatthegratefulgirlcooks

Author's signature

Original recipe source: “Taste of Home” magazine, Feb,/Mar 2001 issue, page 11, published by Reiman Publications.

↓↓ PRINTABLE RECIPE BELOW ↓↓

0 from 0 votes
Little Pecan Pies For Two
Prep Time
35 mins
Cook Time
35 mins
Total Time
1 hr 10 mins
 

Little Pecan Pies For Two are a delicious, rich-tasting dessert! Each mini pie can serve 2 people, or 1 person (if you don't mind calories)!

Category: Dessert
Cuisine: American
Keyword: little pecan pies for two
Servings: 4 (½ a mini pie per serving)
Calories Per Serving: 311 kcal
Author: JB @ The Grateful Girl Cooks!
Ingredients
For Crust:
  • ½ cup all purpose flour
  • teaspoon salt
  • 3 Tablespoons vegetable shortening
  • 4 teaspoons very cold water
For Filling:
  • 1 large egg
  • cup packed dark brown sugar
  • cup light corn syrup
  • ½ teaspoon vanilla extract
Instructions
  1. Stir flour and salt in medium bowl. Cut in shortening with pastry blender or two forks until shortening is reduced to the size of peas. Slowly add cold water into dough, mixing by hand as it's added, until you can shape dough into a ball. Have a food processor? Pulse flour, salt and shortening until "pea-sized", drizzle COLD water in while pulsing, until mixture comes together in a ball. Wrap dough ball; refrigerate 30 minutes. While chilling, make pie filling and preheat oven to 375℉.

  2. Place egg, corn syrup, brown sugar, and vanilla in a mixing bowl. Use a fork to fully combine these ingredients. Set aside.

  3. Remove chilled dough from refrigerator. Divide in half; roll each piece into a 6" circle on lightly floured surface. Transfer dough into tart pans or miniature pie pans. Patch any tears in the dough. If using tart pan, trim dough even with top rim of the pan. Press dough lightly into the crimped edges. If using mini pie pan, scallop edges, to form a crust.

  4. Divide pecan halves into pans, covering bottom as much as possible. Carefully pour (or spoon) pie filling over pecans (almost to the top of the pie crust).

  5. Carefully place pies on baking sheet and into a 375°F. oven (don't spill the filling). Bake for 35-40 minutes or until knife inserted into the top comes out clean. Pies should be browned on top, and crust should be slightly pulled away from edges. Cool on a wire rack for 15 minutes before removing them from the tart pans.

  6. Top pies with whipped cream (optional, but yummy), and serve. Enjoy!
Nutrition Facts
Little Pecan Pies For Two
Amount Per Serving (1 ½ of a mini pie)
Calories 311 Calories from Fat 99
% Daily Value*
Fat 11g17%
Saturated Fat 3g19%
Trans Fat 1g
Polyunsaturated Fat 3g
Monounsaturated Fat 4g
Cholesterol 47mg16%
Sodium 114mg5%
Potassium 59mg2%
Carbohydrates 52g17%
Fiber 0.4g2%
Sugar 40g44%
Protein 3g6%
Vitamin A 68IU1%
Calcium 29mg3%
Iron 1mg6%
* Percent Daily Values are based on a 2000 calorie diet.

Here’s one more to pin on your Pinterest boards!Little Pecan Pies For Two are a delicious, rich-tasting dessert! Each mini pie can serve 2 people, or 1 person (if you don't mind calories)!

Classic Pot Roast

Classic Pot Roast is comfort food at it’s very best! Make this delicious, tender beef dish for those you love, using only a few ingredients!
Classic Pot Roast is comfort food at it's very best! Make this delicious, tender beef dish for those you love, using only a few ingredients!

When I was growing up I looked forward to my Mom’s pot roast. She would put the meat, along with carrots, onions AND potatoes in the pot and while it cooked, our little house would smell so good!

These days, I love cooking roast with carrots and onions only, and prefer to make mashed potatoes (and gravy) separately to serve on the side. YUM! Same great taste, and our home still smells amazing while it cooks!

To me, a tender pot roast is comfort food, and when I make it nowadays, it brings back warm memories from my childhood. I don’t make it as often now, because I’m only cooking for two. When I do make it, I buy a small roast which is enough for several servings and leftovers!

There are so many ways to season and prepare pot roast. I found the original recipe for this pot roast online a while ago, made some very minor changes, and this is how I make classic pot roast now.

Scroll Down For A Printable Recipe At The Bottom Of The Page

Pan-Sear The Veggies

The first thing to do is pan-sear the onions and carrots separately in a large Dutch oven. NOTE: You will use this pot for the roast as well, so it must be oven-safe.

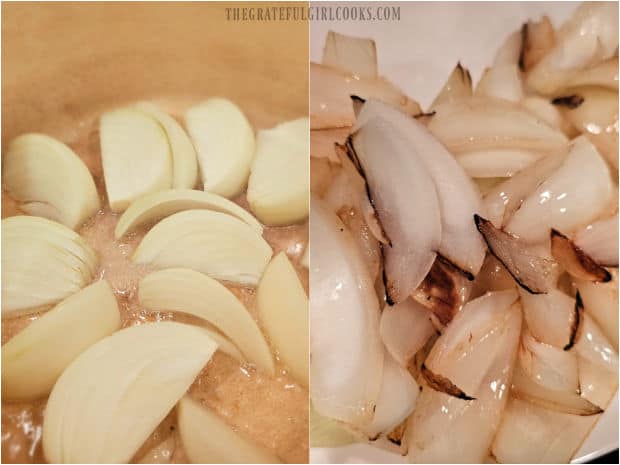
Heat a couple Tablespoons of vegetable oil in a Dutch oven over Medium-High heat. When the oil is hot and shimmering, add the prepared onions. Each one of the onions should be peeled, ends trimmed, and then cut into 8 wedges (from top to bottom).

Cook the onions about 2-3 minutes, stirring occasionally until slightly browned and translucent. Carefully remove and transfer the onions to a plate.

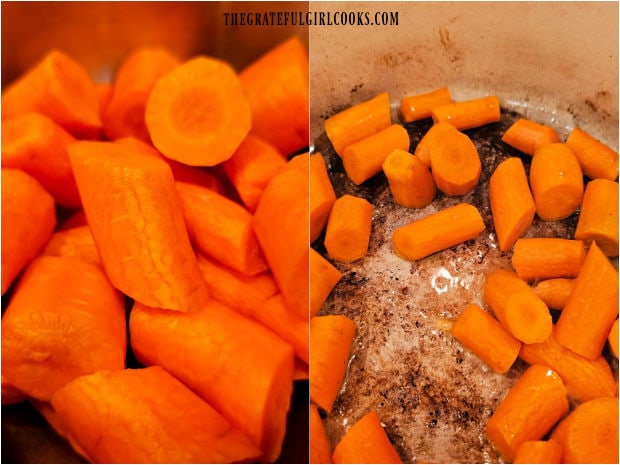
Now add the carrots (2″ slices) to the hot pot and cook for 2-3 minutes, stirring occasionally until they’re slightly browned. Remove them and transfer to the plate, as well.

Onion wedges are lightly browned in hot oil.Carrot chunks are lightly browned in hot oil.

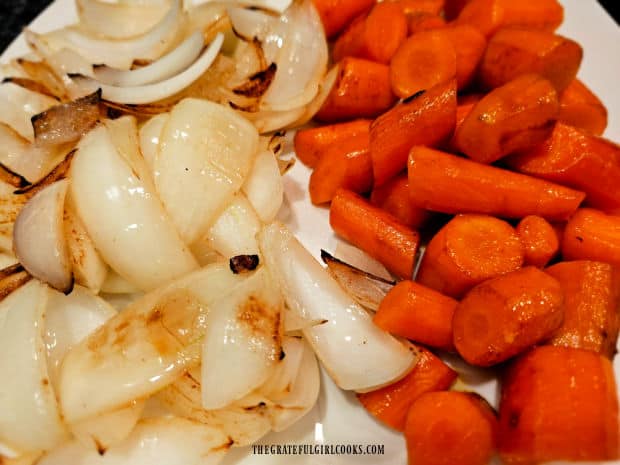
Now you should have a large plate with the pan-seared onions and carrots on it. Set these veggies aside while you brown the beef.

Lightly browned onions and carrots rest on a plate after being cooked.

Season And Pan-Sear The Pot Roast

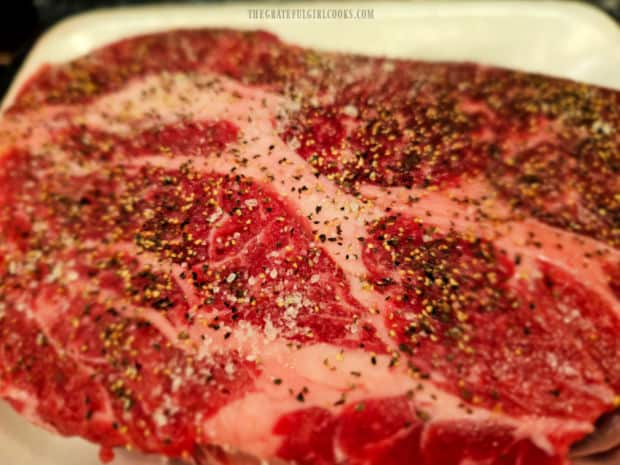
Season the pot roast generously on all sides with salt and pepper. Add a bit more oil to the pan (if necessary), and heat it on Medium-High.

Chuck roast is seasoned on all sides with salt and pepper.

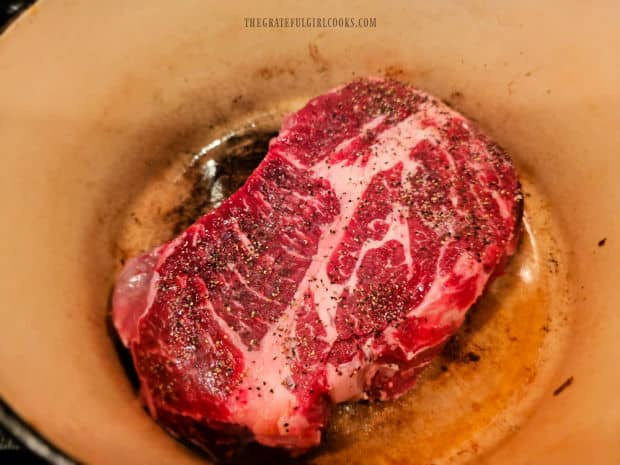
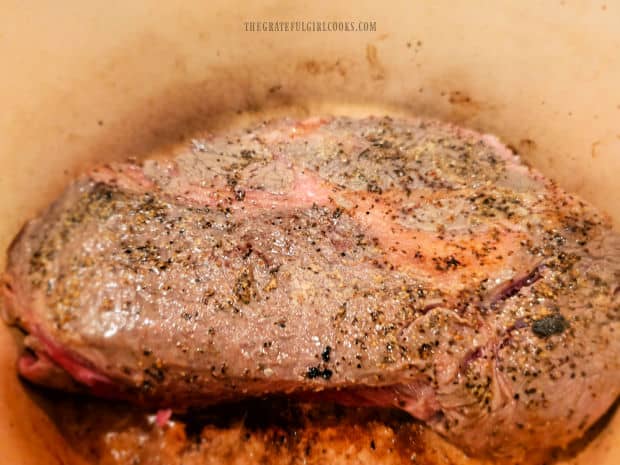
When the oil is very hot (but not smoking), add the seasoned pot roast. Pan-sear the meat for about 2 minutes without moving it, then turn to the other side and repeat, to ensure all sides of the meat are browned.

You will not cook the beef all the way through, but simply want all sides of the roast to be browned. When done, remove and transfer the browned roast to a plate.

Roast is pan-seared in hot oil in a Dutch oven.Pot roast is browned on all sides before it is baked.

De-Glaze The Pan

After browning the onions, carrots and beef, there will be little bits of them stuck to the bottom of the pot. They have lots of flavor, so it is time to de-glaze the pot!

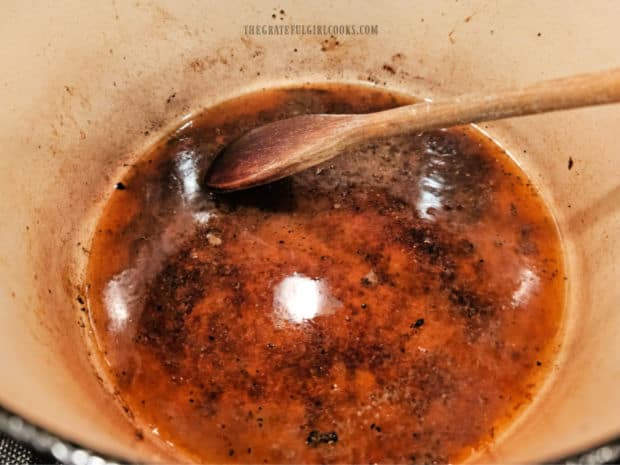
To do this, add 1 cup of beef broth and minced garlic to the pot, and cook on Medium-High, for 1-2 minutes. Use a spoon to scrape those browned bits off the bottom of the pot as it cooks.

The browned bits add a LOT of flavor to the broth the roast will cook in, so don’t skip this step! Remove the pot from the heat.

Beef broth and minced garlic are added and used to deglaze the pot.

Bake The Classic Pot Roast

Place the roast back into the pot, then add the remaining 2 cups of beef broth. The broth should come about ½ way up the sides of the roast.

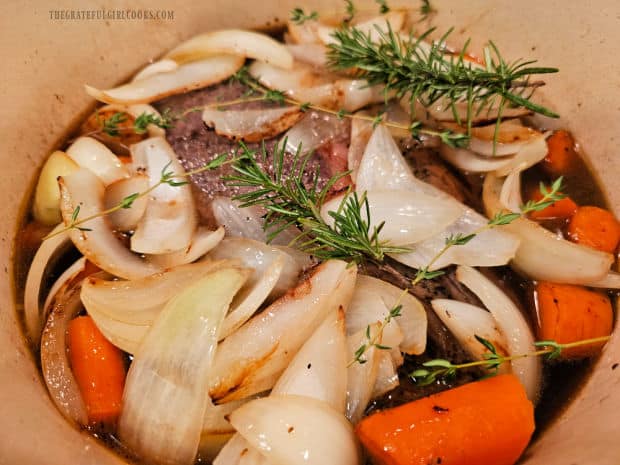
Surround and cover the roast with the carrots and onions. Add a couple sprigs of fresh rosemary and several sprigs of fresh thyme to the top.

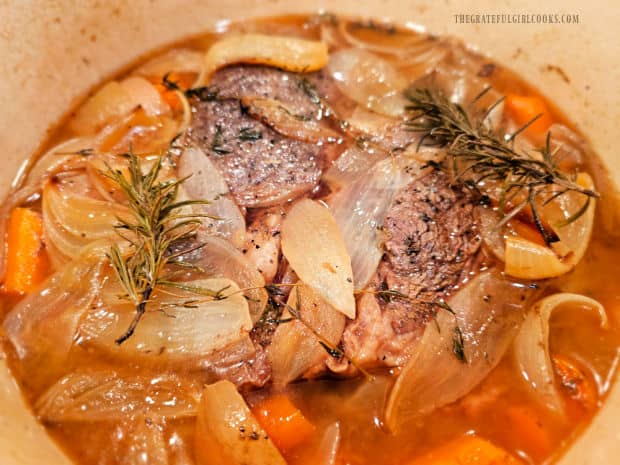
Put a lid on the pot and bake the pot roast at 275° F. for 3 hours (low and slow!). Cooking the meat low and slow will produce a very tender roast!

NOTE: If you are using a larger roast (4-5 pounds), you will need to let it bake for about 4 hours at the same temperature.

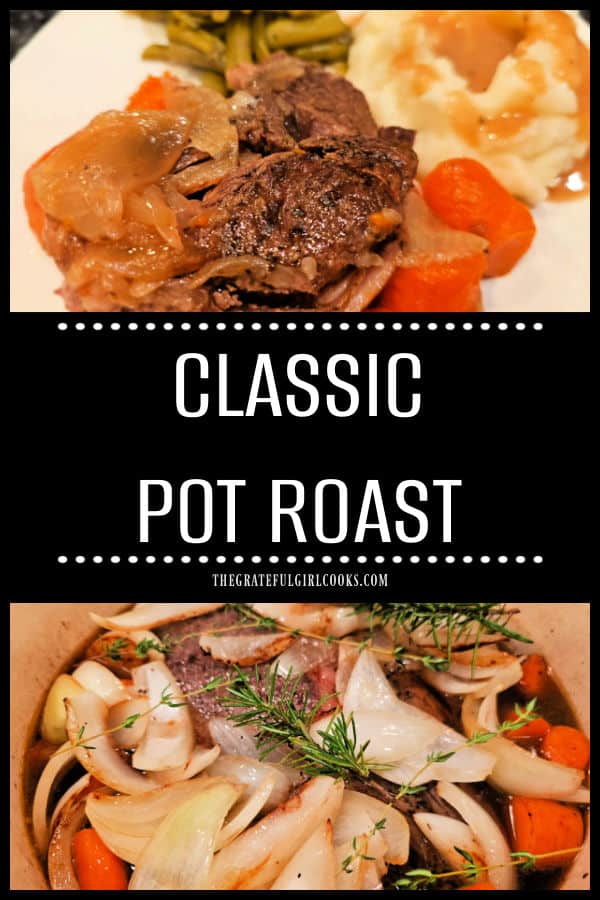
Pot roast, onions, carrots and fresh herbs are ready to be baked.After baking for 3 hours, the classic pot roast is ready to be served.

Serve And Enjoy Classic Pot Roast

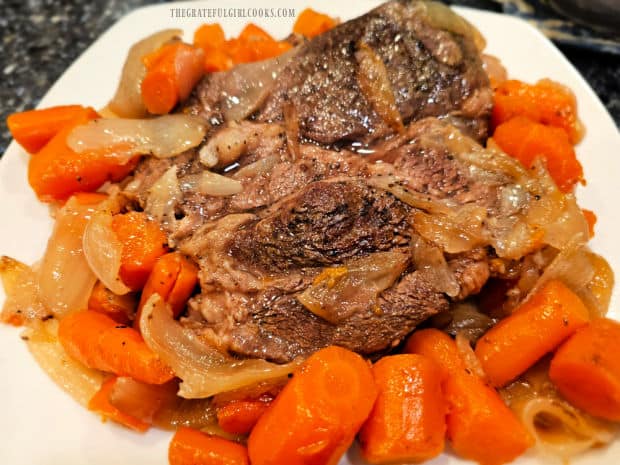
When the classic pot roast is finished baking, carefully transfer it to a serving platter. Be careful, the meat is usually falling-apart tender!

Arrange the carrots and onions on the platter, and spoon a bit of the broth from the pot over the top, if desired.  Slice the pot roast into individual portions, transfer to plates and add the onions and carrots. Serve with your favorite side dishes, and enjoy!

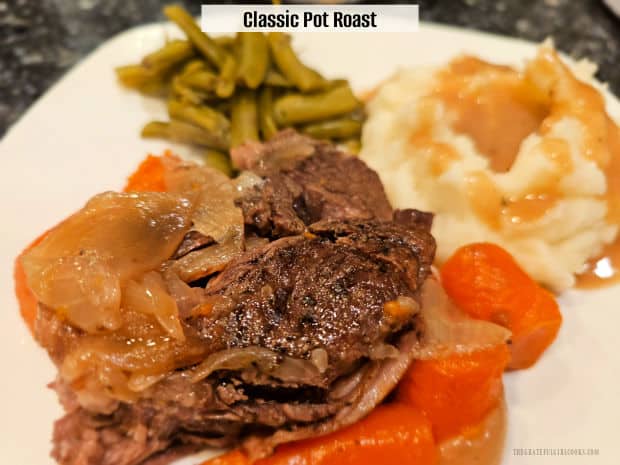
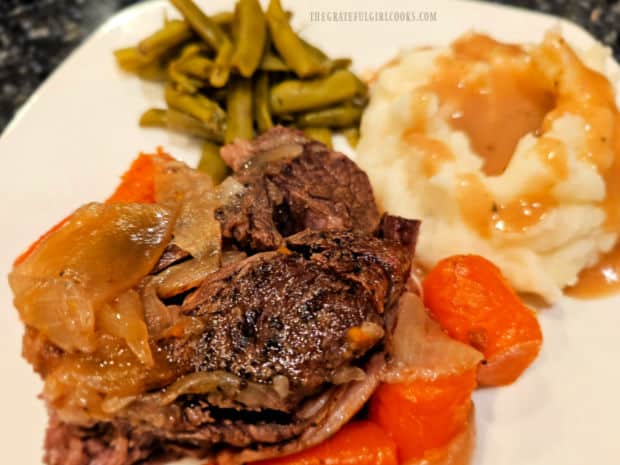
Our favorite way to enjoy this meal is with green beans from our garden, and mashed potatoes and gravy (made from the beef broth remaining in the pot). It’s such a comforting and delicious meal!

Classic pot roast on white platter, with onions and carrots on the side.The classic pot roast, served with green beans, mashed potatoes & gravy.

The pot roast, carrots and onions all have wonderful flavor, and are VERY tender! I hope you have the opportunity to make this dish for those you love, and trust you’ll enjoy it, too.

Thank you for taking time out of your day to stop by. I invite you to come back again soon for more family-friendly recipes. Take care, may God bless you, and have a GREAT day!

Looking For More BEEF Recipes?

You can find ALL of my recipes in the Recipe Index, which is located at the top of the page. I have quite a few delicious recipes featuring beef, including:

Want More Recipes? Get My FREE Newsletter!

I publish a newsletter 2 times per month (1st and 15th) with lots of recipes, tips, etc..
Would you like to join our growing list of subscribers?

There is a Newsletter subscription box on the top right (or bottom) of each blog post, depending on the device you use.
You can submit your e-mail address there, to be added to my mailing list.

Find Me On Social Media:

Facebook page: The Grateful Girl Cooks!
Pinterest:
The Grateful Girl Cooks!
Instagram:
jbatthegratefulgirlcooks

Author's signature

Recipe adapted from: https://www.foodnetwork.com/recipes/ree-drummond/perfect-pot-roast-recipe-2118771

↓↓ PRINTABLE RECIPE BELOW ↓↓

0 from 0 votes
Classic Pot Roast
Prep Time
15 mins
Cook Time
3 hrs
Total Time
3 hrs 15 mins
 

Classic Pot Roast is comfort food at it's very best! Make this delicious, tender beef dish for those you love, using only a few ingredients!

Category: Main Dish
Cuisine: American
Keyword: classic pot roast
Servings: 5 (from 3lb. roast + veggies)
Calories Per Serving: 597 kcal
Author: JB @ The Grateful Girl Cooks!
Ingredients
  • 3 pound pot roast (chuck roast)
  • salt and black pepper to season beef generously
  • 2 Tablespoons vegetable oil
  • 6 medium carrots peeled, cut in 2" round pieces
  • 2 medium yellow onions peeled, each cut in 8 wedges, top to bottom
  • teaspoons minced garlic
  • 3 cups beef broth
  • 4-6 sprigs fresh thyme
  • 2 sprigs fresh rosemary
Instructions
  1. Preheat oven to 275℉. (or 135℃.)

  2. Heat vegetable oil in a Dutch oven (oven-safe) over Medium-High heat. When oil is shimmering, add onion wedges. Cook 2-3 minutes, stirring occasionally until slightly browned and translucent. Remove/Transfer onions to a plate. Add carrots to the hot pot; cook 2-3 minutes on Medium-High until slightly browned. Remove/Transfer carrots to the plate, as well.

  3. Generously season roast with salt and pepper on all sides. Add more oil to the pot (if necessary); heat on Medium-High. When oil is hot, add roast. Cook meat for 1-2 minutes without moving it, then turn to the other side; repeat to ensure all sides are browned (but not cooked through). When done, remove/ transfer roast out of the pot to a plate.

  4. Add 1 cup beef broth and minced garlic to the pot; cook on Medium-High for 1-2 minutes. Use a spoon to scrape the browned bits off the bottom as it cooks. Remove pot from the heat.

  5. Place roast back into the pot; add remaining 2 cups beef broth. Broth should come about ½ way up the sides of the roast. Add carrots and onions. Place sprigs of fresh rosemary and fresh thyme on top. Put a lid on the pot and bake roast at 275° F. for 3 hours (low and slow!). NOTE: If using a larger roast (4-5 pounds), you will need to let it bake for about 4 hours.

  6. When finished baking, carefully transfer roast to a serving platter. Be careful, the meat is usually fall-apart tender! Discard thyme and rosemary. Arrange carrots and onions on platter; spoon a bit of broth over the top, if desired.  Slice pot roast into portions, transfer to plates; add onions and carrots. Serve, and enjoy!

Nutrition Facts
Classic Pot Roast
Amount Per Serving (1 (1/5 of total))
Calories 597 Calories from Fat 333
% Daily Value*
Fat 37g57%
Saturated Fat 15g94%
Trans Fat 2g
Polyunsaturated Fat 6g
Monounsaturated Fat 17g
Cholesterol 188mg63%
Sodium 809mg35%
Potassium 1287mg37%
Carbohydrates 12g4%
Fiber 3g13%
Sugar 5g6%
Protein 55g110%
Vitamin A 12304IU246%
Vitamin C 9mg11%
Calcium 94mg9%
Iron 6mg33%
* Percent Daily Values are based on a 2000 calorie diet.

Here’s one more to pin on your Pinterest boards!Classic Pot Roast is comfort food at it's very best! Make this delicious, tender beef dish for those you love, using only a few ingredients!


Vegetable Cheddar Quiche

Make a delicious vegetable cheddar quiche to enjoy at breakfast, lunch or dinner! Easy to make, and filled with cheese and lots of veggies.

Today I want to share a recipe I created for a delicious vegetable cheddar quiche! I LOVE all varieties of quiche, and appreciate how versatile it is. We enjoy eating quiche for breakfast, lunch and dinner!

This recipe has lots of veggies in it because I wanted to use up loads of veggies we had in our refrigerator! After thinking about different ways to cook them, I I decided to create my own recipe for a yummy quiche that featured them.

A traditional pie/pastry crust is filled with sautéed fresh zucchini, cauliflower, broccoli, red bell pepper, garlic, green onions and carrots. You can use a frozen (thawed) 9″ deep dish crust or a homemade one. Your choice!

After topping the veggies with grated cheddar cheese, a traditional egg filling is poured over these ingredients and the quiche is baked to perfection! Vegetable Cheddar Quiche is delicious, colorful, and full of “good for you “veggies! Here’s how to make it.

Scroll Down For A Printable Recipe Card At The Bottom Of The Page

Cook The Veggie Filling

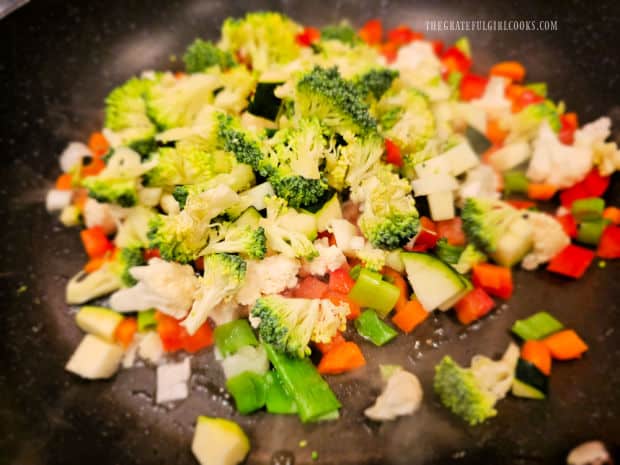
Finely chop the fresh veggies. Try and keep all the pieces about the same size, so they will cook evenly (I cut round zucchini slices into quarters).

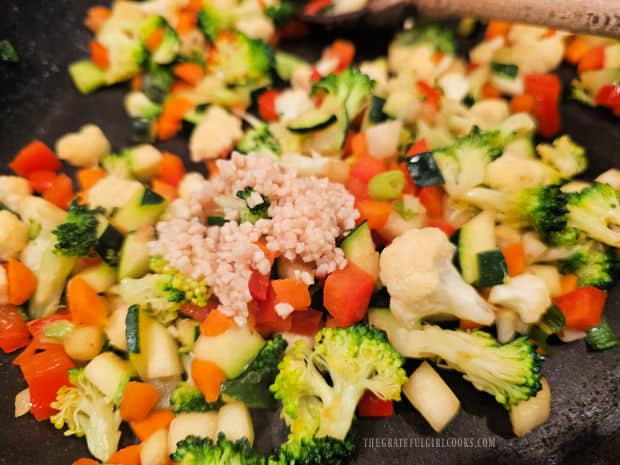
Heat oil in a large skillet on Medium heat. Add the veggies (except garlic), and sauté them, stirring occasionally, for 4 minutes.

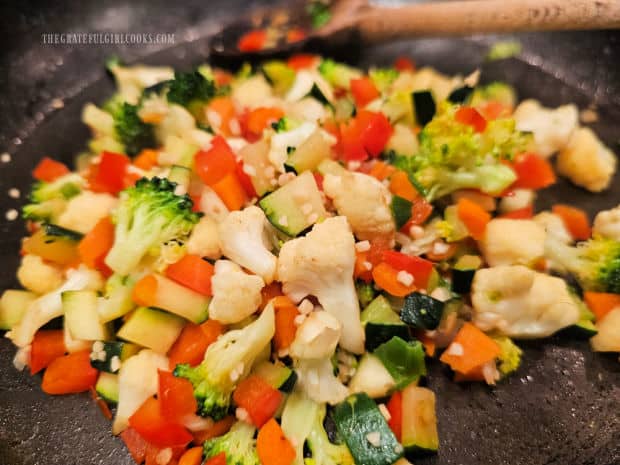
Stir the minced garlic into the vegetables until combined and cook for 1 more minute, stirring often so the garlic doesn’t burn.

Chopped veggies are cooked in oil in a hot, large skillet.Minced garlic is added to, and cooked with the veggies for the quiche.

When finished cooking the veggies, transfer them from the skillet to a bowl, and let them cool to room temperature. Set aside.

The chopped vegetables cool to room temp. after cooking.

Prepare The Egg Filling

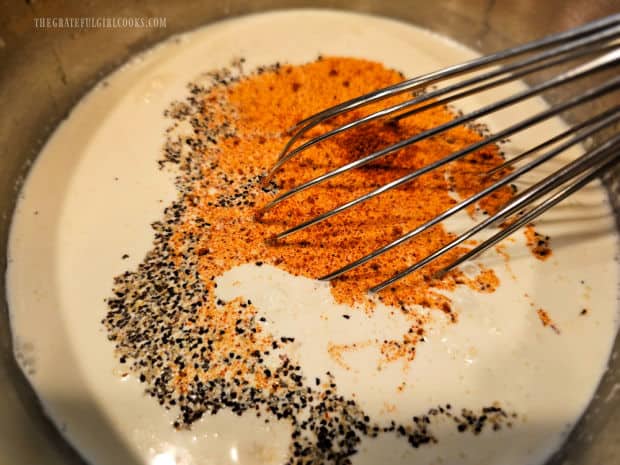
Now it’s time to make a traditional egg filling for the quiche. Whisk eggs, heavy whipping cream, salt, pepper, and cayenne pepper together in a medium-sized bowl until fully combined. Set the bowl aside.

Egg filling for the quiche is whisked together in a bowl until combined.

Prepare The Quiche For Baking

You can use a purchased DEEP DISH pie crust (thawed) OR use a 9″ homemade deep pie crust to make this quiche. Prick the bottom and sides of the crust several times with the tines of a fork.

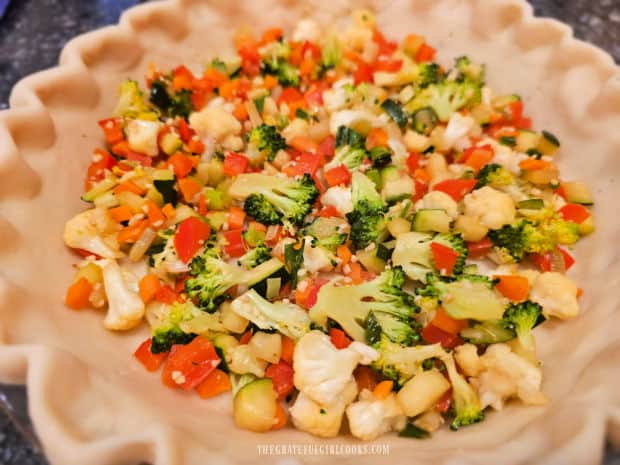
Add the “cooled to room temperature” veggies to the pie crust, and spread to cover the bottom of the crust.

TIP: It’s important the veggies have cooled so they don’t cause the bottom of the pie crust (containing butter or shortening) to “soften or melt”.

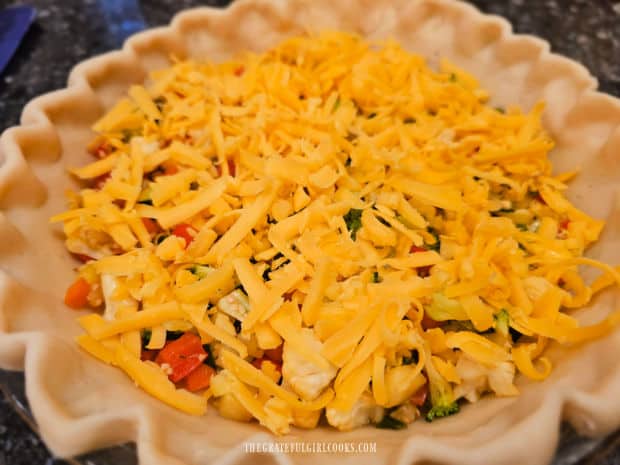
Sprinkle the veggies with grated cheddar cheese, making sure to cover the surface of the quiche as much as possible.

Cooked veggies are added to an unbaked pie crust.Grated cheddar cheese is added to cover the chopped veggies.

Bake The Quiche

Place a large piece of aluminum foil on the oven shelf UNDER the shelf you will be baking the quiche on. This will help with cleanup in case it drips!

Carefully pour the egg filling over the veggies and cheese in the pie crust. Note: The pie crust will end up being VERY full!

CAREFULLY transfer the vegetable cheddar quiche onto a middle rack in a preheated 400°F. oven, being careful not to spill the filling!

Bake at 400°F. for 15 minutes, then turn the heat down to 300°F, and continue cooking for 35-40 minutes. When done, the top of the quiche should be golden brown. A toothpick inserted into the top/middle of the quiche should come out clean.

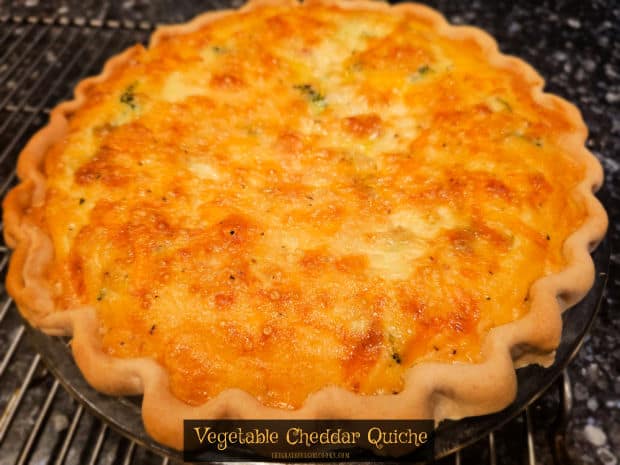
Egg filling for the quiche is poured over the veggie and cheese filling.After baking, the Vegetable Cheddar Quiche is golden brown on top.

Serve The Vegetable Cheddar Quiche

Transfer the baked vegetable cheddar quiche (still in the pie pan) to a wire rack, and let it cool for 12-15 minutes, to let the filling “settle” and firm up some. As it cools, it will slightly deflate a bit, as the hot air dissipates inside the quiche.

Slice the quiche into 8 wedges, and serve with your favorite salad or fruit on the side. We enjoy this delicious quiche for breakfast, lunch and dinner! One quiche slice provides protein from the eggs and a fair amount of delicious veggies!

Leftover quiche can be covered and stored in the refrigerator for several days. The leftover quiche can be easily reheated in a microwave, for convenience (and quick lunches or dinners!).

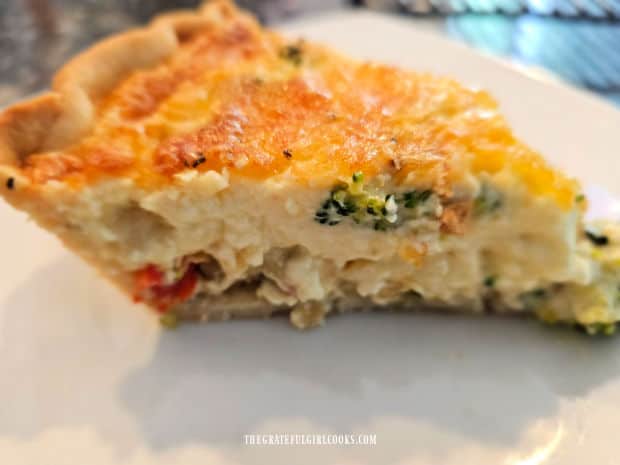
The vegetable cheddar quiche, with one slice already removed.One slice of vegetable cheddar quiche, served on a white plate.

I hope you have the opportunity to make and enjoy this delicious recipe for vegetable cheddar quiche, and trust you’ll enjoy it as we do!

Thanks for stopping by, and I invite you to come back again soon for more family-friendly recipes. Take care, may God bless you, and have a GREAT day!

Looking for More QUICHE Recipes?

You can find ALL of my recipes in the Recipe Index, which is located at the top of the page. I have several delicious quiche recipes you may enjoy, including:

Want More Recipes? Get My FREE Newsletter!

I publish a newsletter 2 times per month (1st and 15th) with lots of recipes, tips, etc..
Would you like to join our growing list of subscribers?

There is a Newsletter subscription box on the top right (or bottom) of each blog post, depending on the device you use.
You can submit your e-mail address there, to be added to my mailing list.

Find Me On Social Media:

Facebook page: The Grateful Girl Cooks!
Pinterest:
The Grateful Girl Cooks!
Instagram:
jbatthegratefulgirlcooks

Author's signature

↓↓ PRINTABLE RECIPE BELOW ↓↓

0 from 0 votes
Vegetable Cheddar Quiche
Prep Time
15 mins
Cook Time
50 mins
Total Time
1 hr 5 mins
 

Make a delicious vegetable cheddar quiche to enjoy at breakfast, lunch or dinner! Easy to make, and filled with cheese and lots of veggies.

Category: Breakfast, Brunch, Dinner, Lunch
Cuisine: American
Keyword: vegetable cheddar quiche
Servings: 8
Calories Per Serving: 264 kcal
Author: JB @ The Grateful Girl Cooks!
Ingredients
For Quiche:
  • 1 9" deep dish pie crust uncooked/thawed
  • 1 Tablespoon vegetable oil
  • ½ cup zucchini quarters ½" round slices, cut in ¼'s
  • ½ cup broccoli florets small florets
  • ½ cup cauliflower florets small florets
  • stems green onions (scallions) bulb and stem, chopped
  • cup red bell pepper chopped-small pieces
  • 5 baby carrots sliced- small pieces
  • teaspoons minced garlic
For Egg Filling:
  • 4 large eggs
  • 2 cups heavy whipping cream
  • ¾ teaspoon salt
  • ¼ teaspoon black pepper
  • ¼ teaspoon cayenne pepper
Instructions
  1. Preheat oven to 400℉. Prick bottom and sides of uncooked/thawed 9" deep dish pie crust several times with the tines of a fork.

  2. Prepare veggies: Chop veggies about the same size (small), so they'll cook evenly. Heat oil in large skillet on Medium. Add veggies (except garlic); sauté, stirring occasionally, for 4 minutes. Stir garlic in until combined; cook 1 more minute, stirring often so garlic doesn't burn. Remove skillet from heat. Transfer veggies to a bowl; Set aside and let cool to room temp.

  3. Make egg filling: Whisk eggs, heavy whipping cream, salt, pepper, and cayenne pepper together in medium bowl until fully combined. Set bowl aside.

  4. Add "cooled to room temp." veggies to pie crust. Spread to cover bottom of crust. Sprinkle with grated cheese, covering veggies as much as possible. Pour egg filling over veggies/cheese. Pie crust will be VERY full! CAREFULLY transfer quiche onto middle rack of oven, being careful not to spill!

  5. Bake at 400°F. for 15 minutes, then reduce heat to 300°F, and continue cooking 35-40 minutes. When done, quiche should be golden brown. A toothpick inserted into the top/middle should come out clean. Transfer pie plate to a wire rack; let cool 12-15 minutes before slicing/serving.

  6. When ready to serve, slice into 8 wedges. Refrigerate any leftover quiche for up to 3-4 days. Microwave to reheat. Enjoy!
Nutrition Facts
Vegetable Cheddar Quiche
Amount Per Serving (1 slice (1/8 of total))
Calories 264 Calories from Fat 234
% Daily Value*
Fat 26g40%
Saturated Fat 15g94%
Trans Fat 0.02g
Polyunsaturated Fat 2g
Monounsaturated Fat 7g
Cholesterol 160mg53%
Sodium 279mg12%
Potassium 196mg6%
Carbohydrates 4g1%
Fiber 1g4%
Sugar 3g3%
Protein 5g10%
Vitamin A 2168IU43%
Vitamin C 19mg23%
Calcium 63mg6%
Iron 1mg6%
* Percent Daily Values are based on a 2000 calorie diet.

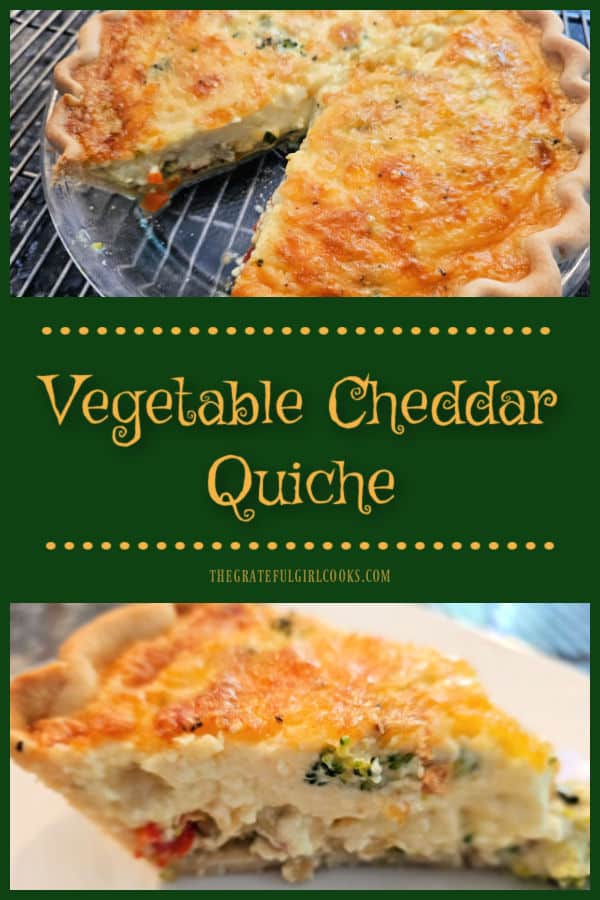
Here’s one more to pin on your Pinterest boards!Make a delicious vegetable cheddar quiche to enjoy at breakfast, lunch or dinner! Easy to make, and filled with cheese and lots of veggies.

Carrot Ribbon Salad

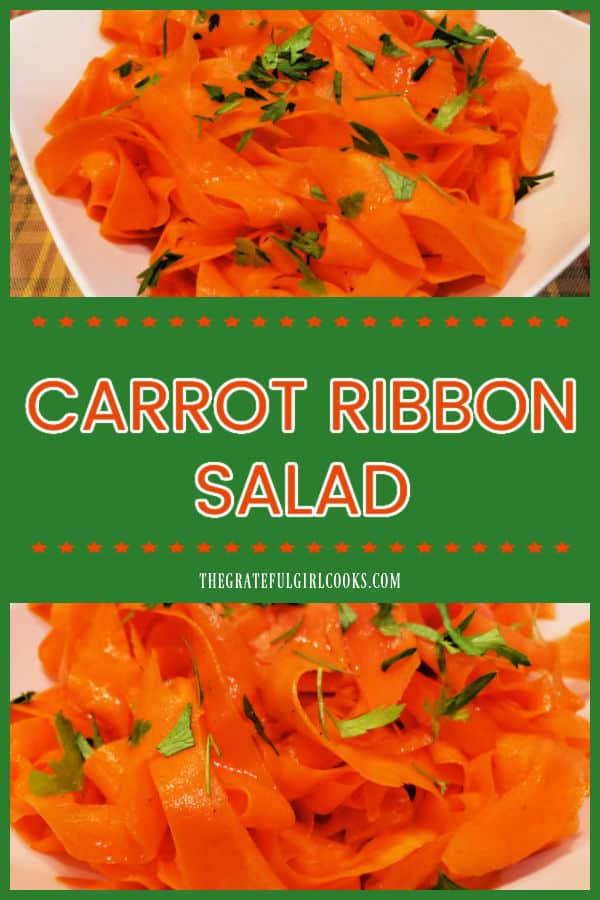
Carrot Ribbon Salad is a savory salad, with long thin carrot “ribbons”, covered in a simple lemon, spices and olive oil salad dressing! 
Carrot Ribbon Salad is a savory salad, with long thin carrot "ribbons", covered in a simple lemon, spices and olive oil salad dressing!

If you’re looking for an easy to make side dish, check out this recipe for Carrot Ribbon Salad. It’s delicious, and so simple to make you won’t believe it!

Long carrot ribbons are coated with a simple, easy citrus homemade salad dressing with a few spices, topped with fresh parsley, and served. How easy is THAT?

All you will need is a vegetable peeler, and the simple list of ingredients. Here’s how to make this yummy chilled salad.

Scroll Down For A Printable Recipe Card At The Bottom Of The Page

Make The Carrot Ribbons Using A Vegetable Peeler

Cut the stem ends off, then use a vegetable peeler to peel the carrots (discard the outer peel).

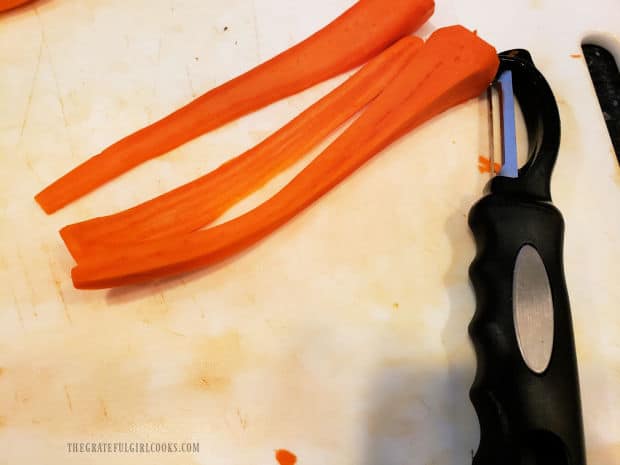
Carefully run the vegetable peeler the entire length of each carrot, creating long thin carrot “ribbons”. Each one should be the length of the carrots, and will look like orange “fettucine” noodles once done.

A vegetable peeler is used to slice long thin ribbons from fresh carrots.

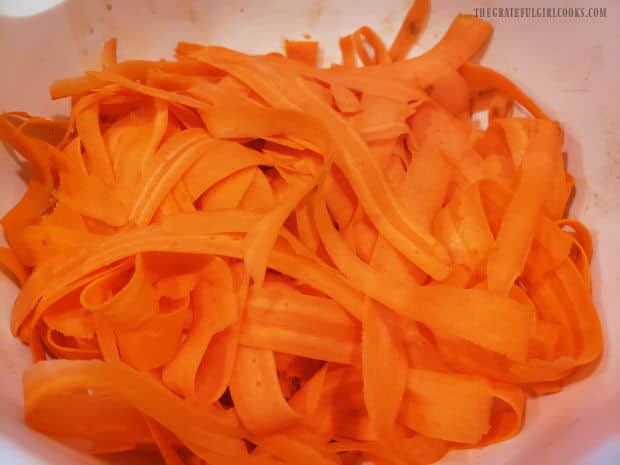
You will end up with a nice big bowl or orange carrot ribbons (and quite possibly you might have orange fingers, too!).

Set the carrots aside while you make the simple salad dressing.

Thinly sliced carrot ribbons in a large white mixing bowl.

Prepare The Dressing For The Carrot Salad

Combine olive oil, fresh lemon juice, salt, ground coriander, ground cumin, a pinch of cayenne pepper and ground cinnamon in a small bowl.

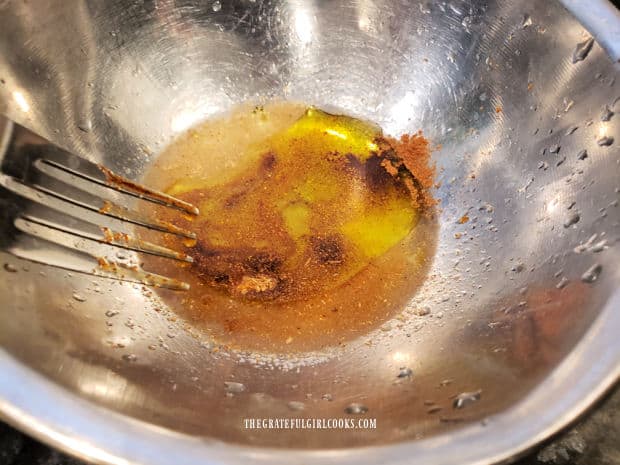
Use a fork or a small whisk to combine these salad dressing ingredients until fully blended.

A fork is used to combine lemon juice, olive oil and spices in a metal bowl.

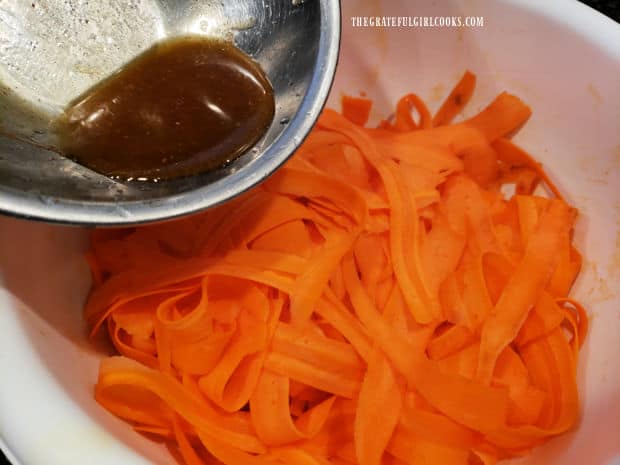
Pour the blended salad dressing over the carrot ribbons.

Homemade salad dressing is poured over the carrot ribbon salad.

Toss To Coat

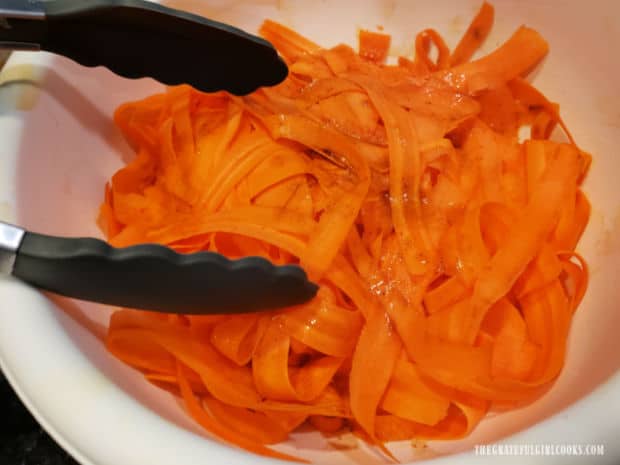
Use tongs to toss the carrots and salad dressing until the carrot ribbons are coated with the dressing.

At this point, the carrot ribbon salad can be served, however it tastes even better if covered and refrigerated for at least 30 minutes.

That way the salad is nicely chilled and the flavors have a bit of time to mingle with and flavor the carrots. This is your choice, though!

Tongs are used to combine carrot ribbons and salad dressing.

Garnish And Serve The Carrot Ribbon Salad

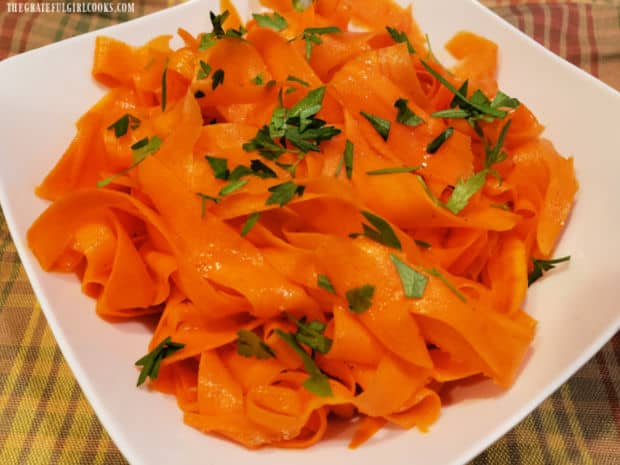
To serve, place the chilled salad in a serving bowl. Toss again, then garnish the salad with with chopped fresh parsley leaves.

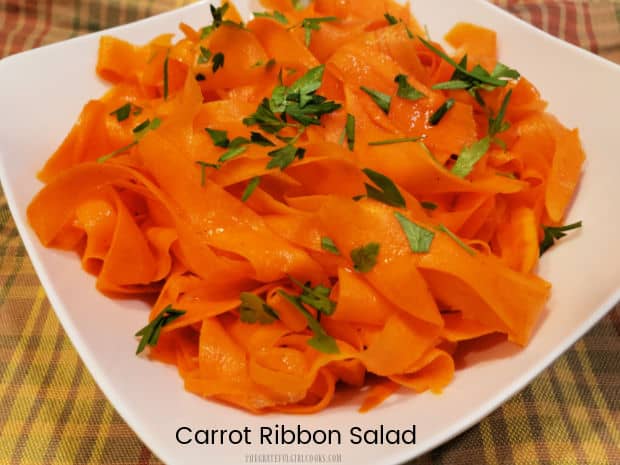
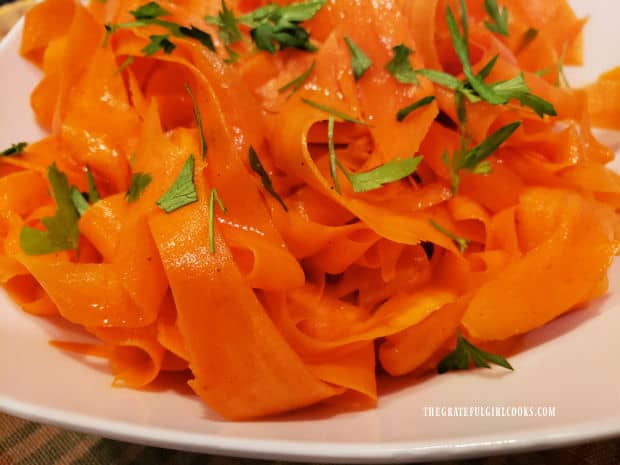
Serve and enjoy! The spices are in no way overpowering, in fact they are quite mild and refreshing in this chilled salad!

Carrot ribbon salad in a white bowl, and garnished with chopped fresh parsley.Chopped fresh parsley leaves garnish the carrot ribbon salad.

I hope you have the opportunity to try this delicious savory salad, and trust you’ll enjoy it, too!

Thanks for stopping by, and I invite you to come back again soon for more family-friendly recipes. Take care, may God bless you, and have a GREAT day!

Looking For More SALAD Recipes?

You can find ALL of my recipes in the Recipe Index, which is located at the top of the page. I have some delicious salad recipes (savory and sweet) to enjoy, including:

Want More Recipes? Get My FREE Newsletter!

I publish a newsletter 2 times per month (1st and 15th) with lots of recipes, tips, etc..
Would you like to join our growing list of subscribers?

There is a Newsletter subscription box on the top right (or bottom) of each blog post, depending on the device you use.
You can submit your e-mail address there, to be added to my mailing list.

Find Me On Social Media:

Facebook page: The Grateful Girl Cooks!
Pinterest:
The Grateful Girl Cooks!
Instagram:
jbatthegratefulgirlcooks

Author's signature

Recipe adapted from: “The Chopped Cookbook”, page 123,  by Television Food Network, G.P., published by Clarkson Potter, 2014

↓↓ PRINTABLE RECIPE BELOW ↓↓

0 from 0 votes
Carrot Ribbon Salad
Prep Time
15 mins
Cook Time
0 mins
Total Time
15 mins
 

Carrot Ribbon Salad is a savory salad, with long thin carrot "ribbons", covered in a simple lemon, spices and olive oil salad dressing!

Category: Salad, Vegetable Dish
Cuisine: All Cuisines
Keyword: carrot ribbon salad
Servings: 3
Calories Per Serving: 111 kcal
Author: JB @ The Grateful Girl Cooks!
Ingredients
  • ¾ pound carrots peeled
For Salad Dressing:
  • Tablespoons extra virgin olive oil
  • Tablespoons fresh lemon juice
  • ½ teaspoon salt
  • ¼ teaspoon ground coriander
  • ¼ teaspoon ground cumin
  • 1 pinch cayenne pepper
  • 1 pinch ground cinnamon
Chopped fresh parsley leaves for Garnishing Salad
    Instructions
    1. Cut stem ends off carrots; use vegetable peeler to peel (discard outer peel). Carefully run vegetable peeler the entire length of each carrot, creating long thin carrot "ribbons". Set aside.

    2. In separate bowl, combine olive oil, lemon juice, salt, coriander, cumin, cayenne pepper and cinnamon. Use a fork or whisk to combine ingredients until fully blended.

    3. Pour salad dressing over carrot ribbons. Toss well, with tongs, to fully coat. Cover bowl and refrigerate (optional) for 30 minutes or more.

    4. Transfer to serving bowl. Toss gently. Garnish salad with chopped fresh parsley leaves. Serve, and enjoy!

    Nutrition Facts
    Carrot Ribbon Salad
    Amount Per Serving (1 (1/3 of total))
    Calories 111 Calories from Fat 63
    % Daily Value*
    Fat 7g11%
    Saturated Fat 1g6%
    Polyunsaturated Fat 1g
    Monounsaturated Fat 5g
    Sodium 466mg20%
    Potassium 375mg11%
    Carbohydrates 12g4%
    Fiber 3g13%
    Sugar 6g7%
    Protein 1g2%
    Vitamin A 18961IU379%
    Vitamin C 10mg12%
    Calcium 41mg4%
    Iron 1mg6%
    * Percent Daily Values are based on a 2000 calorie diet.

    Here’s one more to pin on your Pinterest boards!

    Carrot Ribbon Salad is a savory salad, with long thin carrot "ribbons", covered in a simple lemon, spices and olive oil salad dressing!

    Stuffed Jack O’ Lantern Peppers

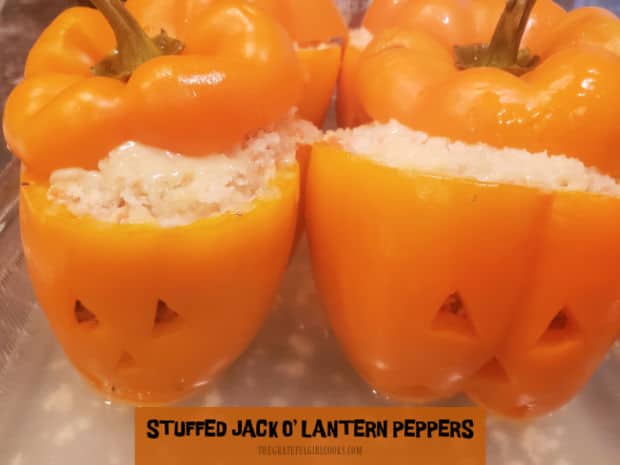
    Make cute, delicious Stuffed Jack O’ Lantern Peppers for 4! Filled with chicken, rice, salsa and cheese, this is a fun idea for a Fall meal!
    Make cute, delicious Stuffed Jack O' Lantern Peppers for 4! Filled with chicken, rice, salsa and cheese, this is a fun idea for a Fall meal!

    If you’re looking for a unique, yet filling main dish to serve during the Fall, I hope you’ll check out this fun way to serve stuffed peppers!

    The recipe for stuffed jack o’ lantern peppers is fairly simple to make, especially if you can use pre-cooked chicken and rice.

    Each stuffed pepper also has Parmesan and mozzarella cheeses, as well as chunky salsa and spices, which give the filling a bit of a Southwest flavor.

    I’m confident you’ll enjoy these cute little stuffed jack o’ lantern peppers. Here’s how to make them.

    Scroll Down For A Printable Recipe At The Bottom Of The Page

    Carve The Jack O’ Lantern Peppers

    Preheat your oven to 425°F, so it will be at temperature and ready to go, as soon as the peppers have been stuffed.

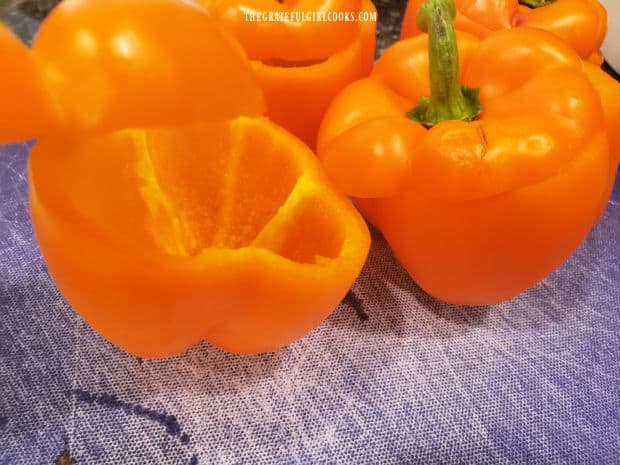
    Cut the tops off each bell pepper, then set the intact tops aside while you carve and decorate the peppers. Use a spoon to remove all the seeds from inside the bell peppers. 

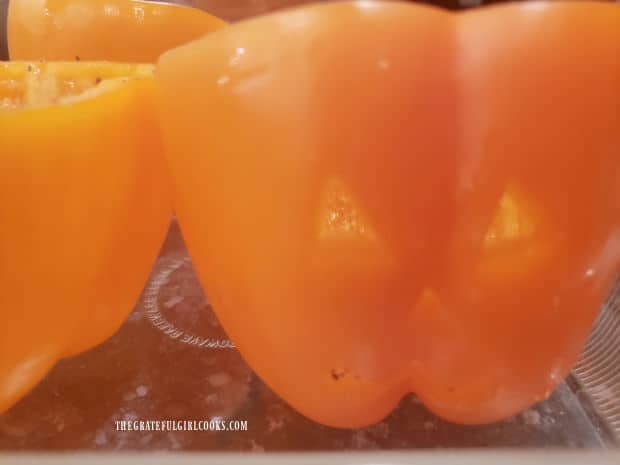
    Use a very small paring knife to carefully carve a pumpkin face out of each bell pepper. I make small triangles for the eyes and nose, then carve out a jagged “mouth” on each one. 

    The tops of four orange bell peppers are sliced and removed.Pumpkin faces are carved out of each orange bell pepper.

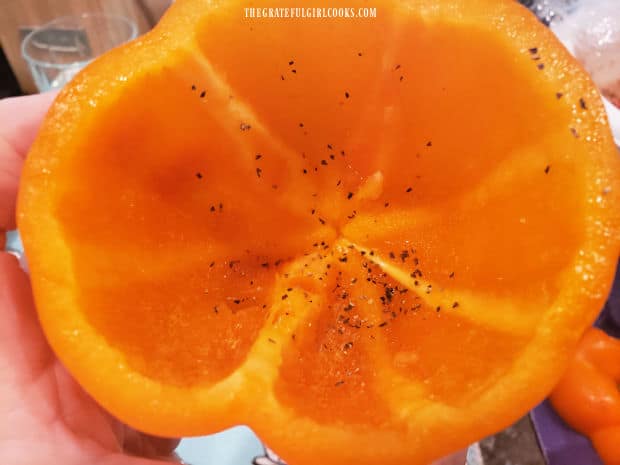
    Rub the inside of the peppers with a small amount of olive oil, then lightly season with a tiny bit of salt and pepper. Put the bell peppers in a baking dish, cut side facing up.

    The inside of each bell pepper is seasoned with olive oil, salt and pepper.

    Prepare The Chicken Filling

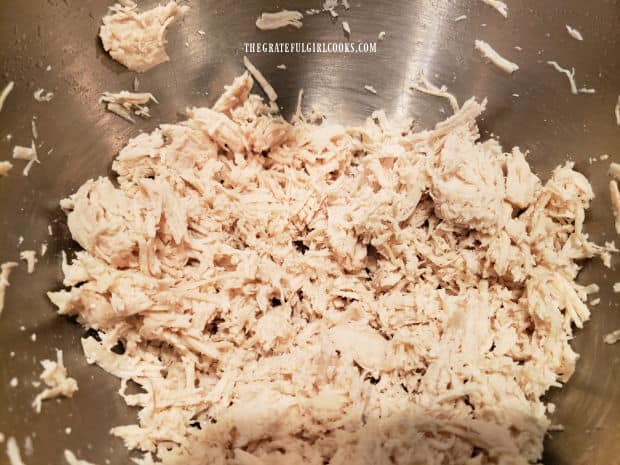
    Place 2 cups of shredded cooked chicken breast into a large mixing bowl. Add cooked rice, chunky salsa, shredded mozzarella cheese, garlic powder, ground cumin, and salt.

    Stir these ingredients well, until they’re fully combined. This is the filling you will use to stuff the Jack O’ Lantern bell peppers.

    Chicken is shredded, then salsa, cheese, rice and seasonings are added.

    Stuff The Jack O’ Lantern Peppers 

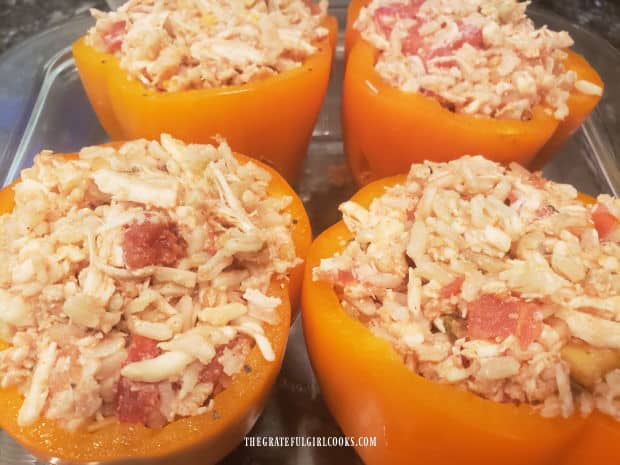
    Use a spoon to fill each of the bell peppers with the chicken mixture. You should have enough chicken filling to reach the top of each pepper.

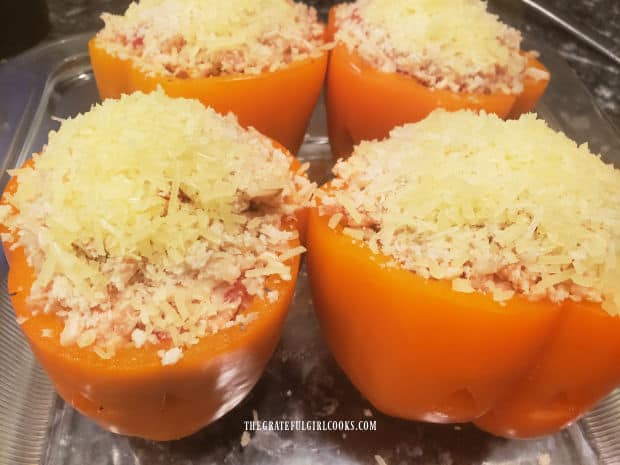
    Sprinkle Panko breadcrumbs evenly over the top of the peppers, then add grated Parmesan cheese, to finish.

    Carefully add enough water into the baking dish to cover the bottom of the dish with about ½” of water. Put the top back on each of the stuffed peppers.

    Jack O' Lantern peppers are stuffed with the chicken and rice filling.Stuffed Jack O' Lantern peppers are covered with breadcrumbs and Parmesan.

    Time to Bake!

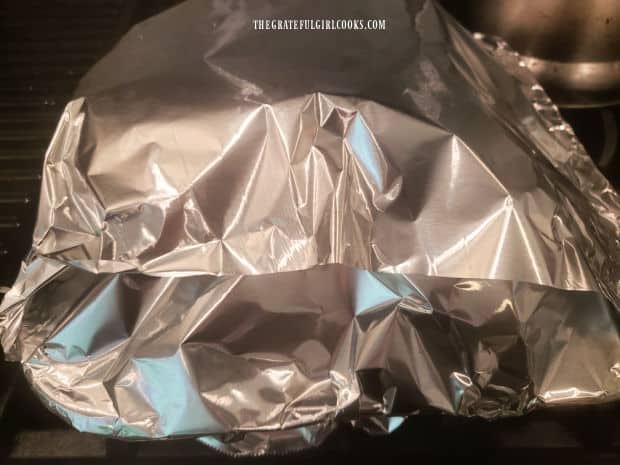
    Spray aluminum foil with non-stick baking spray, and cover the dish (sprayed side down). Be careful to not puncture the foil with the pumpkin stems!

    Bake the stuffed jack o’ lantern peppers at 425°F. for about 40 minutes. When done, the bell peppers should be very tender and the chicken filling should be fully heated through.

    Covered with aluminum foil, the stuffed peppers are baked for 40 minutes.After baking, the orange bell peppers are tender and heated through.

    Serve The Stuffed Jack O’ Lantern Peppers

    Carefully remove each stuffed pepper out of the baking dish using a spatula, and place them on individual serving plates.

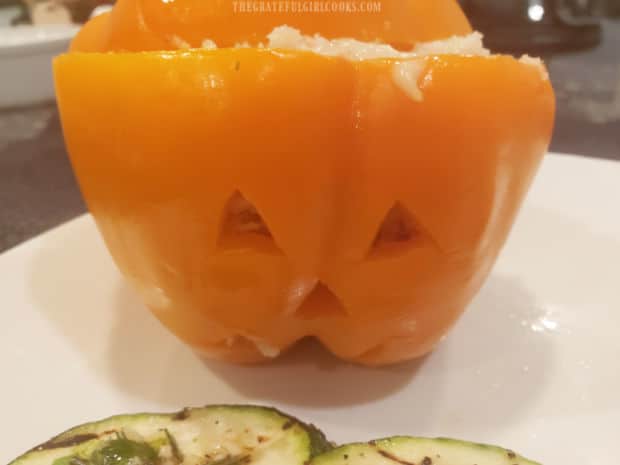
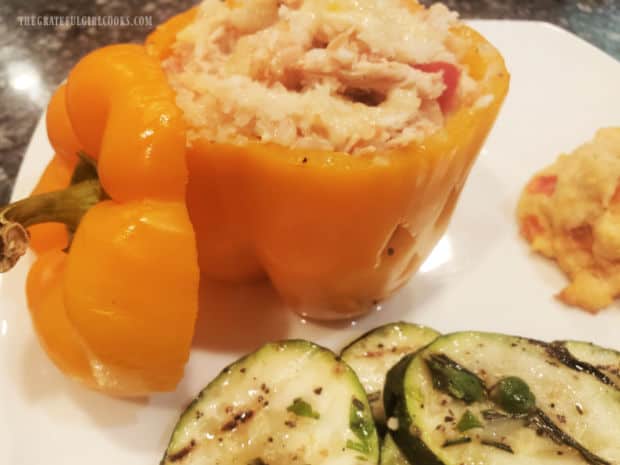
    Serve the stuffed jack o’ lantern peppers with the top ON or you can place it alongside the pepper to reveal the chicken filling inside.

    Enjoy this filling chicken and rice dish with a favorite vegetable side or salad. We enjoyed the stuffed peppers, served with Grilled Herb Garlic Zucchini and Tomato Basil Drop Biscuits.

    One of the stuffed jack o' lantern peppers, served on a white plate.Zucchini is served with one of the stuffed jack o' lantern peppers.

    I hope you have the chance to make these cute, tasty stuffed jack o’ lantern peppers. They’re a fun dish to make during the Fall season, but are also a nice meal to make any time of the year!

    Thanks for stopping by, and I invite you to come back soon for more family-friendly recipes. Take care, and have a GREAT day!

    Looking For More FALL Recipes?

    You can find ALL of my recipes in the Recipe Index, which is located at the top of the page. I have lots of delicious recipes, perfect for the Fall season, including:

    Want More Recipes? Get My FREE Newsletter!

    I publish a newsletter 2 times per month (1st and 15th) with lots of recipes, tips, etc..
    Would you like to join our growing list of subscribers?

    There is a Newsletter subscription box on the top right (or bottom) of each blog post, depending on the device you use.
    You can submit your e-mail address there, to be added to my mailing list.

    Find Me On Social Media:

    Facebook page: The Grateful Girl Cooks!
    Pinterest:
    The Grateful Girl Cooks!
    Instagram:
    jbatthegratefulgirlcooks

    Author's signature

    Recipe adapted from: mymagazine.us (a mailer from Kroger), Fall issue, page 7

    ↓↓ PRINTABLE RECIPE BELOW ↓↓

    0 from 0 votes
    Stuffed Jack O' Lantern Peppers
    Prep Time
    15 mins
    Cook Time
    40 mins
    Total Time
    55 mins
     

    Make cute, delicious Stuffed Jack O' Lantern Peppers for 4! Filled with chicken, rice, salsa and cheese, this is a fun idea for a Fall meal!

    Category: Main Dish
    Cuisine: American
    Keyword: stuffed jack o' lantern peppers
    Servings: 4
    Calories Per Serving: 349 kcal
    Author: JB @ The Grateful Girl Cooks!
    Ingredients
    • 4 large orange bell peppers
    • 2 teaspoons olive oil
    • salt & pepper to season bell peppers
    • 2 cups shredded, pre-cooked chicken breast
    • 1 cup cooked white or brown rice
    • cups chunky salsa medium or mild
    • ½ teaspoon ground cumin
    • ½ teaspoon table salt
    • ¼ teaspoon garlic powder
    • ¼ cup Panko breadcrumbs
    • ¼ cup grated Parmesan cheese
    • ¾ cup shredded mozzarella cheese
    Instructions
    1. Preheat oven to 425°F.

    2. Carefully slice the top off each bell pepper and set aside; remove all the seeds. Use a very small knife to carve a pumpkin face out of each bell pepper.

    3. Rub the inside of each pepper with a bit of olive oil, then lightly season each with a pinch of salt and pepper. Put peppers in a baking dish, cut side up.

    4. Place shredded chicken in a large mixing bowl. Add cooked rice, chunky salsa, shredded mozzarella, garlic powder, ground cumin, and salt. Stir until combined.

    5. Use a spoon to fill each pepper to the top with chicken filling. Sprinkle Panko breadcrumbs evenly on top, then add grated Parmesan cheese, to finish. Carefully add enough water to the baking dish to cover the bottom with ½" of water. Put the top back on each stuffed pepper.

    6. Spray aluminum foil with non-stick spray; cover baking dish (sprayed side down). Be careful to not puncture foil with the stems! Bake peppers at 425°F. for 40 minutes. When done, peppers should be tender and the filling should be completely heated through.

    7. Remove each stuffed pepper out of baking dish using a spatula, transfer to plates. Serve immediately, and enjoy!

    Nutrition Facts
    Stuffed Jack O' Lantern Peppers
    Amount Per Serving (1 stuffed pepper)
    Calories 349 Calories from Fat 108
    % Daily Value*
    Fat 12g18%
    Saturated Fat 5g31%
    Polyunsaturated Fat 1g
    Monounsaturated Fat 4g
    Cholesterol 82mg27%
    Sodium 1256mg55%
    Potassium 737mg21%
    Carbohydrates 29g10%
    Fiber 5g21%
    Sugar 9g10%
    Protein 32g64%
    Vitamin A 4408IU88%
    Vitamin C 154mg187%
    Calcium 221mg22%
    Iron 2mg11%
    * Percent Daily Values are based on a 2000 calorie diet.

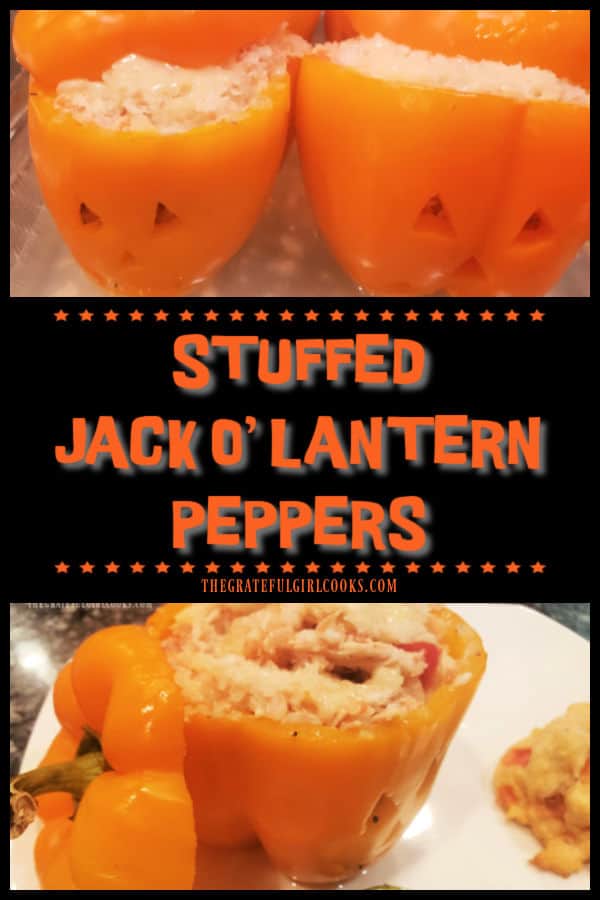
    Here’s one more to pin on your Pinterest boards!Make cute, delicious Stuffed Jack O' Lantern Peppers for 4! Filled with chicken, rice, salsa and cheese, this is a fun idea for a Fall meal!

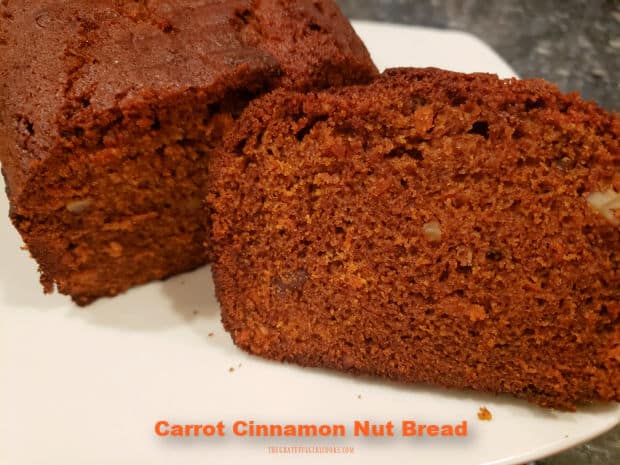
    Carrot Cinnamon Nut Bread

    Carrot Cinnamon Nut Bread is an “easy to make” delicious bread, flavored with cinnamon and molasses, and filled with grated carrots and nuts.
    Carrot Cinnamon Nut Bread is an "easy to make" delicious bread, flavored with cinnamon and molasses, and filled with grated carrots and nuts.

    I really enjoy baking bread, whether it’s loaves of savory bread or sweetened bread! It’s fun to try different recipes, then get to enjoy a slice of warm bread with a meal or for breakfast!

    Today I am sharing a recipe from a woman named Fern who attended church with my husband and I. This recipe was published in our church cookbook about 35 years ago.

    Fern was an excellent cook (I have several of her recipes), and though she has been in heaven for awhile now, her recipes live on!

    The recipe for carrot cinnamon nut bread is really tasty, quick and simple to make, so I am sharing it here so you can enjoy it, too! Here’s how to make it.

    Scroll Down For A Printable Recipe Card At The Bottom Of The Page

    Make The Batter For The Carrot Cinnamon Nut Bread

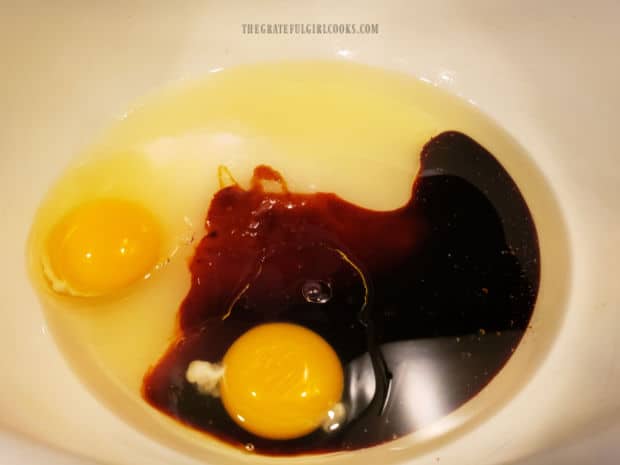
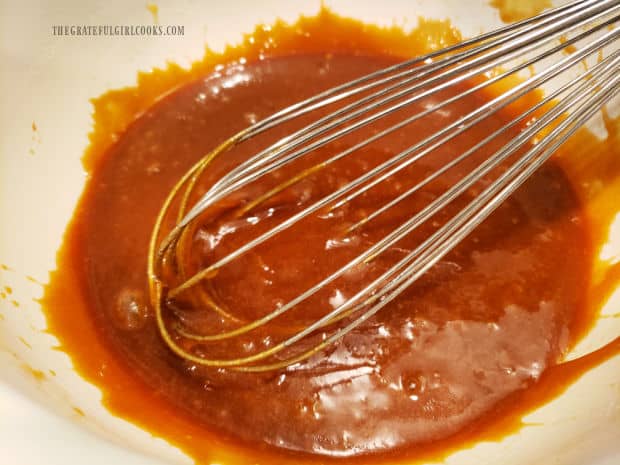
    Mix granulated sugar, molasses, vegetable oil and two eggs together in a large mixing bowl. Use a wire whisk to combine these ingredients.

    This is the bowl of “wet ingredients”. Set the bowl aside while you mix the “dry ingredients” together in a separate bowl. 

    Two eggs, molasses, sugar and vegetable oil, in a large white bowl.A wire whisk is used to combine the wet ingredients for the batter.

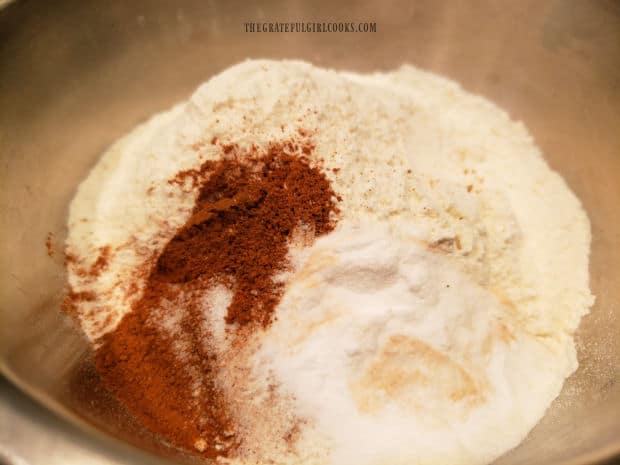
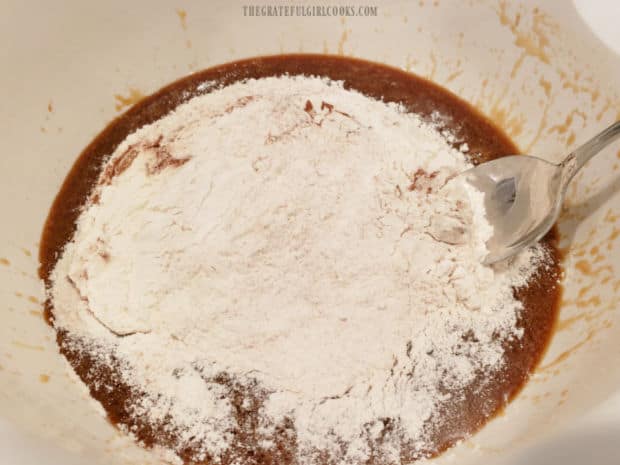
    In a separate bowl, stir together all purpose flour, cinnamon, baking soda and salt until combined.

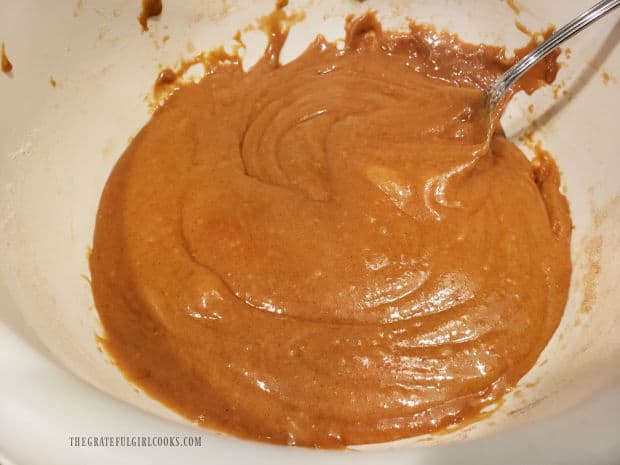
    Add these “dry ingredients” to the bowl of “wet ingredients”, and stir until the ingredients are combined.

    Flour, cinnamon, baking soda and salt are measured into a large bowl.Flour mixture is stirred into the wet batter mixture until combined.

    Final Step Before Baking

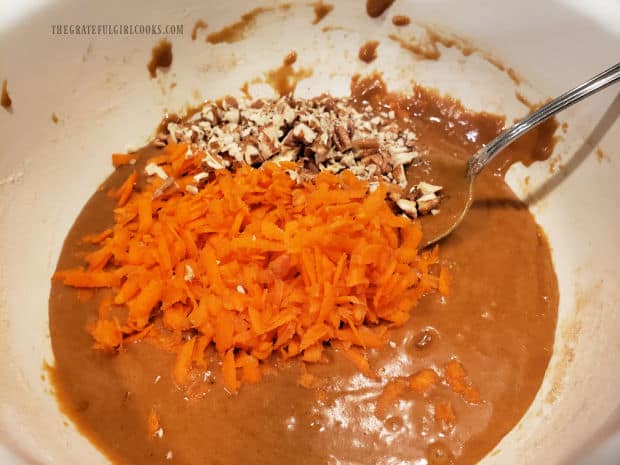
    The batter for the carrot cinnamon nut bread is almost ready! The final step is to add grated and peeled carrots and chopped walnuts (or pecans) to the batter.

    Stir the carrots and nuts into the batter only until just combined. Don’t overmix the batter or the bread can become dense.

    A white bowl, full of combined batter for the carrot cinnamon nut bread.Grated carrots and chopped nuts are added to the bread batter in the bowl.

    Time To Bake The Bread

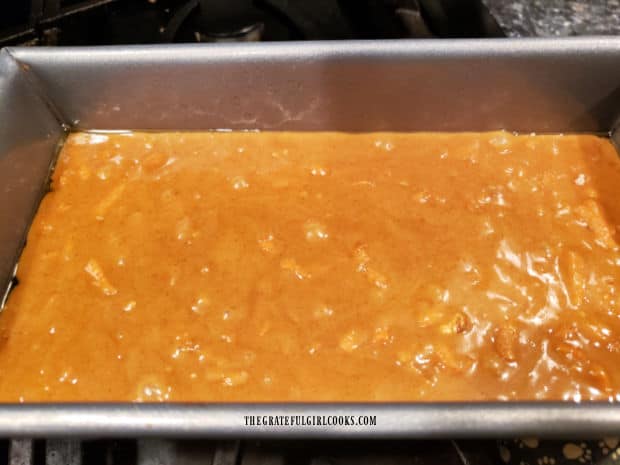
    Generously spray or grease the bottom and sides of a 9″ x 5″ loaf pan. Pour the batter into the prepared pan, spreading the batter evenly to distribute.

    Bake the carrot cinnamon nut bread at 375°F. for 50-60 minutes, or until a toothpick inserted into the top/middle of the loaf comes out clean.

    TIP: Oven temps can vary quite a bit, so I suggest checking for doneness at the 50 minute mark. If not completely done at that point, check again every couple of minutes until fully cooked.

    The batter for the bread in a 9" x 5" baking loaf pan.

    Once done, remove the pan from the oven and let cool on a wire rack. After about 15 minutes, run a butter knife around the inside edges of the pan, to loosen the bread.

    Invert the pan upside down to remove the loaf, then allow the loaf of carrot cinnamon nut bread to cool on a wire rack.

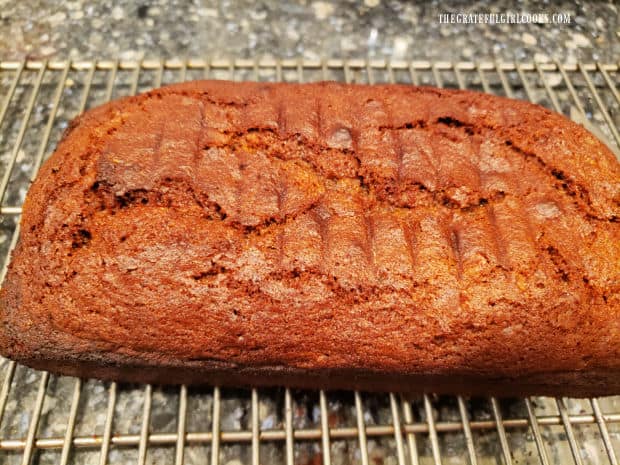
    One loaf of carrot cinnamon nut bread, cooling on a wire rack after baking.

    Slice And Serve The Carrot Cinnamon Nut Bread

    When the bread cools enough to suit your taste (we like it slightly warm), slice the carrot cinnamon nut bread and serve.

    With a loaf this size, we usually get 10 slices. If desired, spread each slice with some softened butter… and dig in!

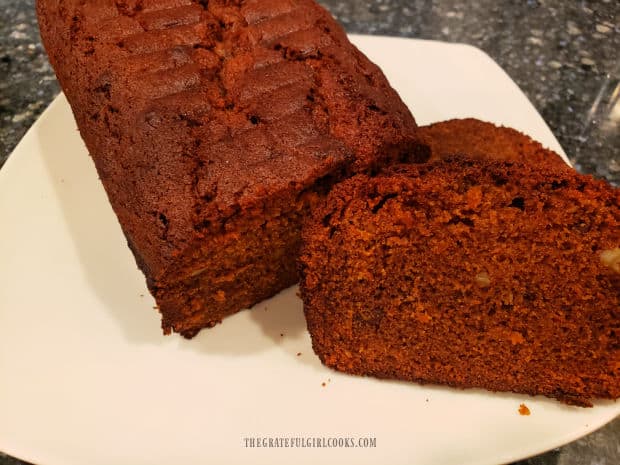
    This bread has a deep brown color, and you can see the flecks of carrot and nuts all through each slice. It’s really delicious!

    Carrot cinnamon nut bread loaf and one slice, on a white plate.

    I hope you have the opportunity to make this yummy bread, and trust you will enjoy it as much as we do! The loaf also freezes well, if wrapped tightly in plastic wrap and aluminum foil.

    Thanks for stopping by, and I invite you to come back again soon for more family friendly recipes. Take care, may God bless you, and have a GREAT day!

    Looking For More “Sweet” BREAD RECIPES?

    You can find ALL of my recipes in the Recipe Index, which is located at the top of the page. I have lots of “sweet” bread recipes to choose from, including:

    Want More Recipes? Get My FREE Newsletter!

    I publish a newsletter 2 times per month (1st and 15th) with lots of recipes, tips, etc..
    Would you like to join our growing list of subscribers?

    There is a Newsletter subscription box on the top right (or bottom) of each blog post, depending on the device you use.
    You can submit your e-mail address there, to be added to my mailing list.

    Find Me On Social Media:

    Facebook page: The Grateful Girl Cooks!
    Pinterest:
    The Grateful Girl Cooks!
    Instagram:
    jbatthegratefulgirlcooks

    Author's signature

    Original recipe source: submitted by Fern Bain in “Cooking With Love”, page 23, published by Monte Vista Chapel Ladies Fellowship, 1988

    ↓↓ PRINTABLE RECIPE BELOW ↓↓

    0 from 0 votes
    Carrot Cinnamon Nut Bread
    Prep Time
    10 mins
    Cook Time
    50 mins
    Total Time
    1 hr
     

    Carrot Cinnamon Nut Bread is an "easy to make" delicious bread, flavored with cinnamon and molasses, and filled with grated carrots and nuts.

    Category: Bread/Breakfast, Snack
    Cuisine: American
    Keyword: carrot cinnamon nut bread
    Servings: 10 slices
    Calories Per Serving: 337 kcal
    Author: JB @ The Grateful Girl Cooks!
    Ingredients
    • ¾ cup granulated sugar
    • ¼ cup molasses
    • cup vegetable oil
    • 2 large eggs
    • cups all purpose flour unsifted
    • 1 teaspoon ground cinnamon
    • 1 teaspoon baking soda
    • ½ teaspoon salt
    • 1 cup grated, peeled raw carrots
    • ½ cup chopped walnuts (or pecans)
    Instructions
    1. Preheat oven to 375℉. Generously grease (or spray) bottom and sides of a 9" x 5" loaf pan.

    2. Mix sugar, molasses, oil and eggs together in a large mixing bowl, using a wire whisk. Set aside.

    3. In separate bowl, stir flour, cinnamon, baking soda and salt until combined. Add this to the bowl of molasses mixture; stir until combined.

    4. Add carrots and chopped nuts to the batter. Stir just until combined. Don't overmix batter or bread can become dense.

    5. Spread batter evenly in greased loaf pan. Bake at 375°F. for 50-60 minutes (check it at 50 minutes), or until a toothpick inserted into the top/middle of the loaf comes out clean.

    6. Remove pan from oven; cool on wire rack for about 15 minutes. Run a butter knife around inside edges of pan, to loosen bread. Invert pan to remove loaf; cool loaf on wire rack. Slice, serve, and enjoy!

    Nutrition Facts
    Carrot Cinnamon Nut Bread
    Amount Per Serving (1 slice (1/10 of total))
    Calories 337 Calories from Fat 180
    % Daily Value*
    Fat 20g31%
    Saturated Fat 3g19%
    Trans Fat 0.1g
    Polyunsaturated Fat 11g
    Monounsaturated Fat 4g
    Cholesterol 37mg12%
    Sodium 253mg11%
    Potassium 225mg6%
    Carbohydrates 38g13%
    Fiber 1g4%
    Sugar 22g24%
    Protein 4g8%
    Vitamin A 2194IU44%
    Vitamin C 1mg1%
    Calcium 38mg4%
    Iron 2mg11%
    * Percent Daily Values are based on a 2000 calorie diet.

    Here’s one more to pin on your Pinterest boards!Carrot Cinnamon Nut Bread is an "easy to make" delicious bread, flavored with cinnamon and molasses, and filled with grated carrots and nuts.

    Pork Chops In Sour Cream Sauce

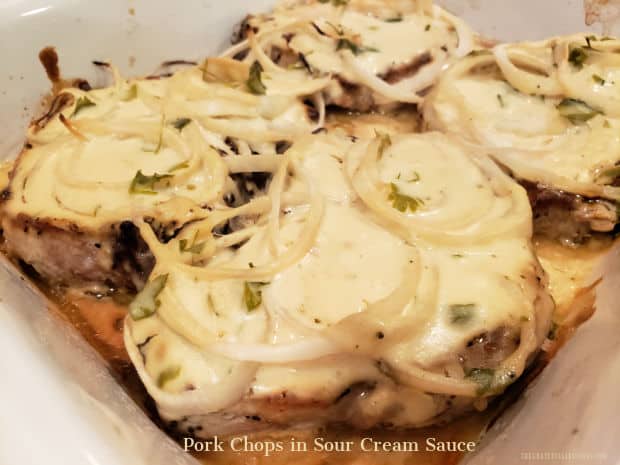
    Pork Chops in Sour Cream Sauce is a delicious dish featuring browned, “bone-in” pork chops and onions baked in a sour cream wine sauce.
    Pork Chops in Sour Cream Sauce is a delicious dish featuring browned, "bone-in" pork chops and onions baked in a sour cream wine sauce.

    Today I want to share a recipe I discovered many, many years ago in one of my old cookbooks. The recipe was first published almost 30 years ago, but good recipes are timeless… right?

    Making this dish is fairly simple. Basically, you will pan-sear pork chops until browned, cover with onion rings and an easy to make sour cream wine sauce, then bake until done.

    The pork chops come out tender and juicy, and have great flavor from the onions and sauce they are baked in. I think you will enjoy this recipe. Here’s how to make it.

    Scroll Down For A Printable Recipe Card At The Bottom Of The Page

    Season The Pork Chops

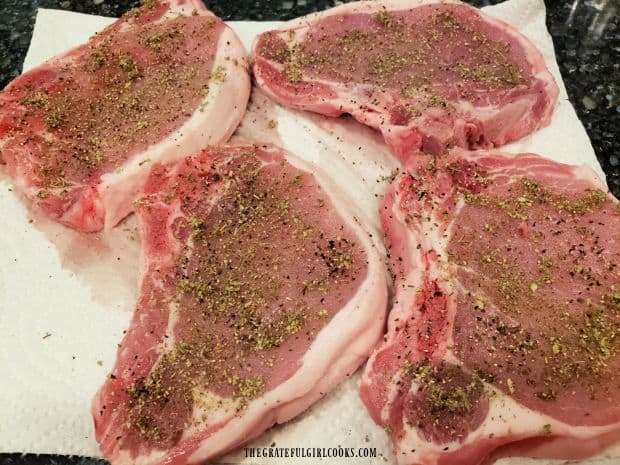
    Dry the pork chops on both sides with paper towels to remove extra moisture. This will allow the pork chops to brown better when they are pan-seared.

    Season the pork chops on both sides with salt, pepper, and dried sage. Press the seasonings into the meat to help them adhere.

    Pork chops are blotted dry, then lightly seasoned with salt, pepper and sage.

    Pan-Sear The Seasoned Pork Chops

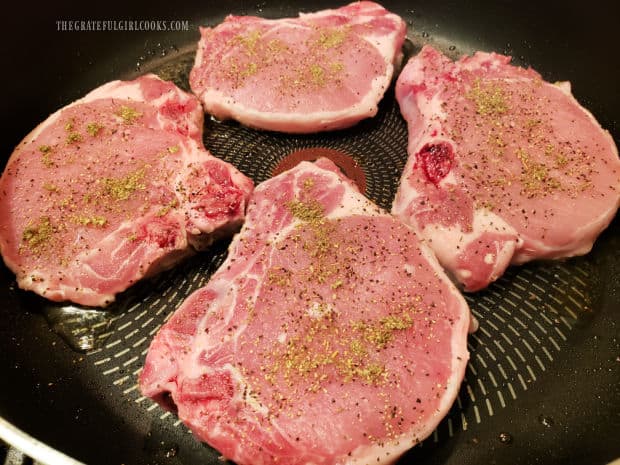
    Heat a Tablespoon of vegetable oil on Medium heat in a large non-stick skillet, until very hot, but not smoking.

    Place the pork chops in a single layer in the hot oil. You should hear them sizzle when they hit the hot oil in the skillet.

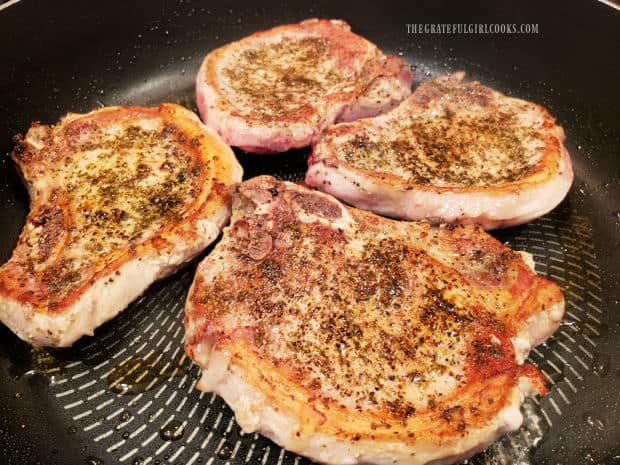
    Brown the chops, without moving them in the skillet, for 5 minutes. Turn the pork chops over, and cook the other side for 5 minutes.

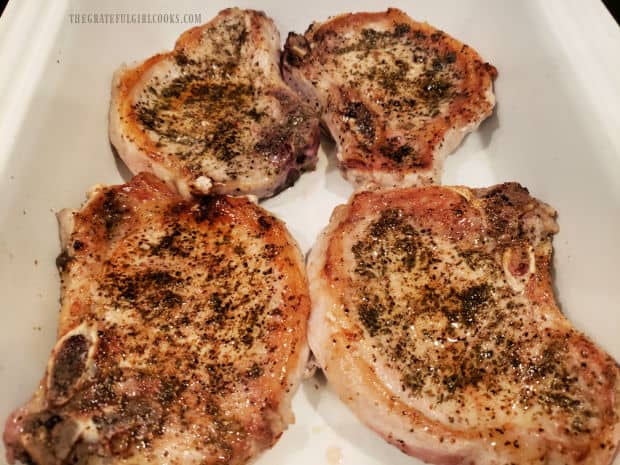
    The pork chops should be nicely browned on both sides. They will finish cooking when they are baked later.

    Four pork chops are pan-seared in hot oil in a large skillet.Both sides of the pork chops are pan-seared until browned.

    Transfer the pork chops into a greased (or sprayed) 9″ x 9″ baking dish, keeping them in a single layer in the dish.

    NOTE: Do not clean the skillet. You’ll use the drippings from cooking the chops later, when you make the sour cream sauce.

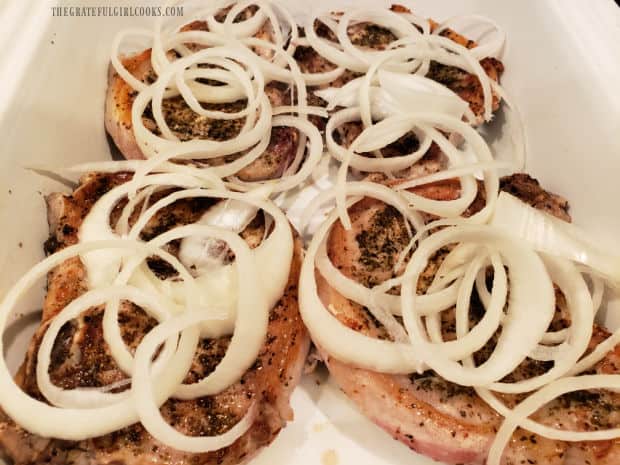
    Spread thinly sliced onion rings on top of the pork chops, evenly distributing them. Set the dish aside.

    The pan-seared pork chops are placed in a baking dish in single layer.Thin onion ring slices are placed on top of the pork chops.

    Make The Sour Cream Sauce

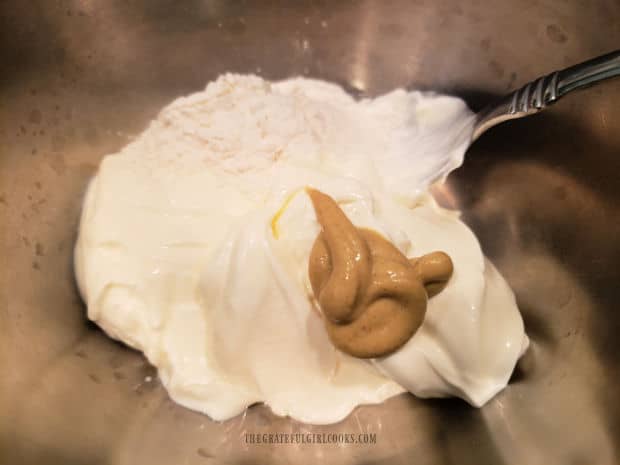
    Now it’s time o make the EASY sour cream sauce. Stir sour cream, Dijon mustard and flour in a small bowl until fully combined. Set aside.

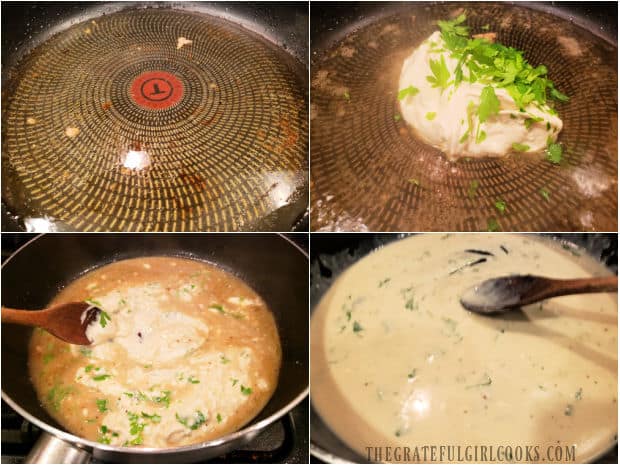
    Add chicken broth and dry white wine to the skillet you cooked the pork chops in. Bring the liquid to a boil, and let it boil for 1 minute.

    Add the sour cream mixture and fresh, chopped parsley to the skillet. Stir well, to fully combine these ingredients.

    Sour cream, flour and Dijon mustard are combined in a small bowl.A 4 photo collage showing how to make the sour cream sauce in a skillet.

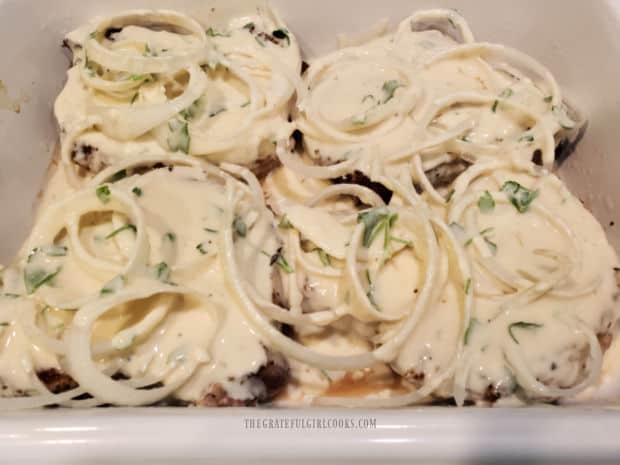
    Remove the skillet from the heat, and pour the sour cream sauce over the pork chops and onion rings, making sure the chops are covered.

    Sour cream sauce is poured over the onion topped pork chops in dish.

    Bake The Pork Chops In Sour Cream Sauce 

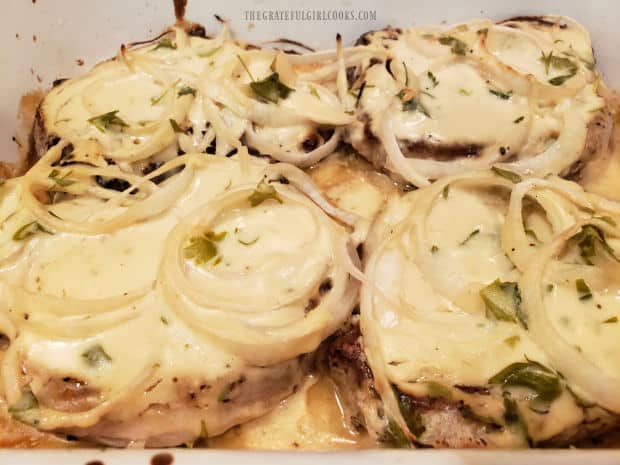
    Place the pork chops (uncovered) in a preheated 350°F. oven. Bake them for 35 minutes, until the onions have slightly browned, and the sauce is bubbly.

    Pork Chops in Sour Cream Sauce are bubbly and browned, after baking.

    Serve The Pork Chops in Sour Cream Sauce

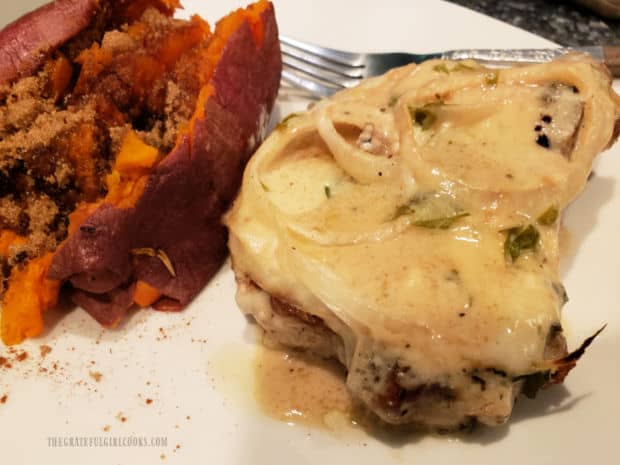
    When finished baking, the pork chops are ready to be served. Transfer the pork chops to individual serving plates.

    Spoon any remaining sour cream sauce left in the baking dish on top of the pork chops. Serve immediately with a favorite side dish, and enjoy!

    One of the pork chops in sour cream sauce, on plate with a baked sweet potato.

    I hope you enjoy making (and eating) these yummy pork chops.  I appreciate you taking the time to check out this recipe, and trust you’ll enjoy this recipe.

    Thank you for stopping by today. Please come back again soon for more family friendly recipes. Take care, may God bless you, and have a GREAT day!

    Looking For More PORK CHOP Recipes?

    You can find ALL of my recipes in the Recipe Index, which is located at the top of the page. I have some absolutely delicious pork chop recipes you might enjoy, including:

    Want More Recipes? Get My FREE Newsletter!

    I publish a newsletter 2 times per month (1st and 15th) with lots of recipes, tips, etc..
    Would you like to join our growing list of subscribers?

    There is a Newsletter subscription box on the top right (or bottom) of each blog post, depending on the device you use.
    You can submit your e-mail address there, to be added to my mailing list.

    Find Me On Social Media:

    Facebook page: The Grateful Girl Cooks!
    Pinterest:
    The Grateful Girl Cooks!
    Instagram:
    jbatthegratefulgirlcooks

    Author's signature

    Original recipe source: “What’s For Dinner?”, by Maryana Vollstedt, page 155, published by Chronicle Books in 1997

    ↓↓ PRINTABLE RECIPE BELOW ↓↓

    0 from 0 votes
    Pork Chops in Sour Cream Sauce
    Prep Time
    15 mins
    Cook Time
    35 mins
    Total Time
    50 mins
     

    Pork Chops in Sour Cream Sauce is a delicious dish featuring browned, "bone-in" pork chops and onions baked in a sour cream wine sauce.

    Category: Main Course
    Cuisine: All Cuisines
    Keyword: pork chops in sour cream sauce
    Servings: 4
    Calories Per Serving: 387 kcal
    Author: JB @ The Grateful Girl Cooks!
    Ingredients
    • 4 large bone-in pork chops
    • 2 teaspoons dried sage
    • 1 teaspoon salt
    • 1 teaspoon pepper
    • 1 Tablespoon vegetable oil
    • ½ medium yellow onion sliced very thin, separated into rings
    For Sour Cream Sauce:
    • ½ cup light sour cream
    • 1 Tablespoon all purpose flour
    • 1 teaspoon Dijon mustard
    • ½ cup chicken broth
    • ¼ cup dry white wine
    • ¼ cup chopped parsley
    Instructions
    1. Preheat oven to 350℉. Grease or spray a 9" x 9" baking dish.

    2. Pat pork chops dry (both sides) with paper towels. Season both sides with salt, pepper, and sage. Press spices into the meat to adhere.

    3. Heat oil on Medium heat in large, non-stick skillet, until hot, but not smoking. Place pork chops in skillet in a single layer. Brown chops (without moving them) for 5 minutes. Turn pork chops over; cook other side for 5 minutes.

    4. Transfer chops to a greased/sprayed 9" x 9" baking dish in a single layer. NOTE: Do not clean skillet. You'll use drippings from chops later. Spread onion rings on top of pork chops, evenly distributing. Set dish aside.

    5. Make Sour Cream Sauce- In small bowl, stir to combine sour cream, Dijon, and flour. Set aside. Add chicken broth and white wine to the skillet you cooked the pork chops in. Bring to a boil; let boil for 1 minute. Add sour cream mixture and parsley. Stir well, to fully combine ingredients. Remove skillet from heat,

    6. Pour sour cream sauce over pork chops/onion rings. Bake pork chops (uncovered) for 35 minutes, until sauce is bubbly. Serve, and enjoy.

    Nutrition Facts
    Pork Chops in Sour Cream Sauce
    Amount Per Serving (1 pork chop)
    Calories 387 Calories from Fat 198
    % Daily Value*
    Fat 22g34%
    Saturated Fat 8g50%
    Trans Fat 0.2g
    Polyunsaturated Fat 4g
    Monounsaturated Fat 8g
    Cholesterol 128mg43%
    Sodium 825mg36%
    Potassium 710mg20%
    Carbohydrates 6g2%
    Fiber 1g4%
    Sugar 1g1%
    Protein 37g74%
    Vitamin A 428IU9%
    Vitamin C 6mg7%
    Calcium 88mg9%
    Iron 2mg11%
    * Percent Daily Values are based on a 2000 calorie diet.

    Here’s one more to pin on your Pinterest boards!

    Pork Chops in Sour Cream Sauce is a delicious dish featuring browned, "bone-in" pork chops and onions baked in a sour cream wine sauce.

    Baby Eggplant Mozzarella Bites

    Baby Eggplant Mozzarella Bites are an easy veggie dish for two! Eggplant slices are covered with Italian sauce and mozzarella, then baked.
    Baby Eggplant Mozzarella Bites are an easy veggie dish for two! Eggplant slices are covered with Italian sauce and mozzarella, then baked.

    How I Got This Eggplant Recipe

    One of our neighbors, Mary, who also has a small raised bed garden invited me over to pick some of her blueberries. While there I asked her about a pretty flowering plant she had (thinking it was a flower!).

    She explained to me that it was a plant called a patio baby eggplant. What? I had never even heard of a miniature eggplant  (also called Baby or Italian eggplant). I’ve never seen them in the grocery store, either!

    She showed me the tiny 3″ long veggies growing under the leaves, then cut off three of them for me to take home. Mary also told me a good way to bake them (similar to eggplant parmesan, but quicker and less steps).

    When I got home, I made this side dish to go with our dinner, while her “recipe” was fresh in my brain. This is the result, and my husband and I LOVED them! Here’s how to make baby eggplant mozzarella bites.

    Scroll Down For A Printable Recipe Card At The Bottom Of The Page

    Patio Baby Italian Eggplant?

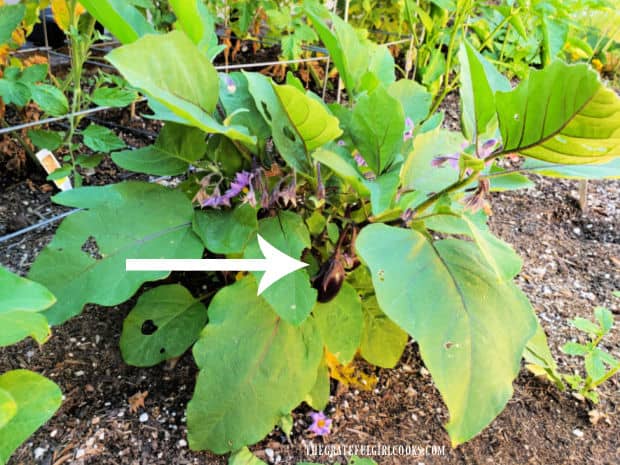
    Baby eggplants grow easily on beautiful, flowering plants. The plants produce pretty purple flowers, and very small “miniature” eggplants.

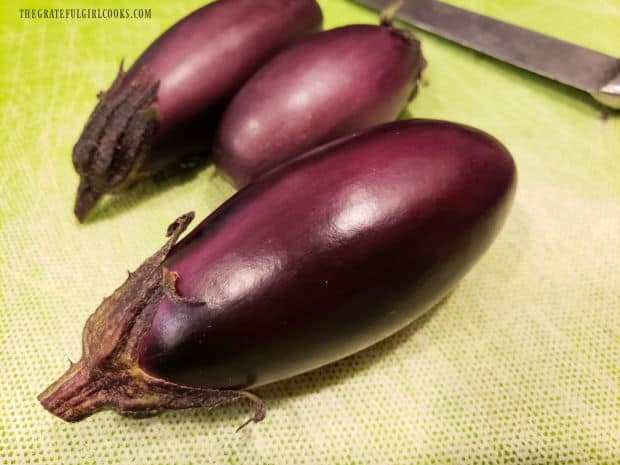
    Baby eggplants are also commonly referred to as “Italian” eggplant. These little eggplants are typically harvested when they’ve grown to 2 to 3 inches long.

    Their shiny purple skin is a tip-off that they are ripe, as well. The outside beautiful purple skin tends to get dull in color as they become overly mature (past their prime).

    These little bitty eggplants are perfect for slicing and roasting, because their outside peel and flesh is quite tender. They can be cooked fairly quickly, due to their small size.

    Baby eggplant bushes produce purple flowers and small miniature eggplants.Three baby purple colored Italian eggplants are used to make this dish.

    Prepare The Eggplant

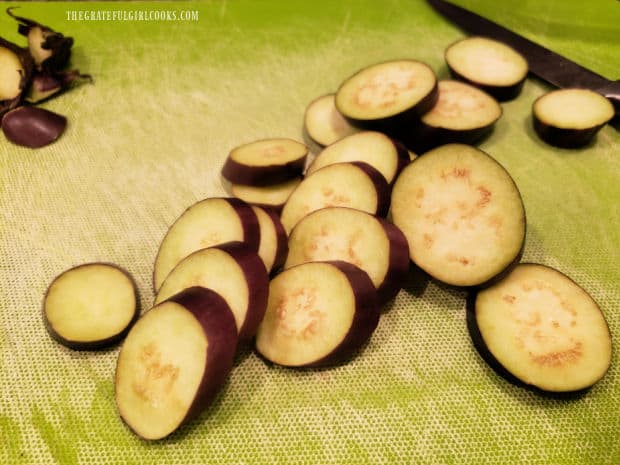
    Rinse and dry each eggplant, then cut off the stem end. Cut the mini eggplants into circular slices, approximately 1/4″ to 1/3″ wide.

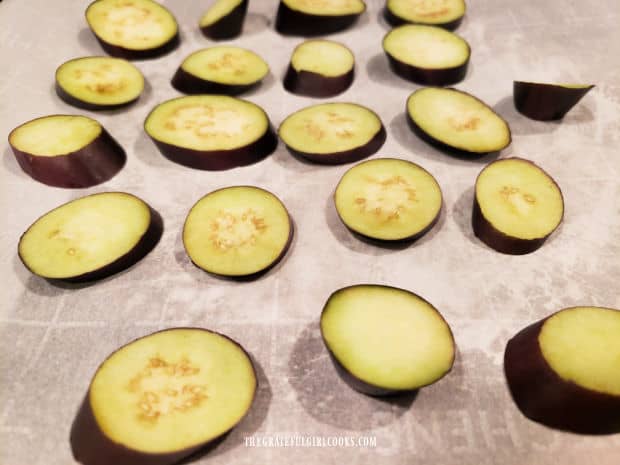
    Lay the slices on a parchment paper-lined baking sheet in a single layer, fairly close together.

    Stems are removed and thin circular slices are cut from the 3 baby eggplants.Baby eggplant slices are placed on a parchment paper-lined baking sheet.

    Time For Some Sauce!

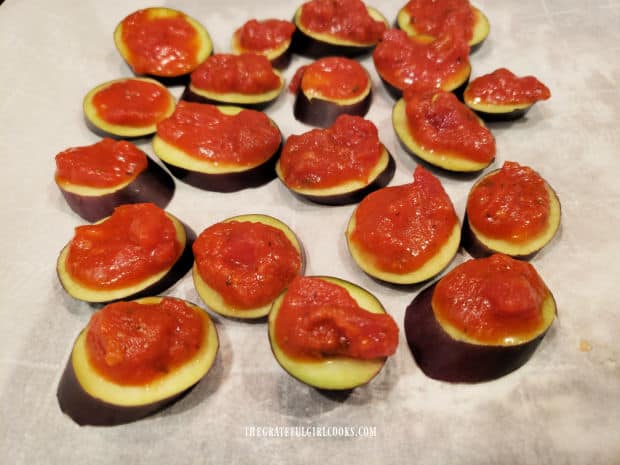
    Spoon a little bit of marinara sauce on top of each eggplant slice, using only enough sauce to almost cover each piece.

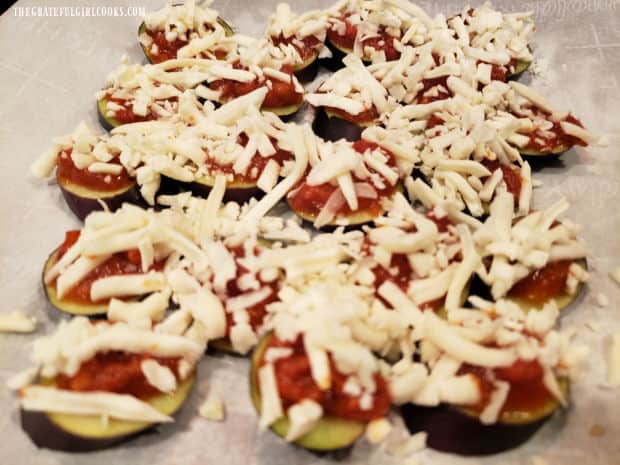
    Sprinkle each slice with shredded mozzarella cheese, enough to cover the sauce.  Carefully push the slices even closer together before adding shredded mozzarella cheese.

    A tiny spoonful of marinara sauce is spooned on top of each eggplant slice.Shredded mozzarella cheese is sprinkled on top of the marinara sauce.

    Bake The Baby Eggplant Mozzarella Bites

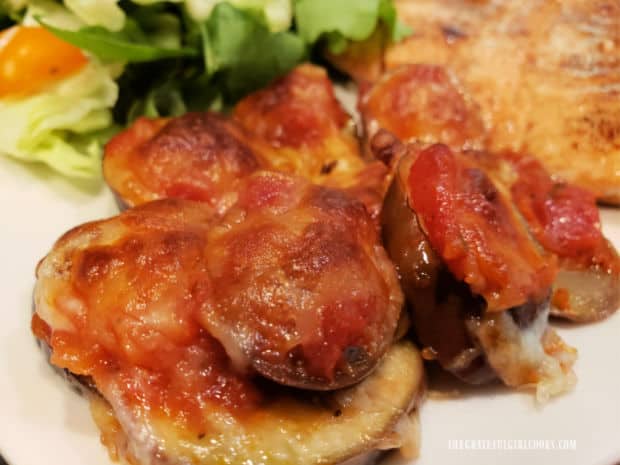
    Bake the baby eggplant mozzarella bites in a preheated 425°F. oven for 10-11 minutes, or until tender. Check for tenderness by inserting a butter knife into a slice. It should go into the eggplant slice very easily.

    The cheese should be fully melted and lightly browned, as well. Grab a spatula to remove the baby eggplant mozzarella bites from the baking sheet.

    After baking, the baby eggplant mozzarella bites are ready to serve!

    Serve And Enjoy!
    Transfer the baby eggplant mozzarella bites (using a spatula) from the lined baking sheet to individual plates.

    Divide the eggplant slices evenly, to ensure two servings. Serve hot with a favorite main dish, and enjoy (we had salmon and a green salad on the side!

    The eggplant bites are very tender, and flavored well with the Italian marinara sauce and melted cheese! YUM. They are so good!

    Some baby eggplant mozzarella bites on a white plate with salad behind them.

    I hope you have the chance to try this recipe for baby eggplant mozzarella bites, and trust you’ll enjoy it as much as we do. This recipe (which serves 2) can easily be doubled or tripled for larger families.

    If you love traditional Eggplant Parmesan, you can check out my recipe post for that classic version right HERE.

    I’m sure I’ll be planting seeds to grow patio-sized baby eggplants next year in our own backyard raised bed garden, and look forward to enjoying this dish many times in the future.

    Thanks for stopping by. I invite you to come back soon for more family-friendly recipes. Take care, may God bless you, and have a GREAT day!

    Looking For More VEGGIE SIDE DISH Recipes?

    You can find ALL of my recipes in the Recipe Index, which is located at the top of the page. I have a terrific variety of veggie side dish recipes to choose from, including:

    Want More Recipes? Get My FREE Newsletter!

    I publish a newsletter 2 times per month (1st and 15th) with lots of recipes, tips, etc..
    Would you like to join our growing list of subscribers?

    There is a Newsletter subscription box on the top right (or bottom) of each blog post, depending on the device you use.
    You can submit your e-mail address there, to be added to my mailing list.

    Find Me On Social Media:

    Facebook page: The Grateful Girl Cooks!
    Pinterest:
    The Grateful Girl Cooks!
    Instagram:
    jbatthegratefulgirlcooks

    Author's signature

    Recipe source: My neighbor, Mary P. 

    ↓↓ PRINTABLE RECIPE BELOW ↓↓

    0 from 0 votes
    Baby Eggplant Mozzarella Bites
    Prep Time
    5 mins
    Cook Time
    11 mins
    Total Time
    16 mins
     

    Baby Eggplant Mozzarella Bites are an easy veggie dish for two! Eggplant slices are covered with Italian sauce and mozzarella, then baked.

    Category: Side Dish, Vegetable Dish
    Cuisine: All Cuisines
    Keyword: baby eggplant mozzarella bites
    Servings: 2
    Calories Per Serving: 151 kcal
    Author: JB @ The Grateful Girl Cooks!
    Ingredients
    • 3 baby Italian eggplants each about 2"-3" inch long
    • cup marinara sauce approximate
    • cup shredded mozzarella cheese or more, as desired
    Instructions
    1. Preheat oven to 425℉. Line a baking sheet with parchment paper.

    2. Rinse/dry eggplants. Cut stem end off each eggplant. Cut into circular slices between 1/4" and 1/3" wide.

    3. Lay eggplant slices on prepared baking sheet in a single layer, close together. Spoon marinara sauce on each slice, using only enough to almost cover each one. Sprinkle each slice with shredded mozzarella cheese, enough to cover sauce.

    4. Bake at 425°F. for 10-11 minutes, or until tender. Check tenderness by inserting a knife into a slice. Cheese should be melted/lightly browned, as well.

    5. Use spatula to transfer eggplant bites to plates. Serve hot, and enjoy!
    Nutrition Facts
    Baby Eggplant Mozzarella Bites
    Amount Per Serving (1 (1/2 of total))
    Calories 151 Calories from Fat 45
    % Daily Value*
    Fat 5g8%
    Saturated Fat 3g19%
    Polyunsaturated Fat 0.5g
    Monounsaturated Fat 1g
    Cholesterol 15mg5%
    Sodium 317mg14%
    Potassium 912mg26%
    Carbohydrates 23g8%
    Fiber 11g46%
    Sugar 14g16%
    Protein 8g16%
    Vitamin A 381IU8%
    Vitamin C 10mg12%
    Calcium 130mg13%
    Iron 1mg6%
    * Percent Daily Values are based on a 2000 calorie diet.

    Here’s one more to pin on your Pinterest boards!

    Baby Eggplant Mozzarella Bites are an easy veggie dish for two! Eggplant slices are covered with Italian sauce and mozzarella, then baked.