Hoisin Vinaigrette For Salads

Make Hoisin Vinaigrette For Salads in 5 minutes! Recipe yields enough vinaigrette for 4 side salads or 2 entrée salads, and it’s delicious!
Make Hoisin Vinaigrette For Salads in 5 minutes! Recipe yields enough vinaigrette for 4 side salads or 2 entrée salads, and it's delicious!

Today I want to share a simple, quick recipe for a delicious and unique salad dressing I’ve made for several years.

Hoisin Vinaigrette For Salads is incredibly EASY to make, with 8 ingredients and a blender or food processor. It is a flavor-filled Asian inspired vinaigrette that bumps mixed green salads up a notch, in my opinion.

Did I mention how ridiculously easy it is to make in 5 minutes or less? Oh… I did? Okay! Here’s how to make it.

Scroll Down For A Printable Recipe Card At The Bottom Of The Page

What Ingredients Will I Need?

There are 8 ingredients used to make this hoisin vinaigrette for salads. All of them can usually be found in local grocery stores.

You will need soy sauce, sesame oil, garlic, Dijon mustard, oil, white wine vinegar and hoisin sauce for the vinaigrette. Sesame oil and hoisin sauce are typically found in the Asian food section of most grocery stores. 

Ingredients used to make hoisin vinaigrette for salads.

Hoisin Sauce Is The “Star” Of This Vinaigrette

Hoisin sauce is really the “star” of this vinaigrette. It is a dark-colored, flavorful, slightly sweet and tangy thick sauce, commonly used in Asian recipes. 

A jar of commercially prepared hoisin sauce, used in this recipe.

Did You Know You Can Make Homemade Hoisin Sauce?

If you don’t have access to a jar of commercially prepared hoisin sauce, you can make a homemade version that has a fairly similar flavor. Granted, it’s a “version” of the original but it will work perfectly fine for this vinaigrette recipe.

Authentic hoisin sauce uses fermented soybean paste as one of its main ingredients. I don’t know about you, but I don’t normally keep that ingredient in my pantry!

Many Asian recipes call for hoisin sauce in their ingredient list. If I don’t have a jar of hoisin sauce when I need it, I make my own, using this recipe (found on my blog).

If you don’t have authentic hoisin sauce, this works well in recipes as a good stand-in for the original. The ingredients for the homemade version of hoisin sauce are shown below.

Ingredients used to make a homemade version of hoisin sauce.Close up photo of homemade version of hoisin sauce on a spoon.

Prepare The Vinaigrette 

Making the hoisin vinaigrette for salads is super easy! Place all the ingredients into a blender or food processor.

Process (or blend) all of the ingredients until completely mixed into a smooth and creamy vinaigrette. Transfer the salad dressing into a small container.

Cover and refrigerate the vinaigrette until you’re ready to serve it on a favorite mixed green salad. It tastes best when its had a little time to chill, so all the flavors can “mingle” and get to know each other!

After blending, the hoisin vinaigrette for salads is smooth and creamy.

Time To Enjoy The Hoisin Vinaigrette For Salads

There should be enough of the hoisin vinaigrette to dress four small side salads. If you’re using it on a large, main dish salad, you should have enough of the dressing for two salads.

The photo below shows the vinaigrette on a main dish salad I make called Mixed Salad with Hoisin Vinaigrette and Crisp Panko Chicken.

This flavorful vinaigrette is a wonderful addition to many types of mixed green salad, and I think you’ll enjoy it. Be sure to store any leftover vinaigrette in the refrigerator (covered), for up to 4-5 days.

Hoisin vinaigrette for salads, on mixed greens with chicken, in white bowl.

Thank you for taking time out of your busy day to visit my website. I trust you enjoy this easy to prepare salad dressing as much as we do. This recipe can easily be doubled or tripled, to suit your needs.

Please come back soon for more family-friendly recipes. Take care, may God bless you, and have a GREAT day!

Looking For More SALAD DRESSING Recipes?

You can find ALL of my recipes in the Recipe Index, which is located at the top of the page. I have a nice variety of homemade salad dressings for you to check out, including:

Want More Recipes? Get My FREE Newsletter!

I publish a newsletter 2 times per month (1st and 15th) with lots of recipes, tips, etc..
Would you like to join our growing list of subscribers?

There is a Newsletter subscription box on the top right (or bottom) of each blog post, depending on the device you use.
You can submit your e-mail address there, to be added to my mailing list.

Find Me On Social Media:

Facebook page: The Grateful Girl Cooks!
Pinterest:
The Grateful Girl Cooks!
Instagram:
jbatthegratefulgirlcooks

Author's signature

Original recipe source: “Cooking Light- Annual Recipes 2007”, page 103, published by Oxmoor House, Inc.

↓↓ PRINTABLE RECIPE BELOW ↓↓

0 from 0 votes
Hoisin Vinaigrette For Salads
Prep Time
5 mins
Cook Time
0 mins
Total Time
5 mins
 

Make Hoisin Vinaigrette For Salads in 5 minutes! Recipe yields enough vinaigrette for 4 side salads or 2 entrée salads, and it's delicious!

Category: Condiment, Salad Dressing
Cuisine: All Cuisines
Keyword: hoisin vinaigrette
Servings: 4 side salads
Calories Per Serving: 49 kcal
Author: JB @ The Grateful Girl Cooks!
Ingredients
  • 2 Tablespoons white wine vinegar
  • Tablespoons hoisin sauce
  • 1 Tablespoon Dijon mustard
  • 1 Tablespoon fresh ginger peeled and finely grated
  • 2 teaspoons vegetable oil
  • teaspoons soy sauce or low-sodium, if available
  • 1 teaspoon toasted sesame oil
  • ½ teaspoon minced garlic or 1 large clove
Instructions
  1. Place all ingredients into a blender or food processor.

  2. Process until completely mixed into a smooth, creamy vinaigrette. Transfer salad dressing into a small container.

  3. Cover and refrigerate vinaigrette until ready to serve on a mixed green salad. TIP: It tastes best when its had time to chill, so the flavors can "mingle" and get to know each other!

  4. Recipe is easily doubled or tripled. Store any leftover vinaigrette (covered) in refrigerator.

Recipe Notes

Note: The caloric calculation was made using the amount needed for 4 small side salads. If using on a main dish salad (2 servings), the caloric count will be higher.

Nutrition Facts
Hoisin Vinaigrette For Salads
Amount Per Serving (1 (1/4 of total))
Calories 49 Calories from Fat 36
% Daily Value*
Fat 4g6%
Saturated Fat 1g6%
Trans Fat 0.01g
Polyunsaturated Fat 2g
Monounsaturated Fat 1g
Cholesterol 0.2mg0%
Sodium 207mg9%
Potassium 31mg1%
Carbohydrates 3g1%
Fiber 0.4g2%
Sugar 2g2%
Protein 1g2%
Vitamin A 3IU0%
Vitamin C 0.3mg0%
Calcium 6mg1%
Iron 0.2mg1%
* Percent Daily Values are based on a 2000 calorie diet.

Here’s one more to pin on your Pinterest boards!Make a Hoisin Vinaigrette For Salads in 5 minutes! Recipe yields enough vinaigrette for 4 side salads or 2 entrée salads, and it's delicious!

Stuffed Dover Sole For Two

Stuffed Dover Sole For Two features rolled fillets filled with rice, cheese and broccoli, covered with a lemon butter sauce and baked. Yummy!

Do you enjoy Dover sole? We like the Dover sole fillets, because they are mild in flavor, inexpensive to buy, and are very adaptable to the many ways they can be prepared.

Today I want to share a simple, but delicious recipe for Stuffed Dover Sole For Two, and hope you enjoy it like we do. With a little bit of pre-planning, this can be a very quick meal to get on the table, and it tastes and looks great, too!

The recipe makes four rolled and stuffed pieces of Dover sole. We usually serve two fillets per person because once rolled, the fish fillets are small, but you could serve four people (1 fillet per person) if you want smaller servings. Here’s how to make this dish.

Scroll Down For A Printable Recipe Card At The Bottom Of The Page

Make The Simple Lemon Butter Sauce

Preheat your oven to 350°F. before beginning, because the prep for the fish only takes a few minutes. Grease or spray a medium baking dish on the bottom, and set aside. 

Now let’s make the sauce. In a small bowl, stir lemon juice, melted butter, salt and black pepper together until fully combined. Set the bowl aside while you prepare the stuffing for the fish.

You will use part of this sauce in the filling and then use the remaining sauce to drizzle on the fish roll-ups before they are baked.

Lemon juice, melted butter, salt and pepper combine to make the sauce.

Combine The Stuffing Ingredients

Now you’re ready to make the filling for the fish fillets. This rice, cheese, and broccoli stuffing will be rolled up in each of the fish fillets before baking.

In a separate medium-sized bowl, combine cooked broccoli, cooked brown (or white) rice, grated cheese, salt, pepper, and ½ TABLESPOON of the lemon butter sauce. Stir gently until these ingredients have been combined.

TIP: If possible, pre-cook the broccoli and rice for the dish early in the day (or the night before). I like to do that, so when I’m ready to make our dinner, they’re already cooked, and this dish takes less prep time.

Cooked rice, broccoli, grated cheese and spices for stuffing, in a metal bowl.After mixing, the stuffing ingredients are ready to add to the fish.

Prepare The Dover Sole For Baking

Lay the fish fillets out on several thicknesses of paper towels, and blot the fish on both sides, to remove excess moisture.

Divide the rice/broccoli/cheese mixture evenly down the middle of each fillet, covering the entire length of the piece of fish. It typically averages out to approximately ½ cup of filling per piece of fish.

Dover sole fillets on paper towels, to absorb excess moisture.Broccoli, cheese and rice mixture is used to top the Dove sole filets.

Into The Baking Dish They Go

Carefully roll up each piece of fish starting with the short end, then place them into the prepared baking dish, with the seam side DOWN.

If any of the stuffing falls out while transferring the fish to the baking dish, just pick it up and put it back inside! Place the fish roll-ups side by side in the dish, because they will give support and hold together better while baking.

Evenly divide and pour (or brush) the remaining butter mixture over the top of the fish fillets. Now the Stuffed Dover Sole for Two is ready for the oven!

Fish fillets are rolled around the stuffing and placed in greased baking dish.Lemon butter sauce is drizzled over Stuffed Dover Sole For Two before baking.

Bake The Fish

Bake the fish at 350°F for 20-25 minutes (uncovered) OR until the fish flakes easily with a fork. Check the fish for “doneness” at 20 minutes.

Depending on the thickness of the fillets used, it may take 3-5 more minutes to finish cooking all the way through. The fish will be pale and opaque on the surface once fully cooked.

Remove the baking dish from the oven. Lightly sprinkle the top of each piece with paprika. The paprika adds extra color and flavor to the Dover sole, so don’t skip this final step.

Paprika is sprinkled over the Stuffed Dover Sole For Two, once baked.

Serve The Stuffed Dover Sole For Two

Use a spatula to transfer the Stuffed Dover Sole For Two onto serving plates. We serve two fillets per person for a filling meal (they’re fairly small once rolled and baked), but the serving size is your choice.

Serve with lemon slices on the side, so the juice can be squeezed over each piece, and then enjoy this simple, delicious dish.

Stuffed Dover Sole For Two has a simple, classic flavor I believe you’ll appreciate. The small amount of rice, cheese, broccoli, etc. in the filling adds additional color, texture, nutrients and flavor to the fish.

Lemon slices are used to garnish the Stuffed Dover Sole For Two on the plate.

I really hope you have the opportunity to try this recipe or Stuffed Dover Sole For Two. If you choose to pre-cook the rice and broccoli ahead of time, this is a really quick meal to pull together at the last minute!

Thank you for stopping by, and I invite you to come back again soon for more family-friendly recipes. Take care, may God bless you, and have a GREAT day!

Looking For More SEAFOOD Recipes?

You can find ALL of my recipes in the Recipe Index, which is located at the top of the page. I have a wonderful variety of seafood recipes to choose from, including:

Want More Recipes? Get My FREE Newsletter!

I publish a newsletter 2 times per month (1st and 15th) with lots of recipes, tips, etc..
Would you like to join our growing list of subscribers?

There is a Newsletter subscription box on the top right (or bottom) of each blog post, depending on the device you use.
You can submit your e-mail address there, to be added to my mailing list.

Find Me On Social Media:

Facebook page: The Grateful Girl Cooks!
Pinterest:
The Grateful Girl Cooks!
Instagram:
jbatthegratefulgirlcooks

Author's signature

Recipe adapted from: https://www.lovetoknow.com/food-drink/recipes/filet-sole-recipes

↓↓ PRINTABLE RECIPE BELOW ↓↓

0 from 0 votes
Stuffed Dover Sole For Two
Prep Time
10 mins
Cook Time
20 mins
Total Time
30 mins
 

Stuffed Dover Sole For Two features rolled fillets filled with rice, cheese and broccoli, covered with a lemon butter sauce and baked. Yummy!

Category: Main Course
Cuisine: American
Keyword: stuffed Dover sole
Servings: 2 (two fillets per serving)
Calories Per Serving: 396 kcal
Author: JB @ The Grateful Girl Cooks!
Ingredients
For Butter Sauce:
  • 1 Tablespoon butter, melted **DIVIDED USE**
  • ½ Tablespoon fresh lemon juice
  • ½ teaspoon salt
  • ¼ teaspoon ground black pepper
For Fish:
  • 16 ounces Dover sole fillets = four (4 oz. each) boneless, skinless fillets
  • 1 cup cooked broccoli florets chopped, cooked, drained
  • ½ cup cooked brown rice can substitute white rice
  • ½ cup grated cheddar cheese
  • paprika to lightly sprinkle on baked fish.
  • 2 thin slices lemon each cut in half, for garnish
Instructions
  1. Preheat oven to 350°F. Grease/spray a medium baking dish on the bottom; set aside. 

  2. In a small bowl, stir lemon juice, melted butter, salt and pepper until combined. Set bowl aside.

  3. In a separate medium-sized bowl, combine broccoli, rice, cheddar cheese, salt, pepper, and HALF (½)Tablespoon (only) of the lemon/butter sauce; stir until combined. TIP: If possible, pre-cook broccoli and rice early in the day (or the night before), for less prep time.

  4. Lay fish fillets out on paper towels; blot fish on both sides, to remove excess moisture. Divide rice/broccoli/cheese mixture evenly down the middle of each fillet, covering length of the fish. It should be about ½ cup filling per fillet.

  5. Carefully roll up each fillet starting with the short end. Place in prepared baking dish seam side DOWN. If any stuffing falls out while transferring the fillets, just pick it up and put it back inside! Place fish roll-ups side by side in dish, because they will support and hold together better while baking. Evenly divide and pour (or brush) remaining butter mixture over the top of the fish.

  6. Bake (uncovered) at 350°F for 20-25 minutes OR until fish flakes easily with a fork. Check it at 20 minutes, then cook more, if necessary (depending on thickness of the fish). The fish will still be pale/opaque once fully cooked. Remove from the oven. Lightly sprinkle the top of each piece with paprika.

  7. Use a spatula to transfer fish to serving plates. Serve immediately, with lemon slices on the side, and enjoy!

Nutrition Facts
Stuffed Dover Sole For Two
Amount Per Serving (2 fillets)
Calories 396 Calories from Fat 180
% Daily Value*
Fat 20g31%
Saturated Fat 10g63%
Trans Fat 0.3g
Polyunsaturated Fat 2g
Monounsaturated Fat 5g
Cholesterol 145mg48%
Sodium 1010mg44%
Potassium 577mg16%
Carbohydrates 16g5%
Fiber 2g8%
Sugar 1g1%
Protein 37g74%
Vitamin A 818IU16%
Vitamin C 43mg52%
Calcium 277mg28%
Iron 1mg6%
* Percent Daily Values are based on a 2000 calorie diet.

Here’s one more to pin on your Pinterest boards!Stuffed Dover Sole For Two features rolled fillets filled with rice, cheese and broccoli, covered with a lemon butter sauce and baked. Yummy!

Traditional Greek Salad

Make a delicious, healthy Traditional Greek Salad to serve four people as a side dish. It’s very easy to make and serve in under 15 minutes.
Make a delicious, healthy Traditional Greek Salad to serve four people as a side dish. It's very easy to make and serve in under 15 minutes.

Do you enjoy Greek salads? We sure do. The different recipes for Greek salads I have made over the years usually include romaine lettuce as the base for the salad.

This traditional Greek salad has no lettuce in it at all, yet it actually is an authentic Greek salad. It it full of fresh crisp veggies, tangy kalamata olives and creamy feta cheese, which are all coated in a simple, classic Greek dressing.

The end result is an absolutely superb, fresh and healthy Greek salad that is a cinch to prepare and tastes amazing! Here’s how to make it.

Scroll Down For A Printable Recipe Card At The Bottom Of The Page

Prepare The Salad

Slice, peel and cut up fresh tomatoes, red onions, a large cucumber, red bell pepper. Add these ingredients, plus kalamata olives to a large salad bowl.

For this recipe I like to use a large English cucumber, but a large “regular” cucumber will also be okay, if that is what you have!

Cucumbers, red peppers, tomatoes, red onions and kalamata olives in salad bowl.

Crumble Feta Cheese On Top Of The Salad

Now it’s time to add the great flavor of feta cheese, a classic Greek ingredient in this salad. I typically will buy a flat “block” of feta at the grocery store, then cut it in half.

Crumble the cheese in fairly large pieces over the top of the veggies in the salad bowl, then set the bowl aside.

Half a block of feta cheese is used to top the traditional Greek salad.Feta cheese is crumbled into big pieces and added to the top of the salad.

Make The Salad Dressing

It’s super easy to make a basic salad dressing for the traditional Greek salad. Place extra virgin olive oil, red wine vinegar, lemon juice, ground oregano, salt and pepper in a small bowl.

Use a fork or small whisk to fully mix these ingredients together until they become emulsified. This means the oil and vinegar are fully combined and not separated (like oil and water).

Olive oil, red wine vinegar, lemon juice, oregano, salt & pepper in a small dish.The salad dressing for the traditional Greek salad is mixed using a fork.

Add Salad Dressing And Toss To Combine

Immediately pour the salad dressing over the top of the salad. Use tongs to gently toss the ingredients together. Toss the salad until the  dressing coats all the veggies, olives and feta cheese.

Simple salad dressing is poured over the top of the Greek salad.All the ingredients for the Greek salad are tossed together, using tongs.

Once the veggies, olives and feta are covered with the dressing, this yummy salad is ready to be served and enjoyed!

After combining the ingredients, the Greek salad is ready to be enjoyed.

Serve The Traditional Greek Salad

You can serve the salad as four side salads, OR if you want a meatless meal, divide the entire salad into two portions and go for it! I usually divide the salad into 4 portions.

NOTE: If you want to make the salad up ahead of time, you can cover the bowl with plastic wrap and refrigerate it for several hours. Do NOT add the salad dressing until you’re ready to serve the salad

We love to have this traditional Greek salad with grilled or pan-seared, lightly seasoned chicken. This salad has such big, bold flavors that simply seasoned chicken pairs very well with it, and is a good balance!

The veggies are crisp and crunchy, and the slightly salty creamy feta cheese knocks it out of the park. YUM!

Traditional Greek Salad, served with chicken on the side, on a white plate.The traditional Greek salad is covered with dressing, and is ready to EAT!

I really hope you enjoy the classic flavors of this Traditional Greek Salad as much as we do! Store any leftover salad in an airtight container in the refrigerator.

The recipe, as written, will yield enough for 4 side salads, but it can also be served as a meatless main dish for two, if desired.

Thanks for stopping by, and I invite you to come back again soon for more family-friendly recipes. Take care, and have a GREAT day!

Looking For More SALAD Recipes?

You can find ALL of my recipes in the Recipe Index, which is located at the top of the page. I have lots of delicious salad recipes, including:

Want More Recipes? Get My FREE Newsletter!

I publish a newsletter 2 times per month (1st and 15th) with lots of recipes, tips, etc..
Would you like to join our growing list of subscribers?

There is a Newsletter subscription box on the top right (or bottom) of each blog post, depending on the device you use.
You can submit your e-mail address there, to be added to my mailing list.

Find Me On Social Media:

Facebook page: The Grateful Girl Cooks!
Pinterest:
The Grateful Girl Cooks!
Instagram:
jbatthegratefulgirlcooks

Author's signature

Recipe adapted from: George Zikos, via https://www.mediterraneanliving.com/authentic-greek-salad-horiatiki-salata/  

↓↓ PRINTABLE RECIPE BELOW ↓↓

0 from 0 votes
Traditional Greek Salad
Prep Time
15 mins
Cook Time
0 mins
Total Time
15 mins
 

Make a delicious, healthy Traditional Greek Salad to serve four people as a side dish. It's very easy to make and serve in under 15 minutes.

Category: Meatless Entree, Salad
Cuisine: Greek
Keyword: traditional Greek salad
Servings: 4 side salads
Calories Per Serving: 252 kcal
Author: JB @ The Grateful Girl Cooks!
Ingredients
For Salad:
  • 3 medium tomatoes each cut in 6 wedges
  • 1 large English cucumber or large standard cucumber
  • 15 kalamata olives pitted
  • ¼ cup red onion sliced into thin strips
  • red bell pepper sliced into thin strips
  • 4 ounces feta cheese big crumbles
For Salad Dressing:
  • ¼ cup extra virgin olive oil
  • 1 Tablespoon red wine vinegar
  • ½ teaspoon fresh lemon juice
  • ½ teaspoon ground oregano
  • 2 pinches salt
  • 1 pinch black pepper
Instructions
  1. Place prepped tomatoes, cucumbers, olives, red onion, red bell pepper and kalamata olives in a large salad bowl.

  2. Crumble feta cheese over the top of the salad, then set the bowl aside.

  3. Place olive oil, red wine vinegar, lemon juice, oregano, salt and pepper in a small bowl. Use a fork or whisk to mix these ingredients together until they become emulsified. Emulsification means oil and vinegar are fully combined and not separated.

  4. Pour salad dressing over salad. Use tongs to gently toss ingredients together until salad dressing covers all the salad ingredients. Serve and enjoy!
Recipe Notes

NOTE: If you want to make the salad up ahead of time, you can cover the bowl with plastic wrap and refrigerate it for several hours. Do NOT add the salad dressing until you're ready to serve the salad

Nutrition Facts
Traditional Greek Salad
Amount Per Serving (1 side salad (1/4 of total))
Calories 252 Calories from Fat 198
% Daily Value*
Fat 22g34%
Saturated Fat 6g38%
Polyunsaturated Fat 2g
Monounsaturated Fat 13g
Cholesterol 25mg8%
Sodium 758mg33%
Potassium 389mg11%
Carbohydrates 10g3%
Fiber 2g8%
Sugar 5g6%
Protein 6g12%
Vitamin A 1263IU25%
Vitamin C 25mg30%
Calcium 176mg18%
Iron 1mg6%
* Percent Daily Values are based on a 2000 calorie diet.

Here’s one more to pin on your Pinterest boards!Make a delicious, healthy Traditional Greek Salad to serve four people as a side dish. It's very easy to make and serve in under 15 minutes.

Coconut Almond Coffee Creamer

Make simple homemade Coconut Almond Coffee Creamer in 5 minutes or less! This flavorful creamer will really enhance your cup of hot coffee!

I’m not sure about you, but I love coffee! Well… I love my coffee IF it has coffee creamer in it, so it doesn’t really TASTE like coffee. Ha Ha!

Truly, I need my morning coffee with just the right amount of coffee creamer in it! Over the past couple years, I’ve been trying out made from scratch coffee creamers in an effort to find some good recipes that are “keepers”.

This recipe for coconut almond coffee creamer is a “keeper”, for sure. I found the recipe online a few years ago, made a couple slight changes, and today I want to share this simple coffee creamer recipe with you. Here’s how to make it.

Scroll Down For A Printable Recipe Card At The Bottom Of The Page

What Ingredients Will I Need?

You will need Half and Half, chocolate syrup, sweetened condensed milk, coconut extract and almond extract to make this creamer. NOTE: It is very important to use sweetened condensed milk and NOT evaporated milk!

That’s it! Five ingredients and a few minutes time are all that is necessary to make this delicious, flavorful coffee creamer.

Half and Half, condensed milk, chocolate syrup, coconut/ almond extracts used for creamer.

How To Make This Coffee Creamer

Pour half and half, chocolate syrup, and the coconut and almond extracts into a medium-sized saucepan.

Give them a stir to combine, then heat on Medium-Low heat, stirring often, ONLY until the half and half has been warmed. Do not let the liquid come to a boil, but simply heat it through.

Creamer ingredients are warmed in a saucepan until heated through.The creamer liquid is heated through in a saucepan.

Add The Sweetened Condensed Milk

Remove the pan from the heat source. Immediately stir the sweetened condensed milk into the heated half and half, and continue to stir.

The warm half and half will help melt the condensed milk. Continue to stir until the coconut almond coffee creamer is smooth and the condensed milk has been fully incorporated.

Sweetened condensed milk is added to other creamer ingredients in pan.

Let the creamer cool for a few minutes, then carefully pour it into a storage container. I typically use old creamer bottles to store my homemade creamers.

TIP: Insert a funnel into the mouth of the container to transfer the liquid into the bottle (or other container), for less chance of spillage!

A funnel is used to transfer coconut almond coffee creamer to a bottle.

Enjoy The Coconut Almond Coffee Creamer!

Put a label and a lid on the container, and refrigerate the creamer until it’s well chilled. After the coconut almond coffee creamer has fully chilled, it is ready to be used. 

Coconut Almond Coffee Creamer in a bottle, chilled, and ready to use.

Add your desired amount of coffee creamer to a steaming hot cup of coffee, take a sip, and ENJOY! It is delicious!

Be sure to cover the container and store your leftover creamer in the refrigerator, because it must be kept cold.

A mug of coffee with coconut almond coffee creamer, ready to enjoy.

I hope you enjoy this simple, but GOOD coconut almond coffee creamer! I sure do, and trust you will, as well.

Thanks for stopping by, and please come back again soon for more family-friendly recipes. May God bless you, take care, and have a GREAT day!

Looking For More HOMEMADE COFFEE CREAMER Recipes?

You can find ALL of my recipes in the Recipe Index, which is located at the top of the page. I have several coffee creamer recipes you might enjoy, including:

Want More Recipes? Get My FREE Newsletter!

I publish a newsletter 2 times per month (1st and 15th) with lots of recipes, tips, etc..
Would you like to join our growing list of subscribers?

There is a Newsletter subscription box on the top right (or bottom) of each blog post, depending on the device you use.
You can submit your e-mail address there, to be added to my mailing list.

Find Me On Social Media:

Facebook page: The Grateful Girl Cooks!
Pinterest:
The Grateful Girl Cooks!
Instagram:
jbatthegratefulgirlcooks

Author's signature

Recipe adapted from: sisterssavingcents.com

↓↓ PRINTABLE RECIPE BELOW ↓↓

0 from 0 votes
Coconut Almond Coffee Creamer
Prep Time
5 mins
Cook Time
0 mins
Total Time
5 mins
 

Make simple homemade Coconut Almond Coffee Creamer in 5 minutes or less! This flavorful creamer will really enhance your cup of hot coffee!

Category: Beverage, Condiment
Cuisine: American
Keyword: coconut almond coffee creamer
Servings: 56 Tablespoons (approx. 28 ounces total)
Calories Per Serving: 38 kcal
Author: JB @ The Grateful Girl Cooks!
Ingredients
  • 2 cups half and half
  • Tablespoons chocolate syrup
  • 2 Tablespoons coconut extract
  • teaspoons almond extract
  • 14 ounces sweetened condensed milk = 1 can
Instructions
  1. Pour half and half, chocolate syrup, coconut and almond extracts into a medium-sized saucepan. Stir to combine.

  2. Heat on Medium-Low, stirring often, ONLY until half and half is warmed. Do not let liquid come to a boil- simply heat it through.

  3. Remove pan from heat source. Immediately stir sweetened condensed milk into the heated liquid. Continue to stir until coconut almond coffee creamer is smooth and condensed milk is fully incorporated.

  4. Let creamer cool a few minutes, then carefully pour it into a container (with a lid). TIP: Insert a funnel into the mouth of the container to transfer liquid into the bottle (or other container), for less chance of spillage! Refrigerate creamer before using.

Nutrition Facts
Coconut Almond Coffee Creamer
Amount Per Serving (1 Tablespoon)
Calories 38 Calories from Fat 18
% Daily Value*
Fat 2g3%
Saturated Fat 1g6%
Polyunsaturated Fat 0.1g
Monounsaturated Fat 0.5g
Cholesterol 5mg2%
Sodium 15mg1%
Potassium 41mg1%
Carbohydrates 5g2%
Fiber 0.02g0%
Sugar 5g6%
Protein 1g2%
Vitamin A 50IU1%
Vitamin C 0.3mg0%
Calcium 30mg3%
Iron 0.04mg0%
* Percent Daily Values are based on a 2000 calorie diet.

Here’s one more to pin on your Pinterest boards!Make simple homemade Coconut Almond Coffee Creamer in 5 minutes or less! This flavorful creamer will really enhance your cup of hot coffee!


Raspberry Thumbprint Cookies

Make Raspberry Thumbprint Cookies for the holidays or any time! These bite-size treats, with chocolate chips and raspberry jam are wonderful!

If you’re looking for an easy-to-make delicious cookie, may I suggest trying this one for raspberry thumbprint cookies?

Thumbprint cookies have been around for a long time. They get their name from a small indentation made in a cookie (using your thumb) which is then filled with a sweet topping.

This simple recipe is one I found in an old cookbook I have that is almost 30 years old. I liked this particular recipe because not only does it have raspberry jam (in the indentation), but it’s filled with miniature chocolate chips!

Chocolate and raspberry for a flavor combination? Yes, please! Here’s how to make these yummy cookies in under 30 minutes.

Scroll Down For A Printable Recipe At The Bottom Of The Page

Make The Cookie Dough

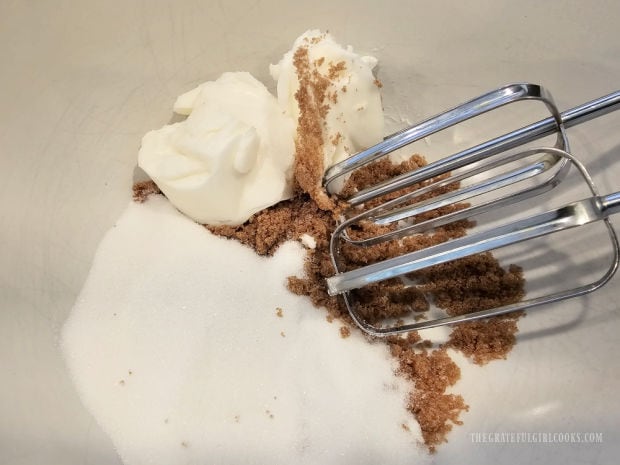
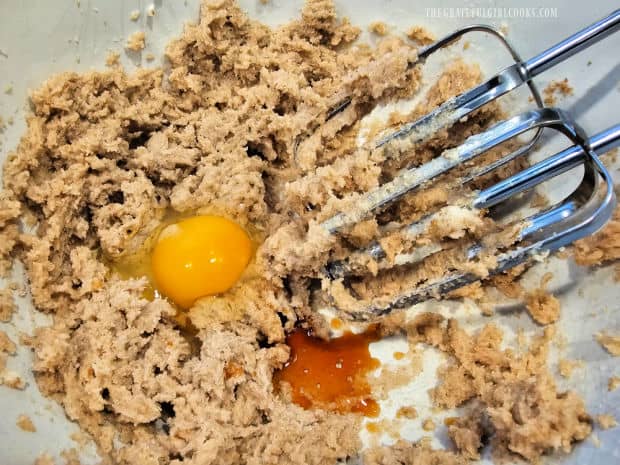
Place softened stick of butter, granulated sugar, brown sugar, vanilla and salt in a large mixing bowl. Beat these ingredients using an electric mixer, until they become soft and smooth.

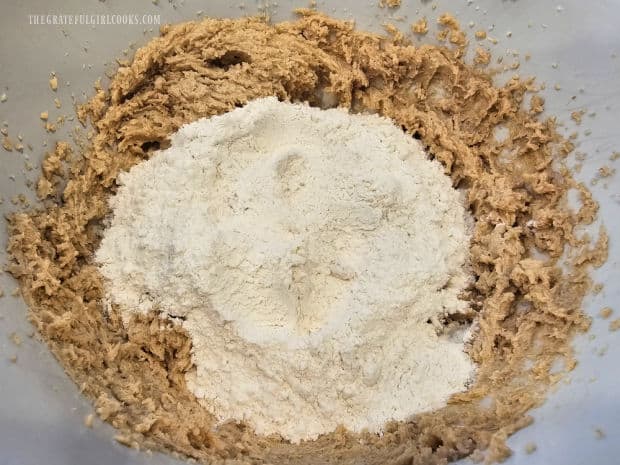
Add sifted flour and milk to the bowl, and continue to mix until all the dough ingredients have been combined.

Butter, brown and granulated sugars, vanilla and salt are blended until creamy.Sifted flour and milk are mixed into the cookie dough.

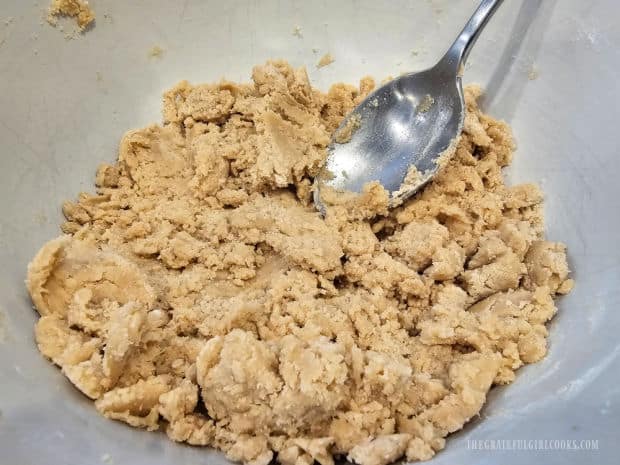
The cookie dough will be very crumbly at this point. Add miniature chocolate chips, and STIR them in, to combine.

Miniature semi-sweet chocolate chips are stirred into the dough.The dough for the raspberry thumbprint cookies is very crumbly.

Shape The Crumbly Cookie Dough Into Balls

Now it’s time to shape the crumbly dough into dough balls. Put a Tablespoon of the “dough mixture” in the palm of your hands, and compress and tightly shape and roll the dough into a 1″ ball.

You should have enough “dough” to form 36 cookies. As you form each one, place it on ungreased cookie sheets, with the cookies about 2″ apart from each other.

Crumbly cookie dough is shaped by hand into 1" balls.

Indent The Cookies And Fill

Use your thumb to make a small indentation in the top/middle of each cookie dough ball. Do NOT press all the way to the bottom or break through the bottom of the cookie.

TIP: I find it helpful to “shore up” the sides of the cookies, as they may slightly crack around the edges while pressing the indentation in them. Just use your fingers to pinch or close up any slight cracks.

Place a very tiny amount of raspberry jam into the cookie indentation. I use a very small spoon to do this, because there’s only room for a bit of jam in these little cookies! Once the cookies are are filled, they are ready to bake.

A thumb is used to slightly indent cookie dough balls on a baking sheet.A small amount of raspberry jam is placed in the cookie indentation.

Bake The Raspberry Thumbprint Cookies

Bake the raspberry thumbprint cookies at 375°F. on the middle racks of your oven for 10-12 minutes. When done, the cookies should be golden brown on the top and bottom.

Let the cookies cool for 1-2 minutes on the baking sheet, then transfer them (using a spatula) to wire racks to finish cooling to room temperature. 

The raspberry thumbprint cookies cool on wire rack after baking.A close up of one of the raspberry thumbprint cookies on a wire rack.

Enjoy The Raspberry Thumbprint Cookies

When the raspberry thumbprint cookies have cooled to room temperature, they are ready to be served. Transfer them to a platter, and dig in!

The cookie itself has the texture of a shortbread cookie, and the chocolate chips and raspberry jam pair are a wonderful flavor combination!

I’m sure you will enjoy these little scrumptious bites, and trust you’ll like them as much as we do!

A white platter is used to serve the raspberry thumbprint cookies.

Thank you for stopping by, and I invite you to come back soon for more family-friendly recipes. Take care, and have a GREAT day!

Looking For More COOKIE Recipes?

You can find ALL of my recipes in the Recipe Index, which is located at the top of the page. I have many delicious cookie recipes to choose from, including:

Want More Recipes? Get My FREE Newsletter!

I publish a newsletter 2 times per month (1st and 15th) with lots of recipes, tips, etc..
Would you like to join our growing list of subscribers?

There is a Newsletter subscription box on the top right (or bottom) of each blog post, depending on the device you use.
You can submit your e-mail address there, to be added to my mailing list.

Find Me On Social Media:

Facebook page: The Grateful Girl Cooks!
Pinterest:
The Grateful Girl Cooks!
Instagram:
jbatthegratefulgirlcooks

Author's signature

Original recipe source: “The Spirit of Christmas Cookbook”, page 27, published by Leisure Arts, Inc. in 1996.

↓↓ PRINTABLE RECIPE BELOW ↓↓

0 from 0 votes
Raspberry Thumbprint Cookies
Prep Time
15 mins
Cook Time
10 mins
Total Time
25 mins
 

Make Raspberry Thumbprint Cookies for the holidays or any time! These bite-size treats, with chocolate chips and raspberry jam are wonderful!

Category: Dessert, Snack
Cuisine: All Cuisines
Keyword: raspberry thumbprint cookies
Servings: 36
Calories Per Serving: 73 kcal
Author: JB @ The Grateful Girl Cooks!
Ingredients
  • ½ cup butter softened (1 stick)
  • ¼ cup granulated sugar
  • ¼ cup brown sugar (packed)
  • 1 teaspoon vanilla extract
  • ½ teaspoon salt
  • cups flour (sifted)
  • 2 Tablespoons milk
  • cup miniature semi-sweet chocolate chips
  • ¼ cup raspberry jam **approximate
Instructions
  1. Preheat oven to 375℉.

  2. Place butter, granulated sugar, brown sugar, vanilla and salt in a large mixing bowl. Beat with an electric mixer, until they become soft and smooth. Add sifted flour and milk; continue to mix until combined. Dough will be very crumbly. Add chocolate chips; stir to combine.

  3. Put 1 Tablespoon of dough mixture in the palm of your hands; compress, tightly shape and roll dough into a 1" ball. Form 36 cookies, placing dough balls on ungreased cookie sheets, 2" apart from each other.

  4. Use your thumb to make a small indentation in the top/middle of each dough ball. Do NOT press all the way to the bottom or break through bottom of cookie. TIP: I find it helpful to "shore up" the sides of the cookies, as they may slightly crack around the edges while indenting them. Use your fingers to pinch/close any cracks. Place a very tiny amount of raspberry jam into the indentation.

  5. Bake at 375°F. on middle racks of oven for 10-12 minutes. When done, cookies should be golden brown and "set". Let cookies cool 1-2 minutes on baking sheet, then transfer with spatula to wire racks to cool. Serve at room temperature.

Recipe Notes

NOTES: 1% milk was used for caloric calculation. Amount of jam is an estimate. You may use a little more or less, depending on the size of indentations.

Nutrition Facts
Raspberry Thumbprint Cookies
Amount Per Serving (1 cookie)
Calories 73 Calories from Fat 27
% Daily Value*
Fat 3g5%
Saturated Fat 2g13%
Trans Fat 0.1g
Polyunsaturated Fat 0.1g
Monounsaturated Fat 1g
Cholesterol 7mg2%
Sodium 54mg2%
Potassium 24mg1%
Carbohydrates 10g3%
Fiber 0.3g1%
Sugar 5g6%
Protein 1g2%
Vitamin A 82IU2%
Vitamin C 0.2mg0%
Calcium 6mg1%
Iron 0.4mg2%
* Percent Daily Values are based on a 2000 calorie diet.

Here’s one more to pin on your Pinterest boards!Make Raspberry Thumbprint Cookies for the holidays or any time! These bite-size treats, with chocolate chips and raspberry jam are wonderful!

Easy Fettucine Alfredo

Make delicious, creamy and Easy Fettucine Alfredo for a special meal! It’s easy to make with only a few ingredients, and is a decadent dish!
Make delicious, creamy and Easy Fettucine Alfredo for a special meal! It's easy to make with only a few ingredients, and is a decadent dish!

Many, many years ago when I had our first son, we were invited to dinner at a dear friend Lona’s home to celebrate the birth of our first baby. Lona made us fettucine alfredo for dinner, and it was absolutely FABULOUS.

Before we left I asked her to please give me her recipe, and I’ve used this recipe ever since (over 40 years now). I was shocked to see how truly simple it was to make, but WOW… does it ever taste great!

Our sweet friend Lona passed away years ago, but her memory lives on in so many tangible ways in our lives. Every single time I make this

As most folks know, fettucine alfredo is definitely not a “diet friendly” meal, but every now and then ya just gotta go for it, right? The pasta is cheesy and delicious, and it really is simple to prepare. Here’s how to make it:

Scroll Down for A Printable Recipe Card At the Bottom Of The Page

Cook The Fettucine Pasta

The first thing you will need to do is cook the fettucine pasta in a large saucepan, according to the package instructions. Once the pasta hits the boiling water it will cook for approximately 13 minutes.

While the pasta cooks, prepare the Alfredo sauce in a separate pan. That way the sauce will be done when the pasta is done!

Fettucine pasta is cooked in boiling water according to package instructions.

Make The Alfredo Sauce While Pasta Cooks

To make the Alfredo sauce, melt butter on LOW heat in a medium saucepan. Once the butter has melted, stir in garlic powder and a pinch of salt until combined.

Pour a pint of heavy whipping cream into the melted butter mixture, and stir, until combined. Cook this on a LOW simmer for 4-5 minutes, stirring often, but don’t let it boil.

Melted butter in saucepan is combined with garlic powder.A pint of heavy whipping cream is poured into the melted butter in pan.

Add The Parmesan Cheese

Add 1½ cups of fresh, finely grated Parmesan cheese and a small amount of salt into the Alfredo sauce mixture. I also add about ¼ cup of canned Parmesan cheese (i.e. “Kraft” green shaker container) to the mix.

TIP#1: If you don’t have (or like) canned Parmesan, simply add more freshly grated Parmesan cheese, to taste.

Stir these into the Alfredo sauce, and continue to cook on LOW heat, stirring often. Continue cooking until all the cheese has melted, but don’t let the sauce boil!

Tip #2: You can make the sauce ahead of time, then re-heat it (on LOW) in the pan right before the pasta is done cooking, to save time.

Lots of grated Parmesan cheese is added to the fettucine sauce in pan.A pan full of creamy sauce for the Easy Fettucine Alfredo.

Final Step

When the pasta is finished cooking and is tender to the bite, immediately drain off the hot water, then place the pasta back into the pan. DO NOT RINSE the pasta! You want it good and HOT!

Quickly pour all of the hot Alfredo sauce on top of the hot pasta. Use tongs to toss well and fully coat all the noodles with the sauce. Cook the fettucine and sauce for 1-2 minutes on low heat, until fully heated through.

Cooked fettucine pasta is drained after cooking and put back into hot pan.Thick alfredo sauce is poured over the hot pasta and tossed to combine.

Serve And Enjoy The Easy Fettucine Alfredo

Immediately portion each serving onto plates or into serving bowls. If desired, finely grate additional Parmesan on top of each serving, and garnish with fresh parsley.

Serve the easy fettucine alfredo immediately while still hot, and enjoy this delicious dish.

A bowl of Easy Fettucine Alfredo, topped with Parmesan cheese and parsley.

I hope you enjoy this recipe for easy fettucine alfredo as much as our family does. Even though it is decadent and a high calorie meal, this is a dish we always look forward to!

Thank you for stopping by, and I invite you to come back again soon for more family-friendly recipes. Take care, have a GREAT day, and may God bless you.

Looking For More PASTA RECIPES?

You can find ALL of my recipes in the Recipe Index, which is located at the top of the page. I have a nice variety of pasta dishes to choose from, including:

Want More Recipes? Get My FREE Newsletter!

I publish a newsletter 2 times per month (1st and 15th) with lots of recipes, tips, etc..
Would you like to join our growing list of subscribers?

There is a Newsletter subscription box on the top right (or bottom) of each blog post, depending on the device you use.
You can submit your e-mail address there, to be added to my mailing list.

Find Me On Social Media:

Facebook page: The Grateful Girl Cooks!
Pinterest:
The Grateful Girl Cooks!
Instagram:
jbatthegratefulgirlcooks

Author's signature

Recipe adapted from: my dear friend Lona Wig (R.I.P.)

↓↓ PRINTABLE RECIPE BELOW ↓↓

0 from 0 votes
Easy Fettucine Alfredo
Prep Time
10 mins
Cook Time
13 mins
Total Time
23 mins
 

Make delicious, creamy and Easy Fettucine Alfredo for a special meal! It's easy to make with only a few ingredients, and is a decadent dish!

Category: Entree, Main Course
Cuisine: All Cuisines
Keyword: easy fettucine alfredo
Servings: 5
Calories Per Serving: 892 kcal
Author: JB @ The Grateful Girl Cooks!
Ingredients
  • 12 ounces dried fettucine pasta cooked according to pkg. instructions
For Alfredo Sauce:
  • 8 Tablespoons butter = 1 stick or ½ cup
  • ½ teaspoon garlic powder
  • ¼ teaspoon salt
  • 1 pint heavy whipping cream
  • cups fresh Parmesan cheese finely grated
  • ¼ cup canned Parmesan cheese (i.e. Kraft, Kroger, etc.)
(OPTIONAL) GARNISH: additional grated Parmesan and/or parsley if desired
    Instructions
    1. Cook fettucine in boiling water according to pkg. instructions (approx. 13 minutes). While pasta cooks, prepare Alfredo sauce in a separate pan.

    Make Alfredo Sauce:
    1. Melt butter on LOW heat in a medium saucepan. Once melted, stir in garlic powder and salt until combined. Pour in whipping cream; stir, until combined. Cook on a LOW simmer 4-5 minutes, stirring often, but don't let it boil.

    2. Add 1½ cups of fresh, finely grated Parmesan cheese and ¼ cup canned Parmesan cheese (i.e. "Kraft" green shaker container) to the mix. TIP#1: If you don't have (or like) canned Parmesan, add more fresh grated Parmesan cheese. Stir cheeses into the Alfredo sauce; cook on LOW heat, stirring often. Continue cooking until cheese has melted; do not let sauce boil! Tip #2: You can make sauce ahead of time, then re-heat it (on LOW) in the pan right before pasta is done cooking, to save time.

    Finish And Serve:
    1. When pasta is done, immediately drain the hot water. DO NOT RINSE PASTA! You want it HOT! Place drained pasta back into the pan. Quickly pour hot Alfredo sauce on top. Use tongs to toss well and fully coat pasta with sauce. Cook the fettucine and sauce 1-2 minutes on low heat, until heated through.

    2. Immediately portion each serving onto plates or into serving bowls. If desired, grate additional Parmesan on each serving, and garnish with fresh parsley. Serve easy fettucine alfredo immediately while hot, and enjoy!
    Nutrition Facts
    Easy Fettucine Alfredo
    Amount Per Serving (1 (1/5 of total))
    Calories 892 Calories from Fat 585
    % Daily Value*
    Fat 65g100%
    Saturated Fat 40g250%
    Trans Fat 1g
    Polyunsaturated Fat 3g
    Monounsaturated Fat 16g
    Cholesterol 243mg81%
    Sodium 913mg40%
    Potassium 329mg9%
    Carbohydrates 56g19%
    Fiber 2g8%
    Sugar 4g4%
    Protein 23g46%
    Vitamin A 2296IU46%
    Vitamin C 1mg1%
    Calcium 401mg40%
    Iron 2mg11%
    * Percent Daily Values are based on a 2000 calorie diet.

    Here’s one more to pin on your Pinterest boards!Make delicious, creamy and Easy Fettucine Alfredo for a special meal! It's easy to make with only a few ingredients, and is a decadent dish!

    Ranch Pretzel Bites

    Make a big batch of Ranch Pretzel Bites for snacking or gift-giving! They’re easy to make, and are baked in a buttery seasoning sauce!
    Make a big batch of Ranch Pretzel Bites for snacking or gift-giving! They're easy to make, and are baked in a buttery seasoning sauce!

    If you’re looking for a delicious, easy to make snack OR a “foodie” gift for family, friends, or co-workers, may I suggest Ranch Pretzel Bites?

    This recipe is one I found almost 30 years ago in one of my cookbooks, and it’s so easy to make! Store-bought pretzel twists are coated in a buttery seasoning sauce, then baked for an hour. That’s it!

    The seasoning sauce (with Ranch seasoning) bakes right onto the pretzels, leaving them with wonderful flavor and a crispy bite. They are really so simple to prepare.

    You can enjoy these pretzel bites as a tasty snack OR put them in a cute container as a food gift for someone you love. Here’s how to make yummy Ranch Pretzel Bites.

    Scroll Down For A Printable Recipe Card At The Bottom Of The Page

    Make The Ranch Seasoning Sauce

    Before making the sauce, preheat your oven to 250°F. The seasoning sauce takes only a minute or two to prepare, so you want the oven preheated and ready, to save time!

    Melt a stick of butter in a saucepan on Low heat. Once the butter has partially melted, add a packet of Ranch seasoning mix, Worcestershire sauce, and seasoning salt.

    Butter is melted in a saucepan as a base for the seasoning sauce.A packet of Ranch seasoning mix is used to season the pretzel sauce.

    Stir these ingredients together until they are fully incorporated into the melted butter. This is the seasoning sauce for the pretzels.

    Ranch mix, Worcestershire, and seasoning salt are added to melted butter. The buttery seasoning sauce is ready to be baked on twist pretzels.

    Season The Pretzels

    Place the pretzel twists in a large mixing bowl, then pour the seasoning sauce all over the top of them. Use tongs or two large spoons to gently toss the pretzels.

    Continue tossing the pretzels until all the sauce has been distributed, and the pretzels are fully coated.

    Seasoning sauce is poured over mini twist pretzels in a large bowl.

    Time To Bake!

    Spread the seasoned pretzels out in a single layer (as much as possible) on a large, rimmed baking sheet. If there is any sauce left in the bowl, simply distribute it over the pretzels.

    Stir these ingredients together until they are fully incorporated into the melted butter. This is the seasoning sauce for the pretzels.

    Bake the ranch pretzel bites at 250°F. for 1 hour. Every 15 minutes, gently toss (and flip) the pretzels, then re-arrange them on the baking sheet and continue cooking.

    Seasoned pretzels on baking sheet in one layer, ready for oven.

    When the pretzels have finished baking, transfer them onto wax paper or parchment paper on the counter.

    Allow the ranch pretzel bites to fully cool to room temperature before serving or packaging them in gift containers.

    Ranch pretzel bites, cooling on parchment paper after baking for 1 hour.

    Serve The Ranch Pretzel Bites

    Once at room temperature, these yummy snacks are ready to be enjoyed. Place them in a large bowl, and watch how fast they disappear!

    Close up photo of the ranch pretzel bites, cooling on parchment paper.

    These crispy little snacks also make great gifts! Pack them into cute gift jars or containers, then give a thoughtful food gift to someone you care for.

    Be sure to store any leftover pretzel bites in an airtight bag or container, for freshness.

    The ranch pretzel bites can be given in a decorative jar as a gift.

    I hope you have the chance to try ranch pretzel bites for yourself. They are delicious, and quite addicting, so you may find yourself (or your family) going back often for more!

    Thanks for taking the time to stop by, and I invite you to come back again soon for more family-friendly recipes. Take care, may God bless you, and have a GREAT day!

    Looking For More SNACK OR APPETIZER Recipes?

    You can find ALL of my recipes in the Recipe Index, which is located at the top of the page. I have some delicious recipes for snacks and appetizers you might enjoy, including:

    Want More Recipes? Get My FREE Newsletter!

    I publish a newsletter 2 times per month (1st and 15th) with lots of recipes, tips, etc..
    Would you like to join our growing list of subscribers?

    There is a Newsletter subscription box on the top right (or bottom) of each blog post, depending on the device you use.
    You can submit your e-mail address there, to be added to my mailing list.

    Find Me On Social Media:

    Facebook page: The Grateful Girl Cooks!
    Pinterest:
    The Grateful Girl Cooks!
    Instagram:
    jbatthegratefulgirlcooks

    Author's signature

    Original recipe source: “The Spirit Of Christmas Cookbook”, page 158, published by Leisure Arts, Inc. in 1996

    ↓↓ PRINTABLE RECIPE BELOW ↓↓

    5 from 1 vote
    Ranch Pretzel Bites
    Prep Time
    5 mins
    Cook Time
    1 hr
    Total Time
    1 hr 5 mins
     

    Make a big batch of Ranch Pretzel Bites for snacking or gift-giving! They're easy to make, and are baked in a buttery seasoning sauce!

    Category: Appetizer/Snack
    Cuisine: All Cuisines
    Keyword: ranch pretzel bites
    Servings: 12 (½ cup per serving)
    Calories Per Serving: 178 kcal
    Author: JB @ The Grateful Girl Cooks!
    Ingredients
    • 6 cups pretzels (mini-twist) (approx. ¾ of a 15 oz. bag=12 oz.)
    • ½ cup butter (1 stick)
    • 1 pkg. Ranch salad dressing mix
    • 1 Tablespoons Worcestershire sauce
    • ½ teaspoon seasoning salt
    Instructions
    1. Preheat oven to 250°F.

    2. Melt butter in a saucepan on Low heat. Add Ranch seasoning mix, Worcestershire sauce, and seasoning salt. Stir until fully combined, then remove from heat.

    3. Put pretzels in a large bowl. Pour sauce on top. Use tongs or 2 large spoons to gently toss pretzels until all sauce is distributed, and pretzels are fully coated.

    4. Spread seasoned pretzels in a single layer on a large, rimmed baking sheet. Bake at 250°F. for 1 hour. Every 15 minutes, gently toss the pretzels, then re-arrange on baking sheet and continue cooking.

    5. When done, transfer pretzels to wax paper or parchment paper. Cool to room temperature before serving or packaging in gift containers. Store leftovers in airtight containers. Enjoy!

    Nutrition Facts
    Ranch Pretzel Bites
    Amount Per Serving (0.5 cup)
    Calories 178 Calories from Fat 72
    % Daily Value*
    Fat 8g12%
    Saturated Fat 5g31%
    Trans Fat 0.3g
    Polyunsaturated Fat 1g
    Monounsaturated Fat 2g
    Cholesterol 20mg7%
    Sodium 411mg18%
    Potassium 136mg4%
    Carbohydrates 25g8%
    Fiber 2g8%
    Sugar 0.1g0%
    Protein 3g6%
    Vitamin A 237IU5%
    Vitamin C 0.5mg1%
    Calcium 12mg1%
    Iron 1mg6%
    * Percent Daily Values are based on a 2000 calorie diet.

    Here’s one more to pin on your Pinterest boards!Make a big batch of Ranch Pretzel Bites for snacking or gift-giving! They're easy to make, and are baked in a buttery seasoning sauce!


    Peppermint Patty Bars

    Enjoy fantastic Peppermint Patty Bars year-round! These miniature bars have the same great flavors you love in classic peppermint patties.
    Enjoy fantastic Peppermint Patty Bars year-round! These miniature bars have the same great flavors you love in classic peppermint patties.

    Do you enjoy York Peppermint Patties or Junior Mints? We sure love the flavor combination of chocolate AND peppermint! I’ve made 3-4 different recipes for peppermint patties over the past 20 years, but never found one I genuinely, truly LOVED… until THIS one.

    I received a recipe for peppermint patties from a friend (it was from a magazine she subscribes to), and I really liked the filling ingredients that were used in it. I decided to try it and “slightly” tweak the recipe a bit. This recipe for peppermint patty bars is the result.

    These bars are not the “traditional” ROUND patties, but are rectangular and the shape of a mini candy bar! For this recipe I use dark chocolate candy wafers for the coating, and love the crispness, once the chocolate hardens on the peppermint filling.

    They are ABSOLUTELY delicious, and a perfect dessert treat for the holidays, or a GREAT food gift for friends or family! We cannot stay out of them, because they are SO YUMMY! Here’s how to make these decadent peppermint patty bars. 

    Scroll Down For A Printable Recipe Card At The Bottom Of The Page

    Make The Peppermint Filling

    Combine powdered sugar, vegetable shortening, light corn syrup, water and peppermint extract in a large bowl. Use electric beaters on LOW speed to mix these ingredients together. NOTE: The filling will be very crumbly, even after being mixed.

    NOTE: The dark chocolate candy wafers (shown below) are used later, to cover the peppermint bars. **You can find them in big craft stores (like Hobby Lobby or Michael’s), or large grocery stores. It can also be called almond bark. If you can’t find this ingredient, you can substitute dark chocolate chips.

    Ingredients that will be used to make peppermint patty bars.Electric mixer is used to combine peppermint filling ingredients in a bowl.

    Use clean hands to pinch and knead the filling crumbles together. Continue to do this until the dough becomes fairly smooth in texture and binds together well.

    Shape this peppermint filling into a basic log form, then carefully transfer it to wax paper or parchment paper on a hard surface.

    Crumbly peppermint dough is kneaded by hand until it is compacted.Dough is shaped into a rough rectangular log shape in bowl.

    Shape Then Refrigerate Peppermint Patty Filling “Log”

    Continue to shape the filling into a rectangular log about 1½” wide and about 9″ long, compacting the filling as you form it.

    Wrap the peppermint log tightly in plastic wrap, place it on a cookie sheet, and then REFRIGERATE FOR 1 HOUR!

    Peppermint filling is formed into a 9" long x 1½" wide long log shape.The peppermint patty filling is wrapped, then refrigerated for 1 hour.

    Now Let’s SLICE It And FREEZE It!

    After the peppermint filling has fully chilled, remove the plastic wrap from the “log”. Use a serrated knife to carefully slice the log into ¼” thick slices. You should end up with a total of about 32 rectangular-shaped slices.

    Place the slices in a single layer on a large baking sheet and pop them back in the FREEZER for 15 minutes. This will make them very cold, so they hold together as they’re dipped in melted chocolate. 

    A serrated knife is used to slice the peppermint patty filling into 32 pieces.

    Time To Melt The Chocolate

    Once the peppermint bars have been in the freezer for 15 minutes, it’s time to melt the chocolate for dipping. Place about 1/3 of the chocolate into a bowl, along with about 1/3 of the vegetable shortening.

    IMPORTANT TIP: The bowl, spoon, etc. that you use must be DRY. Any water that gets into the chocolate could make the chocolate “seize up” and get too hard.

    Melt the chocolate and shortening on High power in a microwave for 45 seconds. Remove the bowl from the microwave and stir. At first the chocolate will be hardly melted, but that’s okay. Stir it anyway.

    Repeat this process in 30 second intervals, stirring after each heating, until eventually the chocolate is fully melted and smooth.

    ANOTHER TIP: Dip only about a third of the peppermint patties at a time, then re-melt more chocolate, etc.. Continue until all the peppermint patty bars are dipped.

    Three photo collage showing the steps in melting the chocolate candy wafers.

    Time For Chocolate “Dipping” Each Bar

    Carefully place one peppermint bar at a time into the chocolate, and gently turn it over until all sides are covered with chocolate.

    I typically use a spoon to help coat the bar with chocolate, and a small fork to lift the bar out of the bowl. Let the excess chocolate run down, and into the bowl.

    Immediately place the peppermint patty bar onto waxed paper OR parchment paper. Add colorful sprinkles immediately after each bar is dipped, so they adhere before the chocolate hardens!

    Repeat this process with each peppermint bar, until all are chocolate-dipped and decorated with sprinkles (if using).

    Each peppermint bar is coated in chocolate and decorated with sprinkles.

    Serve And Enjoy The Peppermint Patty Bars

    Let the chocolate completely harden on the peppermint patty bars before serving. Give them time to rest and set up (without moving them) for about 15 minutes, and then dive in!

    My husband enjoys peppermint patty bars at room temperature, but I like to refrigerate them before I gobble them up. Try them both ways to determine how you enjoy them the most!

    Keep any leftovers stored in an airtight container in the refrigerator. They will keep for quite a while, if stored properly.

    Be warned, though. Peppermint patty bars are so absolutely delicious, minty and refreshing, it will be hard to keep out of them!

    A platter with peppermint patty bars that are ready to be served.White peppermint filling is shown inside one of the peppermint patty bars.

    I hope you enjoy these classic treats, and trust you will love them like we do! They also make a great food gift! Put them on a decorative plate or in a Christmas tin, and embellish it with a pretty bow or tag. Your friends and family will love this gift!

    Thanks for stopping by, and please come back again soon for more family-friendly recipes. Take care, may God bless you, and have a GREAT day!

    Looking For More CHOCOLATE Recipes?

    You can find ALL of my recipes in the Recipe Index, which is located at the top of the page. I have LOTS of yummy chocolate treats for you to check out, including:

    Want More Recipes? Get My FREE Newsletter!

    I publish a newsletter 2 times per month (1st and 15th) with lots of recipes, tips, etc..
    Would you like to join our growing list of subscribers?

    There is a Newsletter subscription box on the top right (or bottom) of each blog post, depending on the device you use.
    You can submit your e-mail address there, to be added to my mailing list.

    Find Me On Social Media:

    Facebook page: The Grateful Girl Cooks!
    Pinterest:
    The Grateful Girl Cooks!
    Instagram:
    jbatthegratefulgirlcooks

    Author's signature

    Filling recipe adapted from: Joanna Gaines, via Magnolia Magazine (a friend had the original recipe)

    ↓↓ PRINTABLE RECIPE BELOW ↓↓

    0 from 0 votes
    Peppermint Patty Bars
    Prep Time
    20 mins
    Chilling/Freezer time (inactive prep)
    1 hr 15 mins
    Total Time
    1 hr 35 mins
     

    Enjoy fantastic Peppermint Patty Bars year-round! These miniature bars have the same great flavors you love in classic peppermint patties.

    Category: Candy, Dessert
    Cuisine: All Cuisines
    Keyword: peppermint patty bars
    Servings: 32
    Calories Per Serving: 107 kcal
    Author: JB @ The Grateful Girl Cooks!
    Ingredients
    For Peppermint Filling:
    • cups powdered sugar
    • Tablespoons light corn syrup
    • 2 Tablespoons vegetable shortening
    • 2 teaspoons water
    • 2 teaspoons peppermint extract
    For Chocolate Coating:
    • 12 ounces dark chocolate candy melts (* see NOTES) can sub. dark chocolate chips/almond bark
    • teaspoons vegetable shortening
    • decorative sprinkles, for garnish (OPTIONAL)
    Instructions
    Make Peppermint Filling:
    1. Combine powdered sugar, shortening, corn syrup, water and peppermint extract in a large bowl. Use electric mixer on LOW speed to mix ingredients. NOTE: Filling will be very crumbly, even after mixing.

    2. Use your hands to pinch/ knead the filling crumbles together. Continue until dough is fairly smooth in texture. Shape into a basic log form; transfer to wax paper or parchment paper. Continue to shape the filling into a rectangular log about 1½" wide and about 9" long, compacting filling as you form it. Wrap log tightly in plastic wrap; place on cookie sheet. REFRIGERATE FOR 1 HOUR!

    3. Remove wrap from chilled "log". Use a serrated knife to carefully cut log into ¼" thick slices. You should end up with about 32 slices. Place slices in a single layer on baking sheet(s). Place them in the FREEZER for 15 minutes.

    Chocolate And Dipping:
    1. Place about ⅓ of chocolate and ⅓ of the vegetable shortening in a microwave-safe bowl. Place bowl in microwave. Cook on High power for 45 seconds. Remove bowl and stir chocolate. Chocolate will be barely melted, but stir anyway. Repeat this process in 30 second intervals, stirring after each heating, until chocolate is fully melted and smooth. IMPORTANT TIP: The bowl, spoon, etc. you use must be DRY. Any water that gets into the chocolate can make chocolate "seize up" and get too hard. Dip about ⅓ of the peppermint patties at a time, then re-melt more chocolate, etc., as needed. Continue until all bars are dipped.

    2. FOR EACH BAR: Carefully place 1 bar at a time into chocolate; gently turn it over until all sides are chocolate-covered. TIP: Use a spoon to help coat bar with chocolate, and a small fork to lift the bar out of the bowl. Let excess chocolate run down and back into bowl. Immediately place the peppermint patty bar onto waxed paper OR parchment paper. Add colorful sprinkles immediately after each bar is dipped, so they adhere before chocolate hardens! Repeat this with each peppermint bar, until all are chocolate-dipped and decorated.

    3. Let chocolate completely harden before serving. Keep any leftovers stored in an airtight container in refrigerator. Enjoy!

    Recipe Notes

    FYI NOTE: Depending on the variety of dark chocolate melts used, the total calorie count of each bar can vary quite a bit. I used Make n' Mold chocolate candy wafers (sold at Hobby Lobby), but most grocers (or hobby shops) have a variety of candy wafers, almond bark or dark chocolate chips, which can be used for chocolate coating for the bars. Each differing variety will produce a different total caloric count.

    Nutrition Facts
    Peppermint Patty Bars
    Amount Per Serving (1 bar)
    Calories 107 Calories from Fat 36
    % Daily Value*
    Fat 4g6%
    Saturated Fat 3g19%
    Trans Fat 0.1g
    Polyunsaturated Fat 0.3g
    Monounsaturated Fat 0.4g
    Sodium 16mg1%
    Potassium 1mg0%
    Carbohydrates 17g6%
    Fiber 0.3g1%
    Sugar 17g19%
    Protein 1g2%
    Calcium 11mg1%
    Iron 0.4mg2%
    * Percent Daily Values are based on a 2000 calorie diet.

    Here’s one more to pin on your Pinterest boards!Enjoy fantastic Peppermint Patty Bars year-round! These miniature bars have the same great flavors you love in classic peppermint patties.


    Salmon In Spinach Cream Sauce

    Salmon In Spinach Cream Sauce is a simple, decadent seafood dish you’ll LOVE! This recipe can be made in 15 minutes (using only 1 skillet).
    Salmon In Spinach Cream Sauce is a simple, decadent seafood dish you'll LOVE! This recipe can be made in 15 minutes (using only 1 skillet).

    If you’re looking for a simple salmon recipe that is easy, pretty quick to prepare, AND tastes wonderful, here it is!

    Boneless, skinless salmon fillets are pan-seared in hot oil until browned on both sides. They are served on top of (and garnished with) a easy-to-make creamy, garlic, spinach and sun-dried tomato sauce.

    The convenient thing is this entire dish can be made using only ONE skillet, which also makes for easy clean up. YES!!! I found the original recipe on the Harry and David blog, made a few changes, and we really have enjoyed this lovely meal.

    The salmon is super delicious, and it’s perfect for serving on a busy night, without investing a lot of time or trouble making it! That a winning combination in my book.

    The recipe as written below makes two servings, but is VERY EASY to adapt for more servings. Here’s how to make it.

    Scroll Down For A Printable Recipe Card At The Bottom Of The Page

    Prepare The Salmon Fillets

    Pat the salmon fillets dry using paper towels to absorb the moisture. Sprinkle seasoning salt on top of each piece, dividing it evenly between the fillets.

    Boneless, skinless salmon fillets are patted dry, then seasoned lightly.

    Heat olive oil in a skillet on Medium heat until it is very hot, but not smoking. Lay the salmon fillets in the hot skillet with the seasoned side down.

    Cook the salmon for 3-4 minutes without moving, then carefully turn the fillets to the other side, using a spatula. The salmon should be nicely browned.

    Continue to cook the salmon for another 3-4 minutes or until it is fully cooked through, and flakes easily. Transfer the salmon fillets to a platter and cover with foil, to keep them warm.

    Two salmon fillets cook, seasoned side down, in hot oil in a skillet.The salmon fillets are flipped over to cook the other side.

    Make The Spinach Cream Sauce

    Use the same skillet (without rinsing) to make the spinach cream sauce. Turn the heat down to LOW. Stir minced garlic into the hot skillet, and cook it for 30 seconds, stirring often so it doesn’t burn.

    Add baby spinach, heavy whipping cream, and chopped, sun-dried tomatoes. NOTE: The sun-dried tomatoes should be the type that are packed in olive oil. Lightly drain them and chop before adding them to the sauce.

    Toss gently until these ingredients are combined. Stir often and cook on LOW heat only until the spinach has wilted. This will only take 2-3  minutes (don’t let the cream boil).

    Sauce is made with garlic, whipping cream, spinach and sun-dried tomatoes.The sauce is done when the spinach has wilted in the skillet.

    Transfer the salmon fillets back into the skillet on top of the spinach cream sauce, and then cover the skillet with a lid or foil.

    Heat on LOW only until the salmon is re-heated through (1-2 minutes), being careful to not let the cream sauce boil.

    Cooked salmon fillets are put back into skillet on top of the spinach sauce.

    Serve The Salmon In Spinach Cream Sauce

    To serve the salmon in spinach cream sauce, spoon a small amount of the spinach sauce on the serving plate.

    Place a salmon fillet on top of the sauce, and then spoon additional spinach cream sauce on top of the fish. Repeat this with the other fillet (or fillets) and serve immediately.

    Serve the salmon in spinach cream sauce with your favorite sides while hot, and enjoy this wonderful, decadent looking main dish!  

    Salmon In Spinach Cream Sauce, served with rolls and peas on the side.A serving of salmon in spinach cream sauce, served on a white plate.

    I’m confident you’re going to like salmon in spinach cream sauce, because it not only LOOKS good, it IS good! I hope you (and those you love) really enjoy it!

    Thank you for taking time out of your busy day to stop by. I invite you to come back again soon for more family-friendly recipes. Take care, may God bless you, and have a GREAT day!

    Looking For More SALMON Recipes?

    You can find ALL of my recipes in the Recipe Index, which is located at the top of the page. I have many delicious salmon recipes you might enjoy checking out, including:

    Want More Recipes? Get My FREE Newsletter!

    I publish a newsletter 2 times per month (1st and 15th) with lots of recipes, tips, etc..
    Would you like to join our growing list of subscribers?

    There is a Newsletter subscription box on the top right (or bottom) of each blog post, depending on the device you use.
    You can submit your e-mail address there, to be added to my mailing list.

    Find Me On Social Media:

    Facebook page: The Grateful Girl Cooks!
    Pinterest:
    The Grateful Girl Cooks!
    Instagram:
    jbatthegratefulgirlcooks

    Author's signature

    Recipe adapted from: Christina Lane, via The Table, at https://www.harryanddavid.com/blog/cast-iron-salmon-recipe/

    ↓↓ PRINTABLE RECIPE BELOW ↓↓

    0 from 0 votes
    Salmon In Spinach Cream Sauce
    Prep Time
    5 mins
    Cook Time
    10 mins
    Total Time
    15 mins
     

    Salmon In Spinach Cream Sauce is a simple, decadent seafood dish you'll LOVE! This recipe can be made in 15 minutes (using only 1 skillet).

    Category: Entree-Seafood, Main Dish
    Cuisine: All Cuisines
    Keyword: salmon, spinach, cream sauce
    Servings: 2
    Calories Per Serving: 364 kcal
    Author: JB @ The Grateful Girl Cooks!
    Ingredients
    For Salmon:
    • 8 ounces boneless, skinless salmon fillets approx. 4 ounces per fillet
    • ½ teaspoon seasoning salt
    • 1 Tablespoon olive oil
    For Spinach Cream Sauce:
    • 1 teaspoon minced garlic
    • cups baby spinach (fresh)
    • ¼ cup sun-dried tomatoes (packed in oil) drained slightly and chopped
    • ¼ cup heavy whipping cream (OR half and half)
    • 1 pinch salt and pepper (1 pinch each) , to season sauce to taste
    Instructions
    1. Pat salmon dry with paper towels. Sprinkle salmon (top only) with seasoning salt.

    2. Heat olive oil in a skillet on Medium heat until very hot, but not smoking. Put salmon in skillet, seasoned side down. Cook 3-4 minutes, then carefully turn the fillets to the other side. Salmon should be nicely browned. Cook other side 3-4 minutes until fully cooked through, and flakes easily. Transfer salmon to a platter; cover with foil, to keep them warm.

    3. Use same skillet (without rinsing) to make spinach cream sauce. Turn heat down to LOW. Stir garlic into hot skillet; cook for 30 seconds, stirring often. Add spinach, whipping cream, and chopped, sun-dried tomatoes. Toss gently until combined. Stirring often, cook on LOW heat only until spinach has wilted. This takes 2-3  minutes (don't let cream boil).

    4. Carefully transfer salmon back into the skillet (on top of spinach cream sauce). Cover skillet with a lid or foil. Heat on LOW only until salmon is re-heated through (1-2 minutes), being careful to not let cream sauce boil.

    5. To serve, spoon a small amount of spinach sauce on a plate. Place a salmon fillet on top of the sauce. Spoon additional spinach cream sauce on top of the fish. Repeat with other fillet (or fillets); serve immediately while hot. Enjoy!

    Nutrition Facts
    Salmon In Spinach Cream Sauce
    Amount Per Serving (1 fillet + sauce)
    Calories 364 Calories from Fat 243
    % Daily Value*
    Fat 27g42%
    Saturated Fat 9g56%
    Polyunsaturated Fat 4g
    Monounsaturated Fat 11g
    Cholesterol 96mg32%
    Sodium 725mg32%
    Potassium 1015mg29%
    Carbohydrates 6g2%
    Fiber 2g8%
    Sugar 1g1%
    Protein 25g50%
    Vitamin A 4176IU84%
    Vitamin C 25mg30%
    Calcium 80mg8%
    Iron 2mg11%
    * Percent Daily Values are based on a 2000 calorie diet.

    Here’s one more to pin on your Pinterest boards!Salmon In Spinach Cream Sauce is a simple, decadent seafood dish you'll LOVE! This recipe can be made in 15 minutes (using only 1 skillet).

    Maple Chile Glazed Carrots

    Maple Chile Glazed Carrots are a simple, yet delicious veggie side dish. Carrots are cooked with maple syrup, onions, butter, and spices.
    Maple Chile Glazed Carrots are a simple, yet delicious veggie side dish. Carrots are cooked with maple syrup, onions, butter, and spices.

    Today I would like to share a delicious recipe I found in a cookbook several years ago and made a couple slight changes to, in order to suit our taste.

    These maple chile glazed carrots are easy to prepare, and are a wonderful tasting side dish, perfect for serving with a variety of main dishes.

    Sliced carrots are cooked until tender in a sweet (maple syrup) and mild spice sauce which eventually glazes the carrots! It’s simple, really! Here’s how to make these yummy maple chile glazed carrots.

    Scroll Down for A Printable Recipe Card At The Bottom Of The Page

    Prep The Carrots

    I use 4 medium-sized carrots to make this recipe. Slice off the ends, peel the carrots, then discard the ends and peels. Cut the carrots into round slices, about ½” thick (approx. the width of a fingertip), then set aside.

    Four medium sized carrots are needed to make maple chile glazed carrots.Carrots are peeled, then cut in 1/2" round slices.

    Sauté The Onions

    Melt butter on Medium-High heat in a medium-sized skillet. Once melted, add chopped onions and cook, stirring often, until the onions become tender and translucent in color. This usually takes about 3-4 minutes.

    Chopped onions are cooked in butter in a medium sized skillet.

    Cook The Carrots

    Add the sliced carrots to the onions in the skillet, then add maple syrup, water, chile powder, salt, and cinnamon. Stir, to combine these ingredients in the skillet.

    Carrots, maple syrup, water, salt, chile powder and cinnamon are stirred in.

    Bring the liquids to a low simmer, then PARTIALLY cover the skillet. Let the carrots cook on a low simmer for about 5-6 minutes, or until they are crisp-tender in texture.

    The skillet is left partially covered while the maple chili glazed carrots cook.

    Remove the cover from the skillet. Continue cooking the maple chile glazed carrots for 4 minutes (uncovered) on a low simmer, stirring occasionally.

    When done, the liquid should be reduced in volume and slightly thickened, and the glaze carrots should be glossy/shiny looking.

    The carrots should also be tender at this point. Remove the skillet from the heat, because this side dish is now ready to be served!

    Carrots are tender, and liquid has reduced to a fine gloss when done.

    Serve The Maple Chile Glazed Carrots

    Transfer the hot, maple chile glazed carrots to a serving bowl. Garnish the carrots with a few fresh thyme leaves and a tiny bit of freshly grated nutmeg. Serve immediately while hot, and enjoy!
    NOTE: The garnishes are completely optional, but do add additional flavor and color to the dish! If you have access to them, I recommend using them.

    Maple chile glazed carrots are served, garnished with thyme leaves and nutmeg.

    I hope you have the opportunity to try this recipe, and trust you’ll enjoy this simple vegetable side dish as much as we do!

    Thanks for stopping by, and I invite you to com back soon for more family-friendly recipes. Take care, may God bless you, and have a GREAT day!

    Looking For More VEGETABLE SIDE DISH Recipes?

    You can find ALL of my recipes in the Recipe Index, which is located at the top of the page. I have lots of delicious veggie side dish recipes you might enjoy, including:

    Want More Recipes? Get My FREE Newsletter!

    I publish a newsletter 2 times per month (1st and 15th) with lots of recipes, tips, etc..
    Would you like to join our growing list of subscribers?

    There is a Newsletter subscription box on the top right (or bottom) of each blog post, depending on the device you use.
    You can submit your e-mail address there, to be added to my mailing list.

    Find Me On Social Media:

    Facebook page: The Grateful Girl Cooks!
    Pinterest:
    The Grateful Girl Cooks!
    Instagram:
    jbatthegratefulgirlcooks

    Author's signature

    Recipe adapted from: “The Chopped Cookbook”, by The Food Network, G.P., page 123, published in 2014 by Clarkson Potter

    ↓↓ PRINTABLE RECIPE BELOW ↓↓

    0 from 0 votes
    Maple Chile Glazed Carrots
    Prep Time
    5 mins
    Cook Time
    12 mins
    Total Time
    17 mins
     

    Maple Chile Glazed Carrots are a simple, yet delicious veggie side dish. Carrots are cooked with maple syrup, onions, butter, and spices.

    Category: Side Dish, Vegetable Dish
    Cuisine: All Cuisines
    Keyword: maple chile glazed carrots
    Servings: 4
    Calories Per Serving: 122 kcal
    Author: JB @ The Grateful Girl Cooks!
    Ingredients
    • 4 medium carrots peeled, cut in ½" round slices
    • Tablespoons unsalted butter
    • ¼ cup yellow onion chopped
    • 4 Tablespoons maple syrup
    • 4 Tablespoons water
    • ½ teaspoon salt
    • ¾ teaspoon chile powder
    • teaspoon ground cinnamon
    Optional Garnish: fresh thyme leaves and fresh grated nutmeg
      Instructions
      1. Peel carrots and trim ends. Cut carrots into round slices, about ½" thick; set aside.

      2. Melt butter on Medium-High in a medium skillet. Add onions and cook, stirring often, until onions become tender and translucent in color (3-4 minutes). Stir in carrots, maple syrup, water, chile powder, salt, & cinnamon until combined.

      3. Bring liquid to a low simmer, then PARTIALLY cover the skillet. Let carrots cook on a low simmer (partially covered) for 5-6 minutes, or until crisp-tender in texture.

      4. Remove cover from skillet. Continue simmering carrots (uncovered) for 4 minutes on a low simmer, stirring occasionally. When done, liquid should be reduced in volume and slightly thickened. Glaze on carrots should be glossy/shiny looking, and carrots tender. Remove skillet from heat source.

      5. Transfer carrots to serving bowl. Garnish with a few fresh thyme leaves and a tiny bit of freshly grated nutmeg. Serve hot, and enjoy!
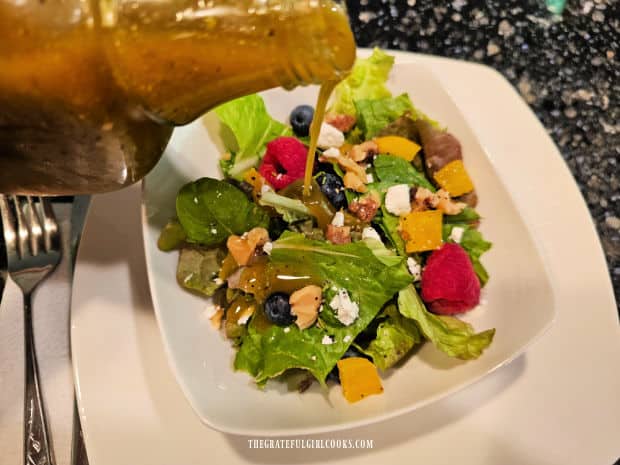
      Nutrition Facts
      Maple Chile Glazed Carrots
      Amount Per Serving (1 (1/4 of total))
      Calories 122 Calories from Fat 36
      % Daily Value*
      Fat 4g6%
      Saturated Fat 3g19%
      Trans Fat 0.2g
      Polyunsaturated Fat 0.3g
      Monounsaturated Fat 1g
      Cholesterol 11mg4%
      Sodium 342mg15%
      Potassium 264mg8%
      Carbohydrates 20g7%
      Fiber 2g8%
      Sugar 15g17%
      Protein 1g2%
      Vitamin A 10433IU209%
      Vitamin C 4mg5%
      Calcium 48mg5%
      Iron 0.3mg2%
      * Percent Daily Values are based on a 2000 calorie diet.

      Here’s one more to pin on your Pinterest boards!
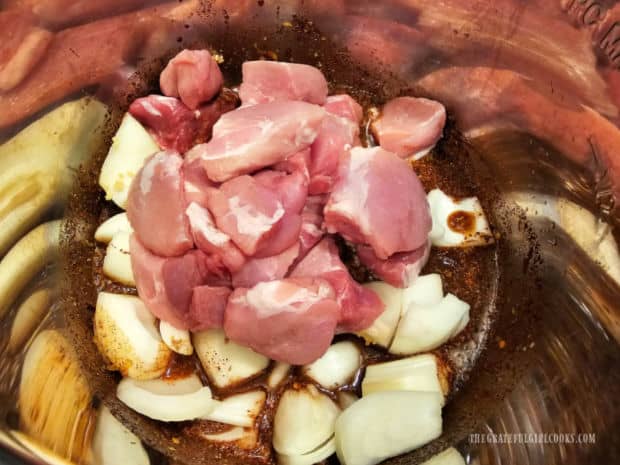
      Maple Chile Glazed Carrots are a simple, yet delicious veggie side dish. Carrots are cooked with maple syrup, onions, butter, and spices.