Month: June 2020

Coconut Pineapple Smoothie

Enjoy a simple, delicious Coconut Pineapple Smoothie, made w/ coconut Greek yogurt, banana, pineapple, and coconut milk (or other refrigerated milk).

Well, well, well… Summer is almost here! I don’t know about you, but when it’s hot outside, I enjoy a cold fruit smoothie for breakfast or a snack.  Thick, cold and creamy, and full of flavor, this coconut pineapple smoothie with only 4 ingredients is a personal favorite of mine!

One of the other COOL things about this smoothie is that it can also be FROZEN, to enjoy later in the day as a frozen (like ice cream) treat. YUMMO. You can read about that further down in this post.  Here’s how to make this delicious smoothie:

Scroll Down For A Printable Recipe Card At the Bottom Of The Page

What’s IN This Smoothie?

This coconut pineapple smoothie only has 4 basic ingredients, plus an optional garnish. They are: frozen pineapple chunks, a frozen banana, coconut-flavored Greek yogurt, and milk. I love to use refrigerated coconut milk (not the canned kind), but any milk that you enjoy or have on hand will do the trick.

Ingredients for the smoothie are yogurt, pineapple, banana and milk.

Let’s Get This Blending Party Started

Making the smoothie is a cinch. We ALL KNOW it is not rocket science to make a smoothie, but here’s what ya need to do. Pour the milk into a blender.

Add the frozen pineapple chunks, coconut yogurt and banana (peeled and still frozen). By using frozen banana and pineapple, you will NOT need to add ice (which could water down the drink a bit).

Mix on high speed (pulsing if needed), until the mixture is completely blended, creamy and smooth. TIP: You may need to stop the blender and scrape down the sides a couple of times to make sure the ingredients fully combine.

This usually takes only 1-2 minutes. Once fully blended, your coconut pineapple smoothie is ready to serve.

All four ingredients are placed in a blender, and mixed until smooth.Once the ingredients are fully blended, the coconut pineapple smoothie is ready.

Ready To Serve The Coconut Pineapple Smoothie!

The recipe will make enough for two medium sized servings, but if you’re really hungry, then by all means go for it, and make it one huge smoothie! It will be really cold, due to the addition of that frozen pineapple and banana.

Here is a coconut pineapple smoothie, served with a straw.

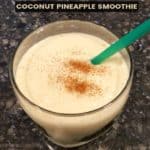
One of my FAVORITE ways to enjoy this smoothie is to add a small pinch of ground cinnamon to the top of the drink before serving.

I love the little hint of cinnamon flavor. This is absolutely optional, but I highly recommend it, because it looks good and tastes good.

The coconut pineapple smoothie has a sprinkle of ground cinnamon on top for garnish.

You Can Freeze The Coconut Pineapple Smoothie, Too!

Another way I enjoy this, is to only drink half of the finished smoothie. Then I take the other serving and place it in a sealed freezer-safe container and place it in the freezer for 1 hour or more. This will become an amazing afternoon snack!

Once it has frozen most of the way through, remove it from the freezer, grab a spoon and dig in. It will “feel” like you are eating coconut pineapple ice cream.

When partially frozen, it will have the texture of thick frozen yogurt. Leave it in the freezer longer than a couple hours, and it will become very firm, so you need to let it sit out for 10 minutes or so to soften it up before scooping.

Freezing a portion of the smoothie is a great way to enjoy it in another form, like ice cream You can also freeze it for another day, then let it defrost to drinking consistency, and enjoy round #2 of the smoothie as a beverage.

The smoothie can also be frozen to be eaten later like ice cream.After freezing for an hour, the smoothie "ice cream" is ready to scoop and enjoy!

I hope you enjoy this delicious fruit smoothie recipe, perfect for any time of the day, or any time of the year! Thanks for stopping by. Take care, and have a wonderful day, full of love, hope, and joy.

Looking For More SMOOTHIE Recipes?

You can find all of my smoothie recipes in the Recipe Index, located at the top of the page. A few of our family favorites include:

Want More Recipes? Get My FREE Newsletter!

I publish a newsletter 2 times per month (1st and 15th) with lots of recipes, tips, etc..
Would you like to join our growing list of subscribers?

There is a Newsletter subscription box on the top right (or bottom) of each blog post, depending on the device you use.
You can submit your e-mail address there, to be added to my mailing list.

Find Me On Social Media:

Facebook page: The Grateful Girl Cooks!
Pinterest:
The Grateful Girl Cooks!
Instagram:
jbatthegratefulgirlcooks

Author's signature

↓↓ PRINTABLE RECIPE BELOW ↓↓

0 from 0 votes
Coconut Pineapple Smoothie
Prep Time
3 mins
Cook Time
0 mins
Total Time
3 mins
 

Enjoy a simple, delicious Coconut Pineapple Smoothie, made w/ coconut Greek yogurt, banana, pineapple, and coconut milk (or other refrigerated milk).

Category: Beverage, Breakfast, Snack
Cuisine: All Cuisines
Keyword: coconut pineapple smoothie
Servings: 2
Calories Per Serving: 150 kcal
Author: JB @ The Grateful Girl Cooks!
Ingredients
  • 5.3 ounces Coconut Greek yogurt (Oikos Triple Threat)
  • ½ cup frozen pineapple chunks (do not thaw)
  • 1 medium frozen banana (do not thaw) , peeled and cut in chunks
  • ½ cup coconut milk or other milk , refrigerated (not canned)
  • 1 pinch ground cinnamon (for garnish-optional)
Instructions
  1. Pour milk into blender. Add frozen pineapple chunks, coconut yogurt and frozen banana chunks. By using frozen banana and pineapple, you will NOT need to add ice (which could water down the drink).

  2. Mix on high speed (pulsing if needed), until mixture is completely blended, creamy and smooth. TIP: You may need to stop the blender and scrape down the sides a couple of times to make sure the ingredients fully combine. Once fully blended, the coconut pineapple smoothie is ready to serve.

  3. Garnish each drink with a pinch of ground cinnamon, if desired. Enjoy!

  4. IF FREEZING: Place smoothie in covered, freezer-safe container. Freeze for 1-2 hours. If freezing longer than that, remove frozen smoothie from freezer about 10 minutes before eating to allow it to soften up a bit.

Nutrition Facts
Coconut Pineapple Smoothie
Amount Per Serving (1 g)
Calories 150 Calories from Fat 9
% Daily Value*
Fat 1g2%
Saturated Fat 1g6%
Cholesterol 3mg1%
Sodium 34mg1%
Potassium 285mg8%
Carbohydrates 30g10%
Fiber 4g17%
Sugar 20g22%
Protein 8g16%
Vitamin A 67IU1%
Vitamin C 11mg13%
Calcium 34mg3%
Iron 1mg6%
* Percent Daily Values are based on a 2000 calorie diet.

Here’s one more to pin on your Pinterest boards!Enjoy a simple, delicious Coconut Pineapple Smoothie, made w/ coconut Greek yogurt, banana, pineapple, and coconut milk (or other refrigerated milk).

Easy Tortellini Soup

Enjoy a piping hot bowl of yummy, Italian-inspired, Easy Tortellini Soup, made in under 30 minutes with only a few key ingredients and spices.

Even though the weather has been heating up this week, I want to share this soup recipe with you, cause it’s YUMMY, no matter what time of year it is. This recipe for easy tortellini soup is just that… EASY! It also happens to be delicious (in case that matters, too – ha ha!).

If you enjoy Italian food, and the spices associated with it, you’re gonna enjoy this soup. It has a tomato-based broth, with Italian spices, fragrant garlic, cheese tortellini pasta, chopped spinach, and is topped with a sprinkling of grated Parmesan cheese. Because it doesn’t require a long cooking time, you’ll be slurping up this delicious soup in NO TIME! Here’s how simple it is to make:

Scroll Down For A Printable Recipe Card At The Bottom Of The Page

Prepare The Tortellini

Cook the fresh, frozen, or dry tortellini in salted water, according to the package directions. Once done cooking, drain the tortellini, and set aside. I like to cook the tortellini AND the spinach (see below) at the same time, to save time.

Cheese tortellini are cooked per package directions, and then drained.

Prepare The Spinach

Cook the chopped spinach according to the package instructions. Once cooked, put the spinach into a strainer which is placed on top of a bowl.  Press down with the back of a spoon to press out the spinach juice into the bowl below.

The juice will collect in the bowl sitting underneath the strainer. Keep pressing (a lot) to drain off as much of the juice as you can. Discard the juice once finished. Set the spinach aside. Now it’s SOUP time, and it will come together REALLY quickly!

Frozen chopped spinach is thawed, then drained of excess liquid in a strainer.

How To Make Easy Tortellini Soup

Place the butter into the saucepan you will be using. Melt the butter on medium heat, and then add the minced garlic. Cook on medium heat for about a minute, stirring constantly, so the garlic doesn’t burn. Burnt garlic has a bitter taste, and you do NOT want that in your tortellini soup!

Now add the chicken broth to the pan, and heat it until it comes to a boil. Once boiling, reduce the heat to a low simmer, and then add the cooked, drained tortellini. Simmer for 5 minutes on low heat, stirring occasionally.

Butter and garlic is cooked in the soup pan for about a minute.Cooked and drained tortellini is added to the broth in the soup pan.

Finish Making This Easy Tortellini Soup

Once the soup has simmered for 5 minutes, add the diced tomatoes (including juice), drained spinach, salt, and Italian seasoning. Stir well, to fully combine the ingredients. Continue to heat the tortellini soup on low heat for 5 more minutes, or until the soup is fully heated through.

Drained spinach, tomatoes, and spices are added to the tortellini soup.The easy tortellini soup is cooked until heated through.

Serving Easy Tortellini Soup

Once the soup is fully heated through, it is ready to be served and gobbled up! Ladle the soup into individual bowls, and sprinkle grated Parmesan cheese on top. The Parmesan cheese garnish is optional, but trust me, it makes this Italian-inspired soup taste SO GOOD!

This wonderfully easy tortellini soup tastes great, especially if you serve it with a nice piece of crusty garlic bread on the side! Yum… I really hope you enjoy it. Store any leftover soup (covered) in your refrigerator for up to 2-3 days.

The finished tortellini soup is topped with finely grated Parmesan cheese.A close up photo of the easy tortellini soup.

This truly is a simple soup to make, and it tastes wonderful. We were able to share some with one of our neighbors who lives alone, and he enjoyed it, too!  I hope you have the opportunity to make it for those you love, and trust you will enjoy it, too! Thanks for stopping by, take care, and have a great day.

Looking For More TORTELLINI Recipes?

You can find all of my recipes in the Recipe Index, located at the top of the page. I have several tortellini recipes, which include:

Looking For More SOUP Recipes?

You can find all of my soup recipes in the Recipe Index, located at the top of the page. I have quite a few delicious soup recipes I think you will enjoy, including:

Interested In More Recipes?

Thank you for visiting this website. I appreciate you using some of your valuable time to do soIf you’re interested, I publish a newsletter 2 times per month (1st and 15th) with all the latest recipes, and other fun info. I would be honored to have you join our growing list of subscribers, so you never miss a great recipe!
There is a Newsletter subscription box on the top right side (or bottom) of each blog post, depending on the device you use, where you can easily submit your e-mail address (only) to be included in my mailing list.

You Can Also Find Me On Social Media:
Facebook page: The Grateful Girl Cooks!
Pinterest: The Grateful Girl Cooks!
Instagram: jbatthegratefulgirlcooks

Author's signature

0 from 0 votes
Easy Tortellini Soup
Prep Time
15 mins
Cook Time
10 mins
Total Time
25 mins
 

Enjoy a piping hot bowl of yummy, Italian-inspired, Easy Tortellini Soup, made in under 30 minutes with only a few key ingredients and spices.

Category: Entree, Soup
Cuisine: American, Italian
Keyword: tortellini soup
Servings: 6
Calories Per Serving: 191 kcal
Author: JB @ The Grateful Girl Cooks!
Ingredients
  • 8 ounces fresh, frozen, or dried cheese tortellini
  • 10 ounces frozen chopped spinach
  • 1 Tablespoon butter
  • 2 cloves garlic , minced
  • 28 ounces chicken broth
  • 14.5 ounces diced tomatoes (canned) , undrained
  • 1 Tablespoon Italian seasoning
  • ½ teaspoon salt
  • 6 Tablespoons grated Parmesan cheese (optional, for garnish)
Instructions
  1. Cook fresh, frozen, or dry tortellini in salted water, according to pkg. directions. Once done, drain tortellini; set aside.

  2. Cook spinach according to pkg. directions. When done, put spinach into a strainer placed on top of a bowl.  Press down with the back of a spoon to press out juice into bowl below. Drain off as much juice as possible. Discard juice, and set spinach aside.

  3. Melt butter on medium heat in large soup pan. Once melted, add minced garlic. Cook for 1 minute, stirring constantly, so garlic doesn't burn. Add chicken broth to pan, and heat until it comes to a boil. Once boiling, reduce heat to a low simmer. Add tortellini. Simmer for 5 minutes on low heat, stirring occasionally. Add diced tomatoes (including juice), spinach, salt, and Italian seasoning. Stir well, to combine ingredients. Continue to heat soup for 5 more minutes, or until fully heated through.

  4. Ladle hot soup into bowls, and sprinkle grated Parmesan cheese on each serving. Serve, and enjoy! Store any leftover soup (covered), in refrigerator, for up to 2-3 days.

Nutrition Facts
Easy Tortellini Soup
Amount Per Serving (1 (1/6 of total))
Calories 191 Calories from Fat 63
% Daily Value*
Fat 7g11%
Saturated Fat 3g19%
Cholesterol 24mg8%
Sodium 1068mg46%
Potassium 415mg12%
Carbohydrates 23g8%
Fiber 4g17%
Sugar 3g3%
Protein 11g22%
Vitamin A 5736IU115%
Vitamin C 19mg23%
Calcium 214mg21%
Iron 3mg17%
* Percent Daily Values are based on a 2000 calorie diet.

Here’s one more to pin on your Pinterest boards!Enjoy a piping hot bowl of yummy, Italian-inspired, Easy Tortellini Soup, made in under 30 minutes with only a few key ingredients and spices.

Brown Sugar Pork Chops

Brown Sugar Pork Chops are an easy and delicious dish, featuring seared pork chops baked in a simple garlic, butter, spices and brown sugar sauce!

Do you enjoy pork chops? We do, even though we don’t eat them too often. We used to prefer thick boneless chops, but have slowly gravitated back toward using bone-in chops in most of my recipes.

It’s good (for those who love to cook) to keep a few wonderful, “tried and true” recipes in “the old kitchen tool belt”. THIS is definitely one of those kind of recipes, so I’m happy to share it with you, and hope you enjoy it.

Brown sugar pork chops are a favorite way we enjoy “the other white meat”. They are simple to prepare, and taste wonderful!

Basically what you will do is brown the pork chops, make a simple sauce, and then bake the sauce-covered pork chops. It’s all so easy (and ready in about 35 minutes), so here’s how to make them:

Scroll Down For A Printable Recipe Card At The Bottom Of The Page

Season And Pan-Sear The Pork Chops

For this recipe you can use either bone-in or boneless pork chops (about 1″ thick). We prefer the bone-in, because the meat seems to stay a bit more juicy. Regardless of which type (bone-in or boneless) you decide to use, you’ll still enjoy these yummy pork chops!

NOTE: This recipe makes 4 pork chop servings- I was only making them for my husband and I this time, which is reflected in these photos.

The first thing you will need to do (after preheating your oven) is to season and pan-sear the pork chops. Pat the chops dry with paper towels, then lightly season BOTH sides with salt and ground black pepper.

Pork chops are seasoned with salt and pepper on both sides before pan-searing.

Heat the olive oil on medium-high heat in a large oven-proof skillet. Once the oil is very hot (but not smoking), carefully add the pork chops in one layer. They should sizzle when they hit the hot oil in the skillet. The hot oil will serve to give the chops a nicely browned exterior.

Cook the chops (without moving them) for 5-6 minutes. They should be well browned on the bottom. Carefully turn them to the other side, and continue cooking for another 5 minutes.

Transfer the pork chops to a plate or platter, and cover with foil to help keep them warm while you make the sauce. Do NOT clean out the skillet, because any little browned bits left in there will help flavor the sauce!

The meat is seasoned and then pan-seared in olive oil in a hot skillet.The pork chops are seared until browned, and then flipped to cook the other side.

Prepare The Brown Sugar Sauce

Now it’s time to quickly make the brown sugar sauce for the pork chops. Add butter to the skillet you cooked the pork chops in, and melt it on low heat.

Once melted, add the brown sugar, Italian seasoning, and minced garlic. Stir well to combine, and cook for 1 minute, stirring constantly, so the garlic doesn’t burn.

The brown sugar sauce will bubble quite a bit, but keep stirring! After one minute, add the pork chops back into the skillet, and turn off the heat.

Melted butter, garlic, brown sugar and Italian seasoning combine to make sauce for pork chops.Brown sugar sauce for pork chops is cooked before adding pork chops.

Bake The Pork Chops

When the pork chops are back in the skillet, spoon enough of the sauce over each one to cover the top. Pop the skillet into a preheated 400°F. oven, and bake the chops (uncovered) for 12-15 minutes.

The pork chops are safely cooked through once they reach an internal temperature of 145-160°F.

Chops are added to sauce, and covered with sauce before baking.

Serve The Brown Sugar Pork Chops

Once the brown sugar pork chops are done baking, they’re ready to be served. Spoon more of the pan sauce over the top of each chop, and then garnish with lemon wedges, chopped chives (or parsley), if desired.

Brown sugar pork chops are garnished with chives and lemon wedges before serving.

Our favorite way to enjoy these yummy brown sugar pork chops is to serve them placed on top of a bed of mashed potatoes. The meat and slightly sweet sauce taste wonderful when paired with creamy, buttery potatoes!

You can also serve these tasty chops with buttered orzo pasta or egg noodles, but mashed potatoes remain our favorite choice! We enjoyed fresh steamed asparagus served on the side, too! Gotta get those veggies in!

My husband told me that this recipe for brown sugar pork chops is one of his favorites, and that makes me happy! I suspect these fantastic tasting pork chops will make your taste buds happy, too.

The brown sugar pork chops are served on mashed potatoes, with asparagus on the side.

Thanks for stopping by today. I sincerely hope you have the opportunity to make this delicious dish for yourself and those you love. Also, if you have an air fryer, be sure to try my recipe for Air Fryer Pork Chops For Two, a quick and delicious recipe you’ll love!

Take care, and have a great day. A complete, printable recipe card is located below, for your convenience.

Looking For More PORK CHOP Recipes?

You can find all of my pork recipes in the Recipe Index, which is located at the top of the page. I have quite a few pork chop recipes, including:

Want More Recipes? Get My FREE Newsletter!

I publish a newsletter 2 times per month (1st and 15th) with lots of recipes, tips, etc..
Would you like to join our growing list of subscribers?

There is a Newsletter subscription box on the top right (or bottom) of each blog post, depending on the device you use.
You can submit your e-mail address there, to be added to my mailing list.

Find Me On Social Media:

Facebook page: The Grateful Girl Cooks!
Pinterest:
The Grateful Girl Cooks!
Instagram:
jbatthegratefulgirlcooks

Author's signature

Original recipe source: dinneratthezoo.com/brown-sugar-pork-chops/

↓↓ PRINTABLE RECIPE BELOW ↓↓

4.34 from 3 votes
Brown Sugar Pork Chops
Prep Time
10 mins
Cook Time
25 mins
Total Time
35 mins
 

Brown Sugar Pork Chops are an easy and delicious dish, featuring seared pork chops baked in a simple garlic, butter, spices and brown sugar sauce!

Category: Entree
Cuisine: American
Keyword: brown sugar pork chops
Servings: 4
Calories Per Serving: 420 kcal
Author: JB @ The Grateful Girl Cooks!
Ingredients
  • 4 bone-in or boneless pork chops , approx. 1" thick
  • salt and pepper , enough to lightly season chops
  • 2 teaspoons extra-virgin olive oil
  • 3 Tablespoons butter
  • 3 Tablespoons brown sugar
  • 2 teaspoons minced garlic
  • 1 teaspoon Italian seasoning
Optional Garnish: chopped chives (or parsley), lemon wedges
    Instructions
    1. Preheat oven to 400°F. Pat pork chops dry with paper towels; lightly season BOTH sides with salt and pepper.

    2. Heat olive oil on medium-high heat in a large oven-proof skillet. Once oil is very hot (but not smoking), carefully add pork chops in one layer. They should sizzle when they hit the hot oil. Cook chops for 5-6 minutes, without moving them. Turn them over, and continue cooking the other side for 5 minutes. Transfer pork chops to a platter, and cover with foil to keep them warm. Do NOT clean out the skillet.

    3. Make the sauce: Melt butter on low heat using the same skillet. Add brown sugar, Italian seasoning, and minced garlic. Stir well, and cook for 1 minute, stirring constantly, so the garlic doesn't burn. Add pork chops back into the skillet, and turn off the heat.

    4. Spoon enough sauce over each pork chop to cover. Place skillet into 400°F. oven and bake (uncovered) for 12-15 minutes. The pork is safely cooked once the chops reach an internal temperature of 145-160°F. When done, they are ready to be served.

    5. To serve, spoon pan sauce over pork chops; garnish with lemon wedges, chopped chives (or parsley) if desired. Serve chops on a bed of mashed potatoes, orzo pasta, or egg noodles. Enjoy!

    Nutrition Facts
    Brown Sugar Pork Chops
    Amount Per Serving (1 pork chop)
    Calories 420 Calories from Fat 234
    % Daily Value*
    Fat 26g40%
    Saturated Fat 11g69%
    Cholesterol 140mg47%
    Sodium 171mg7%
    Potassium 603mg17%
    Carbohydrates 10g3%
    Fiber 1g4%
    Sugar 9g10%
    Protein 35g70%
    Vitamin A 262IU5%
    Vitamin C 1mg1%
    Calcium 55mg6%
    Iron 1mg6%
    * Percent Daily Values are based on a 2000 calorie diet.

    Here’s one more to pin on your Pinterest boards!Brown Sugar Pork Chops are an easy and delicious dish, featuring seared pork chops baked in a simple garlic, butter, spices and brown sugar sauce!

    Orange Herb Vinaigrette

    It’s EASY to make this delicious Orange Herb Vinaigrette in under 5 minutes, to add flavor and color to your favorite mixed green or couscous salads.
    It's EASY to make this delicious Orange Herb Vinaigrette in under 5 minutes, to add flavor and color to your favorite mixed green or couscous salads.

    If you’re looking for a new salad dressing that has a ton of flavor, may I suggest this orange herb vinaigrette? I originally found it in a recipe I was trying a few years ago, and have made this salad dressing many times since then.

    It only takes a few minutes to throw together, which is another win-win for busy folks, and it tastes great on orzo or couscous salads, as well as on a chilled mixed green salad. YUMMO! Here’s how to make this simple dressing:

    Scroll Down For A Printable Recipe Card At The Bottom Of The Page

    Ingredients Needed For Orange Herb Vinaigrette

    To make this orange herb vinaigrette you will need the following ingredients (shown below). They are oil, white wine vinegar, an orange, honey, and some dried spices (turmeric, tarragon, thyme, salt & pepper).

    I typically use vegetable oil for this vinaigrette, but you can substitute canola or grapeseed oil, as well, for the same great taste. It’s also helpful to have a microplane (seen in photo below) to finely grate or “zest” the orange peel. TIP: If you don’t have access to a microplane zester, use the smallest opening on a box grater. The orange “zest” is added, in addition to the juice of the orange, for an abundance of citrus flavor.

    The ingredients needed to make the vinaigrette salad dressing.

    Mix Up The Vinaigrette

    Just in case you’re wondering, I don’t mean “confuse the vinaigrette” when I say “mix up the vinaigrette”. OK? OK. Just makin’ sure we’re on the same page here (wink, wink). Place all the ingredients EXCEPT for the salt and pepper into a small bowl or measuring cup. Whisk well, with a wire whisk or a small fork, until the ingredients are fully combined and the vinaigrette has emulsified.

    To “emulsify” salad dressing means to mix so thoroughly that ingredients that normally don’t combine well (like oil and water), can “come together” in a way that transforms them into a stabilized unit. Most vinaigrettes are emulsified, to fully incorporate the vinegar and oil, which are pretty standard ingredients.

    Once the orange herb vinaigrette is fully mixed, it is ready to use on the salad.

    Ready To Serve!

    Once the vinaigrette has emulsified, season it lightly to taste, with the salt and ground black pepper. Give it another quick stir, and the vinaigrette is ready to be used.

    Drizzle this salad dressing over your favorite mixed green salad, orzo or couscous salad. In the photo below, you can the vinaigrette being drizzled over my Cranberry Orange Israeli Couscous. It tastes FANTASTIC! Hope you like it, too.

    The orange herb vinaigrette is poured on an Israeli couscous salad and then tossed.

    In no time at all you can create this wonderful homemade salad dressing. I’m confident you will enjoy it, using your own ingredients, and made in your own kitchen. Thanks for stopping by today, and spending some of your valuable time on this blog. Take care, and have a great day. See below for the printable recipe card.

    Looking For More SALAD DRESSING Recipes?

    You can find all of my salad dressing recipes in the Recipe Index, located at the top of the page. I have quite a few, including:

    Interested In More Recipes?

    Thank you for visiting this website. I appreciate you using some of your valuable time to do soIf you’re interested, I publish a newsletter 2 times per month (1st and 15th) with all the latest recipes, and other fun info. I would be honored to have you join our growing list of subscribers, so you never miss a great recipe!
    There is a Newsletter subscription box on the top right side (or bottom) of each blog post, depending on the device you use, where you can easily submit your e-mail address (only) to be included in my mailing list.

    You Can Also Find Me On Social Media:
    Facebook page: The Grateful Girl Cooks!
    Pinterest: The Grateful Girl Cooks!
    Instagram: jbatthegratefulgirlcooks

    Author's signature

    Original recipe source (a blog no longer around): http://artisinalfood.blogspot.com/2011/12/israeli-couscous-with-cranberries-and.html

    0 from 0 votes
    Orange Herb Vinaigrette
    Prep Time
    5 mins
    Cook Time
    0 mins
    Total Time
    5 mins
     

    It's EASY to make this delicious Orange Herb Vinaigrette in under 5 minutes, to add flavor and color to your favorite mixed green or couscous salads.

    Category: Salad, Salad Dressing
    Cuisine: All Cuisines
    Keyword: orange herb vinaigrette
    Servings: 8 Tablespoons (approx. 1/2 cup)
    Calories Per Serving: 62 kcal
    Author: JB @ The Grateful Girl Cooks!
    Ingredients
    • 3 Tablespoons vegetable oil (or canola/grapeseed oil)
    • Tablespoons white wine vinegar
    • 1 Tablespoon honey
    • 1 medium orange (juice and zest)
    • ½ teaspoon turmeric
    • ½ teaspoon dried thyme
    • ½ teaspoon dried tarragon
    • salt/pepper, to taste
    Instructions
    1. Place all ingredients EXCEPT for salt and pepper in a small bowl or measuring cup. Whisk well, with a wire whisk or a small fork, until the ingredients are fully combined and the vinaigrette has emulsified. NOTE: To "emulsify" salad dressing means to mix so thoroughly that ingredients that normally don't combine well (like oil and water), can "come together" in a way that transforms them into a stabilized unit.

    2. Season lightly with salt and black pepper, to taste. Stir again, and then drizzle over salad to serve.

    3. Store any leftover vinaigrette in a sealed container in the refrigerator for up to 2-3 days. Remove vinaigrette from refrigerator a few minutes before serving, and stir well, to re-blend before using.

    Nutrition Facts
    Orange Herb Vinaigrette
    Amount Per Serving (1 Tablespoon)
    Calories 62 Calories from Fat 45
    % Daily Value*
    Fat 5g8%
    Saturated Fat 4g25%
    Sodium 1mg0%
    Potassium 30mg1%
    Carbohydrates 4g1%
    Fiber 1g4%
    Sugar 4g4%
    Protein 1g2%
    Vitamin A 37IU1%
    Vitamin C 9mg11%
    Calcium 8mg1%
    Iron 1mg6%
    * Percent Daily Values are based on a 2000 calorie diet.

    Here’s one more to pin on your Pinterest boards!It's EASY to make this delicious Orange Herb Vinaigrette in under 5 minutes, to add flavor and color to your favorite mixed green or couscous salads.

    Pineapple Peanut Coleslaw

    Pineapple Peanut Coleslaw is an easy and delicious salad/side dish for your next BBQ! This sweet, crunchy salad is ready in 10 minutes, and serves 8.Pineapple Peanut Coleslaw is an easy and delicious salad/side dish for your next BBQ! This sweet, crunchy salad is ready in 10 minutes, and serves 8.

    If you enjoy coleslaw, then I am pretty confident you will really enjoy this slight “twist” on the classic side dish! Crunchy, sweet, and lightly flavored with a creamy dressing, pineapple peanut coleslaw will be a big hit at any get together! The great news is that it is SO EASY to make, with minimal effort!

    Pineapple tidbits add a slightly sweet touch to the salad, and roasted peanuts and crisp cabbage add the crunch! Pour the easy to make handmade dressing over the top, give it a toss, refrigerate until ready to serve, and poof! A great tasting salad for your next BBQ or potluck! Here’s how easy it is to make pineapple peanut coleslaw:

    Scroll Down for A Printable Recipe Card At the Bottom Of The Page

    Make The Pineapple Peanut Coleslaw

    One reason this recipe is so easy is because you use a bag of pre-shredded coleslaw mix, which is available in the produce section of most grocery stores. Place the bag of shredded coleslaw mix into a large salad bowl. Add the peanuts, drained pineapple tidbits (remembering to reserve the juice), and sliced green onions.

    Pineapple tidbits, green onions, peanuts are added to the coleslaw mix in bowl.

    Make The Creamy Coleslaw Dressing

    You can make the salad dressing for the coleslaw in no time at all. The ingredients for the dressing include plain yogurt (regular or Greek), apple cider vinegar, pineapple juice (from the can of pineapple tidbits), brown sugar, salt, black pepper, and red pepper flakes.

    Place the dressing ingredients in a medium sized bowl, and whisk together until fully blended and smooth. You can use a wire whisk or a fork to do this, and it will only take about a minute to fully blend.

    The ingredients for the coleslaw dressing are placed in a bowl to mix.

    Coleslaw dressing is whisked together until fully mixed.

    Pour the creamy salad dressing over the top of the coleslaw, and then gently toss, to combine all the ingredients, and fully coat them with dressing. **See how EASY this pineapple peanut coleslaw is to make? Told ya!

    The salad dressing is added to the bowl of pineapple peanut coleslaw.

    Ready To Eat!

    Once the pineapple peanut coleslaw is fully mixed, you can eat it right away, OR you can chill it in the refrigerator for a couple of hours (your choice). My personal opinion is that this coleslaw is definitely BEST when served very cold… just sayin’.  After refrigerating, toss the salad again before serving to get the dressing mixed back in.

    Right before serving, sprinkle a few more peanuts and red pepper flakes on the top of the coleslaw as a garnish, if desired. Serve, and enjoy.

    A closeup of the pineapple peanut coleslaw, after being tossed with the dressing.Peanuts and red pepper flakes garnish the chilled coleslaw.

    Storing The Pineapple Peanut Coleslaw

    Cover any leftovers, and store in the refrigerator for up to 2-3 days. Juice will accumulate on the bottom of the bowl, due to all those juicy pineapple tidbits. No problem… just spoon any unwanted juice out of the bottom of the bowl, and discard!

    Pineapple peanut coleslaw is a delicious side dish... crunchy and sweet!

    I really hope you enjoy this simple, but flavor-filled coleslaw recipe. We love it as a side dish with hamburgers or pulled pork sandwiches, but the coleslaw can also be placed ONTO a BBQ shredded pork sandwich for a tasty, crunchy addition. If you enjoy coleslaw, be sure to check out my yummy recipes for purple coleslaw and poppyseed apple raisin coleslaw!

    Thanks for stopping by today. I hope you have a great day, and trust you will return for more recipes in the future.

    Looking For More SIDE SALAD Recipes?

    You can find all of my side dish recipes in the Recipe Index, located at the top of the page. A few side salad recipes you might enjoy include:

    Interested In More Recipes?

    Thank you for visiting this website. I appreciate you using some of your valuable time to do soIf you’re interested, I publish a newsletter 2 times per month (1st and 15th) with all the latest recipes, and other fun info. I would be honored to have you join our growing list of subscribers, so you never miss a great recipe!
    There is a Newsletter subscription box on the top right side (or bottom) of each blog post, depending on the device you use, where you can easily submit your e-mail address (only) to be included in my mailing list.

    You Can Also Find Me On Social Media:
    Facebook page: The Grateful Girl Cooks!
    Pinterest: The Grateful Girl Cooks!
    Instagram: jbatthegratefulgirlcooks

    Author's signature

    Recipe adapted from: asouthernsoul.com/pineapple-slaw/

    5 from 1 vote
    Pineapple Peanut Coleslaw
    Prep Time
    10 mins
    Cook Time
    0 mins
    Total Time
    10 mins
     

    Pineapple Peanut Coleslaw is an easy and delicious salad/side dish for your next BBQ! This sweet, crunchy salad is ready in 10 minutes, and serves 8.

    Category: Salad/Side Dish
    Cuisine: American
    Keyword: pineapple peanut coleslaw
    Servings: 8
    Calories Per Serving: 124 kcal
    Author: JB @ The Grateful Girl Cooks!
    Ingredients
    For Coleslaw:
    • 14 ounces shredded coleslaw mix (bagged) , or 3 generous cups homemade slaw mix
    • 20 ounce canned pineapple tidbits , drained (reserve juice)
    • 3 stalks green onions (bulb and stem) , sliced
    • cup roasted salted peanuts , plus more for garnish, if desired
    For Coleslaw Dressing:
    • ½ cup plain yogurt ,regular or Greek
    • 3 Tablespoons reserved pineapple juice
    • 3 Tablespoons apple cider vinegar
    • 3 Tablespoons brown sugar
    • 1 teaspoon salt
    • ½ teaspoon ground black pepper
    • ¼ teaspoon red pepper flakes , plus more for garnish, if desired
    Instructions
    1. Place coleslaw mix in a large salad bowl. Add peanuts, drained pineapple tidbits, and sliced green onions.

    2. Put coleslaw dressing ingredients in a medium sized bowl. Whisk with fork or wire whisk until fully blended and smooth. Pour dressing over coleslaw, and gently toss, to coat and fully combine all ingredients. Serve immediately, or refrigerate 1-2 hours until well-chilled. Garnish with a tiny bit of red pepper flakes and additional peanuts before serving, if desired. Enjoy!

    3. Cover, and store leftover coleslaw in refrigerator for up to 2-3 days. Discard any accumulated liquid that accumulates on bottom of bowl (pineapple juice).

    Recipe Notes

    Substitutions: No peanuts? No problem. You can substitute sliced roasted almonds, or chopped roasted salted cashews.

    Nutrition Facts
    Pineapple Peanut Coleslaw
    Amount Per Serving (1 g)
    Calories 124 Calories from Fat 27
    % Daily Value*
    Fat 3g5%
    Saturated Fat 1g6%
    Cholesterol 1mg0%
    Sodium 336mg15%
    Potassium 245mg7%
    Carbohydrates 21g7%
    Fiber 3g13%
    Sugar 17g19%
    Protein 4g8%
    Vitamin A 156IU3%
    Vitamin C 26mg32%
    Calcium 61mg6%
    Iron 1mg6%
    * Percent Daily Values are based on a 2000 calorie diet.

    Here’s one more to pin on your Pinterest boards!Pineapple Peanut Coleslaw is an easy and delicious salad/side dish for your next BBQ! This sweet, crunchy salad is ready in 10 minutes, and serves 8.

    Air Fryer Bacon Cheeseburger

    Learn how easy it is to make a juicy good Air Fryer Bacon Cheeseburger, using this appliance. Can’t get outside to grill? Use an air fryer instead!
    Learn how easy it is to make a juicy good Air Fryer Bacon Cheeseburger, using this appliance. Can't get outside to grill? Use an air fryer instead!

    When it’s raining outside and we can’t grill burgers on our BBQ, we make ’em in our air fryer! My husband and I have made air fryer bacon cheeseburgers quite a few times now, and guess what? They’re really GOOD! They are also very easy to prepare with super heated hot air.

    Now that we have this recipe in our air fryer cooking tool belt, even the weather can’t stop us from enjoying a great burger whenever we want one. Here’s how we make ’em:

    Scroll Down For A Printable Recipe Card At The Bottom Of The Page

    Toast The Buns (optional)

    Before cooking the hamburger patties, if you would like to toast the hamburger buns, simply lightly spread each half with butter and cook on low heat in a large skillet until golden brown. We love them toasted, which helps keep the buns from getting too soggy. Set the buns aside once toasted. This is completely optional, but it makes an air fryer bacon cheeseburger even better, in our humble opinion.

    Hamburger buns, after being lightly toasted with butter in a skillet

    Season The Hamburger Patties

    We used 1/4 pound ground beef patties. To season the hamburger patties for air fryer cooking, lightly brush each patty on one side with melted butter and a tiny bit of liquid smoke flavoring. The liquid smoke is optional, but we find it really helps provide a smoky taste to the meat (like outside grilling does). Lightly sprinkle the patties on one side with salt and Montreal steak seasoning. You can substitute your own favorite seasonings, if desired, to suit your personal taste.

    Have the slices of cheddar (or American) cheese AND the precooked bacon nearby. Did you know you can even cook bacon in an air fryer? Yes you can… and it is fabulous! For each cheeseburger I use a strip of precooked bacon that has been cut in half. You will add these right at the end of the air frying time, so will need them nearby, ready to go!

    Hamburger patties are seasoned with spices, butter, and liquid smoke before cooking.Pre-cooked bacon and cheddar cheese slices ready to add to cooked burgers.

    Cooking An Air Fryer Bacon Cheeseburger

    Preheat your air fryer to 360°F. This will take 3-4 minutes typically. Place the patties in the air fryer basket, seasoned side down. Cook for 5 minutes, then turn the patties over, and continue cooking for 2 more minutes. Our burgers were medium-well once done.

    NOTE: Because air fryer temps for different models of air fryers, your cooking time may be a tiny bit less or a tiny bit longer. Check for your preferred done-ness. Once done, TURN OFF THE AIR FRYER (and quickly do the next step)!

    Burgers are cooked in air fryer, then flipped and cooked some more.


    Once the air fryer is turned off (but still really HOT), immediately place a slice of cheese onto each burger patty. Lay the bacon strips on top of the cheese (2 halves per burger). Close the air fryer and let the patties sit, in the still hot (but powered off) air fryer. After 2 minutes, remove the burger patties from the air fryer.

    The heat will have melted the cheese and re-heated the bacon. My husband decided at the last moment to leave the cheese off his air fryer bacon cheeseburger (how dare he!), and ate the cheese by itself, instead. Jeepers.

    Bacon slices, cheddar cheese added to air fryer bacon cheeseburger.Cheese has melted and bacon is hot. Time to build a burger.

    Build Your Air Fryer Bacon Cheeseburger and Eat!

    Place the burger patties onto toasted (or untoasted) buns. Add your favorite condiments, along with lettuce tomato, and pickles. We LOVE our air fryer bacon cheeseburgers with fresh avocado slices, too. YUM. Serve, and enjoy these delicious burgers.

    Air fryer bacon cheeseburger is assembled before eating.A juicy, hot air fryer bacon cheeseburger, ready to devour.

    We’ve made these air fryer burgers quite a few times, since we get our fair share of rain here in Oregon. We love to grill burgers outside on our Weber BBQ, but also love making them in our handy air fryer when rainy or snowy weather prohibits it!

    Hope you give this air fryer bacon cheeseburger recipe a try, and trust you will enjoy it as much as we do. Take care, and have a great day.

    Looking For More AIR FRYER recipes?

    You can find all of my recipes in the Recipe Index, located at the top of the page. I have several delicious air fryer recipes, including:

    Interested In More Recipes?

    Thank you for visiting this website. I appreciate you using some of your valuable time to do soIf you’re interested, I publish a newsletter 2 times per month (1st and 15th) with all the latest recipes, and other fun info. I would be honored to have you join our growing list of subscribers, so you never miss a great recipe!
    There is a Newsletter subscription box on the top right side (or bottom) of each blog post, depending on the device you use, where you can easily submit your e-mail address (only) to be included in my mailing list.

    You Can Also Find Me On Social Media:
    Facebook page: The Grateful Girl Cooks!
    Pinterest: The Grateful Girl Cooks!
    Instagram: jbatthegratefulgirlcooks

    Author's signature

    5 from 1 vote
    Air Fryer Bacon Cheeseburger
    Prep Time
    5 mins
    Cook Time
    7 mins
    Total Time
    12 mins
     

    Learn how easy it is to make a juicy good Air Fryer Bacon Cheeseburger, using this appliance. Can't get outside to grill? Use an air fryer instead!

    Category: Dinner, Entree, Lunch
    Cuisine: American
    Keyword: air fryer bacon cheeseburger
    Servings: 2
    Calories Per Serving: 399 kcal
    Author: JB @ The Grateful Girl Cooks!
    Ingredients
    • 2 medium hamburger buns , pan-toasted with melted butter (if using toasted buns)
    • 2 slices bacon, pre-cooked
    • 2 slices cheddar cheese (or American)
    • ½ pound ground beef burger patties ,two patties - 1/4 pound each
    • 1 teaspoon butter, melted
    • ½ teaspoon liquid smoke flavoring, divided (optional)
    • salt and Montreal steak seasoning to taste , or preferred seasonings
    • Condiments and Burger Toppings, as desired
    Instructions
    1. Before cooking hamburger patties, if you'd like to toast the hamburger buns, simply spread each half lightly with softened butter. Cook on low heat (butter side down) in a large skillet until golden brown. Set aside.

    2. Season hamburger patties by lightly brushing each on one side with melted butter and a tiny bit of liquid smoke flavoring. Lightly sprinkle patties with salt and Montreal steak seasoning. You can substitute your favorite seasonings, if desired, to suit your personal taste. Have cheese slices AND precooked bacon nearby. You will quickly add these at the end of the air frying time, so you'll need them close.

    3. Preheat air fryer to 360°F. This takes 3-4 minutes. Place patties in air fryer basket, seasoned side down. Cook for 5 minutes, then turn patties over, and continue cooking for 2 more minutes. NOTE: Because air fryer temps vary quite a bit, your cooking time may be a bit less or a bit longer. Once done, TURN OFF THE AIR FRYER! Immediately place a slice of cheese onto each burger patty. Lay bacon strips on top of the cheese (2 halves per burger). Close the air fryer and let the patties sit in the hot (but powered off) air fryer. After 2 minutes, remove the patties from the air fryer. The residual heat will have melted the cheese and heated the bacon.

    4. Place burger patties onto prepared buns, and garnish with your preferred condiments and toppings. Serve, and enjoy!

    Recipe Notes

    Caloric calculation was made using untoasted hamburger buns, lean ground beef, bacon and cheese for the burgers. No additional condiments or burger toppings were calculated as they may vary, by personal choice.

    Nutrition Facts
    Air Fryer Bacon Cheeseburger
    Amount Per Serving (1 burger (without condiments))
    Calories 399 Calories from Fat 162
    % Daily Value*
    Fat 18g28%
    Saturated Fat 9g56%
    Cholesterol 101mg34%
    Sodium 553mg24%
    Potassium 487mg14%
    Carbohydrates 22g7%
    Fiber 1g4%
    Sugar 3g3%
    Protein 36g72%
    Vitamin A 233IU5%
    Vitamin C 1mg1%
    Calcium 207mg21%
    Iron 4mg22%
    * Percent Daily Values are based on a 2000 calorie diet.

    Here’s one more to pin on your Pinterest boards!Learn how easy it is to make a juicy good Air Fryer Bacon Cheeseburger, using this appliance. Can't get outside to grill? Use an air fryer instead!

    Avocado Cilantro Lime Dressing

    Delicious avocado cilantro lime dressing can be used as a topping on Southwest-inspired salads, baked potatoes, OR as a quick dip for tortilla chips!
    Delicious avocado cilantro lime dressing can be used as a topping on Southwest-inspired salads, baked potatoes, OR as a quick dip for tortilla chips!

    Looking for a delicious salad dressing that can also double as a topping for potatoes, or even as a dip for that big ol’ bag of tortilla chips? Well… here it is – avocado cilantro lime dressing! Thick, creamy, and loaded with Southwestern flavors, this really is a wonderfully easy and versatile dressing.

    It is amazingly simple to prepare in under 10 minutes from start to finish, and tastes fantastic, no matter how you decide to serve it. Here’s how to make this delicious dressing/dip:

    Scroll Down For A Printable Recipe Card At The Bottom Of The Page

    What’s In Avocado Cilantro Lime Dressing?

    The ingredients necessary to make avocado cilantro lime dressing are all fairly common. They are avocado, cilantro, lime juice, red wine vinegar, olive oil, red onion flakes, cumin, and salt/pepper. See the printable recipe card at the bottom of this post for exact measurements.

    A photo of the ingredients used to make this salad dressing.

    It’s EASY To Make Avocado Cilantro Lime Dressing

    Making this creamy salad dressing (or topping) could not be any easier! Measure all the ingredients except for the salt and pepper into a blender. Blend on high speed until the dressing is smooth and creamy. Once done, season to taste with salt and pepper.

    If you do not own a blender, you can use an electric mixer, to combine the ingredients until they’re smooth and creamy. It might take just a bit longer than if using a blender, but this is a good alternative. Once done, season to taste with salt and pepper.

    TIP: If you’re using this as a traditional salad dressing and want it to be thinner, no problem! Simply thin it slightly by adding a tiny bit more olive oil and red wine vinegar, and mixing well.

    What Can You Do With Avocado Cilantro Lime Dressing?

    The avocado cilantro lime dressing can now be used as a dip or a topping, and wow, does it taste wonderful! Grab some tortilla chips for a flavor-packed creamy avocado dip, or top a steamin’ hot baked potato with this dressing (instead of sour cream). Yum. Can you see the specks of cilantro in creamy dressing, shown in the photo below? Oh yeah.

    Avocado Cilantro Lime Dressing is mixed until creamy and smooth, using a blender.

    I also use this as a dressing for my yummy black bean, corn and tomato salad. The creamy dressing tastes fantastic when mixed into this delicious side dish, as well.

    The avocado salad dressing is mixed into a Southwestern black bean and corn salad.

    Another way we have enjoyed the avocado cilantro lime dressing is to use it as a topping for a main dish Southwestern steak salad. You can see it in the photo below, as well. So much flavor is added to each salad.

    Dollop a steak salad with avocado cilantro lime dressing to finish.

    However you choose to enjoy it, this creamy avocado cilantro lime dressing is absolutely delicious! I hope you have the chance to make this recipe for those you love. Thanks for stopping by, and have a wonderful day, friend.

    Looking for more SALAD DRESSING recipes?

    You can find all of my salad dressing recipes in the Recipe Index, located at the top of the page. I have quite a few, including:

    Interested In More Recipes?

    Thank you for visiting this website. I appreciate you using some of your valuable time to do soIf you’re interested, I publish a newsletter 2 times per month (1st and 15th) with all the latest recipes, and other fun info. I would be honored to have you join our growing list of subscribers, so you never miss a great recipe!
    There is a Newsletter subscription box on the top right side (or bottom) of each blog post, depending on the device you use, where you can easily submit your e-mail address (only) to be included in my mailing list.

    You Can Also Find Me On Social Media:
    Facebook page: The Grateful Girl Cooks!
    Pinterest:
    The Grateful Girl Cooks!
    Instagram:
    jbatthegratefulgirlcooks

    Author's signature

    Original recipe source: Krista Rollins at http://www.joyfulhealthyeats.com/southwestern-steak-salad-with-cilantro-avocado-dressing/

    0 from 0 votes
    Avocado Cilantro Lime Dressing
    Prep Time
    10 mins
    Cook Time
    0 mins
    Total Time
    10 mins
     

    Delicious avocado cilantro lime dressing can be used as a topping on Southwest-inspired salads, baked potatoes, OR as a quick dip for tortilla chips!

    Category: Salad Dressing
    Cuisine: American, Southwestern
    Keyword: avocado cilantro lime dressing
    Servings: 4
    Calories Per Serving: 118 kcal
    Author: JB @ The Grateful Girl Cooks!
    Ingredients
    • 1 large avocado
    • 1 cup fresh cilantro , chopped
    • ¼ cup fresh lime juice
    • 1 Tablespoon olive oil
    • 1 Tablespoon red wine vinegar
    • ¼ teaspoon red pepper flakes
    • ¼ teaspoon ground cumin
    • salt and black pepper, to taste
    Instructions
    1. Measure all ingredients except for salt and pepper into a blender. Blend on high speed until the dressing is smooth and creamy. Once done, season to taste with salt and pepper.

      *NOTE: If you do not own a blender, you can use an electric mixer to combine ingredients until smooth and creamy. It might take a bit longer than if using a blender, but is a good alternative. Once done, season to taste with salt and pepper.

    2. Serve this creamy dressing with tortilla chips as a dip, or top a baked potato with it (instead of butter/sour cream. Add to Southwest-inspired salads as a dressing, and toss to fully combine. ENJOY!

    Recipe Notes

    TIP: If you're using this as a salad dressing and want it to be thinner, no problem! Simply thin it slightly by adding a tiny bit more olive oil and red wine vinegar, and mixing well.

    Nutrition Facts
    Avocado Cilantro Lime Dressing
    Amount Per Serving (1 (1/4 of total))
    Calories 118 Calories from Fat 99
    % Daily Value*
    Fat 11g17%
    Saturated Fat 2g13%
    Sodium 8mg0%
    Potassium 282mg8%
    Carbohydrates 6g2%
    Fiber 3g13%
    Sugar 1g1%
    Protein 1g2%
    Vitamin A 380IU8%
    Vitamin C 11mg13%
    Calcium 9mg1%
    Iron 1mg6%
    * Percent Daily Values are based on a 2000 calorie diet.

    Here’s one more to pin on your Pinterest boards!Delicious avocado cilantro lime dressing can be used as a topping on Southwest-inspired salads, baked potatoes, OR as a quick dip for tortilla chips!

    Blueberry French Toast Cups

    Blueberry French Toast Cups are delicious, single serving breakfast treats that are easy to make, and can be cooked in an air fryer OR in an oven.
    Blueberry French Toast Cups are delicious, single serving breakfast treats that are easy to make, and can be cooked in an air fryer OR in an oven.

    If you enjoy the taste of French toast, then I am confident you will also enjoy these blueberry French toast cups! This version of the classic uses overnight-soaked bread cubes in an egg mixture (with lemon zest, maple syrup, cinnamon and vanilla).

    With this overnight refrigeration, the bread cubes really soak up some flavor before being cooked in an air fryer OR in a traditional oven. So… yes, you will need to make this recipe up the night BEFORE you want to enjoy it, but the prep time is minimal!

    Then, when you wake up the next morning, all you have to do is cook it! BOOM. A wonderful “mini” French toast breakfast for two awaits, filled with juicy blueberries, and served with your choice of powdered sugar and/or maple syrup.

    I created this dish after experimenting with (and being inspired by) my recipes for classic French toast and Blueberry and Cream-Cheese Stuffed French Toast. Then I adapted the recipe I came up with, to allow it to be cooked in an oven OR an air fryer.

    It turns out like a cute individual serving of French toast “casserole”, and it sure is yummy. Here’s how to make this dish for two:

    Scroll Down For A Printable Recipe Card At The Bottom Of The Page

    Preparing The Ingredients

    The first thing you will need to do is prepare the ingredients for their overnight “soak”. Generously butter the bottom and sides of 2 oven-safe ramekins. The ramekins I use are a standard size, which is about 4½ wide by 2″ tall.

    Cut some (one to two day old- i.e. “stale”) French bread into bite-sized pieces, leaving the crusts ON the bread. Divide the cubes of bread between the 2 ramekins, and then evenly divide and add the fresh blueberries to each dish.

    IMPORTANT: The reason for using stale, or one or two day-old bread is that it has hardened somewhat, which will allow it to soak in an egg mixture overnight without it becoming so soggy (as with fresh bread) that it falls apart into MUSH.

    Day old french bread is cut into cubes for this recipe.Bread cubes and fresh blueberries are placed into well-buttered ramekins.

    Prepare The Egg Mixture

    In a medium bowl, place the eggs, vanilla, milk, maple syrup, cinnamon, and lemon zest. Whisk together (with fork or wire whisk) until well blended.

    Pour the egg mixture into the ramekins, evenly dividing between the two dishes. The mixture should come to almost the top of the ramekins.

    Eggs, milk, cinnamon, vanilla and maple syrup are mixed together for the batter.The egg mixture is poured over the blueberry french toast cups.

    Let Rest Overnight In Refrigerator

    Use a spoon or fork to lightly press the bread cubes down into the egg mixture. You will want as many of the bread cubes covered with the liquid as possible.

    Cover the ramekins with plastic wrap, and place them in the refrigerator overnight (at least 6 hours). The bread cubes will soak up a lot of the egg mixture overnight.

    Remove the ramekins from the fridge about 15 minutes to take some of the chill off before cooking. Remove plastic wrap, and press the bread cubes back down into any remaining liquid.

    The ramekins are covered then refrigerated overnight to soak up egg mixture.

    Cooking Blueberry French Toast Cups In An Air Fryer OR Oven

    Now you’re ready to cook the blueberry French toast cups! They can be cooked in an air fryer, or in a traditional oven. My photos reflect the air fryer version. Here is how to cook the French toast cups, using either method:

    To Cook In An Air Fryer: Preheat air fryer to 350° F. Place both of the ramekins carefully into air fryer basket, being careful not to spill. Cook for 13 minutes, then reduce the temperature to 250°A, and cook for 3 more minutes, or until a toothpick inserted into the middle comes out free of “batter”. The French toast cups should be nice and golden brown on top.

    IMPORTANT: Since air fryer AND oven temps can vary with different manufacturers, be sure to check on your blueberry French toast cups occasionally toward the end of the cooking time, to ensure they do not overcook.

    To Cook In An Oven: Preheat oven to 375°F. Bake both of the ramekins for approximately 30 minutes. or until a toothpick inserted into the middle comes out free of “batter”. The French toast cups should be nice and golden brown on top.

    Blueberry french toast cups are lightly browned after cooking in an air fryer.

    Serving Blueberry French Toast Cups

    Once the blueberry French toast cups are finished cooking (either method), transfer the ramekins to a wire rack to cool. Sift powdered sugar over the top of each ramekin before serving.

    We think they taste best when they have had time to cool a bit, and like to eat them while still warm, but not blazing hot!

    My husband likes to eat his right out of the ramekin, with only sifted powdered sugar. I prefer to slide a butter knife around the edges of the ramekin and remove the French toast cup from the ramekin.

    Then I place the French toast cup on a plate, and add maple syrup! YUMMO. Both ways to serve it are shown below.

    Powdered sugar is sifted over the top of the french toast cup before serving.The blueberry french toast cup (with syrup) has been removed from the ramekin.

    Here’s a peek at the inside of one of the blueberry French toast cups, before I devoured it. The inside was cooked all the way through, and there were an abundance of juicy, warm blueberries. This was a wonderful breakfast treat we both enjoyed.

    The inside of the french toast cup is filled with juicy blueberries!

    I hope you have the opportunity to try this recipe. All you have to remember is to prepare it the evening before you want to enjoy it.

    A little bit of pre-planning never hurts, and then all you have to do in the morning is cook it and enjoy it! Thanks for stopping by. Take care and have a wonderful day.

    Looking For More BREAKFAST Recipes?

    You can find all of my breakfast recipes in the Recipe Index, located at the top of the page. I have quite a variety, including:

    Want More Recipes? Get My FREE Newsletter!

    I publish a newsletter 2 times per month (1st and 15th) with lots of recipes, tips, etc..
    Would you like to join our growing list of subscribers?

    There is a Newsletter subscription box on the top right (or bottom) of each blog post, depending on the device you use.
    You can submit your e-mail address there, to be added to my mailing list.

    Find Me On Social Media:

    Facebook page: The Grateful Girl Cooks!
    Pinterest:
    The Grateful Girl Cooks!
    Instagram:
    jbatthegratefulgirlcooks

    Author's signature

    ↓↓ PRINTABLE RECIPE BELOW ↓↓


    0 from 0 votes
    Blueberry French Toast Cups
    Prep Time
    5 mins
    Cook Time
    16 mins
    Total Time
    21 mins
     

    Blueberry French Toast Cups are delicious, single serving breakfast treats that are easy to make, and can be cooked in an air fryer OR in an oven.

    Category: Breakfast
    Cuisine: American
    Keyword: blueberry french toast cups
    Servings: 2
    Calories Per Serving: 431 kcal
    Author: JB @ The Grateful Girl Cooks!
    Ingredients
    • 2 teaspoons butter , softened (to butter ramekins)
    • 2 cups stale Italian bread , cut into bite sized cubes
    • 3 large eggs
    • 1 cup milk
    • 2 Tablespoons maple syrup , can substitute pancake syrup if necessary
    • 1 teaspoon vanilla extract
    • ¼ teaspoon ground cinnamon
    • ½ lemon (zest from) , only use the lemon zest
    • ½ cup fresh blueberries
    • powdered sugar and maple syrup , as desired for serving
    Instructions
    1. Generously butter bottom/sides of 2 oven-safe ramekins. Cut 1-2 day-old french bread into bite-sized pieces, leaving crusts ON. Divide bread cubes between 2 ramekins; then add blueberries.

    2. In a medium bowl, whisk eggs, vanilla, milk, maple syrup, cinnamon and lemon zest until mixed well. Pour egg mixture evenly into ramekins, dividing between both. Mixture should come to almost the top of dish. Use a spoon/fork to lightly press the bread cubes down into egg mixture to cover as much of the bread cubes as possible.

    3. Cover ramekins with plastic wrap. Chill in refrigerator overnight (at least 6 hours). Remove from fridge for 10-15 minutes before cooking, to take some chill off. Remove plastic wrap. Press bread cubes back down into any remaining liquid.

    4. To Cook In An Air Fryer: Preheat air fryer to 350° F. Place both ramekins carefully into air fryer basket, being careful not to spill. Cook for 13 minutes; reduce temperature to 250°F, Cook 3 more minutes, or until a toothpick inserted into the middle comes out free of "batter". They should be nicely browned on top.

      IMPORTANT: Since air fryer AND oven temps can vary, be sure to check on your French toast cups occasionally, so they do not undercook OR overcook.

      To Cook In An Oven: Preheat oven to 375°F. Bake both ramekins for approximately 30 minutes. or until a toothpick inserted into the middle comes out free of "batter". The French toast cups should be nicely browned on top.

    5. Transfer ramekins to a wire rack to cool for 10-12 minutes. Sift powdered sugar over the top before serving. Serve with maple syrup, if desired.

    Recipe Notes

    NOTE: Caloric calculation does not include powdered sugar or maple syrup, which are optional and used for serving.

    Nutrition Facts
    Blueberry French Toast Cups
    Amount Per Serving (1 g)
    Calories 431 Calories from Fat 198
    % Daily Value*
    Fat 22g34%
    Saturated Fat 11g69%
    Cholesterol 296mg99%
    Sodium 300mg13%
    Potassium 415mg12%
    Carbohydrates 41g14%
    Fiber 2g8%
    Sugar 31g34%
    Protein 16g32%
    Vitamin A 761IU15%
    Vitamin C 6mg7%
    Calcium 211mg21%
    Iron 2mg11%
    * Percent Daily Values are based on a 2000 calorie diet.

    Here’s one more to pin on your Pinterest boards!Blueberry French Toast Cups are delicious, single serving breakfast treats that are easy to make, and can be cooked in an air fryer OR in an oven.