Month: June 2022

Blackberry Pie

Use fresh or frozen blackberries to make a delicious classic blackberry pie using a homemade or purchased pie crust! Summertime at its best!

If you’re looking for a real taste of summer, try this yummy recipe for blackberry pie. Simple to make, using store-bought or homemade pie crusts and fresh or frozen blackberries, this is a delicious dessert that can be enjoyed year-round.

Where we live in NW Oregon, blackberries grow wild practically everywhere. Sometimes in the summer I can even pick a big pail of blackberries while out walking our dog (he is patient while I pick them!). I figure… why waste a perfect opportunity to get some FREE fresh blackberries! I’ve made so many great recipes using them over the years, from muffins, to syrup, jam, cobblers, crisps, etc. that I can’t wait for them to ripen each summer. This blackberry pie is another way to use a bunch of fresh or frozen blackberries to make a delicious PIE.  Here’s how to make it:

Scroll Down For A Printable Recipe Card At The Bottom Of The Page

A Word About The Pie Crust

This pie requires a top and bottom crust. You can use your favorite pie crust recipe OR buy a 2 crust package at the store. NOTE: If purchasing pie crusts for convenience, do not buy the premade pie “shells” in the freezer section. Buy the type of pie pastry dough that you unroll from the pkg. then manually roll out and place in pan (Pillsbury has this in most grocery stores in refrigerated section).

For your convenience, I’ve included my homemade pie crust recipe and instructions (to make two) in the printable recipe card, but feel free to use whatever pie crust recipe you enjoy. The rest of this post will show you how to make this pie, assuming you already have the pie crusts made or purchased.

Make The Pie Filling

Place 5 cups of fresh blackberries OR frozen (unsweetened and unthawed) into a large mixing bowl. Add granulated sugar, flour, cinnamon, lemon juice and zest and gently toss until combined.

Blackberries are tossed with sugar, flour, cinnamon, lemon juice and zest until combined.

Filling The Pie Crust

Place one crust into a 9″ deep dish pie pan. Prick the bottom and sides of the bottom pastry crust several times with the tines (the pointy ends) of a fork. Pour the blackberry pie filling into the prepared crust. Cut the butter into small chunks and dot the top of the fruit filling with the butter.

The pie crust pastry is pricked with the tines of a fork, then pie filling is added.Blackberry pie filling is added to crust and dotted with butter before adding top pastry crust.

Top the blackberry pie with the other pie crust. Trim the edges of the dough to about 1/2″ from the outside edge of the pie pan. Seal the edges of the top crust to the bottom crust by tucking the top crust under the edge of the bottom crust, and pinching the two crusts together to seal. Use your fingers to seal the two crusts together and then create a fluted edge.

Use a sharp knife to cut 3-4 small slits in the top crust. These are the “air vents” that allow the hot steam to escape while the pie bakes. Now the blackberry pie is ready to be baked.

Top crust is added and shaped, then steam vents are cut into the top before baking.

Baking The Blackberry Pie

Bake the blackberry pie at 425°F. for 45-50 minutes. TIP: Place a sheet of aluminum foil directly UNDER the pie pan, to catch drips that may bubble up and out while baking.

TIP: Check the pie after 30 minutes. If the crust is browning too fast, simply lay another sheet of aluminum foil over the top to protect the crust from over-browning, then continue baking. When done, the pie crust will be lightly browned and the juices will be bubbling up in the steam vents on top.

Partway through the baking time, the crust is turning golden in color.The finished blackberry pie is golden brown on top and the filling is bubbly around the edges.

Who’s Ready For A Slice Of Blackberry Pie?

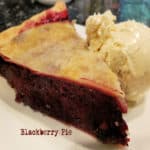
Let the pie cool down a bit, so it’s not all “molten lava-like” inside. This resting time helps the juices stabilize, which will allow you to slice the pie better. Once the pie has cooled slightly (10-15 minutes), cut it into 8 slices, and serve them warm, with a big ol’ scoop of vanilla ice cream on the side! The crust comes out golden and flaky, and the blackberry pie tastes amazing!

This really is a perfect summer treat using fresh berries, but nowadays this pie can be made year round, thanks to the availability of frozen blackberries in most grocery stores! YUM!

After a few pieces have been cut, here is a look at the blackberry filling inside the pie.A slice of blackberry pie with a scoop of vanilla ice cream, served on a white plate.

I hope you have the opportunity to make this delicious blackberry pie for your family or friends.  If you enjoy blackberries, check out my recipes for Blackberry Crisp, Blackberry Jam, Blackberry Muffins, Blackberry Pie Bars and Blackberry Soda! I even have yummy recipes for Blackberry Scones and Blackberry Pancake Syrup! Have a great day, and thank you for stopping by. Please come back again soon!

Looking For More PIE Recipes?

You can find ALL of my recipes in the Recipe Index, located at the top of the page. I have some wonderful pie recipes you’ll enjoy, including:

Interested In More Recipes?

Thank you for visiting this website. I appreciate you using some of your valuable time to do soIf you’re interested, I publish a newsletter 2 times per month (1st and 15th) with all the latest recipes, and other fun info. I would be honored to have you join our growing list of subscribers, so you never miss a great recipe!
There is a Newsletter subscription box on the top right side (or bottom) of each blog post, depending on the device you use, where you can easily submit your e-mail address (only) to be included in my mailing list.

You Can Also Find Me On Social Media:

Facebook page: The Grateful Girl Cooks!
Pinterest:
The Grateful Girl Cooks!
Instagram:
jbatthegratefulgirlcooks

Author's signature

Original recipe source: Pie Filling adapted from “The New Pillsbury Family Cookbook, page 149, published 1973 by The Pillsbury Company
Homemade Pie Crust Recipe from my Mom here

↓↓ PRINTABLE RECIPE BELOW ↓↓

0 from 0 votes
Blackberry Pie
Prep Time
15 mins
Cook Time
45 mins
Total Time
1 hr
 

Use fresh or frozen blackberries to make a delicious classic blackberry pie using a homemade or purchased pie crust! Summertime at its best!

Category: Desssert
Cuisine: American
Keyword: blackberry pie
Servings: 8 slices
Calories Per Serving: 453 kcal
Author: JB @ The Grateful Girl Cooks!
Ingredients
Homemade Pie Crust (for 2 nine inch deep dish crusts - top and bottom crust)
  • 2 cups un-sifted all purpose flour
  • cup vegetable shortening
  • 1 teaspoon salt
  • 5-7 Tablespoons ice cold water
Pie Filling:
  • 5 cups blackberries see NOTE re: frozen berries
  • cups granulated sugar
  • ½ cup all purpose flour
  • 1 teaspoons lemon juice
  • ½ teaspoon lemon zest
  • ½ teaspoon ground cinnamon
Instructions
  1. Preheat oven to 425°F.

Make The Pie Crust:
  1. Place flour, shortening and salt in food processor (or large bowl if hand-mixing). Pulse (if using food processor) or cut in the shortening with a pastry blender (or 2 forks) until shortening is reduced to the size of peas. Drizzle in ice cold water starting with least amount (5Tbl.) and adding more later, if necessary. Process (or knead by hand) until well-combined and mixture can be formed into a ball.

  2. Divide dough ball evenly in half. Place one dough ball on a lightly floured surface, and roll out to a circle, about 10-11" in diameter. Place the crust in a 9" deep dish pie pan, then follow directions below for filling pie crust. Roll out remaining dough ball (top crust) following same process.

Make The Pie:
  1. Place fresh blackberries OR frozen (unsweetened/unthawed) into large mixing bowl. Add sugar, flour, cinnamon, lemon juice, and zest; gently toss to combine.

  2. Place one pie crust into a 9" deep dish pie pan. Prick bottom/sides of crust several times with the tines of a fork. Pour pie filling into prepared crust. Cut butter into chunks; dot the top of pie filling with butter.

  3. Top pie with 2nd crust, stretching slightly to meet edges of bottom crust. Trim edges of dough to ½" from outside edge of pan. Seal edges of top crust to bottom crust by tucking top crust under the edge of the bottom crust. Pinch two crusts together to seal. Use your fingers to seal the two crusts together, then create fluted edge around pie. Use sharp knife to cut 3-4 small slits in top crust. They allow steam to escape while pie bakes.

  4. Bake on middle rack in preheated 425°F.oven for 45-50 minutes. TIP: Place a sheet of aluminum foil UNDER pie pan, to catch drips that may bubble out while baking. TIP: Check pie after 30 minutes. If crust is browning too fast, lay a sheet of aluminum foil over the top, then continue baking. When done, the pie crust should be lightly browned and juices will be bubbling up in the steam vents.

  5. Let pie cool down about 10-15 minutes. Cut into 8 slices, and serve with a scoop of vanilla ice cream on the side!

Recipe Notes

NOTES:
**You may also use two purchased pastry pie dough crusts (the kind you roll out) or two of your own pie crust recipe. You will need 2 pastry pie crusts for this pie (top and bottom crust)

**If using frozen berries, add them directly into the flour and sugar while still frozen.

Nutrition Facts
Blackberry Pie
Amount Per Serving (1 slice (1/8 of total))
Calories 453 Calories from Fat 162
% Daily Value*
Fat 18g28%
Saturated Fat 4g25%
Trans Fat 2g
Polyunsaturated Fat 5g
Monounsaturated Fat 7g
Sodium 294mg13%
Potassium 190mg5%
Carbohydrates 70g23%
Fiber 6g25%
Sugar 36g40%
Protein 5g10%
Vitamin A 193IU4%
Vitamin C 19mg23%
Calcium 34mg3%
Iron 2mg11%
* Percent Daily Values are based on a 2000 calorie diet.

Here’s one more to pin on your Pinterest boards!Use fresh or frozen blackberries to make a delicious classic blackberry pie using a homemade or purchased pie crust! Summertime at its best!

Turkey Tortilla Soup

Have leftover roast turkey? Make a pot of yummy Turkey Tortilla Soup, garnished with cheese, tomato, cilantro and baked tortilla strips!

If you enjoy the flavor of Southwestern-style soups or chilis, then I believe you will really love this turkey tortilla soup! The soup can be made quite simply, and features cooked turkey, so it’s a perfect soup to use any leftover cooked turkey you might have!

Typically once Thanksgiving is over, or any time we cook a whole turkey or turkey breast, we have leftover turkey. I usually make turkey noodle soup with leftover turkey, but this tortilla soup is now (also) an option. You only need 2 cups of cooked turkey to make this soup, and it is so yummy!

Corn tortillas are used  in two ways for this soup. They are used uncooked IN the soup and used (baked ’til crispy) ON TOP of the soup, adding flavor and texture.

The turkey tortilla soup is garnished with crispy tortilla strips, and then can be topped with cheese, tomatoes, sour cream, avocado and cilantro, if desired! YUM! Turkey tortilla soup not only LOOKS great… it tastes great, too. Here’s how to make it:

Scroll Down For A Printable Recipe Card At The Bottom Of The Page

Prep The Corn Tortillas

Preheat your oven to 450°F. Place the corn tortillas in two piles of 5 each, stacking 5 tortillas on top of each other. Slice the tortillas into ½” wide strips. Reserve and set aside one stack of strips from 5 tortillas until later.

The reserved stack of tortilla strips will go (uncooked) into the soup, and the remaining strips will be baked until crispy to garnish the finished soup.

Take the remaining stack of strips (from 5 tortillas) and place them on a large baking sheet, in a single layer. Lightly coat the strips with non-stick cooking spray, then turn them over and spray the other side.

Bake the tortilla strips at 450°F for 9-10 minutes, turning them over once, halfway through the cooking timeOnce crispy and browned, remove them from the oven, let cool, then place in an airtight container, plastic wrap or bag until you’re ready to serve the soup.

Corn tortillas are sliced into 1/2" strips for the soup.Half of the tortilla strips are sprayed with oil, then baked until crispy, for garnishing soup.

Let’s Make Some Turkey Tortilla Soup!

Now you’re ready to make some delicious turkey tortilla soup! TIP: If you start the soup while the tortilla strips are baking, you will save time! Heat olive oil on MEDIUM in a large soup pot or Dutch oven.

Once oil is hot, add chopped onion, minced garlic and jalapeño. Cook for 5-6 minutes, stirring often (so garlic doesn’t burn), until onions are softened and slightly browned.

Pour in the chicken broth, then add the reserved (unbaked) tortilla strips to the soup pot. Stir to combine, and cook on MEDIUM heat for 3-5 minutes. This cooking time will soften the tortilla strips which helps to slightly thicken the broth.

Chopped onion, jalapeno and minced garlic are lightly browned in olive oil in soup pot.Unbaked corn tortilla strips are added to chicken broth and sauteed onion mixture in soup pan.

The next step is to add canned (mild-flavored) enchilada sauce, chopped turkey and ground cumin to the soup.

Stir these ingredients in, then cook the turkey tortilla soup for 7-8 more minutes on Medium heat. Do NOT let the soup boil. The soup is done when the turkey and the soup is fully heated through.

NOTE: If you feel the soup is too spicy (depending on the brand of enchilada sauce you used), simply add a little more water or chicken broth to even it out a bit.

Chopped turkey, enchilada sauce and ground cumin are added to the turkey tortilla soup.A ladle full of the turkey tortilla soup, ready to be served.

Serving Turkey Tortilla Soup

To serve the turkey tortilla soup, ladle the hot soup into serving bowls. Place several baked tortilla strips on top of each serving of soup. At this point, the soup is ready to serve, unless you want to add optional toppings (which I recommend!).

OPTIONAL, BUT GOOD: If desired, garnish each serving with shredded cheddar cheese, chopped tomatoes, and cilantro leaves. A dollop of sour cream or avocado chunks can also add to the presentation and taste of this dish, too.

These extra toppings are completely OPTIONAL, but they really do add additional flavor and color to the soup.  Serve immediately, and enjoy this delicious soup!

Bowl of turkey tortilla soup is garnished with tomatoes, cheese, baked tortilla strips and cilantro.Shredded cheese, tomatoes, cilantro and baked tortilla strips top the soup.

I truly hope you enjoy this tasty soup… we LOVE it, and trust you will, too! This soup is such a wonderful way to use up turkey leftovers!

Thanks for stopping by today, and I hope you will come back again for more delicious recipes. Take care, may God bless you, and have a GREAT day!

Looking For More SOUP Recipes?

You can find ALL of my recipes in the Recipe Index, located at the top of the page. I have many delicious soup recipes for you to enjoy, including:

Want More Recipes? Get My FREE Newsletter!

I publish a newsletter 2 times per month (1st and 15th) with lots of recipes, tips, etc..
Would you like to join our growing list of subscribers?

There is a Newsletter subscription box on the top right (or bottom) of each blog post, depending on the device you use.
You can submit your e-mail address there, to be added to my mailing list.

Find Me On Social Media:

Facebook page: The Grateful Girl Cooks!
Pinterest:
The Grateful Girl Cooks!
Instagram:
jbatthegratefulgirlcooks

Author's signature

Original recipe source: “Southern Living Best-Loved Christmas Classics”, page 242, published 2013 by Time Home Entertainment, Inc./ Oxmoor House

↓↓ PRINTABLE RECIPE BELOW ↓↓

0 from 0 votes
Turkey Tortilla Soup
Prep Time
15 mins
Cook Time
20 mins
Total Time
35 mins
 

Have leftover roast turkey? Make a pot of yummy Turkey Tortilla Soup, garnished with cheese, tomato, cilantro and baked tortilla strips!

Category: Main Course, Soup
Cuisine: Southwestern
Keyword: turkey tortilla soup
Servings: 8 cups
Calories Per Serving: 105 kcal
Author: JB @ The Grateful Girl Cooks!
Ingredients
  • 10 6" corn tortillas cut in ½" strips, divided use
  • vegetable cooking spray as needed
  • 1 Tablespoon olive oil
  • 1 small yellow onion chopped
  • 1 small jalapeño pepper , seeded and minced
  • 2 garlic cloves minced
  • 32 ounces chicken broth
  • 2 cups chopped cooked turkey breast meat used in caloric calculation
  • 10 ounce can MILD enchilada sauce
  • 1 teaspoon ground cumin
Additional Garnishes (optional): shredded cheddar cheese, cilantro, chopped tomatoes, avocado, sour cream
    Instructions
    1. Preheat oven to 450°F.

    2. Place tortillas in two piles of 5 each, stacking 5 tortillas on top of each other. Slice tortillas into ½" wide strips. Reserve/set aside one stack of strips from 5 tortillas until later. Take remaining strips (from 5 tortillas) and place them on a large baking sheet in a single layer. Spray strips with cooking spray; turn and spray other side. Bake strips at 450°F for 9-10 minutes, turning them over once halfway through cooking timeOnce crispy/browned, remove them from oven, let cool, then place in airtight container, plastic wrap or bag until ready to serve soup. TIP: If you start soup while tortilla strips are baking, you'll save time!

    3. Heat olive oil on MEDIUM heat in large soup pot or Dutch oven. Once oil is hot, add onion, garlic and jalapeño. Cook 5-6 minutes, stirring often (so garlic doesn't burn) until onions are softened/slightly brown.

    4. Add chicken broth and reserved (unbaked) tortilla strips to soup pot. Stir to combine; turn heat down to MEDIUM; cook 3-5 minutes. This will soften the tortilla strips which help to slightly thicken broth.

    5. Add turkey, enchilada sauce, and cumin to soup. Stir well, then cook 7-8 minutes on MEDIUM heat until soup is fully heated through. Do NOT let soup boil.

    6. To serve, ladle soup into serving bowls. Place several baked tortilla strips on top. OPTIONAL: If desired, also garnish with cheese, tomatoes, cilantro, avocado or sour cream. Serve immediately, and enjoy this delicious soup!

    Recipe Notes

    NOTE: Caloric calculation made using a serving size of 1 cup, and using turkey breast meat. It does NOT include optional garnishes of cheese, avocado, cilantro, tomato or sour cream, but DOES include baked tortilla strips.

    Nutrition Facts
    Turkey Tortilla Soup
    Amount Per Serving (1 cup (8 oz.))
    Calories 105 Calories from Fat 27
    % Daily Value*
    Fat 3g5%
    Saturated Fat 1g6%
    Trans Fat 1g
    Polyunsaturated Fat 1g
    Monounsaturated Fat 2g
    Cholesterol 34mg11%
    Sodium 851mg37%
    Potassium 190mg5%
    Carbohydrates 5g2%
    Fiber 1g4%
    Sugar 3g3%
    Protein 14g28%
    Vitamin A 273IU5%
    Vitamin C 4mg5%
    Calcium 20mg2%
    Iron 1mg6%
    * Percent Daily Values are based on a 2000 calorie diet.

    Here’s one more to pin on your Pinterest boards!Have leftover roast turkey? Make a pot of yummy Turkey Tortilla Soup, garnished with cheese, tomato, cilantro and baked tortilla strips!

    Lemon Mint Tea

    Lemon Mint Tea is simple to make with only a few ingredients, and it can be enjoyed hot to warm you up, or cold to refresh you on a hot day!Lemon Mint Tea is simple to make with only a few ingredients, and it can be enjoyed hot to warm you up, or cold to refresh you on a hot day!

    On a hot day, nothing refreshes like a glass of iced tea, but on a cold day, there’s something warming and soothing about a mug of hot tea. Lucky for you, this Lemon Mint Tea can satisfy both those expectations! It’s super simple to make in just a few minutes, and it’s flavored with peppermint tea, a cinnamon stick, lemon juice and a bit of sugar. It’s DELICIOUS!

    If you want to drink it hot, it can be ready after steeping 5 minutes, and if you want it cold, you will need to let it cool down before pouring it over ice. Other than that, it’s EASY PEASY, and I know you’re going to love it! I found the recipe years ago in an old cookbook I have, and finally got around to taking photos for my blog. Here’s how to make lemon mint tea:

     Scroll Down For A Printable Recipe Card At The Bottom Of The Page

    How To Make The Tea

    The recipe as written will make 1 serving, but can EASILY be doubled, tripled, etc. (only 1 cinnamon stick needed for up to 10 servings). To make the tea, you will need to have a lemon, a peppermint tea bag, cinnamon stick and granulated sugar. My photos below will show how to make ONE serving.

    One peppermint tea bag, lemon, sugar and a cinnamon stick are used to make this tea.

    Place the tea bag and the cinnamon stick in a small saucepan. Pour one cup of boiling water over them, then immediately put a lid on the pan. Let the tea steep (covered) for 5 minutes. Once it has fully steeped, remove the tea bag and cinnamon stick.

    A peppermint tea bag and cinnamon stick are steeped in boiling water (covered) for 5 minutes.

    Add 1 Tablespoon of granulated sugar and 1 Tablespoon of freshly squeezed lemon juice to the hot tea. Stir well, until the sugar has had a chance to fully dissolve. Now the tea is done!

    Granulated sugar and fresh lemon juice are added to the brewed mint tea.

    Serving Lemon Mint Tea HOT

    If you want to enjoy the tea HOT, simply pour the hot beverage into a mug once the sugar has dissolved. You can garnish the mug of lemon mint tea with a fresh sprig of mint and a lemon wedge, if desired. That is completely optional, but sure makes that mug of hot tea look good!

    Hot lemon mint tea is poured into a mug once done.A mug of hot lemon mint tea, garnished with a mint sprig and lemon wedge, to serve.

    Lemon Mint Tea Served COLD

    If you prefer your tea COLD, let the tea first cool to room temperature. Once cooled, fill a glass with ice cubes, and pour the tea into the glass. NOTE: One reason you shouldn’t pour HOT tea over ice is because it could possibly cause the glass to crack. The other reason is that the HOT tea will melt the ice cubes faster which waters down the tea considerably.

    Iced cold lemon mint tea is garnished with a lemon wedge and mint sprig to serve.

    I hope you have the chance to try this delicious tea, and trust you’ll enjoy it like I do. Thank you for stopping by, and please come back again soon for more family-friendly recipes. Take care, and have a great day.

    Looking For More BEVERAGE Recipes?

    You can find ALL f my recipes in the Recipe Index, located at the top of the page. I have some wonderful hot AND cold beverage recipes you may enjoy, including:

    Interested In More Recipes?

    Thank you for visiting this website. I appreciate you using some of your valuable time to do soIf you’re interested, I publish a newsletter 2 times per month (1st and 15th) with all the latest recipes, and other fun info. I would be honored to have you join our growing list of subscribers, so you never miss a great recipe!
    There is a Newsletter subscription box on the top right side (or bottom) of each blog post, depending on the device you use, where you can easily submit your e-mail address (only) to be included in my mailing list.

    You Can Also Find Me On Social Media:

    Facebook page: The Grateful Girl Cooks!
    Pinterest:
    The Grateful Girl Cooks!
    Instagram:
    jbatthegratefulgirlcooks

    Author's signature

    Original recipe source: “The Complete Cooking Light Cookbook”, page 49, published in 2000 by Oxmoor House

    ↓↓ PRINTABLE RECIPE BELOW ↓↓

    0 from 0 votes
    Lemon Mint Tea
    Prep Time
    6 mins
    Cook Time
    0 mins
    Total Time
    6 mins
     

    Lemon Mint Tea is simple to make with only a few ingredients, and it can be enjoyed hot to warm you up, or cold to refresh you on a hot day!

    Category: Beverage
    Cuisine: All Cuisines
    Keyword: lemon, mint, tea
    Servings: 1 cup
    Calories Per Serving: 52 kcal
    Author: JB @ The Grateful Girl Cooks!
    Ingredients
    • 8 ounces boiling water =1 cup
    • 1 teabag peppermint tea single size
    • 1 3 inch cinnamon stick
    • 1 Tablespoon granulated sugar
    • 1 Tablespoon fresh lemon juice
    • 1 Lemon wedge and Mint sprig (OPTIONAL) for garnish
    Instructions
    Directions For ONE Serving:
    1. Place tea bag and cinnamon stick into a small saucepan. Pour 8 ounces boiling water over them; immediately cover pan. Let tea steep (covered) for 5 minutes. Once fully steeped, remove tea bag and cinnamon stick.

    2. Add 1 Tablespoon granulated sugar and 1 Tablespoon fresh lemon juice to hot tea. Stir well, until sugar fully dissolves.

    To Enjoy HOT:
    1. Pour hot tea into a mug once sugar has dissolved. Garnish with a fresh sprig of mint and a lemon wedge, if desired. Serve, and enjoy.

    To Enjoy COLD:
    1. Let tea first cool to room temperature. Once cooled, fill a glass with ice cubes, and pour tea into glass. NOTE: One reason you shouldn't pour HOT tea over ice is because it could possibly cause the glass to crack. The other reason is that the heat will melt the ice cubes which would water down the tea considerably.

    Recipe Notes

    Note: If making then the quantity desired, increase the amount of tea bags, sugar and lemon juice times the amount you want. However- you will only need ONE cinnamon stick to flavor up to about 10 servings.

    Nutrition Facts
    Lemon Mint Tea
    Amount Per Serving (1 cup (8 oz.))
    Calories 52 Calories from Fat 9
    % Daily Value*
    Fat 1g2%
    Saturated Fat 1g6%
    Sodium 12mg1%
    Potassium 20mg1%
    Carbohydrates 14g5%
    Fiber 1g4%
    Sugar 12g13%
    Protein 1g2%
    Vitamin A 4IU0%
    Vitamin C 6mg7%
    Calcium 18mg2%
    Iron 1mg6%
    * Percent Daily Values are based on a 2000 calorie diet.

    Here’s one more to pin on your Pinterest boards!Lemon Mint Tea is simple to make with only a few ingredients, and it can be enjoyed hot to warm you up, or cold to refresh you on a hot day!

    Blueberry Cinnamon Overnight Oats

    Blueberry Cinnamon Overnight Oats are a delicious, “make ahead” meal (5 min. prep). Chill overnight, then enjoy a blueberry-packed breakfast!
    Blueberry Cinnamon Overnight Oats are a delicious, "make ahead" meal (5 min. prep). Chill overnight, then enjoy a blueberry-packed breakfast!

    If you enjoy delicious meals that can quickly be eaten OR taken with you to work, etc., then overnight oats are a meal you’ll enjoy! It only takes a couple minutes to mix the ingredients in canning jars, then put them in the fridge overnight! I love overnight oats, because they’re so convenient to make ahead, and they taste delicious!

    The next morning, if you’re in a hurry to get to work, school, etc., just open the jar, give them a stir, and EAT! Overnight oats do not have to be heated, and are made to be eaten cold! Individual servings in canning jars also make overnight oats PORTABLE! Grab a spoon, a jar out of the fridge… and out the door you go… with a filling breakfast or snack you can eat later!

    Blueberry Cinnamon Overnight Oats are filled with fresh (or frozen) blueberries, and have almond butter added, for added protein! Cinnamon and vanilla add extra flavor, blueberries provide sweetness, and the oats become thick and creamy, once refrigerated! Here’s how easy blueberry cinnamon overnight oats are to prepare:

    Scroll Down For A Printable Recipe Card At The Bottom Of The Page

    What Ingredients Will I Need?

    You need old fashioned oats, almond butter, fresh OR frozen blueberries, cinnamon, vanilla, and almond milk (or dairy milk) for this recipe. The recipe yields 2 jars of blueberry cinnamon overnight oats, but can easily be doubled. You can safely store jars of these overnight oats in the fridge up to 3 days.

    Oats, cinnamon, vanilla, almond butter, milk and frozen or fresh blueberries are used in the recipe.

    How To Prepare Blueberry Cinnamon Overnight Oats

    This recipe makes enough for TWO jars, so the ingredients will need to be divided evenly between them. Place ½ C. of oats, ½ C. almond milk, 1 T. almond butter, and ½ t. each of cinnamon and vanilla into EACH JAR. Stir the ingredients well, until they are combined. TIP: Use a PINT sized jar, to have room for all the ingredients, and have room to stir them.

    Gently stir ½ C. blueberries into each jar, until they’re incorporated into the oat mixture NOTE: If using FROZEN blueberries, DO NOT THAW before adding!

    Milk, oats, cinnamon, vanilla and almond butter are combined in a Mason jar.Part of the blueberries are added to the jar, then gently stirred into the oat mixture.

    Mix Then Add MORE Blueberries!

    Once the blueberries have been mixed in, add another ½ C. of blueberries to each jar. Do not stir them into the oats, but let them sit on top of the oats! Screw on the lid to each jar, and place in the refrigerator.

    Blueberry Cinnamon Overnight Oats will need to chill for about 8 hours in a refrigerator for best results. Make them, and refrigerate the jars before heading to bed, and they’ll be ready when you wake up.

    The overnight oats are mixed with fresh or frozen blueberries in the jar.Topped with more blueberries, the jars are then covered and refrigerated overnight.

    The Blueberry Cinnamon Oats Are Ready To Eat!

    After the jars of oats have chilled overnight, they are ready to be enjoyed. Old-fashioned oats absorb the milk, leaving a creamy, thick oatmeal treat, filled with all those juicy blueberries! YUM! You can safely store jars of oats (or “breakfast on the go”) in the refrigerator for up to 3 days! YES… overnight oats are meant to be eaten cold. There’s no need to heat them!

    Blueberry Cinnamon Overnight Oats turn out creamy and delicious after refrigerating overnight.

    I hope you enjoy these delicious blueberry cinnamon overnight oats! Thank you for taking time out of your busy day to visit this website today. I do hope you will come back again for more family-friendly recipes. Take care… and have a GREAT day! May God bless you.

    Looking For More OVERNIGHT OATS Recipes?

    You can find ALL my recipes in the Recipe Index, located at the top of the page. I have some wonderful recipes for overnight oats I’m confident you’ll enjoy, which include:

    Interested In More Recipes?

    Thank you for visiting this website. I appreciate you using some of your valuable time to do soIf you’re interested, I publish a newsletter 2 times per month (1st and 15th) with all the latest recipes, and other fun info. I would be honored to have you join our growing list of subscribers, so you never miss a great recipe!
    There is a Newsletter subscription box on the top right side (or bottom) of each blog post, depending on the device you use, where you can easily submit your e-mail address (only) to be included in my mailing list.

    You Can Also Find Me On Social Media:

    Facebook page: The Grateful Girl Cooks!
    Pinterest:
    The Grateful Girl Cooks!
    Instagram:
    jbatthegratefulgirlcooks

    Author's signature

    Recipe adapted from: Isabel D. Price in the book, “Food Meets Faith”, published by Live Smart Solutions, LLC, 2019, page 82

    ↓↓ PRINTABLE RECIPE BELOW ↓↓

    0 from 0 votes
    Blueberry Cinnamon Overnight Oats
    Prep Time
    5 mins
    Cook Time
    0 mins
    Refrigeration (inactive time)
    8 hrs
    Total Time
    8 hrs 5 mins
     

    Blueberry Cinnamon Overnight Oats are a delicious, "make ahead" meal (5 min. prep). Chill overnight, then enjoy a blueberry-packed breakfast!

    Category: Breakfast, Snack
    Cuisine: American
    Keyword: blueberry, cinnamon, overnight oats
    Servings: 2
    Calories Per Serving: 362 kcal
    Author: JB @ The Grateful Girl Cooks!
    Ingredients
    • 1 cup old-fashioned oats NOT instant
    • 1 cup unsweetened almond milk can sub. dairy milk or coconut milk
    • 2 Tablespoons almond butter
    • 1 teaspoon cinnamon
    • 1 teaspoon vanilla extract
    • 2 cups blueberries fresh or frozen (unthawed)
    Instructions
    1. Place ½ C. of oats, ½ C. almond milk, 1 T. almond butter, and ½ t. each of cinnamon and vanilla into EACH PINT JAR. Stir well, until combined.

    2. Gently stir ½ C. blueberries into each jar, until incorporated into oat mixture. NOTE: If using FROZEN blueberries, DO NOT THAW before adding!

    3. Add another ½ C. of blueberries to each jar, but do not stir them into the oats. Let them sit on top! Screw the lid onto each jar; place jars in fridge. Chill overnight (8 hours) for best results.

    4. Once chilled, remove lid; stir content wells; oats are to be eaten cold. Store jars up to 3 days in fridge. Enjoy!

    Nutrition Facts
    Blueberry Cinnamon Overnight Oats
    Amount Per Serving (1 g)
    Calories 362 Calories from Fat 126
    % Daily Value*
    Fat 14g22%
    Saturated Fat 1g6%
    Polyunsaturated Fat 4g
    Monounsaturated Fat 7g
    Sodium 168mg7%
    Potassium 388mg11%
    Carbohydrates 53g18%
    Fiber 10g42%
    Sugar 16g18%
    Protein 10g20%
    Vitamin A 83IU2%
    Vitamin C 14mg17%
    Calcium 246mg25%
    Iron 3mg17%
    * Percent Daily Values are based on a 2000 calorie diet.

    Here’s one more to pin on your Pinterest boards!Blueberry Cinnamon Overnight Oats are a delicious, "make ahead" meal (5 min. prep). Chill overnight, then enjoy a blueberry-packed breakfast!

    Sweet Potato Apple Bake

    You’ll love Sweet Potato Apple Bake! This yummy dish features layers of sweet potatoes, apples, butter, cinnamon, brown sugar and pecans!
    You'll love Sweet Potato Apple Bake! This yummy dish features layers of sweet potatoes, apples, butter, cinnamon, brown sugar and pecans!

    Today I want to share an absolutely delicious side dish! It’s a dish that requires minimal prep before it is baked to perfection. My husband and I both think it tastes like dessert, even though we enjoy it served as a side dish. It’s the best of two worlds… if you enjoy sweet potatoes and the taste of apple pie… then this dish is for YOU!

    The sweet potato apple bake only takes about 10 minutes to get ready, then it bakes away the rest of the time. How easy is THAT? I really think you’re gonna love this tasty dish, so let me show you just how simple it is to prepare.

    Scroll Down For A Printable Recipe Card At The Bottom Of The Page

    Prepare The Sweet Potato And Apple

    Before starting, preheat your oven to 350°F. It doesn’t take long to get the potatoes ready, so you want your oven preheated to save time! Peel a large sweet potato (the red skinned kind). Slice the sweet potato in half lengthwise. Cut each half into half-moon shaped pieces about ¼” thick. Separate the slices into two equal piles.

    Peel the apple, then remove the seeds. Cut the apple in half from the stem down to the bottom. Cut each half into the same size half-moon shaped pieces (¼” thick). Keep the apple slices in one pile.

    A large sweet potato is peeled, halved, then cut into moon shaped slices.An apple is peeled, then cut into thin slices, along with a sweet potato.

    Time To Layer This Dish!

    Spray or grease a 2 quart baking dish. Place the slices of HALF the sweet potato in a single layer in the dish. Evenly sprinkle the slices with ½ Tablespoon of brown sugar. Next, place ALL of the apples on top of the sweet potatoes, keeping the apple slices in a single layer, as much as possible.

    Sprinkle the apple slices with ½ Tablespoon brown sugar and the cinnamon. Measure out 2 Tablespoon of chopped pecans and set them aside for later (not in the layering). Take the REMAINING chopped pecans and evenly sprinkle them over the brown sugar cinnamon apple slices.

    A baking dish with bottom layer of sweet potato and brown sugar, topped with apple slices.Pecans and cinnamon are sprinkled on a layer of apple slices in baking dish.

    Now add the final half of the sweet potato slices over the apples, placing them in a single layer, once again. Sprinkle the sweet potatoes with the remaining Tablespoon of brown sugar, then drizzle melted butter over the sweet potatoes.

    Brown sugar is sprinkled on final layer of sweet potato slices in baking dish.Melted butter is drizzled over the sweet potatoes.

    Ready To Bake

    COVER THE BAKING DISH and bake at 350°F. for 35 minutes. Remove the dish from the oven, and top with the reserved 2 Tablespoons pecans (and a couple shakes of cinnamon, if desired).

    Leave the lid OFF and place the dish back into the oven. Continue baking (uncovered) for an additional 30-35 minutes. When done, the sweet potatoes and apples will be lightly browned and tender. You can insert a knife into a sweet potato slice to make sure it is tender!

    The sweet potato apple bake is covered with melted butter and brown sugar.Chopped pecans and cinnamon is added to the top of the dish when halfway done baking.

    The Sweet Potato Apple Bake Is Ready To Enjoy!

    Let the sweet potato apple bake cool for just a minute, then serve it with a favorite main course, and enjoy this amazing side dish! When I was photographing this recipe, my husband and I had just smoked a whole turkey on our Traeger grill.

    We served slices of the smoked turkey with this sweet potato and apple dish, along with steamed broccoli. Even though we enjoyed this meal at the very beginning of MAY, it felt like it was THANKSGIVING! Turkey and sweet potatoes… yum! This dish would be a wonderful addition to any holiday feast!

    Sweet Potato Apple Bake is golden brown and tender to the bite when done baking.A portion of the sweet potato apple bake, served with turkey slice and steamed broccoli.

    I hope you have the chance to try this flavor-filled recipe, because it really does taste great. The recipe yields 4 servings, so it is also a fairly inexpensive side dish to make. Thanks for stopping by, and please come back soon for more family-friendly recipes. Take care, and have a great day.

    Looking For More VEGGIE Recipes?

    You can find ALL of my recipes in the Recipe Index, located at the top of the page. I have LOTS of yummy veggie recipes for you to choose from, including:

    Interested In More Recipes?

    Thank you for visiting this website. I appreciate you using some of your valuable time to do soIf you’re interested, I publish a newsletter 2 times per month (1st and 15th) with all the latest recipes, and other fun info. I would be honored to have you join our growing list of subscribers, so you never miss a great recipe!
    There is a Newsletter subscription box on the top right side (or bottom) of each blog post, depending on the device you use, where you can easily submit your e-mail address (only) to be included in my mailing list.

    You Can Also Find Me On Social Media:

    Facebook page: The Grateful Girl Cooks!
    Pinterest:
    The Grateful Girl Cooks!
    Instagram:
    jbatthegratefulgirlcooks

    Author's signature

    Recipe adapted from the cookbook: “Southern Living Best-Loved Christmas Classics”, page 113, published in 2013 by Time Home Entertainment, Inc./Oxmoor House

    ↓↓ PRINTABLE RECIPE BELOW ↓↓

    0 from 0 votes
    Sweet Potato Apple Bake
    Prep Time
    10 mins
    Cook Time
    1 hr 5 mins
    Total Time
    1 hr 15 mins
     

    You'll love Sweet Potato Apple Bake! This yummy dish features layers of sweet potatoes, apples, butter, cinnamon, brown sugar and pecans!

    Category: Side Dish, Vegetable Dish
    Cuisine: American
    Keyword: sweet potato apple bake
    Servings: 4
    Calories Per Serving: 206 kcal
    Author: JB @ The Grateful Girl Cooks!
    Ingredients
    • 1 large sweet potato (approx. 8 oz.)
    • 1 large Granny Smith apple (approx. 8 oz.)
    • 2 Tablespoons packed dark brown sugar **divided use
    • 2 Tablespoons butter melted
    • cup chopped pecans ** divided use
    • ¼ teaspoon ground cinnamon
    Instructions
    1. Preheat oven to 350°F. Grease or spray a 2 quart baking dish.

    2. Peel sweet potato; slice in half lengthwise. Slice each half into "half-moon" shaped pieces about ¼" thick. Divide slices into two equal piles. Peel apple; remove seeds. Cut apple in half from stem down to bottom. Slice each half into ¼" thick "half-moon" shaped pieces. Keep apple slices in one pile. You should have 2 piles of sweet potato (½ potato in each) and 1 pile of apple slices.

    Three Layers:
    1. Layer#1: Place one pile of sweet potato slices (½ of total) in a single layer in baking dish. Evenly sprinkle slices with ½ Tablespoon brown sugar.

      Layer #2: Place ALL apple slices on top of sweet potatoes in a single layer. Sprinkle apples with ½ Tablespoon brown sugar and the cinnamon. **Measure out 2 Tablespoons from the chopped pecans - set them aside for later (not in the layering). Take REMAINING chopped pecans and sprinkle them over apples.

      Layer #3: Put remaining sweet potato slices in a single layer over apples. Sprinkle with remaining 1 Tablespoon brown sugar, then drizzle with melted butter.

    Bake:
    1. COVER baking dish; bake at 350°F for 35 minutes. Remove from oven; top with reserved 2 Tablespoons pecans (and a couple shakes of cinnamon, if desired). Place dish (uncovered) back into oven. Continue baking (uncovered) for 30-35 minutes. When done, sweet potatoes/apples will be lightly browned and tender. Insert a knife into a sweet potato slice to check for tenderness. Remove from oven; let cool for a minute, then serve.

    Nutrition Facts
    Sweet Potato Apple Bake
    Amount Per Serving (1 (1/4 of total))
    Calories 206 Calories from Fat 108
    % Daily Value*
    Fat 12g18%
    Saturated Fat 4g25%
    Trans Fat 1g
    Polyunsaturated Fat 2g
    Monounsaturated Fat 5g
    Cholesterol 15mg5%
    Sodium 63mg3%
    Potassium 321mg9%
    Carbohydrates 24g8%
    Fiber 4g17%
    Sugar 15g17%
    Protein 2g4%
    Vitamin A 8859IU177%
    Vitamin C 11mg13%
    Calcium 35mg4%
    Iron 1mg6%
    * Percent Daily Values are based on a 2000 calorie diet.

    Here’s one more to pin on your Pinterest boards!You'll love Sweet Potato Apple Bake! This yummy dish features layers of sweet potatoes, apples, butter, cinnamon, brown sugar and pecans!

    Bacon, Onion and Spinach Tart

    Enjoy a Bacon, Onion and Spinach Tart for breakfast, lunch or dinner! It’s yummy, and filled with caramelized onions, cheese, spinach & bacon.
    Enjoy a Bacon, Onion and Spinach Tart for breakfast, lunch or dinner! It's yummy, and filled with caramelized onions, cheese, spinach & bacon.

    If you’re interested in an absolutely scrumptious recipe that can do double duty as either breakfast, lunch OR dinner, may I suggest this bacon, onion and spinach tart? How convenient it is to make this tart, then have it in the fridge to enjoy the leftovers throughout the week!

    Caramelized onions are the unabashed star of this dish, as their flavor and sweetness permeate every bite! Add some bacon, spinach, cheese, and eggs to the filling, and you’ve got yourself a fabulous recipe! Here’s how to make this flavor-packed bacon, onion and spinach tart.

    Scroll Down For A Printable Recipe Card At The Bottom Of The Page

    Prepare The Crust For The Tart

    For this tart, feel free to use either a homemade pie crust OR a purchased, refrigerated rolled, flat pie crust. Roll the dough out, and fit the pie crust into a 9″ tart pan (with a removable bottom). Press the dough into the sides of the pan, then trim away excess crust from the top edge. You will want the top edge of the crust to be flush with the pan.

    Use the tines of a fork to prick the dough in several places on the sides and bottom. Keep the prepared crust in the refrigerator while the filling for the tart is made.

    Pie dough is placed and shaped in a tart pan, to be ready for the filling.

    Cook The Bacon And Spinach

    Cut 4 strips of bacon crosswise into small thin strips. I use kitchen scissors and stack the bacon strips to quickly cut the pieces. Place the bacon strips into a large non-stick skillet and cook on Medium heat, stirring often. Cook the bacon for approximately 6-8 minutes.

    Add 6 cups of fresh baby spinach into the skillet with the bacon. It looks like a lot of spinach, but will greatly reduce in size as it cooks. Continue to stir and cook for 1 minute, or until the spinach has wilted. Transfer the bacon/spinach mixture out of the skillet with a slotted spoon. Place on a plate lined with paper towels, to absorb excess grease.

    Strips of bacon are quickly cooked in a large skillet.Baby spinach leaves are added to the cooked bacon in a large skillet.After cooking, the bacon and spinach will be removed from the pan to cool.

    Caramelize The Onions

    Caramelized onions will take about 25 minutes to turn out perfect, so plan ahead! Place sliced onions, dried thyme and (part of) the salt into the same large skillet you cooked the bacon/spinach in. Turn the heat to MEDIUM, and put a lid on the skillet.

    Cook the onions (covered) for 25 minutes, stirring occasionally. Continue to cook (covered) until the onions have caramelized. They will also reduce in size as they become browned and fully cooked. The longer they cook, the more caramelized and sweeter the onions become! TIP: PREHEAT your oven while the onions are cooking!

    Once the onions have caramelized, take the skillet off the heat, stir, then let them cool, uncovered, for 5 minutes.

    Sliced onions, salt and thyme are placed in large skillet to cook.A lid is placed on the skillet of onions while they cook and caramelize.Once caramelized, the onions in the skillet become brown in color.

    Prepare The Bacon, Onion And Spinach Tart For Baking

    Now it’s time to make the filling for the Bacon, Onion and Spinach Tart! In a large mixing bowl, whisk together eggs, half and half, pepper and remaining salt until fully combined. Stir in the bacon and spinach mixture. Add the cooled caramelized onions, and stir until all ingredients are incorporated.

    Carefully pour the tart filling into the prepared crust. The filling will come very close to the top of the crust. Make sure the spinach and bacon are evenly distributed in the filling. Now the bacon, onion and spinach tart is ready for baking.

    Cooked bacon and spinach are added to the tarts egg filling in a large bowl.Filling for the bacon, onion and spinach tart is poured into prepared crust in a tart pan.

    Bake And Broil

    Bake the tart at 375°F. for 15 minutes, then reduce the heat to 325°, and bake another 20 minutes at the lower temperature. Remove the tart from the oven and turn the oven to the BROIL setting. Sprinkle the top of the tart with shredded cheese, then place the tart about 6″ from the broiler heating element. Let it broil for 1-2 minutes, or only until the cheese has melted!. Keep an eye on it so you don’t burn the top!

    Transfer the bacon, onion and spinach tart to a wire rack and let it cool about 5 minutes, before you attempt to slice and serve it.

    After baking, cheese is sprinkled on top of the tart and placed under broiler to melt it.A baked bacon, onion and spinach tart cools on wire rack for 5 minutes before serving.

    Slice And Serve The Bacon, Onion and Spinach Tart

    Carefully remove the tart rim from the tart by pushing up from the bottom to separate the tart from the metal rim. Slice the tart into 8 slices, serve, and enjoy! Keep any leftovers covered and refrigerated for up to 4-5 days.

    The leftovers can be easily microwaved to reheat, which makes this delicious tart a perfect choice to enjoy again for breakfast, lunch or dinner the next day! When we had this for dinner, we enjoyed it served with fresh fruit and Pistachio Asparagus In Orange Sauce!

    A slice of the bacon, onion and spinach tart is removed from the pan, for serving.Asparagus and fresh fruit are served alongside a slice of bacon, onion and spinach tart.

    I really do love the versatility of this dish! The leftovers are wonderful as they hold up well taste-wise, even after being refrigerated for several days! I’m confident you’re going to enjoy this meal. Thanks for stopping by, and I invite you to come back again soon for more family friendly recipes. Take care, and have a GREAT day! 

    Looking For More TART Or QUICHE Recipes?

    You can find ALL of my recipes in the Recipe Index, located at the top of the page. I have other tart recipes (quiches, too) that you might enjoy, including:

    Interested In More Recipes?

    Thank you for visiting this website. I appreciate you using some of your valuable time to do soIf you’re interested, I publish a newsletter 2 times per month (1st and 15th) with all the latest recipes, and other fun info. I would be honored to have you join our growing list of subscribers, so you never miss a great recipe!
    There is a Newsletter subscription box on the top right side (or bottom) of each blog post, depending on the device you use, where you can easily submit your e-mail address (only) to be included in my mailing list.

    You Can Also Find Me On Social Media:

    Facebook page: The Grateful Girl Cooks!
    Pinterest:
    The Grateful Girl Cooks!
    Instagram:
    jbatthegratefulgirlcooks

    Author's signature

    Recipe adapted from and printed from original source in April, 2018 at FamilyCircle.com

    ↓↓ PRINTABLE RECIPE BELOW ↓↓

    5 from 1 vote
    Bacon, Onion and Spinach Tart
    Prep Time
    30 mins
    Cook Time
    35 mins
    Total Time
    1 hr 5 mins
     

    Enjoy a Bacon, Onion and Spinach Tart for breakfast, lunch or dinner! It's yummy, and filled with caramelized onions, cheese, spinach & bacon.

    Category: Breakfast, Dinner, Lunch
    Cuisine: American
    Keyword: bacon onion and cheese tart
    Servings: 8
    Calories Per Serving: 258 kcal
    Author: JB @ The Grateful Girl Cooks!
    Ingredients
    • 1 refrigerated rolled pie crust or homemade
    • 4 slices bacon crosswise cut into ¼" strips
    • 6 cups baby spinach leaves
    • pounds yellow onions (about 4) cut into ¼" slices (about 6 cups total)
    • ¾ teaspoon salt
    • ¼ teaspoon dried thyme
    • 3 large eggs
    • ¾ cup half and half
    • ¼ teaspoon black pepper
    • cup shredded cheddar cheese or Gruyere
    Instructions
    Prep:
    1. Roll out dough; fit it into a 9" tart pan (with removable bottom). Press dough into sides of pan; trim away excess crust from top edge, so top of crust is flush with pan. Use fork tines to prick dough on sides and bottom. Refrigerate crust while making tart filling.

    2. Cut 4 strips of bacon crosswise into small thin strips. Place bacon strips in a large non-stick skillet. Cook on Medium heat, stirring often. Cook approx. 6-8 minutes. Add spinach. Continue to stir; cook for 1 minute, or until spinach has wilted. Transfer bacon/spinach mixture out of skillet with a slotted spoon. Place on plate lined with paper towels, to absorb excess grease. Do not clean skillet.

    Caramelize Onions:
    1. Place onions, thyme and ¼ teaspoon salt into the same skillet. Turn to Medium heat; put a lid on skillet. Cook onions (covered) for 25 minutes, stirring occasionally. Continue to cook (covered) until onions have caramelized, softened and are a rich brown color. When done, remove skillet from heat. Stir, then let them cool, uncovered, for 5 minutes. TIP: Preheat oven to 375°F. while onions are cooking.

    Make Tart Filling:
    1. In large mixing bowl, whisk together eggs, half and half, pepper and remaining ½ tsp. salt until combined. Stir in bacon/spinach. Add cooled onions; stir until combined. Carefully pour filling into crust, making sure spinach/onions/bacon are evenly distributed.

    Time For The Oven:
    1. Bake at 375°F. for 15 minutes, then reduce the heat to 325°, and bake another 20 minutes at lower temperature. Remove tart from oven, and turn oven to BROIL setting. Sprinkle top of tart with shredded cheese. Place tart about 6" from broiler heating element. Let it broil for 1-2 minutes, or until cheese has melted. Keep an eye on it so you don't burn the top! Transfer tart to wire rack. Let cool 5 minutes before removing from tart pan, slicing and serving.

    2. Carefully remove metal rim from the tart by pushing up from the bottom to separate tart from outer rim. Cut into 8 slices, serve, and enjoy! Keep any leftovers covered/refrigerated up to 4-5 days.

    Nutrition Facts
    Bacon, Onion and Spinach Tart
    Amount Per Serving (1 slice (1/8 of total))
    Calories 258 Calories from Fat 144
    % Daily Value*
    Fat 16g25%
    Saturated Fat 6g38%
    Trans Fat 1g
    Polyunsaturated Fat 2g
    Monounsaturated Fat 6g
    Cholesterol 90mg30%
    Sodium 470mg20%
    Potassium 353mg10%
    Carbohydrates 21g7%
    Fiber 3g13%
    Sugar 5g6%
    Protein 8g16%
    Vitamin A 2346IU47%
    Vitamin C 13mg16%
    Calcium 115mg12%
    Iron 2mg11%
    * Percent Daily Values are based on a 2000 calorie diet.

    Here’s one more to pin on your Pinterest boards!Enjoy a Bacon, Onion and Spinach Tart for breakfast, lunch or dinner! It's yummy, and filled with caramelized onions, cheese, spinach & bacon.

    Baked Banana Doughnuts

    Whip up some Baked Banana Doughnuts, glazed, then topped with chocolate and toasted nuts! Easy to make, delicious, and ready in 25 minutes!
    Whip up some Baked Banana Doughnuts, glazed, then topped with chocolate and toasted nuts! Easy to make, delicious, and ready in 25 minutes!

    Good morning! Today I want to share a delicious recipe for baked banana doughnuts! Our family enjoyed them at our Easter brunch this past April, and they were a wonderful addition to our “feast”. Banana baked doughnuts have wonderful flavor, and look good, too!. I “prettied them up” a bit by adding chocolate drizzle and toasted nuts to each one, which gave them even better presentation and flavor! A family member was overheard saying they look like “REAL” doughnuts… ha ha!!

    These breakfast treats (or snacks) are BAKED, and not FRIED, which makes them even easier to prepare! To make them, you will need to have a doughnut pan with a six doughnut well in it. I got mine years ago online, and it was fairly inexpensive. I’ve used mine many times over the years to make doughnuts, so it was a worthwhile purchase. 

    Scroll Down For A Printable Recipe Card At The Bottom Of The Page

    Make The Batter For The Doughnuts

    Before beginning, remember to preheat your oven to 325°F. It doesn’t take long at all to prepare the batter, so you will want that oven hot and ready to go, when you’re ready to bake the doughnuts. While the oven preheats, make the batter. Lightly spray or grease the doughnut pan, as well.

    Whisk together all purpose flour, granulated sugar, cinnamon, baking powder and salt in a large bowl. Once you’ve combined these ingredients, make a “well” in the center of the mix, then set the bowl aside. In a separate bowl, combine mashed banana, buttermilk, a beaten egg, melted (cooled) butter and vanilla extract.

    Flour, sugar, baking powder, cinnamon and salt are placed in a medium bowl and combined.Egg, banana, buttermilk, vanilla and melted butter are combined in bowl.

    Pour the banana mixture into the well in the middle of the dry ingredients, and then stir until all ingredients are combined. Don’t overmix the batter… only stir until all ingredients have been incorporated into a thick batter.

    Egg mixture is poured into a well in the dry ingredients, then combined.Batter for baked banana doughnuts is thoroughly combined and ready to use.

    Bake The Doughnuts

    Evenly divide the doughnut batter into your lightly greased doughnut pan. I spoon the batter into each doughnut well, and it is not too messy at all. You will find that the batter will fill each well almost to the top.

    Bake the doughnuts on the middle rack of the oven, at 325°F. for about 10-12 minutes. They will not be overly browned once done baking, but they should be set on top and cooked through. If you gently touch the top of the doughnut, it should spring back lightly.

    Transfer the pan to a wire rack to cool slightly before removing the baked banana doughnuts from the pan. Once cooled slightly, place the doughnuts onto the wire rack, and put a sheet of wax paper or aluminum foil UNDER the rack. The foil or wax paper will catch any drips when you glaze the doughnuts later.

    The baked banana doughnut batter is divided evenly into six wells in doughnut pan.After baking, the banana doughnuts cool in the pan on a wire rack before removing.Baked banana doughnuts cooling on a wire rack.

    Glaze And Decorate The Doughnuts

    While the baked banana doughnuts cool, make the simple glaze. Stir or whisk together powdered sugar, vanilla extract and milk until the glaze is smooth (no lumps!). Once the doughnuts have cooled to room temperature, dip the top of each doughnut (one at a time) into the glaze.

    Dip doughnuts enough to cover the top of the doughnut, then quickly flip it over, allowing excess glaze to drip back into the bowl. Set the glazed doughnut back (frosting side UP) onto the wire rack, and repeat this process with the remaining doughnuts. 

    A glaze is made with powdered sugar, milk and vanilla to frost the baked doughnuts.Each doughnut is placed in the glaze to fully coat the top of each one.Six baked banana doughnuts on a wire rack after being glazed.

    Once the glaze has been applied and has firmed up just a bit… drizzle melted chocolate over each donut, then add the toasted, chopped nuts on top of the chocolate. Lightly press the nuts into the chocolate so they will adhere to the doughnut. Let the toppings firm up before serving.

    Chopped toasted nuts and melted chocolate are added to the top of each doughnut.

    Serve The Baked Banana Doughnuts!

    Once the glaze and chocolate toppings have firmed up, the baked banana doughnuts are ready to serve! We served them at our Easter brunch, and they were a hit! In the photo below you can see them (with the red arrow), along with our other choices.

    We enjoyed them with a variety of dishes, including creamy deviled eggs, snickerdoodle bread, egg, cheese and veggie breakfast casserole, chocolate chip orange scones, and blueberry lemon muffins!

    A serving plate with six baked banana doughnuts on it, ready to eat!Easter brunch included the baked banana doughnuts (see red arrow).

    I hope you enjoy these yummy baked banana doughnuts! Thank you for stopping by my blog today, and I invite you to come back again for more family friendly recipes. Take care, and have a GREAT day!

    Looking for More DOUGHNUT Recipes?

    You can find ALL of my recipes in the Recipe Index, located at the top of the page. I have some absolutely delicious doughnut recipes for you to enjoy, including:

    Interested In More Recipes?

    Thank you for visiting this website. I appreciate you using some of your valuable time to do soIf you’re interested, I publish a newsletter 2 times per month (1st and 15th) with all the latest recipes, and other fun info. I would be honored to have you join our growing list of subscribers, so you never miss a great recipe!
    There is a Newsletter subscription box on the top right side (or bottom) of each blog post, depending on the device you use, where you can easily submit your e-mail address (only) to be included in my mailing list.

    You Can Also Find Me On Social Media:

    Facebook page: The Grateful Girl Cooks!
    Pinterest:
    The Grateful Girl Cooks!
    Instagram:
    jbatthegratefulgirlcooks

    Author's signature

    Recipe adapted from: https://www.imbored-letsgo.com/baked-banana-donuts/

    ↓↓ PRINTABLE RECIPE BELOW ↓↓

    0 from 0 votes
    Baked Banana Doughnuts
    Prep Time
    15 mins
    Cook Time
    10 mins
    Total Time
    25 mins
     

    Whip up some Baked Banana Doughnuts, glazed, then topped with chocolate and toasted nuts! Easy to make, delicious, and ready in 25 minutes!

    Category: Breakfast, Snack
    Cuisine: American
    Keyword: , doughnuts, baked banana doughnuts, banana donuts
    Servings: 6 doughnuts
    Calories Per Serving: 307 kcal
    Author: JB @ The Grateful Girl Cooks!
    Ingredients
    • 1 cup all purpose flour
    • ¼ cup granulated sugar
    • 1 teaspoon baking powder
    • ½ teaspoon salt
    • ½ teaspoon cinnamon
    • 1 banana very ripe, mashed
    • 1 large egg beaten
    • ¼ cup buttermilk
    • 1 teaspoon vanilla extract
    • 1 Tablespoon butter melted
    For Glaze:
    • 1 cup powdered sugar
    • 1 Tablespoon milk
    • ½ teaspoon vanilla extract
    For Topping:
    • 10 walnuts or pecans lightly toasted, chopped
    • ¼ cup semi-sweet chocolate melted
    Instructions
    1. Preheat oven to 325°F. Lightly spray/grease doughnut pan.

    2. Whisk flour, sugar, cinnamon, baking powder and salt in large bowl. Once combined, make a "well" in the center; set bowl aside.

    3. In separate bowl, combine mashed banana, buttermilk, egg, melted butter (cooled) and vanilla. Add this to the flour mixture. Stir to combine ingredients only until incorporated into batter.

    4. Evenly spoon batter into prepared pan, filling each well almost to the top. Bake at 325°F. for 10-12 minutes (on middle rack of oven). Finished doughnuts will be cooked through, and lightly sping back when gently touched on the top. Place pan on wire rack to cool 1-2 minutes, then transfer doughnuts out of pan to wire rack. Let cool completely. Place foil or wax paper UNDER the rack to prepare for glazing doughnuts.

    Glaze/Garnish Doughnuts
    1. While doughnuts cool, make glaze. In a small bowl, stir powdered sugar, vanilla and milk until smooth (no lumps!). Once the doughnuts have cooled to room temp., dip top of doughnuts (one at a time) into glaze, to cover top of doughnut. Allow excess glaze to drip back into bowl, then flip doughnut over. Set doughnut, glazed side UP on wire rack. Repeat with remaining doughnuts.

    2. Once glaze has firmed up, drizzle melted chocolate over each donut, then quickly sprinkle with toasted, chopped nuts. Lightly press the nuts into the chocolate so they adhere. Let toppings firm up before serving.

    Recipe Notes

    NOTE: To toast walnuts/pecans, place them in a skillet and heat on medium heat for 2-3 minutes, stirring occasionally until lightly toasted and aromatic.

    Nutrition Facts
    Baked Banana Doughnuts
    Amount Per Serving (1 doughnut)
    Calories 307 Calories from Fat 72
    % Daily Value*
    Fat 8g12%
    Saturated Fat 4g25%
    Trans Fat 1g
    Polyunsaturated Fat 2g
    Monounsaturated Fat 2g
    Cholesterol 38mg13%
    Sodium 235mg10%
    Potassium 248mg7%
    Carbohydrates 54g18%
    Fiber 2g8%
    Sugar 34g38%
    Protein 5g10%
    Vitamin A 140IU3%
    Vitamin C 2mg2%
    Calcium 63mg6%
    Iron 2mg11%
    * Percent Daily Values are based on a 2000 calorie diet.

    Here’s one more to pin on your Pinterest boards!Whip up some Baked Banana Doughnuts, glazed, then topped with chocolate and toasted nuts! Easy to make, delicious, and ready in 25 minutes!

    Air Fryer Whole Chicken

    Use your air fryer to make an Air Fryer Whole Chicken in about 1 hour! The crispy, well-seasoned and browned chicken tastes delicious!
    Use your air fryer to make an Air Fryer Whole Chicken in about 1 hour! The crispy, well-seasoned and browned chicken tastes delicious!

    Using an air fryer to cook an entire chicken is a great way to prepare a crispy, browned whole chicken. The process is extremely simple, and the cooked chicken is full of flavor! After the chicken is well-seasoned, the air fryer does the rest of the work for you!

    Air fryers use extremely hot air circulating around the food to cook it, and we really enjoy using ours! There is minimal hands-on, prep time necessary (about 10 minutes) to make a 4½ pound air fryer whole chicken. The rest of the time is simply letting the air fryer cook the chicken! When you use the homemade spice mixture as shown below, the cooked chicken also has great flavor! Here’s how to make this dish:

    Scroll Down For A Printable Recipe Card At The Bottom Of The Page

    Looking For A Good Spice Rub?

    Obviously, when making an air fryer whole chicken, feel free to use whatever spice mixture you enjoy, to season the chicken. However, I love to use this homemade spice mix and have included the ingredients in the printable recipe card below.

    The spices used are brown sugar, paprika, garlic, salt, pepper, onion powder, cayenne, cumin and dry mustard, and they add great flavor to the chicken! Mix these ingredients together in a medium-sized bowl. The ingredients will yield about 1/2 cup of spice mix, but you’ll only need 4 Tablespoons to season one chicken, so save the rest for another time!

    Spices used to flavor the air fryer whole chicken are measured into a bowl.Seasoning mix is combined before adding it to olive oil to help season a whole chicken.

    Prepare The Chicken For Cooking

    Remove giblets from the cavity of the chicken (and discard). Rinse the chicken, and pat it dry, using paper towels to absorb moisture. I recommend using kitchen twine or raffia to tie the legs of the chicken together (see photo below). This helps the chicken cook more evenly! Tuck the wings snugly under the chicken for cooking, as well.

    Place 4 Tablespoons of the combined spice mixture and 1½ T. olive oil in a separate bowl. Mix together, then spread this spice rub over the entire chicken. Be sure to spread some of the spice rub into the chicken cavity, also. Now this big ol’ chicken is ready for the air fryer!

    Chicken legs are tied together, and chicken is covered with spice mixture before cooking.

    Into The Air Fryer It Goes!

    Preheat your air fryer to 360°F. This usually takes 4-5 minutes. Place the seasoned whole chicken into the fryer BREAST SIDE DOWN. NOTE: The photo below is only to show that an entire chicken can fit into the basket of an air fryer! Anyways… place it breast side down into the basket for cooking.

    Cook the chicken at 360°F. for about 45-50 minutes. Carefully turn the chicken over to the other side (breast side up), and continue cooking for an additional 10 minutes or until the chicken reaches a safe internal temperature of 165°F. Once the internal temperature is 165°F., it is considered done and is safe to eat. To check the temperature, insert a meat thermometer into the thick part of the chicken between the thigh and the breast.  The finished chicken should also be beautifully browned and crispy on the outside. 

    TIP: Because the weight of each chicken used may vary a bit, keep an eye on it! Yours may take slightly less time or slightly more time to finish cooking. Check the temperature occasionally, to make sure it is not overcooked or undercooked.

    An entire seasoned chicken, before cooking, in an air fryer basket.

    Time To Serve The Air Fryer Whole Chicken

    Transfer the whole chicken to a cutting board and let it rest for 5-10 minutes before slicing. This “resting time” allows the juices time to redistribute throughout the chicken. After the air fryer whole chicken has rested, slice away! A whole chicken can be cut into 8 pieces, with two pieces each of the breasts, legs, thighs, and wings.

    An Air Fryer Whole Chicken after cooking is browned and crispy on the outside.The inside of the air fryer whole chicken after cooking, now sliced and ready to serve.

    I hope you enjoy making and eating this air fryer whole chicken! We enjoy cooking whole chickens this way, and love the flavor and the way it turns out. Thanks for stopping by today, and I invite you to come back again soon for more recipes! Take care, and have a GREAT day!

    Looking For More AIR FRYER Recipes?

    You can find ALL of my recipes in the Recipe Index, which is located at the top of the page. I have a nice variety of air fryer recipes, including:

    Interested In More Recipes?

    Thank you for visiting this website. I appreciate you using some of your valuable time to do soIf you’re interested, I publish a newsletter 2 times per month (1st and 15th) with all the latest recipes, and other fun info. I would be honored to have you join our growing list of subscribers, so you never miss a great recipe!
    There is a Newsletter subscription box on the top right side (or bottom) of each blog post, depending on the device you use, where you can easily submit your e-mail address (only) to be included in my mailing list.

    You Can Also Find Me On Social Media:

    Facebook page: The Grateful Girl Cooks!
    Pinterest:
    The Grateful Girl Cooks!
    Instagram:
    jbatthegratefulgirlcooks

    Author's signature

    ↓↓ PRINTABLE RECIPE BELOW ↓↓

    0 from 0 votes
    Air Fryer Whole Chicken
    Prep Time
    10 mins
    Cook Time
    1 hr
    Total Time
    1 hr 10 mins
     

    Use your air fryer to make an Air Fryer Whole Chicken in about 1 hour! The crispy, well-seasoned and browned chicken tastes delicious!

    Category: Dinner, Main Course
    Cuisine: American
    Keyword: air fryer whole chicken
    Servings: 8 pieces
    Calories Per Serving: 313 kcal
    Author: JB @ The Grateful Girl Cooks!
    Ingredients
    • pound whole chicken giblets removed from cavity
    For Seasoning:
    • Tablespoons olive oil
    • Tablespoons brown sugar
    • 2 Tablespoons paprika
    • 1 Tablespoon garlic powder
    • 1 Tablespoon salt
    • teaspoons black pepper
    • teaspoons onion powder
    • ¾ teaspoon cayenne pepper
    • ¾ teaspoon ground cumin
    • ¾ teaspoon dry mustard powder
    Instructions
    Prepare Chicken:
    1. Remove giblets from the cavity of the chicken. Rinse and pat the chicken dry using paper towels. Use kitchen twine or raffia to tie the legs of the chicken together. This helps the chicken cook evenly! Tuck the wings snugly under chicken for cooking.

    2. Mix spices together in a medium-sized bowl. NOTE: This will yield about ½ cup spice mix; you only need 4 T. spice mix for one chicken (so save the rest for another time). Place 4 Tablespoons of the combined homemade spice mixture and the olive oil into a separate bowl. Stir to combine, then rub entire chicken with the spice mix. Be sure to spread some spice mix inside the chicken cavity.

    Air Fry The Seasoned Chicken:
    1. Preheat air fryer to 360°F. (about 4-5 minutes). Place seasoned chicken into fryer basket BREAST SIDE DOWN. Cook chicken at 360°F. for about 45-50 minutes. Carefully turn chicken over (now breast side UP). Continue cooking 10 minutes, or until chicken reaches an internal temperature of 165°F. Because weight of chickens used may vary, keep an eye on it! Check internal temp. occasionally, to make sure it isn't overcooked or undercooked.

    2. Transfer chicken to cutting board; let it rest 5-10 minutes before slicing. This allows juices time to redistribute through the meat. Once chicken has rested, slice away, and serve!

    Recipe Notes

    NOTE: Estimated caloric calculation made using 8 pieces of chicken divided between total calories. Depending on the size piece consumed, calorie count may vary. The total amount of spices were used to calculate nutrients, however you will not use all the spice mix for one chicken.

    Nutrition Facts
    Air Fryer Whole Chicken
    Amount Per Serving (1 piece (1/8of total pieces))
    Calories 313 Calories from Fat 189
    % Daily Value*
    Fat 21g32%
    Saturated Fat 6g38%
    Trans Fat 1g
    Polyunsaturated Fat 4g
    Monounsaturated Fat 10g
    Cholesterol 92mg31%
    Sodium 961mg42%
    Potassium 306mg9%
    Carbohydrates 6g2%
    Fiber 1g4%
    Sugar 4g4%
    Protein 23g46%
    Vitamin A 1116IU22%
    Vitamin C 2mg2%
    Calcium 28mg3%
    Iron 2mg11%
    * Percent Daily Values are based on a 2000 calorie diet.

    Here’s one more to pin on your Pinterest boards!Use your air fryer to make an Air Fryer Whole Chicken in about 1 hour! The crispy, well-seasoned and browned chicken tastes delicious!