Month: May 2025

Air-Fried Mozzarella Bites

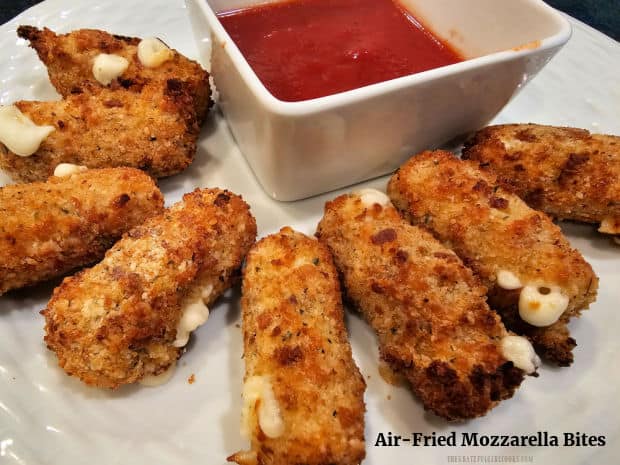
Serve yummy Air-Fried Mozzarella Bites with marinara dipping sauce and watch how fast they disappear! Crisp outside and melted cheese inside!

If you have an air fryer and enjoy “fried” mozzarella and sauce that is popular on restaurant menus, then check out the recipe today to see how to make them at home (for a fraction of the price)!

There’s not too much prep involved, and these delicious appetizers or snacks can even be frozen for a later date, which makes them convenient to have around! I love to make them in my air fryer instead of frying them in a skillet full of hot oil.

Air-Fried Mozzarella Bites come out crispy and golden on the outside, with warm, gooey melted cheese inside. They’re a favorite party food or game day appetizer to serve your family and friends. Here’s how to make them.

Scroll Down For A Printable Recipe Card At The Bottom Of The Page

Prepare The Mozzarella Cheese And Dipping Station

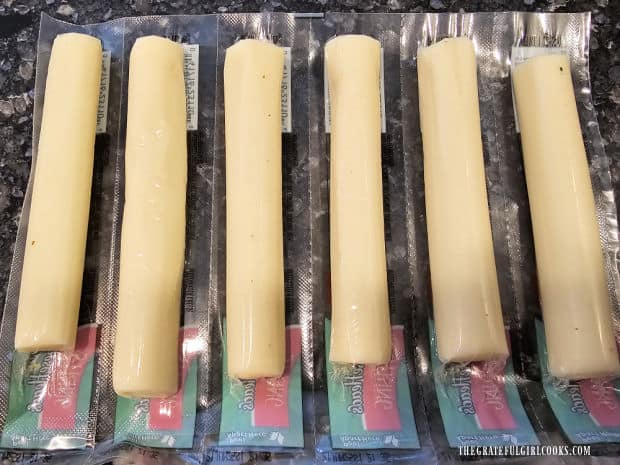
Open 6 individual packages of mozzarella string cheese, discarding the wrappers. Cut each piece in half in the middle so you end up with 12 string cheese halves.

6 sticks of mozzarella string cheese are removed from wrappers and cut in half.

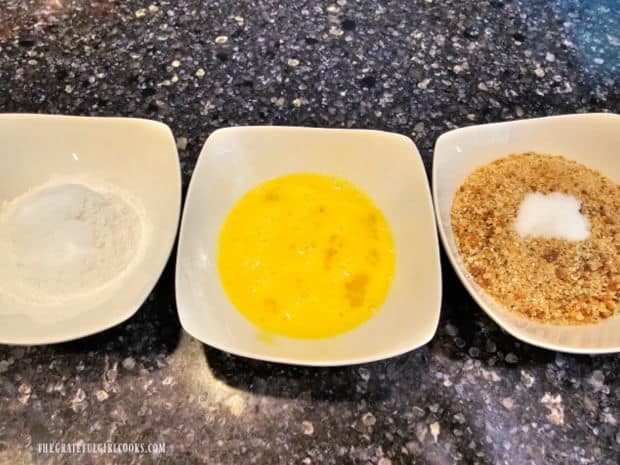
Set out 3 separate “cereal-sized” bowls for the seasoning and dipping “station”. It works well to place them next to each other on the kitchen counter, so the dipping process is easier to manage.

FIRST BOWL: Place ½ cup of all-purpose flour and 1 teaspoon of salt in the bowl and stir together until combined.

SECOND BOWL: Place 2 large eggs and beat them well with a whisk or fork until fully combined.

THIRD BOWL: Place 1 cup of Italian seasoned breadcrumbs and 1 teaspoon of salt. Stir until fully combined. 

Three bowls with ingredients for the breading of mozzarella sticks for air-frying.

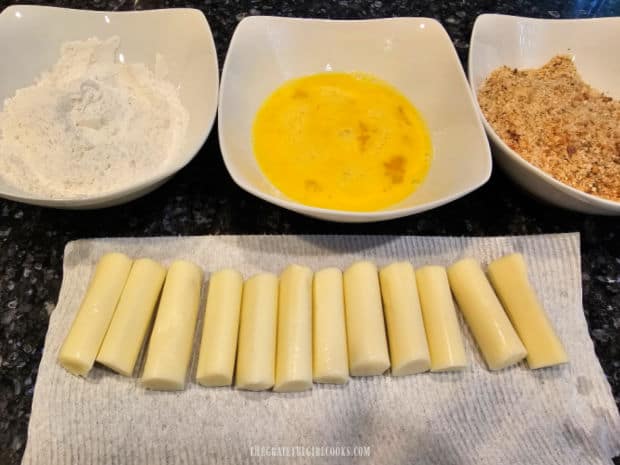
Pat the mozzarella half-sticks well using paper towels, so they are fully dry, then put them right in front of the seasoning bowls. Now it’s time to get the mozzarella bites ready!

Mozzarella halves ready with three bowls of breading ingredients.

Time To Coat The Mozzarella Bites

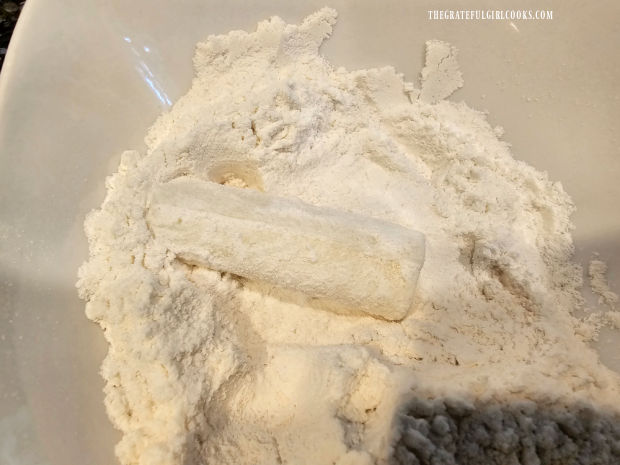
The best way I’ve found to coat the mozzarella bites is to do ONE AT A TIME! Place the mozzarella in the flour and turn it until it is covered on all sides.

A stick of mozzarella string cheese is rolled in a flour mixture until coated.

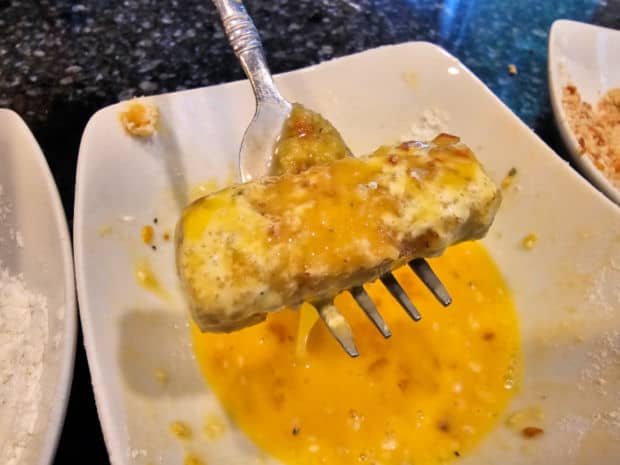
Put the flour-covered cheese in the egg mixture and use a fork (it’s messy!) to turn it until all sides are covered with egg. Lift the cheese up to let any excess egg drip back down into the bowl.

The floured cheese is coated in an egg mixture.

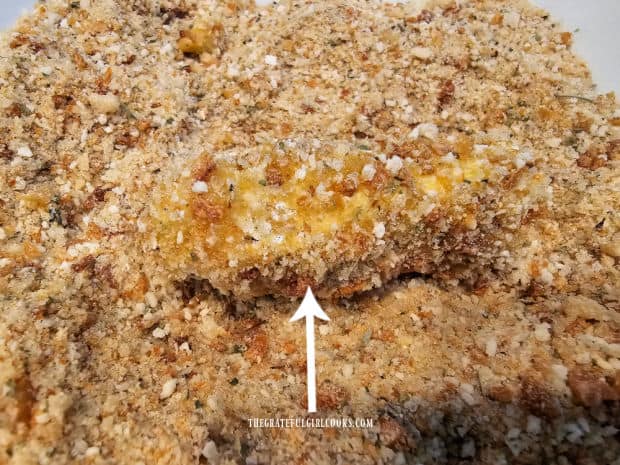
Lay the floured, egg-coated piece of cheese into the seasoned breadcrumbs and roll it in this mixture until it is well-coated on all sides.

IMPORTANT: Now repeat this process again on the same piece of cheese! Dip it back in the flour, back in the egg, then give it a final roll in the breadcrumbs!

Each piece of mozzarella needs to be processed this way (2 times for each piece of mozzarella!). As you finish each one, place it on a parchment paper-lined baking sheet, then go to the next piece.

Flour and egg-coated cheese is rolled in seasoned breadcrumb mixture.

Ready To Freeze

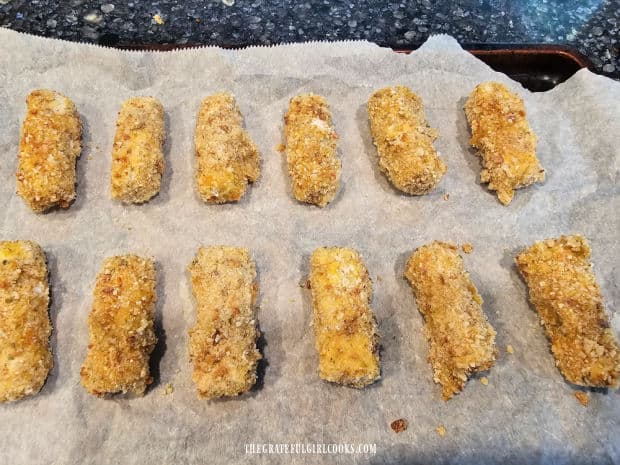
When you’re done, you should have 12 mozzarella bites that have each been “covered” two times. Lay them with a space in between each one (in a single layer) on the parchment paper-lined baking sheet and place them in the freezer for 2 hours. This will “flash-freeze them. Don’t skip this step!

This freezing time is very important so the air-fried mozzarella bites will be solid and hold together once they are in the hot air fryer! This recipe will yield 12 air-fried mozzarella bites. When they’ve been flash-frozen for two hours they can be removed and air-fried immediately.

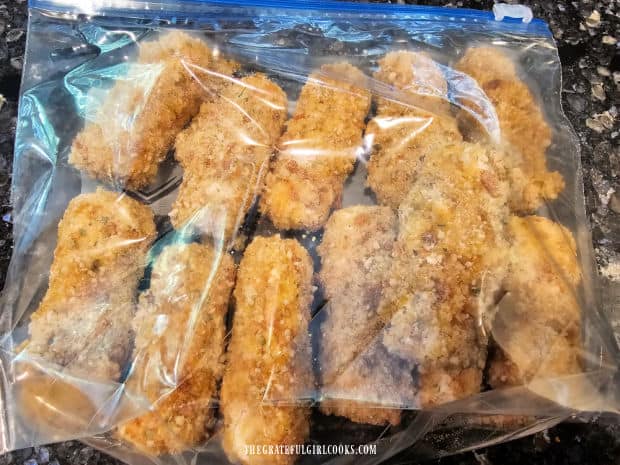
Breaded, seasoned mozzarella sticks are flash frozen on baking sheet for 2 hours.

Can They Be Made Ahead?

YES! You can pre-make the mozzarella bites, flash-freeze them for two hours and keep them in the freezer for several weeks or until you want to cook all or a few of them).

If you will be doing this, transfer the frozen mozzarella sticks off the baking sheet and store them in a freezer-safe resealable bag or container.

The flash-frozen mozzarella bites can be stored for weeks in a freezer before cooking.

Time To Cook The Air-Fried Mozzarella Bites

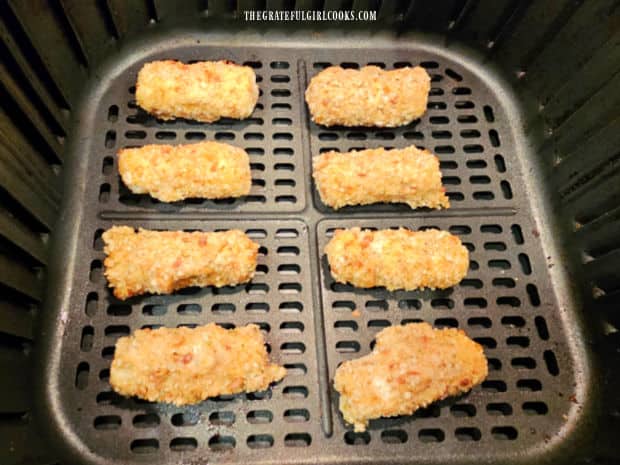
Preheat your air fryer to 400°F. Spritz the mozzarella sticks lightly (on top) with cooking spray, olive oil or vegetable oil. Lay the frozen (do not thaw) mozzarella sticks in a single layer, spritzed side UP in the basket.

Cook them for 3 minutes, then open the air fryer and gently turn the cheese bites over to the other side. Lightly spritz the other side with oil or cooking spray, then continue cooking for about 3 more minutes (approx. 6 minutes total time).

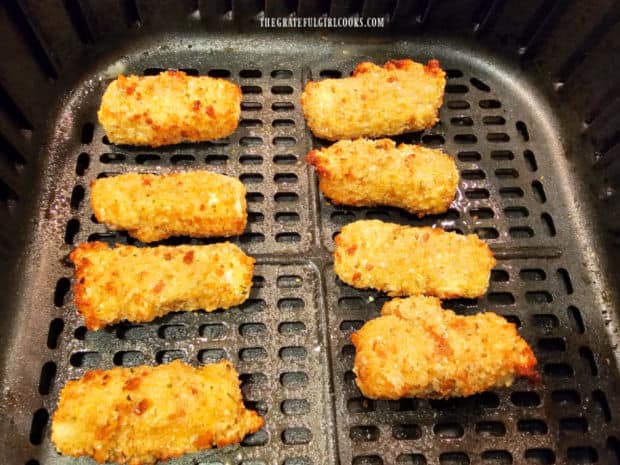
When done, the air-fried mozzarella bites should be heated all the way through and should be crispy and golden in color on the outside. Some of the melted cheese could also be present on the surface as it oozes out very slightly while cooking.

Eight mozzarella bites are cooked in air fryer basket in a single layer.The finished air-fried mozzarella bites are crispy and golden brown after cooking.

Serve And Enjoy!
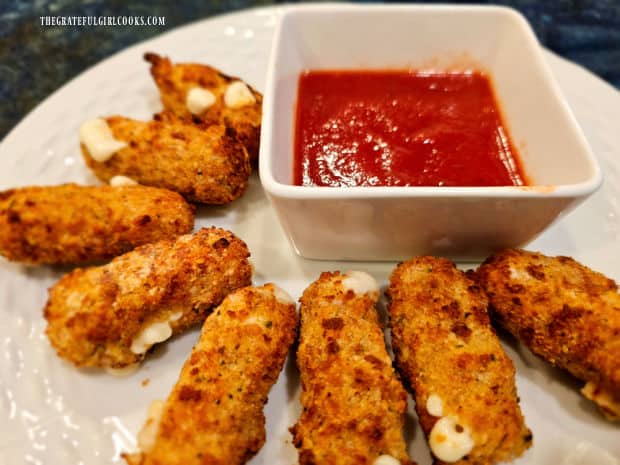
Transfer the HOT mozzarella bites to a serving plate with a small dish of warm marinara sauce on the side, for dipping! TIP: Let the mozzarella bites cool very slightly before digging in because the cheese inside is very hot when they first come out of the air fryer!

It is fun taking that first bite because the string cheese is gooey, melted, and has a good long “pull” of warm, stringy cheese! YUM!

Air-fried mozzarella bites are served hot with warm marinara sauce for dipping.

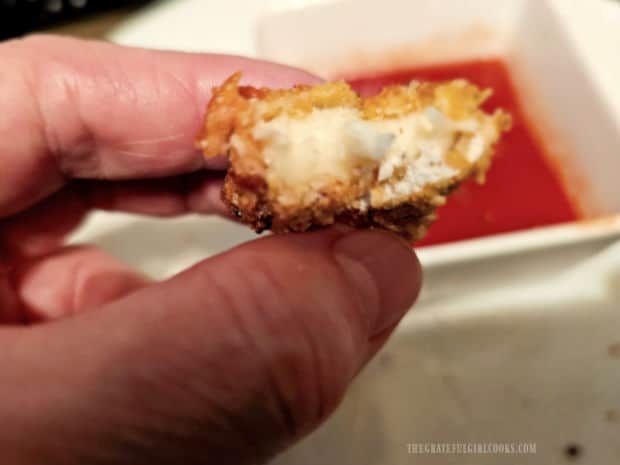
Lots of melted cheese inside each bite and dipping each air-fried crispy bite in marinara sauce adds to the overall great taste! YUM!

The melted mozzarella inside is shown after a bite has been taken.

I hope you have the opportunity to make these fun appetizers for those you love, and trust you’ll love them as much as we do! Thank for stopping by, and please come back again soon for more family-friendly recipes. Take care, may God bless you, and have a wonderful day.

Looking For More APPETIZER Recipes?

You can find ALL of my recipes in the Recipe Index, which is located at the top of the page. I have a wonderful variety of appetizer recipes (no air fryer necessary) to check out, including:

Want More Recipes? Get My FREE Newsletter!

I publish a newsletter 2 times per month (1st and 15th) with lots of recipes, tips, etc..
Would you like to join our growing list of subscribers?

There is a Newsletter subscription box on the top right (or bottom) of each blog post, depending on the device you use.
You can submit your e-mail address there, to be added to my mailing list.

Find Me On Social Media:

Facebook page: The Grateful Girl Cooks!
Pinterest:
The Grateful Girl Cooks!
Instagram:
jbatthegratefulgirlcooks

Author's signature

Original recipe source: “Food Network Magazine”, January/February 2021 issue, page 41

↓↓ PRINTABLE RECIPE BELOW ↓↓

0 from 0 votes
Air-Fried Mozzarella Bites
Prep Time
15 mins
Cook Time
6 mins
Inactive FREEZING time
2 hrs
Total Time
2 hrs 21 mins
 

Serve yummy Air-Fried Mozzarella Bites with marinara dipping sauce and watch how fast they disappear! Crisp outside and melted cheese inside!

Category: Appetizer/Snack
Cuisine: All Cuisines
Keyword: air-fried mozzarella bites
Servings: 12 (1 per serving)
Calories Per Serving: 100 kcal
Author: JB @ The Grateful Girl Cooks!
Ingredients
  • 6 1 oz. sticks mozzarella string cheese (part-skim) cut in half across width
  • ½ cup all-purpose flour
  • 2 teaspoons salt (DIVIDED USE)
  • 2 large eggs beaten/whisked until combined
  • 1 cup Italian seasoned breadcrumbs
Dipping Sauce: Marinara Sauce (approx. ½ cup)
    Instructions
    1. Cut each piece of string cheese in half widthwise. Pat pieces dry with paper towel.

    2. Set out 3 small bowls side by side with the following ingredients. FIRST BOWL: Place flour and 1 tsp. of salt in bowl; stir together until combined. SECOND BOWL: Add eggs; beat with a whisk or fork until combined. THIRD BOWL: Stir seasoned breadcrumbs and 1 tsp. of salt together until combined.

    3. Place one cheese piece in flour mixture; turn until covered on all sides. Put flour-covered cheese in the egg mixture; use a fork to turn it until all sides are covered with egg. Let excess egg drip back down into the bowl. Lay floured, egg-coated cheese in the breadcrumbs; roll until well-coated on all sides. IMPORTANT: Repeat this process again on the same piece of coated cheese! Dip it back in the flour, back in the egg, then give it a final roll in the breadcrumbs! **Finish all remaining cheese pieces the same way (coating each piece 2 times)

    4. Lay each piece with a space in between each one (in a single layer) on a parchment paper-lined baking sheet. You should have 12 mozzarella bites that have each been "covered" two times. Place them in the freezer for 2 hours. This will "flash-freeze them. Don't skip this step!

    5. To Cook: Preheat air fryer to 400°F. Spritz each piece lightly (on top) with cooking spray, olive oil or vegetable oil. Lay frozen mozzarella bites (do not thaw) in a single layer, spritzed side UP in the basket. Cook for 3 minutes, then turn each piece over. Lightly spritz top side with oil or cooking spray; continue cooking for about 3 more minutes (approx. 6 minutes total time). When done, mozzarella bites should be heated through and crispy, golden brown on the outside.

    6. Transfer mozzarella bites to a serving plate with a dish of warm marinara sauce on the side, for dipping! TIP: Let mozzarella bites cool slightly before serving because the cheese inside is very hot when they first come out of the air fryer! Enjoy.

    Recipe Notes

    NOTE: This caloric calculation is an estimate only, made using an online ingredient calculation program. It does not include marinara sauce because the amount used, or varieties may differ greatly. Also- please note that the FULL calorie amounts for the flour, eggs and breadcrumbs are included in the caloric calculation, but you may not use the entire amount for the preparation.

    Nutrition Facts
    Air-Fried Mozzarella Bites
    Amount Per Serving (1 mozzarella bite)
    Calories 100 Calories from Fat 27
    % Daily Value*
    Fat 3g5%
    Saturated Fat 1g6%
    Trans Fat 0.003g
    Polyunsaturated Fat 0.4g
    Monounsaturated Fat 0.4g
    Cholesterol 38mg13%
    Sodium 641mg28%
    Potassium 40mg1%
    Carbohydrates 11g4%
    Fiber 1g4%
    Sugar 1g1%
    Protein 7g14%
    Vitamin A 64IU1%
    Vitamin C 0.3mg0%
    Calcium 24mg2%
    Iron 1mg6%
    * Percent Daily Values are based on a 2000 calorie diet.

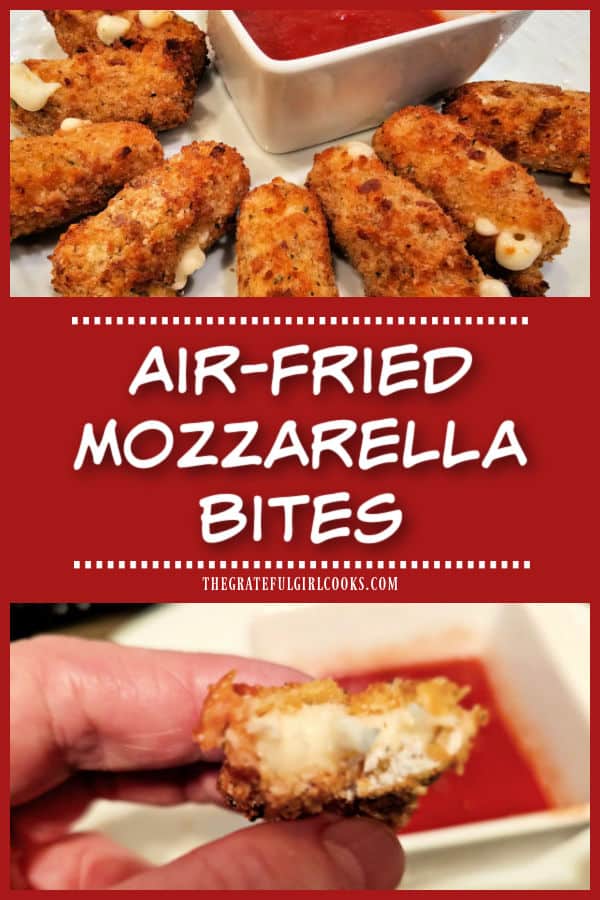
    Here’s one more to pin on your Pinterest boards!Serve yummy Air-Fried Mozzarella Bites with marinara dipping sauce and watch how fast they disappear! Crisp outside and melted cheese inside!

    Spinach Apple Quinoa Salad

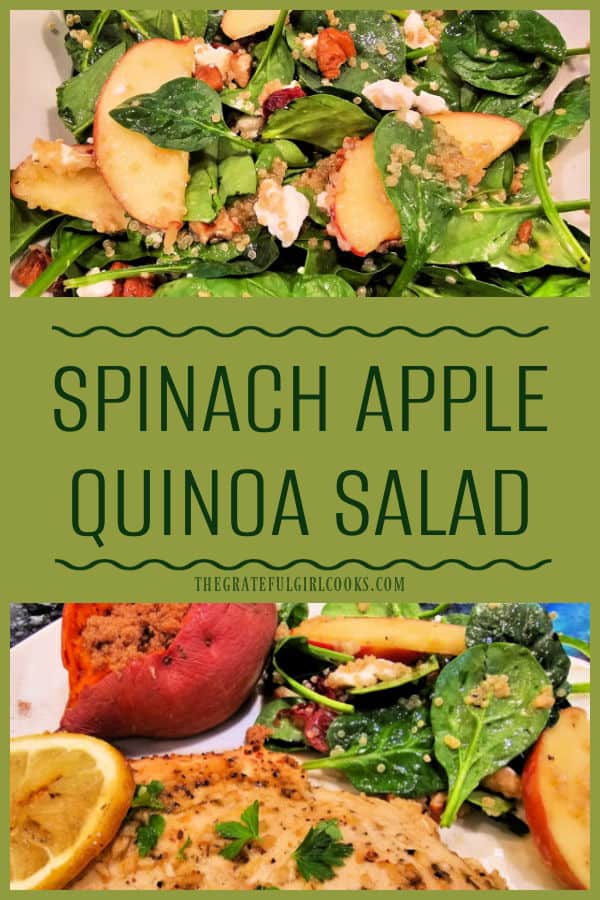
    Spinach Apple Quinoa Salad is an amazing, delicious salad with cranberries, goat cheese, and toasted pecans! It’s a great side dish or entree!
    Spinach Apple Quinoa Salad is an amazing, delicious salad with cranberries, goat cheese, and toasted pecans! It's a great side dish or entree!

    Hi, friends! If you’re looking for a fantastic salad, I’m confident you’re going to love the recipe for spinach apple quinoa salad I’m sharing today. I found the original recipe online about a year ago and only have positive things to say about it.

    This salad is packed with color, texture, crunch, protein, fiber and creamy goat cheese and it’s become one of my favorite salads! Topped with a delicious honey, lemon and Dijon salad dressing, it’s a wonderful side dish to compliment a variety of meals.

    The spinach apple quinoa salad is also wonderful served as a healthy light lunch too, because it’s filling AND the quinoa in it provides a good amount of old-fashioned protein!

    Apart from a tiny bit of prep (cooking the quinoa and toasting pecans), all it takes is “building the salad” layer by layer, adding salad dressing, and eating! Here’s how to make this scrumptious spinach apple quinoa salad.

    Scroll Down For A Printable Recipe Card At The Bottom Of The Page

    A Little Prep – Cook The Quinoa

    The first thing you’ll need to do is cook ¼ cup of quinoa and let it cool completely, before you can add it to the salad. Before cooking the quinoa, give it a good rinse and drain it well.

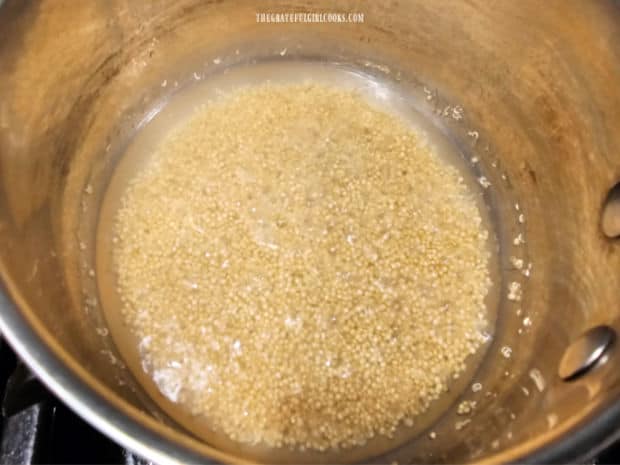
    Bring a ½ cup of water to a boil in a small saucepan, then add the rinsed/drained quinoa.  Stir to combine, then turn the heat down to Low (a simmer) and put a lid on the saucepan.

    Cook the quinoa (covered) for 10-12 minutes OR until all of the water has been absorbed. I recommend checking on it and giving the quinoa a quick stir once or twice while it cooks.

    Quinoa is cooked in boiling water until all water is gone.

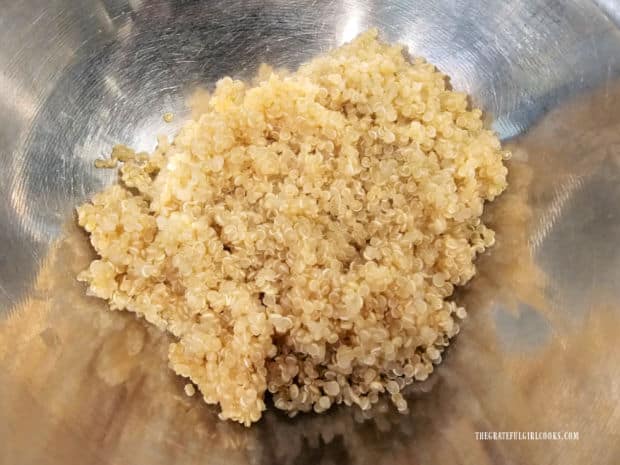
    Once all the liquid’s been absorbed, the quinoa is done. Use a fork to “fluff” up the quinoa, then transfer it out of the hot saucepan and place it in a bowl. Allow the quinoa to cool until it’s at room temperature before adding it to the salad.

    The cooked quinoa is cooled to room temperature in a bowl.

    Toast The Pecans

    While the quinoa is cooking (and cooling), lightly “toast” the pecans. I prefer to roughly chop or break apart the pecans, but if you’d prefer to use intact pecan halves, feel free to do so.

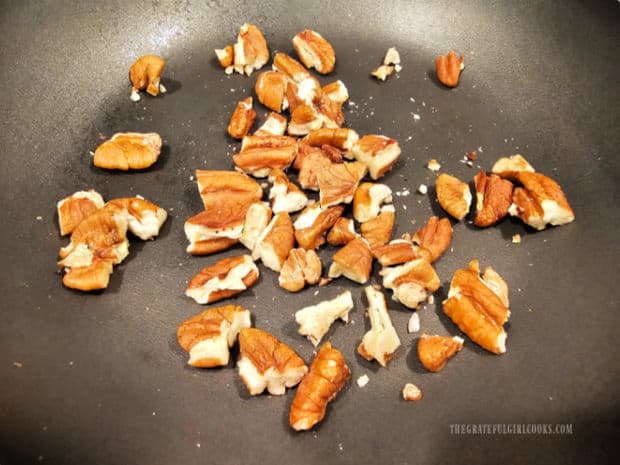
    Place the pecans in a small skillet, and heat them on Medium, stirring often, for 3-5 minutes to lightly “toast” them. Keep checking them and stirring, because the nuts can burn fairly quickly if you’re not keeping an eye on them.

    When they become aromatic and are lightly browned, they’re done! Transfer the pecans out of the skillet and let them cool completely to room temperature before adding them to the salad.

    Pecan pieces are lightly "toasted" in a dry skillet until aromatic.

    Make The Salad Dressing

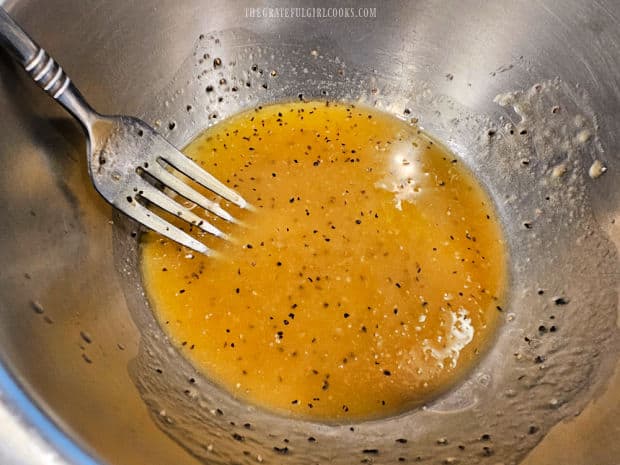
    The ingredients you’ll use for the salad dressing are extra virgin olive oil, fresh lemon juice, honey, Dijon mustard, salt and black pepper. In a small bowl, combine these ingredients using a whisk or a fork until they have been fully incorporated together. 

    A lemon Dijon salad dressing ix mixed together for the salad.

    Time To Create The Spinach Apple Quinoa Salad

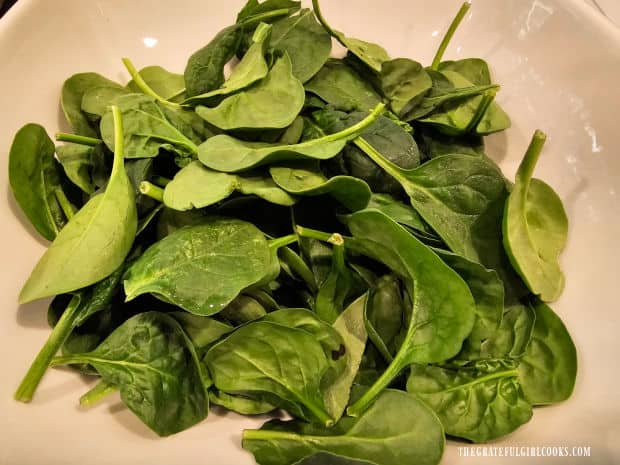
    Place clean, dry baby spinach leaves in a medium sized serving bowl. Make sure the leaves are dry to ensure the salad dressing will coat them well.

    Baby spinach leaves are placed in a large serving bowl.

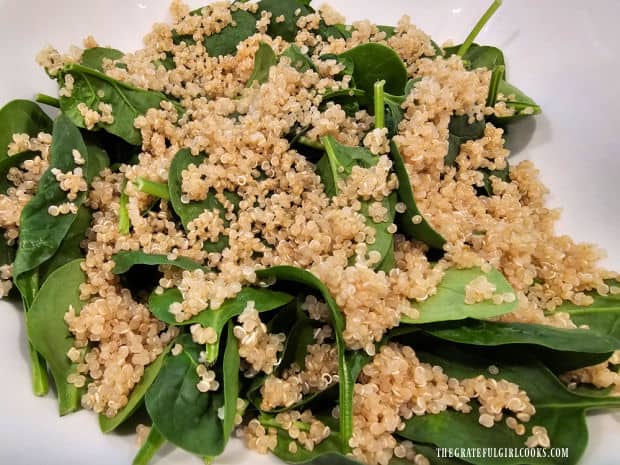
    Fluff the cooked and cooled quinoa again with a fork, then add it on top of the baby spinach leaves in the bowl.

    Room temperature, cooked quinoa is added to baby spinach leaves in bowl.

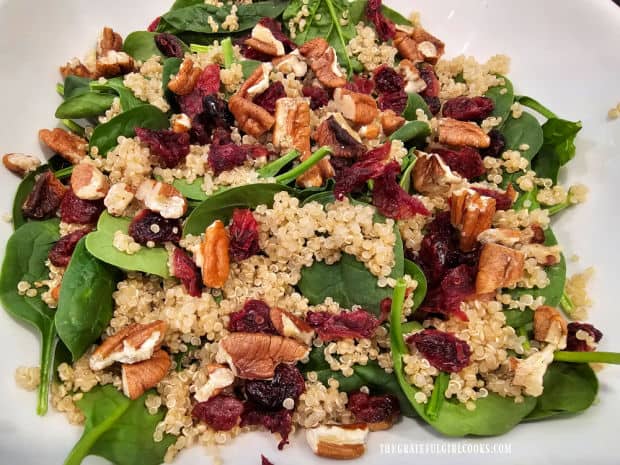
    Top the quinoa with the toasted pecan pieces and dried cranberries. Now this yummy salad is starting to look nice and colorful, right?

    Toasted pecans, dried cranberries are added to the salad.

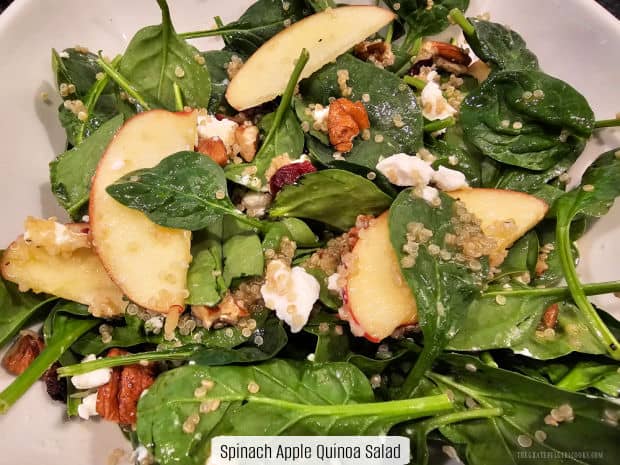
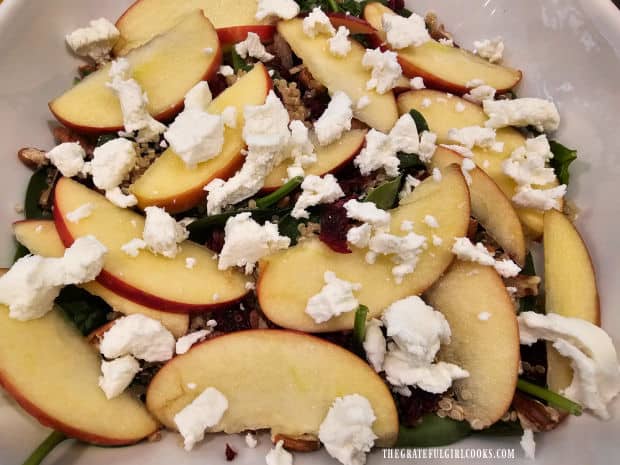
    Top the salad with thin unpeeled apple slices (or chunks) and then add creamy goat cheese crumbles. Now all that is left to do is add the salad dressing, toss and serve!

    TIP If you’re not going to serve the salad right away, toss the apple slices in some lemon juice before adding, so they don’t turn brown, once exposed to the air.

    Goat cheese crumbles and thinly sliced apples are added to the salad.

    Dress And Serve The Spinach Apple Quinoa Salad

    Give the salad dressing a final whisk, then add it to the salad. NOTE: Don’t add the dressing ahead of time- only add it right before you serve the salad, for best results!

    Gently toss the salad until all the ingredients are covered with the salad dressing. Gently re-arrange some of the apples, cranberries, pecans and goat cheese back on top of the salad for presentation (if desired).

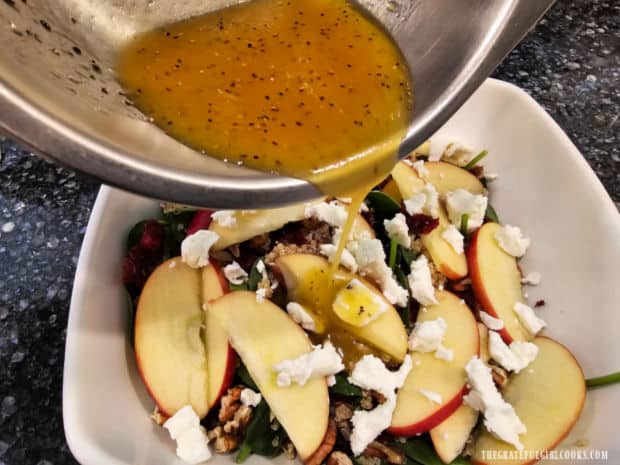
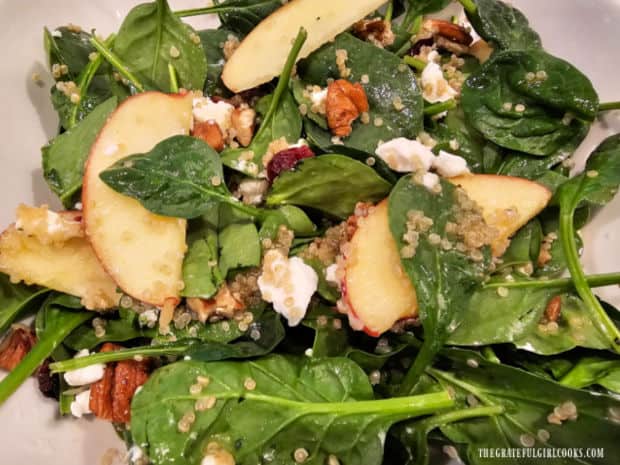
    Lemon dressing is poured over the Spinach Apple Quinoa Salad before combining.The Spinach Apple Quinoa Salad is ready to serve after the dressing is added.

    Serve and enjoy this delicious salad alongside a favorite main dish! You could also enjoy having the Spinach Apple Quinoa Salad as a main dish, dividing the full amount of salad in half (2 servings).

    The quinoa packs enough protein and fiber that would make this tasty salad a wonderful and filling side dish or a “stand-alone” lunch meal.

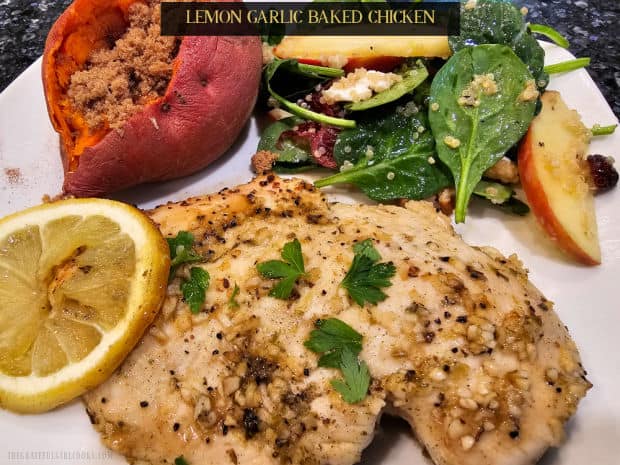
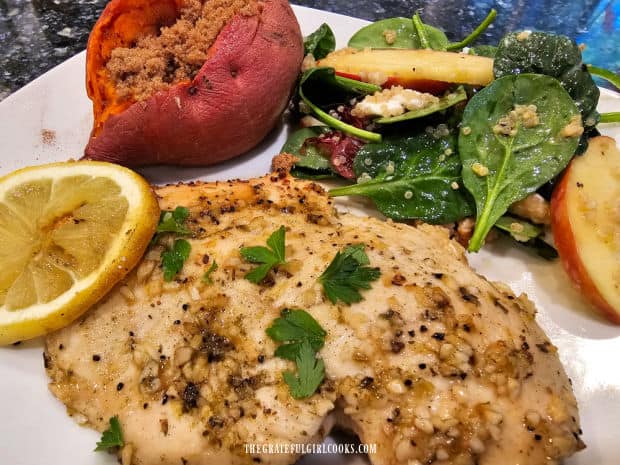
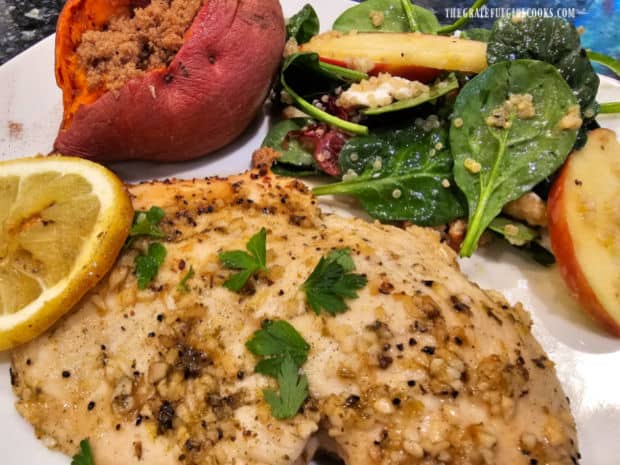
    Spinach Apple Quinoa Salad is served with lemon chicken and a baked sweet potato.

    I really hope you enjoy this fantastic spinach apple quinoa salad, and trust those you share it with will like it, as well! The recipe can easily be doubled or tripled to meet your needs, which is a great thing!

    Thank you for stopping by today, and I invite you to come back again soon for more family-friendly recipes. Take care, may God bless you, and have a wonderful day!

    Looking For More SALAD Recipes?

    You can find ALL of my recipes in the Recipe Index, which is located at the top of the page. I have lots of fantastic salad recipes (sweet, savory and main dish) to choose from, including:

    Want More Recipes? Get My FREE Newsletter!

    I publish a newsletter 2 times per month (1st and 15th) with lots of recipes, tips, etc..
    Would you like to join our growing list of subscribers?

    There is a Newsletter subscription box on the top right (or bottom) of each blog post, depending on the device you use.
    You can submit your e-mail address there, to be added to my mailing list.

    Find Me On Social Media:

    Facebook page: The Grateful Girl Cooks!
    Pinterest:
    The Grateful Girl Cooks!
    Instagram:
    jbatthegratefulgirlcooks

    Author's signature

    Recipe adapted from: https://kristineskitchenblog.com/spinach-and-quinoa-salad-with-apple-and-pecans/amp/

    ↓↓ PRINTABLE RECIPE BELOW ↓↓

    0 from 0 votes
    Spinach Apple Quinoa Salad
    Prep Time
    15 mins
    Cook Time
    10 mins
    Total Time
    25 mins
     

    Spinach Apple Quinoa Salad is an amazing, delicious salad with cranberries, goat cheese, and toasted pecans! It's a great side dish or entree!

    Category: Salad
    Cuisine: All Cuisines
    Keyword: spinach, apple, quinoa, salad
    Servings: 3
    Calories Per Serving: 324 kcal
    Author: JB @ The Grateful Girl Cooks!
    Ingredients
    For Salad:
    • ½ cup water
    • ¼ cup uncooked quinoa rinsed, drained
    • ¼ cup raw pecans (or walnuts) rough chopped or halves
    • cups fresh baby spinach
    • ¼ cup dried cranberries
    • ½ large apple (unpeeled) cored/thinly sliced (or cut in chunks)
    • 2 ounces goat cheese
    For Salad Dressing:
    • 2 Tablespoons extra virgin olive oil
    • 2 Tablespoons fresh lemon juice
    • 1 Tablespoon honey
    • ¾ teaspoon Dijon mustard
    • teaspoon salt
    • 1 pinch black pepper
    Instructions
    1. Bring water to a boil in a small saucepan; add rinsed/drained quinoa. Stir to combine, then turn heat down to Low (simmer) and put a lid on pan. Cook quinoa (covered) for 10-12 minutes OR until all water has been absorbed. Check on it and give quinoa a stir 1 or 2 times while it cooks.

    2. Once all liquid is absorbed, quinoa is done. Fluff it with a fork, then transfer quinoa to a bowl and cool to room temp.

    3. Place pecans in a small skillet. Cook on Medium, stirring often, for 3-5 minutes to lightly "toast" them. Keep checking them and stirring (they can burn quickly). When they become aromatic and are lightly browned, they're done! Transfer them out of the skillet and cool to room temp.

    4. In a small bowl, combine salad dressing ingredients using a whisk (or fork) until fully incorporated. 

    5. To "build" the salad, put spinach in medium bowl. Top with (cooled) quinoa, dried cranberries, (cooled) pecans, apple slices and crumbled goat cheese. Right before serving, add salad dressing and gently toss to combine. Serve and enjoy!
    Nutrition Facts
    Spinach Apple Quinoa Salad
    Amount Per Serving (1 (1/3 of total))
    Calories 324 Calories from Fat 180
    % Daily Value*
    Fat 20g31%
    Saturated Fat 5g31%
    Polyunsaturated Fat 3g
    Monounsaturated Fat 11g
    Cholesterol 9mg3%
    Sodium 244mg11%
    Potassium 375mg11%
    Carbohydrates 32g11%
    Fiber 4g17%
    Sugar 18g20%
    Protein 7g14%
    Vitamin A 3506IU70%
    Vitamin C 16mg19%
    Calcium 80mg8%
    Iron 2mg11%
    * Percent Daily Values are based on a 2000 calorie diet.

    Here’s one more to pin on your Pinterest boards!Spinach Apple Quinoa Salad is an amazing, delicious salad with cranberries, goat cheese, and toasted pecans! It's a great side dish or entree!


    Instant Pot Macaroni and Cheese

    Enjoy yummy Instant Pot Macaroni and Cheese, with a creamy sauce of sharp white cheddar cheese, American cheese, butter, milk and seasoning.
    Enjoy yummy Instant Pot Macaroni and Cheese, with a creamy sauce of sharp white cheddar cheese, American cheese, butter, milk and seasoning.

    I don’t know about your family, but ours LOVES macaroni and cheese! While macaroni and cheese is not known for being a really HEALTHY meal which is an understatement (*cough, cough), we still love it and have loved it since we were young kids!

    Today I want to share a recipe I make for us – Instant Pot Macaroni and Cheese, and it’s really good. The Instant Pot cooks the pasta so quickly and then everything else is simply added, stirred, melted, seasoned and then served! By the way, if you don’t own an Instant Pot, be sure to check out my recipe for delicious Easy Stovetop Macaroni and Cheese

    If you are fortunate enough to have an Instant Pot (I was given mine and am grateful for it), I hope you’ll consider trying this yummy recipe. It can be served as a side dish or as a main dish (meatless). Here’s how to make Instant Pot macaroni and cheese.

    Scroll Down For A Printable Recipe Card At The Bottom Of The Page

    Cook the Macaroni Noodles

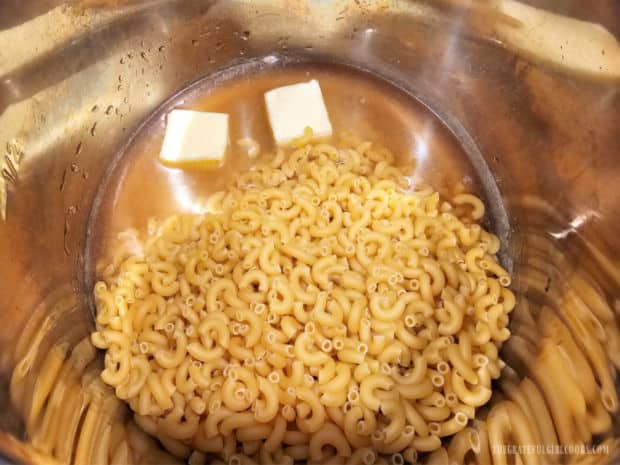
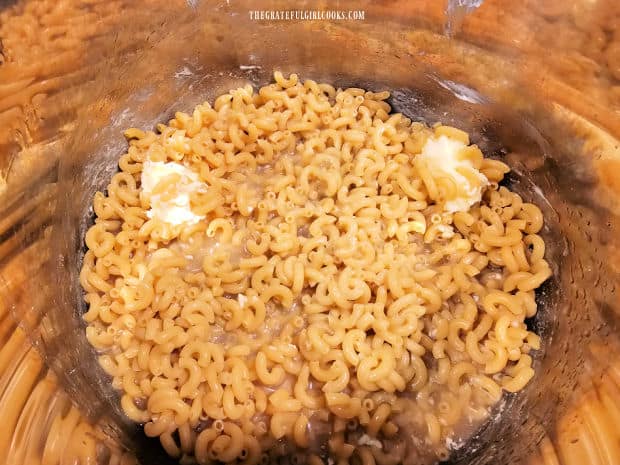
    Place uncooked macaroni noodles, chicken broth and butter in the inner cannister of the Instant Pot. Give them a good stir, then press the pasta down as much as possible into the liquid. NOTE: You can substitute water for the chicken broth, if desired. 

    Lock the lid in place, then flip the pressure release valve to SEALING. Now press the MANUAL button (high pressure) and set the timer for 4 minutes. It will take 5-10 minutes for the Instant Pot to reach full internal pressure and then the pressure gauge button will pop up.

    The cooking program (and timer) will begin pressure cooking once the machine has reached full pressure. When the cooking time is completed, the machine should beep. Perform a quick release of the steam inside the pot by flipping the pressure release valve to VENTING.

    When all steam (and pressure) has been fully released, the pressure gauge button should drop back down, indicating it is safe to open the lid of the Instant Pot. 

    Elbow macaroni, butter and chicken broth in Instant pot.Pasta is pressed down into chicken broth as much as possible before cooking.

    Add The Remaining Ingredients

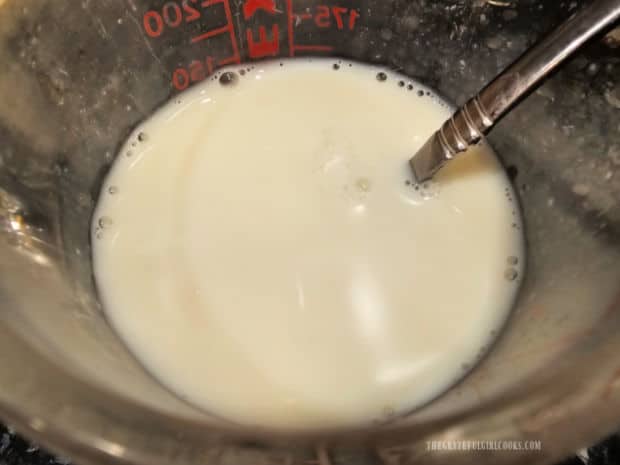
    Press the CANCEL button to end the cooking program, open the lid and then press the SAUTÉ button. Add milk, Tabasco (or other hot sauce) and yellow table mustard to the cooked noodles in the pot.

    Milk is mixed with hot sauce and yellow mustard in a measuring cup.

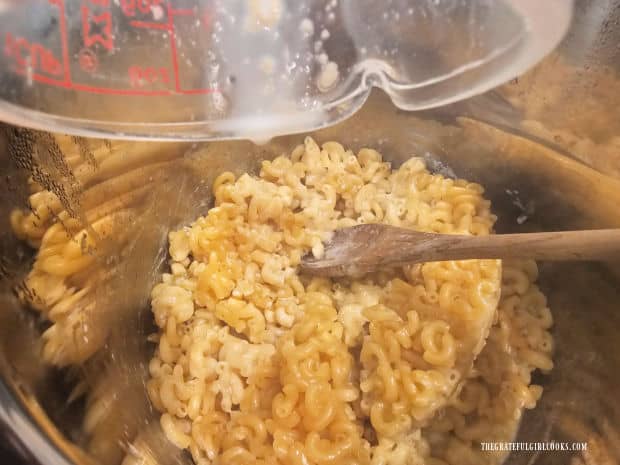
    Mix the milk, mustard and hot sauce into the pasta very well, to combine them with the cooked pasta. Keep stirring, so the noodles don’t stick to the bottom while heating them on Sauté.  

    The milk mixture is added to the cooked pasta and stirred to combine.

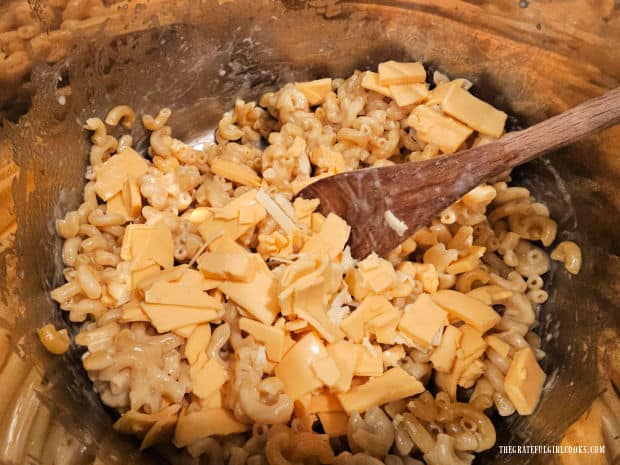
    Add American cheese to the pasta and give it a quick stir to combine. I cut mine into small pieces so it will melt faster. The use of American cheese gives the macaroni a nice creamy texture once it melts.

    American cheese (in pieces) is stirred into the cooked macaroni.

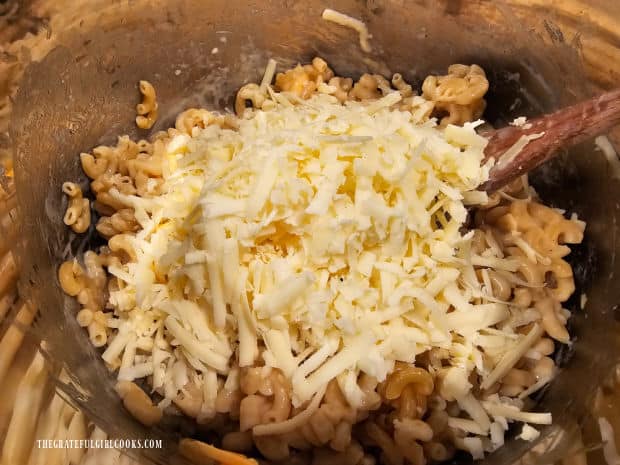
    Stir in grated sharp white cheddar cheese and continue to stir constantly until all the cheese has fully melted and been “merged” with the noodles.

    Grated white cheddar is added and stirred into the pasta, to combine and melt.

    Final Step

    The Instant Pot mac and cheese should be hot, tender, and the sauce should be quite creamy and cheesy. Stir in a teaspoon of butter and add additional milk, if desired.

    The sauce will thicken as the cheese melts, so if you want the sauce to be creamier, add more milk (a little at a time) until the sauce reaches the consistency you prefer.

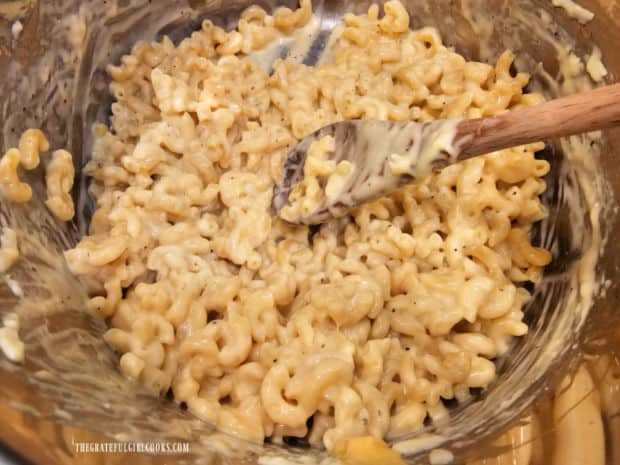
    Take a bite and then season the Instant Pot mac and cheese with salt and black pepper to suit your taste.  Continue to cook and stir, and once the pasta is fully heated through, it’s ready to serve. Remember to press CANCEL to turn off the heat for the Instant Pot.

    Butter, salt and pepper are added to Instant Pot macaroni and cheese and heated through.

    Serve The Instant Pot Macaroni And Cheese

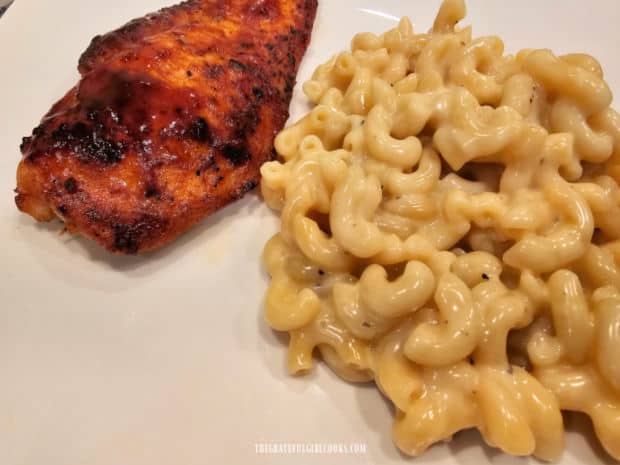
    When the Instant Pot mac and cheese is hot, either transfer it to a large serving bowl OR scoop it straight out of the inner pot onto individual plates. Serve the mac and cheese immediately while hot and enjoy it as meatless main dish or as a side dish served with a favorite entree.

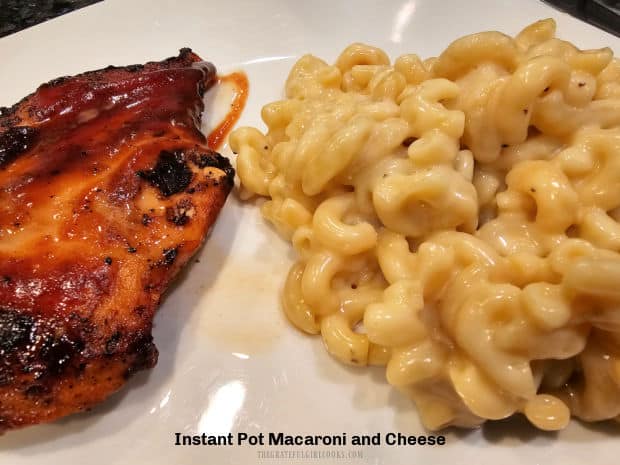
    The Instant Pot macaroni and cheese is served with BBQ chicken on a white plate.

    I hope you have the opportunity to make Instant Pot Macaroni and Cheese for those you love. It really is a tasty side dish OR meatless main dish, and I trust you’ll enjoy it occasionally as much as we do, even if it is rather high in calories.

    Thank you for stopping by, and I invite you to come back again soon for more family-friendly recipes. Take care, may God bless you, and have a wonderful day!

    Looking For More INSTANT POT Recipes?

    You can find ALL of my recipes in the Recipe Index which is located in the Menu at the top of the page. I have some wonderful Instant Pot recipes you might enjoy, including:

    Want More Recipes? Get My FREE Newsletter!

    I publish a newsletter 2 times per month (1st and 15th) with lots of recipes, tips, etc..
    Would you like to join our growing list of subscribers?

    There is a Newsletter subscription box on the top right (or bottom) of each blog post, depending on the device you use.
    You can submit your e-mail address there, to be added to my mailing list.

    Find Me On Social Media:

    Facebook page: The Grateful Girl Cooks!
    Pinterest:
    The Grateful Girl Cooks!
    Instagram:
    jbatthegratefulgirlcooks

    Author's signature

    ↓↓ PRINTABLE RECIPE BELOW ↓↓

    0 from 0 votes
    Instant Pot Macaroni and Cheese
    Prep Time
    10 mins
    Cook Time
    4 mins
    Pressurization (Instant Pot) (approx.)
    10 mins
    Total Time
    24 mins
     

    Enjoy yummy Instant Pot Macaroni and Cheese, with a creamy sauce of sharp white cheddar cheese, American cheese, butter, milk and seasoning.

    Category: Main Dish, Side Dish
    Cuisine: All Cuisines
    Keyword: Instant pot, macaroni and cheese, meatless
    Servings: 8 side dish servings (½ cup)
    Calories Per Serving: 485 kcal
    Author: JB @ The Grateful Girl Cooks!
    Ingredients
    • cups low sodium chicken broth can substitute water
    • 16 ounces elbow macaroni uncooked
    • 2 TBSP. butter
    • ¾ cup low-fat milk
    • 1 TBSP. Tabasco sauce or other hot sauce
    • tsp. yellow mustard
    • 8 ounces American cheese (or Velveeta) cut in small pieces
    • 8 ounces white sharp cheddar cheese grated
    • salt and black pepper, to taste
    • 1 tsp. butter + more milk (if desired) for creaminess
    Instructions
    1. Place macaroni, chicken broth (or water) and 2 Tbsp. butter in the Instant Pot. Stir, then press pasta down as much as possible into liquid. Lock lid; set pressure release valve to SEALING. Press MANUAL button (high pressure) and set timer for 4 minutes. It takes about 5-10 minutes to reach full pressure (pressure gauge button will pop up) and then cooking program will begin. When done cooking, perform a quick release of steam by turning pressure release valve to VENTING. When all steam (and pressure) is fully released, pressure gauge button should drop back down, indicating it's safe to open the lid. 

    2. Press CANCEL button, open lid then press the SAUTÉ button. Add milk, Tabasco and mustard to the cooked noodles. Stir well, to combine, so noodles don't stick to the bottom while heating.

    3. Add American cheese; stir to combine, then add sharp white cheddar. Continue heating, stirring constantly until all cheese is melted and incorporated.

    4. Mac and cheese should be hot, tender, and the sauce should be creamy. Stir in remaining 1 tsp. butter. Sauce thickens as the cheese melts, so if you want the sauce creamier, add more milk until it reaches the consistency you prefer. Take a bite, season with salt and pepper, to taste.  Continue to heat and stir until pasta is fully heated through. Serve hot and enjoy!
    Nutrition Facts
    Instant Pot Macaroni and Cheese
    Amount Per Serving (1 (½ cup))
    Calories 485 Calories from Fat 216
    % Daily Value*
    Fat 24g37%
    Saturated Fat 13g81%
    Trans Fat 0.5g
    Polyunsaturated Fat 1g
    Monounsaturated Fat 6g
    Cholesterol 68mg23%
    Sodium 780mg34%
    Potassium 279mg8%
    Carbohydrates 46g15%
    Fiber 2g8%
    Sugar 3g3%
    Protein 21g42%
    Vitamin A 686IU14%
    Vitamin C 1mg1%
    Calcium 540mg54%
    Iron 1mg6%
    * Percent Daily Values are based on a 2000 calorie diet.

    Here’s one more to pin on your Pinterest boards!Enjoy yummy Instant Pot Macaroni and Cheese, with a creamy sauce of sharp white cheddar cheese, American cheese, butter, milk and seasoning.