Make this filling, delicious Split Pea and Ham Soup on a cold day to warm you up! Recipe also includes tutorial for canning this soup for long term storage!
Last week I decided to can some Split Pea and Ham Soup to store in our pantry for the cold Fall and Winter months ahead. It’s always satisfying to pull out a homemade “bone-warming” hearty soup out of our pantry when it’s cold and stormy outside!
Guess what? Even if you don’t can jars of food, this is a delicious, easy, and economical soup to prepare for your family! This recipe makes a big pot of split pea and ham soup.
Scroll Down For A Printable Recipe Card At the Bottom Of The Page
How To Make Split Pea And Ham Soup
Combine 2 cups of split peas (a one pound bag) with water in a large soup pot. I used water PLUS added 2 large chicken bouillon cubes for flavor. Cook the split peas on medium-low for about an hour, just until they become tender.

Puree The Cooked Split Peas
Use an immersion blender to completely blend the peas until smooth. I puréed the peas until smooth, but it’s okay to leave them a bit chunky, if that’s how you enjoy them. NOTE: You can also process the peas and liquid in a food processor or blender. If using these appliances, work in batches, a little at a time, until puréed.

Make The Split Pea And Ham Soup
Add the carrots, ham, onion, bay leaf, and allspice to the puréed pea mixture in soup pot.

Bring the split pea and ham soup to a boil using medium-high heat. Once the soup is boiling, reduce heat to low. Cook the soup on reduced heat for about 30 minutes. If the soup gets too thick, you can add a little bit more boiling water.
Once fully cooked, the split pea and ham soup will be ready to eat (if NOT canning).

How To Can Split Pea And Ham Soup
If canning, while soup is cooking, prepare pressure canner, canning jars and flat lids per manufacturer instructions (for cleaning, heating, etc.). Typically I put clean canning jars on a dish towel lined baking sheet. Let the jars heat in a 225 degree oven for about 20 minutes before filling.

Ladle the hot split pea and ham soup into prepared hot jars. Leave 1 inch headspace in each jar. The soup will thicken during the canning process, by the way!
Remove air bubbles from each jar, and make sure you have the correct headspace. Adjust the headspace, if necessary, by removing or adding liquid. Wipe rims of each jar clean with a wet paper towel to ensure a proper seal. Place a prepared flat lid on each jar, then tighten the screw band on, to fingertip tightness.

Carefully place the prepared jars of soup into the prepared pressure canner using canning tongs. Lock the lid, and process, according to manufacturer and USDA instructions for YOUR specific pressure canner. Example: Bring to boil, vent steam for 10 minutes, close vent, etc..
How Long To Process The Split Pea and Ham Soup In Pressure Canner
Process jars of soup at 10 pounds pressure. Pint jars are processed for 75 minutes and Quart jars are processed for 90 minutes.

When processing time is done, turn the heat off. Let the pressure in your canner drop to zero on it’s own. Wait a couple additional minutes, then open vent. Let canner sit for an additional 10 minutes once vent is open. Carefully remove lid, then remove jars, using canning tongs.
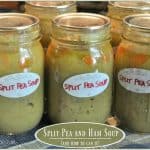
Place the hot jars of split pea and ham soup onto a dish towel. Do NOT set jars directly onto kitchen counter, because the extremely hot jars could crack, because of temperature variations. Let the hot jars cool undisturbed, for 24 hours, then label the jars of soup, and store in your pantry.

This recipe (from one of myBall canning books), makes 5 pint sized jars or 2 quart sized jars of split pea and ham soup. I made 5 pint jars this time, and now they are happily shelved in our pantry for a “rainy” day!
Canned split pea and ham soup tends to thicken quite a bit during the processing. When you open a jar, simply add a little bit of hot water to the soup. Heat soup until hot, and serve! It’s delicious!

It’s very fulfilling to prepare canned foods to stock our pantry with foods like this split pea and ham soup! I hope you enjoy the canning process, as well as this wonderful tasting soup! Have a great day!
Looking For Other Canning Recipes On This Blog?
You can find my canning recipes in the Recipe Index in the top Menu Bar at the top of each blog post. Some of my canning recipes include:
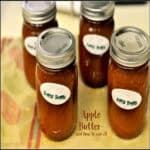
- Apple Butter
- Bread and Butter Pickles
- Ham and Bean Soup
- Green Beans
- Dried Beans (pinto/black/garbanzo, etc.)
I have many more canning recipes, including lots of Jam recipes, too! Hope you will check them out in my Recipe Index!
Interested In More Recipes?
Thank you for visiting this website. I appreciate you using some of your valuable time to do so. If you’re interested, I publish a newsletter 2 times per month (1st and 15th) with all the latest recipes, and other fun info. I would be honored to have you join our growing list of subscribers, so you never miss a great recipe!
There is a Newsletter subscription box on the top right side (or bottom) of each blog post, depending on the device you use, where you can easily submit your e-mail address (only) to be included in my mailing list.
You Can Also Find Me On Social Media:
Facebook page: The Grateful Girl Cooks!
Pinterest: The Grateful Girl Cooks!
Instagram: jbatthegratefulgirlcooks

Recipe Source: My book called “Ball Complete Book of Home Preserving”, Published 2012, Robert Rose, Inc., page 403.
- 2 cups dried split peas
- 8 cups water
- 2 large chicken bouillon cubes (optional, but adds additional flavor to broth)
- 1 cup diced ham
- 1 ½ cups sliced carrots
- 1 cup chopped onion
- ¼ teaspoon ground allspice
- 1 bay leaf
- Salt and Pepper , to taste
- Place split peas, water and chicken bouillon cubes into a large saucepan or soup pot (stainless steel is best). Bring the ingredients to a boil with medium-high heat, stirring occasionally. Once they come to a boil, turn down the heat to a low simmer; let the peas continue to cook for about an hour (or until the split peas become tender).
- When peas are done, purée peas and liquid, using a stick immersion blender OR processing in batches using a food processor. If using food processor, return purée to pan.
- Prepare pressure canner, jars, lids, etc. per manufacturer guidelines.
- Add ham, carrots, onion, allspice and bay leaf to soup. Bring soup to a boil. Reduce heat to low and cook for 30 minutes. Season soup with salt and pepper, to taste. If soup is a bit too thick, you can thin it out a little by adding a bit of boiling water to pan. Stir to combine. Remove bay leaf.
- Place hot, prepared jars on a dish towel. Ladle the soup mixture into jars, being sure to leave 1 inch headspace on each jar. Remove or add liquid, as necessary, to ensure correct headspace. Remove air bubbles from jars, then wipe the rim of jars clean using a wet paper towel, to ensure a good seal. Place hot flat lids on jar, then screw the bands into place until they are fingertip tight.
- Carefully put the jars into water in prepared pressure canner. Lock lid; turn heat to medium-high. Once vent begins steaming, let it vent for 10 minutes, then close vent. Heat until canner reaches 10 pounds pressure. After it reaches 10 pounds pressure, process PINTS for 75 minutes and QUARTS for 90 minutes.
- When done, turn off heat. Let the pressure in the canner drop to zero naturally. Once it gets to zero, wait a couple more minutes, then open the vent cover. Wait another 10 minutes, then carefully remove the canner lid. Place the hot jars on a dish towel on counter, and let them sit undisturbed for 24 hours. Check for proper seal, then label and store jars in pantry.
If using quart sized jars, this recipe will make 2 quarts (plus a bit more). The recipe is easily doubled.
When you open a can, you will notice that the soup will have thickened slightly during the canning process. Just add a bit of water to soup, reheat and enjoy!
Here’s one more to pin on your Pinterest boards!


. Learn how to make this classic sauce, and can it for long term storage! / The Grateful Girl Cooks!")

 / The Grateful Girl Cooks!")
 / The Grateful Girl Cooks!")
 / The Grateful Girl Cooks!")
. Learn how to make this classic sauce, and can it for long term storage! / The Grateful Girl Cooks!")


 - The Grateful Girl Cooks!")
 - The Grateful Girl Cooks!")
 - The Grateful Girl Cooks!")
 - The Grateful Girl Cooks!")
 - The Grateful Girl Cooks!")
 - The Grateful Girl Cooks!")
 - The Grateful Girl Cooks!")
 - The Grateful Girl Cooks!")
 - The Grateful Girl Cooks!")
 - The Grateful Girl Cooks!")
 - The Grateful Girl Cooks!")
 - The Grateful Girl Cooks!")


 / The Grateful Girl Cooks! This delicious and hearty ham and bean soup will fill you up... recipe also includes \"how to\" instructions for canning jars of soup to store in your pantry!")
 / The Grateful Girl Cooks!")
 / The Grateful Girl Cooks!")
 / The Grateful Girl Cooks!")
 / The Grateful Girl Cooks!")
 / The Grateful Girl Cooks!")
 / The Grateful Girl Cooks!")
 / The Grateful Girl Cooks!")
 / The Grateful Girl Cooks!")
 / The Grateful Girl Cooks!")
 / The Grateful Girl Cooks!")

 / The Grateful Girl Cooks! This delicious and hearty ham and bean soup will fill you up... recipe also includes \"how to\" instructions for canning jars of soup to store in your pantry!")