Category: Vegetable Dishes

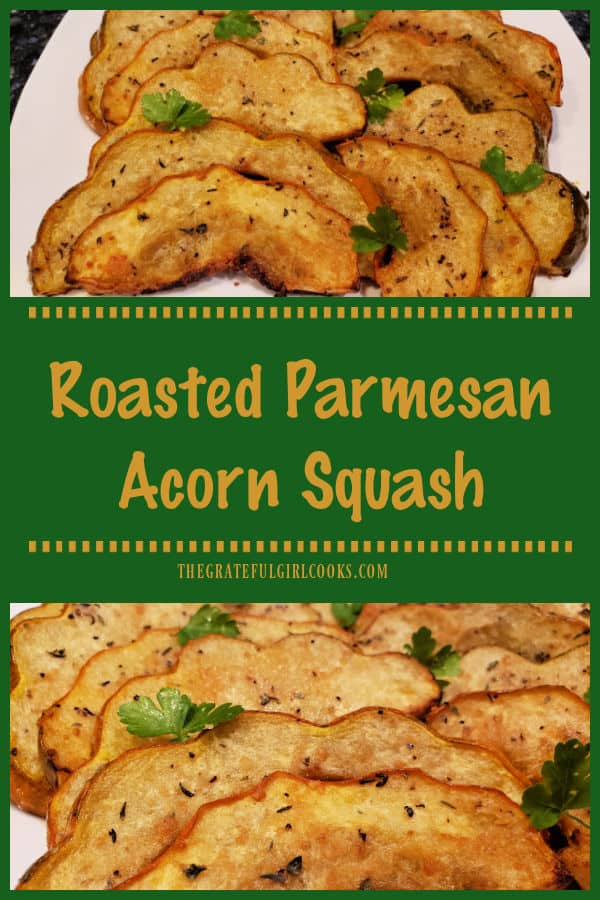
Roasted Parmesan Acorn Squash

Roasted Parmesan Acorn Squash is a tasty veggie side dish! Squash is seasoned with butter, spices, and Parmesan, and it’s ready in 30 minutes!
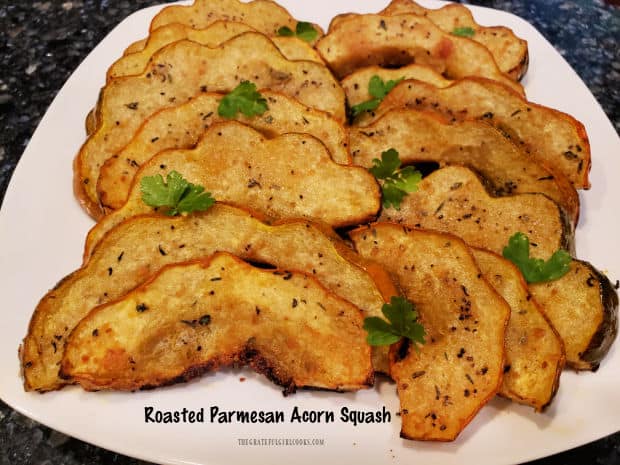
Roasted Parmesan Acorn Squash is a tasty veggie side dish! Squash is seasoned with butter, spices, and Parmesan, and it's ready in 30 minutes!

Tender and seasoned well with butter, spices and Parmesan cheese, this simple acorn squash recipe is delicious, and I think you’ll enjoy it! I’ve been experimenting with acorn squash recipes for the past couple of years, have enjoyed the process!

I’ve already posted delicious “sweet” recipes for Apple Pecan Stuffed Acorn Squash and Baked Praline Acorn Squash on my blog. Now it’s time for a “SAVORY” recipe for this versatile winter squash! It is ready in 30 minutes from start to finish, so you can’t go wrong with this recipe! Here’s how easy it is to make:

Scroll Down For A Printable Recipe Card At The Bottom Of The Page

Prepare The Acorn Squash For Baking

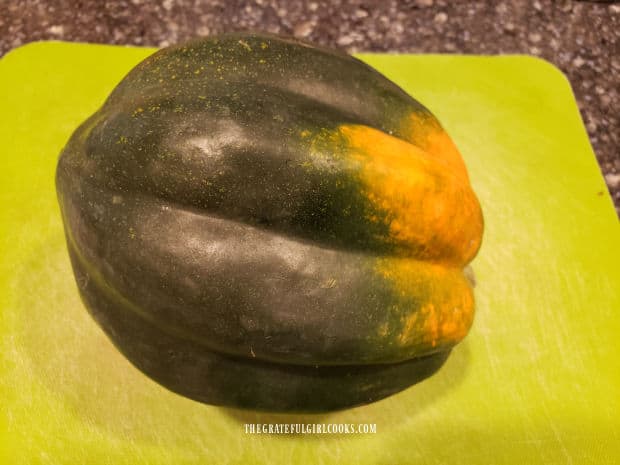
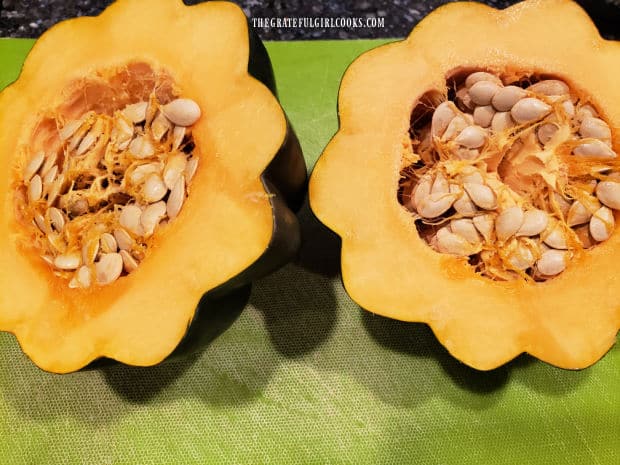
Before beginning, remember to preheat your oven to 400°F. Okay- here we go:  Start with a 1½ to 2 pound acorn squash. This is considered a medium sized squash, since they can get as large as 5 pounds! Carefully slice the squash in half through the middle (NOT stem to bottom!) then scoop out and discard the seeds and pulp from each half.

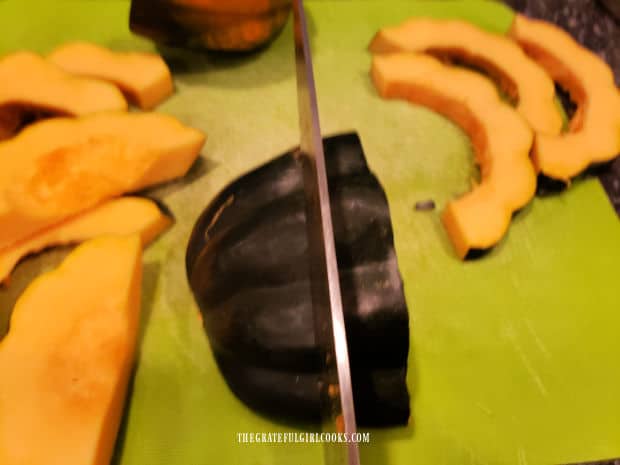
Place the squash, cut side down, and slice each half into 1″ wide slices, creating a half moon-shaped slice. Place all the slices into a large mixing bowl, and set aside.

A medium sized acorn squash ready to slice in half for this recipe.Seeds and pulp need to be removed from each of the acorn squash halves.One inch slices are cut from each of the acorn squash halves.

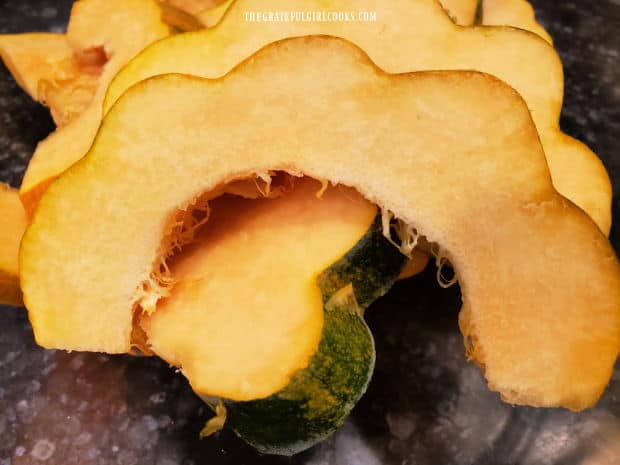
This is what the slices will look like after they have been cut.

The acorn squash slices resemble a half-moon in shape after being cut.

Seasoning The Acorn Squash

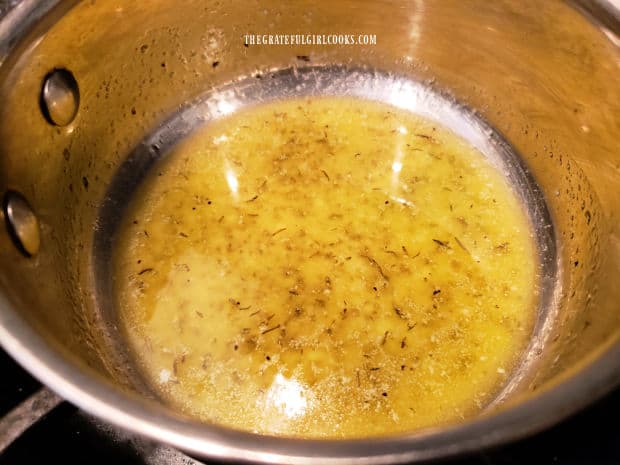
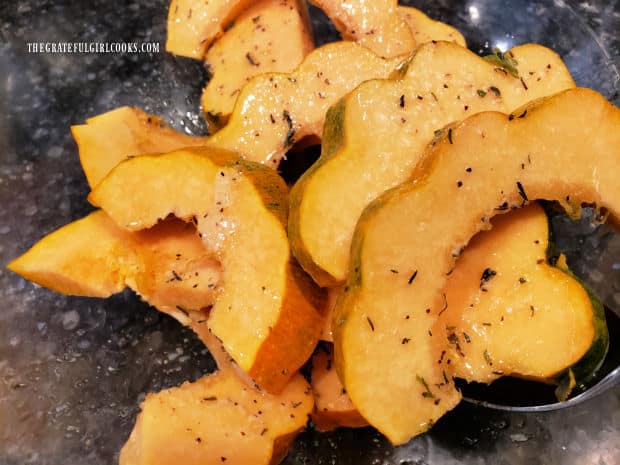
Now it’s time to make the seasoning sauce for the squash. Melt butter in a small saucepan. When melted, add garlic powder, oregano, thyme, salt and pepper, and stir to combine. Pour the sauce over the acorn squash slices, and toss gently, until the squash is covered on all sides with the buttery spice mixture.

Spices are combined with melted butter in a small saucepan.

All the acorn squash slices are gently tossed to coat them with butter/spice mixture.

Bake The Acorn Squash

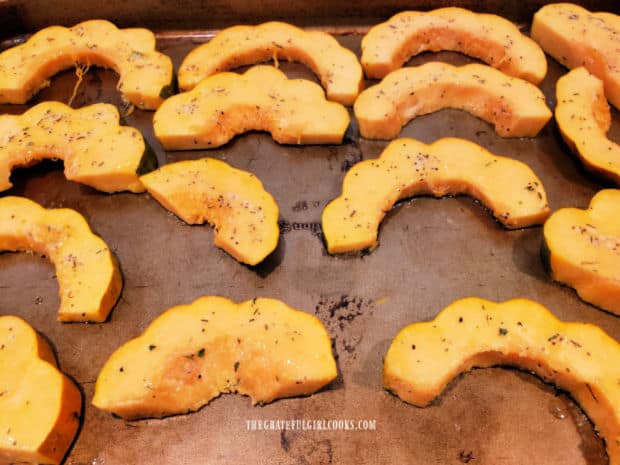
Lay the seasoned acorn squash slices in a single layer on a large baking sheet. Sprinkle each slice on top with a little grated Parmesan cheese (either fresh grated or the kind you get in a green shaker can). Bake them at 400°F. for 20 minutes, or until the squash is tender.

Test for doneness by inserting a knife into the middle of a slice. It should glide in smoothly, showing you the squash is tender. Remove the pan from the oven, and serve the roasted Parmesan acorn squash while hot.

Acorn squash is sprinkled with Parmesan cheese and baked in a single layer for 20 minutes.


Serve The Roasted Parmesan Acorn Squash

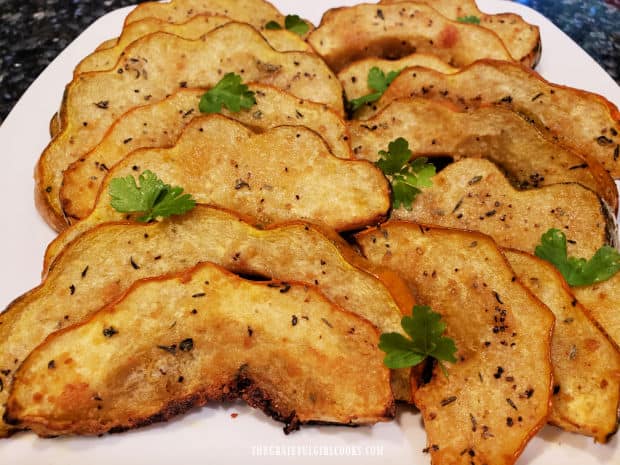
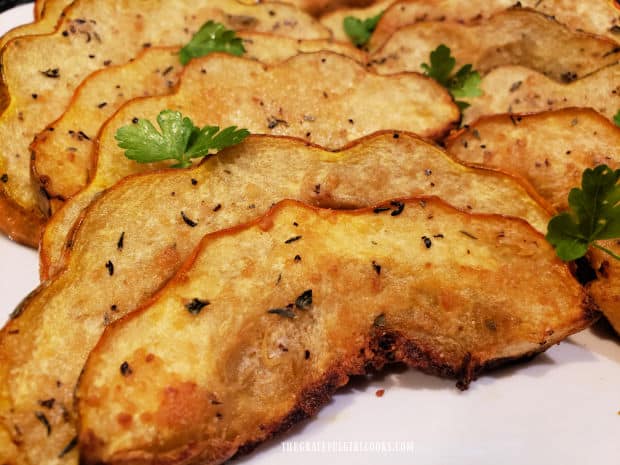
To serve, arrange the roasted Parmesan acorn squash slices on a serving platter or onto individual plates. Garnish with fresh parsley, if desired. Serve immediately and enjoy this savory vegetable side dish. A butter knife can easily be used to separate (cut away) the tender squash from the peel.

The roasted Parmesan acorn squash is garnished with fresh parsley and served.Roasted Parmesan acorn squash is served hot, and is very tender to the bite

I hope you have the opportunity to try this easy to prepare side dish, and trust you will enjoy it as much as we do. Thank you for stopping by today, and I invite you to come back soon for more family-friendly recipes. Take care, and have a GREAT day!

Looking For More VEGGIE SIDE DISH Recipes?

You can find ALL of my recipes in the Recipe Index, which is located at the top of the page. I have a wonderful variety of vegetable side dish recipes for you to choose from, including:

Interested In More Recipes?

Thank you for visiting this website. I appreciate you using some of your valuable time to do soIf you’re interested, I publish a newsletter 2 times per month (1st and 15th) with all the latest recipes, and other fun info. I would be honored to have you join our growing list of subscribers, so you never miss a great recipe!
There is a Newsletter subscription box on the top right side (or bottom) of each blog post, depending on the device you use, where you can easily submit your e-mail address (only) to be included in my mailing list.

You Can Also Find Me On Social Media:

Facebook page: The Grateful Girl Cooks!
Pinterest:
The Grateful Girl Cooks!
Instagram:
jbatthegratefulgirlcooks

Author's signature

↓↓ PRINTABLE RECIPE BELOW ↓↓

0 from 0 votes
Roasted Parmesan Acorn Squash
Prep Time
10 mins
Cook Time
20 mins
Total Time
30 mins
 

Roasted Parmesan Acorn Squash is a tasty veggie side dish! Squash is seasoned with butter, spices, and Parmesan, and it's ready in 30 minutes!

Category: Side Dish, Vegetable
Cuisine: American
Keyword: roasted Parmesan acorn squash
Servings: 4
Calories Per Serving: 161 kcal
Author: JB @ The Grateful Girl Cooks!
Ingredients
  • 1 medium acorn squash between 1½-2 pounds
  • 3 Tablespoons butter
  • ¼ teaspoon garlic powder
  • ¼ teaspoon oregano
  • ¼ teaspoon thyme
  • ¼ teaspoon salt
  • ¼ teaspoon black pepper
  • 3 Tablespoons grated Parmesan cheese fresh or shaker container
  • fresh parsley (optional for garnish)
Instructions
  1. Preheat oven to 400°F.

  2. Carefully slice squash in half through the middle (NOT stem to bottom!). Scoop out/discard seeds and pulp. Place squash cut side down, and slice each half into 1" wide slices, creating half moon-shaped slices. Place into large bowl; set aside.

  3. Melt butter in a small saucepan. Add garlic powder, oregano, thyme, salt and pepper; stir to combine. Pour sauce over acorn squash; toss gently, until squash is covered on all sides with sauce. Lay slices in single layer on large baking sheet. Sprinkle slices with grated Parmesan (fresh grated or green shaker can type).

  4. Bake at 400°F. for 20 minutes, or until the squash is fork-tender. Test for doneness by inserting knife into the middle of a slice. It should glide in smoothly. Remove from the oven; serve roasted Parmesan acorn squash immediately, garnishing with fresh parsley, if desired.

Nutrition Facts
Roasted Parmesan Acorn Squash
Amount Per Serving (1 (1/4 of total))
Calories 161 Calories from Fat 90
% Daily Value*
Fat 10g15%
Saturated Fat 6g38%
Trans Fat 0.3g
Polyunsaturated Fat 0.4g
Monounsaturated Fat 2g
Cholesterol 26mg9%
Sodium 284mg12%
Potassium 606mg17%
Carbohydrates 19g6%
Fiber 3g13%
Sugar 0.02g0%
Protein 3g6%
Vitamin A 928IU19%
Vitamin C 19mg23%
Calcium 95mg10%
Iron 1mg6%
* Percent Daily Values are based on a 2000 calorie diet.

Here’s one more to pin on your Pinterest boards!Roasted Parmesan Acorn Squash is a tasty veggie side dish! Squash is seasoned with butter, spices, and Parmesan, and it's ready in 30 minutes!
 

Spicy Sweet Potato Bites

Spicy Sweet Potato Bites (2 servings) are an easy to make, oven-roasted side dish. Seasoned with Southwestern spices, you’ll enjoy them!
Spicy Sweet Potato Bites (2 servings) are an easy to make, oven-roasted side dish. Seasoned with Southwestern spices, you'll enjoy them!

If you enjoy sweet potatoes, then I am pretty sure you’ll enjoy these yummy, oven-roasted spicy sweet potato bites! They have a tiny little “kick” from the Southwestern-inspired spices, but honestly, they are not TOO spicy for most folks.

The recipe, as written, is enough for two servings (or three, if serving a smaller portion). A medium-sized fresh sweet potato is sliced, cubed, seasoned with oil and spices, then roasted until soft and tender. It really is a simple dish to make, and tastes great, especially when paired with beef, chicken or pork! Let me show you how easy it is to make this delicious veggie side dish!

Scroll Down For A Printable Recipe Card At The Bottom Of The Page

Preparing The Sweet Potatoes

Before beginning, preheat your oven to 350°F. It doesn’t take long to prepare the sweet potatoes, and you want the oven preheated once they’re ready to go! Okay? Okay. Now let’s get the sweet potatoes ready to be roasted.

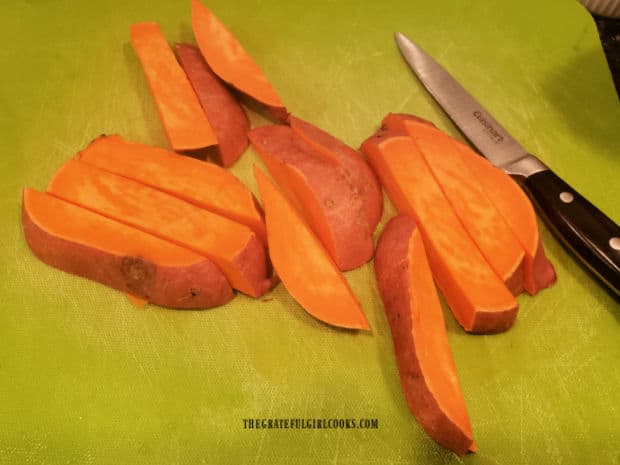
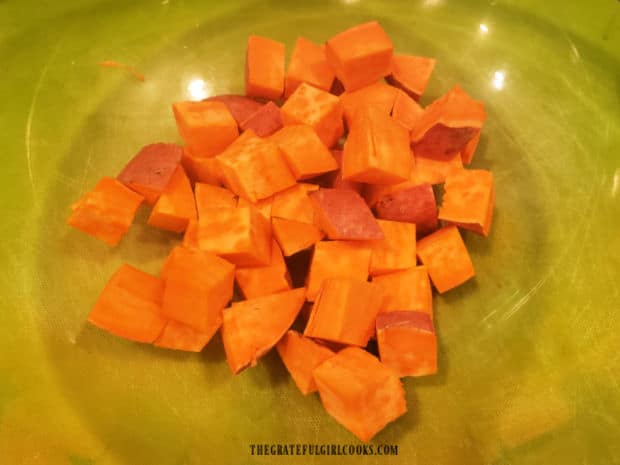
Clean the unpeeled sweet potatoes well with water to remove any dirt present, then pat dry. Carefully cut the UNPEELED sweet potato into  1″ long wedges (the length of the sweet potato). Cut each wedge into thirds, lengthwise (like a long French fry). Now cut each piece into small cubes (a width of about an inch or so). Place the sweet potato cubes into a mixing bowl.

Fresh, unpeeled sweet potatoes are cut in wedges, then diced into cubes.Diced sweet potatoes in a large glass bowl, ready for seasoning.

Seasoning The Sweet Potatoes

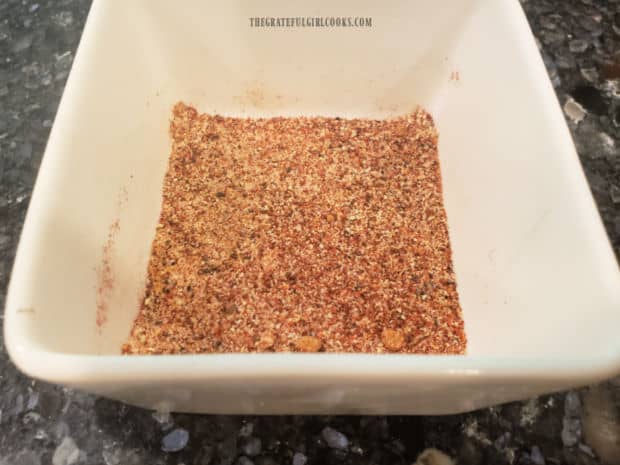
The spicy seasoning mix is a cinch to make. Simply measure garlic powder, chili powder, cumin, cayenne pepper, salt and black pepper into a small bowl or container. Stir to mix, then set aside. See how easy that was? Now it’s time to season the sweet potatoes before roasting.

Spices are combined in small dish to season the Spicy Sweet Potato Bites.

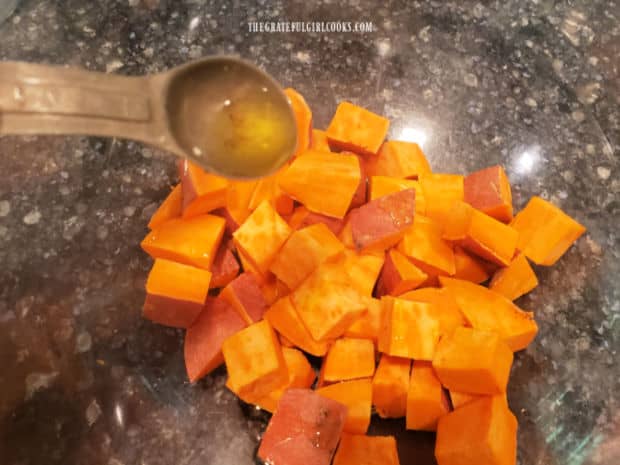
Add 2 teaspoons of extra virgin olive oil to the sweet potato cubes, then stir or toss them, to lightly coat them with the oil. Lightly coating the sweet potatoes with oil helps the spices to “stick” to the potatoes for baking.

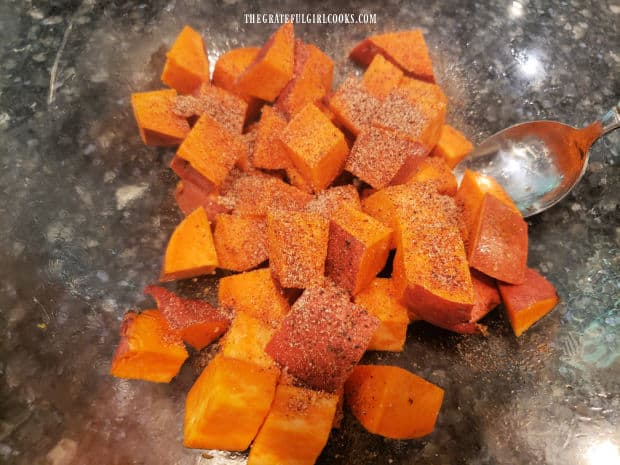
Sprinkle the spice mix over the sweet potatoes, and then stir or toss them well, making sure all potatoes are covered with the oil and spices. Now the sweet potatoes are ready to roast in the oven.

Olive oil is added to sweet potato cubes, then tossed to combine.Seasoning mixture is added to oil-covered sweet potato cubes before cooking.

Time To Bake!

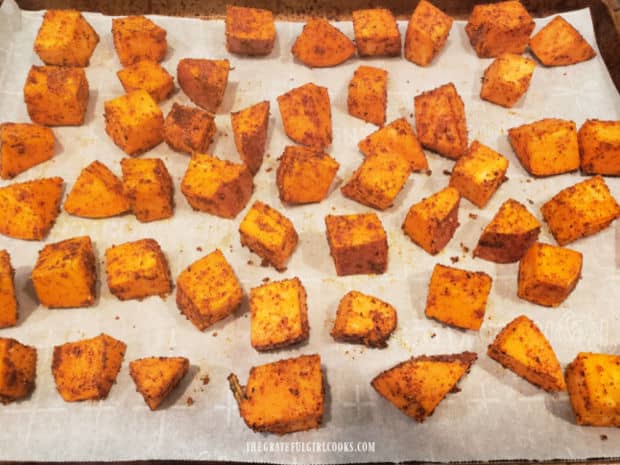
Line a baking sheet with a piece of parchment paper or a Silpat liner, then add the seasoned sweet potatoes in a single layer. Bake the spicy sweet potato bites in a 350°F. preheated oven for 45-50 minutes. Your total baking time may vary slightly, due to the size of the potato cubes you’re using, or temperature variations in different ovens.

When done, the spicy sweet potato bites should be slightly crispy on the outside, yet soft and tender on the inside. You can test for doneness by inserting a knife into a piece to see if it is soft inside. If nice and tender, they’re ready to serve. If still a bit firm, place them back in the oven for 2-3 more minutes, then check again.

Single layer of spicy sweet potato bites on parchment paper, ready to bake.

Who’s Ready For Some Spicy Sweet Potato Bites?

Once done, transfer the hot, roasted sweet potatoes to a serving bowl or individual plates, and serve hot. This recipe (as written below) will yield 2 good sized servings (or 3 small servings). The recipe can easily be doubled or tripled to make the quantity you need, if necessary!

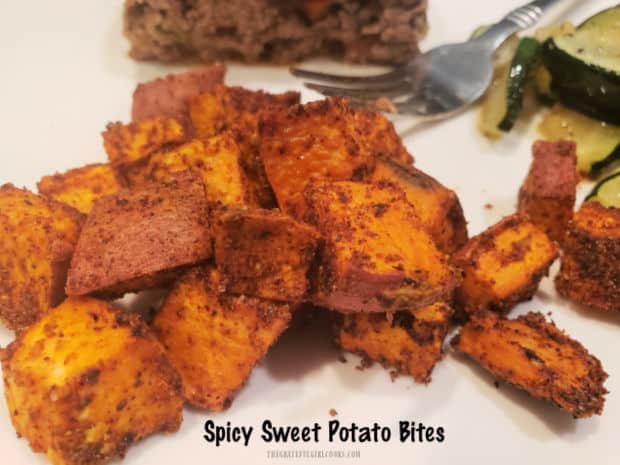
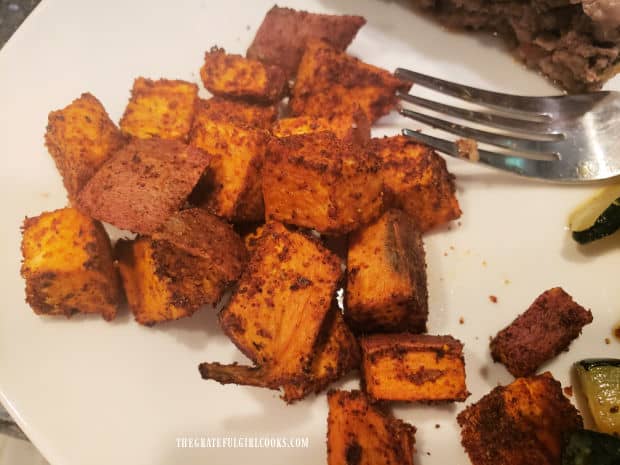
Spicy Sweet Potato Bites are served as a side dish, on a white plate.

I hope you enjoy this simple recipe for spicy sweet potato bites… we sure do! Thanks for stopping by this blog today, and I invite you to come back again soon for more yummy recipes! Take care, and have a GREAT day!

Looking For More SWEET POTATO Recipes?

You can find ALL of my recipes in the Recipe Index, located at the top of the page. I have a nice variety of sweet potato and yam recipes for you to enjoy, including:

Interested In More Recipes?

Thank you for visiting this website. I appreciate you using some of your valuable time to do soIf you’re interested, I publish a newsletter 2 times per month (1st and 15th) with all the latest recipes, and other fun info. I would be honored to have you join our growing list of subscribers, so you never miss a great recipe!
There is a Newsletter subscription box on the top right side (or bottom) of each blog post, depending on the device you use, where you can easily submit your e-mail address (only) to be included in my mailing list.

You Can Also Find Me On Social Media:

Facebook page: The Grateful Girl Cooks!
Pinterest:
The Grateful Girl Cooks!
Instagram:
jbatthegratefulgirlcooks

Author's signature

↓↓ PRINTABLE RECIPE BELOW ↓↓

0 from 0 votes
Spicy Sweet Potato Bites
Prep Time
5 mins
Cook Time
45 mins
Total Time
50 mins
 

Spicy Sweet Potato Bites (2 servings) are an easy to make, oven-roasted side dish. Seasoned with Southwestern spices, you'll enjoy them!

Category: Side Dish, Vegetable Dish
Cuisine: American
Keyword: spicy sweet potato bites
Servings: 2 (or 3 smaller portions)
Calories Per Serving: 142 kcal
Author: JB @ The Grateful Girl Cooks!
Ingredients
  • 1 medium sweet potato unpeeled
  • 2 teaspoons extra virgin olive oil
  • 1 teaspoon garlic powder
  • ¾ teaspoon chili powder
  • ¼ teaspoon cumin
  • teaspoon cayenne pepper
  • ¼ teaspoon salt
  • ¼ teaspoon black pepper
Instructions
  1. Preheat oven to 350°F. Line a baking sheet with parchment paper OR Silpat liner.

  2. Clean sweet potatoes with water to remove any dirt present; pat dry. Carefully cut UNPEELED sweet potato into 1" long wedges (length of the sweet potato). Cut each wedge into thirds lengthwise (like a French fry). Now cut each piece into small cubes (width of about 1"). Place sweet potatoes in a mixing bowl.

  3. Measure garlic powder, chili powder, cumin, cayenne pepper, salt and pepper into a small bowl. Stir to mix; set aside.

  4. Add olive oil to sweet potatoes; stir or toss, to lightly coat them with oil. Sprinkle potatoes with spice mix; stir or toss well, making sure potatoes are covered with oil/spices.

  5. Place sweet potatoes onto prepared baking sheet in a single layer. Bake at 350°F. for 45-50 minutes. When done, potatoes should be slightly crunchy on the outside and soft on the inside. Test for doneness by inserting a knife into a piece. If soft inside, they're ready to serve. If still a bit firm, place back in oven for 2-3 more minutes, then check again. Serve hot.

Nutrition Facts
Spicy Sweet Potato Bites
Amount Per Serving (1 (1/2 of total))
Calories 142 Calories from Fat 36
% Daily Value*
Fat 4g6%
Saturated Fat 1g6%
Polyunsaturated Fat 1g
Monounsaturated Fat 3g
Sodium 367mg16%
Potassium 424mg12%
Carbohydrates 25g8%
Fiber 4g17%
Sugar 5g6%
Protein 2g4%
Vitamin A 16310IU326%
Vitamin C 3mg4%
Calcium 41mg4%
Iron 1mg6%
* Percent Daily Values are based on a 2000 calorie diet.

Here’s one more to pin on your Pinterest boards!Spicy Sweet Potato Bites (2 servings) are an easy to make, oven-roasted side dish. Seasoned with Southwestern spices, you'll enjoy them!


Air Fryer Crispy Mini Potatoes

It doesn’t take long to make Air Fryer Crispy Mini Potatoes! Crispy outside, soft inside and seasoned well, they’re a great veggie side dish!
It doesn't take long to make Air Fryer Crispy Mini Potatoes! Crispy outside, soft inside and seasoned well, they're a great veggie side dish!

If you enjoy potatoes and have access to an air fryer, you’re more than likely going to LOVE these little potatoes! We sure do! They are cooked in an air fryer, which is a kitchen appliance that uses super hot circulating air to cook food, using very little oil.

The outside potato peel get all crispy and delicious, yet the inside stays fluffy and soft! These yummy little potatoes are so delicious, and the best part is they’re simple to make, and only take a few minutes to prep! Let me show you how to make this perfect side dish, which pairs well with poultry, fish, beef or pork!

Scroll Down For A Printable Recipe Card At The Bottom Of The Page

Prepping The Mini Potatoes For The Air Fryer

Preheat your air fryer to 400°F. for 3-4 minutes while you get the potatoes ready to cook. You can use small red or golden potatoes, but if you happen to have both kinds, USE them! Ours came already combined in a bag at our local grocery store.

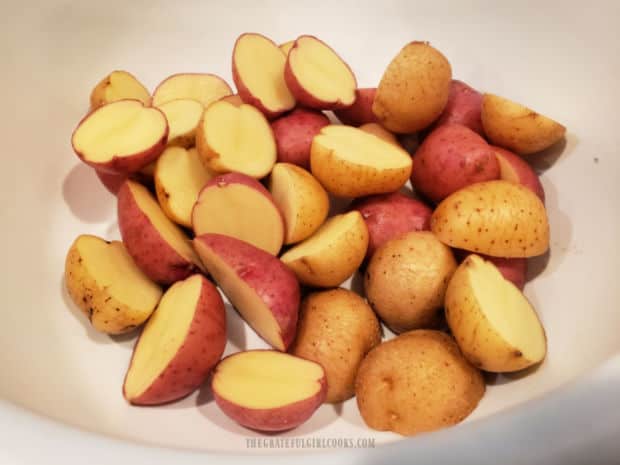
My favorite way to make this recipe is using both red and gold potatoes. Try to use small potatoes, roughly about the size of a plum for this recipe (and for quickest cooking time). Clean or scrub the outside of the potatoes to remove any dirt, then dry them thoroughly. Slice each potato in half, then place the halves in a mixing bowl.

Red and gold mini potatoes are rinsed clean, then dried and cut in half before seasoning.

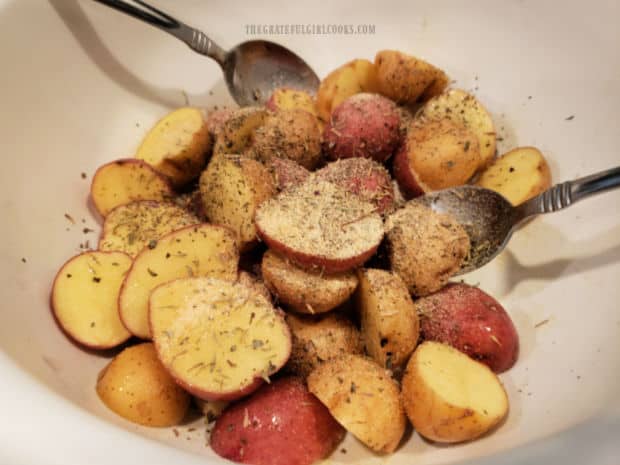
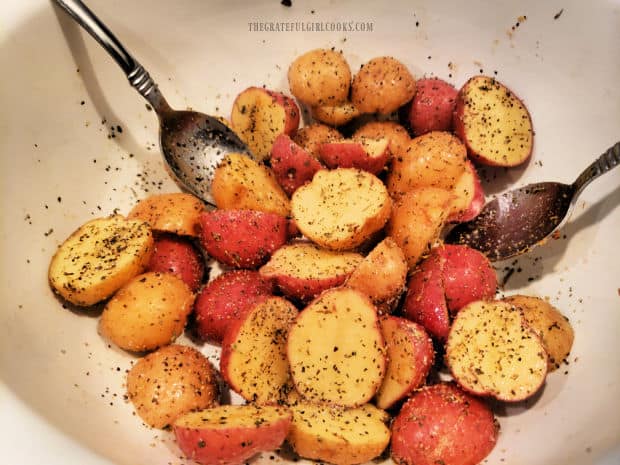
Drizzle the potatoes with olive oil, and then add Italian seasoning, garlic powder, salt and pepper to the potatoes. Toss the potatoes well, so they’re covered with the oil and the spices. That’s it… see how easy the prep work is? Now the mini potatoes are ready to cook!

Olive oil and seasonings are added to the bowl of halved mini potatoes.The mini potatoes have been tossed with olive oil and seasonings and are ready to cook.

Into The Air Fryer They Go!

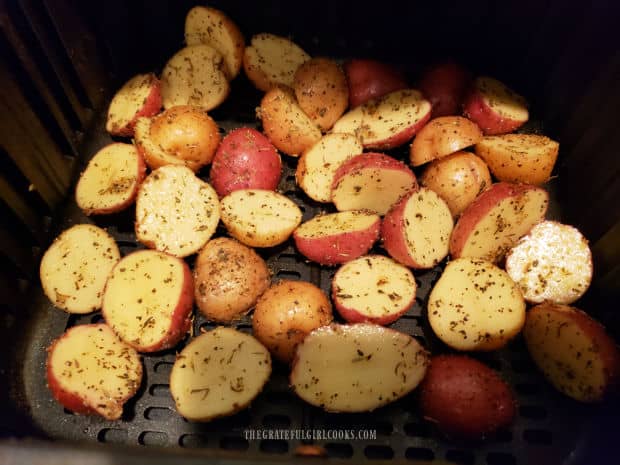
Place the seasoned potato halves into the basket of your air fryer, trying to keep them in a single layer, if possible. Cook them at 400°F for 10 minutes, then remove the basket and stir them or give the basket a good shake.

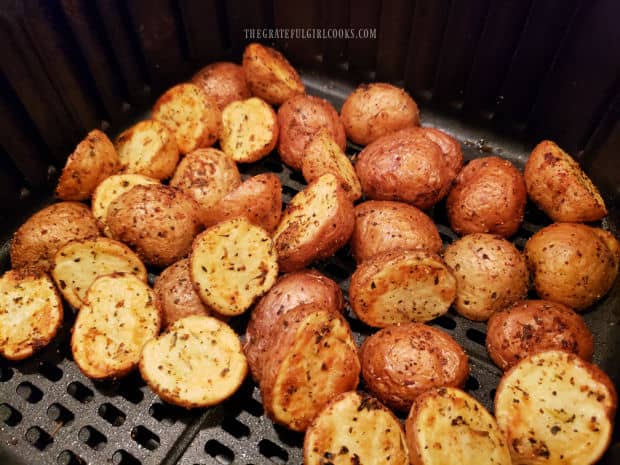
Cook them for an additional 7-8 minutes, then check to see if they’re done. The outsides should be crispy and lightly browned. Stick a knife into a potato half. If done, the knife should easily glide into the softened insides of the potato. NOTE: If your potatoes are slightly larger in size, please be aware they may require 2-3 more minutes to finish cooking all the way through.

Seasoned mini potatoes are placed in a single layer in air fryer basket to cook.Air Fryer crispy mini potatoes are finished cooking, and are ready to serve.

Prepare Potatoes For Serving

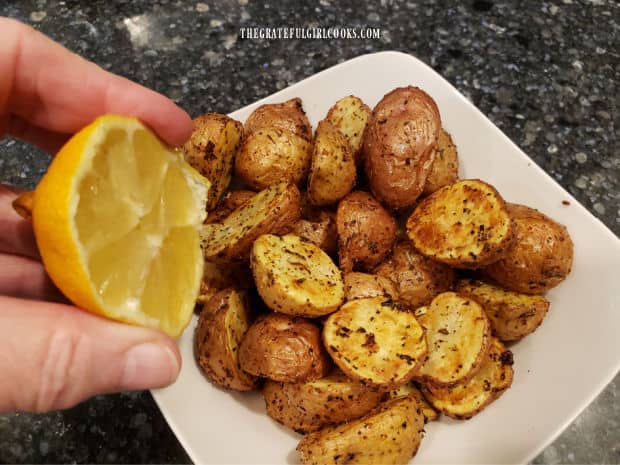
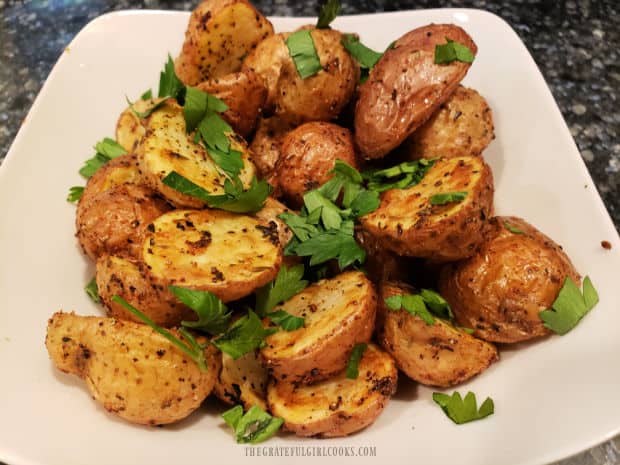
Once done, transfer the hot air fryer crispy mini potatoes to a serving bowl. Generously squeeze fresh lemon juice over the top of the potatoes and gently stir. Sprinkle the top of the potatoes with chopped fresh parsley, and serve the potatoes immediately.

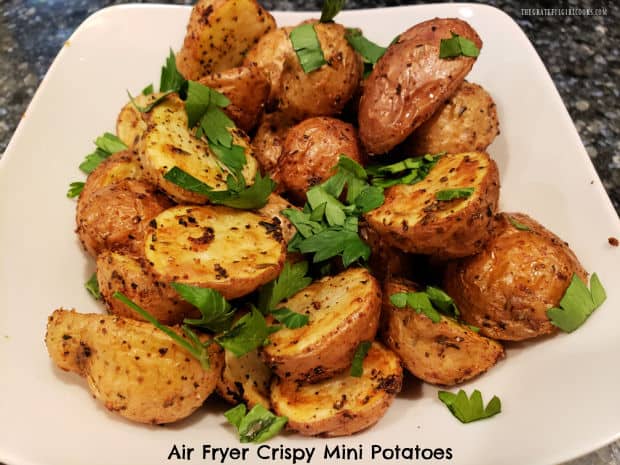
Fresh lemon juice is squeezed over the hot mini potatoes before serving.A white bowl of air fryer crispy mini potatoes garnished with parsley, ready to be eaten!

Time To Enjoy Some Air Fryer Crispy Mini Potatoes!

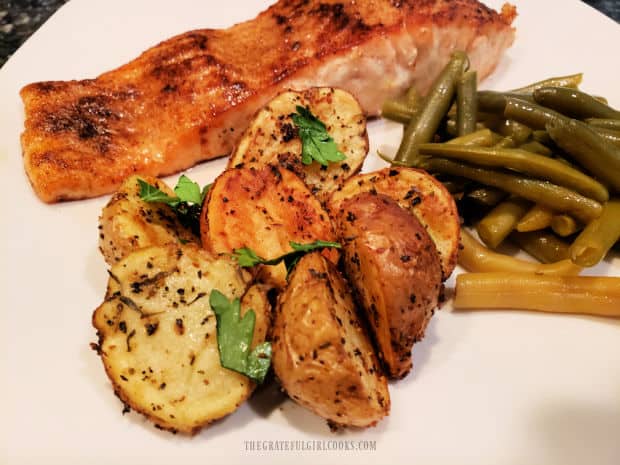
Wow… I think you’re going to love these little spuds! They were served (in the photo below) with Pan Seared Creole Salmon  and some of our home grown and canned green beans! What a delicious meal, and I’m not kidding… these little potatoes taste wonderful!
Salmon and green beans served on a plate with air fryer crispy mini potatoes.

I hope you have the chance to make some air fryer crispy mini potatoes soon for those you love, and trust you’ll enjoy them! Thank you so much for stopping by, and please come back again soon for more family-friendly recipes. Have a great day.

Looking For More POTATO Recipes?

You can find ALL of my recipes in the Recipe Index, located at the top of the page. I have some wonderful potato recipes for you to enjoy, including:

Interested In More Recipes?

Thank you for visiting this website. I appreciate you using some of your valuable time to do soIf you’re interested, I publish a newsletter 2 times per month (1st and 15th) with all the latest recipes, and other fun info. I would be honored to have you join our growing list of subscribers, so you never miss a great recipe!
There is a Newsletter subscription box on the top right side (or bottom) of each blog post, depending on the device you use, where you can easily submit your e-mail address (only) to be included in my mailing list.

You Can Also Find Me On Social Media:

Facebook page: The Grateful Girl Cooks!
Pinterest:
The Grateful Girl Cooks!
Instagram:
jbatthegratefulgirlcooks

Author's signature

Recipe adapted from: Delish.com

↓↓ PRINTABLE RECIPE BELOW ↓↓

0 from 0 votes
Air Fryer Crispy Mini Potatoes
Prep Time
5 mins
Cook Time
17 mins
Total Time
22 mins
 

It doesn't take long to make Air Fryer Crispy Mini Potatoes! Crispy outside, soft inside and seasoned well, they're a great veggie side dish!

Category: Side Dish, Vegetable Dish
Cuisine: American
Keyword: air fryer crispy mini potatoes
Servings: 4
Calories Per Serving: 123 kcal
Author: JB @ The Grateful Girl Cooks!
Ingredients
  • 1 pound baby potatoes (red /gold) (about 20 small potatoes), halved
  • 1 Tablespoon extra virgin olive oil
  • 1 teaspoon Italian seasoning
  • 1 teaspoon garlic powder
  • ½ teaspoon salt + more if desired
  • ½ teaspoon black pepper + more if desired
  • fresh lemon juice a generous squeeze or two
  • fresh parsley chopped
Instructions
  1. Preheat air fryer to 400°F. for 3-4 minutes while you get potatoes ready.

  2. Clean potatoes to remove dirt, then dry. Cut potatoes in half; place in bowl.

  3. Drizzle potatoes with olive oil; add Italian seasoning, garlic powder, salt and pepper. Toss potatoes well, so they're covered with oil/spices.

  4. Place potatoes halves in air fryer basket in a single layer. Cook at 400°F for 10 minutes; stir potatoes or give basket a good shake. Cook potatoes 7-8 more minutes, then check to see if they're done. Stick a knife into a potato. If done, knife should easily glide in and out of the potato. NOTE: If potatoes used are larger, they may require 2-3 additional minutes to finish cooking.

  5. Transfer potatoes to serving bowl. Squeeze fresh lemon juice over them; gently stir to combine. Sprinkle with chopped parsley; serve immediately.

Nutrition Facts
Air Fryer Crispy Mini Potatoes
Amount Per Serving (1 (1/4 of total))
Calories 123 Calories from Fat 36
% Daily Value*
Fat 4g6%
Saturated Fat 1g6%
Polyunsaturated Fat 1g
Monounsaturated Fat 3g
Sodium 298mg13%
Potassium 496mg14%
Carbohydrates 21g7%
Fiber 3g13%
Sugar 1g1%
Protein 2g4%
Vitamin A 12IU0%
Vitamin C 22mg27%
Calcium 24mg2%
Iron 1mg6%
* Percent Daily Values are based on a 2000 calorie diet.

Here’s one more to pin on your Pinterest boards!It doesn't take long to make Air Fryer Crispy Mini Potatoes! Crispy outside, soft inside and seasoned well, they're a great veggie side dish!

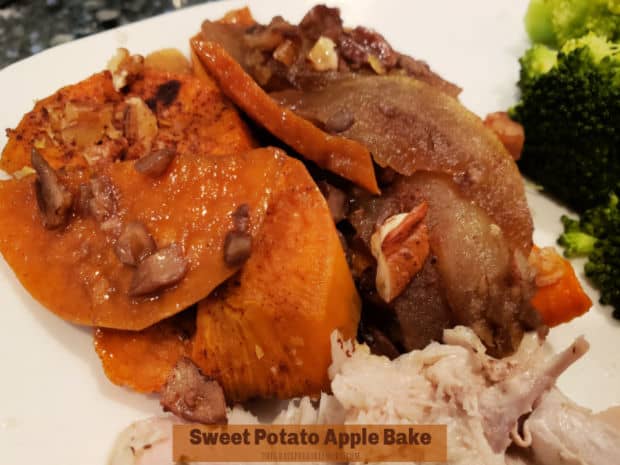
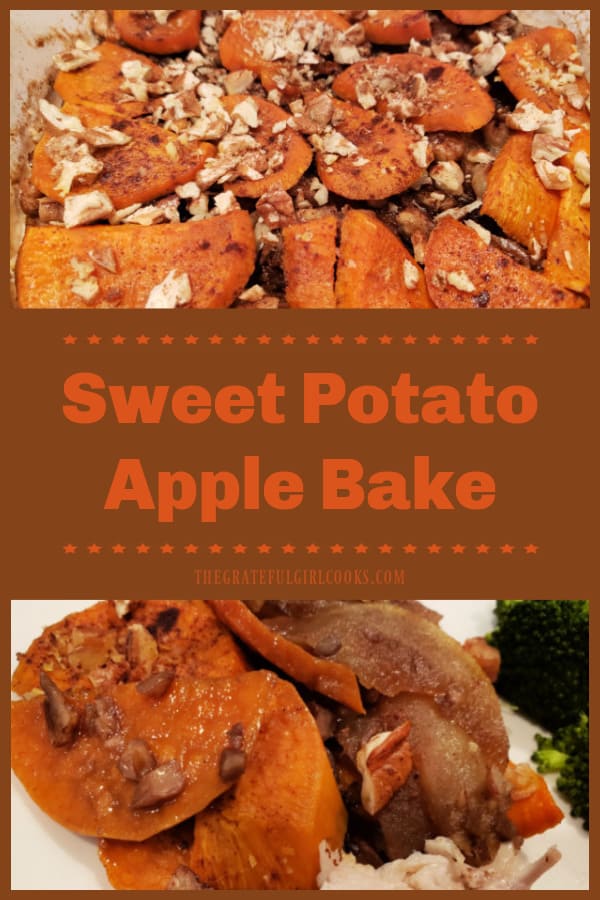
Sweet Potato Apple Bake

You’ll love Sweet Potato Apple Bake! This yummy dish features layers of sweet potatoes, apples, butter, cinnamon, brown sugar and pecans!
You'll love Sweet Potato Apple Bake! This yummy dish features layers of sweet potatoes, apples, butter, cinnamon, brown sugar and pecans!

Today I want to share an absolutely delicious side dish! It’s a dish that requires minimal prep before it is baked to perfection. My husband and I both think it tastes like dessert, even though we enjoy it served as a side dish. It’s the best of two worlds… if you enjoy sweet potatoes and the taste of apple pie… then this dish is for YOU!

The sweet potato apple bake only takes about 10 minutes to get ready, then it bakes away the rest of the time. How easy is THAT? I really think you’re gonna love this tasty dish, so let me show you just how simple it is to prepare.

Scroll Down For A Printable Recipe Card At The Bottom Of The Page

Prepare The Sweet Potato And Apple

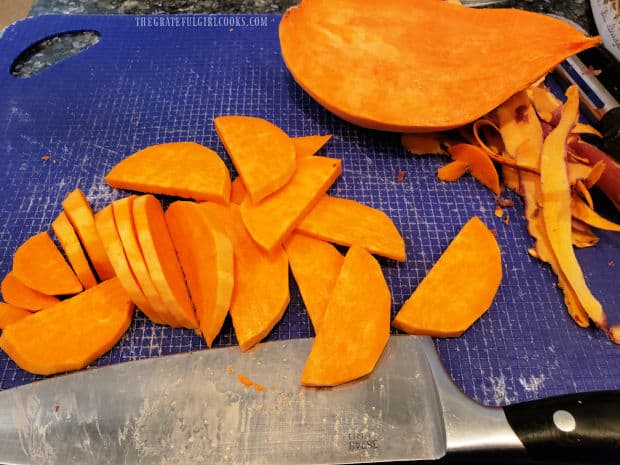
Before starting, preheat your oven to 350°F. It doesn’t take long to get the potatoes ready, so you want your oven preheated to save time! Peel a large sweet potato (the red skinned kind). Slice the sweet potato in half lengthwise. Cut each half into half-moon shaped pieces about ¼” thick. Separate the slices into two equal piles.

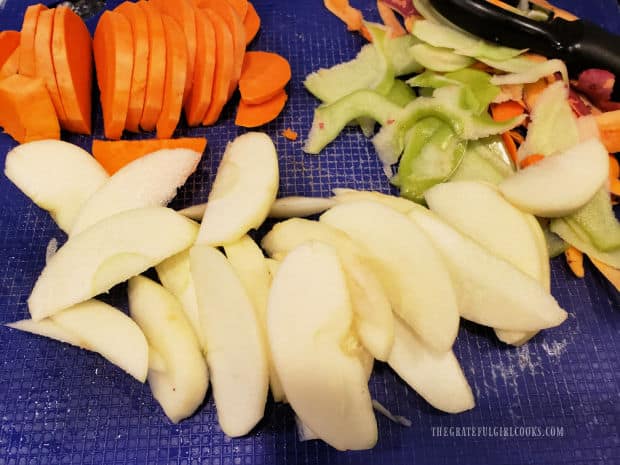
Peel the apple, then remove the seeds. Cut the apple in half from the stem down to the bottom. Cut each half into the same size half-moon shaped pieces (¼” thick). Keep the apple slices in one pile.

A large sweet potato is peeled, halved, then cut into moon shaped slices.An apple is peeled, then cut into thin slices, along with a sweet potato.

Time To Layer This Dish!

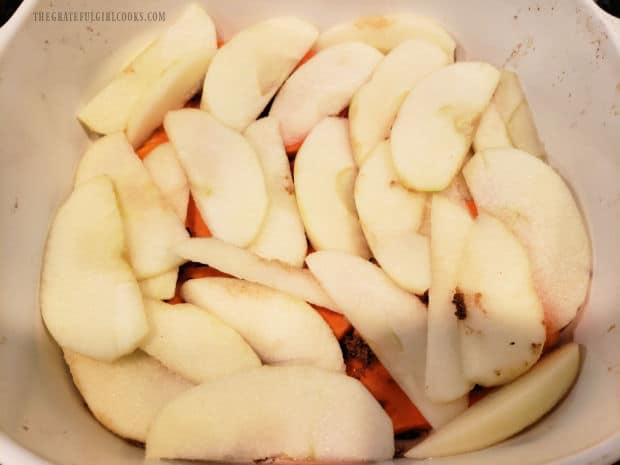
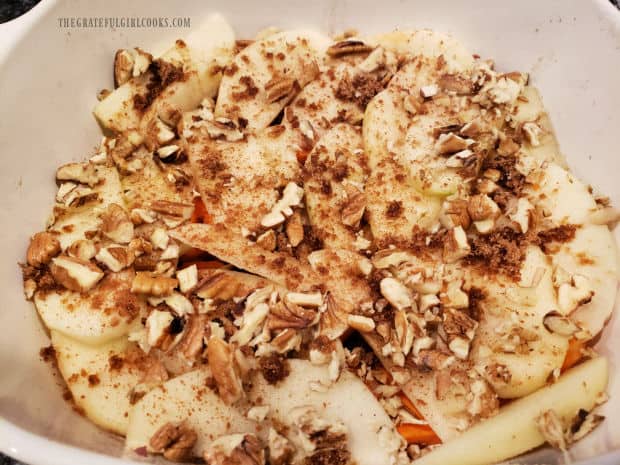
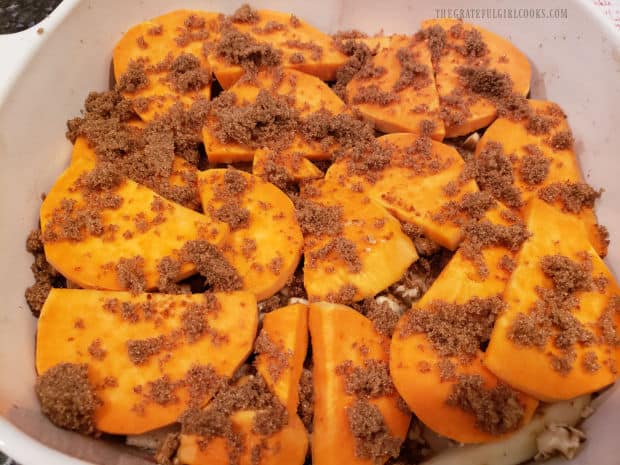
Spray or grease a 2 quart baking dish. Place the slices of HALF the sweet potato in a single layer in the dish. Evenly sprinkle the slices with ½ Tablespoon of brown sugar. Next, place ALL of the apples on top of the sweet potatoes, keeping the apple slices in a single layer, as much as possible.

Sprinkle the apple slices with ½ Tablespoon brown sugar and the cinnamon. Measure out 2 Tablespoon of chopped pecans and set them aside for later (not in the layering). Take the REMAINING chopped pecans and evenly sprinkle them over the brown sugar cinnamon apple slices.

A baking dish with bottom layer of sweet potato and brown sugar, topped with apple slices.Pecans and cinnamon are sprinkled on a layer of apple slices in baking dish.

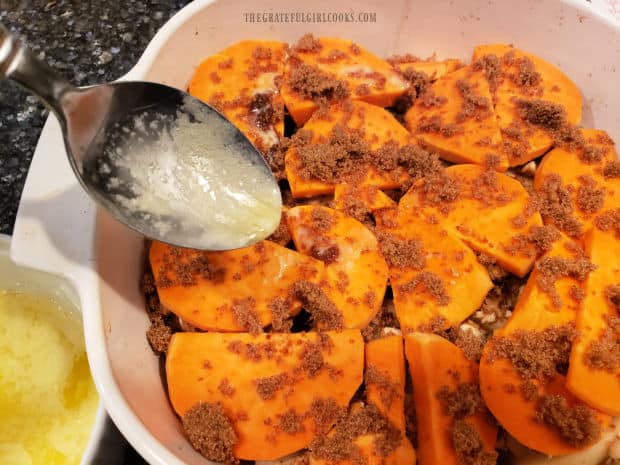
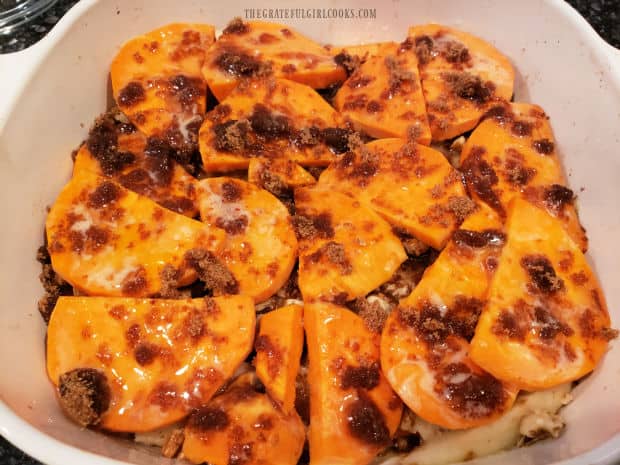
Now add the final half of the sweet potato slices over the apples, placing them in a single layer, once again. Sprinkle the sweet potatoes with the remaining Tablespoon of brown sugar, then drizzle melted butter over the sweet potatoes.

Brown sugar is sprinkled on final layer of sweet potato slices in baking dish.Melted butter is drizzled over the sweet potatoes.

Ready To Bake

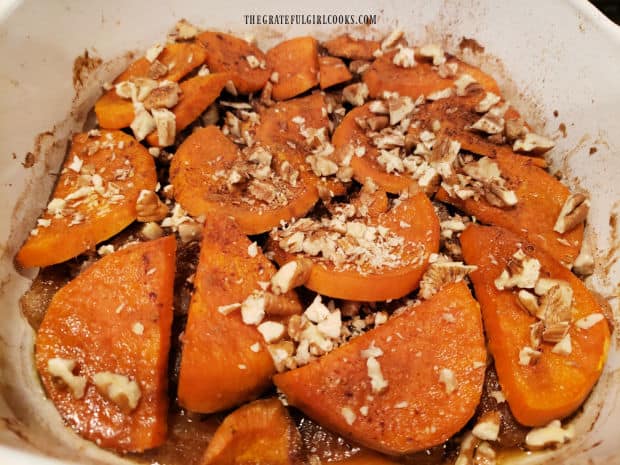
COVER THE BAKING DISH and bake at 350°F. for 35 minutes. Remove the dish from the oven, and top with the reserved 2 Tablespoons pecans (and a couple shakes of cinnamon, if desired).

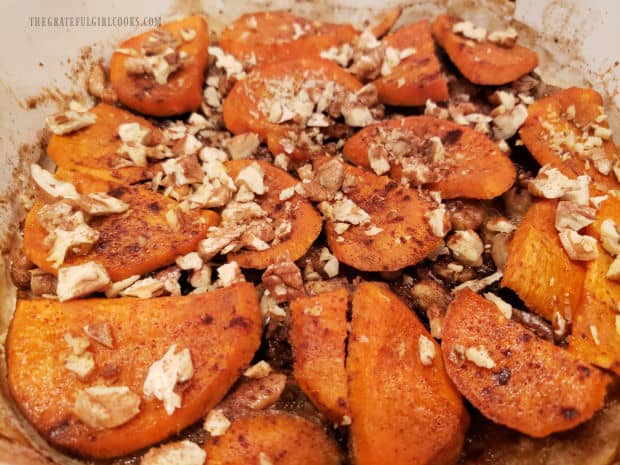
Leave the lid OFF and place the dish back into the oven. Continue baking (uncovered) for an additional 30-35 minutes. When done, the sweet potatoes and apples will be lightly browned and tender. You can insert a knife into a sweet potato slice to make sure it is tender!

The sweet potato apple bake is covered with melted butter and brown sugar.Chopped pecans and cinnamon is added to the top of the dish when halfway done baking.

The Sweet Potato Apple Bake Is Ready To Enjoy!

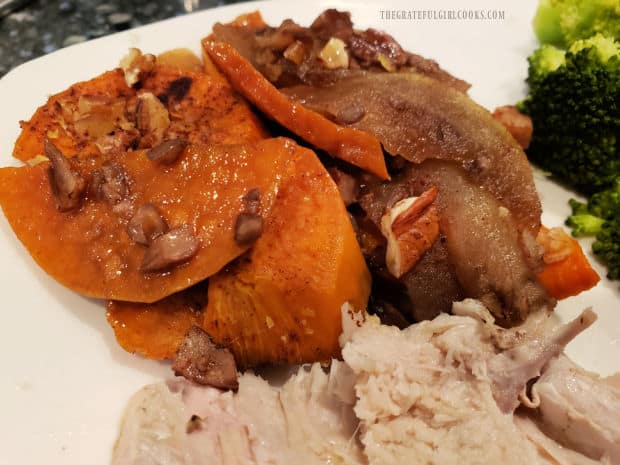
Let the sweet potato apple bake cool for just a minute, then serve it with a favorite main course, and enjoy this amazing side dish! When I was photographing this recipe, my husband and I had just smoked a whole turkey on our Traeger grill.

We served slices of the smoked turkey with this sweet potato and apple dish, along with steamed broccoli. Even though we enjoyed this meal at the very beginning of MAY, it felt like it was THANKSGIVING! Turkey and sweet potatoes… yum! This dish would be a wonderful addition to any holiday feast!

Sweet Potato Apple Bake is golden brown and tender to the bite when done baking.A portion of the sweet potato apple bake, served with turkey slice and steamed broccoli.

I hope you have the chance to try this flavor-filled recipe, because it really does taste great. The recipe yields 4 servings, so it is also a fairly inexpensive side dish to make. Thanks for stopping by, and please come back soon for more family-friendly recipes. Take care, and have a great day.

Looking For More VEGGIE Recipes?

You can find ALL of my recipes in the Recipe Index, located at the top of the page. I have LOTS of yummy veggie recipes for you to choose from, including:

Interested In More Recipes?

Thank you for visiting this website. I appreciate you using some of your valuable time to do soIf you’re interested, I publish a newsletter 2 times per month (1st and 15th) with all the latest recipes, and other fun info. I would be honored to have you join our growing list of subscribers, so you never miss a great recipe!
There is a Newsletter subscription box on the top right side (or bottom) of each blog post, depending on the device you use, where you can easily submit your e-mail address (only) to be included in my mailing list.

You Can Also Find Me On Social Media:

Facebook page: The Grateful Girl Cooks!
Pinterest:
The Grateful Girl Cooks!
Instagram:
jbatthegratefulgirlcooks

Author's signature

Recipe adapted from the cookbook: “Southern Living Best-Loved Christmas Classics”, page 113, published in 2013 by Time Home Entertainment, Inc./Oxmoor House

↓↓ PRINTABLE RECIPE BELOW ↓↓

0 from 0 votes
Sweet Potato Apple Bake
Prep Time
10 mins
Cook Time
1 hr 5 mins
Total Time
1 hr 15 mins
 

You'll love Sweet Potato Apple Bake! This yummy dish features layers of sweet potatoes, apples, butter, cinnamon, brown sugar and pecans!

Category: Side Dish, Vegetable Dish
Cuisine: American
Keyword: sweet potato apple bake
Servings: 4
Calories Per Serving: 206 kcal
Author: JB @ The Grateful Girl Cooks!
Ingredients
  • 1 large sweet potato (approx. 8 oz.)
  • 1 large Granny Smith apple (approx. 8 oz.)
  • 2 Tablespoons packed dark brown sugar **divided use
  • 2 Tablespoons butter melted
  • cup chopped pecans ** divided use
  • ¼ teaspoon ground cinnamon
Instructions
  1. Preheat oven to 350°F. Grease or spray a 2 quart baking dish.

  2. Peel sweet potato; slice in half lengthwise. Slice each half into "half-moon" shaped pieces about ¼" thick. Divide slices into two equal piles. Peel apple; remove seeds. Cut apple in half from stem down to bottom. Slice each half into ¼" thick "half-moon" shaped pieces. Keep apple slices in one pile. You should have 2 piles of sweet potato (½ potato in each) and 1 pile of apple slices.

Three Layers:
  1. Layer#1: Place one pile of sweet potato slices (½ of total) in a single layer in baking dish. Evenly sprinkle slices with ½ Tablespoon brown sugar.

    Layer #2: Place ALL apple slices on top of sweet potatoes in a single layer. Sprinkle apples with ½ Tablespoon brown sugar and the cinnamon. **Measure out 2 Tablespoons from the chopped pecans - set them aside for later (not in the layering). Take REMAINING chopped pecans and sprinkle them over apples.

    Layer #3: Put remaining sweet potato slices in a single layer over apples. Sprinkle with remaining 1 Tablespoon brown sugar, then drizzle with melted butter.

Bake:
  1. COVER baking dish; bake at 350°F for 35 minutes. Remove from oven; top with reserved 2 Tablespoons pecans (and a couple shakes of cinnamon, if desired). Place dish (uncovered) back into oven. Continue baking (uncovered) for 30-35 minutes. When done, sweet potatoes/apples will be lightly browned and tender. Insert a knife into a sweet potato slice to check for tenderness. Remove from oven; let cool for a minute, then serve.

Nutrition Facts
Sweet Potato Apple Bake
Amount Per Serving (1 (1/4 of total))
Calories 206 Calories from Fat 108
% Daily Value*
Fat 12g18%
Saturated Fat 4g25%
Trans Fat 1g
Polyunsaturated Fat 2g
Monounsaturated Fat 5g
Cholesterol 15mg5%
Sodium 63mg3%
Potassium 321mg9%
Carbohydrates 24g8%
Fiber 4g17%
Sugar 15g17%
Protein 2g4%
Vitamin A 8859IU177%
Vitamin C 11mg13%
Calcium 35mg4%
Iron 1mg6%
* Percent Daily Values are based on a 2000 calorie diet.

Here’s one more to pin on your Pinterest boards!You'll love Sweet Potato Apple Bake! This yummy dish features layers of sweet potatoes, apples, butter, cinnamon, brown sugar and pecans!

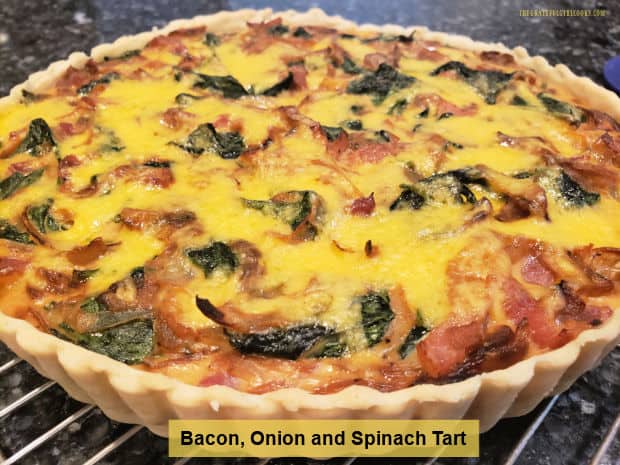
Bacon, Onion and Spinach Tart

Enjoy a Bacon, Onion and Spinach Tart for breakfast, lunch or dinner! It’s yummy, and filled with caramelized onions, cheese, spinach & bacon.
Enjoy a Bacon, Onion and Spinach Tart for breakfast, lunch or dinner! It's yummy, and filled with caramelized onions, cheese, spinach & bacon.

If you’re interested in an absolutely scrumptious recipe that can do double duty as either breakfast, lunch OR dinner, may I suggest this bacon, onion and spinach tart? How convenient it is to make this tart, then have it in the fridge to enjoy the leftovers throughout the week!

Caramelized onions are the unabashed star of this dish, as their flavor and sweetness permeate every bite! Add some bacon, spinach, cheese, and eggs to the filling, and you’ve got yourself a fabulous recipe! Here’s how to make this flavor-packed bacon, onion and spinach tart.

Scroll Down For A Printable Recipe Card At The Bottom Of The Page

Prepare The Crust For The Tart

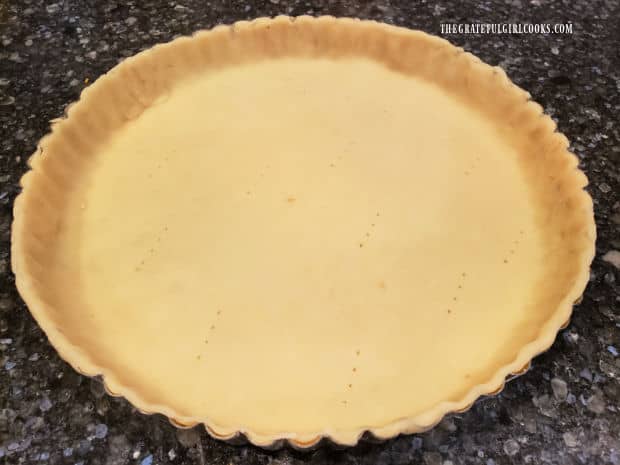
For this tart, feel free to use either a homemade pie crust OR a purchased, refrigerated rolled, flat pie crust. Roll the dough out, and fit the pie crust into a 9″ tart pan (with a removable bottom). Press the dough into the sides of the pan, then trim away excess crust from the top edge. You will want the top edge of the crust to be flush with the pan.

Use the tines of a fork to prick the dough in several places on the sides and bottom. Keep the prepared crust in the refrigerator while the filling for the tart is made.

Pie dough is placed and shaped in a tart pan, to be ready for the filling.

Cook The Bacon And Spinach

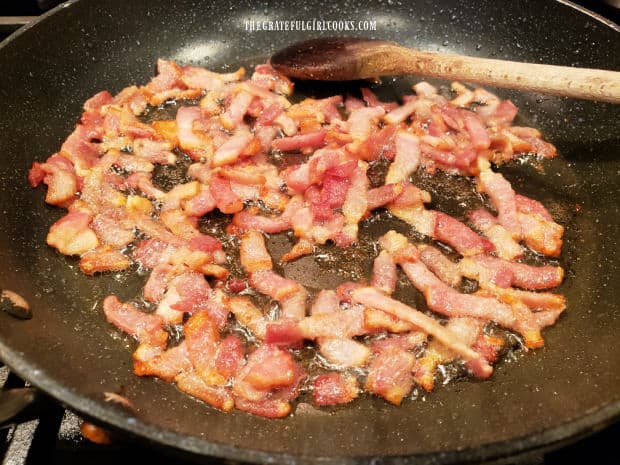
Cut 4 strips of bacon crosswise into small thin strips. I use kitchen scissors and stack the bacon strips to quickly cut the pieces. Place the bacon strips into a large non-stick skillet and cook on Medium heat, stirring often. Cook the bacon for approximately 6-8 minutes.

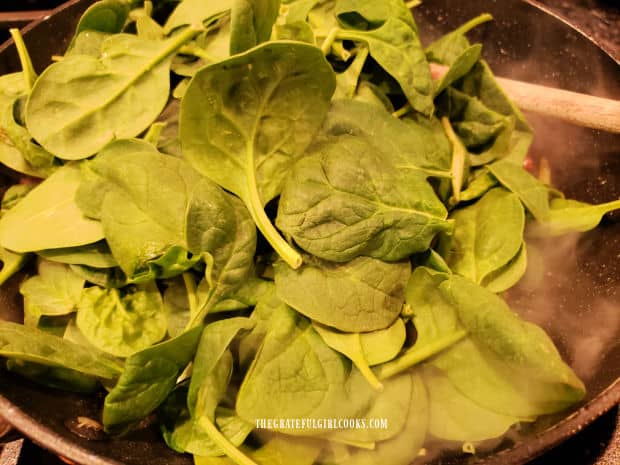
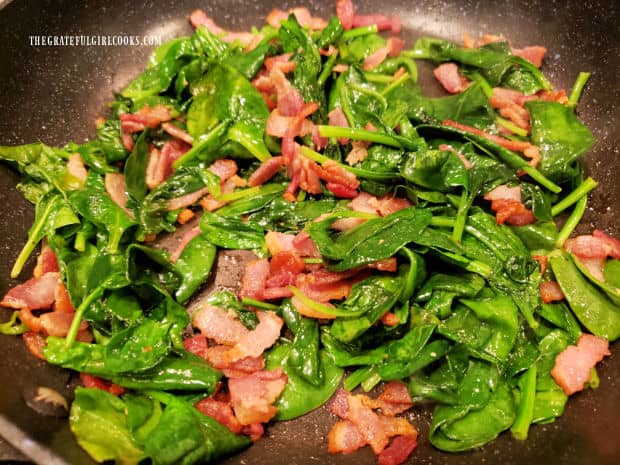
Add 6 cups of fresh baby spinach into the skillet with the bacon. It looks like a lot of spinach, but will greatly reduce in size as it cooks. Continue to stir and cook for 1 minute, or until the spinach has wilted. Transfer the bacon/spinach mixture out of the skillet with a slotted spoon. Place on a plate lined with paper towels, to absorb excess grease.

Strips of bacon are quickly cooked in a large skillet.Baby spinach leaves are added to the cooked bacon in a large skillet.After cooking, the bacon and spinach will be removed from the pan to cool.

Caramelize The Onions

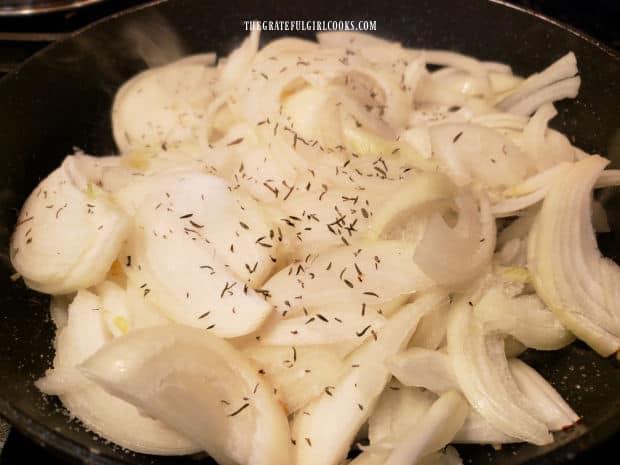
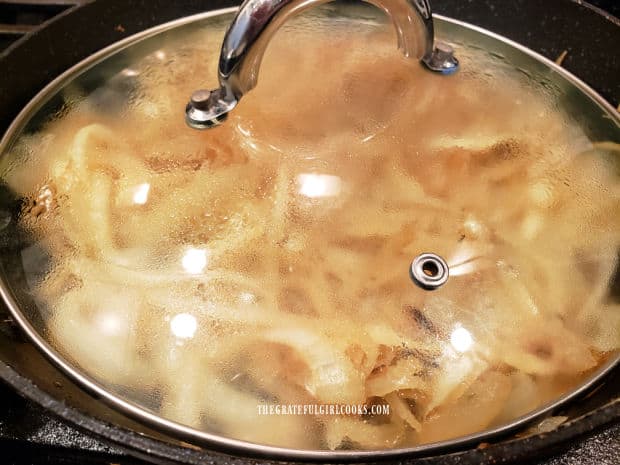
Caramelized onions will take about 25 minutes to turn out perfect, so plan ahead! Place sliced onions, dried thyme and (part of) the salt into the same large skillet you cooked the bacon/spinach in. Turn the heat to MEDIUM, and put a lid on the skillet.

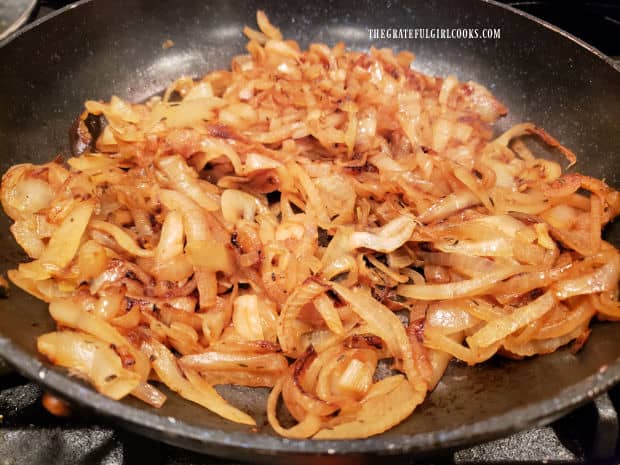
Cook the onions (covered) for 25 minutes, stirring occasionally. Continue to cook (covered) until the onions have caramelized. They will also reduce in size as they become browned and fully cooked. The longer they cook, the more caramelized and sweeter the onions become! TIP: PREHEAT your oven while the onions are cooking!

Once the onions have caramelized, take the skillet off the heat, stir, then let them cool, uncovered, for 5 minutes.

Sliced onions, salt and thyme are placed in large skillet to cook.A lid is placed on the skillet of onions while they cook and caramelize.Once caramelized, the onions in the skillet become brown in color.

Prepare The Bacon, Onion And Spinach Tart For Baking

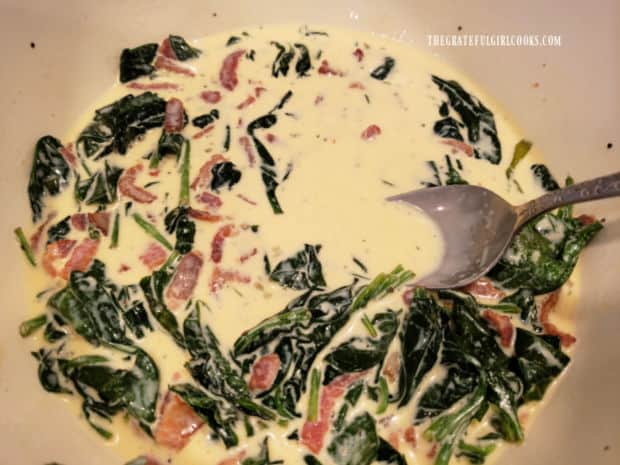
Now it’s time to make the filling for the Bacon, Onion and Spinach Tart! In a large mixing bowl, whisk together eggs, half and half, pepper and remaining salt until fully combined. Stir in the bacon and spinach mixture. Add the cooled caramelized onions, and stir until all ingredients are incorporated.

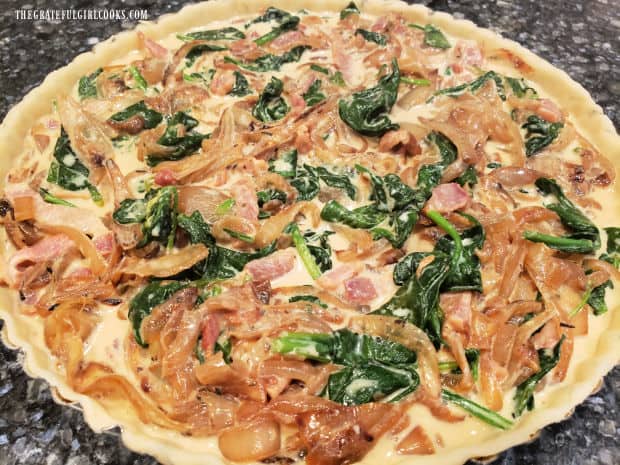
Carefully pour the tart filling into the prepared crust. The filling will come very close to the top of the crust. Make sure the spinach and bacon are evenly distributed in the filling. Now the bacon, onion and spinach tart is ready for baking.

Cooked bacon and spinach are added to the tarts egg filling in a large bowl.Filling for the bacon, onion and spinach tart is poured into prepared crust in a tart pan.

Bake And Broil

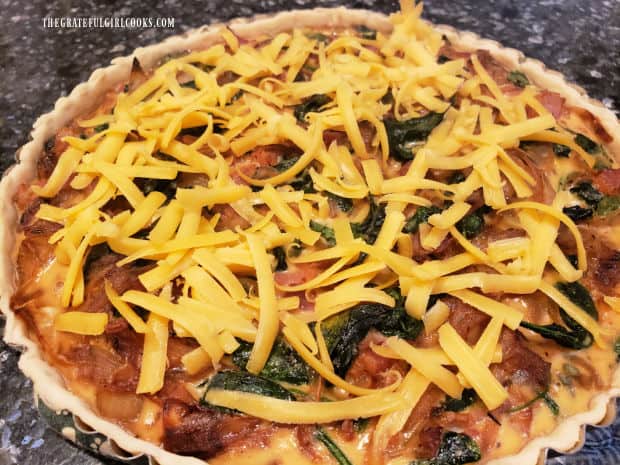
Bake the tart at 375°F. for 15 minutes, then reduce the heat to 325°, and bake another 20 minutes at the lower temperature. Remove the tart from the oven and turn the oven to the BROIL setting. Sprinkle the top of the tart with shredded cheese, then place the tart about 6″ from the broiler heating element. Let it broil for 1-2 minutes, or only until the cheese has melted!. Keep an eye on it so you don’t burn the top!

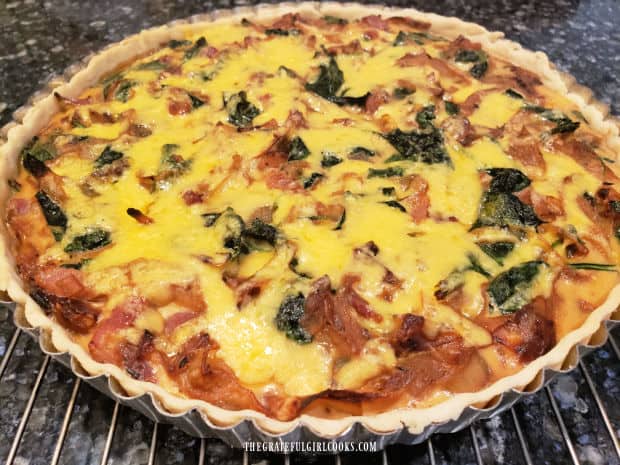
Transfer the bacon, onion and spinach tart to a wire rack and let it cool about 5 minutes, before you attempt to slice and serve it.

After baking, cheese is sprinkled on top of the tart and placed under broiler to melt it.A baked bacon, onion and spinach tart cools on wire rack for 5 minutes before serving.

Slice And Serve The Bacon, Onion and Spinach Tart

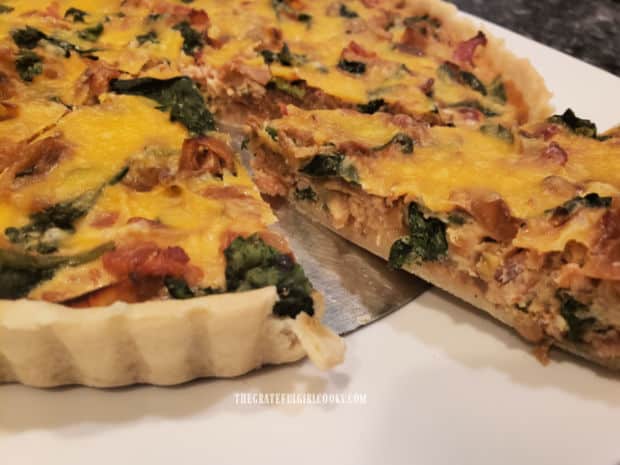
Carefully remove the tart rim from the tart by pushing up from the bottom to separate the tart from the metal rim. Slice the tart into 8 slices, serve, and enjoy! Keep any leftovers covered and refrigerated for up to 4-5 days.

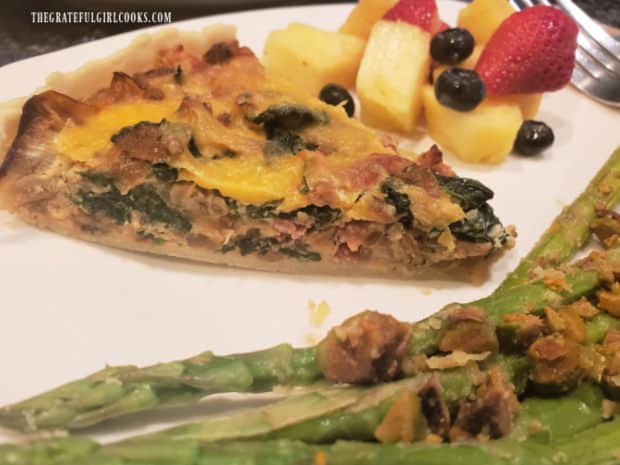
The leftovers can be easily microwaved to reheat, which makes this delicious tart a perfect choice to enjoy again for breakfast, lunch or dinner the next day! When we had this for dinner, we enjoyed it served with fresh fruit and Pistachio Asparagus In Orange Sauce!

A slice of the bacon, onion and spinach tart is removed from the pan, for serving.Asparagus and fresh fruit are served alongside a slice of bacon, onion and spinach tart.

I really do love the versatility of this dish! The leftovers are wonderful as they hold up well taste-wise, even after being refrigerated for several days! I’m confident you’re going to enjoy this meal. Thanks for stopping by, and I invite you to come back again soon for more family friendly recipes. Take care, and have a GREAT day! 

Looking For More TART Or QUICHE Recipes?

You can find ALL of my recipes in the Recipe Index, located at the top of the page. I have other tart recipes (quiches, too) that you might enjoy, including:

Interested In More Recipes?

Thank you for visiting this website. I appreciate you using some of your valuable time to do soIf you’re interested, I publish a newsletter 2 times per month (1st and 15th) with all the latest recipes, and other fun info. I would be honored to have you join our growing list of subscribers, so you never miss a great recipe!
There is a Newsletter subscription box on the top right side (or bottom) of each blog post, depending on the device you use, where you can easily submit your e-mail address (only) to be included in my mailing list.

You Can Also Find Me On Social Media:

Facebook page: The Grateful Girl Cooks!
Pinterest:
The Grateful Girl Cooks!
Instagram:
jbatthegratefulgirlcooks

Author's signature

Recipe adapted from and printed from original source in April, 2018 at FamilyCircle.com

↓↓ PRINTABLE RECIPE BELOW ↓↓

5 from 1 vote
Bacon, Onion and Spinach Tart
Prep Time
30 mins
Cook Time
35 mins
Total Time
1 hr 5 mins
 

Enjoy a Bacon, Onion and Spinach Tart for breakfast, lunch or dinner! It's yummy, and filled with caramelized onions, cheese, spinach & bacon.

Category: Breakfast, Dinner, Lunch
Cuisine: American
Keyword: bacon onion and cheese tart
Servings: 8
Calories Per Serving: 258 kcal
Author: JB @ The Grateful Girl Cooks!
Ingredients
  • 1 refrigerated rolled pie crust or homemade
  • 4 slices bacon crosswise cut into ¼" strips
  • 6 cups baby spinach leaves
  • pounds yellow onions (about 4) cut into ¼" slices (about 6 cups total)
  • ¾ teaspoon salt
  • ¼ teaspoon dried thyme
  • 3 large eggs
  • ¾ cup half and half
  • ¼ teaspoon black pepper
  • cup shredded cheddar cheese or Gruyere
Instructions
Prep:
  1. Roll out dough; fit it into a 9" tart pan (with removable bottom). Press dough into sides of pan; trim away excess crust from top edge, so top of crust is flush with pan. Use fork tines to prick dough on sides and bottom. Refrigerate crust while making tart filling.

  2. Cut 4 strips of bacon crosswise into small thin strips. Place bacon strips in a large non-stick skillet. Cook on Medium heat, stirring often. Cook approx. 6-8 minutes. Add spinach. Continue to stir; cook for 1 minute, or until spinach has wilted. Transfer bacon/spinach mixture out of skillet with a slotted spoon. Place on plate lined with paper towels, to absorb excess grease. Do not clean skillet.

Caramelize Onions:
  1. Place onions, thyme and ¼ teaspoon salt into the same skillet. Turn to Medium heat; put a lid on skillet. Cook onions (covered) for 25 minutes, stirring occasionally. Continue to cook (covered) until onions have caramelized, softened and are a rich brown color. When done, remove skillet from heat. Stir, then let them cool, uncovered, for 5 minutes. TIP: Preheat oven to 375°F. while onions are cooking.

Make Tart Filling:
  1. In large mixing bowl, whisk together eggs, half and half, pepper and remaining ½ tsp. salt until combined. Stir in bacon/spinach. Add cooled onions; stir until combined. Carefully pour filling into crust, making sure spinach/onions/bacon are evenly distributed.

Time For The Oven:
  1. Bake at 375°F. for 15 minutes, then reduce the heat to 325°, and bake another 20 minutes at lower temperature. Remove tart from oven, and turn oven to BROIL setting. Sprinkle top of tart with shredded cheese. Place tart about 6" from broiler heating element. Let it broil for 1-2 minutes, or until cheese has melted. Keep an eye on it so you don't burn the top! Transfer tart to wire rack. Let cool 5 minutes before removing from tart pan, slicing and serving.

  2. Carefully remove metal rim from the tart by pushing up from the bottom to separate tart from outer rim. Cut into 8 slices, serve, and enjoy! Keep any leftovers covered/refrigerated up to 4-5 days.

Nutrition Facts
Bacon, Onion and Spinach Tart
Amount Per Serving (1 slice (1/8 of total))
Calories 258 Calories from Fat 144
% Daily Value*
Fat 16g25%
Saturated Fat 6g38%
Trans Fat 1g
Polyunsaturated Fat 2g
Monounsaturated Fat 6g
Cholesterol 90mg30%
Sodium 470mg20%
Potassium 353mg10%
Carbohydrates 21g7%
Fiber 3g13%
Sugar 5g6%
Protein 8g16%
Vitamin A 2346IU47%
Vitamin C 13mg16%
Calcium 115mg12%
Iron 2mg11%
* Percent Daily Values are based on a 2000 calorie diet.

Here’s one more to pin on your Pinterest boards!Enjoy a Bacon, Onion and Spinach Tart for breakfast, lunch or dinner! It's yummy, and filled with caramelized onions, cheese, spinach & bacon.

Country Skillet Potatoes

Country Skillet Potatoes are tender potatoes, caramelized with onions, garlic and bell peppers. It’s a great side dish for a breakfast or entree.
Country Skillet Potatoes are tender potatoes, caramelized with onions, garlic and bell peppers. It's a great side dish for a breakfast or entree.

We love potatoes! Do you enjoy them, too? There are so many different ways to use them in recipes, because they are such a versatile vegetable. Today I want to share a recipe for country skillet potatoes that can double as a breakfast side dish or as a tasty veggie that is a delicious side for a variety main dish meats.

When I found the original recipe online they were called potatoes O’Brien, apparently named after a famous restaurant. But growing up, my Dad (who was from Texas) occasionally made cubed potatoes or hash browns using almost identical ingredients, and called them fried potatoes or skillet potatoes. This recipe I found reminded me of my Dad’s recipe (which I never got from him before he passed away). Whatever you want to call them is just fine with me, because they are truly delicious potatoes!

Potato cubes are cooked in butter and olive oil with caramelized onions and red and green bell peppers until tender on the inside and a bit crispy on the outside. The recipe I am sharing today will make about 3-4 small servings of these yummy skillet potatoes! They are really delicious, so let me show you how to make them.

Scroll Down For A Printable Recipe Card At The Bottom Of The Page

Cook The Peppers And Onions

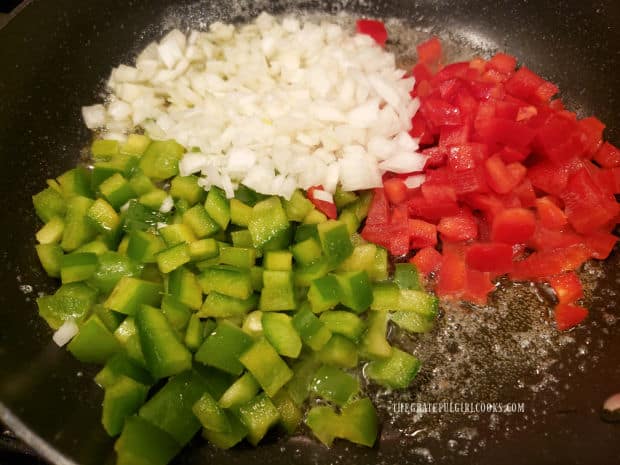
Heat 1 Tablespoon of butter and ¾ Tablespoon of olive oil in a large skillet on Medium-High heat. Once the butter has melted, add chopped onions and chopped red and green bell peppers. Let the veggies cook for 8-10 minutes, stirring occasionally.

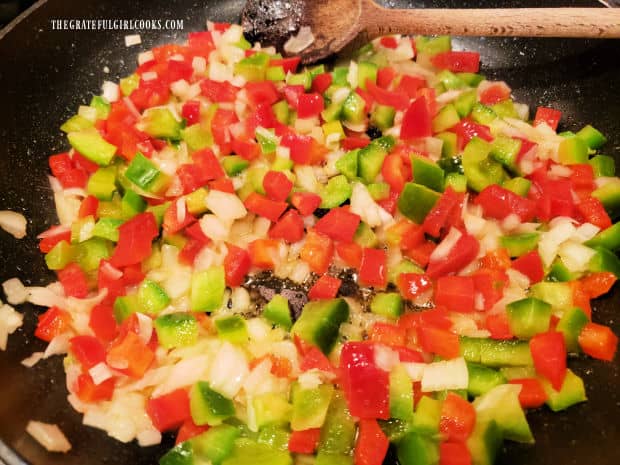
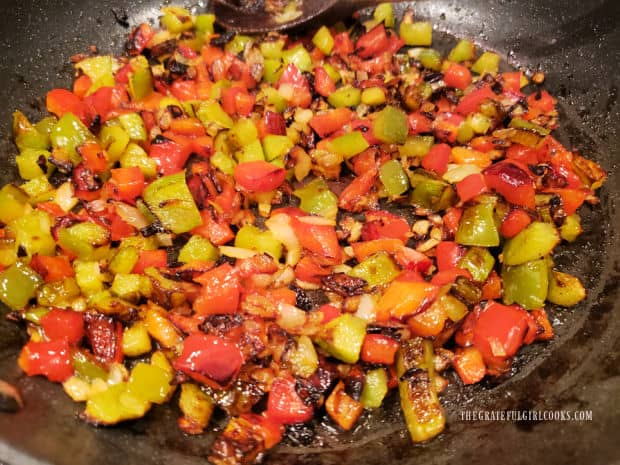
As they cook, the peppers and onions will soften and will begin to slightly “char” on the outside. Continue to stir every minute or so while they finish cooking.

Onions with red and green bell peppers cook in butter and oil in skillet.Bell peppers and onion continue to cook in skillet until charred and tender.When done cooking, the onions and bell peppers are charred on the outside and tender.

Add The Potatoes

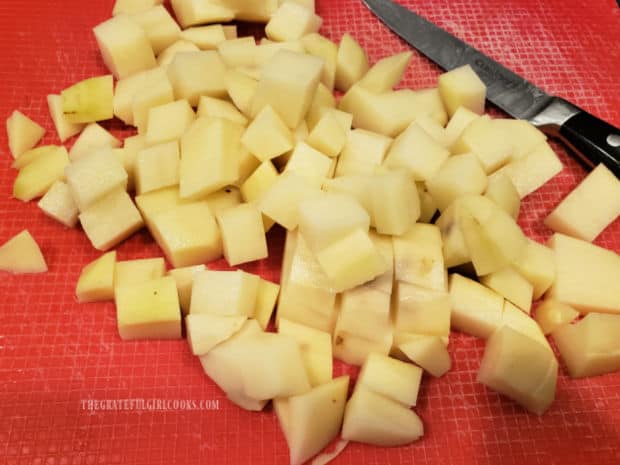
While the onions and peppers are cooking for 8-10 minutes, peel and cube the potatoes into approximately ½”- ¾” cubes. The reason to wait until this time to peel and cut them is so they don’t turn brown from exposure to the air! When the onions and peppers have finished cooking, add the cubed potatoes to the skillet. Season with salt and pepper.

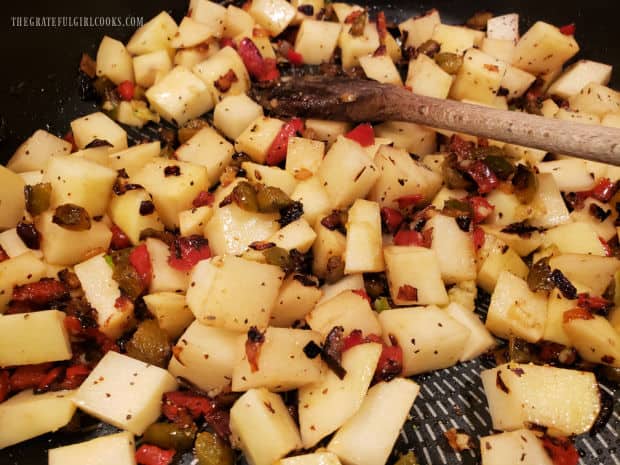
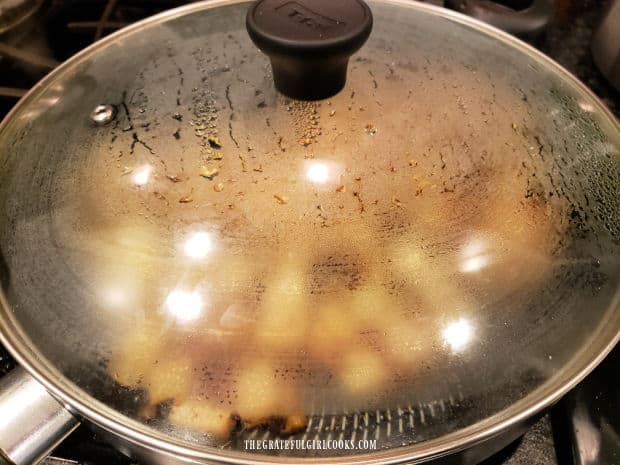
Turn the stove down to Medium heat, and cover the skillet with a lid. Cook the potatoes and veggies for 10-12 additional minutes, stirring every 1-2 minutes. Steam will condense on the inside of the lid on the skillet and drip back into the skillet to help cook the potatoes. TIP: If it seems the potatoes are sticking to the skillet, add a Tablespoon or so of water to help with the steaming/cooking.

Russet potatoes are peeled, then cut into 1/2" cubes before cooking.Potato cubes are combined with the charred bell peppers and onions in skillet.A lid covers the pan of country skillet potatoes to steam them until tender.

When Are The Potatoes DONE?

The country skillet potatoes are ready for the final step when the potatoes are fork-tender. They may need a bit longer to become tender, depending on the size of the potato cubes. If so, simply keep a lid on the skillet, and let them cook a bit more, until tender.

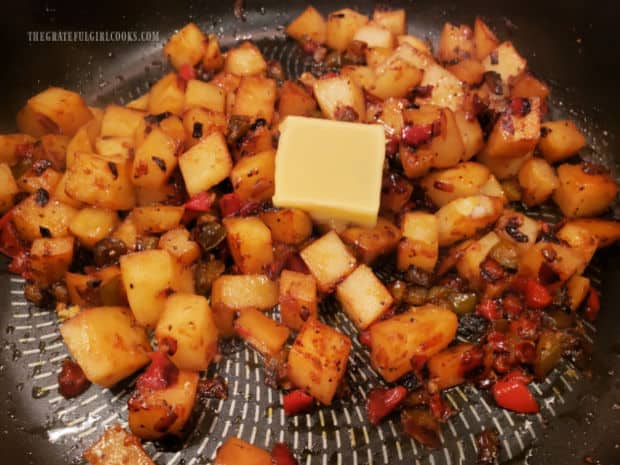
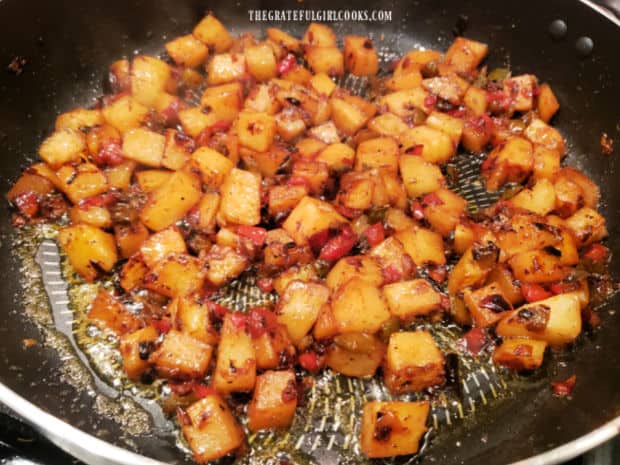
Once the potatoes are fork-tender, remove the lid from the skillet. Add the remaining ½ Tablespoon of butter and the remaining ¾ Tablespoon olive oil to the skillet, and stir to combine. Turn the heat to HIGH, and let the potatoes cook (uncovered) an additional 2-3 minutes, stirring often, to let them get crispy on the outside. Take a taste, and if desired, season with additional salt and pepper.

Butter and additional olive oil is added to the country skillet potatoes to help them get crispy.Country skillet potatoes cook a few more minutes (uncovered) to crisp up the potatoes.

Serve The Country Skillet Potatoes!

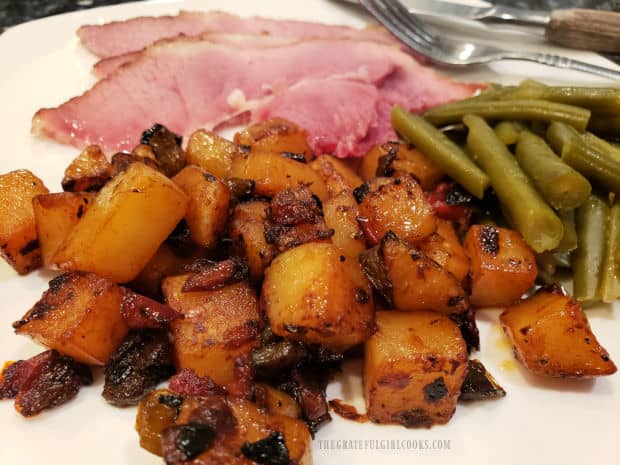
When the country skillet potatoes are hot and crispy on the outside, remove the skillet from the heat. Serve immediately while hot, and enjoy this delicious side dish for breakfast, lunch, OR dinner!

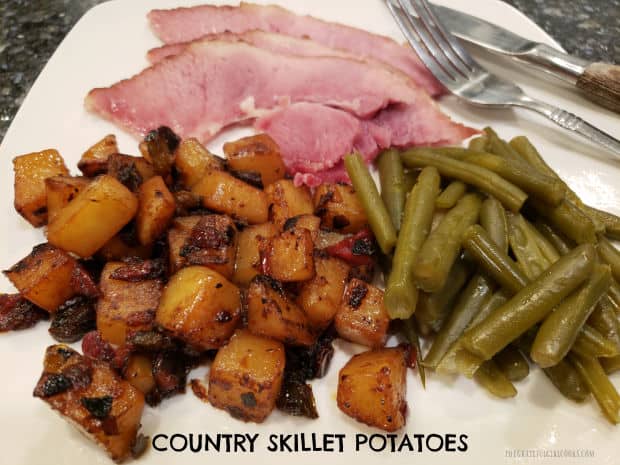
A serving of country skillet potatoes, served with ham slices and green beans.

I hope you enjoy making and eating these country skillet potatoes. Thank you for taking time out of your busy day to visit this blog. I hope you will choose to come back again soon for more family-friendly recipes. Take care, and have a GREAT day!

Looking For More POTATO Recipes?

You can find ALL of my recipes in the Recipe Index, located at the top of the page. I have some wonderful recipes featuring potatoes for you to enjoy, including:

Interested In More Recipes?

Thank you for visiting this website. I appreciate you using some of your valuable time to do soIf you’re interested, I publish a newsletter 2 times per month (1st and 15th) with all the latest recipes, and other fun info. I would be honored to have you join our growing list of subscribers, so you never miss a great recipe!
There is a Newsletter subscription box on the top right side (or bottom) of each blog post, depending on the device you use, where you can easily submit your e-mail address (only) to be included in my mailing list.

You Can Also Find Me On Social Media:

Facebook page: The Grateful Girl Cooks!
Pinterest:
The Grateful Girl Cooks!
Instagram:
jbatthegratefulgirlcooks

Author's signature

Recipe Adapted from Jack and Martha at: https://www.afamilyfeast.com/potatoes-obrien/

↓↓ PRINTABLE RECIPE BELOW ↓↓

0 from 0 votes
Country Skillet Potatoes
Prep Time
20 mins
Cook Time
25 mins
Total Time
45 mins
 

Country Skillet Potatoes are tender potatoes, caramelized with onions, garlic and bell peppers. It's a great side dish for a breakfast or entree.

Category: Side Dish, Vegetable Dish
Cuisine: American
Keyword: country skillet potatoes, fried potatoes
Servings: 3 (or 4 small portions)
Calories Per Serving: 270 kcal
Author: JB @ The Grateful Girl Cooks!
Ingredients
  • Tablespoon butter DIVIDED USE
  • Tablespoon extra virgin olive oil DIVIDED USE
  • 1 cup red bell pepper seeded, finely chopped
  • ¾ cup green bell pepper seeded, finely chopped
  • ¾ cup yellow onion peeled, finely chopped
  • 1 pound Russet potatoes (approx. 2 large or 3 medium)
  • ½ Tablespoon minced garlic
  • ½ teaspoon kosher salt
  • ¼ teaspoon coarse black pepper
Instructions
  1. Heat 1 Tablespoon butter and ¾ Tablespoon olive oil in large skillet on Medium-High heat. Once butter melts,, add onions and red/green peppers. Cook 8-10 minutes, stirring occasionally. Peppers and onions will soften and slightly "char" on the outside. Continue to stir occasionally.

  2. While onions/peppers cook, peel and cube potatoes into ½"- ¾" cubes. When onions and peppers are done,, add potatoes to skillet. Season with salt/pepper.

  3. Turn heat to Medium; put lid on skillet. Cook potatoes 10-12 minutes, stirring every 1-2 minutes. Steam will condense on inside of skillet lid and drip back into skillet to help cook potatoes. TIP: If it seems potatoes are sticking to skillet, add a small amount (1 Tablespoon or so) of water to help them steam/cook.

  4. Potatoes are ready when they become fork-tender. They may need longer to become tender, depending on size of the cubes. If so, simply keep lid on skillet; let them cook a bit more until tender.

  5. Once potatoes are fork-tender, remove skillet lid. Add remaining ½ Tablespoon butter and ¾ Tablespoon olive oil; gently stir to combine. Turn heat to HIGH; let potatoes cook (uncovered) 2-3 minutes, stirring often, to let them get crispy on the outside. Taste; if desired, season with additional salt and pepper. Serve immediately, and enjoy!

Nutrition Facts
Country Skillet Potatoes
Amount Per Serving (1 (1/3 of total))
Calories 270 Calories from Fat 117
% Daily Value*
Fat 13g20%
Saturated Fat 5g31%
Trans Fat 1g
Polyunsaturated Fat 1g
Monounsaturated Fat 7g
Cholesterol 15mg5%
Sodium 445mg19%
Potassium 868mg25%
Carbohydrates 36g12%
Fiber 4g17%
Sugar 6g7%
Protein 5g10%
Vitamin A 1871IU37%
Vitamin C 106mg128%
Calcium 41mg4%
Iron 2mg11%
* Percent Daily Values are based on a 2000 calorie diet.

Here’s one more to pin on your Pinterest boards!Country Skillet Potatoes are tender potatoes, caramelized with onions, garlic and bell peppers. It's a great side dish for a breakfast or entree.

Pistachio Asparagus In Orange Sauce

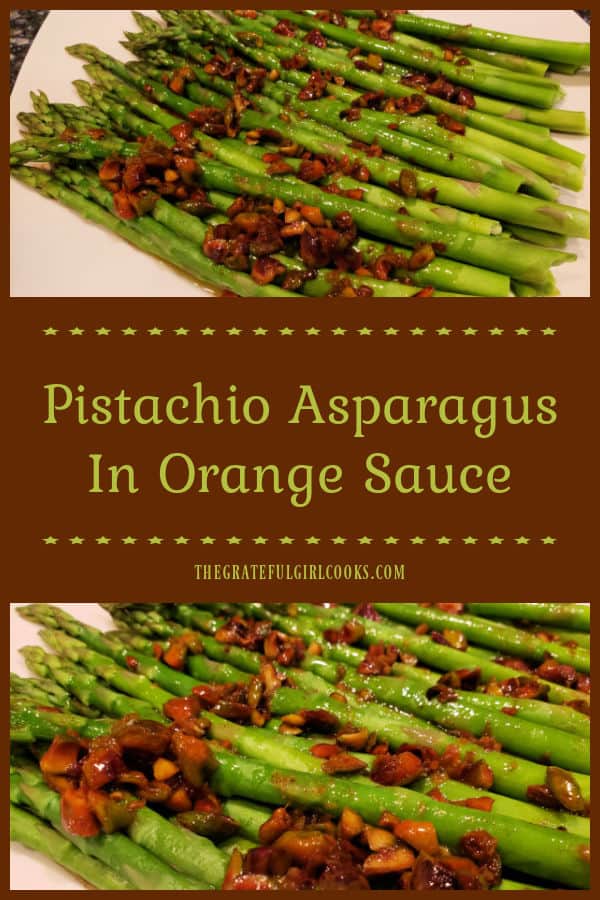
Pistachio Asparagus In Orange Sauce is a delicious, simple side dish! Steamed asparagus is topped with browned butter orange/pistachio sauce.

My husband and I love fresh asparagus, especially when it comes into season here locally. Many years ago I came across a unique sounding recipe while browsing through a food magazine I subscribed to. The idea of adding crunchy pistachios, orange juice and zest in a browned butter sauce to steamed asparagus made me want to try that recipe. Let me tell you… this veggie dish does not disappoint!

Overall the recipe is quite simple. Trimmed asparagus are steamed for just a few minutes, and while it’s steaming, you make a simple butter/orange/pistachio sauce. Serve the asparagus drizzled with the pistachio and orange sauce, and enjoy! All in all, it only takes about 20 minutes from start to finish, and the recipe makes 4 servings. It’s delicious! Here’s how to make this dish:

Scroll Down For A Printable Recipe Card At The Bottom Of The Page

Prepare The Asparagus

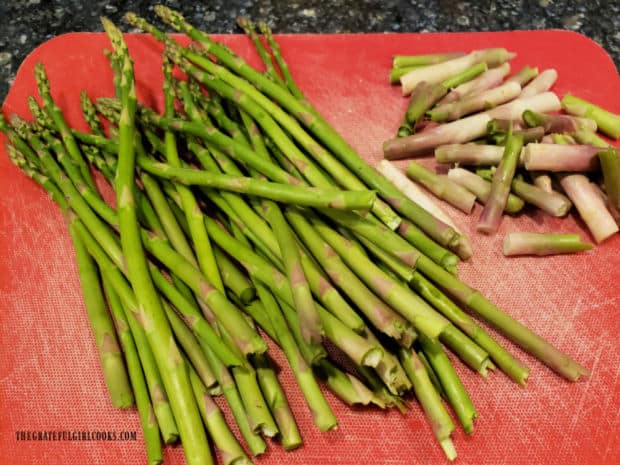
Cut or snap off the “woody” ends of the asparagus stalks. Place 1″ of water into a large skillet (you need a skillet with a cover). Put the asparagus into a steamer basket, and place the basket in the skillet, over the water.

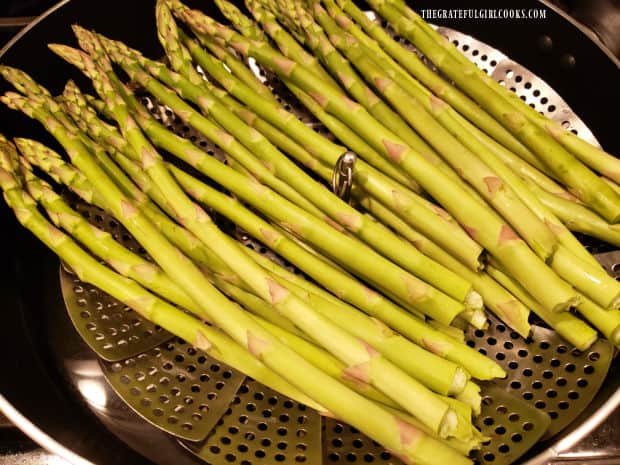
Bring the water to a boil on medium-high heat, then place a lid on the skillet and steam the asparagus for 4-5 minutes. Remove the skillet from the heat once the asparagus is crisp-tender, and keep the asparagus warm.

The woody ends of fresh asparagus are cut or snapped off.Asparagus stalks are steamed in basket over water in skillet until crisp tender.

Make The Pistachio And Orange Butter Sauce

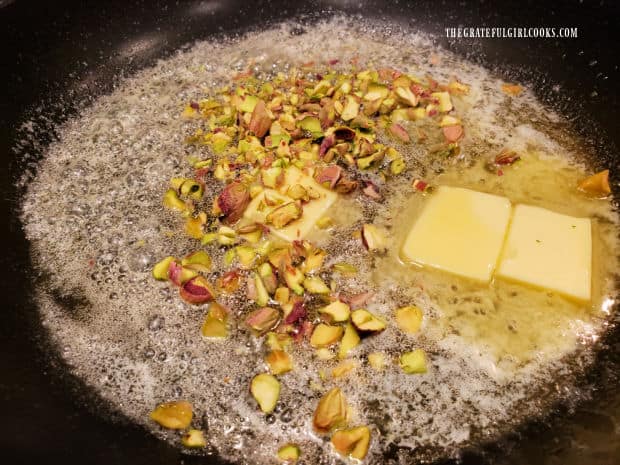
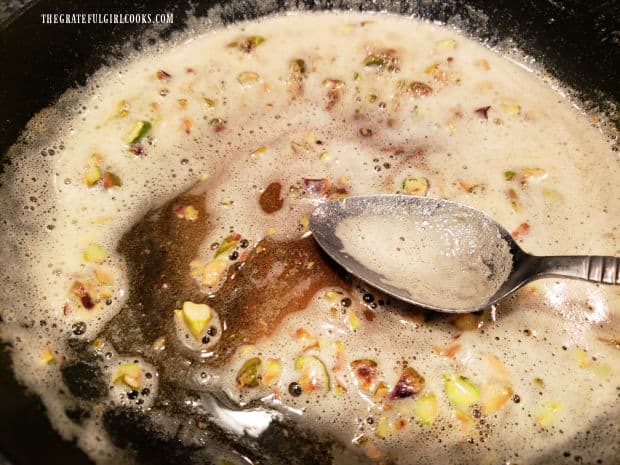
While the asparagus is cooking, make the orange pistachio butter sauce. Melt butter in a separate large skillet on medium heat. Add chopped pistachios, and cook them for 3-4 minutes, until the nuts are lightly browned. Add orange juice and orange zest to the skillet, and stir to combine with the other ingredients.

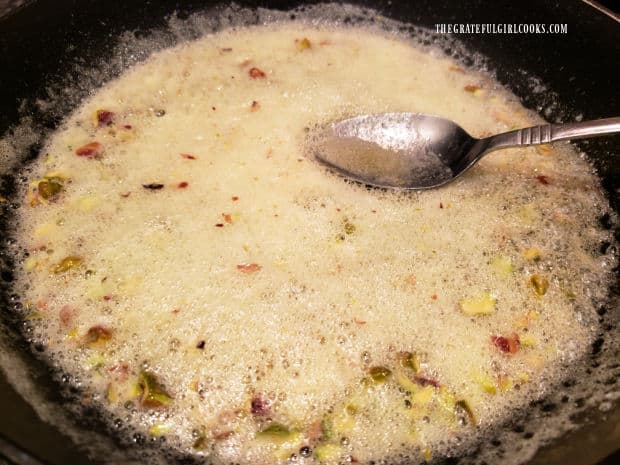
The liquid will become foamy as it cooks, and the butter will begin to brown as the butterfat solids separate. Stir the sauce often as it cooks.

Chopped pistachios are cooked in butter until browned.Orange juice and orange zest are added to butter and pecans in skillet, creating a foamy liquid.

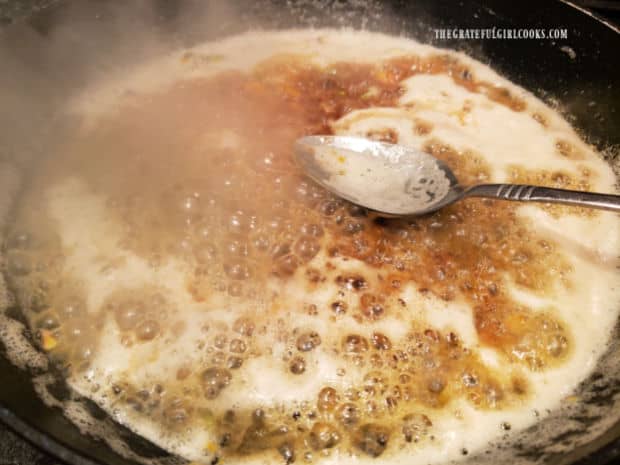
You can see (below) the butter has begun to brown, resulting in a slightly nutty flavor. Once the butter has browned, turn off the heat, and the foaminess will dissipate, leaving a richly colored brown butter, pistachio and orange sauce.

As butter begins to brown, the orange pistachio sauce comes together.The browned butter orange pistachio sauce is ready to drizzle on asparagus.

Time To Serve The Pistachio Asparagus In Orange Sauce

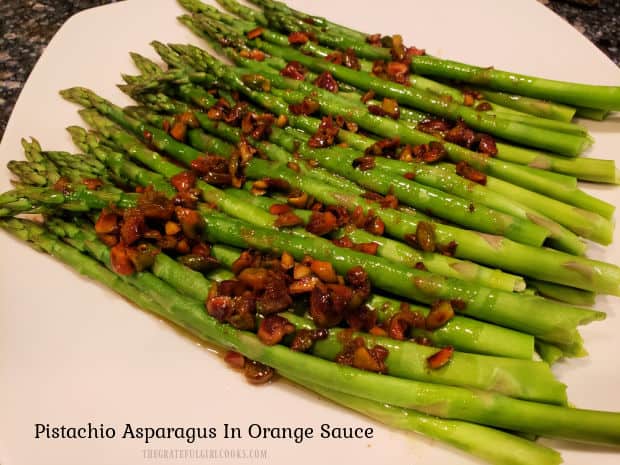
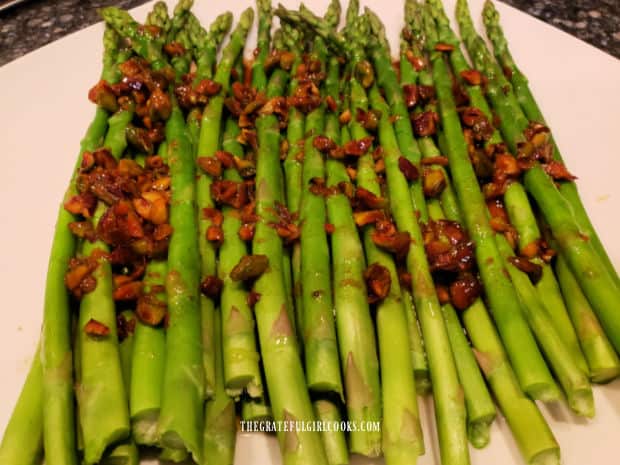
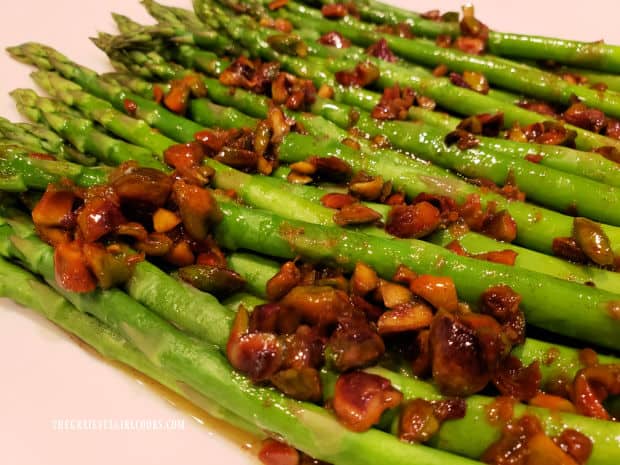
Place the asparagus stalks on a serving platter, then drizzle the orange sauce and pistachios evenly over the top of the asparagus. Season with a dash of black pepper, and serve immediately, while hot.

Pistachio Asparagus in Orange Sauce is served hot, on a white platter.A close up photo of the Pistachio Asparagus In Orange Sauce.

I hope you have the chance to make this simple, yet delicious veggie side dish for yourself or those you love. Thanks for stopping by today, and I hope you’ll come back soon for more recipes. Take care, and have a GREAT day.

Looking For More ASPARAGUS Recipes?

You can find ALL of my recipes in the Recipe Index, located at the top of the page. I have some delicious recipes with asparagus (and other veggies) you might enjoy, including:

Interested In More Recipes?

Thank you for visiting this website. I appreciate you using some of your valuable time to do soIf you’re interested, I publish a newsletter 2 times per month (1st and 15th) with all the latest recipes, and other fun info. I would be honored to have you join our growing list of subscribers, so you never miss a great recipe!
There is a Newsletter subscription box on the top right side (or bottom) of each blog post, depending on the device you use, where you can easily submit your e-mail address (only) to be included in my mailing list.

You Can Also Find Me On Social Media:

Facebook page: The Grateful Girl Cooks!
Pinterest:
The Grateful Girl Cooks!
Instagram:
jbatthegratefulgirlcooks

Author's signature

Original recipe source: “Taste of Home” magazine, April/May 2001 edition, pages 33-34, Reiman Publications

↓↓ PRINTABLE RECIPE BELOW ↓↓

0 from 0 votes
Pistachio Asparagus In Orange Sauce
Prep Time
15 mins
Cook Time
5 mins
Total Time
20 mins
 

Pistachio Asparagus In Orange Sauce is a delicious, simple side dish! Steamed asparagus is topped with browned butter orange/pistachio sauce.

Category: Side Dish, Vegetable Dish
Cuisine: American
Keyword: pistachio asparagus in orange sauce
Servings: 4
Calories Per Serving: 186 kcal
Author: JB @ The Grateful Girl Cooks!
Ingredients
  • 1 pound fresh asparagus ends trimmed
  • 3 Tablespoons chopped pistachio nuts
  • 5 Tablespoons butter
  • 3 Tablespoons fresh orange juice
  • teaspoons orange zest (finely grated peel)
  • 1 pinch black pepper
Instructions
  1. Cut or snap off "woody" ends of asparagus. Pour water in a large skillet to a depth of 1". Lay asparagus on a steamer basket; place basket over water in skillet, Bring water to a boil on medium-high heat. Put lid on skillet; steam asparagus for 4-5 minutes. Remove skillet from heat when asparagus is crisp-tender; keep asparagus warm.

  2. While asparagus cooks, make the sauce. Melt butter in a separate large skillet on medium heat. Add chopped pistachios; cook for 3-4 minutes, until lightly browned. Add orange juice and zest to skillet; stir to combine. Liquid will become foamy as it cooks; butter will turn brown as butterfat solids separate. Stir sauce often until sauce is heated through and nicely browned.

  3. To serve, place asparagus on serving platter. Drizzle sauce and pistachios evenly over asparagus. Season with a dash of pepper. Serve immediately while hot.

Nutrition Facts
Pistachio Asparagus In Orange Sauce
Amount Per Serving (1 (1/4 of total))
Calories 186 Calories from Fat 153
% Daily Value*
Fat 17g26%
Saturated Fat 9g56%
Trans Fat 1g
Polyunsaturated Fat 1g
Monounsaturated Fat 5g
Cholesterol 38mg13%
Sodium 115mg5%
Potassium 318mg9%
Carbohydrates 7g2%
Fiber 3g13%
Sugar 4g4%
Protein 4g8%
Vitamin A 1347IU27%
Vitamin C 14mg17%
Calcium 40mg4%
Iron 3mg17%
* Percent Daily Values are based on a 2000 calorie diet.

Here’s one more to pin on your Pinterest boards!Pistachio Asparagus In Orange Sauce is a delicious, simple side dish! Steamed asparagus is topped with browned butter orange/pistachio sauce.

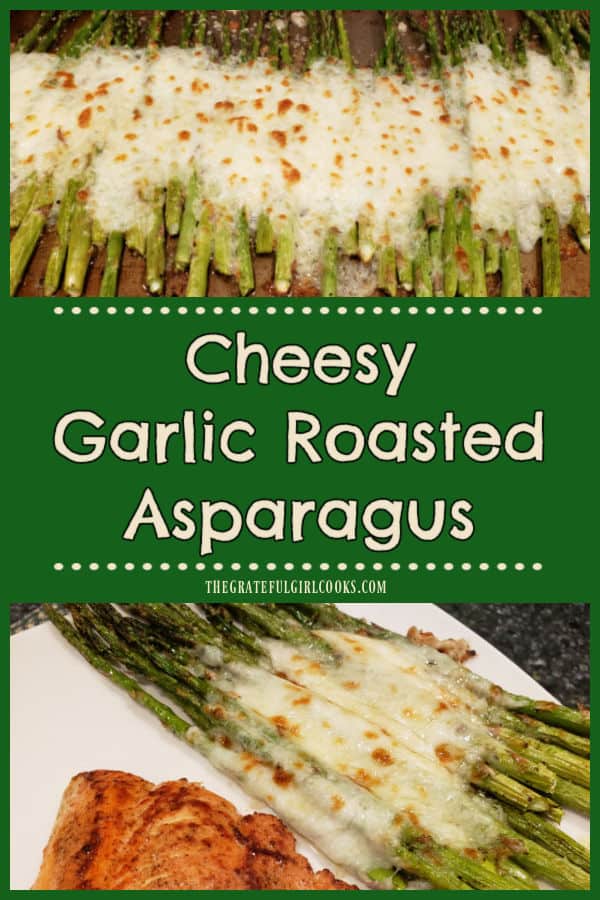
Cheesy Garlic Roasted Asparagus

Cheesy Garlic Roasted Asparagus is a delicious veggie dish, that’s oven-roasted and topped with melted mozzarella and Parmesan cheeses.
Cheesy Garlic Roasted Asparagus is a delicious veggie dish, that's oven-roasted and topped with melted mozzarella and Parmesan cheeses.

Do you enjoy fresh asparagus? We really do, especially when it is in season in the Spring, and prices come down for this delicious vegetable. A couple asparagus recipes we really enjoy are cream of asparagus soup and grilled asparagus with lemon and Parmesan! Today I want to share a wonderful recipe I found online (on Pinterest) that’s a yummy way to enjoy fresh asparagus.

Fresh asparagus spears are coated in a garlic/olive oil mixture, oven-roasted, and then coated with Parmesan and mozzarella cheeses. After that, the asparagus is then put back in the oven to melt the cheese. Once melted, and the cheese is bubbly and lightly browned, it’s ready to serve in all it’s cheesy goodness! It’s delicious, and today I want to show you how simple it is to prepare.

Scroll Down For A Printable Recipe Card At The Bottom Of The Page

How To Make Cheesy Garlic Roasted Asparagus

First things first- preheat your oven to 425°F.  It doesn’t take long to prepare the asparagus, and you’ll need the oven hot and “ready to go” once you’re done seasoning them.

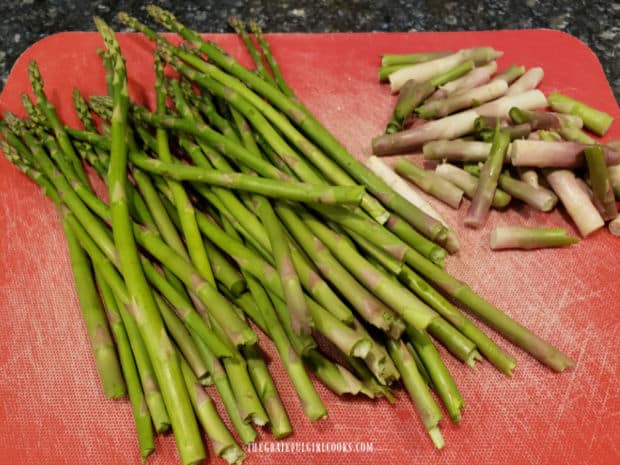
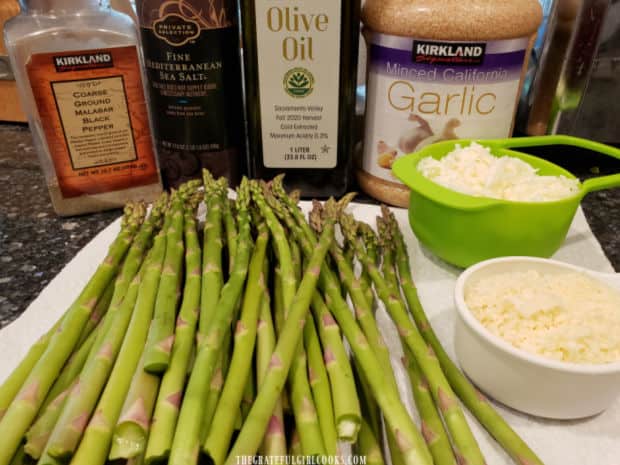
This recipe requires one pound of fresh asparagus. Snap or slice off the “woody” ends of the stalks, then discard the ends. Gather the ingredients needed, which are olive oil, minced garlic, salt, pepper, shredded mozzarella cheese and grated Parmesan cheese.

"Woody" ends of fresh asparagus are snapped or cut off.Salt, pepper, olive oil, garlic, mozzarella and Parmesan and asparagus are ingredients used.

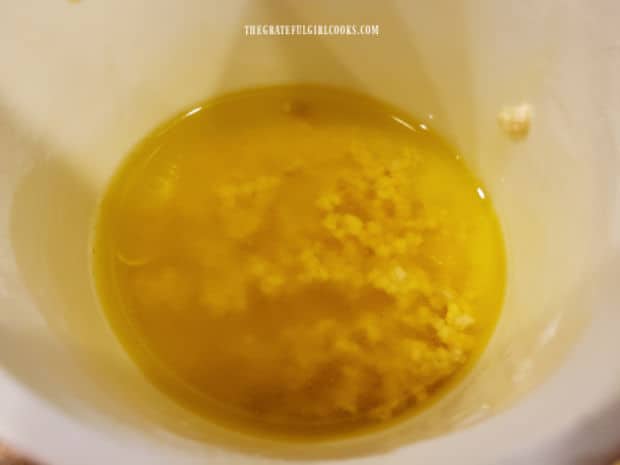
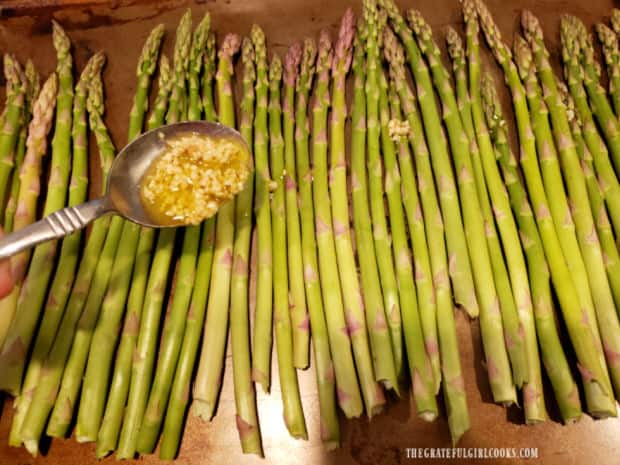
Place olive oil and the minced garlic in a small bowl or cup, and stir well to combine. Lay the prepared asparagus stalks in a single layer on a large rimmed baking sheet. Drizzle the olive oil mixture over the asparagus. Toss the asparagus to cover each stalk with the garlic and oil mixture, then place them back in a single layer on the baking sheet.

Minced garlic cloves are combined with olive oil to season asparagus.A garlic and olive oil mixture is drizzled over fresh asparagus before baking.

Ready To Roast

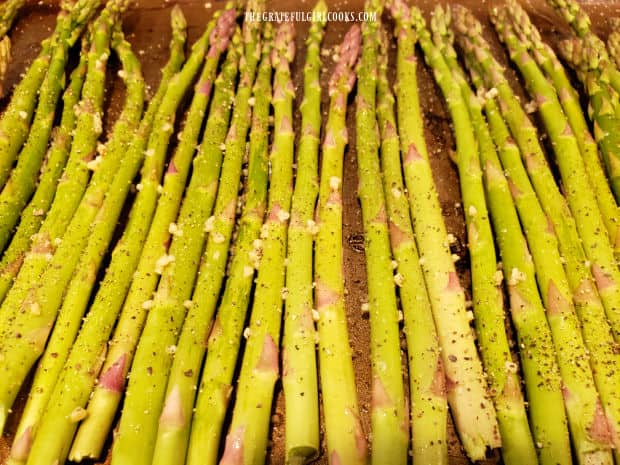
Sprinkle the asparagus spears with salt and black pepper. Now the asparagus is ready to roast in the oven. Bake at 425°F for approximately 12-15 minutes. The asparagus should be tender, but not FRIED.

Keep in mind that the thicker the stalks, the longer it will take them to become tender. Keep an eye on them as they bake, and check on them around 10 minutes into the baking time. When done, remove the pan from the oven.

The asparagus stalks are now seasoned with salt and pepper.

Final Step – Add The Cheeses

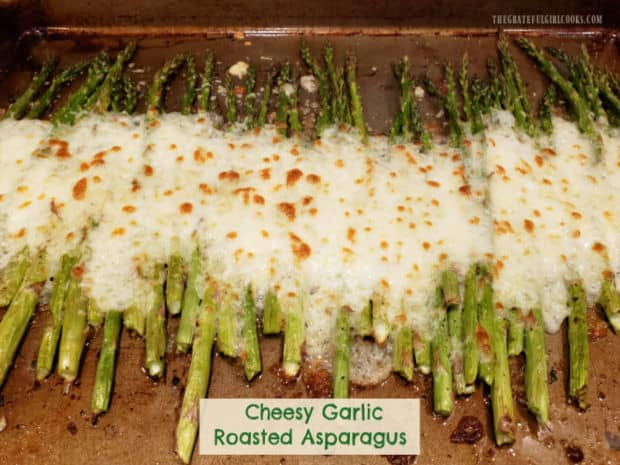
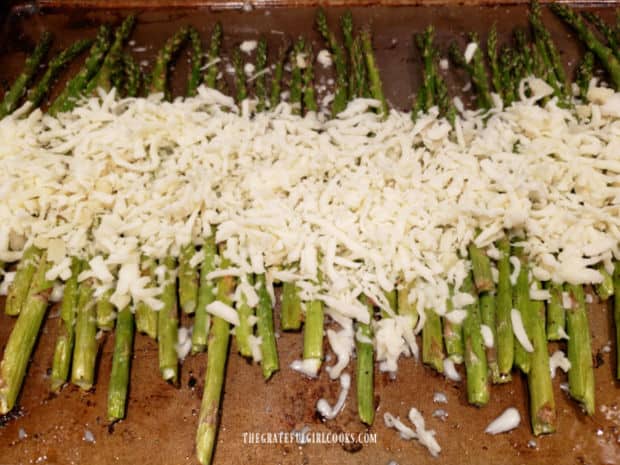
Sprinkle the grated Parmesan cheese and then the shredded mozzarella cheese across the middle section of the asparagus spears (as shown below). I like to keep the bottom and the top of the asparagus free of cheese (for presentation). Feel free to totally cover the asparagus with cheese, if you prefer.

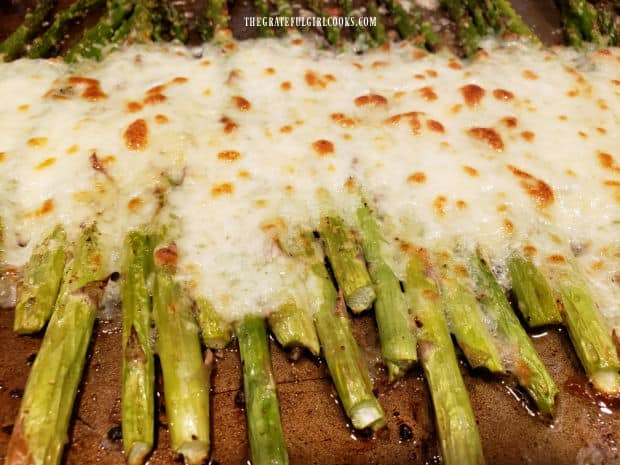
Place the pan back into the oven and continue baking for a couple of minutes, until the cheese has fully melted. Once melted, turn the oven broiler on, and place the baking sheet 4-5 inches away from the heating element. Broil only until the cheese is bubbling and has turned golden brown on top. Please keep an eye on it, because you do NOT want it to burn under the broiler!

A layer of Parmesan and mozzarella cheeses are added to roasted asparagus.Cheesy Garlic Roasted Asparagus, hot out of the oven, and ready to serve.

Time To Eat Some Cheesy Garlic Roasted Asparagus!

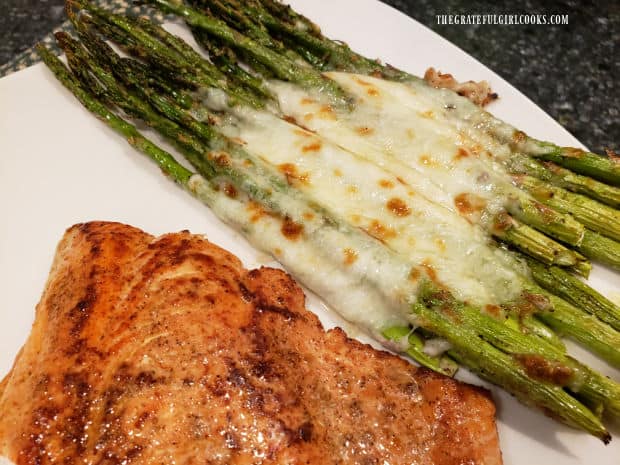
Remove the baking sheet from the oven, and transfer the cheesy garlic roasted asparagus to individual plates (or a serving platter) using a large spatula. I separate up a section (or serving) at a time, and move it to our plates. When I photographed this dish, we enjoyed it served with pan seared Creole salmon, and it was a great pairing!

A portion of the cheesy garlic roasted asparagus is served alongside salmon on plate.

Thanks for stopping by, and I truly hope you have the opportunity to make this delicious cheesy garlic roasted asparagus side dish! Take care, have a great day, and please come back soon for more family-friendly recipes. May God bless you and those you love.

Looking For More ASPARAGUS Recipes?

You can find ALL of my recipes in the Recipe index, located at the top of the page. I have a wonderful variety of other vegetable side dish recipes for you to enjoy, including these asparagus recipes:

Interested In More Recipes?

Thank you for visiting this website. I appreciate you using some of your valuable time to do soIf you’re interested, I publish a newsletter 2 times per month (1st and 15th) with all the latest recipes, and other fun info. I would be honored to have you join our growing list of subscribers, so you never miss a great recipe!
There is a Newsletter subscription box on the top right side (or bottom) of each blog post, depending on the device you use, where you can easily submit your e-mail address (only) to be included in my mailing list.

You Can Also Find Me On Social Media:

Facebook page: The Grateful Girl Cooks!
Pinterest:
The Grateful Girl Cooks!
Instagram:
jbatthegratefulgirlcooks

Author's signature

Original recipe source: Meaghan, at: https://4sonrus.com/garlic-roasted-cheesy-sheet-pan-asparagus/

↓↓ PRINTABLE RECIPE BELOW ↓↓

0 from 0 votes
Cheesy Garlic Roasted Asparagus
Prep Time
5 mins
Cook Time
20 mins
Total Time
25 mins
 

Cheesy Garlic Roasted Asparagus is a delicious veggie dish, that's oven-roasted and topped with melted mozzarella and Parmesan cheeses.

Category: Side Dish, Vegetable Dish
Cuisine: American
Keyword: cheesy garlic roasted asparagus
Servings: 4
Calories Per Serving: 219 kcal
Author: JB @ The Grateful Girl Cooks!
Ingredients
  • 1 pound fresh asparagus woody ends removed
  • Tablespoons extra virgin olive oil
  • 2 Tablespoons minced garlic
  • ½ teaspoon salt or seasoned to taste
  • ½ teaspoon black pepper or seasoned to taste
  • cup grated Parmesan cheese
  • 1 cup shredded low-fat mozzarella cheese
Instructions
  1. Preheat oven to 425°F. 

  2. Mix olive oil and garlic in small bowl. Lay asparagus spears on large baking sheet in a single layer. Drizzle with olive oil/garlic. Toss asparagus to cover with oil; put back in a single layer. Sprinkle with salt and pepper.

  3. Bake at 425°F for 10-15 minutes, until tender, but not fried. Thicker spears will take longer to become tender. Keep an eye on them as they bake; once tender, remove from oven.

  4. Evenly spread Parmesan and mozzarella across middle section of asparagus. Put pan back in oven: bake 1-2 minutes, until cheese melts. Turn oven broiler on; place pan 4-5 inches away from heating element. Broil until cheese is bubbling and golden brown on top. Keep an eye on it, because you don't want it to burn!

  5. Remove pan from oven; use spatula to transfer asparagus to plates. Enjoy!

Nutrition Facts
Cheesy Garlic Roasted Asparagus
Amount Per Serving (1 (1/4 of total))
Calories 219 Calories from Fat 144
% Daily Value*
Fat 16g25%
Saturated Fat 5g31%
Polyunsaturated Fat 1g
Monounsaturated Fat 8g
Cholesterol 25mg8%
Sodium 615mg27%
Potassium 302mg9%
Carbohydrates 9g3%
Fiber 3g13%
Sugar 3g3%
Protein 12g24%
Vitamin A 1067IU21%
Vitamin C 9mg11%
Calcium 337mg34%
Iron 3mg17%
* Percent Daily Values are based on a 2000 calorie diet.

Here’s one more to pin on your Pinterest boards!Cheesy Garlic Roasted Asparagus is a delicious veggie dish, that's oven-roasted and topped with melted mozzarella and Parmesan cheeses.

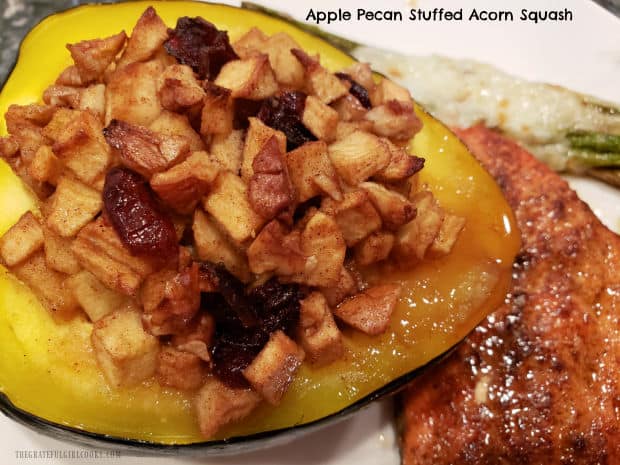
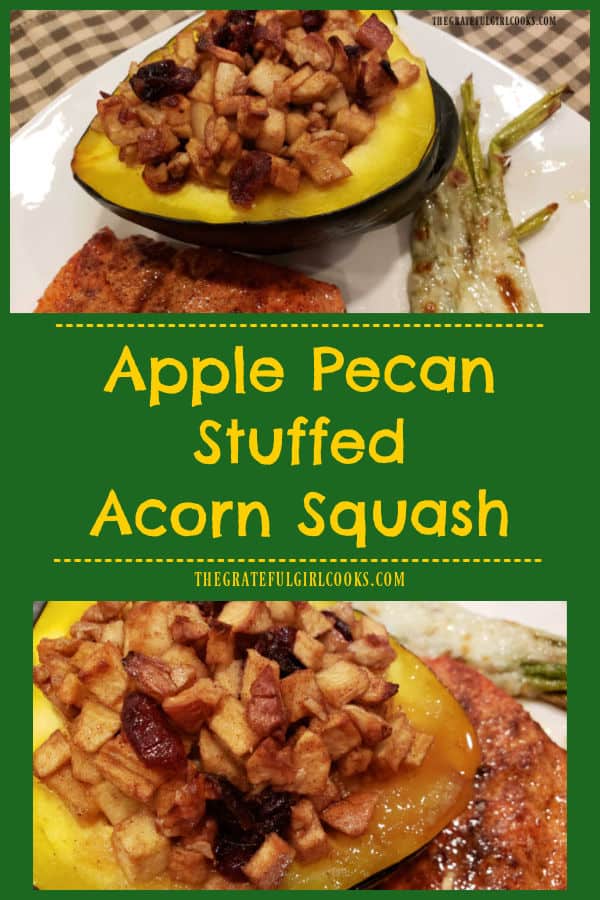
Apple Pecan Stuffed Acorn Squash

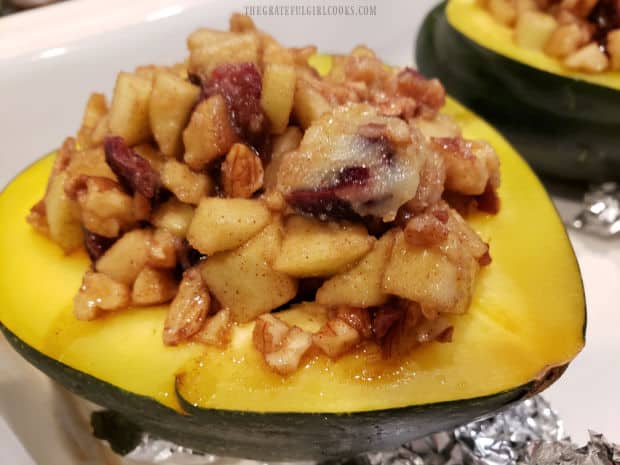
Apple Pecan Stuffed Acorn Squash is a yummy baked side dish filled with cranberries, brown sugar, butter, cinnamon, apples and pecans.Apple Pecan Stuffed Acorn Squash is a yummy baked side dish filled with cranberries, brown sugar, butter, cinnamon, apples and pecans.

While looking for different ways to cook acorn squash, I found a recipe in The Farmers Almanac that sounded really good. I made a couple changes to the original recipe, and cut the recipe in half (to make 2 servings, instead of 4).

This recipe for Apple Pecan Stuffed Acorn Squash is amazing, and it’s super easy to prepare. An acorn squash is stuffed with apples, cranberries, pecans, brown sugar, butter, and cinnamon. The squash is then re-baked until the fruit filling and squash is soft and tender.

There is minimal prep time involved, which is always a win-win in my book! Here’s how to make this delicious side dish:

Scroll Down For A Printable Recipe Card At The Bottom Of The Page

Prepare The Acorn Squash

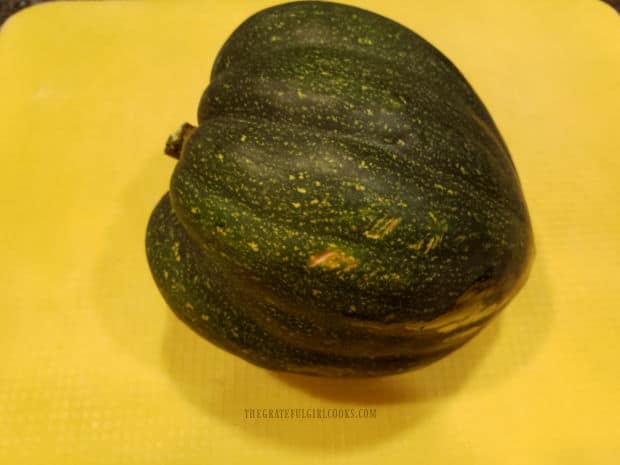
Acorn squash is a vegetable that belongs to the winter squash family, and is dark green in color, with long ridges from top to bottom. Some people think it resembles the shape of an acorn.

An acorn squash is a golden color inside, and becomes slightly sweet in flavor, once it has been fully cooked.

To prepare the acorn squash for this recipe, carefully cut the squash in half, lengthwise, from top to bottom, and remove the stem.

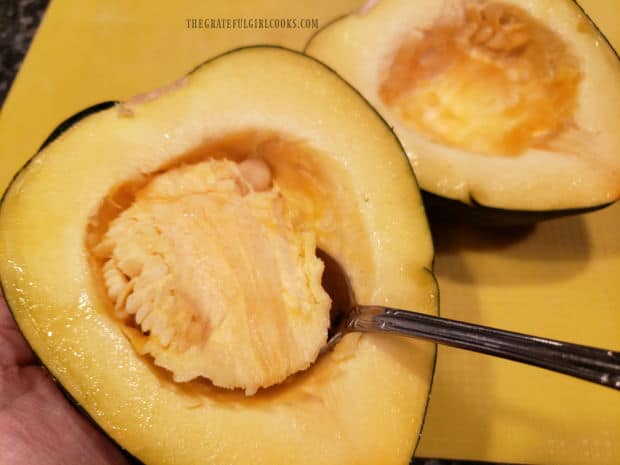
Once the squash is cut, use a spoon to remove seeds and pulp from each half. Be careful to NOT cut through the outer skin on the bottom. This will leave a large well in the center.

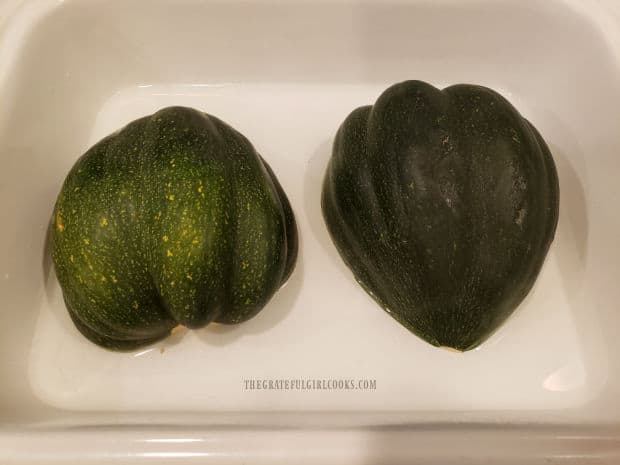
One acorn squash ready to be prepared for baking.After slicing it in half, the acorn squash seeds and stringy pulp are removed.

Place the squash halves, cut side down, in a large baking dish. Pour boiling water into the dish around the squash halves, to a depth of about ¼”.

Bake The Squash

Place the pan into a preheated 375°F. oven, and bake the acorn squash (uncovered) for 30 minutes.

When the squash is done, remove the pan from the oven. Carefully turn the baked squash halves over with a spatula, so the flesh side is facing up.

Acorn squash halves are baked in 1/4" water in an oven-safe rimmed pan.

Stuff The Squash And Bake

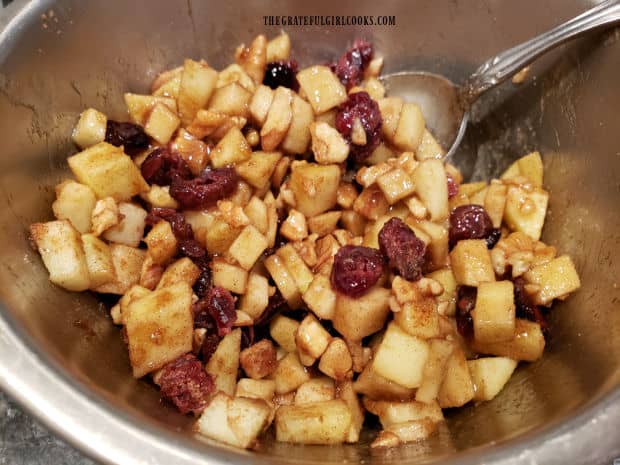
Now it’s time to make the filling. Place chopped apples, dried cranberries, chopped pecans, brown sugar, cinnamon and melted butter in a bowl and stir well, to combine.

Divide the fruit mixture evenly between the squash halves, filling the well in the center, and mounding it on top.

TIP: Use aluminum foil to help level the squash, by crumpling it up and wedging it under the front of each squash half.

Place the pan back into the oven (uncovered). Continue baking the squash for 30 minutes, or until the squash and apples are tender. Remove the pan from the oven.

A filling with diced apples, cranberries, pecans, etc. is combined to fill acorn squash halves.Each of the squash halves are filled with the apple pecan mixture before baking again.

Serve The Apple Pecan Stuffed Acorn Squash

Serve the apple pecan stuffed acorn squash once it’s removed from the oven. Use a heavy spatula to transfer the squash halves to individual plates, then serve.

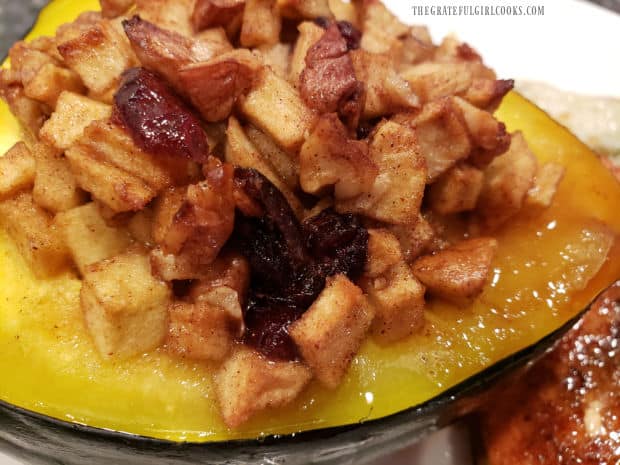
The apples, chewy cranberries, cinnamon, butter, brown sugar and crunchy pecans taste amazing, when paired with the slightly sweet acorn squash!

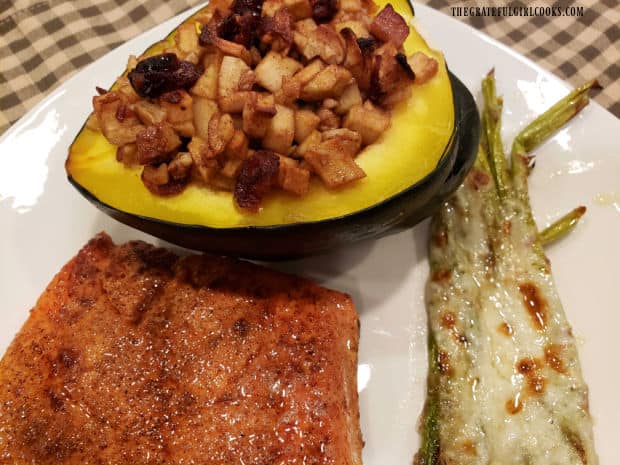
We enjoy apple pecan stuffed acorn squash, served with Pan Seared Creole Salmon and Cheesy Garlic Roasted Asparagus.

My husband said the acorn squash was “almost” like eating dessert! I think this yummy side dish would be great for Thanksgiving, because of its unique presentation.

The apple pecan stuffed acorn squash, shown served with asparagus and salmon on plate.A close up picture of the apple pecan stuffed acorn squash, with cranberries.

I hope you have the opportunity to make this wonderful tasting veggie dish! We really love it, and trust you (and those you love) will, too!

Thanks for stopping by, and I hope you’ll come back again soon for more family-friendly recipes. Take care, and have a GREAT day!

Looking For More VEGETABLE Recipes?

You can find ALL of my recipes in the Recipe Index, located at the top of the page. I have a wonderful variety of really delicious vegetable recipes, including:

Want More Recipes? Get My FREE Newsletter!

I publish a newsletter 2 times per month (1st and 15th) with lots of recipes, tips, etc..
Would you like to join our growing list of subscribers?

There is a Newsletter subscription box on the top right (or bottom) of each blog post, depending on the device you use.
You can submit your e-mail address there, to be added to my mailing list.

Find Me On Social Media:

Facebook page: The Grateful Girl Cooks!
Pinterest:
The Grateful Girl Cooks!
Instagram:
jbatthegratefulgirlcooks

Author's signature

Recipe adapted from: farmersalmanac.com/acorn-squash-with-apple-raisin-stuffing-11905

↓↓ PRINTABLE RECIPE BELOW ↓↓

0 from 0 votes
Apple Pecan Stuffed Acorn Squash
Prep Time
35 mins
Cook Time
30 mins
Total Time
1 hr 5 mins
 

Apple Pecan Stuffed Acorn Squash is a yummy baked side dish filled with cranberries, brown sugar, butter, cinnamon, apples and pecans.

Category: Side Dish, Vegetable Dish
Cuisine: American
Keyword: apple pecan stuffed acorn squash
Servings: 2
Calories Per Serving: 388 kcal
Author: JB @ The Grateful Girl Cooks!
Ingredients
  • 1 medium acorn squash
  • 1 large Granny Smith apple (or other cooking apple) peeled, cored, chopped in ½" pieces
  • 2 Tablespoons dried cranberries or raisins
  • Tablespoons brown sugar
  • ¼ cup chopped pecans
  • Tablespoons butter melted
  • ¼ teaspoon ground cinnamon
Instructions
  1. Preheat oven to 375°F.

  2. Cut squash in half lengthwise, from top to bottom. Use a spoon to remove seeds/stringy pulp from center of each piece.

  3. Pour boiling water into large baking dish, to a depth of ¼". Place squash cut side down into dish. Bake (uncovered) at 375°F. for 30 minutes. Once done, remove from oven; turn squash over with a spatula, so flesh side is facing up. TIP: Use aluminum foil to help level the squash by crumpling and wedging it under the front of each piece of squash.

  4. Place apples, cranberries, pecans, brown sugar, cinnamon and melted butter in a bowl. Stir well, to combine. Divide mixture evenly between squash halves, filling the well, and mounding it on top.

  5. Place pan back into oven (uncovered). Continue baking for 30 minutes, or until squash/apples are tender. When done, remove from oven. Use a heavy spatula to transfer squash halves to plates. Serve and enjoy!

Nutrition Facts
Apple Pecan Stuffed Acorn Squash
Amount Per Serving (1 half squash)
Calories 388 Calories from Fat 162
% Daily Value*
Fat 18g28%
Saturated Fat 5g31%
Trans Fat 1g
Polyunsaturated Fat 3g
Monounsaturated Fat 7g
Cholesterol 19mg6%
Sodium 73mg3%
Potassium 946mg27%
Carbohydrates 63g21%
Fiber 8g33%
Sugar 32g36%
Protein 3g6%
Vitamin A 1078IU22%
Vitamin C 29mg35%
Calcium 102mg10%
Iron 2mg11%
* Percent Daily Values are based on a 2000 calorie diet.

Here’s one more to pin on your Pinterest boards!Apple Pecan Stuffed Acorn Squash is a yummy baked side dish filled with cranberries, brown sugar, butter, cinnamon, apples and pecans.


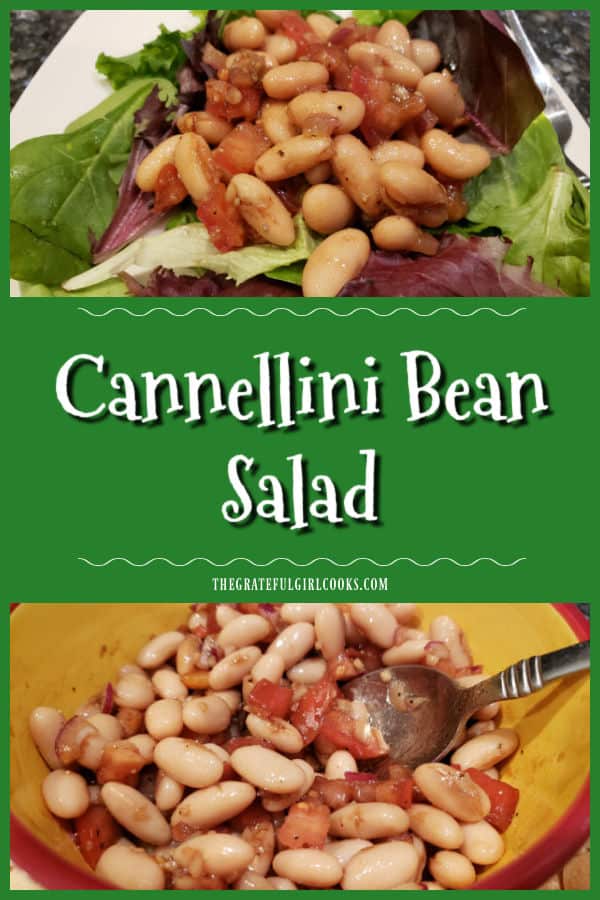
Cannellini Bean Salad

Cannellini Bean Salad with tomatoes, onion, olive oil, balsamic, vinegar and garlic is easy to make and delicious as a salad topper OR a dip!

Today I want to share with you a recipe for cannellini bean salad. It’s SUPER EASY to make in just a couple minutes, and can be enjoyed as is, OR on top of mixed greens (delicious) OR served as a dip with pita chips, etc. However you choose to serve it, the flavors are wonderful, and I’m confident you’ll enjoy this simple salad!

I found the original recipe in one of the cookbooks I own called “100 Days Of Real Food”, by Lisa Leake. It’s a great cookbook for those looking to cook with wholesome family-friendly foods. She serves this salad as a dip, which we love, but I’ve found I enjoy it the most served as a topper over a mixed green salad.

The beans and the delicious dressing they are covered with make it a double whammy salad. Lots of protein and fiber is provided from the beans and tomatoes, onions, garlic, olive oil, balsamic vinegar with seasoning create a salad dressing! It’s a win-win, no matter how you serve it! Here’s how to make this delicious vegetarian and gluten-free salad:

Scroll Down For A Printable Recipe Card At The Bottom Of The Page

How To Make This EASY Cannellini Bean Salad

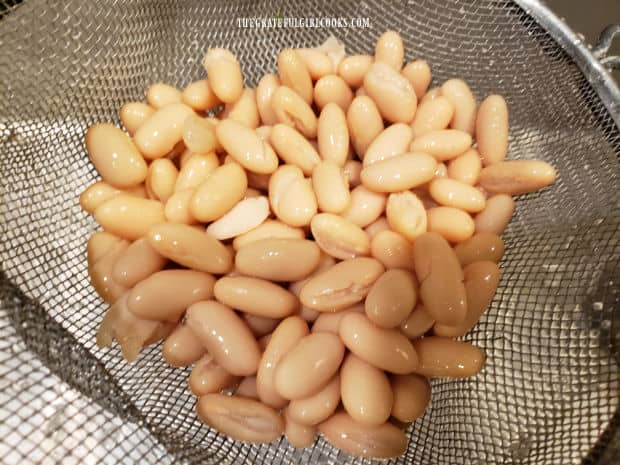
Drain, and then rinse one can (approx. 15 oz.) of cannellini beans. After the beans are drained and rinsed well, place them into a small or medium-sized serving bowl.

Cannellini beans are drained from the can and rinsed well before making the salad.

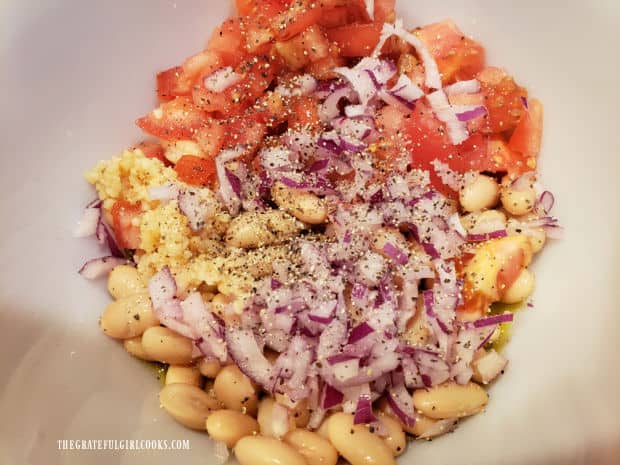
Add the rest of the ingredients to the bowl of drained cannellini beans. The remaining ingredients are tomato, red onion, garlic, olive oil, balsamic vinegar, salt and black pepper. Stir, to fully combine these ingredients. 

At this point the cannellini bean salad is finished and can be served immediately. Stir the ingredients a couple of times to keep the beans coated with the simple dressing. OPTIONAL: Cover the bowl and let the flavors “mingle” in the refrigerator for 20-30 minutes before serving, for even more flavor. Your choice!

All the ingredients for the cannellini bean salad are combined in a bowl.

Enjoy This Salad On Mixed Greens! 

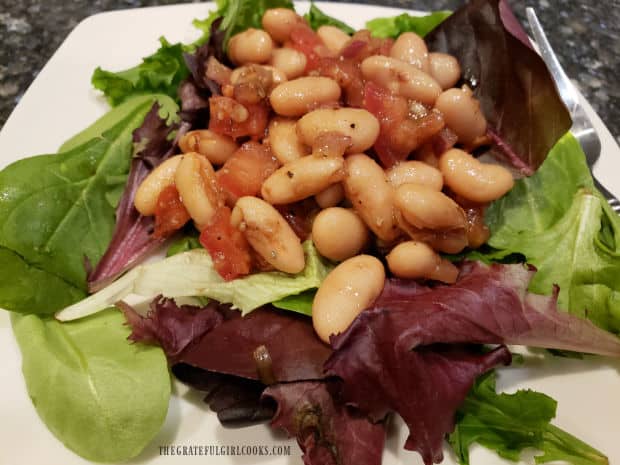
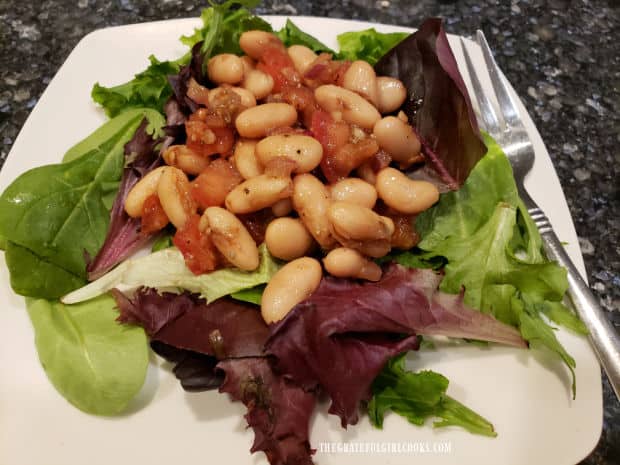
My favorite way to enjoy the cannellini bean salad is to place a portion on a bed of chilled mixed greens. Stir the beans before serving, and don’t forget to spoon some olive oil/balsamic dressing (from the bottom of the bowl) on top. 

The beans provide fiber and protein, and the red onion, garlic and tomato add flavor, texture and color. Another added bonus is that the oil/balsamic mixture creates a simple, but delicious salad dressing, so there’s no need to add any. It’s delicious, just as it is!

Cannellini bean salad is served as a topper for a mixed green salad.

Cannellini Bean Salad Can Be Served As A DIP, Too!

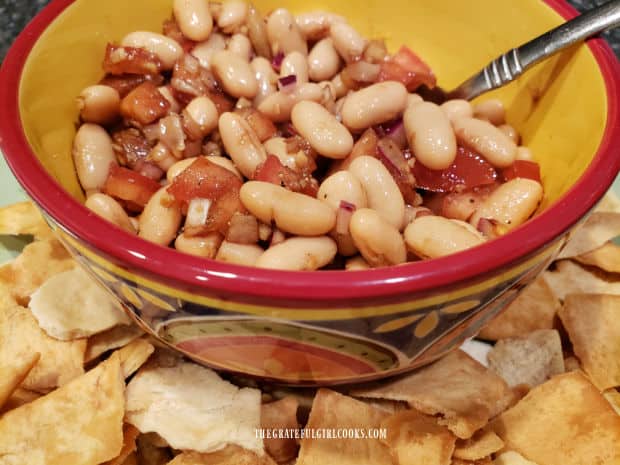
My husband enjoys the cannellini bean salad served as a dip, too! Just stir it well, and serve it with pita chips, crackers or pieces of firm, crusty bread! It’s a simple, yet tasty dip I’m sure you will enjoy! This easy salad (or dip) has a lot of flavor!

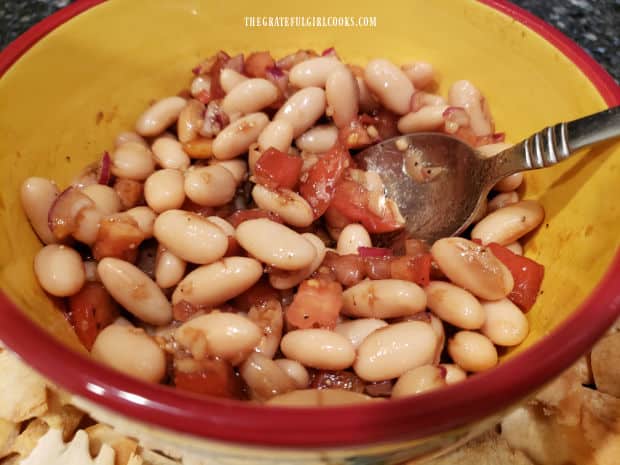
The cannellini bean salad can be served as a dip with pita chips, crackers or crusty bread.A bowl of cannellini bean salad ready to be served as a dip or eaten as is.

Thank you for stopping by today. I hope you’ll try this easy to prepare dish, and trust you will enjoy it as much as we do. It should keep well (covered) in the refrigerator for up to 4-5 days. Please come back again soon for more family-friendly recipes. Take care, and have a GREAT day!

Looking For More SALAD Recipes?

You can find ALL of my recipes in the Recipe Index, which is located at the top of the page. I have many delicious salad recipes for you to enjoy, including:

Interested In More Recipes?

Thank you for visiting this website. I appreciate you using some of your valuable time to do soIf you’re interested, I publish a newsletter 2 times per month (1st and 15th) with all the latest recipes, and other fun info. I would be honored to have you join our growing list of subscribers, so you never miss a great recipe!
There is a Newsletter subscription box on the top right side (or bottom) of each blog post, depending on the device you use, where you can easily submit your e-mail address (only) to be included in my mailing list.

You Can Also Find Me On Social Media:

Facebook page: The Grateful Girl Cooks!
Pinterest:
The Grateful Girl Cooks!
Instagram:
jbatthegratefulgirlcooks

Author's signature

Original recipe source: The cookbook “100 Days Of Real Food”, by Lisa Leake, page 195, published by Harper Collins Publishers in 2014

↓↓ PRINTABLE RECIPE BELOW ↓↓

0 from 0 votes
Cannellini Bean Salad
Prep Time
10 mins
Cook Time
0 mins
Total Time
10 mins
 

Cannellini Bean Salad with tomatoes, onion, olive oil, balsamic, vinegar and garlic is easy to make and delicious as a salad topper OR a dip!

Category: Appetizer, Salad
Cuisine: American
Keyword: cannellini bean salad
Servings: 4
Calories Per Serving: 190 kcal
Author: JB @ The Grateful Girl Cooks!
Ingredients
  • 15 ounces cannellini beans drained/rinsed
  • 1 medium tomato chopped
  • cup red onion diced
  • 2 garlic cloves minced
  • 3 Tablespoons extra virgin olive oil
  • 2 Tablespoons balsamic vinegar
  • ¼ teaspoon salt use more if needed, to taste
  • ¼ teaspoon ground black pepper
Instructions
  1. Drain and rinse cannellini beans. Place the beans in a small or medium-sized serving bowl.

  2. Add remaining ingredients, and stir to fully combine. Serve and enjoy! OPTIONAL: If desired, cover and refrigerate for 20-30 minutes for flavors to mingle.

  3. Can be served as a dip with pita bread, crackers or crusty slices of bread OR as a salad topper, OR eaten as is. If using as a salad topper, be sure to spoon some olive oil/balsamic dressing (from bottom of the bowl) over the salad.

  4. Store leftovers (covered) in refrigerator for up to 4-5 days.

Recipe Notes

NOTE: Canned cannellini beans vary in weight from 15 ounces up to 15.5 ounces. Use a whole can; the various weights will all work just fine!

Nutrition Facts
Cannellini Bean Salad
Amount Per Serving (1 (1/4 of total))
Calories 190 Calories from Fat 99
% Daily Value*
Fat 11g17%
Saturated Fat 1g6%
Polyunsaturated Fat 1g
Monounsaturated Fat 8g
Sodium 378mg16%
Potassium 109mg3%
Carbohydrates 21g7%
Fiber 6g25%
Sugar 3g3%
Protein 6g12%
Vitamin A 257IU5%
Vitamin C 6mg7%
Calcium 76mg8%
Iron 3mg17%
* Percent Daily Values are based on a 2000 calorie diet.

Here’s one more to pin on your Pinterest boards!Cannellini Bean Salad with tomatoes, onion, olive oil, balsamic, vinegar and garlic is easy to make and delicious as a salad topper OR a dip!