Searching for "chicken and dumplings"

Tuscan Chicken & Vegetable Soup

Tuscan Chicken Vegetable Soup is a delicious, Italian-inspired soup. This hearty soup (with 7 veggies) is perfect anytime, especially on a cold day!Tuscan Chicken Vegetable Soup is a delicious, Italian-inspired soup. This hearty soup (with 7 veggies) is perfect anytime, especially on a cold day!
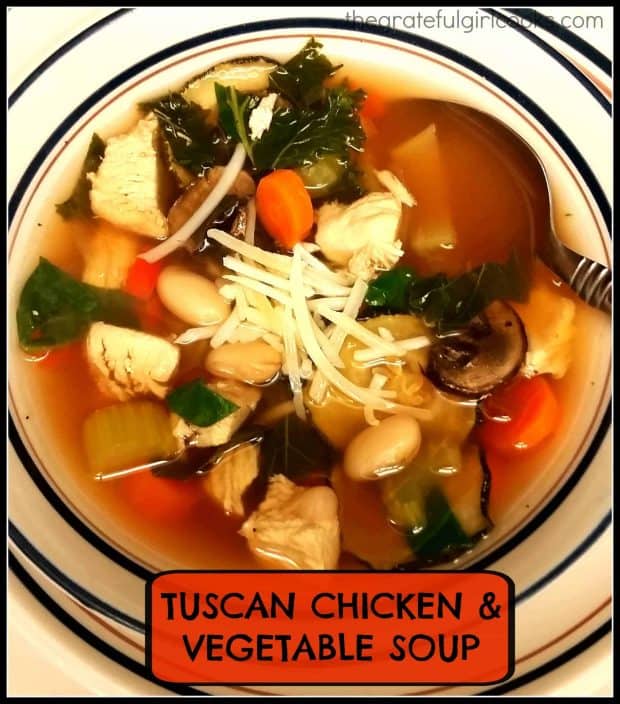
Fall is here! I am ready for cool, crisp mornings… and soup! I made a pot of Tuscan Chicken & Vegetable Soup yesterday, and it was really good!

We’re had a gorgeous summer here in the beautiful Pacific Northwest, but I am really enjoying the cooling air, the trees beginning to turn into their Fall colors, etc. There’s just something about Fall that calls for a large pot of delicious smelling soup cooking away on the stove.

Scroll Down For A Printable Recipe Card At The Bottom Of The Page

How I Came Up With This Recipe For Tuscan Chicken Vegetable Soup

Yesterday I was in the mood for a yummy, Italian-inspired Tuscan chicken vegetable soup. I’ve seen many recipes online for Tuscan Soup over the years (trust me, there’s a bazillion of them). Because of that, I had a basic idea of what items COULD go into this soup. I I ended up not using any ONE particular recipe, because I decided to simply create my own version. Guess what? We LOVED it!!!!

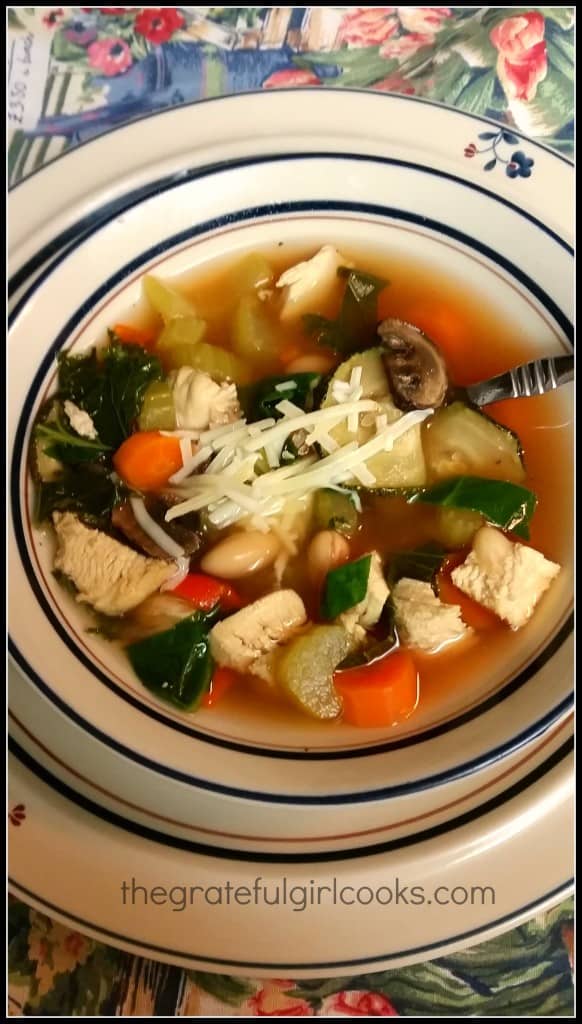
Seriously, people, we LOVED this Tuscan chicken vegetable soup! Success! Lots of “good-for you-veggies”, cannelini beans, chicken, and spices in a light Italian broth produces one great pot of soup!

Can You Make This Soup Vegetarian?

If you wish to make this a vegetarian friendly soup, it is easy! I typically use chicken broth and chicken in this soup when I make it. However, this soup tastes just as good using vegetable broth and NO chicken (if you’re vegetarian).

A bowl of the Tuscan chicken vegetable soup, ready to eat!

The Tuscan chicken vegetable soup was fun to make, because I was able to use some of the veggies I grew in our garden. These home-grown veggies included onion, garlic, oregano, thyme, basil, carrots, kale and spinach! Of course, all those ingredients can also be found at your local grocery store!

All that said, this Tuscan chicken vegetable soup is an easy recipe to prepare, and is absolutely delicious! I sure hope you’ll try it. Serious… you just gotta try this soup, because it is so yummy! Throw on a warm sweater, some sweatpants, turn on some great music, and make a pot of this soup. While you’re at it, enjoy the beauty of this glorious Fall season! Enjoy!

Looking For More SOUP Recipes?

You can find all of my soup recipes in the Recipe Index, located at the top of the page. These recipes include:

Interested In More Recipes?

Thank you for visiting this website. I appreciate you using some of your valuable time to do soIf you’re interested, I publish a newsletter 2 times per month (1st and 15th) with all the latest recipes, and other fun info. I would be honored to have you join our growing list of subscribers, so you never miss a great recipe!
There is a Newsletter subscription box on the top right side (or bottom) of each blog post, depending on the device you use, where you can easily submit your e-mail address (only) to be included in my mailing list.

You Can Also Find Me On Social Media:

Facebook page: The Grateful Girl Cooks!
Pinterest:
The Grateful Girl Cooks!
Instagram:
jbatthegratefulgirlcooks

Author's signatureRecipe Source: My brain. In “Fall” mode.

↓↓ PRINTABLE RECIPE BELOW ↓↓

0 from 0 votes
Tuscan Chicken & Vegetable Soup
Prep Time
15 mins
Cook Time
50 mins
Total Time
1 hr 5 mins
 

Tuscan Chicken Vegetable Soup is a delicious, Italian-inspired soup. This hearty soup (with 7 veggies) is perfect anytime, especially on a cold day!

Category: Soup
Cuisine: Italian
Keyword: Tuscan chicken vegetable soup
Servings: 6 servings
Calories Per Serving: 194 kcal
Author: JB @ The Grateful Girl Cooks!
Ingredients
  • 2 boneless chicken breasts , cooked and cubed
  • 7 cups chicken broth (may substitute vegetable broth, if desired)
  • 1/2 cup onion , chopped
  • 3 carrot stalks , sliced thinly
  • 3 celery stalks , sliced thinly
  • 1/2 cup sliced mushrooms
  • 1/2 small zucchini , sliced thinly
  • 2 Tablespoons olive oil
  • 1 cup kale , chopped (stems removed) (if omitting, double the spinach quantity!)
  • 1 cup baby spinach , chopped
  • 1 can cannellini beans , drained
  • 1/2 teaspoon Salt & pepper , to taste (may have to add more)
  • 1/2 teaspoon dried basil
  • 1/2 teaspoon dried oregano
  • 1/4 teaspoon dried thyme
  • 1/4 teaspoon garlic powder
  • 1/3 cup tomato paste
  • Parmesan cheese , grated (for garnish if desired)
Instructions
  1. In a large soup pot, saute the onion, carrots, celery, mushrooms, and zucchini in olive oil for 3-4 minutes. Add the chicken broth and cooked, cubed chicken to soup pot. Now add the salt & pepper, basil, oregano, thyme, and garlic powder to season the soup. Bring soup to a boil, then reduce heat to low.

  2. Add tomato paste, Mix well to combine. Add cannellini beans, kale and spinach. Season again with salt & pepper to taste, if necessary. Cook on low for 45 minutes, stirring occasionally.

  3. When ready, ladle hot soup into bowls, garnish with grated Parmesan cheese, and serve. Enjoy!

Recipe Notes

Tip: Use a pre-cooked rotisserie chicken for the fastest way to make this recipe.

*I boiled the chicken breasts in water for 45 minutes earlier in the day... then used them later in this recipe. Whatever works best for you is the bottom line.

Nutrition Facts
Tuscan Chicken & Vegetable Soup
Amount Per Serving (1 serving)
Calories 194 Calories from Fat 54
% Daily Value*
Fat 6g9%
Saturated Fat 1g6%
Cholesterol 24mg8%
Sodium 1556mg68%
Potassium 826mg24%
Carbohydrates 21g7%
Fiber 5g21%
Sugar 4g4%
Protein 15g30%
Vitamin A 7035IU141%
Vitamin C 44.1mg53%
Calcium 116mg12%
Iron 3.4mg19%
* Percent Daily Values are based on a 2000 calorie diet.

Here’s one more to pin on your Pinterest boards!Tuscan Chicken Vegetable Soup is a delicious, Italian-inspired soup. This hearty soup (with 7 veggies) is perfect anytime, especially on a cold day!


Save

Save

Jalapeño Cheddar Cornbread

Jalapeño Cheddar Cornbread, (with corn kernels, sliced jalapeños, onions and grated cheddar cheese), is an EASY to make, flavorful side dish for 8!

Do you enjoy cornbread as a side dish? We do, especially when it is paired with a big bowl of hot soup! A lot of times I use a recipe I’ve posted for Marie Callender’s cornbread, which is a traditional flavored, high-rising cornbread. It is a family favorite, especially when I make my recipe for chicken and dumplings!

Sometimes, however, I want to make cornbread with a bit more kick! My mom occasionally made “Mexican Cornbread” when I was growing up, which tastes very similar to this recipe (which I’ve had for over 20 years). This recipe for jalapeño cheddar cornbread is not too spicy at all, and has whole kernel corn, onions, and grated cheddar cheese in it, which adds texture, color, and flavor! It’s DELICIOUS, and today I want to share the easy recipe with you.

Scroll Down For A Printable Recipe Card At The Bottom Of The Page

Prepare The Skillet Or Pan For The Cornbread First!

Generously grease or spray a 9″ oven-proof skillet, square baking dish, or pie pan on the bottom and sides (I use a cast iron skillet). Place the pan on the middle rack of your oven. Preheat the oven to 350° F, and let the oven preheat WITH THE SKILLET STILL IN THE OVEN. You want the skillet for the cornbread to be really hot when you add the batter, because this helps the edges to get crispy!

While the oven (and skillet) are heating, prepare the batter for the cornbread. Since the oven will typically take about 10 minutes to preheat, you have plenty of time to whip up the easy batter!

Prepare The Batter

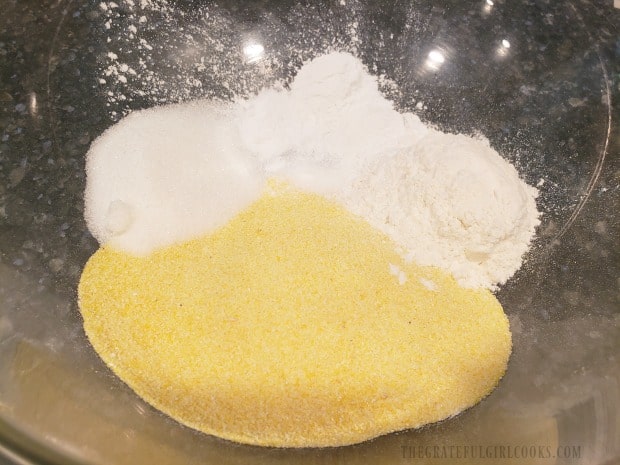
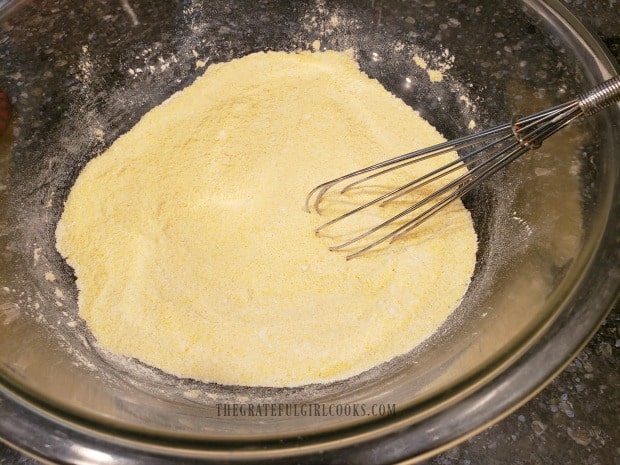
Making the cornbread batter is REALLY easy! The first thing you need to do is measure the yellow cornmeal, flour, sugar, salt, baking powder and baking soda into a large mixing bowl. Whisk these dry ingredients together, until fully combined, and then set the bowl aside.

The dry ingredients for cornbread batter are added to a large mixing bowl.Flour, cornmeal and other dry ingredients are whisked together to mix.

In a SEPARATE mixing bowl, combine beaten eggs, buttermilk, oil, corn, onion, grated cheddar cheese, and sliced, de-seeded jalapeños. Stir these wet ingredients very well, until fully combined. **(See note in printable recipe card at the bottom of this post for easy substitutions for buttermilk, jalapeños or the whole kernel canned corn).

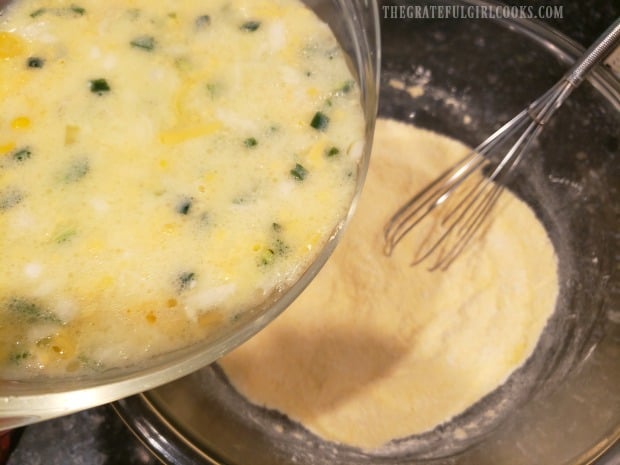
Pour the bowl full of the wet ingredients into the bowl with the dry ingredients. Stir the cornbread batter well, just until the batter is moistened and fully mixed. Now the batter for your jalapeño cheddar cornbread is ready to go! (See how easy that was?)

Onions cheddar cheese, jalapenos, eggs, etc. help flavor the cornbread batter.The wet ingredients are poured into the dry ingredients to make a batter.

Time To Bake The Jalapeño Cheddar Cornbread!

Once the oven is preheated, CAREFULLY remove the skillet or pan from the oven. IT WILL BE HOT! Immediately pour the cornbread batter into the skillet. You might even hear it sizzle when it hits the hot pan!

Bake the jalapeño cheddar cornbread (on a middle oven rack) at 350° F. for 30-35 minutes. When done, the cornbread should be golden brown on top, and a toothpick inserted into the middle should come out clean! Since ovens vary in temperatures, be sure to check it at the 30 minute mark to ensure you don’t overcook the cornbread!

Batter for jalapeño cheddar cornbread is poured into a heated skillet before baking..

Remove the finished cornbread from the oven, and let it cool for 2-3 minutes before attempting to slice and serve it.

When ready to serve, slice the jalapeño cheddar cornbread into 8 wedges (or pieces, if using a square baking dish). Lift each piece out of the skillet using a spatula, serve, and enjoy! We enjoyed our cornbread along with a bowl of my hubby’s favorite pinto beans and ham. This yummy cornbread was a perfect side dish (smeared with butter, of course!).

Baked jalapeño cheddar cornbread is golden brown on the top.A slice of the finished jalapeño cheddar cornbread is ready to eat!

Hope you are staying safe and well, during this month of “stay at home” guidelines. I pray you and those you love will soon have a chance to share a meal together, and enjoy each others company and hugs once again. I know we sure are looking forward to that day!

Take care, stay strong, and look for opportunities to serve or support others during this time, in whatever way you safely can. Have a GOOD day, and may God bless you with His love and presence!

Looking For Other BREAD Recipes?

You can find all of my bread recipes in the Recipe Index, located at the top of the page. I have quite a few you might want to try, including:

Interested In More Recipes?

Thank you for visiting this website. I appreciate you using some of your valuable time to do soIf you’re interested, I publish a newsletter 2 times per month (1st and 15th) with all the latest recipes, and other fun info. I would be honored to have you join our growing list of subscribers, so you never miss a great recipe!
There is a Newsletter subscription box on the top right side (or bottom) of each blog post, depending on the device you use, where you can easily submit your e-mail address (only) to be included in my mailing list.

You Can Also Find Me On Social Media:
Facebook page: The Grateful Girl Cooks!
Pinterest: The Grateful Girl Cooks!
Instagram: jbatthegratefulgirlcooks

Author's signature

Original recipe source: unknown (wrote it down many years ago on a 3×5″ recipe card – original publication not noted)

0 from 0 votes
Jalapeño Cheddar Cornbread
Prep Time
10 mins
Cook Time
30 mins
Total Time
40 mins
 

Jalapeño Cheddar Cornbread, (with corn kernels, sliced jalapeños, onions and grated cheddar cheese), is an EASY to make, flavorful side dish for 8!

Category: Bread, Side Dish
Cuisine: American
Keyword: jalapeño cheddar cornbread
Servings: 8 pieces
Calories Per Serving: 315 kcal
Author: JB @ The Grateful Girl Cooks!
Ingredients
  • 1 cup yellow cornmeal
  • cup all purpose flour
  • 2 Tablespoons granulated sugar
  • 1 teaspoon salt
  • 2 teaspoons baking powder
  • ½ teaspoon baking soda
  • 2 large eggs , beaten
  • 1 cup buttermilk , see NOTES for substitution
  • ½ cup vegetable oil
  • 8 ounces canned whole kernel corn , drained - See NOTES for substitution
  • cup brown onion , finely chopped
  • 2 small fresh jalapeños , seeded, diced - See NOTES for substitution
  • ½ cup grated cheddar cheese
Instructions
  1. Generously grease or spray a 9" oven-proof skillet, square baking dish, or pie pan on bottom and sides. Place pan on middle rack in oven. Preheat oven to 350° F, leaving skillet in oven while it preheats. While oven (and skillet) are heating, prepare cornbread batter.

  2. Measure cornmeal, flour, sugar, salt, baking powder and baking soda into a large mixing bowl. Whisk together, until fully combined; set bowl aside.

  3. In a SEPARATE mixing bowl, combine beaten eggs, buttermilk, oil, corn, onion, cheddar cheese, and jalapeños. Stir well, until combined. Pour into bowl with the dry ingredients. Stir well, just until batter is moistened and fully mixed.

  4. Once oven is preheated, carefully remove skillet or pan from oven. IT WILL BE HOT! Immediately pour batter into skillet. Bake on a middle oven rack at 350° F. for 30-35 minutes. When done, cornbread should be golden brown on top, and a toothpick inserted into the middle should come out clean! Since ovens vary in temperatures, be sure to check it at 30 minutes, to ensure you don't overcook it! Remove finished cornbread from oven. Let it cool for 2-3 minutes before attempting to slice. When ready to serve, slice into 8 portions. Serve, and enjoy (with butter, if desired).

Recipe Notes

SUBSTITUTIONS -
No fresh jalapeños? You can substitute canned OR 2 Tablespoons chopped green bell pepper.
No buttermilk? Add 1 Tablespoon white vinegar to 1 C. milk. Stir, let stand for 5 minutes.
No whole kernel canned corn? Add 8 ounces canned cream style corn.

Nutrition Facts
Jalapeño Cheddar Cornbread
Amount Per Serving (1 piece)
Calories 315 Calories from Fat 180
% Daily Value*
Fat 20g31%
Saturated Fat 14g88%
Cholesterol 57mg19%
Sodium 501mg22%
Potassium 289mg8%
Carbohydrates 28g9%
Fiber 2g8%
Sugar 5g6%
Protein 8g16%
Vitamin A 221IU4%
Vitamin C 6mg7%
Calcium 137mg14%
Iron 1mg6%
* Percent Daily Values are based on a 2000 calorie diet.

Here’s one more to pin on your Pinterest boards!Jalapeño Cheddar Cornbread, (with corn kernels, sliced jalapeños, onions and grated cheddar cheese), is an EASY to make, flavorful side dish for 8!

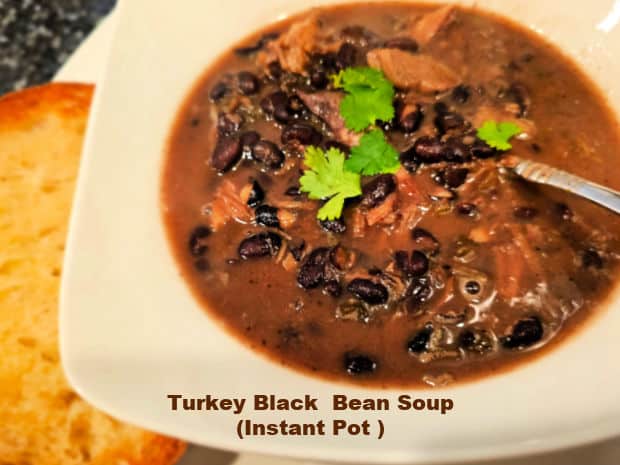
Turkey Black Bean Soup (Instant Pot)

Make delicious Turkey Black Bean Soup using an Instant Pot and leftover turkey! The recipe yields six servings of this hearty, filling soup.

Today I want to share a delicious recipe for Turkey Black Bean Soup, which is made using a pressure cooker. I found the original recipe in a cookbook I own (from author Coco Morante), made a couple slight changes, and the soup is scrumptious.

I don’t know about you, but when I make a turkey, there are always leftovers! A cooked turkey leg (drumstick) and wing are used in this recipe to provide flavor and meat for the soup, so it’s a wonderful way to use those leftovers.
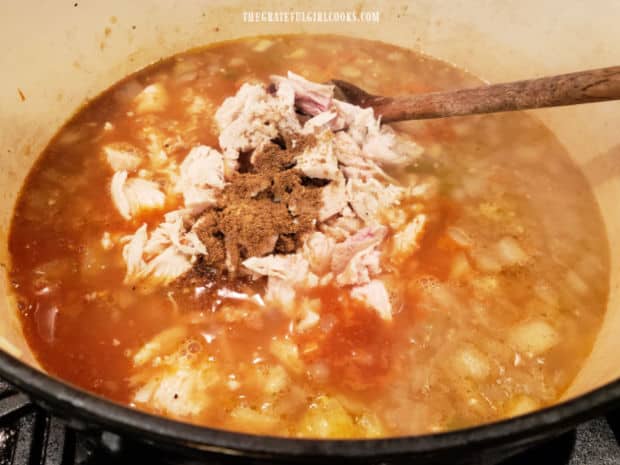
Dried black beans are cooked with the soup in the Instant Pot, so there’s no need to pre-soak them, which is a real time-saver! The soup itself takes a little longer than an hour to cook, but almost all of it is “hands-off” time!
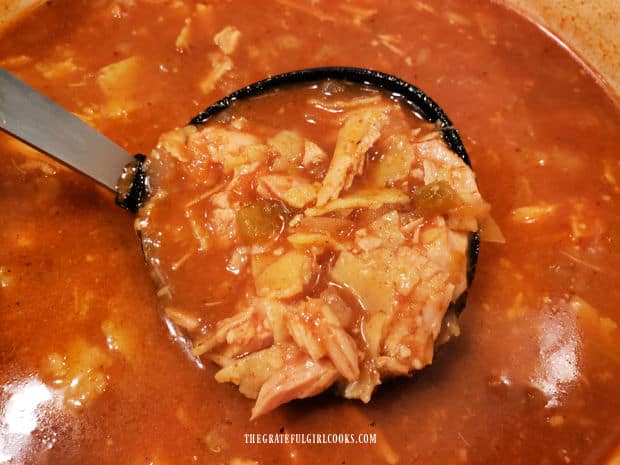
Here’s how to make this yummy turkey black bean soup in a pressure cooker. I’m really confident you’re going to enjoy it!

Scroll Down For A Printable Recipe Card At The Bottom Of The Page

Sauté The Veggies

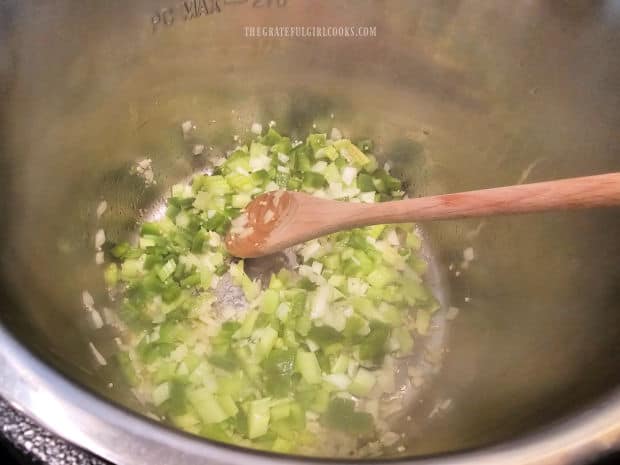
Measure olive oil into the inner pot and press the SAUTÉ button to heat the olive oil. Once the oil is hot (but not smoking), add diced onion, bell pepper, celery, salt, pepper, and red chili pepper flakes.

Stir to combine these ingredients, and sauté them for about 4 minutes until they have become tender. Stir in minced garlic, and cook an additional minute, stirring often, and being careful not to burn the garlic.

Chopped onion, bell pepper and celery are sautéed in oil in the Instant Pot.

Add Black Beans, Turkey, And Water

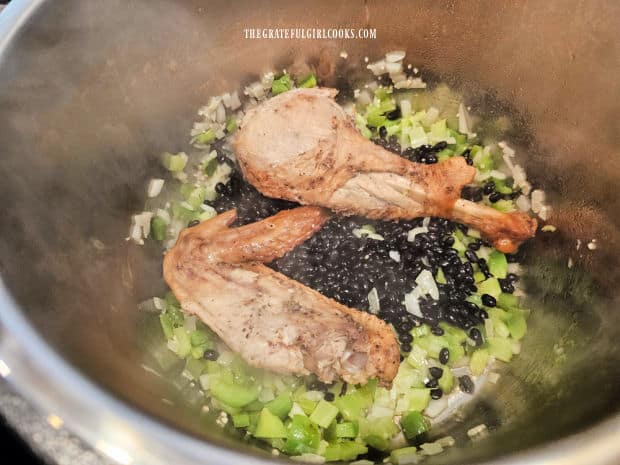
Put the dried black beans and turkey into the pot. I use a large cooked turkey drumstick and one wing, with a total weight of about 12-14 ounces (including the bones).

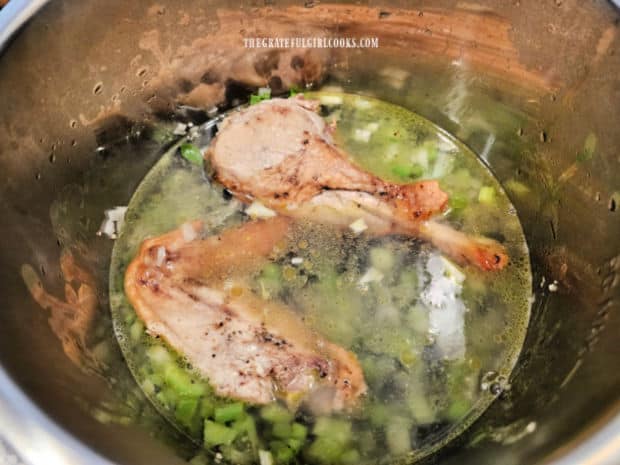
Pour in 4 cups of water. This should be enough water to slightly submerge the veggies and beans. Once that is done, you are ready to cook!

A cooked turkey leg, wing and dried black beans are added to the pot.Four cups of water is added to the pot, submerging the veggies and beans.

Time To Cook!

Lock the lid of the pressure cooker in place, and flip the Pressure Release knob to SEALING. Press the CANCEL button to stop the Sauté function.

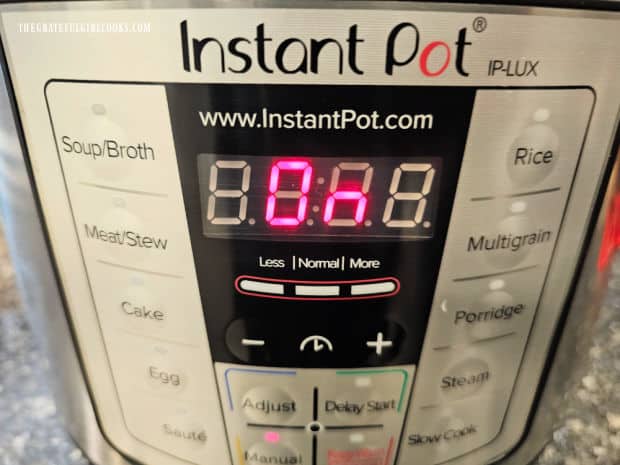
Select the MANUAL button (or the Bean/Chili or Pressure Cook button). Set the cooking timer for 1 hour and 15 minutes on HIGH pressure. Once the Instant Pot has reached full internal pressure (takes about 15 minutes), the cooking time will begin.

Once the cooking program has ended, let the pressure release NATURALLY for 25 minutes (you do nothing!). After 25 minutes, flip the Pressure Release knob to VENTING, which will let any remaining steam escape.

Once the pressure gauge has dropped back down (indicating no remaining internal pressure), it is safe to open the Instant Pot.

An Instant Pot is used to prepare this recipe for turkey black bean soup.

Shred Turkey And Finish Seasoning Soup

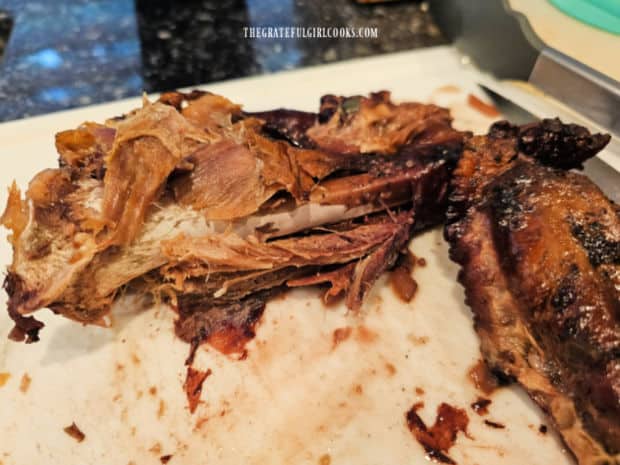
Use a large slotted spoon (or tongs) to remove the turkey from the pot and onto a cutting board. It will be VERY tender, and may fall apart!

Remove the turkey meat from the bones, discarding any skin or bones. Cut the turkey into small bite-sized pieces (or shred it, if you prefer it that way).

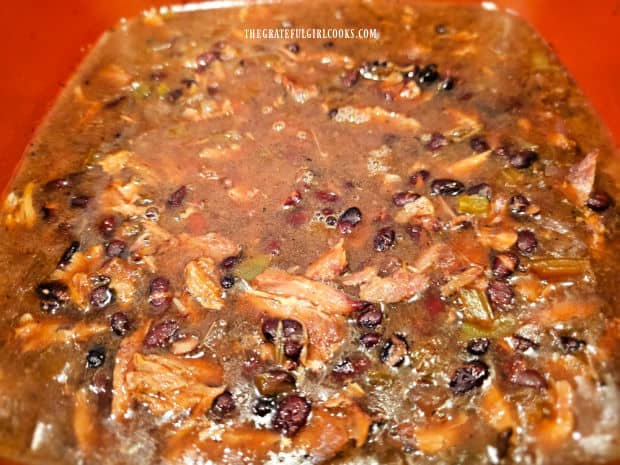
Place the turkey meat back into the pot, then add apple cider vinegar and stir until it has been incorporated into the turkey black bean soup. Take a little bite of the soup, and add more salt and pepper, to suit your taste.

After cooking, the turkey meat is removed, and bones and skin are discarded.Bite-sized pieces of turkey meat are added back into the soup.

Enjoy A Bowl Of Turkey Black Bean Soup

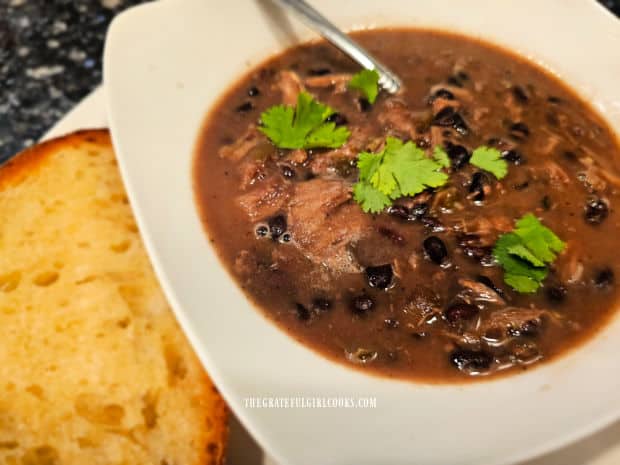
Now it’s time to enjoy a big, hot bowl of turkey black bean soup! Ladle portions of the hot soup into serving bowls, and serve immediately! If desired, garnish with cilantro and/or sour cream.

We love this soup when served with toasted garlic bread on the side, because we can dip the bread in the hot soup… it’s so good!

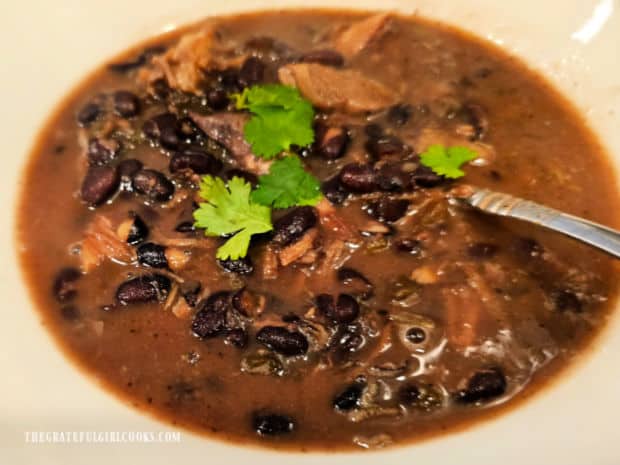
The black beans are tender, the broth is seasoned well, and the turkey helps add more protein and flavor to this delicious soup! 

Turkey black bean soup, topped with cilantro, served with bread on the side.A bowl of the turkey black bean soup, garnished with cilantro leaves.

I hope you have the opportunity to try this wonderful soup. It is filing and delicious, and is a fantastic way to use up leftover turkey!

If you enjoy using an Instant Pot, be sure to check out my other recipes, including Instant Pot Beef Stew, Ground Beef Stroganoff, Pork Carnitas, and Rice Pudding!

Thank you for stopping by, and I invite you to come back again soon for more family-friendly recipes. Take care, may God bless you… and have a great day!

Looking For More SOUP Recipes?

You can find ALL of my recipes in the Recipe Index, which is located at the top of the page. I have lots of delicious soups (and other Instant Pot recipes) to enjoy, including:

Want More Recipes? Get My FREE Newsletter!

I publish a newsletter 2 times per month (1st and 15th) with lots of recipes, tips, etc..
Would you like to join our growing list of subscribers?

There is a Newsletter subscription box on the top right (or bottom) of each blog post, depending on the device you use.
You can submit your e-mail address there, to be added to my mailing list.

Find Me On Social Media:

Facebook page: The Grateful Girl Cooks!
Pinterest:
The Grateful Girl Cooks!
Instagram:
jbatthegratefulgirlcooks

Author's signature

Recipe adapted from: “The Ultimate Instant Pot Cookbook”, by Coco Morante, page 85, published by TenSpeed Press, 2018

↓↓ PRINTABLE RECIPE BELOW ↓↓

0 from 0 votes
Turkey Black Bean Soup (Instant Pot)
Prep Time
15 mins
Cook Time
1 hr 15 mins
Natural Pressure Release Time
25 mins
Total Time
1 hr 55 mins
 

Make delicious Turkey Black Bean Soup using an Instant Pot and leftover turkey! The recipe yields six servings of this hearty, filling soup.

Category: Main Dish, Soup
Cuisine: All Cuisines
Keyword: Instant pot, turkey black bean soup
Servings: 6
Calories Per Serving: 277 kcal
Author: JB @ The Grateful Girl Cooks!
Ingredients
  • 3 Tablespoons olive oil
  • 1 medium yellow onion peeled, diced
  • 1 medium green bell pepper seeded, diced
  • 2 medium celery stalks diced
  • teaspoons minced garlic
  • 1 teaspoon salt
  • ½ teaspoon black pepper
  • teaspoon red chili pepper flakes
  • cups dried black beans
  • 14 ounces cooked turkey drumstick (and 1 wing) bone in total amount = 14 ounces
  • 4 cups water
  • 1 Tablespoon apple cider vinegar
Optional Garnish: cilantro/sour cream
    Instructions
    1. Measure olive oil into the inner pot and press SAUTÉ button to heat the olive oil. Once oil is hot (but not smoking), add onion, bell pepper, celery, salt, pepper, and red chili pepper flakes. Stir to combine; sauté for 4 minutes or until tender. Stir in garlic. Cook 1 minute, stirring often (to not burn the garlic).

    2. Put dried beans and turkey into the pot. Pour in 4 cups of water, which should slightly submerge veggies and beans.

    3. Lock the lid in place; flip Pressure Release knob to SEALING. Press the CANCEL button to stop the Sauté function. Select the MANUAL button (or the Bean/Chili or Pressure Cook button). Set cooking timer for 1 hour and 15 minutes at HIGH pressure. Once the Instant Pot has reached full pressure (takes about 15 minutes), the cooking time will begin.

    4. Once cooking program has ended, let the pressure release NATURALLY for 25 minutes (do nothing!). After 25 minutes, flip the Pressure Release knob to VENTING, which lets any remaining steam escape. Once pressure gauge has dropped back down (indicating no remaining internal pressure), it is safe to open the Instant Pot.

    5. Use a large slotted spoon (or tongs) to transfer turkey from the pot to a cutting board. Remove meat from the bones, discarding skin/bones. Cut turkey into small pieces (or shred it). Place meat back into the pot. Add apple cider vinegar; stir until incorporated. Taste soup; add more salt/pepper, if desired.

    6. Serve soup immediately; garnish portions with cilantro or sour cream, if desired.

    Nutrition Facts
    Turkey Black Bean Soup (Instant Pot)
    Amount Per Serving (1 (1/6 of total))
    Calories 277 Calories from Fat 99
    % Daily Value*
    Fat 11g17%
    Saturated Fat 2g13%
    Polyunsaturated Fat 2g
    Monounsaturated Fat 6g
    Cholesterol 31mg10%
    Sodium 443mg19%
    Potassium 821mg23%
    Carbohydrates 29g10%
    Fiber 7g29%
    Sugar 2g2%
    Protein 18g36%
    Vitamin A 155IU3%
    Vitamin C 18mg22%
    Calcium 76mg8%
    Iron 3mg17%
    * Percent Daily Values are based on a 2000 calorie diet.

    Here’s one more to pin on your Pinterest boards!Make delicious Turkey Black Bean Soup using an Instant Pot and leftover turkey! The recipe yields six servings of this hearty, filling soup.

    Easy Black Bean Stew

    Easy Black Bean Stew is a hearty meatless dish, with black beans, pearl couscous, onions, and tomatoes in a savory Southwestern-style broth.
    Easy Black Bean Stew is a hearty meatless dish, with black beans, pearl couscous, onions, and tomatoes in a savory Southwestern-style broth.

    If you enjoy the flavor of chili, then I’m confident you will enjoy this easy black bean stew. The dish is incredibly simple to prepare, and is very filling, because of the black beans and pearl couscous used. Onions, diced tomatoes and spices round out the dish, and when garnished with sour cream and green onions, it’s a great meatless meal! 

    My husband and I are trying to eat a couple of meatless meals each week, and this one is always a big hit! With only a few minutes prep time and a short cooking time, this meatless meal is not only quick and simple, it tastes GREAT! Here’s how to make this easy black bean stew:

    Scroll Down For A Printable Recipe Card At The Bottom Of The Page

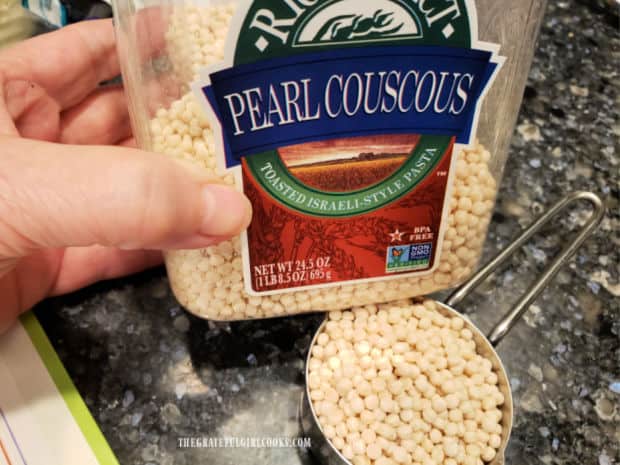
    The recipe calls for pearl couscous (also known as Israeli couscous), which is typically located near the rice at most grocery stores.. It is a round-shaped pasta, similar in size to a pearl, so you can see why it’s called “pearl” couscous. Pearl couscous cooks quickly and is a wonderful addition to this dish.

    Pearl couscous is used in this recipe, and is pearl-shaped pasta.

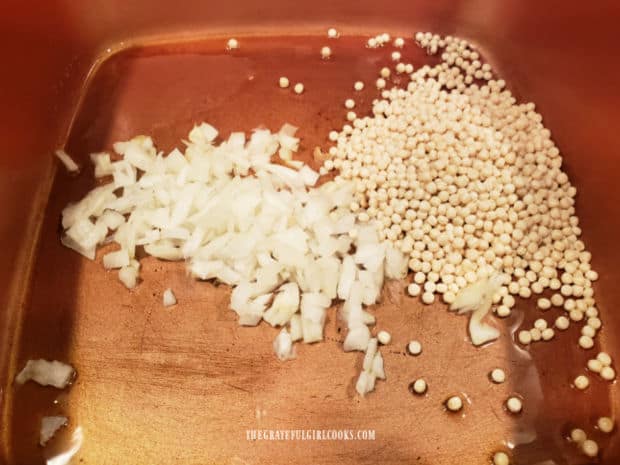
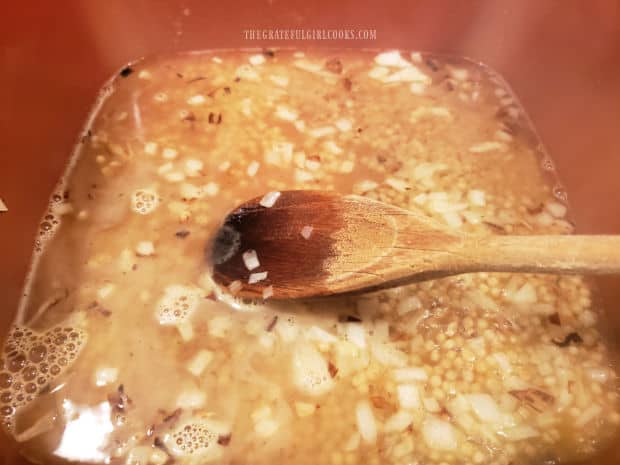
    First, heat 2 teaspoons of olive oil on medium heat in a large, non-stick saucepan. Once the oil is hot (but not smoking), add chopped onion and the pearl couscous (uncooked). Stir often, and cook for 5 minutes. The onions will soften and the couscous will become lightly “toasted”.

    Add chicken broth, minced garlic and ground cumin to the pan, then bring the liquid to a boil. Cover the saucepan with a lid once it begins boiling, and turn the heat down to low. Allow the broth to simmer (covered) for 5 minutes.

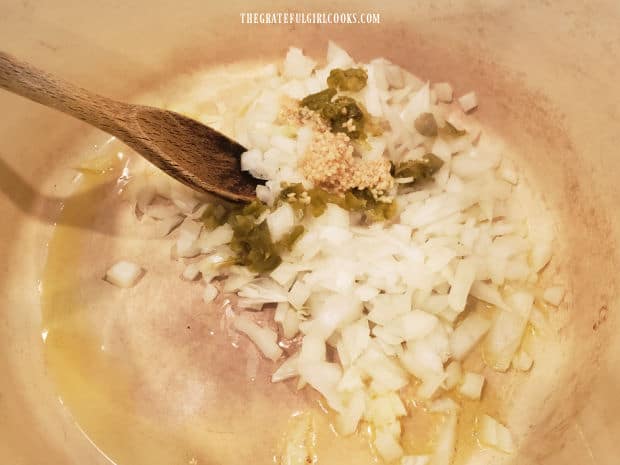
    Chopped onion and pearl couscous are cooked in pan for about 5 minutes.Chicken broth and spices are added to the onion and couscous in pan.

    Almost Finished Making The Stew

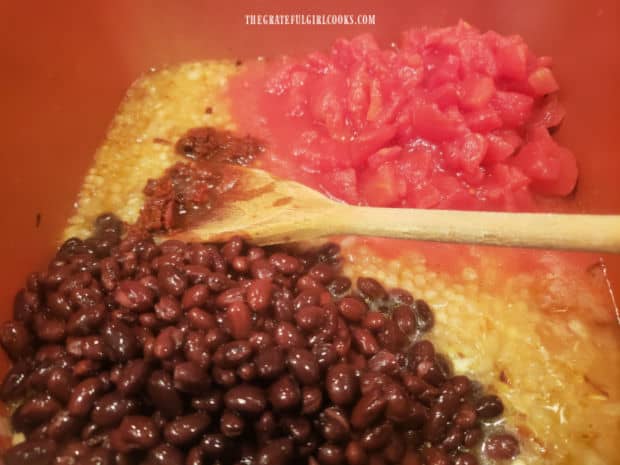
    Remove the lid and add black beans (drained, rinsed), diced tomatoes (including juice), and a teaspoon of minced chipotle pepper in adobo sauce. Stir the black bean stew until all the ingredients are combined. 

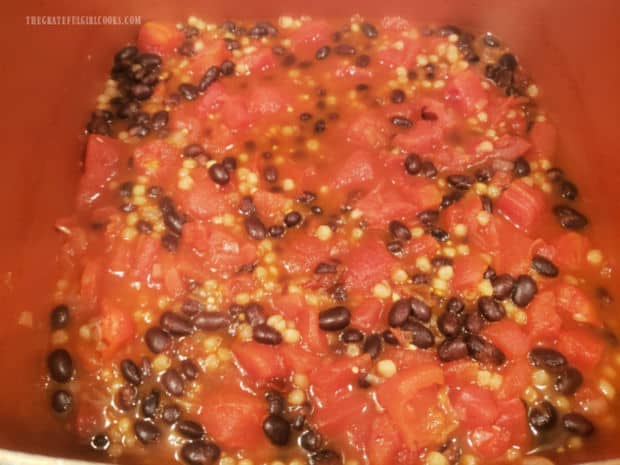
    Put a lid on the pan and let the stew simmer (covered) on low heat for 4 minutes, or until the pearl couscous is tender. The stew will be fairly thick when done. If you want it to be more “soup-like”, add a bit more broth or hot water, and stir it in. I usually tend to add a bit more broth to ours at the very end. See how easy it is to make black bean stew? Now you’re ready to serve it! 

    Chipotle pepper, black beans and diced tomatoes are added to the easy black bean stew.Easy black bean stew cooks and broth is added to thin it out, if desired.

    Serve The Easy Black Bean Stew

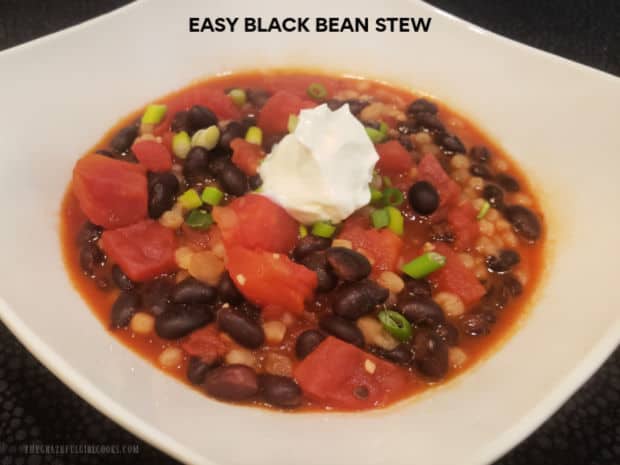
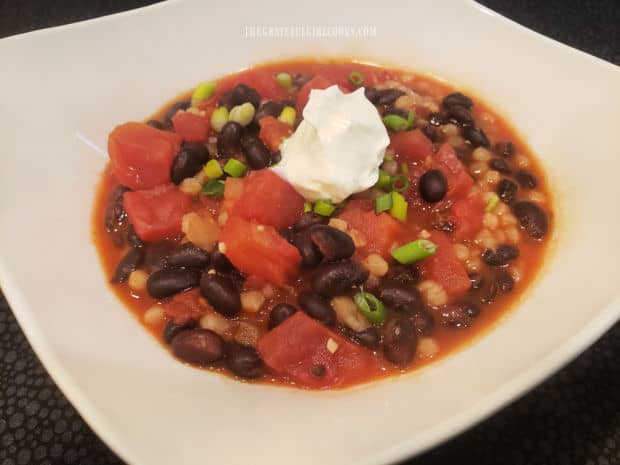
    When the stew is fully heated and the couscous is tender, it is ready to serve! Ladle the black bean stew into serving bowls. If desired, garnish each serving with a dollop of sour cream and some chopped green onions (scallions). The garnishes are optional, but provide great added color and flavor to the dish, and I heartily recommend it!

    You could also add avocado chunks or chopped cilantro, if desired, to “make it your own”. This soup really does taste great, for something so simple to make! I am confident you’re going to enjoy this meal. A big slice of crusty bread on the side goes well with the stew. It tastes great dipping it into the seasoned broth. YUM!

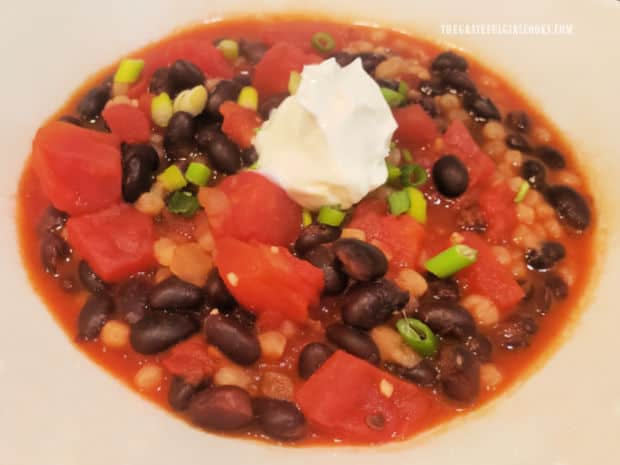
    The easy black bean stew is garnished with chopped green onions and sour cream to serve.A white bowl full of easy black bean stew is ready to be eaten and enjoyed.

    I sure hope you enjoy this delicious black bean stew, if you have the opportunity to try it. Thank you so much for stopping by today, and I invite you to come back soon for more delicious recipes. Take care, may God bless you, and have a great day.

    Looking For More SOUP Recipes?

    You can find ALL of my recipes in the Recipe Index, located at the top of the page. I have lots of fantastic soup recipes for you to check out, including:

    Interested In More Recipes?

    Thank you for visiting this website. I appreciate you using some of your valuable time to do soIf you’re interested, I publish a newsletter 2 times per month (1st and 15th) with all the latest recipes, and other fun info. I would be honored to have you join our growing list of subscribers, so you never miss a great recipe!
    There is a Newsletter subscription box on the top right side (or bottom) of each blog post, depending on the device you use, where you can easily submit your e-mail address (only) to be included in my mailing list.

    You Can Also Find Me On Social Media:

    Facebook page: The Grateful Girl Cooks!
    Pinterest:
    The Grateful Girl Cooks!
    Instagram:
    jbatthegratefulgirlcooks

    Author's signature

    Recipe adapted from the cookbook: “Cooking Light Annual Recipes 2004, page 273, published in 2003 by Oxmoor House

    ↓↓ PRINTABLE RECIPE BELOW ↓↓

    0 from 0 votes
    Easy Black Bean Stew
    Prep Time
    10 mins
    Cook Time
    15 mins
    Total Time
    25 mins
     

    Easy Black Bean Stew is a hearty meatless dish, with black beans, pearl couscous, onions, and tomatoes in a savory Southwestern-style broth.

    Category: Main Dish, Meatless, Soup
    Cuisine: American
    Keyword: black bean stew
    Servings: 4 small bowls
    Calories Per Serving: 211 kcal
    Author: JB @ The Grateful Girl Cooks!
    Ingredients
    • 2 teaspoons olive oil
    • ½ cup chopped yellow onion
    • cup uncooked Israeli (pearl) couscous
    • cups low-sodium chicken broth
    • 1 can black beans (14.25 oz.) rinsed, drained
    • 1 can diced tomatoes (14.25oz.) including juice
    • 1 teaspoon minced canned chipotle chili in adobo sauce
    • 1 teaspoon minced garlic
    • ¼ teaspoon ground cumin
    For Garnish: (optional, but recommended!)
    • 1 Tablespoon sliced green onions
    • 4 teaspoons low-fat sour cream
    Instructions
    1. Heat olive oil on medium heat in a large, non-stick saucepan. Once oil is hot (but not smoking), add chopped yellow onion and uncooked couscous.. Stir often, and cook for 5 minutes.

    2. Add chicken broth, garlic and cumin to the pan. Bring liquid to a boil. Cover pan with a lid once boiling and turn heat to low. Let stew simmer (covered) for 5 minutes.

    3. Remove lid; add black beans, tomatoes (including juice), and minced chipotle pepper in adobo sauce. Stir until all ingredients are combined. Cover pan; simmer (covered) on low heat for 4 minutes, or until couscous is tender. NOTE: Stew will be fairly thick. If you want it more "soup-like", add more broth or hot water, and stir it in.

    4. Ladle stew into serving bowls. If desired, garnish each serving with a dollop of sour cream and chopped green onions. Garnishes are optional, but provide added color and flavor, Serve hot, and enjoy!

    Recipe Notes

    NOTE: Caloric calculation includes sour cream and green onion garnish in total.

    Nutrition Facts
    Easy Black Bean Stew
    Amount Per Serving (1 (1/4 of total))
    Calories 211 Calories from Fat 36
    % Daily Value*
    Fat 4g6%
    Saturated Fat 1g6%
    Polyunsaturated Fat 1g
    Monounsaturated Fat 2g
    Cholesterol 1mg0%
    Sodium 581mg25%
    Potassium 648mg19%
    Carbohydrates 36g12%
    Fiber 9g38%
    Sugar 4g4%
    Protein 11g22%
    Vitamin A 215IU4%
    Vitamin C 14mg17%
    Calcium 87mg9%
    Iron 3mg17%
    * Percent Daily Values are based on a 2000 calorie diet.

    Here’s one more to pin on your Pinterest boards!Easy Black Bean Stew is a hearty meatless dish, with black beans, pearl couscous, onions, and tomatoes in a savory Southwestern-style broth.

    Turkey Tortilla Soup

    Have leftover roast turkey? Make a pot of yummy Turkey Tortilla Soup, garnished with cheese, tomato, cilantro and baked tortilla strips!
    Have leftover roast turkey? Make a pot of yummy Turkey Tortilla Soup, garnished with cheese, tomato, cilantro and baked tortilla strips!

    If you enjoy the flavor of Southwestern-style soups or chilis, then I believe you will really love this turkey tortilla soup! The soup can be made quite simply, and features cooked turkey, so it’s a perfect soup to use any leftover cooked turkey you might have!

    Typically once Thanksgiving is over, or any time we cook a whole turkey or turkey breast, we have leftover turkey. I usually make turkey noodle soup with leftover turkey, but this tortilla soup is now (also) an option. You only need 2 cups of cooked turkey to make this soup, and it is so yummy!

    Corn tortillas are used  in two ways for this soup. They are used uncooked IN the soup and used (baked ’til crispy) ON TOP of the soup, adding flavor and texture.

    The turkey tortilla soup is garnished with crispy tortilla strips, and then can be topped with cheese, tomatoes, sour cream, avocado and cilantro, if desired! YUM! Turkey tortilla soup not only LOOKS great… it tastes great, too. Here’s how to make it:

    Scroll Down For A Printable Recipe Card At The Bottom Of The Page

    Prep The Corn Tortillas

    Preheat your oven to 450°F. Place the corn tortillas in two piles of 5 each, stacking 5 tortillas on top of each other. Slice the tortillas into ½” wide strips. Reserve and set aside one stack of strips from 5 tortillas until later.

    The reserved stack of tortilla strips will go (uncooked) into the soup, and the remaining strips will be baked until crispy to garnish the finished soup.

    Take the remaining stack of strips (from 5 tortillas) and place them on a large baking sheet, in a single layer. Lightly coat the strips with non-stick cooking spray, then turn them over and spray the other side.

    Bake the tortilla strips at 450°F for 9-10 minutes, turning them over once, halfway through the cooking timeOnce crispy and browned, remove them from the oven, let cool, then place in an airtight container, plastic wrap or bag until you’re ready to serve the soup.

    Corn tortillas are sliced into 1/2" strips for the soup.Half of the tortilla strips are sprayed with oil, then baked until crispy, for garnishing soup.

    Let’s Make Some Turkey Tortilla Soup!

    Now you’re ready to make some delicious turkey tortilla soup! TIP: If you start the soup while the tortilla strips are baking, you will save time! Heat olive oil on MEDIUM in a large soup pot or Dutch oven.

    Once oil is hot, add chopped onion, minced garlic and jalapeño. Cook for 5-6 minutes, stirring often (so garlic doesn’t burn), until onions are softened and slightly browned.

    Pour in the chicken broth, then add the reserved (unbaked) tortilla strips to the soup pot. Stir to combine, and cook on MEDIUM heat for 3-5 minutes. This cooking time will soften the tortilla strips which helps to slightly thicken the broth.

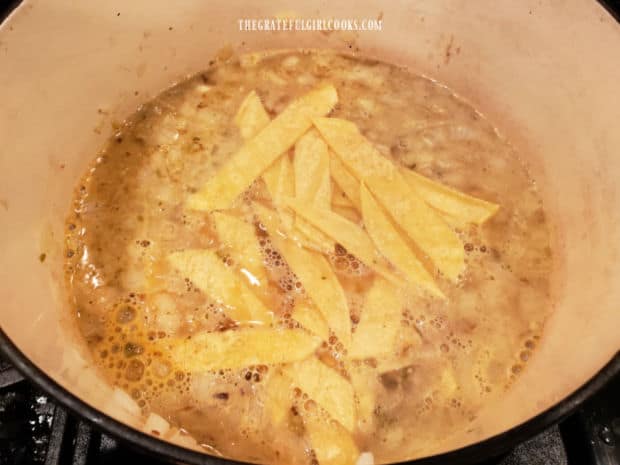
    Chopped onion, jalapeno and minced garlic are lightly browned in olive oil in soup pot.Unbaked corn tortilla strips are added to chicken broth and sauteed onion mixture in soup pan.

    The next step is to add canned (mild-flavored) enchilada sauce, chopped turkey and ground cumin to the soup.

    Stir these ingredients in, then cook the turkey tortilla soup for 7-8 more minutes on Medium heat. Do NOT let the soup boil. The soup is done when the turkey and the soup is fully heated through.

    NOTE: If you feel the soup is too spicy (depending on the brand of enchilada sauce you used), simply add a little more water or chicken broth to even it out a bit.

    Chopped turkey, enchilada sauce and ground cumin are added to the turkey tortilla soup.A ladle full of the turkey tortilla soup, ready to be served.

    Serving Turkey Tortilla Soup

    To serve the turkey tortilla soup, ladle the hot soup into serving bowls. Place several baked tortilla strips on top of each serving of soup. At this point, the soup is ready to serve, unless you want to add optional toppings (which I recommend!).

    OPTIONAL, BUT GOOD: If desired, garnish each serving with shredded cheddar cheese, chopped tomatoes, and cilantro leaves. A dollop of sour cream or avocado chunks can also add to the presentation and taste of this dish, too.

    These extra toppings are completely OPTIONAL, but they really do add additional flavor and color to the soup.  Serve immediately, and enjoy this delicious soup!

    Bowl of turkey tortilla soup is garnished with tomatoes, cheese, baked tortilla strips and cilantro.Shredded cheese, tomatoes, cilantro and baked tortilla strips top the soup.

    I truly hope you enjoy this tasty soup… we LOVE it, and trust you will, too! This soup is such a wonderful way to use up turkey leftovers!

    Thanks for stopping by today, and I hope you will come back again for more delicious recipes. Take care, may God bless you, and have a GREAT day!

    Looking For More SOUP Recipes?

    You can find ALL of my recipes in the Recipe Index, located at the top of the page. I have many delicious soup recipes for you to enjoy, including:

    Want More Recipes? Get My FREE Newsletter!

    I publish a newsletter 2 times per month (1st and 15th) with lots of recipes, tips, etc..
    Would you like to join our growing list of subscribers?

    There is a Newsletter subscription box on the top right (or bottom) of each blog post, depending on the device you use.
    You can submit your e-mail address there, to be added to my mailing list.

    Find Me On Social Media:

    Facebook page: The Grateful Girl Cooks!
    Pinterest:
    The Grateful Girl Cooks!
    Instagram:
    jbatthegratefulgirlcooks

    Author's signature

    Original recipe source: “Southern Living Best-Loved Christmas Classics”, page 242, published 2013 by Time Home Entertainment, Inc./ Oxmoor House

    ↓↓ PRINTABLE RECIPE BELOW ↓↓

    0 from 0 votes
    Turkey Tortilla Soup
    Prep Time
    15 mins
    Cook Time
    20 mins
    Total Time
    35 mins
     

    Have leftover roast turkey? Make a pot of yummy Turkey Tortilla Soup, garnished with cheese, tomato, cilantro and baked tortilla strips!

    Category: Main Course, Soup
    Cuisine: Southwestern
    Keyword: turkey tortilla soup
    Servings: 8 cups
    Calories Per Serving: 105 kcal
    Author: JB @ The Grateful Girl Cooks!
    Ingredients
    • 10 6" corn tortillas cut in ½" strips, divided use
    • vegetable cooking spray as needed
    • 1 Tablespoon olive oil
    • 1 small yellow onion chopped
    • 1 small jalapeño pepper , seeded and minced
    • 2 garlic cloves minced
    • 32 ounces chicken broth
    • 2 cups chopped cooked turkey breast meat used in caloric calculation
    • 10 ounce can MILD enchilada sauce
    • 1 teaspoon ground cumin
    Additional Garnishes (optional): shredded cheddar cheese, cilantro, chopped tomatoes, avocado, sour cream
      Instructions
      1. Preheat oven to 450°F.

      2. Place tortillas in two piles of 5 each, stacking 5 tortillas on top of each other. Slice tortillas into ½" wide strips. Reserve/set aside one stack of strips from 5 tortillas until later. Take remaining strips (from 5 tortillas) and place them on a large baking sheet in a single layer. Spray strips with cooking spray; turn and spray other side. Bake strips at 450°F for 9-10 minutes, turning them over once halfway through cooking timeOnce crispy/browned, remove them from oven, let cool, then place in airtight container, plastic wrap or bag until ready to serve soup. TIP: If you start soup while tortilla strips are baking, you'll save time!

      3. Heat olive oil on MEDIUM heat in large soup pot or Dutch oven. Once oil is hot, add onion, garlic and jalapeño. Cook 5-6 minutes, stirring often (so garlic doesn't burn) until onions are softened/slightly brown.

      4. Add chicken broth and reserved (unbaked) tortilla strips to soup pot. Stir to combine; turn heat down to MEDIUM; cook 3-5 minutes. This will soften the tortilla strips which help to slightly thicken broth.

      5. Add turkey, enchilada sauce, and cumin to soup. Stir well, then cook 7-8 minutes on MEDIUM heat until soup is fully heated through. Do NOT let soup boil.

      6. To serve, ladle soup into serving bowls. Place several baked tortilla strips on top. OPTIONAL: If desired, also garnish with cheese, tomatoes, cilantro, avocado or sour cream. Serve immediately, and enjoy this delicious soup!

      Recipe Notes

      NOTE: Caloric calculation made using a serving size of 1 cup, and using turkey breast meat. It does NOT include optional garnishes of cheese, avocado, cilantro, tomato or sour cream, but DOES include baked tortilla strips.

      Nutrition Facts
      Turkey Tortilla Soup
      Amount Per Serving (1 cup (8 oz.))
      Calories 105 Calories from Fat 27
      % Daily Value*
      Fat 3g5%
      Saturated Fat 1g6%
      Trans Fat 1g
      Polyunsaturated Fat 1g
      Monounsaturated Fat 2g
      Cholesterol 34mg11%
      Sodium 851mg37%
      Potassium 190mg5%
      Carbohydrates 5g2%
      Fiber 1g4%
      Sugar 3g3%
      Protein 14g28%
      Vitamin A 273IU5%
      Vitamin C 4mg5%
      Calcium 20mg2%
      Iron 1mg6%
      * Percent Daily Values are based on a 2000 calorie diet.

      Here’s one more to pin on your Pinterest boards!Have leftover roast turkey? Make a pot of yummy Turkey Tortilla Soup, garnished with cheese, tomato, cilantro and baked tortilla strips!

      Tasty Turkey Chili

      Make a pot of tasty turkey chili with fresh veggies, spices, pinto beans and black beans. Chili is easy to make, filling, and tastes great!
      Make a pot of tasty turkey chili with fresh veggies, spices, pinto beans and black beans. Chili is easy to make, filling, and tastes great!

      I don’t know about where you live, but it has been cold here the past few weeks in Oregon. It’s been so cold each morning while walking our dog that I leave our house bundled up, from head to toe. My husband and I have been craving hot, comfort food meals lately due to the cold of Winter. We’ve enjoyed eating LOTS of tasty turkey chili in the past month or two!

      This is a simple soup to make, and the end result is a delicious, wonderfully spiced turkey chili I think you will enjoy. Ground turkey and black and pinto beans provide protein and fiber, so it is a filling soup. Lots of fresh veggies such as tomatoes, celery, onions, and bell peppers contribute to the texture and taste of this chili, as well.

      I came up with this this soup recipe after looking at lots of different recipes (including my Mom’s- a family favorite), added some new ingredients or spices here and there, and ended up with this tasty turkey chili! It’s delicious! Here’s how to make it:

      Scroll Down For A Printable Recipe Card At The Bottom Of The Page

      Prepare The Spice Mix

      Place the chili powder, cumin, paprika, oregano, and cayenne pepper in a small bowl. Stir to fully combine these spices, then set aside. This will be the spice mix you will use to season the chili.

      Chili powder, cumin, paprika, cayenne pepper and oregano are used to make spice mix for chili.

      Cook The Turkey

      Spray a large saucepan generously with non-stick spray.  Add one pound of ground turkey. Stir and cook on high heat until the meat has turned light brown in color and is cooked through. This usually takes about 5 minutes. Drain and discard any grease, then transfer the turkey to a bowl or plate, and cover.

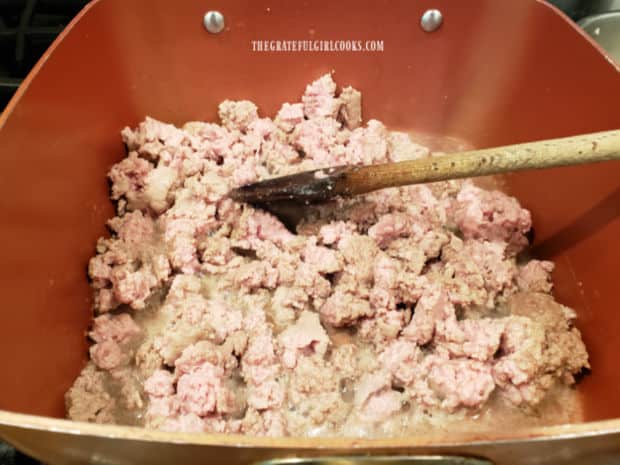
      Ground turkey is cooked until lightly browned and cooked through, in large saucepan.

      Okay- Let’s Make Some Tasty Turkey Chili

      Add a teaspoon of butter to the saucepan, and allow to melt over low heat. Stir in chopped onion, celery and red bell pepper. Cook  on LOW heat for 4 -5 minutes, stirring the veggies often until the onions are translucent. Add minced garlic to the pan and cook for an additional 30 seconds, stirring so the garlic doesn’t burn. Note: You can substitute green bell peppers for the red OR use a combination of red and green.

      Chopped onion, red bell peppers and celery are cooked until softened in saucepan.Minced garlic is added to the cooked vegetables during the last minute of cooking.

      Pour the spice mixture into the pan of cooked veggies. Stir to cover the veggies with the spices. Add fresh chopped tomatoes (or canned, if using), chicken broth, and 3 cups of water to the pan. Stir well, to combine ingredients. Bring this mixture to a boil, then let it simmer (uncovered) for about 20 minutes.

      NOTE: If you don’t have access to enough fresh tomatoes (2½ cups chopped), you can substitute a 28 oz. can of diced tomatoes (+ juice), and it will taste great in this chili, too! I do this often, as well.

      Homemade seasoning mix is added to the sautéed veggies in the saucepan.Chopped fresh tomatoes are added to the saucepan with cooked veggies and spices.

      Final Steps Before Serving

      Now it’s time to finish cooking this tasty turkey chili! Add the cooked turkey back into the pan, followed by the drained black beans and pinto beans. Stir well, to combine all ingredients. Take a taste, and add additional salt at this point, if desired.

      Cook the tasty turkey chili for about 10 more minutes on MEDIUM heat to ensure it is fully heated through.

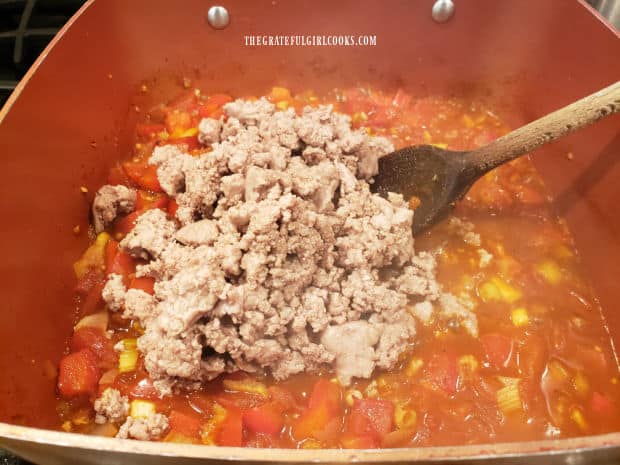
      Cooked ground turkey is added to the chili.

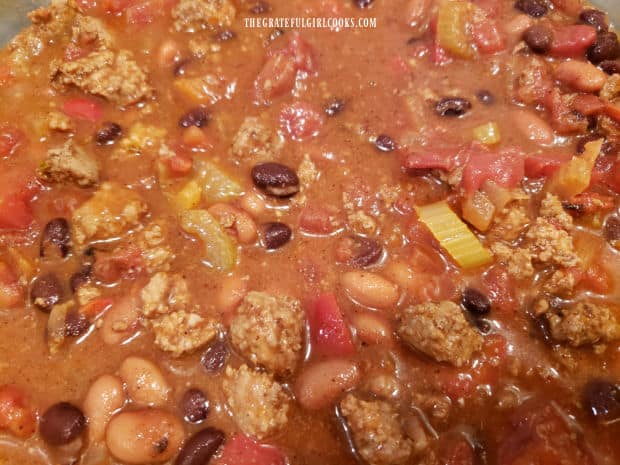
      Pinto and black beans are added, to finish the tasty turkey chili.

      Time For A Bowl Of Tasty Turkey Chili!

      Once the tasty turkey chili is hot, it’s time to serve it up and ENJOY! It tastes delicious as is, but feel free to top it with grated cheese or a dollop of sour cream if you want! Yum!

      A soup mug holds a serving of the hot and tasty turkey chili, ready to eat.

      I really hope you enjoy this tasty turkey chili. We love the leftovers for quick lunches, too! For us, it is a nice change from beef chili, and is a bit more healthy, thanks to the use of turkey. Thanks for stopping by, and I hope you’ll come back again soon for more delicious, family-friendly recipes. Have a GREAT day!

      Looking For More SOUP Recipes?

      You can find ALL of my recipes in the Recipe Index, located at the top of the page. I have a broad variety of soup recipes for you to enjoy, including:

      Interested In More Recipes?

      Thank you for visiting this website. I appreciate you using some of your valuable time to do soIf you’re interested, I publish a newsletter 2 times per month (1st and 15th) with all the latest recipes, and other fun info. I would be honored to have you join our growing list of subscribers, so you never miss a great recipe!
      There is a Newsletter subscription box on the top right side (or bottom) of each blog post, depending on the device you use, where you can easily submit your e-mail address (only) to be included in my mailing list.

      You Can Also Find Me On Social Media:

      Facebook page: The Grateful Girl Cooks!
      Pinterest:
      The Grateful Girl Cooks!
      Instagram:
      jbatthegratefulgirlcooks

      Author's signature

      ↓↓ PRINTABLE RECIPE BELOW ↓↓

      0 from 0 votes
      Tasty Turkey Chili
      Prep Time
      10 mins
      Cook Time
      35 mins
      Total Time
      45 mins
       

      Make a pot of tasty turkey chili with fresh veggies, spices, pinto beans and black beans. Chili is easy to make, filling, and tastes great!

      Category: Main Dish, Soup
      Cuisine: Mexican
      Keyword: tasty turkey chili
      Servings: 6
      Calories Per Serving: 264 kcal
      Author: JB @ The Grateful Girl Cooks!
      Ingredients
      For Spice Mix:
      • 2 teaspoons chili powder
      • teaspoons ground cumin
      • 1 teaspoon paprika
      • ½ teaspoon dried oregano
      • teaspoon cayenne pepper
      For Rest Of Chili:
      • 1 pound ground turkey
      • salt/pepper for seasoning turkey, to taste
      • 1 teaspoon butter
      • 1 cup chopped yellow onion
      • 1 cup chopped red bell pepper or combo of red/green
      • ½ cup chopped celery
      • 1 Tablespoon minced garlic
      • cups fresh chopped tomatoes or 28 oz. can diced +juice
      • ½ cup low sodium chicken broth
      • 3 cups water
      • 15..25 ounce can black beans , rinsed/drained
      • 15.5 ounce can pinto beans rinsed/drained
      • additional salt if needed, to taste
      Instructions
      1. Place chili powder, cumin, paprika, oregano, and cayenne pepper in a small bowl. Stir to combine, then set aside.

      2. Spray large saucepan with non-stick spray.  Add ground turkey; stir/cook on high heat until it turns light brown in color and is cooked through (about 5 min.). Drain and discard any grease, then transfer turkey to a bowl or plate, and cover.

      3. Add butter to saucepan; melt over low heat. Stir in chopped onion, celery and red pepper. Cook  on LOW heat 4 -5 minutes, stirring often until onions are translucent. Add garlic; cook for 30 seconds, stirring so garlic doesn't burn.

      4. Add spices; stir to combine. Now add fresh tomatoes (or canned, if using), chicken broth, and 3 cups of water to pan. Stir well, to combine ingredients. Bring to a boil, then let simmer (uncovered) for about 20 minutes.

      5. Add cooked turkey back into pan, followed by black beans and pinto beans. Stir well, to combine. Taste; add additional salt, if desired. Cook chili about 10 more minutes on MEDIUM heat to ensure it's fully heated through. Serve, and enjoy!

      Recipe Notes

      NOTE: Approximately 1½ cups per serving. Salt was not calculated in the sodium percentage as amounts people use may vary greatly.

      Nutrition Facts
      Tasty Turkey Chili
      Amount Per Serving (1 (1/6 of total))
      Calories 264 Calories from Fat 27
      % Daily Value*
      Fat 3g5%
      Saturated Fat 1g6%
      Trans Fat 1g
      Polyunsaturated Fat 1g
      Monounsaturated Fat 1g
      Cholesterol 43mg14%
      Sodium 551mg24%
      Potassium 1048mg30%
      Carbohydrates 33g11%
      Fiber 11g46%
      Sugar 6g7%
      Protein 28g56%
      Vitamin A 2067IU41%
      Vitamin C 51mg62%
      Calcium 101mg10%
      Iron 4mg22%
      * Percent Daily Values are based on a 2000 calorie diet.

      Here’s one more to pin on your Pinterest boards!Make a pot of tasty turkey chili with fresh veggies, spices, pinto beans and black beans. Chili is easy to make, filling, and tastes great!

      Cream Of Asparagus Soup

      Make four servings of delicious Cream of Asparagus Soup in under 30 minutes! It’s so easy to make – serve as a main dish OR as a side dish.
      Make four servings of delicious Cream of Asparagus Soup in under 30 minutes! It's so easy to make - serve as a main dish OR as a side dish.

      We love asparagus, especially in the Spring when it is readily available at much lower than normal prices! Recently my husband picked up a couple large bunches of asparagus at the grocery store, so we enjoyed some of them pan-steamed until crisp-tender and served with chicken.

      The rest of the fresh asparagus was used for this wonderful tasting cream of asparagus soup! YUYM! The original recipe came from one of my OLD “Taste of Home” magazines (from 21 years ago!), but it is a timeless, fantastic recipe you’re gonna love! One of the reasons I love this soup is because not all of the asparagus is pureed until creamy. Half of the soup is pureed in a blender or food processor to make it creamy; but some of the tender small pieces of asparagus are left intact in the soup. I like that!

      This cream of asparagus soup is incredibly EASY to make, as well. If you enjoy fresh asparagus, I’m confident you’ll enjoy a bowl of this delicious soup. Here is how to make four servings of cream of asparagus soup:

      Scroll Down For A Printable Recipe Card At The Bottom Of The Page

      Prepare The Vegetables For The Soup

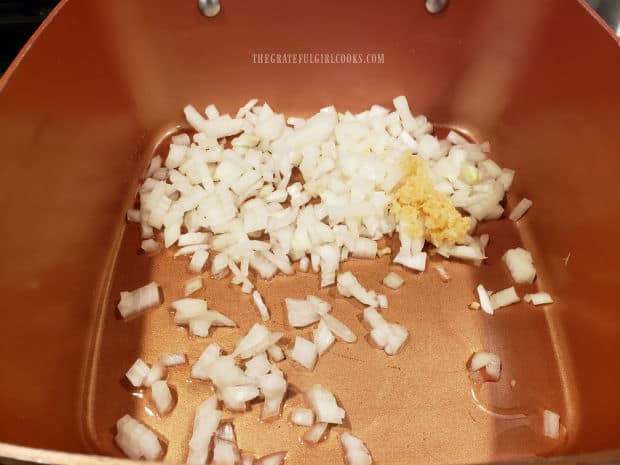
      The first thing you will do is sauté chopped onion and minced garlic in a large saucepan. Heat oil on medium-low heat until hot, but not smoking. Add the veggies, then cook for 3-4 minutes (until tender). Stir often, to ensure the garlic does not burn and become bitter. 

      Chopped onion and minced garlic are cooked in oil in a large saucepan.

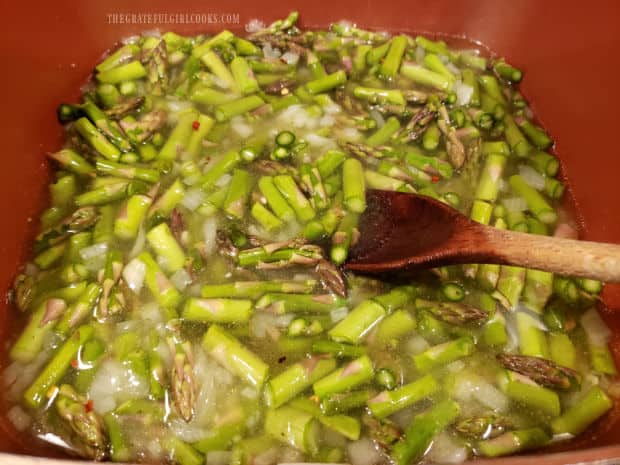
      Add the fresh asparagus pieces, low-sodium chicken broth, and red pepper flakes to the saucepan. Bring the broth to a boil, then reduce the heat to Low, and cover the saucepan. Let this mixture simmer (covered) on low for 13-15 minutes, or until the asparagus is tender. Once done, remove the pan from the heat.

      Asparagus, chicken broth, and red pepper flakes are added to the cream of asparagus soup in pan.

      Make The Cream Base For The Soup

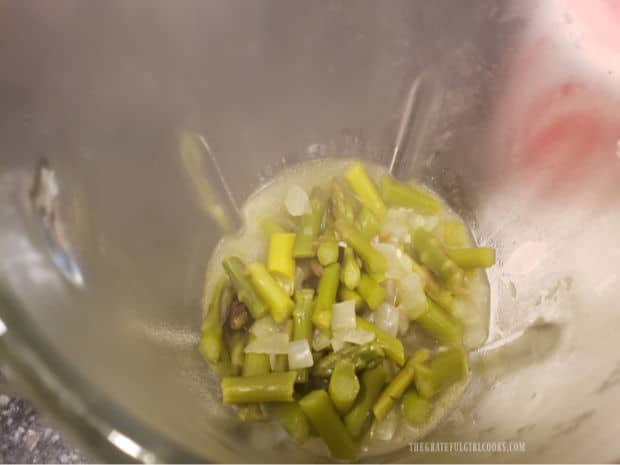
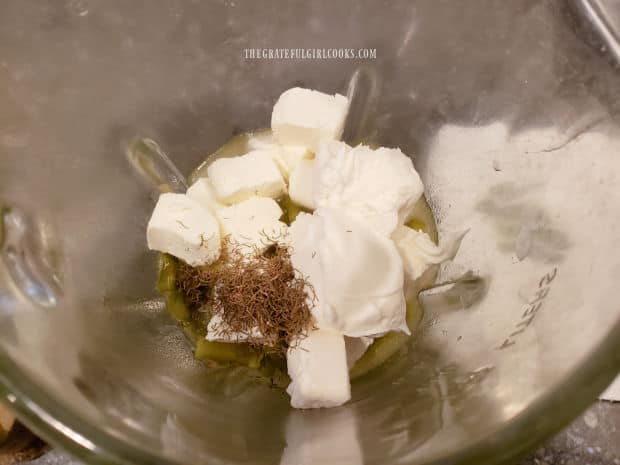
      Remove about HALF of the asparagus mixture (including broth), and place it in a blender (or food processor). Add cream cheese, sour cream and dried dill weed or fresh chopped dill. Process these ingredients in the blender or food processor until smooth and creamy. 

      Half the soup mixture is transferred out of the saucepan into a blender for processing.Cream cheese, sour cream and dried dill are added to asparagus in blender and processed until creamy.

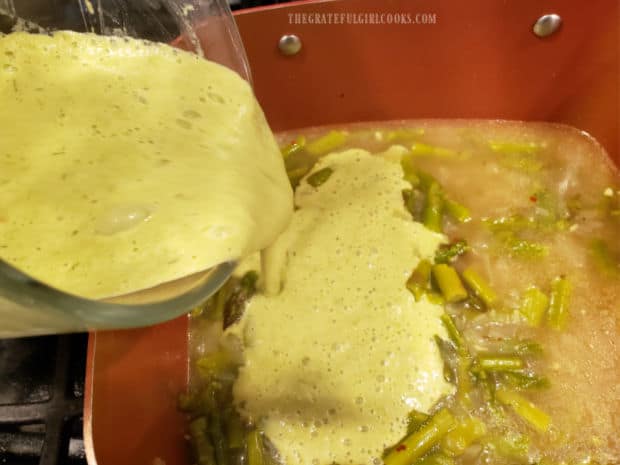
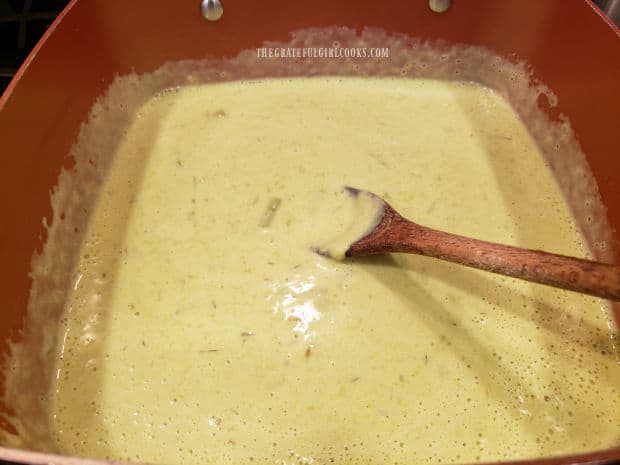
      Pour the creamed mixture back into the saucepan with the remaining ingredients, and stir to fully combine the cream of asparagus soup. Turn the heat to Medium, and cook, just until the soup is heated through. The cream of asparagus soup will be thick, creamy, and have small pieces of tender asparagus in there, as well.

      Pureed cream of asparagus soup is added back into remaining ingredients in saucepan.After stirring, the cream of asparagus soup is thick and creamy.

      Serve The Cream Of Asparagus Soup

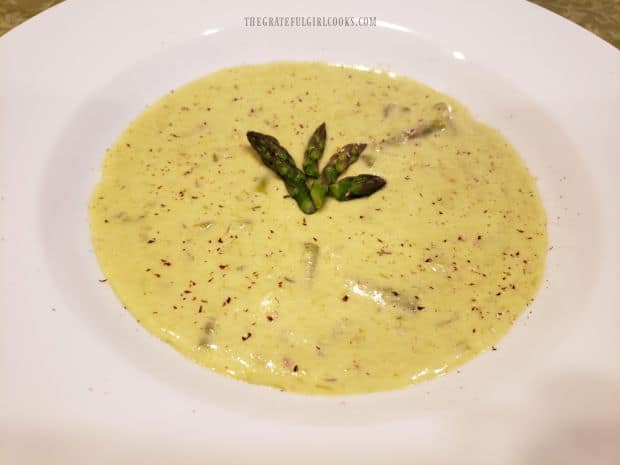
      Once the cream of asparagus soup is fully heated through, it is time to serve! See how easy that was? Ladle the hot soup into four bowls, and lightly sprinkle each portion with ground nutmeg on top. That’s it! Grab a spoon, and enjoy this delicious, thick, creamy, soup! Store any leftover soup in an airtight container in the refrigerator for up to 3-4 days. Reheat in a saucepan or in the microwave.

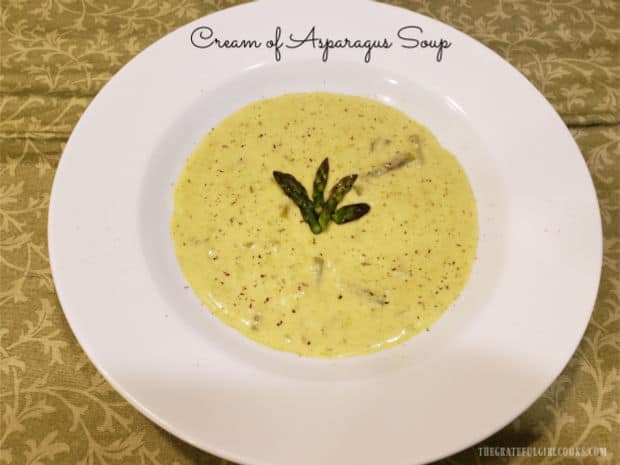
      The cream of asparagus soup is sprinkled with ground nutmeg and served hot, in a white bowl.

      I truly hope you try this delicious cream of asparagus soup. We LOVE it, and trust you will, too. Thank you for taking time out of your busy day to visit my blog. Have a great day, and come back for another visit real soon.

      Looking For More SOUP Recipes?

      You can find all of my soup recipes in the Recipe Index, which is located at the top of the page. I have lots of them you’ll enjoy, including:

      Interested In More Recipes?

      Thank you for visiting this website. I appreciate you using some of your valuable time to do soIf you’re interested, I publish a newsletter 2 times per month (1st and 15th) with all the latest recipes, and other fun info. I would be honored to have you join our growing list of subscribers, so you never miss a great recipe!
      There is a Newsletter subscription box on the top right side (or bottom) of each blog post, depending on the device you use, where you can easily submit your e-mail address (only) to be included in my mailing list.

      You Can Also Find Me On Social Media:

      Facebook page: The Grateful Girl Cooks!
      Pinterest:
      The Grateful Girl Cooks!
      Instagram:
      jbatthegratefulgirlcooks

      Author's signature

      Original recipe source: “Taste of Home” magazine, April/May 2000 edition, page 17, published by Reiman Publications, Inc.

      0 from 0 votes
      Cream of Asparagus Soup
      Prep Time
      10 mins
      Cook Time
      15 mins
      Total Time
      25 mins
       

      Make four servings of delicious Cream of Asparagus Soup in under 30 minutes! It's so easy to make - serve as a main dish OR as a side dish.

      Category: Main Course, Side Dish, Soup
      Cuisine: American
      Keyword: cream of asparagus soup
      Servings: 4
      Calories Per Serving: 119 kcal
      Author: JB @ The Grateful Girl Cooks!
      Ingredients
      • 1 teaspoon vegetable oil
      • 1 medium yellow onion , finely chopped
      • 2 medium garlic cloves , minced
      • 3 cups fresh cut asparagus (1" slices) woody bottom part of stem removed/discarded
      • cups low-sodium chicken broth (or regular)
      • teaspoon crushed red pepper flakes
      • 3 ounces light cream cheese , OR regular, cut in small cubes
      • 2 Tablespoons light sour cream (or regular)
      • 1 teaspoon dried dill weed , OR 1 Tablespoon chopped fresh dill
      • ½ teaspoon ground nutmeg , for garnish
      Instructions
      1. Heat oil on medium-low heat until hot, but not smoking. Add onion and garlic; cook 3-4 minutes (until tender). Stir often, to ensure garlic doesn't burn and become bitter. 

      2. Add asparagus pieces, chicken broth, and red pepper flakes to saucepan. Bring broth to a boil, then reduce heat to Low. Cover the saucepan. Let simmer (covered) on low 13-15 minutes, or until asparagus is tender. Once done, remove pan from the heat.

      3. Remove HALF the asparagus mixture (including broth); place in blender or food processor. Add the cream cheese, sour cream and dill. Process until smooth and creamy. Pour creamed mixture back into saucepan (with remaining ingredients), and stir to fully combine soup. Cook on Medium heat only until soup is heated through.

      4. Ladle hot soup into four bowls; lightly sprinkle each portion with ground nutmeg. Grab a spoon, and enjoy this delicious, thick, creamy, soup! Store any leftover soup in an airtight container in refrigerator for up to 3-4 days. Reheat in a saucepan or in a microwave.

      Nutrition Facts
      Cream of Asparagus Soup
      Amount Per Serving (1 (1/4 of total))
      Calories 119 Calories from Fat 54
      % Daily Value*
      Fat 6g9%
      Saturated Fat 4g25%
      Cholesterol 14mg5%
      Sodium 153mg7%
      Potassium 452mg13%
      Carbohydrates 11g4%
      Fiber 3g13%
      Sugar 5g6%
      Protein 8g16%
      Vitamin A 931IU19%
      Vitamin C 8mg10%
      Calcium 84mg8%
      Iron 3mg17%
      * Percent Daily Values are based on a 2000 calorie diet.

      Here’s one more to pin on your Pinterest boards!Make four servings of delicious Cream of Asparagus Soup in under 30 minutes! It's so easy to make - serve as a main dish OR as a side dish.

      Navy Bean Soup

      Navy Bean Soup is delicious and filling! Slowly cooked dried navy beans, carrots, garlic, celery, onion, broth & spices create a robust soup.
      Navy Bean Soup is delicious and filling! Slowly cooked dried navy beans, carrots, garlic, celery, onion, broth & spices create a robust soup.

      Do you enjoy soup? We really do, especially in the cold of winter when a big bowl of piping hot soup takes the chill off the day! Today I want to share with you a recipe that I originally found in an old Italian cookbook of mine (from Williams-Sonoma). It is really tasty, warming, and filling.

      The recipe uses dried navy beans, so the only “downside” (if there is one), is that it will take some time to soak and cook the beans until they have slightly softened. Typically I soak the beans early in the day, then add them to the soup later and then let the soup cook low and slow to infuse the beans with flavor, and to soften them perfectly! It’s inactive prep time, so you do other things while they soak!

      So… as long as you plan ahead a little bit, you will have no problems making this absolutely DELICIOUS navy bean soup. Yes… it will take a bit of your time on your part, but it is worth it! Don’t forget, a lot of the time involved is inactive time (soaking, cooking, etc.) Let me show you how to make navy bean soup:

      Scroll Down For A Printable Recipe Card At The Bottom Of The Page

      Prepare The Navy Beans

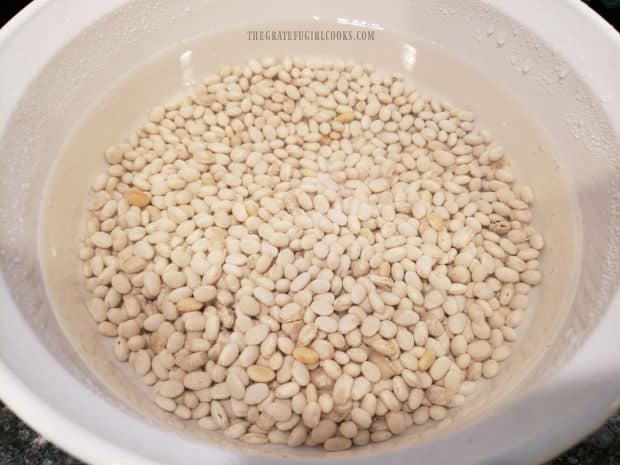
      Bags of navy beans can be found in most grocery stores, and are a very economical main ingredient for the soup. Because this recipe calls for dried navy beans, that means you’ll need to plan ahead to soak them (which helps soften them).  I usually do this step early in the day, so the beans have several hours to soak.

      To do this, first rinse the navy beans in a strainer. Once rinsed, place the beans in a large bowl and completely cover with water. Let them soak for at least 3 hours, and then drain.

      Dried navy beans are soaked in water for hours to soften them.

      Ready To Cook the Navy Bean Soup

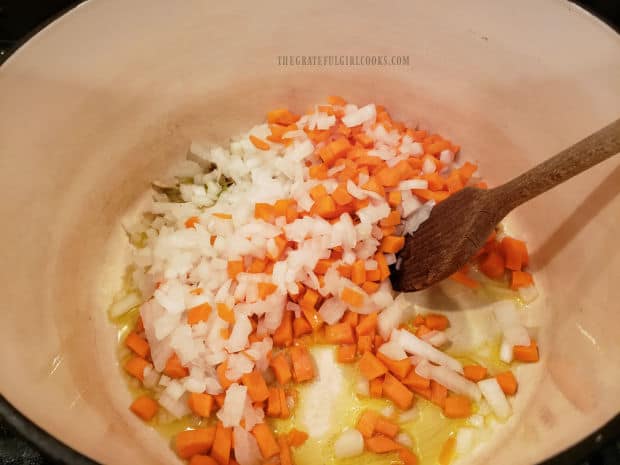
      Okay… the beans have soaked. Now it’s time to start making the soup. Place olive oil into a large soup pot, and let it get warm (on medium heat). Add chopped celery, carrots and onion to the pot, and cook for about 8-10 minutes (stirring occasionally) until the veggies have softened.

      Once the veggie have softened, add minced garlic and minced fresh rosemary to the pot, and stir  to combine. Cook this mixture for a couple minutes, stirring often so the garlic doesn’t burn.

      Carrots, celery and onion are cooked in olive oil in a large soup pot.

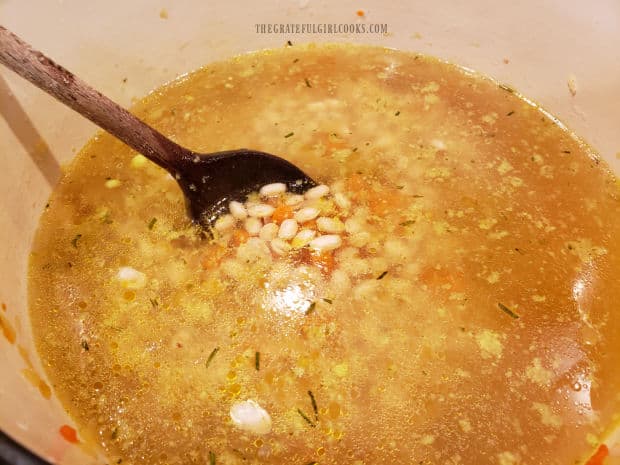
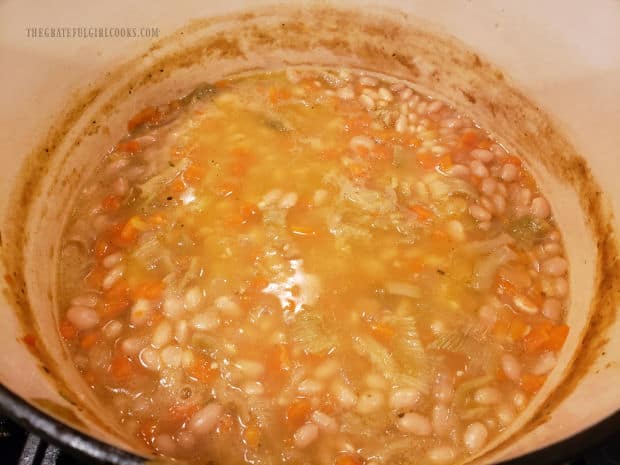
      Add the chicken stock (or vegetable stock) and the drained, softened navy beans to the pot. Stir to combine, and then bring it to a boil on MEDIUM heat. Once boiling, reduce the heat to LOW, and let the navy bean soup simmer for about 1½ hours, uncovered. You will know it is done when the beans are soft to the bite, and the liquid has reduced in quantity. Let the soup cool for 5 minutes.

      Chicken stock, navy beans and seasonings are cooked in soup pot.Beans have softened and liquid has reduced in the navy bean soup.

      Thickening The Navy Bean Soup

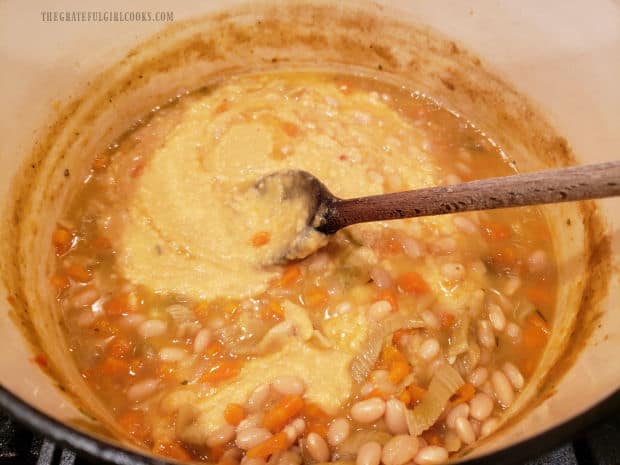
      Now you’re ready for the last step… thickening the navy bean soup for eating! It’s EASY. Remove about 1/3 of the bean mixture and place it in a blender (or food processor). Process the bean/soup mixture until it becomes a puree, smooth in texture.

      Return the pureed bean mix to the soup pot, and stir well, to fully incorporate the puree into the soup. This will really help thicken the soup! Gently reheat the soup until it’s hot enough to serve. Season the navy bean soup with salt and black pepper, to suit your personal taste.

      Some beans are pureed, then added back into the navy bean soup.Pureed navy beans will help thicken the soup.

      Garnish, Serve, and Enjoy!

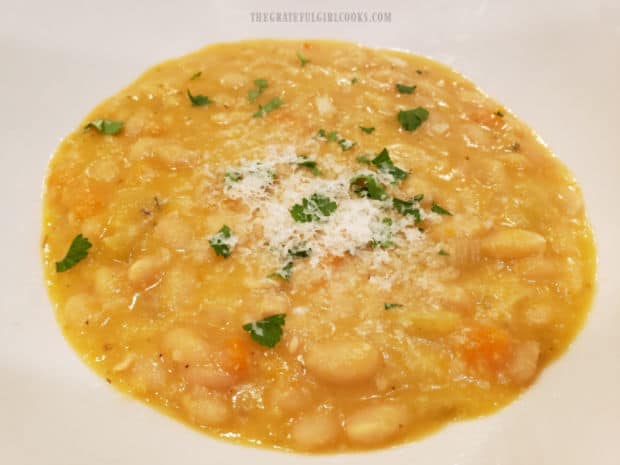
      Once you have the soup seasoned to your liking, it is time to serve/ Ladle the navy bean soup into individual serving bowls. Garnish each portion with chopped parsley and grated Parmesan cheese. Serve piping hot, and enjoy this thick, creamy and delicious soup!

      Bowl of navy bean soup, garnished with Parmesan cheese and parsley.Taking a spoonful of thick navy bean soup from a white bowl.

      I really hope you have a chance to make and enjoy eating this soup. We sure enjoy it, and trust you will, too! Thank you for stopping by, and sincerely hope you will come back soon. Have a GREAT day!

      Looking For More SOUP Recipes?

      You can find all of my soup recipes in the Recipe Index, located at the top of the page. I have lots of delicious soup recipes, including:

      Interested In More Recipes?

      Thank you for visiting this website. I appreciate you using some of your valuable time to do soIf you’re interested, I publish a newsletter 2 times per month (1st and 15th) with all the latest recipes, and other fun info. I would be honored to have you join our growing list of subscribers, so you never miss a great recipe!
      There is a Newsletter subscription box on the top right side (or bottom) of each blog post, depending on the device you use, where you can easily submit your e-mail address (only) to be included in my mailing list.

      You Can Also Find Me On Social Media:

      Facebook page: The Grateful Girl Cooks!
      Pinterest:
      The Grateful Girl Cooks!
      Instagram:
      jbatthegratefulgirlcooks

      Author's signature

      Original recipe source: The cookbook “Williams-Sonoma Italian Favorites”, page 22, published in 2004 by Oxmoor House and Williams-Sonoma, Inc.

      0 from 0 votes
      Navy Bean Soup
      Prep Time
      10 mins
      Cook Time
      1 hr 30 mins
      Inactive (Bean Soaking Time)
      3 hrs
      Total Time
      4 hrs 40 mins
       

      Navy Bean Soup is delicious and filling! Slowly cooked dried navy beans, carrots, garlic, celery, onion, broth & spices create a robust soup.

      Category: Main Course, Soup
      Cuisine: American
      Keyword: navy bean soup
      Servings: 6
      Calories Per Serving: 332 kcal
      Author: JB @ The Grateful Girl Cooks!
      Ingredients
      • cups small navy beans (dried)
      • 3 Tablespoons olive oil
      • 1 medium yellow onion , finely chopped
      • 1 large carrot , peeled/finely chopped
      • 1 stalk celery , finely chopped
      • 2 cloves garlic , minced
      • 1 teaspoon fresh rosemary , minced
      • 7 cups low-sodium chicken broth , or vegetable broth
      • salt & pepper, to taste
      To Garnish:
      • ½ cup grated Parmesan cheese
      • 1 Tablespoon Italian flat leaf parsley , chopped
      Instructions
      1. Rinse beans in a strainer. Once rinsed, place beans in large bowl; cover completely with water. Let beans soak at least 3 hours; drain.

      2. Once beans have soaked at least 3 hours: Place olive oil into a large soup pot; heat oil until warm on medium heat. Add celery, carrots and onion; cook 8-10 minutes (stirring occasionally) until veggies have softened. Add garlic and rosemary; stir  to combine. Cook 2 minutes, stirring often, so garlic doesn't burn.

      3. Add chicken stock (or vegetable stock or water) and the drained beans. Stir to combine, and bring to a boil on MEDIUM heat. Once boiling, reduce heat to LOW; simmer soup gently for 1½ hours, uncovered. It is done when beans are soft to the bite., and liquid has reduced. Let cool for 5 minutes.

      4. Remove about 1/3 of the bean mixture; place in a blender (or food processor). Process bean/soup mixture until it becomes a smooth puree. Return puree to soup; stir well, to mix puree into soup. Gently reheat soup until hot. Season with salt and pepper, to taste.

      5. Ladle hot soup into serving bowls. Garnish each portion with chopped parsley and grated Parmesan cheese. Serve, and enjoy!

      Recipe Notes

      NOTE: If you do not have access to chicken or vegetable broth, you can substitute 7 cups water. However... the flavor will be much better using the broth.

      Nutrition Facts
      Navy Bean Soup
      Amount Per Serving (1 (1/6 of total))
      Calories 332 Calories from Fat 108
      % Daily Value*
      Fat 12g18%
      Saturated Fat 3g19%
      Cholesterol 7mg2%
      Sodium 227mg10%
      Potassium 950mg27%
      Carbohydrates 39g13%
      Fiber 13g54%
      Sugar 4g4%
      Protein 21g42%
      Vitamin A 2108IU42%
      Vitamin C 3mg4%
      Calcium 193mg19%
      Iron 4mg22%
      * Percent Daily Values are based on a 2000 calorie diet.

      Here’s one more to pin on your Pinterest boards!Navy Bean Soup is delicious and filling! Slowly cooked dried navy beans, carrots, garlic, celery, onion, broth & spices create a robust soup.

      Creamy Avgolemono Soup

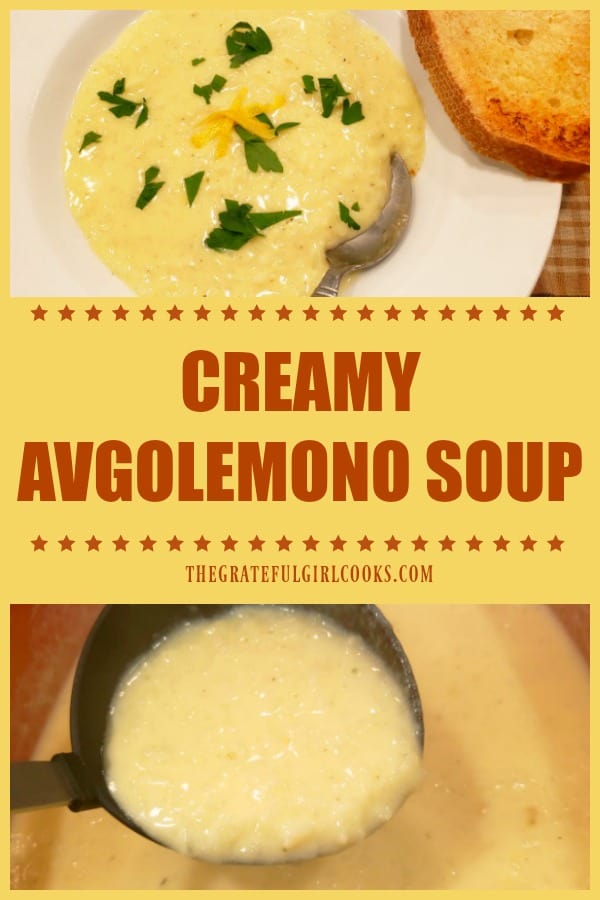
      Creamy Avgolemono Soup is a classic Greek dish (with rice) that is delicious, rich and lemony, and very easy to make in under 30 minutes.Creamy Avgolemono Soup is a classic Greek dish (with rice) that is delicious, rich and lemony, and very easy to make in under 30 minutes.

      For many years I have read about, looked at recipes, and wondered about Avgolemono soup. It sounded quite unusual. I was tempted many times to give it a try, but never did, until last month. Whoa! I LOVED this soup! Who knew that a lemon-flavored creamy rice soup could taste so incredibly GOOD?

      Creamy avgolemono soup is a classic Greek beloved soup, one of their signature dishes, to be sure. Avgolemono” comes from the Greek language. “AVGO” means egg, and “LEMONO” means lemon. This light and creamy simple soup only uses a few ingredients, is EASY to make, and tastes wonderfully bright and fresh! I hope you will give it a try… it will surprise you, most likely. Here’s how to make it:

      Scroll Down For A Printable Recipe Card At The Bottom Of The Page

      How To Make Creamy Avgolemono Soup

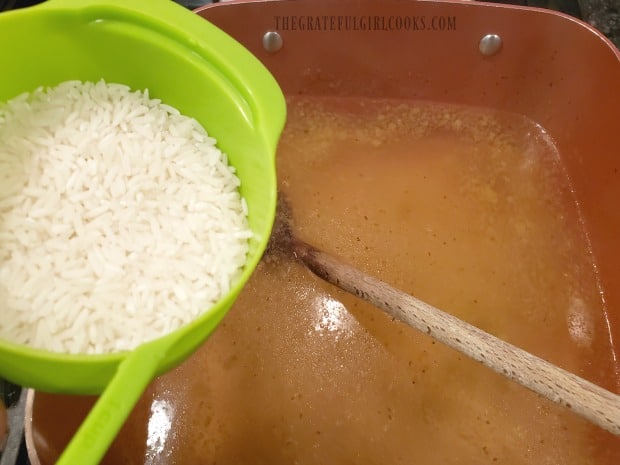
      Heat six cups of chicken broth in a large saucepan over medium-high heat. Bring it to a boil, and then pour in a half cup of uncooked long grain rice. Stir well, to combine.

      Cook the broth and rice, uncovered, for 15-20 minutes on medium-high heat, until the rice becomes tender. Stir the rice occasionally while it is cooking, to prevent it from sticking to the bottom of the pan.

      Uncooked rice is added to boiling chicken broth to cook.

      Temper The Egg Mixture Before Adding To Hot Soup

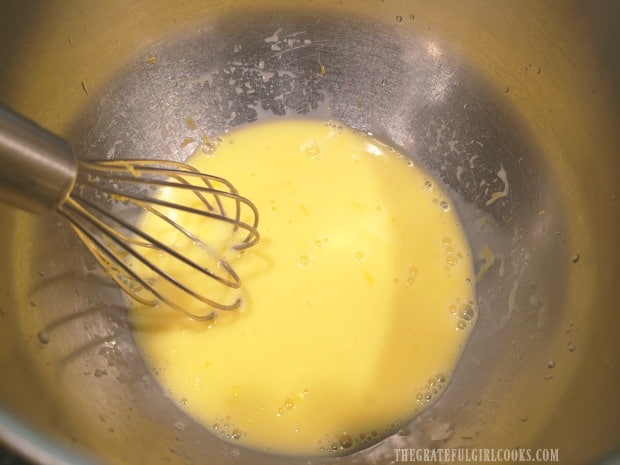
      In a medium-sized bowl, whisk four egg yolks lightly, and then add fresh lemon juice and finely grated lemon zest, whisking to combine. Now it’s time to “temper” the egg mixture. This is a VERY important step!

      *Tempering the eggs means slowly adding in hot broth VERY SLOWLY. This raises the temperature of the eggs, so that when they’re added to very hot soup, they won’t become “scrambled eggs”. Here’s how to temper the egg mixture:

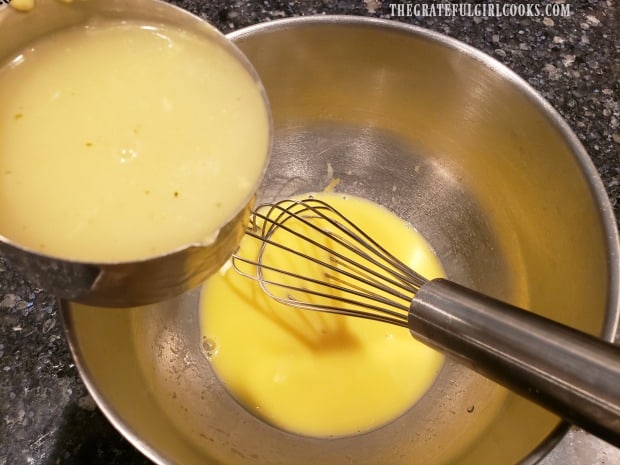
      Slowly drizzle 1 cup of the hot broth into the egg mixture, whisking constantly as you add it. Continue whisking until all the cup of broth has been added. Turn the heat down to medium-low under the broth in the pan , and then slowly add the warmed egg mixture back into the hot broth in the pot, whisking as you add it. 

      Egg yolks, lemon juice and zest are whisked together until combined.Hot broth is slowly drizzled/whisked into egg mixture to temper the eggs.

      Finish Cooking The Soup

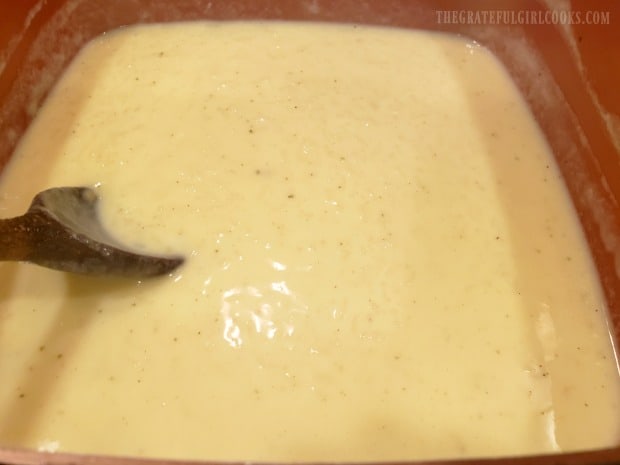
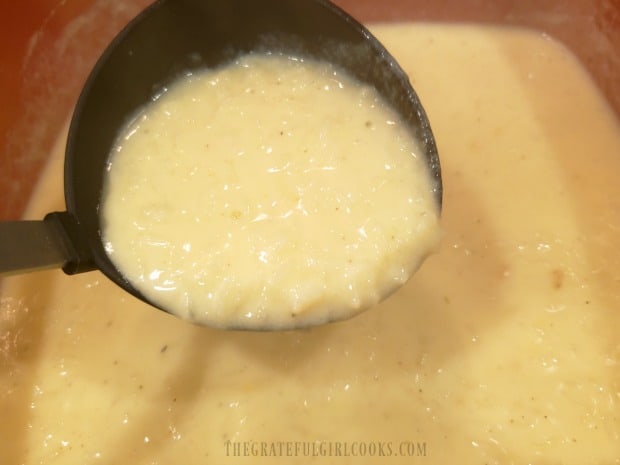
      Let the soup continue to cook on medium-low heat for 3-4 minutes, stirring often. DO NOT LET THE SOUP COME TO A BOIL!  The creamy avgolemono soup will thicken up a little bit as it continues to cook. Once it has fully heated through (about 3-4 minutes), remove the pan from the heat. Season lightly (to suit your taste) with salt and pepper.

      Avgolemono soup is cooked 3-4 minutes after adding tempered egg mixture.The soup is lemony, rich, thick and creamy after heating through.

      Ready For A Bowl Of Creamy Avgolemono Soup!

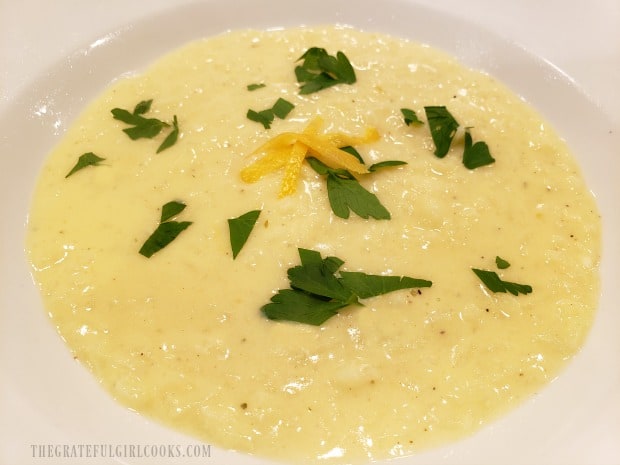
      Once heated through, the creamy avgolemono soup is ready to eat! Ladle the hot soup into serving bowls, and garnish each serving with chopped fresh flat-leaf parsley (and strips of lemon peel, if desired).

      The parsley and lemon peel add a “pop” of color, and another layer of flavor, but are not absolutely essential if you don’t have them handy! The soup is thick and creamy, bursting with lemon flavor, and the rice is very tender (and filling). We enjoy this soup with crusty slices of garlic bread on the side. YUM!

      A bowl of Creamy Avgolemono Soup, garnished with chopped parsley and lemon peel.Garlic bread served on the rim of a bowl of creamy avgolemono soup.

      I truly hope you will give this creamy avgolemono soup a try- it’s quite delicious! The leftovers were microwaved for lunch the next day, and were wonderful, as well! Thank you for stopping by, and I hope you will come back soon. Take care.

      Looking For More SOUP Recipes?

      You can find all of my recipes in the Recipe Index, which is located at the top of the page. I have lots of soup recipes you’ll enjoy, including:

      Interested In More Recipes?

      Thank you for visiting this website. I appreciate you using some of your valuable time to do soIf you’re interested, I publish a newsletter 2 times per month (1st and 15th) with all the latest recipes, and other fun info. I would be honored to have you join our growing list of subscribers, so you never miss a great recipe!
      There is a Newsletter subscription box on the top right side (or bottom) of each blog post, depending on the device you use, where you can easily submit your e-mail address (only) to be included in my mailing list.

      You Can Also Find Me On Social Media:

      Facebook page: The Grateful Girl Cooks!
      Pinterest:
      The Grateful Girl Cooks!
      Instagram:
      jbatthegratefulgirlcooks

      Author's signature

      Original recipe source: The cookbook: “Williams-Sonoma Soup Of The Day”, by Kate McMillan, published by Weldon Owen, Inc. 2011, page 15

      5 from 3 votes
      Creamy Avgolemono Soup
      Prep Time
      5 mins
      Cook Time
      20 mins
      Total Time
      25 mins
       

      Creamy Avgolemono Soup is a classic Greek dish (with rice) that is delicious, rich and lemony, and very easy to make in under 30 minutes.

      Category: Dinner, Soup
      Cuisine: Greek
      Keyword: creamy avgolemono soup
      Servings: 4
      Calories Per Serving: 200 kcal
      Author: JB @ The Grateful Girl Cooks!
      Ingredients
      • 6 cups low-sodium chicken broth
      • ½ cup long grain white rice , uncooked
      • 4 large egg yolks , slightly beaten
      • ¼ cup fresh lemon juice
      • 1 teaspoon lemon zest (finely grated lemon peel)
      • salt/pepper, to taste
      • 2 Tablespoons fresh parsley (flat leaf) , chopped for garnish
      Instructions
      1. Heat broth in large saucepan on medium-high heat. Bring to a boil; add uncooked rice. Cook uncovered, 15-20 minutes on medium-high heat, until rice is tender. .Stir occasionally while it cooks, to prevent rice from sticking to bottom of pan.

      2. In a medium bowl, whisk egg yolks lightly. Add lemon juice and zest, whisking to combine. "Temper" the egg mixture. *Tempering eggs means slowly adding in hot broth VERY SLOWLY. This raises the temperature of the eggs, so that when added to hot soup, they won't scramble. Here's how: Measure out, then slowly drizzle 1 cup of the hot broth into the egg mixture, whisking constantly as you add it. Continue whisking until the entire cup of broth is added.

      3. Turn the heat down to medium-low under the broth in pan; slowly add the warmed egg mixture back into the broth in pan, constantly whisking as you add it back in. Let the soup continue cooking on medium-low heat for 3-4 minutes, stirring often. DO NOT LET THE SOUP COME TO A BOIL! Soup will thicken up a bit as it cooks. Once hot (3-4 minutes), remove pan from the heat.

      4. Season lightly (to suit your taste) with salt and pepper. Ladle hot soup into bowls, and garnish each serving with chopped parsley (and strips of lemon peel, if desired). Enjoy!

      Nutrition Facts
      Creamy Avgolemono Soup
      Amount Per Serving (1 g)
      Calories 200 Calories from Fat 63
      % Daily Value*
      Fat 7g11%
      Saturated Fat 2g13%
      Cholesterol 184mg61%
      Sodium 117mg5%
      Potassium 376mg11%
      Carbohydrates 25g8%
      Fiber 1g4%
      Sugar 1g1%
      Protein 12g24%
      Vitamin A 414IU8%
      Vitamin C 9mg11%
      Calcium 45mg5%
      Iron 2mg11%
      * Percent Daily Values are based on a 2000 calorie diet.

      Here’s one more to pin on your Pinterest boards!Creamy Avgolemono Soup is a classic Greek dish (with rice) that is delicious, rich and lemony, and very easy to make in under 30 minutes.

      Caramel Apple Cider

      Fall and Winter are perfect seasons for easy-to-make delicious, hot Caramel Apple Cider, with whipped cream and caramel sauce!
      Fall and Winter are perfect seasons for easy-to-make delicious, hot Caramel Apple Cider, with whipped cream and caramel sauce!

      Fall is here… and with it comes the gorgeous foliage (on the trees AND on the ground), crisp air, cooler temperatures, and in our area of the Pacific Northwest… RAIN. When Fall arrives, I love to wear sweatshirts, sweatpants, curl up by our fireplace each morning, AND drink a lot of HOT beverages, to keep me WARM!

      Fall leaves and cooler temperatures encourage us to enjoy hot apple cider!

      Fall and Winter are also the perfect seasons to enjoy Apple Cider Bundt Cake, Valencia Orange Hot Chocolate, Mom’s Apple Cake, and a big, hot bowl of Grandma’s Southern-Style Chicken n’ Dumplings! YUM! And now, here’s a wonderful hot beverage to enjoy, too!

      The cider recipe I am sharing today is a delicious twist on “typical” apple cider. I discovered it in one of my old cookbooks from Southern Living (a Christmas edition). Tried it and loved it, so it’s now a lovely recipe to enjoy, especially during cool weather. With a few additional (simple) ingredients, you can transform a simple mug of apple cider into a delicious, glamorous looking, hot beverage treat!

      This recipe for caramel apple cider is really easy to make, and is done in just under 15 minutes. The recipe yields four, one cup servings. Here’s how to make this yummy drink:

      Scroll Down For A Printable Recipe Card At The Bottom Of The Page

      How To Make Caramel Apple Cider

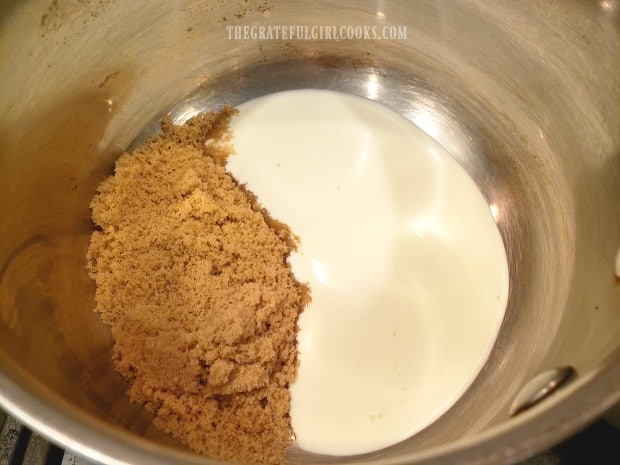
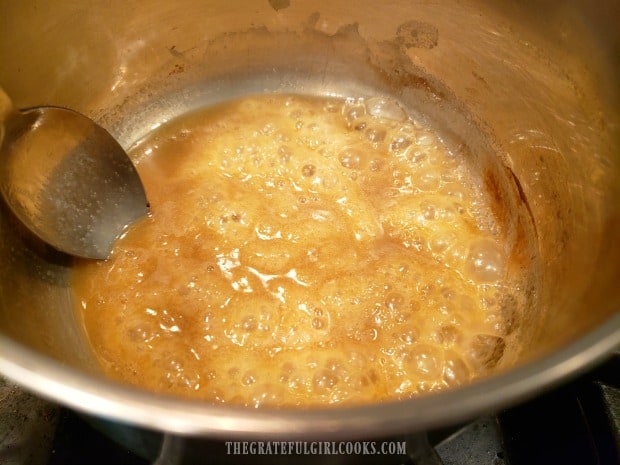
      Place heavy whipping cream and light brown sugar in a large saucepan. Stir the two ingredients together, and cook, on medium heat, stirring constantly. Cook for  a total of two minutes (stirring constantly), until the liquid is very bubbly.

      Whipping cream and brown sugar are cooked in saucepan.Brown sugar and heavy whipping cream cook until bubbly.

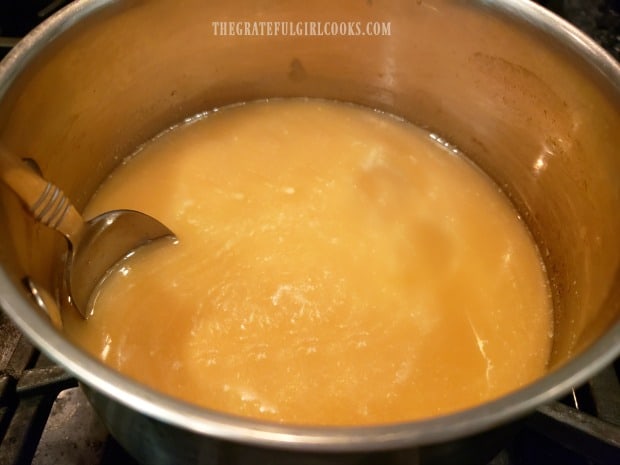
      Pour in the apple cider and vanilla extract. Stir well, to fully combine the ingredients. Cook the caramel apple cider for ten minutes, or until the cider is fully heated through. Once it is really hot, remove the pan from the heat source. Now it’s time to garnish, and enjoy this yummy hot drink.

      Apple cider and vanilla are added to the saucepan and heated through.

      Serving Caramel Apple Cider

      Ladle the steamin’ hot caramel apple cider into four mugs (approx. 8 ounces per mug). Top each mug of cider with aerosol whipped cream (really spray it on there!), and then drizzle the whipped cream with room temperature caramel sauce. You can also sprinkle each cider with ground cinnamon, if desired.

      Serve the caramel apple cider immediately, and enjoy this tasty hot drink. The addition of the vanilla, cream and light brown sugar, give the cider a surprising, caramel-like twist, which I think you will enjoy! And the whipped cream and caramel sauce topping? YES, please!

      A mug of caramel apple cider, topped with whipped cream and caramel sauce.

      I hope you enjoy the sights, sounds, and experiences this Fall season. Make yourself (and those you love), a nice hot mug of caramel apple cider, sit back, and enjoy the changing of the seasons! If you enjoy this drink, be sure to check out my recipe for Hot Spiced Apple Cider!

      Whipped cream and caramel sauce top a mug of hot caramel apple cider.

      Thank you so much for stopping by today. I hope you have a wonderful day, and pray God provides you with encouragement, wisdom and grace for everything you encounter today. Come back soon, okay?

      Looking For More FALL-INSPIRED Recipes?

      You can more of my recipes in the Recipe Index, located in the MENU bar at the top of the page. I have quite a few recipes perfect for this season, including:

      Interested In More Recipes?

      Thank you for visiting this website. I appreciate you using some of your valuable time to do soIf you’re interested, I publish a newsletter 2 times per month (1st and 15th) with all the latest recipes, and other fun info. I would be honored to have you join our growing list of subscribers, so you never miss a great recipe!
      There is a Newsletter subscription box on the top right side (or bottom) of each blog post, depending on the device you use, where you can easily submit your e-mail address (only) to be included in my mailing list.

      You Can Also Find Me On Social Media:

      Facebook page: The Grateful Girl Cooks!
      Pinterest:
      The Grateful Girl Cooks!
      Instagram:
      jbatthegratefulgirlcooks

      Author's signature

      Original recipe source: The cookbook “Christmas with Southern Living 2010”, published by Oxmoor House, page 145

      0 from 0 votes
      Caramel Apple Cider
      Prep Time
      3 mins
      Cook Time
      10 mins
      Total Time
      13 mins
       

      Fall and Winter are perfect seasons for easy-to-make delicious, hot Caramel Apple Cider, with whipped cream and caramel sauce!

      Category: Beverage
      Cuisine: American
      Keyword: caramel apple cider
      Servings: 4 (8 oz. servings)
      Calories Per Serving: 250 kcal
      Author: JB @ The Grateful Girl Cooks!
      Ingredients
      For Caramel Apple Cider:
      • cup heavy whipping cream
      • cup light brown sugar
      • 4 cups apple cider
      • 1 teaspoon vanilla extract
      For Topping (optional, but good!)
      • aerosol whipped cream, caramel sauce, cinnamon
      Instructions
      1. Place whipping cream and light brown sugar in a large saucepan. Stir to combine ingredients. Cook on medium heat 2 minutes (stirring constantly), until very bubbly.

      2. Add apple cider and vanilla to pan. Stir well, to combine ingredients. Cook (stirring occasionally) for 10 minutes on medium-low heat, or until cider is fully heated through. Remove pan from heat source.

      3. Ladle hot cider into 4 mugs (approx. 8 ounces per mug). Top each cider with aerosol whipped cream (really spray it on there!), then drizzle with caramel sauce. Serve immediately, Enjoy.

      Recipe Notes

      NOTE: The optional toppings (aerosol whipped cream, caramel sauce & cinnamon) are not included in the caloric calculation, because amounts used may vary from person to person.

      Nutrition Facts
      Caramel Apple Cider
      Amount Per Serving (1 cup (8 oz.)s)
      Calories 250 Calories from Fat 72
      % Daily Value*
      Fat 8g12%
      Saturated Fat 5g31%
      Cholesterol 27mg9%
      Sodium 22mg1%
      Potassium 278mg8%
      Carbohydrates 45g15%
      Fiber 1g4%
      Sugar 41g46%
      Protein 1g2%
      Vitamin A 292IU6%
      Vitamin C 2mg2%
      Calcium 47mg5%
      Iron 1mg6%
      * Percent Daily Values are based on a 2000 calorie diet.

      Here’s one more to pin on your Pinterest boards!Fall and Winter are perfect seasons for easy-to-make delicious, hot Caramel Apple Cider, with whipped cream and caramel sauce!