Searching for "chicken and dumplings"

Grandma’s Southern-Style Chicken n’ Dumplings

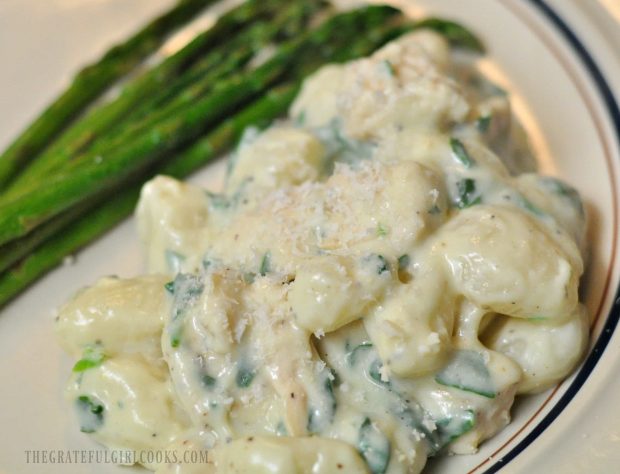
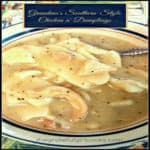
You will LOVE these Southern-Style Chicken n’ Dumplings just the way my Texas Grandma used to cook them! A big bowl of this filling hot soup is comfort food at it’s very best!You will LOVE these "Southern Style" chicken n' dumplings just the way my Texas Grandma used to cook them! A big bowl of this filling hot soup is comfort food at it's very best!

Fall is upon us, and Old Man Winter is just around the corner. Not too sure about you, but I tend to “hunker down” during this season of the year, and yearn for fires in the fireplace, a warm home, and good old comfort food, like a big pot of my Grandma’s Southern-Style Chicken n’ Dumplings! Yum!

Scroll Down For A Printable Recipe Card At The Bottom Of The Page

Why Are These Dumplings Flat Like Noodles?

I used to wonder about the use of the word “dumplings” in the name, since a lot of people make biscuit-like dumplings (and these look more like noodles), but if my beloved  Southern Grandma called them “dumplings”, well then “dumplings” they will be! Even Wikipedia tells us “dumplings” can be either PUFFY (typical in the Northeast) or ROLLED FLAT(Southern style!).

My Grandma, who lived in East Texas before she passed away, used to make this wonderful chicken n’ dumpling soup for us when we would visit on family vacations. My mom also made Grandma’s recipe for our family, then I began making this same recipe for my family many, many years ago. Our grown sons love this soup, as well, and I can’t even begin to count how many times they have eaten this meal.

Our oldest son, who is now 33 years old, still requests this as part of his birthday celebration, which amazes me to this day! It is REALLY simple, absolutely delicious, comforting and filling, and is very inexpensive to make… which is probably why I’ve been making this meal for so long!

Why Is This Recipe Good On The Old Wallet?

I start with a whole chicken. That’s the main ingredient in this soup, and I only use half the meat from the chicken, so I get another entire other meal out of the rest. That, to me, is a win-win.  Any time I can spend about $5 on a chicken and get two meals (plus leftovers) out of the deal is a good thing! I am sharing lots of pics for this recipe, but don’t let that scare you. This is simple, people!

So How Do I Make These Yummy Southern-Style Chicken n’ Dumplings?

Place a whole thawed chicken (that is rinsed and cavity cleared) into a large stockpot. Cover with water. (If you want you can add 1/2 cup each of chopped onion, celery, and carrots to help flavor the broth, but it really is not necessary). Bring the water to boiling and cook the chicken for 1 hour.

Whole chicken cooking in stockpotWhen done, remove the chicken to a large bowl to cool down.

Fully cooked chicken ready for soup with dumplingsPour the broth through a sieve to strain out any veggies, particles, etc. Pour broth back into stockpot. I discard the veggies I flavored the broth with, but if you want to leave them in, go for it!

Straining chicken broth for soupWhen the chicken has cooled, remove the skin. You can usually just pull it off from the different pieces using your clean hands.

Removing skin from cooked chicken before adding to soupCutting The Meat Off The Chicken

The chicken will be so tender the legs and thighs will easily tear off. I like to put a flexible cutting board on a baking sheet with edges, to help catch any liquid run-off.

Chicken for dumpling soup is tender and practically falls off boneCut or pull off all the meat from the chicken, and place into a large bowl. The chicken should be cut into bite sized pieces. I usually end up with between 4-5 cups of shredded chicken.

Shredded chicken to add to the soup and dumplingsStore Extra Chicken For Use In Another Recipe!

I like to use about 2 -2 1/2 cups of chicken for this recipe. You can use all of the chicken if you want, but I prefer to put the rest of the chicken into a freezer bag and into my freezer, so I have cooked chicken ready for another meal (like quesadillas, enchiladas, casseroles, etc.), as well!

Leftover chicken pieces not used for soup are frozen in storage bagsAdd The Chicken Pieces To The Broth

At this point, you will need to add 2 to 2 1/2 cups of shredded chicken back into the pot of chicken broth.

Shredded chicken is added back into broth before dumplings are addedI add two large cubes of chicken bouillon to the hot broth to add additional flavor. The cubes will break down and dissolve as the southern-style chicken ‘n dumplings cook.

Additional flavor is added to chicken n' dumplings soup base with bouillon seasoningMake The Dumplings

Heat the broth back up on medium high heat. While it is coming to a boil, I make the dumplings. I know a lot of people make big puffy biscuit-like “dumplings”, but this is how my Grandma made Southern-style chicken n’ dumplings, and that is why they look like large noodles.

Start by blending flour, salt, and shortening together using a pastry cutter, cutting it in until the shortening is the size of small peas. Easy!

Mixing up the dumplings dough with pastry blenderHot water and more flour is added and mixture is firmed up into a large dough ball. Let the chicken n’ dumplings dough rest for about 10 minutes, then shape into 3 equal sized portions.

Hot water is added to dumplings dough, then mixed together.Dumpling dough is separated into 3 equal sized pieces

Roll And Slice The Dumplings

Roll out the dough on a flour covered surface, one dough ball at a time, until it is thinly rolled out, and about the size of a pie crust.

Each dumpling dough ball is rolled out on a floured surfaceDumpling dough is rolled out until very thin on floured sufaceUse a pizza cutter (or a very sharp knife) to cut the chicken n’ dumpling dough into long strips about an inch wide. Repeat the entire rolling/cutting process with the other two dough balls, adding additional flour to cutting board before rolling each one.

A pizza cutter is used to slice dough for dumplings into thin strips

Add The Dumplings To The Soup Broth

Once the broth is boiling, carefully drop the “dumplings” a few at a time into the boiling broth, continuing until all the dumplings are in the pot.

Southern style dumplings are added to boiling chicken and brothAs dumplings cook, they float to surface of soupAdd a small amount of butter, as well as salt and pepper to the soup to help season it. Taste the broth, then add additional salt and/or pepper to suit your taste. I usually add a LOT of pepper to ours.

Butter, salt and pepper are added to chicken n' dumplings in potMix a couple spoonfuls of flour with some cold water (blend it well with a fork), and add it to the soup. This will help to thicken up the broth.

A flour slurry is added to chicken n' dumplings to thicken soup

Time To Eat Grandma’s Southern-Style Chicken n’ Dumplings!

Cook the Southern-style chicken n’ dumplings until broth has thickened a bit, and is very hot. When ready to serve, ladle the soup into individual serving bowls, and serve with a big piece of crusty French bread on the side. That’s it! This is so yummy… and is “comfort food” at its best! Not only that, but the leftovers are amazing!

Grandma's Southern-Style Chicken n' Dumplings served hot in a bowl

Sure hope you will give these Southern-style chicken n’ dumplings a try. You might even enjoy a few other soups I have here on the blog, like Albondigas Soup, Chicken Wild Rice and Bacon Soup, or any of the soups you can find in the Recipe Index at the top of the page.

There’s nothing better than having a big pot of Grandma’s Southern-Style Chicken n’ Dumplings available to slurp on during the cold Fall and Winter seasons! Enjoy!

Interested In More Recipes?

Thank you for visiting this website. I appreciate you using some of your valuable time to do soIf you’re interested, I publish a newsletter 2 times per month (1st and 15th) with all the latest recipes, and other fun info. I would be honored to have you join our growing list of subscribers, so you never miss a great recipe!
There is a Newsletter subscription box on the top right side (or bottom) of each blog post, depending on the device you use, where you can easily submit your e-mail address (only) to be included in my mailing list.

You Can Also Find Me On Social Media:

Facebook page: The Grateful Girl Cooks!
Pinterest:
The Grateful Girl Cooks!
Instagram:
jbatthegratefulgirlcooks

Author's signatureRecipe Source: My Grandma B.

↓↓ PRINTABLE RECIPE BELOW ↓↓

5 from 9 votes
Grandma's Southern-Style Chicken n' Dumplings
Prep Time
15 mins
Cook Time
1 hr 15 mins
Total Time
1 hr 30 mins
 
You will LOVE these "Southern Style" chicken n' dumplings just the way my Texas Grandma used to cook them! A big bowl of this filling hot soup is comfort food at it's very best!
Category: Soup
Cuisine: American
Keyword: chicken n' dumplings
Servings: 8 servings
Calories Per Serving: 341 kcal
Author: JB @ The Grateful Girl Cooks!
Ingredients
To Cook Chicken And Make Broth:
  • 1 whole chicken , thawed and cleaned (remove and discard giblets from cavity)
  • 1/2 cup carrots , celery, and onion (OPTIONAL-to flavor the chicken broth)
  • Water to completely cover chicken in a large stockpot.
To Make The Dumplings:
  • 1 cup all purpose flour
  • 1 teaspoon salt
  • 2 heaping Tablespoons vegetable shortening
  • 1/2 cup HOT water
  • 1/2 cup plus 2 Tablespoons all purpose flour
To finish soup:
  • Two large chicken bouillon cubes
  • 1 Tablespoon butter
  • 1/4 cup water mixed with 2 Tablespoons flour
  • Salt and Pepper , to taste (approx. 1 teaspoon salt, 1/2 teaspoon pepper)
Instructions
  1. Put the chicken and the veggies (if using) in a large stockpot. Cover completely with water. Bring to a quick boil, then continue cooking chicken for one hour. When done, remove chicken to large bowl to cool. Strain broth to remove leftover veggies or other particles. Return broth to stockpot.
  2. Once chicken is cool, remove skin, then cut chicken into bite sized pieces. (At this point I divide the chicken pieces in half, and freeze half for use in another meal).
  3. Add chicken pieces (approx. 2 1/2 cups) back into chicken broth. Heat the chicken and broth back up to boiling. Add bouillon cubes, salt and pepper (to taste).
  4. While chicken is coming to a boil, make the dumplings. In a large bowl, using a pastry blender or two knives, cut the shortening and salt into the cup of flour, until shortening is the size of small peas. Add 1/2 cup HOT water and 1/2 cup, plus 2 Tablespoons of flour to the mixture. Stir and work the mixture until a soft dough ball forms (firm enough to roll out). Divide dough into 3 equal sized balls, then let the dough rest for 10 minutes.
  5. Generously flour a work surface. Roll each dough ball out (one at a time), sprinkling with flour (if necessary) to keep dough from sticking to work surface. Roll out to about the size of a large pie crust (roll out thin). Cut dough into strips about an inch wide using a pizza cutter or knife. Repeat process for remaining dough balls.
  6. Drop dumplings a couple at a time into hot boiling chicken/broth mixture until all have been added to pot; add butter, and continue cooking.
  7. Make a slurry by mixing 1/4 cup water with 2 large Tablespoons flour. Stir well to combine, then add to soup pot, and stir well. (this helps to thicken broth a bit). Cook an additional 10 minutes on high to fully cook dumplings. Taste test broth, and add additional salt and pepper, if desired. Ladle hot soup into bowls, serve, and enjoy (especially with crusty french bread on the side!)
Recipe Notes

If you are pressed for time, you can always start with store bought chicken broth (cook the chicken in water/drain, THEN use broth in pot), and can also use a pre-cooked rotisserie chicken to get the chicken from, BUT I prefer to make it the way I have posted it, as it is far less expensive... but, hey... whatever works, right?

Nutrition Facts
Grandma's Southern-Style Chicken n' Dumplings
Amount Per Serving (1 serving)
Calories 341 Calories from Fat 171
% Daily Value*
Fat 19g29%
Saturated Fat 5g31%
Cholesterol 75mg25%
Sodium 435mg19%
Potassium 230mg7%
Carbohydrates 20g7%
Protein 20g40%
Vitamin A 1515IU30%
Vitamin C 2mg2%
Calcium 15mg2%
Iron 2.1mg12%
* Percent Daily Values are based on a 2000 calorie diet.

Here’s one more to pin on your Pinterest boards!You'll LOVE "Southern Style" chicken n' dumplings just the way my Grandma made them! A big bowl of this filling hot soup is comfort food at it's very best!


Save

Save

Save

Save

Save

Save

Save

Save

Gnocchi and Broccoli Carbonara

Gnocchi and Broccoli Carbonara is a delicious Italian dish, featuring potato dumplings coated in a bacon, Parmesan, mushroom and garlic creamy sauce.

Do you enjoy eating gnocchi? We really enjoy these soft Italian potato dumplings! Cooked gnocchi can be paired with a variety of sauces, for a simple to prepare meal. Gnocchi, in Italian, means “little lumps”, and that is exactly what they are. They are typically made with potatoes and flour, and cook very quickly.

Recently I decided to cook a package of gnocchi I had in our pantry. I decided to make up my own recipe that uses my tried and true pasta carbonara sauce (think BACON). Then I added steamed broccoli, cooked gnocchi, mushrooms, garlic and onions, and created this delicious recipe for gnocchi and broccoli carbonara! Here’s how to make it:

Scroll Down For A Printable Recipe Card At The Bottom Of The Page

Cook The Bacon

The first thing you should do is to fry the bacon until very crispy. I like to slice the bacon into small pieces, because it cooks faster that way! Stack a few slices of bacon on top of each other and then cut into 1/2 inch slices. Fry in a large skillet, stirring often until done.

Once the bacon is crisp, remove it from the skillet, and place the bacon pieces on paper towels to absorb grease. Drain MOST of the bacon grease from the pan, but leave approximately 2 Tablespoons bacon grease in the skillet. It will be used to add additional flavoring to the carbonara sauce later!


Bacon is cooked in large skillet until very crisp.

Cook The Rest Of The Veggies

Return the skillet (with bacon grease) to the stove. Add the chopped onions and mushrooms to the skillet. Cook them on medium-low heat until they turn golden brown (3-4 minutes).

Now add the minced garlic and the crisp bacon crumbles to the skillet. Continue to cook, stirring often, for one more minute. Add the chopped and steamed broccoli to the skillet, and stir to combine. Set the skillet aside while you make the carbonara sauce.

Cooked onions, mushrooms, garlic, broccoli and crisp bacon are mixed together in skillet.

Make The Carbonara Sauce

In a medium bowl, whisk together the eggs, whipping cream, parmesan cheese, parsley, salt, pepper and red pepper flakes until combined. Use a wire whisk or a fork to do this.

Once combined, it is time to “temper” the sauce. Set the sauce aside while you begin cooking the gnocchi. You will need hot, starchy water from cooking the gnocchi to help temper the sauce.The carbonara sauce is prepared by whisking ingredients together in bowl.

Temper The Carbonara Sauce

Tempering the sauce is important because there are fresh eggs in the sauce. If you add hot liquid too quickly to the sauce later, the eggs will probably scramble. We do NOT want scrambled eggs in the sauce, do we? NOPE!

Before tempering the sauce, start the gnocchi cooking per the package instructions. You will need some of the starchy hot water from that pan to temper the sauce. OK? Basically you are going to boil the gnocchi for a few minutes, and use a bit of that boiling water in the carbonara sauce. Here is how easy it is to slowly temper the sauce:

Gnocchi (potato dumplings) are boiled for a few minutes in water, to cook fully.

Take about 6 Tablespoons (ONE TABLESPOON AT A TIME) of the boiling starchy water from the gnocchi pan and SLOWLY drizzle it into the egg mixture, while whisking the sauce, to slowly disperse the hot water.

Continue to drizzle hot water and whisk continuously, until all 6 Tablespoons of gnocchi water have been added. Once this is done, pour the carbonara sauce over the veggies and bacon mixture in the skillet, and stir to combine.

Carbonara sauce is tempered, then added to the veggies and bacon in skillet.

Finishing The Gnocchi and Broccoli Carbonara

Once the sauce, bacon and veggies are combined, drain the cooked gnocchi. Add the cooked gnocchi to the skillet. Gently stir, to fully combine the ingredients. Cook on low heat for 1-2 minutes, or until heated through, but do not let the sauce boil.

Once the gnocchi are heated through, and fully coated with sauce, the gnocchi and broccoli carbonara is ready to serve!

Heating the gnocchi and broccoli carbonara in a skillet before serving.After heating through, the gnocchi and broccoli carbonara is ready to be served.

Serve The Gnocchi And Broccoli Carbonara

To serve, spoon out portions of the gnocchi onto plates or into bowls. Garnish each serving with additional shredded Parmesan cheese, if desired. Serve while hot, and enjoy!

The gnocchi and broccoli carbonara is garnished with grated Parmesan cheese.

Wow… was this dish yummy! Even the leftovers were good a couple days later! The gnocchi and broccoli carbonara can be easily microwaved on medium heat until re-heated to perfection! I sure hope you will give this recipe a try! It is soooo good! Have a GREAT day, and may God bless you in all you do today.

Looking For More Recipes That Use Gnocchi?

You can find all of my recipes in the Recipe Index. located at the top of the page. I have a few other gnocchi recipes, including:

Interested In More Recipes?

Thank you for visiting this website. I appreciate you using some of your valuable time to do soIf you’re interested, I publish a newsletter 2 times per month (1st and 15th) with all the latest recipes, and other fun info. I would be honored to have you join our growing list of subscribers, so you never miss a great recipe!
There is a Newsletter subscription box on the top right side (or bottom) of each blog post, depending on the device you use, where you can easily submit your e-mail address (only) to be included in my mailing list.

You Can Also Find Me On Social Media:
Facebook page: The Grateful Girl Cooks!
Pinterest: The Grateful Girl Cooks!
Instagram: jbatthegratefulgirlcooks

Author's signature

Recipe Source: My brain, and my hunger.

0 from 0 votes
Gnocchi and Broccoli Carbonara
Prep Time
15 mins
Cook Time
5 mins
Total Time
20 mins
 

Gnocchi and Broccoli Carbonara is a delicious Italian dish, featuring potato dumplings coated in a bacon, Parmesan, mushroom and garlic creamy sauce.

Category: Main Course
Cuisine: Italian
Keyword: gnocchi and broccoli carbonara
Servings: 5
Calories Per Serving: 523 kcal
Author: JB @ The Grateful Girl Cooks!
Ingredients
  • 6 slices bacon
  • ½ medium yellow onion , finely chopped
  • 4 mushrooms , button or baby portobello
  • 3 large eggs
  • ¾ cup shredded Parmesan cheese
  • ¾ cup heavy whipping cream
  • ½ teaspoon salt
  • ¼ teaspoon black pepper
  • 1 teaspoon parsley flakes
  • ½ teaspoon red pepper flakes
  • 1 cup steamed broccoli (pre-cooked and chopped)
  • 17.6 ounce potato gnocchi
  • additional Parmesan for garnish (optional)
Instructions
  1. Fry bacon in large skillet until very crisp. Stack a few slices of bacon on top of each other and then cut into 1/2 inch slices. Fry in a large skillet, stirring often until done. Remove bacon from skillet, and place on paper towels to absorb grease. Drain MOST of the grease from skillet, but leave approx. 2 Tablespoons bacon grease in the skillet.

  2. Return skillet (with bacon grease) to stove. Add onions and mushrooms. Cook on medium-low heat until golden brown (3-4 minutes). Add garlic and bacon crumbles to skillet. Continue to cook, stirring often, for one more minute. Add chopped and steamed broccoli to skillet, and stir to combine. Set the skillet aside while you make carbonara sauce.

  3. Make Sauce: In a medium bowl, whisk eggs, whipping cream, parmesan cheese, parsley, salt, pepper and red pepper flakes together until combined. Set the sauce aside while you begin cooking the gnocchi, according to package directions. You will need hot, starchy water from cooking the gnocchi to help temper the sauce.

  4. Tempering the sauce is important because there are fresh eggs in the sauce. If you add hot liquid too quickly to the sauce, the eggs will likely scramble. Take about 6 Tablespoons (ONE AT A TIME) of the boiling starchy water from gnocchi pan and SLOWLY drizzle it into the egg mixture, while whisking continuously, to slowly disperse hot water. Continue to drizzle hot water and whisk, until all 6 Tablespoons of hot water have been added. Once done, pour the carbonara sauce over the veggies and bacon mixture in the skillet, and stir to combine.

  5. Once sauce, bacon and veggies are combined, drain the cooked gnocchi. Add the gnocchi to the skillet. Gently stir, to fully combine ingredients. Cook on low heat for 1-2 minutes, or until heated through, but do not let it boil. Once heated through and gnocchi are fully coated with sauce, it is ready to serve! To serve, spoon out portions of gnocchi onto plates or into bowls. Garnish each serving with additional shredded Parmesan cheese, if desired. Serve while hot, and enjoy!

Nutrition Facts
Gnocchi and Broccoli Carbonara
Amount Per Serving (1 (1/5 of total))
Calories 523 Calories from Fat 288
% Daily Value*
Fat 32g49%
Saturated Fat 16g100%
Cholesterol 206mg69%
Sodium 1047mg46%
Potassium 269mg8%
Carbohydrates 41g14%
Fiber 3g13%
Sugar 1g1%
Protein 19g38%
Vitamin A 1011IU20%
Vitamin C 18mg22%
Calcium 240mg24%
Iron 5mg28%
* Percent Daily Values are based on a 2000 calorie diet.

Here’s one more to pin on your Pinterest boards!Gnocchi and Broccoli Carbonara is a delicious Italian dish, featuring potato dumplings coated in a bacon, Parmesan, mushroom and garlic creamy sauce.

Easy Chicken Pot Pie

If you enjoy family-friendly comfort food, then you will love this easy chicken pot pie, filled with chicken breast and veggies in a delicious gravy!

My husband and I have a fondness for chicken pot pies. Especially my husband. Nine times out of ten, my hubby will buy Marie Callender’s pot pies when he makes a Costco run. BUT… when I want to make a homemade chicken pot pie, THIS is the recipe I use!

Filled with chicken breast chunks, gravy, and all the standard pot pie veggies like potatoes, carrots, peas, onions and celery, this is one yummy and easy chicken pot pie! Best part is that it doesn’t require too much work to make, especially if you use store-bought pie crusts! Here’s how to make this delicious dinner!

Scroll Down For A Printable Recipe Card At The Bottom Of The Page

How To Make Easy Chicken Pot Pie

Prepare the veggies and chicken, but cutting them into bite-sized pieces (note: the potatoes are not shown in this photo).

Place the prepared celery, carrots, frozen peas, potatoes and chicken into a large saucepan. Add the chicken broth to the pan. Bring this mixture to a rolling boil, and then continue boiling for 15 minutes. Once done, drain the veggies, reserving 1¾ cups of the broth to use later!

Chicken, celery, frozen peas and sliced carrots are part of the filling for this dish.The veggies and chicken pieces cook in chicken both for 15 minutes.

Pre-Bake The Bottom Pie Crust

While the veggies and chicken are being cooked, pre-bake ONE bottom 9″ pie crust in a preheated oven (recipe requires TWO crusts). You can use already made pie crusts OR make homemade crusts like I did.

Prick the crust with the tines of a fork (on bottom and sides of crust). Bake in a preheated 425° F. oven for 5-7 minutes. Try to time this so the crust is done when the chicken pot pie filling is thickened.

Pre-baking the bottom pie crust for a few minutes.

Make The Easy Chicken Pot Pie Filling

Now it is time to make the chicken pot pie filling!  Make sure to have the cooked, drained veggies and chicken in a large saucepan.

Drained veggies and chicken in saucepan, waiting for thickened sauce.

In a separate skillet (or pan), cook the chopped onions in butter (on medium-low heat) for 3-4 minutes until they are translucent in color and cooked through. Add the flour, celery seed, salt and pepper to the skillet, and stir well, to fully combine the ingredients.

Onions are cooked, then flour and spices are added to skillet.

Now stir in the reserved chicken broth (1¾ cup) and milk. Stir or whisk these ingredients into the onion mixture. Continue to cook the creamy filling on medium-low heat, stirring or whisking often. The filling will thicken fairly quickly as it cooks.

Chicken and milk are added to the cooked onions, flour and spices.The sauce has thickened, and is ready to add to the veggies and chicken.

Once the gravy filling has thickened, pour it into the pan with the drained chicken and veggies. Stir gently, to thoroughly combine these ingredients. This is the filling for your easy chicken pot pie (and it really was easy, wasn’t it?).

Finish Making This Easy Chicken Pot Pie

Okay… now take the pie crust you pre-baked out of the oven. Turn the oven down to 375° F. Pour all of the chicken pot pie filling into the pre-baked bottom crust, and spread it out evenly on the crust.

The easy chicken pot pie filling is now ready!The chicken pot pie filling is spread into the pre-baked pie crust.

Place the second pie crust (uncooked) onto the top of the filling. Seal up the edges, and crimp the crusts together. Make a few slits in the top of the chicken pot pie with a sharp knife, because this will let the steam escape from the pie as it bakes! Nobody wants their chicken pot pie to explode, right?

Another pie crust is added to the top of the chicken pot pie and sealed before baking.

Bake The Easy Chicken Pot Pie

Place the chicken pot pie on the middle rack of the oven. Bake it at 375° F. for approximately 30 minutes. Because oven vary greatly in temperature ranges, I recommend checking it at 25 minutes, then continue baking until the pot pie is golden brown on top.

You might also see some of the filling bubbling to the top. I ended up letting mine cook for 35 minutes total. When done, remove the easy chicken pot pie from the oven, and be sure to let it “rest” for 10-12 minutes, before slicing and serving.

A peek at the inside of this easy chicken pot pie after removing a slice.

We really enjoyed this easy chicken pot pie! The leftovers were fantastic, as well! Cover the leftover pot pie with plastic wrap and store in the refrigerator, and it will “keep” for 3-4 days.

The filling really sets up nicely after being refrigerated (for leftovers), which makes slicing into the filling even easier. A quick pop into the microwave oven to reheat, and the leftovers are ready for a quick lunch or another dinner!

A single serving of chicken pot pie on a white plate.

We really enjoyed this simple, but delicious chicken pot pie! I would encourage you to give it a try, and hope you and those you love, will be pleased with the results, like we were! Have a great day!

Looking For More Chicken Recipes?

You can find all of my recipes for chicken in the Recipe Index, located at the top of the page (there are a lot of them!). A few favorites include:

Interested In More Recipes?

Thank you for visiting this website. I appreciate you using some of your valuable time to do soIf you’re interested, I publish a newsletter 2 times per month (1st and 15th) with all the latest recipes, and other fun info. I would be honored to have you join our growing list of subscribers, so you never miss a great recipe!
There is a Newsletter subscription box on the top right side (or bottom) of each blog post, depending on the device you use, where you can easily submit your e-mail address (only) to be included in my mailing list.

You Can Also Find Me On Social Media:
Facebook page: The Grateful Girl Cooks!
Pinterest: The Grateful Girl Cooks!
Instagram: jbatthegratefulgirlcooks

Author's signature

Original recipe source: https://www.iheartnaptime.net/chicken-pot-pie/

0 from 0 votes
Easy Chicken Pot Pie
Prep Time
25 mins
Cook Time
30 mins
Total Time
55 mins
 

If you enjoy family-friendly comfort food, then you will love this easy chicken pot pie, filled with chicken breast and veggies in a delicious gravy!

Category: Main Dish
Cuisine: American
Keyword: easy chicken pot pie
Servings: 8 slices
Calories Per Serving: 444 kcal
Author: JB @ The Grateful Girl Cooks!
Ingredients
  • 1 pound boneless, skinless chicken breasts , cut into bite-sized cubes
  • 1 large potato , peeled and cubed
  • 1 cup sliced carrots
  • ½ cup sliced celery
  • ½ cup frozen green peas
  • cup butter
  • cup chopped onion
  • cup all purpose flour
  • ¾ teaspoon salt
  • ¼ teaspoon black pepper
  • ¼ teaspoon celery seed
  • 32 ounces chicken stock (or broth) , for boiling - (reserving 1¾ cup for filling)
  • cup milk
  • 2 9" unbaked pie crusts (purchased or homemade)
Instructions
  1. Prepare the veggies and chicken. Place the cut, sliced celery, carrots, peas, potatoes and chicken into a large saucepan. Add chicken broth to the pan. Bring this mixture to a rolling boil, and then continue boiling for 15 minutes. Once done, drain the veggies, reserving 1¾ cups of broth to use later!

  2. While veggies and chicken are being cooked, pre-bake the bottom 9" pie crust in a preheated oven (recipe requires TWO crusts). You can use already made pie crusts OR make your own. Prick the crust with the tines of a fork (on bottom and sides of crust). Bake in a preheated 425° F. oven for 5-7 minutes.

  3. In a skillet, cook chopped onions in butter (on medium-low heat) for 3-4 minutes until translucent in color and cooked through. Add flour, celery seed, salt and pepper to skillet, and stir well, to combine ingredients. Stir or whisk in reserved chicken broth (1¾ cup) and milk. Cook on medium-low heat, stirring or whisking as it cooks. The filling will thicken fairly quickly. Once filling has thickened, pour it into the pan with the drained chicken and veggies. Stir gently, to thoroughly combine these ingredients. Take the pre-baked pie crust out of the oven. Turn oven down to 375° F. Pour pot pie filling into pre-baked bottom crust, and spread it out evenly. Place other pie crust (uncooked) on top of the filling. Seal up edges, form crust, and crimp the crusts together. Make a few slits in the top of the pie with a knife, because this lets the steam escape as it bakes!

  4. Place pot pie on the middle rack of the oven. Bake at 375° F. for approximately 30 minutes (mine ended up taking 35 minutes). Because oven temps vary greatly, I recommend checking it at 25 minutes, then continue baking until pie crust is golden brown on top. When done, remove chicken pot pie from the oven, and let it "rest" for 10-12 minutes, before slicing and serving. Enjoy!

Nutrition Facts
Easy Chicken Pot Pie
Amount Per Serving (1 slice (1/8th of pie))
Calories 444 Calories from Fat 198
% Daily Value*
Fat 22g34%
Saturated Fat 9g56%
Cholesterol 62mg21%
Sodium 718mg31%
Potassium 692mg20%
Carbohydrates 39g13%
Fiber 3g13%
Sugar 5g6%
Protein 21g42%
Vitamin A 3057IU61%
Vitamin C 11mg13%
Calcium 65mg7%
Iron 3mg17%
* Percent Daily Values are based on a 2000 calorie diet.

Here’s one more to pin on your Pinterest boards!If you enjoy family-friendly comfort food, then you will love this easy chicken pot pie, filled with chicken breast and veggies in a delicious gravy!

Southwestern Chicken Soup

You’ll love this delicious Southwestern Chicken Soup, a Weight Watchers dish with corn, black beans, tomatoes, bell peppers, and avocado slices!
You'll love this delicious Southwestern Chicken Soup, a Weight Watchers dish with corn, black beans, tomatoes, bell peppers, and avocado slices!

Recently I tried a new (to us) soup recipe that I found on Weight Watchers.  The soup sounded really good, and since it was freezing cold outside (the middle of winter), I decided to make some. A bowl of hot soup really warms a gal up on a chilly February evening!

Whoa! This Southwestern chicken soup tastes amazing! The portion size is large (1¾ cups per serving = 3 Smart Points), and is packed with corn, black beans, tomatoes, in a Southwestern spiced broth. Trust me- this is one flavor-packed bowl of soup!

If you enjoy Southwestern flavored dishes, chances are you will LOVE this hearty soup! It’s very easy to make, so you can be serving up steaming hot bowls of Southwestern chicken soup before you know it!

Scroll Down For A Printable Recipe Card At The Bottom Of The Page

How To Make Southwestern Chicken Soup

Place one teaspoon of olive oil in a large soup pot or Dutch oven. Heat oil on medium-high heat until very hot, but not smoking. Lightly season chicken pieces with salt and pepper, then add to the pot.

Cook the chicken on all sides, stirring often, for approximately 5 minutes. The chicken should be very lightly browned and cooked all the way through. Once the chicken is done, remove it from pan with a slotted spoon, and transfer to a plate. Set chicken aside until later.

Cooking the chicken breast pieces for Southwestern chicken soup.

Add the remaining 1 teaspoon of olive oil back into the pan (the same one you cooked the chicken in). Heat oil on medium-high, then add the onion, bell pepper, and jalapeño to the pan.

Cook for 3 minutes, stirring often, until veggies have softened up a bit. Add the chili powder, minced garlic, and ground cumin to the pan, and stir to combine. Cook this mixture for an additional 30 seconds once combined.

Bell peppers, jalapeño and onions are cooked, to add to Southwestern chicken soup.

Spices for Southwestern chicken soup are added to onions, jalapeños and peppers in pan

Stir the chicken broth, diced tomatoes, black beans and corn into the soup. Bring the soup to a boil. Once soup begins to boil, put a lid on the pan, and turn the heat down to LOW. Continue to cook the Southwestern chicken soup on low heat (covered) for about 8-9 minutes. The veggies should be nice and tender at this point.

Broth, tomatoes and corn are added to the pan of Southwestern chicken soup.

Add The Cooked Chicken And Finish The Soup

Carefully add the cooked chicken pieces back into the hot Southwestern chicken soup. Stir the ingredients to combine, and continue to cook just until the chicken is fully heated through. It should only take about 2-3 minutes to reheat the chicken.

Remove the pot of soup from the heat, and stir in the fresh lime juice. The Southwestern Chicken Soup is now ready to garnish, then eat!

Cooked chicken pieces are added to the pot of Southwestern chicken soup.

See all those nice veggies and chicken chunks in this soup? You’re gonna enjoy this!

A ladle, full of yummy Southwestern chicken soup.

To Serve Southwestern Chicken Soup

When ready to serve, ladle the soup into bowls. Each serving of this hearty soup is 1¾ cups, so full bowls of Southwestern Chicken Soup are in order! Garnish each bowl of soup with 2 slices of ripe avocado, and a few cilantro leaves, and some crumbled corn chips. Grab a spoon and help yourself to a big bite of this delicious Southwestern chicken soup!

NOTE: The original Weight Watchers recipe did NOT use corn chips. I added 3 crumbled up corn chips to each bowl of soup, for a nice looking presentation and “crunch”. 

Southwestern Chicken Soup is served with avocado slices, corn chips and cilantro on top.

We really LOVED this soup!  My husband said this might have become his new FAVORITE soup! Wow! That’s saying a lot, since I make a lot of yummy soups! The leftovers were yummy, too! The soup will keep for 4 days in refrigerator and up to 3 months in the freezer.

Sure do hope you will consider trying this Southwestern chicken soup. It is incredibly easy to make, and tastes absolutely wonderful. If you follow the Weight Watchers program to track your food intake, this recipe has a value of 3 Smart Points (without corn chips). Have a great day!

Looking For More SOUP Recipes?

You can find all of my recipes in the Recipe Index, located at the top of the page. I have lots of soup recipes published, including:

Interested In More Recipes?

Thank you for visiting this website. I appreciate you using some of your valuable time to do soIf you’re interested, I publish a newsletter 2 times per month (1st and 15th) with all the latest recipes, and other fun info. I would be honored to have you join our growing list of subscribers, so you never miss a great recipe!
There is a Newsletter subscription box on the top right side (or bottom) of each blog post, depending on the device you use, where you can easily submit your e-mail address (only) to be included in my mailing list.

You Can Also Find Me On Social Media:

Facebook page: The Grateful Girl Cooks!
Pinterest:
The Grateful Girl Cooks!
Instagram:
jbatthegratefulgirlcooks

Author's signature

Original Recipe Source: https://www.weightwatchers.com/us/recipe/southwestern-chicken-soup/59779f66112c2b4e18b0fd84 

0 from 0 votes
Southwestern Chicken Soup
Prep Time
10 mins
Cook Time
25 mins
Total Time
35 mins
 

You'll love this delicious Southwestern Chicken Soup, a Weight Watchers dish with corn, black beans, tomatoes, bell peppers, and avocado slices!

Category: Entree, Soup
Cuisine: Southwestern
Keyword: Southwestern chicken soup
Servings: 4
Calories Per Serving: 401 kcal
Author: JB @ The Grateful Girl Cooks!
Ingredients
  • 2 teaspoons olive oil , divided use
  • 1 pound chicken breasts (boneless, skinless) , cut in 1/2" cubes
  • 1/2 teaspoon salt
  • 1/4 teaspoon black pepper
  • 1 medium onion , chopped
  • 1 small green bell pepper , seeded and chopped
  • 2 cloves garlic , minced
  • 1 medium jalapeño pepper , seeded and chopped
  • 1 Tablespoon chili powder
  • 2 teaspoons ground cumin
  • 29 ounces chicken broth (reduced sodium) (this is two 14.5 oz. cans)
  • 14.5 ounces canned diced tomatoes , drained
  • 1 cup frozen corn kernels (or fresh)
  • 15.25 ounces canned black beans , drained and rinsed
  • 1 Tablespoon fresh lime juice
  • 1/2 medium avocado , pitted, peeled, cut into 8 slices
  • 1/4 cup cilantro leaves
Instructions
  1. Heat 1 teaspoon of the olive oil in a large soup pot, on medium-high heat until very hot, but not smoking. Lightly season chicken pieces with salt and pepper, then add to pan Cook chicken on all sides, stirring often, for about 5 minutes. Chicken should be lightly browned and cooked all the way through. Once chicken is done, remove from pan, and transfer to a plate. Set chicken aside.

  2. Add remaining 1 teaspoon of oil back into the pan (the same one you cooked chicken in). Heat oil on medium-high, then add onion, bell pepper, and jalapeño. Cook for 3 minutes, stirring often, until veggies have softened a bit. Stir in the chili powder, minced garlic, and ground cumin. Cook this mixture for an additional 30 seconds once combined. Stir in chicken broth, diced tomatoes, black beans and corn.

  3. Bring the soup to a boil. Once it boils, put a lid on the pan, and turn heat to LOW. Continue to cook soup on low heat (covered) for about 8-9 minutes. The veggies should be nice and tender.

  4. Carefully add the cooked chicken back into soup. Stir to combine, and continue to cook until chicken is heated through. This should take 2-3 minutes. Remove pan from the heat, and stir in the fresh lime juice. 

  5. To serve, ladle the soup into bowls. Each serving is 1¾ cups. Garnish each bowl of soup with 2 avocado slices, and a few cilantro leaves. You can also add a few crumbled corn chips (optional) if you want! Serve, and enjoy!

Recipe Notes

OPTIONAL: You can crumble up two or three corn chips on top to garnish each bowl of soup. The corn chips are NOT included in caloric or WW points calculation.

Nutrition Facts
Southwestern Chicken Soup
Amount Per Serving (1 bowl (1¾ cups + 2 avocado slices per serving))
Calories 401 Calories from Fat 99
% Daily Value*
Fat 11g17%
Saturated Fat 2g13%
Cholesterol 72mg24%
Sodium 1085mg47%
Potassium 1457mg42%
Carbohydrates 40g13%
Fiber 12g50%
Sugar 6g7%
Protein 38g76%
Vitamin A 1070IU21%
Vitamin C 41.4mg50%
Calcium 112mg11%
Iron 5.3mg29%
* Percent Daily Values are based on a 2000 calorie diet.

Here’s one more to pin on your Pinterest boards!You'll love this delicious Southwestern Chicken Soup, a Weight Watchers dish with corn, black beans, tomatoes, bell peppers, and avocado slices!

Chicken Noodle Soup

Delicious, homemade chicken noodle soup, made with leftover rotisserie chicken, celery, carrots, garlic, onions and spinach, will warm you up on a cold day!
Delicious, homemade chicken noodle soup, with leftover rotisserie chicken, celery, carrots, garlic, onions and spinach will warm you up on a cold day!

We recently bought a rotisserie chicken at Costco. They always seem to have the best roasted chicken! After a couple days of enjoying it, we were left with a mostly picked over whole chicken in our fridge. About 75% of the meat was gone off the bones, and we had the “skeletal remnants” in the fridge.

A lot of folks would throw out the rest of the chicken, at that point. But did you know the bones and tiny bits of chicken left hanging on for dear life can make an incredible tasting chicken noodle soup? YEP!  I decided not to waste the leftovers, and make a big pot of soup for our rainy night dinner!

The results? A wonderful tasting homemade chicken noodle soup that we enjoyed for a few more days, for dinner and a couple lunches! So the next time you have a leftover roasted chicken  (or have some leftover pre-cooked chicken and chicken broth in your kitchen), make soup! It’s EASY!  Here’s how:

Scroll Down For A Printable Recipe Card At The Bottom Of The Page

Making Chicken Noodle Soup Using Leftover Roasted Chicken

The photo below shows you what was left of our rotisserie chicken. Poor thing never had a chance! Most of the meat had already been eaten, but there was still some attached to the bones. This is PERFECT for making a delicious broth for the soup!

So, to make a good broth for the chicken noodle soup, place the chicken (or what’s left of it) into a large soup pot, and cover it with water.

Leftover rotisserie chicken in pot of water to make chicken noodle soup.

Add sliced carrots, celery, chopped onions and two smashed cloves of garlic to the pot. The carrots, onion, and celery are considered the holy trinity of cooking, because they impart so much flavor. They will be perfect to flavor the chicken noodle soup base!

Celery, carrots, garlic and onion added to chicken in water, for chicken noodle soup.

Add salt, pepper, and two large chicken bouillon cubes to the soup pot. Bring the water to a boil on medium high heat. Cook for about 35 minutes, then remove from heat. Carefully remove whole chicken from pot, and let it cool a bit.

Once it has cooled some, pick off all the pieces of chicken you can get from the bones, and add them back into the pot. Believe it or not, I ended up with about 2 cups of shredded chicken! Discard the bones once finished. Skim any accumulated grease off the top of the soup, and remove the two smashed garlic cloves.

If NOT Using A Whole Chicken To Make This Chicken Noodle Soup

NOTE: If NOT using a whole chicken, simply cook the veggies for about 15 minutes (to soften), then add two cups of cooked, shredded chicken into the pot. Make sure to add THREE large chicken bouillon cubes to the water, for flavor.

Timesaving Tip For Making Homemade Chicken Noodle Soup

I made this soup to use up our rotisserie chicken leftovers. HOWEVER… IF YOU WANT TO SAVE TIME, simply use 4 quarts of store bought chicken broth with your veggies and precooked chicken. Then there is no need to make your own chicken broth, and it will still have lots of flavor!

It will end up costing you a bit more to make the soup, but will save you time, if that’s an issue!

Holding a ladle full of chicken soup (without noodles)

Put the chicken noodle soup back on the stove on medium high heat. Bring the soup to a full boil, then add the uncooked rotini pasta. If you don’t have rotini pasta noodles, add your favorite! Stir, and cook the noodles for the time stated on package (typically this is between 11-13 minutes).

Uncooked rotini pasta is added to boiling chicken noodle soup in pan.

Chicken noodle soup in a ladle is almost done cooking.

When the noodles are finished cooking, add 1 Tablespoon of butter to the pot. Stir in the thawed and drained chopped spinach. Continue cooking the soup for a couple minutes, until chicken noodle soup is heated through. Take a small taste, and add salt and/or pepper, as desired.

Spinach has been added to chicken noodle soup in pot.

A ladle, full of the finished chicken noodle soup.

And there you have it! Instead of throwing away the remnants of a whole rotisserie chicken, you have used it to make a delicious pot of homemade chicken noodle soup!

A big pot, full of homemade chicken noodle soup.

Who’s Ready To Eat Some Chicken Noodle Soup?

All that’s left to do is ladle up a bowlful of hot soup, and serve it to those you love!  It’s really quite easy to make a delicious, filling pot of chicken noodle soup very inexpensively! The best part is that this soup, filled with chicken, pasta, spinach, carrots, onions, celery and a wonderful tasting broth TASTES SO GOOD!

A bowl of hot chicken noodle soup is ready to eat!

Sure hope you will consider trying this recipe for homemade chicken noodle soup! I think it’s fun to get a huge pot of delicious soup using only a few simple, common ingredients!

Looking For More SOUP Recipes?

You can find all my soup recipes in the Recipe Index, located at the top of the page. A few favorites of ours include:

Interested In More Recipes?

Thank you for visiting this website. I appreciate you using some of your valuable time to do soIf you’re interested, I publish a newsletter 2 times per month (1st and 15th) with all the latest recipes, and other fun info. I would be honored to have you join our growing list of subscribers, so you never miss a great recipe!
There is a Newsletter subscription box on the top right side (or bottom) of each blog post, depending on the device you use, where you can easily submit your e-mail address (only) to be included in my mailing list.

You Can Also Find Me On Social Media:

Facebook page: The Grateful Girl Cooks!
Pinterest:
The Grateful Girl Cooks!
Instagram:
jbatthegratefulgirlcooks

Have a wonderful day!

Author's signature

0 from 0 votes
Chicken Noodle Soup
Prep Time
40 mins
Cook Time
15 mins
Total Time
55 mins
 
Delicious, homemade chicken noodle soup, with leftover rotisserie chicken, celery, carrots, garlic, onions and spinach, will warm you up on a cold day!
Category: Main Course, Soup
Cuisine: American
Keyword: chicken noodle soup
Servings: 8
Calories Per Serving: 152 kcal
Author: JB @ The Grateful Girl Cooks!
Ingredients
  • 2 cups cooked chicken
  • 4 quarts water , to cover chicken
  • 2 cubes chicken bouillon , large cubes
  • 2 large carrots , peeled, sliced
  • 1/2 cup onion , chopped
  • 2 stalks celery , chopped
  • 2 garlic cloves , peeled, smashed
  • 1/2 teaspoon salt
  • 1/2 teaspoon black pepper
  • cups uncooked rotini pasta , or pasta of choice
  • 1 Tablespoon butter
  • 1 cup chopped frozen spinach , thawed & drained
Instructions
If Using Rotisserie Chicken Carcass (to make soup base)
  1. Place the chicken carcass (what's left of it) into a large soup pot, and cover it with water. Add sliced carrots, celery, chopped onions and two smashed cloves of garlic to the pot. Add salt, pepper, and two large chicken bouillon cubes. 

  2. Bring the water to a boil on medium high heat. Cook for 35 minutes, then remove pan from heat. Carefully remove chicken carcass from pot, and let it cool a bit. Once it has cooled some, pick off all the pieces of chicken you can get from the bones, and add them back into the pot. Discard bones, once finished. Skim any accumulated grease off the top of the soup, and remove the two smashed garlic cloves.  

  3. Put the soup back on the stove on medium high heat. Bring the soup to a full boil, then add uncooked rotini pasta. Stir, and cook the noodles for the time stated on package until done (typically this is between 11-13 minutes).

  4. When noodles are finished cooking, add 1 Tablespoon of butter to the pot. Stir in the thawed, drained chopped spinach. Continue cooking soup for a couple minutes, until it's heated through. Take a taste, and add salt and/or pepper, as desired. Serve, and enjoy!

If Using Pre-Cooked Chicken And Store Bought Chicken Broth (TIMESAVER)
  1. Cook the veggies (carrots, onions, celery, garlic) in the boiling broth (4 quarts) for 15 minutes, then add shredded chicken and pasta (etc.) and cook per instructions above. Once noodles are cooked, add butter, spinach, and season with additional salt/pepper as desired. Serve, and enjoy!

Recipe Notes

Caloric calculation is based on "made from scratch" method (using leftover chicken and bones).

Nutrition Facts
Chicken Noodle Soup
Amount Per Serving (1 (1/8 of total))
Calories 152 Calories from Fat 54
% Daily Value*
Fat 6g9%
Saturated Fat 2g13%
Cholesterol 30mg10%
Sodium 220mg10%
Potassium 264mg8%
Carbohydrates 12g4%
Fiber 1g4%
Sugar 1g1%
Protein 10g20%
Vitamin A 5410IU108%
Vitamin C 3.4mg4%
Calcium 45mg5%
Iron 1mg6%
* Percent Daily Values are based on a 2000 calorie diet.

Here’s one more to pin on your Pinterest boards!Delicious, homemade chicken noodle soup, with leftover rotisserie chicken, celery, carrots, garlic, onions and spinach, will warm you up on a cold day!

Chicken, Parmesan & Spinach Gnocchi

Chicken Parmesan Spinach Gnocchi is an easy to make, 30 minute Italian dish with chicken, fluffy potato dumplings, Parmesan cheese sauce and spinach! Chicken Parmesan Spinach Gnocchi is an easy to make, 30 minute Italian entree with chicken, fluffy potato dumplings, Parmesan cheese sauce and spinach!
What do you get when you combine chicken, fluffy Italian potato dumplings, Parmesan cheese sauce and spinach into an easy meal? This recipe for Chicken Parmesan Spinach Gnocchi, that’s what… a simple, yet absolutely delicious entree!  If you’re a Vegetarian, you can simply leave the chicken out and still enjoy this wonderful dish!

I found the original recipe on Pinterest, and decided to fix it for dinner recently.  It was sooooo good!  This chicken parmesan spinach gnocchi recipe serves 4, and only takes about 30 minutes to prepare, from start to finish!

Talk about Italian comfort food! Whoa… the potato gnocchi are a classic Italian pasta, and the chicken breast chunks provide protein. In addition, the creamy Parmesan sauce is amazing, and the fresh spinach used in the recipe would make Popeye proud!

Scroll Down For A Printable Recipe Card At The Bottom Of the Page

How To Make Chicken Parmesan Spinach Gnocchi

Here’s how simple this recipe is to prepare:  Cut 2 boneless, skinless chicken breasts into bite sized pieces. Lightly season with salt, pepper, and garlic powder.  Heat olive oil in skillet on medium high heat.

Once oil is hot, add chicken and cook 3-4 minutes, turning occasionally until cooked through.  Remove chicken from skillet; keep warm.

Chicken, Parmesan & Spinach Gnocchi / The Grateful Girl Cooks!Chicken, Parmesan & Spinach Gnocchi / The Grateful Girl Cooks!Cook The Gnocchi

Prepare gnocchi according to package directions. Basically, you add them to boiling water, cook, and when they float to the surface they are done. This typically takes only a few minutes.  Drain the gnocchi. Set aside.

Chicken, Parmesan & Spinach Gnocchi / The Grateful Girl Cooks!Chicken, Parmesan & Spinach Gnocchi / The Grateful Girl Cooks!Prepare The Sauce

Place the empty pan back on the stove. Add butter to pan and heat on medium until melted. Add minced garlic and cook for 1 minute, stirring well.  Add flour; stir well to remove lumps and form a roux (thick paste).

Cook and stir for 30 seconds, just to “cook out” the raw flour taste. Add milk slowly to roux; stir or whisk it well to remove any remaining lumps. Cook this for 2-3 minutes only until the sauce has begun to thicken.

Chicken, Parmesan & Spinach Gnocchi / The Grateful Girl Cooks!
This is what the creamy sauce will look like, as it begins to thicken while cooking.

Chicken, Parmesan & Spinach Gnocchi / The Grateful Girl Cooks!
Time For Some “Add-Ins”

Stir in the chopped fresh spinach.  Cook for 3-4 minutes until the sauce has thickened and spinach has wilted.  Add Parmesan cheese and the cooked chicken into sauce. Stir well to combine.

You can add a bit more milk if the sauce is too thick. Taste the finished sauce, then season with additional salt and pepper, if necessary, to suit your personal taste preference.

Chicken, Parmesan & Spinach Gnocchi / The Grateful Girl Cooks!

Add The Gnocchi And Serve

Remove the pan from the heat, and add cooked, drained gnocchi. Gently stir until all ingredients are combined.  If necessary, reheat through on low. Serve the chicken parmesan spinach gnocchi immediately once it reaches the desired heat.

Chicken, Parmesan & Spinach Gnocchi / The Grateful Girl Cooks!
Serving Chicken, Parmesan & Spinach Gnocchi

I dish up the gnocchi onto individual serving plates, then garnish with a bit more grated Parmesan cheese (can never have too much Parmesan, right?). Serve, and enjoy this wonderful chicken dish! It’s creamy, has great flavor, and is delicious and filling!

If you enjoy this chicken parmesan spinach gnocchi, you will LOVE my “copycat” recipe for Olive Garden’s Chicken Gnocchi Soup or a recipe for Creamy Italian Sausage Gnocchi. They are both delicious, also!

Chicken, Parmesan & Spinach Gnocchi / The Grateful Girl Cooks!
I really hope you will consider making this chicken parmesan spinach gnocchi recipe. I think you will be surprised at just how simple it is to make, in such a short time.  Have a wonderful day… and be KIND as you journey through this 24 hours you’ve been given!

Be sure and check out ALL my recipes in the Recipe Index, which is located at the top of the page. I have a LOT of delicious, family-friendly recipes I’m confident you will enjoy

Interested In More Recipes?

Thank you for visiting this website. I appreciate you using some of your valuable time to do soIf you’re interested, I publish a newsletter 2 times per month (1st and 15th) with all the latest recipes, and other fun info. I would be honored to have you join our growing list of subscribers, so you never miss a great recipe!
There is a Newsletter subscription box on the top right side (or bottom) of each blog post, depending on the device you use, where you can easily submit your e-mail address (only) to be included in my mailing list.

You Can Also Find Me On Social Media:
Facebook page: The Grateful Girl Cooks!
Pinterest: The Grateful Girl Cooks!
Instagram: jbatthegratefulgirlcooks

Author's signature

Recipe Adapted From:  http://www.lifeasastrawberry.com/parmesan-spinach-gnocchi/

0 from 0 votes
Chicken, Parmesan & Spinach Gnocchi
Prep Time
10 mins
Cook Time
20 mins
Total Time
30 mins
 

Chicken Parmesan Spinach Gnocchi is an easy to make, 30 minute Italian entree with chicken, fluffy potato dumplings, Parmesan cheese sauce and spinach!

Category: Entree
Cuisine: Italian
Keyword: chicken parmesan spinach gnocchi
Servings: 4 servings
Calories Per Serving: 478 kcal
Author: JB @ The Grateful Girl Cooks!
Ingredients
  • 2 chicken breasts (boneless, skinless)
  • Salt , pepper and garlic powder (to lightly season chicken)
  • 1 Tablespoon olive oil
  • 16 ounces potato gnocchi (found in pasta section)
  • 2 Tablespoons butter
  • 1 clove garlic , minced
  • 2 Tablespoons all purpose flour
  • cups milk
  • 3 cups fresh spinach , chopped
  • Additional salt/pepper and milk , if necessary
  • 1 cup finely shredded Parmesan cheese (plus more for garnish, if desired)
Instructions
  1. Cut chicken into bite sized pieces. Lightly season with salt, pepper, and garlic powder. Heat olive oil in skillet on medium high heat. Once oil is hot, add chicken and cook 3-4 minutes, turning occasionally until cooked through. Remove chicken from skillet and keep warm.
  2. Prepare gnocchi according to pkg. directions (add to boiling water, cook, and when they float to surface they're done - 3-4 minutes). Drain gnocchi. Set aside. Place empty pan back on stove.
  3. Add butter to pan; heat on medium until melted. Add minced garlic; cook for 1 minute, stirring well. Add flour; whisk well to remove lumps and form a roux (thick paste). Cook and stir for 30-60 seconds to "cook out" flour taste. Add milk slowly to roux; stir well. Cook for 2-3 minutes only until sauce has begun to thicken.
  4. Add chopped spinach; stir well. Cook for 3-4 minutes until sauce has thickened and spinach has wilted. Add Parmesan cheese, then add cooked chicken to sauce. Stir well. Add a bit more milk if sauce is too thick. Taste sauce; season with additional salt and pepper, if necessary.
  5. Remove pan from heat; add cooked and drained gnocchi. Gently stir until all ingredients are combined. If necessary, reheat through on low. Serve immediately upon reaching desired heat.
  6. Serve, garnishing each portion with grated Parmesan cheese. Enjoy!
Nutrition Facts
Chicken, Parmesan & Spinach Gnocchi
Amount Per Serving (1 serving)
Calories 478 Calories from Fat 162
% Daily Value*
Fat 18g28%
Saturated Fat 9g56%
Cholesterol 71mg24%
Sodium 950mg41%
Potassium 468mg13%
Carbohydrates 48g16%
Fiber 3g13%
Sugar 4g4%
Protein 29g58%
Vitamin A 2640IU53%
Vitamin C 7.3mg9%
Calcium 436mg44%
Iron 5.3mg29%
* Percent Daily Values are based on a 2000 calorie diet.

Here’s one more to pin on your Pinterest boards!Chicken Parmesan Spinach Gnocchi is an easy to make, 30 minute Italian entree with chicken, fluffy potato dumplings, Parmesan cheese sauce and spinach!

Save

Save

Save

Save

Save

Save

Save

Save

Save

Save

Save

Save

Save

Save

Save

Save

Olive Garden Chicken Gnocchi Soup

This delicious, copycat version of Olive Garden’s beloved thick and creamy chicken gnocchi soup is easy to make in 30 minutes, for lunch or dinner!This delicious, copycat version of Olive Garden's beloved thick and creamy chicken gnocchi soup is easy to make in 30 minutes... for lunch or dinner!
Last year a friend from out of state was staying in our home for several days. My friend Patti and I went to a local restaurant, where I tasted an amazing soup… Olive Garden Chicken Gnocchi Soup!  It was so good I’ve been on a quest ever since, to find a great recipe to duplicate it.

I think I found a great recipe on Pinterest. The soup tastes amazingly similar to the restaurant version, and it is crazy delicious! Did I mention it only takes 25-30 minutes from start to finish to make, as well? Yep.  EASY and delicious – now that’s my kind of meal! Here’s how you make this main course soup:

Scroll Down For A Printable Recipe Card At The Bottom Of The Page

How To Make Olive Garden Chicken Gnocchi Soup

Add butter and olive oil to a large soup pot. Turn heat to medium-high heat, and melt butter. Add diced onion and celery and sauté for 3-4 minutes, stirring occasionally, until onions are translucent and tender. During the last minute, add the minced garlic and continue cooking, stirring to prevent garlic from burning.

Cooking onion, celery and garlic for gnocchi soup

Once onions and celery are tender, add the flour to the pan.  Stir to combine all the ingredients.  This makes a “roux” which helps to thicken the soup. Cook the roux for an additional minute, stirring well.

Flour added to onion and celery to thicken chicken gnocchi soup

Add the half and half and the chicken broth to the soup pot, and stir well, to fully combine ingredients.

Half n' half added to chicken gnocchi soup

Chicken broth added to soup

The chicken gnocchi soup will look like the photo below. Continue to cook, stirring frequently until the soup begins to thicken.

Finish Making The Chicken Gnocchi Soup

Once the soup has begun to thicken, add the shredded carrots, chopped spinach, fresh thyme leaves, diced chicken breast, and potato gnocchi. Stir well, to fully blend all these ingredients into the chicken gnocchi soup.

Soup base for chicken gnocchi soup, cooking in large saucepan.

Continue to cook the soup on medium heat until soup is heated through, and the potato gnocchi is fully cooked (between 5 and 10 minutes). The soup will thicken up a bit more, too. See that good looking gnocchi? YUM.

Gnocchi from soup, with spinach and carrots, on wooden spoon

Serve The Olive Garden Chicken Gnocchi Soup

Once the chicken gnocchi soup is finished cooking, give it a taste test. Season with salt and ground black pepper, to taste.  See the bites of gnocchi, chicken, spinach and shredded carrots in the photo below? This is a meal in a bowl, friends!

Ladle full of homemade Olive Garden Chicken Gnocchi Soup

Ladle the creamy soup into serving bowls, and serve this chicken gnocchi soup while HOT! I think you’re gonna love this soup… we sure did! The potato gnocchi in the soup taste like little dumplings!

Soup, with chicken and gnocchi, is served in white bowl

We ate our Olive Garden chicken gnocchi soup with thick slices of crusty French bread. French bread tasted GREAT dipped in the soup to “sop up” some of that delicious creamy broth!

Thick, creamy gnocchi soup in white bowl

Sure hope you will consider making this absolutely delicious and filling chicken gnocchi soup. It’s quick and easy to prepare on a busy day, but is so filling and super delicious! The leftovers were just as good, as well! Have a great day, and thanks for taking the time to check out this recipe. Hope you enjoy it.

Looking For More GNOCCHI Recipes?

You can find all my recipes in the Recipe Index, located at the top of the page. I have some delicious gnocchi recipes you might be interested in, including:

Interested In More Recipes?

Thank you for visiting this website. I appreciate you using some of your valuable time to do soIf you’re interested, I publish a newsletter 2 times per month (1st and 15th) with all the latest recipes, and other fun info. I would be honored to have you join our growing list of subscribers, so you never miss a great recipe!
There is a Newsletter subscription box on the top right side (or bottom) of each blog post, depending on the device you use, where you can easily submit your e-mail address (only) to be included in my mailing list.

You Can Also Find Me On Social Media:
Facebook page: The Grateful Girl Cooks!
Pinterest: The Grateful Girl Cooks!
Instagram: jbatthegratefulgirlcooks

Author's signature

Recipe Source: http://therecipecritic.com/2016/09/creamy-chicken-gnocchi-soup-olive-garden-copycat/

0 from 0 votes
Olive Garden Chicken Gnocchi Soup
Prep Time
10 mins
Cook Time
20 mins
Total Time
30 mins
 
This delicious, copycat version of Olive Garden's beloved thick and creamy chicken gnocchi soup is easy to make in 30 minutes... for lunch or dinner!
Category: Soup
Cuisine: Italian
Keyword: chicken gnocchi soup
Servings: 6 servings
Calories Per Serving: 383 kcal
Author: JB @ The Grateful Girl Cooks!
Ingredients
  • 3 Tablespoons butter
  • 1 Tablespoon olive oil
  • 1 cup brown onion , diced
  • 1/2 cup celery , diced
  • 2 garlic cloves , minced
  • 1/4 cup all-purpose flour
  • 2 cups half and half
  • 1 can (14 ounces) chicken broth (**See NOTES section below for tip)
  • 1 cup shredded carrots
  • 1 cup fresh spinach leaves , chopped (may substitute frozen, chopped spinach-drained well)
  • 1 Tablespoon fresh thyme leaves
  • 1 cup cooked chicken breast , diced
  • 1 package (16 ounces) potato gnocchi (found in pasta aisle)
  • Salt and ground black pepper , to taste
Instructions
  1. Place the butter and olive oil in a large soup pot. Melt butter on medium-high heat. Add diced onion and celery. Sauté until onions are translucent and tender (about 3-4 minutes), stirring occasionally. During the last minute, add the minced garlic.
  2. Add flour to the pan, stir well, to combine (this makes a "roux"). Continue to cook this for an additional minute.
  3. Add the half and half, then the chicken broth to the soup pot. Mix well, to combine, and continue to cook, stirring frequently until the soup begins to thicken.
  4. Once soup has begun to thicken, add shredded carrots, chopped spinach, fresh thyme leaves, diced chicken and gnocchi. Simmer on low for 5-10 minutes, until soup is heated and thickened, and gnocchi have fully cooked. Taste and season with salt and pepper, if desired.
  5. Serve hot... and enjoy!
Recipe Notes

If you prefer a thinner soup, simply add an additional can of chicken broth to soup. (I like it thick and creamy, so only used one can!)

Nutrition Facts
Olive Garden Chicken Gnocchi Soup
Amount Per Serving (1 serving)
Calories 383 Calories from Fat 171
% Daily Value*
Fat 19g29%
Saturated Fat 10g63%
Cholesterol 64mg21%
Sodium 625mg27%
Potassium 381mg11%
Carbohydrates 40g13%
Fiber 3g13%
Sugar 2g2%
Protein 14g28%
Vitamin A 4585IU92%
Vitamin C 12.5mg15%
Calcium 137mg14%
Iron 3.9mg22%
* Percent Daily Values are based on a 2000 calorie diet.

Here’s one more to pin on your Pinterest boards!This delicious, copycat version of Olive Garden's beloved thick and creamy chicken gnocchi soup is easy to make in 30 minutes... for lunch or dinner!

Save

Save

Save

Save

Save

Save

Save

Save

Save

Save

Save

Teriyaki Chicken

Who needs takeout, when you can easily make this delicious Teriyaki Chicken, with chicken breasts baked in an Asian inspired sauce, served on rice? It’s simple and delicious!Who needs takeout, when you can easily make this delicious Teriyaki Chicken, with chicken breasts baked in an Asian inspired sauce, served on rice?

Do you enjoy Teriyaki Chicken? I sure do, so I wanted to share an easy and delicious recipe with you today, so you can make your own at home!  The taste is OUTSTANDING!

This really is one of my favorite dishes! There’s just something about the Asian teriyaki glaze that pushes all my buttons! I enjoy using this recipe (for the Teriyaki Sauce) to also make Teriyaki Chicken Rice Bowls. YUM.  I think you’ll be surprised at just how easy it is to make!

Scroll Down For A Printable Recipe Card At The Bottom Of The Page

Make The Teriyaki Sauce

Here’s what you do:  First make up the teriyaki sauce (don’t worry-it’s EASY). The ingredients are cooked until it becomes a thick and amazing sauce.

Whisking and cooking homemade teriyaki sauce in saucepan

Heat olive oil in a large skillet until it is hot, but not smoking. Cook the boneless, skinless chicken breasts in the hot oil until they are golden brown. Once the bottom side is golden brown, gently turn them over and continue cooking other side, until the chicken is fully cooked through.

Four chicken breasts cooking in skilletBrowned chicken breasts cooking in skillet.

Place the browned chicken breasts into an oven-proof baking dish. Pour the thickened teriyaki sauce on top and around the chicken breasts, to fully coat them.

Teriyaki sauce poured over cooked chicken breasts in white baking dish

Bake The Teriyaki Chicken

Once they are covered in that yummy teriyaki sauce, the chicken breasts are baked for 15-20 minutes. See how it gets the name teriyaki chicken? Chicken and teriyaki sauce… easy peasy!

Teriyaki chicken baked in sauce

To Serve Teriyaki Chicken

Once the teriyaki chicken is fully baked, remove the pan from the oven. Transfer the chicken breasts from the pan onto a cutting board. Slice each chicken breast into thin strips.

Serve the teriyaki chicken slices on top of a bed of rice. Drizzle the chicken with additional sauce, and garnish it with sliced green onions and sesame seeds.  That’s it! See how EASY it is to make delicious teriyaki chicken? Well, just wait until you TASTE it, because it’s absolutely delicious!

The teriyaki chicken is sliced and served on rice, with fruit on side.

A serving of teriyaki chicken with sliced green onions, on top of white rice.

Hope you’ll give this recipe for teriyaki chicken a try. I think you’re gonna LOVE it! Have a blessed day, and I sincerely hope you will stop by again soon.

Looking For More CHICKEN Recipes?

You can find all of my recipes (including chicken) in the Recipe Index, located at the top of the page. A few of these chicken recipes you might be interested in are:

Interested In More Recipes?

Thank you for visiting this website. I appreciate you using some of your valuable time to do soIf you’re interested, I publish a newsletter 2 times per month (1st and 15th) with all the latest recipes, and other fun info. I would be honored to have you join our growing list of subscribers, so you never miss a great recipe!
There is a Newsletter subscription box on the top right side (or bottom) of each blog post, depending on the device you use, where you can easily submit your e-mail address (only) to be included in my mailing list.

You Can Also Find Me On Social Media:
Facebook page: The Grateful Girl Cooks!
Pinterest: The Grateful Girl Cooks!
Instagram: jbatthegratefulgirlcooks

Author's signature

Recipe Source:  http://www.asweetpeachef.com/entrees/teriyaki-chicken/

↓↓ PRINTABLE RECIPE BELOW ↓↓

0 from 0 votes
Teriyaki Chicken
Prep Time
15 mins
Cook Time
20 mins
Total Time
35 mins
 

Who needs takeout, when you can easily make this delicious Teriyaki Chicken, with chicken breasts baked in a flavorful Asian inspired sauce, served on rice?

Category: Main Course
Cuisine: Asian
Keyword: teriyaki chicken
Servings: 4 servings
Calories Per Serving: 225 kcal
Author: JB @ The Grateful Girl Cooks!
Ingredients
For Teriyaki Sauce:
  • 1/3 cup soy sauce (low sodium)
  • 2 Tablespoons honey
  • 1 Tablespoon brown sugar
  • 2 cloves garlic , minced
  • 1 teaspoon fresh ginger , finely minced
  • 1 teaspoon apple cider vinegar
  • 1/3 cup water
  • 1 Tablespoon cornstarch
For Chicken:
  • 1 Tablespoon olive oil
  • 4 boneless , skinless chicken breasts
  • Salt & Black Pepper (just a pinch of each)
For Garnish (optional):
  • sliced green onions and sesame seeds
Instructions
To Make The Teriyaki Sauce:
  1. Place soy sauce, honey, brown sugar, garlic, ginger and apple cider vinegar in a medium sized pan. Heat this mixture on medium-high; stir it frequently.
  2. In separate bowl, combine cornstarch and water. Stir until cornstarch has dissolved, then add it to the ingredients in the pan. Stir frequently and cook for 6-7 minutes, until the mixture has thickened. Remove from heat and set aside.
To Make The Chicken:
  1. Make sure your oven is preheated to 425 degrees F.
  2. Pour Tablespoon of olive oil into a large skillet Heat olive oil on high heat. Season the pieces of chicken with salt and pepper. Put the chicken into hot oil in skillet. Once you put chicken breasts into skillet, don't move them. Cook chicken for 4-5 minutes, then turn to cook other side for 3-4 minutes. Chicken should be golden brown in color. Remove and place in a baking dish that has been sprayed with non-stick spray.
  3. Pour the teriyaki sauce over the top and all around the chicken pieces.
  4. Bake chicken at 425 degrees for 15-20 minutes (or until no longer pink in middle). Sauce will be bubbly.
  5. When done, remove chicken from oven. Serve on top of a bed of rice, and garnish each piece with sliced green onions and sesame seeds. Enjoy!.
Recipe Notes

If you want to cook it all in one pan, make sure to cook the chicken in an oven-proof skillet.

Nutrition Facts
Teriyaki Chicken
Amount Per Serving (1 piece)
Calories 225 Calories from Fat 54
% Daily Value*
Fat 6g9%
Saturated Fat 1g6%
Cholesterol 72mg24%
Sodium 1222mg53%
Potassium 459mg13%
Carbohydrates 15g5%
Sugar 11g12%
Protein 26g52%
Vitamin A 35IU1%
Vitamin C 1.8mg2%
Calcium 12mg1%
Iron 0.9mg5%
* Percent Daily Values are based on a 2000 calorie diet.

Here’s one more to pin on your Pinterest boards!Who needs takeout, when you can easily make this delicious Teriyaki Chicken, with chicken breasts baked in an Asian inspired sauce, served on rice?

Save

Save

Save

Chicken Recipes

Click on the name of recipe for direct link.

Air Fryer Chicken Breasts
Air Fryer Chicken Chimichangas
Air Fryer Chicken Parmesan
Asian BBQ Chicken Wings
Asian Chicken Lettuce Wraps
Asian Chicken Thigh Skillet
Asian Lemon Chicken Strips
Alice Springs Chicken (Outback Steakhouse Copycat)
Baked Asian Chicken Wings
Baked Chicken Thighs And Legs
Baked Parmesan Chicken
Balsamic Chicken with Asparagus and Mushrooms
BBQ Chicken Tortilla Pizza
Buffalo Honey Hot Wings
Butternut Squash Risotto with Chicken
Cajun Chicken Pasta
Cajun Chicken Strips
Chicken And Asparagus Lemon Stir Fry
Chicken And Asparagus Risotto
Chicken and Broccoli Stuffed Shells
Chicken And Veggie Stir-Fry
Chicken Black Bean Quesadilla
Chicken Broccoli Fettucine Alfredo
Chicken Club Pasta Salad
Chicken Cutlets in Pan Sauce
Chicken Cutlets With Pecan Sauce
Chicken Divan
Chicken Enchilada Meatballs
Chicken Enchilada Mole Casserole
Chicken Enchilada Quiche
Chicken Fajita Rice Bowl
Chicken Fried Chicken With Country Gravy
Chicken Green Chile Enchiladas
Chicken Noodle Soup
Chicken Marsala
Chicken Marsala – “21 Day Fix” Recipe
Chicken, Parmesan & Spinach Gnocchi
Chicken Pasta Casserole
Chicken Piccata
Chicken Pineapple Bacon Burger
Chicken Pomodoro
Chicken, Quinoa And Veggies
Chicken Salad
Chicken Sausage and Spinach Pasta
Chicken Thigh Osso Bucco
Chicken Veggie TexMex Skillet
Chopped Greek Chicken Salad
Coconut Milk Braised Chicken
Copycat Applebee’s Oriental Chicken Salad
Coq au Vin
Cranberry Chicken
Creamy Chicken Broccoli Quinoa Casserole
Creamy Chicken Primavera
Creamy Lemon Tarragon Chicken
Creamy Mushroom Chicken Thighs
Crockpot Chicken Tikka Masala
Crunchy Buttermilk Fried Chicken
Easy Baked BBQ Chicken
Easy Cashew Chicken
Easy Chicken Caesar Salad
Easy Chicken Jalapeño
Easy Chicken Pot Pie
Easy Chicken Rice Casserole
Easy Chicken Salad For Sandwiches (Willow Tree brand copycat)
Easy Grilled Chicken With Jerk Seasoning
Fiesta Chicken Pasta Casserole
Firecracker Chicken Meatballs
Fried Chicken, Spicy Mayo and Slaw Sandwich
Garlic Ginger Sesame Marinated Chicken
Garlic Lime Chicken Thighs
Grandma’s Southern-Style Chicken n’ Dumplings
Greek-Style Chicken Wings
Green Chile Chicken Crockpot Enchilada Soup
Grilled Chili & Lime Chicken Fajita Salad
Grilled Lemon Chicken Breasts
Grilled Marmalade Chicken
Hawaiian “Huli Huli” Chicken
Healthy Kung Pao Chicken
Hoisin Sriracha Chicken
Homemade Shake And Bake Chicken
Honey BBQ Chicken Strips
Honey Garlic Chicken (For Crock Pot)
Honey Garlic Chicken And Veggies (one pan meal)
Honey Lime Chicken Skewers
Honey Lime Grilled Chicken
Italian Chicken Parmesan Meatballs
Kung Pao Chicken
Kung Pao Zoodles (zucchini noodles, w/ chicken)
Layered Chicken Enchilada Casserole
Lemon Pineapple Chicken Bites
Lemon Rosemary Chicken Breasts
Marinated Baked Chicken Thighs
Marinated Pan-Seared Mexican Chicken
Mediterranean Chicken Sandwich
Mexican Shredded Chicken (crock pot)
Mixed Salad with Hoisin Vinaigrette and Crisp Panko Chicken
Mom’s Chicken Parmigiana

Mom’s Grilled Chicken EASY Basting Sauce
One Pan Greek Chicken And Orzo
Orange Cashew Chicken
Orange Dijon Chicken Breasts
Pecan-Crusted Chicken
P.F. Chang’s Ginger Chicken With Broccoli
Rosemary Chicken With Caramelized Onion Wine Sauce
Santa Fe Chicken
Santa Fe Chicken Sandwich (copycat)
Sesame Chicken Salad with Ginger Dressing
Simple Chicken Sausage Pasta
Skillet Monterey Chicken
Southwest Chicken Salad
Southwestern Chicken Lime Soup
Sticky Orange Chicken
Strawberry Avocado Spinach Salad with Grilled Chicken
Stuffed Jack O’ Lantern Peppers
Sun Dried Tomato, Spinach & Cheese Stuffed Chicken Breasts
Sweet Fire Chicken (Panda Express Copycat)
Szechuan Chicken
Tandoori Chicken (Weight Watchers)
Teriyaki Chicken
Teriyaki Chicken Rice Bowl
Teriyaki Chicken with Homemade Sauce
Thai Chicken Linguini
Traeger Chili Smoked Chicken Breasts
Traeger Roasted Chicken
Tuscan Garlic Chicken
West African Chicken and Peanut Stew
Yum Yum Chicken

Chicken Thigh Osso Bucco

Chicken Thigh Osso Bucco is a delicious twist on an Italian classic. Braised in white wine, chicken stock & veggies, it’s served on mashed potatoes or polenta!Chicken Thigh Osso Bucco is a delicious twist on an Italian classic. Braised in white wine, chicken stock & veggies, it's served on mashed potatoes or polenta!

I enjoy searching for and finding new recipes to make for our family and friends. It’s especially fun when I stumble onto a recipe, make it, and enjoy it so much that I KNOW it will be made over and over again. Such is the case with this recipe for Chicken Thigh Osso Bucco!

Before making this dish, I had to find an answer to one truly important question. Exactly WHAT IS OSSO BUCCO in the first place? Well, here’s the answer! In Italian “osso bucco” means “bone with a hole”, and refers to the typical way this recipe is prepared – with veal shanks. Veal shanks have a bone filled with bone marrow in the center of the meat, therefore that is how it got the name. Makes sense, right?

Scroll Down For A Pintable Recipe Card At The Bottom Of The Page

Chicken Thigh Osso Bucco

THIS recipe uses chicken thighs (bone in, skin on) instead of veal shanks, but the method of cooking is virtually the same. The meat braises for almost an hour in liquid, which results in a very tender piece of chicken.

This recipe for chicken thigh osso bucco originally was featured on the television show “The Chew”, and was prepared by host Clinton Kelly. I stumbled upon a slight adaptation of that recipe on another website, and that is the version I used to make this delicious dinner! Chicken thigh osso bucco is served on top of creamy mashed potatoes (or polenta, if that’s your preference). The dish smells fabulous, and tastes fabulous!

Prepare The Chicken

Here’s how you prepare this dish: *Note: original recipe calls for 8 chicken thighs. I used 4 since I was only cooking for two people, but kept everything else in recipe the same.

Dredge chicken thighs in flour to coat, then season them with salt and pepper.

Chicken thighs coated in flour for chicken thigh osso bucco.

Heat olive oil in a large stock pot. Add the floured chicken thighs to the hot oil, then sear the meat on both sides, until golden brown.

Thighs are seared in pan for chicken thigh osso bucco.

Once chicken is browned on both sides (but not cooked all the way through), transfer it to a plate or wire rack. Let it rest.

4 pan-seared chicken thighs, for chcken thigh osso bucco, on wire rack.

Cook The Veggies

Place the diced carrots and onions into the same pan you cooked the chicken thighs in (do not clean pan). Cook for several minutes, stirring occasionally until the veggies have softened.

Diced carrots and onions cooked in large saucepan, for chicken thigh osso bucco.

Add garlic, tomato paste, white wine, chicken stock, rosemary and thyme to the veggies in the pan. Stir, to mix these ingredients together. Continue to cook until the liquid has reduced by about half.

Sauce is cooking for chicken thigh osso bucco dish.

Simmer The Chicken

Once the liquid is reduced by about half, add the chicken thighs back into the pan. Put a lid on the pan. Continue to simmer the chicken on low for about 45-50 minutes, until the chicken thigh osso bucco is cooked all the way through. Once that is completed, you are ready to serve this delicious dish.

Chicken pieces for chicken thigh osso bucco, are added to sauce, to bake.

Time To Serve Chicken Thigh Osso Bucco

To serve, place the chicken thigh osso bucco on top of creamy mashed potatoes (or polenta). Spoon some of the leftover sauce and veggies over the top of each piece of the chicken. Grab your fork, and get ready to dig in.

Chicken Thigh Osso Bucco served on top of potatoes, with broccoli on the side.

That’s it!  Chicken Thigh Osso Bucco is easy to make, fabulous tasting, and very filling! It also looks good on the plate, right? YUM! The chicken and veggies are very tender, and easy to cut. I think you will LOVE it!

Chicken thigh osso bucco served on top of mashed potatoes.

I really hope you will consider making this chicken thigh osso bucco. It is absolutely delicious, and will definitely be making it again! Have a wonderful day… praying we will all seek to be an encourager to someone who might need it today.

Looking For More Chicken Recipes?

There are LOTS of chicken recipes on my website. You can check them out using the Recipe Index at the top of the page. Some of our favorites include:

Interested In More Recipes?

Thank you for visiting this website. I appreciate you using some of your valuable time to do soIf you’re interested, I publish a newsletter 2 times per month (1st and 15th) with all the latest recipes, and other fun info. I would be honored to have you join our growing list of subscribers, so you never miss a great recipe! 

There is a Newsletter subscription box on the top right side (or bottom) of each blog post, depending on the device you use, where you can easily submit your e-mail address (only) to be included in my mailing list.

You Can Also Find Me On Social Media:

Facebook page: The Grateful Girl Cooks!
Pinterest:
The Grateful Girl Cooks!
Instagram:
jbatthegratefulgirlcooks

Author's signature

Recipe Source: http://dinnerthendessert.com/clinton-kelleys-chicken-thigh-osso-bucco/

4.8 from 10 votes
Chicken Thigh Osso Bucco
Prep Time
15 mins
Cook Time
1 hr
Total Time
1 hr 15 mins
 

Chicken Thigh Osso Bucco is a delicious twist on an Italian classic. Braised in white wine, chicken stock & veggies, it's served on mashed potatoes or polenta!

Category: Entree
Cuisine: Italian
Keyword: chicken thigh osso bucco
Servings: 8 servings
Calories Per Serving: 327 kcal
Author: JB @ The Grateful Girl Cooks!
Ingredients
  • 8 chicken thighs bone in, skin on
  • 1/2 cup all purpose flour
  • 1/2 teaspoon salt
  • 1/4 teaspoon ground black pepper
  • olive oil (enough to cover bottom of pan)
  • 1 brown onion (diced)
  • 1 large carrot (peeled, sliced, cut into quarters)
  • 2 cloves garlic (minced)
  • 1 Tablespoon tomato paste
  • 1 cup dry white wine
  • 1 cup chicken stock
  • 1/2 teaspoon dried rosemary
  • 1/2 teaspoon dried thyme
  • parsley for garnish (if desired)
Instructions
  1. Place flour, salt and pepper on plate. Mix. Dredge chicken in flour mixture until all sides are covered.
  2. Add olive oil (enough to cover bottom of pan) to large heavy-bottomed saucepan. Heat on medium.
  3. When oil is hot, add chicken. Sear chicken until it is browned on both sides (you might need to brown chicken in batches). Remove chicken from pan.
  4. Add a bit more olive oil if necessary. Add onions and carrots; cook until softened (4-5 minutes).
  5. Add minced garlic. Cook for one more minute, stirring to prevent burning.
  6. Add tomato paste, wine, chicken stock, rosemary and thyme. Stir to combine all ingredients. Cook until the liquid in the pan has reduced by about half.
  7. Add the chicken thighs back to the pan; turn heat to low. Cover pan, and cook on low for 45-50 minutes (or until is cooked all the way through.
  8. Serve cooked chicken on top of creamy mashed potatoes or polenta. Spoon some of the veggies and sauce over the top of chicken. Garnish with parsley, if desired.
Nutrition Facts
Chicken Thigh Osso Bucco
Amount Per Serving (1 piece)
Calories 327 Calories from Fat 171
% Daily Value*
Fat 19g29%
Saturated Fat 5g31%
Cholesterol 111mg37%
Sodium 298mg13%
Potassium 357mg10%
Carbohydrates 10g3%
Sugar 1g1%
Protein 20g40%
Vitamin A 1390IU28%
Vitamin C 2.1mg3%
Calcium 19mg2%
Iron 1.5mg8%
* Percent Daily Values are based on a 2000 calorie diet.

Here’s one more to pin on your Pinterest boards!Chicken Thigh Osso Bucco is a delicious twist on an Italian classic. Braised in white wine, chicken stock & veggies, it's served on mashed potatoes or polenta!

Save

Save

Save