Category: Breakfast

Cinnamon Roll Crescents

Cinnamon roll crescents are quick and easy to make! Crescent roll dough is coated in a brown sugar/cinnamon mixture, then rolled, baked and drizzled with glaze!
Cinnamon roll crescents are quick and easy to make! Crescent roll dough is coated in brown sugar/cinnamon, then rolled, baked and drizzled with glaze!

I found a recipe on Pinterest that sounded like a totally quick and easy way to have a “cinnamon roll” to munch on with breakfast, so I decided to try it! There was a can of crescent roll dough in the refrigerator begging to be used, so out it came, for this delicious recipe!

We LOVE my homemade cinnamon rolls, but they take quite a while to prepare because of time necessary to let the homemade dough rise, etc. When you want the taste of a cinnamon roll, but without the fuss and effort, these cute little cinnamon roll crescents are the way to go!

We were having scrambled eggs and some bacon that I cooked in our oven, and I wanted something quick, easy, and yummy to serve with it. This was the perfect accompaniment, and we loved these cute little cinnamon roll crescents! They only take a couple minutes to prepare, and then they bake for only 9-12 minutes!

Scroll Down For A Printable Recipe Card At The Bottom Of The Page

How To Make Cinnamon Roll Crescents

The first thing you need to do is mix up the cinnamon roll filling! Easy! Simply mix together some brown sugar and cinnamon in a small bowl, until combined. DONE!

Brown sugar and cinnamon are mixed together for the cinnamon roll crescents filling.

Grab a can of refrigerated crescent roll dough out of the fridge. I used this kind, which has the dough for 8 crescent rolls in it.

Refrigerated crescent roll dough is used to make this breakfast treat quick and easy!

Cover The Crescent Roll Triangles With Filling Mixture

Separate each of the crescent rolls at the perforations, then lay them on a 13 x 9 inch ungreased baking sheet, about an inch apart. NOTE: You can also make them and roll them, THEN put them on the baking sheet, if desired.

Sprinkle the entire surface of each dough triangle with the filling mixture. Yes… it will be a bit messy, and yes, it will fall all over the baking sheet. No worries. Just scoop up as much as you can and dump it right back on top! Gently press down some of the filling onto the dough.

NOTE: You will most likely NOT use all of the mix. You can see in the photo below how much I had left AFTER completely covering the dough! Store the extras for next time!

Dough is separated into 8 portions and covered with brown sugar/cinnamon filling.

Now roll up the cinnamon roll crescents. If you can, roll each one up, beginning at the short side, and roll toward the tip of the triangle, but no worries! You can see in the photo below how mine weren’t that “pretty” or even moderately fashionable. This particular can of dough was pretty decimated when I took it out of the can. Trust me… it doesn’t matter!

Simply roll them up and tuck the end point under. Yes… again, some of the filling will fall out as you roll. I just scooped up what I could, and sprinkled it right back, on top! I used a pastry brush to clean up and remove the extra filling on the pan.

Dough is rolled up and sprinkled with extra filling mixture on top.

Bake The Cinnamon Roll Crescents

Bake the cinnamon roll crescents in a preheated 350° F oven, for between 9-12 minutes. Since oven temps vary greatly, be sure to check on them around 8-9 minutes.

When done, the cinnamon roll crescents will be golden brown on top (and will sure smell good!). Transfer the crescents to a wire rack, that is positioned on top of wax or parchment paper, and let them cool. The paper underneath will catch the drips when you glaze the crescents later.

Cinnamon roll crescents are baked until golden brown, then transferred to wire rack to cool.

Glazing The Cinnamon Roll Crescents

While the cinnamon roll crescents cool, mix together the glaze. Whisk together powdered sugar and heavy cream (or milk) in a small bowl, it reaches your desired consistency.

A simple glaze is mixed to drizzle onto the baked cinnamon roll crescents once done.

Lightly drizzle the glaze over the tops of the cinnamon roll crescents once they have cooled down a bit. The wax (or parchment) paper placed under the wire rack will make your cleanup a lot easier!
The glaze will firm up very quickly, and then the cinnamon roll crescents are ready to serve! Aren’t they CUTE? You can see the glaze on top, and all that cinnamon and brown sugar filling in every bit of these decadent breakfast treats!

The cinnamon roll crescents were served along with scrambled eggs and bacon.

I truly hope you will consider trying these super easy and quick cinnamon roll crescents. They are absolutely delicious, and I am confident you will enjoy them as much as we did! Have a wonderful day, and may God bless you.

Looking For More BREAKFAST Recipes?

You can find all of my recipes in the Recipe Index, located at the top of the page. A few other breakfast recipes you might be interested in trying include:

Interested In More Recipes?

Thank you for visiting this website. I appreciate you using some of your valuable time to do soIf you’re interested, I publish a newsletter 2 times per month (1st and 15th) with all the latest recipes, and other fun info. I would be honored to have you join our growing list of subscribers, so you never miss a great recipe!

There is a Newsletter subscription box on the top right side (or bottom) of each blog post, depending on the device you use, where you can easily submit your e-mail address (only) to be included in my mailing list.

You Can Also Find Me On Social Media:
Facebook page: The Grateful Girl Cooks!
Pinterest: The Grateful Girl Cooks!
Instagram: jbatthegratefulgirlcooks

Author's signature

Original recipe source: http://www.sprinklesomesugar.com/cinnamon-roll-crescents/

↓↓ PRINTABLE RECIPE BELOW ↓↓

0 from 0 votes
Cinnamon Roll Crescents
Prep Time
10 mins
Cook Time
9 mins
Total Time
19 mins
 
Cinnamon roll crescents are quick and easy to make! Crescent roll dough is coated in a brown sugar/cinnamon mixture, then rolled, baked and drizzled with glaze!
Category: Breakfast, Brunch
Cuisine: American
Keyword: cinnamon roll crescents
Servings: 8 crescents
Calories Per Serving: 186 kcal
Author: JB @ The Grateful Girl Cooks!
Ingredients
  • 8 ounces refrigerated crescent roll dough (1 can)
  • 1/2 cup brown sugar (light or dark)
  • 3 teaspoons cinnamon
For Glaze:
  • 1/2 cup powdered sugar (confectioner's sugar)
  • 2-3 Tablespoons heavy cream or milk
Instructions
  1. Preheat oven to 375° F. 

  2. Separate the crescent rolls at the perforations, then lay them on a 13 x 9 inch ungreased baking sheet, about an inch apart. Sprinkle entire surface of each dough triangle with the filling mixture. Yes... it will be messy. Scoop up as much as you can and dump it right back on top! Gently press down the filling onto the dough. Roll up crescents and tuck the end point under. Some of the filling will fall out as you roll. Scoop up what you can, and sprinkle it back, on top! NOTE: You will most likely NOT use all of the mix.  Store extra filling for next time! 

  3. Bake at 350° F, between 9-12 minutes. Since oven temps vary, check on them around 8-9 minutes. When done, crescents will be golden brown. Remove from oven and transfer to a wire rack, positioned on top of wax or parchment paper; let them cool for a few minutes.

  4. While crescents cool, make the glaze. Whisk together powdered sugar and heavy cream (or milk) in a small bowl, until it reaches desired consistency. Lightly drizzle glaze over the top of the crescents once they have cooled slightly. The paper placed under the wire rack will make cleanup a lot easier! The glaze firms up quickly, and then cinnamon roll crescents are ready to serve! Enjoy!

Nutrition Facts
Cinnamon Roll Crescents
Amount Per Serving (1 g)
Calories 186 Calories from Fat 63
% Daily Value*
Fat 7g11%
Saturated Fat 3g19%
Cholesterol 5mg2%
Sodium 228mg10%
Potassium 18mg1%
Carbohydrates 33g11%
Sugar 23g26%
Protein 1g2%
Vitamin A 55IU1%
Calcium 21mg2%
Iron 0.5mg3%
* Percent Daily Values are based on a 2000 calorie diet.

Here’s one more to pin on your Pinterest boards!Cinnamon roll crescents are quick and easy to make! Crescent roll dough is coated in brown sugar/cinnamon, then rolled, baked and drizzled with glaze!

Bacon Broccoli Quiche

Bacon broccoli quiche is a perfect dish for any meal! Bacon, broccoli, red pepper & garlic add flavor to this egg based dish, baked in a pie crust.

Do you like QUICHE? We sure do! I think it is a perfect breakfast, lunch OR dinner dish, which makes it very convenient to have around! It is soooo good!

Making classic quiche lorraine has been something I’ve done for almost 40 years now. I’ve also added my recipes for Italian Sausage and Spinach Quiche, Quiche Lorraine, and Southwestern Bacon Quiche to this blog, and recommend these delicious dishes, as well. Now I can add this bacon broccoli quiche to the list, too!

Scroll Down For A Printable Recipe Card At the Bottom Of The Page

How To Make This Quiche

Preheat oven to 425 degrees. While oven is preheating, cook bacon in a non-stick skillet or in the oven, until it’s completely cooked through, and crispy. I like to cut the bacon into small pieces BEFORE cooking in a skillet, because it cooks much faster that way!

Remove bacon from pan to paper towels (to drain) and crumble it (if you cooked whole slices). Be sure NOT to drain grease from skillet. You will cook the veggies in it, which will add flavor!

Chopped bacon is cooked until crisp, to add to the bacon broccoli quiche.

Using the same skillet (with the bacon grease still in it), cook the onion, red bell pepper and broccoli for 4-5 minutes until softened. Stir often while this mixture cooks.

Add the minced garlic to the veggies, and cook for one more minute, stirring to combine. Remove veggies from the heat, and set them aside to cool down a bit (before adding to pie crust dough) .

Chopped broccoli, red bell peppers, garlic and onion are cooked, before adding to the quiche.

Prepare The Deep Dish Pie Crust

TIP: To save time and effort, you can use a purchased DEEP DISH pie crust. My photos show a homemade pie crust, because that’s just how I roll. Whatever type of pie crust you use, just make sure it is deep dish, because there is a lot of filling that goes into the quiche, itself.

Prepare the unbaked deep dish pie shell by piercing the dough on the bottom and sides with the tines of a fork. This step helps prevent the crust from creating air pockets and puffing up too much while baking. Do this for homemade or purchased pie crust.

Pricking an unbaked quiche crust with the tines of a fork, before baking.

Add The Bacon Broccoli Quiche Filling

Add the crumbled bacon and veggies to the unbaked, prepared pie crust. Top the bacon and veggies with the grated mozzarella and Swiss cheese.

The cooked bacon and veggies are added to an uncooked pie crust.

Grated mozzarella and Swiss cheeses are added to the bacon broccoli quiche.

Mix and Add The Egg and Cream Quiche Filling

In a separate bowl, whisk together whipping cream, eggs, cayenne pepper and salt, until well blended. Pour the egg mixture on top of the bacon/veggies/cheese mixture in the pie crust.

Gently mix ingredients together. I use a fork- just be careful not to mix too hard or you will damage the crust. Mix only enough to blend the ingredients evenly together!

Egg and cream filling are poured over the quiche ingredients in the crust.

Here is the bacon broccoli quiche, before it goes into the oven.

Bake The Broccoli Bacon Quiche

Carefully put quiche into a preheated 425 degree oven. Don’t spill it! Bake at 425 degrees for 15 minutes, then reduce heat to 300 degrees and bake for an additional 35-40 minutes (quiche is done when a knife comes out clean).

Remove the baked bacon broccoli quiche (still in pan) to a wire rack to cool. When it first comes out of the oven it will be nice and puffed up, as in the photo below. The top of the quiche will flatten as it cools down.

 This is a picture of the bacon broccoli quiche right AFTER it comes out of the oven.

Let the quiche cool down a bit, slice into 8 portions, serve… and enjoy! We enjoy eating this bacon broccoli quiche, and think it tastes best when it is warm, but not too hot!

One slice has been removed from the finished quiche.

Slice yourself a piece of this delicious bacon broccoli quiche, and enjoy it for breakfast, lunch OR dinner! It really is quite versatile, and the leftovers store well in the refrigerator for several days!

When you are ready to have a slice of leftover bacon broccoli quiche, simply reheat it in the microwave for a quick and easy meal!

One slice of bacon broccoli quiche, with fresh fruit on the side.

Hope that you will try this yummy quiche, and trust you will enjoy it as much as we do! Have a wonderful day!

Interested In More Recipes?

Thank you for visiting this website. I appreciate you using some of your valuable time to do soIf you’re interested, I publish a newsletter 2 times per month (1st and 15th) with all the latest recipes, and other fun info. I would be honored to have you join our growing list of subscribers, so you never miss a great recipe!

There is a Newsletter subscription box on the top right side (or bottom) of each blog post, depending on the device you use, where you can easily submit your e-mail address (only) to be included in my mailing list.

You Can Also Find Me On Social Media:
Facebook page: The Grateful Girl Cooks!
Pinterest: The Grateful Girl Cooks!
Instagram: jbatthegratefulgirlcooks

Author's signature

Recipe Source: my brain and my mom’s pie crust recipe

0 from 0 votes
Bacon Broccoli Quiche
Prep Time
20 mins
Cook Time
50 mins
Total Time
1 hr 10 mins
 
Bacon broccoli quiche is a perfect dish for any meal! Bacon, broccoli, red pepper & garlic add flavor to this egg based dish, baked in a pie crust.
Category: Breakfast, Brunch, Dinner
Cuisine: American
Keyword: bacon broccoli quiche
Servings: 8 slices
Calories Per Serving: 462 kcal
Author: JB @ The Grateful Girl Cooks!
Ingredients
  • 1 deep dish pie crust (homemade or purchased) , unbaked
  • 6 slices bacon , cooked crisp, crumbled
  • 1/2 cup yellow onion , finely chopped
  • 1/2 cup broccoli florets (fresh or frozen) , finely chopped
  • 1/4 cup red bell pepper , finely chopped
  • 1 teaspoon minced garlic
  • 1/2 cup shredded mozzarella cheese
  • 1/2 cup shredded Swiss cheese
  • 2 cups heavy whipping cream
  • 4 large eggs
  • 1/2 teaspoon salt
  • 1/8 teaspoon cayenne pepper
Instructions
  1. Preheat oven to 425 degrees. While oven is preheating, cook bacon in a non-stick skillet (or oven), until crispy and cooked through. Remove bacon from pan to paper towels (to drain) and then crumble; do NOT drain grease from skillet.

  2. Using the same skillet (with the bacon grease still in it), cook the onion, red bell pepper and broccoli for 4-5 minutes until softened. Add the minced garlic during the last minute of cooking. Remove veggies from the heat, and set aside to cool.
  3. Prepare the unbaked deep dish pie shell by piercing the dough on the bottom and sides with the tines of a fork - (this helps prevent air pockets puffing up while baking). Add the crumbled bacon to the unbaked, prepared pie crust, then add the cooked veggies. Top with the grated mozzarella and Swiss cheese.

  4. In a separate bowl, whisk together whipping cream, eggs, cayenne pepper and salt, until well blended. Pour the egg mixture on top of the bacon/veggies/cheese mixture in the pie crust. Gently mix ingredients together (I use a fork-be careful not to mix too hard or you will damage the crust. Just enough to blend the ingredients evenly together!)
  5. Carefully put quiche into a preheated 425 degree oven. Don't spill it! Bake at 425 degrees for 15 minutes, then reduce heat to 300 degrees and bake for an additional 35-40 minutes (quiche is done when a knife comes out clean). Remove quiche pan to a wire rack. Let it cool down a bit, slice, serve... and enjoy!

Nutrition Facts
Bacon Broccoli Quiche
Amount Per Serving (1 slice)
Calories 462 Calories from Fat 360
% Daily Value*
Fat 40g62%
Saturated Fat 20g125%
Cholesterol 106mg35%
Sodium 437mg19%
Potassium 155mg4%
Carbohydrates 17g6%
Protein 8g16%
Vitamin A 1170IU23%
Vitamin C 12.3mg15%
Calcium 138mg14%
Iron 0.8mg4%
* Percent Daily Values are based on a 2000 calorie diet.

Here’s one more to pin on your Pinterest boards!Bacon broccoli quiche is a perfect dish for any meal! Bacon, broccoli, red pepper & garlic add flavor to this egg based dish, baked in a pie crust.

How To Cook Bacon In An Oven

Do you know how to cook bacon in an oven? This method makes it INCREDIBLY EASY to make “practically hands-free”, perfect bacon every time!
Do you know how to cook bacon in an oven? This method makes it INCREDIBLY EASY to make "practically hands-free", perfect bacon every time!

Well, it is said that “an old dog can’t learn new tricks”. I beg to differ!  After cooking bacon in a skillet and on a electric grill for most of my life, I can safely say I DID learn a new trick! The trick I learned was how to cook bacon in an OVEN!

Cooking bacon in the oven (and the easy clean up) helps save time! You can be busy doing other things while the bacon cooks. PLUS, you don’t have to stand right there, watching the bacon splatter all over the skillet or stove top! You won’t even have to clean out the skillet or griddle once it’s done. Just pull up the foil, wad it up, and throw it in the trash! It’s a WIN-WIN!

Have you ever prepared bacon this way? Gotta tell ya, it is life changing! I love that cooking bacon this way is practically hands-free, clean up is next to nothing, and it is SO EASY! Once you’ve made bacon this way (and it turns out perfect), you will be “hooked for life”!

Scroll Down For A Printable Recipe Card At The Bottom Of The Page

How To Cook Bacon In An Oven!

It’s always best to do first things first, right? Line a large baking sheet with aluminum foil (up the edges), and then lightly spray the foil with non-stick baking spray. Lay the strips of uncooked bacon onto the foil in a single layer, leaving just a bit of space in between each slice.

IMPORTANT: Place the baking sheet into your oven, and THEN turn the oven on to 400°F. THAT’S RIGHT! Don’t preheat the oven!

Bacon is placed in a single layer on sprayed foil on baking sheet before cooking.

Turn on the oven AFTER you add the bacon. Cook the bacon slices for 15-20 minutes, without disturbing. There is no need to turn the bacon over, or do anything else to it! Since this is “hands-free” cooking, I was able to prepare the rest of our meal while the bacon was in the oven!

TIP: If you want the bacon to be REALLY crisp, you can place it on a wire rack to cook, but I have found that we prefer it, cooked right on the foil.

Timing The Bacon For Doneness

My recommendation is to check the bacon at the 15 minute mark! Obviously thin slices of bacon will cook for a slightly shorter amount of time than a thicker slice of bacon! I was using fairly thick slices, and they were perfectly done in 16 minutes! Plus, did you notice that when you cook bacon in an oven, the bacon slices don’t shrink up as much? .

To perfectly cook bacon in an oven is very easy, and is practically "hands free"!

Once the bacon is done cooking, remove the baking sheet from the oven. Transfer the cooked bacon to a couple layers of paper towels. The paper towels will help to absorb any extra bacon grease left on the bacon.

Cooked bacon is drained on paper towels before serving.

That’s it! Just like that, and with hardly any effort, you’ve learned how to cook bacon in an oven!  We enjoyed perfectly cooked bacon with some scrambled eggs and yummy cinnamon roll crescents. YUM!

The cooked bacon is done perfectly, and served with cinnamon crescent rolls and scrambled eggs!

This truly is the easiest way to cook bacon in an oven! No splatter screens and grease filled skillets anymore… just perfectly cooked bacon slices! As an added bonus, you can just roll up the used aluminum foil, and throw it into the trash with no pan cleanup!

Hope you will try this method next time you want bacon for breakfast, or to add to a burger (or other recipes).

Looking For More BACON Recipes?

Everything is better with bacon, right? You can find all my recipes in the Recipe Index, located at the top of the page. Here are a few other recipes you might enjoy that heavily feature BACON:

Interested In More Recipes?

Thank you for visiting this website. I appreciate you using some of your valuable time to do soIf you’re interested, I publish a newsletter 2 times per month (1st and 15th) with all the latest recipes, and other fun info. I would be honored to have you join our growing list of subscribers, so you never miss a great recipe!

There is a Newsletter subscription box on the top right side (or bottom) of each blog post, depending on the device you use, where you can easily submit your e-mail address (only) to be included in my mailing list.

You Can Also Find Me On Social Media:
Facebook page: The Grateful Girl Cooks!
Pinterest: The Grateful Girl Cooks!
Instagram: jbatthegratefulgirlcooks

Author's signature.

0 from 0 votes
How To Cook Bacon In An Oven
Prep Time
5 mins
Cook Time
15 mins
Total Time
20 mins
 
Do you know how to cook bacon in an oven? This method makes it INCREDIBLY EASY to make "practically hands-free", perfect bacon every time!
Category: Breakfast, Tip
Cuisine: American
Keyword: cook bacon in an oven
Servings: 8 slices
Calories Per Serving: 91 kcal
Author: JB @ The Grateful Girl Cooks!
Ingredients
  • 8 slices bacon
  • Non-stick baking spray
Instructions
  1. Line a large baking sheet with aluminum foil (up the edges), and then lightly spray foil with non-stick baking spray.

  2. Lay strips of uncooked bacon onto the foil in a single layer, leaving a bit of space between each slice. IMPORTANT: Place baking sheet into oven, and THEN turn the oven on to 400°F. THAT'S RIGHT! Don't preheat the oven!

  3. Turn on the oven AFTER you add the bacon. Cook bacon slices at 400° for 15-20 minutes, without disturbing. Check them at 15 minutes, because due to varying thicknesses of bacon, cooking times can vary slightly. There is no need to turn the bacon over, or do anything else to it!

  4. Once bacon is done cooking to your desired amount of "crispness", remove  baking sheet from oven. Transfer cooked bacon to a couple layers of paper towels. The paper towels will absorb any extra bacon grease left on the bacon. Serve, and enjoy!

Nutrition Facts
How To Cook Bacon In An Oven
Amount Per Serving (1 slice)
Calories 91 Calories from Fat 72
% Daily Value*
Fat 8g12%
Saturated Fat 2g13%
Cholesterol 14mg5%
Sodium 145mg6%
Potassium 43mg1%
Protein 2g4%
Vitamin A 10IU0%
Iron 0.1mg1%
* Percent Daily Values are based on a 2000 calorie diet.

Here’s one more to pin on your Pinterest boards!Do you know how to cook bacon in an oven? This method makes it INCREDIBLY EASY to make "practically hands-free", perfect bacon every time!

WW Freestyle Banana Blueberry Pancakes

Delicious banana blueberry pancakes (6 ingredient) are made with NO flour, have GREAT flavor and ZERO points, if using the Weight Watchers Freestyle plan.
Delicious banana blueberry pancakes (6 ingredient) are made with NO flour, have GREAT flavor and ZERO points, if using Weight Watchers Freestyle plan.

Do you enjoy pancakes? I sure do, but because they pack quite a calorie punch, I typically may only indulge in them about once a month or so. Even though I LOVE them, I’ve been known to refer to them as “gut bombs”!

Recently I made some banana blueberry pancakes using ingredients that count as ZERO points on the Weight Watchers Freestyle eating plan. Basically the Freestyle plan includes certain foods (about 200) that are tracked as zero point foods in an effort to help you focus on this food list (to assist in making wiser food selection choices).

My Inspiration For Making These “Flourless” Banana Blueberry Pancakes

I decided to try and make some pancakes using only those ingredients found on the Freestyle zero points list, and see how they turned out. Can you tell I was craving pancakes? So, into the kitchen I went to experiment.

My goal was to NOT use flour (not on the “list”), and knew it could work, because I had made peanut butter cookies this way (without flour) before, and they were fantastic! I decided to make banana blueberry pancakes, and use banana and eggs as the base for the pancake batter. And THAT is how I came up with this pancake recipe! It was EASY, and the pancakes tasted amazing!

Scroll Down For A Printable Recipe Card At The Bottom Of The Page

How To Make WW Freestyle Banana Blueberry Pancakes

Place a large ripe banana (they’re sweeter), two eggs, cinnamon, baking powder, and vanilla extract into a medium sized mixing bowl.

Use an electric mixer to fully blend these ingredients together. NOTE: The mixture will be thinner than if you were using a commercially prepared pancake mix with flour.

Banana, eggs, cinnamon, baking powder and vanilla in bowl to make batter for pancakes.

Batter for the banana blueberry pancakes is mixed in bowl.

Cook The Pancakes

Spray an electric griddle (or large skillet) with non-stick baking spray (or lightly brush with oil). Heat the griddle on a medium-high heat.

Once the griddle is hot, carefully pour or ladle out the batter into 5 small pancakes. Each of the banana blueberry pancakes was about 4 inches in diameter. I used a large measuring cup with a pour spout to do this, but a soup ladle will also do the trick!

Batter is poured onto electric grill, to make 5 Weight Watchers Freestyle banana blueberry pancakes.

As soon as you have the pancakes on the hot grill, place the blueberries onto the pancakes. Once bubbles have formed over the surface of the pancakes, and they are nice and brown underneath, carefully turn the pancakes to the other side using a spatula.

NOTE: Be very careful when turning pancakes. The batter is thin, and since they are studded with the weight of the blueberries, you don’t want to tear the pancakes!

Fresh blueberries are added to the pancakes cooking on the electric grill.

The photo below is what the banana blueberry pancakes looked like right after I flipped them to the other side. Nice and golden brown!

Continue to cook the pancakes until the other side is golden brown as well, and the center of the pancake is firm (not too soft and mushy). The pancakes are now done, and are ready to serve!

The banana blueberry pancakes are carefully flipped to cook other side.

Serve The Banana Blueberry Pancakes

Transfer the pancakes to a plate. Now, the pancakes DO have calories (just over 300), but if you are on the Weight Watchers Freestyle plan, pig out! 5 of these pancakes are zero points! If not on Freestyle plan, simply enjoy them all, or split them with someone you love!

I garnished the pancakes with additional blueberries and several banana slices to make it “look pretty”, and served this dish.  The blueberries inside the pancakes are loaded with juice and flavor, so you can eat the pancakes just like this OR you can add just one more “garnish”!

A serving of banana blueberry pancakes, topped with banana slices and fresh blueberries.

Other Optional Toppings For The Banana Blueberry Pancakes

I lightly dusted the banana blueberry pancakes with 1/2 of a teaspoon of sifted powdered sugar (for the photo, of course!). How much or little you use is your choice (and extra calories).

You can also top these pancakes with traditional pancake syrup OR sugar-free pancake syrup (to stick with the plan), or just top them with a dollop of whipped cream. Again, these toppings have more calories (and points values), but eat them however you like ’em!

Banana blueberry pancakes, served with optional pancake syrup.

The banana blueberry pancakes are light in texture, popping with big, juicy blueberries, and have a wonderful flavor! WooHoo! I really hope you will give these a try, and trust you will enjoy them, too! Have a great day!

Looking For More PANCAKE Recipes?

You can find all of my recipes in the Recipe Index, located at the top of the page. A few wonderful “traditional” pancake recipes include:

Interested In More Recipes Via Newsletter?

Thank you for visiting this website. I appreciate you using some of your valuable time to do soIf you’re interested, I publish a newsletter 2 times per month (1st and 15th) with all the latest recipes, and other fun info. I would be honored to have you join our growing list of subscribers, so you never miss a great recipe!

There is a Newsletter subscription box on the top right side (or bottom) of each blog post, depending on the device you use, where you can easily submit your e-mail address (only) to be included in my mailing list.

You Can Also Find Me On Social Media:
Facebook page: The Grateful Girl Cooks!
Pinterest: The Grateful Girl Cooks!
Instagram: jbatthegratefulgirlcooks

Author's signature

Recipe Source: my hungry brain

↓↓ PRINTABLE RECIPE BELOW ↓↓

0 from 0 votes
WW Freestyle Banana Blueberry Pancakes
Prep Time
5 mins
Cook Time
4 mins
Total Time
9 mins
 
Delicious banana blueberry pancakes (5 ingredient) are made with NO flour, have GREAT flavor and ZERO points, if using Weight Watchers Freestyle plan.
Category: Breakfast
Cuisine: American
Keyword: banana blueberry pancakes
Servings: 1 serving (5 small pancakes)
Calories Per Serving: 318 kcal
Author: JB @ The Grateful Girl Cooks!
Ingredients
  • 1 large banana
  • 2 large eggs
  • 1/4 teaspoon cinnamon
  • 1/2 teaspoon baking powder
  • 1/2 teaspoon vanilla extract
  • 1/2 cup blueberries (approximate)
  • non-stick spray or vegetable oil
OPTIONAL GARNISHES INCLUDE: sliced banana, fresh blueberries, sifted powdered sugar, or pancake syrup (regular or sugar-free).
    Instructions
    1. Place a ripe banana (they are sweeter), two eggs, cinnamon, baking powder, and vanilla into a large mixing bowl. Use an electric mixer to fully blend these ingredients. NOTE: The mixture will be thinner than if you were using a commercially prepared pancake mix with flour in it.

    2. Spray an electric griddle (or large skillet) with non-stick baking spray (or lightly brush with oil). Heat the griddle on a medium-high heat. Once griddle is hot, carefully pour or ladle out batter into 5 pancakes (about 4" each in diameter). 

    3. As soon as all pancakes are on grill, place blueberries onto pancakes. Once bubbles have formed on pancake surface, and they are nice and brown underneath, carefully turn the pancakes to the other side using a spatula. NOTE: Be very careful when turning. The batter is thin, and since they are studded with the weight of the blueberries, you don't want to tear the pancakes! Continue to cook the pancakes until the other side is golden brown as well, and the center of the pancake is firm.

    4. Once done cooking, transfer pancakes to a plate. Garnish with additional banana slices and blueberries. Additional garnishes can include powdered sugar, whipped cream, regular or sugar-free pancake syrup, etc. (these calories are not included in calorie count!). Enjoy!

    Recipe Notes

    One serving is 5 small pancakes! Caloric Calculation was made without including optional garnishes. Wt. Watchers zero points were calculated without any garnishes except for additional blueberries and banana slices.

    Nutrition Facts
    WW Freestyle Banana Blueberry Pancakes
    Amount Per Serving (1 (5 small pancakes))
    Calories 318 Calories from Fat 99
    % Daily Value*
    Fat 11g17%
    Saturated Fat 3g19%
    Cholesterol 421mg140%
    Sodium 164mg7%
    Potassium 837mg24%
    Carbohydrates 40g13%
    Fiber 5g21%
    Sugar 22g24%
    Protein 16g32%
    Vitamin A 690IU14%
    Vitamin C 17.4mg21%
    Calcium 150mg15%
    Iron 2.5mg14%
    * Percent Daily Values are based on a 2000 calorie diet.

    Here’s one more to pin on your Pinterest boards!Delicious banana blueberry pancakes (6 ingredient) are made with NO flour, have GREAT flavor and ZERO points, if using Weight Watchers Freestyle plan.

    Apple Pie Pancakes

    You can easily transform ordinary pancake mix into Apple Pie Pancakes, with only a couple added ingredients! You’ll love this special breakfast treat!
    You can easily transform ordinary pancake mix into Apple Pie Pancakes, with only a couple added ingredients! You'll love this special breakfast treat!

    We happen to love pancakes in our home, but tend to only have them about once a month. I’ve made many different kinds from scratch, but always keep a convenient bag of pancake mix around, for those times we just really want a pancake or two without any fuss!

    This recipe for apple pie pancakes evolved out of one of those kind of mornings!  Pancakes sounded GOOD, but I wanted to tweak  or “class” them up just a little bit! 

    I went to our pantry and pulled out a jar of my home-canned apple pie filling! Into the kitchen I went, to create something quick, yummy (and different) for breakfast!

    The lure of a big, convenient bag of pancake mix was calling to me (nice, quick and easy), so I grabbed it, and as quick as a flash, these apple pie pancakes were born!

    The use of pancake mix makes this such a simple, convenient recipe to throw together, but it results in a delicious twist on plain, “normal” pancakes! Here’s how to make delicious apple pie pancakes:

    Scroll Down For A Printable Recipe Card At The Bottom Of The Page

    It’s EASY To Make Apple Pie Pancakes

    Measure out the pancake mix and water that the mix you are using calls for, into a medium sized mixing bowl.  I used Krusteaz brand pancake mix, so I measured out the mix, then added the water.

    Whatever brand of pancake mix you use, use their ingredient list, and remember to make enough for 12 (4″) pancakes!

    Add 1/2 cup of the apple pie filling to the pancake mix. You can use home-canned apple pie filling or store bought.  Can you see the small apple chunks in the pie filling I made? Yum.

    The apple pie filling will add lots of flavor to the pancake batter. Stir the batter until blended.

    Mixing apple pie filling into the batter for apple pie pancakes.

    Add the ground cinnamon to the batter, and stir it in, as well.  Even though the pie filling had cinnamon in it, adding EXTRA cinnamon really helps add even more flavor to the pancakes.

    Cinnamon is added to the apple pie pancakes batter.

    Time To Cook The Apple Pie Pancakes

    Spray a griddle or large skillet with non-stick baking spray. Heat griddle (or skillet) until hot. Pour the batter onto griddle, forming 4″ wide pancakes, leaving a bit of space between each one.

    You will probably have to cook the apple pie pancakes in batches, because the recipe, as written, will yield about 12 pancakes (4″ each).  Cook until bubbles form on the top of the pancakes, then carefully flip to the other side.

    Continue cooking the other side of the apple pie pancakes until done in the center, then remove to serving plate, and keep warm. Repeat process until all batter has been used.

    Apple pie pancakes cooking on electric grill.

    The apple pie pancakes are turned when nicely browned, to finish cooking.

    Ready For Serving!

    Once all the apple pie pancakes are finished cooking, transfer the pancakes to individual serving plates.

    Place 2 pancakes on each plate, and top with a pad of butter (if desired), and about 4 Tablespoons of the reserved apple pie filling.

    Butter and warm apple pie filling top a stack of apple pie pancakes.

    There is no need for any maple syrup, because the apple pie topping is sweetened already!

    The addition of cinnamon flavor, and the bits of softened, sweet apples really take these pancakes from “ordinary” to “extra-ordinary”! YUMMMM!

    A nice forkful of the apple pie pancakes, ready to eat!

    These apple pie pancakes are really a quick and easy way to make an average breakfast more unique! Sure do hope you will consider trying this “recipe”, because I’m pretty confident you will enjoy it!

    Looking For More PANCAKE Or WAFFLE Recipes?

    You can find all of my published recipes in the Recipe Index, located at the top of the page. Here are a few other pancake or waffle recipes I think you might enjoy:

    Want More Recipes? Get My FREE Newsletter!

    I publish a newsletter 2 times per month (1st and 15th) with lots of recipes, tips, etc..
    Would you like to join our growing list of subscribers?

    There is a Newsletter subscription box on the top right (or bottom) of each blog post, depending on the device you use.
    You can submit your e-mail address there, to be added to my mailing list.

    Find Me On Social Media:

    Facebook page: The Grateful Girl Cooks!
    Pinterest:
    The Grateful Girl Cooks!
    Instagram:
    jbatthegratefulgirlcooks

    Author's signature

    Recipe Source: My hungry brain. After coffee.

    ↓↓ PRINTABLE RECIPE BELOW ↓↓

    0 from 0 votes
    Apple Pie Pancakes
    Prep Time
    4 mins
    Cook Time
    5 mins
    Total Time
    9 mins
     
    You can easily transform ordinary pancake mix into Apple Pie Pancakes, with only a couple added ingredients! You'll love this special breakfast treat!
    Category: Breakfast
    Cuisine: American
    Keyword: apple pie pancakes
    Servings: 6 ( 2 pancakes (4") per serving)
    Calories Per Serving: 170 kcal
    Author: JB @ The Grateful Girl Cooks!
    Ingredients
    • 2 cups pancake mix (I used Krusteaz)
    • 1 +1/3 cups water
    • 1 teaspoon ground cinnamon
    • 16 ounces apple pie filling (home canned or store bought) , divided use
    • non-stick baking spray
    Instructions
    1. Measure out pancake mix and water that the mix you are using calls for, into a medium sized mixing bowl.  Whatever brand of pancake mix you use, use their ingredient list, and remember to make enough for 12 (4") pancakes! Add 1/2 cup of the apple pie filling to the mix (reserving the rest for later). Add the ground cinnamon to the batter, and stir just until the batter is fully mixed.

    2. Spray a griddle or large skillet with non-stick baking spray. Heat on medium heat until hot. Pour batter onto griddle, forming 4" wide pancakes, leaving a bit of space between each one. Cook until bubbles form on the top of the pancakes and the bottom edges are golden brown, then carefully flip to the other side. Continue cooking until done in the center, then remove to serving plate, and keep warm. Repeat process until all batter has been used.

    3. To serve, transfer pancakes to individual plates. Place 2 pancakes on each plate, and top each serving with a pad of butter (if desired), and about 4 Tablespoons of the reserved apple pie filling. Serve, and enjoy!

    Recipe Notes

    Other Serving Suggestions: 

    • Add toasted, chopped walnuts to batter (or use as garnish on top).
    • Top apple pie filling on pancakes with whipped cream.
    Nutrition Facts
    Apple Pie Pancakes
    Amount Per Serving (2 pancakes + 4 T. topping)
    Calories 170 Calories from Fat 27
    % Daily Value*
    Fat 3g5%
    Cholesterol 30mg10%
    Sodium 257mg11%
    Potassium 120mg3%
    Carbohydrates 32g11%
    Fiber 1g4%
    Sugar 10g11%
    Protein 3g6%
    Vitamin A 125IU3%
    Vitamin C 1.6mg2%
    Calcium 100mg10%
    Iron 0.8mg4%
    * Percent Daily Values are based on a 2000 calorie diet.

    Here’s one more to pin on your Pinterest boards!You can easily transform ordinary pancake mix into Apple Pie Pancakes, with only a couple added ingredients! You'll love this special breakfast treat!


    Double Chocolate Scones

    Double Chocolate Scones are easy to make, decadent chocolate scones, filled with white chocolate chips, and drizzled with a simple glaze on top!
    Double Chocolate Scones are easy to make, decadent chocolate scones, filled with white chocolate chips, and drizzled with a simple glaze on top!

    Do you enjoy scones? We sure do, in our home! I’ve been making them for YEARS and YEARS, and always love searching for, and trying new scone recipes. 

    Recently I found an old, handwritten recipe on a 3″x5″ index card I saved at least 15 years ago (LONG before the internet and  Pinterest made it so easy to save recipes!).

    Unfortunately, I had not written down what magazine, newspaper or cookbook I found the original recipe in, so I can’t give due credit to the original author. 

    All these years later, I still had not ever made these scones, but they sounded good. So… I made a couple basic changes to the original recipe and ended up with 8 delicious double chocolate scones! Here’s how to make them:

    Scroll Down For A Printable Recipe Card At The Bottom Of The Page

    Make The Dough For The Double Chocolate Scones

    Preheat your oven to 375° F.  Mix flour, brown sugar, cocoa powder, baking soda, baking powder and salt in a large bowl.

    Cut in VERY COLD butter, using a hand held pastry blender or two forks. Cut the butter into the dry ingredients until butter is reduced to the size of peas.

    Mixing ingredients with butter to make double chocolate scones.

    Add plain yogurt and one egg yolk to the mixture in the bowl. Stir mixture by hand, or with an electric beater until blended. The dough is fairly thick, so if you are mixing by hand, it will take a few minutes to bind together.

    Add the white chocolate chips to the dough, and place the dough onto a lightly floured work surface. Knead the dough with the palm of your hand 10 times, folding the dough over, after each time. Do this until the dough comes together in a nice ball.

    Eggs, plain yogurt, and white chocolate chips are added to the double chocolate scones dough.

    Pat and shape the double chocolate scones dough out with your hands until it is formed into a 9″ wide circle.  Use a sharp knife or a pizza cutter to evenly cut the dough into 8 pie shaped wedges.

    Place the eight scones onto an UNGREASED large baking sheet ( I used my ratty old pizza pan!). Leave about an inch in between each of the wedges, so they stay separated while baking.

    The double chocolate scones dough is rolled into a 9 inch circle, then cut into 8 pieces.

    Bake The Scones

    Bake the double chocolate scones at 375° F. for 17-18 minutes. When done, remove pan from oven, and let the scones cool for 5-10 still on the pan. Because ovens can vary in temperatures, I would recommend checking the scones at the 15 minute mark, to check for “doneness”.

    Place a piece of wax paper on the counter, and transfer the double chocolate scones from the pan to a wire rack (on top of the wax paper).

    TIP: The wax paper will collect any drips when you drizzle the scones with glaze later, making your cleanup much easier!

    Double chocolate scones are baked, then placed on wire rack to cool.

    Glaze The Baked Double Chocolate Scones

    Once the double chocolate scones have cooled, it is time to add the decorative glaze! The simple powdered sugar glaze helps make them look good, and adds an extra touch of sweetness to the finished scones!

    Making the glaze is simple! Mix together powdered sugar and a few drops of water at a time, in a small bowl. Stir. Add a couple more drops of water, and stir. Continue to do this until the glaze is an easy to drizzle consistency… not too thick, and not too thin!

    If glaze is too thick, add a couple drops of water. Got it too thin? Add more powdered sugar. Use a spoon or fork, and decoratively drizzle the glaze over the tops of the scones. The wax paper below will catch any messy drips!

    A powdered sugar glaze is drizzled over the baked double chocolate scones before serving.

    After glazing the scones, let the icing firm up (it will only take a few minutes), and then you double chocolate scones are ready to serve!

    The glaze on top is allowed to firm up, before serving the double chocolate scones.

    Serve The Double Chocolate Scones!

    You can either just pick up a scone and enjoy it, as is, OR you can get all fancy with them! We usually just shove them into our mouths (truth), but sometimes, (especially for company) I want the presentation to be memorable! Remember… you eat with your EYES first, right?

    I sifted cocoa powder very lightly on a small white plate, and then placed the double chocolate scone on top. A big dollop of aerosol whipped cream was sprayed next to the scone, and the whipped cream was garnished with a thin, half slice of a Cara Cara orange!

    The double chocolate scone is served with a dollop of whipped cream and an orange slice.The double chocolate scone is cut in half to reveal the inside.

    This recipe for double chocolate scones is a KEEPER! We really enjoyed them! I even put a few away in our freezer, so my husband and I can enjoy them for another breakfast soon!

    Hope you have a wonderful day.  May your joys be many, and your sorrows few! Thank you for visiting this blog. I trust you will find some wonderful recipes to make for those you love!

    Looking For More SCONE Recipes?

    I have LOTS of scone recipes! They can be found in the Recipe Index, located at the top of the page.  They’re all good, but a few of our family favorites include:

    Interested In More Recipes?

    Thank you for visiting this website. I appreciate you using some of your valuable time to do soIf you’re interested, I publish a newsletter 2 times per month (1st and 15th) with all the latest recipes, and other fun info. I would be honored to have you join our growing list of subscribers, so you never miss a great recipe!
    There is a Newsletter subscription box on the top right side (or bottom) of each blog post, depending on the device you use, where you can easily submit your e-mail address (only) to be included in my mailing list.

    You Can Also Find Me On Social Media:

    Facebook page: The Grateful Girl Cooks!
    Pinterest:
    The Grateful Girl Cooks!
    Instagram:
    jbatthegratefulgirlcooks

    Author's signature

    Original recipe source: Unknown

    0 from 0 votes
    Double Chocolate Scones
    Prep Time
    10 mins
    Cook Time
    17 mins
    Total Time
    27 mins
     
    Double Chocolate Scones are easy to make, decadent chocolate scones, filled with white chocolate chips, and drizzled with a simple glaze on top!
    Category: Bread/Breakfast
    Cuisine: American
    Keyword: double chocolate scones
    Servings: 8 scones
    Calories Per Serving: 408 kcal
    Author: JB @ The Grateful Girl Cooks!
    Ingredients
    • 2 cups all purpose flour
    • 1/3 cup brown sugar
    • 1/3 cup cocoa powder (unsweetened)
    • 2 teaspoons baking powder
    • 3/4 teaspoon baking soda
    • 1/8 teaspoon salt
    • 1/2 cup butter (very cold)
    • 1 egg yolk , beaten
    • 8 ounces plain yogurt , regular or Greek
    • 3/4 cup white chocolate chips
    For Glaze:
    • 1/2 cup powdered sugar
    • water , as needed
    Instructions
    1. Preheat oven to 375° F.  Mix flour, brown sugar, cocoa powder, baking soda, baking powder and salt in a large bowl. Cut in VERY COLD butter, using a hand held pastry blender or two forks. Cut the butter into dry ingredients until butter is reduced to the size of peas.

    2. Add yogurt and egg yolk to the bowl. Mix by hand, or with electric beater until fully blended. The dough is fairly thick, so if mixing by hand, it will take a few minutes to bind together. Add white chocolate chips to dough, and stir to combine. Place dough on lightly floured work surface. Knead dough with the palms of your hand 10 times, folding dough over, after each time. Do this until the dough comes together in a ball.

    3. Pat and shape dough with your hands until it is formed into a 9" wide circle.  Use a sharp knife or a pizza cutter to evenly cut dough into 8 pie shaped wedges. Put scones on an ungreased baking sheet, about 1" apart, so they stay separated while baking. Bake at 375° F. for 17-18 minutes. 

    4. When done, remove pan from oven, and let scones cool for 5-10 minutes, still on the pan. Place a piece of wax paper on the counter, with wire rack on top. Transfer scones to the wire rack. TIP: The wax paper will collect any drips when you drizzle the scones with glaze, making cleanup much easier!

    5. Make The Glaze: While scones cool, mix together powdered sugar and a few drops of water at a time, in a small bowl. Stir. Add a couple more drops of water, and stir. Continue to do this until the glaze is an easy to drizzle consistency... not too thick, and not too thin! Too thick? Add drops of water. Too thin? Add powdered sugar! Drizzle the glaze over the tops of the cooled scones, using a spoon or fork. Let glaze firm up, then scones are ready to serve. Enjoy!

    Nutrition Facts
    Double Chocolate Scones
    Amount Per Serving (1 scone)
    Calories 408 Calories from Fat 162
    % Daily Value*
    Fat 18g28%
    Saturated Fat 11g69%
    Cholesterol 60mg20%
    Sodium 273mg12%
    Potassium 249mg7%
    Carbohydrates 54g18%
    Fiber 2g8%
    Sugar 27g30%
    Protein 8g16%
    Vitamin A 405IU8%
    Calcium 133mg13%
    Iron 2.2mg12%
    * Percent Daily Values are based on a 2000 calorie diet.


    Here’s one more to pin on your Pinterest boards!Double Chocolate Scones are easy to make, decadent chocolate scones, filled with white chocolate chips, and drizzled with a simple glaze on top!

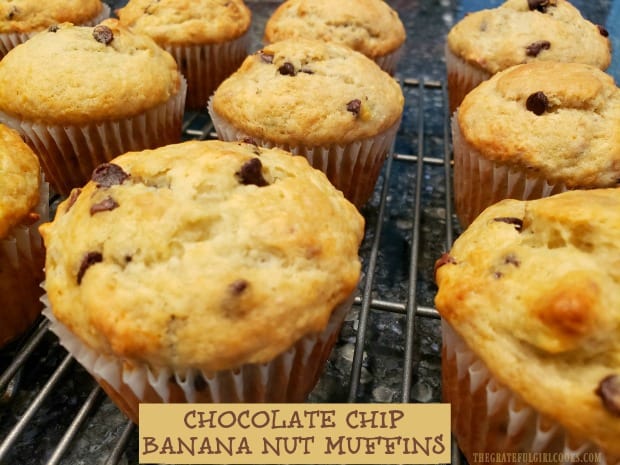
    Banana Chocolate Chip Muffins

    EASY, delicious banana chocolate chip muffins can be ready and on the table in 30 minutes! You’ll LOVE these simple, yummy breakfast treats!
    EASY, delicious banana chocolate chip muffins can be ready and on the table in 30 minutes! You'll LOVE these simple, yummy breakfast treats!

    I’ve been making banana chocolate chip muffins for years, because we love them! Recently I tried a “slightly different” recipe I found on Pinterest, which has sour cream as one of the ingredients. We had some super ripe bananas on the counter that were begging to be used… so they became yummy breakfast muffins!

    This recipe is incredibly EASY to make with minimal “prep time” (10 minutes), and the addition of sour cream makes these banana chocolate chip muffins very moist and delicious! We really enjoyed them a lot, so I want to pass the simple recipe on to you today!

    Scroll Down For A Printable Recipe Card At The Bottom Of The Page

    How To Make Banana Chocolate Chip Muffins

    Preheat your oven to 350° F.  Prepare a standard sized muffin tin, by inserting paper cupcake/muffin liners OR by greasing each muffin cup. Set the muffin tin aside.

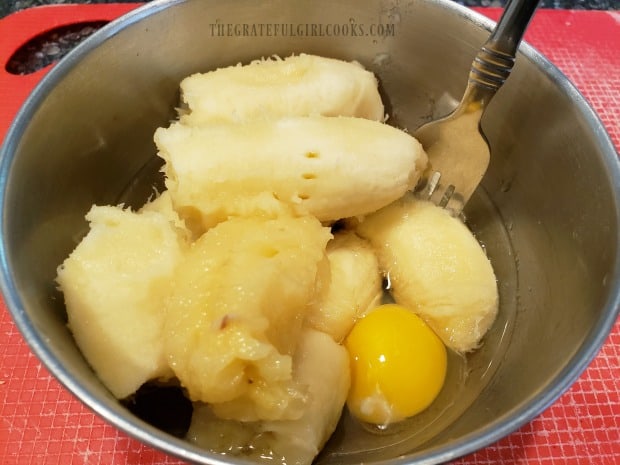
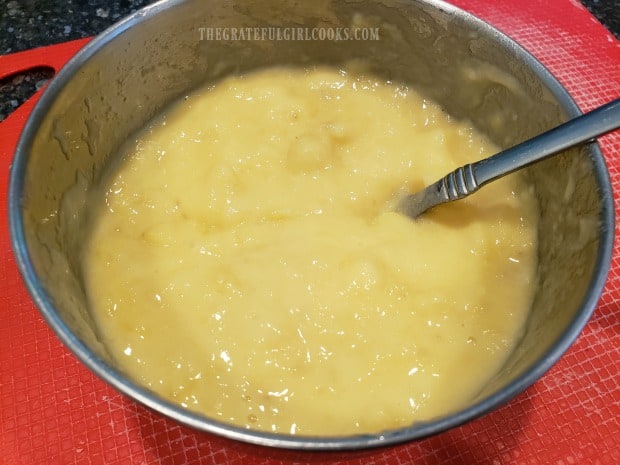
    Place very ripe bananas, sour cream, vanilla extract, softened butter and eggs into a large mixing bowl. Use an electric mixer to blend these ingredients well. You will still have little pieces of banana in the batter when done mixing.

    Bananas, eggs, butter, sour cream, etc. are mixed together for batter for banana chocolate chip muffins.

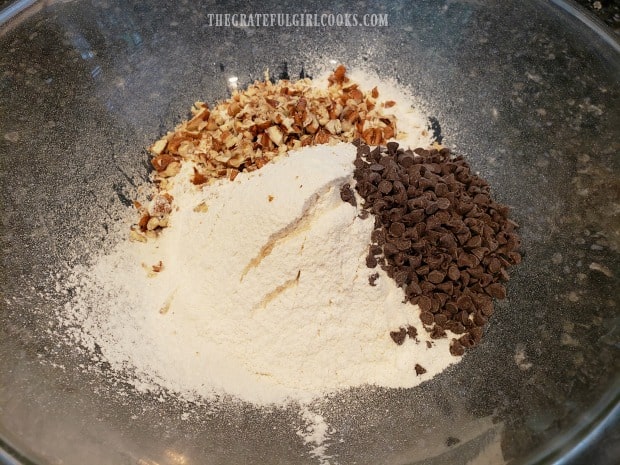
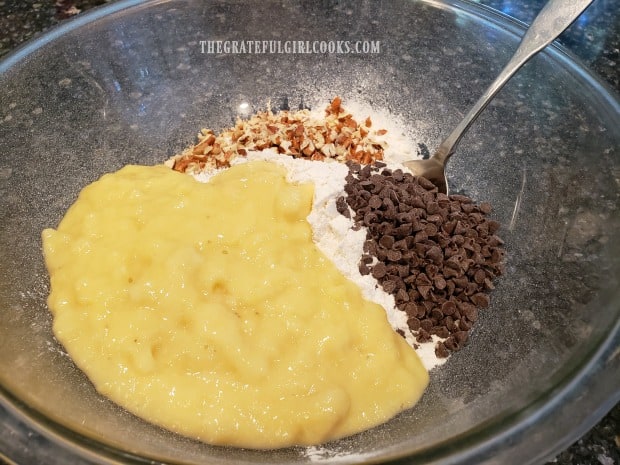
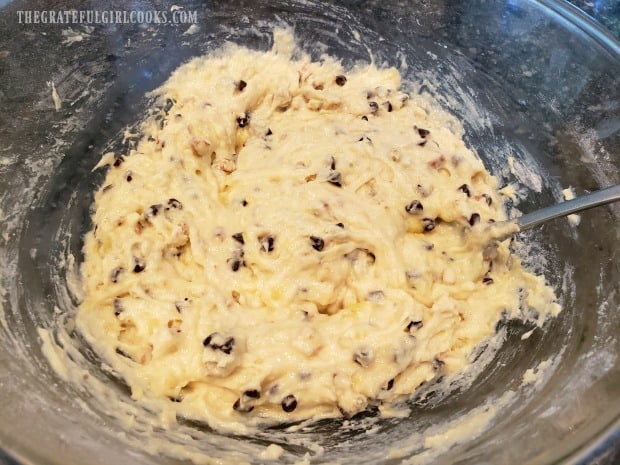
    Add granulated sugar, all purpose flour, baking soda and chocolate chips to the bowl. Stir these ingredients together until batter is fully blended.

    Just like that, you have the batter made for these banana chocolate chip muffins! In less than 10 minutes prep time, you are ready to get these muffins portioned out, and in the oven!

    Flour, sugar, soda and chocolate chips are mixed into banana chocolate chip muffins batter.

    Bake The Banana Chocolate Chip Muffins

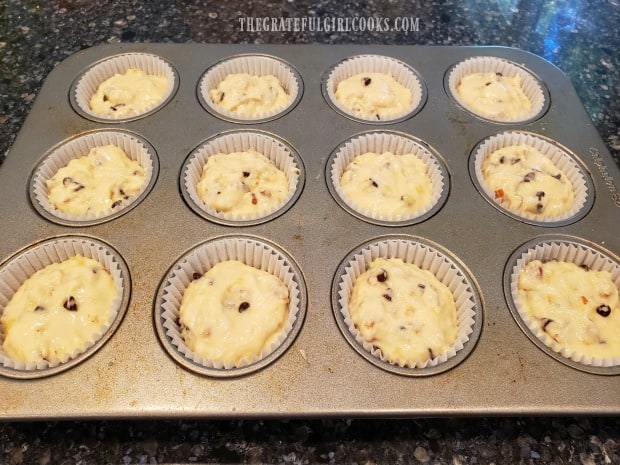
    Pour or spoon the banana chocolate chip batter into the prepared muffin tin, equally dividing the batter into 12 portions. The batter will come up fairly high in each of the paper liners or muffin wells. OPTIONAL: If you want, you can a few chocolate chips to the top of the muffins before baking (for appearance), but it is not necessary. I did not do this step, as you can see from the photos below.

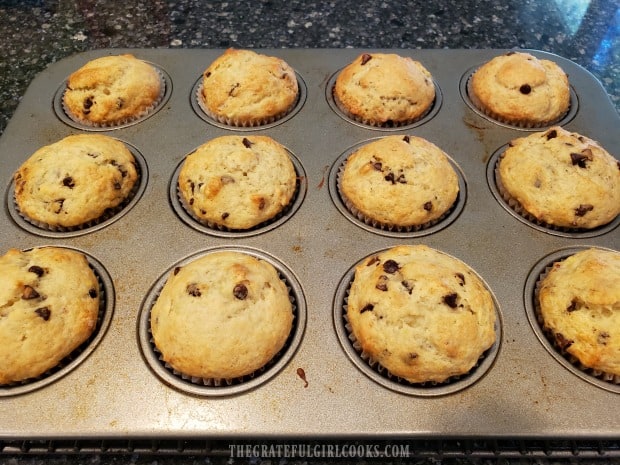
    Bake the banana chocolate chip muffins on the middle rack at 350° F for 20 minutes, or until the muffins are golden brown on top.  When done, remove the pan from the oven.

    Banana chocolate chip muffins are prepared in muffin tins, then baked until golden brown.

    Transfer the muffins to a wire rack to cool slightly before serving.  This recipe makes 12 delicious banana chocolate chip muffins (and they freeze well).

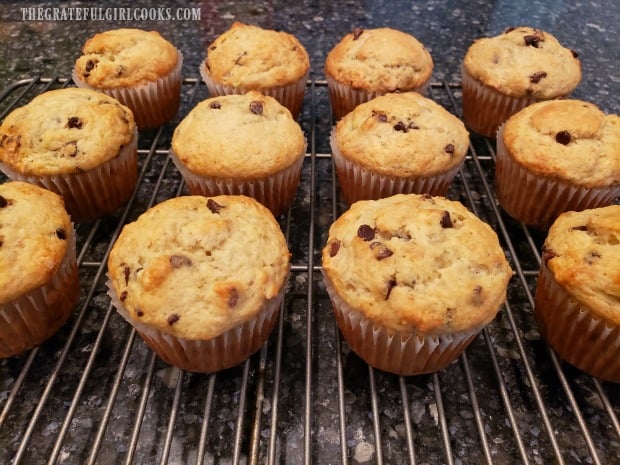
    The banana chocolate chip muffins, cooling on a wire rack after baking.

    Once cooled a bit, the muffins are ready for you (and those you love) to enjoy!  Behold… my cute little banana chocolate chip muffin, on a plate, ready to slice in half and enjoy with a tiny bit of softened butter (and a cup of coffee)!

    One of the banana chocolate chip muffins, on a plate, ready to be eaten.

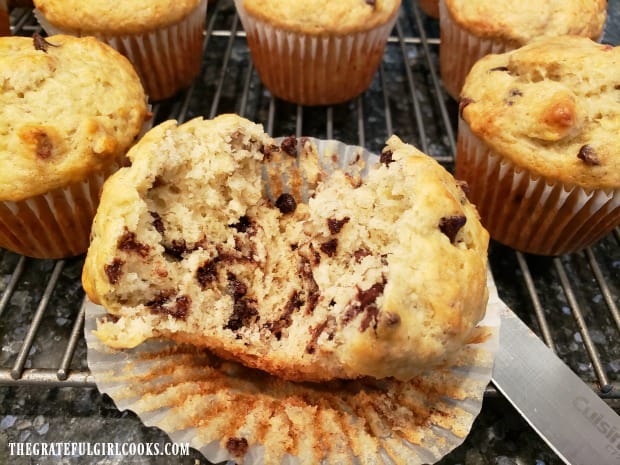
    One of the banana chocolate chip muffins, sliced in half to show the inside.

    We really enjoyed these scrumptious banana chocolate chip muffins. My husband really loved these muffins, too, even though he is not the world’s biggest banana muffin or banana bread fan! They were so easy to make, and taste delicious!

    I gave a few of the muffins to our oldest son to enjoy, and froze a few for another time when we want a muffin for breakfast! YUM! Hope you try this EASY and quick recipe! I’m pretty sure you will love these muffins as much as we did! Have a GREAT day!

    Looking for More MUFFIN Recipes?

    You can find ALL of my muffin recipes in the Recipe Index, located at the top of the page. A few favorites you might enjoy include:

    Interested In More Recipes?

    Thank you for visiting this website. I appreciate you using some of your valuable time to do soIf you’re interested, I publish a newsletter 2 times per month (1st and 15th) with all the latest recipes, and other fun info. I would be honored to have you join our growing list of subscribers, so you never miss a great recipe!
    There is a Newsletter subscription box on the top right side (or bottom) of each blog post, depending on the device you use, where you can easily submit your e-mail address (only) to be included in my mailing list.

    You Can Also Find Me On Social Media:

    Facebook page: The Grateful Girl Cooks!
    Pinterest:
    The Grateful Girl Cooks!
    Instagram:
    jbatthegratefulgirlcooks

    Author's signature

    Original Recipe Source: https://designeddecor.com/tantalizing-tuesday-chocolate-chip-banana-muffins/

    0 from 0 votes
    Banana Chocolate Chip Muffins
    Prep Time
    10 mins
    Cook Time
    20 mins
    Total Time
    30 mins
     
    EASY, delicious banana chocolate chip muffins can be ready and on the table in 30 minutes! You'll LOVE these simple, yummy breakfast treats!
    Category: Bread/Breakfast
    Cuisine: American
    Keyword: banana chocolate chip muffins
    Servings: 12 muffins
    Calories Per Serving: 306 kcal
    Author: JB @ The Grateful Girl Cooks!
    Ingredients
    • 3 bananas (very ripe)
    • 3 Tablespoons sour cream
    • 1 teaspoon vanilla extract
    • 1/2 cup butter (1 stick) , softened
    • 2 eggs
    • 1 cup granulated sugar
    • 2 cups all purpose flour
    • 1 teaspoon baking soda
    • 3/4 cup chocolate chips
    Instructions
    1. Preheat oven to 350° F. Prepare a standard-sized muffin tin by inserting paper cupcake/muffin liners OR by greasing each muffin cup. Set the muffin tin aside.

    2. Place bananas, sour cream, vanilla extract, softened butter and eggs into a large mixing bowl. Use electric mixer to blend well. You will still have little pieces of banana in the batter when done. Add granulated sugar, all purpose flour, baking soda and chocolate chips to the bowl. Stir ingredients until batter is fully blended.

    3. Pour or spoon batter into prepared muffin tin, equally dividing batter into 12 portions. The batter will come up fairly high in each of the paper liners or muffin wells. OPTIONAL: You can add a few chocolate chips to the top of the batter before baking (for appearance), but it is not necessary.  

    4. Bake on the middle rack of preheated 350° F oven for 20 minutes, or until golden brown on top. When done, remove from oven. Transfer muffins out of pan to a wire rack to cool slightly before serving. Enjoy!

    Nutrition Facts
    Banana Chocolate Chip Muffins
    Amount Per Serving (1 muffin)
    Calories 306 Calories from Fat 99
    % Daily Value*
    Fat 11g17%
    Saturated Fat 6g38%
    Cholesterol 50mg17%
    Sodium 179mg8%
    Potassium 144mg4%
    Carbohydrates 47g16%
    Fiber 1g4%
    Sugar 27g30%
    Protein 4g8%
    Vitamin A 330IU7%
    Vitamin C 2.6mg3%
    Calcium 28mg3%
    Iron 1.3mg7%
    * Percent Daily Values are based on a 2000 calorie diet.

    Here’s one more to pin on your Pinterest boards!EASY, delicious banana chocolate chip muffins can be ready and on the table in 30 minutes! You'll LOVE these simple, yummy breakfast treats!

    Crescent Roll Coffeecake

    It’s so EASY to make this buttery, scrumptious crescent roll coffeecake, using a can of crescent rolls, jam, and a few other common ingredients!
    It's so EASY to make this buttery, scrumptious crescent roll coffeecake, using a can of crescent rolls, jam, and a few other common ingredients!

    What do you do with a roll of crescent rolls you find in the refrigerator?  That was my dilemna recently after discovering a can of crescent rolls in the back of our refrigerator. They had been “hiding out” in the fridge for a couple of weeks, and needed to be used. I knew I didn’t want to simply make rolls for dinner… I wanted to make something more “fun”!

    This recipe for crescent roll coffeecake was one I had found on Pinterest and saved, so I pulled the recipe and made a DELICIOUS breakfast for my husband and myself!  Talk about  EASY! This recipe is just that, and you can even customize it with your FAVORITE jam!

    We were VERY surprised at just how absolutely yummy this crescent roll coffeecake was! Here’s how to make it, and I am positive you will really enjoy it, too!

    Scroll Down For A Printable Recipe Card At The Bottom Of The Page

    How To Make A Crescent Roll Coffeecake

    Place granulated sugar, eggs, softened butter, and vanilla extract into a medium sized bowl.  Beat these ingredients well, with an electric mixer, until batter is smooth. Stir all purpose flour into the batter, then set this mixture aside.

    Mixing up the batter for the crescent roll coffeecake.

    Carefully unroll one 8 serving package of refrigerated crescent roll dough onto a piece of wax or parchment paper. Separate the dough into 8 triangles, by slicing through the perforations. I found using a pizza cutter to do this was very handy!

    Slicing crescent roll dough into triangles to make the crescent roll coffeecake.

    Preparing The Crescent Roll Coffeecake

    Spread one Tablespoon of jam (or jelly) onto each crescent roll triangle. The coffeecake I made this time used homemade boysenberry jam, but you can use your favorite flavor. Roll up each crescent roll beginning at the short side, as shown below in the photo. Place each crescent roll (once rolled), into a 9″ cake pan, that has been sprayed with a non stick spray.

    You can see from the photo below, that the eight crescent rolls touch the edge of the pan, and all point to the center of the pan. Don’t worry if they look a bit “messy”. They will be covered up!

    Jam is spread onto each dough triangle then rolled up and placed in baking pan, for crescent roll coffeecake.

    Spoon the reserved egg batter over crescent roll coffeecake. You should have enough batter to completely cover everything in the pan. Sprinkle the top of the crescent roll coffeecake with chopped pecans (or walnuts).  Don’t skip this step, because it will add a nice crunch to the dish! Now the coffeecake is ready to bake!

    Batter is poured over the crescent roll coffeecake, then it is topped with nuts before baking.

    Bake the crescent roll coffeecake in a preheated 375° F. oven. Bake it for 25 minutes, or until it is golden brown on top and the center of the coffeecake is set. Once done, remove the pan from the oven, and place the pan onto a wire rack to cool. The photo below shows you what the crescent roll coffeecake looked like, fresh out of the oven.

    When done baking, the crescent roll coffeecake is golden brown all over the top.

    While the coffeecake is cooling, quickly mix up the glaze by stirring powdered sugar and milk together in a small bowl, until smooth.

    Glaze The Baked Crescent Roll Coffeecake Before Serving

    Once the crescent roll coffeecake has cooled some, but is still warm, drizzle the glaze over the surface of the coffeecake. Let the icing firm up just a bit as the coffeecake continues to cool, and then it’s ready to eat!

    Powdered sugar glaze is mixed up, then drizzled over the top of the crescent roll coffeecake.

    Once the crescent roll coffeecake has cooled to room temperature, it is ready to serve! Time to slice a piece! In the photos below, you can see the jam filling, and the buttery, golden brown topping. The coffeecake slices nicely and holds together wonderfully!

    Make 8 slices, cutting in between each the crescent rolls, and you’re done! Grab a fork, and a piece of this delicious crescent roll coffeecake (with a cup of coffee), and DIG IN! It tastes wonderful!

    A nice slice of crescent roll coffeecake has been cut out and is ready to eat.

    A slice of crescent roll coffeecake, on a plate, ready to be eaten!

    Hope you and those you love enjoy this breakfast treat! My husband and I LOVED this coffeecake, and the leftovers were yummy, as well. Have a GREAT day, friends.

    Looking For More Coffeecake Recipes?

    All my recipes can be found in the Recipe Index, located at the top of the page. A few favorite coffeecake recipes include:

    Interested In More Recipes?

    Thank you for visiting this website. I appreciate you using some of your valuable time to do soIf you’re interested, I publish a newsletter 2 times per month (1st and 15th) with all the latest recipes, and other fun info. I would be honored to have you join our growing list of subscribers, so you never miss a great recipe!
    There is a Newsletter subscription box on the top right side (or bottom) of each blog post, depending on the device you use, where you can easily submit your e-mail address (only) to be included in my mailing list.

    You Can Also Find Me On Social Media:

    Facebook page: The Grateful Girl Cooks!
    Pinterest:
    The Grateful Girl Cooks!
    Instagram:
    jbatthegratefulgirlcooks

    Author's signature

    Recipe Source: thesouthernladycooks.com/2017/04/21/crescent-roll-coffee-cake/

    0 from 0 votes
    Crescent Roll Coffeecake
    Prep Time
    10 mins
    Cook Time
    25 mins
    Total Time
    35 mins
     
    It's so EASY to make this buttery, scrumptious crescent roll coffeecake, using a can of crescent rolls, jam, and a few other common ingredients!
    Category: Breakfast
    Cuisine: American
    Keyword: crescent roll coffeecake
    Servings: 8
    Calories Per Serving: 364 kcal
    Author: JB @ The Grateful Girl Cooks!
    Ingredients
    • 4 Tablespoons butter , softened
    • 1/2 cup granulated sugar
    • 2 large eggs
    • 1 teaspoon vanilla extract
    • 1/4 cup all purpose flour
    • 8 ounce can crescent dinner rolls (1 can)
    • 1/2 cup pecans (or walnuts) , chopped
    • 8 Tablespoons boysenberry or blackberry jam (or jam of choice)
    For Glaze:
    • 1/2 cup powdered sugar
    • 3 Tablespoons milk
    Instructions
    1. Place granulated sugar, eggs, softened butter, and vanilla extract into a medium sized bowl.  Beat well, with an electric mixer, until batter is smooth. Stir all purpose flour into the batter, then set mixture aside.

    2. Carefully unroll one 8 serving package of refrigerated crescent roll dough onto a piece of wax or parchment paper. Separate the dough into 8 triangles, by slicing through the perforations.

    3. Spread one Tablespoon of jam (or jelly) onto each crescent roll triangle. Roll up each crescent roll beginning at the short side. Place each crescent roll (once rolled), into a 9" cake pan, that's been sprayed with a non stick spray. Place one end each crescent roll touching the edge of the pan, and the other end pointing to the center of the pan. Spoon the reserved egg batter over the rolls. You should have enough batter to completely cover everything in the pan. Sprinkle the top of the coffeecake with chopped pecans (or walnuts). 

    4. Bake in a preheated 375° F. oven for 25 minutes, or until golden brown on top and center of the coffeecake is set. Once done, remove from oven, and place pan on a wire rack to cool.

    For Glaze:
    1. Stir powdered sugar and milk together in a small bowl, until smooth.Once coffeecake has cooled some, but is still warm, drizzle glaze over the surface of  coffeecake. Let glaze firm up a bit, and then it's ready to eat! Slice into 8 pieces between each of the crescent rolls, serve, and ENJOY!

    Nutrition Facts
    Crescent Roll Coffeecake
    Amount Per Serving (1 slice)
    Calories 364 Calories from Fat 153
    % Daily Value*
    Fat 17g26%
    Saturated Fat 7g44%
    Cholesterol 68mg23%
    Sodium 301mg13%
    Potassium 67mg2%
    Carbohydrates 49g16%
    Sugar 33g37%
    Protein 4g8%
    Vitamin A 260IU5%
    Vitamin C 1.7mg2%
    Calcium 24mg2%
    Iron 1mg6%
    * Percent Daily Values are based on a 2000 calorie diet.

    Here’s one more to pin on your Pinterest boards!It's so EASY to make this buttery, scrumptious crescent roll coffeecake, using a can of crescent rolls, jam, and a few other common ingredients!

    Blueberry Apple Pecan Baked Oatmeal

    Blueberry Apple Pecan Baked Oatmeal is a filling, incredible tasting breakfast dish, with rolled oats, apples, crunchy pecans, and juicy blueberries!
    Blueberry Apple Pecan Baked Oatmeal is a filling, incredible tasting breakfast dish, with rolled oats, apples, crunchy pecans, and juicy blueberries!

    Do you enjoy BAKED oatmeal?  We are becoming big fans of this hearty breakfast treat, especially as we try new recipes for it, in our home.

    Quite a while ago, I made Banana Bread Baked Oatmeal, and our family really enjoyed it, so when I saw THIS recipe, I knew we had to try it!  Since this recipe for blueberry baked oatmeal had apples, blueberries AND pecans in it (personal favorites), I was certain it would be a big hit!

    Let me tell you, it was a HUGE hit! My husband and I loved this easy to prepare, scrumptious  breakfast!  With a bottom layer of fresh blueberries and chopped apples, along with a topping of chopped pecans (or walnuts), there was fruit and crunch in every single bite! YUMMMM!

    This recipe for blueberry apple pecan baked oatmeal makes 8 servings, so there will be plenty for everyone! The leftovers taste fantastic, too. My husband and I enjoyed eating this filling breakfast for several days after it was made. Here’s how to make it:

    Scroll Down For A Printable Recipe Card At The Bottom Of The Page

    How To Make Blueberry Baked Oatmeal

    The first thing you will need to do is to lightly coat an 8×8 inch baking dish with cooking spray (bottom and sides). The second thing you need to do is preheat the oven to 325° F.

    PLEASE NOTE: In the step below, note that only 3/4 cup of the chopped pecans are combined with the oat mixture. Reserve the remaining 1/2 cup of pecans to top off the blueberry baked oatmeal with, before baking!

    In a large bowl, combine the old-fashioned oats, 3/4 cup of the chopped pecans (or walnuts), cinnamon, salt and baking powder. Stir until the ingredients are mixed. Set the bowl aside.

    Oats, chopped pecans and spices are mixed together for blueberry baked oatmeal.

    In a separate bowl, place the low-fat milk, egg, plain Greek yogurt, maple syrup, melted coconut oil and some vanilla extract.

    Whisk these “wet” ingredients together, until they are fully blended and creamy. Set this bowl aside.

    Milk, yogurt, eggs, coconut oil and vanilla are mixed together for blueberry baked oatmeal.

    To Assemble The Blueberry Baked Oatmeal

    Evenly distribute the blueberries and then the chopped apples onto the bottom of the prepared baking dish. I placed the blueberries down first, and then added the chopped apples on top.

    Blueberries and chopped apples are spread across the bottom of baking dish for blueberry baked oatmeal.

    Sprinkle the oats and pecan mixture evenly over the top of the blueberries and apples, to cover.

    Dry mixture of oats, spices and pecans placed on top of blueberries and apples in dish.

    Pour the milk/yogurt mixture over the oats.  Using a spoon, press down all over the surface of the oats, so that the dry oat mixture is submerged into the liquid.

    I firmly pressed the back of the spoon down over the entire surface of the oats, to do this step. This is an important step, which holds it all together, so don’t skip this one!

    Milk mixture is added to blueberry baked oatmeal dish, and oats are pressed down into liquid.

    Sprinkle the remaining 1/2 cup of chopped pecans evenly over the top of the oats.  If you want, you can lightly sprinkle the top with additional cinnamon, but it is not necessary. Now your blueberry apple pecan baked oatmeal is ready for the oven!

    Chopped pecans are added to top of blueberry baked oatmeal before baking.

    Cook The Blueberry Baked Oatmeal

    Bake the oatmeal at 325° F. for approximately 40-45 minutes. When done, the top of the blueberry baked oatmeal will be a nice golden brown color, and the oats will be “set”, and not sloshy.

    Once done, remove the pan with the blueberry baked oatmeal from the oven. Let it cool on a wire rack for several minutes, before attempting to slice.

    A side view of blueberry baked oatmeal, right after it comes out of the oven.

    Blueberry baked oatmeal can be served warm, or at room temperature. Our favorite way to enjoy this dish was at room temperature! When ready to serve, slice the blueberry baked oatmeal into 8 portions, transfer to plates, grab a fork, and enjoy!

    Do I Need To Add Anything Else To Serve Blueberry Baked Oatmeal?

    NOPE! We think this blueberry apple pecan baked oatmeal has so much going for it taste-wise, nothing else is needed, to serve! It is PERFECT, just the way it is.

    If you want, you can always top it with more Greek yogurt or maple syrup, but give it a try, just the way it is. We’re pretty sure you’re gonna LOVE it!

    A slice of blueberry baked oatmeal on a plate, with rest of dish in background.

    A close up view of a slice of blueberry apple pecan baked oatmeal on a plate.

    My husband and I LOVED this blueberry baked oatmeal, served along with our morning coffee! What a DELICIOUS breakfast treat to awaken to each morning!  If you keep the leftovers covered, there is no need to refrigerate this dish. We enjoyed it for several days!

    The juicy blueberries and apples in each bite make this a wonderfully dense, but moist baked oatmeal. There is a lot of flavor in this breakfast, and I think you’re gonna love it, too! It’s texture, juicy fruit and crunchy pecans reminds me a bit of a yummy coffeecake. It’s so good. Sure do hope you will try this blueberry baked oatmeal! Have a wonderful day!

    Looking For More BREAKFAST Recipes?

    You can find all of my recipes in the Recipe Index, located at the top of the page. I have lots of yummy recipes for breakfast dishes, including:

    Interested In More Recipes?

    Thank you for visiting this website. I appreciate you using some of your valuable time to do soIf you’re interested, I publish a newsletter 2 times per month (1st and 15th) with all the latest recipes, and other fun info. I would be honored to have you join our growing list of subscribers, so you never miss a great recipe!
    There is a Newsletter subscription box on the top right side (or bottom) of each blog post, depending on the device you use, where you can easily submit your e-mail address (only) to be included in my mailing list.

    You Can Also Find Me On Social Media:

    Facebook page: The Grateful Girl Cooks!
    Pinterest:
    The Grateful Girl Cooks!
    Instagram:
    jbatthegratefulgirlcooks

    Author's signature

    Recipe Adapted From: https://thefoodiephysician.com/dining-with-doc-blueberry-apple-walnut/

    0 from 0 votes
    Blueberry Apple Pecan Baked Oatmeal
    Prep Time
    15 mins
    Cook Time
    40 mins
    Total Time
    55 mins
     
    Blueberry Apple Pecan Baked Oatmeal is a filling, incredible tasting breakfast dish, with rolled oats, apples, crunchy pecans, and juicy blueberries!
    Category: Breakfast
    Cuisine: American
    Keyword: blueberry baked oatmeal
    Servings: 8
    Calories Per Serving: 319 kcal
    Author: JB @ The Grateful Girl Cooks!
    Ingredients
    • 2 cups old-fashioned rolled oats
    • cups pecans (or walnuts) , chopped), divided use
    • 1 teaspoon cinnamon
    • 1 teaspoon baking powder
    • 1/4 teaspoon salt
    • cups low-fat milk (1%)
    • 1/2 cup plain low fat Greek yogurt (can substitute light sour cream)
    • 1/3 cup maple syrup
    • 1 large egg
    • 2 Tablespoons melted coconut oil (can substitute unsalted butter)
    • 1 teaspoon vanilla extract
    • cups blueberries
    • cups finely chopped, peeled apple
    Instructions
    1. Lightly coat an 8x8 inch baking dish with cooking spray (bottom/sides). Preheat oven to 325° F.

    2. In a large bowl, combine oats, 3/4 cup chopped pecans (reserve remaining pecans), cinnamon, salt and baking powder. Stir until ingredients are mixed. Set the bowl aside.

    3. In a separate bowl, place milk, egg, plain Greek yogurt, maple syrup, melted coconut oil and some vanilla extract. Whisk these "wet" ingredients together, until fully blended and creamy. Set the bowl aside.

    4. Evenly distribute the blueberries and then chopped apples on the bottom of the prepared baking dish.  Sprinkle the oats and pecan mixture evenly over the fruit layers, to cover. Pour the milk/yogurt mixture over the oats.  Using the back of a spoon, press down firmly all over the surface of the oats, so the dry oat mixture is submerged into the liquid. Sprinkle the remaining 1/2 cup chopped pecans evenly over the oats. 

    5. Bake at 325° F. for approximately 40-45 minutes. When done, the top of the oatmeal will be a nice golden brown color, and the oats will be "set", not sloshy. Remove pan from the oven. Let it cool on a wire rack. Blueberry baked oatmeal can be served warm, or at room temperature (our favorite=room temp.). When ready to serve, slice into 8 portions, transfer to plates, and enjoy!

    Nutrition Facts
    Blueberry Apple Pecan Baked Oatmeal
    Amount Per Serving (1 g)
    Calories 319 Calories from Fat 153
    % Daily Value*
    Fat 17g26%
    Saturated Fat 5g31%
    Cholesterol 30mg10%
    Sodium 109mg5%
    Potassium 325mg9%
    Carbohydrates 35g12%
    Fiber 4g17%
    Sugar 16g18%
    Protein 7g14%
    Vitamin A 120IU2%
    Vitamin C 4mg5%
    Calcium 128mg13%
    Iron 1.5mg8%
    * Percent Daily Values are based on a 2000 calorie diet.

    Here’s one more to pin on your Pinterest boards!Blueberry Apple Pecan Baked Oatmeal is a filling, incredible tasting breakfast dish, with rolled oats, apples, crunchy pecans, and juicy blueberries!

    Mini Zucchini Loaves with Browned Butter Icing

    Mini zucchini loaves (with creamy browned butter icing) are a delicious treat or snack. This easy recipe makes 2 mini loaves, which are perfect for gift-giving!
    Mini zucchini loaves, with creamy browned butter icing are a delicious treat or snack. Easy recipe makes 2 mini loaves, perfect for gift-giving!

    This past Fall, I saw a recipe for a zucchini cake that had amazing looking frosting on it, and knew I had to try it! The twist to the original recipe came when I decided to make mini zucchini loaves out of the recipe (instead of a cake), but still use the creamy frosting!

    The recipe was very easy to make, and yielded two very moist, absolutely scrumptious mini zucchini loaves. My husband and I shared a loaf over the next couple of days, and we gave the second loaf to one of our neighbors.  Oh YUM… what a great tasting treat!

    Scroll Down For A Printable Recipe Card At The Bottom Of The Page

    How To Make Mini Zucchini Loaves

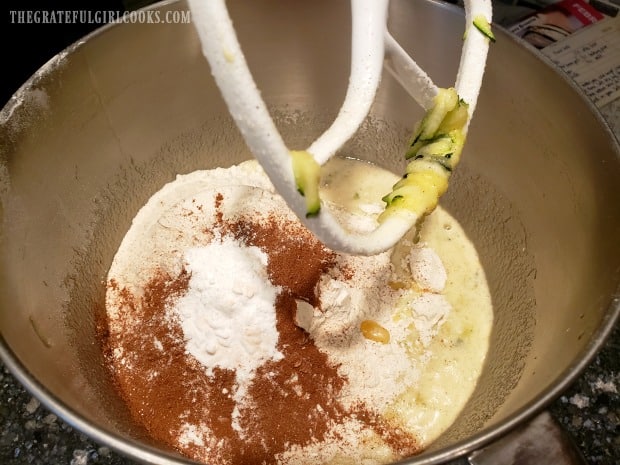
    The process is very easy to make this bread. Begin by preheating the oven to 350°F. Stir the flour, salt, baking powder, cinnamon, and baking soda together in a medium bowl. Set the bowl with these dry ingredients aside until later.

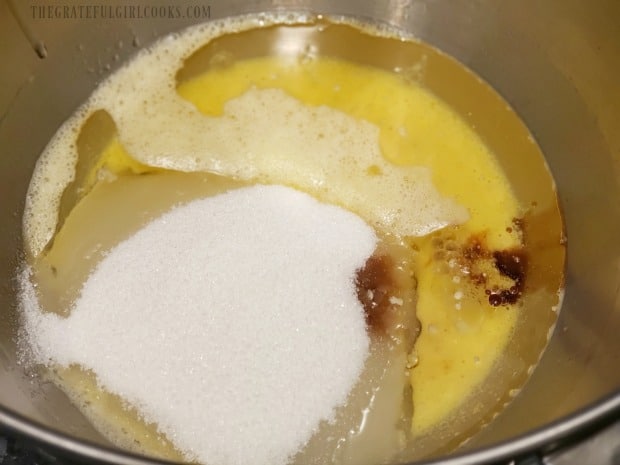
    In a separate bowl, beat the eggs well. Add the granulated sugar to the eggs, and beat well again, until combined and sugar has dissolved. Stir vanilla extract and vegetable oil into the egg mixture, until fully combined. Add the dry ingredients to the bowl with the egg mixture, and stir the ingredients just until the mixture is combined.

    Mixing dry ingredients, then adding eggs, sugar and vanilla to better for mini zucchini loaves.

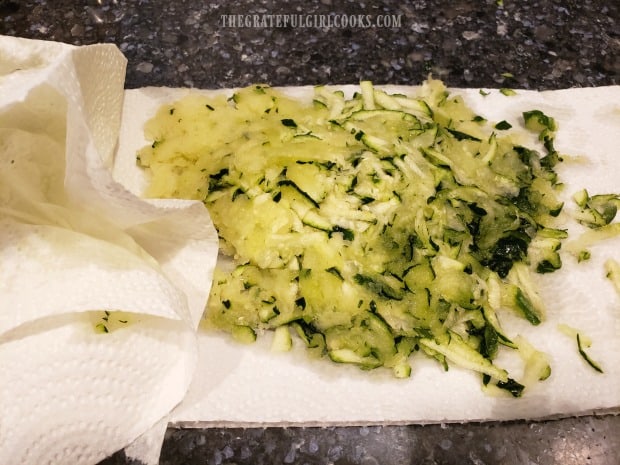
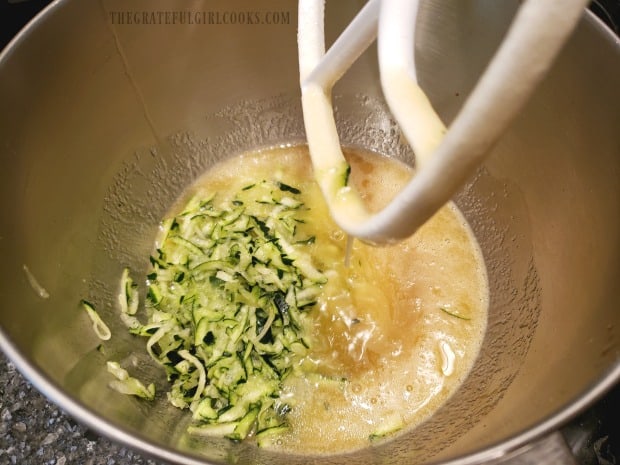
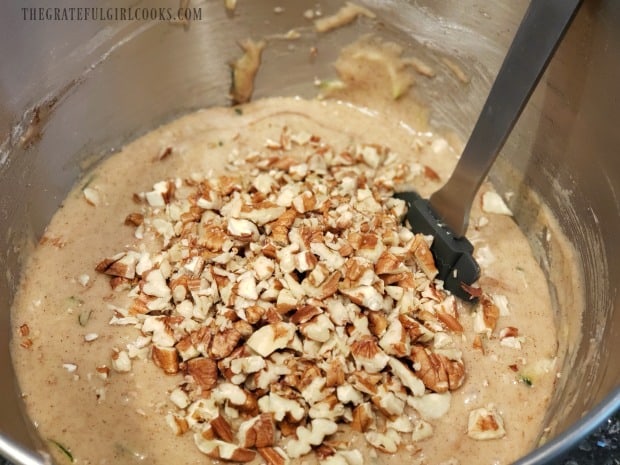
    Add the chopped walnuts (or pecans) and the grated, drained zucchini to the batter (see tip below for “draining” zucchini). Gently stir the zucchini and nuts in, until combined. This is the batter for the mini zucchini loaves. See how EASY that was?

    Adding dry ingredients, zucchini and nuts to batter for mini zucchini loaves.

    TIP For “Draining” Zucchini

    You can easily “drain” the shredded zucchini between layers of paper towels, to help absorb a lot of the moisture from the veggie. Trust me, you don’t want wet, soggy zucchini in your mini zucchini loaves!

    To do this, lay out several layers of paper towel, and place all of the grated zucchini on top.  Add a couple layers of paper towels on top of the zucchini, and press down to absorb lots of excess moisture. Who knew zucchini had so much moisture in it? You will be glad you did this!

    Draining shredded zucchini between layers of paper towels, to absorb moisture.

    Baking The Mini Zucchini Loaves

    Once you have your batter prepared for the mini zucchini loaves, it’s time to BAKE!  Divide the batter evenly into 2 greased mini sized bread loaf pans. Bake the mini zucchini loaves in a preheated 350°F oven for 40-45 minutes. Since oven temps vary greatly, be sure to check the loaves at 35 minutes, then 40, to make sure they are completely “done” .

    To test their “doneness”, simply insert a toothpick into the top center of a loaf. If the toothpick comes out “clean” (with no wet batter hanging on for dear life), the loaves are done. The mini zucchini loaves should also be nice and golden brown on the outside. Transfer the loaves to a wire rack to cool completely before covering them with browned butter icing.

    Baking mini zucchini loaves in oven and 2 finished loaves, out of oven.

    Making Browned Butter Icing For Mini Zucchini Loaves

    To make the browned butter icing, melt 3 Tablespoons unsalted butter in a skillet on medium low heat. Cook the butter on this temperature until the color starts to change slightly to golden brown.

    Turn the temperature down to low heat.  The milk solids will begin to turn into brown specks in the liquid (see middle photo below).  Continue cooking, taking care to not let it burn, until butter is a nice brown color (photo on right, below). Remove skillet from the heat.

    3 photos showing how to brown butter for the icing for mini zucchini loaves.

    Let the browned butter cool for 5-6 minutes, then add the powdered sugar.  Add cinnamon and vanilla, and then thin the icing out by adding the milk. Stir to combine. If necessary, add a tiny bit more milk (if needed), to create a spreadable consistency for the icing for the mini zucchini loaves.

    Powdered sugar and cinnamon are added to icing mixture for mini zucchini loaves.

    Evenly divide the browned butter icing between the two mini zucchini loaves. Spread as much (or as little) as you want onto the loaves. I used it all on the two loaves, and the icing was nice and thick on top!

    Two mini zucchini loaves are topped with browned butter icing.

    Time To EAT!

    Let the mini zucchini loaves sit for a few minutes, to give the icing a chance to firm up a little bit. The only remaining step left is to slice a nice piece… and EAT IT! YUMMY! The mini zucchini loaves are very moist, full of cute little pieces of zucchini and chopped nuts, flavored with cinnamon and taste WONDERFUL. The browned butter frosting takes it OVER THE TOP to Flavor Town! Enjoy!
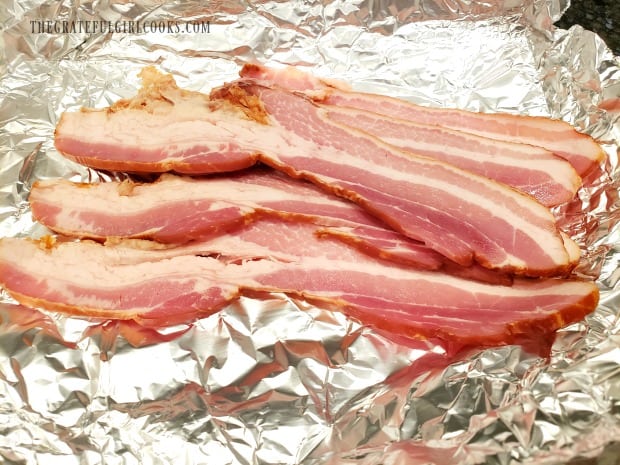
    A slice of one of the mini zucchini loaves is held in hand before eating!

    Sure do hope you will consider trying this recipe for mini zucchini loaves, with browned butter icing. Pour yourself a hot cup of coffee or tea, and enjoy a slice (or two). Have a GREAT day!

    By the way, if you are looking for more homemade sweet bread loaf recipes, I hope you will check out a few favorites. These and ALL my recipes can be found in the Recipe Index, located at the top of the page.

    Interested In More Recipes?

    Thank you for visiting this website. I appreciate you using some of your valuable time to do soIf you’re interested, I publish a newsletter 2 times per month (1st and 15th) with all the latest recipes, and other fun info. I would be honored to have you join our growing list of subscribers, so you never miss a great recipe!
    There is a Newsletter subscription box on the top right side (or bottom) of each blog post, depending on the device you use, where you can easily submit your e-mail address (only) to be included in my mailing list.
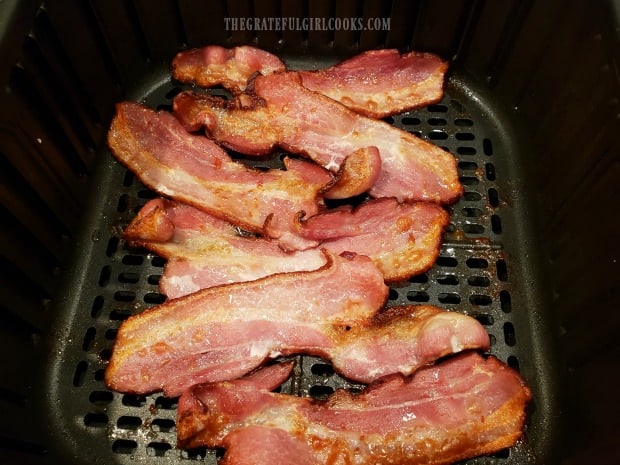
    You Can Also Find Me On Social Media:

    Facebook page: The Grateful Girl Cooks!
    Pinterest:
    The Grateful Girl Cooks!
    Instagram:
    jbatthegratefulgirlcooks

    Author's signature

    Recipe Adapted From: https://theviewfromgreatisland.com/end-of-summer-zucchini-cake-with-browned-butter-frosting/

    0 from 0 votes
    Mini Zucchini Loaves with Browned Butter Icing
    Prep Time
    20 mins
    Cook Time
    40 mins
    Resting Time
    15 mins
    Total Time
    1 hr 15 mins
     

    Mini zucchini loaves (with creamy browned butter icing) are a delicious treat or snack. This easy recipe makes 2 mini loaves, perfect for gift-giving!
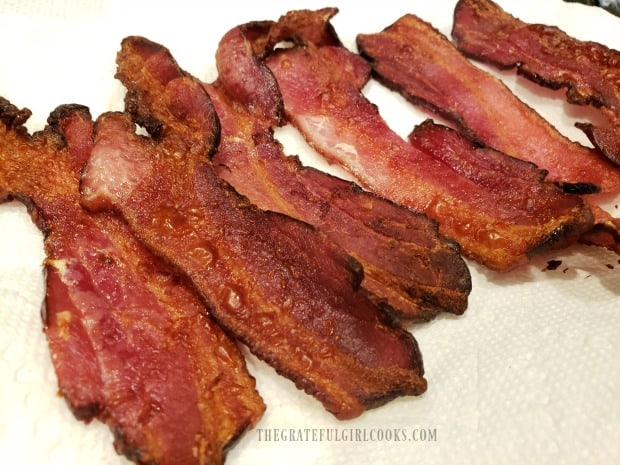
    Category: Bread/Breakfast
    Cuisine: American
    Keyword: mini zucchini loaves
    Servings: 10 servings (2 mini loaves)
    Calories Per Serving: 385 kcal
    Author: JB @ The Grateful Girl Cooks!
    Ingredients
    For Bread:
    • 1 cup all purpose flour
    • 1 teaspoon baking soda
    • 1 teaspoon cinnamon
    • 1/2 teaspoon salt
    • 1 pinch baking powder
    • 1 cup granulated sugar
    • 1/2 cup vegetable oil
    • 2 teaspoons vanilla extract
    • 1 cup shredded zucchini , drained and packed into cup
    • 1/2 cup chopped walnuts (or pecans)
    For Browned Butter Icing:
    • 3 Tablespoons unsalted butter
    • 2 cups confectioner's sugar (powdered)
    • 1/4 teaspoon cinnamon
    • 1/8 teaspoon vanilla extract
    • 2 Tablespoons milk, to thin , plus additional if needed
    Instructions
    1. Preheat oven to 350°F.  Stir the flour, salt, baking powder, cinnamon, and baking soda together in a medium bowl. Set aside.

    2. In a separate bowl, beat the eggs well. Add the granulated sugar to the eggs, and beat well again, until combined and sugar has dissolved. Stir vanilla extract and vegetable oil into the egg mixture, until fully combined. Add the dry ingredients to the bowl with the egg mixture, and stir the ingredients just until the mixture is combined. Add chopped walnuts (or pecans) and the grated, drained zucchini to the batter. Gently stir zucchini and nuts in, until combined. TIP TO DRAIN ZUCCHINI: Lay out several layers of paper towel, and place grated zucchini on top.  Add a couple layers of paper towels on top of the zucchini, and press down to absorb lots of excess moisture.

    3. Divide batter evenly into 2 greased mini sized bread loaf pans. Bake in 350°F oven for 40-45 minutes. Since oven temps vary greatly, be sure to check the loaves at 35 minutes, then 40 etc., to make sure they are done. To test "doneness", insert a toothpick into the top center of a loaf. If it comes out "clean" (with no wet batter hanging on for dear life), loaves are done. Transfer loaves to a wire rack to cool completely before removing from pan and covering with  icing.

    To Make Browned Butter Icing:
    1. Melt butter in a skillet on medium low heat. Cook the butter at this temperature until the color starts to change slightly to golden brown. Once golden brown, lower the temperature to low heat.  The milk solids will begin to turn into brown specks in the liquid.  Continue cooking, taking care NOT to let it burn, until the butter is a deep brown color. Remove skillet from the heat.
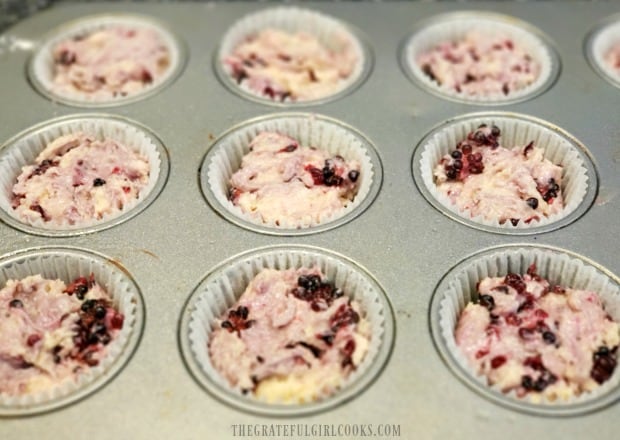
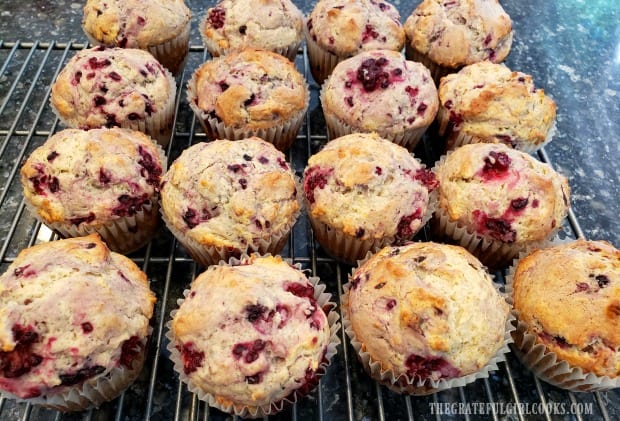
    2. Let the browned butter cool for 5-6 minutes, then add powdered sugar.  Add cinnamon and vanilla, then thin the icing out by adding milk. Stir to combine. If necessary, add a tiny bit more milk, to create a spreadable consistency for the icing. Evenly divide the browned butter icing between the two mini zucchini loaves. Let the loaves sit for a few minutes, to give the icing a chance to firm up.  Slice each mini loaf into 5 pieces, serve, and enjoy!

    Nutrition Facts
    Mini Zucchini Loaves with Browned Butter Icing
    Amount Per Serving (1 slice)
    Calories 385 Calories from Fat 162
    % Daily Value*
    Fat 18g28%
    Saturated Fat 11g69%
    Cholesterol 9mg3%
    Sodium 229mg10%
    Potassium 75mg2%
    Carbohydrates 55g18%
    Sugar 44g49%
    Protein 2g4%
    Vitamin A 130IU3%
    Vitamin C 2.2mg3%
    Calcium 16mg2%
    Iron 0.8mg4%
    * Percent Daily Values are based on a 2000 calorie diet.

    Here’s one more to pin on your Pinterest boards!Mini zucchini loaves (with creamy browned butter icing) are a delicious treat or snack. This easy recipe makes 2 mini loaves, perfect for gift-giving!