Category: Breakfast

Poppyseed Cake

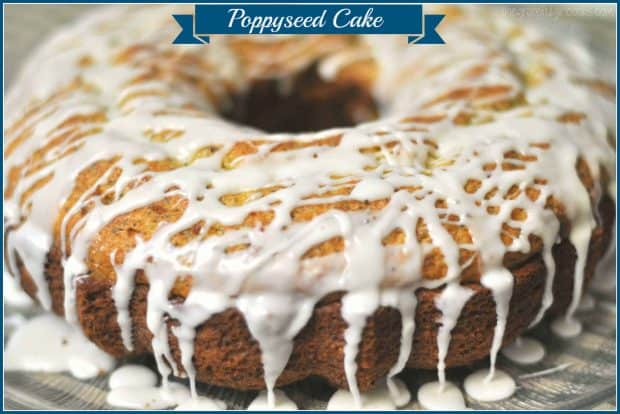
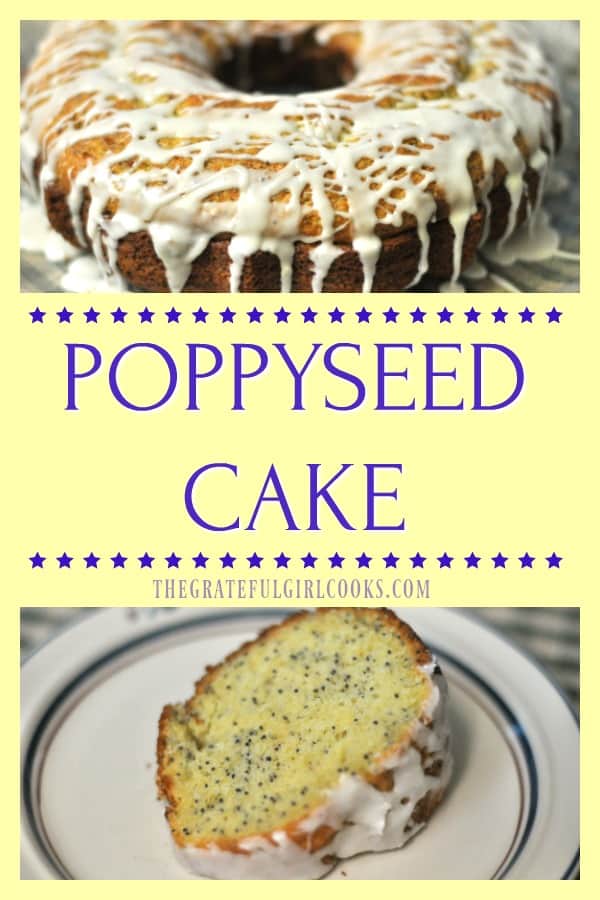
This Poppyseed Cake is absolutely EASY, delicious, serves 12 as dessert or coffeecake, and takes only 5 minutes prep time, using a boxed cake mix!This Poppyseed Cake is absolutely EASY, delicious, serves 12 as dessert or coffeecake, and takes only 5 minutes prep time, using a boxed cake mix!
Want a fabulous tasting cake recipe that only has a few ingredients, takes 5 minutes to throw together, and can be served as dessert OR coffeecake? Well if you do, this Poppyseed Cake is perfect for you!

I found the recipe for this poppyseed cake in my Mom’s trusty recipe box over 35 years ago and wrote it down on a little 3×5 index card. It looked easy to prepare, and turned out fantastic the very first time I made it, so I’ve been making it ever since!

The recipe is totally EASY, EASY, EASY, and tastes amazing, due to the subtle flavor imparted into a simple boxed yellow cake mix by adding a couple additional ingredients like poppyseeds and cooking sherry!

Scroll Down for A Printable Recipe Card At The Bottom Of The Page

Prepare The Cake Batter

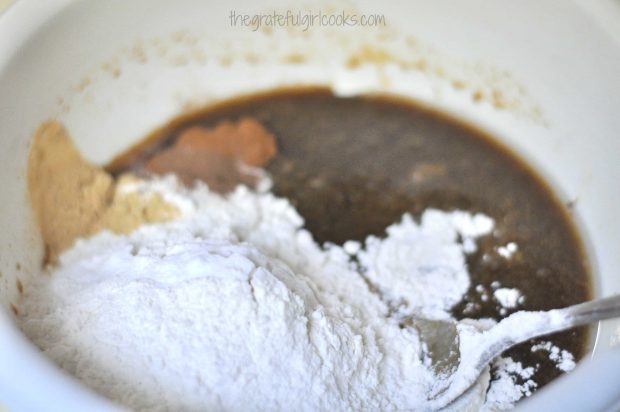
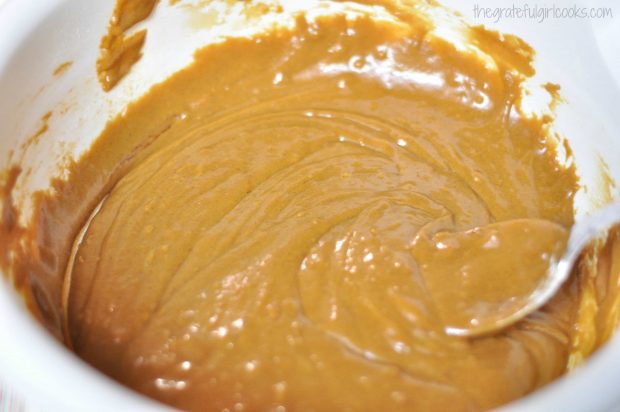
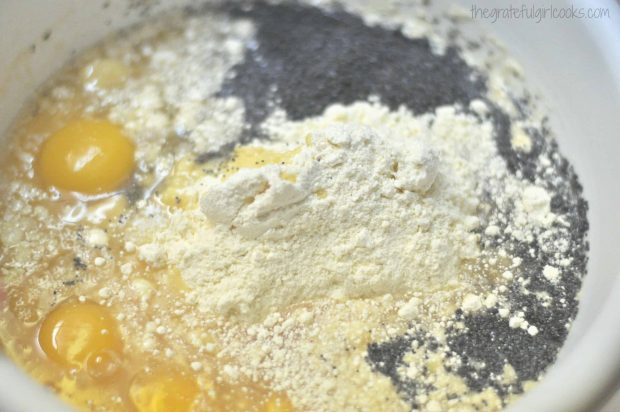
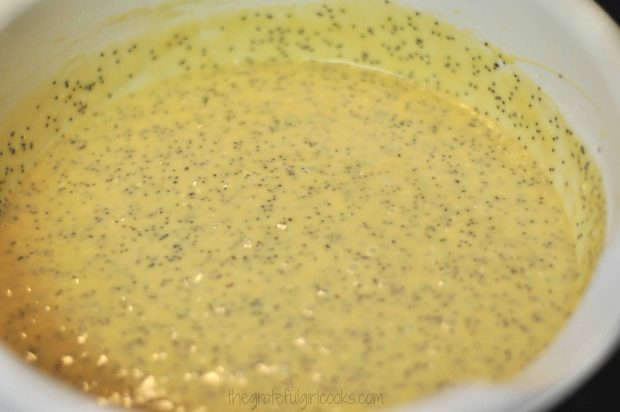
The poppyseed cake can be in the oven in about 5 minutes! How’s THAT for easy? Combine cake mix, oil, cooking sherry, eggs and poppyseeds in a large bowl. Mix well for 4-5 minutes. That’s it! The cake batter is ready!

Poppyseeds, cake mix, and eggs in mixing bowl.

Batter for poppyseed cake in white bowl, and ready to pour into pan.

Bake The Poppyseed Cake

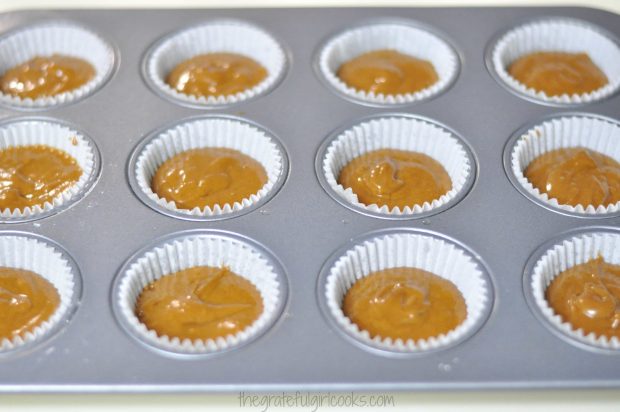
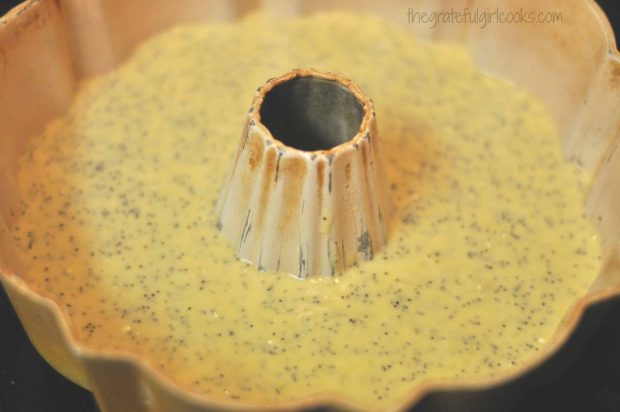
Pour the cake batter into a very well-greased bundt pan. Make sure the batter is evenly distributed.  Bake the poppyseed cake at 350 degrees for 45 minutes. You can test for “done-ness” by inserting a toothpick into the center of the cake. If it comes out clean, then it is ready!

When the cake is done, remove the bundt pan from the oven, and transfer the pan to a wire rack to completely cool the cake.

Here is the poppyseed cake batter in bundt pan, ready to bake.

Removing the Poppyseed Cake From the Bundt Pan

Once the cake has cooled completely, run a spatula or butter knife around the edges of the cake, because it helps to loosen the edges. Place a large plate upside down on top of the bundt pan, and holding both bundt pan and plate securely, flip the cake upside down, inverting the cake onto the plate.

If you greased the pan really well, it should come right out onto the plate.  Once onto plate, carefully turn the cake over again so it is right side up on a serving platter.

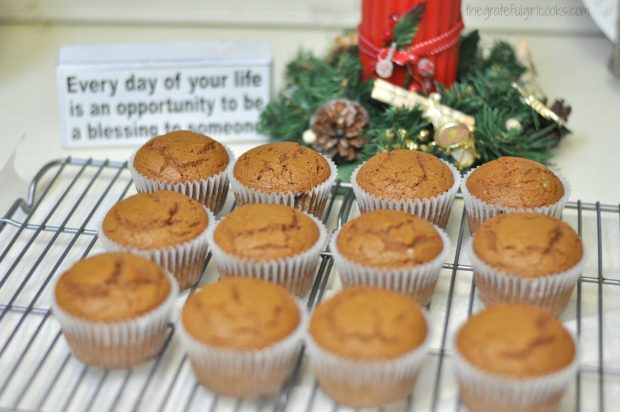
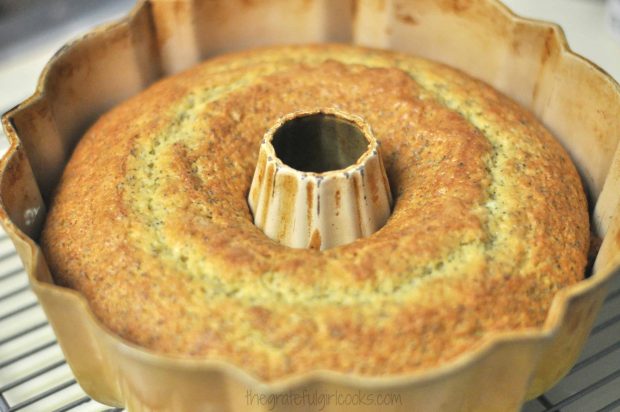
Fully baked poppyseed cake in bundt pan on rack

Make The Decorative Icing To Drizzle On the Cake

Decorating the cake with an icing drizzle is completely optional (cake tastes great all by itself), and the icing adds a nice fancy touch, and a little sweetness.

In a small bowl, mix together the icing ingredients until you have an icing that can be decoratively drizzled over the surface of the cake. Let this icing firm up completely, once you’ve drizzled it onto cake.

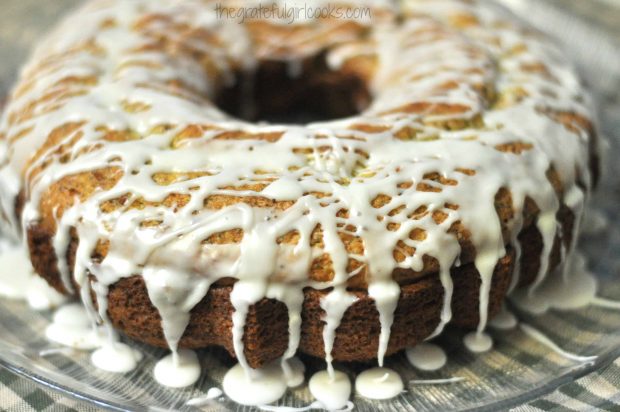
Icing dripping off of the poppyseed cake.

Time To Serve The Poppyseed Cake!

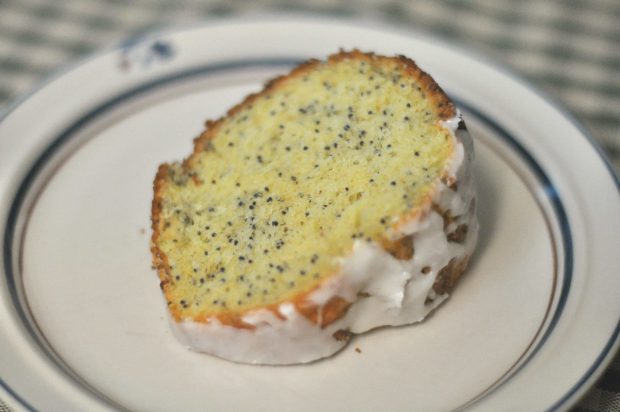
Slice and serve! If serving poppyseed cake as a dessert, a scoop of ice cream is a perfect accompaniment.  When serving it as a breakfast or snack coffeecake, it tastes great with a good cup of coffee or tea! Doesn’t it look yummy?

One slice of poppyseed cake, sitting on a plate.

The flavor is wonderful, and the cake is not dry!  Sure hope you will consider making this Poppyseed Cake. It’s also a wonderful addition to any brunch table, too.

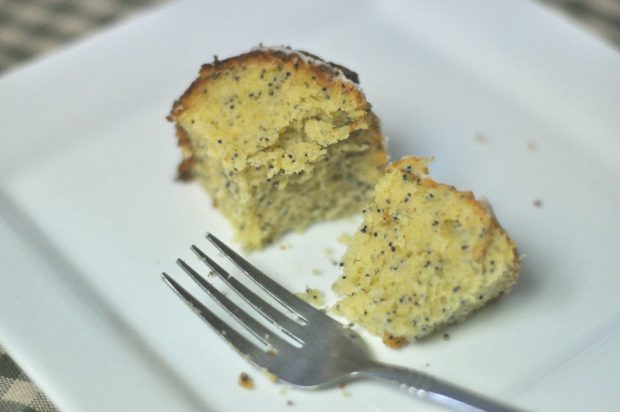
A fork and bite of the poppyseed cake on a white plate.

Thanks for taking time out of your day to give this recipe a “look”. Really glad I found it in my Mom’s old recipe box so long ago.  I don’t have a clue who the original author was, but am thankful for the recipe, because I’ve made it many, many times over the past 35 years!

By the way, if you enjoy cakes that can double as dessert OR coffeecake, be sure to check out my recipe for Hummingbird Cake! Have a wonderful day.

Looking For More CAKE Recipes?

You can find all of my cake recipes in the Recipe Index, located at the top of the page. A few favorites include:

Interested In More Recipes?

Thank you for visiting this website. I appreciate you using some of your valuable time to do soIf you’re interested, I publish a newsletter 2 times per month (1st and 15th) with all the latest recipes, and other fun info. I would be honored to have you join our growing list of subscribers, so you never miss a great recipe!
There is a Newsletter subscription box on the top right side (or bottom) of each blog post, depending on the device you use, where you can easily submit your e-mail address (only) to be included in my mailing list.

You Can Also Find Me On Social Media:
Facebook page: The Grateful Girl Cooks!
Pinterest: The Grateful Girl Cooks!
Instagram: jbatthegratefulgirlcooks

Author's signature

Recipe Source:  My Mom (years and years ago)

0 from 0 votes
Poppyseed Cake
Prep Time
5 mins
Cook Time
45 mins
Total Time
50 mins
 

This Poppyseed Cake is absolutely EASY, delicious, serves 12 as dessert or coffeecake, and takes only 5 minutes prep time, using a boxed cake mix!

Category: Dessert or Coffeecake
Cuisine: American
Keyword: poppyseed cake
Servings: 12 servings
Calories Per Serving: 363 kcal
Author: JB @ The Grateful Girl Cooks!
Ingredients
For cake:
  • 1 box yellow cake mix (get the kind that says "with pudding")
  • 3/4 cup cooking sherry
  • 3/4 cup vegetable oil
  • 4 large eggs
  • 1/3 cup poppyseeds
For Icing:
  • 1 cup powdered sugar
  • 1 teaspoon vanilla extract
  • a few sprinkles water at a time (until icing becomes a "drizzling" consistency)
Instructions
  1. Preheat oven to 350 degrees F. Grease a bundt pan very well. Set aside.
  2. In large bowl, mix cake ingredients for 5 minutes (boxed yellow cake mix, cooking sherry, oil, eggs and poppyseeds). Pour batter evenly into greased/floured cake pan. Bake cake at 350 degrees for 45 minutes. Remove pan to wire rack to cool.
  3. While cake is cooling, mix up icing ingredients in small bowl. Add sprinkles of water until icing is thick enough to drizzle over top of finished cake. (Too thick... add couple drops water. Too thin... add more powdered sugar).
  4. Once cake has completely cooled, invert a plate over top of bundt pan, and holding both plate and bundt pan securely, flip the cake over. Once cake is on plate, carefully turn it over once more on serving platter so the right side is facing up. Decoratively drizzle the icing over top of cake. Let icing firm up, then serve and enjoy this tasty cake for dessert (with a scoop of ice cream) or as a coffeecake for breakfast!
Recipe Notes

The baking time indicated is designed for a bundt pan. If using a standard sized cake pan, your cooking time will need to be adjusted slightly.

Nutrition Facts
Poppyseed Cake
Amount Per Serving (1 slice)
Calories 363 Calories from Fat 153
% Daily Value*
Fat 17g26%
Saturated Fat 12g75%
Cholesterol 54mg18%
Sodium 336mg15%
Potassium 70mg2%
Carbohydrates 46g15%
Fiber 1g4%
Sugar 28g31%
Protein 3g6%
Vitamin A 80IU2%
Calcium 140mg14%
Iron 1.5mg8%
* Percent Daily Values are based on a 2000 calorie diet.

Here’s one more to pin on your Pinterest boards!This Poppyseed Cake is absolutely EASY, delicious, serves 12 as dessert or coffeecake, and takes only 5 minutes prep time, using a boxed cake mix!
 

Save

Save

Save

Save

Save

Save

Save

Save

Save

Save

Save

Save

Save

Save

Save

Tomato, Basil and Three Cheese Tart

Tomato Basil Three Cheese Tart has a flaky crust, tomatoes, Ricotta, Parmesan, Mozzarella cheese, Italian spices, and is perfect for breakfast, lunch OR dinner!
I found this recipe for a “quiche-like tart” on Pinterest from one of my favorite bloggers, tweaked the recipe very slightly, and enjoyed the results very much!  The recipe features a delectable (pat in the pan) crust.

It is flavored with quiche-style filling, fresh mozzarella cheese, Parmesan cheese, and Ricotta cheese, plus fresh basil leaves and Italian spices. This beautiful tart is beautifully “crowned” with beautiful tomato slices for a pop of flavor and color!

Believe it or not, the tomato basil three cheese tart was not too hard to make, either! This dish is perfect for breakfast, lunch OR dinner. I think it would be fabulous to serve at a brunch! Here’s how to make it.

Scroll Down For A Printable Recipe Card At The Bottom Of The Page

How To Make This Tomato Basil Three Cheese Tart

Preheat your oven to 410 degrees F.  Place butter, oil, water, sugar and salt in an oven-proof bowl. Place bowl in preheated oven; cook for 15 minutes. Remove hot bowl from oven.

Add flour into the hot butter mixture. Stir this until the dough comes together and can be formed into a ball. Place the dough ball into a 10 or 11 inch tart pan (with a removable bottom).

Tomato, Basil and Three Cheese Tart / The Grateful Girl Cooks!

Tomato, Basil and Three Cheese Tart / The Grateful Girl Cooks!

Tomato, Basil and Three Cheese Tart / The Grateful Girl Cooks!
Once dough has cooled enough to handle, press the dough into the tart pan and up the sides to form a crust. (Hint from original recipe author: save a tiny bit of dough which can be used to repair any cracks in crust after baking).  Pierce the crust all over with the tines of a fork.

Bake The Crust

Press the sides of the crust in the pan to help reinforce the crust. I used a fork to do this. Bake crust at 410 degrees for 15 minutes (until golden in color).  Remove crust from oven. If any cracks occurred, use the tiny bit of dough to do a quick repair job. Let crust cool.  Reduce oven temperature to 375 F. Place a long baking sheet into the heated oven (for later).

NOTE*** — I only had a 9 inch tart pan, so as you can see from my photos, I used the extra crust for two little tarts as well, then just divided the filling between the tarts. (The smaller crusts took a bit less time to cook).

Tomato, Basil and Three Cheese Tart / The Grateful Girl Cooks!

Tomato, Basil and Three Cheese Tart / The Grateful Girl Cooks!

Tomato, Basil and Three Cheese Tart / The Grateful Girl Cooks!

Prepare Filling For The Tomato Basil Three Cheese Tart

While you are baking crust or waiting for crust to cool down, combine the eggs, ricotta, Parmesan, half and half, Italian seasoning and salt in a medium bowl. Stir well to mix; once combined, add the small basil leaves and stir together. Set aside.

Tomato, Basil and Three Cheese Tart / The Grateful Girl Cooks!

Slice tomatoes (1/4 inch slices). Place slices on top of several paper towel to let them drain a bit.  While the tart is in the oven baking, lightly brush the tops of each tomato slice with a bit of olive oil

Tomato, Basil and Three Cheese Tart / The Grateful Girl Cooks!

Once the tart crust has cooled completely, add the grated fresh mozzarella cheese and spread to cover bottom of crust. Pour the egg mixture over the top of the mozzarella cheese.

Tomato, Basil and Three Cheese Tart / The Grateful Girl Cooks!

Tomato, Basil and Three Cheese Tart / The Grateful Girl Cooks!

Bake The Tart

Place the tart onto the heated baking sheet (in the oven) and bake on the pan for 10 minutes at 375 F. Remove tomato basil three cheese tart from oven after 10 minutes; arrange the tomato slices on top of the tart. Sprinkle tomato slices with salt and black pepper.

Place the tart back in the oven and continue to bake for an additional 15-20 minutes (mine took 20), until just set. When you slightly wiggle the tart pan, the filling should no longer “jiggle” back and forth. Remove the tart pan to a wire rack and let cool for at least 10 minutes before serving.

Tomato, Basil and Three Cheese Tart / The Grateful Girl Cooks!

Aren’t They Pretty?

This is how they looked when they first came out of the oven. I already had taken the tart pan off the small ones, as they had cooked and cooled enough before the large tart was done. Aren’t they gorgeous???

Tomato, Basil and Three Cheese Tart / The Grateful Girl Cooks!

I kinda like the little bitty ones… they would be perfect to serve at a brunch!

https://www.thegratefulgirlcooks.com/tomato-basil-three-cheese-tart/

Time To EAT!

This tomato basil three cheese tart can be served hot (after it rest for 10 minutes), or at room temperature. Either way is wonderful. Wrap the leftovers well, and they will keep for several days, if refrigerated.

Tomato, Basil and Three Cheese Tart / The Grateful Girl Cooks!

I hope you will consider making this delicious tomato basil three cheese tart.  An added benefit was being able to use fresh tomatoes and basil from our garden to make this tart! It was wonderful to have the leftovers hanging around in our refrigerator for a few days. Then it was so easy to grab a quick slice for breakfast or lunch!

In Other News!

Have a blessed day… in other news – we got a new Pembroke welsh corgi puppy yesterday, so I am up to my eyeballs in “PUPPY” stuff. So tired, yet so very thankful for our new furry bundle of JOY (even if he doesn’t seem too sure about his new living arrangements)!

Cooper is our new corgi puppy!

Sure hope you enjoy this tomato basil three cheese tart! We sure did! Thanks for stopping by, and have a wonderful day.

Looking For More Quiche-Like Recipes Like This?

You can find all my recipes in the Recipe Index, located at the top of the page. I have several quiche recipes similar to this one that you might enjoy, including:

Interested In More Recipes?

Thank you for visiting this website. I appreciate you using some of your valuable time to do soIf you’re interested, I publish a newsletter 2 times per month (1st and 15th) with all the latest recipes, and other fun info. I would be honored to have you join our growing list of subscribers, so you never miss a great recipe!
There is a Newsletter subscription box on the top right side (or bottom) of each blog post, depending on the device you use, where you can easily submit your e-mail address (only) to be included in my mailing list.

You Can Also Find Me On Social Media:
Facebook page: The Grateful Girl Cooks!
Pinterest: The Grateful Girl Cooks!
Instagram: jbatthegratefulgirlcooks

Author's signature

Recipe Adapted From: http://thecafesucrefarine.com/2016/06/tomato-basil-fresh-mozzarella-tart/

↓↓ PRINTABLE RECIPE BELOW ↓↓

0 from 0 votes
Tomato, Basil and Three Cheese Tart
Prep Time
35 mins
Cook Time
30 mins
Total Time
1 hr 5 mins
 
Tomato Basil Three Cheese Tart has a flaky crust, tomatoes, Ricotta, Parmesan, Mozzarella cheese, Italian spices, and is perfect for breakfast, lunch OR dinner!
Category: Brunch, Entree
Cuisine: American
Keyword: tomato basil three cheese tart
Servings: 8 servings
Calories Per Serving: 552 kcal
Author: JB @ The Grateful Girl Cooks!
Ingredients
For crust:
  • 6 ounces butter
  • 2 Tablespoons oil (non-flavored oil)
  • 6 Tablespoons water
  • 1 teaspoon sugar
  • 1/2 teaspoon salt
  • 2 cups all purpose flour , plus 2 Tablespoons
For tart filling:
  • 4 large eggs (room temp)
  • 1 cup ricotta cheese (room temp)
  • 1/3 cup Parmesan cheese (grated)
  • 1 cup half and half
  • 1 teaspoon Italian seasoning (dried)
  • 1/2 teaspoon salt
  • 1/4 cup small , fresh basil leaves
  • 10-15 small colorful tomatoes (I used a combo of Romas and various color cherry tomatoes)
  • 8 ounces fresh mozzarella cheese , grated
  • Olive oil (to lightly brush on tomato slices prior to baking)
  • Salt and pepper , to sprinkle on tart before final bake
Instructions
To make the crust:
  1. Preheat your oven to 410 degrees F. Place the butter, oil, water, sugar and salt in an oven-proof bowl. Place bowl in preheated oven; cook for 15 minutes. Remove hot bowl from oven.
  2. Add flour into the hot butter mixture. Stir this until the dough comes together and can be formed into a ball. Place the dough ball into a 10 or 11 inch tart pan (with a removable bottom). Once dough has cooled enough to handle, press the dough into the tart pan and up the sides to form a crust. (Hint from original recipe author: save a tiny bit of dough which can be used to repair cracked crust after baking).
  3. Pierce the crust all over with the tines of a fork. Press the sides of the crust in the pan to help reinforce the crust. I used the fork to do this. Bake at 410 degrees for 15 minutes (golden in color).
  4. Remove crust from oven. If any cracks occurred, use the tiny bit of dough to do a quick repair job. Let crust cool. Reduce oven temperature to 375 F. Put a long sheet pan into the oven to heat up.
  5. While you are waiting for crust to cool down, combine the eggs, ricotta, Parmesan, half and half, Italian seasoning and salt in a medium bowl. Stir well to mix; once combined, add the small basil leaves and stir together. Set aside.
  6. Slice tomatoes (1/4 inch slices). Place slices on top of several paper towel to let them drain a bit.
  7. Once the tart crust has cooled completely, add the grated fresh mozzarella cheese and spread to cover bottom of crust. Pour the egg mixture over the top of the mozzarella cheese. Place the tart onto the heated baking sheet (in the oven) and bake on the pan for 10 minutes at 375 F.
  8. While the tart is in the oven baking, lightly brush the tops of each tomato slice with a bit of olive oil.
  9. Remove tart from oven after 10 minutes; arrange the tomato slices on top of the tart. Sprinkle tomato slices with salt and black pepper. Place the tart back in the oven and continue to bake for an additional 15-20 minutes (mine took 20), until just set. (When you slightly wiggle the tart pan, the filling no longer "jiggles" back and forth). Remove the tart pan to a wire rack and let cool for at least 10 minutes before serving. The tart is also delicious when served at room temperature!
Recipe Notes

Note: FYI- Original recipe called for 1/2 cup small fresh basil leaves. I made the tart the first time with that measurement, but I found I actually prefer LESS basil flavor in the tart, so have adjusted the quantity down to 1/4 cup small basil leaves for my version.

Nutrition Facts
Tomato, Basil and Three Cheese Tart
Amount Per Serving (1 slice)
Calories 552 Calories from Fat 342
% Daily Value*
Fat 38g58%
Saturated Fat 23g144%
Cholesterol 179mg60%
Sodium 765mg33%
Potassium 526mg15%
Carbohydrates 33g11%
Fiber 2g8%
Sugar 5g6%
Protein 19g38%
Vitamin A 2440IU49%
Vitamin C 21.5mg26%
Calcium 331mg33%
Iron 2.6mg14%
* Percent Daily Values are based on a 2000 calorie diet.

Here’s one more to pin on your Pinterest boards!Tomato Basil Three Cheese Tart has a flaky crust, tomatoes, Ricotta, Parmesan, Mozzarella cheese, Italian spices, and is perfect for breakfast, lunch OR dinner!

Save

Save

Save

Save

Save

Save

Save

Save

Raspberry Cream Cheese Danish

Raspberry cream cheese danish are crescent roll pastries with sweet cream cheese filling, baked and topped with jam, and drizzled with a simple glaze.Raspberry cream cheese danish are crescent roll pastries with sweet cream cheese filling, baked and topped with jam, and drizzled with a simple glaze.
I found a recipe for a quick, easy danish pastry the other day and decided to give it a try. I changed up the recipe just a smidge and the end result? An absolutely delicious Raspberry Cream Cheese Danish pastry, that was enjoyed with a steaming cup of strong coffee!

Our youngest son (“young” meaning 29 years old) popped in for a visit just as I started making these, so he ended up getting to enjoy them with us, and also went home with a big plate full of pastries. There are ALWAYS side benefits of visiting Mom and Dad, right? This recipe is actually fairly easy, and you’ll end up with 16 small danish pastries. Here’s how you make them:

Scroll Down For A Printable Recipe Card At The Bottom Of The Page

How To Make Raspberry Cream Cheese Danish Pastries

Start with 2 cans of refrigerated crescent rolls. The dough will come out with 4 rectangular pieces of dough (two triangles of dough attached with perforations in between). Press the perforations closed to form a solid rectangle.

Once you have done this to both cans of dough you should have 8 rectangles of dough. Sprinkle each rectangle very lightly with sugar (use 1 Tablespoon total evenly divided between rectangles).

Canned crescent roll dough is rolled out into rectangles.

Gently roll out each rectangle to 8 inches long. Cut each rectangle in half length-wise. You will then have 16 rectangles, about 1 inch by 8 inches.

Shape The Dough

Pick up each piece of dough by each end and lightly twist the dough ends in opposite directions (i.e. left hand twist toward you, right hand away from you). Form a small circle with the twisted dough, and pinch to seal the ends.

The crescent roll dough is shaped into round rings.

Place the dough circles onto parchment paper lined baking sheet(s), about 2 inches apart. Set aside.  Preheat oven to 350 degrees.

Dough circles are placed onto parchment paper line baking sheet.

Make The Cream Cheese Filling

In a medium bowl, mix together room temperature cream cheese, 1 Tablespoon granulated sugar, lemon juice, vanilla extract and sour cream, until well combined.

A simple cream cheese filling is mixed together.

Add approximately 1 Tablespoon cream cheese filling to the center of each pastry. Lightly brush the pastry dough with melted butter. NOTE: I was concerned the cream cheese would run out the bottom of the pastry by leaving the pastry circle “open”, but having the parchment paper underneath prevented that from happening!

Bake The Raspberry Cream Cheese Danish Pastries

Bake the raspberry cream cheese danish pastries in a preheated 350 oven for 13-15 minutes, or until they are light golden brown.  When done, remove from oven to a wire rack (LEAVE THE PARCHMENT PAPER UNDERNEATH)

Brushing the danish pastries with melted butter before baking.

Prepare The Glaze While Pastries Cool

While pastries are cooling, prepare the glaze to drizzle over the top of the cooled pastries. Stir powdered sugar, milk, and vanilla extract together until smooth. You want to get it to a drizzling consistency. Too thick? Add drops of milk. Too thin? Add additional powdered sugar.

Place the glaze into a squeeze bottle or into a zip-top bag (you can snip off a tiny spout on the bottom corner of zip-top bag and use it as a pastry bag). You can also just use a spoon to drizzle the glaze onto cooled pastries.

Icing is mixed to drizzle over the finished raspberry cream cheese danish.

This is what the raspberry cream cheese danish pastries looked like fresh from the oven. Once they are completely cooled off, dollop with jam. Decoratively drizzle the glaze over each pastry. Let the glaze firm up a bit, then serve!

A dollop of raspberry jam is added to each baked danish pastry.

They are quite delicious, and weren’t hard to make, either!  THAT is a win-win.  Now where’s my huge mug of coffee??

A drizzle of icing is added to each of the raspberry cream cheese danish pastries before serving.

Hope you consider making these for the ones you love. See the notes section of the printable recipe for other flavors that would taste great as toppings for these pastries.  Have a wonderful day.

Looking For More Recipes For BREAKFAST PASTRIES?

You can find all of my recipes in the Recipe Index, located at the top of the page. A few recipes for breakfast pastries you might enjoy include:

Interested In More Recipes?

Thank you for visiting this website. I appreciate you using some of your valuable time to do soIf you’re interested, I publish a newsletter 2 times per month (1st and 15th) with all the latest recipes, and other fun info. I would be honored to have you join our growing list of subscribers, so you never miss a great recipe!
There is a Newsletter subscription box on the top right side (or bottom) of each blog post, depending on the device you use, where you can easily submit your e-mail address (only) to be included in my mailing list.

You Can Also Find Me On Social Media:
Facebook page: The Grateful Girl Cooks!
Pinterest: The Grateful Girl Cooks!
Instagram: jbatthegratefulgirlcooks

Author's signatureRecipe Slightly Adapted From: http://cakescottage.com/2016/03/07/easy-cream-cheese-danish/

0 from 0 votes
Raspberry Cream Cheese Danish
Prep Time
15 mins
Cook Time
15 mins
Total Time
30 mins
 

Raspberry cream cheese danish are crescent roll pastries with sweet cream cheese filling, baked and topped with jam, and drizzled with a simple glaze.

Category: Breakfast
Cuisine: American
Keyword: raspberry cream cheese danish
Servings: 16 servings
Calories Per Serving: 216 kcal
Author: JB @ The Grateful Girl Cooks!
Ingredients
  • 2 cans crescent rolls
  • 1 package (8 ounce) cream cheese, at room temperature
  • 2 Tablespoons granulated sugar , divided
  • 1 teaspoon fresh lemon juice
  • 3/4 teaspoon vanilla extract
  • 1 teaspoon sour cream
  • Melted butter , approx. 2 Tablespoons (for brushing onto pastries before baking)
  • Raspberry jam (1 small dollop per danish)
For icing:
  • 1 cup confectioner's sugar (powdered sugar)
  • 1 Tablespoon milk (may substitute water)
  • 1/4 teaspoon vanilla extract
Instructions
  1. Before beginning, preheat oven to 350 degrees. Line baking sheets with parchment paper.
  2. Remove crescent roll dough from cans. Keep crescent roll in rectangle shape (two triangles together). Press the perforations closed between dough triangles to make solid rectangle. You should end up with 8 rectangles. Using one Tablespoon (total amount) granulated sugar, sprinkle each rectangle lightly with sugar. Lightly roll out each rectangle to 8 inches long. Cut each rectangle in half lengthwise. (You should now have 16 pieces of dough 1 inch x 8 inches long).
  3. Pick up each piece of dough and holding on to both ends, twist the ends in opposite directions to make a loose "twisted rope" shape. Shape into a small circle and pinch ends of each circle together to seal. Place dough circles two inches apart on parchment paper lined baking sheet(s).
  4. In a separate bowl, prepare filling. Combine (room temp.) cream cheese, remaining Tablespoon granulated sugar, lemon juice, sour cream and vanilla extract. Mix until well combined.
  5. Place approximately 1 Tablespoon filling into the middle of each pastry circle (don't worry-the parchment paper underneath will keep the filling "in" the pastry!). Brush pastry dough with melted butter. Bake in 350 degree oven for 13-15 minutes (mine took 15), or until they are light golden brown. Remove pans from oven and let pastries cool on the parchment paper.
  6. Prepare icing by mixing together powdered sugar, milk and vanilla extract. You want it thin enough to drizzle over cooled pastries. Too thick? Add drops of milk. Too thin? Add more powdered sugar.
  7. Once pastries have completely cooled, place a small dollop of raspberry jam in the middle of the cream cheese filling; decoratively drizzle icing over the top of each pastry. Let icing firm up, then they are ready to serve! (icing can be put into squeeze bottle, drizzled with a spoon, or can be placed into a zip-top bag and the bottom corner can be snipped off to use as a piping bag.
  8. Enjoy!
Recipe Notes

There are lots of flavor variations for these pastries. Instead of raspberry, why not try other jam or pie filling, like cherry, blackberry, blueberry, strawberry, or lemon? All would be fantastic!

Nutrition Facts
Raspberry Cream Cheese Danish
Amount Per Serving (1 danish)
Calories 216 Calories from Fat 108
% Daily Value*
Fat 12g18%
Saturated Fat 6g38%
Cholesterol 19mg6%
Sodium 283mg12%
Potassium 24mg1%
Carbohydrates 25g8%
Sugar 15g17%
Protein 1g2%
Vitamin A 235IU5%
Vitamin C 0.7mg1%
Calcium 16mg2%
Iron 0.5mg3%
* Percent Daily Values are based on a 2000 calorie diet.

Here’s one more to pin on your Pinterest boards!Raspberry cream cheese danish are crescent roll pastries with sweet cream cheese filling, baked and topped with jam, and drizzled with a simple glaze.


Save

Save

Gingerbread Scones

Gingerbread Scones flavored with cinnamon and molasses and drizzled with vanilla glaze are a delicious family treat during the holidays or any time!Gingerbread Scones flavored with cinnamon and molasses and drizzled with vanilla glaze are a delicious family treat during the holidays or any time!
I made Gingerbread Scones recently (trying a new recipe). If you know me, you KNOW I love a good scone. It felt weird… like it “should” be Christmas time when I made them, but it was 90+ degrees outside and the middle of summer! Who cares if it’s hot or cold outside… when you’ve got a tasty breakfast treat in one hand and a mug of coffee in the other!

Scroll Down for A Printable Recipe Card At The Bottom Of The Page

We Sure Do Enjoy Our Scones

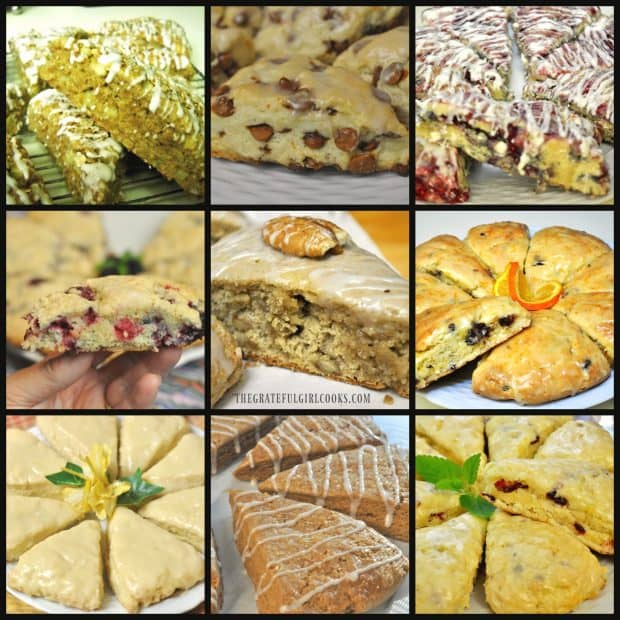
Do YOU enjoy a good scone?  If you like scones (that aren’t dry and crumble like sawdust), then I hope you will check out my Recipe Index for all my other delicious scone recipes.

I’ve posted the recipes for Cinnamon Chip Scones, Cranberry Orange Scones, and Banana Nut Scones, to name a few. Here’s a photo of just some of the delicious scones you can find on this blog.

A picture collage of some of the scones on this blog.

How To Make Gingerbread Scones

Place flour, brown sugar, ginger, baking soda, baking powder, salt and cinnamon in mixing bowl. Cut in the COLD butter with a pastry blender (or two forks), until the mixture is the size of small peas.

Cold butter is cut into dry ingredients for gingerbread scones, with a pastry cutter.
Mix together the molasses, egg yolk, and milk in a small bowl, until combined.

Molasses, egg yolk and milk are combined for gingerbread scones batter.
Pour the molasses mixture into the flour mixture. Stir until dough is moistened and has come together.

Molasses mixture is poured into dry ingredients for gingerbread scone batter.

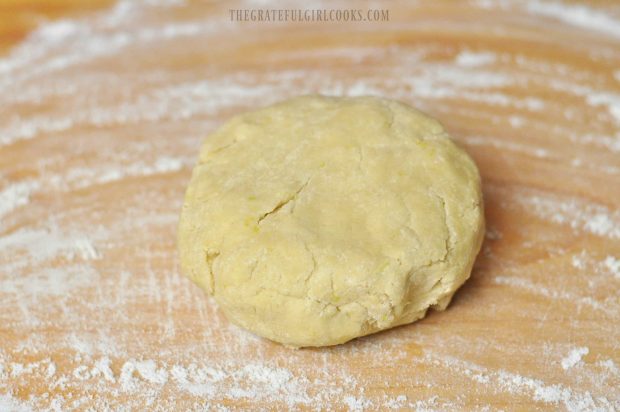
The mixture will be slightly crumbly. Place the dough onto a lightly floured work surface. Knead the dough 6-7 times, incorporating the crumbles into dough, and it forms a solid ball.

The dough for gingerbread scones is very crumbly.

Roll The Dough Into Circle And Slice

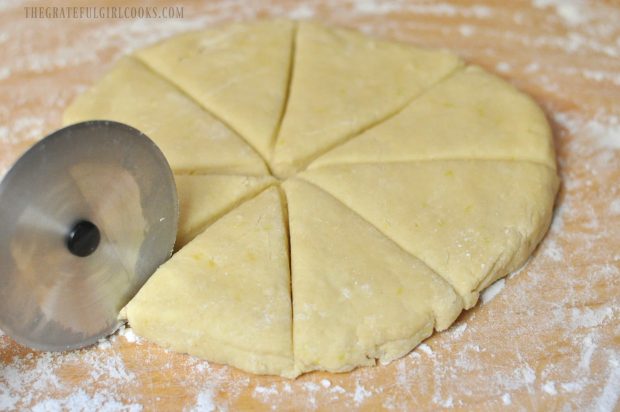
Pat or roll the dough ball out into an 8 inch circle, then slice evenly into 8 pieces.

The dough for gingerbread scones is rolled into 8 inch circle.

Gingerbread scones dough is cut into 8 wedges before baking.

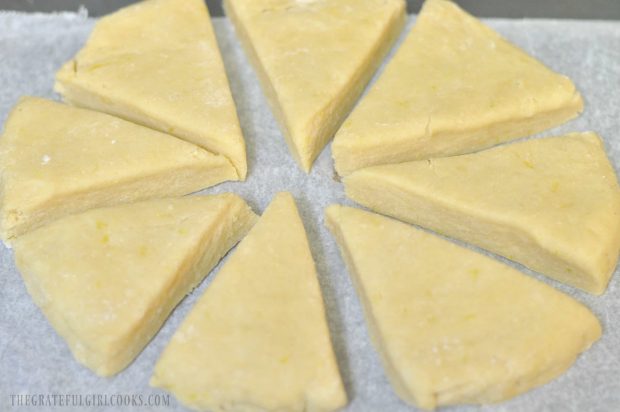
Put the gingerbread scones onto a parchment paper lined baking sheet; keep them about an inch apart from each other. Whisk an egg white until it becomes frothy. Using a pastry brush, evenly brush the egg white over the top of each scone wedge. Sprinkle the top of each scone with coarse sugar (I used raw sugar).

Egg whites are brushed onto tops of gingerbread scones before baking.

Bake The Gingerbread Scones

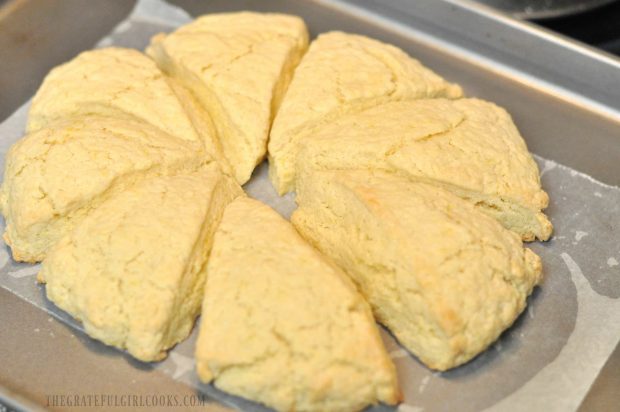
Bake the gingerbread scones in a preheated 400 degree oven for 12-15 minutes. Mine took the entire 15 minutes to turn golden brown. When done, remove baking sheet from oven. Transfer the scones to a wire rack (including the parchment paper). Let cool.

Baked gingerbread scones, right out of the oven.
I moved the scones near our open kitchen window to cool in the morning air. See the raw sugar glistening on the top of the scones?

Baked gingerbread scones cooling on a wire rack after baking.Drizzle The Scones With Icing

It’s not necessary to garnish the scones once they’ve cooled off, but I wanted to add a bit of pretty icing to each one to make them look even better!  To do this, simply mix up powdered sugar, water, and a bit of cinnamon into a glaze-like consistency.

Pour the glaze into a squeeze bottle (you can also use a resealable bag, then snip a little corner off the bottom) and decorate the scones with the icing.

Gingerbread scones are decorated with a vanilla glaze on top.
Let the glaze firm up just a bit, and then the gingerbread scones are all done! Ready to eat… so where’s my huge mug of coffee?

Gingerbread scones with vanilla glaze icing on top.

Hope you will consider trying this recipe! It certainly doesn’t have to be the Holiday season to enjoy a good scone now, does it?  Have a fantastic day!

Looking For More Gingerbread-Inspired Recipes?

You can find all of my recipes in the Recipe Index, located at the top of the page. I have some wonderful gingerbread-inspired recipes, including:

Interested In More Recipes?

Thank you for visiting this website. I appreciate you using some of your valuable time to do soIf you’re interested, I publish a newsletter 2 times per month (1st and 15th) with all the latest recipes, and other fun info. I would be honored to have you join our growing list of subscribers, so you never miss a great recipe!
There is a Newsletter subscription box on the top right side (or bottom) of each blog post, depending on the device you use, where you can easily submit your e-mail address (only) to be included in my mailing list.

You Can Also Find Me On Social Media:
Facebook page: The Grateful Girl Cooks!
Pinterest: The Grateful Girl Cooks!
Instagram: jbatthegratefulgirlcooks

Author's signature

Recipe source: http://heritageschoolhouse.blogspot.com/2009/11/gingerbread-scones-8-servings-2-cups.html

0 from 0 votes
Gingerbread Scones
Prep Time
15 mins
Cook Time
12 mins
Total Time
27 mins
 
Gingerbread Scones flavored with cinnamon and molasses and drizzled with vanilla glaze are a delicious family treat during the holidays or any time!
Category: Breakfast
Cuisine: American
Keyword: gingerbread scones
Servings: 8 servings
Calories Per Serving: 296 kcal
Author: JB @ The Grateful Girl Cooks!
Ingredients
For Scones:
  • 2 cups all purpose flour
  • 3 Tablespoons brown sugar
  • 2 teaspoons baking powder
  • 1/2 teaspoon baking soda
  • 1 teaspoon ground ginger
  • 1/2 teaspoon salt
  • 1/2 teaspoon ground cinnamon
  • 1/4 cup COLD butter (1/2 a cube)
  • 1/3 cup molasses
  • 1/4 cup milk
  • 1 egg , separated
  • Coarse sugar (for dusting tops of scones prior to baking)
For Icing (to decorate scones)
  • Powdered Sugar (approx. 1 cup)
  • Few dribbles of water
  • 1/2 teaspoon vanilla extract
Instructions
  1. In medium bowl, mix together flour, brown sugar, baking powder and baking soda, ginger, salt and cinnamon. Using a pastry blender (or two forks), cut in COLD butter until mixture is about the size of small peas.
  2. In separate bowl, combine molasses, milk and egg yolk until fully mixed. Pour this into the dry ingredients in other bowl. Stir until just moistened. (Mixture was fairly crumbly. I added just a smidge more milk).
  3. Turn dough out onto a lightly floured work surface, then knead dough about 7-8 times. Shape dough into an 8 inch circle (using your hands). Using a sharp knife, cut into 8 equal sized pieces.
  4. Place scones onto a greased (or parchment paper covered) baking sheet. Place the dough wedges about an inch apart (but still in a circle shape).
  5. In a small dish, beat the egg white until it is frothy. Brush the egg white over the top of each scone using a pastry brush. Sprinkle scones with coarse sugar.
  6. Bake scones in preheated 400 degree oven for 12-15 minutes, or until they are light, golden brown in color. When done, remove to wire rack. Let cool.
  7. To add decorative icing to the scones, mix together powdered sugar, vanilla extract and a teaspoon of water. Stir well. Continue to add a couple drops of water at a time until you have an icing that is "drizzle-able" (not too thick... not too thin). Place icing into a plastic squeeze bottle and decoratively drizzle over cooled scones OR place icing into a resealable plastic storage bag, snip a little piece off the bottom corner, and decorate.
Nutrition Facts
Gingerbread Scones
Amount Per Serving (1 scone)
Calories 296 Calories from Fat 54
% Daily Value*
Fat 6g9%
Saturated Fat 4g25%
Cholesterol 36mg12%
Sodium 283mg12%
Potassium 363mg10%
Carbohydrates 54g18%
Sugar 30g33%
Protein 4g8%
Vitamin A 220IU4%
Calcium 94mg9%
Iron 2.4mg13%
* Percent Daily Values are based on a 2000 calorie diet.

Here’s one more to pin on your Pinterest boards!Gingerbread Scones flavored with cinnamon and molasses and drizzled with vanilla glaze are a delicious family treat during the holidays or any time!

Save

Save

Ham, Egg & Cheese Bagel Breakfast Sandwich

You’ll love this hearty, delicious and filling bagel breakfast sandwich, with egg, ham and cheese, which can be ready in under 10 minutes!You'll love this hearty, delicious and filling bagel breakfast sandwich, with egg, ham and cheese, which can be ready in under 10 minutes!
I stared and stared at a bagel calling to me this morning from it’s shelf in our pantry. It looked so forlorn just sitting there, so I decided to turn it into something beautiful. I “morphed” it into a delicious Ham, Egg & Cheese Bagel Breakfast Sandwich (try saying that in one mouthful)!

Being the nice wife that I am (*cough, cough), I asked my husband if he wanted to have one also, since there were actually 2 bagels left in the bag. Of course he said yes (he hardly ever turns down food), so off into the kitchen I went to play… I mean cook us breakfast! Guess what? It tasted fantastic!

Less than 10 minutes later, we were chowing down on these hearty breakfast sandwiches… delicious and filling! And truthfully, they were so easy to make! Here’s how to make them:

Scroll Down For A Printable Recipe Card At The Bottom Of The Page

How To Make This Bagel Breakfast Sandwich

Split a bagel in half. Lightly butter both sides. Place on wire rack under oven broiler (about 5-6 inches away from heating element) and broil, only until they are light golden brown.

Bagels are sliced in half and buttered for broiling.

Buttered bagels are broiled until golden brown.

Once you take them out, place sliced cheddar cheese on one half of the bagel (while bagel is still hot). Put on enough thin slices of cheese to cover.

Thin cheese slices are placed on bagel halves.

Fry The Eggs

In a skillet, fry one egg (per sandwich) however you like them cooked (over medium, over easy or hard). Salt and pepper egg, to taste.

Eggs are fried for bagel breakfast sandwich.

When egg is done, place it on top of the cheese half.  Place a thin slice of deli ham onto the other half, folding the ham to make it cover bagel.

Broil The Bagel Breakfast Sandwich

Place the bagel halves back into the oven under the broiler (about 5-6 inches away from broiler). Re-heat only until cheese begins to melt, and the bagel breakfast sandwich is re-heated.

Fried egg and ham slices are added to breakfast sandwich.

Remove bagel halves from oven. Place the half bagel with the ham on top of the other half. Ta-Da!  Your breakfast sandwich is now ready to devour!

Ham, Egg & Cheese Bagel Breakfast Sandwich is ready to eat!

I cut mine in half, just so I could show you the inside of the bagel breakfast sandwich in all of it’s glorious “bagely-eggy-cheesy-hammy” goodness!

Bagel breakfast sandwich, cut in half, on plate.

This bagel breakfast sandwich was so good… don’t think I will be eating lunch, because it was pretty filling!  Hope you’ll consider making these for your family.  My hunch is that these would be great made up, then frozen (wrapped very tightly). It would be fantastic to have some of these breakfast sandwiches around for a quick re-heating in a microwave on a busy morning!

Have a fantastic day!  Try to find time (in this crazy, busy day) to stop pedaling for just a minute and recharge your soul (and body!). I am always glad for those stolen moments of rest.

Looking For More BREAKFAST Recipes?

You can find ALL my recipes in the Recipe Index, located at the top of the page. I have lots of delicious breakfast recipes you might enjoy, including:


Interested In More Recipes?

Thank you for visiting this website. I appreciate you using some of your valuable time to do soIf you’re interested, I publish a newsletter 2 times per month (1st and 15th) with all the latest recipes, and other fun info. I would be honored to have you join our growing list of subscribers, so you never miss a great recipe!
There is a Newsletter subscription box on the top right side (or bottom) of each blog post, depending on the device you use, where you can easily submit your e-mail address (only) to be included in my mailing list.

You Can Also Find Me On Social Media:
Facebook page: The Grateful Girl Cooks!
Pinterest: The Grateful Girl Cooks!
Instagram: jbatthegratefulgirlcooks

Author's signature

Recipe Source: My hungry brain.

0 from 0 votes
Ham, Egg & Cheese Bagel Breakfast Sandwich
Prep Time
7 mins
Cook Time
0 mins
Total Time
7 mins
 
You'll love this hearty, delicious and filling bagel breakfast sandwich, with egg, ham and cheese, which can be ready in under 10 minutes!
Category: Breakfast Sandwich
Cuisine: American
Keyword: bagel breakfast sandwich
Servings: 1 sandwich
Calories Per Serving: 568 kcal
Author: JB @ The Grateful Girl Cooks!
Ingredients
  • 1 bagel (I used an "Everything" bagel)
  • 1 teaspoon Butter (enough to spread on bagel for broiling)
  • 1 slice Cheddar cheese slices (cut into enough pieces to cover bagel)
  • 1 slice deli ham (thin slice)
  • 1 egg , fried the way you like it!
  • 1 pinch Salt and pepper , to taste (for egg)
Instructions
  1. Slice bagel in half. Lightly butter bagel. Place bagel halves (on a rack) under oven broiler until golden brown. Remove.
  2. Place cheddar cheese on top of one half of the bagel (enough to cover). Fold slice of ham and place on other half of bagel, to cover.

  3. Fry one egg (however your like it). Salt and pepper egg to taste. Remove from skillet and place on top of cheddar cheese.
  4. Place both halves back under oven broiler again to heat it all back up and slightly melt the cheese. Remove from oven, put the two halves together... and enjoy!
Nutrition Facts
Ham, Egg & Cheese Bagel Breakfast Sandwich
Amount Per Serving (1 sandwich)
Calories 568 Calories from Fat 207
% Daily Value*
Fat 23g35%
Saturated Fat 11g69%
Cholesterol 221mg74%
Sodium 1203mg52%
Potassium 246mg7%
Carbohydrates 56g19%
Fiber 2g8%
Protein 29g58%
Vitamin A 645IU13%
Calcium 245mg25%
Iron 2.6mg14%
* Percent Daily Values are based on a 2000 calorie diet.

Here’s one more to pin on your Pinterest boards!You'll love this hearty, delicious and filling bagel breakfast sandwich, with egg, ham and cheese, which can be ready in under 10 minutes!


Save

Save

Southern Bacon Gravy (For Biscuits)

Make thick, creamy Southern BACON Gravy for biscuits- from scratch! Easy to make, and tastes absolutely DELICIOUS!Make thick, creamy Southern BACON Gravy for biscuits- from scratch! Easy to make, and tastes absolutely DELICIOUS!
I grew up loving biscuits and gravy! It was always a big treat when my Mom (a Texas girl) made us Southern Bacon Gravy For Biscuits. Can there be anything better than fresh, fluffy biscuits smothered in a thick gravy made with BACON? Now I will concede that biscuits and gravy will probably not help you get that girlish figure you’ve always wanted, but sometimes you simply want a hearty breakfast that fills you up!

I’ve made biscuits and gravy so many times over the course of my almost 40 year marriage I can’t even count them. My hubby LOVES it when I make biscuits and gravy for breakfast (must be HIS Southern heritage, too)!

Scroll Down For A Printable Recipe Card At the Bottom Of The Page

SO HOW DO I MAKE SOUTHERN BACON GRAVY?

Well- I’m glad you asked.  Here’s how I make ’em:  First cook the bacon until it is crispy.

Southern Bacon Gravy (For Biscuits) / The Grateful Girl Cooks!
Once the bacon is done, remove it from pan to a paper towel, to drain off any remaining grease. When the bacon is cool enough to handle, crumble it into small pieces.

Southern Bacon Gravy (For Biscuits) / The Grateful Girl Cooks!
Do not wipe out the skillet you cooked the bacon in. Discard MOST of the bacon grease (I save mine in a jar in the freezer), BUT KEEP ABOUT 2 TABLESPOONS IN THE SKILLET (My Mom calls this Liquid Gold – ha ha). See all those little bitty bacon bits on the bottom of the skillet? Those, plus the bacon grease will incorporate LOTS of flavor into your gravy!

Southern Bacon Gravy (For Biscuits) / The Grateful Girl Cooks!

Mixing the Gravy

In a bowl or measuring cup, whisk together milk, flour, pepper and salt, until lump free.

Southern Bacon Gravy (For Biscuits) / The Grateful Girl Cooks!

Put the bacon crumbles and the milk/flour mixture into the skillet.  Heat on medium, stirring constantly, until it comes to a boil. Reduce heat a bit, continuing to stir while the mixture thickens. Absolutely give it a taste, to check for seasoning. I always add a lot of pepper, and usually more salt to get it to taste just right!

Southern Bacon Gravy (For Biscuits) / The Grateful Girl Cooks!

Once the gravy has thickened, add a Tablespoon (or two!) of cold butter. Stir until butter is melted and incorporated into gravy.

Southern Bacon Gravy (For Biscuits) / The Grateful Girl Cooks!
It’s a fairly thick gravy. See how it coats the spoon when done?

Southern Bacon Gravy (For Biscuits) / The Grateful Girl Cooks!

Time To Eat Some Southern Bacon Gravy For Biscuits!

Once bacon gravy is heated through, seasoned to taste, etc. get your warm biscuits ready! Split them in half and place them on a plate. I used my recipe for homemade Southern Buttermilk Biscuits here. They’re nice and tall, but any store bought biscuits will do just fine!

Southern Bacon Gravy (For Biscuits) / The Grateful Girl Cooks!

Spoon the hot bacon gravy over each biscuit half. Smother them good!

Southern Bacon Gravy (For Biscuits) / The Grateful Girl Cooks!
That’s IT!  Grab a fork, and dive on in!  Biscuits n’ Gravy may not be so good for your HIPS, but, mercy… they sure taste good on the LIPS! (Go take a long walk after breakfast… it’s all about balance, right?). I really think you’re gonna LOVE this gravy! Bacon really DOES make everything BETTER!

Southern Bacon Gravy (For Biscuits) / The Grateful Girl Cooks!
The gravy can be refrigerated if you have leftovers. Cover it well, and it will keep for a couple days. Reheat (you might need to add a touch of milk), stir it well, and it will be ready to eat again!

I see biscuits and gravy on the menu at lots of restaurants that serve breakfast, but honestly, I’d rather have my homemade version. It’s DELICIOUS (and inexpensive too!).  Have a great day, and give this bacon gravy a try on your favorite biscuit. I think you will LOVE it! Don’t forget to check out ALL of my recipes in the Recipe Index, located at the top of the page.

Interested In More Recipes?

Thank you for visiting this website. I appreciate you using some of your valuable time to do soIf you’re interested, I publish a newsletter 2 times per month (1st and 15th) with all the latest recipes, and other fun info. I would be honored to have you join our growing list of subscribers, so you never miss a great recipe!
There is a Newsletter subscription box on the top right side (or bottom) of each blog post, depending on the device you use, where you can easily submit your e-mail address (only) to be included in my mailing list.

You Can Also Find Me On Social Media:
Facebook page: The Grateful Girl Cooks!
Pinterest: The Grateful Girl Cooks!
Instagram: jbatthegratefulgirlcooks

Southern Bacon Gravy (For Biscuits) / The Grateful Girl Cooks!Recipe Source: My Mom

5 from 5 votes
Southern Bacon Gravy (For Biscuits)
Prep Time
10 mins
Cook Time
6 mins
Total Time
16 mins
 
Make this thick, delicious Southern Bacon Gravy to pour over hot biscuits. Biscuits and Gravy... yum!
Category: Breakfast
Cuisine: American
Keyword: bacon gravy
Servings: 8 servings (2 cups total)
Calories Per Serving: 113 kcal
Author: JB @ The Grateful Girl Cooks!
Ingredients
For gravy:
  • 2 cups milk
  • 2 Tablespoons flour
  • 1/2 teaspoon ground black pepper
  • 3/4 teaspoon salt
  • 6 pieces bacon , cooked until crisp (RESERVE 2 Tablespoons bacon grease in skillet)
  • 1-2 Tablespoons cold butter
  • 8 warm biscuits (pre-cooked, or bake them while cooking bacon)
Instructions
  1. Cook bacon in large skillet until crispy. Remove cooked bacon to paper towels to absorb grease. When cool, crumble bacon into small pieces. Set aside.
  2. Do NOT clean skillet. Leave 2 Tablespoons bacon grease in skillet. Discard the rest.
  3. In separate bowl or container, whisk together milk, flour, salt and pepper, until lump-free. Pour the milk/flour mixture into skillet with remaining bacon grease. Add crumbled bacon pieces. Heat mixture on medium (whisking/stirring constantly) until it comes to a boil; reduce heat a bit, and continue cooking and stirring, until gravy has thickened (5-6 minutes). Give it a taste test.
  4. Add additional salt and pepper, to taste (I ALWAYS add more). Once gravy has thickened, add 1-2 Tablespoons cold butter. Stir until butter is melted, incorporated into gravy, and mixture is heated through.
  5. Slice warm biscuits in half horizontally. Place biscuit halves onto serving plate. Spoon hot gravy over each half. Serve and enjoy!
Recipe Notes

In the words of my Mom... "you can't have enough pepper in this gravy!". Don't be afraid to season this gravy well! Taste, taste, taste, and add salt and pepper until it tastes exactly the way you want it to. *Caloric calculation is for gravy only.

Nutrition Facts
Southern Bacon Gravy (For Biscuits)
Amount Per Serving (1 serving (1/4 cup))
Calories 113 Calories from Fat 72
% Daily Value*
Fat 8g12%
Saturated Fat 3g19%
Cholesterol 17mg6%
Sodium 365mg16%
Potassium 121mg3%
Carbohydrates 4g1%
Sugar 3g3%
Protein 4g8%
Vitamin A 160IU3%
Calcium 74mg7%
Iron 0.2mg1%
* Percent Daily Values are based on a 2000 calorie diet.

Here’s one more to pin on your Pinterest boards!Make thick, creamy Southern BACON Gravy for biscuits- from scratch! Easy to make, and tastes absolutely DELICIOUS!

Save

Save

Save

Save

Save

Save

Southern Buttermilk Biscuits

You will LOVE eating these delicious classic Southern buttermilk biscuits for breakfast… big and tall, big and soft, and big in flavor!You will LOVE eating these delicious classic Southern buttermilk biscuits for breakfast... big and tall, big and soft, and big on flavor!
I love a good biscuit, especially if it’s Southern Buttermilk Biscuits!  I grew up eating homemade biscuits  because my Texas born and raised Mom made them perfectly! We ate our biscuits with jam OR smothered with thick gravy (made with bacon, NOT sausage!).

To me, a good biscuit has to be tall and fluffy! There’s something majestic about a good rise on one… a far cry from the “hockey puck like” ones I’ve had (and made, unfortunately) before.  Well this is a great recipe for making tall, homemade, fluffy buttermilk biscuits. They are easy to make, with a couple helpful “tips”.

SCROLL DOWN FOR A PRINTABLE RECIPE CARD AT THE BOTTOM OF THE PAGE

A Couple Of TIPS:

Tip #1 is to put the butter you are going to use in the freezer for about 20 minutes before using it in this recipe. (It keeps the butter from melting in the dough… little flecks of butter will remain intact, and be, oh so delightful).

Tip #2 is to not pat the dough down too thin. You want to cut the biscuits with the dough about 1-1½ inches thick. Trust me on this!  So here’s HOW you make these:

How To Make Southern Buttermilk Biscuits

First (while butter is freezing), sift together flour, sugar, baking powder, baking soda and salt.

Flour for biscuits in sifter over a white bowl

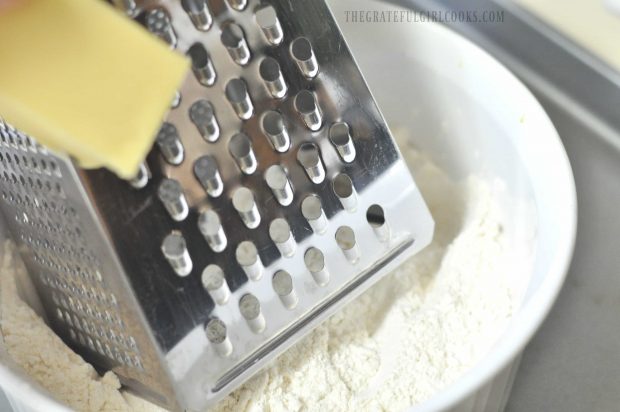
I used a cheese grater to grate the frozen butter. It’s easy when butter is frozen! Add the butter to the dry ingredients.

Grating frozen butter for biscuit dough into bowl

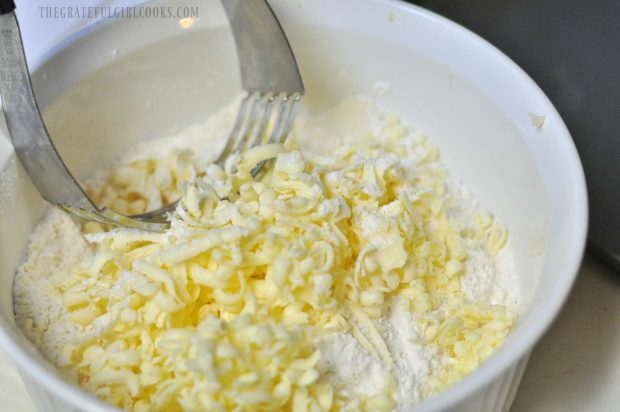
Use a pastry cutter and cut the butter shreds in with the dry ingredients until mixture becomes small coarse crumbs. (If you want, you can use a food processor to mix the dry ingredients and butter… pulse until it becomes small crumbs).

Using pastry cutter to blend in butter for biscuit dough

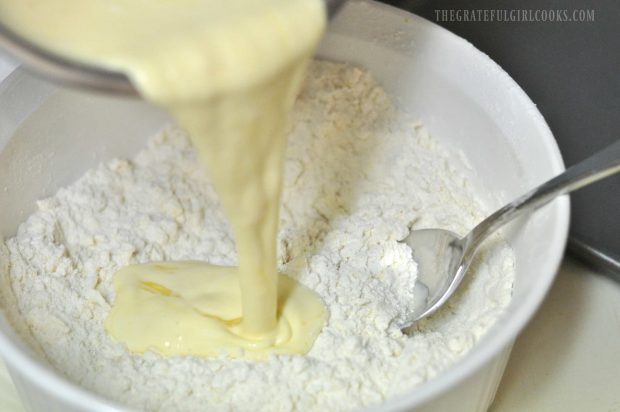
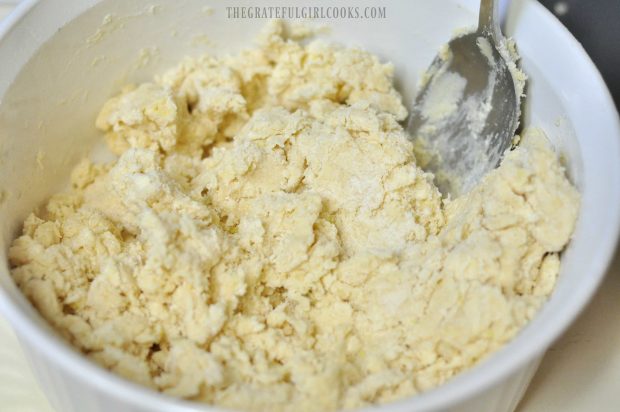
Make a deep well in the mixture.  Add cold buttermilk, then stir the mixture together until fully combined. The dough will be a bit sticky… don’t worry about it!

Cold buttermilk added to flour in bowl

Cutting The Biscuits

Turn the dough out onto a flour covered work surface. Put a little flour on your hands (to help prevent sticking), and shape the dough into a rectangle.

Buttermilk biscuit dough turned out onto floured board

Once dough is a rectangle shape, fold the dough over onto itself 6 times. I folded one end over to touch the other, then rotated dough a quarter turn and did it again, etc. until I had “turned” the dough over on itself 6 times (this helps to create “layers”).

Southern biscuit dough rolled out on floured surface

You should end up with a tall square. Use your hands to flatten down the dough until the dough is about 1-1½ inches thick. You can use a 2½ inch biscuit cutter OR use a clean half-pint canning jar (like I did – same size!). Cut out biscuits. Try not to twist the edges of the dough when you cut.

If you have leftover scraps, you can put them together and cut out more biscuits, but don’t combine the dough more than a couple times! I was able to get 12 biscuits out of the dough.

Cutting buttermilk biscuits from dough using glass jar

Time To Bake These Southern Buttermilk Biscuits

Carefully place the biscuit dough rounds onto a parchment paper lined baking sheet. Put the biscuits close together (just so they are ALMOST touching).  Bake biscuits in a preheated 450 degree oven for 12-15 minutes, or until golden brown on top.

Biscuit dough cut out and ready to bake

Brush melted butter over the tops of the biscuits when done. You can also take the biscuits out a minute or two before they are done, brush the melted butter on the tops, then put it back into oven for a couple more minutes. I’ve done it BOTH ways!

Melted butter being brushed on top of biscuits

Ready To Eat!

The finished biscuits should come out of the oven, with some nice height and soft layers!

Tall, fluffy Southern style biscuits

These buttermilk biscuits taste fantastic topped with butter and some jam (this is with some of my homemade raspberry jam!). Delicious!

Buttermilk biscuits with raspberry jam on top

They are also fantastic smothered in thick, homemade gravy. Here’s my recipe for Southern Bacon Gravy (for biscuits). Lip-smackin’ GOOD!

Southern Buttermilk Biscuits with bacon gravy on top, on plate

However you enjoy eating homemade biscuits (with jam, gravy or plain), I really think you will LOVE these delicious buttery buttermilk biscuits! If you really enjoy biscuits for breakfast, be sure to check out this one for Vanilla Glazed Blueberry Biscuits! They’re so good!

Close up of tall buttermilk biscuit

Have a great day!  I am grateful my husband and I were recently able to visit Victoria, BC for a weekend getaway (for my birthday). It was good to have an adventure together, see new sights, enjoy great food, each other’s company, etc., but it was sure good to come back to our home sweet home in the beautiful Pacific Northwest! For all of those blessings, I am thankful.

Looking For More BREAKFAST Recipes?

You can find ALL my recipes in the Recipe Index, located at the top of the page. I have a wonderful variety of breakfast recipes to check out, including:

Interested In More Recipes?

Thank you for visiting this website. I appreciate you using some of your valuable time to do soIf you’re interested, I publish a newsletter 2 times per month (1st and 15th) with all the latest recipes, and other fun info. I would be honored to have you join our growing list of subscribers, so you never miss a great recipe!
There is a Newsletter subscription box on the top right side (or bottom) of each blog post, depending on the device you use, where you can easily submit your e-mail address (only) to be included in my mailing list.

You Can Also Find Me On Social Media:
Facebook page: The Grateful Girl Cooks!
Pinterest: The Grateful Girl Cooks!
Instagram: jbatthegratefulgirlcooks

Have a WONDERFUL day, friends!
Author's signature

Recipe Source: http://www.thechunkychef.com/buttermilk-biscuits-and-sausage-gravy/

4.67 from 3 votes
Southern Buttermilk Biscuits
Prep Time
15 mins
Cook Time
12 mins
Total Time
27 mins
 

You will LOVE eating these delicious classic Southern buttermilk biscuits for breakfast... big and tall, big and soft, and big on flavor!

Category: Bread, Breakfast
Cuisine: American
Keyword: southern buttermilk biscuits
Servings: 12 biscuits
Calories Per Serving: 159 kcal
Author: JB @ The Grateful Girl Cooks!
Ingredients
  • 6 Tablespoons butter (frozen-put in freezer 15-20 minutes before using)
  • 2 cups all purpose flour
  • 1 Tablespoon granulated sugar
  • 1 Tablespoon baking powder
  • 1/4 teaspoon baking soda
  • 1 teaspoon salt
  • 1 cup buttermilk (cold)
  • 2 Tablespoons melted butter (for brushing on tops of baked biscuits)
Instructions
  1. Put butter into freezer for about 20 minutes before beginning! Preheat oven to 450 degrees.

  2. Sift together flour, sugar, baking powder, baking soda, and salt in a large bowl. Grate frozen butter into the bowl. Using a pastry blender (or two forks), cut the butter into the dry ingredients until the mixture becomes coarse crumbs (with butter about the size of small peas).
  3. Create a "well" in the middle of the crumbs. Add buttermilk. Mix the ingredients together until combined, and you have a slightly sticky soft dough.
  4. Turn the dough out onto a floured work surface. Flour your hands and shape dough into a rectangle. Gently fold the dough onto itself 6 times. End to end, rotating between folds. Once done, you should have a rather tall square piece of dough. Pat this down until dough is between 1 and 1½ inches thick.
  5. Cut biscuits out of dough (using a 2½ inch biscuit cutter OR you can use a half pint canning jar (like I did). Try not to twist the dough as you make the cuts. If you have leftover dough, you can combine them and cut some more biscuits (but only do this once or twice or the dough will flatten).
  6. Place cut biscuit dough onto parchment paper-lined baking sheet. Place them very close together, so that they are ALMOST touching.
  7. Bake biscuits in preheated 450 degree oven for 12-15 minutes, or until they are golden brown on top.
  8. Brush the finished biscuits with melted butter right when you take them out of oven OR take them out right before they are finished, brush them with melted butter and pop them back in oven for last couple minutes. (I've done BOTH).
  9. Serve, and ENJOY!
Recipe Notes

* When freezing butter... I cut the amount needed, froze the cube, then grated it while frozen. You can also cut the butter into small chunks, put the pieces on a plate, then freeze. You can mix the dry ingredients and frozen butter in a food processor, then transfer to a bowl, but I found it just as easy (and less cleanup) to do it all in a bowl, from start to finish!

Nutrition Facts
Southern Buttermilk Biscuits
Amount Per Serving (1 biscuit)
Calories 159 Calories from Fat 72
% Daily Value*
Fat 8g12%
Saturated Fat 5g31%
Cholesterol 22mg7%
Sodium 305mg13%
Potassium 150mg4%
Carbohydrates 18g6%
Sugar 2g2%
Protein 2g4%
Vitamin A 265IU5%
Calcium 71mg7%
Iron 1mg6%
* Percent Daily Values are based on a 2000 calorie diet.

Here’s one more to pin on your Pinterest boards!You will LOVE eating these delicious classic Southern buttermilk biscuits for breakfast... big and tall, big and soft, and big on flavor!


Save

Save

Save

Save

Loaded Hash Browns – Waffle Style

You’ll enjoy Loaded Hash Browns, made with grated potatoes, ham, cheddar cheese, red/green peppers, & red onion, cooked till crispy in a waffle iron!You'll enjoy Loaded Hash Browns, made with grated potatoes, ham, cheddar cheese, red/green peppers, & red onion, cooked till crispy in a waffle iron!
Crispy on the outside, and brimming with ham, red & green peppers, cheddar cheese, and red onion, these yummy loaded hash browns are cooked in your old trusty waffle maker! Yep… WAFFLE-STYLE hash browns!
I’d seen photos of hash browns cooked in waffle irons before, but decided to put my own spin on them. I LOVE to make fully loaded hash browns (I mean… “seriously love”), so decided to give it the old “college try” and make my own version in our waffle iron. Oh my goodness… they were delicious. And crunchy! Here’s how to make them:
Scroll Down for A Printable Recipe Card At The Bottom Of The Page

Prepare The Loaded Hash Browns

Prep the ingredients before starting. Chop red & green peppers, ham and red onion, grate cheese and generously oil, then preheat waffle iron. Having all this done ahead is a GOOD thing.

Some of the ingredients that will be added to the hash browns.

For the potato part… peel, and then grate 2 medium potatoes. I used our box grater to do this.

Grated potatoes are the main ingredients for the loaded hash browns.

Remove Moisture From Grated Potatoes

Now here’s the really important part. You want to get as much moisture out of the grated potatoes as possible. The drier the potatoes are, the crispier the hash browns will be.  I like to use a clean dish towel.

Place the potatoes in the dish towel, the roll it up and twist the ends. Continue to twist and press to absorb as much moisture onto the towel as possible. When done, the potatoes should be a LOT drier, and the towel will be ready for the washing machine… (just sayin’).

Grated potatoes are pressed in a dish towel to remove extra moisture.

Mix the potatoes with the peppers, ham, cheese and onion. Add melted butter, generously salt and pepper mixture and stir together to combine.

Melted butter is added to the uncooked hash brown mixture and stirred in.

This is what you will be looking at, once mixed. The recipe makes enough for two waffles (4 servings).

All the ingredients for the loaded hash browns are mixed together before cooking.

Cooking Loaded Hash Browns In A Waffle Maker

Make sure waffle iron is heavily oiled and PREHEATED before beginning to cook. Add half of the potato mixture to the waffle iron. Press down lid, and cook for approximately 7-10 minutes.

Halfway through cooking, press down hard on the lid to really seal in those potatoes (and help them crisp up). Check the potatoes at about 6 minutes. You want them to be very crispy and golden brown on the outside, yet cooked through. Times may vary per appliance.

Loaded Hash Browns - Waffle Style are placed into preheated waffle iron.

Remove the hash browns from the waffle iron once done, and divide them between four serving plates. Here’s one serving, after a quick toss with a fork.

Finished loaded hash browns are crispy and delicious!

These loaded hash browns – waffle style are delicious! Cooking them in a waffle iron takes some of the pressure off pan frying. While they are happily cooking away, minding their own business in the waffle maker, you’re free to make eggs or other dishes to go with them for a hearty breakfast!

Hope you’ll try these hash browns… and enjoy putting the old family waffle iron to good use!

Looking For More BREAKFAST Recipes?

You can find all of my breakfast recipes in the Recipe Index, located at the top of the page. A few family favorites include:

Interested In More Recipes?

Thank you for visiting this website. I appreciate you using some of your valuable time to do soIf you’re interested, I publish a newsletter 2 times per month (1st and 15th) with all the latest recipes, and other fun info. I would be honored to have you join our growing list of subscribers, so you never miss a great recipe!
There is a Newsletter subscription box on the top right side (or bottom) of each blog post, depending on the device you use, where you can easily submit your e-mail address (only) to be included in my mailing list.

You Can Also Find Me On Social Media:

Facebook page: The Grateful Girl Cooks!
Pinterest:
The Grateful Girl Cooks!
Instagram:
jbatthegratefulgirlcooks

Author's signature

0 from 0 votes
Loaded Hash Browns - Waffle Style
Prep Time
5 mins
Cook Time
7 mins
Total Time
12 mins
 

You'll enjoy Loaded Hash Browns, made with grated potatoes, ham, cheddar cheese, red/green peppers, & red onion, cooked till crispy in a waffle iron!

Category: Breakfast
Cuisine: American
Keyword: loaded hash browns
Servings: 4 servings
Calories Per Serving: 145 kcal
Author: JB @ The Grateful Girl Cooks!
Ingredients
  • 2 Tablespoons chopped ham
  • 2 Tablespoons chopped green bell pepper
  • 1 Tablespoon chopped red bell pepper
  • 1 Tablespoon chopped red onion (or green onion)
  • 3 Tablespoons grated cheddar cheese
  • 1 Tablespoons melted butter
  • 2 medium russet potatoes
  • Salt and pepper , to taste
  • Oil , for waffle iron
Instructions
  1. Prep ham, bell peppers, onion, and cheddar cheese before peeling and grating potatoes. Set aside.
  2. Preheat waffle iron that has been generously coated with oil (IMPORTANT so they don't stick).
  3. Peel, then grate (shred) potatoes. Place grated potatoes on a cloth dish towel. Twist, press, etc. to remove as much liquid as possible from potatoes. When dried, place potatoes in large bowl. Add prepped veggies, ham, etc. to bowl of grated potatoes. Add melted butter, season generously with salt and pepper (to taste). Stir to combine.

  4. Fill preheated waffle iron with approximately half of the potato mixture. (I used a round waffle iron, so there were enough for two waffle sized servings (enough servings for 4 people). Just fill your waffle iron enough to form a nice layer of potatoes. No need to overstuff.
  5. Press down lid and cook hash browns for about 6-7 minutes. Check for crispy outside and "doneness". I usually cook them for a few more minutes after checking them to ensure a really crunchy outside. Pressing down pretty hard on the lid also helps. Appliance temps. vary, so keep an eye on your hash browns. When done, repeat with additional potato mixture, remembering to re-oil waffle iron and preheat before adding. Once done, remove hash browns from waffle iron and divide portions equally (makes 4 servings).

Nutrition Facts
Loaded Hash Browns - Waffle Style
Amount Per Serving (1 (1/4 of total))
Calories 145 Calories from Fat 45
% Daily Value*
Fat 5g8%
Saturated Fat 3g19%
Cholesterol 18mg6%
Sodium 166mg7%
Potassium 444mg13%
Carbohydrates 20g7%
Fiber 1g4%
Sugar 1g1%
Protein 5g10%
Vitamin A 240IU5%
Vitamin C 12.8mg16%
Calcium 60mg6%
Iron 1mg6%
* Percent Daily Values are based on a 2000 calorie diet.

Here’s one more to pin on your Pinterest boards!You'll enjoy Loaded Hash Browns, made with grated potatoes, ham, cheddar cheese, red/green peppers, & red onion, cooked till crispy in a waffle iron!


Save

Save

Save

Banana Bread Baked Oatmeal

You will enjoy Banana Bread Baked Oatmeal! The flavor of banana bread permeates baked oatmeal, in this filling and delicious family-friendly breakfast!You will enjoy Banana Bread Baked Oatmeal! The flavor of banana bread permeates baked oatmeal, in this filling and delicious family-friendly breakfast!

The other day I was looking at recipes online (a hobby of mine), and discovered this one for Banana Bread Baked Oatmeal. I love banana bread and I love oatmeal, so I had a hunch I would enjoy this breakfast treat. Yep- I was right… this is a delicious, filling, flavor-filled breakfast!

The recipe calls for all the goodies found in a good loaf of banana nut bread. This includes bananas, pecans, cinnamon and nutmeg, etc.. This difference is this recipe uses old-fashioned rolled oats, and is baked in a casserole dish! The baked oatmeal is really delicious, and the taste kind of reminds me of my Mom’s Banana Nut Bread.

Scroll Down For A Printable Recipe Card At The Bottom Of The Page

Here’s How Easy It Is To Make Banana Bread Baked Oatmeal

Combine the dry ingredients in a large bowl (oats, brown sugar, baking powder, cinnamon, nutmeg and salt).

Rolled oats and spices in white bowl

Melt the butter and add it to the dry ingredients. Stir the ingredients together, to combine.

Melted butter poured into dry ingredients in bowl

In a separate bowl, mix together milk, mashed banana, egg, and vanilla extract. Pour this mixture into the flour mixture, and stir. Add the chopped pecans and mix well.

Mashed banana, milk, etc. added to oats in bowl

Spray an 8″ square baking dish with non-stick spray (or grease with butter). Pour the baked oatmeal batter into the prepared dish.

Banana Oats in white 8x8 inch baking dish

Time To Bake the Oatmeal

Bake the oatmeal in a preheated 350 degree oven for 25-30 minutes. Mine took 30 minutes to completely firm up in the middle. During the last 5 minutes of baking time, I placed a cookie sheet with extra chopped pecans in the oven to lightly toast (to be used as garnish later… optional).

When the dish is finished baking, remove the pan of banana bread baked oatmeal and sheet of toasted pecans to a wire rack. Sprinkle the top of the oatmeal with toasted chopped pecans. The next thing you do is to let the hot baked oatmeal cool down to room temperature.

Banana Bread Baked Oatmeal baked and out of oven

You can eat the banana bread baked oatmeal warm, but I truly think it tastes best when eaten at room temperature. Once totally cooled, it was easier to cut into pieces, but ultimately… just serve it however you prefer.

Once the oatmeal has cooled, cut it into slices, and serve. You could bake this the night before you want to serve it, so it’s ready to go in the morning. Yum… this baked oatmeal tastes like banana bread, but it’s packed with oats! The old fashioned oats make it an even more filling and nutritious breakfast treat!

Piece of baked banana bread oatmeal on plate with a fork

I’m glad I tried this recipe for banana bread baked oatmeal. I hope you will consider making it, as well. The leftovers the next day were wonderful! This baked oatmeal is really delicious…and is a great way to get kids (and grown-ups – *cough, cough*) to “eat their oatmeal”!

Looking For More OATMEAL Recipes?

You can find all of my recipes in the Recipe Index, which is located at the top of the page. I have some yummy recipes featuring oatmeal, including:

Interested In More Recipes?

Thank you for visiting this website. I appreciate you using some of your valuable time to do soIf you’re interested, I publish a newsletter 2 times per month (1st and 15th) with all the latest recipes, and other fun info. I would be honored to have you join our growing list of subscribers, so you never miss a great recipe!
There is a Newsletter subscription box on the top right side (or bottom) of each blog post, depending on the device you use, where you can easily submit your e-mail address (only) to be included in my mailing list.

You Can Also Find Me On Social Media:

Facebook page: The Grateful Girl Cooks!
Pinterest:
The Grateful Girl Cooks!
Instagram:
jbatthegratefulgirlcooks

Have a great day!

Author's signature

Recipe Source: http://lovegrowswild.com/2015/08/banana-bread-baked-oatmeal/

0 from 0 votes
Banana Bread Baked Oatmeal
Prep Time
10 mins
Cook Time
30 mins
Total Time
40 mins
 
You will enjoy Banana Bread Baked Oatmeal! The flavor of banana bread permeates baked oatmeal, in this filling and delicious family-friendly breakfast!
Category: Breakfast
Cuisine: American
Keyword: baked oatmeal
Servings: 6 servings
Calories Per Serving: 372 kcal
Author: JB @ The Grateful Girl Cooks!
Ingredients
  • 2 cups old fashioned oats
  • 1/3 cup brown sugar
  • 1 teaspoon baking powder
  • 2 teaspoons cinnamon
  • 1/2 teaspoon nutmeg
  • 1/2 teaspoon salt
  • 3 Tablespoons butter , melted
  • 2 cups milk
  • 1 cup mashed banana (this was about 2 medium bananas, mashed)
  • 1 large egg
  • 1 teaspoon vanilla
  • 1/2 cup pecans (or walnuts), chopped
  • 3 Tablespoons chopped pecans , toasted (for garnish-optional)
Instructions
  1. Preheat your oven to 350 degrees. Spray or butter an 8" square baking dish. Set aside.
  2. In large bowl, combine oats, brown sugar, baking powder, cinnamon, nutmeg and salt. Mix well.
  3. Melt butter in microwave safe dish. Add to oat mixture; stir to combine.
  4. In a separate bowl, mix together the milk, mashed banana, egg, and vanilla extract. Add to the flour mixture, and stir well, to fully mix ingredients. Stir in 1/2 cup chopped pecans.
  5. Pour batter into prepared baking dish. Bake at 350 degrees for 25-30 minutes. Test it to make sure it is done in the center. When baked oatmeal is done, remove pan to a wire rack, and let cool. Sprinkle toasted pecans on top, if desired. Serve warm, or let cool completely to room temperature before serving.
Optional- during the last 5 minutes of baking time, place the 3 Tablespoons of chopped pecans on a baking sheet and place into hot oven (do this if you want to garnish oatmeal with toasted pecans).
    Nutrition Facts
    Banana Bread Baked Oatmeal
    Amount Per Serving (1 serving)
    Calories 372 Calories from Fat 162
    % Daily Value*
    Fat 18g28%
    Saturated Fat 5g31%
    Cholesterol 46mg15%
    Sodium 294mg13%
    Potassium 498mg14%
    Carbohydrates 45g15%
    Fiber 5g21%
    Sugar 21g23%
    Protein 8g16%
    Vitamin A 395IU8%
    Vitamin C 3.3mg4%
    Calcium 175mg18%
    Iron 1.9mg11%
    * Percent Daily Values are based on a 2000 calorie diet.

    Here’s one more to pin on your Pinterest boards!You will enjoy Banana Bread Baked Oatmeal! The flavor of banana bread permeates baked oatmeal, in this filling and delicious family-friendly breakfast!


    Save

    Chocolate Chip-Coconut Monkey Bread Minis

    Chocolate Chip Coconut Monkey Bread Minis are a yummy, hand-held version of this breakfast treat! They’re filled with chocolate chips, coconut, butter, brown sugar and cinnamon!Monkey Bread Minis are a yummy, hand-held version of this breakfast treat! They're filled with chocolate chips, coconut, butter, brown sugar and cinnamon!
    Recently I made an eggs, bacon, and biscuit breakfast for my husband and I, but had some leftover biscuit dough. I decided to create miniature, hand-held monkey bread using the leftover dough. These yummy Chocolate Chip Coconut Monkey Bread Minis were the result!

    I didn’t use a recipe, but instead, just went with what I knew would work (based on making monkey bread previously). The decision was made to add coconut and chocolate chips to the middle, as a nice surprise!  These chocolate chip coconut monkey bread minis are very easy to make.

    Since I was using canned biscuits (Grands), I only had 4 rounds of biscuit dough left over, so the recipe I post will make 4, but it is absolutely easy to double the recipe if you have more mouths to feed. Here’s how I made these chocolate chip coconut monkey bread minis. Let me tell you… they are incredibly delicious!

    Scroll Down For A Printable Recipe Cad At The Bottom Of The Page

    How To Make Chocolate Chip Coconut Monkey Bread Minis

    You will need to start with biscuit dough, right out of the can! I used Grands biscuits, because they are so big!

    Canned biscuit dough is used to make monkey bread minis.

    Using kitchen scissors, cut each biscuit in half.  Next, cut each biscuit  half into 3 pieces. Note that each biscuit will end up being cut in 6 pieces when done.

    Each piece of biscuit dough for the monkey bread minis is cut into 6 pieces

    Let the Biscuit Pieces Go Swimming In Butter

    Melt the butter in a microwave safe bowl. Dip each piece of biscuit in the melted butter. Make sure to turn each piece over, to fully coat with butter.

    Monkey bread minis dough is tossed in melted butrer.

    Put all the buttered biscuit pieces in large bowl. Sprinkle liberally with cinnamon (I didn’t measure… just eyeballed it!) This is what it looked like.

    Buttered monkey bread minis are liberally sprinkled with cinnamon.

    Add the brown sugar, and stir to completely coat the biscuit pieces.

    Brown sugar is added to the monkey bread minis in bowl.

    Prepare Chocolate Chip Coconut Monkey Bread Minis For Baking

    Spray a muffin tin with non-stick spray. Place 3 biscuit pieces into each of the 4 muffin cups.

    Three pieces of monkey bread minis dough is placed in each of 4 muffin tins.

    Add the shredded coconut and chocolate chips to the monkey bread minis. I didn’t measure, but estimate it is about a teaspoon of each per muffin cup.

    Chocolate chips and coconut are added to monkey bread minis.

    Place 3 more biscuit pieces over the top of the chocolate chips. Once that’s done, top the monkey bread minis with any butter/brown sugar mixture left in bowl.

    More dough and butter brown sugar topping is added to monkey bread minis in muffin tins.

    Place a few chocolate chips (pointy side down) into the top of each of the monkey bread minis.

    A few chocolate chips are added to tops of monkey bread minis.

    Bake The Monkey Bread Minis

    Place the monkey bread minis in a preheated 350 degree oven. I baked them for 17 minutes (check them around the 15 minute mark). When done, they should be golden brown and not look “doughy” on top.

    Place the hot muffin tin on a wire rack. Let cool for 5 minutes, then carefully removed the the monkey bread minis. You can use a large kitchen spoon to scoop the monkey bread minis out without any trouble. Once removed from pan, let them cool down a bit.

    Chocolate chip coconut monkey bread minis are baked, then cool down on parchment paper.

    You can pull away the pieces just as you would do with monkey bread. Make sure to enjoy the chocolate chip coconut monkey bread minis while warm. You can also simply eat them just like a muffin!

    I cut one in half so you can see the inside. See how the monkey bread minis are filled with melted chocolate chips and coconut? YUMMO!

    Chocolate Chip Coconut Monkey Bread Minis are cut in half to show insides

    These monkey bread minis are so good! The flavors of butter, cinnamon, brown sugar, chocolate and coconut really come together. I hope you enjoy this portable, handheld miniature version of a fun (and somewhat decadent) breakfast treat!!! The recipe can easily be doubled, as well.  Really hope you will give these a try.

    Have an amazing day… my sincere hope is that you may you feel and fully comprehend the unconditional love God has for you. This is something I truly am profoundly grateful for.

    Looking For More BREAKFAST TREATS?

    You can find ALL my recipes in the Recipe Index, located at the top of the page. I have some delicious breakfast recipes, including:

    Interested In More Recipes?

    Thank you for visiting this website. I appreciate you using some of your valuable time to do soIf you’re interested, I publish a newsletter 2 times per month (1st and 15th) with all the latest recipes, and other fun info. I would be honored to have you join our growing list of subscribers, so you never miss a great recipe! 

    There is a Newsletter subscription box on the top right side (or bottom) of each blog post, depending on the device you use, where you can easily submit your e-mail address (only) to be included in my mailing list.

    You Can Also Find Me On Social Media:

    Facebook page: The Grateful Girl Cooks!
    Pinterest:
    The Grateful Girl Cooks!
    Instagram:
    jbatthegratefulgirlcooks

    Author's signature

    Recipe Source: My brain… on coffee.

    ↓↓ PRINTABLE RECIPE BELOW ↓↓

    0 from 0 votes
    Chocolate Chip-Coconut Monkey Bread Minis
    Prep Time
    10 mins
    Cook Time
    17 mins
    Total Time
    27 mins
     

    Chocolate Chip Coconut Monkey Bread Minis are a yummy, hand-held version of this breakfast treat! They're filled with chocolate chips, coconut, butter, brown sugar and cinnamon!

    Category: Breakfast
    Cuisine: American
    Keyword: monkey bread minis
    Servings: 4 servings
    Calories Per Serving: 479 kcal
    Author: JB @ The Grateful Girl Cooks!
    Ingredients
    • 4 large biscuit dough rounds (I used Grands because they are big)
    • 1/2 cup butter , melted
    • 1 teaspoon cinnamon (approx.)
    • 1/4 cup packed brown sugar
    • 4 Tablespoons shredded coconut flakes
    • 4 Tablespoons semi-sweet chocolate chips (plus a few more for top of dough)
    Instructions
    1. Preheat oven to 350 degrees. Melt butter. Pour into a large mixing bowl.

    2. Cut each piece of biscuit dough in half, then cut each half into 3 pieces. (I used kitchen scissors). Toss the biscuit pieces into the butter. Stir to completely coat each piece with butter. Sprinkle with cinnamon, then add brown sugar. Stir to fully coat pieces of dough.

    3. Spray 4 muffin cups with non-stick spray. Place 3 pieces of dough into each of 4 muffin cups. Add 1 Tablespoon of coconut followed by 1 Tablespoon chocolate chips per muffin cup. Top each one with 3 more pieces of dough. If desired, poke a few extra chocolate chips into the top of the dough (point side down to make it stick into the dough). Spoon any leftover brown sugar/butter mixture onto top of each one.
    4. Bake at 350 degrees for approx. 17 minutes (check them at 15 minutes since oven times vary). When done, they should be golden brown in color (and the top should be cooked through and not "doughy" looking). Let them cool in the pan for about 5 minutes, then carefully lift them out to a wire rack to cool. (I used a large serving spoon to scoop all the way under the finished mini monkey breads and to get them out in one piece). Let cool slightly, then serve. Enjoy!

    Recipe Notes

    This recipe is for 4 servings, but can EASILY be doubled, if you have more mouths to feed. Leftovers can be re-warmed in a microwave on a low temperature setting.

    Nutrition Facts
    Chocolate Chip-Coconut Monkey Bread Minis
    Amount Per Serving (1 serving)
    Calories 479 Calories from Fat 315
    % Daily Value*
    Fat 35g54%
    Saturated Fat 20g125%
    Cholesterol 62mg21%
    Sodium 481mg21%
    Potassium 189mg5%
    Carbohydrates 38g13%
    Fiber 2g8%
    Sugar 23g26%
    Protein 3g6%
    Vitamin A 710IU14%
    Calcium 46mg5%
    Iron 2.1mg12%
    * Percent Daily Values are based on a 2000 calorie diet.

    Here’s one more to pin on your Pinterest boards!Chocolate Chip Coconut Monkey Bread Minis are a yummy, hand-held version of this breakfast treat! They're filled with chocolate chips, coconut, butter, brown sugar and cinnamon!


    Save