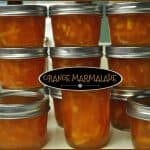
With a very small investment of time, you can make 12 delicious half-pints of homemade orange marmalade for long-term storage or to give as gifts.
Do you enjoy orange marmalade on toast, scones, or biscuits? I really do, and today I want to show you how to make (and can) your own jars of this thick, delicious citrus jam!
Scroll Down For A Printable Recipe Card At The Bottom Of The Page
What Ingredients Do I Need?
The ingredients to make this absolutely delicious citrus marmalade are quite simple. They are oranges, lemons, sugar and pectin powder!

Process For Canning Fruit Jams/Marmalades
I did not take photos during the actual “making” of this particular marmalade, but I can assure you it’s similar in process to making other jams.
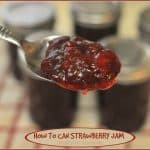
**Below are photos I took while preparing my raspberry jam, so you can “see” the jar filling process.
The fruit is cooked, sugar and pectin are added, then hot clean canning jars are filled, air is removed from jars, and then the jar rims are wiped clean to remove any jam residue.
Clean hot flat lids and jar rings are attached to the jars, and after that, the jars of marmalade are processed in a boiling water bath for 10 minutes.


After Processing The Orange Marmalade
Once the orange marmalade has finished processing, the hot jars are removed from canner and transferred onto a dish towel on the counter to rest and cool for 24 hours.
When the jars have completely cooled, check the lids to ensure all jars are properly sealed for long term storage. Label the jars, then store them in the pantry for later use!

You can see the pieces of the oranges in the finished orange marmalade. When I made this marmalade for the first time, it made just a little bit more than 12 half-pints.
The marmalade lasted a long time in our pantry. I love the fresh citrus taste of orange marmalade on biscuits or toast. Recently I’ve used it on baked chicken, and in my Grilled “Thai” PB& J Sandwiches (yum)!

This orange marmalade is very delicious, and I love that with only a small investment of my time, I can have many jars of this delicious treat to provide for our family for months and months.
What a great thing to give jars of homemade jam as gifts to friends and neighbors! I really hope you will give this marmalade a try! It’s GOOD!
Thanks for stopping by, and I invite you to come back again soon for more family-friendly recipes. Take care, may God bless you, and have a wonderful day.
Looking For More JAM Recipes?
You can find ALL of my recipes in the Recipe Index, which is located at the top of the page. I have lots of wonderful jam recipes to choose from, including:
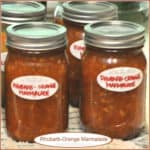
- Rhubarb-Orange Marmalade
- Blueberry Jam
- One Jar Strawberry Rhubarb Jam (no canning or pectin needed)
- Bing Chery Jam
- Marionberry Jam
Want More Recipes? Get My FREE Newsletter!
I publish a newsletter 2 times per month (1st and 15th) with lots of recipes, tips, etc.
Would you like to join our growing list of subscribers?
There is a Newsletter subscription box on the top right (or bottom) of each blog post, depending on the device you use.
You can submit your e-mail address there, to be added to my mailing list.
Find Me On Social Media:
Facebook page: The Grateful Girl Cooks!
Pinterest: The Grateful Girl Cooks!
Instagram: jbatthegratefulgirlcooks

Recipe source: Instructions from inside a box of MCP Pectin powder
↓↓ PRINTABLE RECIPE BELOW ↓↓
- 3½ pounds oranges (Valencia oranges, about 6 large)
- 6 cups water
- 4 lemons (for juice- total = 1/2 cup)
- 9½ cups granulated sugar
- 1 box MCP fruit pectin , (1.75 ounces)
- Cut off ends of oranges. Thinly slice the oranges (keep the peel ON), then cut each slice into 4 pieces. Place oranges, water, and ½ cup fresh lemon juice in a large stockpot (6-8 quart). Bring the mixture to a boil on high heat, then reduce heat and simmer, uncovered for one hour (or until peel is tender),stirring occasionally. Measure out EXACTLY 7 cups of the cooked orange mixture. If necessary, add water to make 7 cups.
- Prepare water bath canner (filled half way with water), canning jars and lids according to manufacturer instructions and general canning guidelines. Bring water in canner to a simmer.
- Measure out the granulated sugar into a large bowl and set aside until ready to add to jam.
- Place 7 cups of prepared orange mixture in large stockpot. Add box of Pectin and stir to combine. Bring mixture to a rolling boil on high heat (a rolling boil is when it's boiling so hard it won't stop bubbling even when stirred).
Stir in granulated sugar quickly (all at once). Stir well to combine. Bring the jam/pectin/sugar mixture back to a full, rolling boil. Once it is a full rolling boil, boil it for exactly 4 minutes, stirring constantly. When time is up, remove pan from heat, then skim off any accumulated foam (and discard).
- Ladle marmalade into hot, prepared jars. Fill the jars, leaving ⅛ inch headspace at the top. Remove air bubbles with a plastic utensil. Adjust the headspace, if necessary, by adding or removing jam.
- Use a damp cloth or paper towel to wipe down rim and edges of the jar. You need it free of debris in order to get a good seal. Cover with a hot, flat jar lid. Screw on bands to fingertip tightness.
- Lower the jars on an elevated rack into the simmering water in the canner. The jars must be completely covered with water, and have at least an inch of water over the top of the jar. Add more boiling water to canner, if necessary. Cover the canner; bring to a gentle boil. Once water is boiling, process jars for 10 minutes. When done, turn off heat, wait for a minute, carefully remove canner lid (lift lid away from you because of steam); lift each jar out (with canning tongs), and place on dish towel on counter to cool (don't put jars directly on counter because temperature differences could possibly crack jars). You should hear "ping" sound as the jars seal properly.
- After the jars cool off, you can check to see if jars sealed properly by pressing the middle of the lid. The jar should NOT spring back when touched. If it does spring back, the jar did not seal properly for long term storage, so you will need to refrigerate that particular jar. Let the sealed jars stand at room temp for 24 hours, wipe clean, label, then store unopened in a cool, dark place.
Altitude Adjustments:Higher altitudes require additional processing times:
1-3 K feet = +5 min. 3-6 K feet = +10 min. 6-8 K feet = +15 min.
Here’s one more to pin on your Pinterest boards! 


 using safe pressure canning guidelines. Recipe yields 8 qts. of old-fashioned chili, for long term storage. / The Grateful Girl Cooks!")


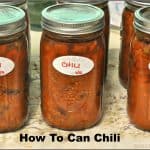
 using safe pressure canning guidelines. Recipe yields 8 qts. of old-fashioned chili, for long term storage./ The Grateful Girl Cooks!")
, for long term storage and convenience. / The Grateful Girl Cooks!")


, for long term storage and convenience. / The Grateful Girl Cooks!")


