Category: Desserts

Old-Fashioned Tapioca Pudding

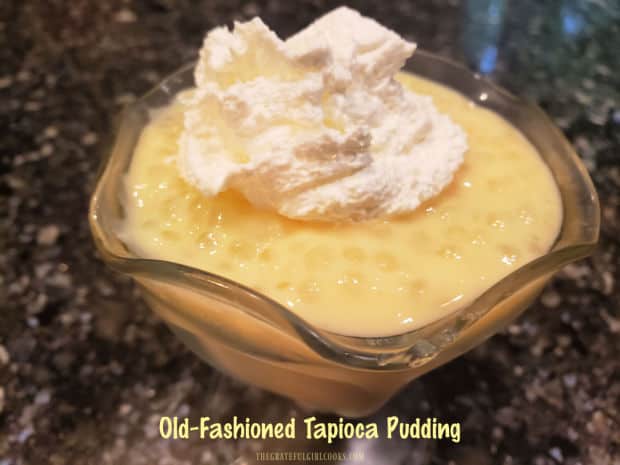
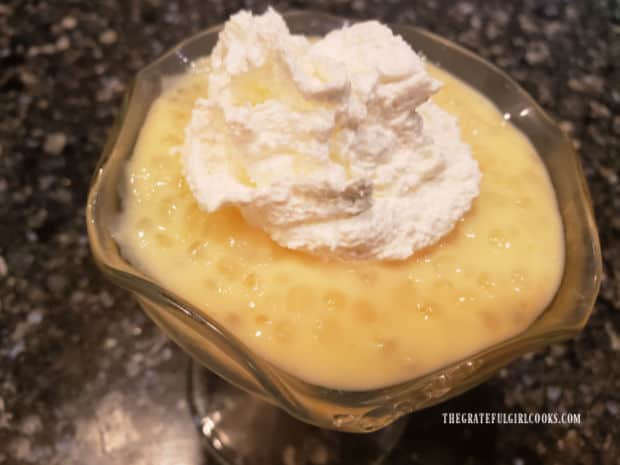
Make 4 servings of delicious Old-Fashioned Tapioca Pudding from scratch! Rich and creamy, you’re going to love this classic dessert!
Make 4 servings of delicious Old-Fashioned Tapioca Pudding from scratch! Rich and creamy, you're going to love this classic dessert!

Growing up, I did not care too much for tapioca pudding, but as an adult, I’ve come to love it! Long ago I used to keep a box of INSTANT tapioca in our pantry, but years ago found a yummy recipe to make this creamy classic pudding from scratch!

Once you buy tapioca pearls at the grocery store, you can store them in the pantry for a long time! Now- whenever we want some old-fashioned tapioca pudding, I’ve already got the tapioca pearls, ready to go! To make this pudding from scratch you need uncooked tapioca pearls, plus a few other common ingredients (sugar, salt, water, eggs, milk and vanilla)! I always have these other ingredients in my kitchen, so when we want this pudding, it’s very convenient to pull together!

Making tapioca pudding from scratch does take a little bit of time (and stirring), but it is well worth it, in my opinion. The finished pudding is cold, creamy, thick, and delicious!

Scroll Down For A Printable Recipe Card At The Bottom Of The Page

Prepare The Tapioca Pearls

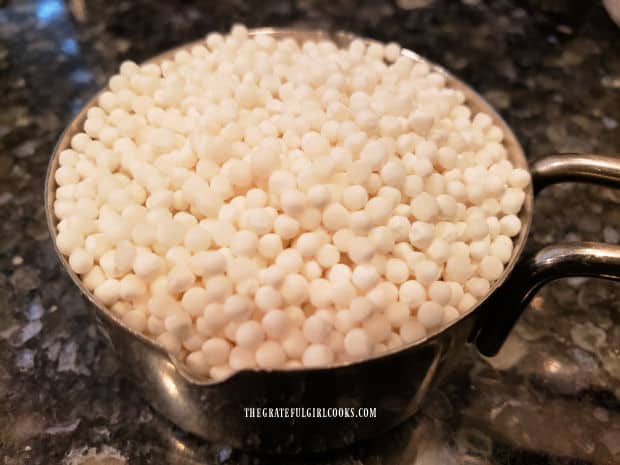
This old-fashioned recipe calls for uncooked small pearl tapioca. You can usually find it near the pudding mixes (or sometimes in the pasta section) at the local grocery store. Do NOT use boxed instant tapioca mix for this recipe. To prepare it to be cooked, measure 1/3 cup of the tapioca pearls into a Medium sized non-stick saucepan. NOTE: Make sure to use a non-stick saucepan, so the pudding won’t scorch on the bottom of the pan during the extended cooking time. I learned this the hard way once awhile ago… trust me!

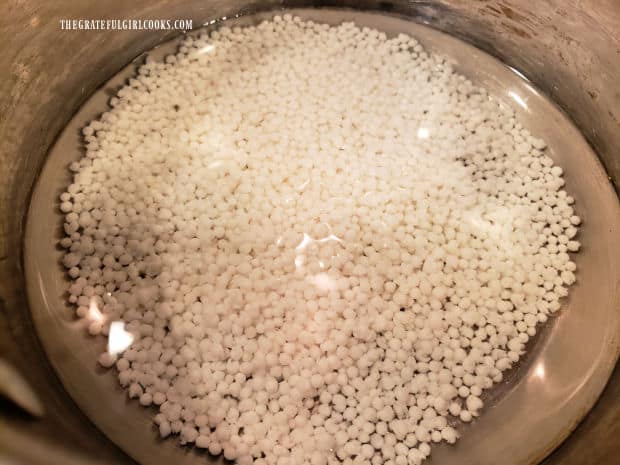
Cover the tapioca pearls with ¾ cup of water, and then let them sit and soak for 30 minutes. This “soaking” helps soften the hard tapioca pearls a bit before cooking. 

Tapioca pearls are measured in a measuring cup before cooking.The tapioca pearls are soaking in a pan full of water.

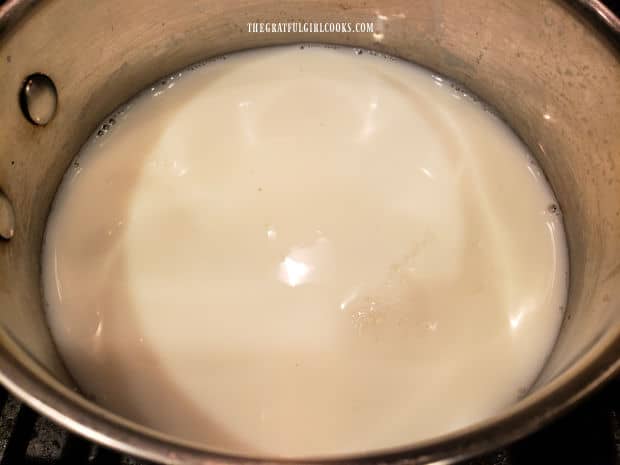
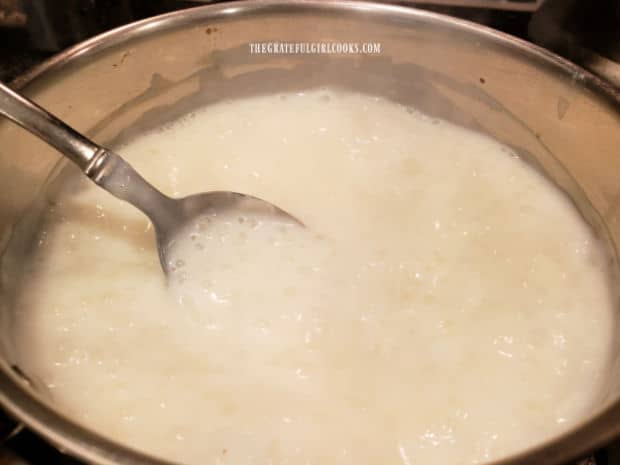
Once the tapioca has finished soaking, add milk and salt to the saucepan. Bring the liquid to a boil on MEDIUM heat, then reduce the heat to LOW and let the pudding simmer for 30 minutes, stirring frequently. The pudding mixture will thicken considerably while it is cooking.
Milk and salt are added to the pan of soaked tapioca pearls.Old-fashioned tapioca pudding cooks for 30 minutes until it thickens.

Temper The Eggs So They Don’t Scramble

When the pudding is done cooking, remove the pan from the heat. Now you need to prepare the eggs to add to the hot mixture. If you add the eggs directly into the hot pudding, they will scramble, and we don’t want that to happen! So the eggs must be “tempered” first, which means warming them up slowly so they can be added to a hot mixture without scrambling them.

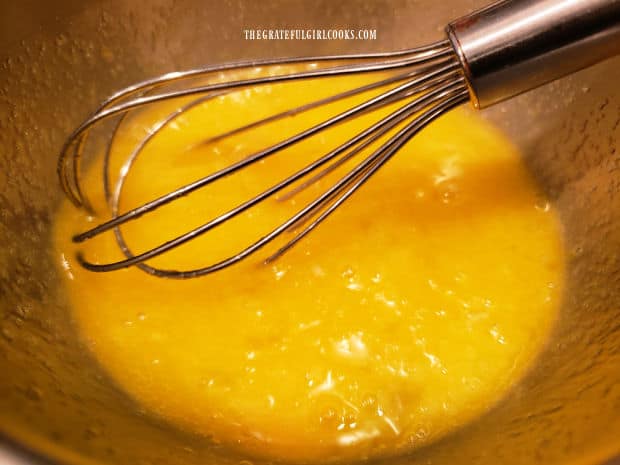
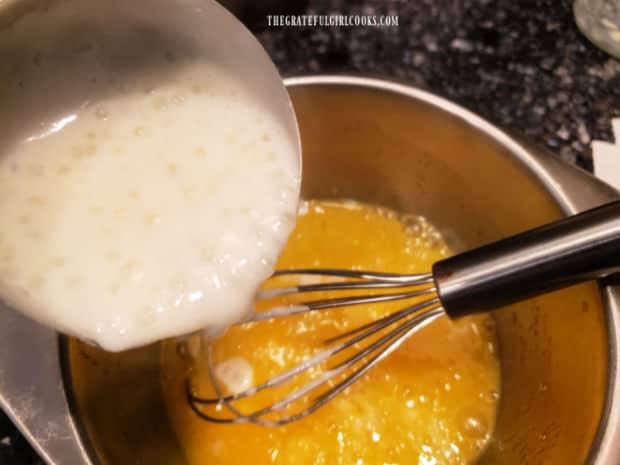
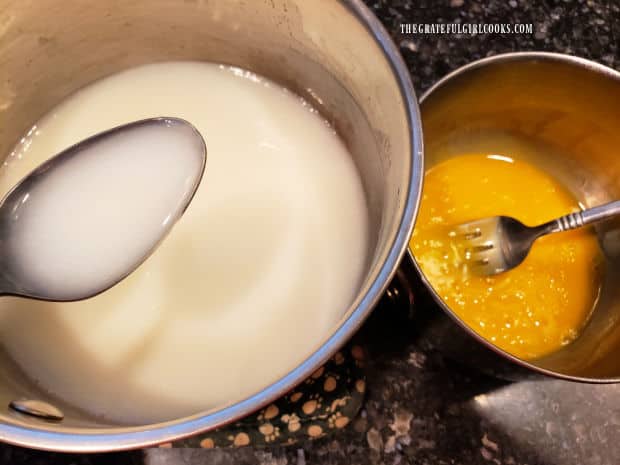
In a small bowl, combine lightly beaten eggs with granulated sugar. Whisk these 2 ingredients together, to combine. Remove ½ cup of the hot pudding from the saucepan. SLOWLY (very slowly) while whisking continuously, drizzle the hot pudding into the eggs, a little at a time. Keep whisking while slowly drizzling in the hot stuff!

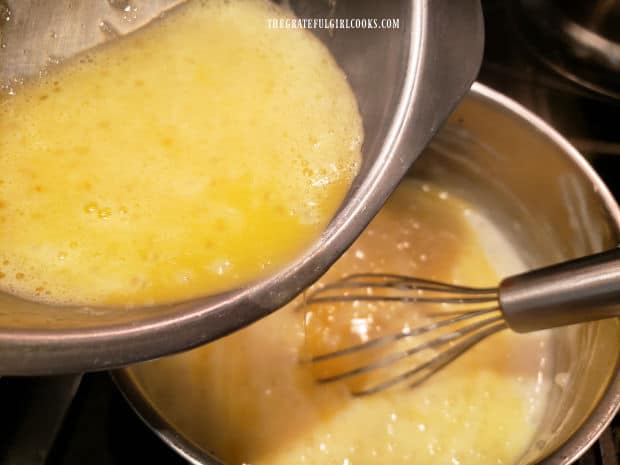
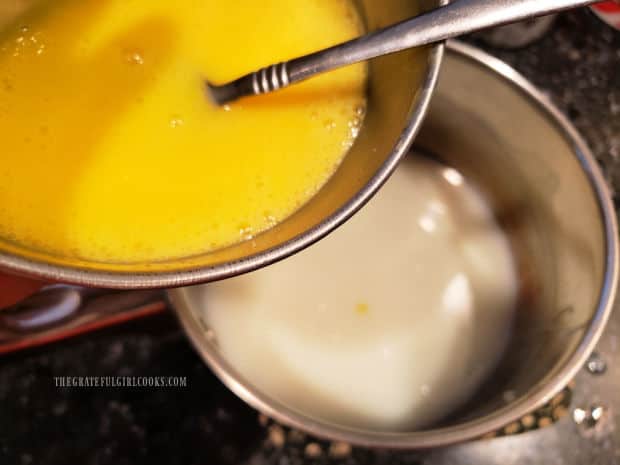
Once ½ cup of hot pudding has been incorporated into the eggs, slowly drizzle the combined mixture back into the remaining hot pudding in the saucepan. Whisk continuously while it’s being added. 

Eggs are whisked with sugar until they're combined.The egg mixture is tempered by drizzling in some hot pudding mixture a bit at a time.Tempered eggs are whisked back into the pan of hot tapioca pudding.

Final Steps Before Chilling

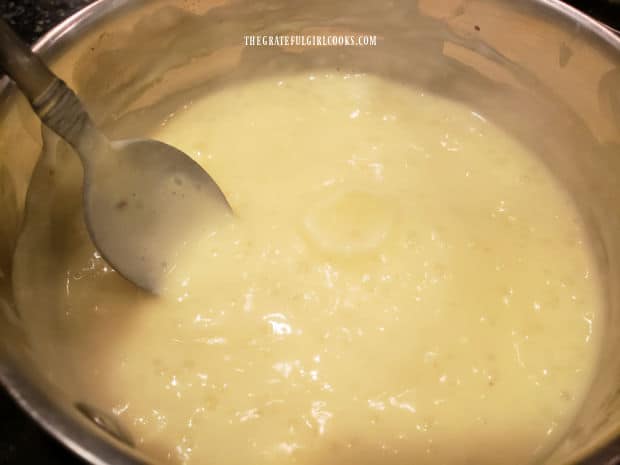
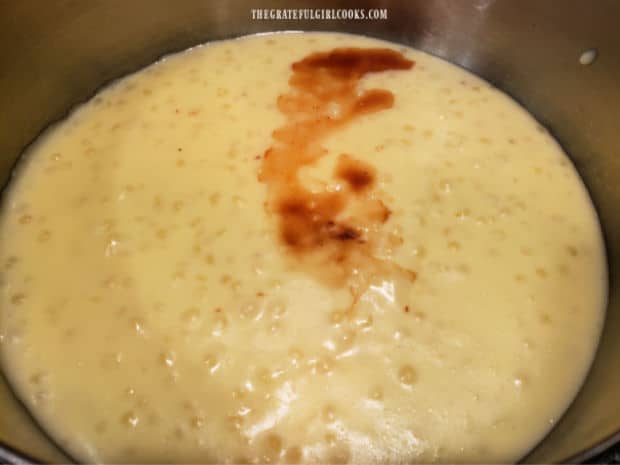
Return the pan to the heat. Cook the old-fashioned tapioca pudding on LOW heat for 4 more minutes, stirring constantly as it continues to thicken. Remove the pan from the heat, and stir in vanilla extract. Transfer all the pudding from the saucepan into a medium sized mixing bowl.

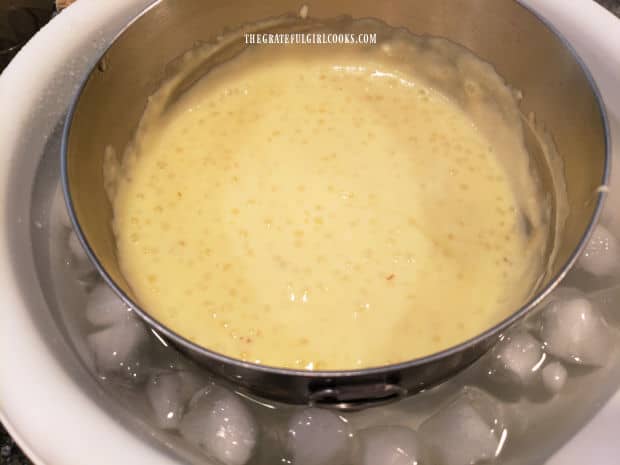
Fill a large bowl (larger than the one the pudding is in) with lots of ice cubes and small amount of water. Set the bowl with the pudding over the ice in the larger bowl (see photo #3 below). This will help to quickly cool the old-fashioned tapioca pudding. Allow the pudding to sit over the ice for 15 minutes, stirring occasionally, as the pudding continues to thicken.

Old-fashioned tapioca pudding is cooked longer until it really thickens.Vanilla extract is added to the tapioca pudding, once off the heat.A bowl of old-fashioned tapioca pudding rests on a bowl of ice water to cool it quickly.
Who Wants Some Old-Fashioned Tapioca Pudding?

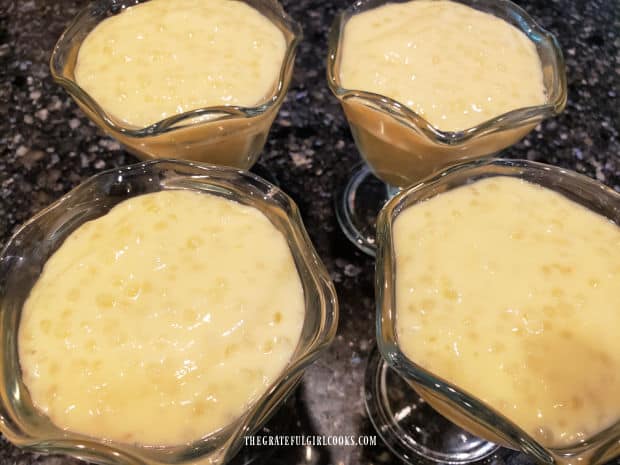
Once the pudding has chilled on top of the ice water “bath” for 15 minutes, remove the pudding bowl from the ice bath. At this point, you can either leave the pudding in the mixing bowl or divide it up into 4 serving containers… your choice. The recipe will yield four servings (½ cup each) of old-fashioned tapioca pudding. Use plastic wrap to cover the pudding (see note below).
IMPORTANT NOTE: Lay the plastic wrap directly on top of the pudding, making contact with the surface of the pudding. This will help to prevent a “skin” from developing on the pudding as it chills.

Place the (covered) old-fashioned tapioca pudding in the refrigerator, and chill completely until ready to serve. Garnish each serving with a dollop of whipped cream or a sprinkle of nutmeg, if desired, then serve cold!

Four servings of old-fashioned tapioca pudding, ready to be refrigerated.Each portion of tapioca pudding is topped with whipped cream before serving.

I hope you enjoy this recipe for old-fashioned tapioca pudding. It takes a little bit of time to prepare, but results in a thick, creamy and delicious classic pudding, I’m confident you’ll enjoy! Thanks for stopping by, and come back soon for more yummy, family-friendly recipes! Take care, and have a great day.

Looking For More PUDDING or MOUSSE Recipes?

You can find ALL of my recipes in the Recipe Index, located at the top of the page. I have some delicious pudding and mousse recipes for you to enjoy, including:

Interested In More Recipes?

Thank you for visiting this website. I appreciate you using some of your valuable time to do soIf you’re interested, I publish a newsletter 2 times per month (1st and 15th) with all the latest recipes, and other fun info. I would be honored to have you join our growing list of subscribers, so you never miss a great recipe!
There is a Newsletter subscription box on the top right side (or bottom) of each blog post, depending on the device you use, where you can easily submit your e-mail address (only) to be included in my mailing list.

You Can Also Find Me On Social Media:

Facebook page: The Grateful Girl Cooks!
Pinterest:
The Grateful Girl Cooks!
Instagram:
jbatthegratefulgirlcooks

Author's signature

Original recipe source: “Cooking Light Annual Recipes 2007, page 292, published in 2006 by Oxmoor House

↓↓ PRINTABLE RECIPE BELOW ↓↓

5 from 1 vote
Old-Fashioned Tapioca Pudding
Prep Time
30 mins
Cook Time
35 mins
Total Time
1 hr 5 mins
 

Make 4 servings of delicious Old-Fashioned Tapioca Pudding from scratch! Rich and creamy, you're going to love this classic dessert!

Category: Desserts
Cuisine: American
Keyword: old-fashioned tapioca pudding
Servings: 4 (1/2 cup) servings
Calories Per Serving: 204 kcal
Author: JB @ The Grateful Girl Cooks!
Ingredients
  • cup small pearl tapioca uncooked
  • ¾ cup water
  • cups low-fat milk (1%)
  • ¼ teaspoon salt
  • 2 large eggs lightly beaten
  • cup granulated sugar
  • ½ teaspoon vanilla extract
OPTIONAL GARNISH FOR SERVING: whipped cream and/or grated nutmeg
    Instructions
    1. Place tapioca pearls in a medium sized non-stick saucepan. NOTE: Make sure to use a non-stick saucepan, so pudding won't scorch on bottom of pan while cooking. Add water; let tapioca soak in water for 30 minutes.

    2. Add milk and salt to the saucepan. Bring liquid to a boil on MEDIUM heat, then reduce heat to LOW. Let pudding simmer for 30 minutes, stirring frequently. Remove pan from heat when done cooking.
    3. In a small bowl, combine eggs with sugar. Whisk, to combine. Remove 1/2 cup hot pudding from the saucepan. SLOWLY (very slowly) while whisking continuously, drizzle this hot pudding into the eggs, a little at a time. Once ½ C. hot pudding has been incorporated into eggs, slowly drizzle combined mixture back into remaining pudding in saucepan, whisking continuously while adding. 

    4. Return pan to heat. Cook pudding on LOW heat 4 more minutes, stirring constantly as it continues to thicken. Remove pan from heat; stir in vanilla. Transfer pudding into a medium-sized mixing bowl.

    5. Fill a large bowl (larger than pudding bowl) with ice cubes and small amount of water. Set pudding bowl over ice in larger bowl for 15 minutes, stirring (carefully) occasionally, as pudding continues to thicken.

    6. After 15 minutes, remove pudding bowl from ice bath. *At this point, you can either leave pudding in mixing bowl or divide it into 4 serving dishes/containers. Use plastic wrap to cover pudding. NOTE: Lay plastic wrap directly on top of pudding, making contact with surface of pudding. This helps prevent a "skin" from forming on pudding as it chills. Place (covered) pudding in refrigerator; chill completely until ready to serve. Garnish each serving with whipped cream and/or a sprinkle of nutmeg, if desired, and serve cold!

    Nutrition Facts
    Old-Fashioned Tapioca Pudding
    Amount Per Serving (1 (1/2 cup serving))
    Calories 204 Calories from Fat 36
    % Daily Value*
    Fat 4g6%
    Saturated Fat 2g13%
    Trans Fat 1g
    Polyunsaturated Fat 1g
    Monounsaturated Fat 1g
    Cholesterol 100mg33%
    Sodium 235mg10%
    Potassium 248mg7%
    Carbohydrates 35g12%
    Fiber 1g4%
    Sugar 24g27%
    Protein 8g16%
    Vitamin A 395IU8%
    Calcium 185mg19%
    Iron 1mg6%
    * Percent Daily Values are based on a 2000 calorie diet.

    Here’s one more to pin on your Pinterest boards!Make 4 servings of delicious Old-Fashioned Tapioca Pudding from scratch! Rich and creamy, you're going to love this classic dessert!

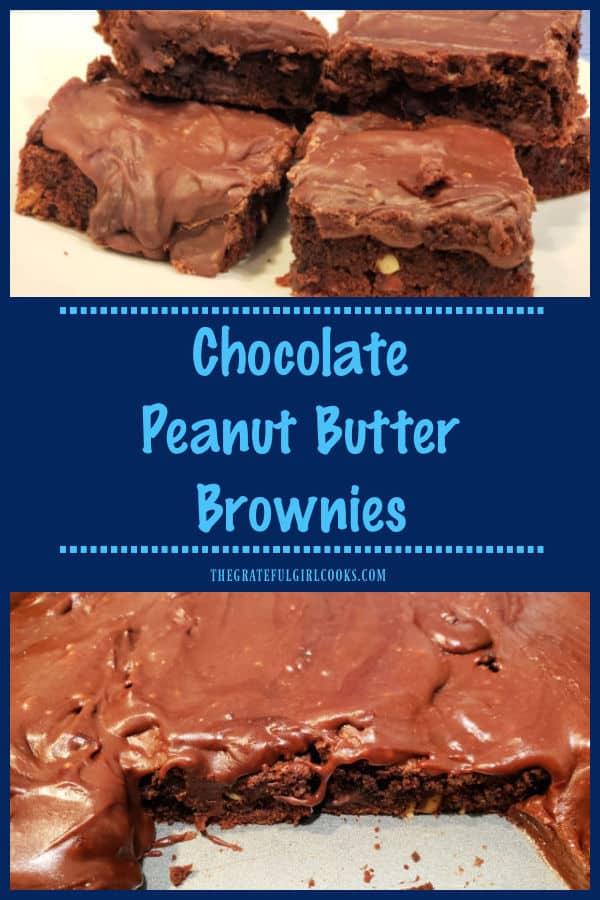
    Chocolate Peanut Butter Brownies

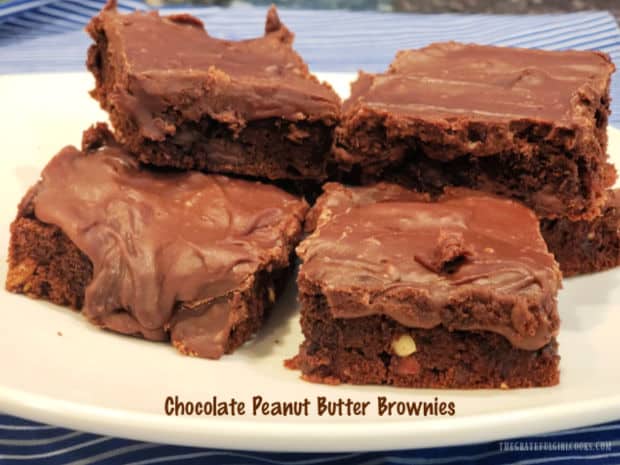
    Chocolate Peanut Butter Brownies are filled with chopped peanuts, chocolate chips and peanut butter, and are absolutely delicious!
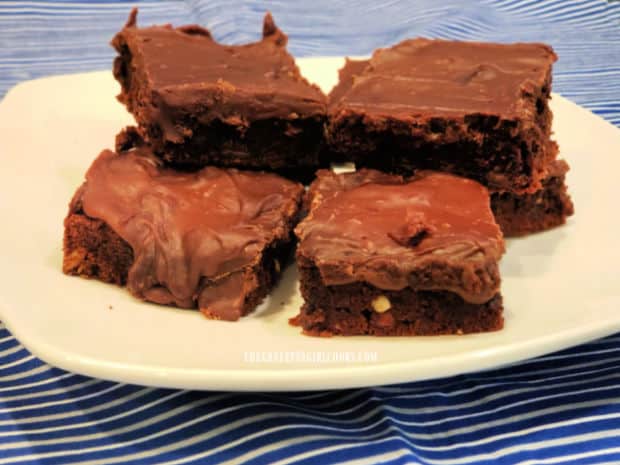
    Chocolate Peanut Butter Brownies are filled with chopped peanuts, chocolate chips and peanut butter, and are absolutely delicious!

    If you love the flavor combo of chocolate and peanut butter, I think you’ll enjoy these delicious chocolate peanut butter BROWNIES!

    The peanut butter taste is not too strong, and it perfectly blends with the fudgy chocolate flavor in these yummy dessert bars!

    With only 10 minutes of hands-on prep, you can have a big ol’ pan of yummy tasting brownies in the oven before you know it. Chocolate peanut butter brownies can be eaten unfrosted OR frosted

    I’ve included a recipe for a delicious chocolate frosting (in the printable recipe card) for your convenience. Here’s how easy these brownies are to make:

    Scroll Down For A Printable Recipe Card At The Bottom Of The Page

    Make The Brownie Batter

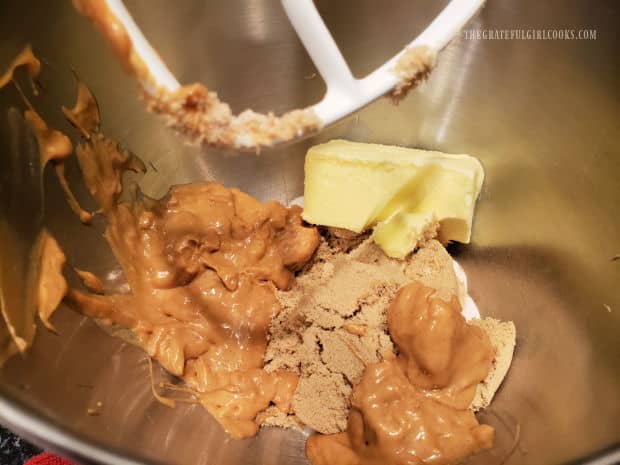
    Measure peanut butter, softened butter, brown sugar and granulated sugar into a large mixing bowl. Cream ingredients together using an electric mixer on High speed until fully blended.

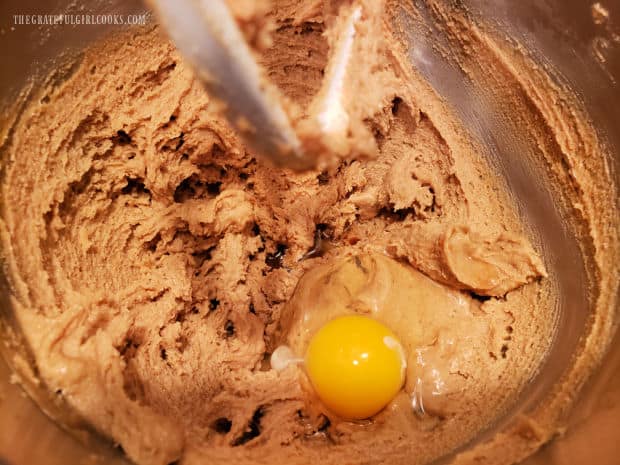
    Turn the mixer down to Medium speed, and add vanilla extract and 4 eggs, ADDING EGGS ONE AT A TIME. Beat the ingredients very well after each egg is added.

    Once done, the chocolate peanut butter brownie batter will be fairly thick.

    Peanut butter, brown & granulated sugar, and butter are combined using a mixer.Four eggs are added to the batter, one at a time, then mixed in.

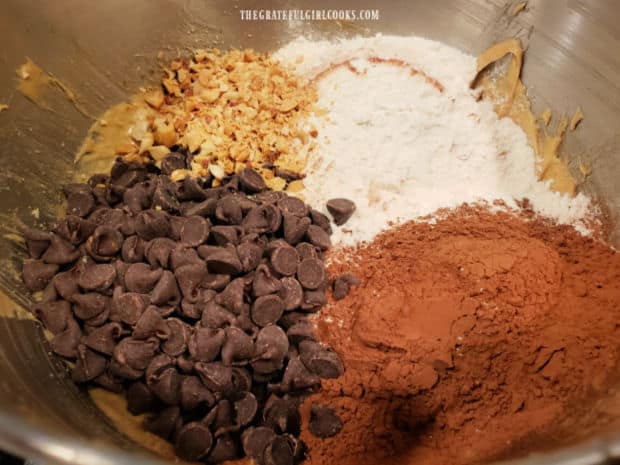
    Stir cocoa powder, flour, salt, chocolate chips and chopped peanuts into the brownie batter until well combined. Now the brownies are ready to be baked!

    Cocoa powder, chocolate chips, flour, salt and peanuts are stirred into the brownie batter.

    Ready To Bake!

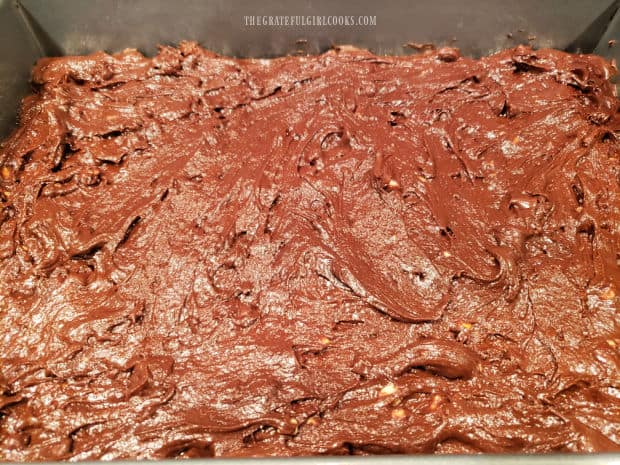
    Lightly grease a 9″ x 13″ baking pan and then spread the batter evenly in the pan. Place the pan of chocolate peanut butter brownies on the center rack of a preheated 350°F. oven.

    Bake at 350°F for 15-20 minutes, or until a toothpick inserted deep into the center of the brownies comes out clean. The top of the brownies should also feel firm once done.

    The batter for chocolate peanut butter brownies is spread into a greased cake pan.

    If You Like “Unfrosted” Chocolate Peanut Butter Brownies

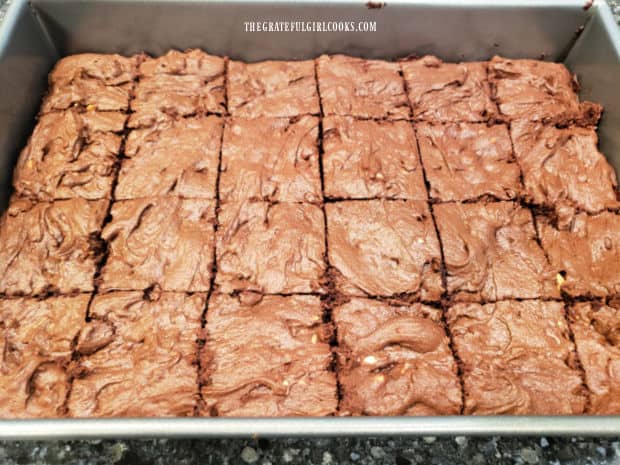
    Remove the pan from the oven, and cut the brownies into 24 portions while still hot. Let them cool  to room temp (still in the pan) after slicing, before serving.

    If you enjoy the chocolate peanut butter brownies UNFROSTED, simply let them cool completely. Transfer them from the pan to a serving plate, and serve.
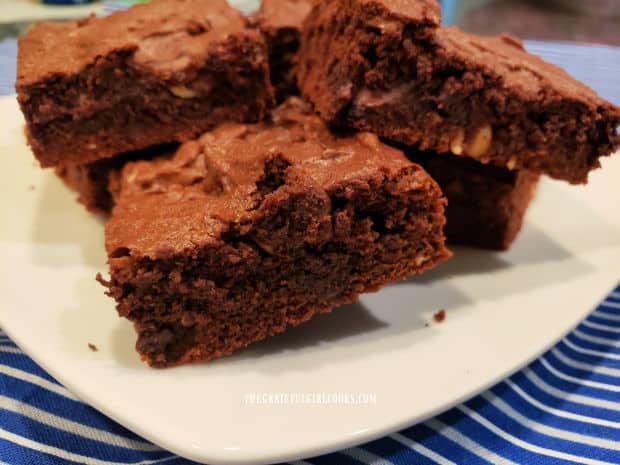
    After baking, the chocolate peanut butter brownies are cut while still hot into 24 portions.A white plate with several unfrosted brownies ready to enjoy.

    If You Like “Frosted” Chocolate Peanut Butter Brownies

    If you prefer chocolate frosting on brownies, you can make it while the brownies cool. It’s EASY! I’ve included the printable recipe below, but here are the basics. 

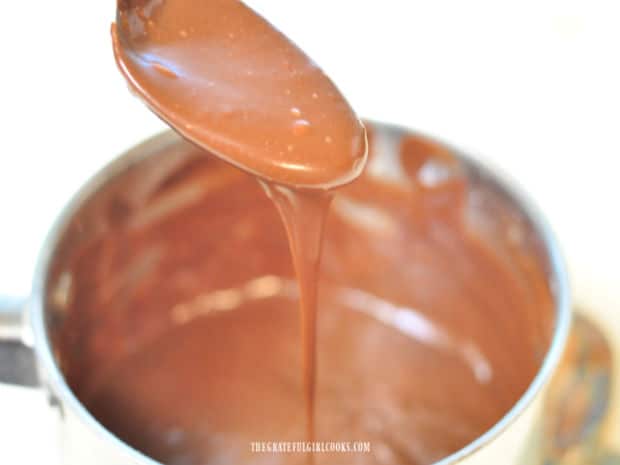
    Melt butter in a saucepan on low heat. Add cocoa powder, and stir it in, until blended with the melted butter. Stir in salt, vanilla, and ¼ cup of milk, stirring by hand until combined.

    Add powdered sugar, and stir well. If necessary add a bit more milk until the frosting becomes smooth and slightly pourable.

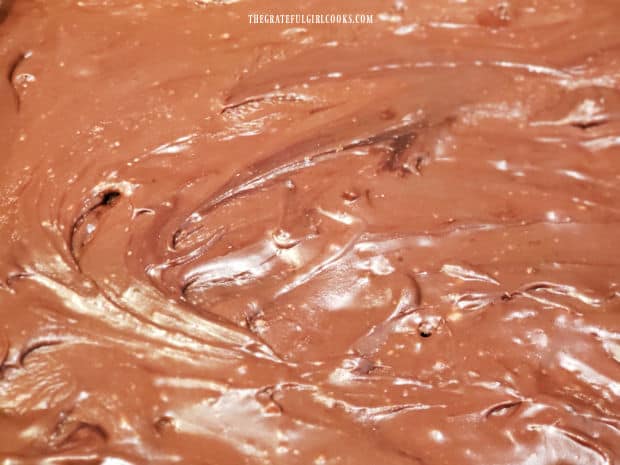
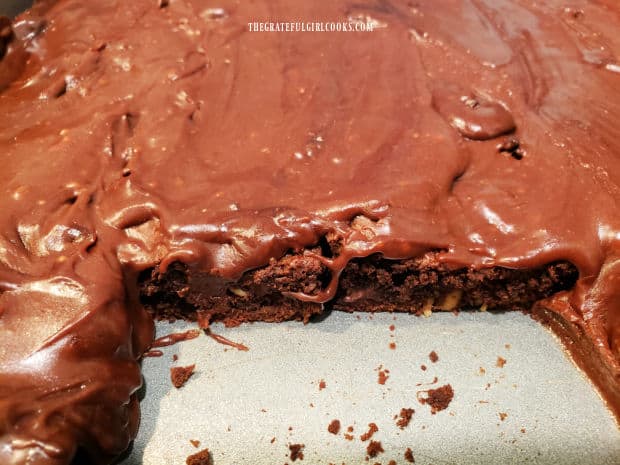
    Poke holes in the tops of the brownies, then immediately pour the chocolate frosting evenly over the surface. The frosting will cover the top and sink into the holes in each brownie. 

    Chocolate frosting can be made to frost the brownies, if desired.Holes are poked in the brownies, then they're covered with chocolate frosting.

    Let the frosting become firm before slicing and transferring the brownies out of the baking pan to a serving plate. Serve, and enjoy these decadent dessert bars.

    A pan of frosted chocolate peanut butter brownies showing the inside after removing brownies..A white plate with several frosted chocolate peanut butter brownies on it.

    I really hope you enjoy these delicious brownies! They taste wonderful, and I hope you (and those you love) like them as much as we do.

    Thanks for taking the time to stop by today, and I invite you to come back soon for more family-friendly recipes. Take care, may God bless you, and have a great day!

    Looking For More BAR COOKIE Recipes?

    You can find ALL of my recipes in the Recipe Index, located at the top of the page. I have some wonderfully delicious bar cookie recipes to enjoy, which include:

    Interested In More Recipes?

    Thank you for visiting this website. I appreciate you using some of your valuable time to do soIf you’re interested, I publish a newsletter 2 times per month (1st and 15th) with all the latest recipes, and other fun info. I would be honored to have you join our growing list of subscribers, so you never miss a great recipe!
    There is a Newsletter subscription box on the top right side (or bottom) of each blog post, depending on the device you use, where you can easily submit your e-mail address (only) to be included in my mailing list.

    You Can Also Find Me On Social Media:

    Facebook page: The Grateful Girl Cooks!
    Pinterest:
    The Grateful Girl Cooks!
    Instagram:
    jbatthegratefulgirlcooks

    Author's signature

    Original recipe source for brownies: “Mollie Katzen’s Vegetable Heaven”, page 204, published in 1997 by Tante Malka, Inc.
    Original recipe source for frosting: my Mom’s frosting recipe for chocolate cake

    ↓↓ PRINTABLE RECIPE BELOW ↓↓

    0 from 0 votes
    Chocolate Peanut Butter Brownies
    Prep Time
    10 mins
    Cook Time
    15 mins
    Resting Time (inactive cooling time)
    30 mins
    Total Time
    55 mins
     

    Chocolate Peanut Butter Brownies are filled with chopped peanuts, chocolate chips and peanut butter, and are absolutely delicious!

    Category: Desssert
    Cuisine: American
    Keyword: chocolate peanut butter brownies
    Servings: 24
    Calories Per Serving: 260 kcal
    Author: JB @ The Grateful Girl Cooks!
    Ingredients
    For Brownie Batter:
    • 1 cup creamy peanut butter (not natural)
    • 1 stick butter (½ cup), softened
    • 1 cup light brown sugar (packed)
    • ½ cup granulated sugar
    • 4 large eggs
    • 1 teaspoon vanilla extract
    • 1 cup unsweetened cocoa powder
    • 1 cup all purpose flour
    • cups semisweet chocolate chips
    • ½ cup cocktail peanuts finely chopped
    For Chocolate Frosting (if using):
    • 6 Tablespoons butter (3/4 stick)
    • 4 Tablespoons unsweetened cocoa powder
    • 1 pinch salt
    • 1 teaspoon vanilla extract
    • 12 ounces powdered sugar
    • ¼ cup low-fat milk (1%) more if necessary to thin frosting
    Instructions
    1. Preheat oven to 350°F. Lightly grease a 9x13 baking pan.

    2. Measure peanut butter, butter, brown sugar and granulated sugar into large mixing bowl. Cream ingredients using electric mixer on High until fully blended. Turn mixer to Medium; add vanilla and eggs, ADDING EGGS ONE AT A TIME. Beat well after each egg is added.

    3. Remove beaters. Add cocoa, flour, chocolate chips and peanuts to batter; stir by hand until fully incorporated into thick batter.

    4. Spread batter evenly in prepared pan. Place pan on center rack of oven. Bake at 350°F. for 15-20 minutes, or until a toothpick inserted deep into the center of the brownies comes out clean. The surface of the brownies should feel firm.

    For UNFROSTED Brownies:
    1. Remove pan from oven. Cut brownies into 24 servings while still hot. Let cool (still in pan) to room temp. after slicing, before removing from pan and serving.

    For FROSTED Brownies:
    1. Slice brownies while still hot. To make frosting: Melt butter on low heat in medium saucepan. Remove from heat. Add cocoa powder; stir well, then add salt, vanilla, and ¼ cup of milk, stirring by hand until combined. Add powdered sugar, and stir well. If necessary add a bit more milk until the frosting becomes slightly pourable. When fully combined, poke holes in the top of the brownies, then pour frosting over the surface to cover. Let frosting become firm, before removing brownies from pan and serving.

    Recipe Notes

    NOTE: Caloric calculation is for UNFROSTED brownies (260 per serving). If using frosting included in recipe card, the caloric content of each brownie will be approx. 344 calories per serving.

    ALSO... if you are using non-salted peanut butter in the brownies, add ¼ tsp. to the brownie batter.

    Nutrition Facts
    Chocolate Peanut Butter Brownies
    Amount Per Serving (1 brownie (1/24 of total))
    Calories 260 Calories from Fat 144
    % Daily Value*
    Fat 16g25%
    Saturated Fat 6g38%
    Trans Fat 1g
    Polyunsaturated Fat 2g
    Monounsaturated Fat 6g
    Cholesterol 42mg14%
    Sodium 106mg5%
    Potassium 223mg6%
    Carbohydrates 27g9%
    Fiber 3g13%
    Sugar 18g20%
    Protein 6g12%
    Vitamin A 167IU3%
    Calcium 33mg3%
    Iron 2mg11%
    * Percent Daily Values are based on a 2000 calorie diet.

    Here’s one more to pin on your Pinterest boards!Chocolate Peanut Butter Brownies are filled with chopped peanuts, chocolate chips and peanut butter, and are absolutely delicious!

    Blackberry Pie

    Use fresh or frozen blackberries to make a delicious classic blackberry pie using a homemade or purchased pie crust! Summertime at its best!
    Use fresh or frozen blackberries to make a delicious classic blackberry pie using a homemade or purchased pie crust! Summertime at its best!

    If you’re looking for a real taste of summer, try this yummy recipe for blackberry pie. Simple to make, using store-bought or homemade pie crusts and fresh or frozen blackberries, this is a delicious dessert that can be enjoyed year-round.

    Where we live in NW Oregon, blackberries grow wild practically everywhere. Sometimes in the summer I can even pick a big pail of blackberries while out walking our dog (he is patient while I pick them!). I figure… why waste a perfect opportunity to get some FREE fresh blackberries! I’ve made so many great recipes using them over the years, from muffins, to syrup, jam, cobblers, crisps, etc. that I can’t wait for them to ripen each summer. This blackberry pie is another way to use a bunch of fresh or frozen blackberries to make a delicious PIE.  Here’s how to make it:

    Scroll Down For A Printable Recipe Card At The Bottom Of The Page

    A Word About The Pie Crust

    This pie requires a top and bottom crust. You can use your favorite pie crust recipe OR buy a 2 crust package at the store. NOTE: If purchasing pie crusts for convenience, do not buy the premade pie “shells” in the freezer section. Buy the type of pie pastry dough that you unroll from the pkg. then manually roll out and place in pan (Pillsbury has this in most grocery stores in refrigerated section).

    For your convenience, I’ve included my homemade pie crust recipe and instructions (to make two) in the printable recipe card, but feel free to use whatever pie crust recipe you enjoy. The rest of this post will show you how to make this pie, assuming you already have the pie crusts made or purchased.

    Make The Pie Filling

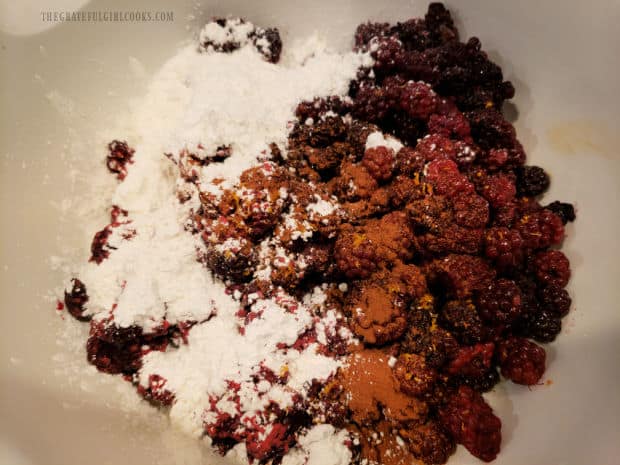
    Place 5 cups of fresh blackberries OR frozen (unsweetened and unthawed) into a large mixing bowl. Add granulated sugar, flour, cinnamon, lemon juice and zest and gently toss until combined.

    Blackberries are tossed with sugar, flour, cinnamon, lemon juice and zest until combined.

    Filling The Pie Crust

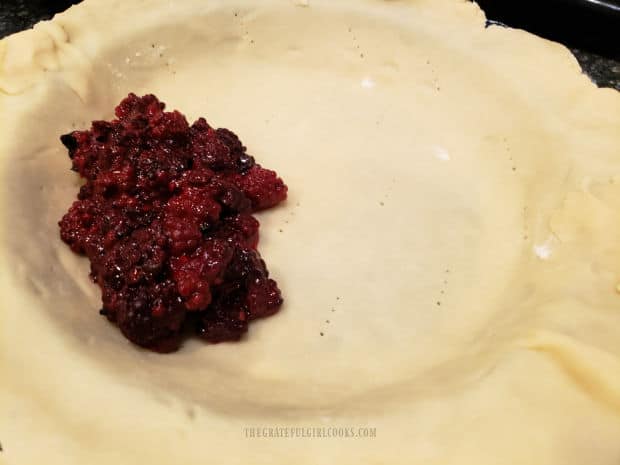
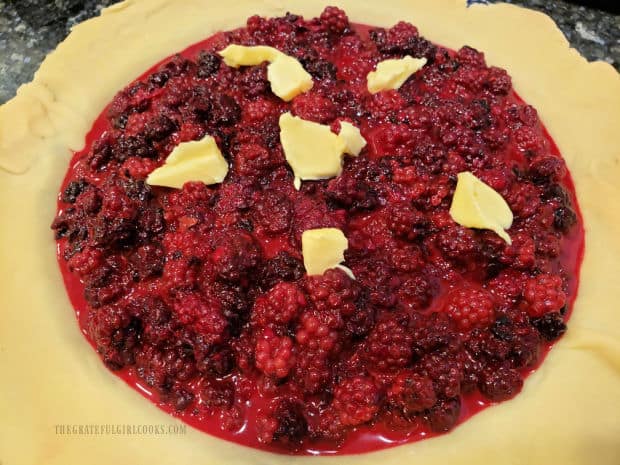
    Place one crust into a 9″ deep dish pie pan. Prick the bottom and sides of the bottom pastry crust several times with the tines (the pointy ends) of a fork. Pour the blackberry pie filling into the prepared crust. Cut the butter into small chunks and dot the top of the fruit filling with the butter.

    The pie crust pastry is pricked with the tines of a fork, then pie filling is added.Blackberry pie filling is added to crust and dotted with butter before adding top pastry crust.

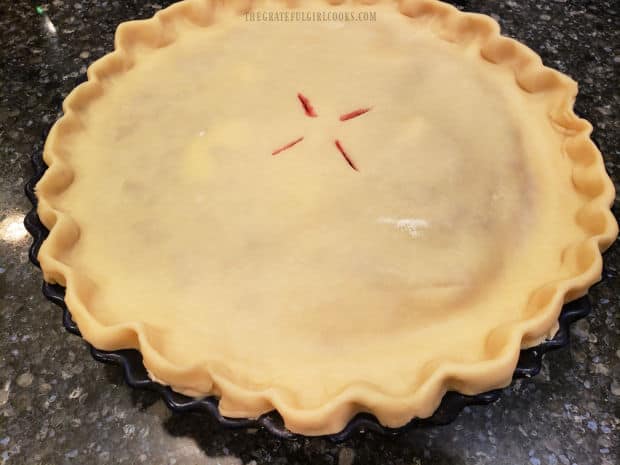
    Top the blackberry pie with the other pie crust. Trim the edges of the dough to about 1/2″ from the outside edge of the pie pan. Seal the edges of the top crust to the bottom crust by tucking the top crust under the edge of the bottom crust, and pinching the two crusts together to seal. Use your fingers to seal the two crusts together and then create a fluted edge.

    Use a sharp knife to cut 3-4 small slits in the top crust. These are the “air vents” that allow the hot steam to escape while the pie bakes. Now the blackberry pie is ready to be baked.

    Top crust is added and shaped, then steam vents are cut into the top before baking.

    Baking The Blackberry Pie

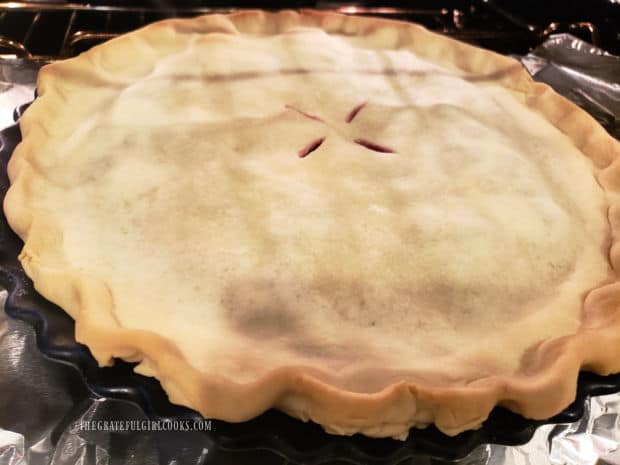
    Bake the blackberry pie at 425°F. for 45-50 minutes. TIP: Place a sheet of aluminum foil directly UNDER the pie pan, to catch drips that may bubble up and out while baking.

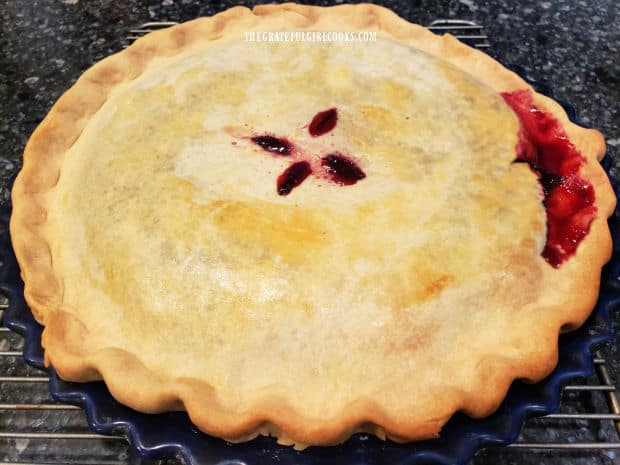
    TIP: Check the pie after 30 minutes. If the crust is browning too fast, simply lay another sheet of aluminum foil over the top to protect the crust from over-browning, then continue baking. When done, the pie crust will be lightly browned and the juices will be bubbling up in the steam vents on top.

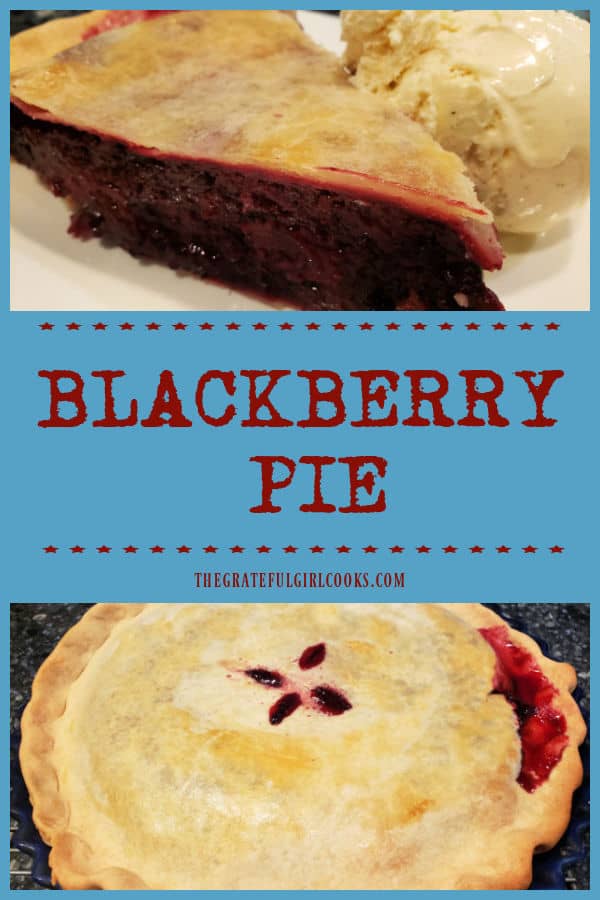
    Partway through the baking time, the crust is turning golden in color.The finished blackberry pie is golden brown on top and the filling is bubbly around the edges.

    Who’s Ready For A Slice Of Blackberry Pie?

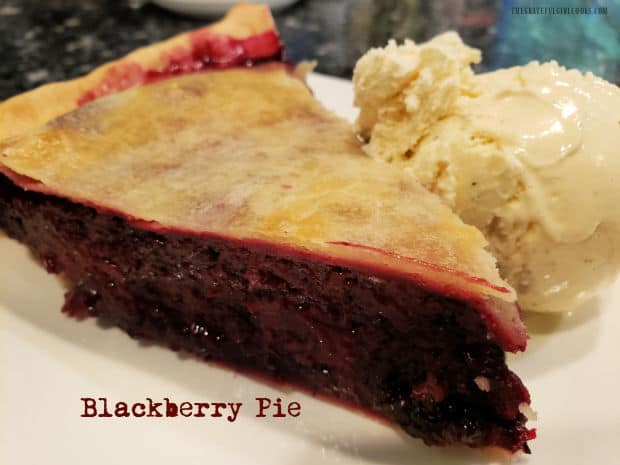
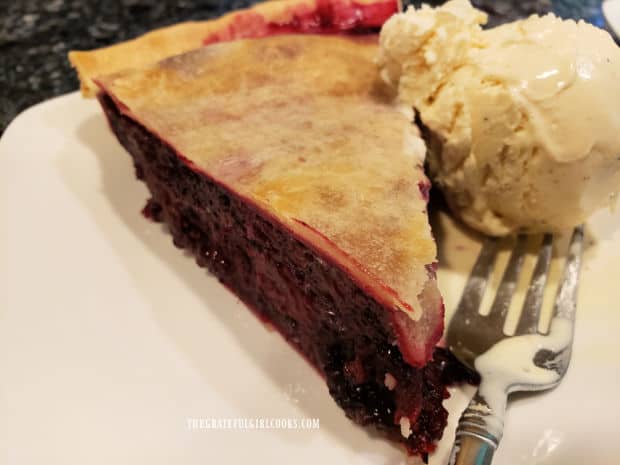
    Let the pie cool down a bit, so it’s not all “molten lava-like” inside. This resting time helps the juices stabilize, which will allow you to slice the pie better. Once the pie has cooled slightly (10-15 minutes), cut it into 8 slices, and serve them warm, with a big ol’ scoop of vanilla ice cream on the side! The crust comes out golden and flaky, and the blackberry pie tastes amazing!

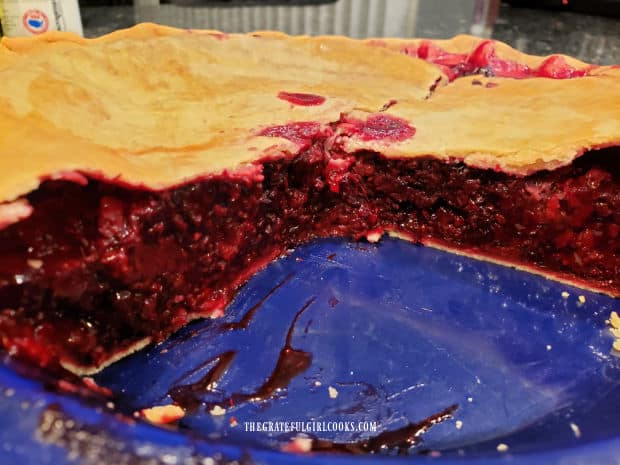
    This really is a perfect summer treat using fresh berries, but nowadays this pie can be made year round, thanks to the availability of frozen blackberries in most grocery stores! YUM!

    After a few pieces have been cut, here is a look at the blackberry filling inside the pie.A slice of blackberry pie with a scoop of vanilla ice cream, served on a white plate.

    I hope you have the opportunity to make this delicious blackberry pie for your family or friends.  If you enjoy blackberries, check out my recipes for Blackberry Crisp, Blackberry Jam, Blackberry Muffins, Blackberry Pie Bars and Blackberry Soda! I even have yummy recipes for Blackberry Scones and Blackberry Pancake Syrup! Have a great day, and thank you for stopping by. Please come back again soon!

    Looking For More PIE Recipes?

    You can find ALL of my recipes in the Recipe Index, located at the top of the page. I have some wonderful pie recipes you’ll enjoy, including:

    Interested In More Recipes?

    Thank you for visiting this website. I appreciate you using some of your valuable time to do soIf you’re interested, I publish a newsletter 2 times per month (1st and 15th) with all the latest recipes, and other fun info. I would be honored to have you join our growing list of subscribers, so you never miss a great recipe!
    There is a Newsletter subscription box on the top right side (or bottom) of each blog post, depending on the device you use, where you can easily submit your e-mail address (only) to be included in my mailing list.

    You Can Also Find Me On Social Media:

    Facebook page: The Grateful Girl Cooks!
    Pinterest:
    The Grateful Girl Cooks!
    Instagram:
    jbatthegratefulgirlcooks

    Author's signature

    Original recipe source: Pie Filling adapted from “The New Pillsbury Family Cookbook, page 149, published 1973 by The Pillsbury Company
    Homemade Pie Crust Recipe from my Mom here

    ↓↓ PRINTABLE RECIPE BELOW ↓↓

    0 from 0 votes
    Blackberry Pie
    Prep Time
    15 mins
    Cook Time
    45 mins
    Total Time
    1 hr
     

    Use fresh or frozen blackberries to make a delicious classic blackberry pie using a homemade or purchased pie crust! Summertime at its best!

    Category: Desssert
    Cuisine: American
    Keyword: blackberry pie
    Servings: 8 slices
    Calories Per Serving: 453 kcal
    Author: JB @ The Grateful Girl Cooks!
    Ingredients
    Homemade Pie Crust (for 2 nine inch deep dish crusts - top and bottom crust)
    • 2 cups un-sifted all purpose flour
    • cup vegetable shortening
    • 1 teaspoon salt
    • 5-7 Tablespoons ice cold water
    Pie Filling:
    • 5 cups blackberries see NOTE re: frozen berries
    • cups granulated sugar
    • ½ cup all purpose flour
    • 1 teaspoons lemon juice
    • ½ teaspoon lemon zest
    • ½ teaspoon ground cinnamon
    Instructions
    1. Preheat oven to 425°F.

    Make The Pie Crust:
    1. Place flour, shortening and salt in food processor (or large bowl if hand-mixing). Pulse (if using food processor) or cut in the shortening with a pastry blender (or 2 forks) until shortening is reduced to the size of peas. Drizzle in ice cold water starting with least amount (5Tbl.) and adding more later, if necessary. Process (or knead by hand) until well-combined and mixture can be formed into a ball.

    2. Divide dough ball evenly in half. Place one dough ball on a lightly floured surface, and roll out to a circle, about 10-11" in diameter. Place the crust in a 9" deep dish pie pan, then follow directions below for filling pie crust. Roll out remaining dough ball (top crust) following same process.

    Make The Pie:
    1. Place fresh blackberries OR frozen (unsweetened/unthawed) into large mixing bowl. Add sugar, flour, cinnamon, lemon juice, and zest; gently toss to combine.

    2. Place one pie crust into a 9" deep dish pie pan. Prick bottom/sides of crust several times with the tines of a fork. Pour pie filling into prepared crust. Cut butter into chunks; dot the top of pie filling with butter.

    3. Top pie with 2nd crust, stretching slightly to meet edges of bottom crust. Trim edges of dough to ½" from outside edge of pan. Seal edges of top crust to bottom crust by tucking top crust under the edge of the bottom crust. Pinch two crusts together to seal. Use your fingers to seal the two crusts together, then create fluted edge around pie. Use sharp knife to cut 3-4 small slits in top crust. They allow steam to escape while pie bakes.

    4. Bake on middle rack in preheated 425°F.oven for 45-50 minutes. TIP: Place a sheet of aluminum foil UNDER pie pan, to catch drips that may bubble out while baking. TIP: Check pie after 30 minutes. If crust is browning too fast, lay a sheet of aluminum foil over the top, then continue baking. When done, the pie crust should be lightly browned and juices will be bubbling up in the steam vents.

    5. Let pie cool down about 10-15 minutes. Cut into 8 slices, and serve with a scoop of vanilla ice cream on the side!

    Recipe Notes

    NOTES:
    **You may also use two purchased pastry pie dough crusts (the kind you roll out) or two of your own pie crust recipe. You will need 2 pastry pie crusts for this pie (top and bottom crust)

    **If using frozen berries, add them directly into the flour and sugar while still frozen.

    Nutrition Facts
    Blackberry Pie
    Amount Per Serving (1 slice (1/8 of total))
    Calories 453 Calories from Fat 162
    % Daily Value*
    Fat 18g28%
    Saturated Fat 4g25%
    Trans Fat 2g
    Polyunsaturated Fat 5g
    Monounsaturated Fat 7g
    Sodium 294mg13%
    Potassium 190mg5%
    Carbohydrates 70g23%
    Fiber 6g25%
    Sugar 36g40%
    Protein 5g10%
    Vitamin A 193IU4%
    Vitamin C 19mg23%
    Calcium 34mg3%
    Iron 2mg11%
    * Percent Daily Values are based on a 2000 calorie diet.

    Here’s one more to pin on your Pinterest boards!Use fresh or frozen blackberries to make a delicious classic blackberry pie using a homemade or purchased pie crust! Summertime at its best!

    Sour Cream Lemon Meringue Pie

    Sour Cream Lemon Meringue Pie, filled with creamy sweet/tart lemon filling and topped with puffy meringue, is a fabulous dessert you’ll love!
    Sour Cream Lemon Meringue Pie, filled with creamy sweet/tart lemon filling and topped with puffy meringue, is a fabulous dessert you'll love!

    Today I want to share a delicious recipe for Sour Cream Lemon Meringue Pie with you. This recipe is very special to me, because my Dad typed it up and e-mailed it to me almost 19 years ago before he passed away. My father loved to cook, and enjoyed listening to a cooking show on the radio on his daily commute to work. He said he thought that’s how he originally got this recipe.

    About 20 years ago, both my Mom AND Dad were confined to bed due to different circumstances. My Mom had severely hurt her back, and my Dad had become paralyzed from the chest down due to complications from bone cancer. Since my Mom was my Dad’s full-time caregiver, they needed some extra help!  I flew home from our home in Oregon to their home in Southern California to take care of them while they both were bedridden. While there, I cooked all the meals for the 3 of us, and enjoyed sharing each one with them.

    One day while there, I found this recipe written down in my Mom’s recipe box and made it as a surprise for them, using lemons from a tree in their backyard. They were so surprised when I brought them slices of fresh sour cream lemon meringue pie upstairs! Of course I “sacrificed for the team” (wink, wink) and ate pie too, and we were thrilled with this dessert. My Dad later sent me the recipe via e-mail so I would always have it. I have treasured this recipe ever since, because I got it from my DAD, who I dearly loved. Here’s how to make this decadent pie:

    Scroll Down For A Printable Recipe Card At The Bottom Of The Page

    Use A Pre-Baked Pie Shell

    You can use a purchased pie crust or a homemade one for the pie. Prick the pie crust on the bottom and sides with the tines of a fork, so it won’t “bubble up” too much when pre-baked. You can also put parchment paper on the bottom and fill the crust with pie weights or dried beans to weigh the pastry down.

    Bake the crust at 350°F. until golden brown around the edges (approx. 8-10 minutes). Set the baked pie crust aside to let it cool.

    Pie shell is baked before making pie filling, and is allowed to cool before filling.

    Make The Lemon Pie Filling

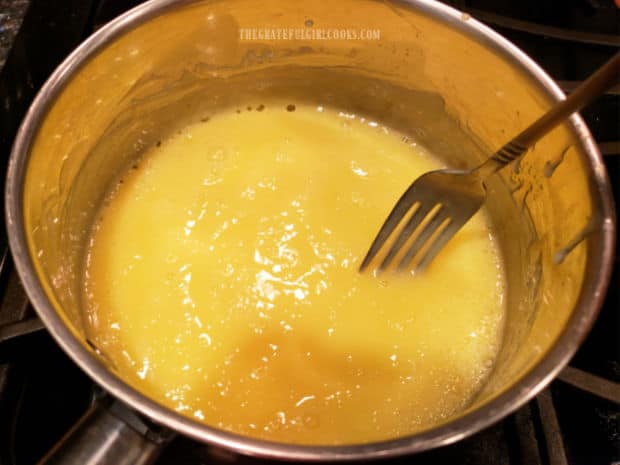
    Now it’s time to make the pie filling. Combine granulated sugar, salt and cornstarch in a medium saucepan. Add milk, and stir to combine. Cook on medium heat, stirring constantly, until thickened and bubbly. Remove the pan from the heat, and set it aside.

    In a small bowl, slightly beat egg yolks. Slowly drizzle in a small amount of the hot milk mixture, a Tablespoon at a time, stirring constantly (total of about 1/3 cup). Keep stirring while adding, because you do NOT want the hot liquid to scramble the egg yolks! This is called “tempering” the eggs, because you “warm them up” so they won’t cook when the cold eggs hit the hot liquid.

    Sugar, cornstarch, salt and milk cook in a saucepan until thickened and bubbly.A small amount of milk mixture is used to temper egg yolks so they don't get scrambled.

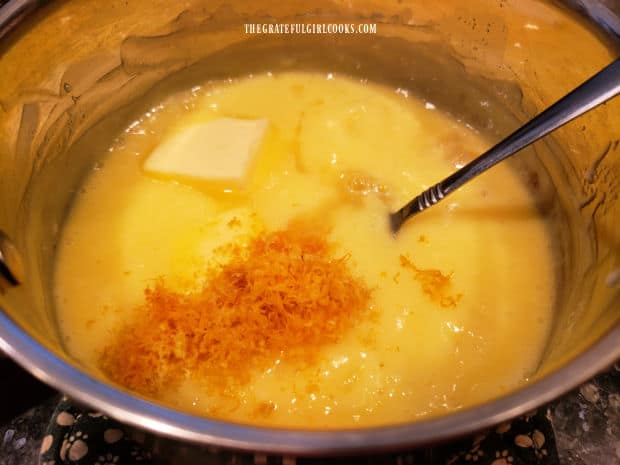
    Slowly add the warmed egg yolks back into the milk in the saucepan, stirring constantly as they’re added. Cook on medium heat for 2 minutes, stirring constantly, then remove the pan from the heat. Immediately stir in the butter, lemon juice, and all but ½ teaspoon of the lemon zest. Cover the pan, and let the pie filling cool to room temperature before completing the final step.

    Once tempered, egg mixture is added into the pan with the thickened milk mixture.Milk and egg thickener is heated in saucepan for two minutes to cook.Butter, lemon zest, and lemon juice are added to the saucepan to make the pie filling.

    Final Step To Make The Filling

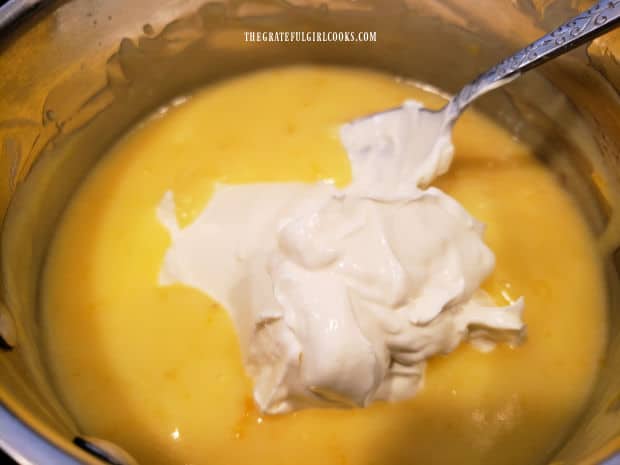
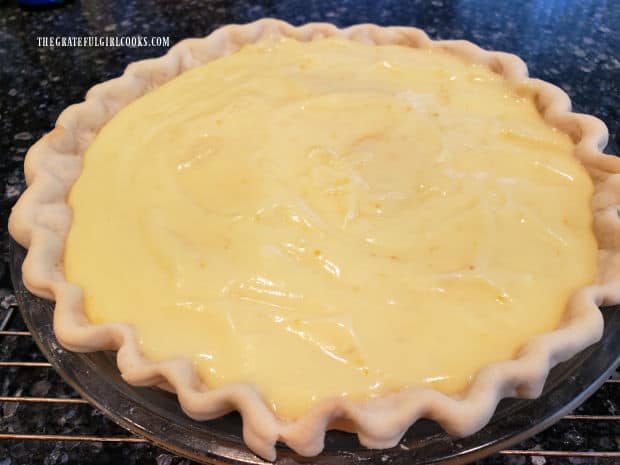
    When the pie filling is at room temperature, fold in the sour cream. Once combined, pour the pie filling into the cooled, pre-baked pie crust. Set the pie aside while you make the meringue topping.

    Sour cream is folded into the cooled lemon filling.

    Pre-baked pie crust is filled with the creamy lemon filling.

    Prepare Meringue And Cover the Pie Filling

    Use an electric mixer to beat the egg whites, cream of tartar and vanilla until soft peaks form. Add 6 Tablespoons granulated sugar (a little at a time while beating), and continue beating until stiff peaks form.

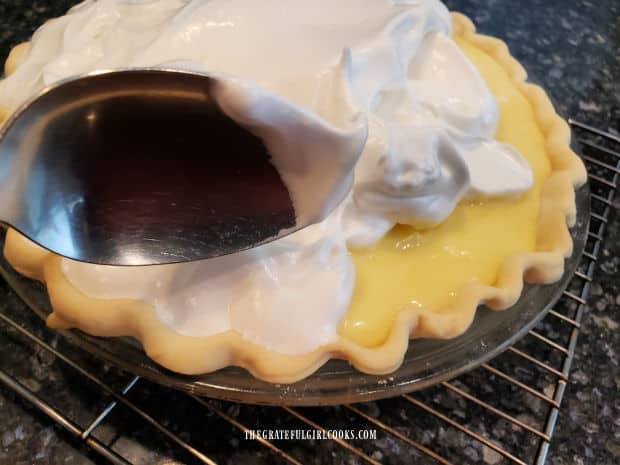
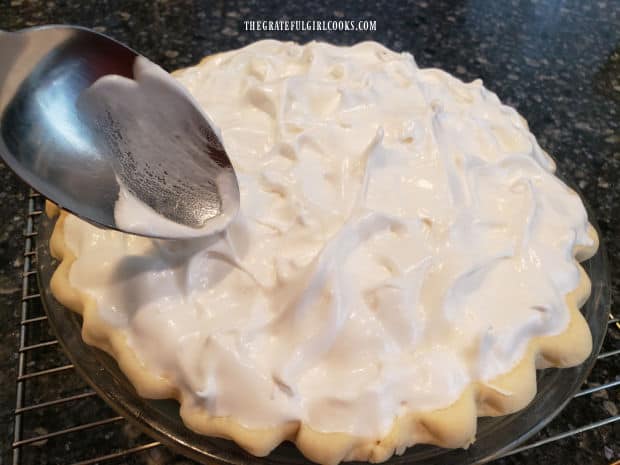
    Spread the meringue carefully over the pie filling, sealing the meringue to the crust. I use the back of a large spoon to drag it all the way to the edges. The filling should be completely sealed in. This way it won’t produce moisture on top of the meringue, due to gaps between the filling and the meringue.

    Take the back of the spoon and “decorate” the meringue topping by pulling up small dollops of meringue to form peaks on the pie.

    Meringue is carefully spread over the surface of warm pie filling, all the way to seal the edges.Decorative dollops of meringue are formed with a spoon on top of pie.

    Bake The Sour Cream Lemon Meringue Pie

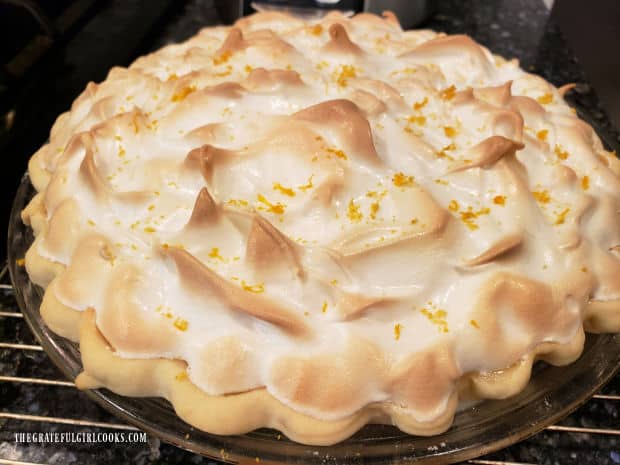
    Bake the sour cream lemon meringue pie in a preheated 350°F. oven for 13-15 minutes. When done, the meringue should be golden brown on top. The pie filling should only BARELY jiggle in the middle.

    Remove the sour cream lemon meringue pie from the oven, and transfer to a wire rack. Sprinkle with the reserved lemon zest. Let the pie cool completely, and then slice and serve! 

    Lemon zest is added to top of the sour cream lemon meringue pie after baking.

    Time To EAT!

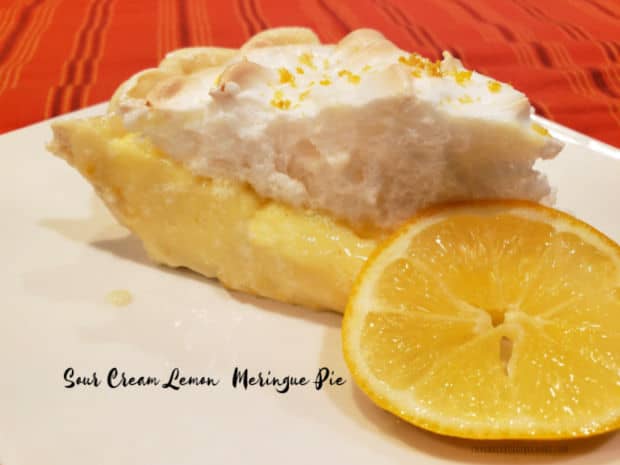
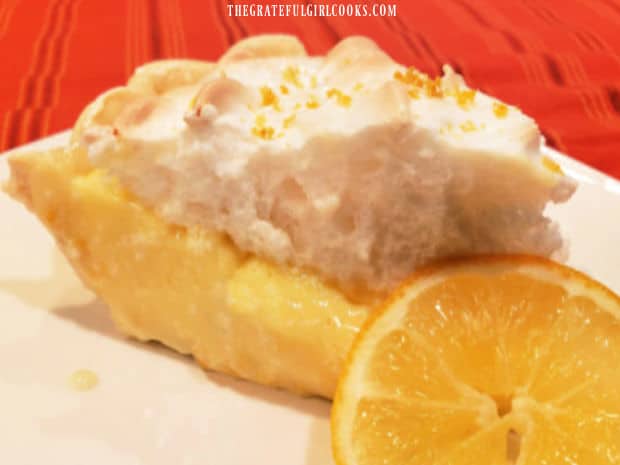
    Slice the pie into 8 wedges, and transfer onto serving plates. It’s SO DELICIOUS, and I think you’ll enjoy this sour cream lemon meringue pie as much as we do! Remember to store any leftover pie in the refrigerator (covered) for up to 3 days. Meringue tends to “break down” a bit when stored, so this pie is at its best served the day it’s made (or within 24 hours).

    A slice of the sour cream lemon meringue pie on a plate with a lemon slice garnish.

    The pie is a perfect combo of sweet and tart, and the fluffy meringue puts it right over the edge! YUMMY! I hope you can make this pie for those you love, and trust they will enjoy it, too. Thanks for stopping by, and I hope you’ll come back for more family friendly recipes. Take care, may God bless you, and have a GREAT day!.

    Looking For More PIE Recipes?

    You can find ALL of my recipes in the Recipe Index, located at the top of the page. I have quite a few delicious pie recipes you might enjoy, including:

    Interested In More Recipes?

    Thank you for visiting this website. I appreciate you using some of your valuable time to do soIf you’re interested, I publish a newsletter 2 times per month (1st and 15th) with all the latest recipes, and other fun info. I would be honored to have you join our growing list of subscribers, so you never miss a great recipe!
    There is a Newsletter subscription box on the top right side (or bottom) of each blog post, depending on the device you use, where you can easily submit your e-mail address (only) to be included in my mailing list.

    You Can Also Find Me On Social Media:

    Facebook page: The Grateful Girl Cooks!
    Pinterest:
    The Grateful Girl Cooks!
    Instagram:
    jbatthegratefulgirlcooks

    Author's signature

    ↓↓ PRINTABLE RECIPE BELOW ↓↓

    1 from 1 vote
    Sour Cream Lemon Meringue Pie
    Prep Time
    30 mins
    Cook Time
    15 mins
    Inactive "Cooling" Time
    30 mins
    Total Time
    1 hr 15 mins
     

    Sour Cream Lemon Meringue Pie, filled with creamy sweet/tart lemon filling and topped with puffy meringue, is a fabulous dessert you'll love!

    Category: Dessert
    Cuisine: American
    Keyword: sour cream lemon meringue pie
    Servings: 8 slices
    Calories Per Serving: 269 kcal
    Author: JB @ The Grateful Girl Cooks!
    Ingredients
    • 1 9" baked pie pastry shell
    • 1 cup granulated sugar
    • 1 Tablespoon cornstarch
    • 1 pinch salt
    • 1 cup milk
    • 3 large eggs **separated
    • 4 Tablespoons butter
    • ¼ cup lemon juice (fresh)
    • 2 Tablespoons grated lemon zest **divided use
    • 1 cup sour cream
    • ½ teaspoon vanilla extract
    • ¼ teaspoon cream of tartar
    • 6 Tablespoons granulated sugar
    Instructions
    1. Preheat oven to 350°F. To pre-bake crust, prick pie crust on bottom and sides with tines of a fork. Bake crust at 350°F. until light brown around edges (approx. 8-10 minutes). Set aside to cool.

    Make Pie Filling
    1. Combine 1 C. sugar, salt, cornstarch in medium saucepan. Add milk; stir to combine. Cook on medium, stirring constantly, until thick/bubbly. Remove from heat; set pan aside.

    2. In small bowl, slightly beat egg yolks. Slowly drizzle in a small amount of the hot milk mixture, a Tablespoon at a time (total approx. 1/3 cup), stirring or whisking constantly. Keep stirring while adding, because you don't want hot liquid to scramble egg yolks! Slowly add warmed egg yolks back into milk in saucepan, stirring constantly as they're added. Cook on medium heat for 2 minutes, stirring constantly. Remove pan from heat. Immediately stir in butter, lemon juice, and all but ½ teaspoon of lemon zest. Cover pan; let pie filling cool to room temperature.

    3. Once at room temp., fold in sour cream. When combined, pour pie filling into room temp. baked pie crust. Set pie aside.

    Make Meringue
    1. Use electric mixer to beat egg whites, cream of tartar, vanilla until soft peaks form. Add 6 Tablespoons granulated sugar (little at a time while beating), and continue beating until stiff peaks form. Spread meringue over pie filling, sealing meringue to the crust. Use back of large spoon to drag it all the way to the edges. Filling should be completely sealed in. Take the back of the spoon and "decorate" meringue by pulling up small dollops of meringue to form peaks on pie.

    Bake
    1. Bake at 350°F. for 13-15 minutes. When done, meringue should be golden brown. Pie filling should only BARELY jiggle in the middle. Transfer pie from oven to wire rack. Sprinkle with reserved lemon zest. Let pie cool completely, then slice and serve! Refrigerate leftovers.

    Recipe Notes

    **IMPORTANT NOTE: Caloric calculation was made WITHOUT the pie crust included. There are so many types of pie crusts (frozen, refrigerated, handmade with butter or shortening, etc.) all with varying ingredients that you might use. On average, pie crust has between 110-175 calories per slice, so please take this into account.

    Nutrition Facts
    Sour Cream Lemon Meringue Pie
    Amount Per Serving (1 slice (1/8 of total))
    Calories 269 Calories from Fat 99
    % Daily Value*
    Fat 11g17%
    Saturated Fat 6g38%
    Trans Fat 1g
    Polyunsaturated Fat 1g
    Monounsaturated Fat 3g
    Cholesterol 97mg32%
    Sodium 115mg5%
    Potassium 157mg4%
    Carbohydrates 39g13%
    Fiber 1g4%
    Sugar 36g40%
    Protein 4g8%
    Vitamin A 402IU8%
    Vitamin C 5mg6%
    Calcium 91mg9%
    Iron 1mg6%
    * Percent Daily Values are based on a 2000 calorie diet.

    Here’s one more to pin on your Pinterest boards!Sour Cream Lemon Meringue Pie, filled with creamy sweet/tart lemon filling and topped with puffy meringue, is a fabulous dessert you'll love!

    Peanut Butter Crunch Cookies

    Yummy Peanut Butter Crunch Cookies are easy to make. Recipe makes 4 dozen cookies filled with peanuts and puffed rice for a crispy texture!
    Yummy Peanut Butter Crunch Cookies are easy to make. Recipe makes 4 dozen cookies filled with peanuts and puffed rice for a crispy texture!

    “Who wants a cookie? I do… I do!”. If I had a dollar for every time I’ve asked my family that question I’d be a wealthy woman-ha ha! Today I want to share with you a recipe for delicious peanut butter crunch cookies.

    I found the recipe many years ago in a magazine I subscribed to called “Real Simple”. These cookies are not overly sweet, but have lots of CRUNCH to them, thanks in part to crispy rice cereal and chopped peanuts in the batter. Did I forget to mention they are also quite YUMMY and can be made in a flash? That’s right!

    The recipe will yield about 4 dozen delicious cookies that you, your family and friends will enjoy. They also freeze well, if wrapped in an airtight container, so you can put some in the freezer for another day! Here’s how to make these treats.

    Scroll Down For A Printable Recipe Card At The Bottom Of The Page

    Make The Cookie Batter

    Before mixing the batter, preheat your oven to 375°F. Using an electric mixer (on HIGH speed), cream butter, brown sugar and granulated sugar together in a large mixing bowl. Beat until they are well combined. Turn the speed down to MEDIUM, then add a large egg, creamy peanut butter and vanilla extract. Beat until light and fluffy (about a minute).

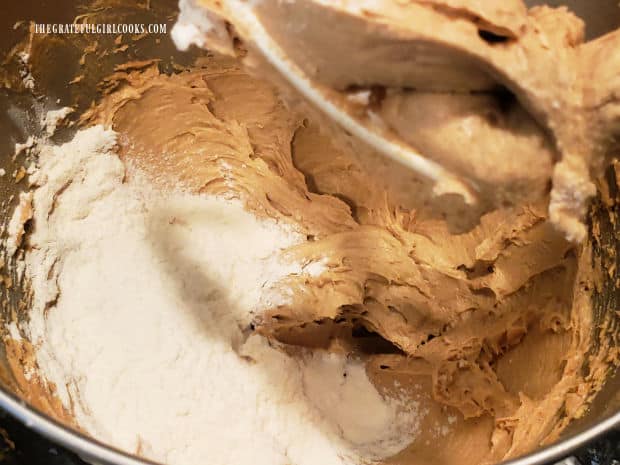
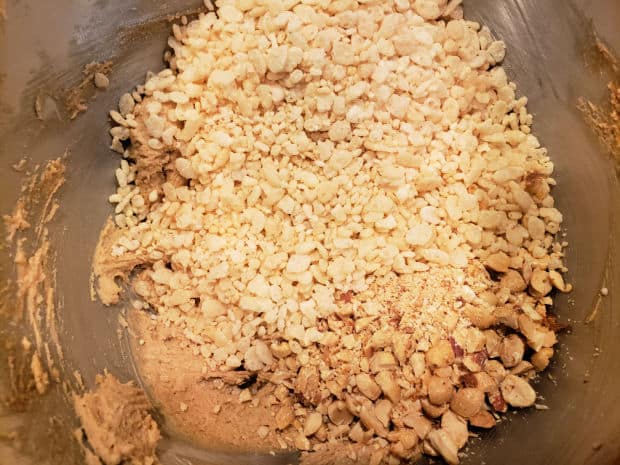
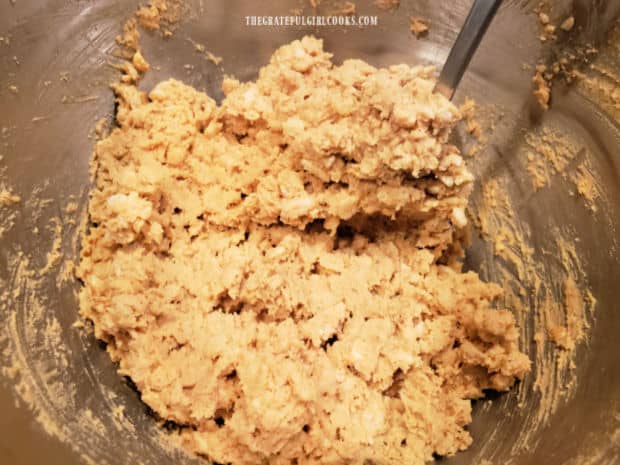
    In a bowl, sift together flour, baking soda, and salt. Turn the electric mixer to LOW speed, then add the flour mixture, a little at a time, to the cookie dough batter. Continue to add in the flour and keep mixing until all the flour mixture has been incorporated. Remove mixer, then FOLD in the chopped peanuts and the crispy rice cereal until well combined.

    Flour, baking powder and salt are sifted then added to the cookie batter in mixing bowl.Puffed rice cereal and chopped peanuts are added to the cookie dough.After combining ingredients, the cookie dough is ready to shape into balls and bake.

    Bake The Cookies

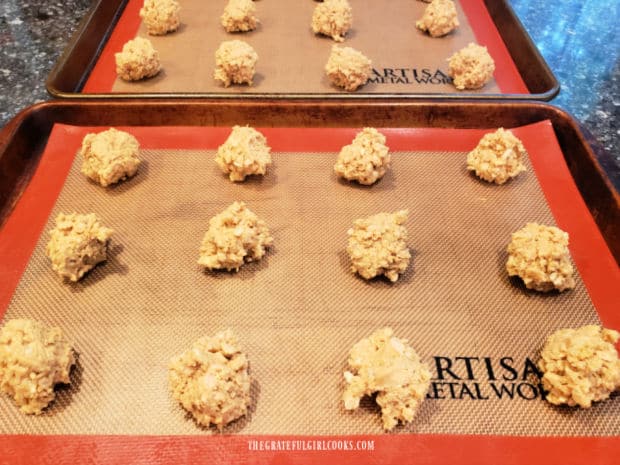
    Shape the cookie dough into 1½” balls by using your hands (it will be sticky). Place the dough balls about 2″ apart on parchment paper-lined or foil-lined baking sheets (or silpat sheets if you have them). Lightly press down the dough with your hands to slightly flatten.

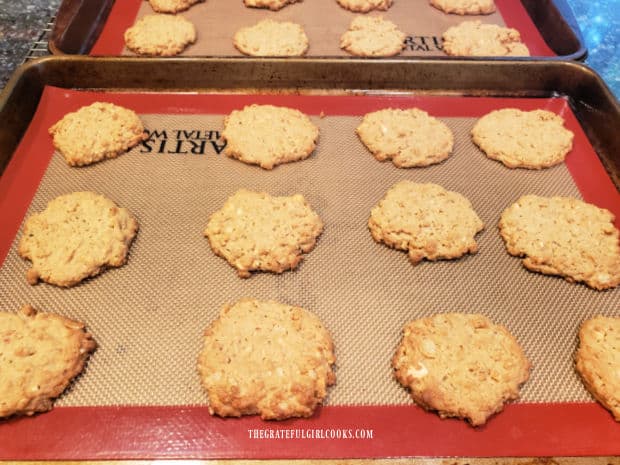
    Bake the peanut butter crunch cookies at 375°F. for 10-12 minutes, or until golden brown and set on top. Remove the cookies from the oven, and let them rest about 5 minutes before transferring them to wire racks to finish cooling.

    Cookie dough is shaped into balls 2" apart, then flattened and baked.Peanut Butter Crunch Cookies rest on baking sheet after removing them from oven.

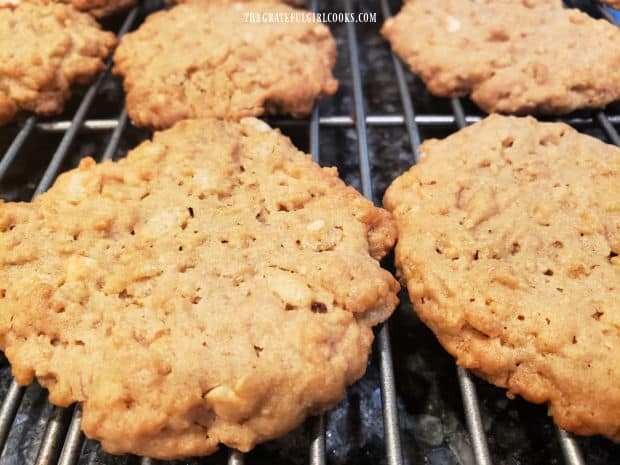
    Let the peanut butter crunch cookies cool completely before serving. They will “crisp up” a bit as they cool. NOTE: If you will be freezing part of the batch, wait until they have completely cooled before wrapping them for the freezer.

    The peanut butter crunch cookies finish cooling on a wire rack.

    Who Wants Some Peanut Butter Crunch Cookies?

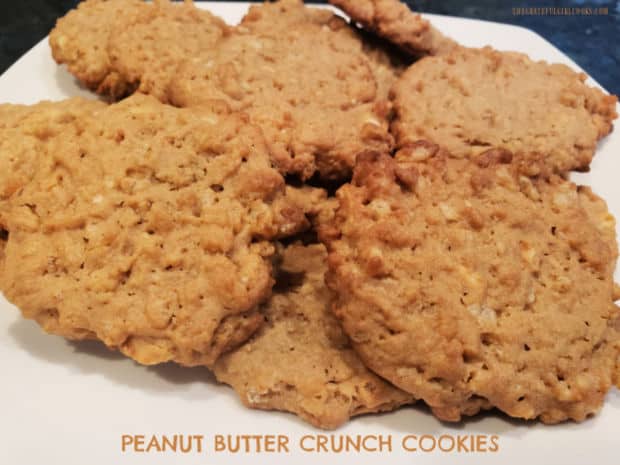
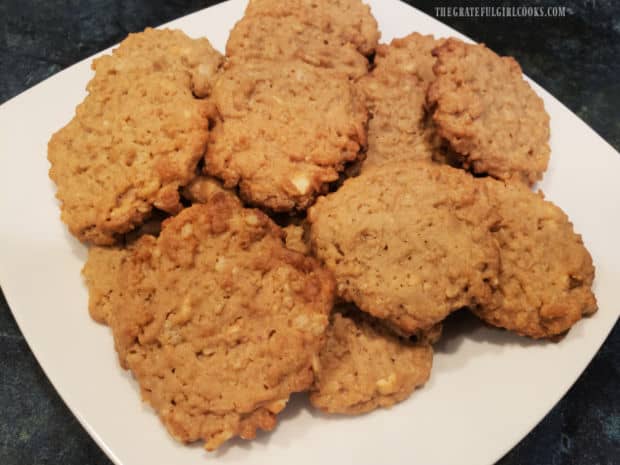
    Once the cookies have cooled to room temperature, they are ready to enjoy. They have a traditional peanut butter cookie flavor, but with extra crispiness thanks to the rice cereal and chopped nuts! They’re really quite good, and I am confident you will enjoy them, too!

    A white plate, full of peanut butter crunch cookies, ready to eat.Crispy Peanut Butter Crunch Cookies on a plate, ready to be enjoyed.

    I really hope you like making and eating these peanut butter crunch cookies… we sure do! Thanks for visiting here today, and I invite you to come back soon for more family-friendly recipes. Take care, and have a GREAT day!

    Looking For More COOKIE Recipes?

    You can find ALL of my recipes in the Recipe Index, located at the top of the page. I have lots of yummy recipes for cookies you’ll enjoy, including:

    Interested In More Recipes?

    Thank you for visiting this website. I appreciate you using some of your valuable time to do soIf you’re interested, I publish a newsletter 2 times per month (1st and 15th) with all the latest recipes, and other fun info. I would be honored to have you join our growing list of subscribers, so you never miss a great recipe!
    There is a Newsletter subscription box on the top right side (or bottom) of each blog post, depending on the device you use, where you can easily submit your e-mail address (only) to be included in my mailing list.

    You Can Also Find Me On Social Media:

    Facebook page: The Grateful Girl Cooks!
    Pinterest:
    The Grateful Girl Cooks!
    Instagram:
    jbatthegratefulgirlcooks

    Author's signature

    Original recipe source: “Real Simple” Magazine, May 2005 issue, page 247

    ↓↓ PRINTABLE RECIPE BELOW ↓↓

    5 from 1 vote
    Peanut Butter Crunch Cookies
    Prep Time
    20 mins
    Cook Time
    12 mins
    Total Time
    32 mins
     

    Yummy Peanut Butter Crunch Cookies are easy to make. Recipe makes 4 dozen cookies filled with peanuts and puffed rice for a crispy texture!

    Category: Desserts, Snack
    Cuisine: American
    Keyword: peanut butter crunch cookies
    Servings: 48 (approx. 4 dzn.)
    Calories Per Serving: 74 kcal
    Author: JB @ The Grateful Girl Cooks!
    Ingredients
    • ½ cup butter at room temperature
    • ½ cup packed brown sugar
    • ¼ cup granulated sugar
    • 1 large egg
    • ¾ cup smooth peanut butter
    • 1 teaspoon vanilla extract
    • 1 cup all purpose flour
    • ½ teaspoon baking soda
    • ½ teaspoon salt
    • 2 cups crispy rice cereal (like Rice Krispies)
    • ½ cup chopped peanuts
    Instructions
    1. Preheat oven to 375°F. Line baking sheets with parchment paper, aluminum foil or silpat sheets.

    2. Using an electric mixer (on HIGH speed), cream butter, brown sugar and granulated sugar together in large mixing bowl. Beat until well combined. Turn speed to MEDIUM, then add egg, peanut butter and vanilla. Beat until light and fluffy (about a minute).

    3. Sift flour, baking soda, and salt together into a separate bowl. Turn mixer to LOW speed, then add flour mixture (a little at a time) to batter until all flour has been incorporated. FOLD peanuts and crispy rice cereal into dough until incorporated.

    4. Shape dough into 1½" balls, rolling dough between using hands (it will be sticky). Place dough balls 2" apart on prepared baking sheets. Lightly press down dough with your hands, to flatten slightly.

    5. Bake cookies at 375°F. for 10-12 minutes, or until golden brown and set. Remove from oven; let cookies rest 5 minutes before transferring to wire racks to cool.

    6. Cool cookies completely before serving. They will "crisp up" as they cool. NOTE: If you are freezing any cookies, wait until completely cooled before freezing. Enjoy!

    Nutrition Facts
    Peanut Butter Crunch Cookies
    Amount Per Serving (1 cookie)
    Calories 74 Calories from Fat 36
    % Daily Value*
    Fat 4g6%
    Saturated Fat 2g13%
    Trans Fat 1g
    Polyunsaturated Fat 1g
    Monounsaturated Fat 2g
    Cholesterol 9mg3%
    Sodium 81mg4%
    Potassium 46mg1%
    Carbohydrates 8g3%
    Fiber 1g4%
    Sugar 4g4%
    Protein 2g4%
    Vitamin A 65IU1%
    Calcium 6mg1%
    Iron 1mg6%
    * Percent Daily Values are based on a 2000 calorie diet.

    Here’s one more to pin on your Pinterest boards!Yummy Peanut Butter Crunch Cookies are easy to make. Recipe makes 4 dozen cookies filled with peanuts and puffed rice for a crispy texture!

    Cinnamon Crinkle Cookies

    Make a batch of yummy Cinnamon Crinkle Cookies, flavored with cinnamon, nutmeg, lemon and orange! Easy to make, the recipe yields about 6 dozen.
    Make a batch of yummy Cinnamon Crinkle Cookies, flavored with cinnamon, nutmeg, lemon and orange! Easy to make, the recipe yields 6 dozen.

    Looking for an easy-to-make recipe for cookies that are absolutely delicious? These cinnamon crinkle cookies fit the bill. They are slightly crisp, and have wonderful cinnamon (and citrus!) flavor. I found the recipe in one of my old cookbooks, and wanted to share it with you today.

    If you make the recipe as written, it will yield about 6 dozen yummy cookies (which also freeze well). They are a cinch to make, so there is no special talent needed to make these treats. Here’s how to make them:

    Scroll Down For A Printable Recipe Card At The Bottom Of The Page

    Make The Cookie Dough

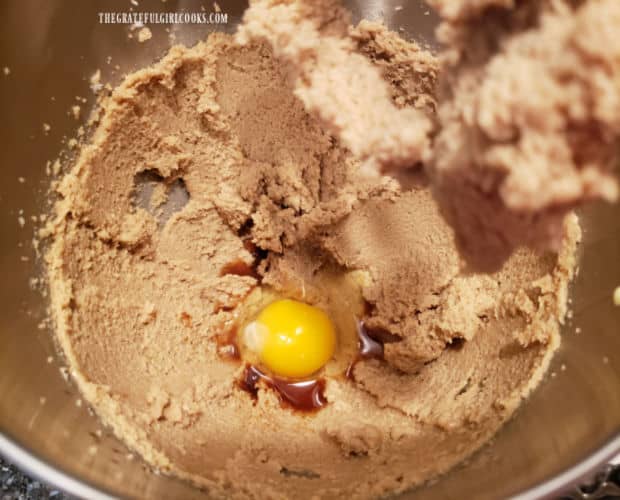
    First- preheat your oven to 350°F. While the oven preheats, cream butter, vegetable shortening, granulated and brown sugars together in a large mixing bowl, using an electric mixer. Continue beating until the mixture becomes light and fluffy in texture (a couple minutes). Add an egg, vanilla and almond extracts, then continue beating the batter until they are fully incorporated.

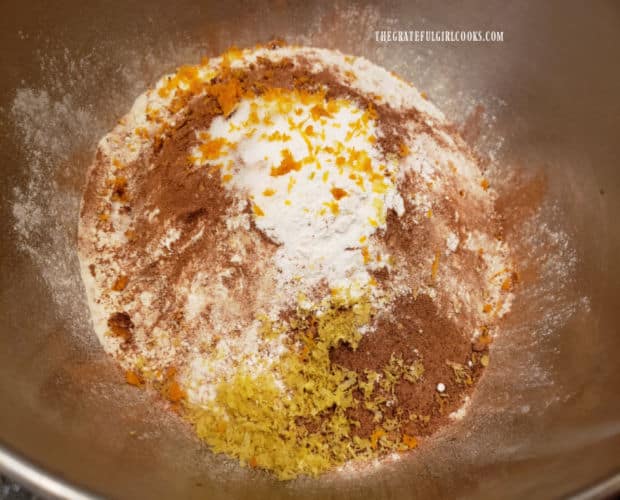
    In a separate bowl, stir together flour, cinnamon, baking soda, cream of tartar, salt, and finely grated lemon and orange peel until combined. Add the flour mixture, a little at a time, to the creamy batter mixture, beating with each addition. The batter for the cinnamon crinkle cookies is done when fully combined.

    An egg, plus vanilla and almond extracts are added to the cookie batter.Dry ingredients, plus orange and lemon zest are combined in a separate large bowl.

    Making The Cookie Dough Balls

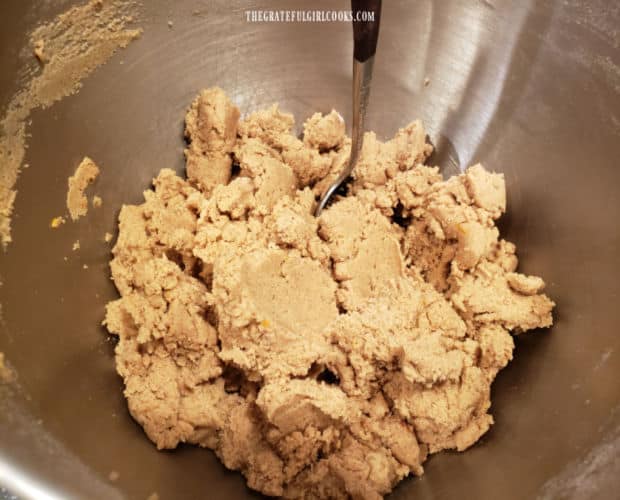
    Form the dough into 1″ balls, by rolling the firm dough between the palms of your hands. You should have enough dough to make approximately 72 cookie dough balls. As you form them, place the dough balls onto wax paper, until all the cookies have been formed.

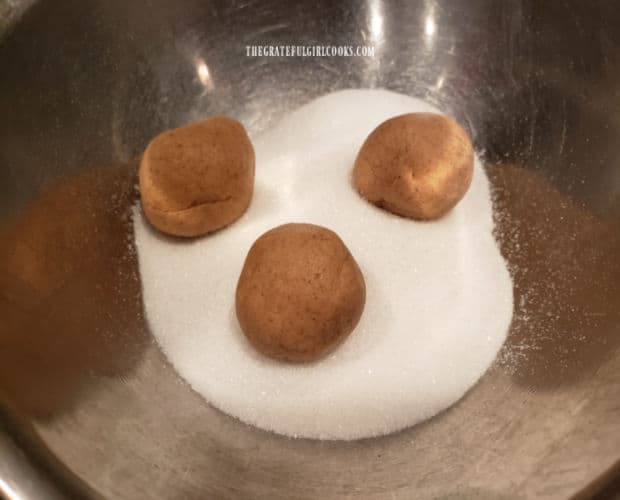
    Place granulated sugar into a small bowl. I typically use about 1/3 cup, but you may require more or less, depending on the size of the finished cookie dough balls. Place 2-3 dough balls at a time into the sugar, and roll them around to coat the entire surface with sugar.

    Dough for the cinnamon crinkle cookies is thick and ready to shape into balls of dough.Dough balls are coated in granulated sugar before baking.

    Bake The Cinnamon Crinkle Cookies

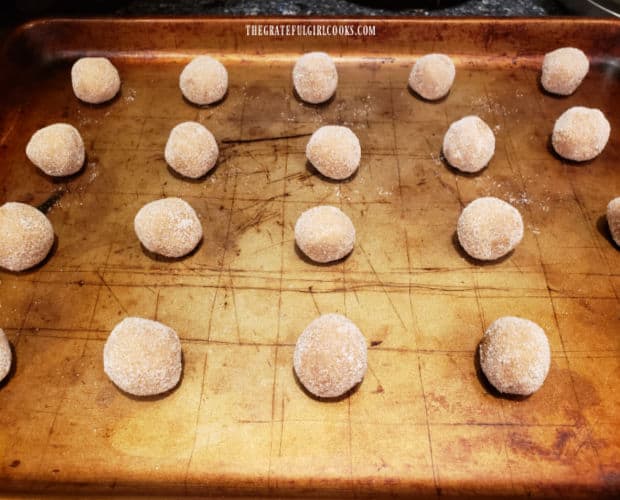
    Place the sugar-coated cinnamon crinkle cookies about 2″ apart from each other onto ungreased baking sheets. As you can see, I used my old ratty baking sheets for this photo shoot, so here they are in all their glory. HA HA! They show the evidence of a LOT of wear and tear over many years, but are still getting the job done. Kind of like me!

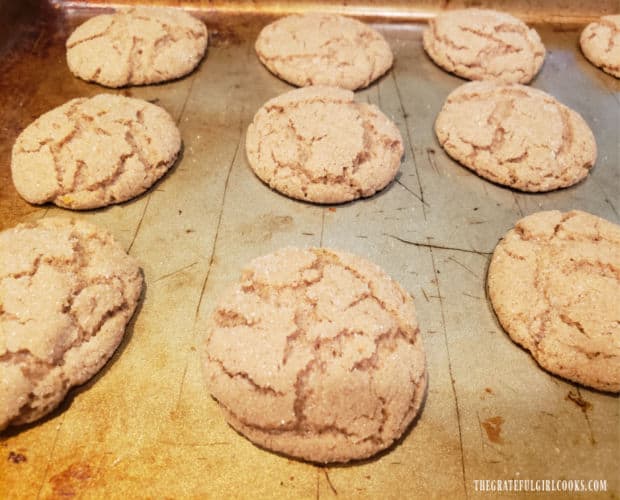
    Bake the cinnamon crinkle cookies in a 350°F oven for 10-15 minutes, or until they are lightly browned and set on top. Mine are usually done in about 12 minutes, but because oven temps can vary greatly, be sure to check on them at the 10 minute mark. The tops should also be crinkled (or crackled) on top when done.

    Sugar-coated dough balls are placed on baking sheets 2" apart.Cinnamon crinkle cookies on baking sheet, right out of the oven.

    Transfer the cinnamon crinkle cookies to a wire rack, and allow them to come to room temperature before serving. They taste BEST at room temp, after they’ve had time to crisp up! Wrap any extras in an air-tight container for storage in the pantry OR in the freezer.

    Since this recipe makes so many cookies, I freeze at least half of them to serve another time after thawing. They also make a yummy, thoughtful food gift for friends, neighbors, or co-workers!

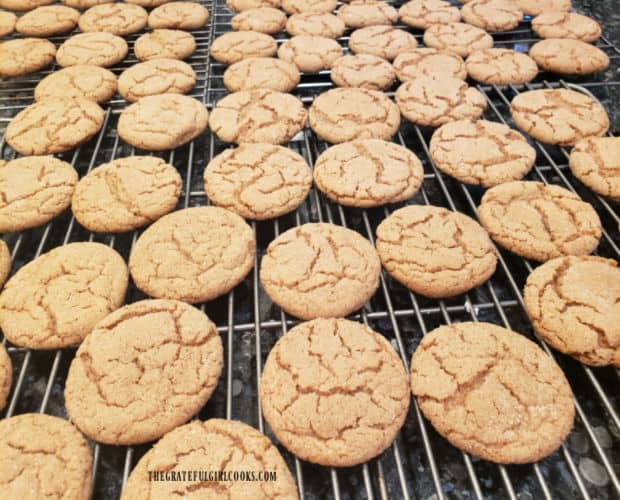
    All of the cinnamon crinkle cookies, cooling on wire racks after baking.

    The Cinnamon Crinkle Cookies Are Ready To EAT!

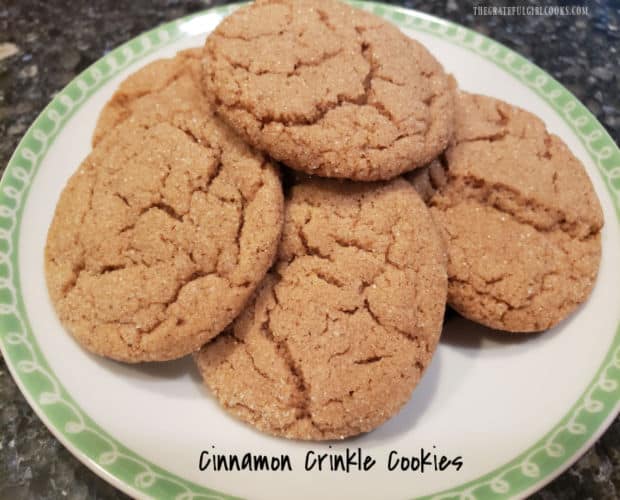
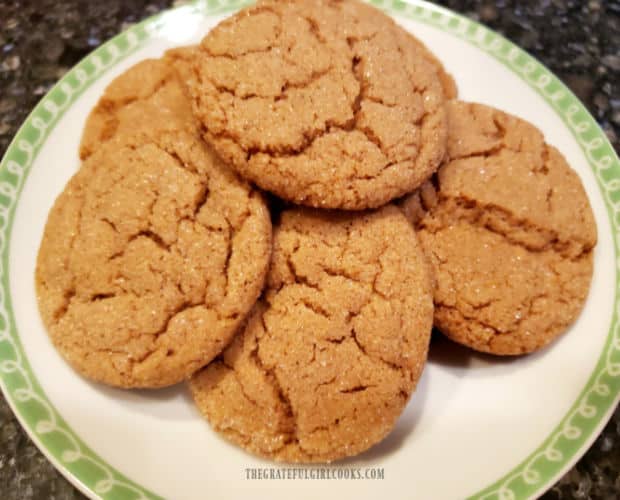
    Cinnamon crinkle cookies are best served at room temperature, because they crisp up as they cool. Pile a bunch of them onto a plate, and watch just how fast they are devoured. They’re REALLY tasty, and I just know you will love ’em!.

    A pile of the cinnamon crinkle cookies on a plate, ready to enjoy!

    I really believe you (and those you love) are going to enjoy every single bite of these delicious cookies! They freeze well, too, so you can put some aside to enjoy at a later date. Thanks for stopping by, and I hope you will come back again soon. Have a great day, and may God bless you in all you do.

    Looking For More COOKIE Recipes?

    You can find ALL of my recipes in the Recipe Index, located at the top of the page. I have lots of yummy cookie recipes for you to enjoy, including:

    Interested In More Recipes?

    Thank you for visiting this website. I appreciate you using some of your valuable time to do soIf you’re interested, I publish a newsletter 2 times per month (1st and 15th) with all the latest recipes, and other fun info. I would be honored to have you join our growing list of subscribers, so you never miss a great recipe!
    There is a Newsletter subscription box on the top right side (or bottom) of each blog post, depending on the device you use, where you can easily submit your e-mail address (only) to be included in my mailing list.

    You Can Also Find Me On Social Media:

    Facebook page: The Grateful Girl Cooks!
    Pinterest:
    The Grateful Girl Cooks!
    Instagram:
    jbatthegratefulgirlcooks

    Author's signature

    Original Recipe Source: The cookbook called “Taste of Home Complete Guide To Baking”, page 43, published in 2004 by Reiman Media Group, Inc.

    ↓↓ PRINTABLE RECIPE BELOW ↓↓

    0 from 0 votes
    Cinnamon Crinkle Cookies
    Prep Time
    15 mins
    Cook Time
    10 mins
    Total Time
    25 mins
     

    Make a batch of yummy Cinnamon Crinkle Cookies, flavored with cinnamon, nutmeg, lemon and orange! Easy to make, the recipe yields 6 dozen.

    Category: Dessert, Snack
    Cuisine: American
    Keyword: cinnamon crinkle cookies
    Servings: 72 (approx. 6 dozen)
    Calories Per Serving: 58 kcal
    Author: JB @ The Grateful Girl Cooks!
    Ingredients
    • ½ cup butter softened
    • ½ cup vegetable shortening
    • 1 cup granulated sugar
    • ½ cup packed brown sugar
    • 1 large egg
    • 1 teaspoon vanilla extract
    • ½ teaspoon almond extract
    • cups all purpose flour
    • 3 teaspoons ground cinnamon
    • 2 teaspoons finely grated orange peel
    • 1 teaspoon finely grated lemon peel
    • 2 teaspoons ground nutmeg
    • 2 teaspoons cream of tartar
    • 2 teaspoons baking soda
    • ½ teaspoon salt
    • cup granulated sugar to cover dough balls
    Instructions
    1. Preheat oven to 350°F. While oven preheats, cream butter, vegetable shortening, granulated and brown sugars together in large mixing bowl, using electric mixer. Continue beating until it becomes light and fluffy in texture (2-3 minutes). Add egg, vanilla and almond extracts; continue beating until fully incorporated.

    2. In separate bowl, stir together flour, cinnamon, baking soda, cream of tartar, salt, lemon and orange peel until combined. Add this, a little at a time, to the creamy butter mixture, beating with each addition, until fully combined.

    3. Form dough into 1" balls, by rolling dough between the palms of your hands, to make approx. 72 dough balls. Place dough balls on wax paper, until all are done.

    4. Place sugar into small bowl (you may need a little more or a little less). Place 2-3 dough balls at a time into sugar; roll them around to coat surface with sugar.

    5. Place dough balls 2" apart on ungreased baking sheets. Bake at 350°F for 10-15 minutes, or until lightly browned. Because oven temps vary, check them at the 10 minute mark. Cookies should be crinkled (or crackled) on top when done. Transfer cookies to wire rack; let come to room temp. before serving. Store extras in an air-tight container in pantry OR in freezer. Enjoy!

    Nutrition Facts
    Cinnamon Crinkle Cookies
    Amount Per Serving (1 cookie)
    Calories 58 Calories from Fat 27
    % Daily Value*
    Fat 3g5%
    Saturated Fat 1g6%
    Trans Fat 1g
    Polyunsaturated Fat 1g
    Monounsaturated Fat 1g
    Cholesterol 6mg2%
    Sodium 59mg3%
    Potassium 23mg1%
    Carbohydrates 8g3%
    Fiber 1g4%
    Sugar 4g4%
    Protein 1g2%
    Vitamin A 44IU1%
    Vitamin C 1mg1%
    Calcium 4mg0%
    Iron 1mg6%
    * Percent Daily Values are based on a 2000 calorie diet.

    Here’s one more to pin on your Pinterest boards!Make a batch of yummy Cinnamon Crinkle Cookies, flavored with cinnamon, nutmeg, lemon and orange! Easy to make, the recipe yields 6 dozen.

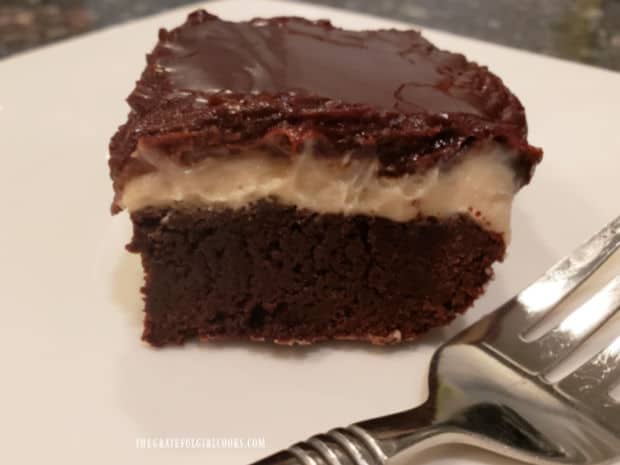
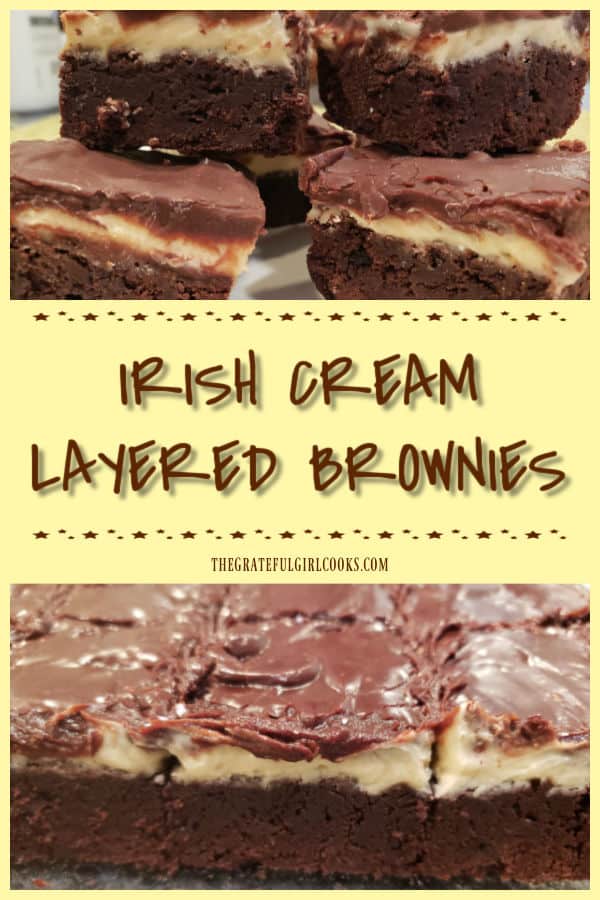
    Irish Cream Layered Brownies

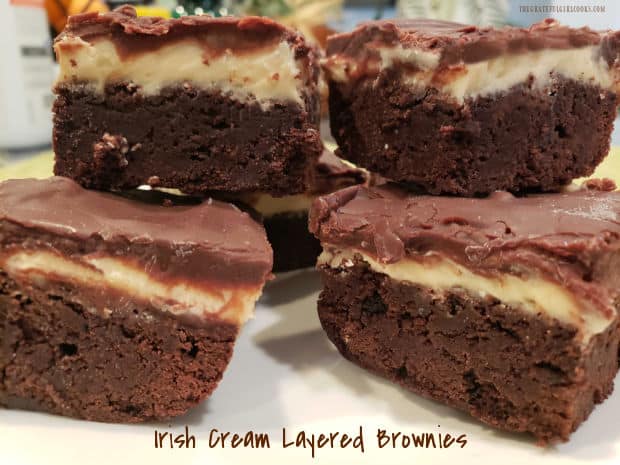
    Irish Cream Layered Brownies are a decadent treat! Fudgy brownies with 2 layers of Irish cream-infused chocolate ganache and buttercream! YUM!Irish Cream Layered Brownies are a decadent treat! Fudgy brownies with 2 layers of Irish cream-infused chocolate ganache and buttercream! YUM!

    Top o’ the morning to ya! Isn’t that we’re “supposed” to say as it nears St. Patrick’s Day? Today I want to share an absolutely scrumptious recipe for Irish Cream Layered Brownies. Thee brownies are made of three distinct layers: a mocha brownie, topped with an Irish Cream frosting, which is topped with Irish cream chocolate ganache.

    Yes… you might detect an “Irish” theme here. One of our sons gave me a cookbook for Christmas to add to my collection. I found this recipe for these sweet treats in it, and we were thrilled with the results! Perfect for St. Patrick’s Day or any time you want a yummy dessert to serve, I’m confident you’re gonna enjoy them. These brownies are chewy and full of flavor, and I can guarantee you no leprechauns were harmed in the making of this recipe.

    Irish cream liqueur is used (sparingly, but it’s in there) to flavor the frosting and the chocolate ganache, giving it a distinctive flavor.  The recipe, as written below will yield 16 delicious Irish Cream Layered Brownies. Here’s how to make them:

    Scroll Down For A Printable Recipe Card At The Bottom Of The Page

    Make The Brownie Batter

    Before mixing the batter, preheat your oven to 350°F and grease the bottom and sides of an 8″ x 8″ square baking pan. Set the pan aside while you make the brownie batter. To make the batter, first sift flour, baking powder and salt into a mixing bowl, then set the bowl aside. 

    Flour, baking powder and salt are sifted together for the brownie batter.

    Melt butter in a small saucepan on low heat, then remove the pan from the heat source. Immediately stir in cocoa, oil, and instant coffee powder. Stir well, to combine, then let the mixture cool a bit (4-5 minutes).

    After it’s cooled, stir in granulated sugar, then beaten eggs, stirring well as the eggs are added. Add the flour mixture and vanilla extract, adding the flour mixture a little at a time. Stir well, between additions, to incorporate the dry ingredients into the batter. 

    A four photo collage showing the steps for making the brownie batter in a saucepan.

    Layer #1- Bake The Brownies

    Spread the brownie batter evenly into the prepared baking pan. Bake at 350°F. for 23-25 minutes, or until the center is set, being careful to NOT overcook the brownies. Test by inserting a toothpick into the top center of the brownies. It should come out free of batter. Transfer the pan to a wire rack to cool until the brownies are just barely warm.

    Brownies are baked in a greased 8"x8" pan until set on top.

    Layer #2- Make The Irish Cream Frosting

    While the brownies cool, mix together the Irish cream frosting. Beat powdered sugar and softened butter together with an electric mixer on Low setting. Add Irish cream liqueur, and beat the frosting until it becomes smooth.

    Spread the frosting over the entire surface of the slightly warm brownies (if they’re too hot, it will melt frosting). Place the pan in a refrigerator and let the chill for 1 hour. This allows the frosting to firm up before adding the top layer of ganache.

    Irish cream flavored frosting is mixed together, then spread on cooled brownies.

    Layer #3- Make The Chocolate Ganache Topping

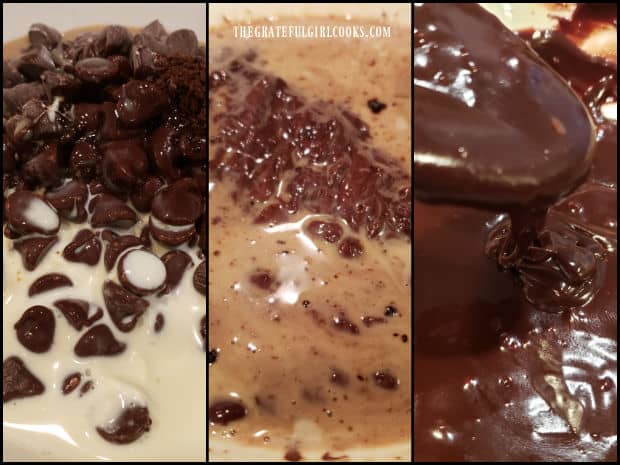
    About 15 minutes before the brownies finish chilling, make the chocolate ganache topping. Place chocolate chips, Irish cream liqueur, heavy whipping cream and instant coffee powder in a microwave-safe bowl.

    Microwave on High temperature for 1 minute, then stir. Place bowl back into the microwave, and heat it on High another 30-45 seconds. Remove and stir the ganache until smooth. Let the ganache cool slightly (3-4 minutes), or until it is warm and spreadable.

    Three photo collage showing chocolate ganache made by microwaving ingredients & stirring until smooth.

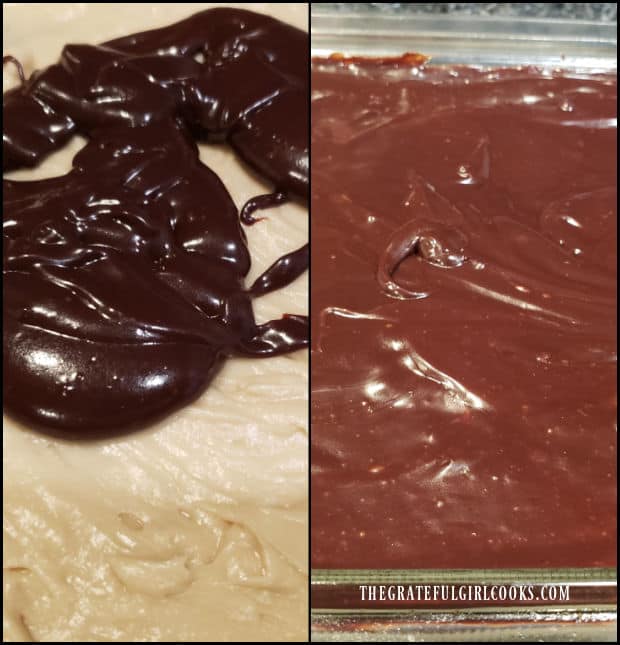
    Spread the ganache evenly over the entire frosting layer. By the way… the photo below is the same ganache. Different lighting, perhaps? Weird! Cover the pan with plastic wrap, and refrigerate the Irish Cream Layered Brownies until the chocolate is firmly set. This usually takes about an hour or less.

    Irish cream chocolate ganache is spread on top of the frosting layer on the brownies.

    The Irish Cream Layered Brownies Are Ready To Eat!

    After the Irish Cream Layered Brownies have been fully chilled, they’re ready to cut, serve, and enjoy! Cut the brownies into 16 pieces, and dig in. They taste wonderful! Store any leftovers covered in the fridge, or give some to friends and family. We gave extra Irish Cream Layered Brownies to both of our sons so they could enjoy them, too!

    The brownies have a light mocha taste, and are chewy and yummy. Those two layers of frosting and ganache will taste awesome, thanks to the Irish cream liqueur infused flavor. Put all three layers together and you’ve got terrific dessert treats for St. Patrick’s Day OR any other day, for that matter! They are dense, rich tasting and oh so good!

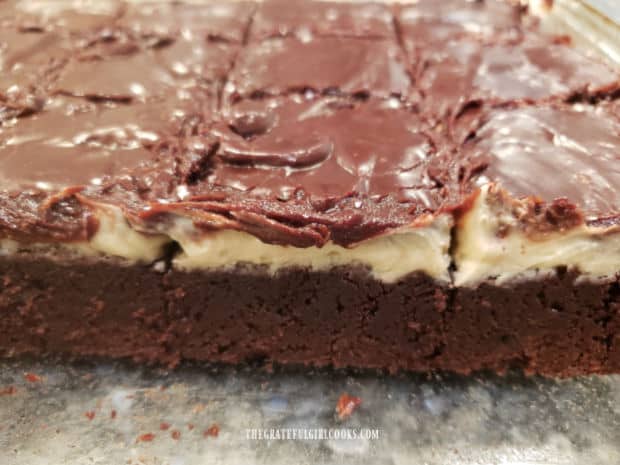
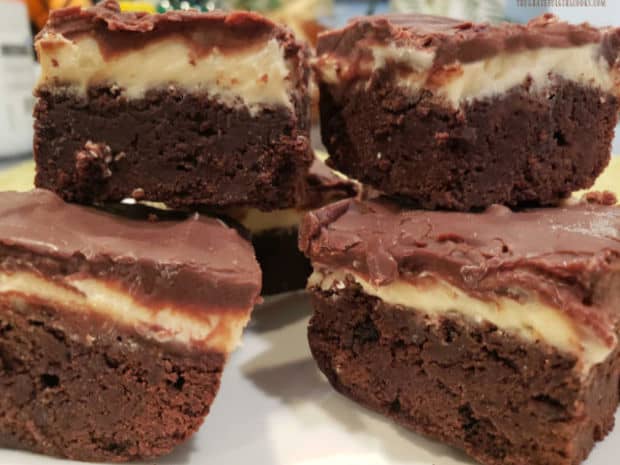
    Photo showing all three layers: brownie layer, frosting layer, and chocolate ganache layer on top.A stack of Irish cream layered brownies, ready to eat on a white plate.One of the Irish cream layered brownies on a white plate, ready to be eaten.

    I really hope you will give these delicious fudgy brownies a try. Remember to plan ahead, to allow for chilling two of the three layers, okay? Thanks for stopping by, and I hope you’ll come back soon for more yummy recipes. Take care, and have a wonderful day.

    Looking For More BAR COOKIE Recipes?

    You can find ALL of my recipes in the Recipe Index, located at the top of the page. I have some really wonderful bar cookie recipes you’ll enjoy, including:

    Interested In More Recipes?

    Thank you for visiting this website. I appreciate you using some of your valuable time to do soIf you’re interested, I publish a newsletter 2 times per month (1st and 15th) with all the latest recipes, and other fun info. I would be honored to have you join our growing list of subscribers, so you never miss a great recipe!
    There is a Newsletter subscription box on the top right side (or bottom) of each blog post, depending on the device you use, where you can easily submit your e-mail address (only) to be included in my mailing list.

    You Can Also Find Me On Social Media:

    Facebook page: The Grateful Girl Cooks!
    Pinterest:
    The Grateful Girl Cooks!
    Instagram:
    jbatthegratefulgirlcooks

    Author's signature

    Original Recipe Source: recipe submitted by Sue Gronholz in “The Taste Of Home Cookbook”, page 486,  published by RDA Enthusiast Brands, LLC, 2019

    ↓↓ PRINTABLE RECIPE BELOW ↓↓

    0 from 0 votes
    Irish Cream Layered Brownies
    Prep Time
    35 mins
    Cook Time
    25 mins
    Additional refrigeration time
    2 hrs
    Total Time
    3 hrs
     

    Irish Cream Layered Brownies are a decadent treat! Fudgy brownies with 2 layers of Irish cream-infused chocolate ganache and buttercream!

    Category: Bar Cookies, Dessert
    Cuisine: American
    Keyword: Irish cream layered brownies
    Servings: 16 brownies
    Calories Per Serving: 296 kcal
    Author: JB @ The Grateful Girl Cooks!
    Ingredients
    For Batter (Layer #1):
    • cup all purpose flour
    • ½ teaspoon baking powder
    • ¼ teaspoon salt
    • cup butter
    • 6 Tablespoons cocoa powder
    • 2 Tablespoons canola oil or vegetable oil
    • ¾ teaspoon instant coffee powder
    • 1 cup granulated sugar
    • 2 large eggs slightly beaten, at room temp.
    • 1 teaspoon vanilla extract
    Frosting (Layer #2)
    • 2 cups powdered sugar (confectioners sugar)
    • ¼ cup butter softened
    • 3 Tablespoons Irish Cream Liqueur
    Chocolate Ganache (Layer #3)
    • 1 cup semisweet chocolate chips
    • 3 Tablespoons Irish Cream Liqueur
    • 2 Tablespoons heavy whipping cream
    • ½ teaspoon instant coffee powder
    Instructions
    1. Preheat oven to 350°F. Grease bottom/sides of 8" x 8" square baking pan. Set pan aside.

    2. MAKE BROWNIE BATTER (Layer #1): Sift flour, baking powder and salt into mixing bowl; set aside.

    3. Melt butter in a saucepan on low heat. Remove pan from heat. Stir in cocoa, oil, and instant coffee powder. Stir well; let cool 4-5 minutes. Add sugar and eggs, stirring constantly as they're added. Gradually add flour mixture and vanilla, a little at a time. Stir well, to fully mix into batter. 

    4. Spread brownie batter evenly in greased pan. Bake at 350°F. about 23-25 minutes, or until center is set. Don't overcook brownies. Test by inserting toothpick into top of brownies. Toothpick should come out free of batter. Transfer pan to wire rack to cool.

    5. MAKE FROSTING (Layer #2): While brownies cool, mix frosting. Beat powdered sugar and soft butter with electric mixer on low setting. Add Irish cream liqueur; beat until frosting becomes smooth. Spread over brownies that are only barely warm. Put pan in refrigerator; chill brownies 1 hour.

    6. MAKE CHOCOLATE GANACHE (Layer #3): Approx. 15 minutes before brownies finish chilling, make ganache. Place chocolate chips, Irish cream liqueur, whipping cream and coffee powder in microwave-safe bowl. Heat in microwave on High for 1 minute, then stir. Put back in microwave; heat another 30-45 seconds. Remove; stir ganache until smooth. Let cool 3-4 minutes until warm and spreadable.

    7. Spread ganache over frosting layer. Cover pan; refrigerate until ganache is set (45-60 minutes). Cut into 16 pieces; serve. Store (covered) in fridge.

    Nutrition Facts
    Irish Cream Layered Brownies
    Amount Per Serving (1 brownie)
    Calories 296 Calories from Fat 135
    % Daily Value*
    Fat 15g23%
    Saturated Fat 8g50%
    Trans Fat 1g
    Polyunsaturated Fat 1g
    Monounsaturated Fat 5g
    Cholesterol 44mg15%
    Sodium 107mg5%
    Potassium 126mg4%
    Carbohydrates 39g13%
    Fiber 2g8%
    Sugar 32g36%
    Protein 3g6%
    Vitamin A 274IU5%
    Vitamin C 1mg1%
    Calcium 23mg2%
    Iron 1mg6%
    * Percent Daily Values are based on a 2000 calorie diet.

    Here’s one more to pin on your Pinterest boards!Irish Cream Layered Brownies are a decadent treat! Fudgy brownies with 2 layers of Irish cream-infused chocolate ganache and buttercream! YUM!


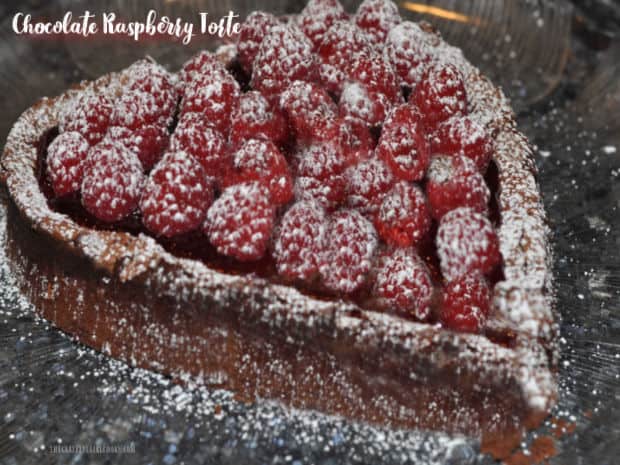
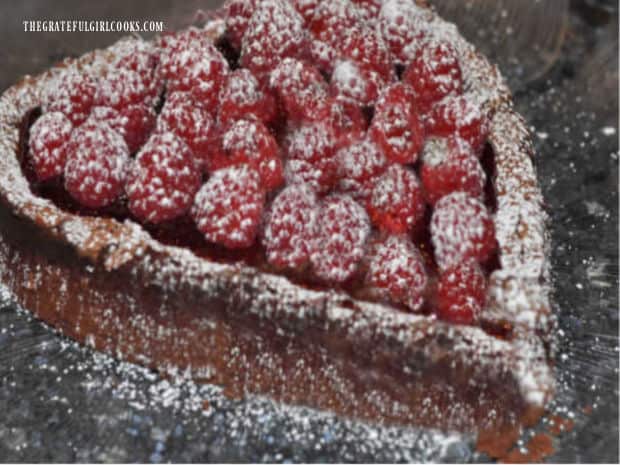
    Chocolate Raspberry Torte

    Chocolate Raspberry Torte is a decadent, fudgy dessert, topped with raspberry glaze, fresh raspberries and powdered sugar! It tastes amazing!
    Chocolate Raspberry Torte is a decadent, fudgy dessert, topped with raspberry glaze, fresh raspberries and powdered sugar! It tastes amazing!

    If you’re looking for a show-stopper dessert for Valentines Day or any other special occasion, may I suggest this incredible chocolate raspberry torte? Chocolate and raspberries are one of my husband’s absolute favorite flavor combinations, so I KNEW he would love this treat!

    I found the recipe in a very old cookbook I bought years and years ago in a thrift store. Recently I was reading through it looking for new ideas and stumbled upon this recipe which grabbed my attention with its beautiful presentation.

    It can be made in several formats: using an 8″ springform round pan, a heart-shaped 8″ springform, OR in 4-5 individual 4″ springform pans. All these pans need to have removeable bottoms.

    The chocolate raspberry torte is amazing in taste, and dense and fudgy in texture. Topped with a simple layer of raspberry glaze and then beautiful fresh raspberries and powdered sugar, it’s a classy looking dessert!

    Today I want to share the steps used, to demonstrate how you can make it, too.

    Scroll Down For A Printable Recipe Card At The Bottom Of The Page

    Prepare The Pan

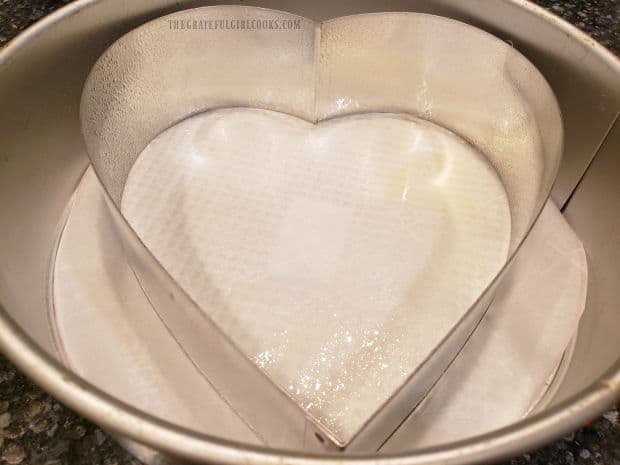
    Before beginning, preheat your oven to 325°F. Whether you are using an 8″ round, 8″ heart-shaped, or 4″ mini springform pans, grease/spray the removeable bottom of the pan (s) you are using.

    I cut parchment paper to fit the bottom of the pan, and then spray. That helps the torte not stick to the bottom of the pan, so it can be easily removed for serving. Set pan aside.

    TIP: I find it helpful to wrap a strip of aluminum foil tightly around the bottom edges of the springform pan to help prevent batter from potentially leaking out of the pan.

    A heart shaped pan with removable bottom is placed inside a round springform pan.

    Time To Make The Batter

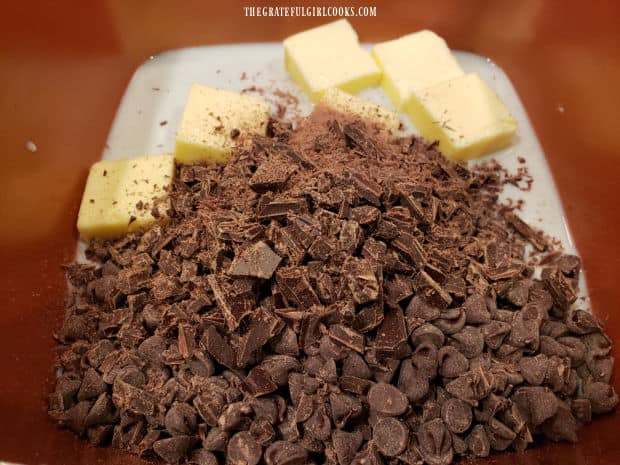
    In a medium saucepan, combine chopped chocolate, butter, and milk. Cook and stir these ingredients on LOW heat until the chocolate has completely melted.

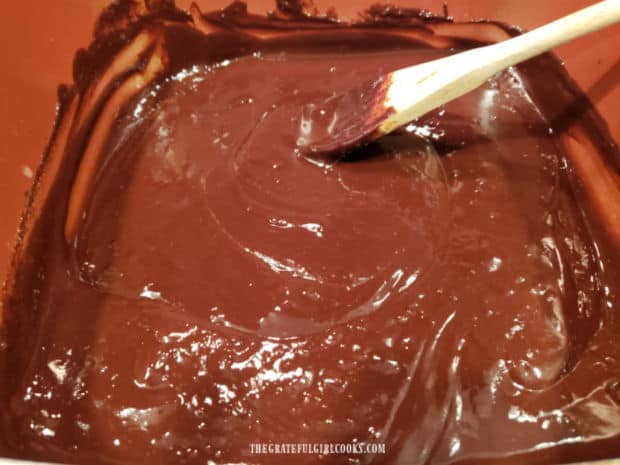
    Once the chocolate has melted and  is very smooth, remove pan from the heat, and let the mixture cool for 20 minutes.

    Bittersweet and semi-sweet chocolate is melted with butter and milk in a saucepan.The chocolate mixture is stirred until all chocolate has melted and mixture is smooth.

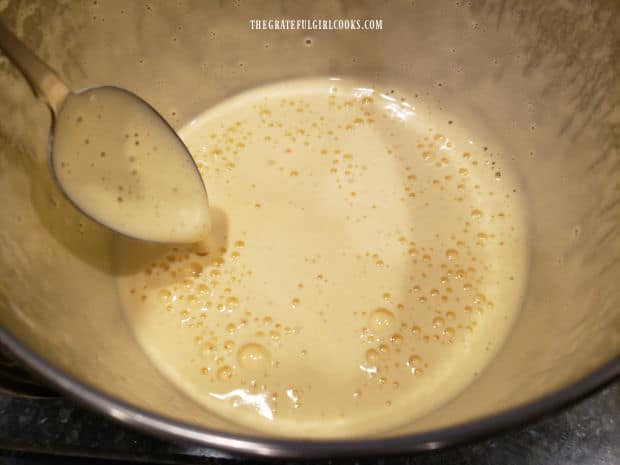
    While the chocolate is cooling, place eggs and vanilla extract in a large mixing bowl. Beat with an electric mixer on LOW speed, just until they are combined. Add granulated sugar and all purpose flour to the egg mixture.

    Beat these ingredients with the electric mixer on HIGH speed for 10 full minutes.

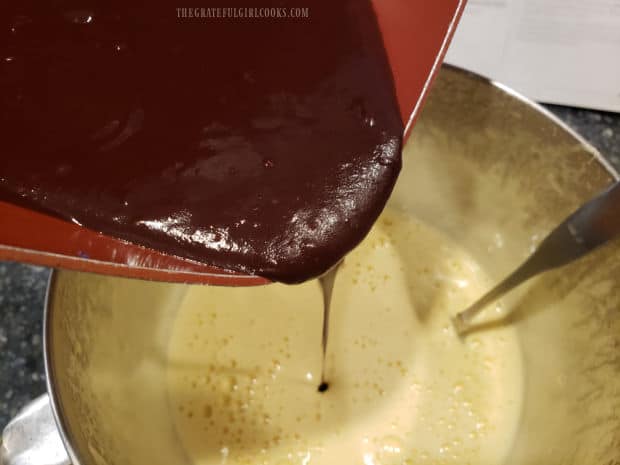
    Pour the cooled chocolate into the egg mixture slowly, stirring the chocolate in, as it is added. NOTE: The reason you need to make sure the chocolate has cooled is so you don’t “scramble” the eggs as it is being added. No one wants that in their chocolate torte, right?

    Eggs, vanilla, sugar and flour are mixed with an electric mixer for 10 minutes.Chocolate mixture is added slowly to egg mixture and then stirred to combine.

    Time To Bake!

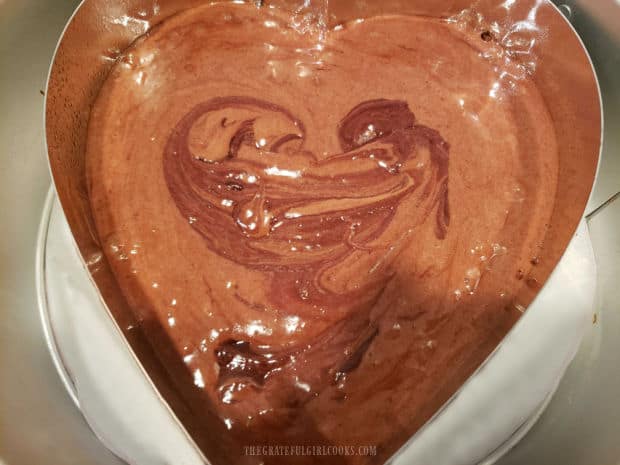
    Carefully pour the batter into the prepared springform pan (or pans) you are using. Bake the chocolate raspberry torte for 30-35 minutes (mini pans about 25-30). The torte is finished cooking when the outer 1/3 of the top is lightly puffed.

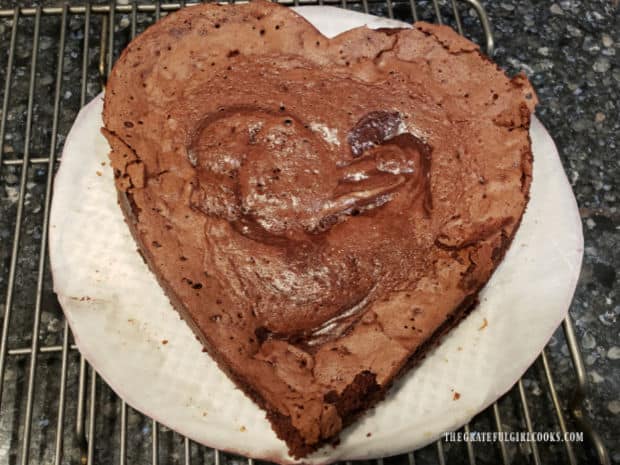
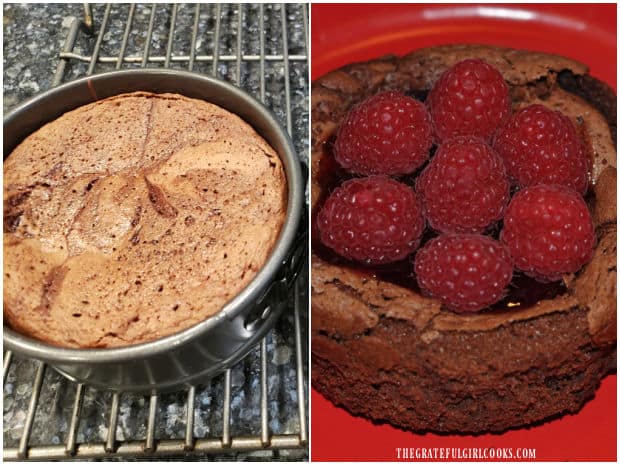
    The center of the torte may still LOOK underbaked, but it will firm up as it cools (see photo #2 below). Because the torte is so dense, the traditional way of testing doneness with a toothpick in the middle will NOT work.

    Let torte cool on wire rack for 20 minutes. Use a knife to go around the edges to loosen the torte from the sides of the pan.

    Once completely cooled, remove the sides of the pan. Carefully wrap the entire torte in aluminum foil and refrigerate for 8 hours or overnight (up to 2 days).

    The batter is poured into the springform pan (this one shaped like a heart)After baking, the torte cools on rack, then sides of the pan are removed and the torte is refrigerated.

    Finishing The Chocolate Raspberry Torte

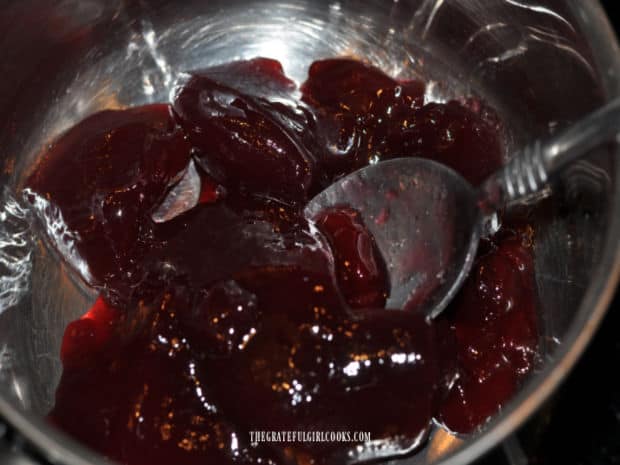
    When you are ready to serve the torte, unwrap it and let it come to room temperature. Melt seedless raspberry jam in a small saucepan on low heat, then remove pan from heat and let jam cool.

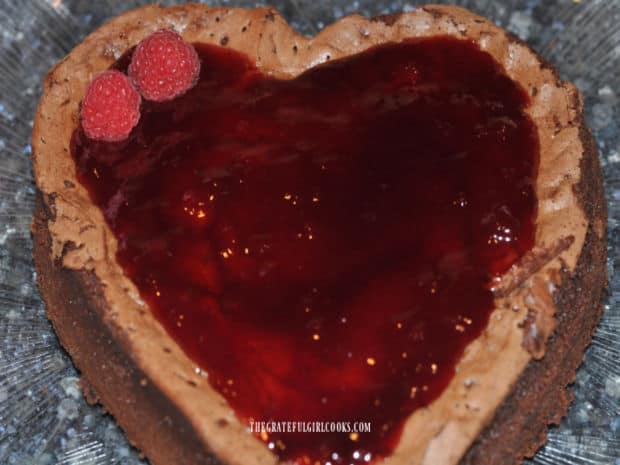
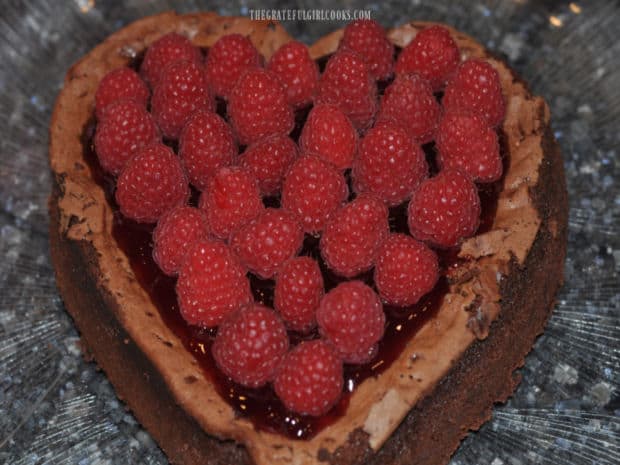
    Once cooled, spread raspberry glaze over the top surface of the torte. Cover the jam glaze with fresh raspberries, adding them to the torte with the stem side facing DOWN.

    Seedless raspberry jam is heated, stirring until mixture becomes a smooth glaze.The raspberry glaze is spread onto chilled torte, then decorated with fresh raspberries to cover.The surface of the chocolate raspberry torte is covered with fresh raspberries.

    Slight Variations On The Shape And Size Of The Torte

    Additional note: If you are using an 8″ round springform pan OR several, mini 4″ pans, follow all instructions written for the “heart-shaped” version.

    Tortes made in 4″ pans will take a few minutes less to cook, but everything else will remain the same (divide jam/raspberries between small torte pans).

    A round 8" springform pan may also be used for this recipe, as well as individual 4" round springform pans.

    Who Wants A Slice Of A Chocolate Raspberry Torte?

    The final step I recommend before serving is to lightly “dust” the top of the chocolate raspberry torte with sifted powdered sugar. I think it looks beautiful with this finishing touch!

    Whether you prepare the dish in a heart-shaped springform pan, an 8″ round springform pan OR 4-5 individual 4″ springform pans, give it this light dusting. You’ll be glad you did!

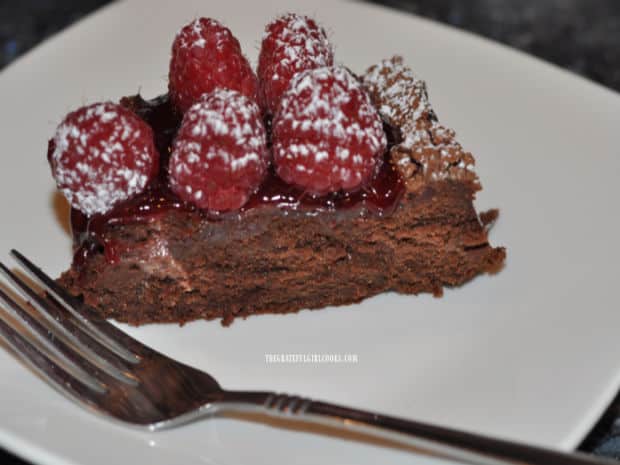
    Cut the torte in thin slices. You should get about 16 total servings this way. The dessert is very dense and fudgy, so a little slice will go a long way!

    I made two extra 4″ individual sized tortes and shared them with a young family of 3 that recently moved into our neighborhood. They (all 3 of them) shared one the first night and split the remaining one the following evening.

    They said they were “fabulous!”, and I agree. My husband and I can barely keep out of this dessert because it is so delicious!

    After dusting the chocolate raspberry torte with powdered sugar, it is ready to be served!A slice of the chocolate raspberry torte, sliced and served on a white plate.

    I hope you will have the opportunity to make this decadent dessert for those you love. I know I will be DEFINITELY making this again and again!

    Thank you for stopping by! I hope you will come back again soon for more family-friendly recipes. Take care, and have a GREAT day!

    Looking For More Delicious CHOCOLATE Desserts?

    You can find ALL of my recipes in the Recipe Index, which is located at the top of the page. I have lots of amazing recipes for chocolate desserts you’ll enjoy, including”

    Interested In More Recipes?

    Thank you for visiting this website. I appreciate you using some of your valuable time to do soIf you’re interested, I publish a newsletter 2 times per month (1st and 15th) with all the latest recipes, and other fun info. I would be honored to have you join our growing list of subscribers, so you never miss a great recipe!
    There is a Newsletter subscription box on the top right side (or bottom) of each blog post, depending on the device you use, where you can easily submit your e-mail address (only) to be included in my mailing list.

    You Can Also Find Me On Social Media:

    Facebook page: The Grateful Girl Cooks!
    Pinterest:
    The Grateful Girl Cooks!
    Instagram:
    jbatthegratefulgirlcooks

    Author's signature

    Original recipe source: The cookbook “A Passion For Chocolate”, published in 2000 by Meredith Corporation, pages 74-75

    ↓↓ PRINTABLE RECIPE BELOW ↓↓

    0 from 0 votes
    Chocolate Raspberry Torte
    Prep Time
    25 mins
    Cook Time
    30 mins
    Refrigeration overnight-inactive
    8 hrs
    Total Time
    8 hrs 55 mins
     

    Chocolate Raspberry Torte is a decadent, fudgy dessert, topped with raspberry glaze, fresh raspberries and powdered sugar! It tastes amazing!

    Category: Desssert
    Cuisine: American
    Keyword: chocolate raspberry torte
    Servings: 16
    Calories Per Serving: 271 kcal
    Author: JB @ The Grateful Girl Cooks!
    Ingredients
    • 10 ounces semi-sweet chocolate coarsely chopped *(see NOTE below)
    • 4 ounces bittersweet chocolate coarsely chopped *(see NOTE below)
    • ½ cup butter (1 stick)
    • ¼ cup milk
    • 5 large eggs
    • 1 teaspoon vanilla extract
    • ½ cup granulated sugar
    • ¼ cup all purpose flour
    • ¼ cup SEEDLESS red raspberry jam
    • 1½-2 cups fresh red raspberries
    • sifted powdered sugar (for garnish)
    Instructions
    1. Preheat oven to 325°F. Cover bottom of pan(s) with parchment paper cut to fit; grease or spray bottom of pan. Set pan aside. TIP: Wrap a strip of aluminum foil tightly around bottom edges of pan to help prevent batter from leaking out of pan.

    2. In medium saucepan, combine chocolate, butter, and milk. Cook and stir on LOW heat until chocolate has melted. Once chocolate has melted and is very smooth, remove pan from heat; let cool off heat for 20 minutes.

    3. While chocolate cools, place eggs and vanilla extract in separate large mixing bowl. Beat with electric mixer on LOW speed, only until combined. Add sugar and flour to eggs. Beat with electric mixer on HIGH speed for a full 10 minutes. Pour cooled chocolate into the egg mixture slowly, stirring as it's added.

    4. Pour batter into prepared pan(s). Bake on middle rack for 30-35 minutes (mini pans about 25-30). It's done when the outer 1/3 of the top is lightly puffed. The center will still LOOK under-baked, but will firm up as it cools. Because it is so dense, the traditional way of testing doneness with a toothpick in the middle will NOT work. Let torte cool on wire rack for 20 minutes. Use a knife to go around edges to loosen torte from sides of the pan. Once completely cooled, remove sides of pan. Carefully wrap torte in aluminum foil; refrigerate 8 hours or overnight (up to 2 days).

    5. To serve torte, unwrap it. Place onto serving platter and let it come to room temperature. Melt seedless raspberry jam in small pan on low heat; remove pan from heat; let jam cool. Once cooled, spread it over top of torte. Cover jam with fresh raspberries, adding them to torte stem side DOWN. Lightly "dust" the top of the torte with sifted powdered sugar. Cut the torte in 16 thin slices, serve and enjoy!

    Recipe Notes

    NOTES: Can substitute all 14 oz. of semi-sweet chocolate (and no bittersweet) OR can substitute 14 oz. of bittersweet (and no semi-sweet). I prefer the combo of both but it will be fine using only one type of chocolate if that is what you have access to.

    Nutrition Facts
    Chocolate Raspberry Torte
    Amount Per Serving (1 (1/16 of total))
    Calories 271 Calories from Fat 153
    % Daily Value*
    Fat 17g26%
    Saturated Fat 10g63%
    Trans Fat 1g
    Polyunsaturated Fat 1g
    Monounsaturated Fat 5g
    Cholesterol 75mg25%
    Sodium 79mg3%
    Potassium 193mg6%
    Carbohydrates 26g9%
    Fiber 3g13%
    Sugar 19g21%
    Protein 4g8%
    Vitamin A 282IU6%
    Vitamin C 3mg4%
    Calcium 35mg4%
    Iron 2mg11%
    * Percent Daily Values are based on a 2000 calorie diet.

    Here’s one more to pin on your Pinterest boards!Chocolate Raspberry Torte is a decadent, fudgy dessert, topped with raspberry glaze, fresh raspberries and powdered sugar! It tastes amazing!

    Chocolate Mint Cookie Bites

    Chocolate Mint Cookie Bites are shortbread-like cookies, with peppermint flavoring in the cookie and the frosting! They’re easy and delicious!
    Chocolate Mint Cookie Bites are shortbread-like cookies, with peppermint flavoring in the cookie and the frosting! They're easy and delicious!

    Okay… these yummy cookies are probably not the fanciest cookies you will ever eat, but they sure taste good! Who needs PERFECT looking cookies anyways? Chocolate mint cookie bites are so easy to make, and when topped with pretty green frosting and some sparkly sprinkles, they are amazing! I adapted the recipe from an old cooking magazine I’ve had for years, and want to share it with you today.

    The combination of flavor from chocolate AND peppermint shines in these shortbread-like little cookies! These cookies are light in texture and big in flavor, and I think you will really enjoy them. Kids can help with the frosting and sprinkles, because they really don’t have to be fancy! Let me show you how easy these little cookies are to make, in practically no time at all!

    Scroll Down For A Printable Recipe Card At The Bottom Of The Page

    Make The Cookie Dough

    Before starting to make the cookie dough, remember to preheat your oven to 375°F. It only takes a few minutes to make the dough, so to save time, you will want your oven preheated and ready to go!

    Using an electric mixer (or stand mixer), cream together softened butter and powdered sugar (confectioners sugar) until smooth. Add melted (but cooled) unsweetened chocolate and peppermint extract to the bowl and beat again, until fully combined. Beat in the all purpose flour, adding 1/3 cup at a time, until all the flour is incorporated into the dough.

    Butter is creamed with powdered sugar for the cookie dough.Melted chocolate and peppermint extract are mixed into the cookie dough.All purpose flour is gradually beaten into the cookie dough mixture in the bowl.

    Now add regular sized (or miniature-sized) semi-sweet chocolate chips to the batter. STIR the chocolate chips into the batter until fully combined. This cookie dough is now ready and it will be quite thick.

    Semi-sweet chocolate chips are stirred into the cookie dough until combined.

    Ready To Bake The Chocolate Mint Cookie Bites!

    Drop the dough for the chocolate mint cookie bites by Tablespoonfuls onto ungreased baking sheets. Leave a couple inches of space between each cookie. I usually try to use a small cookie scoop for this, so the cookies are all about the same size. You should have enough cookie dough for about 30 cookies, so you need a couple baking sheets or you will need to cook them in batches.

    Bake the cookies at 375°F. for 6-8 minutes or until the cookies are firm and set. Oven temps can vary quite a bit, and in our oven this takes 7 minutes, so keep an eye on them. They don’t spread out too much, either. Once done, let the cookies cool (on the pan) for 3-4 minutes before transferring them to a wire rack to finish cooling completely.

    Tablespoons of dough for the chocolate mint cookie bites are placed on baking sheets to cook.

    Time To Make The Frosting For The Cookies

    While the cookies are baking OR cooling, make the green peppermint frosting. In a medium bowl, beat together softened butter, powdered sugar, milk, peppermint extract and a couple drops of green food coloring. Mix until the frosting is a beautiful green color and is completely smooth, with no lumps!

    Once the chocolate mint cookie bites have completely cooled, it’s time to frost them. I frost the cookies one at a time, so the frosting is still a bit “wet” and the sprinkles can adhere to it. Spread a small amount of frosting onto the top of each cookie, and them immediately add a pinch of sprinkles on top. I hold the cookie in one hand, and add the frosting with a small knife. Then, holding the cookie over a small bowl of sprinkles with one hand, I add the sprinkles using my other hand. That way, any “wayward” sprinkles fall back into the bowl of sprinkles!

    Place the frosted/sprinkled cookie back on the wire rack, and repeat with the next cookie, continuing until all cookies are frosted and sprinkled. Let the frosting set tp (firm up) slightly before serving the cookies.

    Green peppermint flavored frosting is mixed together in a bowl while cookies bake.After the cookies cool, they are topped with some of the peppermint green frosting.Colorful sprinkles are added to the top of the frosted chocolate mint cookie bites.

    Ready to Eat Some Chocolate Mint Cookie Bites?

    Once the frosting has firmed up, the cookies are ready to be enjoyed. The insides are light in texture, and each of the chocolate mint cookie bites is filled with chocolate chips! The frosting AND the cookies themselves, have a wonderful chocolate mint flavor, which I think you’ll enjoy!

    Chocolate mint cookie bites rest on wire racks while frosting firms up.A look at the inside of one of the chocolate mint cookie bites, which has been cut in half.

    I really hope you enjoy these delicious cookies! At Christmas time red, green and white sprinkles are the way to go, but you can also highlight these for St. Patrick’s Day, and use only green and white sprinkles. However you make them, I think you’ll enjoy the quick, easy recipe, and their great taste! Thanks for stopping by, and I hope you will come back soon for more family-friendly recipes. Have a great day.

    Looking For More COOKIE Recipes?

    You can find all of my recipes in the Recipe Index, which is located at the top of the page. I have lots of yummy cookie recipes for you to enjoy, including:

    Interested In More Recipes?

    Thank you for visiting this website. I appreciate you using some of your valuable time to do soIf you’re interested, I publish a newsletter 2 times per month (1st and 15th) with all the latest recipes, and other fun info. I would be honored to have you join our growing list of subscribers, so you never miss a great recipe!
    There is a Newsletter subscription box on the top right side (or bottom) of each blog post, depending on the device you use, where you can easily submit your e-mail address (only) to be included in my mailing list.

    You Can Also Find Me On Social Media:

    Facebook page: The Grateful Girl Cooks!
    Pinterest:
    The Grateful Girl Cooks!
    Instagram:
    jbatthegratefulgirlcooks

    Author's signature

    Recipe adapted from: “Taste of Home” magazine, December/January issue, 2004, pages 27-28, contributed by Anne Revers, published by Reiman Publications

    0 from 0 votes
    Chocolate Mint Cookie Bites
    Prep Time
    10 mins
    Cook Time
    7 mins
    Total Time
    17 mins
     

    Chocolate Mint Cookie Bites are shortbread-like cookies, with peppermint flavoring in the cookie and the frosting! They're easy and delicious!

    Category: Dessert
    Cuisine: American
    Keyword: chocolate mint cookie bites
    Servings: 30 cookies (approx.)
    Calories Per Serving: 138 kcal
    Author: JB @ The Grateful Girl Cooks!
    Ingredients
    For Cookie Dough:
    • ¾ cup butter (no substitutes) softened (room temp.)
    • ½ cup powdered sugar (confectioners sugar)
    • 2 ounces unsweetened chocolate (2 squares) melted, cooled
    • ¼ teaspoon peppermint extract
    • cups all purpose flour
    • 1 cup semi-sweet chocolate chips (regular or mini)
    For Frosting:
    • 2 Tablespoons butter softened (room temp.)
    • 1 cup powdered sugar (confectioners sugar)
    • 1 Tablespoon milk
    • ¼ teaspoon peppermint extract
    • 2 drops green food coloring
    • COLORED SPRINKLES (approx. 2-3 Tablespoons)
    Instructions
    1. Preheat oven to 375°F.

    2. Make Dough: Using electric mixer (or stand mixer), cream softened butter and powdered sugar until smooth. Add melted, cooled unsweetened chocolate and peppermint extract; mix until combined. Beat in flour gradually, adding 1/3 cup at a time, until all flour is incorporated into dough. STIR in the chocolate chips, until combined. Dough will be thick.

    3. Drop the dough by Tablespoonfuls onto ungreased baking sheets. Leave 2" between each cookie. There's enough dough for approx. 30 cookies, so you need to use a couple baking sheets or bake the cookies in batches.

    4. Bake at 375°F. for 6-8 minutes or until cookies are firm and set. Oven temps can vary, so keep an eye on them. When done, let cookies cool (on the pan) for 3-4 minutes before transferring them to a wire rack to finish cooling.

    5. Make frosting while cookies bake or cool: In a medium bowl, using an electric mixer, beat together softened butter, powdered sugar, milk, peppermint extract and a couple drops of green food coloring. Mix until frosting is a beautiful green color and is completely smooth (no lumps).

    6. Once cookies have completely cooled, it's time to frost them, one at a time, while frosting is a bit "wet" and sprinkles can adhere to it. Spread a small amount of frosting onto the top of a cookie; immediately add a pinch or two of sprinkles on top. Place frosted/sprinkled cookie back on wire rack. Repeat process, continuing until all cookies are frosted/sprinkled. Let the frosting set up (firm up) slightly before serving the cookies. Enjoy!

    Nutrition Facts
    Chocolate Mint Cookie Bites
    Amount Per Serving (1 cookie)
    Calories 138 Calories from Fat 81
    % Daily Value*
    Fat 9g14%
    Saturated Fat 5g31%
    Trans Fat 1g
    Polyunsaturated Fat 1g
    Monounsaturated Fat 2g
    Cholesterol 15mg5%
    Sodium 49mg2%
    Potassium 59mg2%
    Carbohydrates 15g5%
    Fiber 1g4%
    Sugar 8g9%
    Protein 1g2%
    Vitamin A 169IU3%
    Vitamin C 1mg1%
    Calcium 9mg1%
    Iron 1mg6%
    * Percent Daily Values are based on a 2000 calorie diet.

    Here’s one more to pin on your Pinterest boards!Chocolate Mint Cookie Bites are shortbread-like cookies, with peppermint flavoring in the cookie and the frosting! They're easy and delicious!

    Classic Pizzelle Cookies

    Classic pizzelle cookies are beautiful, delicious treats made in a pizzelle press. They are light, crisp, and imprinted with amazing designs!
    Classic pizzelle cookies are beautiful, delicious treats made in a pizzelle press. They are light, crisp, and imprinted with amazing designs!

    A couple of years ago I got a pizzelle press using a gift card I was given. I had been “looking” at them for quite some time, and was thrilled to be able to get one online (without using my own money-yay!). The very first recipe I made using this appliance was this one for classic pizzelle cookies. YUM!

    Pizzelle cookies are known for their beautiful, intricate designs which are cooked onto both sides of a thin round cookie. We enjoy their crispness and uniqueness, too! Pizzelle press appliances are very reasonable and there are a variety of models (and price ranges) available online. There’s many flavors and types (sweet and savory) of pizzelle recipes available, but today I want to show you how to make basic pizzelle cookies.

    Scroll Down For A Printable Recipe Card At The Bottom Of The Page

    Make The Pizzelle Cookie Dough

    Place the eggs and granulated sugar in a large mixing bowl. Beat well on low speed, using a hand mixer, until well combined and slightly thickened. Add melted (but cooled) butter and vanilla extract to the bowl, and mix only until just combined (about 15 seconds).

    Three eggs and granulated sugar are placed in mixing bowl.Cooled, melted butter and vanilla extract are added to the pizzelle batter and combined.

    In a large separate bowl, whisk together all purpose flour and baking powder. Add these “dry” ingredients to the “wet” ingredients and mix only until the ingredients are combined. Be careful NOT to overmix the batter.

    All purpose flour and baking powder are whisked together in bowl.

    Dry ingredients are added to the bowl of wet ingredients and combined.

    Time To Cook Classic Pizzelle Cookies!

    Preheat your pizzelle press (lid closed) following the manufacturer’s instructions for your model. Once the machine has thoroughly preheated, place a dollop (about a Tablespoon) of the thick cookie batter onto the center of each circle. Remember to follow the instructions for your particular appliance as to the quantity of batter to add! Once the lid has closed, the batter will spread out onto the gridded design, much like a waffle.

    Cook classic pizzelle cookies for the time specified in the directions for your particular appliance (usually only a couple minutes). When done, remove the cookies immediately from the machine. Bring the machine back to heat before continuing to cook the remaining cookies.

    A pizzelle press being preheated before adding batter.Pizzelle cookie batter will be added to the center of each circle and then will be cooked.

    Trim And Cool The Cookies

    When you take the pizzelle cookies off the press, place them on a wire rack to cool. If there are any extra bits of cookie around the edges, simply use kitchen scissors or a knife to remove them while still warm. Think of it as giving these cookies a little trim around the edges, if necessary. As the cookies cool, they will become crisper.

    Continue cooking until you have used all the batter up. Don’t fret if some of your classic pizzelle cookies aren’t perfect… it happens. If it is your first time making these delicious cookies, know that they still taste absolutely delicious!

    Classic pizzelle cookies cooling on wire rack after being removed from machine after cooking.

    Time To Enjoy Some Classic Pizzelle Cookies!

    The beautiful imprint of the patterns on the pizzelle cookies is what gives them their charm! Crisp, light and delicious, they are a perfect food gift for the holidays (or any time). Who wouldn’t enjoy receiving a Christmas plate stacked with these little beauties! YUM!

    Beautiful designs are imprinted on both sides of classic pizzelle cookies.A side view of how thin the classic pizzelle cookies are.Holding up one of the crisp, classic pizzelle cookies, which is ready to be enjoyed!

    I hope you have the opportunity to make these unique, yummy, classic pizzelle cookies for those you love! Thank you for stopping by, and I hope you’ll come back again soon. Take care, and enjoy your day!

    Looking For More COOKIE Recipes?

    You can find ALL of my recipes in the Recipe Index, which is located at the top of the page. I have lots of yummy cookie recipes for you to enjoy, including:

    Interested In More Recipes?

    Thank you for visiting this website. I appreciate you using some of your valuable time to do soIf you’re interested, I publish a newsletter 2 times per month (1st and 15th) with all the latest recipes, and other fun info. I would be honored to have you join our growing list of subscribers, so you never miss a great recipe!
    There is a Newsletter subscription box on the top right side (or bottom) of each blog post, depending on the device you use, where you can easily submit your e-mail address (only) to be included in my mailing list.

    You Can Also Find Me On Social Media:

    Facebook page: The Grateful Girl Cooks!
    Pinterest:
    The Grateful Girl Cooks!
    Instagram:
    jbatthegratefulgirlcooks

    Author's signature

    Original recipe source: Cuisinart Pizzelle Press instruction manual (came with the appliance), page 5, published by Cuisinart, 2017

    0 from 0 votes
    Classic Pizzelle Cookies
    Prep Time
    10 mins
    Cook Time
    3 mins
    Total Time
    13 mins
     

    Classic pizzelle cookies are beautiful, delicious treats made in a pizzelle press. They are light, crisp, and imprinted with amazing designs!

    Category: Dessert
    Cuisine: American
    Keyword: classic pizzelle cookies
    Servings: 24 cookies (approx.)
    Calories Per Serving: 101 kcal
    Author: JB @ The Grateful Girl Cooks!
    Ingredients
    • 3 large eggs
    • ¾ cup granulated sugar
    • 8 Tablespoons butter (1 stick) melted, and cooled
    • 1 teaspoon vanilla extract
    • cups all purpose flour
    • 2 teaspoons baking powder
    Instructions
    1. Place eggs and sugar in a large mixing bowl. Beat on low speed, using a hand mixer, until combined/slightly thickened. Add melted (but cooled) butter and vanilla to bowl; mix only until just combined (about 15 seconds).

    2. In a large separate bowl, whisk together flour and baking powder. Add to egg/sugar mixture. Mix only until combined. Do NOT overmix.

    3. Preheat pizzelle press (lid closed) following manufacturer's instructions. Once preheated, place about a Tablespoon of batter onto the center of each circle. Follow instructions for your appliance as to quantity of batter to add. Cook for time specified for your particular appliance (usually a couple minutes). When done, remove cookies immediately from machine. Bring machine back to heat before continuing to cook remaining cookies.

    4. When you take cookies off the press, place them on a wire rack to cool. If there are any extra bits of cookie around the edges, use kitchen scissors or a knife to remove them while still warm. As cookies cool, they will become crisp. Enjoy!

    Nutrition Facts
    Classic Pizzelle Cookies
    Amount Per Serving (1 g)
    Calories 101 Calories from Fat 36
    % Daily Value*
    Fat 4g6%
    Saturated Fat 3g19%
    Trans Fat 1g
    Polyunsaturated Fat 1g
    Monounsaturated Fat 1g
    Cholesterol 33mg11%
    Sodium 43mg2%
    Potassium 54mg2%
    Carbohydrates 13g4%
    Fiber 1g4%
    Sugar 6g7%
    Protein 2g4%
    Vitamin A 150IU3%
    Calcium 21mg2%
    Iron 1mg6%
    * Percent Daily Values are based on a 2000 calorie diet.

    Here’s one more to pin on your Pinterest boards!Classic pizzelle cookies are beautiful, delicious treats made in a pizzelle press. They are light, crisp, and imprinted with amazing designs!