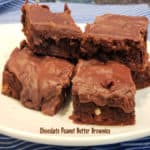
Chocolate Peanut Butter Brownies are filled with chopped peanuts, chocolate chips and peanut butter, and are absolutely delicious!

If you love the flavor combo of chocolate and peanut butter, I think you’ll enjoy these delicious chocolate peanut butter BROWNIES!
The peanut butter taste is not too strong, and it perfectly blends with the fudgy chocolate flavor in these yummy dessert bars!
With only 10 minutes of hands-on prep, you can have a big ol’ pan of yummy tasting brownies in the oven before you know it. Chocolate peanut butter brownies can be eaten unfrosted OR frosted
I’ve included a recipe for a delicious chocolate frosting (in the printable recipe card) for your convenience. Here’s how easy these brownies are to make:
Scroll Down For A Printable Recipe Card At The Bottom Of The Page
Make The Brownie Batter
Measure peanut butter, softened butter, brown sugar and granulated sugar into a large mixing bowl. Cream ingredients together using an electric mixer on High speed until fully blended.
Turn the mixer down to medium speed, and add vanilla extract and 4 eggs, ADDING EGGS ONE AT A TIME. Beat the ingredients very well after each egg is added.
Once done, the chocolate peanut butter brownie batter will be fairly thick.


Stir cocoa powder, flour, salt, chocolate chips and chopped peanuts into the brownie batter until well combined. Now the brownies are ready to be baked!

Ready To Bake!
Lightly grease a 9″ x 13″ baking pan and then spread the batter evenly in the pan. Place the pan of chocolate peanut butter brownies on the center rack of a preheated 350°F. oven.
Bake at 350°F for 15-20 minutes, or until a toothpick inserted deep into the center of the brownies comes out clean. The top of the brownies should also feel firm once done.

If You Like “Unfrosted” Chocolate Peanut Butter Brownies
Remove the pan from the oven and cut the brownies into 24 portions while still hot. Let them cool to room temp (still in the pan) after slicing, before serving.
If you enjoy the chocolate peanut butter brownies UNFROSTED, simply let them cool completely. Transfer them from the pan to a serving plate and serve.


If You Like “Frosted” Chocolate Peanut Butter Brownies
If you prefer chocolate frosting on brownies, you can make it while the brownies cool. It’s EASY! I’ve included the printable recipe below, but here are the basics.
Melt butter in a saucepan on low heat. Add cocoa powder, and stir it in, until blended with the melted butter. Stir in salt, vanilla, and ¼ cup of milk, stirring by hand until combined.
Add powdered sugar and stir well. If necessary, add a bit more milk until the frosting becomes smooth and slightly pourable.
Poke holes in the tops of the brownies, then immediately pour the chocolate frosting evenly over the surface. The frosting will cover the top and sink into the holes in each brownie.


Let the frosting become firm before slicing and transferring the brownies out of the baking pan to a serving plate. Serve, and enjoy these decadent dessert bars.


I really hope you enjoy these delicious brownies! They taste wonderful, and I hope you (and those you love) like them as much as we do.
Thanks for taking the time to stop by today, and I invite you to come back soon for more family-friendly recipes. Take care, may God bless you, and have a great day!
Looking For More BAR COOKIE Recipes?
You can find ALL of my recipes in the Recipe Index, located at the top of the page. I have some wonderfully delicious bar cookie recipes to choose from, including:
- Lemon Bars
- Mocha Cinnamon Brownies
- Frosted Pumpkin Bars
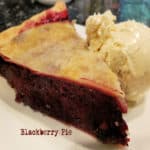
- Blackberry Pie Bars
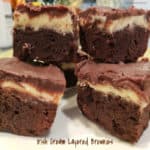
- Irish Cream Layered Brownies
Want More Recipes? Get My FREE Newsletter!
I publish a newsletter 2 times per month (1st and 15th) with lots of recipes, tips, etc.
Would you like to join our growing list of subscribers?
There is a Newsletter subscription box on the top right (or bottom) of each blog post, depending on the device you use.
You can submit your e-mail address there, to be added to my mailing list.
Find Me On Social Media:
Facebook page: The Grateful Girl Cooks!
Pinterest: The Grateful Girl Cooks!
Instagram: jbatthegratefulgirlcooks

Original recipe source for brownies: “Mollie Katzen’s Vegetable Heaven”, page 204, published in 1997 by Tante Malka, Inc.
Original recipe source for frosting: my Mom’s frosting recipe for chocolate cake
↓↓ PRINTABLE RECIPE BELOW ↓↓
Chocolate Peanut Butter Brownies are filled with chopped peanuts, chocolate chips and peanut butter, and are absolutely delicious!
- 1 cup creamy peanut butter (not natural)
- 1 stick butter (½ cup), softened
- 1 cup light brown sugar (packed)
- ½ cup granulated sugar
- 4 large eggs
- 1 teaspoon vanilla extract
- 1 cup unsweetened cocoa powder
- 1 cup all purpose flour
- 1¼ cups semisweet chocolate chips
- ½ cup cocktail peanuts finely chopped
- 6 Tablespoons butter (3/4 stick)
- 4 Tablespoons unsweetened cocoa powder
- 1 pinch salt
- 1 teaspoon vanilla extract
- 12 ounces powdered sugar
- ¼ cup low-fat milk (1%) more if necessary to thin frosting
Preheat oven to 350°F. Lightly grease a 9x13 baking pan.
Measure peanut butter, butter, brown sugar and granulated sugar into large mixing bowl. Cream ingredients using electric mixer on High until fully blended. Turn mixer to Medium; add vanilla and eggs, ADDING EGGS ONE AT A TIME. Beat well after each egg is added.
Remove beaters. Add cocoa, flour, chocolate chips and peanuts to batter; stir by hand until fully incorporated into thick batter.
Spread batter evenly in prepared pan. Place pan on center rack of oven. Bake at 350°F. for 15-20 minutes, or until a toothpick inserted deep into the center of the brownies comes out clean. The surface of the brownies should feel firm.
Remove pan from oven. Cut brownies into 24 servings while still hot. Let cool (still in pan) to room temp. after slicing, before removing from pan and serving.
Slice brownies while still hot. To make frosting: Melt butter on low heat in medium saucepan. Remove from heat. Add cocoa powder; stir well, then add salt, vanilla, and ¼ cup of milk, stirring by hand until combined. Add powdered sugar, and stir well. If necessary add a bit more milk until the frosting becomes slightly pourable. When fully combined, poke holes in the top of the brownies, then pour frosting over the surface to cover. Let frosting become firm, before removing brownies from pan and serving.
NOTE: Caloric calculation is for UNFROSTED brownies (260 per serving). If using frosting included in recipe card, the caloric content of each brownie will be approx. 344 calories per serving.
ALSO... if you are using non-salted peanut butter in the brownies, add ¼ tsp. to the brownie batter.
Here’s one more to pin on your Pinterest boards!