Frosted Pumpkin Bars are easy-to-make delicious treats, with cream cheese frosting, cinnamon, ginger and cloves, for a true taste of FALL!

I can’t say enough great things about these yummy pumpkin bars. They’re SO GOOD. I’ve made them for many years (over 20), since my good friend Carla gave me her recipe way back in October 1999.
This year I realized I hadn’t ever posted the recipe on my blog, so I whipped up another batch a few weeks ago, and took photos as I made them.
Our oldest son was staying with us for just over a week, because of the horrible Oregon wildfires and hazardous smoke that saturated our area. Our home has air conditioning/air filtering, and since he lived right at the evacuation zone, it was “easier for him to breathe” here.
We were glad to have him here, so he could enjoy his “Mom’s cooking”, AND gobble up several of these frosted pumpkin bars.
They are ALWAYS a huge hit (especially this time of year) and are incredibly simple to prepare. Today I want to share the recipe with you, so you can enjoy them, too! Here’s how to make 16 frosted pumpkin bars:
Scroll Down For A Printable Recipe Card At The Bottom Of The Page
Prepare The Batter
In a large bowl, beat softened butter for about 30 seconds until creamy. Add granulated sugar and beat until the mixture is rather “fluffy” (about 2-3 minutes).

Add pumpkin puree (NOT pumpkin pie filling), an egg, and vanilla extract to the bowl. Beat well, until fully incorporated. These are your “wet” ingredients for the pumpkin bars.


In a separate medium-sized bowl, whisk together the dry ingredients. This dry ingredient mixture includes flour, baking soda, salt, cinnamon, ginger and cloves.
Add the dry ingredients to the wet ingredients and beat until the ingredients are fully blended together. Now your batter for the frosted pumpkin bars is complete. Time to bake!


Time To Bake!
Evenly spread the pumpkin batter in an 8″x8″ greased or sprayed baking dish (bottom and sides). Bake the bars at 350°F for about 20-25 minutes. You will know the bars are done when a toothpick inserted into the top center comes out clean.
Once done, remove the pan from the oven, and place it on a wire rack to let the pumpkin bars cool. Let the bars FULLY cool before attempting to frost them!
Trust me on this – if you try to frost them too soon, the heat will melt the butter and cream cheese in the frosting, which is not good. Just be patient and WAIT.


Make The Frosting For The Pumpkin Bars
While the pumpkin bars are cooling, whip up the cream cheese frosting. In a medium bowl, beat together cream cheese and softened butter until fully combined. Add vanilla extract and powdered sugar to the bowl, then beat on low, until smooth.
Once the pumpkin bars have TOTALLY COOLED, spread the cream cheese frosting over the top of the bars. Lightly sprinkle the frosting with ground cinnamon.
Cover the pan and place the pan of frosted pumpkin bars in the REFRIGERATOR to chill completely, in order to give the frosting time to firm up slightly.


Let’s Eat Some Frosted Pumpkin Bars!
After the frosting has chilled and had time to firm up a bit, slice the bars into 16 portions, and serve. Get ready to enjoy a yummy treat!
The bars are filled with the flavors of Fall, thanks to the wonderful “warm” spices of cinnamon, cloves, and ginger. YUM… they are so good. And the simple cream cheese frosting – don’t even get me started on that, because I could eat it with a spoon!
Store any uneaten frosted pumpkin bars, covered, in the refrigerator for up to 5 days, IF they last that long.


I really hope you will have the opportunity to try these absolutely delicious, frosted pumpkin bars! They are a wonderful tasting dessert your family and friends will love.
If you enjoy these pumpkin bars, be sure to check out my recipe for a pumpkin cream cheese roll! It’s a delicious and a beautiful dessert, that is perfect for the holidays.
Thank you for stopping by, and I invite you to come back soon for more family-friendly recipes. Take care, have a GREAT day, and may God bless you.
Looking For More BAR COOKIE Recipes?
You can find ALL of my recipes in the Recipe Index, which is located at the top of the page. I have many delicious bar cookie recipes to choose from, including:
Want More Recipes? Get My FREE Newsletter!
I publish a newsletter 2 times per month (1st and 15th) with lots of recipes, tips, etc.
Would you like to join our growing list of subscribers?
There is a Newsletter subscription box on the top right (or bottom) of each blog post, depending on the device you use.
You can submit your e-mail address there, to be added to my mailing list.
Find Me On Social Media:
Facebook page: The Grateful Girl Cooks!
Pinterest: The Grateful Girl Cooks!
Instagram: jbatthegratefulgirlcooks

Original recipe source: my dear friend, Carla Merrill
↓↓ PRINTABLE RECIPE BELOW ↓↓
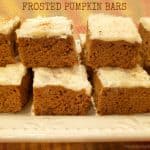
Frosted Pumpkin Bars are easy-to-make delicious treats, with cream cheese frosting, cinnamon, ginger and cloves, for a true taste of FALL!
- ¼ cup butter , softened
- ¾ cup granulated sugar
- 1 large egg
- ¾ cup canned pumpkin puree , NOT pumpkin pie filling
- 1 teaspoon vanilla extract
- 1¼ cups all purpose flour
- 1 teaspoon ground cinnamon
- ½ teaspoon baking soda
- ½ teaspoon salt
- ½ teaspoon ground ginger
- ¼ teaspoon ground cloves
- 1½ ounces cream cheese (light)
- ¼ cup butter , softened
- 1 cup powdered sugar
- ½ teaspoon vanilla extract
In a large bowl, use an electric mixer to beat softened butter for 30 seconds until creamy. Add granulated sugar; beat until mixture is "fluffy" (2-3 minutes). Add pumpkin puree, egg, and vanilla. Beat well, until fully incorporated.
In a separate bowl, whisk together flour, baking soda, salt, cinnamon, ginger and cloves. Add to the wet ingredients, and beat until fully blended. Spread batter in an 8"x8" greased or sprayed baking dish (grease bottom and sides).
Bake at 350°F for about 20-25 minutes. Bars are done when a toothpick inserted into the top center comes out clean. Remove pan from oven; place pan on wire rack. Let bars fully cool before attempting to frost them!
Beat cream cheese and softened butter in a medium bowl until fully combined. Add vanilla extract and powdered sugar; beat until smooth. Once pumpkin bars have TOTALLY COOLED, spread frosting evenly on bars. Lightly sprinkle with cinnamon. Cover pan, and place frosted pumpkin bars in the REFRIGERATOR to chill completely.
Once frosting firms up and bars have chilled, they are ready to serve. Slice into 16 bars, serve, and enjoy! Store leftovers, covered in refrigerator, for up to 5 days.
Here’s one more to pin on your Pinterest boards!


 is a simple, delicious Summer dessert, served with vanilla ice cream! / The Grateful Girl Cooks!")


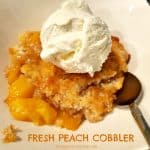
 is a simple, delicious Summer dessert, served with vanilla ice cream!/ The Grateful Girl Cooks!")


