Category: Beef

Chili Spaghetti

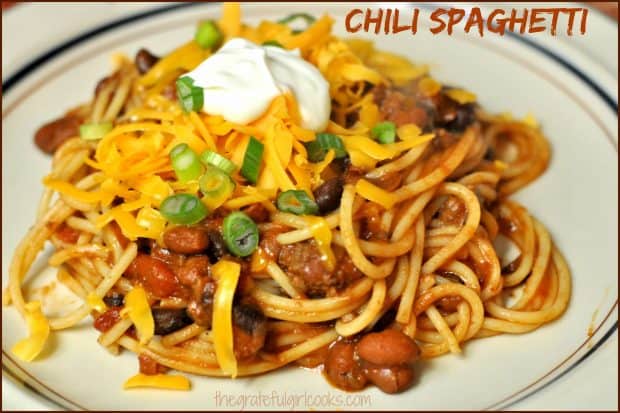
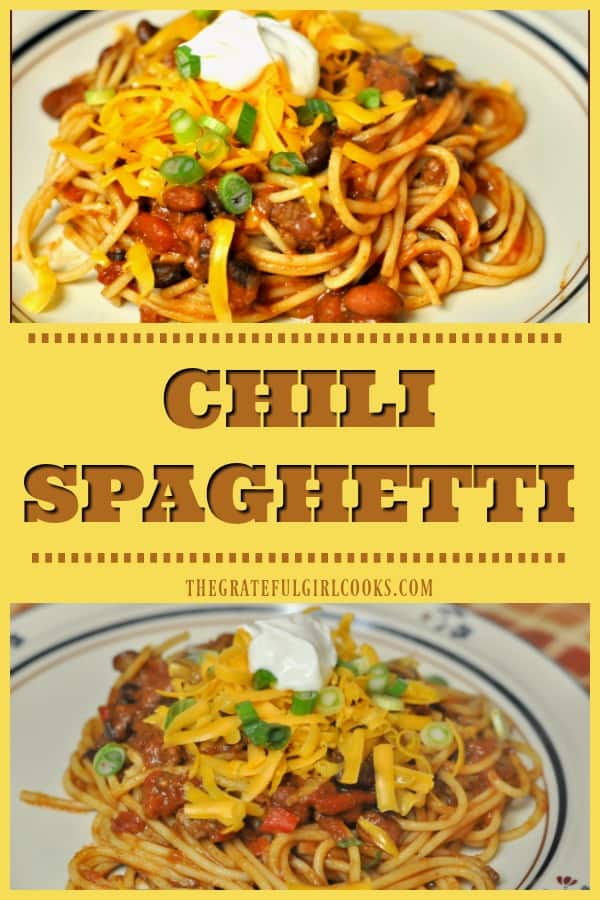
Looking for a quick and easy pasta dinner with a Mexican twist? How about making a batch of Chili Spaghetti, with chili, green onions, cheese and sour cream?Looking for a quick and easy pasta dinner with a Mexican twist? How about making a batch of Chili Spaghetti, with chili, green onions, cheese and sour cream?
When you really think about it, traditional spaghetti has tomatoes, meat, tomato sauce, onions, garlic and cheese (Parmesan). It’s a straight up, not too hard ITALIAN-INSPIRED meal to prepare. Well- guess what? Many of those same ingredients are found in Chili (homemade or purchased), but with a completely different spices. So why NOT make a MEXICAN-INSPIRED spaghetti meal, right? Right.

If you enjoy chili, and you enjoy spaghetti, read on! This easy meal will be a perfect combo meal for you!  Making chili spaghetti is super simple, and it tastes so very good! The pasta dish is very filling, and full of flavor. My hubby and I love having this meal occasionally. If you are more into “regular” spaghetti, be sure and check out my recipes for Easy Spaghetti Sauce with Italian Sausage or Easy Meatballs for Spaghetti.

I make my Mom’s recipe for homemade chili  so I always seem to have some extra in the freezer. I use that for this recipe, but for crying out loud… if you don’t have homemade, just buy some good quality chili (meat and beans) to make this EASY!

How To Make Chili Spaghetti

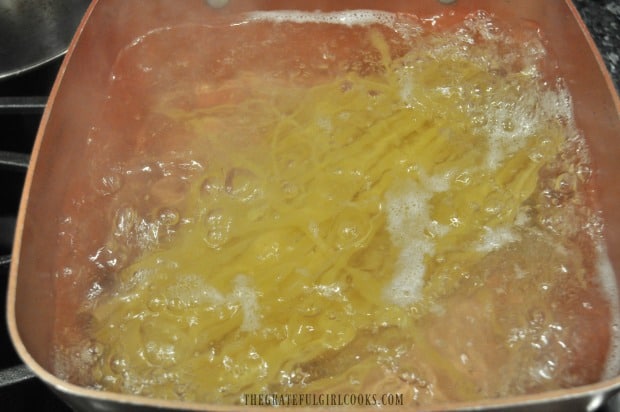
Prepare pasta according to package directions. While the spaghetti noodles are cooking, heat up the chili in a large skillet. A couple minutes before the spaghetti has finished cooking, ladle out about 1/4 cup pasta water (this has starch in it), and stir it into the chili.

Cooking pasta for chili spaghetti.

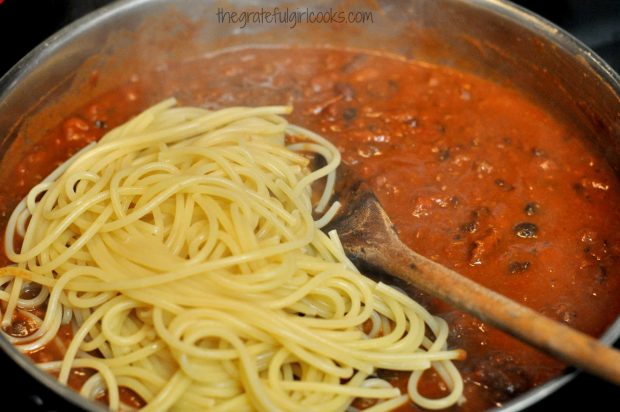
Remove pasta from pan about one minute before it is done. Drain pasta well without rinsing, then add it to the skillet with the chili in it. Stir well or use tongs, to fully combine the chili and the spaghetti noodles.

Cooked pasta is added to chili to make chili spaghetti.

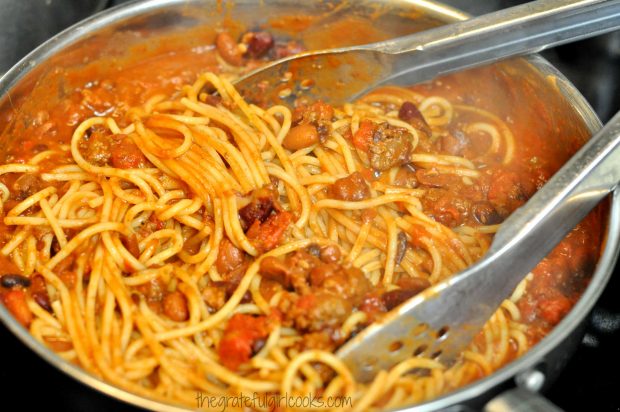
Continue to cook the chili spaghetti for a couple minutes until well coated and pasta is fully cooked through.

Chili Spaghetti is mixed and heated through, in large skillet.

Serving Chili Spaghetti

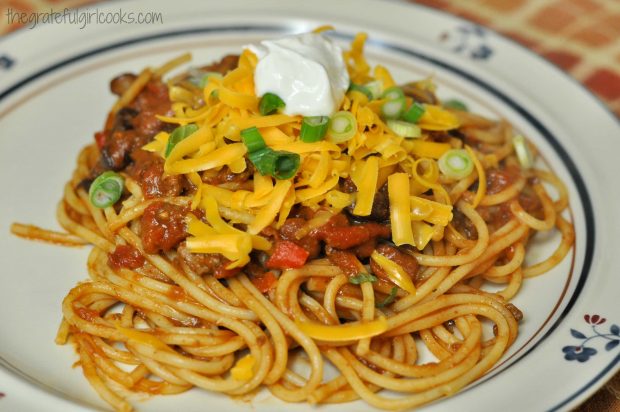
When done, transfer the pasta onto individual serving plates. Spoon a little leftover chili from pan onto pasta. Garnish the spaghetti chili with grated cheddar cheese, sliced green onions and a dollop of sour cream. Serve piping hot, and enjoy!

Note** If you are using store bought canned chili, be sure you have enough chili in the skillet to completely coat the spaghetti! You will also need to have some extra chili in the skillet to spoon on top of the pasta when you plate it!

Chili spaghetti is garnished with cheddar cheese, green onions and sour cream before serving.

No recipe is really needed for chili spaghetti. IT’S WAY TOO EASY!   Sure hope you will give this a try. It is a very easy meal to “throw together” on a busy day, when you are pressed for time, and the family is starving! Have a great weekend, friends. May you find moments of love, laughter, peace, and great JOY!

Looking For More PASTA Recipes?

You can find ALL of my recipes in the Recipe Index, located at the top of the page. I have lots of pasta recipes, including:

Interested In More Recipes?

Thank you for visiting this website. I appreciate you using some of your valuable time to do soIf you’re interested, I publish a newsletter 2 times per month (1st and 15th) with all the latest recipes, and other fun info. I would be honored to have you join our growing list of subscribers, so you never miss a great recipe! 

There is a Newsletter subscription box on the top right side (or bottom) of each blog post, depending on the device you use, where you can easily submit your e-mail address (only) to be included in my mailing list.

You Can Also Find Me On Social Media:

Facebook page: The Grateful Girl Cooks!
Pinterest:
The Grateful Girl Cooks!
Instagram:
jbatthegratefulgirlcooks

Author's signature

Here’s one more to pin on your Pinterest boards!Looking for a quick and easy pasta dinner with a Mexican twist? How about making a batch of Chili Spaghetti, with chili, green onions, cheese and sour cream?

Save

Save

Sundowner Soup

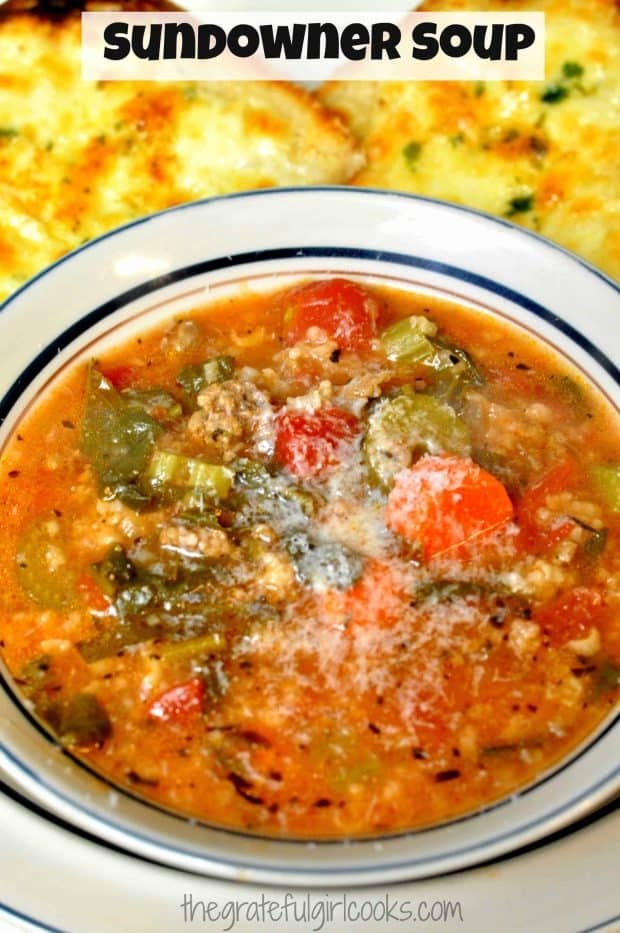
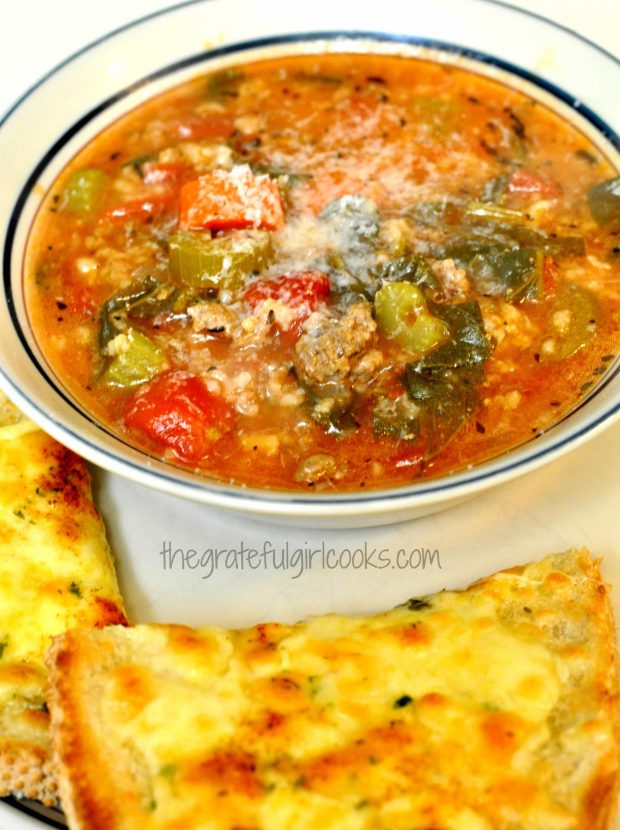
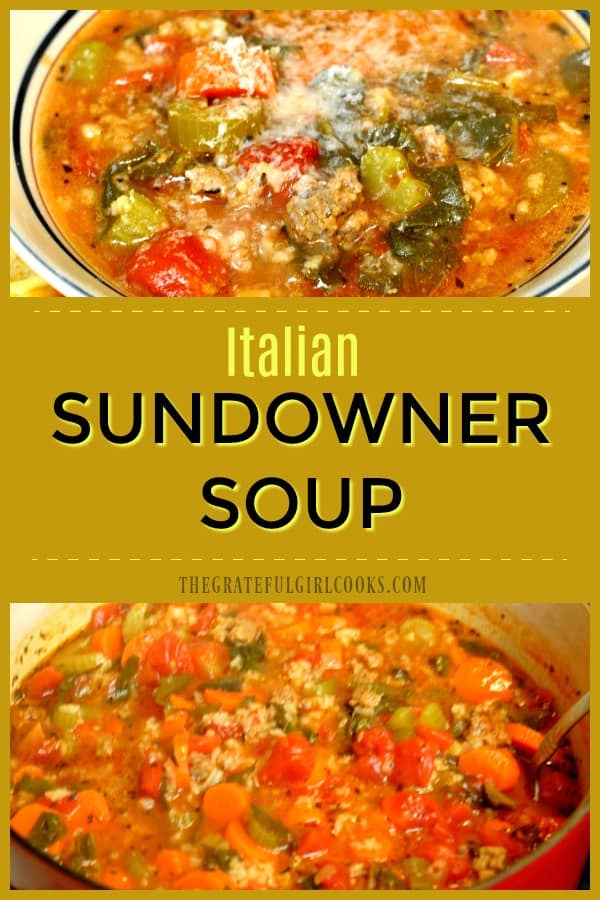
Sundowner Soup is a delicious Italian inspired economical dish that’s easy to make, with ground beef, rice, and vegetables in a tomato based broth.Sundowner Soup is a delicious Italian inspired economical dish that's easy to make, with ground beef, rice, and vegetables in a tomato based broth.
Let me start by saying I HAVE NO IDEA WHY IT IS CALLED SUNDOWNER SOUP. I suppose it might be because you can make up a big pot of this soup in about the same time it takes the sun to set? Well, I don’t really know how or why it got its name, but that’s my story… and I’m sticking with it!

Recently I found this recipe in a 20 year old cookbook. The name of the soup intrigued me, since it apparently had NOTHING to do with the ingredients. I had already laid out one pound of hamburger meat to use for dinner, so decided to give this recipe for sundowner soup a try.

What I can tell you after making it is this: Sundowner soup is delicious, only uses one pound of hamburger meat, and has lots of veggies. The recipe makes a large pot of soup, and is ready in a very short amount of time (under 30 minutes). If you can chop/slice  veggies and brown hamburger meat, you can make this soup!

Scroll Down For A Printable Recipe Card At The Bottom Of The Page

How To Make Sundowner Soup

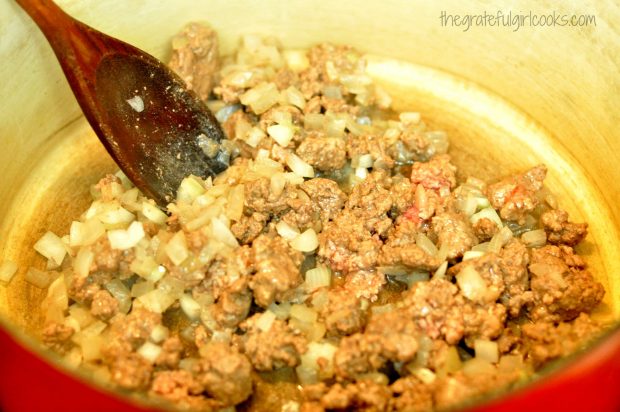
Here’s how you make this tasty (and economical) Italian-flavored soup: Brown the chopped onion and hamburger meat in a large soup pot. Easy, right?

Hamburger meat and onions are cooked before they are added to soup.

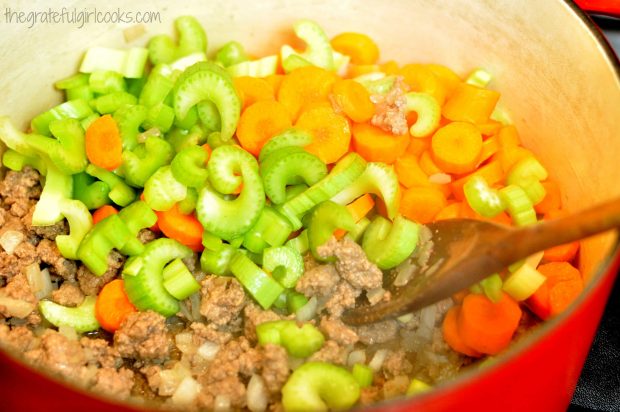
When the meat has browned fully, drain off the grease, and then stir in the sliced carrots and celery. Cook these veggies for 3-4 minutes, until they begin to soften.

Celery and carrots are added to the soup pot.

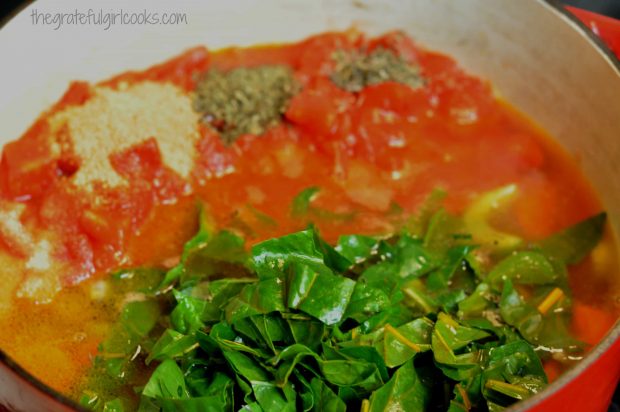
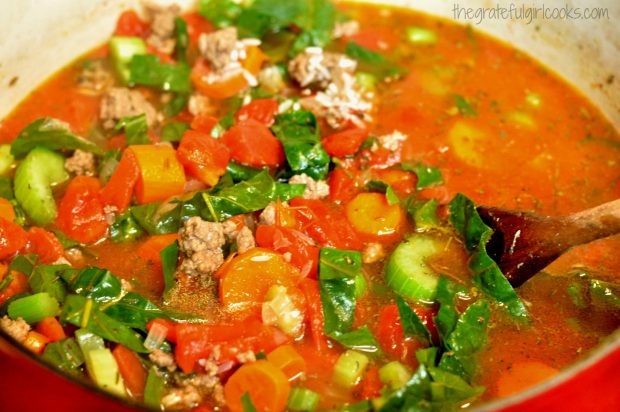
Add canned tomatoes, beef broth, cooking sherry, water, Swiss chard, rice, and herbs to the soup pot. Bring the liquid to a boil, and then simmer (covered) for 15 minutes.

Canned tomatoes, sherry, broth spices and Swiss chard are added to the sundowner soup.

Uncooked rice is also added to the soup where it will cook in the broth.

Finish Making The Soup

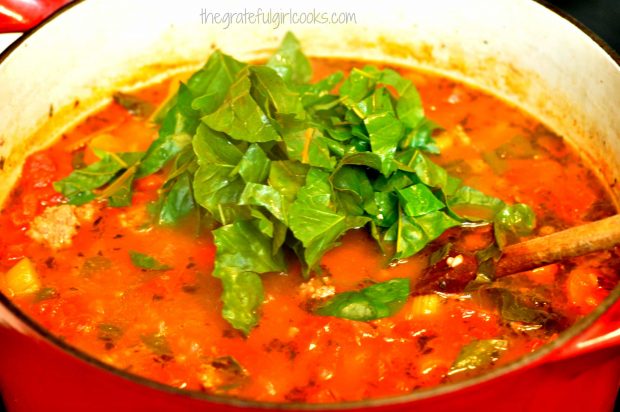
After soup has cooked for 15 minutes, add the remaining half of the Swiss chard. Give the sundowner soup a taste, and season with a bit of salt and pepper, to your liking. Cover and cook the soup for 5 additional minutes.

More Swiss chard is added to the soup.

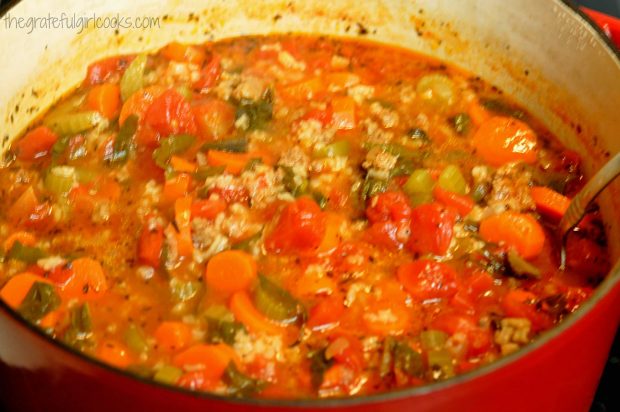
Now uncover the soup pot. The rice should be fully cooked and the soup will have thickened up. If you want the sundowner soup thinner, simply add a bit more water and stir.

The pot of sundowner soup is fully cooked and is now ready to serve.

Serve The Sundowner Soup

Ladle the hot sundowner soup into serving bowls. Garnish the top of each bowl of soup with finely grated Parmesan cheese (optional, but oh, so good!). Serve with some crusty bread on the side, and enjoy. Sundowner soup is quite a filling meal, because it has meat, veggies and rice, all in one dish! I think you will enjoy it!

Each bowl of sundowner soup is garnished with grated Parmesan cheese.

Hope you will give sundowner soup a try. My husband and I LOVED it!  Have a great day. Look around and focus on the multitude of things you (and I) can be grateful for! They are all around.

Looking For More SOUP Recipes?

I have lots of soup recipes! They can be found in the Recipe Index, located at the top of the page. A few favorites include:

Interested In More Recipes?

Thank you for visiting this website. I appreciate you using some of your valuable time to do soIf you’re interested, I publish a newsletter 2 times per month (1st and 15th) with all the latest recipes, and other fun info. I would be honored to have you join our growing list of subscribers, so you never miss a great recipe! 

There is a Newsletter subscription box on the top right side (or bottom) of each blog post, depending on the device you use, where you can easily submit your e-mail address (only) to be included in my mailing list.

You Can Also Find Me On Social Media:

Facebook page: The Grateful Girl Cooks!
Pinterest:
The Grateful Girl Cooks!
Instagram:
jbatthegratefulgirlcooks

Author's signatureRecipe Source: The cookbook called “A Dinner A Day”, by Sally Sondheim & Suzannah Sloan, pg. 46, Published by Warner Books, 1996.

↓↓ PRINTABLE RECIPE BELOW ↓↓

0 from 0 votes
Sundowner Soup
Prep Time
15 mins
Cook Time
20 mins
Total Time
35 mins
 
Sundowner Soup is a delicious Italian inspired economical dish that's easy to make, with ground beef, rice, and vegetables in a tomato based broth.
Category: Soup
Cuisine: Italian
Keyword: Sundowner Soup
Servings: 6 servings
Calories Per Serving: 339 kcal
Author: JB @ The Grateful Girl Cooks!
Ingredients
  • 1 pound ground beef
  • 1 medium onion , chopped
  • 3 stalks celery , sliced
  • 5 medium carrots , peeled and sliced
  • 1 medium bunch Swiss chard (may substitute spinach, if desired)
  • 1 large can (28 ounces) diced tomatoes (undrained)
  • 1 can (14.5 ounces) beef broth
  • 1/4 cup cooking sherry (may substitute beef broth)
  • 2 cups water
  • 1/3 cup long grain white rice
  • 1 teaspoon dried basil
  • 1 teaspoon dried thyme
  • 1 Tablespoon seasoning salt
  • (additional salt and pepper, to taste)
  • Grated Parmesan cheese (for garnish - optional, but good!)
Instructions
  1. Brown ground beef and chopped onion in a large soup pot, stirring occasionally. Drain off grease when done.
  2. While meat is browning, slice celery, peel and slice carrots, and chop Swiss chard (or spinach).
  3. When beef and onions are cooked and drained, add sliced celery and carrots to pan. Cook for 3 minutes.
  4. Add tomatoes (and juice), beef broth, sherry, water, HALF of the Swiss chard, rice, basil, thyme and seasoning salt to the pan. Stir well, to combine; bring mixture to a boil on medium-high heat, then reduce the heat to low, put a lid on pan, and simmer for 15 minutes (covered).
  5. After soup has cooked for 15 minutes, add the rest of the Swiss chard. Taste soup; add salt and pepper, if desired. Put lid back on pan and cook soup 5 more minutes. When done, if soup has thickened too much for your liking, simply add a bit of water to pan, and stir to combine.
  6. Ladle soup into individual bowls; garnish soup with finely grated Parmesan cheese, and enjoy!
  7. By the way- the leftovers are great, as well!
Nutrition Facts
Sundowner Soup
Amount Per Serving (1 g)
Calories 339 Calories from Fat 153
% Daily Value*
Fat 17g26%
Saturated Fat 6g38%
Cholesterol 58mg19%
Sodium 1792mg78%
Potassium 925mg26%
Carbohydrates 26g9%
Fiber 4g17%
Sugar 9g10%
Protein 19g38%
Vitamin A 9400IU188%
Vitamin C 19.6mg24%
Calcium 163mg16%
Iron 4.2mg23%
* Percent Daily Values are based on a 2000 calorie diet.

Here’s one more to pin on your Pinterest boards!Sundowner Soup is a delicious Italian inspired economical dish that's easy to make, with ground beef, rice, and vegetables in a tomato based broth.


Save

Save

Really Good Meatloaf

Take it from me- someone who used to despise meatloaf. This is Really GOOD Meatloaf, especially with the BBQ flavored sauce on top! It’s a cinch to make!Take it from me... someone who used to despise meatloaf. This is Really GOOD Meatloaf, especially with the BBQ flavored sauce on top! It's a cinch to make!

I Have A Sordid History With Meatloaf

I hated meatloaf as a kid. Really, really hated it. My mom coated it with ketchup. Then I married a guy (almost 38 years ago) who happened to LIKE meatloaf (the horror of it all!) . Several years after we married I found this recipe in a church cookbook, and because I loved him, I cooked it for him. Guess what? It is REALLY GOOD MEATLOAF!!!! I actually found a meatloaf (and amazing BBQ sauce) that I LOVE!

And that, my friends, is why I have given it such a dubious recipe name. End of story. Seriously, this meatloaf IS really good, and completely EASY and inexpensive to make, which is always a plus in my book! Here’s what you do:

Scroll Down For A Printable Recipe Card At The Bottom Of The Page

How To Make Really Good Meatloaf

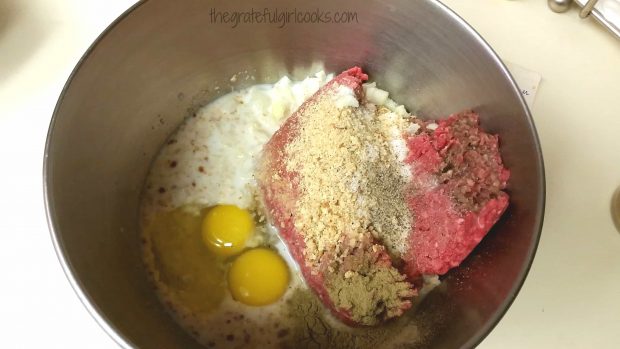
In a large bowl, combine the ingredients for the meatloaf. It is always interesting to me that one of the seasonings used for this meatloaf is POULTRY SEASONING. What? On BEEF? Yep, you got that right. Poultry seasoning contains sage, rosemary, basil, celery seed, oregano, marjoram and thyme, so you can see how those spices add to the flavor of this yummy meatloaf.

Mix all the ingredients for the meatloaf together. That wasn’t too hard, was it? Trust me, the whole meatloaf only takes about 10 minutes prep time!

Ingredients for meatloaf will be mixed together in mixing bowl.

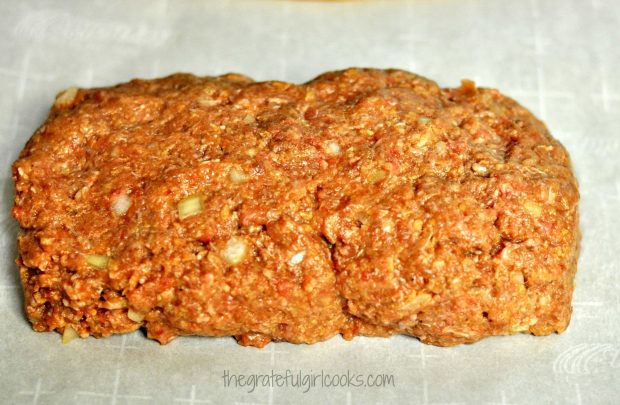
Place a piece of parchment paper on a baking sheet, and form the meat mixture into a loaf shape on top of the parchment.

Meat is shaped into a loaf shape, on parchment paper lined baking sheet.

Make The Sauce

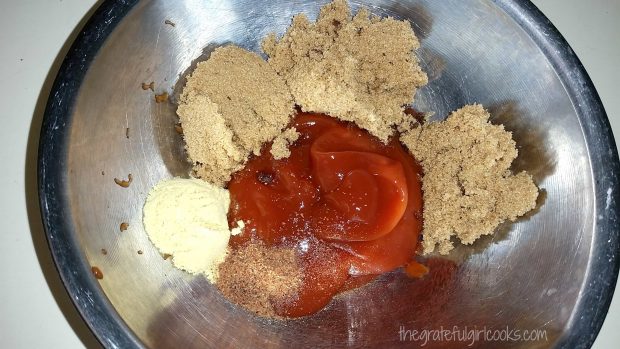
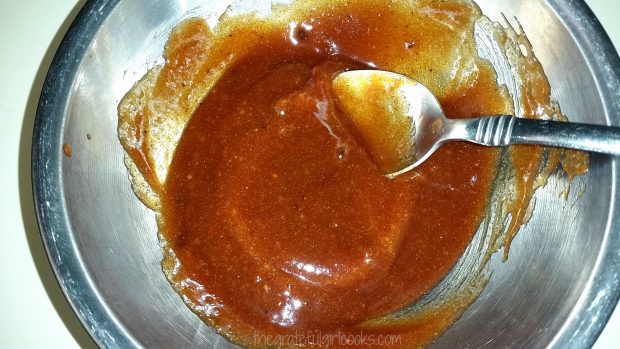
Place the meatloaf into a 350 degree oven for 30 minutes. While it bakes, prepare the sauce that will eventually go on top of the meatloaf. Mix the sauce, and it’s ready (told you this was EASY).

The ingredients for the BBQ sauce for the meatloaf are put into a bowl for mixing.

BBQ sauce for really good meatloaf is mixed together in small metal bowl.

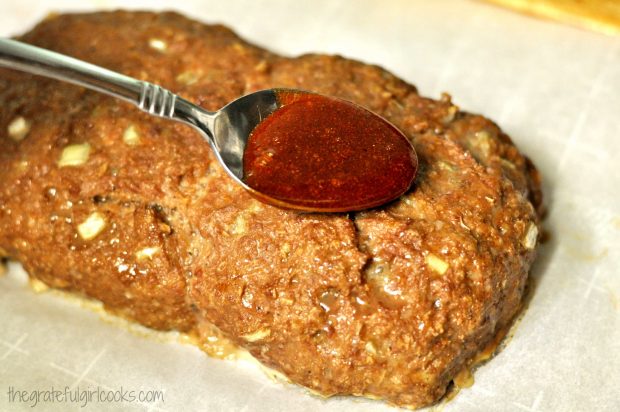
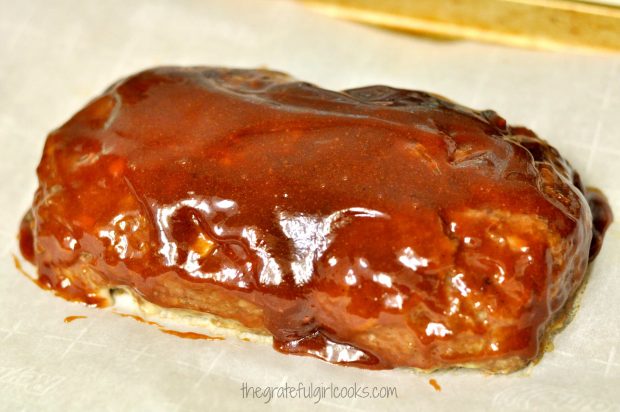
After the meatloaf has cooked for 30 minutes, remove it from the oven and quickly spoon the sauce all over the top and sides of the meatloaf. Once the meatloaf is covered with the sauce, place it back in the oven and continue cooking for another 30 minutes.

BBQ sauce is spooned over half-baked meatloaf.

Half-baked meatloaf is covered with sauce, then put back into oven to finish cooking.

The Really Good Meatloaf Is Baked And Ready To Serve

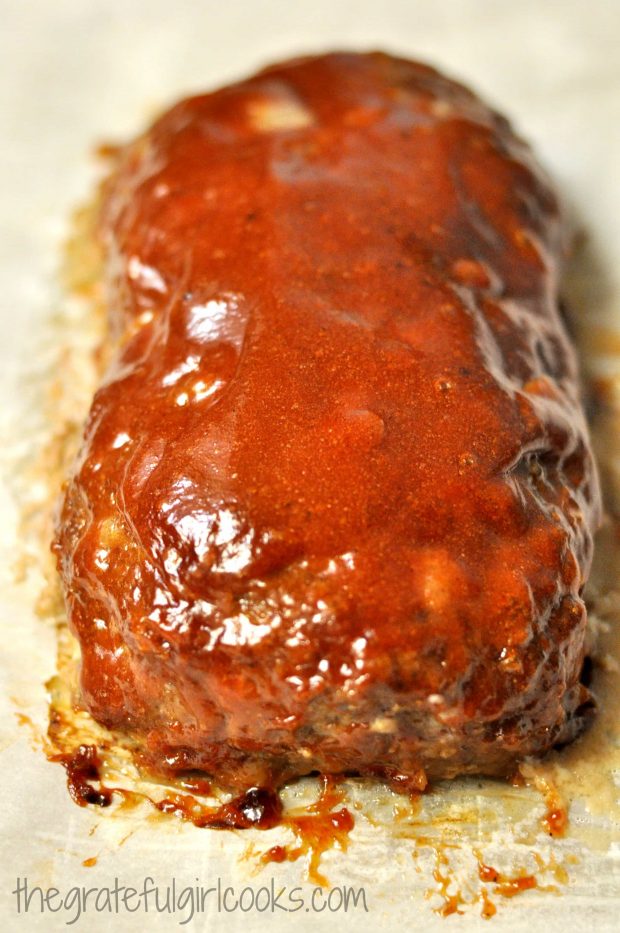
Once the meatloaf is done cooking (after the additional 30 minutes of cooking time), remove it from the oven. Let it sit for just a couple of minutes before slicing.

Really good meatloaf is done baking, and is ready to slice.

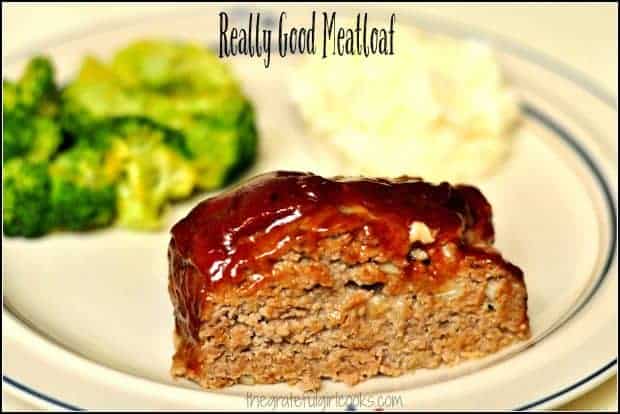
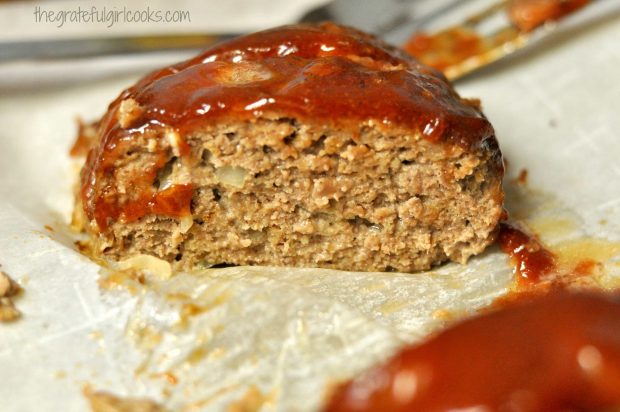
Cut the meat into slices (either 4 or 6, depending on the thickness of the serving size you want). Here’s a peek at the inside of the finished dish. Ooh, that sauce is so good.

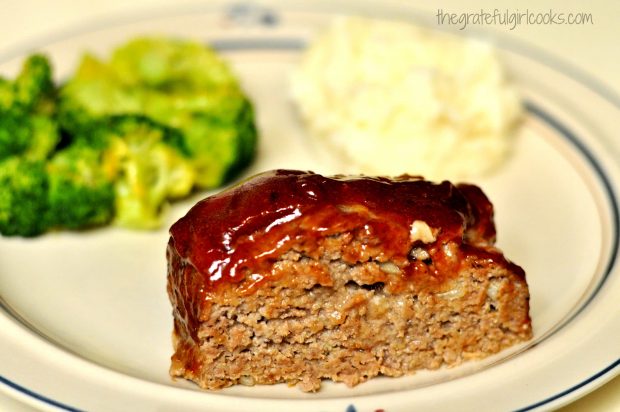
A slice of meatloaf has been cut, and is ready to serve.

My husband and I usually eat this dish with a side of mashed potatoes and a fresh steamed or baked veggie. That’s it! Slice yourself a piece, and enjoy the delicious sauce and wonderful tasting beef dish! EASY, EASY, EASY… and it tastes quite good, too. Sure hope you’ll give this recipe a try!

If you enjoy meatloaf, be sure to try my recipes for TexMex Turkey Meatloaf and Cheesy Italian Meatloaf. Both are delicious meals you will enjoy, as well.

Meatloaf slice on a plate, with mashed potatoes and broccoli on the side.

I’ve been making this dish for over 20 years now, and we really enjoy it! That HAS to be some sort of a Christmas miracle (wink, wink)!  Have a great week, and God bless you!

Looking For Other Recipes That Use Ground Beef?

You can find other recipes using beef in the Recipe Index at the top of the page. A few of our favorites include:

Interested In More Recipes?

Thank you for visiting this website. I appreciate you using some of your valuable time to do soIf you’re interested, I publish a newsletter 2 times per month (1st and 15th) with all the latest recipes, and other fun info. I would be honored to have you join our growing list of subscribers, so you never miss a great recipe! 

There is a Newsletter subscription box on the top right side (or bottom) of each blog post, depending on the device you use, where you can easily submit your e-mail address (only) to be included in my mailing list.

You Can Also Find Me On Social Media:

Facebook page: The Grateful Girl Cooks!
Pinterest:
The Grateful Girl Cooks!
Instagram:
jbatthegratefulgirlcooks

Have a great day!

Author's signatureRecipe Source: Mrs. Gordon Rasmussen, Monte Vista Chapel Ladies Cookbook

5 from 1 vote
Really Good Meatloaf
Prep Time
10 mins
Cook Time
1 hr
Total Time
1 hr 10 mins
 
Take it from me... someone who used to despise meatloaf. This is Really GOOD Meatloaf, especially with the BBQ flavored sauce on top! It's a cinch to make!
Category: Beef, Entree
Cuisine: American
Keyword: meatloaf
Servings: 6 servings
Calories Per Serving: 411 kcal
Author: JB @ The Grateful Girl Cooks!
Ingredients
For The Meatloaf:
  • 2/3 cup dry bread crumbs or crushed crackers (I prefer bread crumbs)
  • 1 cup milk
  • 1 1/2 pounds ground beef
  • 2 eggs
  • 1/4 cup chopped brown onion
  • 1 teaspoon salt
  • 1/4 teaspoon black pepper
  • 1 teaspoon poultry seasoning (YES... poultry seasoning!)
For The Sauce:
  • 3 Tablespoons brown sugar
  • 1/4 cup ketchup
  • 1/4 teaspoon ground nutmeg
  • 1 teaspoon dry mustard powder
Instructions
  1. Mix all meatloaf ingredients together in a large mixing bowl.
  2. Place a piece of parchment paper on a baking sheet (with edges). Place the meat mixture onto the middle of the parchment paper and shape into a loaf.

  3. Bake at 350 degrees for 30 minutes. While it is baking, mix up the sauce ingredients in a small bowl.
  4. After 30 minutes, remove meatloaf from oven; spread the sauce completely over the top and sides of the loaf. Put the meatloaf back into the oven and continue baking for an additional 30 minutes. (Meatloaf will cook for a total of 60 minutes).
  5. When done, remove from oven, slice and serve (4-6 servings, depending on portion size). Enjoy!
Recipe Notes

Caloric calculation is based on a total of 6 servings.

Nutrition Facts
Really Good Meatloaf
Amount Per Serving (1 slice)
Calories 411 Calories from Fat 225
% Daily Value*
Fat 25g38%
Saturated Fat 9g56%
Cholesterol 137mg46%
Sodium 682mg30%
Potassium 458mg13%
Carbohydrates 20g7%
Sugar 11g12%
Protein 24g48%
Vitamin A 215IU4%
Vitamin C 0.9mg1%
Calcium 108mg11%
Iron 3.2mg18%
* Percent Daily Values are based on a 2000 calorie diet.

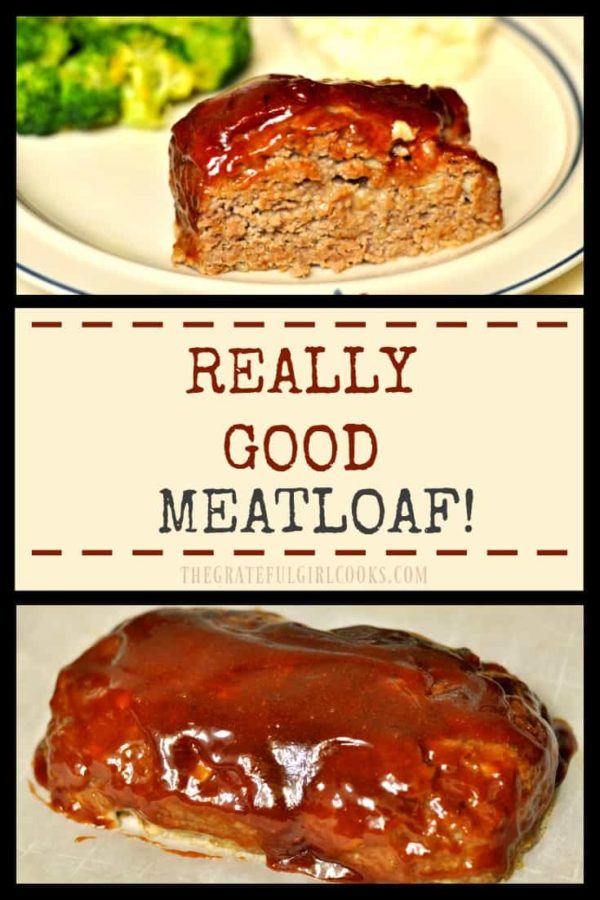
Here’s one more to pin on your Pinterest boards!Take it from me... someone who used to despise meatloaf. This is Really GOOD Meatloaf, especially with the BBQ flavored sauce on top! It's a cinch to make!

Save

Save

Save

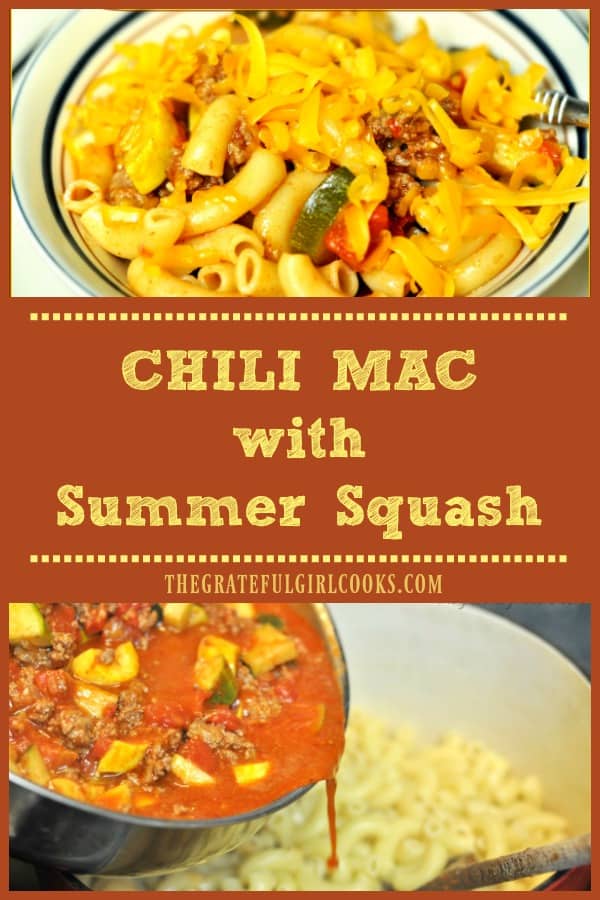
Chili Mac With Summer Squash

Chili Mac with Summer Squash is a budget friendly, easy, delicious meal, with ground beef, pasta, fresh veggies and great Southwest flavor!Chili Mac with Summer Squash is a budget friendly, easy, delicious comfort food meal, with ground beef, pasta, fresh summer veggies and great Southwest flavor!
Well, if you’re looking for an inexpensive, easy to prepare “Comfort Food” kind of meal… this “Chili Mac With Summer Squash” is it!!  I made this Southwestern flavored recipe up as I went along (really), but it is loosely based on the goulash recipe (Italian-flavored) my Mom used to make for us kids when we were growing up.

I fixed this EASY PEASY yummy dish for my husband and I for dinner recently, and it filled us up!  It’s pretty amazing what you can do with a pound of hamburger meat, some fresh veggies from the garden (or store), elbow macaroni, and some tasty Southwestern spices! The recipe serves 4-6 depending on serving size, so all in all, it’s a lot of bang for your hard earned money! Here’s how to make this:

Scroll Down For A Printable Recipe Card At The Bottom Of The Page

Cook The Meat 

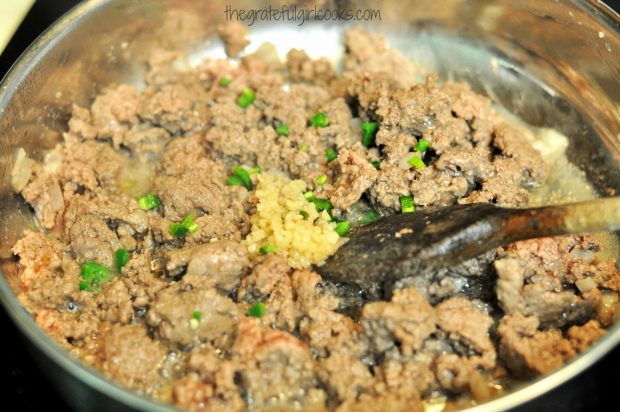
First, brown one pound of ground beef with chopped onions and a bit of diced jalapeno. When it is nearly done, add minced garlic.

Ground beef, onions, garlic and jalapeno are cooked for chili mac
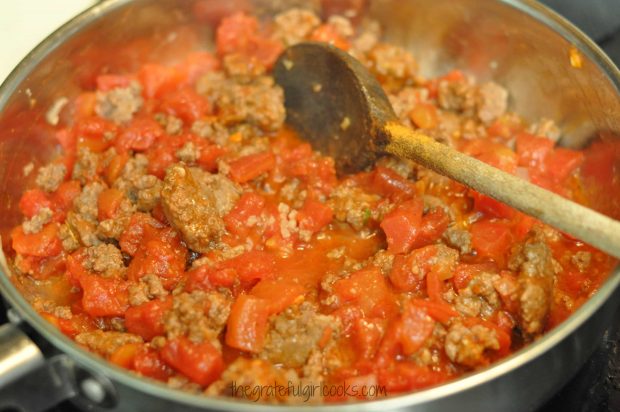
Drain off the grease (discard), then add one small can of diced tomatoes, a little water, some taco seasoning, salt, and pepper to the beef. (I used 3 large Tablespoons of my homemade taco seasoning mix:  “Make Your Own Taco Seasoning Mix”).

Canned tomatoes and chili spices are added to ground beef mixture
Time To Add The Summer Squash!

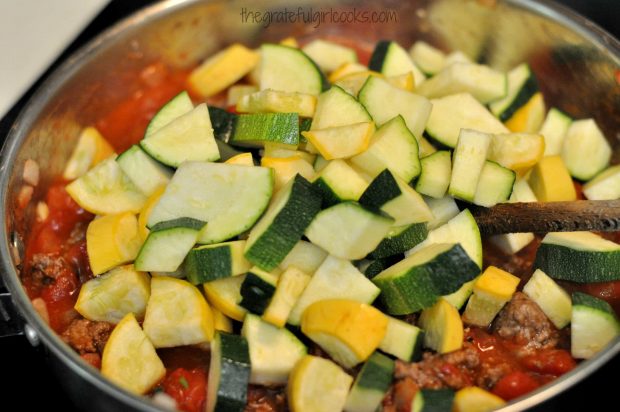
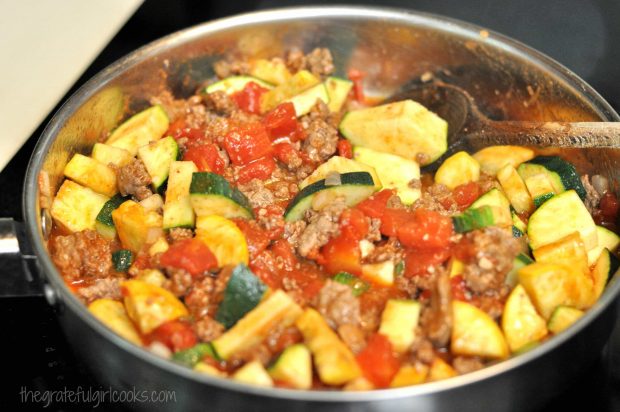
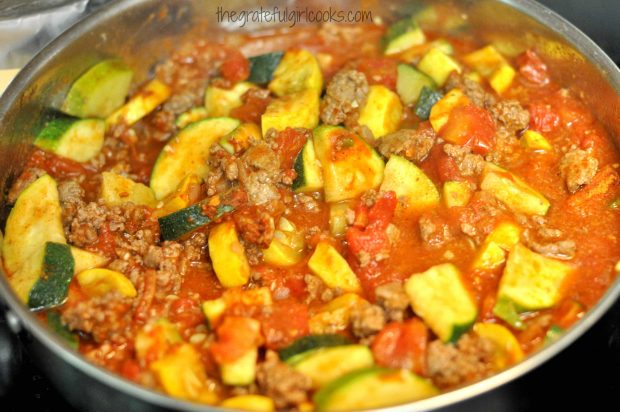
Stir well, then add zucchini and yellow squash (cut in quarters). I used my homegrown veggies (yay for my garden). Stir again to combine, then cover the skillet and let it all cook for 9-10 minutes. Only cook long enough to cook the squash, but not let it get “smooshy”.

Sliced summer squash is added to chili beef mixture

Summer squash is cooked with ground beef, tomatoes and spices
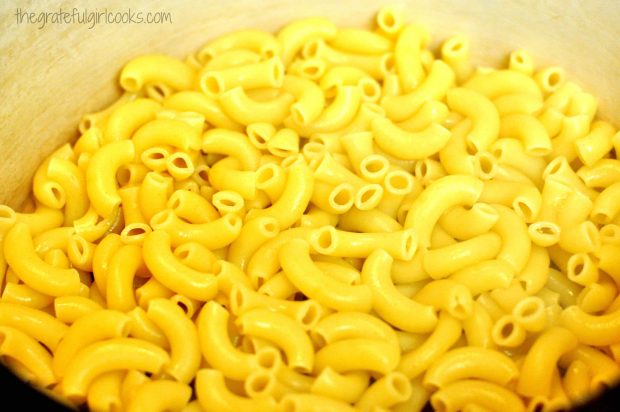
To Save Time: While the meat and veggies are cooking, cook the elbow macaroni separately in a large saucepan. Once the meat and veggies were done cooking, I uncovered the skillet to take a photo to show what it will look like.

Summer squash is finished cooking with chili beef
Finish Making The Chili Mac with Summer Squash

Once the pasta noodles have finished cooking, drain the water from them. Put the drained macaroni noodles back into the large pot they were cooked in.

Macaroni noodles are cooked, then drained.
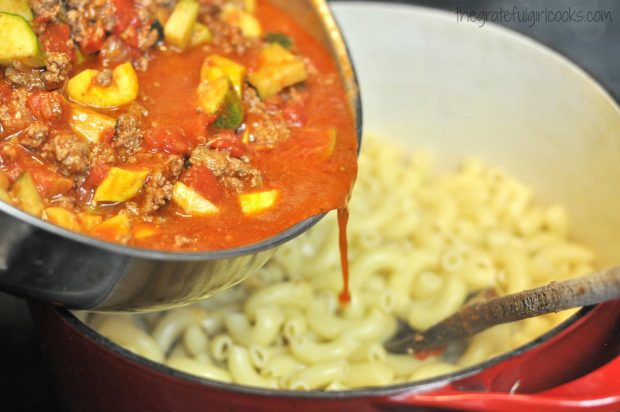
Immediately pour the entire skillet of hot meat and veggies into the pan of cooked/drained macaroni.

Summer squash, chili beef and tomatoes are poured over cooked macaroni
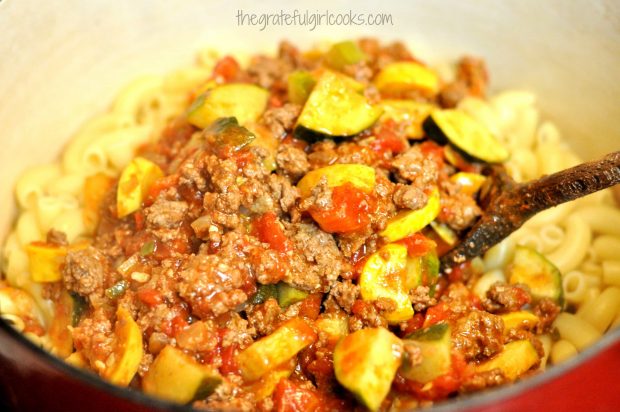
Stir it all together, then heat it another minute or two to make sure it is hot… then taste-test it to make sure it is seasoned with enough salt.

Pasta, beef and summer squash are stirred to combine.
Time to EAT!

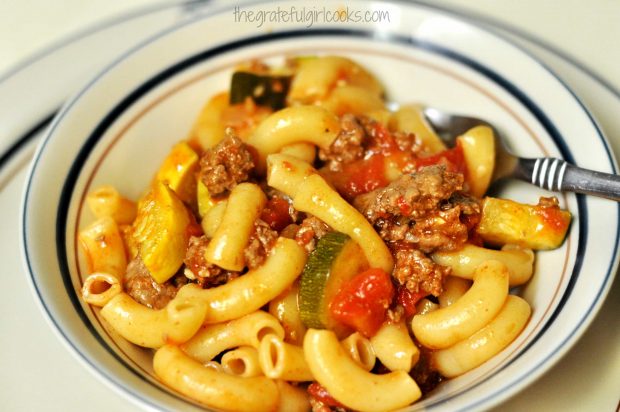
Ladle the Chili Mac into serving bowls while it is piping hot!

Chili mac with summer squash is placed into bowls for serving
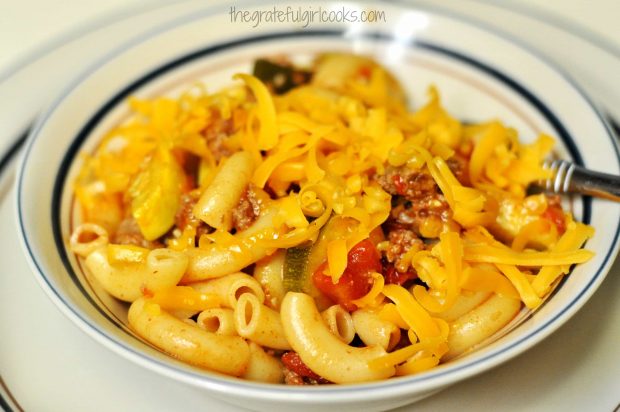
Sprinkle each bowl with a small amount of grated cheddar cheese, then serve it! There ya have it… a tasty one-dish meal that has meat, pasta, AND yummy veggies!

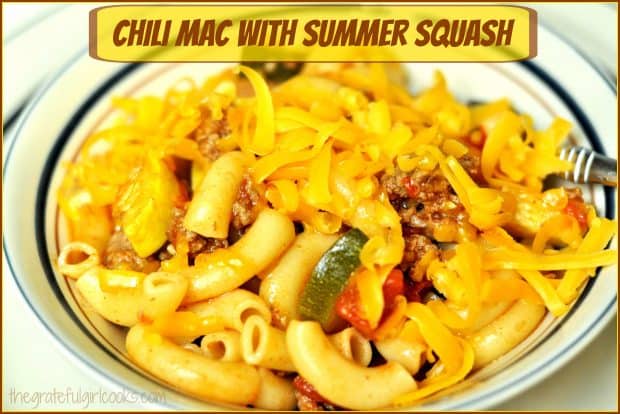
Chili mac is sprinkled with grated cheddar cheese to serve.
All that’s left to do is grab a fork and dig in! Chili Mac with summer squash is quick, easy, totally inexpensive to make, and really good. How good, you ask? The kind of good where you want to “put on stretchy pants and hang out on the couch watching a great movie while you eat this on a rainy day good”.

Sure hope you will give this recipe a try! The leftovers are amazingly yummy, as well- (speaking with first-hand knowledge!)  I think you’ll like this comforting dish as much as we do, and will LOVE how easy it is to prepare!

Looking For More PASTA Recipes?

You can find all of my recipes in the Recipe Index, which is located at the top of the page. I have LOTS of delicious featuring pasta, including:

Interested In More Recipes?

Thank you for visiting this website. I appreciate you using some of your valuable time to do soIf you’re interested, I publish a newsletter 2 times per month (1st and 15th) with all the latest recipes, and other fun info. I would be honored to have you join our growing list of subscribers, so you never miss a great recipe!
There is a Newsletter subscription box on the top right side (or bottom) of each blog post, depending on the device you use, where you can easily submit your e-mail address (only) to be included in my mailing list.

You Can Also Find Me On Social Media:
Facebook page: The Grateful Girl Cooks!
Pinterest: The Grateful Girl Cooks!
Instagram: jbatthegratefulgirlcooks

Have a GREAT day!

Author's signature

0 from 0 votes
Chili Mac With Summer Squash
Prep Time
15 mins
Cook Time
9 mins
Total Time
24 mins
 
Chili Mac with Summer Squash is a budget friendly, easy, delicious comfort food meal, with ground beef, pasta, fresh summer veggies and great Southwest flavor!
Category: Entree
Cuisine: Southwestern
Keyword: chili mac
Servings: 5 servings
Calories Per Serving: 562 kcal
Author: JB @ The Grateful Girl Cooks!
Ingredients
  • 1 pound hamburger meat
  • 1/3 cup chopped onion
  • 1/2 small jalapeno pepper , (de-stemmed and seeded), chopped finely
  • 1 1/2 teaspoons minced garlic
  • 1 teaspoon salt
  • 1/4 teaspoon black pepper
  • 1 envelope taco seasoning or 3 Tablespoons homemade taco seasoning
  • 1 can diced tomatoes (14.5 ounces)
  • 1/2 cup water
  • 1 green zucchini , sliced, then cut into quarters
  • 1 yellow squash , sliced, then cut into quarters
  • 2 cups elbow macaroni (cooked per package directions)
  • 1 cup grated cheddar cheese
  • Additional salt (to taste)
Instructions
  1. Before cooking the hamburger meat, bring a large saucepan full of water to a boil (to cook the macaroni in)
  2. In large skillet, brown the hamburger meat, chopped onion and jalapeno. Right before meat is fully cooked, add the minced garlic. Drain grease off meat when fully cooked. Return skillet to stove.
  3. Add tomatoes, taco seasoning, water, salt and pepper, zucchini, and yellow squash. Stir to combine. Cover skillet, then continue to cook on medium-low for approximately 9 minutes. Do not let squash get smooshy!
  4. While meat mixture is cooking, prepare macaroni noodles in a large saucepan, according to package directions. When done, drain macaroni, then return noodles to large saucepan.
  5. Add in the hot meat/squash mixture. Stir to combine. Heat quickly (uncovered) on medium-high for a minute or two, stirring constantly, to heat dish thoroughly. Taste test. If it needs more salt, add it now.
  6. Spoon mixture into individual serving bowls. Top with grated cheddar cheese, and serve hot!
Nutrition Facts
Chili Mac With Summer Squash
Amount Per Serving (1 serving (1/5 of total))
Calories 562 Calories from Fat 234
% Daily Value*
Fat 26g40%
Saturated Fat 11g69%
Cholesterol 88mg29%
Sodium 809mg35%
Potassium 767mg22%
Carbohydrates 49g16%
Fiber 3g13%
Sugar 5g6%
Protein 30g60%
Vitamin A 515IU10%
Vitamin C 24.1mg29%
Calcium 231mg23%
Iron 3.7mg21%
* Percent Daily Values are based on a 2000 calorie diet.

Here’s one more to pin on your Pinterest boards!Chili Mac with Summer Squash is a budget friendly, easy, delicious comfort food meal, with ground beef, pasta, fresh summer veggies and great Southwest flavor!


Save

Save

Meatballs Stroganoff

Easy, budget friendly, and absolutely delicious, meatballs stroganoff, in a creamy mushroom sauce served on top of egg noodles, is comfort food at it’s best!Easy, budget friendly, and absolutely delicious, meatballs stroganoff, in a creamy mushroom sauce served on top of egg noodles, is comfort food at it's best!

Does it seem like Summer is rushing madly by? It does to me! We’ve had family members visiting for a large part of the month of July, and I am stunned that it’s already August and almost time for FALL. You know what that means, right? IT’S time for “MEATBALLS STROGANOFF”!!! (ok, totally lame transition, but work with me here, folks!)

Here’s the backstory. I thawed out some hamburger meat, fully intending to grill burgers. However, it was so hot outside I didn’t want myself or my hubby to have to grill and sweat at the same time.

I decided to cook something on the old stove top. THAT’S why I made these scrumptious meatballs. Now we can all sleep better tonight, knowing all the intricate details, right? Guess what? This dish is inexpensive to make, and the recipe makes 4-6 servings (depending on just how many meatballs one can eat in a serving)!

Scroll Down For A Printable Recipe Card At The Bottom Of The Page

How To Make Meatballs Stroganoff

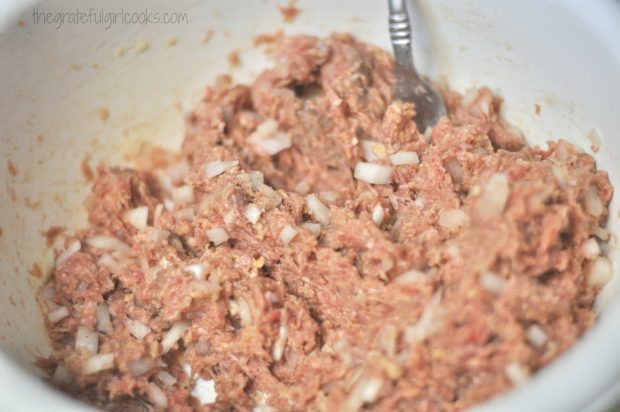
First thing you will need to do is mix up the ground beef, milk, dry bread crumbs, salt and pepper in a large bowl. Easy, right? Right!

Ground beef, bread crumbs and spices in mixing bowl to make meatballs for meatballs stroganoff.
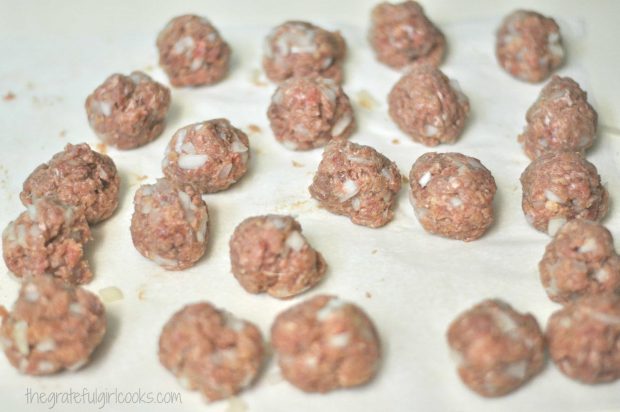
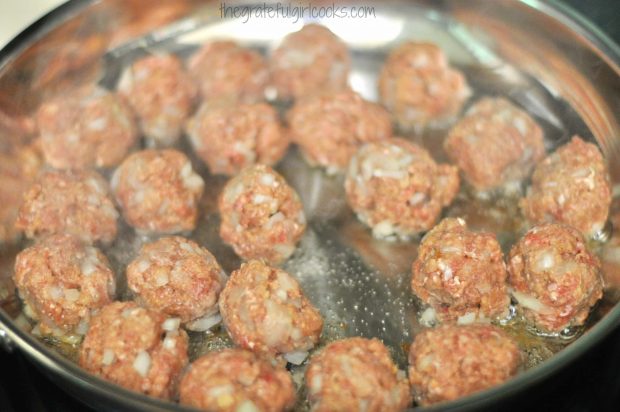
Shape this mixture into meatballs. Brown them in a small amount of butter in a large skillet.

Meatballs browning in oil in large skillet
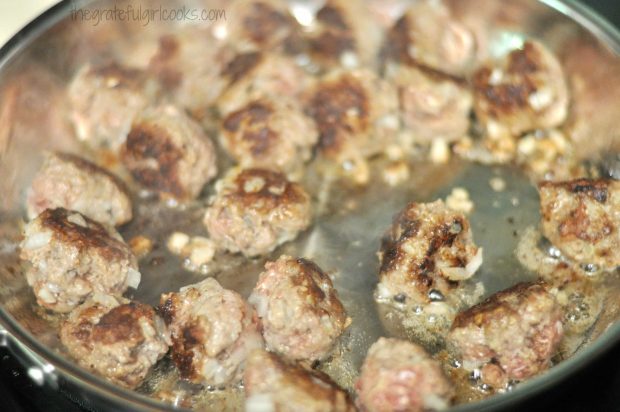
Brown the meatballs on all sides. Once they are brown all over transfer them out of the skillet to a plate while the stroganoff sauce is being made. Drain the grease out of the skillet, and give it a quick wash (the skillet, NOT the grease!).

Browned meatballs for meatballs stroganoff are cooking in silver skillet.
Make The Stroganoff Sauce

To prepare the stroganoff sauce, cook the chopped onions, mushrooms, and paprika in a skillet with a bit of butter until tender.

Cooking mushrooms, onions and spices for stroganoff sauce for meatballs
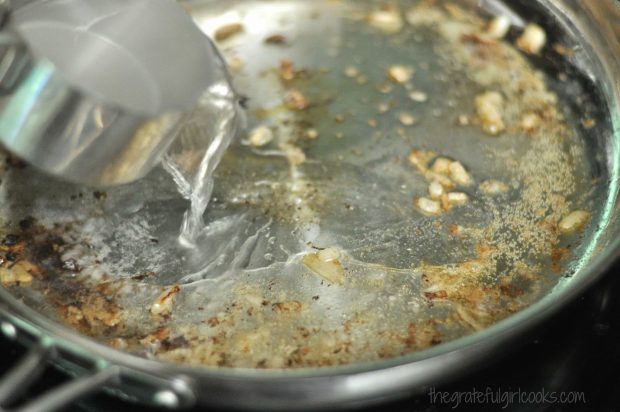
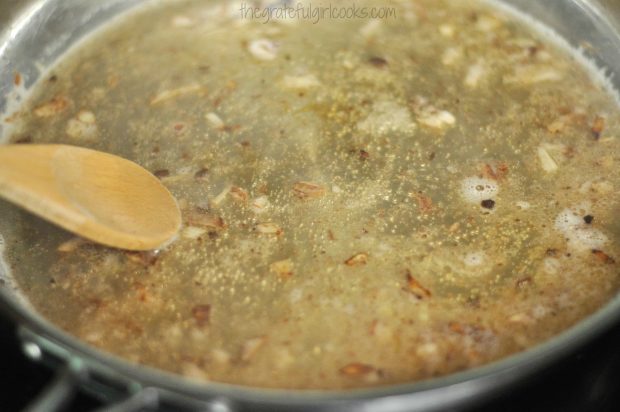
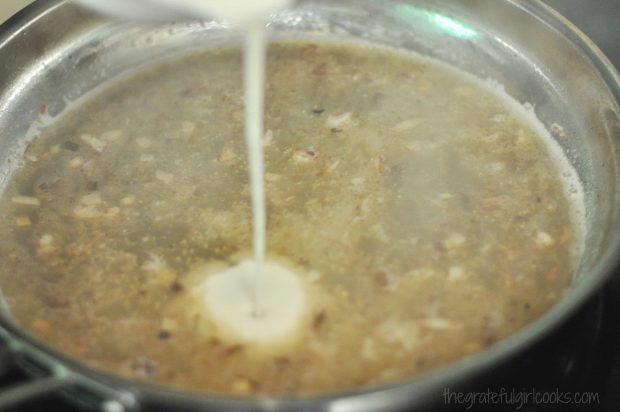
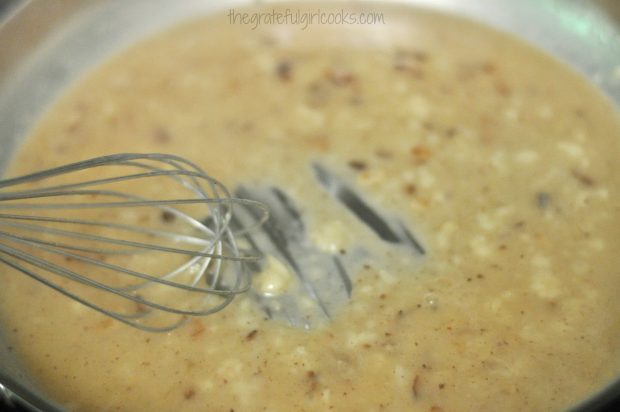
Once the onions are tender, sprinkle the mixture with flour and stir to blend. Add the beef bouillon, salt and pepper to the skillet. Whisk it together to form a sauce.

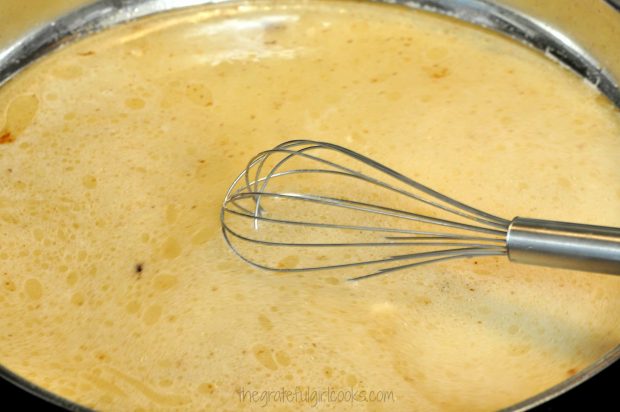
Flour is added to mushrooms and onions in skilletBeef broth is added to stroganoff sauce in skilletStroganoff sauce (with whisk) thickens as it is cooked in pan
Add The Meatballs to the Sauce

Return the meatballs to the sauce, and cover the skillet.  Cook the meatballs stroganoff for 10-12 minutes on medium/low heat, until they’re completely heated through. Spoon the stroganoff sauce over the meatballs several times during this cooking process. The sauce will thicken slightly as it cooks.

While the meatballs stroganoff are cooking, combine the sour cream and Worcestershire sauce in a small bowl, and set aside.

Cooked meatballs stroganoff with sauce in skillet.Cook the Egg Noodles

Cook the egg noodles in a separate pan, according to the manufacturer’s directions. When egg noodles are fully cooked, drain them. Add a little butter and some chopped fresh dill to the noodles if you want (optional).

Egg noodles are cooked to serve with meatballs stroganoff.
Add the blended sour cream/Worcestershire sauce to the meatballs stroganoff and stir, to fully combine. Continue to heat the meatballs stroganoff for a couple of minutes, so they are heated through. Be careful to not let the sauce come to a boil.

Sour cream is added to meatballs stroganoff and sauce at end of cooking time.
Serve the Meatballs Stroganoff

To serve, place the cooked and drained hot egg noodles onto individual plates. Top the noodles with the meatballs stroganoff. A serving size is anywhere from 2-4 meatballs, depending on how hungry you are!

Spoon the extra mushroom sauce over the top of the meatballs and noodles, then sprinkle the top of the meatballs with a bit of fresh or dried parsley.

Meatballs stroganoff is served on top of cooked egg noodles
We really love these “comfort food” meatballs stroganoff! Hope you will give ’em a try! I think you will like them, too. Have a great day!

Looking For More MEATBALL Recipes?

You can find ALL my recipes in the Recipe Index, located at the top of the page. I have several recipes that feature meatballs, including:

Interested In More Recipes?

Thank you for visiting this website. I appreciate you using some of your valuable time to do soIf you’re interested, I publish a newsletter 2 times per month (1st and 15th) with all the latest recipes, and other fun info. I would be honored to have you join our growing list of subscribers, so you never miss a great recipe! 

There is a Newsletter subscription box on the top right side (or bottom) of each blog post, depending on the device you use, where you can easily submit your e-mail address (only) to be included in my mailing list.

You Can Also Find Me On Social Media:

Facebook page: The Grateful Girl Cooks!
Pinterest:
The Grateful Girl Cooks!
Instagram:
jbatthegratefulgirlcooks

Author's signatureRecipe Source: Unknown. I wrote it on a 3×5 card many, many YEARS ago, and neglected to add the original source. Sorry, whoever you are, dear recipe provider!

0 from 0 votes
Meatballs Stroganoff
Prep Time
30 mins
Cook Time
10 mins
Total Time
40 mins
 

Easy, budget friendly, and absolutely delicious, meatballs stroganoff, in a creamy mushroom sauce served on top of egg noodles, is comfort food at it's best!

Category: Entree
Cuisine: American
Keyword: meatballs stroganoff
Servings: 6 servings (3 meatballs each)
Calories Per Serving: 563 kcal
Author: JB @ The Grateful Girl Cooks!
Ingredients
  • 1 1/2 pounds ground beef
  • 3/4 cup milk
  • 3/4 cup dried bread crumbs
  • 3 Tablespoons chopped parsley
  • 1 1/2 teaspoons salt
  • 1/4 teaspoon black pepper
  • 4 Tablespoons butter , divided
  • 3/4 cup chopped brown onions
  • 1/2 pound mushrooms , sliced
  • 3/4 teaspoon paprika
  • 2 Tablespoons flour
  • 1 can beef bouillon/broth
  • 1/2 teaspoon Worcestershire sauce
  • 1/2 cup sour cream
  • 2 cups (cooked) Hot egg noodles , prepared according to manufacturer's directions
  • Chopped fresh dill (optional, for garnishing egg noodles)
  • Chopped parsley (optional, for garnishing meatballs when serving)
Instructions
  1. Mix the ground beef, milk, dried bread crumbs, salt and pepper in a medium bowl. Shape meat mixture into 1/1/4 inch balls.
  2. Add 2 Tablespoons butter to a large skillet. Heat on medium to melt butter. Add meatballs to melted butter and brown meatballs completely on all sides. When done, remove meatballs to a plate. Cover plate with aluminum foil to keep meatballs warm.
  3. In a clean skillet, melt 2 Tablespoons butter over medium heat. Add onions, mushrooms, and paprika. Cook this until onions are tender (3-4 minutes).
  4. Sprinkle flour over onion/mushrooms. Stir to combine. While stirring, add the beef bouillon, salt and pepper, and stir until fully combined.
  5. Begin cooking egg noodles in separate saucepan while you finish making the sauce.
  6. Combine the sour cream and Worcestershire sauce in a small bowl. Set aside.
  7. Return the meatballs to the sauce in skillet, cover, and simmer on low for 10-12 minutes, spooning the sauce over the meatballs to coat, occasionally.
  8. Stir the sour cream/Worcestershire sauce into the meatballs. Stir to combine. Heat through, but do not let sauce boil once you've added the sour cream.
  9. Drain egg noodles, toss with a small amount of butter (if desired), and add some chopped fresh dill (if desired). Place egg noodles onto serving plate, then top with 2-4 meatballs and sauce (quantity of meatballs depending on how hungry you are). Garnish with chopped parsley, if desired. Enjoy!
Nutrition Facts
Meatballs Stroganoff
Amount Per Serving (3 meatballs + noodles)
Calories 563 Calories from Fat 324
% Daily Value*
Fat 36g55%
Saturated Fat 16g100%
Cholesterol 127mg42%
Sodium 1117mg49%
Potassium 621mg18%
Carbohydrates 30g10%
Fiber 2g8%
Sugar 4g4%
Protein 27g54%
Vitamin A 715IU14%
Vitamin C 5.1mg6%
Calcium 123mg12%
Iron 3.9mg22%
* Percent Daily Values are based on a 2000 calorie diet.

Here’s one more to pin on your Pinterest boards!Easy, budget friendly, and absolutely delicious, meatballs stroganoff, in a creamy mushroom sauce served on top of egg noodles, is comfort food at it's best!

Save

Save

Southwestern Cobb Salad with Chili-Rubbed Steak

You’ll enjoy this Southwestern Cobb Salad, with chili-rubbed steak, Romaine lettuce, feta cheese, orange slices, jicama, tomatoes, avocado & a delicious salad dressing.You'll enjoy this Southwestern Cobb Salad, with Romaine lettuce, feta cheese, orange slices, jicama, tomatoes, avocado & a delicious salad dressing.
Last summer I found a Food Network cookbook in a used bookstore. The original price was listed as $29.95, but because it was used, I only paid $1.99 for it. SCORE!  I’ve marked several recipes in it that I want to try… the first one that I’ve “officially” tried is this one for a delicious Southwestern Cobb Salad with Chili-Rubbed Steak. This Southwestern cobb salad has it all- meat, veggies, fruit, cheese, sweet, crunch, and spice. WOW!  You’re gonna love it!

Scroll Down For A Printable Recipe Card At The Bottom Of The Page

Why I LOVE This Southwestern Cobb Salad!

I made this entree salad for our dinner a couple of nights ago. It was fantastic… as well as a gorgeous looking salad!  The salad was fairly easy to prepare, and the tastes were amazing! From the homemade salad dressing with a touch of spice and orange burst of freshness, to the simple chili-rubbed steak, this salad is filled with fresh, wonderful flavors!

The flavors I just described are the supporting stars of this Southwestern cobb salad, which features Romaine lettuce, feta cheese, fresh orange slices, jicama, tomatoes and avocado. My husband and I both LOVED it, and he’s already asked me to prepare it again soon.

How To Make The Salad Dressing For Southwestern Cobb Salad

First thing I did was to make the salad dressing. Making the salad dressing is easy. I loved the addition of orange zest to it… the citrus zest helped make it very fresh tasting! Place the salad dressing ingredients into a small bowl. Easy enough so far, right?

Ingredients for salad dressing for Southwestern cobb salad, in a small bowl

Give the salad dressing ingredients a good whisking, and it’s done! Now all you will need to do is cover the bowl, and refrigerate the dressing until ready to use! EASY!

Whisking salad dressing ingredients for Southwestern cobb salad.

Make A Chili Spice Rub For The Steak

The next thing to do is make the chili spice rub mixture in another small bowl.  It’s simply olive oil and chili powder that you can mix together using a fork.. Making this rub is quick and EASY.

Preparing the spice rub mixture for the steak used in the Southwestern cobb salad.

Once fully mixed, put a little bit of the rub on the steaks. TIP:  The chili rub mixture is fairly spicy, so use discretion how much you put on the steaks.

Chili spice rub is put on steaks before cooking them to use in the Southwestern cobb salad.

Rub the chili powder/oil mixture onto both sides of the steaks, before cooking.

Steaks for Southwestern cobb salad are covered with chili spice rub berore cooking.

How To Peel and Cut Orange Slices For Southwestern Cobb Salad

Once salad dressing, spice rub and steaks are ready, it’s time to chop the fresh veggies and fruit. Start with the orange. Cut the top and bottom peel off of an orange. Then cut down the sides of the orange, removing all peel and white “pith”.

You’ll be left with something that looks like this (below). Use a sharp knife and cut between each of the sections and remove the orange slices for the salad. Get the white membrane cut off the orange slices. It’s not too difficult.

Sectioning a whole peeled orange for slices to use in Southwestern cobb salad.

Preparing Jicama For The Southwestern Cobb Salad

This strange looking thing is a jicama, also known as a Mexican turnip. It has the firm texture of a raw potato. Use a sharp knife and carefully cut the peel off. It will look like a potato once it has been peeled.

Jicama must be peeled to use for Southwestern cobb salad.

Cut the peeled jicama into 1 inch slices, then cut each slice into small cubes.

Raw jicama is sliced then cut into cubes for Southwestern cobb salad.

Assembling The Salad

The prep for the salad involves cubing the jicama, cutting the orange into gorgeous sections, chopping the tomatoes, and cutting a fresh avocado into cubes.

These ingredients for the Southwestern cobb salad were layered in rows, along with crumbled feta cheese, on top of the romaine lettuce. Make sure to leave a couple rows open to add the steak after it has been cooked! The platter with the lettuce and veggies was covered with plastic wrap and went into the refrigerator to keep cold, while I cooked the steak.

Cooking The Steak For Southwestern Cobb Salad

The steak was cooked per the original recipe instructions in the broiler of our oven. It was convenient and delicious, using this oven method. The next time I make this Southwestern Cobb Salad, I will throw the steaks on our Weber grill to achieve an even more smoky taste!

Here’s the what the steak looks like, right after coming out from the oven broiler. Let the meat rest for 5 minutes before cutting. It is important to let the meat rest. This will keep most of the good juices inside the meat, instead of all over the pan. More juice INSIDE the steak means more FLAVOR! Once meat has rested, cut into small cubes.

Chili-rubbed steak is cooked under oven broiler for Southwestern cobb salad.

Remove the salad from refrigerator, and add the steak cubes, as shown. This Southwestern Cobb Salad with chili-rubbed steak sure is pretty to look at!

Roadmap For Assembling and Serving Southwestern Cobb Salad

Here’s the “roadmap” for the salad: Place chopped Romaine lettuce on bottom of serving platter (or individual plates). Arrange rows of prepped fruit and veggies for a colorful presentation.

The order I used for the rows, left to right, were Feta cheese, chopped tomatoes, orange slices, steak cubes, jicama cubes, avocado, and more steak cubes. After the salad is layered, the only thing left to do is pour the dressing on top of the Southwestern cobb salad, and toss gently to combine. That’s it!

Ingredients for Southwestern cobb salad are placed in rows on Romaine lettuce before serving.

This Southwestern Cobb Salad is an all in one dinner salad, and it is delicious! Hope you will give it a try. I confident you will LOVE it!  Enjoy!

If you enjoy Main Course Salads, be sure to check out these recipes below. These and others can be found in the RECIPE INDEX, found in the menu toolbar at the top of each page.

Interested In More Recipes?

Thank you for visiting this website. I appreciate you using some of your valuable time to do soIf you’re interested, I publish a newsletter 2 times per month (1st and 15th) with all the latest recipes, and other fun info. I would be honored to have you join our growing list of subscribers, so you never miss a great recipe!
There is a Newsletter subscription box on the top right side (or bottom) of each blog post, depending on the device you use, where you can easily submit your e-mail address (only) to be included in my mailing list.

You Can Also Find Me On Social Media:

Facebook page: The Grateful Girl Cooks!
Pinterest:
The Grateful Girl Cooks!
Instagram:
jbatthegratefulgirlcooks

  Author's signatureRecipe Source: “Food Network Kitchens Cookbook”, published 2003, The Meredith Corporation, page 78.

0 from 0 votes
Southwestern Cobb Salad with Chili-Rubbed Steak
Prep Time
20 mins
Cook Time
15 mins
Total Time
35 mins
 
You'll enjoy this Southwestern Cobb Salad, with chili-rubbed steak, Romaine lettuce, feta cheese, orange slices, jicama, tomatoes, avocado & a delicious salad dressing.
Category: Entree/Salad
Cuisine: Southwestern
Keyword: Southwestern Cobb Salad
Servings: 4 servings
Calories Per Serving: 694 kcal
Author: JB @ The Grateful Girl Cooks!
Ingredients
For the dressing:
  • 2 cloves garlic cloves , minced
  • 1/2 teaspoon salt
  • 1/3 cup mayonaise
  • 1/3 cup buttermilk
  • 1 Tablespoon chipotle hot sauce (I used sauce from a can of adobo chiles)
  • 3 Tablespoons fresh minced cilantro
  • 1 stem scallion (use the white and green parts of the onion), thinly sliced
  • 1 teaspoon finely grated orange zest
For the steak:
  • 1.75 pounds tri-tip steak or other sirloin steak ( I used 2 steaks), for a total of about 1 3/4 pounds meat
  • 1 Tablespoon olive oil
  • 1.5 Tablespoons chili powder
For the salad:
  • 5 cups head Romaine lettuce , torn or chopped
  • 1 ripe avocado
  • 2 ripe medium tomatoes , diced
  • 1/2 cup crumbled feta cheese , or more (can also use Cotija cheese)
  • 1 orange , peeled, cut into sections
  • 1/2 medium jicama , peeled and cubed (about 1 1/2 cups)
  • Salt and freshly ground black pepper , to taste
Instructions
  1. Make the salad dressing: Smash the garlic cloves with the flat side of a butcher knife, then sprinkle with salt. Mix together to form a thick paste. Put the garlic "paste" into a msall bowl, then add the rest of the salad dressing ingredients (mayo, buttermilk, chipotle hot sauce, cilantro, scallion and orange zest). Whisk ingredients together until thoroughly combined. Cover and refrigerate.
  2. Prepare the steak: Lightly salt and pepper the steak. In a small bowl, mix the chili powder and olive oil together until combined into a thick paste. Put this on the meat, and rub the spices into both sides of the meat. If you are grilling steak outside, put on grill and cook until medium. If you are going to be broiling the steak (as per recipe), here's what you need to do: Put a broiler rack and pan about 6 inches away from the broiler in your oven. Turn broiler on and let the pans PREHEAT for several minutes before putting the meat on the pan. When the broiler pan is really HOT, add the steak. (You should hear it sizzle as it hits the broiler pan). Cook for 7-8 minutes on each side for medium, turning once. When done, remove the steak to a cutting board. Let the meat rest for about 5 minutes, then cut into cubes.
  3. To make the salad: Halve, seed, peel and cube the avocado. Peel and section the orange. Peel and cube the jicama. Chop the tomatoes. Put the chopped Romaine lettuce onto a large serving platter (or in a large salad bowl). Arrange the feta, chopped tomatoes, orange sections, steak, jicama and avocado in strips on top of the lettuce. Sprinkle with salt and pepper. Pour the salad dressing over the salad, and toss to combine. (if making individual serving plates, use 3 Tablespoons of dressing per salad).
Recipe Notes

NOTE: This recipe can be adapted to serve 6, by creating smaller portion sizes.

Nutrition Facts
Southwestern Cobb Salad with Chili-Rubbed Steak
Amount Per Serving (1 (1/4 of total))
Calories 694 Calories from Fat 423
% Daily Value*
Fat 47g72%
Saturated Fat 13g81%
Cholesterol 157mg52%
Sodium 891mg39%
Potassium 1393mg40%
Carbohydrates 20g7%
Fiber 9g38%
Sugar 8g9%
Protein 47g94%
Vitamin A 6800IU136%
Vitamin C 46.6mg56%
Calcium 228mg23%
Iron 4.9mg27%
* Percent Daily Values are based on a 2000 calorie diet.

Here’s one more to pin to your Pinterest boards!You'll enjoy this Southwestern Cobb Salad, with chili-rubbed steak, Romaine lettuce, feta cheese, orange slices, jicama, tomatoes, avocado & a delicious salad dressing.

Save

Save

Save

Save

Chili & Cheese Stuffed Spud

Need a quick, filling lunch or dinner that is REALLY easy? Why not make a chili cheese stuffed spud, with sour cream, cheddar cheese and green onions!Need a quick, filling lunch or dinner that is REALLY easy? Why not make a chili cheese stuffed spud, with sour cream, cheddar cheese and green onions!
Ever have those moments when you just don’t want to cook dinner? What? You do, too??? Shocking! I had one of those moments recently (several times, actually). I ended up making a Chili Cheese Stuffed Spud for my husband and I.

I was too tired to “want” to fix anything, so I  heated up some leftover chili I had in the fridge (Mom’s Old-Fashioned Chili). Use any kind of chili you like! Then I stuffed a big beast-like “baker” potato with the chili.  You know – the BIG potatoes!

That humongous potato was filled with the chili, then topped with cheese, sour cream and green onions, and POOF! Dinner was served! Or as I like to say: “Dinner is served. I am offering two choices tonight for your dining pleasure. 1) Take It, or 2) Leave It.”

A Chili Cheese Stuffed Spud Is A Filling Meal!

This was a delicious, filling, “all-in-one” dinner.  “Ya got your potato, ya got your chili with meat and beans, ya got your cheese, ya got your sour cream, and ya got your green onions” (said with a deep New York accent, of course!). Geepers, if you threw some chocolate on there, you would have almost ALL the food groups represented… but I digress.

I threw (translation: gently and lovingly placed) the potatoes in the oven and baked them, but if you’re pressed for time, just microwave them… easy peasy, either way! Did you know that potatoes are the world’s 4th largest field crop? Yep. It’s true. (Random factoid for the day).

This is such an easy dish to prepare… and it really did fill up our hungry tummies! It’s so versatile… you can take away, or add anything you want (like veggies) to “make it yours”. Just thought I’d share it with you on the ol’ blog today. We sure don’t eat these too often at our house, but every now and then, it’s a quick, economical, and filling meal.

Chili cheese stuffed spud, topped with sour cream, grated cheese & scallions.

The Basics of Making A Chili Cheese Stuffed Spud

I’m not even going to post a recipe for this, because it’s so very basic… Bake (or microwave) a large potato, slice open, generously fill it with hot chili, then top with grated cheddar cheese, a generous dollop of sour cream, and some sliced green onions.

Seriously… how easy is that? Hope you will consider making these Chili & Cheese Stuffed Spuds, especially for those moments when your private chef, caterer, or entire kitchen staff get horribly sick and can’t prepare your evening meal. (*cough, cough*).  But we ALL know this situation would NEVER happen on Downton Abbey, would it now?

Have a wonderful day. Be sure and check out ALL of my recipes in the Recipe Index, which is located at the top of the page. I have a LOT of family-friends recipes I am confident you will enjoy.

Interested In More Recipes?

Thank you for visiting this website. I appreciate you using some of your valuable time to do soIf you’re interested, I publish a newsletter 2 times per month (1st and 15th) with all the latest recipes, and other fun info. I would be honored to have you join our growing list of subscribers, so you never miss a great recipe! 

There is a Newsletter subscription box on the top right side (or bottom) of each blog post, depending on the device you use, where you can easily submit your e-mail address (only) to be included in my mailing list.

You Can Also Find Me On Social Media:

Facebook page: The Grateful Girl Cooks!
Pinterest:
The Grateful Girl Cooks!
Instagram:
jbatthegratefulgirlcooks

Author's signature

Here’s one more to pin on your Pinterest boards!Need a quick, filling lunch or dinner that is REALLY easy? Why not make a chili cheese stuffed spud, with sour cream, cheddar cheese and green onions!

Save

Save

BBQ Glazed Cheese & Spinach Meatballs

You’ll enjoy yummy baked BBQ glazed cheese spinach meatballs, with cheddar and spinach, glazed with a homemade sweet, tangy sauce.
You'll enjoy yummy baked BBQ glazed cheese spinach meatballs, w/ cheddar and spinach, glazed with a homemade sweet, tangy sauce.
Almost 20 years ago my husband and I were served this recipe for BBQ Glazed Cheese & Spinach Meatballs at our friend Carla’s home in Central California. We thought they tasted incredible, and I’ve been making them ever since! True story! I don’t know where she got the original recipe. All I know is that my handwritten 3×5 recipe card is stained from nearly 20 years of making this dish.

The recipe is also fairly economical, because 1½ pounds of ground beef makes about 15 good-sized meatballs which can make several servings. Ground beef is mixed with spinach, grated cheddar cheese, onions, and spices, formed into individual portions, and browned in a skillet. They’re then baked in the oven with a homemade BBQ glaze coating them. 

They come out of the oven amazingly delicious! The meatballs are simple to make, and taste GREAT, served over steamed rice. Our sons are grown men and no longer living at home, so when I make this meal for myself and my hubby, I make extra rice, so we can enjoy another meal of leftovers! Here’s how to make these BBQ glazed cheese spinach meatballs:

Scroll Down For A Printable Recipe Card At The Bottom Of The Page

Make The Meatballs

Seasonings, ground beef, cheese, onions and spinach are place in a large bowl, and then you will need to mix them together. I use a fork to combine the ingredients.

Hamburger meat, cheese, onion and spinach in bowl

Okay… now that all of the ingredients are mixed, it’s time to shape the mixture into cute little meatballs!

Beef is mixed with other ingredients in bowl

Shape the meat mixture into a ball, rolling them between the palms of your clean hands! Each meatball should end up being about 2 inches in diameter.
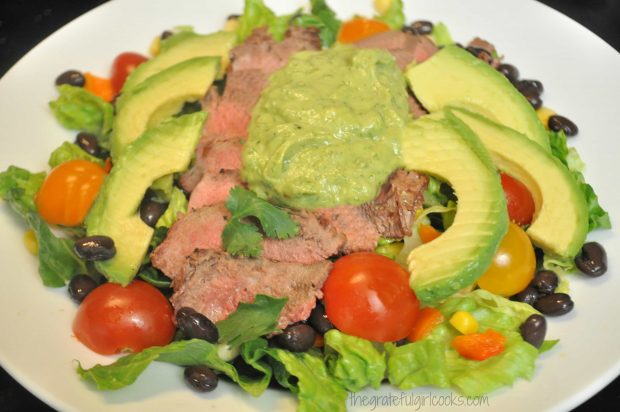
Beef shaped into a meatball being held in a hand

Brown The Meatballs

You can make about 15 meatballs from the ground beef. Place them on aluminum foil as you make each one, before browning them in a skillet.

Meatballs formed on aluminum foil

Here are the meatballs, browning in the skillet. If you do not have a large enough skillet to hold all the meatballs, no problem! You will simply need to brown them in two batches.

Meatballs cooking in a skillet

Brown the meatballs on all sides, but be sure NOT to cook them all the way through. They will finish cooking all the way through in the oven.

Browned meatballs in skillet

Dip Browned Meatballs Into Flour

Once the meatballs have been browned, remove them from the skillet. Place them, a couple at a time, into a small bowl of flour. Turn the meatballs gently,  and cover them on all sides with flour.

Browned meatballs coated in flour in small bowl

When the meatballs are coated with flour, place them into the baking dish. Now they’re ready for the BBQ sauce!

Flour coated meatballs in glass baking dish

Make the sweet and tangy BBQ sauce, and then pour it over the tops of the meatballs. Now the BBQ glazed cheese spinach meatballs are ready to bake!

Sauce covering meatballs in dish

Bake The Glazed BBQ Cheese Spinach Meatballs

When the meatballs are finished baking, remove them from the oven. Here is what they look like hot, and right out of the oven. They smell so good right about now!

BBQ glaze covered meatballs out of oven

Time To Eat BBQ Glazed Cheese Spinach Meatballs!
Place a few meatballs on each individual plate. Drizzle the tops of the meatballs with some of the BBQ sauce. Garnish with a bit of parsley flakes, and serve the glazed BBQ cheese spinach meatballs on a bed of steamed rice. Grab a fork, and dig In!
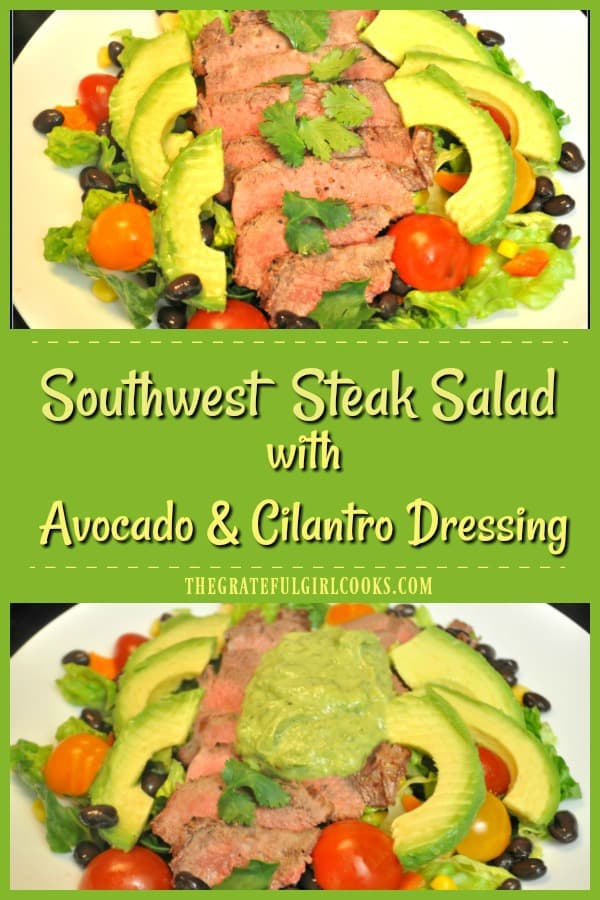
Glazed meatballs on top of cooked rice

This dish is especially delicious served with a side of rice, and a yummy salad or veggie.  If you enjoy this dish, you might also enjoy my recipes for Meatballs Stroganoff, Mom’s Swedish Meatballs and Rice, Hawaiian Meatballs and Rice, or Easy Meatballs For Spaghetti! I sure hope you will give them a try… I think you’re gonna love ’em!

You can find ALL of my recipes in the Recipe Index, located at the top of the page. Thanks for stopping by, and I truly hope you will come back soon for more delicious dishes. Have a great day!

Interested In More Recipes?

Thank you for visiting this website. I appreciate you using some of your valuable time to do soIf you’re interested, I publish a newsletter 2 times per month (1st and 15th) with all the latest recipes, and other fun info. I would be honored to have you join our growing list of subscribers, so you never miss a great recipe!
There is a Newsletter subscription box on the top right side (or bottom) of each blog post, depending on the device you use, where you can easily submit your e-mail address (only) to be included in my mailing list.

You Can Also Find Me On Social Media:

Facebook page: The Grateful Girl Cooks!
Pinterest:
The Grateful Girl Cooks!
Instagram:
jbatthegratefulgirlcooks

Author's signatureRecipe Adapted from: My friend Carla Merrill

↓↓ PRINTABLE RECIPE BELOW ↓↓

0 from 0 votes
BBQ Glazed Cheese & Spinach Meatballs
Prep Time
20 mins
Cook Time
45 mins
Total Time
1 hr 5 mins
 

You'll enjoy yummy baked BBQ glazed cheese spinach meatballs, w/ cheddar and spinach, glazed with a homemade sweet, tangy sauce.

Category: Entree
Cuisine: American
Keyword: BBQ glazed meatballs
Servings: 15 meatballs
Calories Per Serving: 226 kcal
Author: JB @ The Grateful Girl Cooks!
Ingredients
For Meatballs:
  • 1 1/2 pounds ground beef
  • 1 package frozen chopped spinach , thawed completely and drained well
  • 1 small brown onion , finely chopped
  • 1 3/4 teaspoons salt
  • 1/4 teaspoon garlic powder
  • 1/2 teaspoon black pepper
  • 6 Tablespoons grated cheddar cheese
  • 3 Tablespoons flour
  • 2 Tablespoons oil
For sauce:
  • 2 Tablespoons white vinegar
  • 2 teaspoons prepared yellow mustard
  • 4 Tablespoons butter
  • 6 Tablespoons ketchup
  • 2/3 cup brown sugar
  • 1 Pinch dried parsley , for garnish (if desired)
Instructions
  1. Preheat oven to 325°F.

  2. In large bowl, combine ground beef, thawed and *drained spinach* (see note), onion, salt, garlic powder, pepper, and grated cheddar. (*Note: Make sure the spinach is drained very well. Press the spinach between paper towels to absorb a lot of water!) Completely combine ingredients.

  3. Using both hands, roll/shape meat into 2" balls (make approx. 15). Set meatballs onto non-stick paper or foil while making the rest.

  4. In a large non-stick skillet, heat oil on medium-high. When hot, add meatballs. Don't move them the first couple of minutes (so they won't break apart). Brown all sides (but do not cook all the way through). Remove them to paper towels to drain. Place flour in a small bowl. Gently roll each meatball in flour. Once covered on all sides with flour, place them in an 8x8 or 9x9 baking dish. Set aside. 

  5. Make The BBQ Sauce: In a medium saucepan, combine vinegar, mustard, butter, ketchup, and brown sugar. Simmer 2-3 minutes on low heat until butter melts and ingredients are combined. Pour sauce over the top of meatballs (spoon it up to cover them all).

  6. Bake uncovered, at 325°F for 45-50 minutes. When done, transfer pan to wire rack.  To serve, place meatballs on top of steamed rice (if using); spoon sauce from pan over top. Sprinkle with parsley, if desired.  Enjoy!

Recipe Notes

If you want to make more than 15 meatballs, use 2 pounds of hamburger meat. Everything else in the recipe remains the same. You should be able to get about 20 meatballs this way. A serving size is 3-4 meatballs.

Nutrition Facts
BBQ Glazed Cheese & Spinach Meatballs
Amount Per Serving (3 meatballs)
Calories 226 Calories from Fat 126
% Daily Value*
Fat 14g22%
Saturated Fat 6g38%
Cholesterol 46mg15%
Sodium 444mg19%
Potassium 241mg7%
Carbohydrates 14g5%
Sugar 11g12%
Protein 10g20%
Vitamin A 2400IU48%
Vitamin C 2.1mg3%
Calcium 88mg9%
Iron 1.5mg8%
* Percent Daily Values are based on a 2000 calorie diet.

Here’s one more to pin on your Pinterest boards!You'll enjoy yummy baked BBQ glazed cheese spinach meatballs, w/ cheddar and spinach, glazed with a homemade sweet, tangy sauce.


Save

Save

Save

Classic Beef Stew

Classic Beef Stew, a “comfort food” soup filled with meat, potatoes, carrots, beans, and tomatoes, is a hearty and filling meal on a cold day!Classic Beef Stew, a "comfort food" soup filled with meat, potatoes, carrots, beans, and tomatoes, is a hearty and filling meal on a cold day!

My husband and I just returned home after an 11 day road trip to San Diego for Thanksgiving.  It was freezing cold when we returned to our home in Oregon, so I decided to make some Classic Beef Stew for our first dinner home.

I found the recipe for this stew in one of my old copies of Taste of Home magazine years ago. I had cut out the recipe and saved it, but had never made this particular recipe before. I grew up in a home where my Mom made beef stew all the time, and that has been the recipe I have used for years, but decided to try this one, this time.

It turned out wonderful!  This classic beef stew is baked over a couple of hours time, so the entire house smelled so amazingly good! My husband and I enjoyed this beef stew; it was easy to make, and since it yields 6-8 servings, we have leftovers for another meal!

Scroll Down For A Printable Recipe Card At The Bottom Of The Page

How To Make Classic Beef Stew

Here is how you make this hearty stew.  Start by browning the stew meat in an ovenproof baking dish.

Beef stew meat is browned in ovenproof pan.

Pan seared, browned stew meat is used to make classic beef stew.

Time To Bake The Beef Stew

Add chopped onions, tomatoes, beef broth, garlic, and spices to the stew meat in the pan. Give it all a good stir, to mix it together.

Tomatoes, onions, garlic and spices are added to classic beef stew in pan.

You will need to transfer the mixture to an ovenproof baking dish, if not already using one, then bake the stew (covered) for 1½ hours. Pretty positive you are gonna love the smell in your kitchen as this classic beef stew bakes!

Classic Beef Stew is baked for one and a half hours in oven.

Remove Stew From Oven, Add Veggies And Bake Again

Remove the hot stew pan from the oven. Add potatoes, celery, carrots, and green beans to the classic beef stew. Mix well, to combine. Bake for an additional hour (covered).

Carrots, potatoes, celery and green beans are added to classic beef stew, then baked.

Classic beef stew goes back into oven after veggies are added.Time To Serve And Eat Classic Beef Stew

When done baking, carefully remove the baking dish from oven, because it will be HOT. Dish this classic beef stew up into individual bowls, to serve!  I’m pretty sure you will be surprised at how tender the meat is!

Classic Beef Stew comes out of the oven, and is now ready to eat.

I sure hope you will give this classic beef stew a try! We love it, served with some crusty sourdough bread on the side. Hope you enjoy this perfect winter meal!

Looking For More STEW Recipes?

You can find all of my recipes in the Recipe Index, located at the top of the page. I have a couple delicious stew recipes you will enjoy, like West African Chicken and Peanut Stew, or a vegetarian friendly Lentil Stew. They’re both delicious and I highly recommend them!

Interested In More Recipes?

Thank you for visiting this website. I appreciate you using some of your valuable time to do soIf you’re interested, I publish a newsletter 2 times per month (1st and 15th) with all the latest recipes, and other fun info. I would be honored to have you join our growing list of subscribers, so you never miss a great recipe!
There is a Newsletter subscription box on the top right side (or bottom) of each blog post, depending on the device you use, where you can easily submit your e-mail address (only) to be included in my mailing list.

You Can Also Find Me On Social Media:

Facebook page: The Grateful Girl Cooks!
Pinterest:
The Grateful Girl Cooks!
Instagram:
jbatthegratefulgirlcooks

Author's signatureRecipe slightly adapted from: Taste of Home Magazine (year unknown), pg. 55, by Alberta McKay, of Bartlesville, Oklahoma

↓↓ PRINTABLE RECIPE BELOW ↓↓

0 from 0 votes
Classic Beef Stew
Prep Time
15 mins
Cook Time
2 hrs 30 mins
Total Time
2 hrs 45 mins
 
Classic Beef Stew, a "comfort food" soup filled with meat, potatoes, carrots, beans, and tomatoes, is a hearty and filling meal on a cold day!
Category: Entree
Cuisine: American
Keyword: classic beef stew
Servings: 8
Calories Per Serving: 349 kcal
Author: JB @ The Grateful Girl Cooks!
Ingredients
  • 2 pounds beef stew meat (or chuck roast), cut into 1-inch cubes
  • 2 Tablespoons vegetable oil
  • 1-1/2 cups chopped onion
  • 1 can (16 oz) diced tomatoes, with liquid
  • 1 can (10-1/2 oz) beef broth, undiluted
  • 3 Tablespoons quick-cooking tapioca (or whisk in 2 Tablespoons flour)
  • 1 1/2 garlic cloves , minced
  • 1 Tablespoon dried parsley flakes
  • 1 teaspoon salt
  • 1/4 teaspoon pepper
  • 1 bay leaf
  • 6 medium carrots , cut into 2-inch pieces
  • 3 medium potatoes , peeled and cut into 2-inch pieces
  • 1 cup sliced celery , cut into 1-inch pieces
  • 1 can green beans , cut into 2-inch pieces
Instructions
  1. Preheat oven to 350 degrees.
  2. In a dutch oven or large pan, heat the oil until very hot. Add the beef cubes, and cook until all sides are browned. Drain the oil from pan.
  3. Add the onion, tomatoes, beef broth, tapioca (or flour), garlic, parsley, salt, pepper and bay leaf. Bring this mixture to a boil, then remove pan from the heat.
  4. Cover pan (or transfer to an ovenproof large baking dish). Bake mixture in covered dish at 350 degrees for 1-1/2 hours. Remove from oven.
  5. Stir in carrots, potatoes, celery and green beans. Bake, covered, 1 hour longer, or until the meat and vegetables are tender. (mine took about 15 minutes longer). Remove bay leaf before serving. Enjoy!
Nutrition Facts
Classic Beef Stew
Amount Per Serving (1 serving)
Calories 349 Calories from Fat 108
% Daily Value*
Fat 12g18%
Saturated Fat 5g31%
Cholesterol 88mg29%
Sodium 527mg23%
Potassium 927mg26%
Carbohydrates 23g8%
Fiber 5g21%
Sugar 4g4%
Protein 35g70%
Vitamin A 8090IU162%
Vitamin C 20.5mg25%
Calcium 79mg8%
Iron 6.2mg34%
* Percent Daily Values are based on a 2000 calorie diet.

Here’s one more to pin on your Pinterest boards!Classic Beef Stew, a "comfort food" soup filled with meat, potatoes, carrots, beans, and tomatoes, is a hearty and filling meal on a cold day!

Save

Save

Hoisin Asian Meatballs

Hoisin Asian Meatballs are made using ground beef, baked not fried, and are covered with an Asian-inspired hoisin glaze. They are a great appetizer or main dish.Hoisin Asian Meatballs are made using ground beef, are baked not fried , and are covered with an Asian-inspired hoisin glaze. Great appetizer or main dish.

I found this recipe for Hoisin Asian Meatballs a couple of years ago on Pinterest and thought I’d give it a try. It didn’t disappoint!

The ground beef meatballs are easy to make. To make it even easier, they are cooked in the oven, so they are baked, not fried. The baked hoisin asian meatballs are then coated with a wonderful sweet and mildly spicy Asian-inspired Hoisin glaze before serving.

Scroll Down For A Printable Recipe Card At The Bottom Of The Page

What Is Hoisin Sauce?

Hoisin sauce is a commonly used Asian glaze for meat or as an addition to a stir-fry dish… think “Chinese BBQ Sauce”… a bit sweet and a bit spicy. It is commonly made from soybeans, peppers, garlic and sugar. This sauce is widely used in Chinese cooking. When used in this recipe as a base and combined with a few other Asian-inspired ingredients, creates a pretty tasty sauce for the meatballs.

Hoisin sauce is commonly found in most grocery stores in the Asian foods section.  It is also very easy to make at home. I’ve done it, and posted the recipe for hoisin sauce here.

How To Make Hoisin Asian Meatballs

This recipe could not be any easier!  Basically, you mix up the meatball ingredients, roll into meatballs, then bake them for about 15 minutes. While the meatballs bake, mix up the sauce.  Once the meatballs come out of the oven, you simply drizzle each of the meatballs with the hoisin sauce mix, then serve.

See how easy it is to make hoisin Asian meatballs? About 15 minutes total for the prep time, and 12-15 minutes to bake. That’s it!!

How Many Meatballs Does This Recipe Make?

The recipe yields approximately 18 one and a half inch meatballs. Because of the short cooking time, they can easily be ready to serve in 30 minutes, which is an added bonus, right? Right!

Hoisin Asian meatballs can be used solely as individual appetizers. Just stick a fancy toothpick into each one, and serve them on a pretty platter. You can also serve them as a main course (which is how I served them), paired with some rice and a vegetable.

Hoisin Asian Meatballs are served as a main dish, on a bed of rice, with asparagus on the side.

Hope you will give these yummy Hoisin Asian Meatballs a try… I think you will like them! I know we did! Thanks for stopping by, and I hope you will come back soon. Have a great day.

Looking For More Meatball Recipes?

There are several other meatball recipes, using ground beef on this website!  They include:

Interested In More Recipes?

Thank you for visiting this website. I appreciate you using some of your valuable time to do soIf you’re interested, I publish a newsletter 2 times per month (1st and 15th) with all the latest recipes, and other fun info. I would be honored to have you join our growing list of subscribers, so you never miss a great recipe!
There is a Newsletter subscription box on the top right side (or bottom) of each blog post, depending on the device you use, where you can easily submit your e-mail address (only) to be included in my mailing list.

You Can Also Find Me On Social Media:

Facebook page: The Grateful Girl Cooks!
Pinterest:
The Grateful Girl Cooks!
Instagram:
jbatthegratefulgirlcooks

Author's signatureOriginal Recipe Source: http://damndelicious.net/2012/12/16/hoisin-asian-meatballs-sundaysupper/

↓↓ PRINTABLE RECIPE BELOW ↓↓

0 from 0 votes
Hoisin Asian Meatballs
Prep Time
15 mins
Cook Time
15 mins
Total Time
30 mins
 
Hoisin Asian Meatballs are made using ground beef, are baked not fried , and are covered with an Asian-inspired hoisin glaze. Great appetizer or main dish.
Category: Entree
Cuisine: Asian
Keyword: hoisin Asian meatballs
Servings: 18 meatballs
Calories Per Serving: 88 kcal
Author: JB @ The Grateful Girl Cooks!
Ingredients
FOR THE MEATBALLS:
  • 1 pound ground beef
  • 1 teaspoon sesame oil
  • 1/2 cup Panko bread crumbs
  • 1/4 teaspoon ground ginger
  • 1 large egg
  • 2 cloves garlic , finely minced
  • 4 green onions , thinly sliced (stem and bulb), divided (3 for meatballs, 1 for garnish)
  • Sesame seeds , for garnish
FOR THE HOISIN GLAZE:
  • 1/4 cup Hoisin sauce (found in ethnic section at grocery store)
  • 2 Tablespoons rice vinegar
  • 1 Tablespoon soy sauce
  • 1/2 teaspoon sesame oil
  • 2 cloves garlic , finely minced
  • 1/2 teaspoon ground ginger
Instructions
  1. Before making meatballs, preheat your oven to 400 degrees. Place a sheet of parchment paper onto a large baking sheet.
  2. Prepare the meatballs: Mix the ground beef, sesame oil, Panko bread crumbs, ginger, egg, garlic and green onion together in a large bowl. Make sure the ingredients are fully incorporated together. Once combined, use your (clean) hands to form the meat mixture into approximately 18 one and a half inch wide meatballs.
  3. As each meatball is formed, place it on the parchment-lined baking sheet. Bake the meatballs at 400 degrees for 12-15 minutes (meatballs should be browned and cooked through).
  4. Prepare hoisin glaze while meatballs are baking: Mix the glaze ingredients (hoisin sauce, rice vinegar, soy sauce, sesame oil, ginger and garlic) in a small bowl until fully combined.
  5. As soon as meatballs are done, drizzle hoisin glaze over the top of each meatball, garnish with reserved green onions and sesame seeds and serve while hot.
  6. If serving as appetizer, insert toothpicks or small skewers into each meatball on serving tray. If serving as main dish, serve it along with rice and a vegetable. ENJOY!

Nutrition Facts
Hoisin Asian Meatballs
Amount Per Serving (1 meatball)
Calories 88 Calories from Fat 45
% Daily Value*
Fat 5g8%
Saturated Fat 2g13%
Cholesterol 27mg9%
Sodium 124mg5%
Potassium 86mg2%
Carbohydrates 3g1%
Sugar 1g1%
Protein 5g10%
Vitamin A 40IU1%
Vitamin C 0.7mg1%
Calcium 13mg1%
Iron 0.7mg4%
* Percent Daily Values are based on a 2000 calorie diet.

Here’s one more to pin on your Pinterest boards!Hoisin Asian Meatballs are made using ground beef, baked not fried , and are covered with an Asian-inspired hoisin glaze. Great appetizer or main dish.


Save

Save