Category: Chicken

Copycat Applebee’s Oriental Chicken Salad

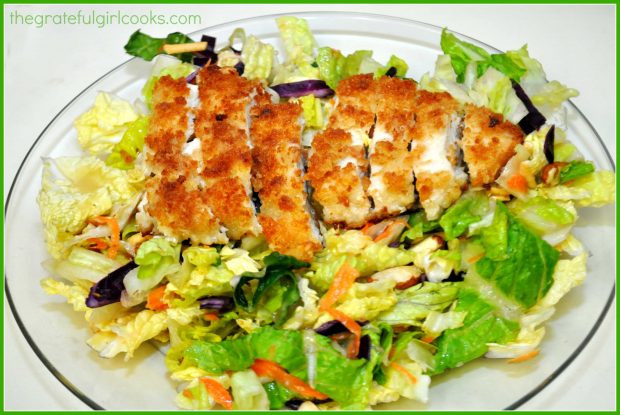
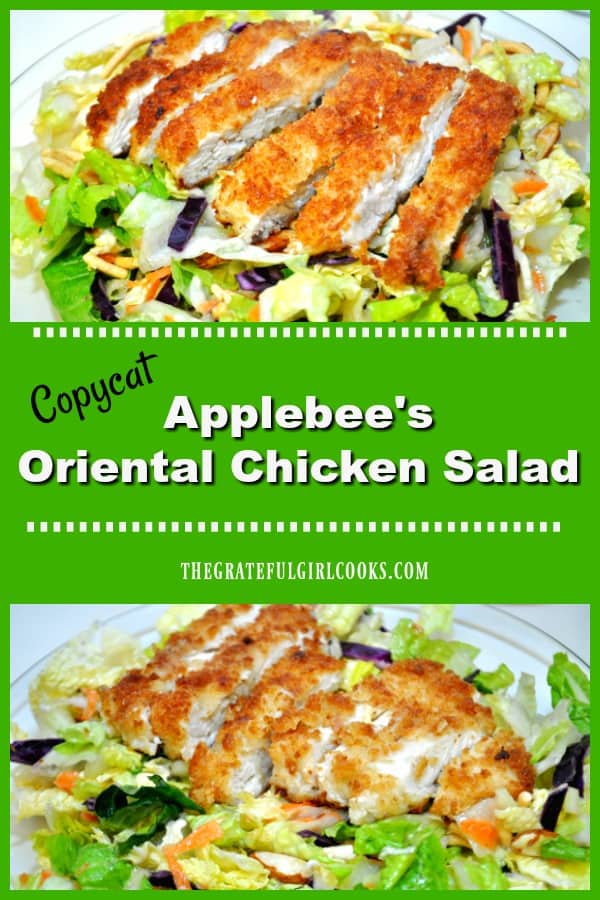
Make a copycat version of Applebee’s Oriental Chicken Salad in the comfort of your own home. You’ll love this delicious main course salad!Copycat Applebee's Oriental Chicken Salad / The Grateful Girl Cooks!Applebee’s Restaurant describes their signature salad as “Crisp Oriental greens topped with chunks of crunchy Chicken Fingers, toasted almonds and crispy rice noodles, tossed in a light Oriental vinaigrette”.
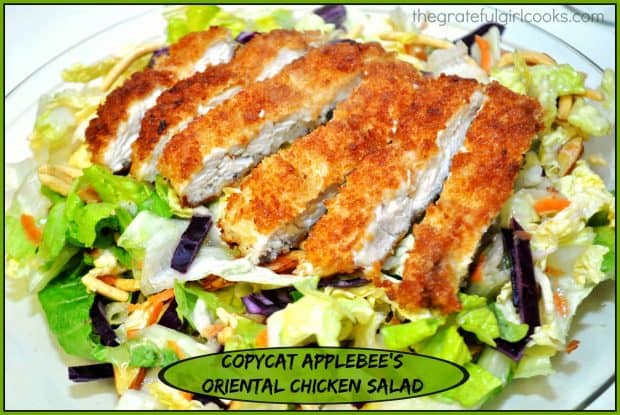
Over the years I have enjoyed finding “copycat” recipes from restaurants and then challenging myself to see if I can duplicate the same thing at home. I have found that sometimes you can make the recipe for half the price of what a restaurant charges. This copycat recipe for Applebee’s Oriental Chicken Salad is a definite keeper! It’s so good, and I have made it countless times!

Scroll Down For A Printable Recipe Card At The Bottom Of The Page

How I Got This Recipe

I love the “Top Secret Recipe” cookbook series, by Todd Wilbur. My sons gave me a couple of his books for Mother’s Day years ago. I’ve bought a couple of others, and they are wonderful. Basically, the author tries to identify what ingredients are in a restaurants food (he orders it, then “dissects” it in his lab to determine the ingredients.

Then he experiments to re-create the recipe until it is as close to the original as he can get. I love this because HE does all the dirty work, and I benefit from his efforts. Awesome! It works for me (heh heh heh)!

Making The Salad Is Fairly Simple

I have never taken a lot of photos of making this salad, unlike my other recipes. But the salad is fairly easy to make. An Asian-inspired salad dressing is whisked together, chicken is breaded, fried and cut into pieces, and the green salad is assembled, then topped with the chicken and the salad dressing..
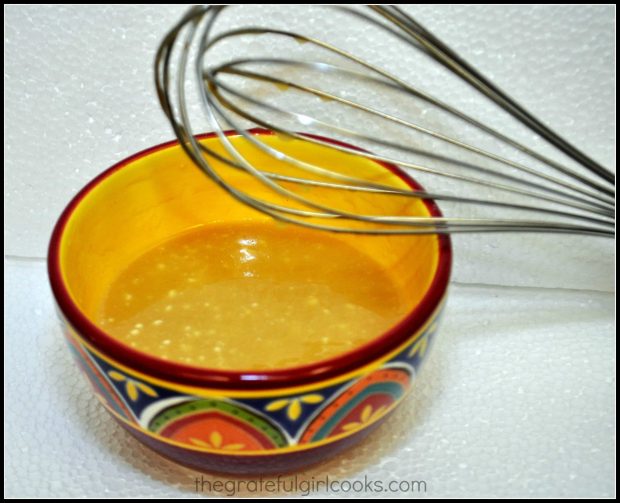
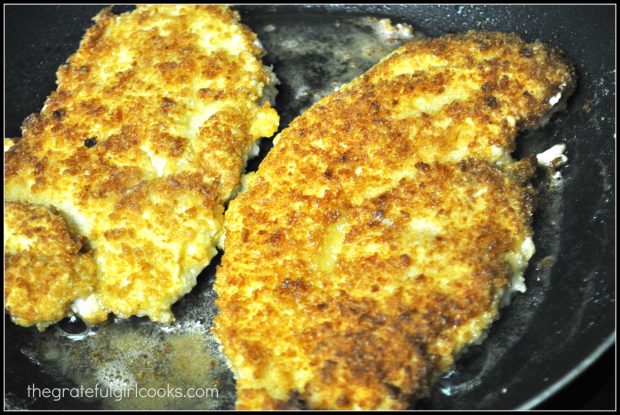
Copycat Applebee's Oriental Chicken Salad / The Grateful Girl Cooks!
Making the delicious Asian-inspired salad dressing is easy!
Copycat Applebee's Oriental Chicken Salad / The Grateful Girl Cooks!
Cooking the chicken… easy!
Copycat Applebee's Oriental Chicken Salad / The Grateful Girl Cooks!
Grab a fork and dig in… you will LOVE the flavors in this salad!

I’ve Made This Applebee’s Oriental Chicken Salad SO MANY Times

This is a salad I have made MANY times over the past 15 years. I’ve made it for my husband and I, AND for as many as 25 hungry co-workers at a staff retreat, all with great results and compliments each time. Honestly, this entree salad is fairly easy to make. It just takes a bit of time to do the “prep” work. My tip: Do the prep work early, then after school or work, cook the chicken and throw it all together. Boom!

I hope you like it!  If you want to serve 4 with this recipe, just split all the ingredients into 4 smaller sized servings (including the chicken… just cut it into chunks and divide it on 4 salads!) We love this filling salad’s great flavor, and think you will, too! Enjoy!

Looking For More MAIN DISH SALAD Recipes?

You can find all of my recipes in the Recipe Index, located at the top of the page. I have some delicious entree salads you’ll enjoy, including:

Interested In More Recipes?

Thank you for visiting this website. I appreciate you using some of your valuable time to do soIf you’re interested, I publish a newsletter 2 times per month (1st and 15th) with all the latest recipes, and other fun info. I would be honored to have you join our growing list of subscribers, so you never miss a great recipe!
There is a Newsletter subscription box on the top right side (or bottom) of each blog post, depending on the device you use, where you can easily submit your e-mail address (only) to be included in my mailing list.

You Can Also Find Me On Social Media:
Facebook page: The Grateful Girl Cooks!
Pinterest: The Grateful Girl Cooks!
Instagram: jbatthegratefulgirlcooks

Author's signatureRecipe Source: The book “Top Secret Restaurant Recipes”, by Todd Wilbur, published 1997, by The Penguin Group, pages 31-32

↓↓ PRINTABLE RECIPE BELOW ↓↓
0 from 0 votes
Copycat Applebee's Oriental Chicken Salad
Prep Time
25 mins
Cook Time
5 mins
Total Time
30 mins
 

Make a copycat version of Applebee's Oriental Chicken Salad in the comfort of your own home. You'll love this delicious main course salad!

Category: Salad or Main Dish
Cuisine: Asian
Keyword: oriental chicken salad
Servings: 2 large servings
Calories Per Serving: 1431 kcal
Author: JB @ The Grateful Girl Cooks!
Ingredients
For the Oriental Dressing:
  • 6 Tablespoons honey
  • 3 Tablespoons white vinegar
  • 8 teaspoons mayonnaise
  • 2 Tablespoons Grey Poupon Dijon mustard
  • 1/4 teaspoons sesame oil (find this in the Asian food section of the grocery store)
For the Chicken:
  • 1 cup vegetable oil , for frying (you want the skillet to have about 1/2 inch deep of oil)
  • 2 eggs
  • 1 cup milk
  • 1 cup all-purpose flour
  • 1 cup Panko breadcrumbs (or you can substitute crushed cornflake crumbs)
  • 2 teaspoons salt
  • 1/2 teaspoons black pepper
  • 2 (3 oz.) boneless, skinless chicken breasts
For the salad:
  • 6 cups chopped romaine lettuce
  • 2 cups chopped purple cabbage
  • 2 cups chopped napa cabbage
  • 1 carrot , julienned or shredded (I grated mine)
  • 2 green onions , sliced (use entire stalk-green and white parts)
  • 2 TBSP sliced , toasted almonds (saute them on low in dry skillet for 3-4 minutes to toast-stir to prevent burning)
  • 2/3 cup chow mein noodles
Instructions
  1. Prepare the salad dressing and chicken: Using a whisk or an electric mixer, blend together the dressing ingredients in a small bowl. Cover and refrigerate until it is well chilled and you are ready to serve the salad.
  2. Preheat the oil in a skillet over medium heat. The temperature of the oil should be around 350 degrees before cooking the chicken (an electric skillet or a temperature gauge is helpful to get the oil at the right heat). The right amount of heat is necessary for a crispy brown crust!
  3. In a small bowl, mix together the eggs and milk until well combined.
  4. In another bowl, mix the panko crumbs (or cornflake crumbs) with the flour, salt and pepper.
  5. Cut the chicken breasts into 4 or 5 long strips. Dip each chicken strip into the egg mixture first, then into the flour mixture, coating each piece completely. Carefully place chicken pieces into the hot skillet (remember, you preheated it, right?) Fry the chicken fingers for approximately 5 minutes, turning and cooking until the coating on all sides has darkened to a golden brown.
  6. Assemble the salad: Prepare the salad by tossing the romaine lettuce with the purple cabbage, napa cabbage and shredded carrot. Place on individual serving plates.
  7. Sprinkle the green onions on top of the lettuce mixture.
  8. Sprinkle the almonds over the salad, then the chow mein noodles.
  9. Cut the chicken into bite sized chunks (that's the authentic way)...sometimes (like in the picture) I just leave the strips on top and let everybody cut up their own...whatever- I'm usually in a big hurry to eat the salad, and don't want to bother cutting it all up into chunks!) Anyways...back to the recipe: Place even amounts of the chicken on top of each salad, placing the chicken in a pile in the middle. Serve the salad dressing on the side. Enjoy!
Recipe Notes

You can easily make this salad into 4 smaller sized portions. Just cut the chicken into chunks, divide the chicken chunks and salad into 4 portions, and you're good to go!
Recipe Source: The book "Top Secret Restaurant Recipes", by Todd Wilbur, published 1997, by The Penguin Group, pages 31-32)

Nutrition Facts
Copycat Applebee's Oriental Chicken Salad
Amount Per Serving (1 large salad)
Calories 1431 Calories from Fat 405
% Daily Value*
Fat 45g69%
Saturated Fat 22g138%
Cholesterol 232mg77%
Sodium 3612mg157%
Potassium 1657mg47%
Carbohydrates 204g68%
Fiber 15g63%
Sugar 70g78%
Protein 56g112%
Vitamin A 19190IU384%
Vitamin C 82mg99%
Calcium 423mg42%
Iron 11.4mg63%
* Percent Daily Values are based on a 2000 calorie diet.

Here’s one more to pin on your Pinterest boards!Make a copycat version of Applebee's Oriental Chicken Salad in the comfort of your own home. You'll love this delicious main course salad!
Save

Save

Save

Tuscan Garlic Chicken

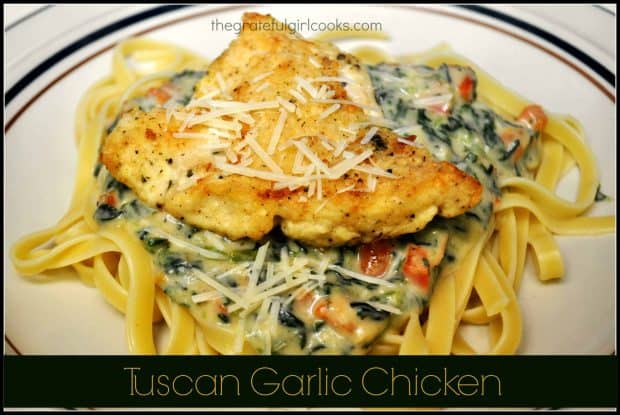
This easy, stove top Tuscan Garlic Chicken features lightly seasoned chicken, with a spinach, red pepper, garlic and Parmesan cheese sauce, on fettuccine pasta.
“Winner, Winner…Chicken Dinner”! I might have said these words after making this amazing recipe for Tuscan garlic chicken last night for dinner.
 
I love to search for new recipes and try them out for my husband and myself, and when I find a great one, like Tuscan garlic chicken, it’s a “Christmas miracle”, as I like to say!  I made a few small changes to the original recipe, utilizing ingredients I had on hand. The end result? We totally enjoyed this dish.
 
Scroll Down For A Printable Recipe Card At The Bottom Of The Page

About This Recipe For Tuscan Garlic Chicken

The Italian flavors of lightly seasoned chicken, spinach, red peppers, garlic and Parmesan cheese on a bed of fettuccine pasta are wonderful! As I made the sauce, I kept tasting it. Yes, it’s a tough job, but “someone” has to do quality control, right?
 
The original recipe calls for 4 chicken breasts, but I only used 2 for this recipe. After pounding them out thinner and cutting them in half (total of 4 pieces of chicken breast), my husband and I ended up having 1 half piece each (with 2 pieces leftover for “leftovers”).That portion size of chicken was more than enough, so that cut the already inexpensive price of this delicious meal way down!
 
I’m very glad I tried this recipe, and look forward to making it again. This would be a great meal to cook when company comes over for dinner! I hope you will give it a try – AND I hope you enjoy it! Here are a few pictures taken while cooking Tuscan garlic chicken:

Some Photos Of The Process

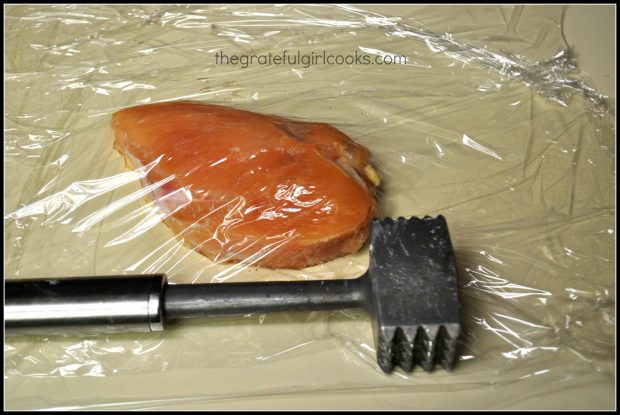
Pounding the chicken breasts between plastic wrap with a meat mallet is good, cheap therapy! Keep pounding until the chicken breasts are fairly flattened.
 
Pound the chicken breasts with a meat mallet, to flatten them.

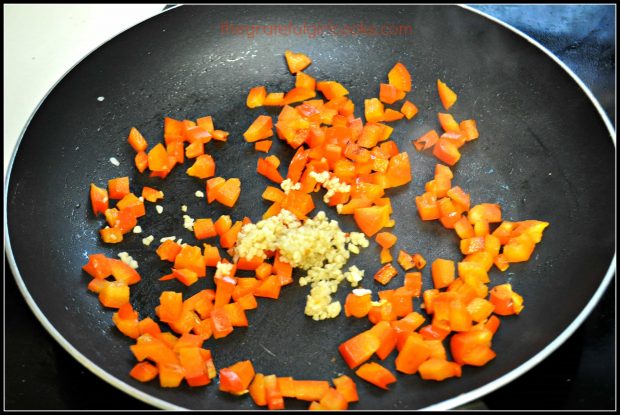
You will cook red peppers and garlic together in a large skillet, before adding the rest of the ingredients needed to make a colorful, creamy sauce for the chicken.
 
Red bell peppers and garlic cook in skillet before adding more sauce ingredients.
 

The Sauce For Tuscan Garlic Chicken Is Very Colorful!

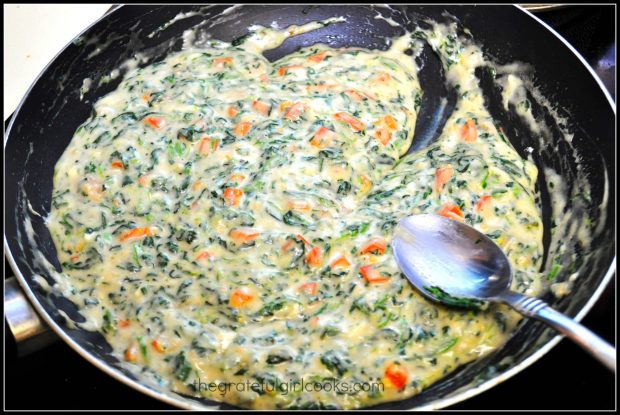
This is what the sauce for Tuscan garlic chicken will look like once all ingredients are added. It is very creamy and full of flavor.
 
The creamy sauce for Tuscan garlic chicken is very colorful in the skillet.

Serving Tuscan Garlic Chicken

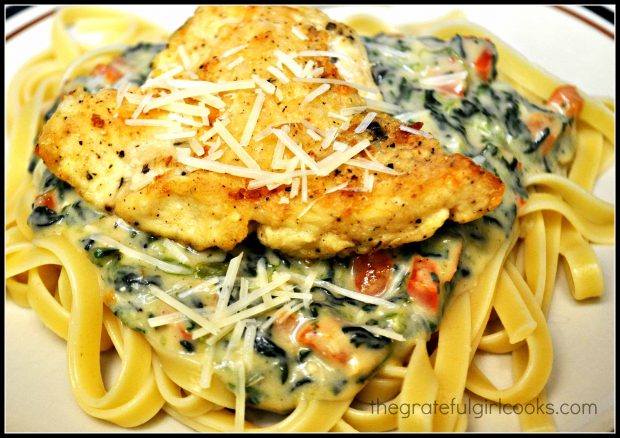
And that’s it! The Tuscan garlic chicken is wonderful, served on top of fettucine pasta. Doesn’t it look good? Well, let me tell you, it IS absolutely DELICIOUS!

Tuscan Garlic Chicken, served on a bed of fettucine noodles.

This chicken dish really is a simple meal to prepare, and it tastes wonderful! Sure hope you will consider making this Tuscan garlic chicken! Thank you for stopping by, and I hope you will come back soon. Have a great day.

Looking For More CHICKEN Recipes?

You can find all of my recipes in the Recipe Index, located at the top of the page. I have LOTS of delicious chicken recipes, including:

Interested In More Recipes?

Thank you for visiting this website. I appreciate you using some of your valuable time to do soIf you’re interested, I publish a newsletter 2 times per month (1st and 15th) with all the latest recipes, and other fun info. I would be honored to have you join our growing list of subscribers, so you never miss a great recipe! 

There is a Newsletter subscription box on the top right side (or bottom) of each blog post, depending on the device you use, where you can easily submit your e-mail address (only) to be included in my mailing list.

You Can Also Find Me On Social Media:

Facebook page: The Grateful Girl Cooks!
Pinterest:
The Grateful Girl Cooks!
Instagram:
jbatthegratefulgirlcooks


Author's signature

 Adapted From: http://www.tastesbetterfromscratch.com/2014/01/tuscan-garlic-chicken.html 

↓↓ PRINTABLE RECIPE BELOW ↓↓

0 from 0 votes
Tuscan Garlic Chicken
Prep Time
30 mins
Cook Time
15 mins
Total Time
45 mins
 

This easy, stove top Tuscan Garlic Chicken features lightly seasoned chicken, with a spinach, red pepper, garlic and Parmesan cheese sauce, on fettuccine pasta.

Category: Entree
Cuisine: Italian
Keyword: Tuscan garlic chicken
Servings: 4
Calories Per Serving: 540 kcal
Author: JB @ The Grateful Girl Cooks!
Ingredients
  • 2 large chicken breasts
  • 2 Tablespoons olive oil
For the chicken coating:
  • 1/2 cup all-purpose flour
  • 1 teaspoon salt
  • 1/2 teaspoon pepper
  • 1/4 teaspoon dried basil
  • 1/4 teaspoon dried oregano
  • 1/4 teaspoon onion powder
  • 1/4 teaspoon garlic powder
For the sauce:
  • 1/2 large red bell pepper , diced
  • 1 Tablespoon minced garlic
  • 1 1/2 Tablespoons olive oil
  • 1/2 cup chicken broth
  • 1/2 Tablespoon flour
  • 3/4 cup milk
  • 1 1/4 teaspoon corn starch
  • 1/4 teaspoon garlic powder
  • salt & pepper , to taste
  • 1/2 small box frozen chopped spinach (cooked according to pkg. & drained well) You can also substitute 2 cups of chopped fresh baby spinach, if desired)
  • 1/2 cup shredded Parmesan cheese (I used the real stuff!)
For the pasta:
  • 1/2 lb. fettuccine noodles , cooked according to pkg. directions)
  • * Note: I'm sure any pasta would work great...the fettuccine noodles were fantastic though; they really handled the sauce well!)
Instructions
  1. Preheat oven to 375 degrees.
  2. Cut the chicken breasts in half. Place each piece between two pieces of plastic wrap and pound with a meat mallet until much thinner (think of this as good therapy...pound, pound, pound!). You can also cut the chicken breasts in half horizontally, if desired. I pounded away!
  3. On a large plate, mix together the chicken coating ingredients (flour, salt, pepper, basil, oregano, onion powder and garlic powder). Dredge the chicken in the mixture, coating both sides.
  4. Heat 2 TBSP olive oil in a non-stick skillet on medium high. When the oil is really HOT, add the chicken. Brown the chicken on both sides (approx. 1-2 minutes per side-till golden brown), then remove chicken from skillet and place in a baking dish and bake at 375 degrees for 15 minutes (or until fully cooked). Keep chicken warm.
  5. While the chicken is in the oven, whip up the sauce. (Easy so far, right?)
  6. To make the sauce, start by sauteing the diced red peppers in just a touch of olive oil for about 5 minutes. Then add the minced garlic and saute for another minute or two (being careful NOT to burn the garlic!). Once done, remove from skillet to a small plate and set aside.
  7. Add the 1 1/2 TBSP olive oil to the warm skillet. Add in the flour and whisk into the oil to blend. Add the chicken broth to this mixture and whisk until smooth. Slowly bring this sauce to a boil.
  8. In a small bowl, combine the milk and the cornstarch until dissolved. Add this to the boiling sauce, then reduce the heat to a simmer.
  9. Stir in the cooked, well-drained spinach (or 2 cups fresh chopped baby spinach), the peppers and garlic mixture, the Parmesan cheese and garlic powder. Season with a touch of salt and pepper (to taste).
  10. Simmer the sauce until it thickens, stirring occasionally. If sauce is too thick, you can always add in several tablespoons of the starchy hot pasta water. (I added 3-4 TBSP of pasta water)
  11. Place fettuccine noodles on plates, top with the sauce and then place the chicken on top. Garnish with a bit of fresh, chopped basil (optional) and some additional shredded Parmesan cheese. ENJOY!
Nutrition Facts
Tuscan Garlic Chicken
Amount Per Serving (1 serving)
Calories 540 Calories from Fat 180
% Daily Value*
Fat 20g31%
Saturated Fat 5g31%
Cholesterol 97mg32%
Sodium 1000mg43%
Potassium 584mg17%
Carbohydrates 59g20%
Fiber 2g8%
Sugar 4g4%
Protein 28g56%
Vitamin A 2120IU42%
Vitamin C 26.6mg32%
Calcium 235mg24%
Iron 2.8mg16%
* Percent Daily Values are based on a 2000 calorie diet.

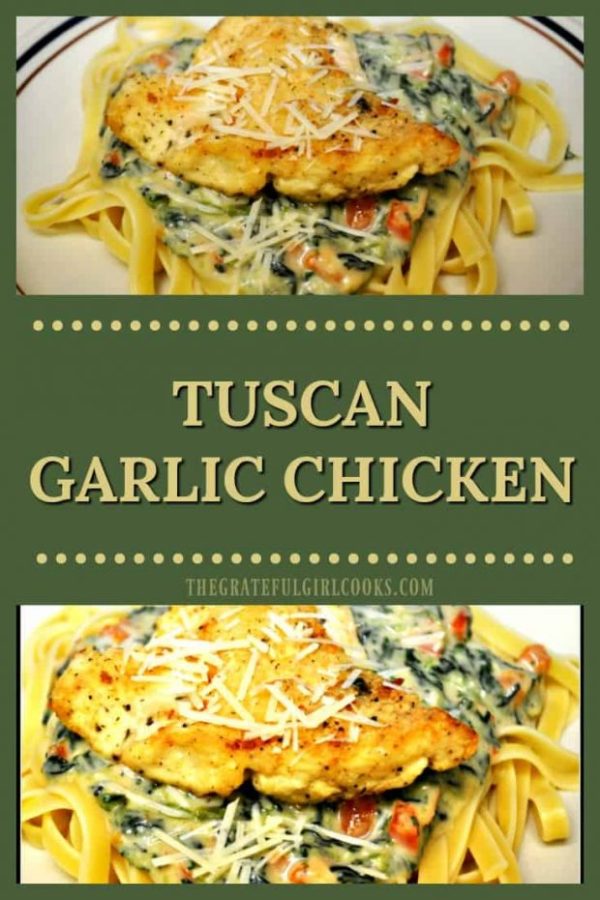
Here’s one more to pin on your Pinterest boards!This easy, stove top Tuscan Garlic Chicken features lightly seasoned chicken, with a spinach, red pepper, garlic and Parmesan cheese sauce, on fettuccine pasta.

Save

Save

Save

Save

Save

Honey Lime Chicken Skewers

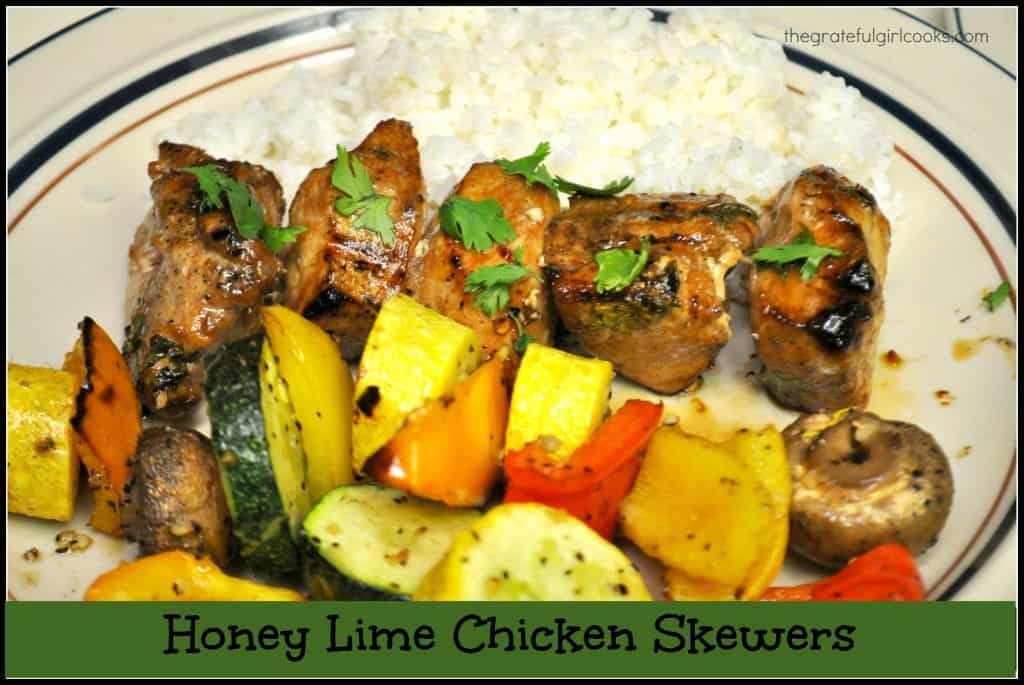
Honey lime chicken skewers, with marinated chicken breast, zucchini, yellow squash, mushrooms and bell peppers are the perfect (yummy) kabobs for grilling!Honey lime chicken skewers, with marinated chicken breast, zucchini, yellow squash, mushrooms and bell peppers are the perfect (yummy) kabobs for grilling!

As I write this post for honey lime chicken skewers, it is the middle of winter in the Pacific Northwest…cold and overcast. Sigh. I find myself longing for more hours of sunlight, warm weather, and the smell of smoke coming from our hard-working BBQ grill, as another delicious chicken dinner is prepared.

We grill as soon as is it warm enough to hang around outside without getting frozen or pelted with rain; I can hardly wait for warm weather and Daylight Savings Time to arrive!

There’s nothing better than sitting outside, sipping iced tea on a warm evening and watching my husband (“The Grill Master”) help me cook dinner, armed with charcoal briquets, charcoal lighter, and kitchen tongs! Yay for BBQs and honey lime chicken skewers!

Scroll Down For A Printable Recipe Card At The Bottom Of The Page

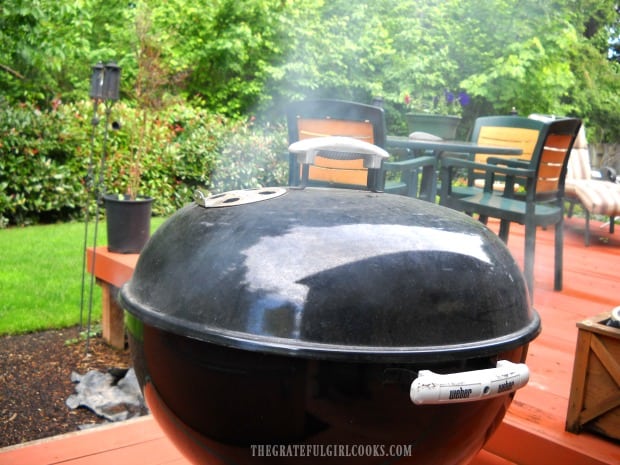
Weber grill is fired up to cook honey lime chicken skewers!

This recipe for honey lime chicken skewers is one I found on Pinterest last year. I added skewers of summer veggies to the dish (grilled separately, but basted with the honey lime marinade), and we really loved it! Honey lime chicken skewers (with yummy grilled veggies) is definitely one of those “Perfect For Those Lazy Days Of Summer” meals.

How To Make These Chicken Skewers (it’s easy)

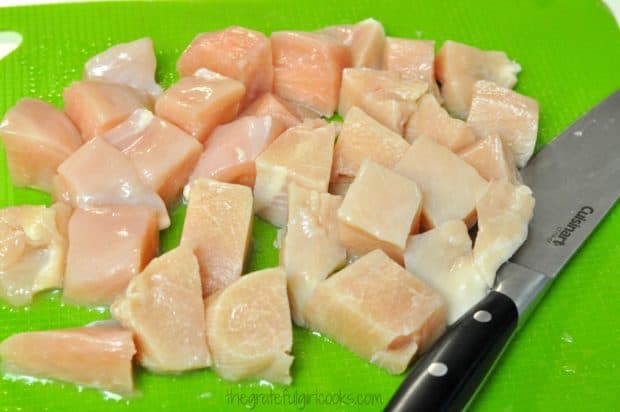
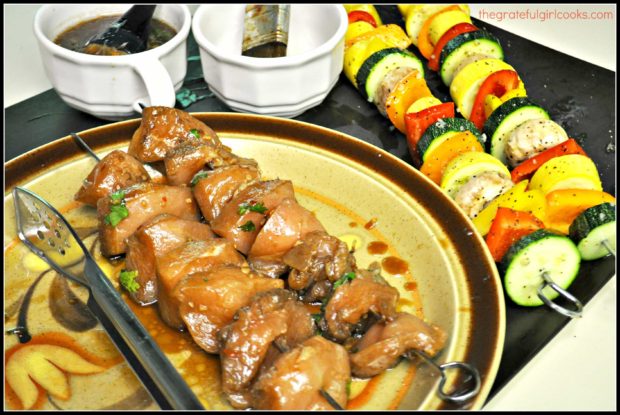
Boneless, skinless chicken breasts are cut into chunks, then marinated, threaded onto skewers, and grilled. TIP: Marinade the chicken early in the day, throw it in the refrigerator before you head to work or go have some summer fun, then skewer and grill it later for an amazing dinner!

Chicken breasts are cut into chunks for honey lime chicken skewers.

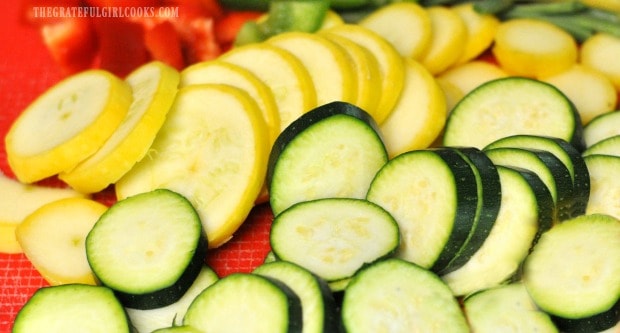
I used zucchini, yellow squash, red and orange bell peppers and button mushrooms. If you want to add your own veggies (such as onions, tomatoes, etc.), please do! Make this honey lime chicken skewers recipe your own!

Zucchini squash and bell peppers, sliced for honey lime chicken skewers.

The chicken pieces are marinated in an amazing honey lime sauce. Marinated chicken cubes are then evenly divided between two skewers.

The veggies are cut, then threaded (alternating veggies), onto two additional skewers. Note: I used metal skewers. If you will be using wooden skewers, remember to soak them in water for approximately 15 minutes. This will help to prevent them from burning on the grill.

Marinated honey lime chicken skewers and veggies ready to grill.

Grilling Honey Lime Chicken Skewers

The kabobs (also known as skewers), are grilled (turning occasionally) until done. They are brushed with some of the reserved honey lime marinade, while they cook. When fully cooked through, the honey lime chicken skewers and grilled veggies are removed from the grill.

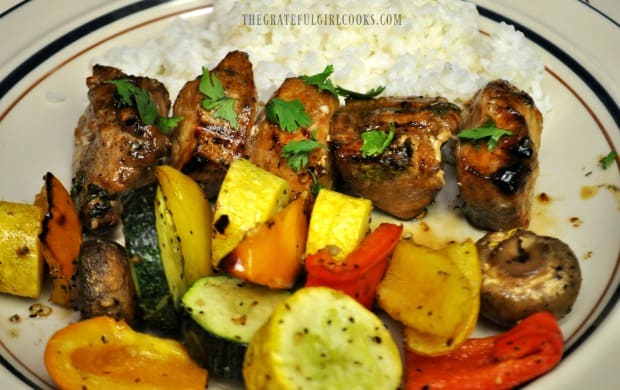
The chicken and veggies are slid off their skewers onto individual plates. We served the grilled chicken and veggies with a side of steamed rice. Honey lime chicken skewers (along with the veggies) are very quick, tasty meal. It’s a real “no-brainer” recipe that is easily doubled or tripled, if you’re feeding a few people. I hope you enjoy it as much as we do!

Honey lime chicken skewers (kabobs), after grilling. Ready to eat!

Hope you will consider trying these honey lime chicken skewers! They have wonderful flavor! Have a great day, and remember… be kind to those you meet today. They may need a kind word from a stranger to make their day a little brighter.

Looking for More KABOB Recipes?

You can find all of my recipes in the Recipe Index, located at the top of the page. I have some delicious kabob recipes you might enjoy, including:

Interested In More Recipes?

Thank you for visiting this website. I appreciate you using some of your valuable time to do soIf you’re interested, I publish a newsletter 2 times per month (1st and 15th) with all the latest recipes, and other fun info. I would be honored to have you join our growing list of subscribers, so you never miss a great recipe! 

There is a Newsletter subscription box on the top right side (or bottom) of each blog post, depending on the device you use, where you can easily submit your e-mail address (only) to be included in my mailing list.

You Can Also Find Me On Social Media:

Facebook page: The Grateful Girl Cooks!
Pinterest:
The Grateful Girl Cooks!
Instagram:
jbatthegratefulgirlcooks

Author's signatureRecipe Source: http://kitchenmeetsgirl.com/honey-lime-chicken-skewers/  

↓↓ PRINTABLE RECIPE BELOW ↓↓

0 from 0 votes
Honey Lime Chicken Skewers
Prep Time
1 hr
Cook Time
15 mins
Total Time
1 hr 15 mins
 
Honey lime chicken skewers, with marinated chicken breast, zucchini, yellow squash, mushrooms and bell peppers are the perfect (yummy) kabobs for grilling!
Category: Entree
Cuisine: American
Keyword: honey lime chicken skewers
Servings: 2
Calories Per Serving: 445 kcal
Author: JB @ The Grateful Girl Cooks!
Ingredients
  • 1 pound boneless skinless chicken breasts , (cut into large chunks)
  • 2 Tablespoons cilantro , chopped (for garnish)
For Marinade:
  • 3 Tablespoons soy sauce
  • 2 Tablespoons honey
  • 1 Tablespoon vegetable oil
  • Juice of 1 lime
  • 2 garlic cloves , minced
  • 1-2 teaspoons Sriracha sauce
  • teaspoon Red pepper flakes
For Veggie Skewers (alternate these on separate skewers):
  • 1 small zucchini , sliced
  • 1 small yellow squash , sliced
  • 6 button mushrooms , rinsed
  • 1/2 red / orange bell pepper
Instructions
  1. Cut boneless, skinless chicken breasts into 1-2" chunks. Set aside while you make the honey lime marinade.

  2. In a small bowl, combine soy sauce, honey, oil, lime juice, minced garlic, Sriracha sauce and red pepper flakes, to make the marinade. Mix thoroughly.
    NOTE: Measure out 3 Tablespoons of marinade and set aside for later. Pour the remaining marinade over the chicken chunks. Marinate the chicken (covered) in the refrigerator for a minimum of 1 hour. The longer you let the chicken marinate, the better the flavor.

  3. Thread marinated chicken onto skewers, dividing evenly. It is BEST to thread the veggies onto separate skewers, since the meat and the veggies tend to cook through at slightly different times. It's easier to cook them on separate skewers.

  4. For veggie skewers: Alternate veggies onto 2 skewers. Place on grill and occasionally brush with the reserved honey lime chicken marinade. Cook veggies, turning skewers occasionally to cook all sides. They will probably take a bit less time to grill than the chicken. Plan accordingly.

  5. Grill chicken skewers on medium-high heat for 6-8 minutes per side, or until the juices run clear. Turn chicken skewers occasionally to ensure they get browned on all sides. Remove skewers from grill, remove skewers from chicken and veggies. Serve, and enjoy!

Recipe Notes

The chicken skewers are best when served alongside grilled skewered vegetables like zucchini, onions, mushrooms and yellow squash. Use whatever veggies you enjoy!

*** I used metal skewers. If you will be using wooden skewers, remember to soak them in water for approximately 15 minutes (this will prevent them from burning on the grill...which would NOT be a good thing!)

Nutrition Facts
Honey Lime Chicken Skewers
Amount Per Serving (1 skewer (each-chicken and veggies))
Calories 445 Calories from Fat 117
% Daily Value*
Fat 13g20%
Saturated Fat 7g44%
Cholesterol 145mg48%
Sodium 1127mg49%
Potassium 1444mg41%
Carbohydrates 29g10%
Fiber 2g8%
Sugar 23g26%
Protein 53g106%
Vitamin A 1265IU25%
Vitamin C 69.5mg84%
Calcium 35mg4%
Iron 2.2mg12%
* Percent Daily Values are based on a 2000 calorie diet.

Here’s one more to pin on your Pinterest boards!Honey lime chicken skewers, with marinated chicken breast, zucchini, yellow squash, mushrooms and bell peppers are the perfect (yummy) kabobs for grilling!


Save

Save

Thai Chicken Linguini

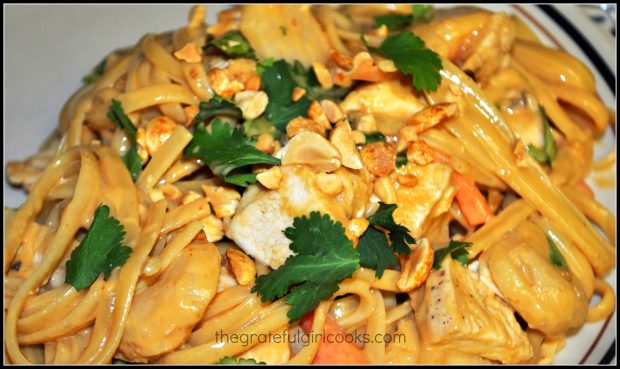
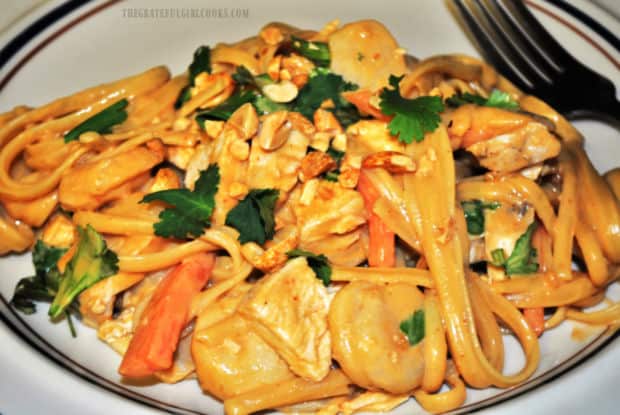
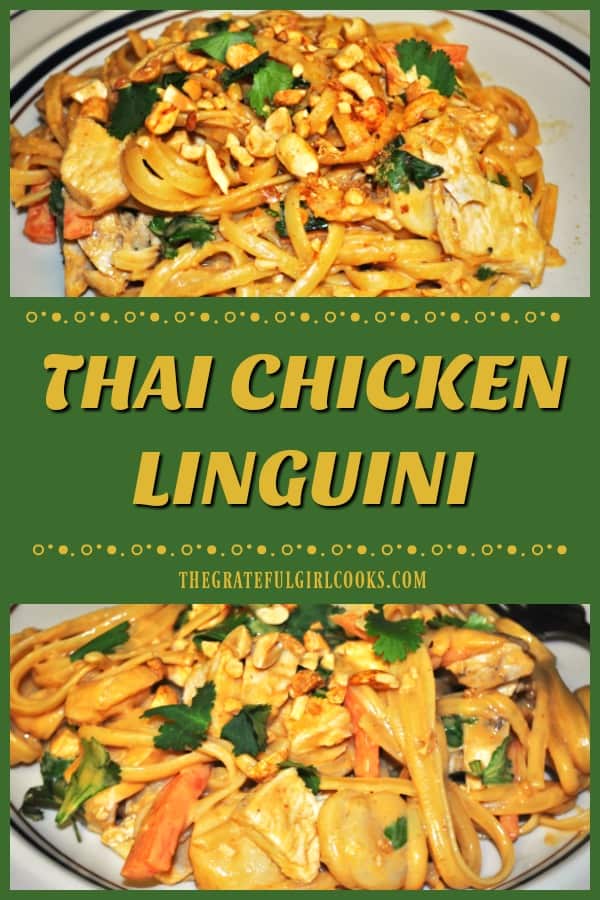
Thai Chicken Linguini (a Cheesecake Factory copycat recipe), with chicken breasts and pasta in a creamy Asian peanut sauce, is absolutely delicious!Thai Chicken Linguini (a Cheesecake Factory copycat recipe), with chicken breasts and pasta in a creamy Asian peanut sauce, is absolutely delicious!
I have always loved the Thai Chicken Linguini at The Cheesecake Factory, however I don’t love the (sometimes) 1-2 hour wait for a table. When you’re hungry, you’re hungry!

Let’s just say I was shocked to find out this entree has been removed from their menu as of 2014. Sadness prevailed… until I found this recipe, and began making it myself, at home!

I began a search to find a good copycat recipe and found a wonderful recipe posted by Amy, at “Sing For Your Supper” that was absolutely perfect.

Now I’ve made this dish many times since then, and love the smooth and creamy Thai peanut sauce that coats the pasta, and the crunchy peanut garnish. This is such a delicious dish! Here’s how to make it.

Scroll Down For A Printable Recipe Card At The Bottom Of The Page

Why NOT Make Thai Chicken Linguini At Home?

Seriously…why wait endlessly for a table when you can make Thai chicken linguini for much less $$, but with the same results at home? It’s really not that difficult at all!

You will need cooked chicken breasts, cooked linguini, julienned and blanched carrots, water chestnuts, cilantro and chopped peanuts (optional) for this dish.

These ingredients will be combined with a simple, flavor-packed peanut sauce before serving. Cilantro and chopped peanuts (optional) will garnish for each serving.

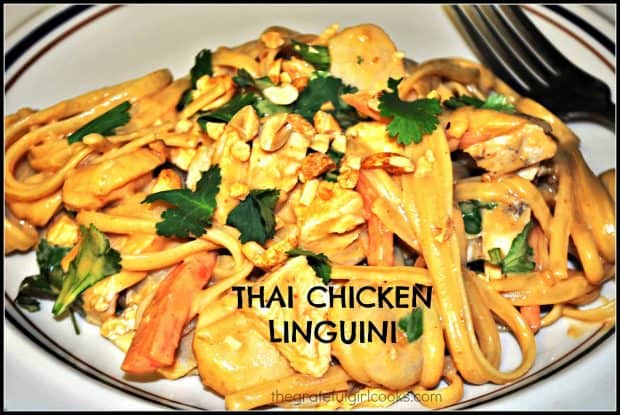
A portion of the Thai chicken linguini, garnished with cilantro and chopped peanuts.

Thai chicken linguini is very easy to make, the flavors and textures are magnificent, and any leftovers you may have are delicious when reheated.

Well, to be perfectly honest… you will ONLY have leftovers if you don’t polish all of it off in one sitting! Just sayin’.

Making The Creamy Peanut Sauce Is Easy!

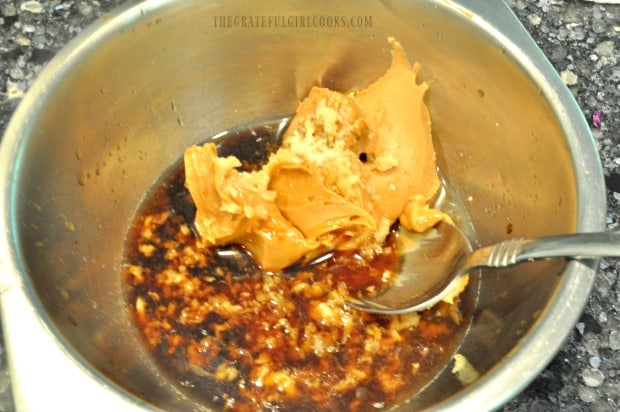
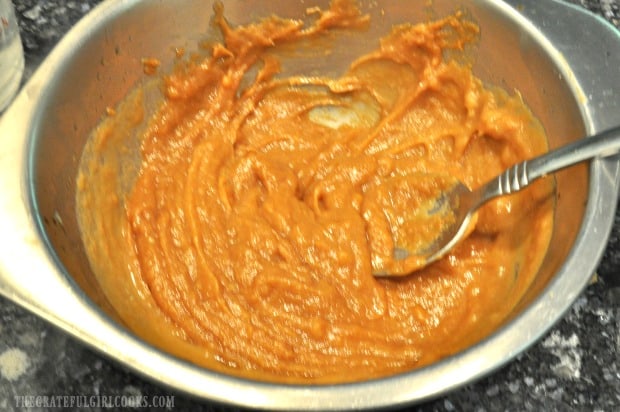
The peanut sauce is made by combining the ingredients for the sauce in a small bowl. You simply stir the ingredients well, until the sauce becomes smooth and creamy.

Ingredients for the sauce are peanut butter, soy sauce, chili paste (or sriracha), brown sugar, lime juice, garlic, rice wine vinegar, ginger and sesame oil.

All ingredients for the peanut sauce are placed in a grey bowl and stirred to combine.Peanut sauce in grey bowl is beginning to become creamy by stirring ingredients.

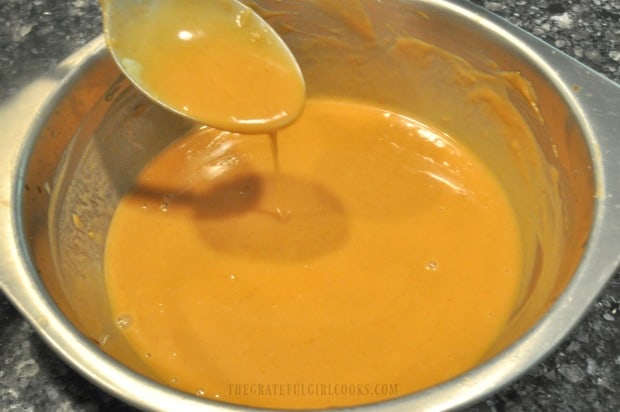
Once the sauce is smooth and creamy, pour it over the hot cooked linguini, cooked chicken breast slices, julienned carrots, water chestnuts, and cilantro. Toss to combine.

The fully blended peanut sauce is smooth and creamy, in a grey bowl.

Grab some chopsticks or a fork and dig in! I really think you will love delicious Thai chicken linguini! It’s so good, and it’s hard to stop eating it, once you’ve started.

A dinner plate with Thai chicken linguini on it, ready to be eaten.

The creamy peanut sauce, chicken breast and the crunch of chopped peanuts, carrots and water chestnuts make this one wonderfully tasty meal.

I could spoon up the creamy peanut sauce and eat it all by itself, because it’s THAT good. Not that I’ve ever done that… wink, wink!

Hope you will give this Thai chicken linguini a try! The recipe makes 4 servings, and can easily be doubled, if necessary. Take care, may God bless you, and have a great day.

Looking For More CHICKEN AND PASTA Recipes?

You can find all of my recipes in the Recipe Index, which is located at the top of the page. I have quite a few recipes featuring chicken AND pasta for you to enjoy, including:

Want More Recipes? Get My FREE Newsletter!

I publish a newsletter 2 times per month (1st and 15th) with lots of recipes, tips, etc..
Would you like to join our growing list of subscribers?

There is a Newsletter subscription box on the top right (or bottom) of each blog post, depending on the device you use.
You can submit your e-mail address there, to be added to my mailing list.

Find Me On Social Media:

Facebook page: The Grateful Girl Cooks!
Pinterest:
The Grateful Girl Cooks!
Instagram:
jbatthegratefulgirlcooks

Author's signature

Original Recipe Source: http://www.singforyoursupperblog.com/pasta/thai-chicken-pasta/

↓↓ PRINTABLE RECIPE BELOW ↓↓

0 from 0 votes
Thai Chicken Linguini
Prep Time
15 mins
Cook Time
12 mins
Total Time
27 mins
 

Thai Chicken Linguini (a Cheesecake Factory copycat recipe), with chicken breasts and pasta in a creamy Asian peanut sauce, is absolutely delicious!

Category: Dinner, Entree
Cuisine: Thai
Keyword: thai chicken linguini
Servings: 4 servings
Calories Per Serving: 675 kcal
Author: JB @ The Grateful Girl Cooks!
Ingredients
For the peanut sauce
  • 1 cup smooth peanut butter
  • 1/4 cup soy sauce
  • 3 tsp. chili paste (I usually substitute 2 tsp. Sriracha sauce)
  • 2 TBSP brown sugar
  • 2 limes , juiced
  • 1/2 cup hot water
  • 1 clove of garlic , minced
  • 1 tsp. rice wine vinegar
  • 1 tsp. ground ginger
  • 1/2 tsp. sesame oil
For the pasta
  • 1/2 lb. linguini (or spaghetti or fettucine), fully cooked and drained
  • 2 boneless , skinless chicken breasts, (seasoned w/ salt/pepper, fully cooked, and sliced diagonally)
  • 2 carrots , julienned (matchstick cut)
  • 1 small can water chestnuts , drained
  • 1/2 bunch of cilantro , chopped (stems discarded) Save small amount for garnish on top of dish.
  • 1 handful chopped peanuts (optional, but GOOD , for garnish (if desired)
Instructions
  1. Cook chicken. (I usually grill it, or boil it for 45 minutes in large saucepan of water). Season with salt and pepper, then slice it thinly on a diagonal.

  2. Make the sauce: Put all sauce ingredients in a small bowl and whisk or mix until fully combined, smooth and creamy. Cover and store in the refrigerator until needed (can be made ahead).

  3. Blanch the julienned carrots (cut into matchstick sized slices) in boiling water for approximately 3 minutes, pulling them out while they are still bright and crisp.

  4. Cook linguini per package directions. Place drained, hot pasta in a large bowl with the carrots, sliced chicken, water chestnuts and cilantro (save a bit of cilantro for garnish!). Pour the peanut sauce over the pasta and toss to coat.

  5. Garnish dish with additional cilantro and chopped peanuts (if using). Serve and enjoy!

Recipe Notes

Note: Cook times for this recipe do not include time for cooking chicken breasts. Some may bake, boil, broil, etc. the chicken. It's up to you to choose the method you prefer.

Chopped peanut garnish is not included in caloric calculation, as this is an optional garnish.

Nutrition Facts
Thai Chicken Linguini
Amount Per Serving (1 serving)
Calories 675 Calories from Fat 225
% Daily Value*
Fat 25g38%
Saturated Fat 4g25%
Trans Fat 0.01g
Polyunsaturated Fat 7g
Monounsaturated Fat 11g
Cholesterol 36mg12%
Sodium 1017mg44%
Potassium 984mg28%
Carbohydrates 79g26%
Fiber 6g25%
Sugar 16g18%
Protein 38g76%
Vitamin A 5144IU103%
Vitamin C 8mg10%
Calcium 64mg6%
Iron 3mg17%
* Percent Daily Values are based on a 2000 calorie diet.

Here’s one more to pin on your Pinterest boards!Thai Chicken Linguini (a Cheesecake Factory copycat recipe), with chicken breasts and pasta in a creamy Asian peanut sauce, is absolutely delicious!


Save

Save

Save

Save

Save

Save

Save

Save

Save

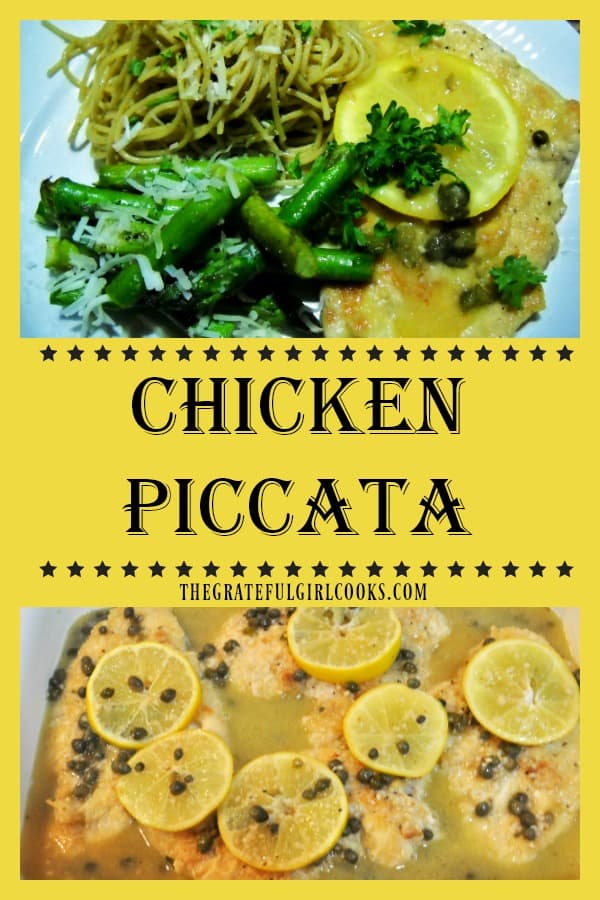
Chicken Piccata

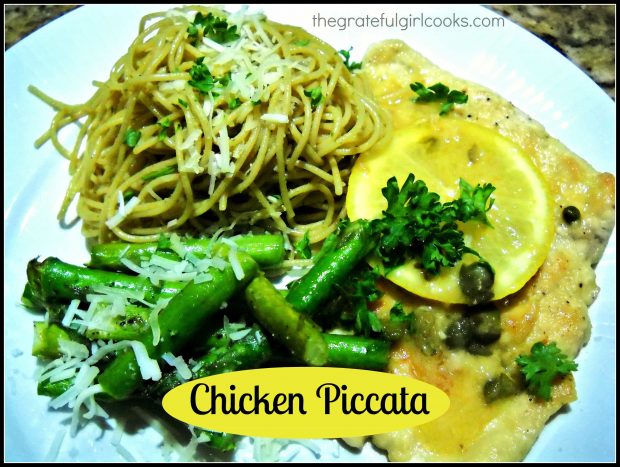
Chicken Piccata is an easy to prepare, classic Italian dish featuring chicken cutlets, cooked in broth with lemons, garlic, white wine and capers.Chicken Piccata is an easy to prepare, classic Italian dish featuring chicken cutlets, cooked in broth with lemons, garlic, white wine and capers.
My husband and I were invited to dinner in the home of good friends from our church a few months ago. We had a wonderful time visiting and then we were treated to a delicious Chicken Piccata dinner (I got to help my friend Sandy a bit in the kitchen—but SHE did 99% of the “work”).

I had never eaten Chicken Piccata before, so I was incredibly surprised how easy to make (as well as how light and delicious) the chicken was, thanks to the subtle flavors of lemons, garlic, capers and white wine. I’ve made this recipe many times since then, because it has become a favorite of ours!

Scroll Down For A Printable Recipe Card At The Bottom Of The Page

Sharing A Great Meal With Our Friends

A great meal and great conversation with dearly loved friends…what more could we ask for? We are so blessed with the friends in our lives…truly a gift from God.

Dinner with friends where we enjoyed chicken piccata.
Well, needless to say… I left their home that evening clutching the recipe in hand (can you see me smiling?). I’ve made this recipe many times since then, but keep forgetting to take photos.

Soooo… I included a photo of the delicious Chicken Piccata my friend Sandy made the evening we joined them for dinner… I guess it counts if I sliced some lemons, gave it a little stir, took the picture, and ate the chicken, right? Ha! Have a great day!

Looking For More CHICKEN Recipes?

You can find ALL of my recipes in the Recipe Index, which is located at the top of the page. I have LOTS of chicken recipes, including:

Interested In More Recipes?

Thank you for visiting this website. I appreciate you using some of your valuable time to do soIf you’re interested, I publish a newsletter 2 times per month (1st and 15th) with all the latest recipes, and other fun info. I would be honored to have you join our growing list of subscribers, so you never miss a great recipe!
There is a Newsletter subscription box on the top right side (or bottom) of each blog post, depending on the device you use, where you can easily submit your e-mail address (only) to be included in my mailing list.

You Can Also Find Me On Social Media:
Facebook page: The Grateful Girl Cooks!
Pinterest: The Grateful Girl Cooks!
Instagram: jbatthegratefulgirlcooks

Author's signature

Recipe Adapted from: www.CuisineAtHome.com

↓↓ PRINTABLE RECIPE BELOW ↓↓

0 from 0 votes
Chicken Piccata
Prep Time
15 mins
Cook Time
10 mins
Total Time
25 mins
 

Chicken Piccata is an easy to prepare, classic Italian dish featuring chicken cutlets, cooked in broth with lemons, garlic, white wine and capers.

Category: Entree
Cuisine: Italian
Keyword: chicken piccata
Servings: 4
Calories Per Serving: 491 kcal
Author: JB @ The Grateful Girl Cooks!
Ingredients
  • 4 chicken cutlets (4 chicken breasts, pounded flat between pieces of plastic wrap)
  • 2-3 Tablespoons all-purpose flour (for dredging chicken)
  • Salt and Pepper (to season chicken cutlets with)
  • 6 Tablespoons vegetable oil
  • 3/4 cup dry white wine
  • 3 teaspoons garlic , minced
  • 1 1/2 cups chicken broth
  • 6 Tablespoons fresh lemon juice
  • 6 Tablespoons capers , drained
  • 2 Tablespoons unsalted butter
  • Fresh lemon slices
  • Chopped fresh parsley for garnish
Instructions
  1. Season the chicken cutlets with salt and pepper, then lightly dredge both sides of chicken in the flour, shaking off the excess.
  2. Spray a skillet with nonstick spray, and add the vegetable oil to skillet; heat oil over medium-high.
  3. Saute the chicken 2-3 minutes on one side, then turn them over and cook the other side for 1-2 minutes with a lid (or covering) on the pan. Transfer chicken to a warm plate; skim off the fat from the pan.
  4. De-glaze the skillet with the wine and add the minced garlic. Cook until the garlic is slightly browned and the liquid is nearly evaporated (approx. 2-3 minutes). Be careful not to burn the garlic.
  5. Add the broth, lemon juice and capers to the skillet.
  6. Return chicken to skillet and cook for an additional minute on each side. Transfer the chicken to a warm plate (serving platter or individual plates).
  7. Finish the sauce by adding the butter and sliced lemons to skillet sauce. Once the butter melts, pour the sauce over the cutlets.
  8. Garnish with chopped fresh parsley and serve. Enjoy! This is delicious with a side of pasta.
Nutrition Facts
Chicken Piccata
Amount Per Serving (1 serving)
Calories 491 Calories from Fat 279
% Daily Value*
Fat 31g48%
Saturated Fat 21g131%
Cholesterol 123mg41%
Sodium 855mg37%
Potassium 763mg22%
Carbohydrates 7g2%
Sugar 1g1%
Protein 37g74%
Vitamin A 240IU5%
Vitamin C 18.2mg22%
Calcium 27mg3%
Iron 1.3mg7%
* Percent Daily Values are based on a 2000 calorie diet.

Here’s one more to pin on your Pinterest boards!Chicken Piccata is an easy to prepare, classic Italian dish featuring chicken cutlets, cooked in broth with lemons, garlic, white wine and capers.


Save

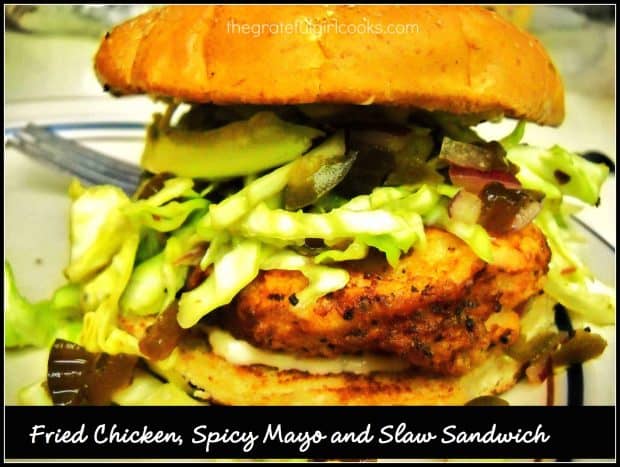
Fried Chicken, Spicy Mayo and Slaw Sandwich

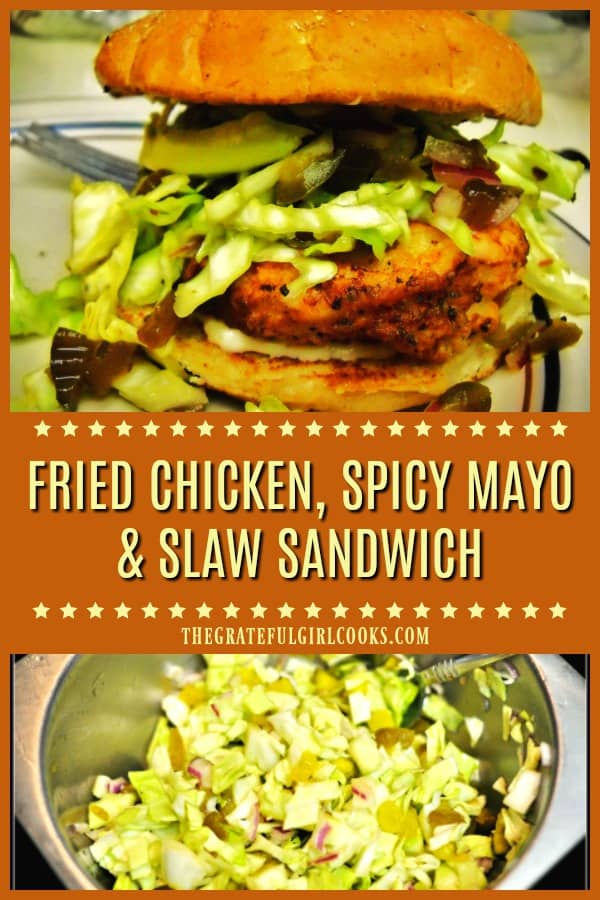
You’re going to love this fried chicken sandwich on a toasted bun, with spicy mayo and slaw. Recipe is from Bon Appétit magazine, and tastes fantastic!You're going to love this fried chicken sandwich on a toasted bun, with spicy mayo and slaw. Recipe from Bon Appétit magazine, and tastes fantastic!

So here’s the story… my friend gave me a subscription to Bon Appétit magazine last year. My husband was looking through one of the issues and came upon this recipe for a Fried Chicken, Spicy Mayo and Slaw Sandwich.

Being the nice guy that he is, he hinted mentioned to me (of course rather casually) that it sure sounded good, and was wondering if I thought I could make this recipe. It sounded pretty straightforward, so I made it! Wow! This fried chicken sandwich tastes amazing… let me show you how to make it:

Scroll Down For A Printable Recipe Card At The Bottom Of The Page

Preparing The Fried Chicken Sandwich

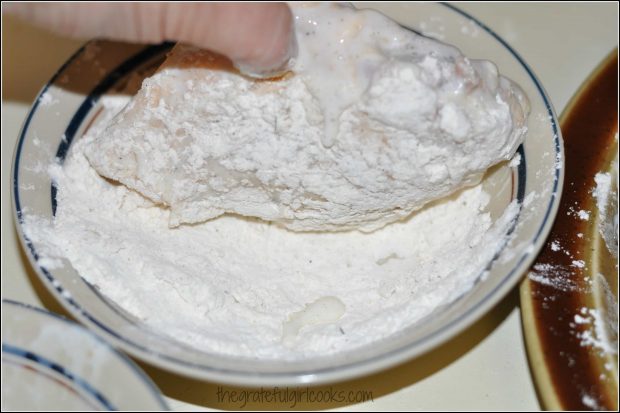
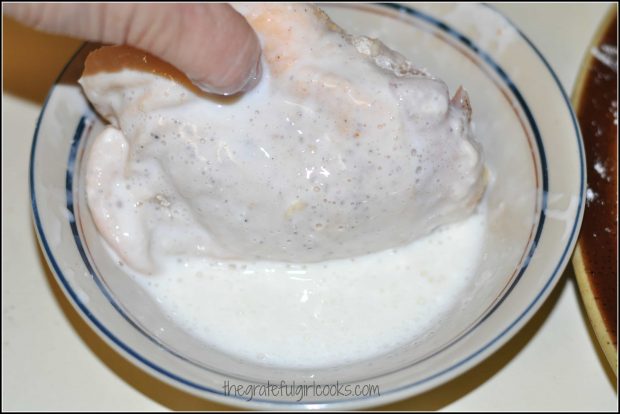
The sandwich calls for fried chicken. I used boneless, skinless chicken breasts which were coated in flour, and buttermilk, and then fried in a skillet (in oil) until done. Large chicken breasts are cut in half, so they cook faster than normal.

Chicken breasts are dredged in flour, buttermilk, and then flour again, before frying. Dredging the chicken in buttermilk before frying.

The Spicy Slaw

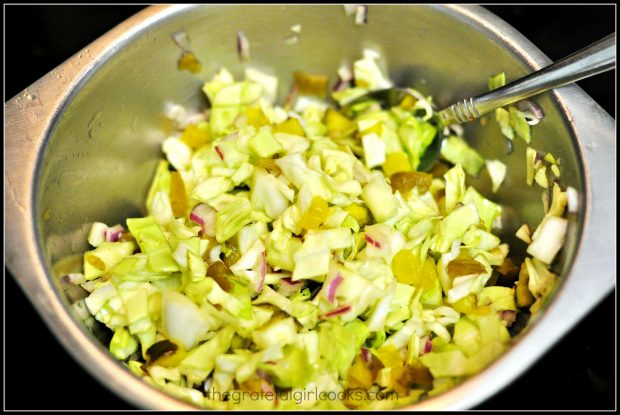
A very easy to make spicy slaw is mixed together to go on the fried chicken sandwich. The slaw has cabbage, hot pepper sauce, garlic, jalapeno, bread and butter pickles and red onions. It’s not too spicy, but it does have a tiny kick to it!

Slaw is mixed to add to the sandwich.

Making The Fried Chicken Sandwich

The fried chicken is placed on a lightly toasted bun which has been spread with a spicy mayonnaise. The fried chicken breast is then added, and is topped with the slaw. Put the top bun on, and you’re ready to enjoy your sandwich! So I did. End of story. Did you enjoy it? Actually, it was fairly easy, and really tastes GOOD! Seriously good. The fried chicken sandwich was fairly easy to prepare, and the taste is unexpectedly wonderful!

My husband and I LOVED it and I have prepared this sandwich a few times since then. Hope you will give it a try, because I think you will really like this delicious fried chicken sandwich. Thanks for stopping by, and I hope you come back again really soon. Have a GREAT day!

Looking For More SANDWICH Recipes?

You can find all of my sandwich recipes in the Recipe Index, located at the top of the page. I have several you’ll enjoy, including:

Interested In More Recipes?

Thank you for visiting this website. I appreciate you using some of your valuable time to do soIf you’re interested, I publish a newsletter 2 times per month (1st and 15th) with all the latest recipes, and other fun info. I would be honored to have you join our growing list of subscribers, so you never miss a great recipe!
There is a Newsletter subscription box on the top right side (or bottom) of each blog post, depending on the device you use, where you can easily submit your e-mail address (only) to be included in my mailing list.

You Can Also Find Me On Social Media:
Facebook page: The Grateful Girl Cooks!
Pinterest: The Grateful Girl Cooks!
Instagram: jbatthegratefulgirlcooks

Author's signature

Recipe Source: http://www.bonappetit.com/recipe/fried-chicken-sandwiches-with-slaw-and-spicy-mayo

↓↓ PRINTABLE RECIPE BELOW ↓↓

0 from 0 votes
Fried Chicken, Spicy Mayo and Slaw Sandwich
Prep Time
20 mins
Cook Time
15 mins
Total Time
35 mins
 

You're going to love this fried chicken sandwich on a toasted bun, with spicy mayo and slaw. Recipe from Bon Appétit magazine, and tastes fantastic!

Category: Entree
Cuisine: American
Keyword: fried chicken sandwich
Servings: 4
Calories Per Serving: 845 kcal
Author: JB @ The Grateful Girl Cooks!
Ingredients
For Spicy Mayo:
  • 1 garlic clove , finely chopped
  • 1/2 cup light mayonnaise (can use regular mayo too, of course)
  • 1 Tablespoon Louisiana-style hot pepper sauce
For Slaw:
  • 1/2 small red onion , thinly sliced
  • 1 jalapeno , finely chopped
  • 4 C. thinly sliced green cabbage
  • 1/2 cup Bread and Butter pickle slices , plus 1/4 cup pickle juice from jar
For Fried Chicken and Assembly:
  • 2 cups all purpose flour
  • 1 Tablespoon ground black pepper
  • 1/2 teaspoon salt (plus more for later)
  • 1 cup buttermilk
  • 2 . large chicken breasts (8 ounces each) , cut in half lengthwise
  • Vegetable or Peanut oil enough to cover bottom of skillet with ½ inch of oil.
  • 4 sandwich rolls (I used Kaiser rolls)
  • 2 TBSP unsalted butter , room temperature (I used regular...whatever!)
Instructions
  1. Make spicy mayo: Mix garlic, mayo and pepper sauce in small bowl. Cover and refrigerate.

  2. Make slaw: In a separate bowl, toss red onion, jalapeno, cabbage, and pickles to combine. Cover and refrigerate.

  3. To make chicken: In a small bowl, whisk flour, black pepper and salt. Set aside. In separate shallow bowl, pour buttermilk. Working with 1 piece of chicken at a time, dredge chicken in flour mixture, shaking off the excess. Then dip the chicken in the buttermilk, letting excess drip back into bowl. Dredge the chicken again in flour mixture, shaking off excess. Set chicken onto a piece of foil while you coat the remaining chicken pieces.

  4. Pour oil into a large, heavy skillet to a depth of at least ½ inch. Place the deep-fry thermometer into the oil so that the bulb is submerged. Heat over medium heat until the thermometer registers 350°. Carefully place the 4 chicken breasts into hot oil. Fry chicken until golden brown and cooked through (approximately 3-4 minutes per side). When done, remove chicken and transfer to a wire rack. Season with additional salt to taste.

  5. Spread the cut sides of the rolls with butter. Heat a large skillet or griddle over medium heat. Working in batches, grill rolls, butter-side down, till lightly brown and crisp (about 1 minute).

  6. To "build" sandwich: Spread bottom of the toasted sandwich roll with 1/4 of the spicy mayo. Then add fried chicken breast, followed by 1/4 of the slaw. Top with other half of roll, and enjoy!

Recipe Notes

You will need a deep-fry thermometer for this recipe.

Nutrition Facts
Fried Chicken, Spicy Mayo and Slaw Sandwich
Amount Per Serving (1 sandwich)
Calories 845 Calories from Fat 306
% Daily Value*
Fat 34g52%
Saturated Fat 18g113%
Cholesterol 98mg33%
Sodium 1192mg52%
Potassium 807mg23%
Carbohydrates 94g31%
Fiber 5g21%
Sugar 11g12%
Protein 39g78%
Vitamin A 580IU12%
Vitamin C 34.8mg42%
Calcium 188mg19%
Iron 5.7mg32%
* Percent Daily Values are based on a 2000 calorie diet.

Here’s one more to pin on your Pinterest boards!You're going to love this fried chicken sandwich on a toasted bun, with spicy mayo and slaw. Recipe from Bon Appétit magazine, and tastes fantastic!


Save

Save

Save