Chicken Veggie Stir Fry, with broccoli, carrots, bok choy, zucchini, onions,etc. in an Asian-inspired sauce, is served on rice in this delicious, 20 minute dish.
Do you enjoy stir-fry meals? We sure do… in fact, I’ve been making this delicious, Asian-inspired Chicken Veggie Stir Fry using the same process and “recipe” for over 20 years.
This dish couldn’t be simpler to make! I came up with a simple Asian sauce after experimenting years ago, then simply added chicken and fresh veggies, cooked it together, and have been making chicken veggie stir fry like this ever since!
The process is simple: stir-fry lightly seasoned, cubed chicken breasts and lots of fresh veggies. Add a homemade Asian flavored sauce (so quick & easy to make), then serve on a bed of rice! The recipe is easy, packed with veggies, and is wonderfully delicious!
Scroll Down For A Printable Recipe Card At The Bottom Of The Page
How To Make Chicken Veggie Stir Fry
TIMESAVING TIP: To save time, I cooked all three parts of this recipe at the same time (it’s easy to do).
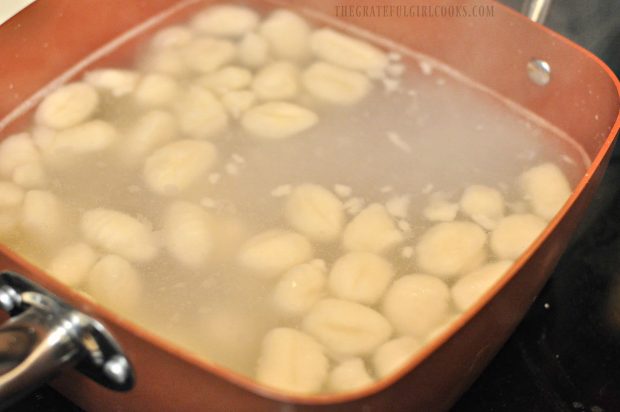
The first thing you will need to do is cook rice according to package directions, and prep the veggies and chicken while the rice is cooking. Make sure the veggies are cut into bite sized pieces. Cut boneless, skinless chicken breasts into 2 inch cubes.


Make The Sauce For Chicken Veggie Stir Fry
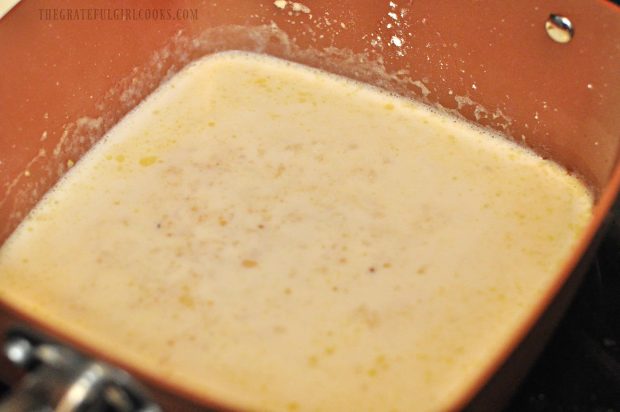
Prepare the stir-fry sauce by combining chicken broth, soy sauce, and ground ginger in a small bowl. Stir in the corn starch and mix well to dissolve any lumps, and set it aside when done.

Cook the Vegetables
In a large skillet, heat HALF of the oil on medium-high heat until very hot, but not smoking. Add all the veggies and cook for 6-7 minutes, stirring often until the veggies are crisp-tender.

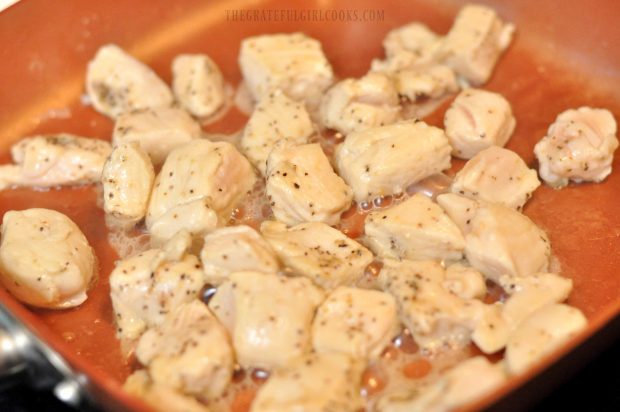
Cook The Chicken
In a separate medium skillet, heat the remaining half of the oil on medium-high until very hot, but not smoking. Add the chicken pieces and cook, turning pieces over to cook through on all sides (about 3-4 minutes). To save time, cook the chicken while the veggies are cooking. Multi-tasking at it’s finest!

When the chicken is finished cooking, add the pieces to the cooked veggies in the large skillet.

Add Sauce To Chicken Veggie Stir Fry
Give the reserved sauce a good stir, then pour it over the chicken and veggies. Cook on medium-high heat, stirring often for about 2 minutes. The sauce will thicken as it cooks and will coat the chicken and veggies.

Once the sauce has thickened and coated everything, add the cashews, and stir to combine. Cook just for a minute, until the chicken veggie stir fry is heated through.

Serve The Chicken Veggie Stir Fry
Serve the chicken veggie stir fry hot, on top of a bed of rice (brown or white). Grab a fork (or chopsticks) and dig right in! It’s GOOD!


Can I Change The Veggies OR Make This Dish Vegetarian?
While you can adjust the veggies according to your taste and what you have available (I’ve done this many times), the basics you should have in this dish are onion, carrots, broccoli, and red peppers, because they add so much color (and flavor) to the dish. Any other veggies you choose to add will enhance the dish with additional flavor and color!!!
If you are a Vegetarian, no problem! Simply omit the chicken from the dish! Be creative… make it your own… and enjoy every bite! Have a wonderful day!
Looking For More CHICKEN Recipes?
You can find all of my recipes in the Recipe Index, which is located at the top of the page. I have LOTS of chicken recipes, including:
Interested In More Recipes?
Thank you for visiting this website. I appreciate you using some of your valuable time to do so. If you’re interested, I publish a newsletter 2 times per month (1st and 15th) with all the latest recipes, and other fun info. I would be honored to have you join our growing list of subscribers, so you never miss a great recipe!
There is a Newsletter subscription box on the top right side (or bottom) of each blog post, depending on the device you use, where you can easily submit your e-mail address (only) to be included in my mailing list.
You Can Also Find Me On Social Media:
Facebook page: The Grateful Girl Cooks!
Pinterest: The Grateful Girl Cooks!
Instagram: jbatthegratefulgirlcooks


- 3 boneless skinless chicken breasts , cut into 2 inch cubes
- Ground ginger (to lightly season chicken with before cooking)
- 6 cups fresh vegetables (total) *See NOTES section below.
- 1/4 cup vegetable oil , divided
- 1/3 cup roasted cashews
- 1 cup chicken broth
- 1/4 cup soy sauce
- 2 Tablespoons corn starch
- 1 teaspoon ground ginger
- Cook rice according to pkg. directions.Cut veggies/chicken in bite size pieces while rice is cooking.
- Make stir-fry sauce by mixing chicken broth, soy sauce, and ground ginger in small bowl. Stir in corn starch and mix well. Set aside.
- In large skillet, heat HALF of the oil on medium-high heat until very hot, but not smoking. Add all veggies; continue cooking for about 6-7 minutes, stirring often until veggies are crisp-tender.
- In separate medium skillet, heat remaining half of the oil on medium-high until very hot, but not smoking. Add chicken; cook all sides until it turns white and is cooked through (about 3-4 minutes).
- Add cooked chicken to the veggies in large skillet.
- Give the sauce a stir, then pour it over chicken and veggies. Cook on medium-high heat, stirring often for about 2 minutes. The sauce will thicken as it cooks and will coat the chicken and veggies.
- When done, add the cashews, and stir to combine. Serve over hot cooked rice... and enjoy!
I used broccoli, onion, carrots, red & green bell peppers, bok choy, mushrooms, sugar snap peas, zucchini and yellow squash. Additional veggie add-ins might also include: fresh chopped asparagus, green onions, fresh green beans, celery, water chestnuts, canned/drained bean sprouts, etc.
Here’s one more to pin on your Pinterest boards!


 - The Grateful Girl Cooks!")
 - The Grateful Girl Cooks!")
 - The Grateful Girl Cooks!")
 - The Grateful Girl Cooks!")
 - The Grateful Girl Cooks!")
 - The Grateful Girl Cooks!")
 - The Grateful Girl Cooks!")
 - The Grateful Girl Cooks!")
 - The Grateful Girl Cooks!")
 / The Grateful Girl Cooks!")
 / The Grateful Girl Cooks!")


