Category: Mexican / Southwestern

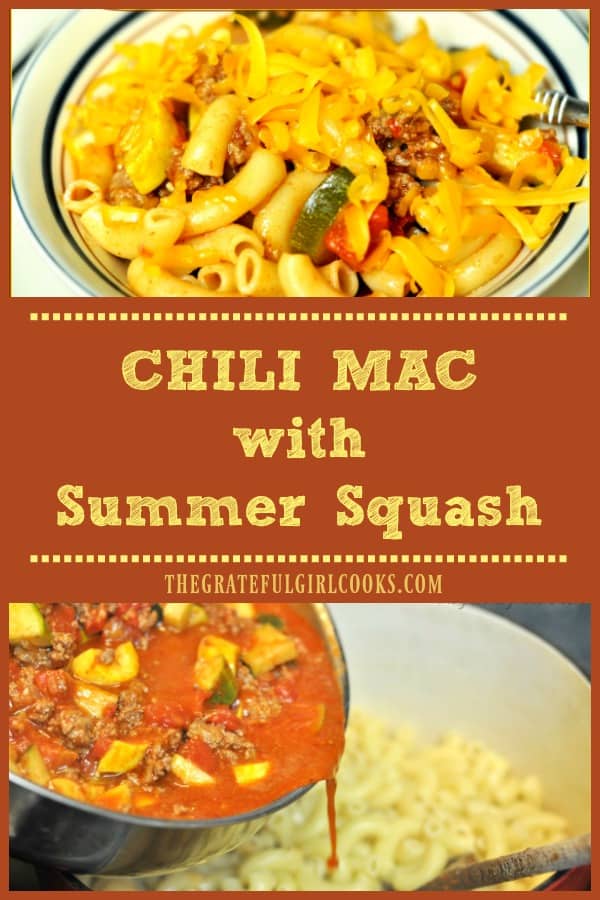
Chili Mac With Summer Squash

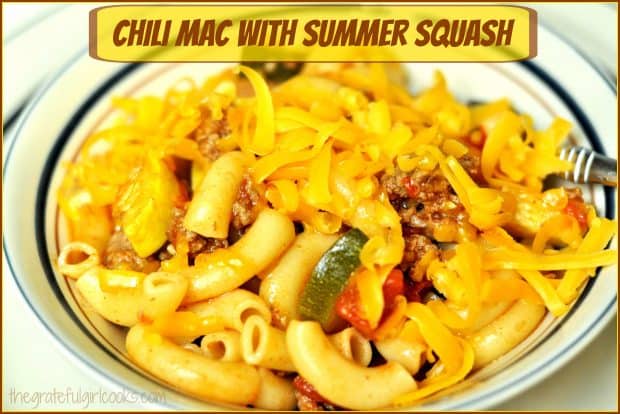
Chili Mac with Summer Squash is a budget friendly, easy, delicious meal, with ground beef, pasta, fresh veggies and great Southwest flavor!Chili Mac with Summer Squash is a budget friendly, easy, delicious comfort food meal, with ground beef, pasta, fresh summer veggies and great Southwest flavor!
Well, if you’re looking for an inexpensive, easy to prepare “Comfort Food” kind of meal… this “Chili Mac With Summer Squash” is it!!  I made this Southwestern flavored recipe up as I went along (really), but it is loosely based on the goulash recipe (Italian-flavored) my Mom used to make for us kids when we were growing up.

I fixed this EASY PEASY yummy dish for my husband and I for dinner recently, and it filled us up!  It’s pretty amazing what you can do with a pound of hamburger meat, some fresh veggies from the garden (or store), elbow macaroni, and some tasty Southwestern spices! The recipe serves 4-6 depending on serving size, so all in all, it’s a lot of bang for your hard earned money! Here’s how to make this:

Scroll Down For A Printable Recipe Card At The Bottom Of The Page

Cook The Meat 

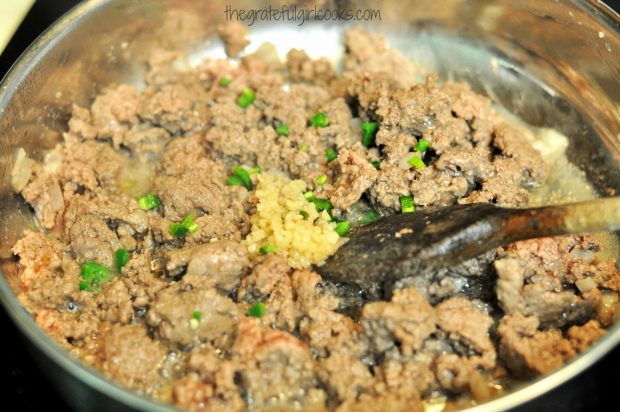
First, brown one pound of ground beef with chopped onions and a bit of diced jalapeno. When it is nearly done, add minced garlic.

Ground beef, onions, garlic and jalapeno are cooked for chili mac
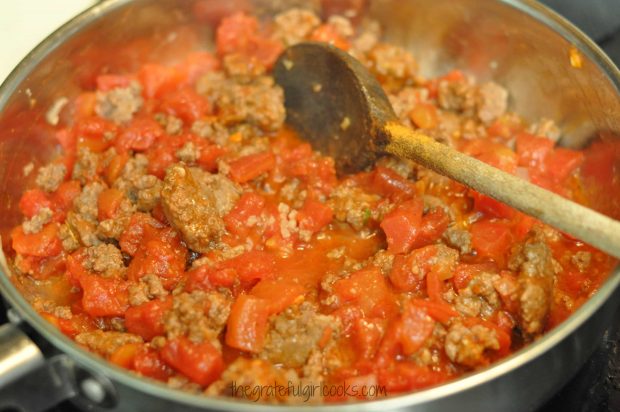
Drain off the grease (discard), then add one small can of diced tomatoes, a little water, some taco seasoning, salt, and pepper to the beef. (I used 3 large Tablespoons of my homemade taco seasoning mix:  “Make Your Own Taco Seasoning Mix”).

Canned tomatoes and chili spices are added to ground beef mixture
Time To Add The Summer Squash!

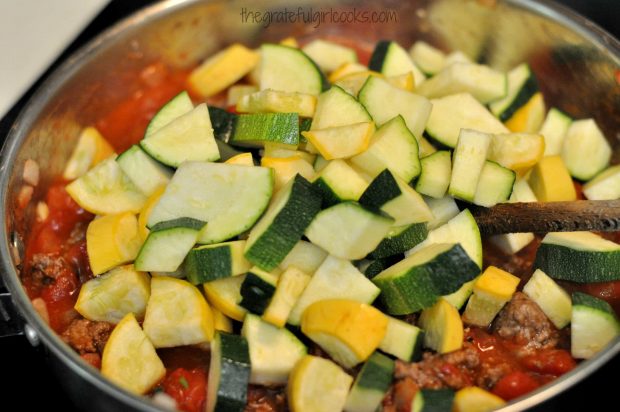
Stir well, then add zucchini and yellow squash (cut in quarters). I used my homegrown veggies (yay for my garden). Stir again to combine, then cover the skillet and let it all cook for 9-10 minutes. Only cook long enough to cook the squash, but not let it get “smooshy”.

Sliced summer squash is added to chili beef mixture

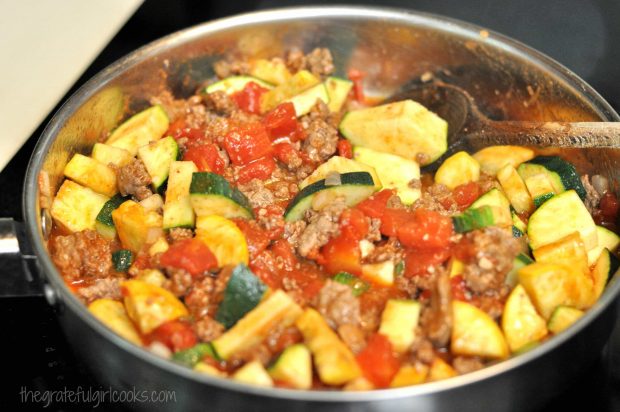
Summer squash is cooked with ground beef, tomatoes and spices
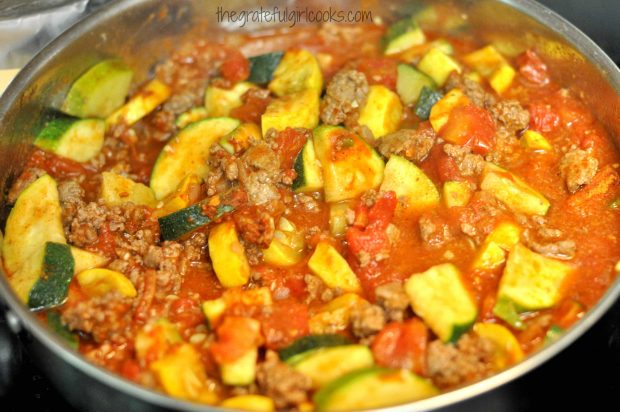
To Save Time: While the meat and veggies are cooking, cook the elbow macaroni separately in a large saucepan. Once the meat and veggies were done cooking, I uncovered the skillet to take a photo to show what it will look like.

Summer squash is finished cooking with chili beef
Finish Making The Chili Mac with Summer Squash

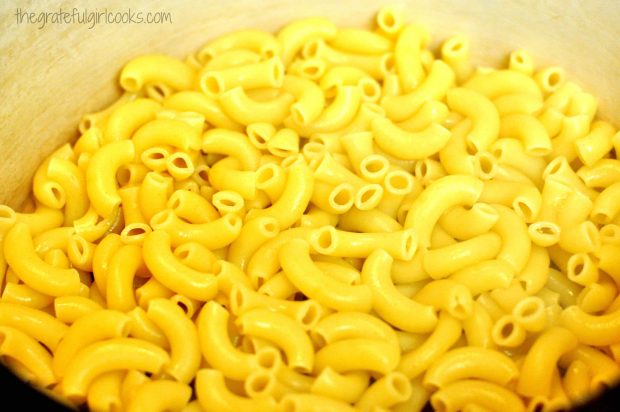
Once the pasta noodles have finished cooking, drain the water from them. Put the drained macaroni noodles back into the large pot they were cooked in.

Macaroni noodles are cooked, then drained.
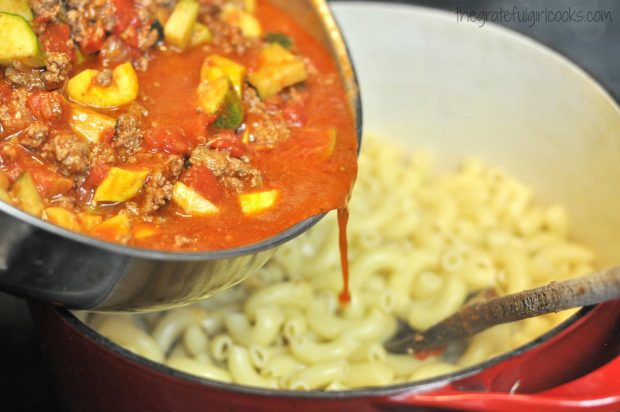
Immediately pour the entire skillet of hot meat and veggies into the pan of cooked/drained macaroni.

Summer squash, chili beef and tomatoes are poured over cooked macaroni
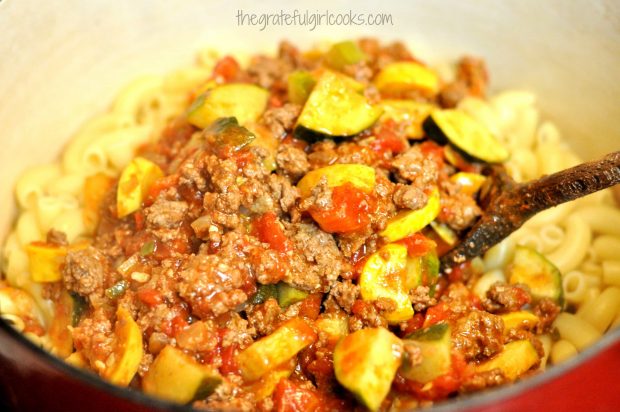
Stir it all together, then heat it another minute or two to make sure it is hot… then taste-test it to make sure it is seasoned with enough salt.

Pasta, beef and summer squash are stirred to combine.
Time to EAT!

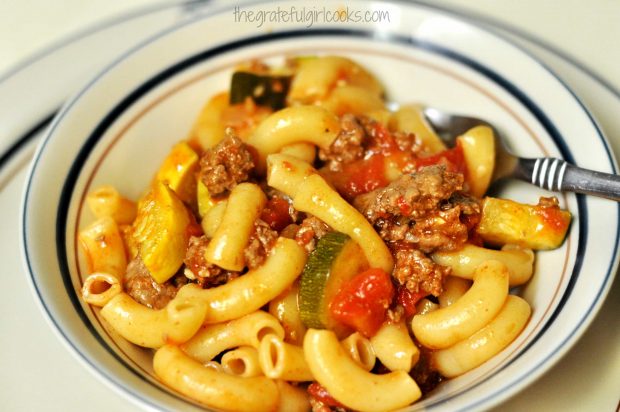
Ladle the Chili Mac into serving bowls while it is piping hot!

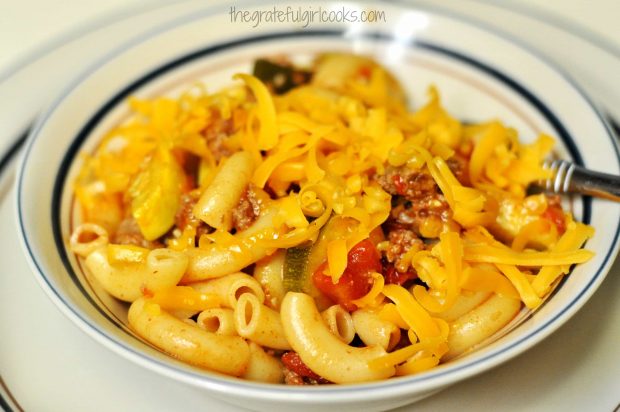
Chili mac with summer squash is placed into bowls for serving
Sprinkle each bowl with a small amount of grated cheddar cheese, then serve it! There ya have it… a tasty one-dish meal that has meat, pasta, AND yummy veggies!

Chili mac is sprinkled with grated cheddar cheese to serve.
All that’s left to do is grab a fork and dig in! Chili Mac with summer squash is quick, easy, totally inexpensive to make, and really good. How good, you ask? The kind of good where you want to “put on stretchy pants and hang out on the couch watching a great movie while you eat this on a rainy day good”.

Sure hope you will give this recipe a try! The leftovers are amazingly yummy, as well- (speaking with first-hand knowledge!)  I think you’ll like this comforting dish as much as we do, and will LOVE how easy it is to prepare!

Looking For More PASTA Recipes?

You can find all of my recipes in the Recipe Index, which is located at the top of the page. I have LOTS of delicious featuring pasta, including:

Interested In More Recipes?

Thank you for visiting this website. I appreciate you using some of your valuable time to do soIf you’re interested, I publish a newsletter 2 times per month (1st and 15th) with all the latest recipes, and other fun info. I would be honored to have you join our growing list of subscribers, so you never miss a great recipe!
There is a Newsletter subscription box on the top right side (or bottom) of each blog post, depending on the device you use, where you can easily submit your e-mail address (only) to be included in my mailing list.

You Can Also Find Me On Social Media:
Facebook page: The Grateful Girl Cooks!
Pinterest: The Grateful Girl Cooks!
Instagram: jbatthegratefulgirlcooks

Have a GREAT day!

Author's signature

0 from 0 votes
Chili Mac With Summer Squash
Prep Time
15 mins
Cook Time
9 mins
Total Time
24 mins
 
Chili Mac with Summer Squash is a budget friendly, easy, delicious comfort food meal, with ground beef, pasta, fresh summer veggies and great Southwest flavor!
Category: Entree
Cuisine: Southwestern
Keyword: chili mac
Servings: 5 servings
Calories Per Serving: 562 kcal
Author: JB @ The Grateful Girl Cooks!
Ingredients
  • 1 pound hamburger meat
  • 1/3 cup chopped onion
  • 1/2 small jalapeno pepper , (de-stemmed and seeded), chopped finely
  • 1 1/2 teaspoons minced garlic
  • 1 teaspoon salt
  • 1/4 teaspoon black pepper
  • 1 envelope taco seasoning or 3 Tablespoons homemade taco seasoning
  • 1 can diced tomatoes (14.5 ounces)
  • 1/2 cup water
  • 1 green zucchini , sliced, then cut into quarters
  • 1 yellow squash , sliced, then cut into quarters
  • 2 cups elbow macaroni (cooked per package directions)
  • 1 cup grated cheddar cheese
  • Additional salt (to taste)
Instructions
  1. Before cooking the hamburger meat, bring a large saucepan full of water to a boil (to cook the macaroni in)
  2. In large skillet, brown the hamburger meat, chopped onion and jalapeno. Right before meat is fully cooked, add the minced garlic. Drain grease off meat when fully cooked. Return skillet to stove.
  3. Add tomatoes, taco seasoning, water, salt and pepper, zucchini, and yellow squash. Stir to combine. Cover skillet, then continue to cook on medium-low for approximately 9 minutes. Do not let squash get smooshy!
  4. While meat mixture is cooking, prepare macaroni noodles in a large saucepan, according to package directions. When done, drain macaroni, then return noodles to large saucepan.
  5. Add in the hot meat/squash mixture. Stir to combine. Heat quickly (uncovered) on medium-high for a minute or two, stirring constantly, to heat dish thoroughly. Taste test. If it needs more salt, add it now.
  6. Spoon mixture into individual serving bowls. Top with grated cheddar cheese, and serve hot!
Nutrition Facts
Chili Mac With Summer Squash
Amount Per Serving (1 serving (1/5 of total))
Calories 562 Calories from Fat 234
% Daily Value*
Fat 26g40%
Saturated Fat 11g69%
Cholesterol 88mg29%
Sodium 809mg35%
Potassium 767mg22%
Carbohydrates 49g16%
Fiber 3g13%
Sugar 5g6%
Protein 30g60%
Vitamin A 515IU10%
Vitamin C 24.1mg29%
Calcium 231mg23%
Iron 3.7mg21%
* Percent Daily Values are based on a 2000 calorie diet.

Here’s one more to pin on your Pinterest boards!Chili Mac with Summer Squash is a budget friendly, easy, delicious comfort food meal, with ground beef, pasta, fresh summer veggies and great Southwest flavor!


Save

Save

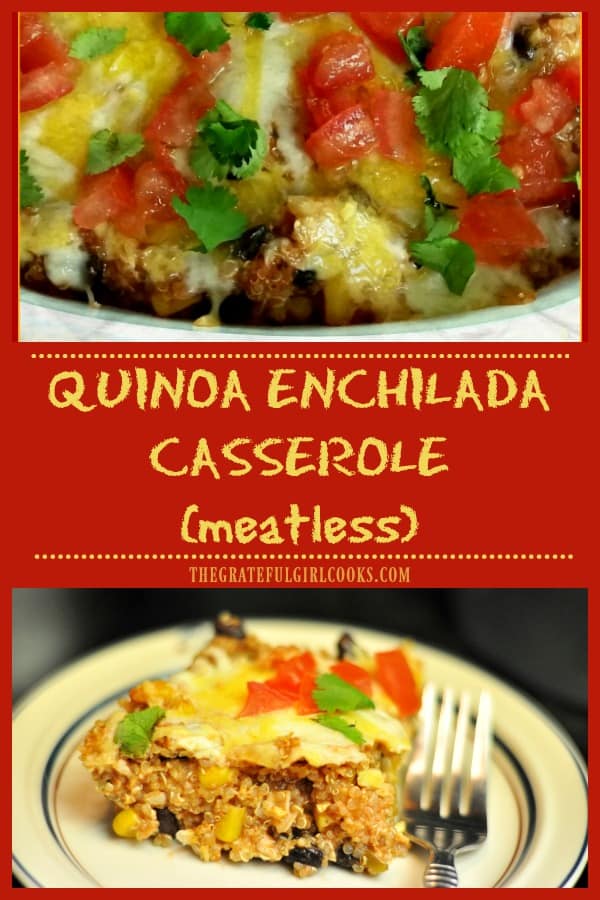
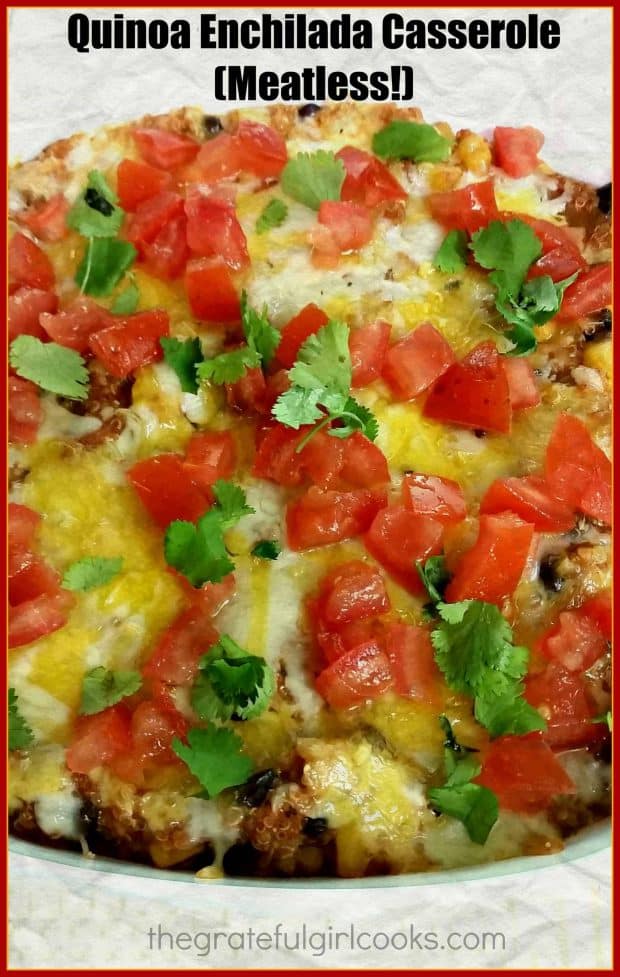
Quinoa Enchilada Casserole (Meatless!)

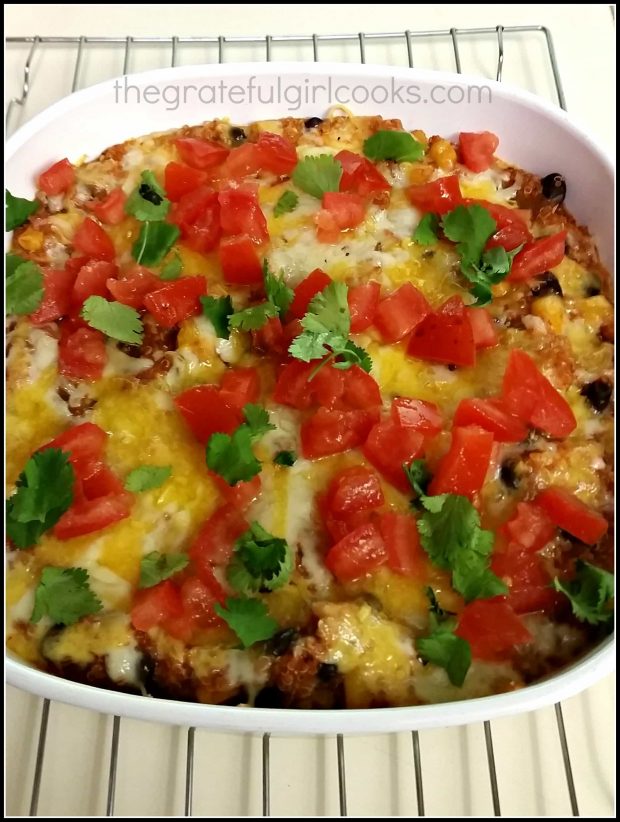
This meatless quinoa enchilada casserole, with black beans, corn, spices, enchilada sauce and cheese will be enjoyed by everyone, vegetarian or not!This meatless quinoa enchilada casserole, with black beans, corn, spices, enchilada sauce and cheese will be enjoyed by everyone, vegetarian or not!

I am always on the lookout for a meatless entree I can serve when we have our Vegetarian son and his girlfriend over for dinner!  I found a recipe for a Quinoa Enchilada Casserole on Pinterest and decided to give it a “taste-test” before offering it up for a family get-together!

Our youngest son (the one who used to love huge steaks and hamburgers) became a vegetarian a few years ago. His girlfriend is also a vegetarian. That complicated things a bit, making dinners more challenging for our “family get-togethers”, so I’m glad I tried this recipe! I only “tweaked” the original recipe just a little bit!

The quinoa enchilada casserole was delicious, and really easy to prepare! If you like a good enchilada, or enjoy a meatless meal occasionally like we do (one with loads of flavor), you will like this recipe… meat eater or not!

Scroll Down For A Printable Recipe Card At The Bottom Of The Page

How To Make Quinoa Enchilada Casserole

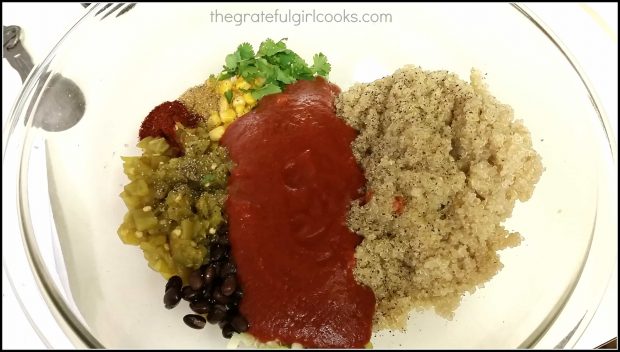
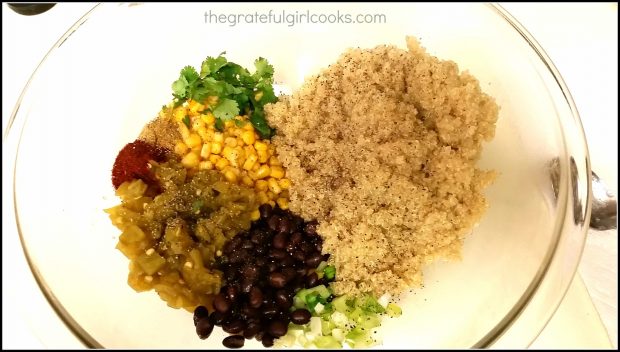
Prepare the quinoa according to package directions. When done, place quinoa in large bowl. Add the green chiles, corn, black beans, cilantro, green onion, cumin, garlic powder, and chili powder.

Cooked quinoa and other ingredients for casserole in mixing bowl.
Add the enchilada sauce, salt and pepper to the quinoa. Stir well, to fully blend all the ingredients.

Enchilada sauce is added to quinoa and casserole ingredients.
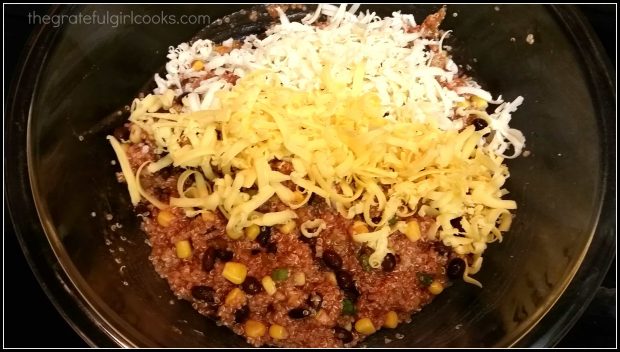
Add a half cup of cheddar cheese and a half cup of pepper jack cheese, and stir until fully combined.

Grated cheddar and jack cheeses are added to casserole ingredients.
Bake The Quinoa Enchilada Casserole

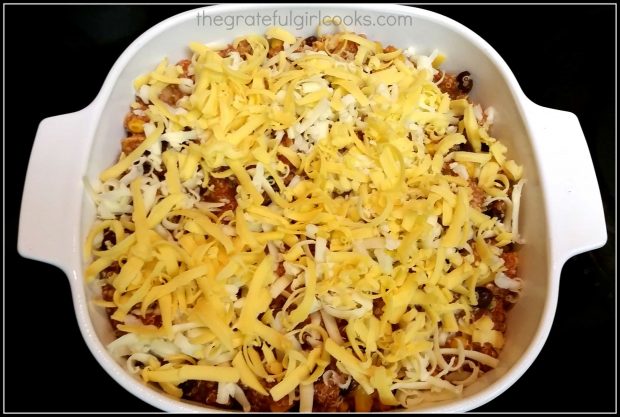
Pour the mixture into a lightly greased (or sprayed) 8×8 inch baking dish. Spread the casserole mixture evenly in the dish. Sprinkle the remaining jack and cheddar cheeses on top. Bake the quinoa enchilada casserole for 20-25 minutes at 375 degrees, or until the cheese is bubbly and fully melted. Remove the casserole to a wire rack.

Quinoa enchilada casserole is placed into an 8x8 baking dish
To Serve The Quinoa Enchilada Casserole

Garnish the top of the casserole with chopped tomato and cilantro. The tomatoes and cilantro not only add a pop of color, they add wonderful flavor to this quinoa enchilada casserole, too! Serve, and enjoy!

Baked quinoa enchilada casserole is garnished with cilantro and tomatoes.

A Note About SERVING This Casserole

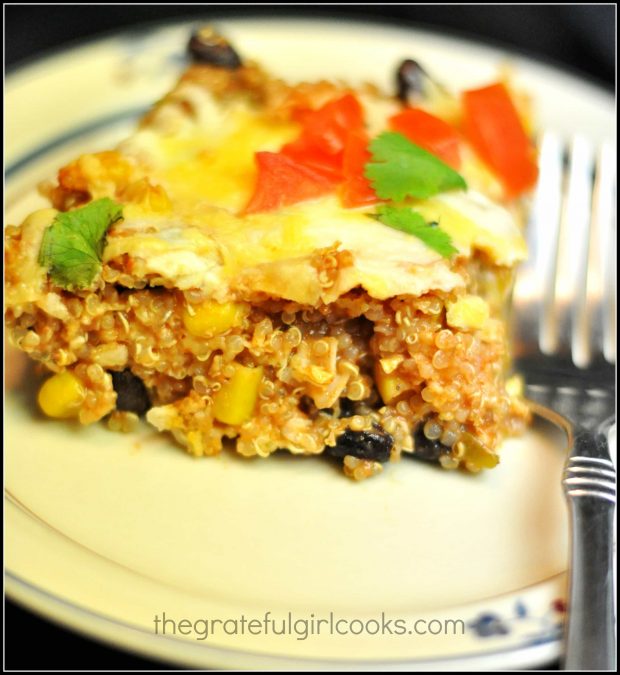
When served piping HOT, fresh from the oven, the texture of the quinoa casserole makes it necessary that it be scooped out with a spoon, rather than cut into pieces with a knife.

I refrigerated the leftovers and the next day was able to cut it into pieces (while chilled) and get this photo so you can see accurately what it looks like on the inside. Once cut, I microwaved the quinoa enchilada casserole to reheat it… and it tasted fantastic!

Quinoa Enchilada Casserole (Meatless!) / The Grateful Girl Cooks!

Hope you will consider trying this recipe for quinoa enchilada casserole. It is packed with flavor (even without meat!) and tastes great! Have a great day, and come back soon.

Looking For More QUINOA Recipes?

All of my recipes can be found in the Recipe Index, located at the top of the page. A few favorite recipes using quinoa include:

Interested In More Recipes?

Thank you for visiting this website. I appreciate you using some of your valuable time to do soIf you’re interested, I publish a newsletter 2 times per month (1st and 15th) with all the latest recipes, and other fun info. I would be honored to have you join our growing list of subscribers, so you never miss a great recipe! 

There is a Newsletter subscription box on the top right side (or bottom) of each blog post, depending on the device you use, where you can easily submit your e-mail address (only) to be included in my mailing list.

You Can Also Find Me On Social Media:

Facebook page: The Grateful Girl Cooks!
Pinterest:
The Grateful Girl Cooks!
Instagram:
jbatthegratefulgirlcooks

Have a GREAT day!

Author's signature

Original Recipe (slightly adapted) from: http://damndelicious.net/2014/07/07/quinoa-enchilada-casserole/

0 from 0 votes
Quinoa Enchilada Casserole (Meatless!)
Prep Time
20 mins
Cook Time
20 mins
Total Time
40 mins
 
This meatless quinoa enchilada casserole, with black beans, corn, spices, enchilada sauce and cheese will be enjoyed by everyone, vegetarian or not!
Category: Meatless Entree
Cuisine: Mexican
Keyword: quinoa enchilada casserole
Servings: 6 servings
Calories Per Serving: 290 kcal
Author: JB @ The Grateful Girl Cooks!
Ingredients
For Casserole:
  • 1 cup quinoa (uncooked)
  • 1 10 ounce can (10 ounces) enchilada sauce
  • 1 4.5 ounce can (4.5 ounce) chopped green chiles (drained)
  • 3/4 cup corn kernels (frozen or canned...doesn't matter)
  • 3/4 cup canned black beans (drained, rinsed)
  • 2 Tablespoons chopped fresh cilantro
  • 1 green onion stalk (green/white parts, sliced)
  • 1/2 teaspoon cumin
  • 1/4 teaspoon garlic powder
  • 1/2 teaspoon chili powder
  • 1/4 teaspoon cayenne pepper
  • Pinch Salt and pepper (to taste)
  • 1 cup grated cheddar cheese (divided)
  • 1 cup pepper jack cheese (divided)
For Garnish:
  • 1 Roma tomato , (diced)
  • 2 Tablespoons chopped fresh cilantro
Instructions
  1. Preheat oven to 375 degrees. Spray an 8x8 inch baking pan with non-stick spray.
  2. Cook quinoa in 2 cups of water (per package directions).
  3. In a large mixing bowl, place the cooked quinoa, green chiles, corn, black beans, cilantro, green onion, cumin, chili powder, garlic powder and cayenne pepper.
  4. Add enchilada sauce, and salt and pepper to taste. Stir to combine.
  5. Add 3/4 cup of cheddar cheese and 3/4 cup of pepper jack cheese. Mix well to combine.
  6. Pour quinoa mixture into prepared baking dish. Spread evenly in dish. Top the casserole with the rest of the cheddar and pepper jack cheeses.
  7. Bake casserole (uncovered) in a 375 degree oven for about 20-25 minutes. Cheese should be melted and very bubbly around edges of pan.
  8. Remove baking dish to a wire rack. Let it cool for a couple minutes. Garnish the top of casserole with diced tomatoes and chopped cilantro. Spoon the casserole out onto serving plates. Serve, and enjoy!
Recipe Notes

Another option: Original recipe used chopped ripe avocados as a garnish (instead of cilantro).

Nutrition Facts
Quinoa Enchilada Casserole (Meatless!)
Amount Per Serving (1 g)
Calories 290 Calories from Fat 126
% Daily Value*
Fat 14g22%
Saturated Fat 7g44%
Cholesterol 36mg12%
Sodium 346mg15%
Potassium 312mg9%
Carbohydrates 26g9%
Fiber 4g17%
Sugar 1g1%
Protein 15g30%
Vitamin A 550IU11%
Vitamin C 2.7mg3%
Calcium 297mg30%
Iron 2.2mg12%
* Percent Daily Values are based on a 2000 calorie diet.

Here’s one more to pin on your Pinterest boards!This meatless quinoa enchilada casserole, with quinoa, black beans, corn, spices, enchilada sauce and cheese will be enjoyed by everyone, vegetarian or not!


Save

Save

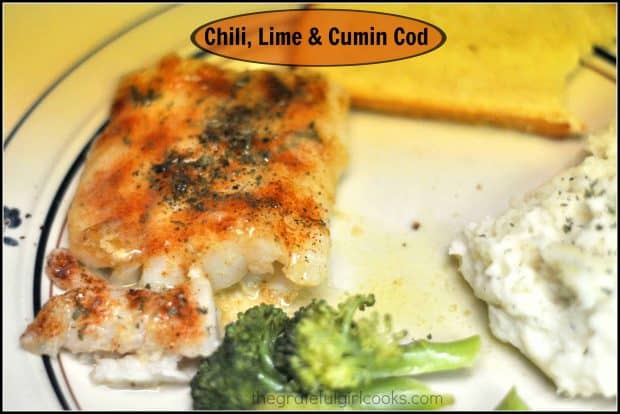
Chili, Lime & Cumin Cod

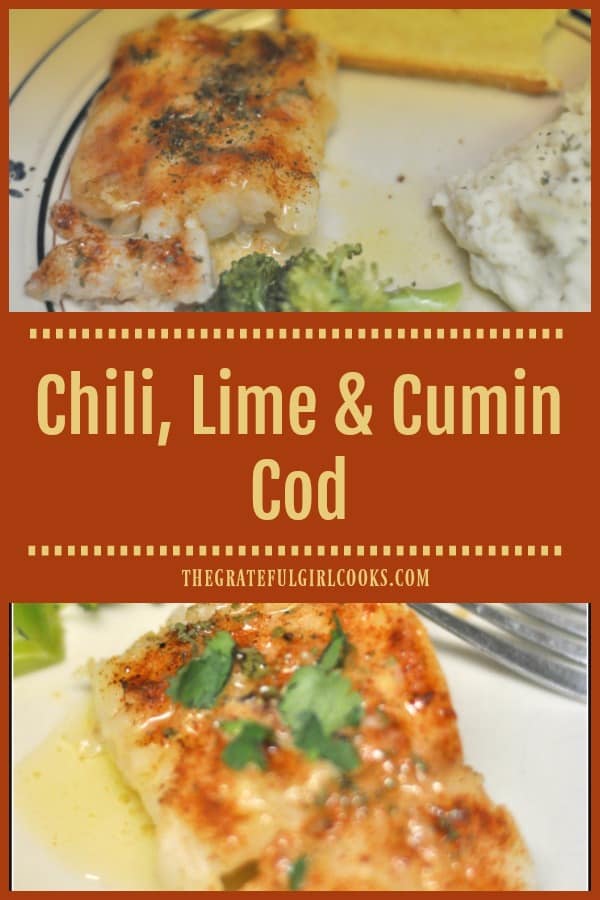
Southwest-inspired Chili Lime Cumin Cod is baked, seasoned fish, topped with a lime, cumin & butter sauce, and is ready in less than 15 minutes!Southwest-inspired Chili Lime Cumin Cod is baked, seasoned fish, topped with a lime, cumin & butter sauce, and is ready in less than 15 minutes!

About a month ago I found a recipe on Pinterest for Chili, Lime Cumin Cod. The flavor combination sounded interesting to me (a bit Southwestern), AND I had a few pieces of cod hanging out in the back of my freezer. So… I decided to give this easy sounding seafood recipe a try.

The entire recipe took less than 15 minutes to prepare, so I would consider this a truly easy, quick, and flavorful seafood entree! I think the quick, flavorful lime cumin butter sauce would also taste great on grilled halibut, swordfish, tilapia or mahi-mahi, as well.

The recipe is so simple, I really don’t think it’s possible to mess this one up! Chili Lime Cumin Cod for the win! This quick and simple, healthy seafood dish is perfect for busy nights where you just want something “good for you”, to eat!

Scroll Down For A Printable Recipe Card At The Bottom Of The Page 

How To Make Chili Lime Cumin Cod

Preheat your oven to 450 degrees. Spray an oven-safe baking pan with non-stick spray (or coat pan with oil).

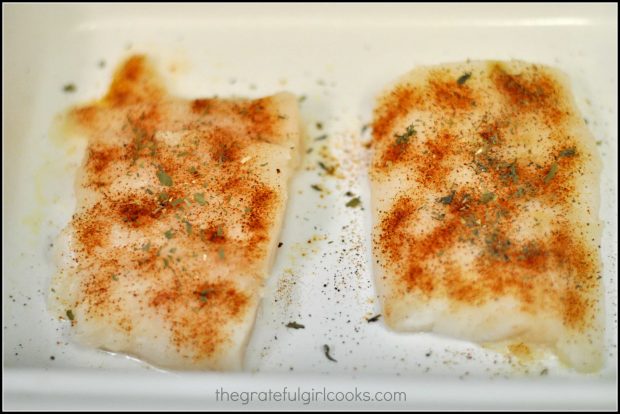
In a small bowl, combine the chili powder, oregano and salt, until fully blended. This is your spice mixture for the fish. Sprinkle spices on top of each of the pieces of cod. Press the spices slightly into the fish to adhere them to the surface of the fish.

Place the pieces of seasoned cod into the prepared baking pan. Bake at 450 degrees for about 10 minutes, or until fish is done and opaque in color.

Cod fillets are seasoned with spices before baking.
Make The Sauce To Top Baked Chili Lime Cumin Cod

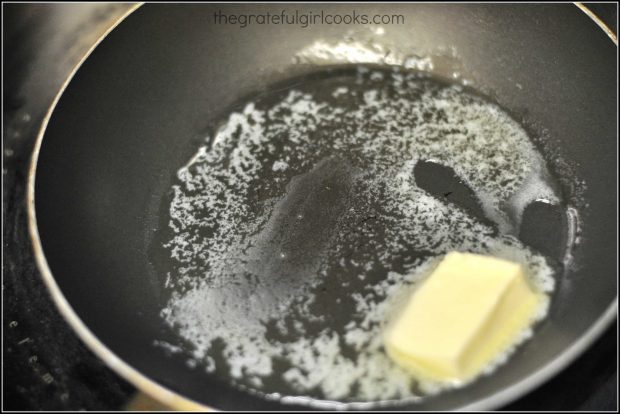
While the fish is baking, make the sauce to top the cooked fish. Melt the butter in a small skillet.

Butter, melting in skillet for making sauce to top chili lime cumin cod.
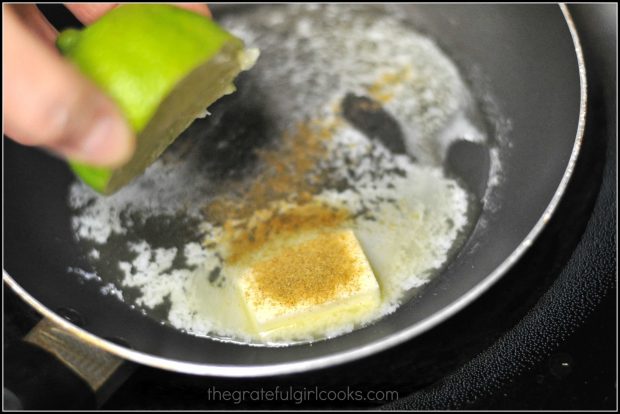
Add cumin powder and the juice of one lime to the melted butter in skillet.

Lime juice and cumin powder added to the sauce for chili lime cumin cod.
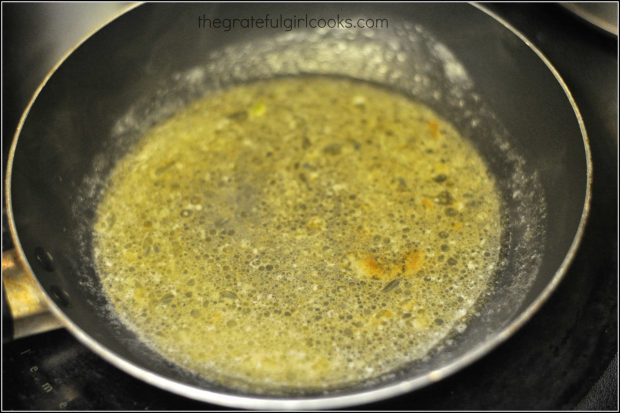
Give the sauce a good stir to combine ingredients. Cook the sauce for one more minute, then remove the skillet from the heat.

The buttery lime sauce is ready to add drizzle over the baked chili lime cumin cod.
Serve The Baked Chili Lime Cumin Cod

Once the fish is done, remove the pan from the oven. Transfer the pieces of baked chili lime cumin cod fish onto individual serving plates. Drizzle each piece of fish with the warm butter lime and cumin sauce.

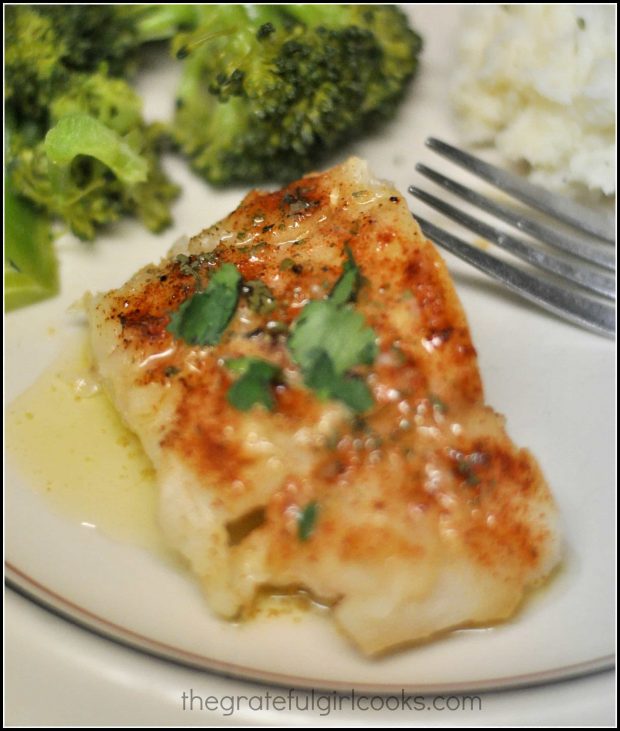
Serve the chili lime cumin cod while it is hot, and enjoy! THAT’S IT! I served the fish with steamed broccoli and some rice on the side. The fish flaked very easily, and the simple butter lime sauce was the perfect finishing touch for the seasoned cod!

Chili Lime Cumin Cod is topped with sauce, then served (with broccoli and rice on the side).

I really hope you enjoy this incredibly SIMPLE seafood dish!  We really enjoyed the chili lime cumin cod, and trust you will, too! Have a GREAT day!

Looking For More COD Recipes?

You can find all of my recipes in the Recipe Index, located at the top of the page.  A few of our favorite seafood recipes featuring cod include:

Interested In More Recipes?

Thank you for visiting this website. I appreciate you using some of your valuable time to do soIf you’re interested, I publish a newsletter 2 times per month (1st and 15th) with all the latest recipes, and other fun info. I would be honored to have you join our growing list of subscribers, so you never miss a great recipe!
There is a Newsletter subscription box on the top right side (or bottom) of each blog post, depending on the device you use, where you can easily submit your e-mail address (only) to be included in my mailing list.

You Can Also Find Me On Social Media:

Facebook page: The Grateful Girl Cooks!
Pinterest:
The Grateful Girl Cooks!
Instagram:
jbatthegratefulgirlcooks

Author's signatureRecipe Source: http://cocinandoconalena.blogspot.com/2010/12/chili-lime-cumin-cod.html

0 from 0 votes
Chili Lime Cumin Cod
Prep Time
5 mins
Cook Time
10 mins
Total Time
15 mins
 
Southwest-inspired Chili Lime Cumin Cod is baked, seasoned fish, topped with a lime, cumin & butter sauce, and is ready in less than 15 minutes!
Category: Entree-Seafood
Cuisine: Southwestern
Keyword: chili lime cumin cod
Servings: 4 servings
Calories Per Serving: 197 kcal
Author: JB @ The Grateful Girl Cooks!
Ingredients
  • 2 pounds cod fillets (4 pieces)
  • 1 teaspoon chili powder
  • 1/2 teaspoon dried oregano (may substitute dried parsley or dried cilantro-I put a bit of each on the fish)
  • 1/2 teaspoon salt
  • 2 Tablespoons butter
  • 1/4 teaspoon cumin
  • 1 lime , juiced
Instructions
  1. Preheat your oven to 450 degrees. Spray an oven-safe baking pan with non-stick spray (or coat pan with oil).

  2. In a small bowl, combine the chili powder, oregano, and salt. Mix to combine. Sprinkle spices on top of the pieces of cod. Press spices slightly into the fish to adhere. Place the seasoned cod into prepared baking pan. 

  3. Bake at 450 degrees for about 10 minutes, or until fish is done and opaque in color.

  4. While the fish is baking, make the sauce to top the cooked fish. Melt the butter in a small skillet. Add cumin and the juice of one lime. Stir to combine; cook for an additional minute. Remove from heat.

  5. When pieces of cod are finished cooking, remove pieces to individual serving plates. Drizzle the Lime/Cumin/Butter sauce over the top of the pieces of fish. Serve... and enjoy!
Recipe Notes

I think the sauce for this recipe would also taste great on grilled halibut, swordfish, mahi-mahi, or tilapia.

Nutrition Facts
Chili Lime Cumin Cod
Amount Per Serving (1 piece)
Calories 197 Calories from Fat 54
% Daily Value*
Fat 6g9%
Saturated Fat 3g19%
Cholesterol 88mg29%
Sodium 441mg19%
Potassium 728mg21%
Carbohydrates 2g1%
Protein 30g60%
Vitamin A 390IU8%
Vitamin C 6.6mg8%
Calcium 37mg4%
Iron 1mg6%
* Percent Daily Values are based on a 2000 calorie diet.

Here’s one more to pin on your Pinterest boards!Southwest-inspired Chili Lime Cumin Cod is baked, seasoned fish, topped with a lime, cumin & butter sauce, and is ready in less than 15 minutes!


Save

Save

Save

Southwestern Cobb Salad with Chili-Rubbed Steak

You’ll enjoy this Southwestern Cobb Salad, with chili-rubbed steak, Romaine lettuce, feta cheese, orange slices, jicama, tomatoes, avocado & a delicious salad dressing.You'll enjoy this Southwestern Cobb Salad, with Romaine lettuce, feta cheese, orange slices, jicama, tomatoes, avocado & a delicious salad dressing.
Last summer I found a Food Network cookbook in a used bookstore. The original price was listed as $29.95, but because it was used, I only paid $1.99 for it. SCORE!  I’ve marked several recipes in it that I want to try… the first one that I’ve “officially” tried is this one for a delicious Southwestern Cobb Salad with Chili-Rubbed Steak. This Southwestern cobb salad has it all- meat, veggies, fruit, cheese, sweet, crunch, and spice. WOW!  You’re gonna love it!

Scroll Down For A Printable Recipe Card At The Bottom Of The Page

Why I LOVE This Southwestern Cobb Salad!

I made this entree salad for our dinner a couple of nights ago. It was fantastic… as well as a gorgeous looking salad!  The salad was fairly easy to prepare, and the tastes were amazing! From the homemade salad dressing with a touch of spice and orange burst of freshness, to the simple chili-rubbed steak, this salad is filled with fresh, wonderful flavors!

The flavors I just described are the supporting stars of this Southwestern cobb salad, which features Romaine lettuce, feta cheese, fresh orange slices, jicama, tomatoes and avocado. My husband and I both LOVED it, and he’s already asked me to prepare it again soon.

How To Make The Salad Dressing For Southwestern Cobb Salad

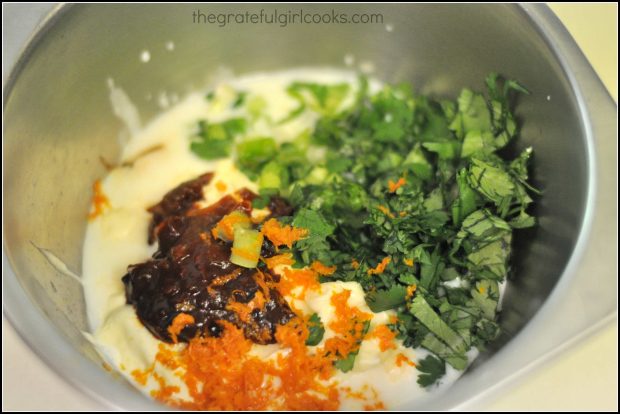
First thing I did was to make the salad dressing. Making the salad dressing is easy. I loved the addition of orange zest to it… the citrus zest helped make it very fresh tasting! Place the salad dressing ingredients into a small bowl. Easy enough so far, right?

Ingredients for salad dressing for Southwestern cobb salad, in a small bowl

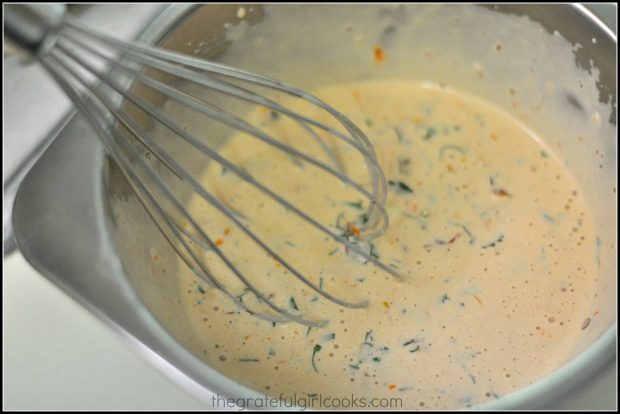
Give the salad dressing ingredients a good whisking, and it’s done! Now all you will need to do is cover the bowl, and refrigerate the dressing until ready to use! EASY!

Whisking salad dressing ingredients for Southwestern cobb salad.

Make A Chili Spice Rub For The Steak

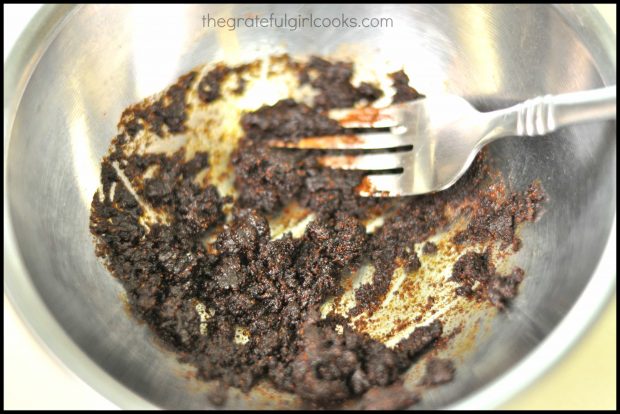
The next thing to do is make the chili spice rub mixture in another small bowl.  It’s simply olive oil and chili powder that you can mix together using a fork.. Making this rub is quick and EASY.

Preparing the spice rub mixture for the steak used in the Southwestern cobb salad.

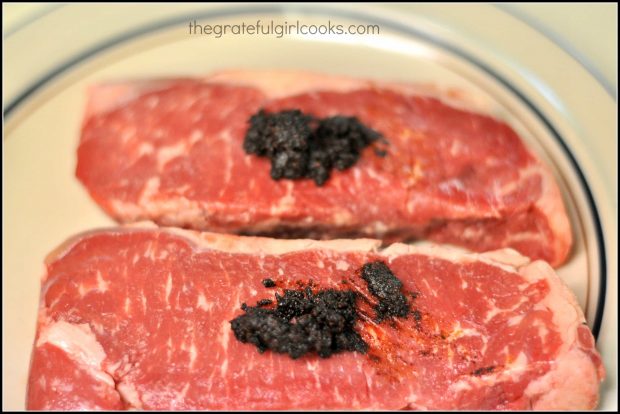
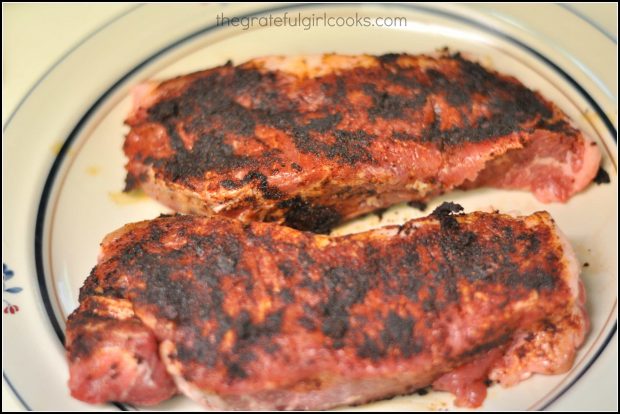
Once fully mixed, put a little bit of the rub on the steaks. TIP:  The chili rub mixture is fairly spicy, so use discretion how much you put on the steaks.

Chili spice rub is put on steaks before cooking them to use in the Southwestern cobb salad.

Rub the chili powder/oil mixture onto both sides of the steaks, before cooking.

Steaks for Southwestern cobb salad are covered with chili spice rub berore cooking.

How To Peel and Cut Orange Slices For Southwestern Cobb Salad

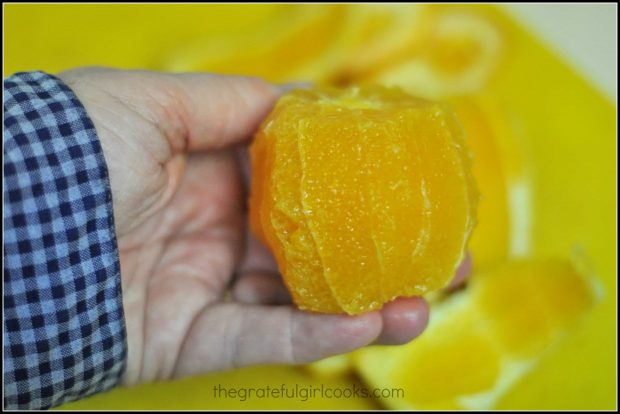
Once salad dressing, spice rub and steaks are ready, it’s time to chop the fresh veggies and fruit. Start with the orange. Cut the top and bottom peel off of an orange. Then cut down the sides of the orange, removing all peel and white “pith”.

You’ll be left with something that looks like this (below). Use a sharp knife and cut between each of the sections and remove the orange slices for the salad. Get the white membrane cut off the orange slices. It’s not too difficult.

Sectioning a whole peeled orange for slices to use in Southwestern cobb salad.

Preparing Jicama For The Southwestern Cobb Salad

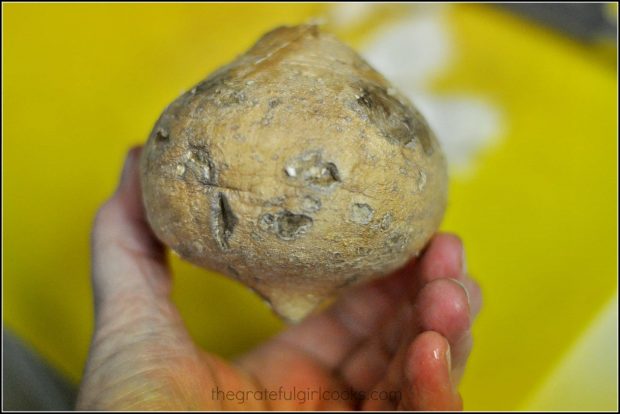
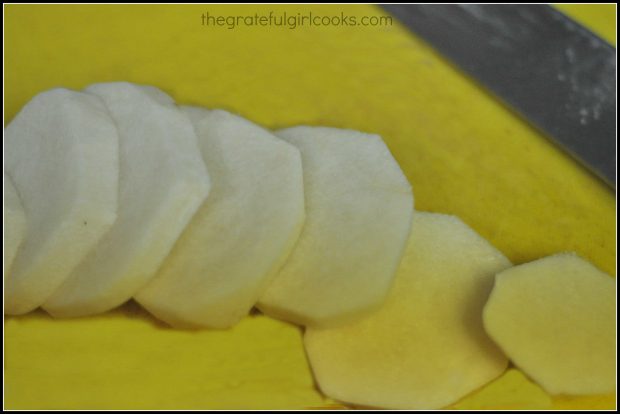
This strange looking thing is a jicama, also known as a Mexican turnip. It has the firm texture of a raw potato. Use a sharp knife and carefully cut the peel off. It will look like a potato once it has been peeled.

Jicama must be peeled to use for Southwestern cobb salad.

Cut the peeled jicama into 1 inch slices, then cut each slice into small cubes.

Raw jicama is sliced then cut into cubes for Southwestern cobb salad.

Assembling The Salad

The prep for the salad involves cubing the jicama, cutting the orange into gorgeous sections, chopping the tomatoes, and cutting a fresh avocado into cubes.

These ingredients for the Southwestern cobb salad were layered in rows, along with crumbled feta cheese, on top of the romaine lettuce. Make sure to leave a couple rows open to add the steak after it has been cooked! The platter with the lettuce and veggies was covered with plastic wrap and went into the refrigerator to keep cold, while I cooked the steak.

Cooking The Steak For Southwestern Cobb Salad

The steak was cooked per the original recipe instructions in the broiler of our oven. It was convenient and delicious, using this oven method. The next time I make this Southwestern Cobb Salad, I will throw the steaks on our Weber grill to achieve an even more smoky taste!

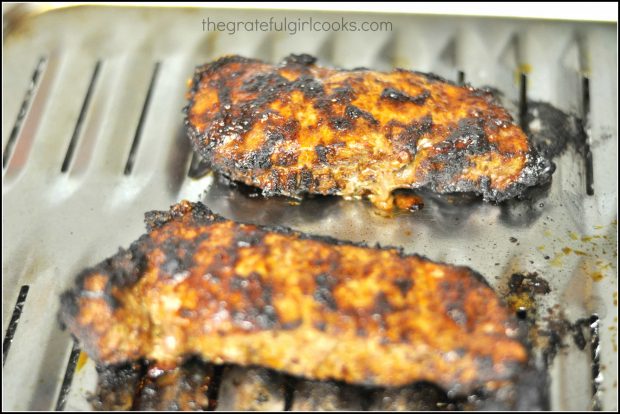
Here’s the what the steak looks like, right after coming out from the oven broiler. Let the meat rest for 5 minutes before cutting. It is important to let the meat rest. This will keep most of the good juices inside the meat, instead of all over the pan. More juice INSIDE the steak means more FLAVOR! Once meat has rested, cut into small cubes.

Chili-rubbed steak is cooked under oven broiler for Southwestern cobb salad.

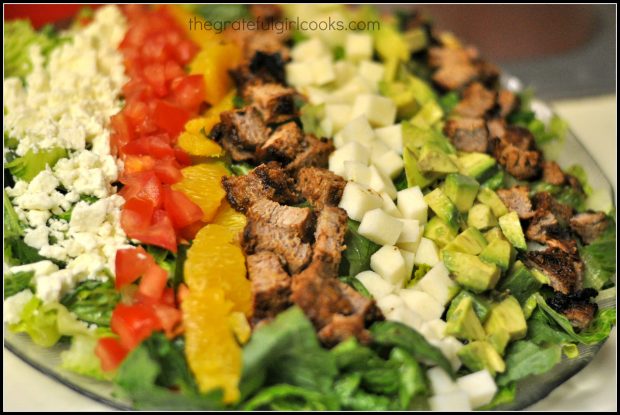
Remove the salad from refrigerator, and add the steak cubes, as shown. This Southwestern Cobb Salad with chili-rubbed steak sure is pretty to look at!

Roadmap For Assembling and Serving Southwestern Cobb Salad

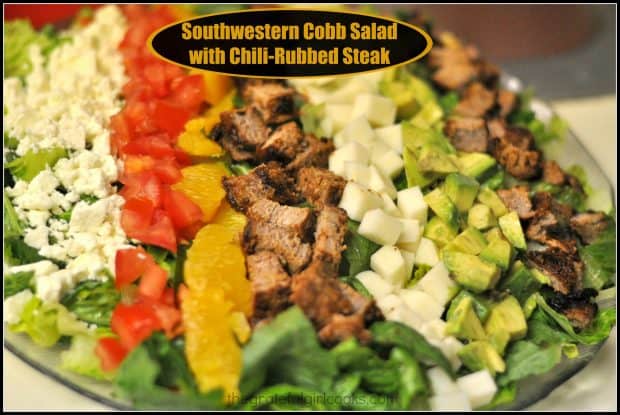
Here’s the “roadmap” for the salad: Place chopped Romaine lettuce on bottom of serving platter (or individual plates). Arrange rows of prepped fruit and veggies for a colorful presentation.

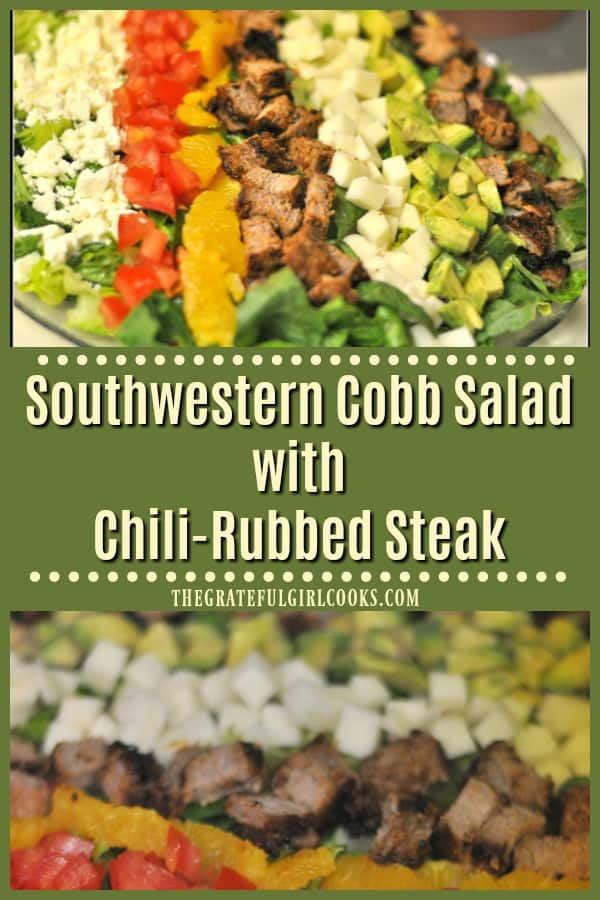
The order I used for the rows, left to right, were Feta cheese, chopped tomatoes, orange slices, steak cubes, jicama cubes, avocado, and more steak cubes. After the salad is layered, the only thing left to do is pour the dressing on top of the Southwestern cobb salad, and toss gently to combine. That’s it!

Ingredients for Southwestern cobb salad are placed in rows on Romaine lettuce before serving.

This Southwestern Cobb Salad is an all in one dinner salad, and it is delicious! Hope you will give it a try. I confident you will LOVE it!  Enjoy!

If you enjoy Main Course Salads, be sure to check out these recipes below. These and others can be found in the RECIPE INDEX, found in the menu toolbar at the top of each page.

Interested In More Recipes?

Thank you for visiting this website. I appreciate you using some of your valuable time to do soIf you’re interested, I publish a newsletter 2 times per month (1st and 15th) with all the latest recipes, and other fun info. I would be honored to have you join our growing list of subscribers, so you never miss a great recipe!
There is a Newsletter subscription box on the top right side (or bottom) of each blog post, depending on the device you use, where you can easily submit your e-mail address (only) to be included in my mailing list.

You Can Also Find Me On Social Media:

Facebook page: The Grateful Girl Cooks!
Pinterest:
The Grateful Girl Cooks!
Instagram:
jbatthegratefulgirlcooks

  Author's signatureRecipe Source: “Food Network Kitchens Cookbook”, published 2003, The Meredith Corporation, page 78.

0 from 0 votes
Southwestern Cobb Salad with Chili-Rubbed Steak
Prep Time
20 mins
Cook Time
15 mins
Total Time
35 mins
 
You'll enjoy this Southwestern Cobb Salad, with chili-rubbed steak, Romaine lettuce, feta cheese, orange slices, jicama, tomatoes, avocado & a delicious salad dressing.
Category: Entree/Salad
Cuisine: Southwestern
Keyword: Southwestern Cobb Salad
Servings: 4 servings
Calories Per Serving: 694 kcal
Author: JB @ The Grateful Girl Cooks!
Ingredients
For the dressing:
  • 2 cloves garlic cloves , minced
  • 1/2 teaspoon salt
  • 1/3 cup mayonaise
  • 1/3 cup buttermilk
  • 1 Tablespoon chipotle hot sauce (I used sauce from a can of adobo chiles)
  • 3 Tablespoons fresh minced cilantro
  • 1 stem scallion (use the white and green parts of the onion), thinly sliced
  • 1 teaspoon finely grated orange zest
For the steak:
  • 1.75 pounds tri-tip steak or other sirloin steak ( I used 2 steaks), for a total of about 1 3/4 pounds meat
  • 1 Tablespoon olive oil
  • 1.5 Tablespoons chili powder
For the salad:
  • 5 cups head Romaine lettuce , torn or chopped
  • 1 ripe avocado
  • 2 ripe medium tomatoes , diced
  • 1/2 cup crumbled feta cheese , or more (can also use Cotija cheese)
  • 1 orange , peeled, cut into sections
  • 1/2 medium jicama , peeled and cubed (about 1 1/2 cups)
  • Salt and freshly ground black pepper , to taste
Instructions
  1. Make the salad dressing: Smash the garlic cloves with the flat side of a butcher knife, then sprinkle with salt. Mix together to form a thick paste. Put the garlic "paste" into a msall bowl, then add the rest of the salad dressing ingredients (mayo, buttermilk, chipotle hot sauce, cilantro, scallion and orange zest). Whisk ingredients together until thoroughly combined. Cover and refrigerate.
  2. Prepare the steak: Lightly salt and pepper the steak. In a small bowl, mix the chili powder and olive oil together until combined into a thick paste. Put this on the meat, and rub the spices into both sides of the meat. If you are grilling steak outside, put on grill and cook until medium. If you are going to be broiling the steak (as per recipe), here's what you need to do: Put a broiler rack and pan about 6 inches away from the broiler in your oven. Turn broiler on and let the pans PREHEAT for several minutes before putting the meat on the pan. When the broiler pan is really HOT, add the steak. (You should hear it sizzle as it hits the broiler pan). Cook for 7-8 minutes on each side for medium, turning once. When done, remove the steak to a cutting board. Let the meat rest for about 5 minutes, then cut into cubes.
  3. To make the salad: Halve, seed, peel and cube the avocado. Peel and section the orange. Peel and cube the jicama. Chop the tomatoes. Put the chopped Romaine lettuce onto a large serving platter (or in a large salad bowl). Arrange the feta, chopped tomatoes, orange sections, steak, jicama and avocado in strips on top of the lettuce. Sprinkle with salt and pepper. Pour the salad dressing over the salad, and toss to combine. (if making individual serving plates, use 3 Tablespoons of dressing per salad).
Recipe Notes

NOTE: This recipe can be adapted to serve 6, by creating smaller portion sizes.

Nutrition Facts
Southwestern Cobb Salad with Chili-Rubbed Steak
Amount Per Serving (1 (1/4 of total))
Calories 694 Calories from Fat 423
% Daily Value*
Fat 47g72%
Saturated Fat 13g81%
Cholesterol 157mg52%
Sodium 891mg39%
Potassium 1393mg40%
Carbohydrates 20g7%
Fiber 9g38%
Sugar 8g9%
Protein 47g94%
Vitamin A 6800IU136%
Vitamin C 46.6mg56%
Calcium 228mg23%
Iron 4.9mg27%
* Percent Daily Values are based on a 2000 calorie diet.

Here’s one more to pin to your Pinterest boards!You'll enjoy this Southwestern Cobb Salad, with chili-rubbed steak, Romaine lettuce, feta cheese, orange slices, jicama, tomatoes, avocado & a delicious salad dressing.

Save

Save

Save

Save

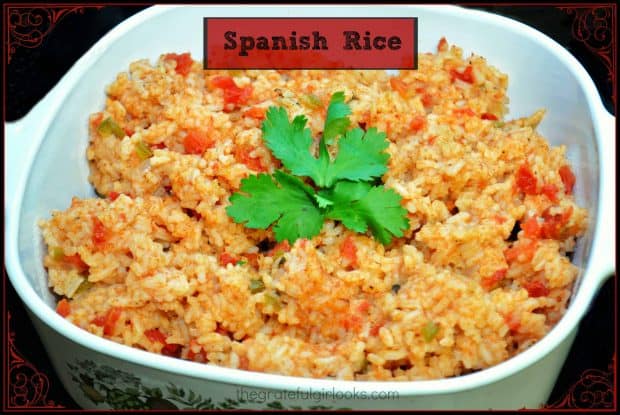
Spanish Rice

It’s easy to make delicious Spanish Rice from scratch, with bell peppers, diced tomatoes, onion, and spices. Perfect side dish for most Mexican foods.Spanish Rice / The Grateful Girl Cooks!

Mexican cuisine is my favorite type of food to eat, if given the choice. I really enjoy making tacos, enchiladas, quesadillas, fajitas, tamales, refried beans and Spanish Rice. For years I bought and cooked a “name brand” version of Spanish Rice to serve with our Mexican dinners.

Why Not Make Spanish Rice From Scratch?

A few years ago, I decided to try to make my own version, so I could control what ingredients went into this dish. I don’t know what took me so long to make Spanish rice from scratch! Typically I have all the ingredients necessary, already in my pantry. I love that I don’t have to purchase a pre-boxed, shelf stable version (with some interesting ingredients) to prepare!

The best part is I can make it myself, with FRESH ingredients in just about the same time as the box mix! Spanish Rice is simple to make, and it’s delicious! Serve this delicious Spanish Rice as a side dish with a couple of tacos or enchiladas, and BOOM! You’ve got a great meal!

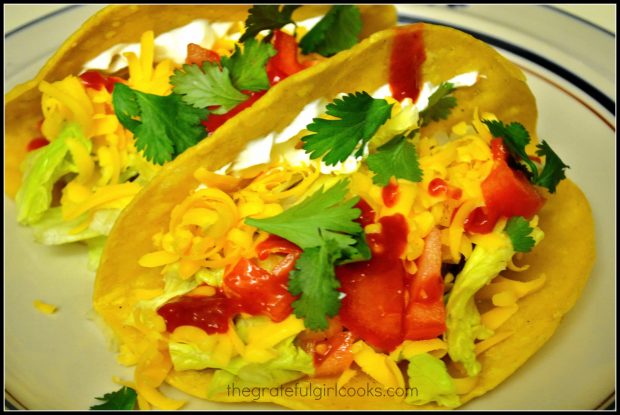
Spanish rice is a great side dish when serving tacos.

Sure hope you’ll give this recipe for Spanish rice a try! The rice is and easy to make, filling side dish. I think you will like it, especially served with some yummy tacos or enchiladas! Enjoy!

Looking For More MEXICAN FOOD Recipes?

You can find all my recipes in the Recipe Index, located at the top of the page. A few favorite Mexican or Southwest inspired recipes are:

Interested In More Recipes?

Thank you for visiting this website. I appreciate you using some of your valuable time to do soIf you’re interested, I publish a newsletter 2 times per month (1st and 15th) with all the latest recipes, and other fun info. I would be honored to have you join our growing list of subscribers, so you never miss a great recipe!
There is a Newsletter subscription box on the top right side (or bottom) of each blog post, depending on the device you use, where you can easily submit your e-mail address (only) to be included in my mailing list.

You Can Also Find Me On Social Media:

Facebook page: The Grateful Girl Cooks!
Pinterest:
The Grateful Girl Cooks!
Instagram:
jbatthegratefulgirlcooks

Author's signatureRecipe Source: My brain, and my Mexican food hunger pangs.

↓↓ PRINTABLE RECIPE BELOW ↓↓

0 from 0 votes
Spanish Rice
Prep Time
10 mins
Cook Time
25 mins
Total Time
35 mins
 
It's easy to make delicious Spanish Rice from scratch, with bell peppers, diced tomatoes, onion, and spices. Perfect side dish for most Mexican foods.
Category: Side Dish
Cuisine: Mexican
Keyword: spanish rice
Servings: 6 servings
Calories Per Serving: 176 kcal
Author: JB @ The Grateful Girl Cooks!
Ingredients
  • 1 cup uncooked rice
  • 2 Tablespoons olive or vegetable oil
  • 3/4 cup brown onion , finely chopped
  • 1/2 cup green pepper , chopped finely
  • 14 ounces diced tomatoes (canned-do not drain) (one 14 ounce can)
  • 1 cup water
  • 1 1/2 teaspoons salt
  • 1 teaspoon chili powder
  • 1/8 teaspoon garlic powder
  • 1/8 teaspoon cumin
  • cilantro for garnish , if desired
Instructions
  1. In a medium saucepan, heat the oil on medium-high heat. Add the onions and green pepper. Cook for 4-5 minutes, until onions are softened and translucent.
  2. Add the rest of the ingredients to the pan (except for cilantro). Stir until ingredients are thoroughly combined.
  3. Bring mixture to a quick boil, then reduce heat to low. Cover pan and cook rice on low simmer for 20-30 minutes, stirring once halfway through cooking time, until liquid has all been absorbed into the rice.
    Check on the rice at the 20 minute mark. If rice needs more cooking time to absorb more liquid, continue cooking. Keep an eye on it, so that you don't burn the rice. When rice is done, place it into serving dish and garnish with cilantro, if desired.  Serve and enjoy!

Nutrition Facts
Spanish Rice
Amount Per Serving (1 g)
Calories 176 Calories from Fat 45
% Daily Value*
Fat 5g8%
Sodium 684mg30%
Potassium 217mg6%
Carbohydrates 29g10%
Fiber 1g4%
Sugar 2g2%
Protein 3g6%
Vitamin A 220IU4%
Vitamin C 17.6mg21%
Calcium 34mg3%
Iron 1mg6%
* Percent Daily Values are based on a 2000 calorie diet.

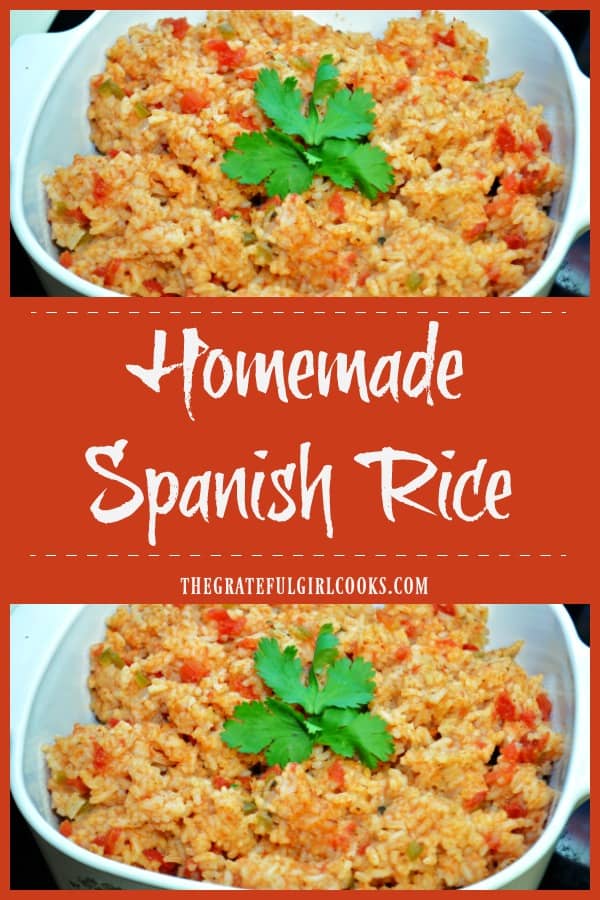
Here’s one more to pin on your Pinterest boards!It's easy to make delicious Spanish Rice from scratch, with bell peppers, diced tomatoes, onion, and spices. Perfect side dish for most Mexican foods.


Save

Save

Pork Tamales

Homemade Shredded Pork Tamales topped with a “made from scratch” California chile sauce, are a delicious classic Mexican dish that you will LOVE!Homemade Shredded Pork Tamales topped with a "made from scratch" California chile sauce, are a delicious classic Mexican dish that you will LOVE!
So… this year for Christmas Eve, I came up with a plan to try making pork tamales. I didn’t have a backup plan in case I failed miserably, but that didn’t stop me from taking the plunge into the big, daunting world of “homemade pork tamales”.

Scroll Down For A Printable Recipe Card At The Bottom Of The Page

Whose Crazy Idea Was This Anyways?

Why I had the hair-brained idea of breaking from our Christmas Eve traditional Italian meal and attempting to make tamales for the FIRST TIME is anybody’s guess. Oh well. I am happy to report that we DID NOT have to eat at a fast food place on Christmas Eve. These tamales turned out to be incredible (what a relief!).

I was definitely out of my “comfort zone” in the kitchen, but one thing I am constantly learning (thanks to my friend Shari, who inspires me always!), is to become more “fearless”. This has taught me to experiment more with new recipes and foods. This is one “experiment” I am thrilled to have tried.

I found a recipe for shredded pork tamales on Pinterest, and thought it sounded good. The author of the recipe said she was given this “authentic” recipe by a woman she met at an international market in the Mexican foods aisle (how bad can that be, right?). The recipe sounded good to me, so I decided to give making tamales a try. I actually cooked the pork roast in my crock pot and made the chile sauce the day before I made the tamales, so a large part of the prep was done ahead of time.

Making Pork Tamales Was A Fun Challenge For Me

The recipe is fairly easy to follow. Truthfully I think the hardest part was trying to tie the tamales up at the end before steaming them. Since I have mastered the art of tying my shoelaces, I found it amazing that it was “harder than I thought it was” to wrangle those tamales!  I persevered, fought the good fight with strands of corn husks and finally managed to get those beautiful tamales tied up. Yippee, and Olé!!! (Note: you don’t have to tie them, if you don’t want… I just think it holds them together much better while they are cooking!)

I hope you will give these a try. They are truly, wonderfully delicious. The recipe makes 16-18 tamales. We ate some, had more for leftovers, and froze some for another meal. I DEFINITELY recommend this recipe, and will be making these again. Here’s a few pictures from the process:

Some Photos Of the “Process”

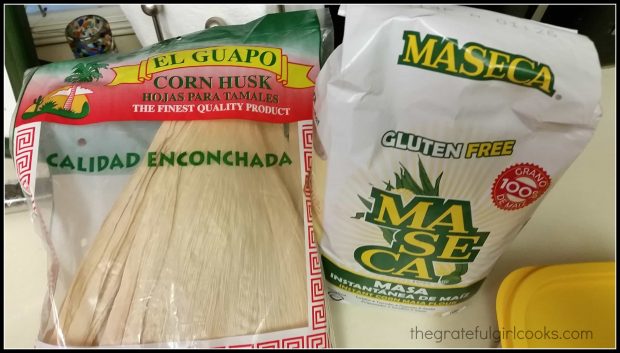
First thing I had to do was purchase corn husks and masa at the local grocery store in the Mexican food section. Easy peasy!

Corn husks and masa for pork tamales

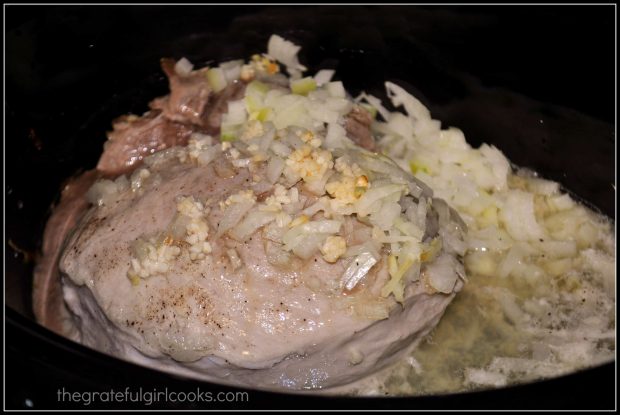
I cooked the pork roast, onion, garlic & spices in a slow-cooker for 6 hours the day before I made the tamales. Here it is right at the beginning of the cook time.

Pork roast is cooked with onions and garlic

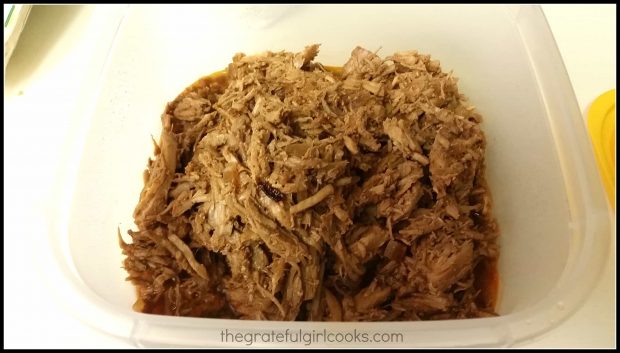
Once the pork is fully cooked, it must be shredded. Here is some of the fully cooked, seasoned, shredded pork ready to put into tamales.

Shredded pork ready for filling tamales

Making The Chile Sauce

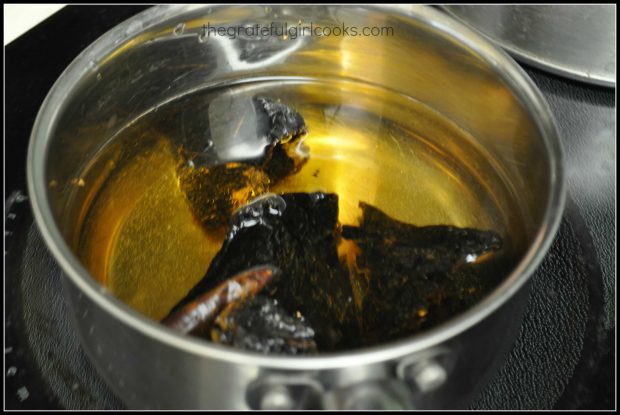
The chile sauce is made using dried California chile pods. This was kind of cool. This mixture turned a dark color once it was done cooking.

Cooking California chile pods to make sauce for tamales

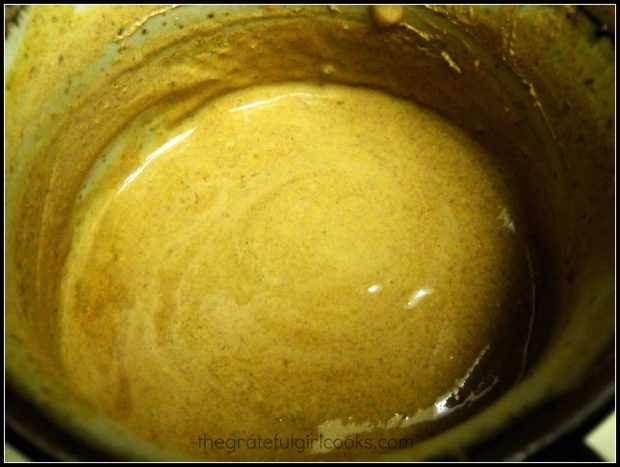
After the chile sauce has been cooked, cooled, and strained, it is added to shredded pork. Sour cream is then added to the leftover sauce, turning it into a light brown color.This will be used to spoon over the finished tamales once they have been removed from their husks. (Sorry for the photo quality…)

Sour cream has been added to chile sauce for tamales

Getting Ready To Cook The Pork Tamales

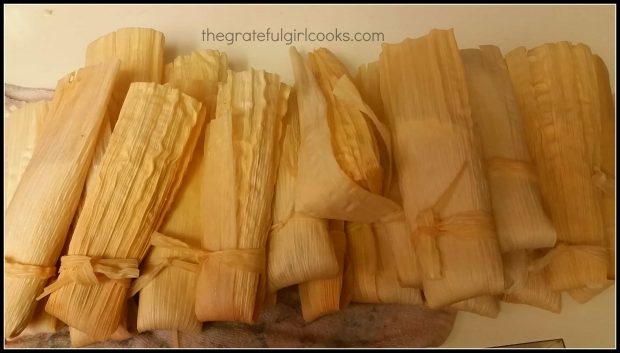
Pork tamales are filled, the bottoms folded up and under, and the husks are secured with a long pliable strand of corn husk. I think they look cute! The one in the middle escaped and had to be re-tied.

Stuffed Pork tamales are filled and tied before cooking

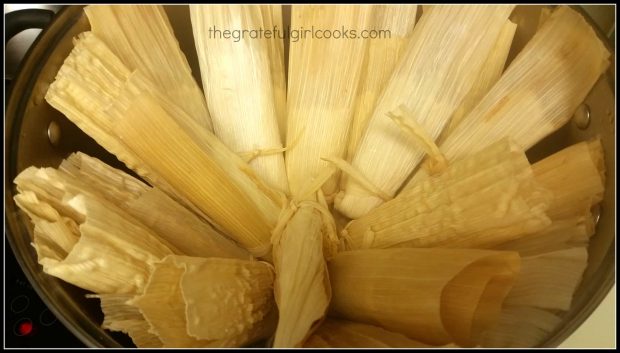
The tops of the tamales remain open, and the  tamales are then placed standing upright into a steamer basket in a large stockpot, and are steamed for 1 hour.

Pork tamales are steamed for one hour

Time To Eat Pork Tamales!

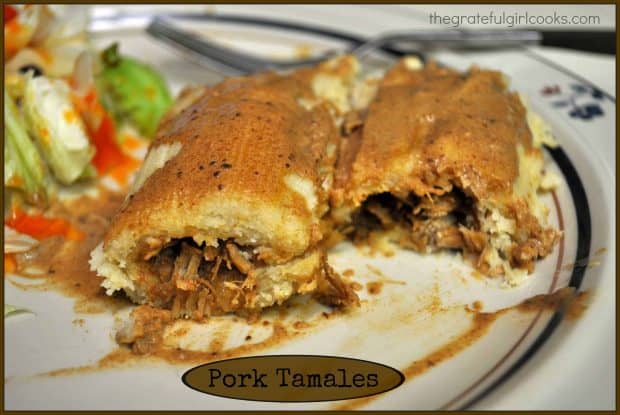
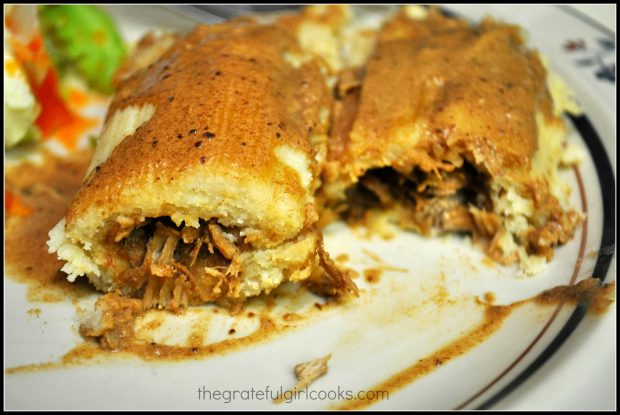
When the tamales are done cooking, you remove the husks, place them on serving plates and spoon some of the chile sauce over the tops. Muy delicioso!!!!!

Shredded pork tamales are served with chile sauce on top

I’m not kidding you when I say these shredded pork tamales were absolutely delicious!  I felt very accomplished to have made these for the first time, and plan to make many more.  I was even able to tightly wrap some of them and freeze them for another day (and they were still good!).

It is a bit of a process to make these pork tamales, but honestly, it was worth every single minute! We LOVED them! I hope you will consider trying this recipe.

Looking For More Mexican-Inspired Recipes?

You can find all my recipes in the Recipe Index, located at the top of the page. I have quite a few Mexican-inspired recipes for you to enjoy, including:

Interested In More Recipes?

Thank you for visiting this website. I appreciate you using some of your valuable time to do soIf you’re interested, I publish a newsletter 2 times per month (1st and 15th) with all the latest recipes, and other fun info. I would be honored to have you join our growing list of subscribers, so you never miss a great recipe!
There is a Newsletter subscription box on the top right side (or bottom) of each blog post, depending on the device you use, where you can easily submit your e-mail address (only) to be included in my mailing list.

You Can Also Find Me On Social Media:
Facebook page: The Grateful Girl Cooks!
Pinterest: The Grateful Girl Cooks!
Instagram: jbatthegratefulgirlcooks

Have a great day!

Author's signatureRecipe Source: http://allrecipes.com/Recipe/Real-Homemade-Tamales/Detail.aspx?event8=1&prop24=SR_Title&e11=real%20homemade%20tamales&e8=Quick%20Search&event10=1&e7=Home%20Page&soid=sr_results_p1i1

↓↓ PRINTABLE RECIPE BELOW ↓↓

0 from 0 votes
Pork Tamales
Prep Time
1 hr
Cook Time
7 hrs
Total Time
8 hrs
 
Homemade Shredded Pork Tamales topped with a "made from scratch" California chile sauce, are a delicious classic Mexican dish that you will LOVE!
Category: Entree
Cuisine: Mexican
Keyword: pork tamales
Servings: 16 tamales
Calories Per Serving: 194 kcal
Author: JB @ The Grateful Girl Cooks!
Ingredients
For Tamale Filling:
  • 1 1/4 pounds pork loin or pork roast
  • 1 large brown onion , chopped
  • 1 teaspoon minced garlic
  • 1/2 teaspoon cumin
  • 1/2 teaspoon chili powder
For Chile Sauce:
  • 4 dried California chile pods (found in Mexican food aisle in most grocery stores)
  • 2 1/2 cups water
  • 1 1/2 teaspoons salt
For Tamale Dough:
  • 2 cups masa harina
  • 1 (10.5 ounce) can beef broth
  • 1 teaspoon baking powder
  • 1/2 teaspoon salt
  • 2/3 cup lard or shortening (I used vegetable shortening)
  • 1 (8 ounce) package dried corn husks
  • 3/4 cup sour cream (add this to extra chili sauce and drizzle over tamales once removed from husk)
Instructions
  1. Place the pork into a Dutch oven or into a crock pot with the onion, garlic, cumin, chili powder and water. IF USING DUTCH OVEN, make sure pork is covered with water. bring water to a boil, reduce heat and cook pork on simmer for about 2 hours, or until the meat is cooked all the way through. IF USING CROCK POT, add about 1 1/2 cups water and cook for 6 hours on high. When meat is done, remove to plate and set aside to cool slightly.
  2. While meat is cooling, make the sauce: Wearing rubber gloves, remove seeds and stems from dried chile pods (trust me, you want to wear gloves). Put the de-seeded chile pods into a small saucepan with 2 cups of water. Simmer the chiles for 20 minutes, uncovered. Remove pan from heat; let cool. Place the chiles and cooking water into a blender or food processor and blend until it becomes smooth. Run the sauce through a strainer to remove any leftover chile pods. Stir the salt into the sauce, then set the sauce aside (If making the sauce ahead of serving, refrigerate it overnight, then bring to room temp before serving!).
  3. Using 2 forks, shred the cooked pork into a bowl. Add 1 cup of the chile sauce to the meat. Mix.
  4. Soak the corn husks in a large tub or pan of HOT water. Let them soak for at least 15-20 minutes, so they become pliable. While they are soaking, make up the Tamale dough:
  5. In a large bowl, or the base of a stand mixer, mix the shortening (or lard) with 1 Tablespoon of the beef broth. Mix this until it becomes fluffy. In a separate bowl, combine the masa harina, salt and baking powder. Stir these dry ingredients into the shortening. Add a more beef broth, a little at a time, and continue stirring until the dough becomes "spongy" (kind of like a thick peanut butter consistency.
  6. Fill the tamale husks one at a time. Remove corn husk from water, dry it off, then spread the dough over the corn husks. Dough should not reach the bottom or the top of the husk ( I left about 2 inches on bottom, 2 inches on top, and 1/2 inch on each side. The dough should be between 1/4 - 1/2 inch thickness. I kind of made a rectangle shape out of the dough (wetting my fingers to spread it out was a big help!). Once the dough is spread evenly onto the husk, spoon 1 heaping Tablespoon of shredded pork filling into the center, lengthwise (like filling a burrito) Fold the sides of the husk together in towards the center, fold the bottom part under and back, then tie the bottom part of the tamale with a long strand of another moist corn husk.

  7. Repeat process with each tamale. Carefully stand the tamales up on top of a steamer basket in a large stockpot. Steam them (covered) for 1 hour. Remove from heat.
  8. While tamales are cooking, mix the extra chile sauce with 3/4 cup sour cream until creamy; set aside (do not refrigerate).
  9. To serve: Remove the tamales you are serving from their husks and place on serving plate. Spoon the chile sauce over the tops of the hot tamales. Serve.
Recipe Notes

Note that the cook time shown is for crockpot cooking of the pork roast. Time is dramatically cut if you cook it in dutch oven. Freeze or refrigerate extra tamales in their husks. I totally recommend cooking the meat the day prior to making the tamales. Then all you have to do is make sauce, dough, assemble tamales, and cook.

Nutrition Facts
Pork Tamales
Amount Per Serving (1 tamale (w/ sauce))
Calories 194 Calories from Fat 99
% Daily Value*
Fat 11g17%
Saturated Fat 3g19%
Cholesterol 26mg9%
Sodium 387mg17%
Potassium 240mg7%
Carbohydrates 12g4%
Fiber 1g4%
Protein 9g18%
Vitamin A 120IU2%
Vitamin C 0.7mg1%
Calcium 50mg5%
Iron 1.4mg8%
* Percent Daily Values are based on a 2000 calorie diet.

Here’s one more to pin on your Pinterest boards!Homemade Shredded Pork Tamales topped with a "made from scratch" California chile sauce, are a delicious classic Mexican dish that you will LOVE!


Save

Save

Save

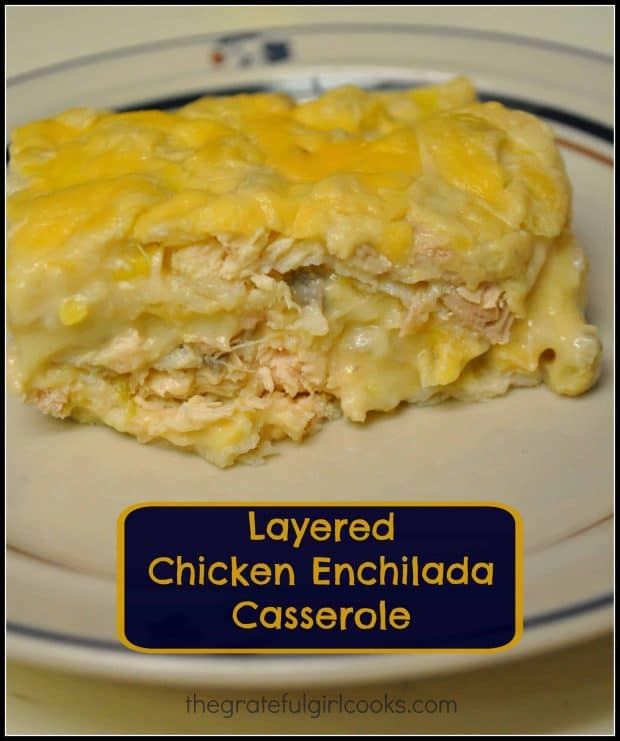
Layered Chicken Enchilada Casserole

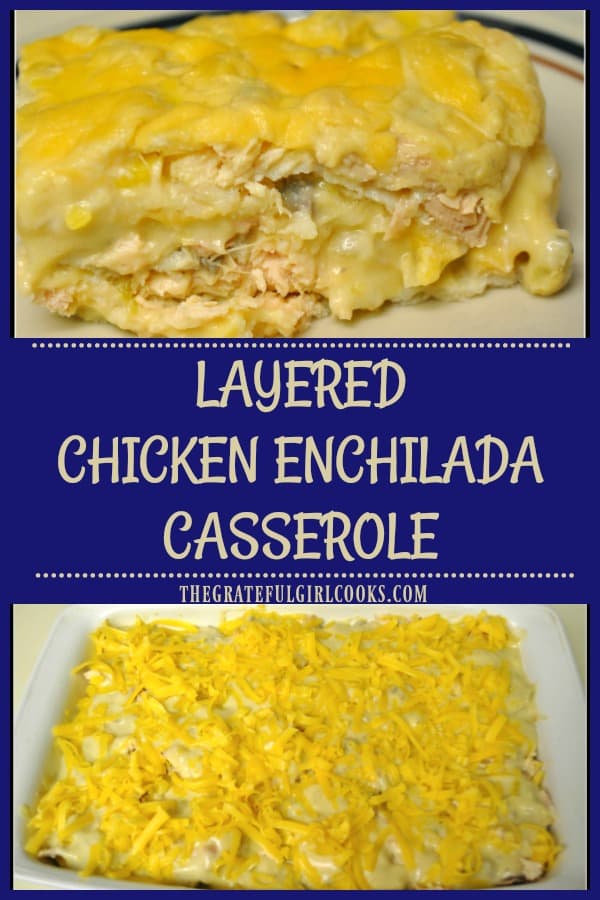
It’s easy to make this yummy layered chicken enchilada casserole, filled with chicken, corn tortillas, creamy sauce, onions, green chiles, and cheddar cheese.It's easy to make this yummy layered chicken enchilada casserole, filled with chicken, corn tortillas, creamy sauce, onions, green chiles, and cheddar cheese.
I received this recipe for a Layered Chicken Enchilada Casserole from my Mom’s best friend over 35 years ago. It is a family favorite meal to this day. It’s a recipe I have made countless times over the years, and during my 30+ years of heading to work every day, really appreciated how quickly it can be assembled, cooked, and enjoyed!

I love Mexican food, and typically eat enchiladas with the traditional red sauce. However, this recipe has a white sauce, with onions and green chiles, so the very first time I made it years ago, I wasn’t sure I would enjoy it. I was wrong. This is a hearty casserole that can easily serve 8-10 people. It’s not too spicy, but has a wonderful flavor from the layers of chicken, corn tortillas, green chiles, onions, white sauce, and cheese. It is absolutely delicious (especially the second day, for leftovers!), and is a snap to prepare.

Since the baking time is only 30 minutes,  it is easy to prepare early in the day, cover and refrigerate it until ready to cook, then slam it (such a nice verbal picture, huh?) in the oven, and enjoy it a short time later. Here’s a few pics to show you the “ho-to’s of making this easy casserole:

Scroll Down For A Printable Recipe Card At The Bottom Of The Page

Preparing The Sauce

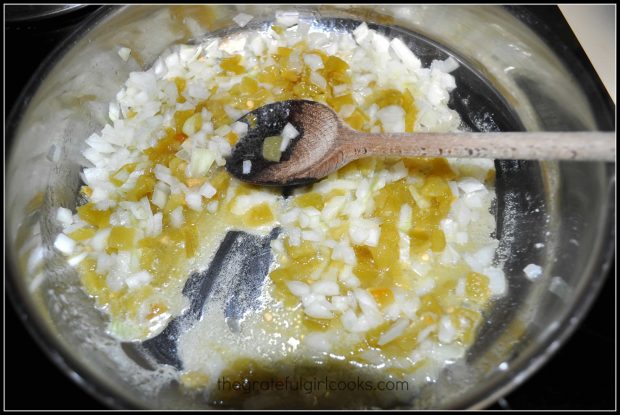
Cook the onions and green chiles in a large skillet to begin making the sauce for this casserole.

Onions and green chiles are cooked to make sauce for casserole

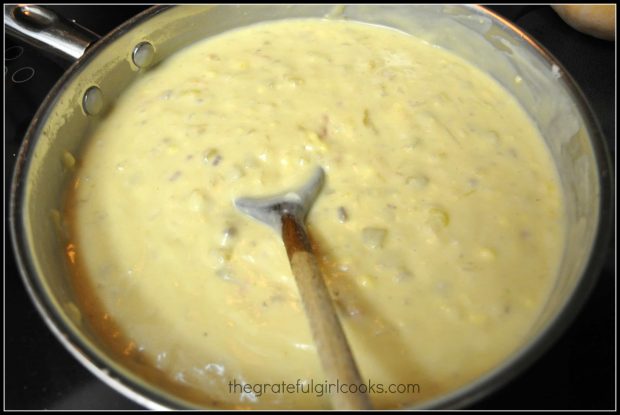
The remaining sauce ingredients are added to the skillet, and now the sauce is cooking happily.

Chicken enchilada casserole sauce cooks until thick and creamy.

Layered Chicken Enchilada Casserole Is Assembled, One Layer At A Time

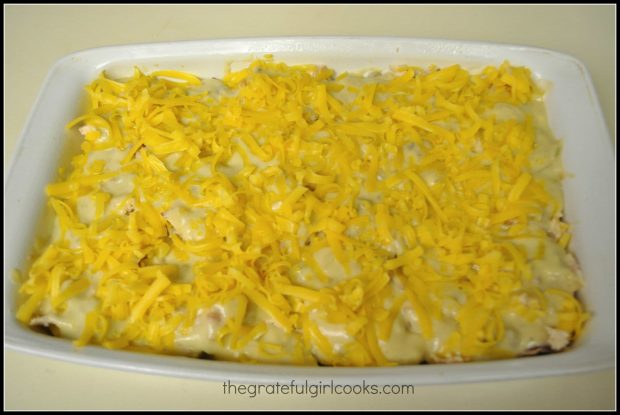
3 layers are added, consisting of tortillas, chicken, sauce and cheddar cheese. Once fully layered, the casserole is ready to bake! This layering is easy to do, because you don’t have to fill and roll the tortillas, as you need to do with traditional enchiladas! You just have to tear the tortillas into pieces and LAYER them!

Layers of tortillas, chicken, sauce and cheese in pan, ready to bake.

Here is the layered chicken enchilada casserole ready to eat, with a small salad on the side. Cheesy, chicken enchilada casserole… for the win!

Layered chicken enchilada casserole served with side salad.

Hope you will give this layered chicken enchilada casserole a try. It’s EASY and DELICIOUS. I REALLY think you will like it, and the leftovers can be EASILY reheated, too!

Looking For More CASSEROLE Recipes?

You can find all of my recipes in the Recipe Index, located at the top of the page. I have several casserole dishes, including:

Interested In More Recipes?

Thank you for visiting this website. I appreciate you using some of your valuable time to do soIf you’re interested, I publish a newsletter 2 times per month (1st and 15th) with all the latest recipes, and other fun info. I would be honored to have you join our growing list of subscribers, so you never miss a great recipe!
There is a Newsletter subscription box on the top right side (or bottom) of each blog post, depending on the device you use, where you can easily submit your e-mail address (only) to be included in my mailing list.

You Can Also Find Me On Social Media:

Facebook page: The Grateful Girl Cooks!
Pinterest:
The Grateful Girl Cooks!
Instagram:
jbatthegratefulgirlcooks

Have a wonderful day!

Author's signatureOriginal recipe source: Sandy Rohrbacher

↓↓ PRINTABLE RECIPE BELOW ↓↓

5 from 3 votes
Layered Chicken Enchilada Casserole
Prep Time
30 mins
Cook Time
30 mins
Total Time
1 hr
 
It's easy to make this yummy layered chicken enchilada casserole, filled with chicken, corn tortillas, creamy sauce, onions, green chiles, and cheddar cheese.
Category: Entree
Cuisine: Mexican, Southwestern
Keyword: chicken enchilada casserole
Servings: 10 servings
Calories Per Serving: 228 kcal
Author: JB @ The Grateful Girl Cooks!
Ingredients
  • 4 chicken breasts (boneless, skinless) , boiled and cubed (save the broth!)
  • 12 corn tortillas
  • 10.5 ounce can cream of mushroom soup
  • 10.5 ounce can cream of chicken soup
  • 4 ounce can diced green chiles
  • 1 cup chicken broth
  • 1 small brown onion , chopped
  • 2 cups grated cheddar cheese
  • 1 Tablespoon butter
Instructions
Make the sauce:
  1. Melt the tablespoon of butter in large skillet. Add the chopped onion and green chiles. Saute these for 3-4 minutes, or until onion is translucent and tender. Add the chicken broth and the contents of both cans of soup to the skillet. Mix well to combine. Simmer the sauce for 5 minutes.
Make the casserole:
  1. Preheat oven to 350 degrees.
  2. Lightly grease a 9x13 baking dish. Layer the ingredients in this order: 1) 4 tortillas, torn into small pieces, 2) 1/3 of the chicken pieces, 3) 1/3 of the sauce, 4) 1/3 of the grated cheese.
  3. Repeat the layers 2 more times, ending with the grated cheese.
  4. Bake casserole, uncovered for 30 minutes or until heated all the way through.
  5. Remove casserole from oven. Let stand for approximately 5 minutes or so, to enable the cheese to firm up a bit (this will make cutting it and serving it up MUCH easier!)
  6. Enjoy!
Recipe Notes

A whole rotisserie chicken can also be used as a substitute for the cooked chicken breasts, if you're pinched for time. Easy!

Nutrition Facts
Layered Chicken Enchilada Casserole
Amount Per Serving (1 (1/10 of total))
Calories 228 Calories from Fat 90
% Daily Value*
Fat 10g15%
Saturated Fat 5g31%
Cholesterol 55mg18%
Sodium 349mg15%
Potassium 295mg8%
Carbohydrates 15g5%
Fiber 2g8%
Protein 17g34%
Vitamin A 290IU6%
Vitamin C 6.8mg8%
Calcium 199mg20%
Iron 0.9mg5%
* Percent Daily Values are based on a 2000 calorie diet.

Here’s one more to pin on your Pinterest boards!It's easy to make this yummy layered chicken enchilada casserole, filled with chicken, corn tortillas, creamy sauce, onions, green chiles, and cheddar cheese.


Save

Save

Easy Crock Pot Refried Beans

Easy crock pot refried beans – It is EASY (and economical) to make your own delicious and inexpensive Mexican refried beans, using a slow cooker!Easy crock pot refried beans - It is EASY (and economical) to make your own delicious and inexpensive Mexican refried beans, using a slow cooker!
I made some Crock Pot Refried Beans recently. From scratch. No cans involved. Guess what? They were absolutely delicious!  Really… these refried beans taste fantastic, they are inexpensive to make, and EASY!

I have been reading through a great book I own called “100 Days Of Real Food”, by author Lisa Leake, and came across this recipe for non-fried, refried beans, made from scratch.

The recipe can be thrown together in about 10 minutes in a crock pot. The pinto beans and spices are slow-cooked for 8-10 hours, lightly mashed, then served. How easy is THAT???

Scroll Down For A Printable Recipe Card At The Bottom Of The Page

Crock Pot Refried Beans Are EASY To Prepare

I started my crock pot when I got my morning coffee, and we enjoyed them with our evening meal later that day. They were so good! When the beans were ready, I took out half of them, mashed them and served them with cheddar cheese melted on top.

I took the other half of the beans (which were still in the flavored broth and served them just as they were (un-mashed) to my husband (because that is his favorite way to eat pinto beans).

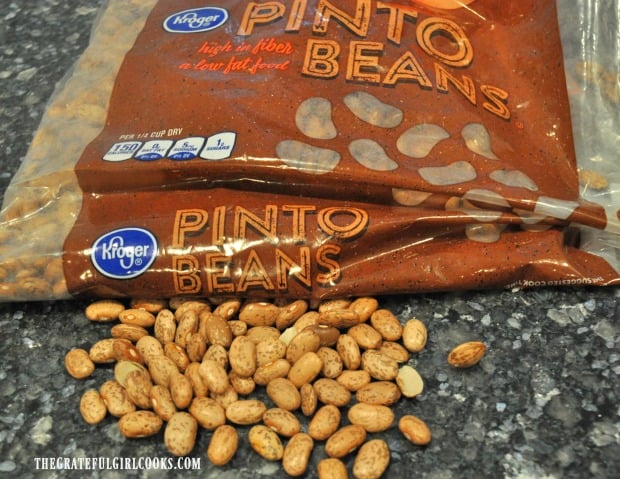
Pinto beans are used to make refried beans... very economical!

The cost of a bag of dry pinto beans is minimal, and this recipe produces just under 4 cups of refried beans, so it is a great budget item, too! And, seriously, these beans are amazingly good!

We have used crock pot refried beans with tacos, burritos and tostadas, all with fantastic results. Here are some pics from while I made them:

How To Make Crock Pot Refried Beans

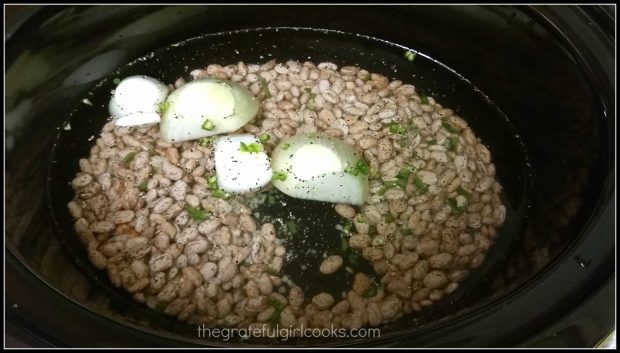
Here are the ingredients in my crock pot with the onions and other spices. The beans are ready to start cooking. This step will only take about 10 minutes or less!

Let them cook all day (9 hours), because you won’t have to mess with them! You just need to start them cooking, then go about your business! EASY!

Refried beans cook in crock pot all day.

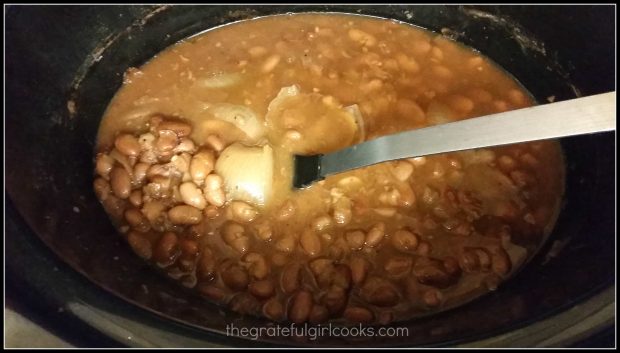
After 9 hours in the crock pot this is what the crock pot refried beans looked like. Drain the beans over the crock pot, removed, and then mash the beans, using a potato masher. You can add a little broth from the crock pot to the beans if you don’t want them too thick.

Refried beans are ready to mash after cooking all day in the crock pot

The Crock Pot Refried Beans Are Ready To Serve

This was such an easy, economical way to make refried beans, and I will make them this way quite often. I really hope you will try making refried beans from scratch. They are so inexpensive to make, and taste absolutely delicious!

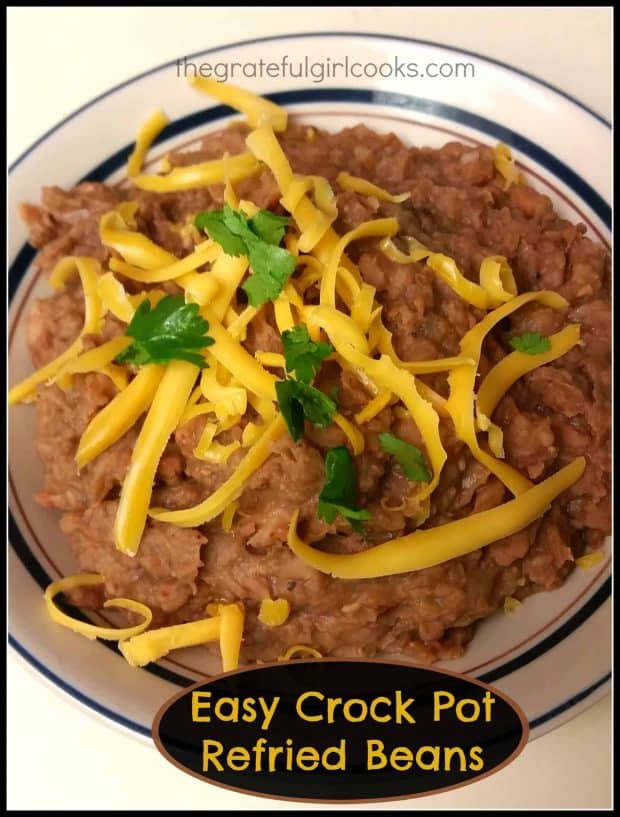
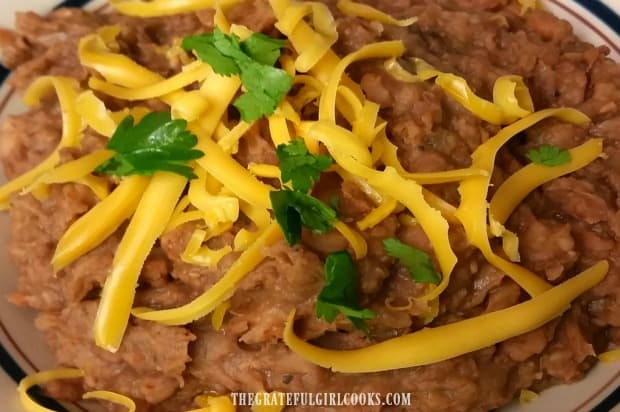
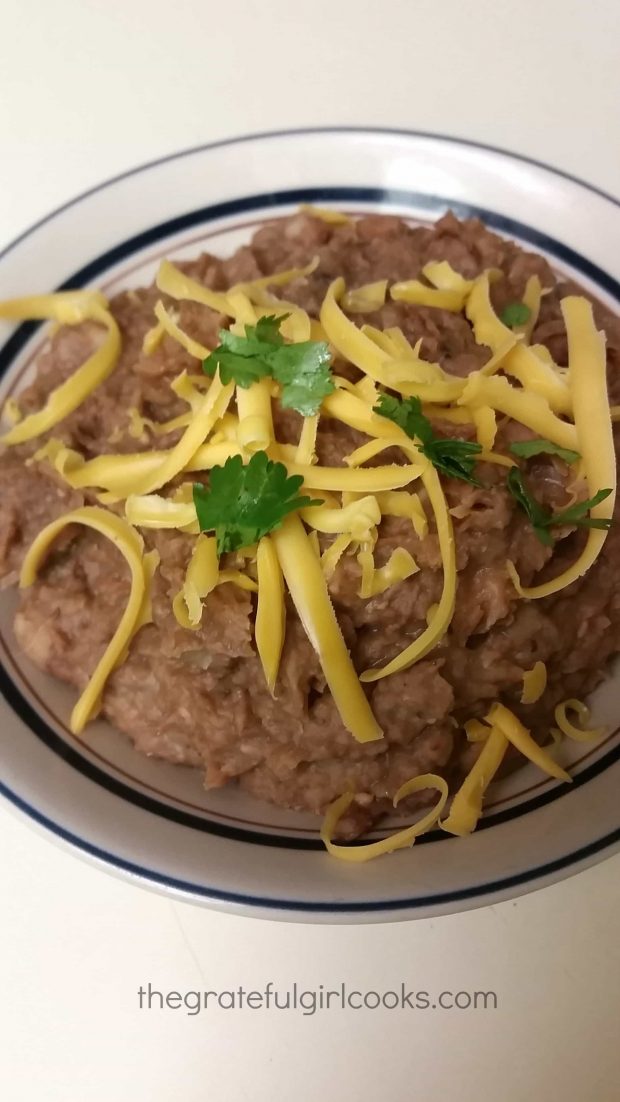
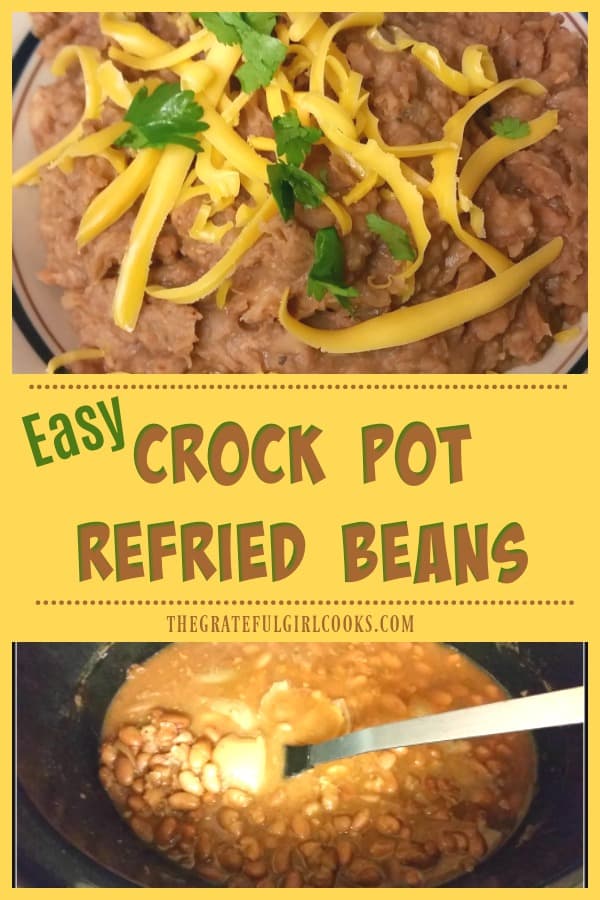
Here are the finished crock pot refried beans ready to eat! They were garnished with a little grated cheddar cheese and cilantro leaves on top, to serve! Muy bueno!

Crock pot refried beans are garnished with cheese and are ready to ea!

Crock pot refried beans are served with a garnish of grated cheddar cheese and cilantro.

Hope you enjoy this recipe for crock pot refried beans. Have a great day, friends! Make it count for something GOOD and courageous! Thanks for stopping by, and I hope you will come back soon for more recipes.
Looking For More Mexican-Style Recipes?

You can find all of my recipes in the Recipe Index, located at the top of the page. I have a good variety of Mexican-style recipes you might enjoy, including:

Interested In More Recipes?

Thank you for visiting this website. I appreciate you using some of your valuable time to do soIf you’re interested, I publish a newsletter 2 times per month (1st and 15th) with all the latest recipes, and other fun info. I would be honored to have you join our growing list of subscribers, so you never miss a great recipe! 
There is a Newsletter subscription box on the top right side (or bottom) of each blog post, depending on the device you use, where you can easily submit your e-mail address (only) to be included in my mailing list.

You Can Also Find Me On Social Media:

Facebook page: The Grateful Girl Cooks!
Pinterest:
The Grateful Girl Cooks!
Instagram:
jbatthegratefulgirlcooks

Author's signatureRecipe Source: “100 Days Of Real Food”, by Lisa Leake (page 155), Published 2014, William Morrow Publishers.

↓↓ PRINTABLE RECIPE BELOW ↓↓

0 from 0 votes
Easy Crock Pot Refried Beans
Prep Time
5 mins
Cook Time
8 hrs
Total Time
8 hrs 5 mins
 

Easy crock pot refried beans - It is EASY (and economical) to make your own delicious and inexpensive Mexican refried beans, using a slow cooker!

Category: Side Dishes
Cuisine: Mexican
Keyword: crock pot refried beans, refried beans
Servings: 8 (1/2 cup servings)
Calories Per Serving: 174 kcal
Author: JB @ The Grateful Girl Cooks!
Ingredients
  • 2 cups dried pinto beans , rinsed
  • 1 yellow onion , peeled, and cut in half
  • 1/2 medium jalapeno , cored, seeded, and diced
  • 2 garlic cloves , peeled and crushed
  • 1 1/4 teaspoons salt
  • 1/2 teaspoon ground black pepper
  • 1/8 teaspoon ground cumin
  • 6 cups water
Optional toppings:
  • Grated cheddar or monterey jack cheese , cilantro, or sour cream
Instructions
  1. Place all ingredients (except for optional toppings) into a crock pot.
  2. Cover pot and cook beans for 8-9 hours on high.
  3. When finished, remove beans from crock pot, drain, and mash them with a potato masher until they reach the correct consistency. Add a little broth from the crock pot to the beans while mashing, if they seem a bit dry. That's it! You just made refried beans from scratch!
  4. Serve with a garnish of grated cheese, cilantro, or sour cream, if desired. Enjoy!

Recipe Notes

NOTE: Caloric calculation does not include optional garnishes (sour cream, cheese or cilantro)

Nutrition Facts
Easy Crock Pot Refried Beans
Amount Per Serving (1 serving)
Calories 174
% Daily Value*
Sodium 369mg16%
Potassium 692mg20%
Carbohydrates 31g10%
Fiber 7g29%
Sugar 1g1%
Protein 10g20%
Vitamin A 10IU0%
Vitamin C 5.4mg7%
Calcium 59mg6%
Iron 2.5mg14%
* Percent Daily Values are based on a 2000 calorie diet.

Here’s one more to pin on your Pinterest boards!Easy crock pot refried beans - It is EASY (and economical) to make your own delicious and inexpensive Mexican refried beans, using a slow cooker!


Save

Save

Save

Marinated, Pan-Seared Mexican Chicken

Marinated, pan-seared Mexican chicken is a delicious, low-fat, easy to prepare dish. The chicken will surprise you with its depth of flavor.Marinated, pan-seared Mexican chicken is a delicious, low-fat, easy to prepare dish. The chicken will surprise you with its depth of flavor.

Do you cook with chicken often? I sure do!  The recipe I want to share today with you is for Marinated, Pan-Seared Mexican Chicken. This recipe is delightfully GOOD. An added benefit is that it’s low in calories (under 200 per serving), so it’s a win-win in my book!

My favorite food to eat is Mexican food. I love the flavors in most Mexican-inspired dishes, which is why I really like this one. Pan-seared Mexican chicken has great flavor, from spices like cumin, chili powder, garlic, oregano and lime juice. YUM!

The recipe for pan-seared Mexican chicken is easy to prepare. I have modified it slightly from a recipe I found on Skinnytaste.com a while ago.

If you can mix up a marinade, add chicken to the marinade, then cook it, you can make this delicious chicken! Here’s how to make it:

Scroll Down For A Printable Recipe Card At The Bottom Of The Page

It’s Easy To Make Marinated Pan-Seared Mexican Chicken!

Marinate the chicken breasts for at least half an hour. TIP: The chicken tastes even better if you let it marinate all day! If you have the time, go for all day marinating.

As you can see in the photo below, I only made two small chicken breasts, since there was only two of us eating this meal.

Chicken breasts are marinated before cooking.

Time To Cook The Pan-Seared Mexican Chicken Breasts!

Spray a large skillet with non-stick cooking spray OR add a Tablespoon of oil. Once the oil is hot, add the marinated chicken breasts.

You can see in the photo below the little pieces of minced garlic on each piece. There’s a lot of flavor saturated on those chicken breasts!

The marinated chicken breasts are pan-seared in a hot skillet.

Cook each side of the pan-seared Mexican chicken until it is golden brown, and cooked through. This usually will take about 4-8 minutes per side depending on the chickens thickness.

The internal temperature of the cooked chicken should be at 165°F. when the chicken breasts are finished cooking.

Two of the marinated, pan-seared Mexican chicken breasts cook in a skillet.

Add the reserved batch of marinade plus 1/4 cup water to the skillet, halfway through cooking the second side of the chicken breasts.

Cook the pan-seared Mexican chicken in the marinade for 3-4 minutes (until cooked through). Spoon the pan drippings over the chicken as it cooks. Once done, the chicken is ready to serve!

Serve The Pan-Seared Marinated Chicken

This pan-seared Mexican chicken recipe is to prepare, and it’s delicious! We enjoy this chicken, and usually serve it with white steamed rice on the side.

You might also enjoy topping the cooked chicken breasts with some pico de gallo salsa as a garnish! That really takes the flavor up another notch!

Finished cooking, the pan-seared Mexican chicken has darkened in color.

Hope you enjoy these tasty (and easy) pan-seared Mexican chicken breasts! They are really easy to prepare, and have good flavor!

Thanks for stopping by today, and I invite you to come back again soon for more family-friendly recipes. Take care, and have a GREAT day!

Looking For More CHICKEN Recipes?

You can find all of my chicken recipes in the Recipe Index, located at the top of the page. A few of those recipes include:

Want More Recipes? Get My FREE Newsletter!

I publish a newsletter 2 times per month (1st and 15th) with lots of recipes, tips, etc..
Would you like to join our growing list of subscribers?

There is a Newsletter subscription box on the top right (or bottom) of each blog post, depending on the device you use.
You can submit your e-mail address there, to be added to my mailing list.

Find Me On Social Media:

Facebook page: The Grateful Girl Cooks!
Pinterest:
The Grateful Girl Cooks!
Instagram:
jbatthegratefulgirlcooks

Author's signatureRecipe Adapted from: http://www.skinnytaste.com/2013/08/grilled-chicken-with-black-bean-mango.html

↓↓ PRINTABLE RECIPE BELOW ↓↓

0 from 0 votes
Marinated, Pan-Seared Mexican Chicken
Prep Time
5 mins
Cook Time
12 mins
Total Time
17 mins
 
Marinated, pan-seared Mexican chicken is a delicious, low-fat, easy to prepare dish. The chicken will surprise you with its depth of flavor.
Category: Entree
Cuisine: Mexican
Keyword: pan-seared Mexican chicken
Servings: 4 servings
Calories Per Serving: 140 kcal
Author: JB @ The Grateful Girl Cooks!
Ingredients
  • 4 boneless skinless chicken breasts (4 ounces each)
  • salt and pepper (to taste)
  • 6 cloves minced garlic
  • 2 teaspoons cumin
  • 1 teaspoon dried oregano
  • 2 limes, JUICE OF
  • 1/4 cup water
Instructions
  1. Season chicken breasts lightly with salt and pepper. Place chicken breasts in large bowl.

  2. In separate bowl, mix together minced garlic, cumin, oregano, and lime juice. Pour HALF of the marinade sauce over chicken. Reserve the other half of  marinade for later.

  3. Coat chicken with marinade. Cover and refrigerate for at LEAST half an hour. (The longer the chicken marinates, the better the flavor!)

  4. Spray skillet with non-stick cooking spray. Heat on medium high until very hot. Once skillet is hot, place marinated chicken into skillet. They should sizzle when added to skillet. Discard marinade that the chicken was in. Cook chicken 3-4 minutes, then turn to other side. Halfway through cooking second side of chicken, add the reserved marinade, plus 1/4 cup water to the skillet. Cook for 3-4 additional minutes, continually spooning sauce over the top of chicken breasts. This will coat the chicken and will help to darken the color. Cook chicken until cooked all the way through.

  5. When chicken is done, remove from skillet. If desired, serve with pico de gallo as a garnish. Serve chicken with rice, or your favorite side dish. Enjoy!

Recipe Notes

Caloric calculation was made based on using a 4 ounce small boneless, skinless chicken breast per serving. Larger portions of chicken will have more calories.

Nutrition Facts
Marinated, Pan-Seared Mexican Chicken
Amount Per Serving (1 (4 ounce) breast)
Calories 140 Calories from Fat 27
% Daily Value*
Fat 3g5%
Cholesterol 72mg24%
Sodium 134mg6%
Potassium 455mg13%
Carbohydrates 2g1%
Protein 24g48%
Vitamin A 45IU1%
Vitamin C 6.4mg8%
Calcium 26mg3%
Iron 1.3mg7%
* Percent Daily Values are based on a 2000 calorie diet.

Here’s one more to pin on your Pinterest boards!Marinated, pan-seared Mexican chicken is a delicious, low-fat, easy to prepare dish. The chicken will surprise you with its depth of flavor.


Save

Save

Save

Make Your Own Taco Seasoning Mix

It’s easy to make up a large batch of taco seasoning mix- perfect Mexican spices for ground beef, chicken or pork to use in tacos, taco salads, etc. It's easy to make up a large batch of taco seasoning mix... perfect Mexican spices for ground beef, chicken or pork to use in tacos, taco salads, etc.
Years ago I got tired of buying the packages of commercially prepared seasoning mixes and started adding my own spices to ground beef, pork or chicken when we ate tacos or taco salads. Today I’d like show you how to make your own taco seasoning mix very easily.

I used to haul out various jars of spices each time I made it and then haul them all back to the cupboard when I was done. Then I found a “copycat” recipe (a copycat version of Lawry’s Taco Seasoning mix) in one of my “Top Secret Recipe” books by Todd Wilbur (I have several of his books and LOVE them).

I took his basic “recipe” for the mix, multiplied it by 12 and ended up with quite a nice supply of taco seasoning, which I store in an old spice canister.  Since we eat tacos quite often (they’re my FAVORITE), it’s handy to have a ready supply of seasoning mix around whenever I need it.

Scroll Down For A Printable Recipe Card At The Bottom Of The Page

How Do You Season Meat With The Taco Seasoning Mix?

It’s easy, because all you do when you want to use it is to add 2/3 cup water to 3 Tablespoons of the mix and the pound of meat, cook for 7-10 minutes and bam! You’re done… and the meat tastes GREAT!

How easy is that? Sure is great to mix this taco seasoning mix all up ONCE and not have to haul all the spices out of the cupboard each and every time we have tacos! Hope you give it a try. It will save you some bucks and valuable time in the long run (and quite possibly a trip to the grocery store!) My photo is a bit blurry, but it’s the only one I took of the seasoning spices before mixing. Oh well.

Spices in bowl used to make the seasoning mix.

How Do You USE This Taco Seasoning Mix To Season Taco Meat?

Add 3 Tablespoons of the taco seasoning mix to browned/drained meat. This photo is using hamburger meat, but the taco seasoning mix is delicious on shredded chicken or pork, too!

The taco seasoning mix is added to a pound of browned hamburger meat.

Add 2/3 cup of water. Cook the taco mixture for 7-10 minutes, until the water has cooked down and been absorbed into the meat.  Now your taco meat is fully seasoned and ready to use!

Cooking the seasoned meat in a skillet, for tacos.

Use Taco Seasoning Mix On A Variety Of Meals

Ready to eat! This time we used the taco mix seasoning to make the seasoned ground beef for taco salads.YUM!

A taco salad was made, using the taco seasoning mix on the meat.

We use the taco seasoning mix all the time when we fix our tacos! The seasoning on the meat is wonderful, and I’m confident you’ll enjoy it, too.

The mix tastes great on the meat for homemade tacos.

I hope you will consider making up a batch of this taco seasoning mix to have around YOUR home. Truthfully, I’m pretty sure you will NOT regret it!

Looking For Other SPICE MIX Recipes?

You can find all of my recipes in the Recipe Index, located at the top of the page. A couple favorite spice mixes include:

Interested In More Recipes?

Thank you for visiting this website. I appreciate you using some of your valuable time to do soIf you’re interested, I publish a newsletter 2 times per month (1st and 15th) with all the latest recipes, and other fun info. I would be honored to have you join our growing list of subscribers, so you never miss a great recipe!
There is a Newsletter subscription box on the top right side (or bottom) of each blog post, depending on the device you use, where you can easily submit your e-mail address (only) to be included in my mailing list.

You Can Also Find Me On Social Media:

Facebook page: The Grateful Girl Cooks!
Pinterest:
The Grateful Girl Cooks!
Instagram:
jbatthegratefulgirlcooks

Make Your Own Taco Seasoning Mix / The Grateful Girl Cooks!Recipe Source: “Even More Top Secret Recipes”, by Todd Wilbur, published by the Penguin Group, 2002 (pages. 118-119)

**The recipe I am posting is the original recipe for enough seasoning mix for one pound of meat. Multiply it for the quantity you wish to have on hand. I found it easiest to make a whole bunch (for 12 meals) at one time.

↓↓ PRINTABLE RECIPE BELOW ↓↓

0 from 0 votes
Make Your Own Taco Seasoning Mix
Prep Time
5 mins
Cook Time
0 mins
Total Time
5 mins
 
It's easy to make up a large batch of taco seasong mix... perfect Mexican spices for ground beef, chicken or pork to use in tacos, taco salads, etc.
Category: Seasonings
Cuisine: Mexican
Keyword: taco seasoning mix
Servings: 1 (3 Tablespoons)
Calories Per Serving: 59 kcal
Author: JB @ The Grateful Girl Cooks!
Ingredients
  • 1 Tablespoon flour
  • 1 teaspoon chili powder
  • 1 teaspoon paprika
  • 3/4 teaspoon salt
  • 3/4 teaspoon minced onion
  • 1/2 teaspoon cumin
  • 1/4 teaspoon cayenne pepper
  • 1/4 teaspoon garlic powder
  • 1/8 teaspoon ground oregano
Instructions
  1. Mix all the ingredients together in a bowl.
  2. To prepare: Brown hamburger meat in a skillet until fully cooked. Drain the grease.
  3. Add the spice mix (or use 3 Tablespoons if you prepared quite a bit of the mix).
  4. Add 2/3 cup water to the meat and spice mixture. Stir to combine. Bring mixture to a boil, then reduce the heat to a low setting and cook, uncovered for 7-10 minutes. Stir occasionally.
  5. Remove from heat. Spoon the seasoned meat into warm tortillas, taco shells, or onto a salad.
  6. Enjoy!
Recipe Notes

NOTE: Quantity listed is equivalent to one envelope of store bought mix. Ingredients as listed when added to a pound of meat (hamburger meat, shredded pork or chicken) will make enough seasoned meat filling for 12 tacos (3 Tablespoons meat each).
*I multiplied the quantity by 12 to get a large quantity of seasoning mix.

Nutrition Facts
Make Your Own Taco Seasoning Mix
Amount Per Serving (1 (3 Tablespoons))
Calories 59
% Daily Value*
Sodium 1781mg77%
Potassium 144mg4%
Carbohydrates 12g4%
Fiber 1g4%
Sugar 1g1%
Protein 2g4%
Vitamin A 1785IU36%
Vitamin C 2.8mg3%
Iron 1.8mg10%
* Percent Daily Values are based on a 2000 calorie diet.

Here’s one more to pin on your Pinterest boards!It's easy to make a large batch of taco seasoning mix - the perfect Mexican spices for ground beef, chicken or pork to use in tacos, taco salads, etc.


Save

Save