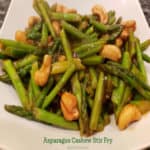
Category: Vegetable Dishes

Cream Of Asparagus Soup

Make four servings of delicious Cream of Asparagus Soup in under 30 minutes! It’s so easy to make – serve as a main dish OR as a side dish.
Make four servings of delicious Cream of Asparagus Soup in under 30 minutes! It's so easy to make - serve as a main dish OR as a side dish.

We love asparagus, especially in the Spring when it is readily available at much lower than normal prices! Recently my husband picked up a couple large bunches of asparagus at the grocery store, so we enjoyed some of them pan-steamed until crisp-tender and served with chicken.

The rest of the fresh asparagus was used for this wonderful tasting cream of asparagus soup! YUYM! The original recipe came from one of my OLD “Taste of Home” magazines (from 21 years ago!), but it is a timeless, fantastic recipe you’re gonna love! One of the reasons I love this soup is because not all of the asparagus is pureed until creamy. Half of the soup is pureed in a blender or food processor to make it creamy; but some of the tender small pieces of asparagus are left intact in the soup. I like that!

This cream of asparagus soup is incredibly EASY to make, as well. If you enjoy fresh asparagus, I’m confident you’ll enjoy a bowl of this delicious soup. Here is how to make four servings of cream of asparagus soup:

Scroll Down For A Printable Recipe Card At The Bottom Of The Page

Prepare The Vegetables For The Soup

The first thing you will do is sauté chopped onion and minced garlic in a large saucepan. Heat oil on medium-low heat until hot, but not smoking. Add the veggies, then cook for 3-4 minutes (until tender). Stir often, to ensure the garlic does not burn and become bitter. 

Chopped onion and minced garlic are cooked in oil in a large saucepan.

Add the fresh asparagus pieces, low-sodium chicken broth, and red pepper flakes to the saucepan. Bring the broth to a boil, then reduce the heat to Low, and cover the saucepan. Let this mixture simmer (covered) on low for 13-15 minutes, or until the asparagus is tender. Once done, remove the pan from the heat.

Asparagus, chicken broth, and red pepper flakes are added to the cream of asparagus soup in pan.

Make The Cream Base For The Soup

Remove about HALF of the asparagus mixture (including broth), and place it in a blender (or food processor). Add cream cheese, sour cream and dried dill weed or fresh chopped dill. Process these ingredients in the blender or food processor until smooth and creamy. 

Half the soup mixture is transferred out of the saucepan into a blender for processing.Cream cheese, sour cream and dried dill are added to asparagus in blender and processed until creamy.

Pour the creamed mixture back into the saucepan with the remaining ingredients, and stir to fully combine the cream of asparagus soup. Turn the heat to Medium, and cook, just until the soup is heated through. The cream of asparagus soup will be thick, creamy, and have small pieces of tender asparagus in there, as well.

Pureed cream of asparagus soup is added back into remaining ingredients in saucepan.After stirring, the cream of asparagus soup is thick and creamy.

Serve The Cream Of Asparagus Soup

Once the cream of asparagus soup is fully heated through, it is time to serve! See how easy that was? Ladle the hot soup into four bowls, and lightly sprinkle each portion with ground nutmeg on top. That’s it! Grab a spoon, and enjoy this delicious, thick, creamy, soup! Store any leftover soup in an airtight container in the refrigerator for up to 3-4 days. Reheat in a saucepan or in the microwave.

The cream of asparagus soup is sprinkled with ground nutmeg and served hot, in a white bowl.

I truly hope you try this delicious cream of asparagus soup. We LOVE it, and trust you will, too. Thank you for taking time out of your busy day to visit my blog. Have a great day, and come back for another visit real soon.

Looking For More SOUP Recipes?

You can find all of my soup recipes in the Recipe Index, which is located at the top of the page. I have lots of them you’ll enjoy, including:

Interested In More Recipes?

Thank you for visiting this website. I appreciate you using some of your valuable time to do soIf you’re interested, I publish a newsletter 2 times per month (1st and 15th) with all the latest recipes, and other fun info. I would be honored to have you join our growing list of subscribers, so you never miss a great recipe!
There is a Newsletter subscription box on the top right side (or bottom) of each blog post, depending on the device you use, where you can easily submit your e-mail address (only) to be included in my mailing list.

You Can Also Find Me On Social Media:

Facebook page: The Grateful Girl Cooks!
Pinterest:
The Grateful Girl Cooks!
Instagram:
jbatthegratefulgirlcooks

Author's signature

Original recipe source: “Taste of Home” magazine, April/May 2000 edition, page 17, published by Reiman Publications, Inc.

0 from 0 votes
Cream of Asparagus Soup
Prep Time
10 mins
Cook Time
15 mins
Total Time
25 mins
 

Make four servings of delicious Cream of Asparagus Soup in under 30 minutes! It's so easy to make - serve as a main dish OR as a side dish.

Category: Main Course, Side Dish, Soup
Cuisine: American
Keyword: cream of asparagus soup
Servings: 4
Calories Per Serving: 119 kcal
Author: JB @ The Grateful Girl Cooks!
Ingredients
  • 1 teaspoon vegetable oil
  • 1 medium yellow onion , finely chopped
  • 2 medium garlic cloves , minced
  • 3 cups fresh cut asparagus (1" slices) woody bottom part of stem removed/discarded
  • cups low-sodium chicken broth (or regular)
  • teaspoon crushed red pepper flakes
  • 3 ounces light cream cheese , OR regular, cut in small cubes
  • 2 Tablespoons light sour cream (or regular)
  • 1 teaspoon dried dill weed , OR 1 Tablespoon chopped fresh dill
  • ½ teaspoon ground nutmeg , for garnish
Instructions
  1. Heat oil on medium-low heat until hot, but not smoking. Add onion and garlic; cook 3-4 minutes (until tender). Stir often, to ensure garlic doesn't burn and become bitter. 

  2. Add asparagus pieces, chicken broth, and red pepper flakes to saucepan. Bring broth to a boil, then reduce heat to Low. Cover the saucepan. Let simmer (covered) on low 13-15 minutes, or until asparagus is tender. Once done, remove pan from the heat.

  3. Remove HALF the asparagus mixture (including broth); place in blender or food processor. Add the cream cheese, sour cream and dill. Process until smooth and creamy. Pour creamed mixture back into saucepan (with remaining ingredients), and stir to fully combine soup. Cook on Medium heat only until soup is heated through.

  4. Ladle hot soup into four bowls; lightly sprinkle each portion with ground nutmeg. Grab a spoon, and enjoy this delicious, thick, creamy, soup! Store any leftover soup in an airtight container in refrigerator for up to 3-4 days. Reheat in a saucepan or in a microwave.

Nutrition Facts
Cream of Asparagus Soup
Amount Per Serving (1 (1/4 of total))
Calories 119 Calories from Fat 54
% Daily Value*
Fat 6g9%
Saturated Fat 4g25%
Cholesterol 14mg5%
Sodium 153mg7%
Potassium 452mg13%
Carbohydrates 11g4%
Fiber 3g13%
Sugar 5g6%
Protein 8g16%
Vitamin A 931IU19%
Vitamin C 8mg10%
Calcium 84mg8%
Iron 3mg17%
* Percent Daily Values are based on a 2000 calorie diet.

Here’s one more to pin on your Pinterest boards!Make four servings of delicious Cream of Asparagus Soup in under 30 minutes! It's so easy to make - serve as a main dish OR as a side dish.

Parmesan Garlic Potato Wedges

You’re gonna love these absolutely tender, delicious, Italian-seasoned Parmesan Garlic Potato Wedges. They’re easy to make, and baked to perfection.
You're gonna love these absolutely tender, delicious, Italian-seasoned Parmesan Garlic Potato Wedges. Easy to make, and baked to perfection.

Anyone out there love potatoes? We sure do! Whether they’re mashed, baked, grilled or fried, we love the humble potato. Today I want to share with you a wonderful way to season and bake potato wedges. I found the recipe online several years ago, and they’re delicious! These potatoes will compliment a variety of meat dishes, so they’re a wonderful choice for a simple, flavorful side dish.

The recipe is for Parmesan garlic potato wedges (using russet potatoes), and they are so EASY to prepare. This recipe will make enough for about 4-6 servings. The potato wedges are well-seasoned, and then they’re baked until soft and tender, and let me tell you… they taste GREAT! Here’s how to make them:

Scroll Down For A Printable Recipe Card At The Bottom Of The Page

Prepare The Potatoes For Baking

The first thing you need to do is preheat your oven to 375°F, and grease or spray a 9″x13″ baking sheet (set aside). Okay… now let’s get these potatoes ready for baking! Scrub the outside of the potatoes clean, but leave the peel on. Cut each potato in half lengthwise, then cut each half into 3 wedges. Try to keep the wedges about the same thickness in size, so they will all cook consistently in the same amount of time.

Place the potato wedges in a large bowl, and drizzle with olive oil. Toss them to coat with oil, then add grated Parmesan cheese, and toss again to coat the potatoes with cheese.

Unpeeled potatoes are sliced into wedges before baking.Potato wedges are drizzled with olive oil, and tossed to coat.Grated Parmesan cheese is added to, and tossed with the potato wedges.

Make The Seasoning Mix

Measure garlic powder, Italian seasoning and salt into a small bowl, then stir to combine. NOTE: If you want to make your own Italian seasoning, here is how I make mine. Sprinkle the seasoning mix over the potato wedges, tossing again to cover the potatoes with the spices.

A seasoning mix is made combining Italian seasoning, garlic powder and salt.Seasoning mix is tossed with the potato wedges to coat them in spices.

Time To Bake The Parmesan Garlic Potato Wedges

Hooray- now it’s time to bake these tasty spuds! Remember that greased baking sheet you set aside earlier? Yep… grab it, and place the seasoned potato wedges (peel side down) on it, in a single layer.

Bake the potatoes at 375°F. for between 25-35 minutes. Check for doneness at the 25 minute mark. They are ready when they can easily be pierced with a fork or knife (very tender), and are light golden brown in color.

The Parmesan garlic potato wedges are baked in a single layer, skin side down.

Time To Eat!

Once they have finished baking, they are ready to eat. Place the Parmesan Garlic Potato Wedges on a serving platter, and sprinkle them with chopped parsley or cilantro. You can also serve them with a dipping sauce if you want, but that is completely optional. We like them just the way they are, to be honest!

The potato wedges are so delicious… the Parmesan cheese and other spices give each bite incredible flavor! I’m confident you’ll enjoy this easy side dish that pairs especially well with chicken, beef or pork. YUM!

Parmesan garlic potato wedges are garnished with cilantro or parsley before serving.A close up of the spices on the baked Parmesan garlic potato wedges.

Thank you for visiting my blog, and appreciate the time you took to do so. I really hope you will have the opportunity to make these delicious potato wedges for yourself or those you love. Have a great day, and I trust you will come back soon for more recipes.

Looking For More POTATO Recipes?

You can find all of the recipes from my blog in the Recipe Index, which is located at the top of the page. I have several recipes featuring potatoes, including:

Interested In More Recipes?

Thank you for visiting this website. I appreciate you using some of your valuable time to do soIf you’re interested, I publish a newsletter 2 times per month (1st and 15th) with all the latest recipes, and other fun info. I would be honored to have you join our growing list of subscribers, so you never miss a great recipe!
There is a Newsletter subscription box on the top right side (or bottom) of each blog post, depending on the device you use, where you can easily submit your e-mail address (only) to be included in my mailing list.

You Can Also Find Me On Social Media:

Facebook page: The Grateful Girl Cooks!
Pinterest:
The Grateful Girl Cooks!
Instagram:
jbatthegratefulgirlcooks

Author's signature

Original recipe source: Tiffany, at http://www.lecremedelacrumb.com/baked-garlic-parmesan-potato-wedges/

0 from 0 votes
Parmesan Garlic Potato Wedges
Prep Time
10 mins
Cook Time
30 mins
Total Time
40 mins
 

You're gonna love these absolutely tender, delicious, Italian-seasoned Parmesan Garlic Potato Wedges. Easy to make, and baked to perfection.

Category: Appetizer, Side Dish, Vegetable Dish
Cuisine: American
Keyword: Parmesan garlic potato wedges
Servings: 6 (4 wedges per serving)
Calories Per Serving: 236 kcal
Author: JB @ The Grateful Girl Cooks!
Ingredients
  • 4 medium russet potatoes
  • 4 Tablespoons olive oil
  • ½ cup grated Parmesan cheese
  • 2 teaspoons Italian seasoning
  • 2 teaspoons salt
  • 2 teaspoons garlic powder
  • OPTIONAL: chopped parsley or cilantro for garnish
Instructions
  1. Preheat oven to 375°F, and grease/spray a 9"x13" baking sheet (set aside).

  2. Scrub outside of potatoes clean, but leave the peel ON. Slice each potato in half lengthwise, then cut each half into 3 long wedges. Try to keep wedges about the same thickness, so they cook consistently.

  3. Place potatoes in a large bowl. Drizzle with olive oil, and toss to coat them with oil. Add grated Parmesan cheese, and toss again. Measure garlic powder, Italian seasoning and salt into a small bowl; stir to combine. Sprinkle seasoning mix over potato wedges, tossing to cover potatoes with spices.

  4. Place potato wedges (peel side down) in a single layer on prepared baking sheet. Bake at 375°F. for 25-35 minutes. Check for doneness at 25 minute mark (cause oven temps can vary). Potatoes are ready when they can easily be pierced with a fork or knife (very tender), and are light golden brown in color. When done, remove from oven, and garnish with chopped parsley or cilantro, if desired. Serve, and enjoy!

Recipe Notes

NOTE: Suggestions for optional dipping sauces are ranch or bleu cheese dressing, if desired.

Nutrition Facts
Parmesan Garlic Potato Wedges
Amount Per Serving (1 (4 wedges))
Calories 236 Calories from Fat 108
% Daily Value*
Fat 12g18%
Saturated Fat 3g19%
Cholesterol 7mg2%
Sodium 911mg40%
Potassium 623mg18%
Carbohydrates 27g9%
Fiber 2g8%
Sugar 1g1%
Protein 6g12%
Vitamin A 85IU2%
Vitamin C 8mg10%
Calcium 123mg12%
Iron 2mg11%
* Percent Daily Values are based on a 2000 calorie diet.

Here’s one more to pin on your Pinterest boards!You're gonna love these absolutely tender, delicious, Italian-seasoned Parmesan Garlic Potato Wedges. Easy to make, and baked to perfection.


Asian Cucumber Salad

Asian Cucumber Salad is an easy side dish, with sliced cucumbers & green onions marinated in an Asian-inspired sauce, served cold and crispy!

I grew up eating marinated cucumbers, because my Mom made them quite often, especially in the hot summertime. I’ve shared her basic recipe, called “Mom’s Marinated Cucumbers” here on the blog previously, and hope you will check it out, if interested. They’re really good!

This recipe I am sharing today has a slight Asian twist to it, due in part to it’s use of rice vinegar and soy sauce. Asian Cucumber Salad is simple to make in about 10 minutes, but you will have to allow time for the cucumbers to marinate for the best flavor, so plan ahead! I like to make up a batch in the morning to be able to enjoy later in the day! Let me show you how easy this salad is to make:

Scroll Down For A Printable Recipe Card At The Bottom Of The Page

Prepare The Cucumbers

Trim the ends off the cucumbers, and then use a vegetable peeler or knife to remove all the peel. Once peeled, thinly slice (about 1/4″) all of the cucumbers. You can use regular cucumbers OR English cucumbers for this salad.

NOTE: I used one really large English cucumber for these photos, but you can also use 2 large or 3 medium sized regular cucumbers, if desired. There is enough marinade for either way you choose to fix this dish.

The cucumbers are washed, ends trimmed off, then peeled.Cucumbers are peeled, and cut into thin slices for Asian Cucumber Salad.

Now it’s time to get the cucumbers ready for marinating! Place the cucumber slices and chopped green onions (scallions) into a container with a lid or a large re-sealable plastic bag. You’re going to use all the white parts of each green onion, and SOME of the green tops, okay?

NOTE: I prefer to use a large dish with a lid when marinating these, because sometimes the plastic re-sealable bags can leak (and that’s not good).

Chopped green onions and sliced cucumbers in dish before marinating.

Marinate The Cucumbers

It’s EASY to make the Asian-inspired marinade for the cucumbers. Measure rice vinegar, water, reduced sodium soy sauce, granulated sugar, salt and black pepper into a small bowl. Whisk or stir well, until these ingredients are fully combined. Pour the marinade over the sliced cucumbers and green onions, and gently stir until the cucumbers are coated on all sides.

Place a tight fitting lid on the dish (or seal the bag), and place the dish into your refrigerator. For BEST flavor, let the cucumbers marinate in the sauce for several hours to saturate them with flavor (or even overnight, if you want). Stir occasionally, to ensure the cucumbers remain coated with marinade.

Asian sauce is mixed then poured over cucumber mix to marinate.

Serve The Asian Cucumber Salad

After they’ve marinated for several hours (or overnight), it’s time to serve the Asian Cucumber Salad. Remove the cucumbers with a slotted spoon, letting the marinade drain off the cucumbers before serving.

Transfer the drained Asian Cucumber Salad to a serving dish, and lightly sprinkle with sesame seeds. Serve the salad – the cucumbers will be crisp, cold, and full of flavor! They’re so good, I find myself grabbing one or two slices out of the fridge for a quick, tasty snack any time of the day.

Asian Cucumber Salad is served garnished with sesame seeds in a white bowl.A close up photo of the Asian Cucumber Salad in a white bowl.

You can also use the marinated, drained cucumbers on your favorite mixed green salad, for a crunchy, tasty pop of flavor! They’re delicious when used in this way, as well.

Marinated cucumbers are delicious and crunchy added to a mixed green salad.

I hope you have the chance to try this simple recipe, and am positive you will enjoy it. Thanks so much for stopping by for a visit today. Have a great day, and come back soon, okay?

Looking For More Salad Recipes?

You can find all of my salad recipes in the Recipe Index, which is located at the top of the page. I have lots of yummy salad recipes, including:

Interested In More Recipes?

Thank you for visiting this website. I appreciate you using some of your valuable time to do soIf you’re interested, I publish a newsletter 2 times per month (1st and 15th) with all the latest recipes, and other fun info. I would be honored to have you join our growing list of subscribers, so you never miss a great recipe!
There is a Newsletter subscription box on the top right side (or bottom) of each blog post, depending on the device you use, where you can easily submit your e-mail address (only) to be included in my mailing list.

You Can Also Find Me On Social Media:

Facebook page: The Grateful Girl Cooks!
Pinterest:
The Grateful Girl Cooks!
Instagram:
jbatthegratefulgirlcooks

Author's signature

Recipe Adapted From: The cookbook “What’s For Dinner?”, by Maryana Vollstedt, published in 1997 by Chronicle Books, page 99.

0 from 0 votes
Asian Cucumber Salad
Prep Time
10 mins
Marinating Time (inactive)
3 hrs
Total Time
3 hrs 10 mins
 

Asian Cucumber Salad is an easy side dish, with sliced cucumbers & green onions marinated in an Asian-inspired sauce, served cold and crispy!

Category: Salad, Vegetable Dish
Cuisine: Asian
Keyword: Asian cucumber salad
Servings: 4
Calories Per Serving: 34 kcal
Author: JB @ The Grateful Girl Cooks!
Ingredients
  • 2 large cucumbers *See Note below
  • 3 stalks green onions (scallions) sliced (white bulb and some green tops)
For Marinade:
  • ½ cup rice vinegar
  • 2 Tablespoons water
  • 2 teaspoons reduced sodium soy sauce
  • 1 teaspoon granulated sugar
  • ¼ teaspoon salt
  • teaspoon black pepper
Garnish:
  • 1 teaspoon sesame seeds if desired for garnish
Instructions
  1. Trim ends off the cucumbers; peel cucumbers. Once peeled, thinly slice (about 1/4") the cucumbers. Place cucumber slices and chopped green onions into a container with a lid, or into a large re-sealable plastic bag.

  2. Measure rice vinegar, water, soy sauce, granulated sugar, salt and pepper into a small bowl. Whisk or stir well, until fully combined. Pour marinade over sliced cucumbers and green onions; gently stir until cucumbers are coated on all sides. Place a tight fitting lid on dish (or seal the bag); place in refrigerator. For BEST flavor, let cucumbers marinate in sauce for several hours to saturate with flavor (or even overnight, if you want). Stir occasionally, to ensure cucumbers remain coated with marinade.

  3. After marinating, they're ready to eat. Remove the cucumbers from the marinade with a slotted spoon, letting the marinade drain off the cucumbers before serving. Transfer to a serving dish. Sprinkle cucumbers with sesame seeds for optional garnish. Serve cold, and enjoy!

Recipe Notes

NOTE: This recipe yields approximately 4 servings as written. The caloric calculation is made using 2 large cucumbers (4 servings total). You can make this dish using 3 medium regular cucumbers, 2 large regular cucumbers, or 1 very large English cucumber, and will still have enough marinade for use in this recipe.

Nutrition Facts
Asian Cucumber Salad
Amount Per Serving (1 (1/4 of total))
Calories 34 Calories from Fat 9
% Daily Value*
Fat 1g2%
Saturated Fat 1g6%
Sodium 234mg10%
Potassium 215mg6%
Carbohydrates 5g2%
Fiber 1g4%
Sugar 3g3%
Protein 1g2%
Vitamin A 191IU4%
Vitamin C 6mg7%
Calcium 31mg3%
Iron 1mg6%
* Percent Daily Values are based on a 2000 calorie diet.

Here’s one more to pin on your Pinterest boards!Asian Cucumber Salad is an easy side dish, with sliced cucumbers & green onions marinated in an Asian-inspired sauce, served cold and crispy!

Roasted Italian Veggie Medley

Roasted Italian Veggie Medley is yummy broccoli, carrots, and red peppers covered with Italian spices, baked, and topped with Parmesan cheese.

Roasted vegetables are so delicious! There’s something magical that happens when fresh veggies are roasted, rather than being boiled in water. There is more depth to their flavor, and the vegetables slightly caramelize on the outside, which makes it my favorite way to fix them. 

This roasted Italian veggie medley is very simple to prepare. It uses three fresh veggies: broccoli, carrots, and sweet, red bell peppers.

The veggies are then drizzled with olive oil and then seasoned with an Italian-inspired spice mix before baking. These finished veggies are topped with finely grated Parmesan cheese before serving, which adds another layer of FLAVOR. Here’s how to make this simple side dish:

Scroll Down For A Printable Recipe Card At The Bottom Of The Page

Make The Seasoning Mix

Making the seasoning mix is ridiculously EASY! Measure Italian seasoning, salt, garlic powder, onion powder, black pepper and a pinch of red pepper flakes into a tiny dish.

Stir well, to combine all the spices, then set aside until they are needed later.

An Italian-inspired seasoning mix is combined in a small dish.

Prepare The Veggies For Baking

Peel, slice off the ends, then cut six medium-sized carrots in half lengthwise. Once sliced in half lengthwise, cut the carrots into 1½-2 inch slices.

Cut the broccoli into florets, then cut the red bell pepper into bite sized chunks, after removing the seeds. Arrange the veggies in a single layer on a large baking sheet.

Drizzle the veggies with olive oil, and toss, to lightly coat all sides. Sprinkle the reserved spice mixture over the top of the vegetables, evenly distributing all the seasoning.

The vegetables are drizzled with olive oil before seasoning.Italian spice mixture is sprinkled over olive oil-drizzled veggies on baking sheet.

Bake The Seasoned Veggies

Roast the veggies, uncovered, in a preheated 400°F oven for 10 minutes. Remove the baking sheet from the oven, and quickly turn the veggies over, to roast the other side. Make sure to keep the veggies in a single layer.

Seasoned vegetables are baked in an oven for ten minutes before turning.

Place the veggies back into the oven and continue roasting them for 10 more minutes, and then they should be done (and tender).

Remove the baking sheet from the oven, and quickly transfer the hot roasted Italian veggie medley to a serving plate or bowl.

Immediately grate Parmesan cheese over the top of the veggies before serving. The heat from the vegetables will help melt the Parmesan cheese.

Flipping the veggies halfway through baking time helps roast both sides.

Serve the Roasted Italian Veggie Medley

Serve the roasted Italian veggie medley as soon as you have the cheese grated on top. I love to finely grate the cheese from a wedge of fresh Parmesan I usually keep in our refrigerator.

Adding Parmesan cheese adds a nice additional layer of Italian flavor to this simple dish. YUM!

TIP: If using bagged, pre-grated Parmesan, you might need to pop the dish in the microwave to help melt the cheese. 

Roasted Italian Veggie Medley is served, topped with finely grated Parmesan cheese.Grated Parmesan cheese garnishes the top of the roasted Italian veggie medley.

And there you have it… a lovely vegetable medley side dish, without a whole lot of work! I hope you will find the time to give this delicious dish a try, and I’m pretty confident you will enjoy it, too.

This is a wonderful and versatile side dish, which beautifully compliments a wide variety of chicken, fish, pork OR beef dishes. The recipe will yield four side servings, but can be EASILY doubled to serve more!

Have a wonderful day, and thank you for stopping by. I sincerely hope you will come back again soon for more family-friendly recipes.

Looking For More VEGGIE Recipes?

You can find all of my recipes in the Recipe Index, located at the top of the page. I have quite a few yummy vegetable dishes to choose from, including:

Want More Recipes? Get My FREE Newsletter!

I publish a newsletter 2 times per month (1st and 15th) with lots of recipes, tips, etc..
Would you like to join our growing list of subscribers?

There is a Newsletter subscription box on the top right (or bottom) of each blog post, depending on the device you use.
You can submit your e-mail address there, to be added to my mailing list.

Find Me On Social Media:

Facebook page: The Grateful Girl Cooks!
Pinterest:
The Grateful Girl Cooks!
Instagram:
jbatthegratefulgirlcooks

Author's signature

↓↓ PRINTABLE RECIPE BELOW ↓↓


0 from 0 votes
Roasted Italian Veggie Medley
Prep Time
10 mins
Cook Time
20 mins
Total Time
30 mins
 

Roasted Italian Veggie Medley is yummy broccoli, carrots, and red peppers covered with Italian spices, baked, and topped with Parmesan cheese.

Category: Side Dish, Vegetable Dish
Cuisine: American
Keyword: Roasted Italian Veggie Medley
Servings: 4
Calories Per Serving: 143 kcal
Author: JB @ The Grateful Girl Cooks!
Ingredients
For Italian Spice Mix:
  • teaspoons Italian seasoning
  • ½ teaspoon garlic powder
  • ½ teaspoon onion powder
  • ½ teaspoon salt
  • ¼ teaspoon black pepper
  • 1 pinch red pepper flakes (optional)
For Rest Of Dish:
  • 5 medium carrots , peeled
  • 3 cups broccoli florets , approx. 1/2 head broccoli
  • ½ large red bell pepper
  • 2 Tablespoons extra virgin olive oil
  • 3 Tablespoons finely grated Parmesan cheese
Instructions
  1. Preheat oven to 400°F.

  2. Measure Italian seasoning, salt, garlic powder, onion powder, black pepper and a pinch of red pepper flakes into a tiny dish. Stir well, to combine spices; set aside.

  3. Peel, slice off ends, then cut carrots in half lengthwise, then cut carrots into 1½-2 inch long slices. Cut broccoli into florets; cut red bell pepper into bite sized chunks, after removing the seeds. Arrange veggies in a single layer on a large baking sheet. Drizzle with olive oil, and toss, to lightly coat all sides. Evenly sprinkle spice mix over top of vegetables.

  4. Roast veggies, uncovered, at 400°F. for 10 minutes. Remove from oven; quickly turn veggies over, to roast other side, keeping them in a single layer. Place veggies back into oven; bake 10 more minutes, or until fork-tender. Remove from oven; transfer hot veggies to serving dish. Immediately grate Parmesan cheese over the top of the veggies before serving. Enjoy!

Nutrition Facts
Roasted Italian Veggie Medley
Amount Per Serving (1 (1/4 of total))
Calories 143 Calories from Fat 81
% Daily Value*
Fat 9g14%
Saturated Fat 2g13%
Cholesterol 3mg1%
Sodium 425mg18%
Potassium 512mg15%
Carbohydrates 14g5%
Fiber 5g21%
Sugar 6g7%
Protein 4g8%
Vitamin A 13851IU277%
Vitamin C 92mg112%
Calcium 111mg11%
Iron 1mg6%
* Percent Daily Values are based on a 2000 calorie diet.

Here’s one more to pin on your Pinterest boards!Roasted Italian Veggie Medley is yummy broccoli, carrots, and red peppers covered with Italian spices, baked, and topped with Parmesan cheese.


Air Fryer Glazed Butternut Squash

Air Fryer Glazed Butternut Squash is an easy veggie dish, with air fried squash cubes covered in a butter, maple syrup and cinnamon glaze.

If you have an air fryer and are looking for a great veggie side dish, I would love to recommend this air fryer glazed butternut squash to you. It’s been fun trying so many recipes using the air fryer I got last year.

For this recipe I tweaked one of my recipes for BAKING maple cinnamon butternut squash, and adapted it (through trial and error) for use in an air fryer. This recipe is the result of my experiments. And boy… is it GOOD! Slightly caramelized on the outside, and creamy soft on the inside, this is a delicious, slightly sweet, butternut squash side dish. Here’s how to make it:

Scroll Down For A Printable Recipe Card At The Bottom Of The Page

Prepare The Butternut Squash

Use a vegetable peeler or a sharp knife, and peel the butternut squash. Cut off a slice of both ends, and discard. Slice the squash lengthwise, and then scoop out all the seeds (discard).

Slice each half squash into 1″ thick crescent-shaped slices, and then cut each slice into bite-sized cubes (about 1½” square). Place all the squash cubes into a large mixing bowl.

A vegetable peeler is used to peel the butternut squash.A butternut squash is sliced in half lengthwise, then seeds are removed.Crescent-shaped slices of the butternut squash are then cut into cubes.

Drizzle extra virgin olive oil on the squash cubes, and then sprinkle with ground cinnamon. Stir well, to fully coat the squash with the oil and cinnamon.

Cinnamon and olive oil are sprinkled onto the squash, then stirred in to coat.

Cooking Air Fryer Glazed Butternut Squash

Now it’s time to cook the butternut squash! Preheat your air fryer to 400°F. This will take a couple minutes. When ready, place the squash cubes in the basket of the air fryer, spreading them out in a single layer as much as possible. 

The air frying process is fairly simple. Basically you will cook, shake the basket, cook, shake the basket, cook, shake the basket and then cook until soft. Got that? The occasional “shaking” allows the squash to get browned on all sides from all that “bumping” around.

Once done, the squash will have reduced in size as it cooked, will be slightly caramelized on the outside, and soft on the inside. You can give one a taste test to make sure it is cooked through.

Air fryer basket with cubes of butternut squash, ready to cook.When done, the squash has reduced in size, and is caramelized on the outside.

Time To Glaze And Serve!

Immediately pour the hot butternut squash into a large bowl. Add melted butter, pure maple syrup and a pinch or two more of ground cinnamon. Stir well, to ensure all the squash gets coated with this glaze.

Transfer to a serving plate or bowl, and serve the air fryer glazed butternut squash while HOT! The buttery cinnamon maple flavors give the squash just a bit of delicious sweetness that kids and adults will love! Serve alongside your favorite chicken, pork or beef dish, and enjoy!

Air fryer glazed butternut squash, served in white bowl.

Thank you for stopping by, and trust you will come back for a visit again soon. I hope you have the opportunity to try this air fryer glazed butternut squash. It’s really good, and I’m confident you and those you love will really enjoy it. Have a GREAT day, and may God bless you.

Looking For More Butternut Squash Recipes?

You can find all of my veggie recipes in the Recipe Index, located at the top of the page. I have several delicious butternut squash recipes you might be interested in, including:

Interested In More Recipes?

Thank you for visiting this website. I appreciate you using some of your valuable time to do soIf you’re interested, I publish a newsletter 2 times per month (1st and 15th) with all the latest recipes, and other fun info. I would be honored to have you join our growing list of subscribers, so you never miss a great recipe!
There is a Newsletter subscription box on the top right side (or bottom) of each blog post, depending on the device you use, where you can easily submit your e-mail address (only) to be included in my mailing list.

You Can Also Find Me On Social Media:

Facebook page: The Grateful Girl Cooks!
Pinterest:
The Grateful Girl Cooks!
Instagram:
jbatthegratefulgirlcooks

Author's signature

0 from 0 votes
Air Fryer Glazed Butternut Squash
Prep Time
10 mins
Cook Time
20 mins
Total Time
30 mins
 

Air Fryer Glazed Butternut Squash is an easy veggie dish, with air fried squash cubes covered in a butter, maple syrup and cinnamon glaze.

Category: Side Dish, Vegetable Dish
Cuisine: American
Keyword: air fryer glazed butternut squash
Servings: 4
Calories Per Serving: 134 kcal
Author: JB @ The Grateful Girl Cooks!
Ingredients
  • 1 medium butternut squash
  • 2 teaspoons extra virgin olive oil
  • ½ teaspoon ground cinnamon
  • 2 teaspoons butter melted
  • 1 Tablespoon pure maple syrup
  • 1 pinch ground cinnamon
Instructions
  1. Use a vegetable peeler or sharp knife to peel butternut squash. Cut off a slice at both ends, and ends. Slice squash lengthwise; scoop out seeds (discard). Slice each half into 1½" thick crescent-shaped slices, then cut each slice into bite-sized cubes (about 1½" square).

  2. Place squash into a large mixing bowl. Drizzle with olive oil, and then sprinkle with cinnamon. Stir well, to fully coat squash with oil and cinnamon.

  3. Preheat air fryer to 400°F. When ready, place squash cubes in the basket of the air fryer, spreading them in a single layer as much as possible. 

  4. Cook 5 minutes. Shake the basket to move the squash around. Cook 5 minutes. Shake again. Cook 5 minutes. Shake again. Cook for 3-5 more minutes until the squash is caramelized on the outside and is soft to the bite on the inside (taste test). When done, remove basket from air fryer.

  5. Immediately pour squash into a large bowl. Add melted butter, maple syrup and 1-2 pinches of ground cinnamon. Stir well, to ensure squash gets coated with glaze. Transfer to a serving plate or bowl, and serve HOT! Enjoy.

Nutrition Facts
Air Fryer Glazed Butternut Squash
Amount Per Serving
Calories 134 Calories from Fat 36
% Daily Value*
Fat 4g6%
Saturated Fat 2g13%
Cholesterol 5mg2%
Sodium 26mg1%
Potassium 671mg19%
Carbohydrates 26g9%
Fiber 4g17%
Sugar 7g8%
Protein 2g4%
Vitamin A 19994IU400%
Vitamin C 39mg47%
Calcium 95mg10%
Iron 1mg6%
* Percent Daily Values are based on a 2000 calorie diet.

Here’s one more to pin on your Pinterest boards!Air Fryer Glazed Butternut Squash is an easy veggie dish, with air fried squash cubes covered in a butter, maple syrup and cinnamon glaze.

Crispy Homemade Hash Browns

It’s easy to make crispy homemade hash browns to serve with a favorite breakfast. Crunchy on the outside, & soft inside, they’re DELICIOUS!
It's easy to make crispy homemade hash browns to serve with a favorite breakfast. Crunchy on the outside, & soft inside, they're DELICIOUS!

Anyone want hash browns with their breakfast? Me, me, me! My husband and I love crispy hash browns, especially with a good egg breakfast, but don’t have them too often.

Most weekday mornings we grab coffee and an English muffin or have granola. HOWEVER… there is nothing like a big hearty breakfast on the weekends!

These crispy homemade hash browns are a wonderful accompaniment to a “full-on” breakfast, and they are very easy to make! They don’t take too much time or effort to make, either. I’ve been making them this way for years, and finally took photos so I could share the recipe with you on my blog!

Golden brown, crunchy on the outside and soft on the inside, these buttery, shredded potatoes taste amazing! Here’s how to make them:

Scroll Down For A Printable Recipe Card At The Bottom Of The Page

Prepare The Potatoes

When I make hash browns, I like to use medium-sized Yukon gold or red potatoes. I had a few German butterball potatoes left from our garden (very similar to Yukons), so I used them for the photos.

It’s certainly okay to use russets, but I personally like the color and flavor of the other varieties best. If using russets, use one really large or two medium sized potatoes to make two servings (as written in the recipe card)

Peel the potatoes, and then use a box grater to shred them immediately. Be sure to grate the potatoes immediately before cooking, so they don’t turn brown from exposure to air! I always shred them onto several thicknesses of paper towels, to help absorb moisture.

Cover the shredded potatoes with several more paper towels, and press firmly to remove as much moisture from the potatoes as possible, which helps create crispy hash browns.The potatoes will turn crispy while cooking instead of steaming in the additional moisture that was not removed. Trust me.

Potatoes are peeled, then grated onto paper towels.Paper towels are used to press into the grated potatoes to absorb excess moisture.

Time To Cook Crispy Homemade Hash Browns!

Okay… the potatoes are grated, and the excess moisture has been absorbed. Now it’s time to cook some crispy homemade hash browns! Add vegetable oil and butter to a large heavy skillet.

TIP: If you have a cast iron skillet, use it! Cook on medium-high heat, stirring until the butter melts, and the skillet is really hot, but not smoking.

Carefully add the shredded potatoes to the hot skillet, evenly distributing them on the bottom of the skillet in a shallow layer. Season with salt, pepper and garlic powder. Once you have the layer of potatoes spread out, do not disturb or move them.

Butter is melted into vegetable oil in large skillet.The hash browns are placed in hot skillet and seasoned.

Flip And Continue Cooking

Cook the crispy homemade hash browns for 3-4 minutes without disturbing them. When you begin to see the bottom edges begin to get golden brown and crispy, carefully turn the hash browns over in one piece, if possible.

Continue cooking an additional 3-4 minutes, occasionally pressing down firmly on the top of the hash browns with the back of a spatula. Flip the hash browns back over to the original side and cook 1-2 more minutes until they are crispy on the outside and lightly browned all over.

The crispy homemade hash browns are cooked, then flipped to cook other side.Seasoned crispy hash browns are fully cooked and ready to serve.

Time To EAT!

Evenly divide the crispy homemade hash browns into two portions and place on plates, keeping each portion intact, if possible.  Serve immediately, adding additional salt and pepper, if desired, to suit your own personal taste.

We enjoyed these hash browns served with a ham and cheese egg scramble and a slice of toast with my homemade strawberry jam. They were crispy, buttery, and absolutely DELICIOUS!

Crispy homemade hash browns, served with scrambled eggs, ham, and toast.

Sure do hope you have a chance to try these delicious crispy homemade hash browns. I’m sure you and those you love will enjoy them, too! Thanks for stopping by. Come back soon… and have a GREAT day!

Looking For More BREAKFAST RECIPES?

You can find all of my recipes in the Recipe Index, located at the top of the page. I have quite a few breakfast dishes I think you will enjoy. They include:

Want More Recipes? Get My FREE Newsletter!

I publish a newsletter 2 times per month (1st and 15th) with lots of recipes, tips, etc..
Would you like to join our growing list of subscribers?

There is a Newsletter subscription box on the top right (or bottom) of each blog post, depending on the device you use.
You can submit your e-mail address there, to be added to my mailing list.

Find Me On Social Media:

Facebook page: The Grateful Girl Cooks!
Pinterest:
The Grateful Girl Cooks!
Instagram:
jbatthegratefulgirlcooks

Author's signature

↓↓ PRINTABLE RECIPE BELOW ↓↓

5 from 1 vote
Crispy Homemade Hash Browns
Prep Time
5 mins
Cook Time
8 mins
Total Time
13 mins
 

It's easy to make crispy homemade hash browns to serve with a favorite breakfast. Crunchy on the outside, & soft inside, they're DELICIOUS!

Category: Breakfast
Cuisine: American
Keyword: crispy homemade hash browns
Servings: 2
Calories Per Serving: 367 kcal
Author: JB @ The Grateful Girl Cooks!
Ingredients
  • 1 Tablespoon butter
  • 2 Tablespoons vegetable oil
  • 3 medium Yukon gold potatoes (or red) , peeled and grated
  • ½ teaspoon salt/pepper (each) plus more, to taste if desired
  • 1 pinch garlic powder
Instructions
  1. Peel potatoes, and use a box grater to shred them immediately onto several thicknesses of paper towels to absorb moisture. Grate potatoes immediately before cooking, so they don't turn brown from exposure to air! Cover shredded potatoes with more paper towels, and press firmly to remove as much moisture as possible, which helps to create CRISPY hash browns.

  2. Add vegetable oil and butter to a large skillet. TIP: If you have a cast iron skillet, use it! Cook on medium-high heat, stirring until butter melts, and skillet is really hot, but not smoking. Carefully add potatoes to skillet, evenly distributing them in skillet in a shallow layer. Season with salt, pepper and garlic powder. Once you have potatoes spread out, do not disturb or move them.

  3. Cook 3-4 minutes without disturbing. When you see bottom edges turn golden brown and crispy, carefully turn the hash browns over in one piece, if possible. Continue cooking for 3-4 minutes, occasionally pressing down firmly on the top of the hash browns with the back of a spatula. Flip the hash browns back over to the original side and cook 1-2 more minutes until they are crispy on the outside and lightly browned all over.

Nutrition Facts
Crispy Homemade Hash Browns
Amount Per Serving (1 g)
Calories 367 Calories from Fat 180
% Daily Value*
Fat 20g31%
Saturated Fat 15g94%
Cholesterol 15mg5%
Sodium 647mg28%
Potassium 1074mg31%
Carbohydrates 45g15%
Fiber 6g25%
Sugar 2g2%
Protein 5g10%
Vitamin A 175IU4%
Vitamin C 50mg61%
Calcium 31mg3%
Iron 2mg11%
* Percent Daily Values are based on a 2000 calorie diet.

Here’s one more to pin on your Pinterest boards!It's easy to make crispy homemade hash browns to serve with a favorite breakfast. Crunchy on the outside, & soft inside, they're DELICIOUS!

Baked Praline Acorn Squash

Baked Praline Acorn Squash is a delicious side dish! Crescent-shaped slices, topped w/ caramelized brown sugar, pecans, maple syrup & spices!

If you are searching for a delicious way to prepare acorn squash, may I suggest this recipe? Baked praline acorn squash is an absolutely delicious use of this delicious, hearty “Winter” vegetable, and I am confident you will love it as much as we do!

The basics of this easy recipe are this: Slice squash, brush with a glaze, sprinkle with a praline-type mixture, and then bake. It truly is an easy recipe to follow, and the end result is an amazing tasting side dish you will be proud to serve at any family dinner or feast! Here’s how to make it, step by step:

Scroll Down For A Printable Recipe Card At The Bottom Of The Page

How To Prepare The Acorn Squash

Before beginning, preheat your oven to 400°F. Okay… now here we go! Behold… the humble acorn squash (seen below), commonly found in most grocery stores. The first thing you will need to do is cut each squash in half horizontally (NOT from stem to bottom). The skin is fairly thick, so use extreme caution when cutting the squash.

Once cut, remove the seeds (and attached pith), using a large spoon to scoop it out. When the seeds have been removed, cut each half in half again. You will have 4 pieces from each squash (8 pieces total, if preparing recipe as written).

A whole acorn squash, before de-seeding and slicing.After slicing the squash in half, the seeds need to be removed.Each of the acorn squash halves are then cut in half, making 4 quarters per squash.

Carefully cut the acorn squash into approximately 1″ slices. This cutting will result in those unique crescent-shaped slices of squash.

Each of the pieces of squash are sliced into crescent-shaped slices.See the crescent-shaped acorn squash slices?

Prep The Slices For Baking

Cover two rimmed baking sheets with aluminum foil. Give each a light coating of non-stick baking spray. Arrange the squash slices in a single layer on each baking sheet. Stir olive oil and maple syrup together in a small bowl until combined.

Brush each slice of squash with HALF of this glaze (top surface only), reserving the other half of the glaze for later.

Raw slices of squash are brushed with an olive oil/maple syrup mixture.

Place the pecan halves and brown sugar in a food processor (or hand-held food chopper). Pulse/process the nuts and brown sugar until the pecans become finely ground. Add salt, black pepper, and the cayenne pepper, and give it a quick pulse to incorporate these ingredients.

Sprinkle HALF of the pecan mixture over the surface of the acorn squash slices, reserving the other half for later.

Pecans, brown sugar, salt, pepper, and cayenne pepper are finely ground in a food processor.

Ready To Bake!

Once the slices have been covered with maple glaze AND the pecan praline mixture, they’re ready to pop in the oven! Bake at 400°F for 5 minutes, then remove the pans from the oven.

Carefully turn each slice over (use a fork, fingers, or tongs), and repeat process the same as before. Brush the slices with maple glaze, then sprinkle with remaining praline mixture. Place them back into the oven, and continue baking for 20 more minutes.

The baked praline acorn squash should be easily pierced with a fork when done. Some caramelization of the brown sugar/pecan mixture should have occurred, as well. Remove the squash from the oven, and transfer slices (carefully) to a serving platter.

Pecan/brown sugar mixture is sprinkled onto squash slices before baking.Baked Praline Acorn Squash slices are flipped after 5 minutes in oven.

Time To Eat The Baked Praline Acorn Squash

Now it’s time to enjoy the baked praline acorn squash. TIP: Please take note that you do NOT eat the peel on acorn squash. Your family or friends will need to simply run a butter knife around the edge and remove the peel before consuming this veggie dish. It’s EASY to do, because the squash is so tender!

The acorn squash has wonderful flavor, especially due to the addition of the brown sugar/pecan mixture on each slice. Slightly sweet, and slightly nutty, with only a tiny little bit of heat from the cayenne, this veggie dish tastes GREAT!

A serving plate full of baked praline acorn squash, baked and ready to eat.The brown sugar/pecan mix has caramelized onto the squash while baking.

I hope you enjoy this recipe for baked praline acorn squash. We love it, and the (covered) leftovers will keep in the fridge for several days. Simply reheat any leftovers in the microwave, and you’re good to go for a second round. Yay for leftovers! If you enjoy this recipe, check out my recipe for Roasted Parmesan Acorn Squash. It shares some similarities to this one, but with a SAVORY flavor palette.

Thank you for taking time out of your busy day to come by for a visit. I’m so glad you did, and hope you will stop by again soon! May God bless you today in every situation and circumstance that comes your way.

Looking For More VEGGIE SIDE DISH Recipes?

You can find all of my vegetable side dish recipes in the Recipe Index, which is located at the top of the page. I have lots of them, including:

Interested In More Recipes?

Thank you for visiting this website. I appreciate you using some of your valuable time to do soIf you’re interested, I publish a newsletter 2 times per month (1st and 15th) with all the latest recipes, and other fun info. I would be honored to have you join our growing list of subscribers, so you never miss a great recipe!
There is a Newsletter subscription box on the top right side (or bottom) of each blog post, depending on the device you use, where you can easily submit your e-mail address (only) to be included in my mailing list.

You Can Also Find Me On Social Media:

Facebook page: The Grateful Girl Cooks!
Pinterest:
The Grateful Girl Cooks!
Instagram:
jbatthegratefulgirlcooks

Author's signature

Original recipe source: Erin Clarke, at: wellplated.com/praline-caramelized-squash/

0 from 0 votes
Baked Praline Acorn Squash
Prep Time
10 mins
Cook Time
25 mins
Total Time
35 mins
 

Baked Praline Acorn Squash is a delicious side dish! Crescent-shaped slices, topped w/ caramelized brown sugar, pecans, maple syrup & spices!

Category: Side Dish, Vegetable Dish
Cuisine: American
Keyword: baked praline acorn squash
Servings: 4
Calories Per Serving: 275 kcal
Author: JB @ The Grateful Girl Cooks!
Ingredients
  • 3 Tablespoons extra virgin olive oil
  • 2 Tablespoons pure maple syrup
  • 2 acorn squash , approx. 1½ pounds each
  • cup dark brown sugar
  • ½ cup pecan halves
  • 2 teaspoons salt
  • 1 teaspoon black pepper
  • teaspoon cayenne pepper
Instructions
  1. Preheat oven to 400°F. Place aluminum foil on two rimmed baking sheets. Lightly spray foil with non-stick baking spray.

  2. Cut each squash in half horizontally (NOT from stem to bottom). Skin is thick; use caution when cutting. Remove seeds and pith. Cut each half in half again, resulting in 4 pieces per squash. Cut squash into approx. 1" thick crescent-shaped slices. Arrange slices in a single layer on prepared baking sheets.

  3. Stir olive oil and maple syrup in a small bowl until combined. Brush each slice of squash with HALF of this glaze (top surface only), reserving other half for later.

  4. Place pecans and brown sugar in a food processor (or hand held food chopper). Pulse/process until the pecans become finely ground. Add salt, black pepper, and cayenne pepper; pulse or chop just enough to incorporate these ingredients. Sprinkle HALF of pecan mixture over top surface of squash slices, reserving other half for later.

  5. Bake at 400°F for 5 minutes; remove pans from oven. Carefully turn slices over (use fork, spatula, fingers, or tongs). Repeat process, brushing slices with remaining glaze, then sprinkling remaining pecan mixture. Place into oven; bake for 20 more minutes. Squash can be easily pierced with a fork when done (fork-tender), and pecan/brown sugar mix should be slightly caramelized. Remove from oven; transfer slices to serving platter. Serve, and enjoy!

Recipe Notes

Caloric calculation made based on 6 servings. Depending on the size squash used, it's possible to get 8 servings from the recipe, as written.
TIP: Please take note that you do NOT eat the peel on acorn squash. Simply run a butter knife around the outer edge and remove the peel (discard) before eating.

Nutrition Facts
Baked Praline Acorn Squash
Amount Per Serving (1 g)
Calories 275 Calories from Fat 117
% Daily Value*
Fat 13g20%
Saturated Fat 2g13%
Sodium 786mg34%
Potassium 852mg24%
Carbohydrates 41g14%
Fiber 4g17%
Sugar 16g18%
Protein 3g6%
Vitamin A 850IU17%
Vitamin C 25mg30%
Calcium 98mg10%
Iron 2mg11%
* Percent Daily Values are based on a 2000 calorie diet.

Here’s one more to pin on your Pinterest boards!Baked Praline Acorn Squash is a delicious side dish! Crescent-shaped slices, topped w/ caramelized brown sugar, pecans, maple syrup & spices!

Scalloped Potatoes For Two

Scalloped Potatoes For Two is an easy to make, delicious side dish, featuring golden potato slices baked in a creamy Parmesan/garlic sauce.

I don’t know about you, but we sure do enjoy potatoes! They are such a versatile veggie which can be transformed from simple and baked to other incredible tasting dishes like this one! These potatoes are simple to prepare, yet have wonderful flavor, and would be a great compliment to most chicken, beef or pork dishes.

I found the recipe on a desk calendar (for foodies) that our youngest son’s girlfriend gave me almost a year ago, and thought it sounded yummy. Yep.. it was, and now we enjoy this hearty side dish any time we want.

I want to share with you a wonderfully tasty recipe for scalloped potatoes for two, that my husband and I enjoy. Since we are “empty-nesters”, often I find that recipes (for 2) are the perfect solution for meals that are “just right” for us. This recipe is outstanding, and can be baked in mini 6 inch skillets (as shown) or in a small baking dish.

Scroll Down For A Printable Recipe Card At The Bottom Of The Page

Make The Sauce

In small skillet or saucepan, melt the butter. Once it has melted, add the minced garlic, and continue cooking (stirring constantly) for one minute on medium-low heat, just until the garlic is barely brown. Be careful NOT to overcook the garlic, as it can become bitter, if burned!

Whisk flour, salt and black pepper into the butter and garlic mixture, until the flour has been fully incorporated.

Minced garlic is quickly cooked in melted butter to begin making the sauce.Flour, salt and pepper are whisked into garlic butter in skillet.

Drizzle the milk into the sauce, while whisking at the same time. Once all the milk has been whisked into the sauce, bring the mixture to a boil, continuing to stir as it cooks. Bring to a boil, then remove the sauce from the heat, and set aside. The sauce will have thickened slightly.

Milk is added to skillet, and whisked in, to form the creamy sauce for potatoes.The sauce is cooked until it thickens.

Assembling The Scalloped Potatoes For Two

Now it’s time to prepare the potatoes. I used some German butterball potatoes from our little garden. See how yellow they are? You can also use Yukon gold potatoes just as easily in this recipe. Yukon gold potatoes are more easily found in grocery stores.

Peel, then slice the potatoes thinly (1/8″ thick), and spread them out in a buttered or greased baking dish (or 2 mini-skillets). Pour the creamy garlic sauce over the top of the potatoes, dividing evenly between skillets (if using). Sprinkle with grated Parmesan cheese. Now it’s time to bake these little beauties!

Peeled, thinly sliced potatoes are fanned out in baking skillets or pans.Thickened creamy sauce is poured over the potatoes.Grated Parmesan cheese is generously sprinkled over the sauce and potatoes.

Bake The Scalloped Potatoes For Two

Bake the potatoes (uncovered) in a preheated 350°F oven for 50-60 minutes. Mine typically take right about 50 minutes, but oven temps can vary widely, so I recommend checking on them at the 50 minute mark. The scalloped potatoes for two are done once the surface is golden brown, potatoes are tender, and the sauce is bubbly around the edges.

Sprinkle the potatoes with chopped fresh parsley (if desired), and let the potatoes cool on a wire rack for 2-3 minutes before serving. You CAN serve them right from their pans (or mini-skillet) if desired, but I like to remove them for serving. If using mini-skillets, run a butter knife around the edges after they’ve cooled for a few minutes, then lift the entire serving out of the skillet, and transfer to plates.

Scalloped Potatoes for Two are golden brown and bubbly once done baking.Fresh chopped parsley is used to garnish the Scalloped Potatoes For Two.

Time To Eat!

You can see a single serving of the scalloped potatoes for two below, after being removed from the mini-skillet. If you’re careful, the entire portion can be removed in one piece! We enjoyed our scalloped potatoes served with garden cherry tomatoes, green beans, and awesome grilled pork chops!

The potatoes are scrumptious, creamy, tender, and full of flavor! We really enjoy this side dish, and sincerely hope you do, too!

A plate with a pork chop, green beans, tomatoes and Scalloped Potatoes For Two.

Thank you very much for stopping by today. I hope you have the opportunity to try this delicious veggie side dish. Whether you cook them in cast iron mini-skillets or in a traditional baking dish, I am confident you will enjoy scalloped potatoes for two! I hope you will come back to this blog again soon. Take care, and have a GREAT day!

Looking For More POTATO Recipes?

You can find all of my side dish recipes in the Recipe Index, which is located at the top of the page. I have several delicious recipes featuring potatoes, including:

Interested In More Recipes?

Thank you for visiting this website. I appreciate you using some of your valuable time to do soIf you’re interested, I publish a newsletter 2 times per month (1st and 15th) with all the latest recipes, and other fun info. I would be honored to have you join our growing list of subscribers, so you never miss a great recipe!
There is a Newsletter subscription box on the top right side (or bottom) of each blog post, depending on the device you use, where you can easily submit your e-mail address (only) to be included in my mailing list.

You Can Also Find Me On Social Media:

Facebook page: The Grateful Girl Cooks!
Pinterest:
The Grateful Girl Cooks!
Instagram:
jbatthegratefulgirlcooks

Author's signature

Original recipe source: The 2020 “Tasty App Desk Calendar” and tasty.co/recipe/

5 from 1 vote
Scalloped Potatoes For Two
Prep Time
10 mins
Cook Time
50 mins
Total Time
1 hr
 

Scalloped Potatoes For Two is an easy to make, delicious side dish, featuring golden potato slices baked in a creamy Parmesan/garlic sauce.

Category: Side Dish, Vegetable
Cuisine: American
Keyword: scalloped potatoes for two
Servings: 2
Calories Per Serving: 346 kcal
Author: JB @ The Grateful Girl Cooks!
Ingredients
  • 1 Tablespoon butter
  • 2 cloves garlic , minced
  • 1 Tablespoon all purpose flour
  • 1 cup low-fat milk
  • 1 teaspoon salt
  • ½ teaspoon ground black pepper
  • 3 medium Yukon or butterball potatoes , peeled
  • 2 Tablespoon grated Parmesan cheese
  • fresh parsley (optional, for garnish) , chopped
Instructions
  1. Preheat oven to 350°F. Grease or butter small baking dish (or mini-skillets).

  2. Melt butter in small skillet/saucepan. Add garlic; Cook (stirring constantly) for one minute on medium-low heat, just until garlic is barely browned. Don't overcook garlic, as it can become bitter, if burned! Whisk flour, salt and pepper into butter/garlic, until flour is incorporated.

  3. Drizzle milk into sauce, while whisking. Bring to a boil, stirring as it cooks. Once it begins boiling, remove from heat; set aside. Sauce will have thickened slightly.

  4. Peel, then slice potatoes thinly (1/8" thick); spread them out in baking dish (or mini-skillets). Pour sauce over potatoes, dividing between skillets (if using). Sprinkle with Parmesan cheese.

  5. Bake (uncovered) at 350°F for 50-60 minutes. Check them at 50 minutes, because oven temps can vary. Potatoes done once surface is golden brown, potatoes are tender, and sauce is bubbly around edges. Remove from oven. Sprinkle with parsley (if desired); let potatoes cool on wire rack for 2-3 minutes before serving. Serve and enjoy.

Recipe Notes

NOTE: You CAN serve potatoes right from the mini-skillets, if desired. To remove from mini-skillets, run a butter knife around edges after they've cooled a few minutes, then lift entire serving out of skillet; transfer to plates. Enjoy!

Nutrition Facts
Scalloped Potatoes For Two
Amount Per Serving (1 g)
Calories 346 Calories from Fat 90
% Daily Value*
Fat 10g15%
Saturated Fat 6g38%
Cholesterol 29mg10%
Sodium 1361mg59%
Potassium 1239mg35%
Carbohydrates 55g18%
Fiber 6g25%
Sugar 8g9%
Protein 12g24%
Vitamin A 339IU7%
Vitamin C 51mg62%
Calcium 233mg23%
Iron 2mg11%
* Percent Daily Values are based on a 2000 calorie diet.

Here’s one more to pin on your Pinterest boards!Scalloped Potatoes For Two is an easy to make, delicious side dish, featuring golden potato slices baked in a creamy Parmesan/garlic sauce.

Lemon Hazelnut Green Beans

Lemon Hazelnut Green Beans are a delicious, flavor-filled side dish, and are a perfect choice for either a casual meal or a holiday feast!

I’m always looking for different ways to prepare green beans. Each summer I harvest a bumper crop of them in our little backyard raised garden. I can a lot of them, putting aside 15-20 jars each year in our pantry for the coming Fall and Winter. The rest we enjoy in a variety of different recipes as summer progresses.

We eat a LOT of green beans in the summer, and this recipe is one I came up with (after experimenting), and have enjoyed ever since. Lemon hazelnut green beans are a simple side dish, but let me tell you… there’s a LOT of flavor to enjoy in every bite. Freshly grated lemon zest adds a pop of fresh, bright flavor, shallots, garlic and red chili flakes give them a bit of zing, and the hazelnuts give the dish CRUNCH.

Lemon Hazelnut Green Beans are a perfect side for any “average” dinner of beef, chicken, pork or seafood. “These beans plays well with others”, as they say. However, this dish would also be absolutely wonderful served for Thanksgiving, or any other special celebration. Here’s how easy it is to make them:

Scroll Down For A Printable Recipe Card At The Bottom Of The Page

How To Make This Veggie Side Dish

Measure a Tablespoon of extra virgin olive oil into a large skillet, and spread it around to cover the bottom of the skillet. Heat the oil on medium heat. Once hot (but not smoking), add chopped shallots (milder than a red onion). Cook, stirring often for 1-2 minutes.

TIP: If you do not have access to shallots, use a yellow onion as a substitute (same measurement).

Chopped shallots are cooked in hot olive oil in a large skillet.

Cooking The Lemon Hazelnut Green Beans

Add the green beans and the vegetable (or chicken) broth to the skillet. The liquid will steam and sizzle when it hits the hot skillet. Stir to combine, and let the green beans cook (uncovered) for approximately 10 minutes. When done, the broth should have dissipated, and the beans should be crisp-tender (not mushy).

NOTE: I recommend using FRESH green beans, without apologies. There’s just something about crisp FRESH green beans for this dish, versus using frozen beans. Just my humble opinion…

Green beans and vegetable (or chicken) broth are added to the skillet.The green beans are cooked about 10 minutes until broth has dissipated.

Immediately add minced garlic, red chili flakes, lemon zest, and roughly chopped roasted hazelnuts to the skillet. Give everything a good stir to incorporate all the ingredients.

TIP: The hazelnuts give the dish a nice crunch, which we really love. Remember- you can always substitute sliced, roasted almonds if hazelnuts are difficult to find in your area. They will add a wonderful crunch, as well!

Cook for about one minute, stirring OFTEN (so garlic doesn’t burn), until the lemon hazelnut green beans are fully heated through. Season to taste with salt and pepper, if desired. Remove the skillet from the heat source, and transfer green beans to a serving dish.

Minced garlic, chili flakes, lemon zest and hazelnuts are added to green beans.

Time To Serve The Lemon Hazelnut Green Beans

As soon as you remove the lemon hazelnut green beans from the heat, it is time to serve them while HOT! Transfer everything to a serving bowl, and dish it up.** If desired, a simple garnish of a few roasted hazelnuts and some pretty thinly sliced lemon peel looks nice (but is totally optional).

Lemon Hazelnut Green Beans are garnished and ready to serve.

The green beans have so much flavor, I’m confident you will enjoy them. The recipe makes enough for 4 side servings, but can be EASILY doubled! The lemon hazelnut green beans pair wonderfully with chicken, beef, pork OR fish, so it’s a versatile side dish for all occasions.

A look at the Lemon Hazelnut Green Beans, up close in a white bowl.

I really hope you enjoy this easy, but absolutely DELICIOUS veggie dish. Easy to prepare, and packed with bright flavors, you’re gonna love them. Have a great day, and come back for a visit again soon.

Looking For More VEGGIE SIDE DISH Recipes?

You can find ALL of my side dish recipes in the Recipe Index, located at the top of the page. I have quite a few delicious veggie side dishes, including:

Interested In More Recipes?

Thank you for visiting this website. I appreciate you using some of your valuable time to do soIf you’re interested, I publish a newsletter 2 times per month (1st and 15th) with all the latest recipes, and other fun info. I would be honored to have you join our growing list of subscribers, so you never miss a great recipe!
There is a Newsletter subscription box on the top right side (or bottom) of each blog post, depending on the device you use, where you can easily submit your e-mail address (only) to be included in my mailing list.

You Can Also Find Me On Social Media:

Facebook page: The Grateful Girl Cooks!
Pinterest:
The Grateful Girl Cooks!
Instagram:
jbatthegratefulgirlcooks

Author's signature

0 from 0 votes
Lemon Hazelnut Green Beans
Prep Time
12 mins
Cook Time
13 mins
Total Time
25 mins
 

Lemon Hazelnut Green Beans are a delicious, flavor-filled side dish, and are a perfect choice for either a casual meal or a holiday feast!

Category: Side Dish, Vegetable Dish
Cuisine: American
Keyword: lemon hazelnut green beans
Servings: 4
Calories Per Serving: 120 kcal
Author: JB @ The Grateful Girl Cooks!
Ingredients
  • 1 Tablespoon extra virgin olive oil
  • 2 Tablespoons chopped shallots
  • 1 pound green beans , trimmed/snapped or cut into 2" pieces
  • ½ cup vegetable OR chicken broth
  • 1 large clove garlic , minced
  • ½ large lemon (ZEST OF) , zest only
  • ¼ teaspoon red chili flakes
  • 3 Tablespoons roughly chopped roasted hazelnuts
  • salt & black pepper , to season to taste
Instructions
  1. Measure olive oil into a large skillet, and spread around to cover bottom of skillet. Heat on medium heat. Once hot (but not smoking), add chopped shallots. Cook, stirring often for 1-2 minutes.

  2. Add green beans and broth to skillet. Stir to combine; cook (uncovered) for 9-10 minutes. When done, broth should have dissipated, and beans should be crisp-tender.

  3. Immediately add garlic, red chili flakes, lemon zest, and hazelnuts to skillet. Stir, to combine. Cook for one minute, stirring OFTEN (so garlic doesn't burn), until beans are heated through. Season to taste with salt and pepper, if desired. Garnish with additional hazelnuts and thinly sliced lemon peel, if desired. Serve immediately.

    TIP: Substitute sliced, roasted almonds if hazelnuts are difficult to find in your area. Enjoy!

Nutrition Facts
Lemon Hazelnut Green Beans
Amount Per Serving (1 g)
Calories 120 Calories from Fat 72
% Daily Value*
Fat 8g12%
Saturated Fat 1g6%
Sodium 10mg0%
Potassium 307mg9%
Carbohydrates 11g4%
Fiber 4g17%
Sugar 5g6%
Protein 4g8%
Vitamin A 820IU16%
Vitamin C 16mg19%
Calcium 51mg5%
Iron 2mg11%
* Percent Daily Values are based on a 2000 calorie diet.

Here’s one more to pin on your Pinterest boards!

Lemon Hazelnut Green Beans are a delicious, flavor-filled side dish, and are a perfect choice for either a casual meal or a holiday feast!

Cheesy Skillet Potatoes

Cheesy Skillet Potatoes are made with Yukon Gold or Butterball potatoes, seasoned with butter, spices & cheese, served with chives & sour cream.
Cheesy Skillet Potatoes are made with Yukon Gold or Butterball potatoes, seasoned w/ butter, spices & cheese, served w/ chives & sour cream.

If you’re on the hunt for a simple potato side dish for a meal, may I suggest these delicious, yet simple, cheesy skillet potatoes? Potatoes are par-boiled for several minutes to soften, then seared in butter in a skillet, seasoned, and topped with cheese, fresh chives, and a nice dollop of sour cream, to finish.

This recipe is one I just kind of made up “on the fly”, while trying to figure out a NEW way to serve potatoes for one of our meals. It is fairly simple to prepare, and looks and tastes really good, too! Here’s how to make this side dish:

Scroll Down for A Printable Recipe Card At The Bottom Of The Page

What Potatoes Should I Use?

We LOVE making this easy side dish using either Yukon gold or German butterball potatoes. They are fairly small, which works well for this dish. Both varieties have a naturally “buttery” flavor to them already, and a slightly yellow hue (especially butterballs). You could also use red potatoes if necessary, (but we prefer Butterballs or Yukons golds for their creamy color and flavor).

I recently dug up over 7 pounds of German butterball potatoes in some half-barrels in our little backyard raised bed garden. I last planted potatoes 5 years ago, but several “volunteer” plants still pop up each summer, so we’ve harvested lots of butterballs every year since then. HOORAY! I used several of our harvested German butterball potatoes to photograph the “how-to’s” of this recipe.

German butterball potatoes, harvested from our little backyard garden.

Prepare The Potatoes

The potatoes need to be par-boiled before “cooking” in the skillet. It’s easy. Par-boiling is simply a quick method used to partially cook food in boiling water to reduce the total cooking time (especially good for hard, dense potatoes).

Par-boiling helps soften the food, but doesn’t allow it to get cooked all the way through. This process also helps remove a bit of the sugars found in potatoes naturally. Place the clean potatoes in a pot of boiling water (enough to cover potatoes) and gently boil for 8-9 minutes. You should be able to insert a knife into the potatoes easily when finished.

Par-boiling the potatoes for 8-9 minutes in water.

Drain, and rinse the potatoes in cold water to help stop the cooking process, once done. Once cool enough to handle, remove the peel from the potatoes (see how YELLOW the butterballs are?). Slice each potato into 1/4″ slices, and set aside.

After being par-boiled, the potatoes are peeled.

Cooking Cheesy Skillet Potatoes

Melt 3 Tablespoons of butter on medium-low heat in a large skillet. Add the sliced potatoes, trying to keep them in a single layer, if possible. Cook for 3-4 minutes without turning (this allows them to get a bit crispy on the bottom). Season by sprinkling potatoes lightly with salt, black pepper, and garlic powder.

Turn the potatoes to cook the other side. Cook for 3-4 more minutes. The potatoes are done once golden brown, and a bit crispy around the edges on both sides. The center of the potatoes should be soft.

Seasoned, round potato slices are cooked in butter in a skillet.Skillet potatoes turn golden brown, and slightly crispy on the edges.

As soon as the potatoes are “done”, remove the skillet from the heat source. Sprinkle the top of the potatoes with the grated cheddar cheese. Place a skillet lid or foil over the top of the skillet for about a minute.

The cheese will melt quickly while the potatoes are hot. Once the cheese has melted, remove lid. Sprinkle cheesy skillet potatoes with chopped fresh chives. They will add color and flavor to the dish.

Cheesy skillet potatoes are topped with grated cheese and chopped fresh chives.

Serve Cheesy Skillet Potatoes

To serve, place portions onto serving plates, and place a dollop of sour cream on top of each portion. Serve while potatoes are hot, and enjoy this simple, but yummy side dish.

The final garnish for the cheesy skillet potatoes is a dollop of sour cream.

I hope you enjoy this veggie side dish. It doesn’t take too long to prepare, and the cheesy skillet potatoes sure taste good! Thank you for stopping by, and I sincerely hope you will visit again soon. Have a great day.

Looking For More Side Dishes Using Potatoes?

You can find all of my side dish recipes in the Recipe Index, located at the top of the page. I have quite a few side dish recipes that feature potatoes, including:

Interested In More Recipes?

Thank you for visiting this website. I appreciate you using some of your valuable time to do soIf you’re interested, I publish a newsletter 2 times per month (1st and 15th) with all the latest recipes, and other fun info. I would be honored to have you join our growing list of subscribers, so you never miss a great recipe!
There is a Newsletter subscription box on the top right side (or bottom) of each blog post, depending on the device you use, where you can easily submit your e-mail address (only) to be included in my mailing list.

You Can Also Find Me On Social Media:

Facebook page: The Grateful Girl Cooks!
Pinterest:
The Grateful Girl Cooks!
Instagram:
jbatthegratefulgirlcooks

Author's signature

Recipe Source: my brain. my hungry brain.

0 from 0 votes
Cheesy Skillet Potatoes
Prep Time
13 mins
Cook Time
7 mins
Total Time
20 mins
 

Cheesy Skillet Potatoes are made with Yukon Gold or Butterball potatoes, seasoned with butter, spices & cheese, served with chives & sour cream.

Category: Side Dish, Vegetable Dish
Cuisine: American
Keyword: cheesy skillet potatoes
Servings: 4
Calories Per Serving: 276 kcal
Author: JB @ The Grateful Girl Cooks!
Ingredients
  • 5 medium Yukon Gold or Butterball potatoes
  • 3 Tablespoons butter
  • ¼ teaspoon salt and black pepper (EACH) , to taste
  • teaspoon garlic powder
  • ¼ cup grated cheddar cheese , or more if preferred
  • 1 Tablespoon chopped fresh chives
  • 2 Tablespoons light sour cream , for garnish
Instructions
  1. Place clean potatoes in a pot of boiling water (enough to cover potatoes). Gently boil for 8-9 minutes. You should be able to insert a knife into a potato easily when finished. Drain, and rinse potatoes in cold water, once done. Once cool enough to handle, peel potatoes. Slice potatoes into 1/4" rounds; set aside.

  2. Melt butter in a large skillet on medium-low heat. Add potatoes, keeping them in a single layer, if possible. Cook 3-4 minutes without turning. Season lightly with salt, black pepper, and garlic powder. Turn potatoes to cook the other side. Cook about 3-4 minutes. Potatoes are done when golden brown, and a bit crispy around the edges on both sides. The center of the potatoes should be soft.

  3. Immediately remove skillet from heat. Sprinkle potatoes with cheese. Place a skillet lid or foil over skillet for 1 minute. Once cheese has melted, remove lid. Transfer portions to plates. Sprinkle with chopped fresh chives, and a dollop of sour cream. Enjoy.

Nutrition Facts
Cheesy Skillet Potatoes
Amount Per Serving (1 (1/4 of total))
Calories 276 Calories from Fat 108
% Daily Value*
Fat 12g18%
Saturated Fat 7g44%
Cholesterol 32mg11%
Sodium 281mg12%
Potassium 907mg26%
Carbohydrates 38g13%
Fiber 5g21%
Sugar 2g2%
Protein 6g12%
Vitamin A 385IU8%
Vitamin C 42mg51%
Calcium 87mg9%
Iron 2mg11%
* Percent Daily Values are based on a 2000 calorie diet.

Here’s one more to pin on your Pinterest boards!Cheesy Skillet Potatoes are made with Yukon Gold or Butterball potatoes, seasoned w/ butter, spices & cheese, served w/ chives & sour cream.