Spiralized Carrot Salad in Lemon Ginger Dressing is a delicious, fresh veggie side dish! It is easy to make, using a vegetable peeler OR spiralizer!

This spiralized carrot salad is really delicious! The salad itself is made with fresh crispy carrots and flat leaf Italian parsley. An easy to make lemon ginger salad dressing is where the magic happens! Once “dressed”, this simple side salad shines!
If you have a spiralizer, you might also enjoy trying Sweet Potato Sage Noodles. It’s a nice, hot side dish that is also very simple to make!
Here are the directions to make this Spiralized Carrot Salad, and I really hope you enjoy this simple, great-tasting dish.
Scroll Down For A Printable Recipe Card At The Bottom Of the Page
Do I Need A Spiralizer To Make This Carrot Salad?
Well, that’s the best part! You DO NOT have to own a special machine to make this dish! The salad can be made using a simple kitchen appliance called a spiralizer OR it can just as easily be made using a good old hand held vegetable peeler!
The salad tastes just as wonderful with long shreds of carrots as it does with curly spiralized carrots! YAY!
How To Make Spiralized Carrot Salad
The first thing to do is slice the ends off the fresh carrots. Once they are cut off, use a vegetable peeler to peel the carrots. Discard peels and end pieces. Easy!

Using A Spiralizer Appliance To Make This Salad
If you own a spiralizer, place the carrot in machine (with a fine shredding blade on it). Spiralize the carrots onto a plate or into a medium sized bowl.
Spiralizing carrots works best if you begin with large, wide carrots (at least 2 inches across).


Using A Vegetable Peeler To Make This Salad
If you do not own a spiralizer machine, no problem! Most people don’t! Simply use your hand held vegetable peeler to make long shreds of the carrots. Do this by peeling the length of the carrots to get nice long shreds.
To Make Lemon Ginger Salad Dressing
In a small bowl, mix together lemon juice, honey, lemon zest, ginger, minced garlic, rice wine vinegar and salt.

Once mixed, slowly drizzle in the olive oil, while whisking. Continue to whisk until the salad dressing has emulsified.

Prepare The Salad
Place the spiralized (or shredded) carrots into a serving bowl. Add roughly chopped flat leaf parsley, then stir to combine ingredients.

Pour the lemon ginger salad dressing over the spiralized carrot salad. Toss the salad, to ensure that all the carrots are covered with the salad dressing.
Once the spiralized carrot salad is covered with dressing, cover the dish with plastic wrap, and place in the refrigerator to chill.
TIP: For maximum flavor and best results, let the salad refrigerate for at LEAST 15 minutes!

Time to Eat The Spiralized Carrot Salad
When ready to serve the spiralized carrot salad, simply remove it from the refrigerator. Give it a final toss before dishing it up and eating!


This spiralized carrot salad is really GOOD! The fresh tasting lemon ginger dressing is a perfect flavor combination for this simple, crisp salad! The finished salad will keep for 1-2 days, if stored (covered) in refrigerator.
Thanks for stopping by, and I invite you to come back again soon for more family-friendly recipes. Take care, and have a GREAT day!
Interested In Other Side Salad Recipes?
If you enjoy a good side salad like we do, you might consider trying some of my other recipes. These side salad recipes include:
These and many other salads can be found in the Recipe Index, shown in the menu bar at the top of each blog post! I hope you will give this recipe for carrot salad a try, and as always, I trust you will enjoy it, as much as we do!
Want More Recipes? Get My FREE Newsletter!
I publish a newsletter 2 times per month (1st and 15th) with lots of recipes, tips, etc..
Would you like to join our growing list of subscribers?
There is a Newsletter subscription box on the top right (or bottom) of each blog post, depending on the device you use.
You can submit your e-mail address there, to be added to my mailing list.
Find Me On Social Media:
Facebook page: The Grateful Girl Cooks!
Pinterest: The Grateful Girl Cooks!
Instagram: jbatthegratefulgirlcooks

Recipe Adapted From: http://girlinthelittleredkitchen.com/2015/06/spiralized-carrot-salad-with-lemon-ginger-dressing/
↓↓ PRINTABLE RECIPE BELOW ↓↓

- 3 large carrots , peeled
- 1/4 cup flat leaf parsley , chopped
- 1 large lemon (juice AND zest)
- 1 teaspoon honey
- 1 inch piece of ginger , peeled and finely minced
- 1 medium garlic clove , finely minced
- 1 Tablespoon rice vinegar
- 1/2 teaspoon salt
- 1/4 cup extra virgin olive oil
Slice the ends off the carrots. Use a vegetable peeler to peel the carrots. Discard peels and end pieces.
If you own a spiralizer, place the carrots, one at a time in machine (with a fine shredding blade on it). Spiralize the carrots onto a plate or into a medium sized bowl. Spiralizing carrots works best if you use large, wide carrots (at least 2 inches across).
If you do not own a spiralizer machine, no problem! Simply use a hand held vegetable peeler to make long shreds of the carrots. Do this by peeling the length of the carrots to get nice long shreds.
In a small bowl, mix together lemon juice, honey, lemon zest, ginger, minced garlic, rice wine vinegar and salt. Once mixed, slowly drizzle in the olive oil, while whisking. Continue to whisk until the salad dressing has emulsified.
Place the spiralized carrots into a serving bowl. Add roughly chopped flat leaf parsley, then stir to combine. Pour salad dressing over salad. Toss gently to coat salad completely. Cover dish with plastic wrap, and place in the refrigerator to chill. For maximum flavor, let the salad refrigerate for at LEAST 15 minutes. Once chilled, serve, and enjoy!
Here’s one more to pin on your Pinterest boards!


 is super easy to make, delicious, and is a great way to keep your kitchen cool during hot summer days, by cooking outside! / The Grateful Girl Cooks!")


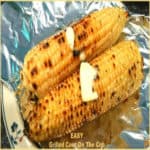
 is super easy to make, delicious, and is a great way to keep your kitchen cool during hot summer days, by cooking outside! / The Grateful Girl Cooks!")
, with rice, orzo pasta, broccoli and cheese! / The Grateful Girl Cooks!")


, with rice, orzo pasta, broccoli and cheese! / The Grateful Girl Cooks!")


