Month: December 2019

Turkey Fiesta Casserole

Turkey Fiesta Casserole is a great way to use up cooked turkey (or chicken). This easy Mexican-style dish has turkey, corn chips, refried beans, cheese & salsa!
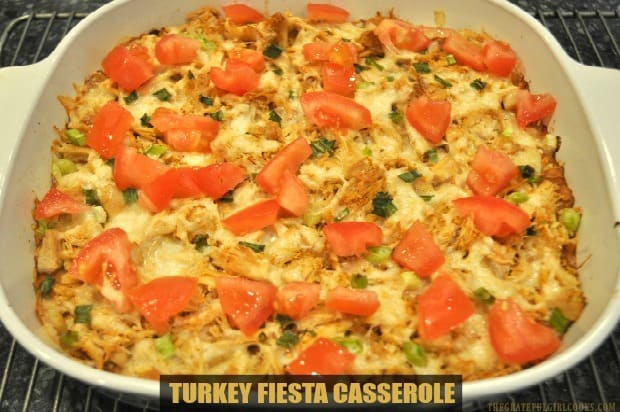
Turkey Fiesta Casserole is a great way to use up cooked turkey. This easy Mexican-style dish has turkey, corn chips, refried beans, cheese & salsa!

Every now and then I grab a few of my old cookbooks or cooking magazines and look back through them for “new” recipes. Recently I went through one of my OLD Taste of Home magazines from 2005 (yes, I saved them), and found this easy to prepare Mexican casserole recipe.

I had some shredded turkey left over from Thanksgiving, and wanted to try a new way to use it besides SOUP (which I already made). This recipe was so easy to make, and while it baked I made the rest of our dinner. Chicken would be a perfect substitute, by the way, if you don’t have any cooked turkey on hand.

The turkey fiesta casserole tastes delicious, especially if you enjoy Mexican-style seasoned dishes! YUM! Layers of crushed corn chips, refried beans, salsa, cheese, and shredded turkey (or can substitute chicken). The results are delicious! Here’s how to make it:

Scroll Down for A Printable Recipe Card At The Bottom Of The Page

Ingredients For Turkey Fiesta Casserole Are Layered In Baking Dish

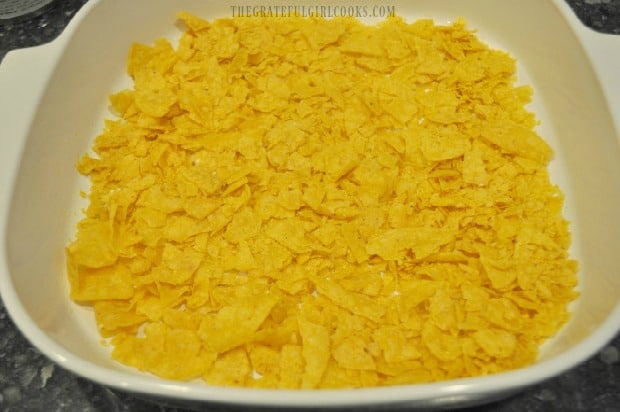
The first ingredient is crushed corn chips or tortilla chips. Place the crushed corn chips in the bottom of a greased (or sprayed) baking dish.

Corn tortilla chips are crushed and placed in baking dish.

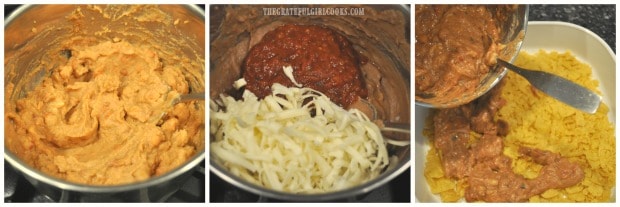
In a saucepan, stir and cook the refried beans until smooth and heated through. If they are really thick, simply add about a Tablespoon of water. Once heated through, remove the pan from the heat.

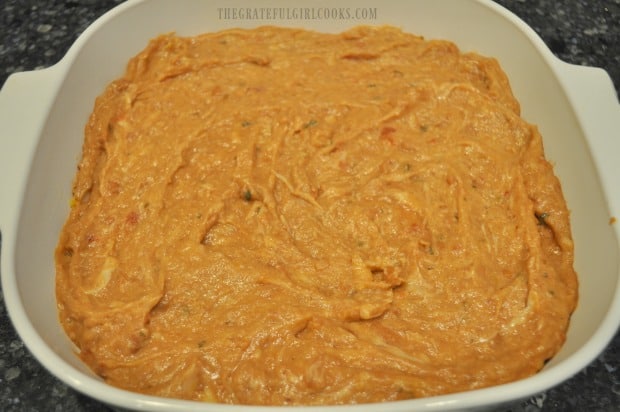
Immediately add 1 cup of grated jack cheese and the salsa. NOTE: Remember to only use 1 cup of cheese and reserve the rest for later!) Stir together, and then spoon and spread this bean mixture over the entire surface of the tortilla chips in the baking dish. Spread carefully, to cover.

Refried beans are heated then mixed with salsa and jack cheese & added to top of corn chips.The refried bean mixture is placed on top of the corn chips in dish.

Time For A Layer of Seasoned Turkey!

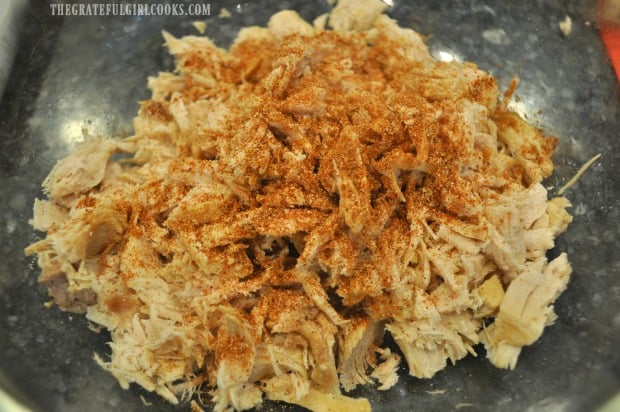
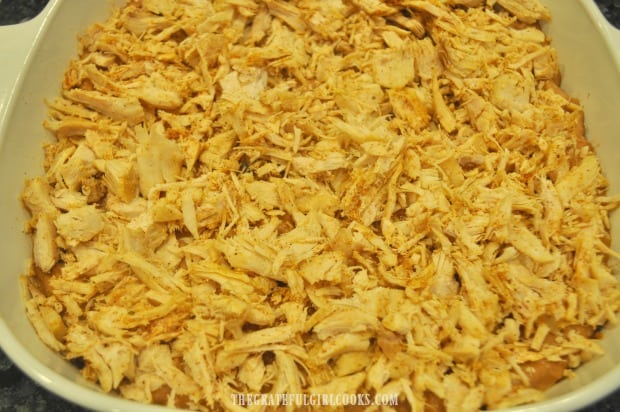
Place the shredded turkey in a bowl, and add taco seasoning (or Mexican spice mix). Stir to incorporate the spices into the meat. Spread this mixture over the refried bean layer in the dish.

Cooked, shredded turkey is seasoned with taco seasoning.Seasoned shredded turkey is placed on top of refried bean mixture in casserole dish.

Final Step Before Baking

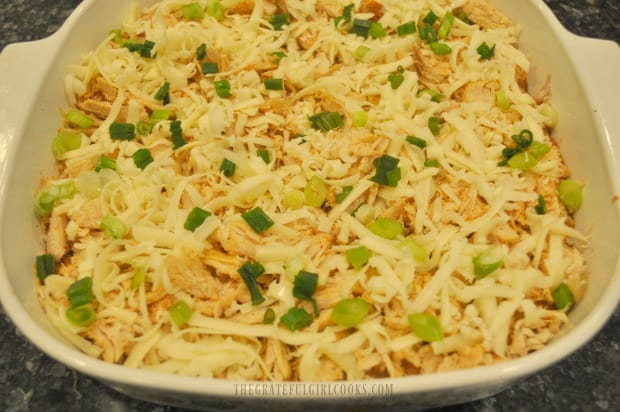
The last layer is the Monterey jack cheese and green onions. Sprinkle grated jack cheese over the turkey layer, and then sprinkle with sliced green onions. Bake the turkey fiesta casserole uncovered, on the middle shelf in a preheated 400° F oven. The casserole needs to bake for 25 minutes OR until the cheese on top is completely melted.

Turkey Fiesta Casserole is topped with jack cheese and green onions and then baked.

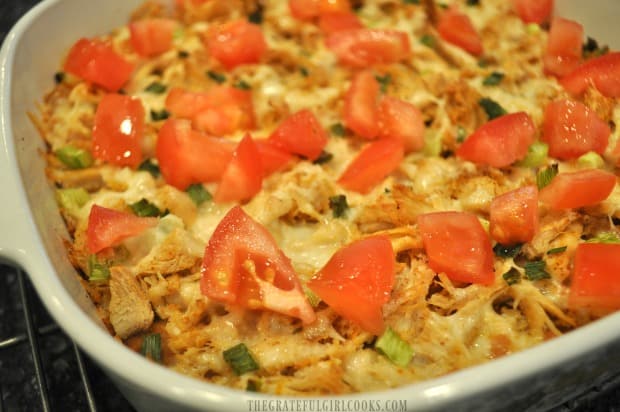
Once the casserole is finished baking, remove it from the oven. Immediately sprinkle chopped tomatoes over the top. Let the HOT casserole sit for just a couple minutes before cutting into it, for serving.

Once done baking, the turkey fiesta casserole is topped with chopped tomatoes before serving.

Serve The Turkey Fiesta Casserole!

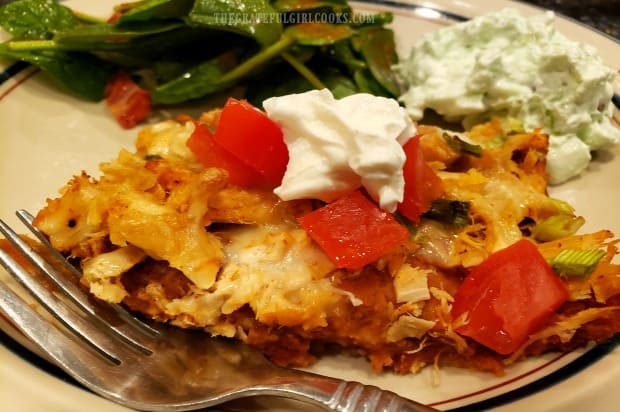
When ready to cut and serve this dish, place a portion onto each serving plate, and garnish with a dollop of sour cream and/or chopped cilantro, if desired. Serve hot, and enjoy this tasty casserole. See- it wasn’t too hard to make after all, right?  We enjoyed it served it with a spinach salad, and Pistachio Pineapple Fluff Salad (leftover from Thanksgiving!).

A dollop of sour cream garnishes this serving of turkey fiesta casserole.

I really hope you will consider trying this easy to prepare turkey fiesta casserole, and hope you like it. We sure did, and enjoyed the leftovers, too! All in all, we got 5 servings from this recipe. The leftovers are good reheated in the microwave, also! Have a good day, friends.

Looking For More CASSEROLE Recipes?

You can find all of my recipes in the Recipe Index, located at the top of the page. A few favorites you might enjoy include:

Interested In More Recipes?

Thank you for visiting this website. I appreciate you using some of your valuable time to do soIf you’re interested, I publish a newsletter 2 times per month (1st and 15th) with all the latest recipes, and other fun info. I would be honored to have you join our growing list of subscribers, so you never miss a great recipe!
There is a Newsletter subscription box on the top right side (or bottom) of each blog post, depending on the device you use, where you can easily submit your e-mail address (only) to be included in my mailing list.

You Can Also Find Me On Social Media:
Facebook page: The Grateful Girl Cooks!
Pinterest: The Grateful Girl Cooks!
Instagram: jbatthegratefulgirlcooks

Author's signature

Original recipe source: Taste of Home Magazine, Dec/Jan 2005, page 48, published by Reiman Media Group Inc.

↓↓ PRINTABLE RECIPE BELOW ↓↓

0 from 0 votes
Turkey Fiesta Casserole
Prep Time
15 mins
Cook Time
20 mins
Total Time
35 mins
 

Turkey Fiesta Casserole is a great way to use up cooked turkey (or chicken). This easy Mexican-style dish has turkey, corn chips, refried beans, cheese & salsa!

Category: Entree - Casserole
Cuisine: Mexican
Keyword: turkey fiesta casserole
Servings: 5
Calories Per Serving: 747 kcal
Author: JB @ The Grateful Girl Cooks!
Ingredients
  • 2 cups coarsely crushed corn chips
  • 16 ounces refried beans (1 can)
  • 2 cups grated Monterey Jack cheese , divided use
  • 1 cup salsa
  • 2 cups shredded cooked turkey (can substitute chicken)
  • 1 teaspoon taco seasoning
  • 1 green onion (scallion) , sliced (stem and bulb)
  • 1 medium tomato , chopped
  • sour cream and/or cilantro for garnish (optional)
Instructions
  1. Preheat oven to 400° F. Spray a 2.5 quart baking dish with non-stick cooking spray.

  2. Spread crushed corn chips on the bottom of the greased dish. Cook refried beans in a saucepan until smooth/heated through. If really thick, add a Tablespoon of water. Once heated through, remove pan from heat. Immediately add 1 cup of grated jack cheese and salsa. NOTE: Remember to only use 1 cup of cheese and reserve the rest for later!) Stir to combine; spoon and spread bean mixture over tortilla chips. Place the shredded turkey in a bowl, and add taco seasoning (or Mexican spice mix). Stir to combine. Distribute seasoned turkey over refried bean layer. Sprinkle reserved jack cheese over turkey, and then sprinkle with sliced green onions.

  3. Bake casserole uncovered, on the middle shelf in preheated 400° F oven. Bake for 25 minutes OR until the cheese on top is completely melted. Remove from oven. and immediately sprinkle chopped tomatoes over the top. Let the HOT casserole sit for just a couple minutes before serving. When ready to serve, garnish each portion with a dollop of sour cream and/or chopped cilantro, if desired. Enjoy!

Recipe Notes

Note: to lower caloric calculation per serving, try using fat free refried beans and/or low-fat cheese.

Nutrition Facts
Turkey Fiesta Casserole
Amount Per Serving (1 g)
Calories 747 Calories from Fat 261
% Daily Value*
Fat 29g45%
Saturated Fat 11g69%
Cholesterol 209mg70%
Sodium 1968mg86%
Potassium 1046mg30%
Carbohydrates 37g12%
Fiber 7g29%
Sugar 6g7%
Protein 85g170%
Vitamin A 964IU19%
Vitamin C 5mg6%
Calcium 487mg49%
Iron 4mg22%
* Percent Daily Values are based on a 2000 calorie diet.

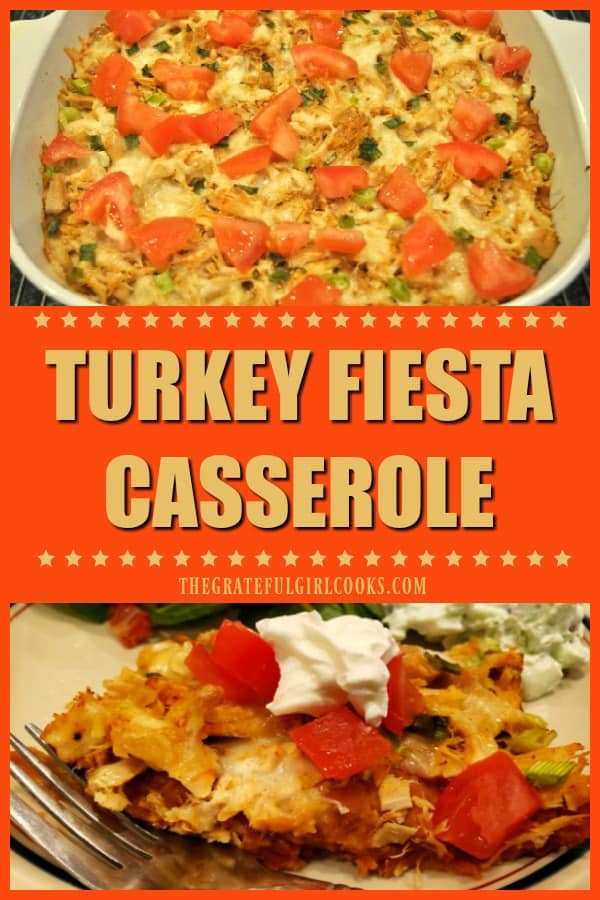
Here’s one more to pin on your Pinterest boards!Turkey Fiesta Casserole is a great way to use up cooked turkey. This easy Mexican-style dish has turkey, corn chips, refried beans, cheese & salsa!
 

Easy Baked Pork Chops

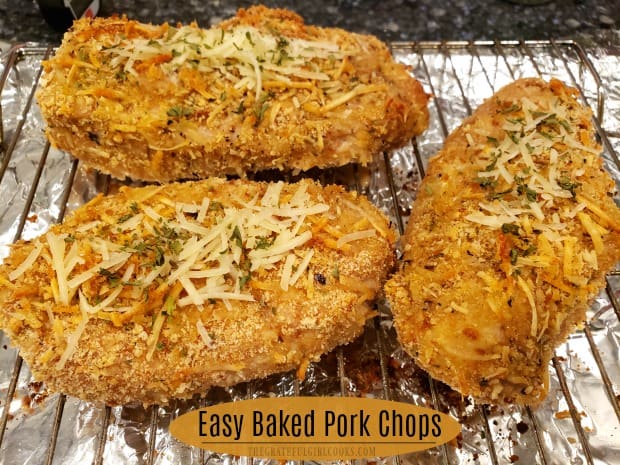
Easy Baked Pork Chops are covered with a seasoned bread crumb/Parmesan cheese mix for lots of flavor! Prep time is 10 minutes, then bake until done!

Have you ever taken some food out of the freezer in order to make it for dinner, and then have no clue how you want to cook it? Yep. That was me recently after taking two really thick pork chops out of our freezer.

As they defrosted, I started to think about HOW I wanted to cook them. I figured I could use one of my tried and true recipes from the blog, OR I could just make it up on the fly as I went. Well, I ended up making it up as I went along, but the results were wonderful!

Really, I ended up just breading the pork chops like I’ve done many times in the past for chicken, cod, AND pork. This time, though, I added in some homemade Italian seasoning mix, a bit of garlic and onion powder, and grated Parmesan cheese to change up the flavor a little bit! These easy baked pork chops turned out really delicious, so I want to share the recipe with you today.

Scroll Down For A Printable Recipe Card At The Bottom Of The Page

Getting Ready

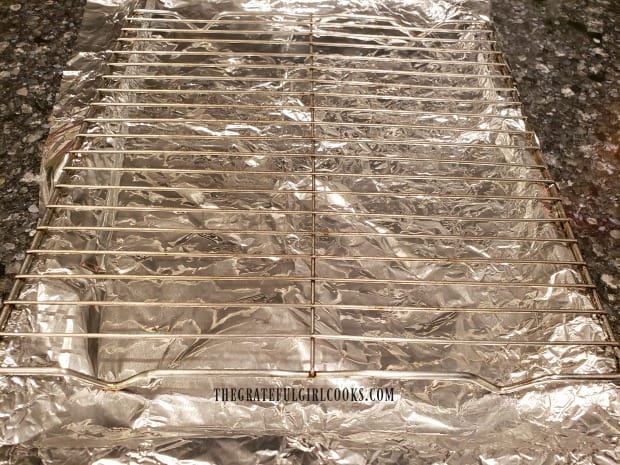
Preheat your oven to 350°F.  Place a sheet of aluminum foil on a rimmed baking sheet. Place a wire rack on top of the baking sheet and give it a light spray with non-stick cooking spray. The foil will catch any drips for super easy cleanup, and the spray will help prevent the chops from sticking to the rack!

A wire rack is positioned over a foil-lined baking sheet before pork chops are cooked.

Make The Seasoned Crumb Topping

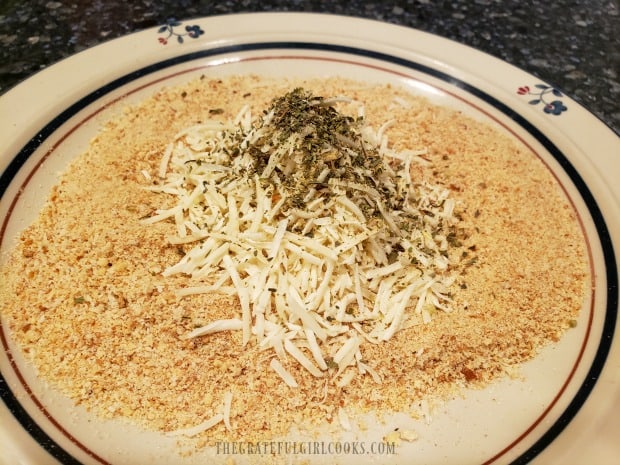
Preheat your oven to 350°F. while you make this topping. Place regular bread crumbs onto a dinner plate, and then add shredded Parmesan cheese, and seasonings. I used some of my homemade Italian seasoning mix, plus a little extra garlic powder and onion powder.

Mix these ingredients together, and spread them out to cover the plate. This will be the crumb coating for your easy baked pork chops.

Bread crumbs, Italian spices and Parmesan cheese form the coating for pork chops.

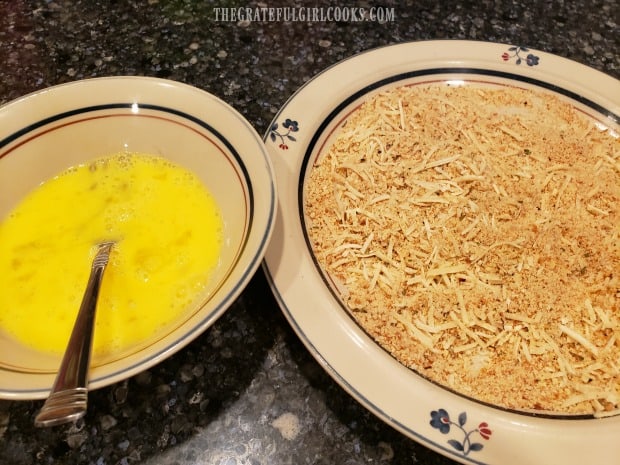
In a separate bowl, whisk together one egg and a Tablespoon of milk. Place the egg mixture and the bread crumb topping side by side on the counter.  Now it’s time to prepare the pork chops!
Pork chops will be dipped in egg mixture, then coated in seasoned bread crumbs before baking.

Prepare The Pork Chops For Baking

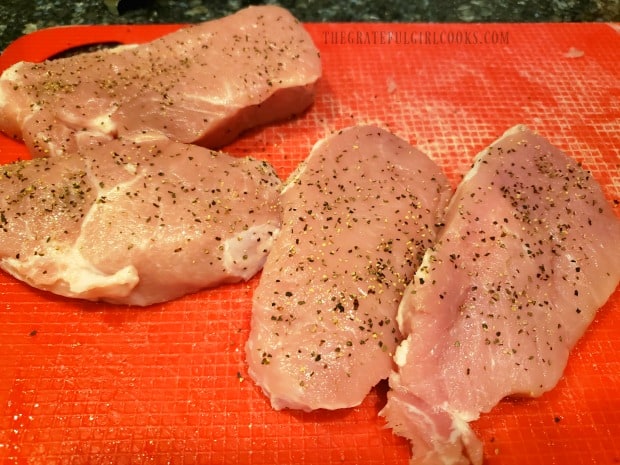
You will need 4 boneless pork chops, about 1″ thick each, for this recipe. I used two REALLY THICK chops, and sliced them horizontally to make 4 “thinner” chops. If there is a lot of fat on the edges of the pork, trim some of it off with a sharp knife. Season each of the pork chops lightly with salt and pepper.

Boneless pork chops are lightly seasoned with salt and pepper.

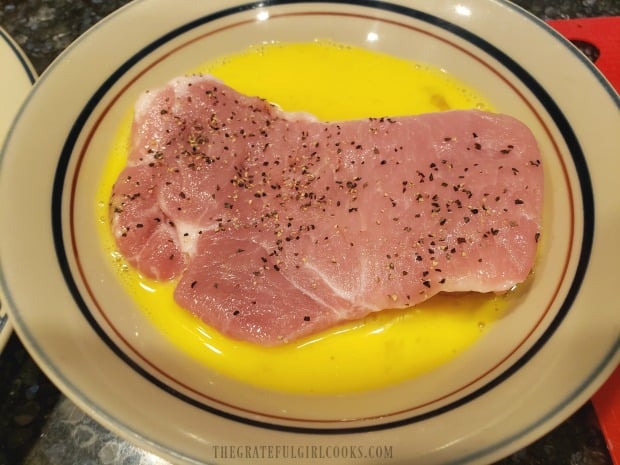
Place one pork chop at a time into the egg mixture. Turn to coat all sides of the chop with the egg. As soon as it is fully coated, let the excess liquid drip back into the bowl, and then lay the pork chop on top of the bread crumb coating on the plate.

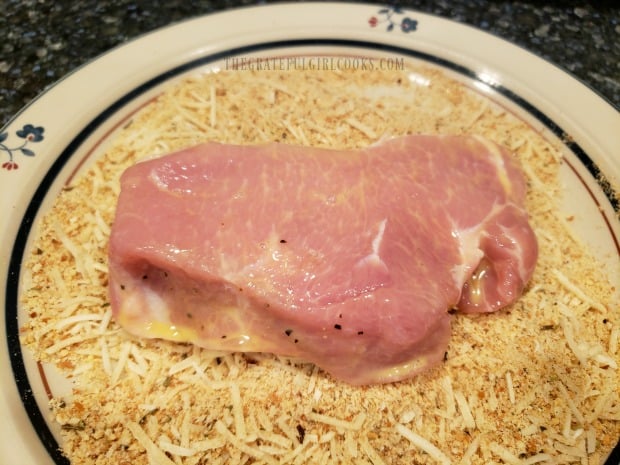
Use your fingers to coat all sides of the pork chop with the Italian crumb topping. Lightly press the crumbs onto all sides of the pork chop. Repeat process with all the pork chops.

Each pork chop is immersed in egg mixture, to cover.Pork chop with egg wash is then coated with seasoned bread crumb mixture.

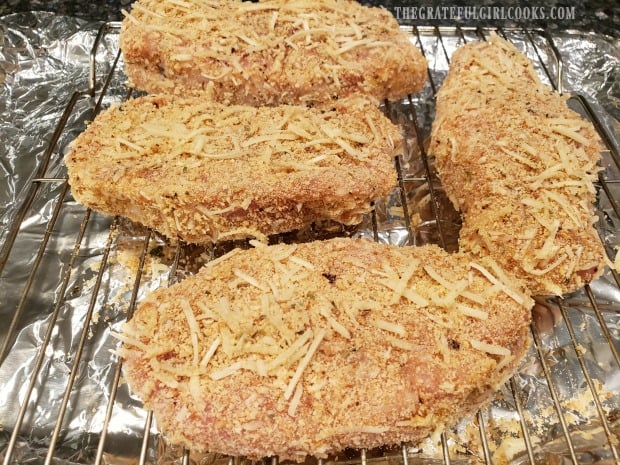
Place the breaded pork chops onto a wire rack in a single layer, leaving just a bit of space between each one. NOTE: I lightly sprayed the top of each pork chop with a little olive oil (a trick I learned from using my air fryer), in order to help brown and help crisp up the outside of the chops. This step is optional, but I do recommend it!
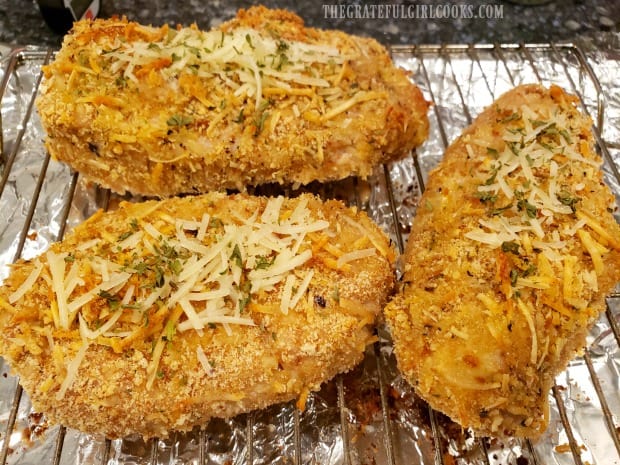
Four easy baked pork chops on a wire rack are ready for the oven!

Place The Easy Baked Pork Chops In The Oven

Now it’s time to cook the pork chops in a preheated 350°F oven! Put the baking sheet on the middle rack of the oven, and let them bake for approximately 25 minutes (this time may vary slightly due to varying thicknesses of pork used).

NOTE: Temperatures can vary greatly in ovens, so I recommend checking them at the 25 minute mark, and know they might take a few more minutes to fully cook through. Pork is considered safe to eat once it reaches an internal temperature of 145°F. 

The easy baked pork chops are golden brown once they finish baking.

Once the easy baked pork chops are done cooking, remove them from the oven, and let them rest for 2-3 minutes before serving. If desired, garnish each chop with additional Parmesan cheese, and a sprinkle of parsley before serving.

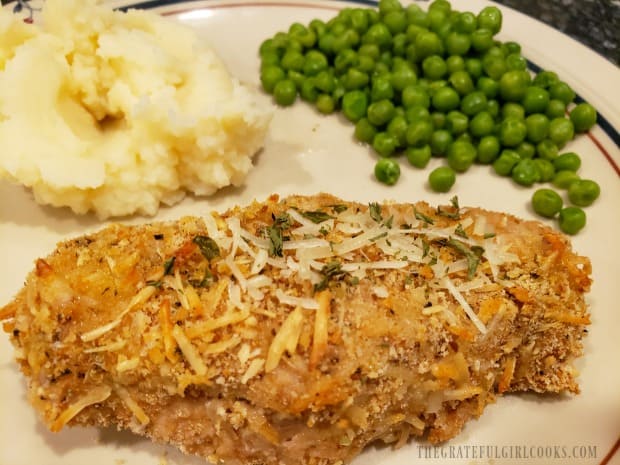
We enjoyed the pork chops, served alongside some creamy mashed potatoes, and green peas. YUM. The meat was tender and juicy, and had a nice flavor, thanks to the seasoned topping. This recipe turned out to be an EASY, quick way to get a nice tasting main dish on the table!

One of the easy baked pork chops, served with mashed potatoes and peas.

I hope you will consider trying this easy to fix pork chop recipe! Have a wonderful day, and thank you for visiting this blog.

Looking For More PORK CHOP Recipes?

You can find all of my recipes in the Recipe Index, located at the top of the page. I have several pork chop recipes, including:

Interested In More Recipes?

Thank you for visiting this website. I appreciate you using some of your valuable time to do soIf you’re interested, I publish a newsletter 2 times per month (1st and 15th) with all the latest recipes, and other fun info. I would be honored to have you join our growing list of subscribers, so you never miss a great recipe!
There is a Newsletter subscription box on the top right side (or bottom) of each blog post, depending on the device you use, where you can easily submit your e-mail address (only) to be included in my mailing list.

You Can Also Find Me On Social Media:
Facebook page: The Grateful Girl Cooks!
Pinterest: The Grateful Girl Cooks!
Instagram: jbatthegratefulgirlcooks

Author's signature

0 from 0 votes
Easy Baked Pork Chops
Prep Time
10 mins
Cook Time
30 mins
Total Time
40 mins
 

Easy Baked Pork Chops are covered with a seasoned bread crumb/Parmesan cheese mix for lots of flavor! Prep time is 10 minutes, then bake until done!

Category: Entree
Cuisine: American
Keyword: easy baked pork chops
Servings: 4
Calories Per Serving: 306 kcal
Author: JB @ The Grateful Girl Cooks!
Ingredients
  • 4 boneless pork chops , about 1" thick
  • salt & pepper (to lightly season chops)
  • ¾ cup bread crumbs
  • cup grated Parmesan cheese
  • 1 teaspoon Italian seasoning
  • ½ teaspoon garlic powder
  • ¼ teaspoon onion powder
  • 1 egg
  • 1 Tablespoon milk
  • non-stick cooking spray (optional)
  • additional Parmesan cheese & parsley for garnish , OPTIONAL
Instructions
  1. Preheat oven to 350°F.  Place a sheet of aluminum foil on a rimmed baking sheet. Place a wire rack on top of the baking sheet and give it a light spray with non-stick cooking spray.

  2. Combine bread crumbs, Parmesan cheese, Italian seasoning, garlic and onion powders on a dinner plate. Spread, to cover plate. In a separate bowl, whisk together egg and milk. Place bowl of egg mixture and plate of bread crumb topping side by side on counter.

  3. Trim excess fat from pork. Season lightly with salt and pepper. Place one chop at a time into egg, and turn to coat all sides. Let excess liquid drip into the bowl, and then lay pork on bread crumb mix. Coat all sides with crumb topping, lightly pressing crumbs onto all sides. Repeat for all pork chops. Place the breaded chops onto wire rack in a single layer. NOTE: I lightly sprayed each pork chop with a little olive oil to help brown/crisp them (a trick I learned from air-frying), but this step is optional.

  4. Place baking sheet on the middle rack, and bake chops at 350°F for approximately 25 minutes (time may vary slightly due to varying thicknesses of pork used). Pork is considered safe to eat once it reaches an internal temperature of 145°F.  Once done, remove from oven and let them rest for 2-3 minutes before serving. If desired, garnish each chop with additional Parmesan cheese, and a sprinkle of parsley.

    NOTE: Temperatures can vary in ovens, so I recommend checking the chops at the 25 minute mark. Please know they might take a few more minutes to fully cook through to an internal temp. of 145°F. 

Nutrition Facts
Easy Baked Pork Chops
Amount Per Serving (1 chop)
Calories 306 Calories from Fat 81
% Daily Value*
Fat 9g14%
Saturated Fat 4g25%
Cholesterol 137mg46%
Sodium 359mg16%
Potassium 584mg17%
Carbohydrates 16g5%
Fiber 1g4%
Sugar 2g2%
Protein 38g76%
Vitamin A 131IU3%
Calcium 155mg16%
Iron 2mg11%
* Percent Daily Values are based on a 2000 calorie diet.

Here’s one more to pin on your Pinterest boards!Easy Baked Pork Chops are covered with a seasoned bread crumb/Parmesan cheese mix for lots of flavor! Prep time is 10 minutes, then bake until done!


Easy Chicken Rice Casserole

Making this easy chicken rice casserole is a cinch, with only 10 minutes prep work before baking! Rice and mushrooms cook in the same dish! YUM!

My mom is moving from Southern California to Georgia, and recently sent me some of her old cookbooks, as she was “downsizing”. I found this easy chicken rice casserole in one of her old cookbooks, and decided to give it a try.

The casserole was incredibly easy to make, and I loved that it was a one dish meal! Rice, mushrooms, and sauce are cooked in the same pan as the chicken breasts, so it really is “no fuss”! The prep time is only about 10 minutes (or less), and then you can sit back while this dish bakes! Perfect for busy nights. Here’s how to make this delicious casserole:

Scroll Down For A Printable Recipe Card At the Bottom Of The Page

Prepare The Chicken Breasts

Preheat the oven to 350° F. and get out an 11 3/4″ x 7 1/2″ baking dish. This casserole is quite economical, because you only need TWO large chicken breasts and only a few other ingredients to serve 4 people.

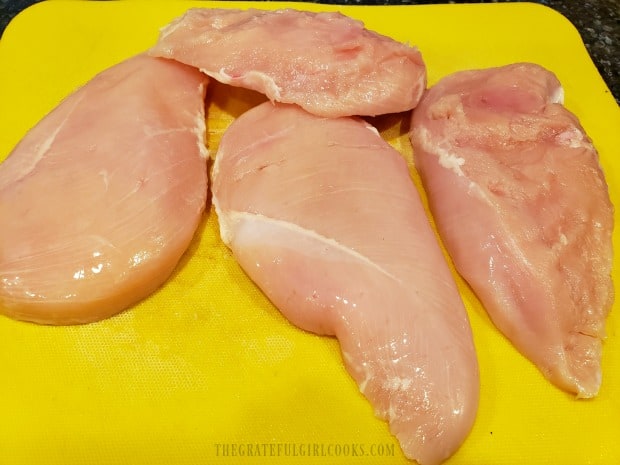
Slice two large boneless skinless chicken breasts in half horizontally to create 4 thin breasts total. Set the chicken aside while you make the simple sauce.

Two large chicken breasts are cut in half horizontally, to create 4 thin pieces of chicken.

Make The Baking Sauce For The Casserole

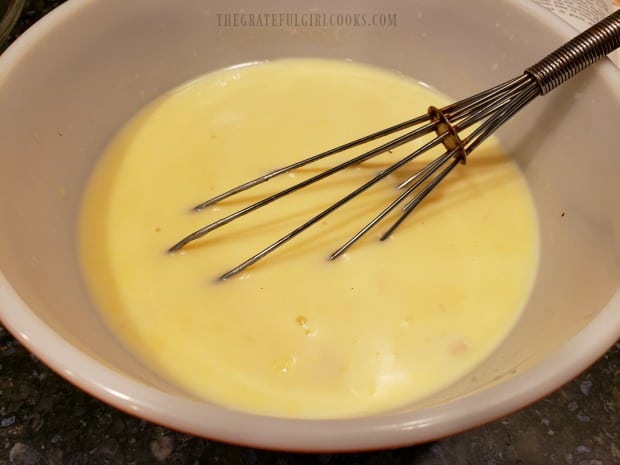
Okay… this sauce is super easy to make! Mix a can of cream of chicken soup (YES- you can substitute cream of mushroom) and milk in a medium sized bowl. Whisk until fully combined. IMPORTANT: MEASURE OUT AND RESERVE 1/2 CUP OF THIS SAUCE FOR LATER!

Cream of chicken soup and milk are combined to start making the sauce.

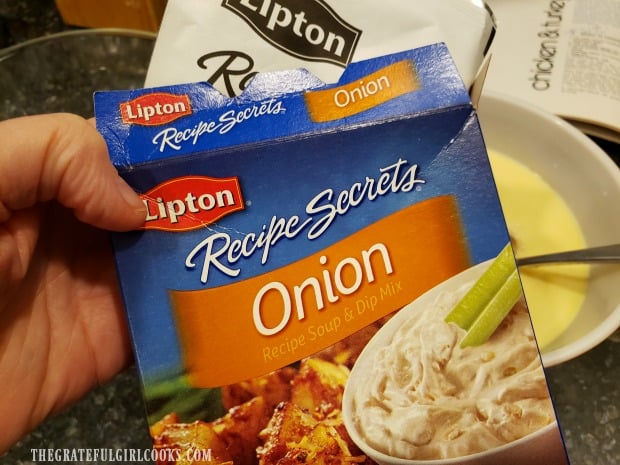
Now mix HALF an envelope of dried onion soup mix in with the remaining soup mixture left in the bowl. Add uncooked white rice, and the mushroom pieces (including the liquid from can) into the sauce mixture. Stir until completely blended.

A packet of dried onion soup mix is used in this recipe.

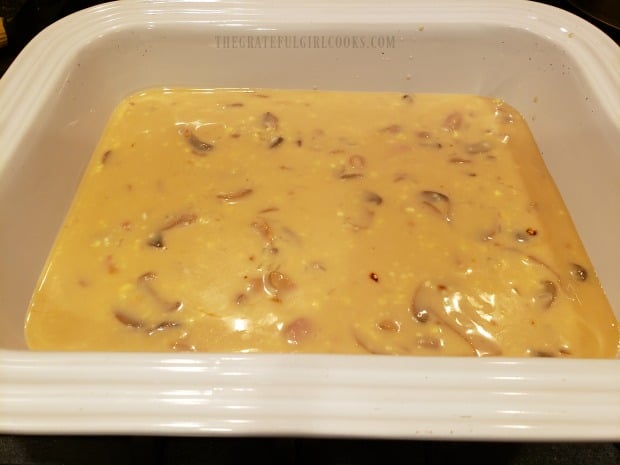
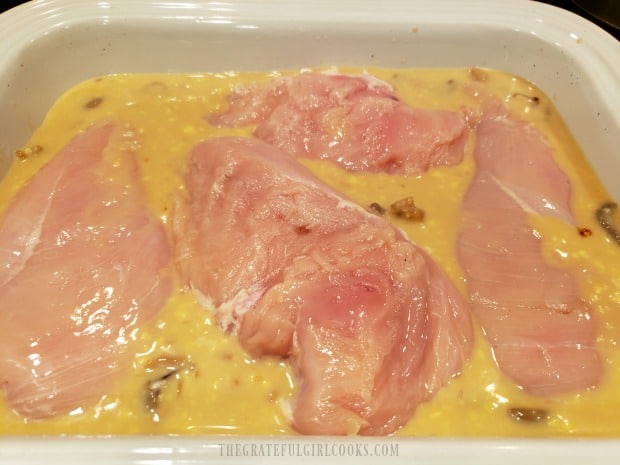
Pour the sauce into an (ungreased) baking dish, and spread it out to fully cover the bottom of the dish. Lay the 4 chicken breasts on top of the sauce in a single layer. BEFORE BAKING: Pour the reserved soup/milk mixture over the top of the chicken pieces. Sprinkle the chicken with the remaining 1/2 of the dried onion soup mix left in the envelope.

Sauce for the easy chicken rice casserole is spread into a baking dish.Four pieces of chicken breast are placed on top of the sauce.

Bake The Easy Chicken Rice Casserole

Cover the easy chicken rice casserole with aluminum foil before baking. Bake the casserole in a preheated 350° F. oven for 1 hour.

After 1 hour, remove the foil from the dish. Place casserole back in the oven and continue baking (uncovered) for 15 more minutes. Carefully remove the casserole from the oven once done, and let it rest for 3-4 minutes before serving.

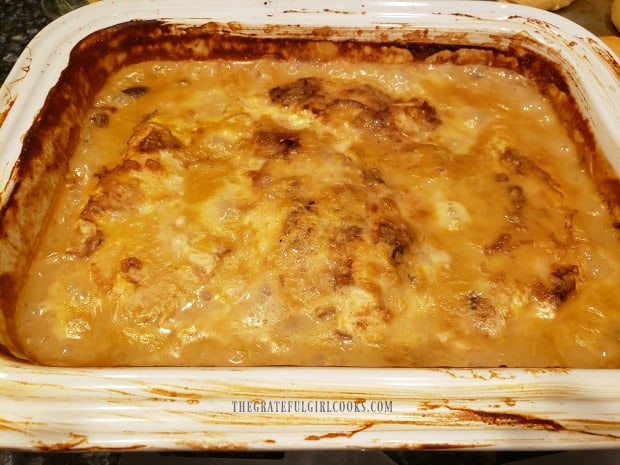
The chicken casserole is baked, and is now ready to serve.

Time To Serve The Easy Chicken Rice Casserole!

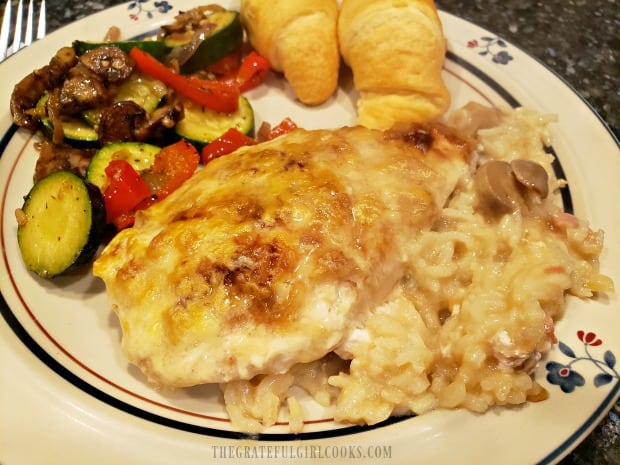
To serve this easy chicken rice casserole, spoon out the creamy rice from under the chicken and portion it out onto plates. Top each serving with one of the chicken breasts.

Now you have a perfectly cooked chicken breast, served atop a creamy bed of fully cooked rice in a delicious mushroom and onion sauce. Serve a veggie or salad on the side, and it’s time to eat!

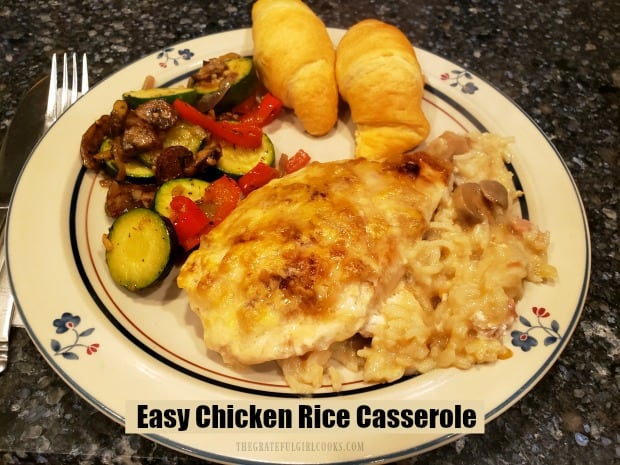
Easy chicken rice casserole is served on plate, with vegetables and rolls.

I truly hope you enjoy this easy to prepare casserole! The leftovers were wonderful heated up in the microwave, too! Have a fantastic day!

Looking For More CASSEROLE Recipes?

You can find all of my recipes in the Recipe Index, located at the top of the page. I have a nice variety of casserole recipes you might enjoy, including:

Interested In More Recipes?

Thank you for visiting this website. I appreciate you using some of your valuable time to do soIf you’re interested, I publish a newsletter 2 times per month (1st and 15th) with all the latest recipes, and other fun info. I would be honored to have you join our growing list of subscribers, so you never miss a great recipe!
There is a Newsletter subscription box on the top right side (or bottom) of each blog post, depending on the device you use, where you can easily submit your e-mail address (only) to be included in my mailing list.

You Can Also Find Me On Social Media:
Facebook page: The Grateful Girl Cooks!
Pinterest: The Grateful Girl Cooks!
Instagram: jbatthegratefulgirlcooks

Author's signature

Recipe adapted from: “Betty Crocker’s Meatless-Main Dishes” cookbook, published 1973, by Golden Press NY and Western Publishing Co., Inc. Racine, Wisconsin, page 8.

0 from 0 votes
Easy Chicken Rice Casserole
Prep Time
10 mins
Cook Time
1 hr 15 mins
Total Time
1 hr 25 mins
 

Making this easy chicken rice casserole is a cinch, with only 10 minutes prep work before baking! Rice and mushrooms cook in the same dish! YUM!

Category: Main Course
Cuisine: American
Keyword: chicken rice casserole
Servings: 4
Calories Per Serving: 379 kcal
Author: JB @ The Grateful Girl Cooks!
Ingredients
  • 2 large boneless, skinless chicken breasts , sliced horizontally (approx. 14 ounces)
  • 10¾ ounces cream of chicken (or mushroom) soup (1 small can)
  • 10¾ ounces milk (use soup can -fill with milk)
  • ¾ cup uncooked white rice
  • 4 ounces mushroom stems and pieces (1 small can), drained
  • ounces dry onion soup mix (1 envelope) I used Lipton's, divided
Instructions
  1. Preheat oven to 350° F. Slice chicken breasts in half horizontally to create 4 thin breasts total. Set chicken aside.

  2. Mix cream of chicken soup (YES- you can substitute cream of mushroom) and milk in a medium sized bowl. Whisk until fully combined. IMPORTANT: MEASURE OUT AND RESERVE 1/2 CUP OF THIS SOUP/MILK MIXTURE FOR LATER!

    Mix HALF an envelope of dried onion soup mix in with the remaining soup mixture in the bowl. Add the uncooked rice, and can of mushroom pieces (including liquid from can) into the sauce mixture. Stir until completely blended.

  3. Pour sauce into an (ungreased) 11¾" x 7½" baking dish, and spread to fully cover bottom of the dish. Lay chicken breasts on top of sauce in a single layer. BEFORE BAKING: Pour the reserved soup/milk mixture over the top of the chicken pieces. Sprinkle the chicken with the remaining 1/2 of the dried onion soup mix left in the envelope.

  4. Cover the casserole with aluminum foil before baking. Bake at 350° F. for 1 hour. After 1 hour, remove the foil. Place casserole back in the oven and continue baking (uncovered) for 15 more minutes. Carefully remove casserole from oven when done, and let it rest for 3-4 minutes before serving. to serve, spoon out the creamy rice from under chicken and portion it onto plates. Top each serving with one of the chicken breasts. Serve, and enjoy!

Nutrition Facts
Easy Chicken Rice Casserole
Amount Per Serving (1 serving (chicken/rice))
Calories 379 Calories from Fat 72
% Daily Value*
Fat 8g12%
Saturated Fat 2g13%
Cholesterol 73mg24%
Sodium 1659mg72%
Potassium 672mg19%
Carbohydrates 45g15%
Fiber 2g8%
Sugar 6g7%
Protein 29g58%
Vitamin A 318IU6%
Vitamin C 2mg2%
Calcium 139mg14%
Iron 2mg11%
* Percent Daily Values are based on a 2000 calorie diet.

Here’s one more to pin on your Pinterest boards!Making this easy chicken rice casserole is a cinch, with only 10 minutes prep work before baking! Rice and mushrooms cook in the same dish! YUM!

Peanut Butter Kiss Cookies

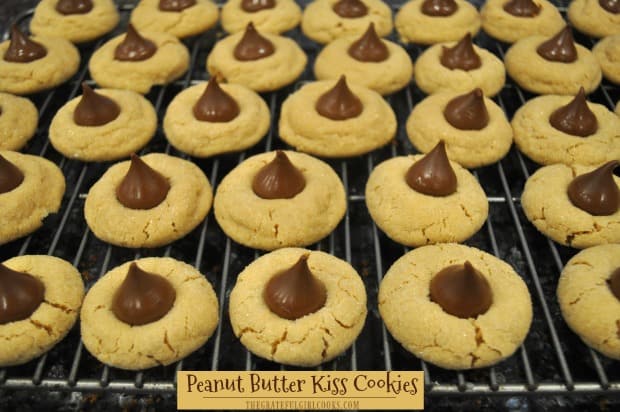
Enjoy this classic recipe for yummy peanut butter kiss cookies, a soft peanut butter cookie with a milk chocolate kiss on top! Recipe makes 4 dozen.

Who doesn’t LOVE peanut butter kiss cookies? This classic cookie, also known as peanut butter blossoms, has always been a personal favorite of mine. If they are on a dessert platter, it is usually one of the very first cookies I head straight to grab!

I decided to post this traditional recipe, just in case someday they don’t print the recipe on the bags of Hershey’s kisses, which is where I got it! Be prepared… that’s my motto, especially in the case of these absolutely YUMMY cookies!

Truth is, they are incredibly easy to make! Last week I made some of these peanut butter kiss cookies to add to the dessert plates I will give our neighbors this Christmas. The recipe makes approximately 48 cookies, so there are plenty to share, and a few to munch on, too! Here’s how to make them:

Scroll Down for A Printable Recipe Card At The Bottom Of The Page

Unwrapping Those Kisses!

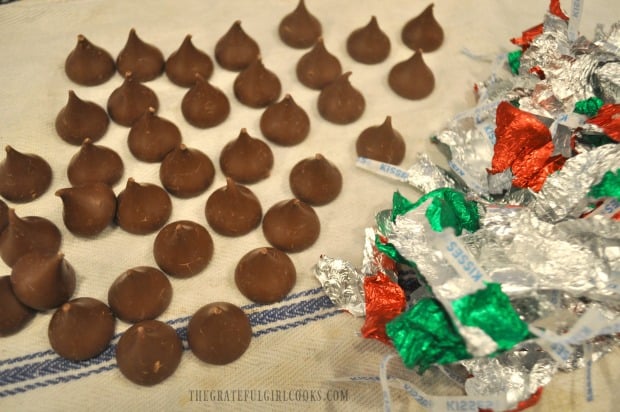
First- peel the wrappers off all 48 Hershey’s kisses. That’s probably the hardest thing about the recipe (ha ha)! Try NOT to eat all 48, people! You need them ready to go, so you can press them into the soft, hot cookies as soon as they come out of the oven!

Unwrapped Hershey Kisses, ready to add to baked cookies.

Time To Make The Cookie Dough!

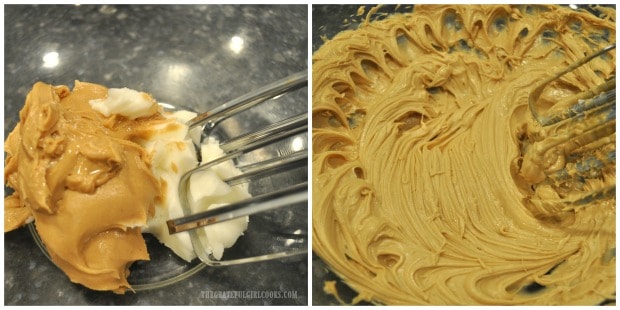
Preheat your oven to 375°F. while you mix up the cookie dough.  Place peanut butter and shortening in a large mixing bowl. Beat these well with an electric mixer, until smooth.

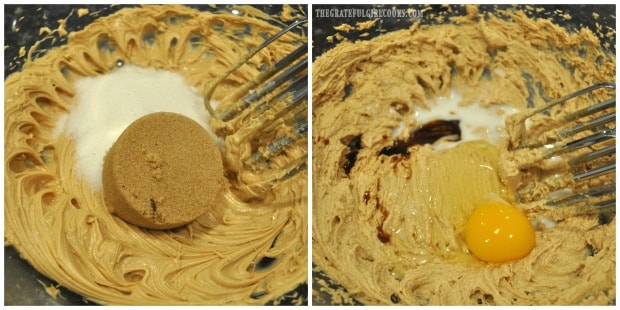
Add 1/3 cup of granulated sugar and light brown sugar, and beat these into the peanut butter mixture until thoroughly blended. Now add the milk, one egg, and vanilla into the dough batter, and again beat well, until fully combined.

Peanut butter and vegetable shortening are beaten together.Sugars, egg, milk and vanilla are added to the cookie dough mixture.

Add Dry Ingredients

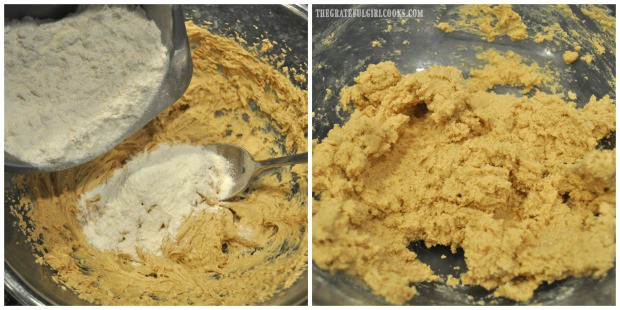
In a separate bowl, stir together all purpose flour, baking soda, and salt. Add these dry ingredients to the peanut butter cookie dough, a little at a time. Continue to beat the ingredients together while you are adding them. The dough will be fairly thick once all the ingredients have been mixed together. Now the cookie dough is ready to be shaped!

Flour, baking soda and salt are added to the cookie dough batter.

Time To Roll The Cookies!

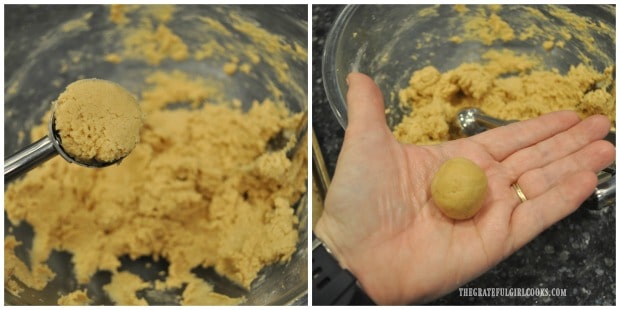
In order to get 48 cookies out of the dough, you will need to shape roll each cookie into a 1″ ball. If you have a small cookie scoop, it makes it fairly easy to do! Roll the dough between the palms of your hands until a small ball of dough is formed.

Cookie dough is rolled into 1" balls before baking.

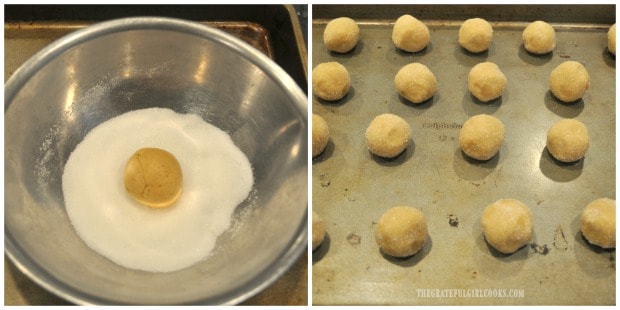
Place some additional granulated sugar in a small bowl (about 1/3 cup). Drop the cookie dough ball into the sugar, and turn, to coat the ball completely with sugar. Place the sugar coated dough ball onto an ungreased cookie sheet.

Repeat this process until all 48 cookies have been formed and placed onto cookie sheets. Keep about 2 inches between dough balls, because the dough will spread as it bakes.

Each dough ball is rolled in granulated sugar, and then placed on baking sheet.

Time To BAKE The Peanut Butter Kiss Cookies!

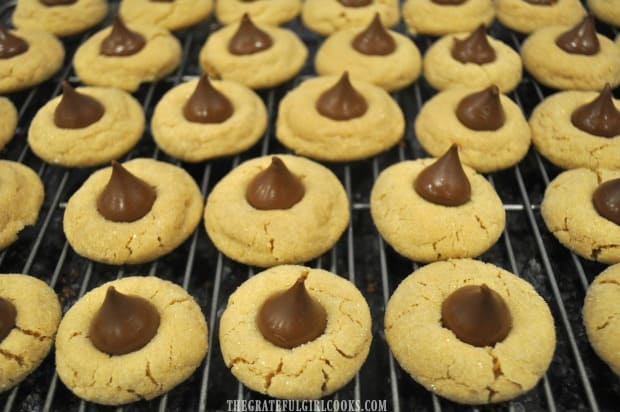
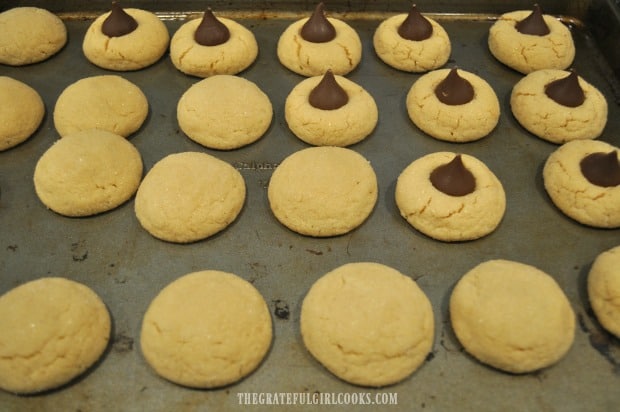
Bake the cookies at 375°F. for 8-10 minutes. They will be lightly browned when done. Remove the cookies from the oven, and immediately press one of the chocolate kisses down slightly into the center of each cookie.

You will see that the cookies will crack slightly around the edges as the chocolate kiss is pressed down slightly. Once all of the kisses have been added, transfer the peanut butter kiss cookies to a wire rack to finish cooling.

Hershey kisses are placed in middle of each cookie, once baked.Peanut butter kiss cookies, cooling on a wire rack.

Who Wants Some Yummy Peanut Butter Kiss Cookies?

Cool the cookies completely before serving. It’s a challenge to not tear right into them, but just let them cool down before popping one into your mouth, okay?

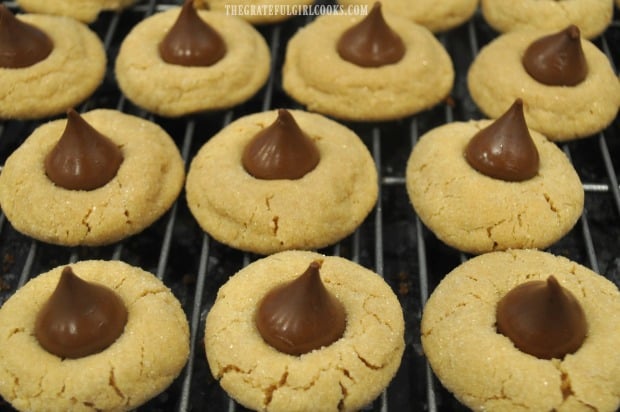
Here are some finished peanut butter kiss cookies, ready to eat!

I really hope you enjoy these peanut butter and chocolate kiss cookies! Peanut butter and chocolate are one of my favorite flavor combos, so how could I NOT love them? They’re so good, and I hope you love them too! Have a great day, and thank you for visiting my blog!

Looking For More COOKIE Recipes?

You can find all of my cookie recipes in the Recipe Index, located at the top of the page. I have quite a few cookie recipes, including:

Interested In More Recipes?

Thank you for visiting this website. I appreciate you using some of your valuable time to do soIf you’re interested, I publish a newsletter 2 times per month (1st and 15th) with all the latest recipes, and other fun info. I would be honored to have you join our growing list of subscribers, so you never miss a great recipe!
There is a Newsletter subscription box on the top right side (or bottom) of each blog post, depending on the device you use, where you can easily submit your e-mail address (only) to be included in my mailing list.

You Can Also Find Me On Social Media:
Facebook page: The Grateful Girl Cooks!
Pinterest: The Grateful Girl Cooks!
Instagram: jbatthegratefulgirlcooks

Author's signature

Original recipe source: Found on the back of a Hershey Kisses package!

↓↓ PRINTABLE RECIPE BELOW ↓↓

0 from 0 votes
Peanut Butter Kiss Cookies
Prep Time
15 mins
Cook Time
8 mins
Total Time
23 mins
 

Enjoy this classic recipe for yummy peanut butter kiss cookies, a soft peanut butter cookie with a milk chocolate kiss on top! Recipe makes 4 dozen.

Category: Dessert
Cuisine: American
Keyword: peanut butter kiss cookies
Servings: 48 cookies (approx.)
Calories Per Serving: 92 kcal
Author: JB @ The Grateful Girl Cooks!
Ingredients
  • 48 Hershey's Kisses (milk chocolate)
  • ½ cup vegetable shortening
  • ¾ cup peanut butter (creamy)
  • cup granulated sugar
  • cup packed light brown sugar
  • 1 egg
  • 2 Tablespoons milk
  • 1 teaspoon vanilla extract
  • cups all purpose flour
  • 1 teaspoon baking soda
  • ½ teaspoon salt
  • additional granulated sugar , to roll cookie balls in
Instructions
  1. Preheat oven to 375°F. Peel the wrappers off 48 Hershey's kisses. You need them ready to go, so you can press them into the soft cookies as soon as they come out of the oven!

  2. Place peanut butter and shortening in a large mixing bowl. Beat well with an electric mixer, until smooth. Add granulated sugar and light brown sugar; beat these into the peanut butter mixture until well combined. Add milk, egg, and vanilla into batter; beat well, until fully combined. In a separate bowl, stir together flour, baking soda, and salt. Add these dry ingredients to dough, a little at a time. Continue to beat together while adding them.

  3. Shape and roll dough into 48, one inch dough balls. Roll each piece of dough between the palms of your hands until a 1" ball is formed.

  4. Place additional granulated sugar in a small bowl (about 1/3 cup). Drop dough ball into sugar, and turn, to coat ball completely. Place sugar coated dough ball onto an ungreased cookie sheet. Repeat process until 48 cookies have been formed and placed onto cookie sheets. Leave 2 inches between dough balls, because dough will spread as it bakes.

  5. Bake at 375°F. for 8-10 minutes. They will be lightly browned when done. Remove cookies from the oven, and immediately press one of the chocolate kisses down slightly into the center of each cookie. The cookies will crack around the edges as the chocolate kiss is pressed down. Once all of the kisses have been added, transfer cookies to a wire rack to finish cooling. Once cooled completely, serve and enjoy!

Nutrition Facts
Peanut Butter Kiss Cookies
Amount Per Serving (1 cookie)
Calories 92 Calories from Fat 54
% Daily Value*
Fat 6g9%
Saturated Fat 2g13%
Cholesterol 5mg2%
Sodium 72mg3%
Potassium 35mg1%
Carbohydrates 10g3%
Fiber 1g4%
Sugar 6g7%
Protein 2g4%
Vitamin A 6IU0%
Calcium 14mg1%
Iron 1mg6%
* Percent Daily Values are based on a 2000 calorie diet.

Here’s one more to pin on your Pinterest boards!Enjoy this classic recipe for yummy peanut butter kiss cookies, a soft peanut butter cookie with a milk chocolate kiss on top! Recipe makes 4 dozen.

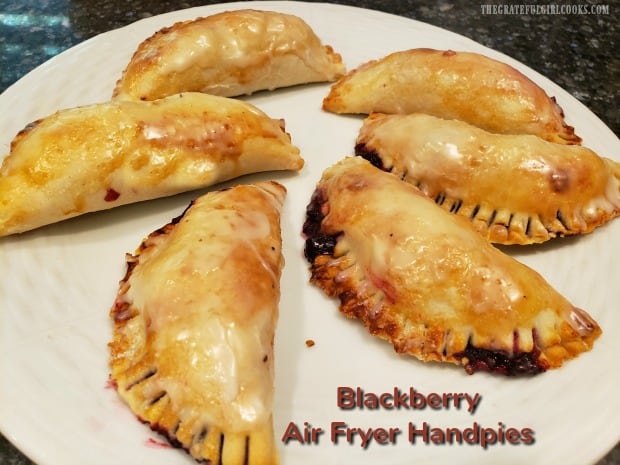
Blackberry Air Fryer Handpies

Make six delicious, glazed blackberry air fryer handpies in about 20 minutes total! They’re easy to make, with purchased or homemade pie crust dough!
Make six delicious, glazed blackberry air fryer handpies in about 20 minutes total! They're easy to make, with purchased or homemade pie crust dough!

Do you like “fried” handpies? I sure do! When I was growing up, my grandma would come and live with us for a few months at a time. I have great memories of seeing her frying fruit pies (apricot, peach, berry, etc) in hot oil in a large skillet. Boy, they sure tasted great when Grandma made them!

I’ve made apricot mini-fried pies (now that I’m all grown up), and always enjoy those, because they remind me of her. Now that I own an air fryer (a birthday gift!), I am longing to create different recipes for air fried “fried pies” (without the oil!).

A couple months ago I decided to try my hand at making blackberry air fryer handpies. I used my standard blackberry pie filling (but cut the recipe in half), and my homemade pie dough (you can use store bought) to make these treats. Guess what? They taste fantastic, so I want to share the easy recipe here on the ol’ blog. Here’s how to make ’em:

Scroll Down For A Printable Recipe Card At The Bottom Of The Page

Prepare The Blackberry Filling

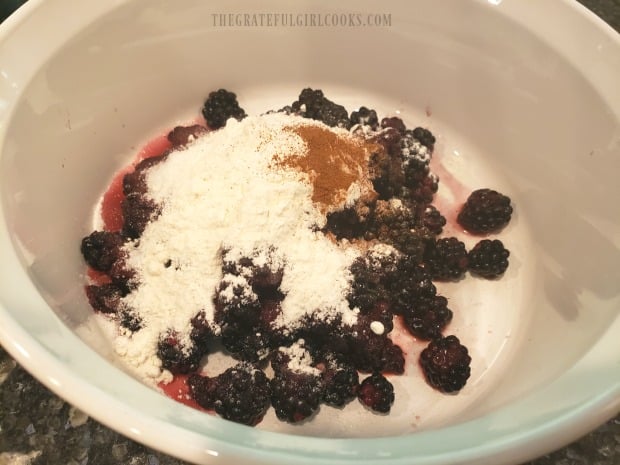
Place the blackberries, sugar, flour and cinnamon in a medium sized bowl. NOTE: If you will be using frozen blackberries, please let them thaw first, and then drain off any accumulated juice before adding the other ingredients.

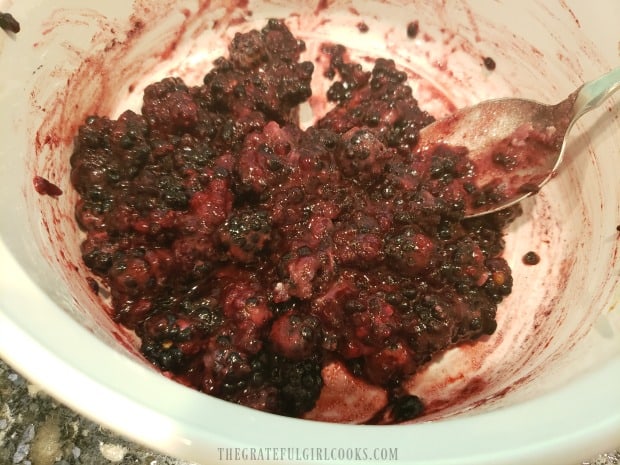
Stir gently, until these ingredients are combined. This is the filling for your blackberry air fryer handpies. See how easy that was? Set the bowl aside while you cut out the pie dough circles.

Blackberries, flour, cinnamon and sugar are combined in a medium sized bowl.Once mixed, the fruit filling is ready to make the blackberry handpies.

Cutting Out The Pie Crust Dough

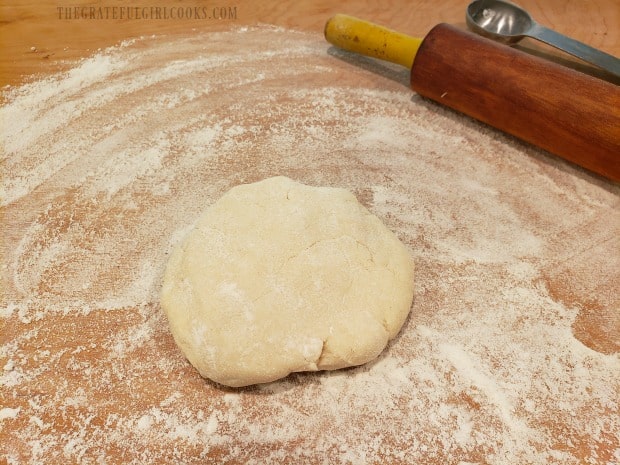
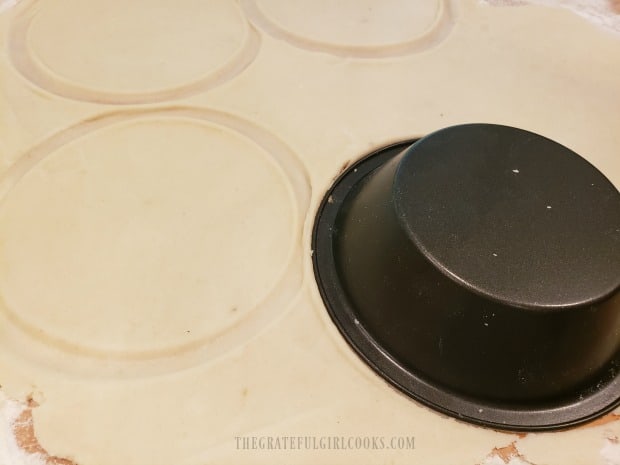
Roll out the pie crust dough (mine shown below is homemade) into a circle shape, large enough for at least a 9″ pie. If using a purchased pie dough crust, you may need to roll it out a bit more, so you have enough dough for 6 handpies!

Cut the dough into six 5″ circles. You can use a wide mug or glass, or a mini pie tin (like I used) to cut the shape. Collect any leftover scraps of dough, then roll them out again to get enough dough for 6 handpies.

Pie dough is rolled out before cutting into circle shapes for handpies.The pie dough is cut into 6 circles for the blackberry handpies.

Fill The Blackberry Handpies

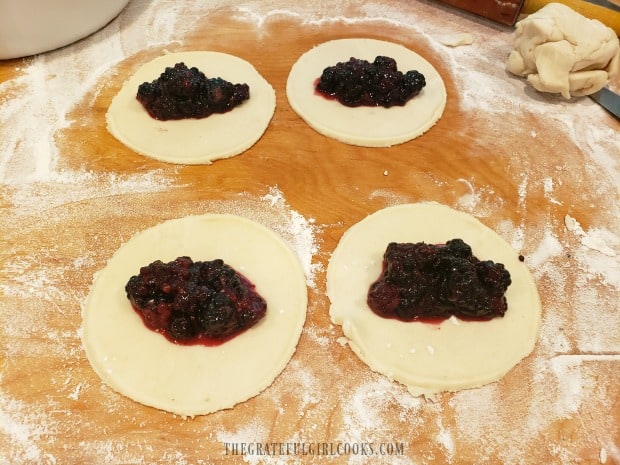
Place a heaping Tablespoonful of the blackberry filling into the center of the dough circles. Be careful not to overfill, or the filling will ooze out! I speak from experience! *cough, cough*

Also, be sure to leave some empty dough around all the circle. Do NOT spread the filling out to the edges, because you need to fold the dough over the blackberry filling, and seal the edges.

A spoonful of blackberry pie filling is placed onto each pie dough circle.

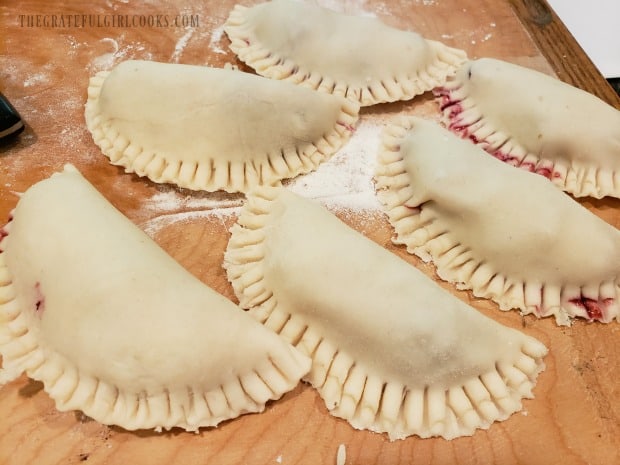
Anyways… pull the dough up and over the blackberry filling to the other edge of the pie dough. Use the tines of a fork (the backside) and press down on the edges of the handpie to seal the two crusts together. Make sure they are sealed together well, so the pies don’t open up while they are cooking.

You can see where some of the filling juiced out of a couple of the handpies when I crimped the edges.. No big deal, it just looks nicer if they don’t look like they are part of a murder scene! Just sayin’.

Dough is folded over the pie filling, and edges are crimped to seal.

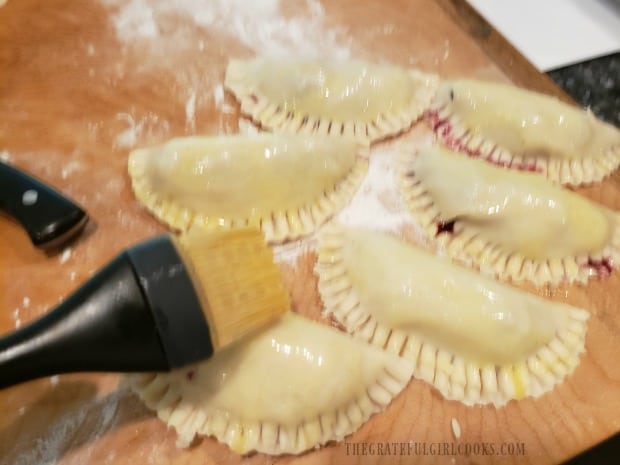
Brush the beaten egg over the entire top surface of the dough. This helps the crust to brown nicely while cooking in the air fryer.

A beaten egg is brushed over the handpies before cooking.

Time To Cook Some Blackberry Air Fryer Handpies!

Preheat your air fryer to 370°F. This will take a few minutes. Once pre-heated, carefully place the handpies into the basket. I was able to get all 6 of them into the basket at the same time, but you can cook them in batches, if your air fryer is smaller.

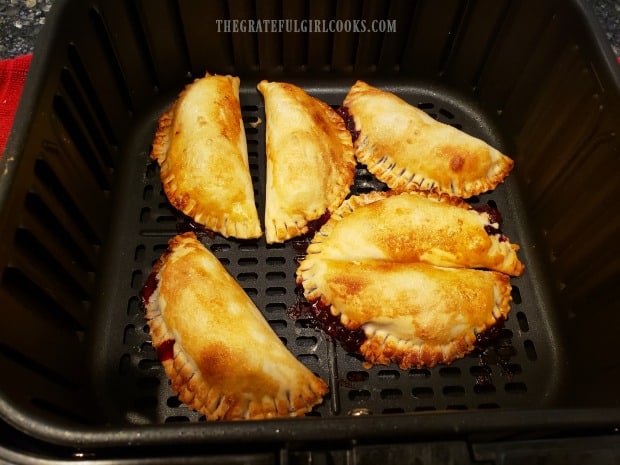
Cook the blackberry air fryer handpies at 370°F for 7-8 minutes. Check them at the 7 minute mark, since air fryer temps can vary greatly with different machines. When the dough is nicely golden brown and crispy on the outside, they are done.

Carefully remove them from the air fryer once done, and transfer them to a wire rack (with wax paper of aluminum foil UNDER the rack. The wax paper or foil will help catch any drips when you brush on the glaze.

Blackberry air fryer handpies are golden brown once fully cooked.

Glaze The Blackberry Air Fryer Handpies

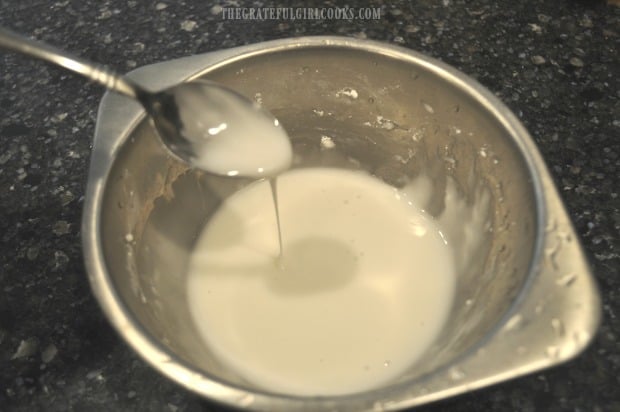
While the handpies cool down just a bit, mix the powdered sugar with drops of water in a small bowl, to make a fairly thin glaze.

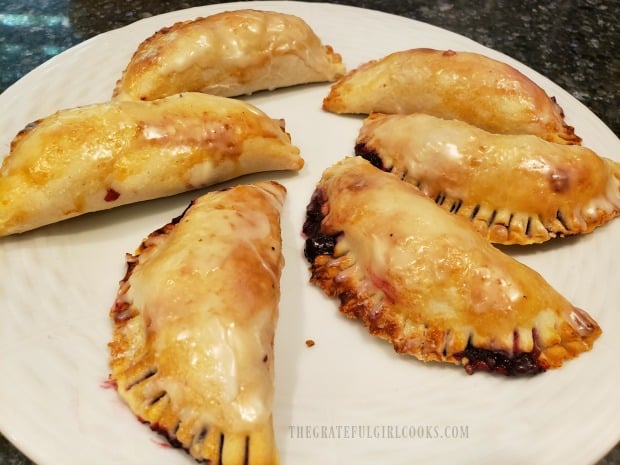
Once the blackberry handpies have cooled a bit, use a pastry brush to brush the glaze all over the top of the pastry. When the glaze has hardened, the handpies are ready to serve!

A glaze is made with water and powdered sugar.

The blackberry handpies are brushed with the glaze, and then are ready to eat!

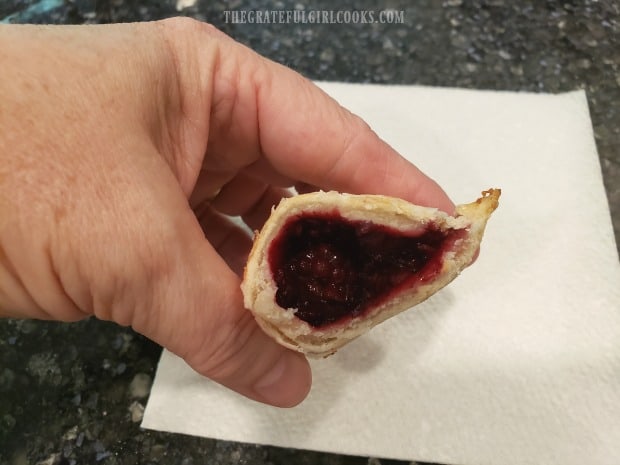
Here’s a peek inside one of the blackberry air fryer handpies.  See that yummy looking blackberry filling inside? Go on… take a big bite… you know you want to, right?

A peek at the inside of one of the handpies, after cooking.

Hope you will consider trying this recipe! I really love my fairly new air fryer, and these mini handpies were absolutely delicious! Have a great day.

Looking For More AIR FRYER Recipes?

You can find all of my recipes in the Recipe Index, located at the top of the page. I have some delicious air fryer recipes you might enjoy, including:

Interested In More Recipes?

Thank you for visiting this website. I appreciate you using some of your valuable time to do soIf you’re interested, I publish a newsletter 2 times per month (1st and 15th) with all the latest recipes, and other fun info. I would be honored to have you join our growing list of subscribers, so you never miss a great recipe!
There is a Newsletter subscription box on the top right side (or bottom) of each blog post, depending on the device you use, where you can easily submit your e-mail address (only) to be included in my mailing list.

You Can Also Find Me On Social Media:
Facebook page: The Grateful Girl Cooks!
Pinterest: The Grateful Girl Cooks!
Instagram: jbatthegratefulgirlcooks

Author's signature


0 from 0 votes
Blackberry Air Fryer Handpies
Prep Time
15 mins
Cook Time
7 mins
Total Time
22 mins
 

Make six delicious, glazed blackberry air fryer handpies in about 20 minutes total! They're easy to make, with purchased or homemade pie crust dough!

Category: Desssert
Cuisine: American
Keyword: blackberry air fryer handpies
Servings: 6
Calories Per Serving: 322 kcal
Author: JB @ The Grateful Girl Cooks!
Ingredients
  • 2 cups blackberries
  • ½ cup granulated sugar
  • Tablespoons all purpose flour
  • teaspoon ground cinnamon
  • 1 pie crust (unbaked) homemade or store bought
  • 1 egg beaten
For Icing:
  • ½ cup powdered sugar
  • 3-4 drops water
Instructions
  1. Place blackberries, sugar, flour and cinnamon in a medium sized bowl. Stir gently, until ingredients are combined. Set bowl aside. NOTE: If using frozen blackberries, thaw first, and then drain off any accumulated juice before adding other ingredients.

  2. Roll pie crust dough into a circle shape, large enough for a 9" pie. If using a purchased pie dough crust, you might need to roll it out more, so you have enough dough for 6 handpies! Cut dough into six 5" circles. Collect leftover scraps of dough, then roll them out again to get enough dough for 6 handpies.

  3. Place a heaping Tablespoonful of blackberry filling into center of each circle. Don't overfill the handpies, or the filling will leak out! Be sure to leave a dough edge around the circle. Do NOT spread the filling out to the edge.

  4. Pull the dough (gently) up and over the blackberry filling to the other edge of the dough. Use the tines of a fork (the backside) and press down on the edges of the handpie to crimp and seal the two crusts together. Make sure they are sealed together well, so the pies don't open up while they are cooking. Brush beaten egg over the top of the handpies. This helps the crust to brown nicely while cooking in the air fryer.

  5. Preheat air fryer to 370°F. Once pre-heated, carefully place handpies into basket. You can cook them in batches, if necessary. Cook handpies at 370°F for 7-8 minutes. Check them at the 7 minute mark, as temperatures can vary with air fryers. When handpies are golden brown and crispy on the outside, they are done. Carefully remove them from air fryer, and transfer to a wire rack.

  6. While the handpies cool, mix the powdered sugar with drops of water in a small bowl, to make a fairly thin glaze. Once handpies have cooled a bit, use a pastry brush to brush the glaze all over the top. When glaze hardens, the handpies are ready to serve! Enjoy!

Nutrition Facts
Blackberry Air Fryer Handpies
Amount Per Serving (1 g)
Calories 322 Calories from Fat 108
% Daily Value*
Fat 12g18%
Saturated Fat 3g19%
Cholesterol 27mg9%
Sodium 144mg6%
Potassium 122mg3%
Carbohydrates 51g17%
Fiber 3g13%
Sugar 29g32%
Protein 4g8%
Vitamin A 142IU3%
Vitamin C 10mg12%
Calcium 26mg3%
Iron 1mg6%
* Percent Daily Values are based on a 2000 calorie diet.

Here’s one more to pin on your Pinterest boards!Make six delicious, glazed blackberry air fryer handpies in about 20 minutes total! They're easy to make, with purchased or homemade pie crust dough!

Chocolate Cashew Cranberry Bites

FIVE MINUTES and THREE INGREDIENTS are all you need to make 2 dozen yummy chocolate cashew cranberry bites, perfect for munching or gift giving!

Looking for an EASY, delicious treat for the holidays, a special snack, or a food gift for a friend or neighbor? Look no further! These chocolate bites can be made quickly, and taste fantastic!

Sweet chocolate, combined with chewy dried cranberries and crunchy cashews make this a treat you and your loved ones will enjoy! Here’s how to make these goodies, in under 10 minutes:

Scroll Down For A Printable Recipe Card At The Bottom Of The Page

It’s EASY To Make Chocolate Cashew Cranberry Bites!

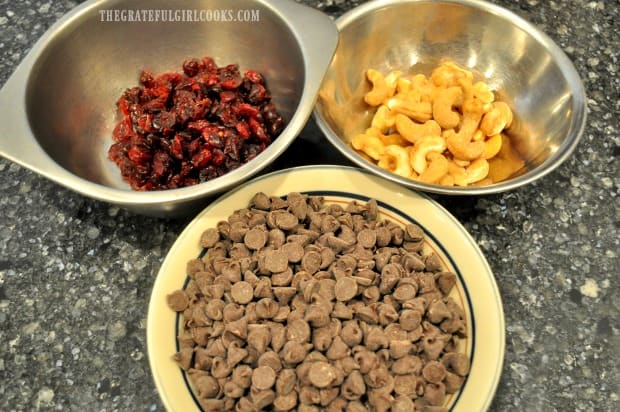
The ingredients for this super simple recipe are semi-sweet chocolate chips, dried cranberries, and roasted cashews (I used salted).

Ingredients for these treats are semi-sweet chocolate, dried cranberries, and roasted cashews.

Melt The Chocolate Chips

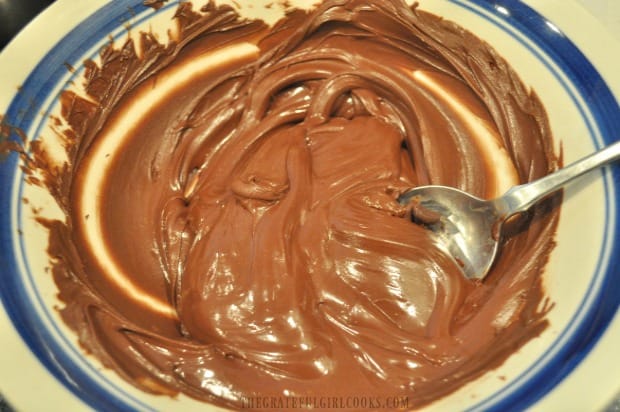
Place the chocolate chips in a medium sized MICROWAVE-SAFE bowl. Microwave the chips on High for 45 seconds. Remove the bowl from the microwave, and stir the chocolate chips (as best as you can). Mixture will be really thick at first.

Place the bowl of chocolate chips back into the microwave, and microwave on High for 30 seconds. Remove and stir. Repeat this process until the chocolate is completely melted once stirred. This may take a few times in the microwave, due to varying temps. Don’t over-cook the chocolate, or it will burn!

Chocolate chips are melted in the microwave until smooth and creamy.

Add Cranberries And Cashews

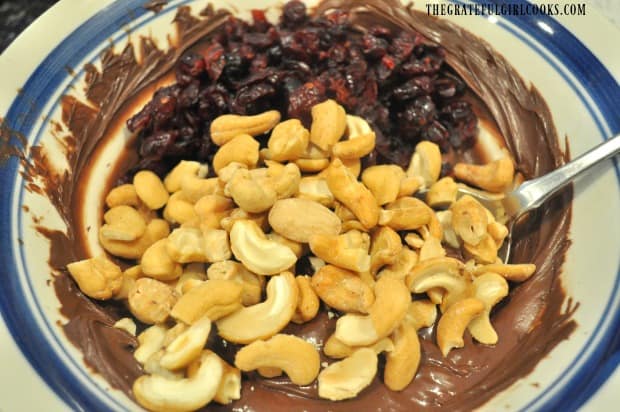
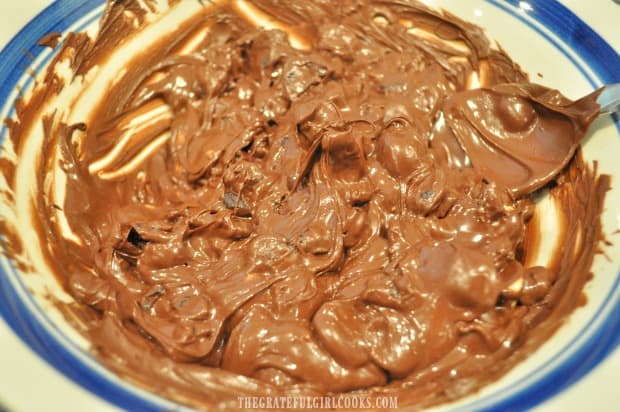
Immediately add the dried cranberries and cashews to the bowl, once the chocolate is melted and smooth. Gently stir, until the melted chocolate covers all of the cranberries and cashews.

Dried cranberries and cashews are added to the melted chocolate in the bowl.The ingredients are stirred until blended, and are ready to form these chocolate bites.

Time To Make Chocolate Cashew Cranberry Bites!

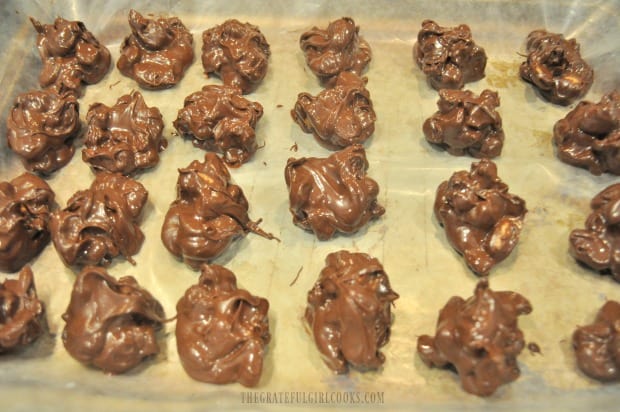
Once you’ve combined the melted chocolate, cashews and cranberries, it’s time to form these yummy bites!  Drop the chocolates by teaspoonfuls onto a wax paper lined baking sheet. You should be able to get 24 treats from this recipe!

Keep a bit of space between each of the chocolate cashew cranberry bites. This way they won’t stick together as the chocolate firms up!

Two dozen chocolate cashew cranberry bites on wax paper.

Let The Chocolate “Firm Up” Before Serving

In the first photo below you see the chocolate cashew cranberry bites right after they have been placed on the wax paper. The chocolate looks “wet and shiny”, because it is still soft.

Now, in the second photo below you see the chocolate cashew cranberry bites after they have been allowed to firm up for about 45 minutes.  See how the chocolate is no longer as shiny?

The chocolate looks shiny while it is still slightly melted, so let the candies rest to firm up.You can see the chocolate is not as shiny once it has firmed up.

Serving And Storing These Goodies

You’re ready to serve the goodies once the chocolate has completely firmed up! They’re perfect to give to neighbors and friends during the holidays, or serve at a potluck or party! I’m sure they will be gobbled up quickly, because they are so good!

If you want to “fancy them up” even more, place the bites in festive paper candy holders! Store any leftovers in a covered container in the refrigerator. They can also be frozen, if you wrap them well.

Two dozen chocolate cashew cranberry bites are ready to serve!

These chocolate candies are a perfect, easy to make treat during the holidays! Throw together the goodies in just a few minutes, and your friends and family will think you’ve been in the kitchen all day! Hope you will give them a try, and trust you will enjoy them!

Looking For More CHOCOLATE Recipes?

You can find all of my recipes in the Recipe Index, located at the top of the page. I have many recipes featuring chocolate, including:

Interested In More Recipes?

Thank you for visiting this website. I appreciate you using some of your valuable time to do soIf you’re interested, I publish a newsletter 2 times per month (1st and 15th) with all the latest recipes, and other fun info. I would be honored to have you join our growing list of subscribers, so you never miss a great recipe!
There is a Newsletter subscription box on the top right side (or bottom) of each blog post, depending on the device you use, where you can easily submit your e-mail address (only) to be included in my mailing list.

You Can Also Find Me On Social Media:
Facebook page: The Grateful Girl Cooks!
Pinterest: The Grateful Girl Cooks!
Instagram: jbatthegratefulgirlcooks

Author's signature

Original recipe source: unknown

0 from 0 votes
Chocolate Cashew Cranberry Bites
Prep Time
5 mins
Cook Time
0 mins
Inactive "Resting" Time (waiting for chocolate to firm up)
45 mins
Total Time
50 mins
 

FIVE MINUTES and THREE INGREDIENTS are all you need to make 2 dozen yummy chocolate cashew cranberry bites, perfect for munching or gift giving!

Category: Dessert
Cuisine: American
Keyword: chocolate cashew cranberry bites
Servings: 24 chocolates
Calories Per Serving: 117 kcal
Author: JB @ The Grateful Girl Cooks!
Ingredients
  • 2 cups semi-sweet chocolate chips
  • cup cashews
  • cup dried cranberries
Instructions
  1. Place chocolate chips in a medium sized MICROWAVE-SAFE bowl. Microwave on HIGH for 45 seconds. Remove the bowl from microwave, and stir chocolate chips (as best as you can). Mixture will be really thick at first. Place bowl back into microwave, and heat again on High for 30 seconds. Remove and stir. Repeat process until chocolate is completely melted once stirred. This may take a few times in the microwave, due to varying temps. Don't over-cook the chocolate, or it will burn!

  2. Immediately add the dried cranberries and cashews to the smooth, melted chocolate. Gently stir, until chocolate covers them all. Drop by teaspoonfuls onto a wax paper lined baking sheet. Keep a bit of space between each of the chocolates, so they won't stick together as the chocolate firms up! Set aside, to let chocolate firm up, for about 45 minutes.

  3. They are ready to serve, once the chocolate has completely firmed up! If you want to "fancy them up" even more, place the bites in festive paper candy holders! Store any leftovers in a covered container in the refrigerator. They can also be frozen, if you wrap them well. Enjoy!

Nutrition Facts
Chocolate Cashew Cranberry Bites
Amount Per Serving (1 chocolate)
Calories 117 Calories from Fat 63
% Daily Value*
Fat 7g11%
Saturated Fat 4g25%
Cholesterol 1mg0%
Sodium 2mg0%
Potassium 109mg3%
Carbohydrates 12g4%
Fiber 2g8%
Sugar 8g9%
Protein 2g4%
Vitamin A 8IU0%
Calcium 11mg1%
Iron 1mg6%
* Percent Daily Values are based on a 2000 calorie diet.

Here’s one more to pin on your Pinterest boards!FIVE MINUTES and THREE INGREDIENTS are all you need to make 2 dozen yummy chocolate cashew cranberry bites, perfect for munching or gift giving!

Gnocchi and Broccoli Carbonara

Gnocchi and Broccoli Carbonara is a delicious Italian dish, featuring potato dumplings coated in a bacon, Parmesan, mushroom and garlic creamy sauce.

Do you enjoy eating gnocchi? We really enjoy these soft Italian potato dumplings! Cooked gnocchi can be paired with a variety of sauces, for a simple to prepare meal. Gnocchi, in Italian, means “little lumps”, and that is exactly what they are. They are typically made with potatoes and flour, and cook very quickly.

Recently I decided to cook a package of gnocchi I had in our pantry. I decided to make up my own recipe that uses my tried and true pasta carbonara sauce (think BACON). Then I added steamed broccoli, cooked gnocchi, mushrooms, garlic and onions, and created this delicious recipe for gnocchi and broccoli carbonara! Here’s how to make it:

Scroll Down For A Printable Recipe Card At The Bottom Of The Page

Cook The Bacon

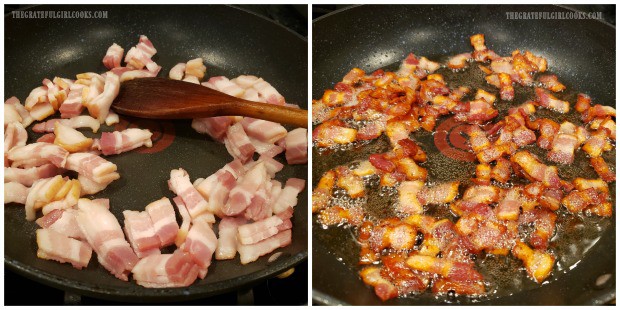
The first thing you should do is to fry the bacon until very crispy. I like to slice the bacon into small pieces, because it cooks faster that way! Stack a few slices of bacon on top of each other and then cut into 1/2 inch slices. Fry in a large skillet, stirring often until done.

Once the bacon is crisp, remove it from the skillet, and place the bacon pieces on paper towels to absorb grease. Drain MOST of the bacon grease from the pan, but leave approximately 2 Tablespoons bacon grease in the skillet. It will be used to add additional flavoring to the carbonara sauce later!


Bacon is cooked in large skillet until very crisp.

Cook The Rest Of The Veggies

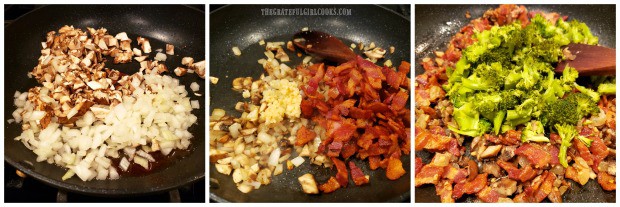
Return the skillet (with bacon grease) to the stove. Add the chopped onions and mushrooms to the skillet. Cook them on medium-low heat until they turn golden brown (3-4 minutes).

Now add the minced garlic and the crisp bacon crumbles to the skillet. Continue to cook, stirring often, for one more minute. Add the chopped and steamed broccoli to the skillet, and stir to combine. Set the skillet aside while you make the carbonara sauce.

Cooked onions, mushrooms, garlic, broccoli and crisp bacon are mixed together in skillet.

Make The Carbonara Sauce

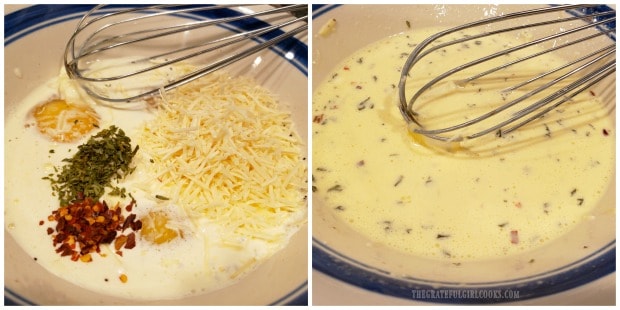
In a medium bowl, whisk together the eggs, whipping cream, parmesan cheese, parsley, salt, pepper and red pepper flakes until combined. Use a wire whisk or a fork to do this.

Once combined, it is time to “temper” the sauce. Set the sauce aside while you begin cooking the gnocchi. You will need hot, starchy water from cooking the gnocchi to help temper the sauce.The carbonara sauce is prepared by whisking ingredients together in bowl.

Temper The Carbonara Sauce

Tempering the sauce is important because there are fresh eggs in the sauce. If you add hot liquid too quickly to the sauce later, the eggs will probably scramble. We do NOT want scrambled eggs in the sauce, do we? NOPE!

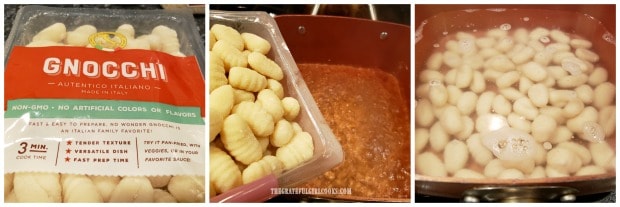
Before tempering the sauce, start the gnocchi cooking per the package instructions. You will need some of the starchy hot water from that pan to temper the sauce. OK? Basically you are going to boil the gnocchi for a few minutes, and use a bit of that boiling water in the carbonara sauce. Here is how easy it is to slowly temper the sauce:

Gnocchi (potato dumplings) are boiled for a few minutes in water, to cook fully.

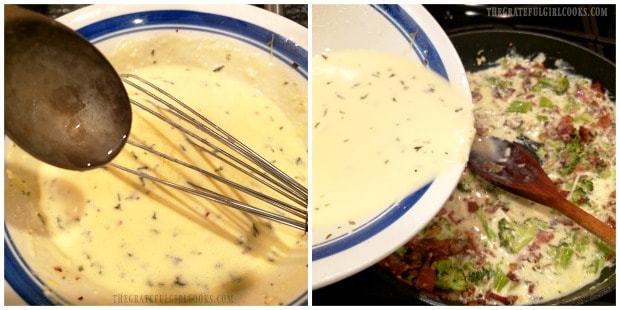
Take about 6 Tablespoons (ONE TABLESPOON AT A TIME) of the boiling starchy water from the gnocchi pan and SLOWLY drizzle it into the egg mixture, while whisking the sauce, to slowly disperse the hot water.

Continue to drizzle hot water and whisk continuously, until all 6 Tablespoons of gnocchi water have been added. Once this is done, pour the carbonara sauce over the veggies and bacon mixture in the skillet, and stir to combine.

Carbonara sauce is tempered, then added to the veggies and bacon in skillet.

Finishing The Gnocchi and Broccoli Carbonara

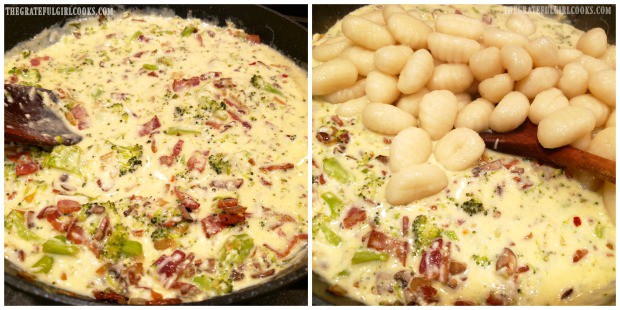
Once the sauce, bacon and veggies are combined, drain the cooked gnocchi. Add the cooked gnocchi to the skillet. Gently stir, to fully combine the ingredients. Cook on low heat for 1-2 minutes, or until heated through, but do not let the sauce boil.

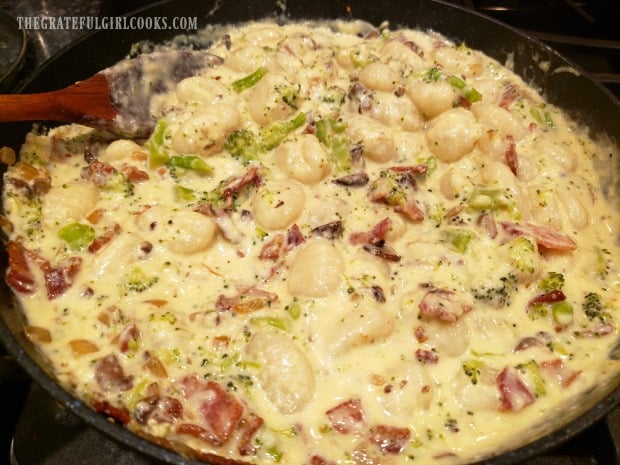
Once the gnocchi are heated through, and fully coated with sauce, the gnocchi and broccoli carbonara is ready to serve!

Heating the gnocchi and broccoli carbonara in a skillet before serving.After heating through, the gnocchi and broccoli carbonara is ready to be served.

Serve The Gnocchi And Broccoli Carbonara

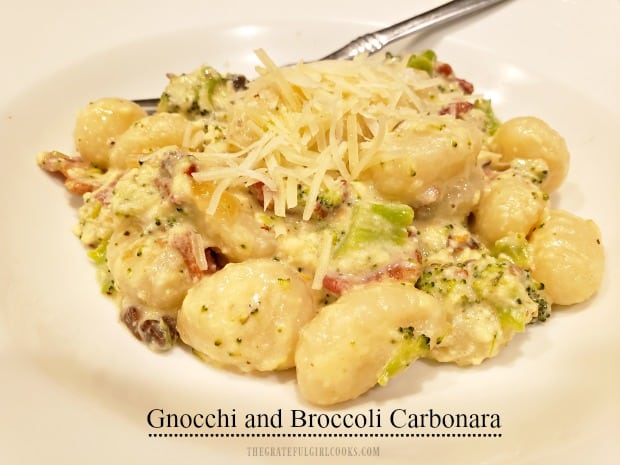
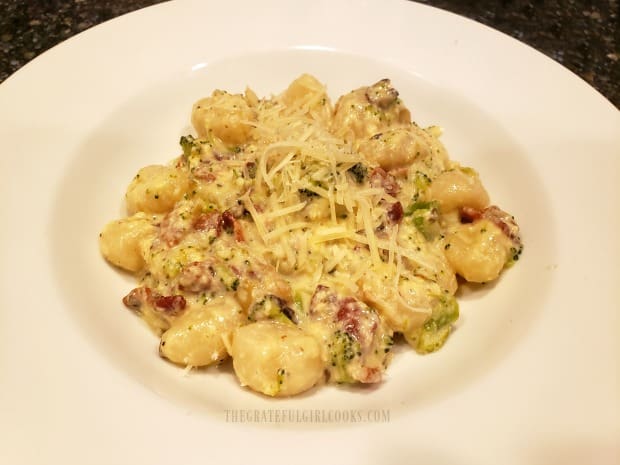
To serve, spoon out portions of the gnocchi onto plates or into bowls. Garnish each serving with additional shredded Parmesan cheese, if desired. Serve while hot, and enjoy!

The gnocchi and broccoli carbonara is garnished with grated Parmesan cheese.

Wow… was this dish yummy! Even the leftovers were good a couple days later! The gnocchi and broccoli carbonara can be easily microwaved on medium heat until re-heated to perfection! I sure hope you will give this recipe a try! It is soooo good! Have a GREAT day, and may God bless you in all you do today.

Looking For More Recipes That Use Gnocchi?

You can find all of my recipes in the Recipe Index. located at the top of the page. I have a few other gnocchi recipes, including:

Interested In More Recipes?

Thank you for visiting this website. I appreciate you using some of your valuable time to do soIf you’re interested, I publish a newsletter 2 times per month (1st and 15th) with all the latest recipes, and other fun info. I would be honored to have you join our growing list of subscribers, so you never miss a great recipe!
There is a Newsletter subscription box on the top right side (or bottom) of each blog post, depending on the device you use, where you can easily submit your e-mail address (only) to be included in my mailing list.

You Can Also Find Me On Social Media:
Facebook page: The Grateful Girl Cooks!
Pinterest: The Grateful Girl Cooks!
Instagram: jbatthegratefulgirlcooks

Author's signature

Recipe Source: My brain, and my hunger.

0 from 0 votes
Gnocchi and Broccoli Carbonara
Prep Time
15 mins
Cook Time
5 mins
Total Time
20 mins
 

Gnocchi and Broccoli Carbonara is a delicious Italian dish, featuring potato dumplings coated in a bacon, Parmesan, mushroom and garlic creamy sauce.

Category: Main Course
Cuisine: Italian
Keyword: gnocchi and broccoli carbonara
Servings: 5
Calories Per Serving: 523 kcal
Author: JB @ The Grateful Girl Cooks!
Ingredients
  • 6 slices bacon
  • ½ medium yellow onion , finely chopped
  • 4 mushrooms , button or baby portobello
  • 3 large eggs
  • ¾ cup shredded Parmesan cheese
  • ¾ cup heavy whipping cream
  • ½ teaspoon salt
  • ¼ teaspoon black pepper
  • 1 teaspoon parsley flakes
  • ½ teaspoon red pepper flakes
  • 1 cup steamed broccoli (pre-cooked and chopped)
  • 17.6 ounce potato gnocchi
  • additional Parmesan for garnish (optional)
Instructions
  1. Fry bacon in large skillet until very crisp. Stack a few slices of bacon on top of each other and then cut into 1/2 inch slices. Fry in a large skillet, stirring often until done. Remove bacon from skillet, and place on paper towels to absorb grease. Drain MOST of the grease from skillet, but leave approx. 2 Tablespoons bacon grease in the skillet.

  2. Return skillet (with bacon grease) to stove. Add onions and mushrooms. Cook on medium-low heat until golden brown (3-4 minutes). Add garlic and bacon crumbles to skillet. Continue to cook, stirring often, for one more minute. Add chopped and steamed broccoli to skillet, and stir to combine. Set the skillet aside while you make carbonara sauce.

  3. Make Sauce: In a medium bowl, whisk eggs, whipping cream, parmesan cheese, parsley, salt, pepper and red pepper flakes together until combined. Set the sauce aside while you begin cooking the gnocchi, according to package directions. You will need hot, starchy water from cooking the gnocchi to help temper the sauce.

  4. Tempering the sauce is important because there are fresh eggs in the sauce. If you add hot liquid too quickly to the sauce, the eggs will likely scramble. Take about 6 Tablespoons (ONE AT A TIME) of the boiling starchy water from gnocchi pan and SLOWLY drizzle it into the egg mixture, while whisking continuously, to slowly disperse hot water. Continue to drizzle hot water and whisk, until all 6 Tablespoons of hot water have been added. Once done, pour the carbonara sauce over the veggies and bacon mixture in the skillet, and stir to combine.

  5. Once sauce, bacon and veggies are combined, drain the cooked gnocchi. Add the gnocchi to the skillet. Gently stir, to fully combine ingredients. Cook on low heat for 1-2 minutes, or until heated through, but do not let it boil. Once heated through and gnocchi are fully coated with sauce, it is ready to serve! To serve, spoon out portions of gnocchi onto plates or into bowls. Garnish each serving with additional shredded Parmesan cheese, if desired. Serve while hot, and enjoy!

Nutrition Facts
Gnocchi and Broccoli Carbonara
Amount Per Serving (1 (1/5 of total))
Calories 523 Calories from Fat 288
% Daily Value*
Fat 32g49%
Saturated Fat 16g100%
Cholesterol 206mg69%
Sodium 1047mg46%
Potassium 269mg8%
Carbohydrates 41g14%
Fiber 3g13%
Sugar 1g1%
Protein 19g38%
Vitamin A 1011IU20%
Vitamin C 18mg22%
Calcium 240mg24%
Iron 5mg28%
* Percent Daily Values are based on a 2000 calorie diet.

Here’s one more to pin on your Pinterest boards!Gnocchi and Broccoli Carbonara is a delicious Italian dish, featuring potato dumplings coated in a bacon, Parmesan, mushroom and garlic creamy sauce.