Month: November 2020

Rum Raisin Muffins

Rum Raisin Muffins are an easy to prepare breakfast treat! Brown sugar muffins filled with rum-soaked raisins! Recipe yields 1 dozen.
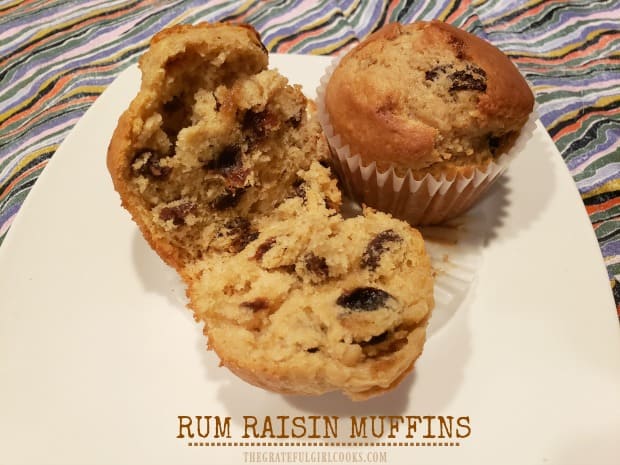

I originally found this recipe for rum raisin muffins in one of the many cookbooks I have collected over the years. This recipe has a very basic brown sugar batter, and has lots of rum-marinated raisins inside. It sounded intriguing, so I made them the first time for my husband and I.

We really liked them! They are not overly sweet, and honestly don’t taste too “rum-like” (in case you’re wondering), but are a moist, yummy muffin. They’re perfect for a quick breakfast or snack, and are very easy to make! Here’s how:

Scroll Down For A Printable Recipe Card At The Bottom Of The Page

Do You REALLY Soak The Raisins In Rum?

Yes. For this recipe, the raisins are soaked in a very small amount of rum. The alcohol will cook out as the muffins bake, leaving a small bit of flavor behind. You can use light rum, dark rum, or coconut rum, whatever type you have access to.

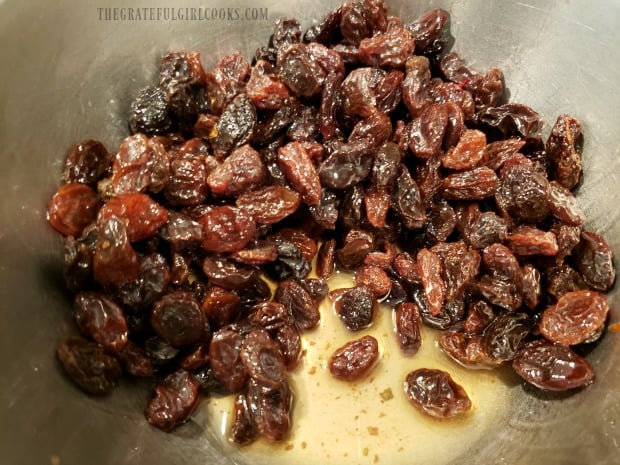
The raisins will take an hour to soak, so plan ahead! Truly, this is the only thing about the entire recipe that will take time. Place the raisins in a small bowl, and stir in the rum, until the raisins are coated. Let them sit for one hour, stirring occasionally, to allow the rum to lightly infuse the raisins with extra flavor. Do NOT drain, once done.

Raisins are soaked in rum before adding to muffin batter.

Prepare The Muffin Batter

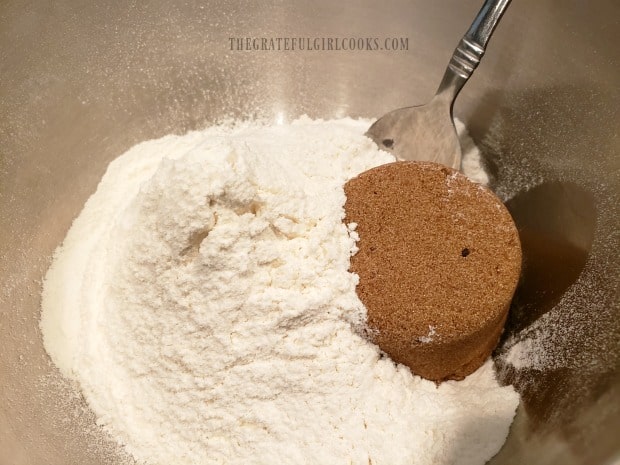
Before beginning, preheat your oven to 400°F, and grease or line with paper liners a 12 cup muffin pan. Now let’s make the batter! It’s a cinch. Sift all purpose flour, baking powder, cinnamon and salt into a large mixing bowl. Add the brown sugar, and stir well, to combine the dry ingredients.

Brown sugar is stirred into sifted flour, baking powder and salt.

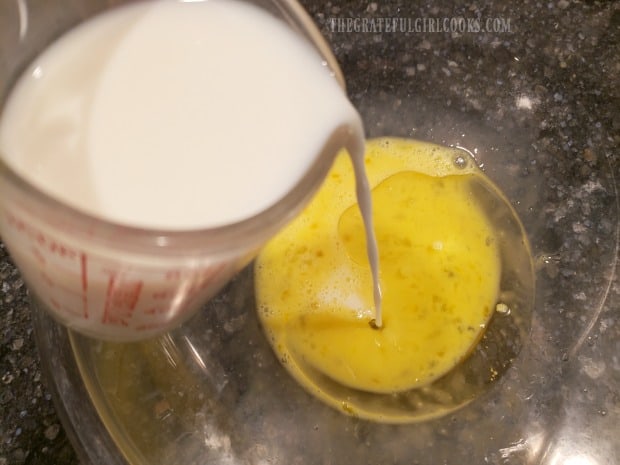
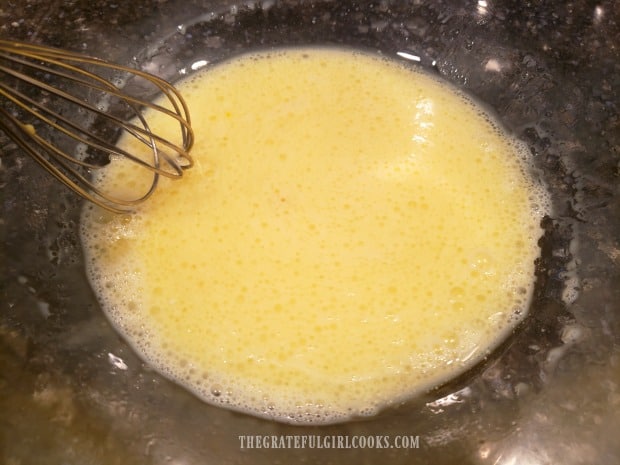
Place two eggs in a separate bowl, and whisk them lightly. Add the oil and milk, and whisk these wet ingredients together until fully combined.

Milk is added to beaten eggs and oil in large bowl.Wet ingredients are whisked together before adding to dry ingredients.

Finish The Batter

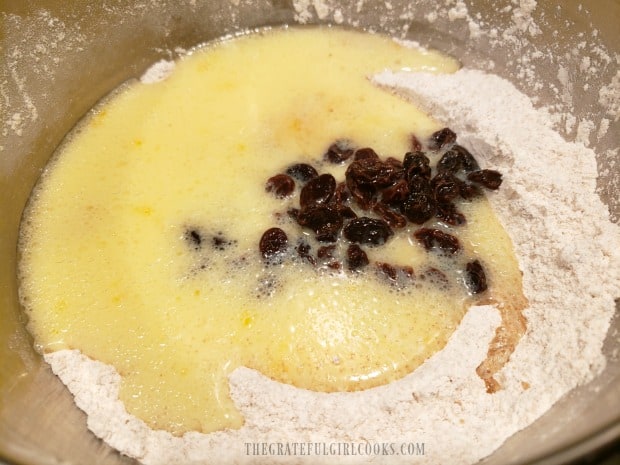
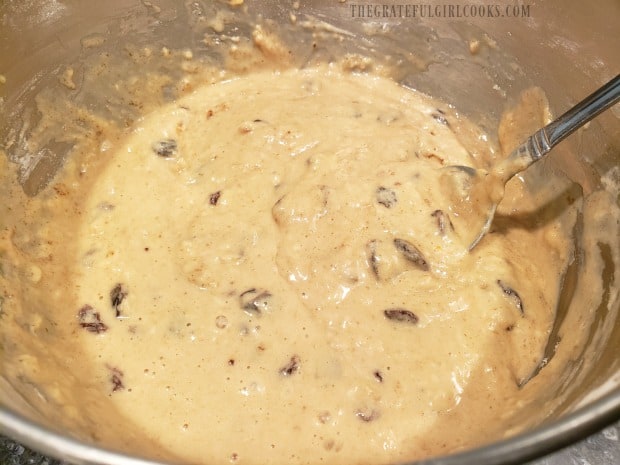
Hollow out a “well” in the middle of the bowl of dry ingredients, and pour in the wet ingredients. Now add the rum-soaked raisins (and any leftover liquid from their bowl) to the mix. Stir all the batter ingredients together gently until everything is combined. Be careful to not overmix the batter. Stir only until all ingredients have been incorporated into a slightly thick batter.

Wet ingredients and rum-soaked raisins are added to dry ingredients.The batter for the rum raisin muffins is ready to use.

Bake The Rum Raisin Muffins

Carefully pour or spoon the batter into the 12 prepared muffin cups, evenly dividing the batter between them. The batter will fill each cup to between 1/2 and 2/3 full.

Bake the rum raisin muffins at 400°F for 18-20 minutes. Test to see if they are done around the 18 minutes mark, by inserting a toothpick into the top of a muffin. If it comes out clean, they are done. The finished muffins will have risen considerably, and be nicely browned. Remove pan from oven. Let muffins cool (still in the pan) for 5 minutes, then transfer them to a wire rack to finish cooling.

Paper-lined muffin cups are filled with the muffin batter.After baking, the rum raisin muffins are nicely browned on top.

Time To Eat!

The rum raisin muffins are delicious, served warm, with a dab of softened butter. They are also yummy, when eaten at room temperature, just as they are. They are filled with plump, chewy raisins, and taste wonderful. I really hope you enjoy them.

Each of the rum raisin muffins is full of rum-soaked raisins!

Thank you so much for stopping by. I hope you have the opportunity to try this recipe for rum raisin muffins. They freeze well, so if you can’t possibly finish them all in one sitting, pop a few into re-sealable freezer bags and toss ’em in the freezer to enjoy at a later date.

Looking For More MUFFIN Recipes?

You can find all of my yummy muffin recipes in the Recipe Index, which is located at the top of the page. I have lots of them, including:

Interested In More Recipes?

Thank you for visiting this website. I appreciate you using some of your valuable time to do soIf you’re interested, I publish a newsletter 2 times per month (1st and 15th) with all the latest recipes, and other fun info. I would be honored to have you join our growing list of subscribers, so you never miss a great recipe!
There is a Newsletter subscription box on the top right side (or bottom) of each blog post, depending on the device you use, where you can easily submit your e-mail address (only) to be included in my mailing list.

You Can Also Find Me On Social Media:

Facebook page: The Grateful Girl Cooks!
Pinterest:
The Grateful Girl Cooks!
Instagram:
jbatthegratefulgirlcooks

Author's signature

Adapted from: The book “1 Mix, 100 Muffins”, by Susanna Tee, published by Parragon Books, 2008, page 28 (Caribbean Rum & Raisin Muffins)

0 from 0 votes
Rum Raisin Muffins
Prep Time
10 mins
Cook Time
18 mins
Marinating Time For Raisins (inactive)
1 hr
Total Time
1 hr 28 mins
 

Rum Raisin Muffins are an easy to prepare breakfast treat! Brown sugar muffins filled with rum-soaked raisins! Recipe yields 1 dozen.

Category: Breakfast, Snack
Cuisine: American
Keyword: rum raisin muffins
Servings: 12 muffins
Calories Per Serving: 255 kcal
Author: JB @ The Grateful Girl Cooks!
Ingredients
  • cups raisins
  • 3 Tablespoons rum white, dark or coconut
  • 2 cups all purpose flour
  • 1 Tablespoon baking powder
  • ½ teaspoon ground cinnamon
  • teaspoon salt
  • ½ cup dark brown sugar* * a HEAPING, packed ½ cup
  • 2 large eggs
  • 1 cup milk* * a SCANT cup of milk
  • 6 Tablespoons vegetable or sunflower oil can sub. melted/cooled butter
Instructions
  1. Place raisins in small bowl; stir in rum. Let raisins sit for 1 hour, stirring occasionally. Do NOT drain, once done.

  2. Preheat oven to 400°F, Grease or insert paper muffin liners into a 12 cup muffin tin.

  3. Sift flour, baking powder, cinnamon and salt into a large mixing bowl. Add brown sugar; stir well, to combine these dry ingredients. Set aside.

  4. Place two eggs in separate bowl; whisk lightly. Add oil and milk; whisk until these "wet ingredients" are combined. Hollow out a "well" in the middle of the bowl of dry ingredients; pour in these wet ingredients. Add rum-soaked raisins (and any liquid from their bowl). Stir gently until all ingredients are combined. Be careful to not overmix the batter... only stir until ingredients have been incorporated into a slightly thick batter.

  5. Evenly divide batter into 12 prepared muffin cups. Fill each cup between 1/2 to 2/3 full. Bake at 400°F for 18-20 minutes. Test to see if done at the 18 minute mark, by inserting a toothpick into the top of a muffin. If it comes out clean, they're done. They will have risen considerably, and be nicely browned. Remove pan from oven. Let muffins cool (still in pan) for 5 minutes, then transfer to wire rack to finish cooling. Enjoy!

Recipe Notes

Caloric calculation made utilizing vegetable oil in recipe.
Nutrition Facts
Rum Raisin Muffins
Amount Per Serving (1 muffin)
Calories 255 Calories from Fat 72
% Daily Value*
Fat 8g12%
Saturated Fat 6g38%
Cholesterol 32mg11%
Sodium 54mg2%
Potassium 326mg9%
Carbohydrates 41g14%
Fiber 2g8%
Sugar 10g11%
Protein 4g8%
Vitamin A 84IU2%
Vitamin C 1mg1%
Calcium 88mg9%
Iron 2mg11%
* Percent Daily Values are based on a 2000 calorie diet.

Here’s one more to pin on your Pinterest boards!Rum Raisin Muffins are an easy to prepare breakfast treat! Brown sugar muffins filled with rum-soaked raisins! Recipe yields 1 dozen.

Creamy Avgolemono Soup

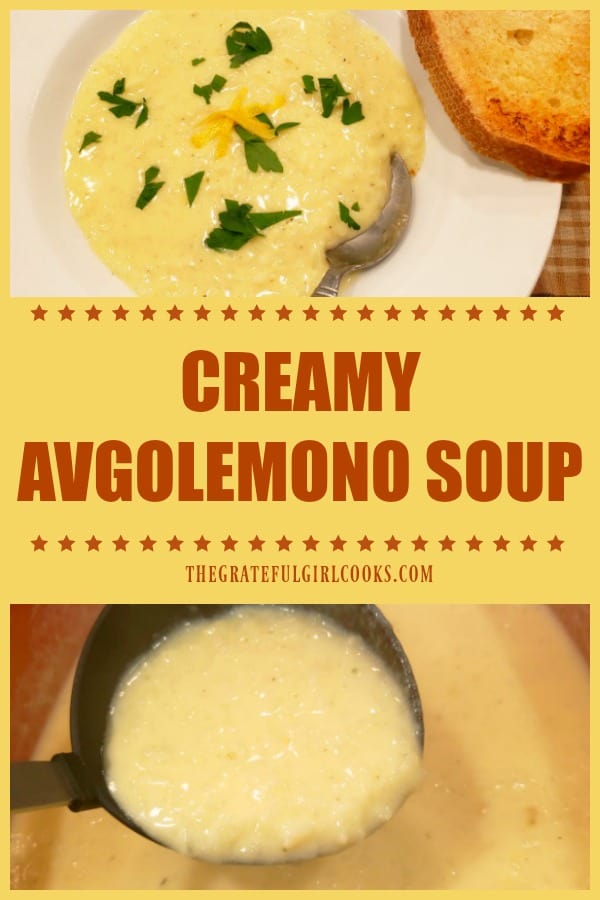
Creamy Avgolemono Soup is a classic Greek dish (with rice) that is delicious, rich and lemony, and very easy to make in under 30 minutes.Creamy Avgolemono Soup is a classic Greek dish (with rice) that is delicious, rich and lemony, and very easy to make in under 30 minutes.

For many years I have read about, looked at recipes, and wondered about Avgolemono soup. It sounded quite unusual. I was tempted many times to give it a try, but never did, until last month. Whoa! I LOVED this soup! Who knew that a lemon-flavored creamy rice soup could taste so incredibly GOOD?

Creamy avgolemono soup is a classic Greek beloved soup, one of their signature dishes, to be sure. Avgolemono” comes from the Greek language. “AVGO” means egg, and “LEMONO” means lemon. This light and creamy simple soup only uses a few ingredients, is EASY to make, and tastes wonderfully bright and fresh! I hope you will give it a try… it will surprise you, most likely. Here’s how to make it:

Scroll Down For A Printable Recipe Card At The Bottom Of The Page

How To Make Creamy Avgolemono Soup

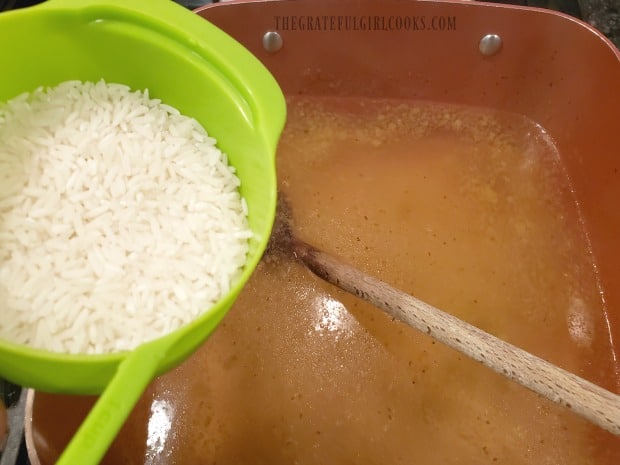
Heat six cups of chicken broth in a large saucepan over medium-high heat. Bring it to a boil, and then pour in a half cup of uncooked long grain rice. Stir well, to combine.

Cook the broth and rice, uncovered, for 15-20 minutes on medium-high heat, until the rice becomes tender. Stir the rice occasionally while it is cooking, to prevent it from sticking to the bottom of the pan.

Uncooked rice is added to boiling chicken broth to cook.

Temper The Egg Mixture Before Adding To Hot Soup

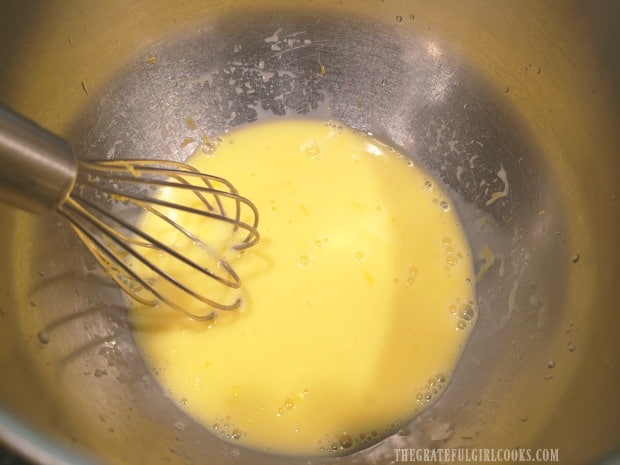
In a medium-sized bowl, whisk four egg yolks lightly, and then add fresh lemon juice and finely grated lemon zest, whisking to combine. Now it’s time to “temper” the egg mixture. This is a VERY important step!

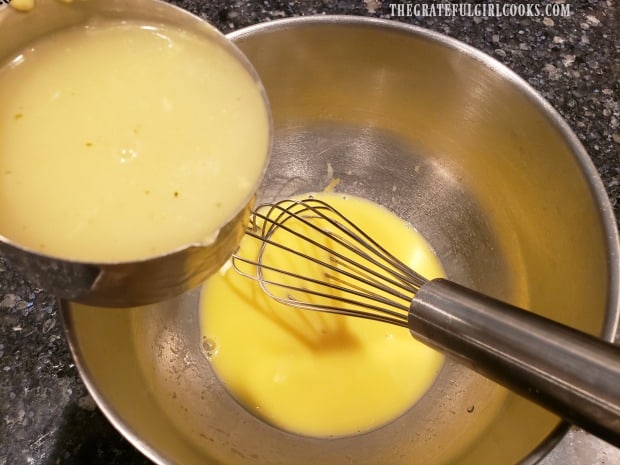
*Tempering the eggs means slowly adding in hot broth VERY SLOWLY. This raises the temperature of the eggs, so that when they’re added to very hot soup, they won’t become “scrambled eggs”. Here’s how to temper the egg mixture:

Slowly drizzle 1 cup of the hot broth into the egg mixture, whisking constantly as you add it. Continue whisking until all the cup of broth has been added. Turn the heat down to medium-low under the broth in the pan , and then slowly add the warmed egg mixture back into the hot broth in the pot, whisking as you add it. 

Egg yolks, lemon juice and zest are whisked together until combined.Hot broth is slowly drizzled/whisked into egg mixture to temper the eggs.

Finish Cooking The Soup

Let the soup continue to cook on medium-low heat for 3-4 minutes, stirring often. DO NOT LET THE SOUP COME TO A BOIL!  The creamy avgolemono soup will thicken up a little bit as it continues to cook. Once it has fully heated through (about 3-4 minutes), remove the pan from the heat. Season lightly (to suit your taste) with salt and pepper.

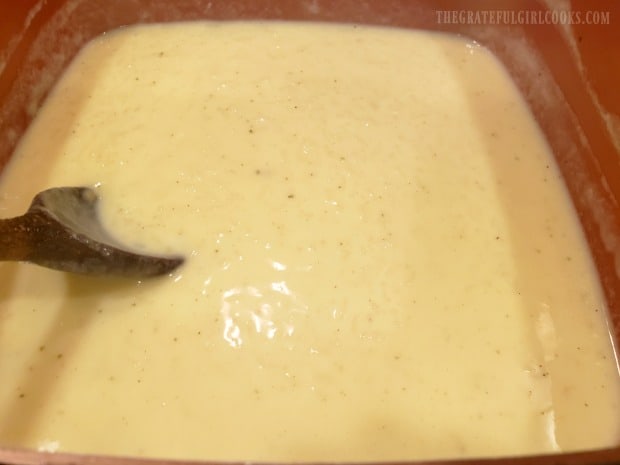
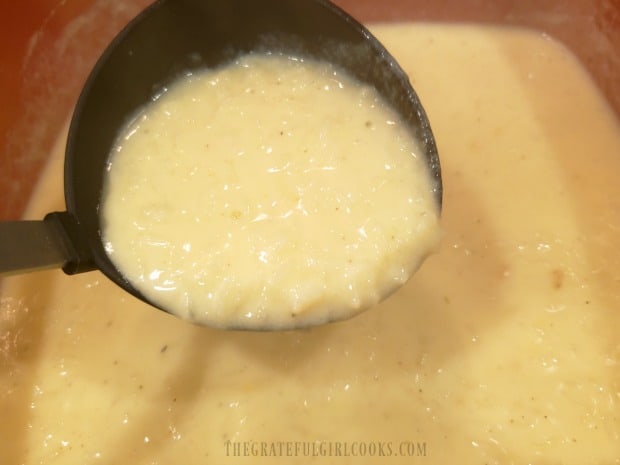
Avgolemono soup is cooked 3-4 minutes after adding tempered egg mixture.The soup is lemony, rich, thick and creamy after heating through.

Ready For A Bowl Of Creamy Avgolemono Soup!

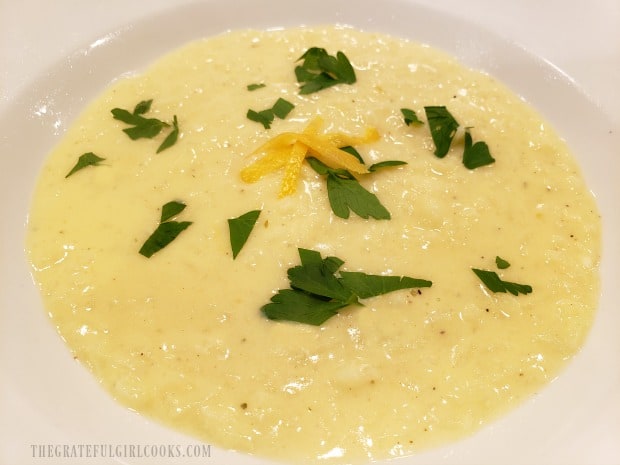
Once heated through, the creamy avgolemono soup is ready to eat! Ladle the hot soup into serving bowls, and garnish each serving with chopped fresh flat-leaf parsley (and strips of lemon peel, if desired).

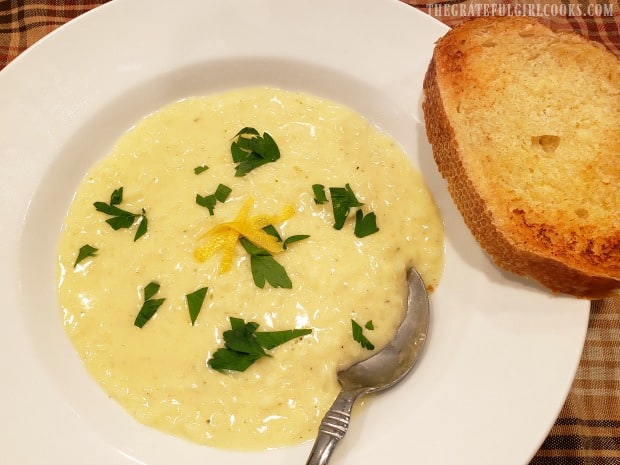
The parsley and lemon peel add a “pop” of color, and another layer of flavor, but are not absolutely essential if you don’t have them handy! The soup is thick and creamy, bursting with lemon flavor, and the rice is very tender (and filling). We enjoy this soup with crusty slices of garlic bread on the side. YUM!

A bowl of Creamy Avgolemono Soup, garnished with chopped parsley and lemon peel.Garlic bread served on the rim of a bowl of creamy avgolemono soup.

I truly hope you will give this creamy avgolemono soup a try- it’s quite delicious! The leftovers were microwaved for lunch the next day, and were wonderful, as well! Thank you for stopping by, and I hope you will come back soon. Take care.

Looking For More SOUP Recipes?

You can find all of my recipes in the Recipe Index, which is located at the top of the page. I have lots of soup recipes you’ll enjoy, including:

Interested In More Recipes?

Thank you for visiting this website. I appreciate you using some of your valuable time to do soIf you’re interested, I publish a newsletter 2 times per month (1st and 15th) with all the latest recipes, and other fun info. I would be honored to have you join our growing list of subscribers, so you never miss a great recipe!
There is a Newsletter subscription box on the top right side (or bottom) of each blog post, depending on the device you use, where you can easily submit your e-mail address (only) to be included in my mailing list.

You Can Also Find Me On Social Media:

Facebook page: The Grateful Girl Cooks!
Pinterest:
The Grateful Girl Cooks!
Instagram:
jbatthegratefulgirlcooks

Author's signature

Original recipe source: The cookbook: “Williams-Sonoma Soup Of The Day”, by Kate McMillan, published by Weldon Owen, Inc. 2011, page 15

5 from 3 votes
Creamy Avgolemono Soup
Prep Time
5 mins
Cook Time
20 mins
Total Time
25 mins
 

Creamy Avgolemono Soup is a classic Greek dish (with rice) that is delicious, rich and lemony, and very easy to make in under 30 minutes.

Category: Dinner, Soup
Cuisine: Greek
Keyword: creamy avgolemono soup
Servings: 4
Calories Per Serving: 200 kcal
Author: JB @ The Grateful Girl Cooks!
Ingredients
  • 6 cups low-sodium chicken broth
  • ½ cup long grain white rice , uncooked
  • 4 large egg yolks , slightly beaten
  • ¼ cup fresh lemon juice
  • 1 teaspoon lemon zest (finely grated lemon peel)
  • salt/pepper, to taste
  • 2 Tablespoons fresh parsley (flat leaf) , chopped for garnish
Instructions
  1. Heat broth in large saucepan on medium-high heat. Bring to a boil; add uncooked rice. Cook uncovered, 15-20 minutes on medium-high heat, until rice is tender. .Stir occasionally while it cooks, to prevent rice from sticking to bottom of pan.

  2. In a medium bowl, whisk egg yolks lightly. Add lemon juice and zest, whisking to combine. "Temper" the egg mixture. *Tempering eggs means slowly adding in hot broth VERY SLOWLY. This raises the temperature of the eggs, so that when added to hot soup, they won't scramble. Here's how: Measure out, then slowly drizzle 1 cup of the hot broth into the egg mixture, whisking constantly as you add it. Continue whisking until the entire cup of broth is added.

  3. Turn the heat down to medium-low under the broth in pan; slowly add the warmed egg mixture back into the broth in pan, constantly whisking as you add it back in. Let the soup continue cooking on medium-low heat for 3-4 minutes, stirring often. DO NOT LET THE SOUP COME TO A BOIL! Soup will thicken up a bit as it cooks. Once hot (3-4 minutes), remove pan from the heat.

  4. Season lightly (to suit your taste) with salt and pepper. Ladle hot soup into bowls, and garnish each serving with chopped parsley (and strips of lemon peel, if desired). Enjoy!

Nutrition Facts
Creamy Avgolemono Soup
Amount Per Serving (1 g)
Calories 200 Calories from Fat 63
% Daily Value*
Fat 7g11%
Saturated Fat 2g13%
Cholesterol 184mg61%
Sodium 117mg5%
Potassium 376mg11%
Carbohydrates 25g8%
Fiber 1g4%
Sugar 1g1%
Protein 12g24%
Vitamin A 414IU8%
Vitamin C 9mg11%
Calcium 45mg5%
Iron 2mg11%
* Percent Daily Values are based on a 2000 calorie diet.

Here’s one more to pin on your Pinterest boards!Creamy Avgolemono Soup is a classic Greek dish (with rice) that is delicious, rich and lemony, and very easy to make in under 30 minutes.

Cranberry Orange Bread

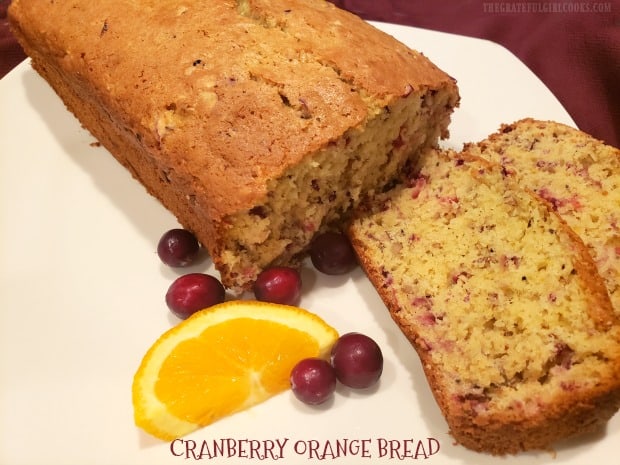
Make a large, delicious loaf of Cranberry Orange Bread! You’ll love this EASY recipe which is perfect for snacking, holidays, or gift-giving!Make a large, delicious loaf of Cranberry Orange Bread! You'll love this EASY recipe which is perfect for snacking, holidays, or gift-giving!

Do you like the flavor combination of cranberries and oranges? I sure do! In the past I’ve posted recipes here using cranberry-orange flavor palettes for cake, scones, and muffins.

I’ve even used the cranberry-orange combo for saladsIsraeli couscous, bagels, sauce and cookies, but realized I’ve never posted my tried and true recipe for simple, easy cranberry orange BREAD. No glazes, icings, etc. to complicate it… just sweet, delicious cranberry orange bread. YUMMO.

This recipe is SO EASY to make! The prep time is very minimal, and then into a hot oven a pan full of batter goes, only to re-appear as a golden loaf of amazing tasting bread!

Cranberry Orange Bread is a yummy treat you will enjoy for breakfast, snacking, OR giving lovingly to a dear friend or family member over the holidays! Here’s how easy it is to make:

Scroll Down For A Printable Recipe Card At The Bottom Of The Page

Prepare The  Batter

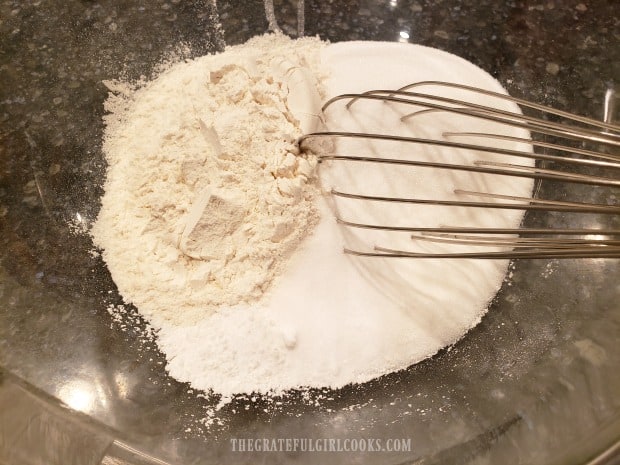
Before beginning, preheat your oven to 350°F. Whisk (or stir) together flour, granulated sugar, baking powder, salt and baking soda in a large mixing bowl, until combined.

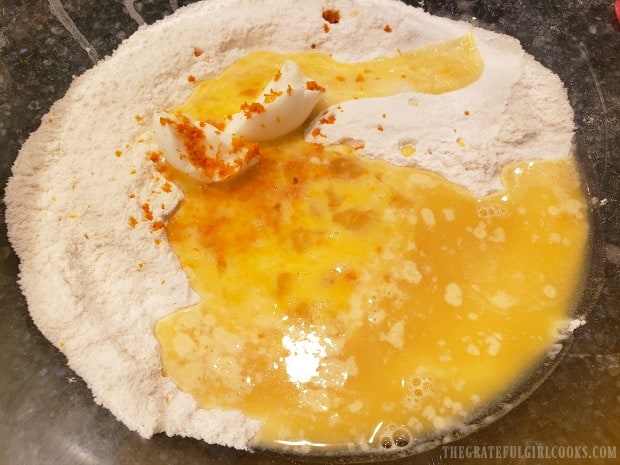
Add one egg (lightly beaten), orange juice, orange zest, and vegetable shortening to the flour mixture. 

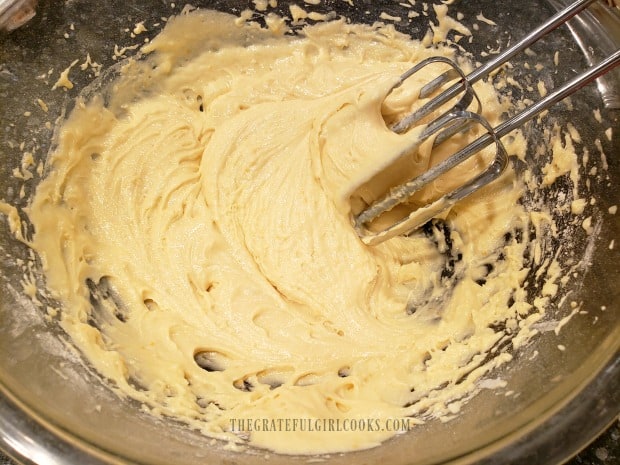
The dry ingredients are whisked together in a large bowl until combined.Egg, orange juice, orange zest and shortening are added to dry ingredients.

Use an electric mixer to fully combine these ingredients together, then remove the beaters.

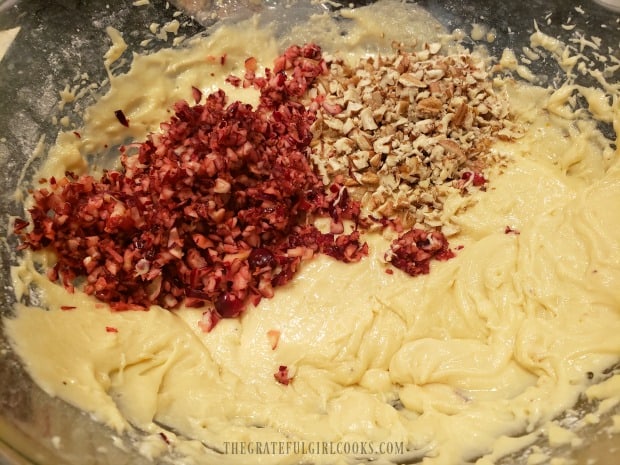
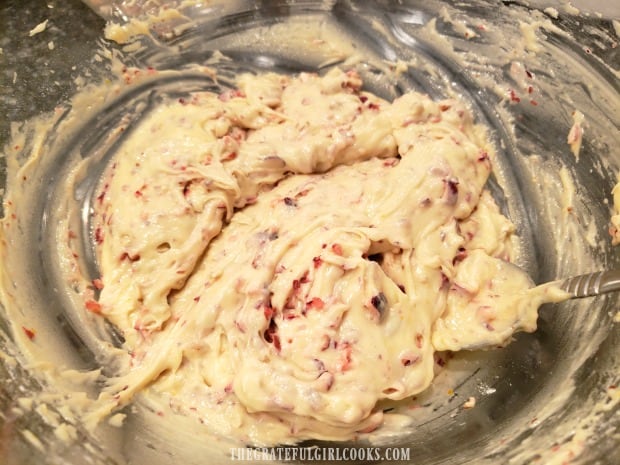
Once mixed, STIR in finely chopped cranberries and nuts (walnuts or pecans). Stir only until all ingredients have been incorporated into the batter.

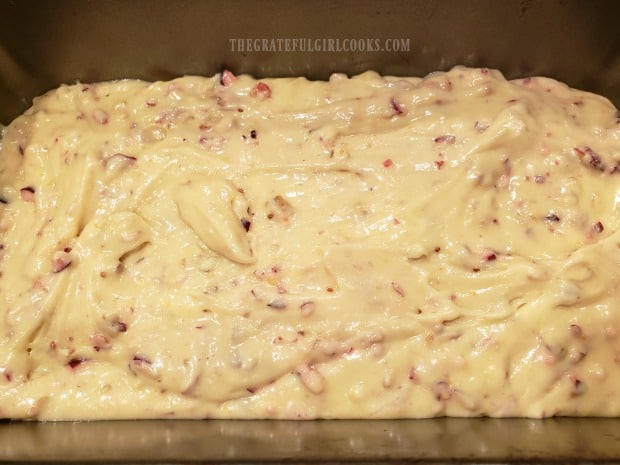
Wet and dry ingredients are mixed together to form batter for the bread.Finely chopped cranberries and pecans are added to the bread batter.After stirring, the cranberry orange bread batter is ready for a baking pan.

Bake The Cranberry Orange Bread

Now that the batter for the cranberry orange bread is ready, it’s time to bake! Grease or spray the bottom only of a 9×5 inch bread pan.

Transfer the batter into the prepared bread pan, evenly distributing the batter. Place the pan on the middle rack of a preheated oven.

Time to bake the cranberry orange bread.

Bake at 350°F for 50-55 minutes, or until a toothpick inserted into the top of the loaf comes out clean.

Oven temperatures tend to vary quite a bit, so I recommend checking the bread at the 50 minute mark, just to make sure you don’t over-cook it.

Removing The Bread From The Pan

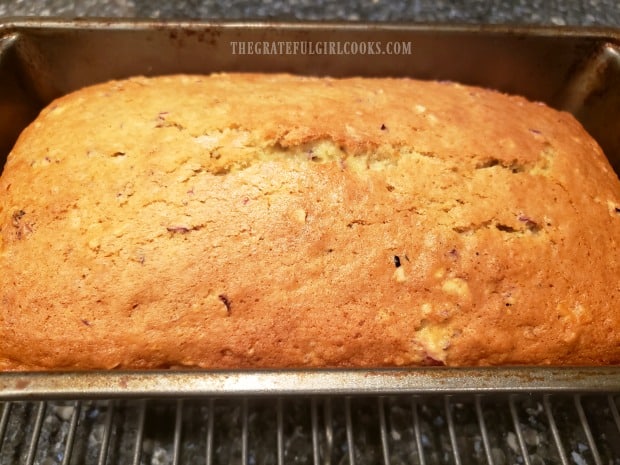
When done, the top should be beautiful and golden brown, and a toothpick will come out CLEAN. Transfer the pan to a wire rack, and let cool for about 10 minutes, before attempting to remove it from the pan.

After it cools, gently slide a butter knife around the edges of the bread to loosen it from the pan.

Place a platter on top of the bread pan. Quickly turn the loaf upside down, and tap on the bottom of the pan until the bread releases. If it doesn’t immediately release, turn it back over, re-do the sides with the butter knife, and let it cool a few more minutes.

Carefully place the loaf back onto a wire rack to finish cooling after removing it from the pan.

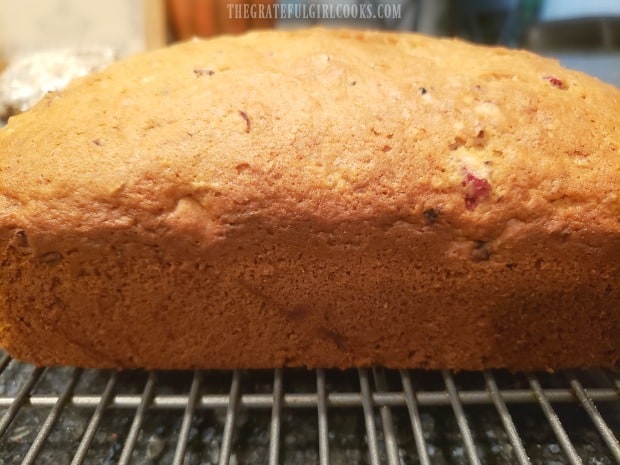
When done, the cranberry orange bread is golden brown on top.A side view of the finished loaf of bread while cooling on wire rack.

Cool, Slice, And Eat!

Let the cranberry orange bread cool for awhile before slicing. This will ensure a nicely cut slice! You can eat the bread warm with a dab of butter if desired. We enjoy this bread the most when served at room temperature, but it’s most certainly YOUR choice.

However you choose to eat it, either still warm or at room temperature… it really is delicious! The cranberry orange flavor is wonderful, and I am confident you will like it! The bread also freezes well, if wrapped very well!

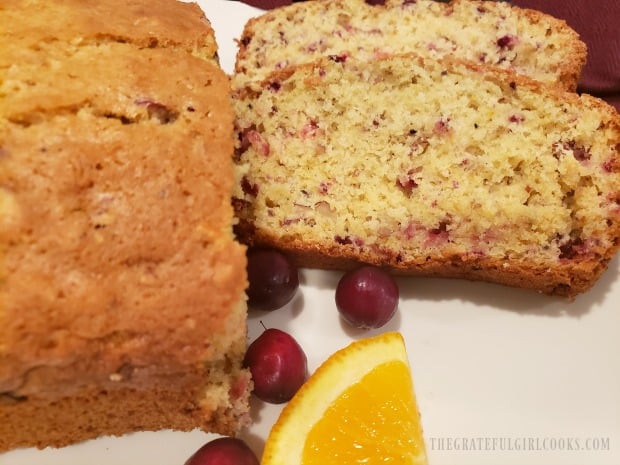
Two slices of cranberry orange bread and remaining loaf on a white plate.

Thank you so much for stopping by. I am grateful you took some of your precious time and spent it here. Hopefully you will have the opportunity to try this delicious bread for yourself, or can make a loaf for someone you love.

Please come back again soon for more family-friendly recipes! Have a great day, and may God bless you.

Looking For More “SWEET” BREAD Recipes?

You can find all of my bread recipes (sweetened and savory) in the Recipe Index, located at the top of the page. I have quite a few “sweet” bread recipes, including:

Want More Recipes? Get My FREE Newsletter!

I publish a newsletter 2 times per month (1st and 15th) with lots of recipes, tips, etc..
Would you like to join our growing list of subscribers?

There is a Newsletter subscription box on the top right (or bottom) of each blog post, depending on the device you use.
You can submit your e-mail address there, to be added to my mailing list.

Find Me On Social Media:

Facebook page: The Grateful Girl Cooks!
Pinterest:
The Grateful Girl Cooks!
Instagram:
jbatthegratefulgirlcooks

Author's signatureOriginal recipe source: unknown (written on an index card I’ve had for over 30 years)

↓↓ PRINTABLE RECIPE BELOW ↓↓

0 from 0 votes
Cranberry Orange Bread
Prep Time
10 mins
Cook Time
50 mins
Total Time
1 hr
 

Make a large, delicious loaf of Cranberry Orange Bread! You'll love this EASY recipe which is perfect for snacking, holidays, or gift-giving!

Category: Bread/Breakfast, Snack
Cuisine: American
Keyword: cranberry orange bread
Servings: 9
Calories Per Serving: 278 kcal
Author: JB @ The Grateful Girl Cooks!
Ingredients
  • 2 cups all purpose flour
  • 1 cup granulated sugar
  • teaspoons baking powder
  • 1 teaspoon salt
  • ½ teaspoon baking soda
  • ¾ cup orange juice
  • 1 large egg , lightly beaten
  • 2 Tablespoons vegetable shortening
  • 1 Tablespoon orange zest , finely grated orange peel
  • 1 cup cranberries , finely chopped
  • ½ cup walnuts or pecans , finely chopped
Instructions
  1. Preheat oven to 350°F. Grease or spray the bottom only of a 9x5 inch bread pan.

  2. Whisk (or stir) flour, sugar, baking powder, salt and baking soda in a large bowl, until combined. Add egg (lightly beaten), orange juice, orange zest, and vegetable shortening to flour mixture. Use an electric mixer to mix ingredients together. STIR in cranberries and nuts. Stir only until all ingredients have been incorporated into batter. Transfer batter into prepared pan, evenly distributing batter. Place pan on middle rack in preheated oven.

  3. Bake at 350°F for 50-55 minutes, or until a toothpick inserted into the top of loaf comes out clean. I recommend checking the bread at 50 minutes, to make sure you don't over-cook it.

  4. When done, the top should be golden brown, and a toothpick has come out CLEAN. Transfer pan to a wire rack; let cool for 10 minutes, before attempting to remove bread from pan. After it cools, slide a butter knife around edges of the bread to loosen it from pan. Place a platter on top of the bread pan. Holding both platter and bread pan carefully turn loaf upside down; tap on bottom of pan until bread releases. If it doesn't immediately release, turn it back over, re-do sides with butter knife, and let cool 3-4 more minutes. Carefully place loaf on wire rack to finish cooling after removing it from pan. Let cool, slice and enjoy warm, or at room temperature.

Recipe Notes

Caloric calculation made using pecans.

Nutrition Facts
Cranberry Orange Bread
Amount Per Serving (1 g)
Calories 278 Calories from Fat 72
% Daily Value*
Fat 8g12%
Saturated Fat 1g6%
Cholesterol 21mg7%
Sodium 329mg14%
Potassium 184mg5%
Carbohydrates 48g16%
Fiber 2g8%
Sugar 25g28%
Protein 5g10%
Vitamin A 78IU2%
Vitamin C 13mg16%
Calcium 45mg5%
Iron 2mg11%
* Percent Daily Values are based on a 2000 calorie diet.

Here’s one more to pin on your Pinterest boards!Make a large, delicious loaf of Cranberry Orange Bread! You'll love this EASY recipe which is perfect for snacking, holidays, or gift-giving!


Baked Praline Acorn Squash

Baked Praline Acorn Squash is a delicious side dish! Crescent-shaped slices, topped w/ caramelized brown sugar, pecans, maple syrup & spices!

If you are searching for a delicious way to prepare acorn squash, may I suggest this recipe? Baked praline acorn squash is an absolutely delicious use of this delicious, hearty “Winter” vegetable, and I am confident you will love it as much as we do!

The basics of this easy recipe are this: Slice squash, brush with a glaze, sprinkle with a praline-type mixture, and then bake. It truly is an easy recipe to follow, and the end result is an amazing tasting side dish you will be proud to serve at any family dinner or feast! Here’s how to make it, step by step:

Scroll Down For A Printable Recipe Card At The Bottom Of The Page

How To Prepare The Acorn Squash

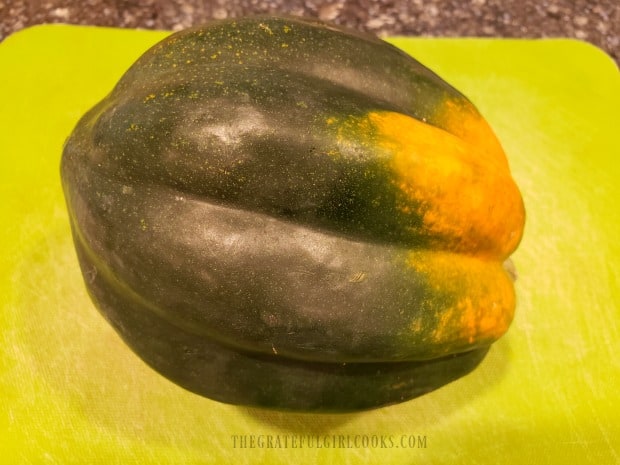
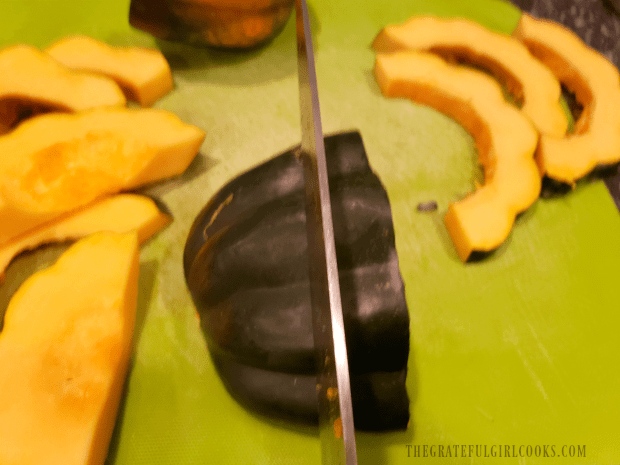
Before beginning, preheat your oven to 400°F. Okay… now here we go! Behold… the humble acorn squash (seen below), commonly found in most grocery stores. The first thing you will need to do is cut each squash in half horizontally (NOT from stem to bottom). The skin is fairly thick, so use extreme caution when cutting the squash.

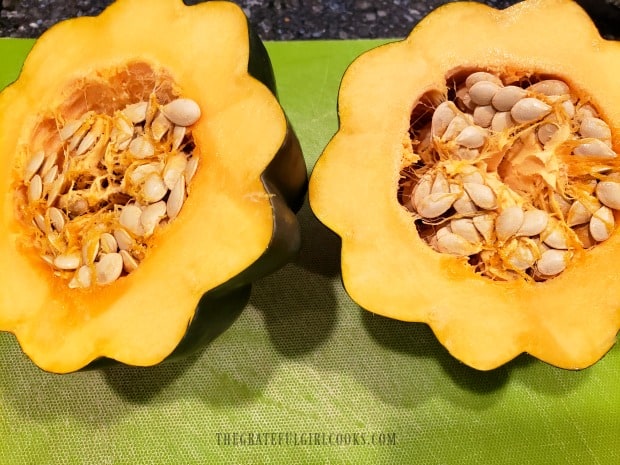
Once cut, remove the seeds (and attached pith), using a large spoon to scoop it out. When the seeds have been removed, cut each half in half again. You will have 4 pieces from each squash (8 pieces total, if preparing recipe as written).

A whole acorn squash, before de-seeding and slicing.After slicing the squash in half, the seeds need to be removed.Each of the acorn squash halves are then cut in half, making 4 quarters per squash.

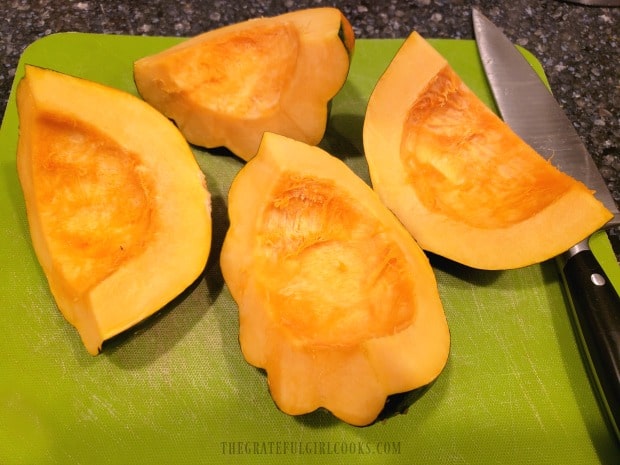
Carefully cut the acorn squash into approximately 1″ slices. This cutting will result in those unique crescent-shaped slices of squash.

Each of the pieces of squash are sliced into crescent-shaped slices.See the crescent-shaped acorn squash slices?

Prep The Slices For Baking

Cover two rimmed baking sheets with aluminum foil. Give each a light coating of non-stick baking spray. Arrange the squash slices in a single layer on each baking sheet. Stir olive oil and maple syrup together in a small bowl until combined.

Brush each slice of squash with HALF of this glaze (top surface only), reserving the other half of the glaze for later.

Raw slices of squash are brushed with an olive oil/maple syrup mixture.

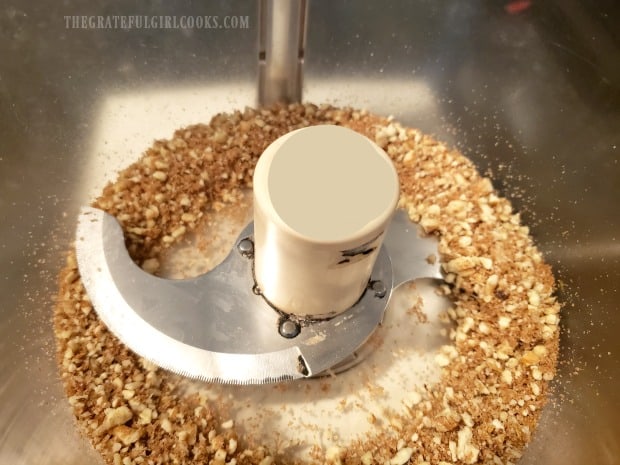
Place the pecan halves and brown sugar in a food processor (or hand-held food chopper). Pulse/process the nuts and brown sugar until the pecans become finely ground. Add salt, black pepper, and the cayenne pepper, and give it a quick pulse to incorporate these ingredients.

Sprinkle HALF of the pecan mixture over the surface of the acorn squash slices, reserving the other half for later.

Pecans, brown sugar, salt, pepper, and cayenne pepper are finely ground in a food processor.

Ready To Bake!

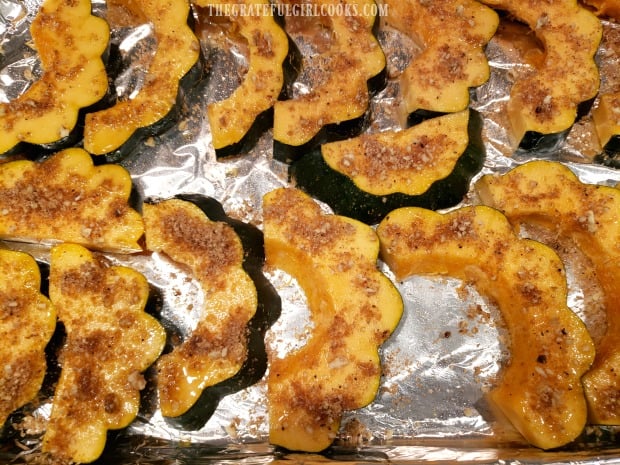
Once the slices have been covered with maple glaze AND the pecan praline mixture, they’re ready to pop in the oven! Bake at 400°F for 5 minutes, then remove the pans from the oven.

Carefully turn each slice over (use a fork, fingers, or tongs), and repeat process the same as before. Brush the slices with maple glaze, then sprinkle with remaining praline mixture. Place them back into the oven, and continue baking for 20 more minutes.

The baked praline acorn squash should be easily pierced with a fork when done. Some caramelization of the brown sugar/pecan mixture should have occurred, as well. Remove the squash from the oven, and transfer slices (carefully) to a serving platter.

Pecan/brown sugar mixture is sprinkled onto squash slices before baking.Baked Praline Acorn Squash slices are flipped after 5 minutes in oven.

Time To Eat The Baked Praline Acorn Squash

Now it’s time to enjoy the baked praline acorn squash. TIP: Please take note that you do NOT eat the peel on acorn squash. Your family or friends will need to simply run a butter knife around the edge and remove the peel before consuming this veggie dish. It’s EASY to do, because the squash is so tender!

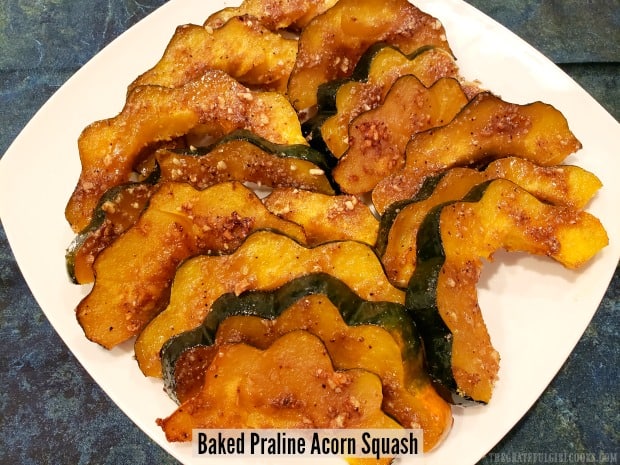
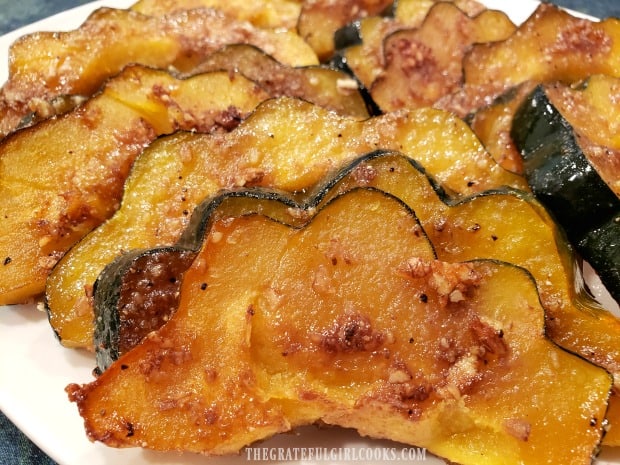
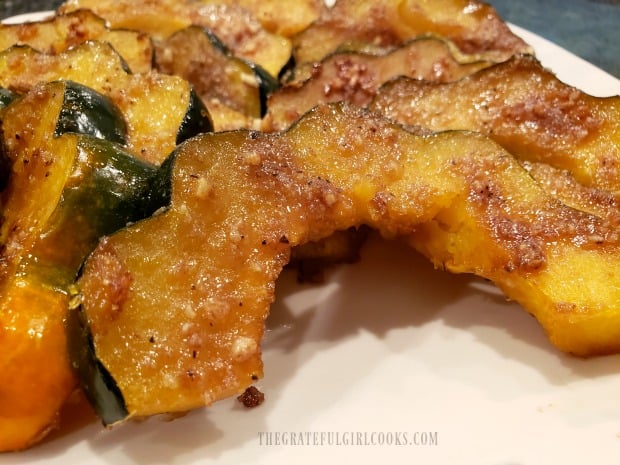
The acorn squash has wonderful flavor, especially due to the addition of the brown sugar/pecan mixture on each slice. Slightly sweet, and slightly nutty, with only a tiny little bit of heat from the cayenne, this veggie dish tastes GREAT!

A serving plate full of baked praline acorn squash, baked and ready to eat.The brown sugar/pecan mix has caramelized onto the squash while baking.

I hope you enjoy this recipe for baked praline acorn squash. We love it, and the (covered) leftovers will keep in the fridge for several days. Simply reheat any leftovers in the microwave, and you’re good to go for a second round. Yay for leftovers! If you enjoy this recipe, check out my recipe for Roasted Parmesan Acorn Squash. It shares some similarities to this one, but with a SAVORY flavor palette.

Thank you for taking time out of your busy day to come by for a visit. I’m so glad you did, and hope you will stop by again soon! May God bless you today in every situation and circumstance that comes your way.

Looking For More VEGGIE SIDE DISH Recipes?

You can find all of my vegetable side dish recipes in the Recipe Index, which is located at the top of the page. I have lots of them, including:

Interested In More Recipes?

Thank you for visiting this website. I appreciate you using some of your valuable time to do soIf you’re interested, I publish a newsletter 2 times per month (1st and 15th) with all the latest recipes, and other fun info. I would be honored to have you join our growing list of subscribers, so you never miss a great recipe!
There is a Newsletter subscription box on the top right side (or bottom) of each blog post, depending on the device you use, where you can easily submit your e-mail address (only) to be included in my mailing list.

You Can Also Find Me On Social Media:

Facebook page: The Grateful Girl Cooks!
Pinterest:
The Grateful Girl Cooks!
Instagram:
jbatthegratefulgirlcooks

Author's signature

Original recipe source: Erin Clarke, at: wellplated.com/praline-caramelized-squash/

0 from 0 votes
Baked Praline Acorn Squash
Prep Time
10 mins
Cook Time
25 mins
Total Time
35 mins
 

Baked Praline Acorn Squash is a delicious side dish! Crescent-shaped slices, topped w/ caramelized brown sugar, pecans, maple syrup & spices!

Category: Side Dish, Vegetable Dish
Cuisine: American
Keyword: baked praline acorn squash
Servings: 4
Calories Per Serving: 275 kcal
Author: JB @ The Grateful Girl Cooks!
Ingredients
  • 3 Tablespoons extra virgin olive oil
  • 2 Tablespoons pure maple syrup
  • 2 acorn squash , approx. 1½ pounds each
  • cup dark brown sugar
  • ½ cup pecan halves
  • 2 teaspoons salt
  • 1 teaspoon black pepper
  • teaspoon cayenne pepper
Instructions
  1. Preheat oven to 400°F. Place aluminum foil on two rimmed baking sheets. Lightly spray foil with non-stick baking spray.

  2. Cut each squash in half horizontally (NOT from stem to bottom). Skin is thick; use caution when cutting. Remove seeds and pith. Cut each half in half again, resulting in 4 pieces per squash. Cut squash into approx. 1" thick crescent-shaped slices. Arrange slices in a single layer on prepared baking sheets.

  3. Stir olive oil and maple syrup in a small bowl until combined. Brush each slice of squash with HALF of this glaze (top surface only), reserving other half for later.

  4. Place pecans and brown sugar in a food processor (or hand held food chopper). Pulse/process until the pecans become finely ground. Add salt, black pepper, and cayenne pepper; pulse or chop just enough to incorporate these ingredients. Sprinkle HALF of pecan mixture over top surface of squash slices, reserving other half for later.

  5. Bake at 400°F for 5 minutes; remove pans from oven. Carefully turn slices over (use fork, spatula, fingers, or tongs). Repeat process, brushing slices with remaining glaze, then sprinkling remaining pecan mixture. Place into oven; bake for 20 more minutes. Squash can be easily pierced with a fork when done (fork-tender), and pecan/brown sugar mix should be slightly caramelized. Remove from oven; transfer slices to serving platter. Serve, and enjoy!

Recipe Notes

Caloric calculation made based on 6 servings. Depending on the size squash used, it's possible to get 8 servings from the recipe, as written.
TIP: Please take note that you do NOT eat the peel on acorn squash. Simply run a butter knife around the outer edge and remove the peel (discard) before eating.

Nutrition Facts
Baked Praline Acorn Squash
Amount Per Serving (1 g)
Calories 275 Calories from Fat 117
% Daily Value*
Fat 13g20%
Saturated Fat 2g13%
Sodium 786mg34%
Potassium 852mg24%
Carbohydrates 41g14%
Fiber 4g17%
Sugar 16g18%
Protein 3g6%
Vitamin A 850IU17%
Vitamin C 25mg30%
Calcium 98mg10%
Iron 2mg11%
* Percent Daily Values are based on a 2000 calorie diet.

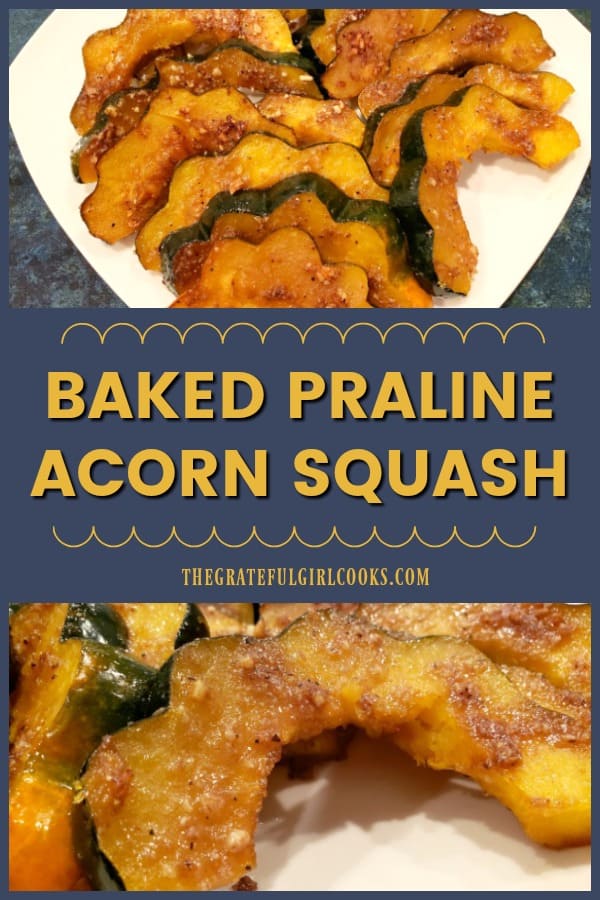
Here’s one more to pin on your Pinterest boards!Baked Praline Acorn Squash is a delicious side dish! Crescent-shaped slices, topped w/ caramelized brown sugar, pecans, maple syrup & spices!

Awesome Pecan Pie

Ready for the holidays? Why not bake an awesome pecan pie from scratch? This pie is absolutely delicious, and it’s very simple to make.
Ready for the holidays? Why not bake an awesome pecan pie from scratch? This pie is absolutely delicious, and it's very simple to make. My husband absolutely LOVES pecan pie. For many, many years I have made pecan pies, using the recipe found on the bottle of corn syrup (one of the ingredients).

All that has changed now, ever since I began making awesome pecan pie using another recipe. It’s a total KEEPER, and I want to share the recipe here with you today, and show you how to make it.

One of the unique things about this recipe that sets it apart is in its use of pecans. The recipe calls for finely chopped pecans, quartered pecans, and whole pecan halves used to decorate the top of this delicious pie.
This is also a vey easy pie to make. The flaky buttery crust, as written in the recipe is fantastic, but if really pressed for time, you could always use a pie dough shell. Let me show you how to make an awesome pecan pie!

Scroll Down For A Printable Recipe Card At The Bottom Of The Page

Make The Pie Crust

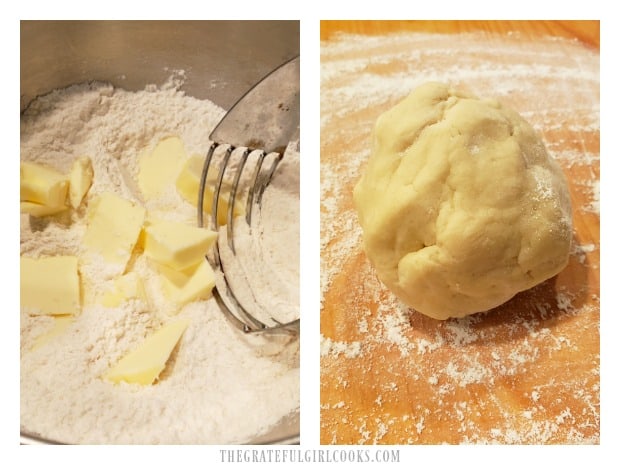
Measure all purpose flour, granulated sugar and salt into a large mixing bowl. Use a pastry cutter to “cut” chunks of very cold butter into the flour mixture. Do this until the butter has been “cut” into the crumbs (and becomes about the size of peas).

Sprinkle the dough with ice water, and stir until the pastry dough is bound together enough to form a dough ball.

Tip: You can also do this step in a food processor, if desired. Pulse cold butter chunks into flour mixture until butter is the size of peas. Drizzle in cold water while machine is running, until dough ball is formed.

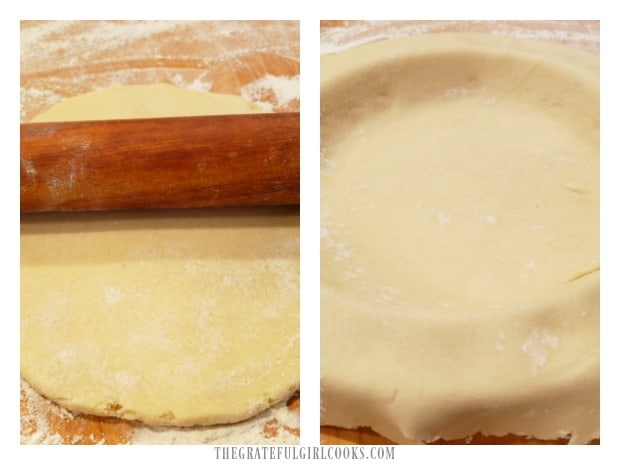
Place the dough ball on a lightly floured work surface. Roll the dough out until it becomes a circle that is at least an inch larger than the pie pan you will be using.

Carefully transfer the pie crust to the pie pan (I fold the dough circle in half, then lift it up and place it into the pie pan). PLACE THE PIE CRUST IN YOUR REFRIGERATOR TO KEEP IT COLD WHILE YOU MAKE THE FILLING!

Butter is cut into pie crust ingredients, and then a ball of dough is formed.Pie crust is rolled out, then put in pie pan, leaving crust overhanging the sides.

Make The Awesome Pecan Pie Filling

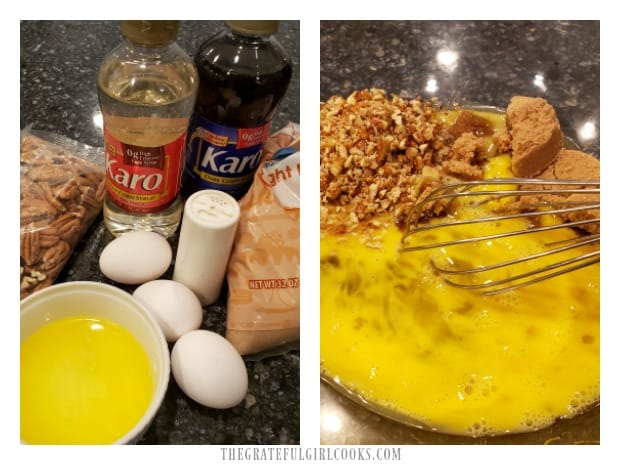
Now it’s time to make the pie filling. The ingredients for the filling are eggs, light and dark corn syrup, butter, brown sugar, a pinch of salt, and finely chopped pecans.

Whisk or stir these ingredients together in a medium sized mixing bowl until they are fully combined. I usually whisk the eggs lightly, then stir in the rest!

The pie filling ingredients are whisked together before adding to the crust.

Fill The Pie

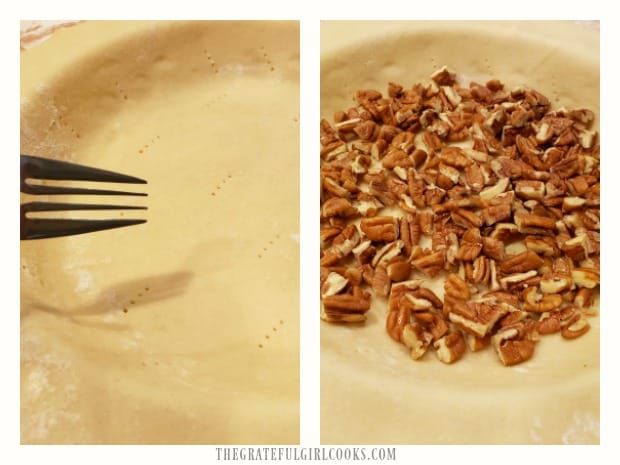
Use the tines of a fork to puncture the crust dough in several places on the bottom and sides. This helps to prevent air pockets from forming.

Add the quartered pecans to the crust, spreading them in a single layer, to cover the bottom as much as possible.

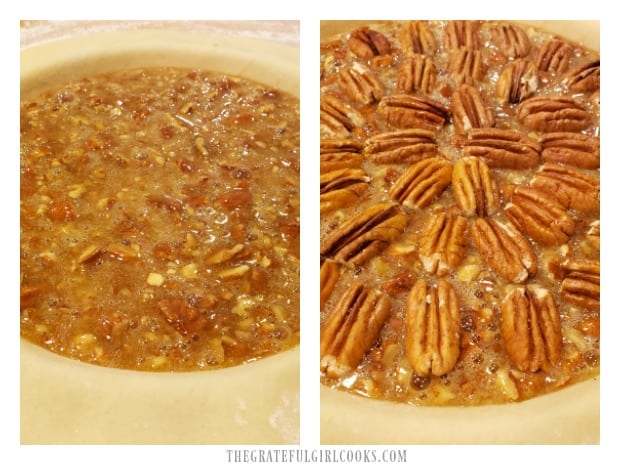
Pie crust is pierced with fork tines, then quartered pecans are added.Carefully pour the pie filling over the quartered pecans in the pie crust. Once the filling is in, decoratively arrange the remaining pecan halves over the top of the pie.

I start by going around the edge, and then work my way into the center with the pecan halves. They will lay right on top of the filling.
The pie filling is poured into crust, and then topped with pecan halves.

Bake Your Awesome Pecan Pie

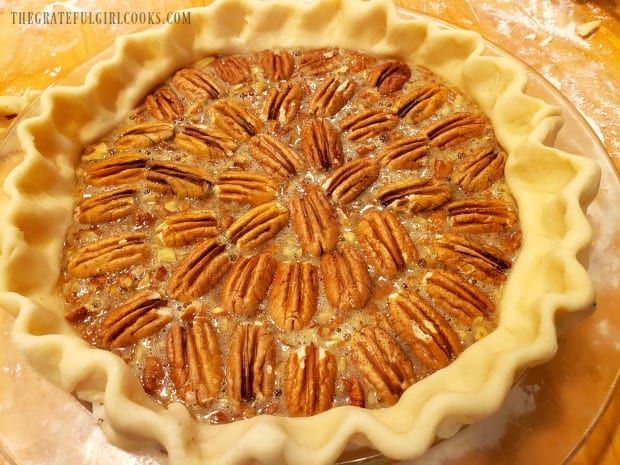
The last thing you will need to do is trim off any excess dough, then crimp the edges of your pie crust decoratively. Once that’s done, place the pie on the middle rack of a preheated 350°F oven.

Bake the pie for 1 hour, or until firm and nicely browned. The crust should be golden and flaky when done.

Pecans decorate the top of the pie before it is baked.The top of the awesome pecan pie is golden browned after baking.

Time For A Slice Of Pecan Pie!

Once the pie has cooled (for about an hour), it is ready to serve (it slices better, too!). We actually prefer it served at room temperature.

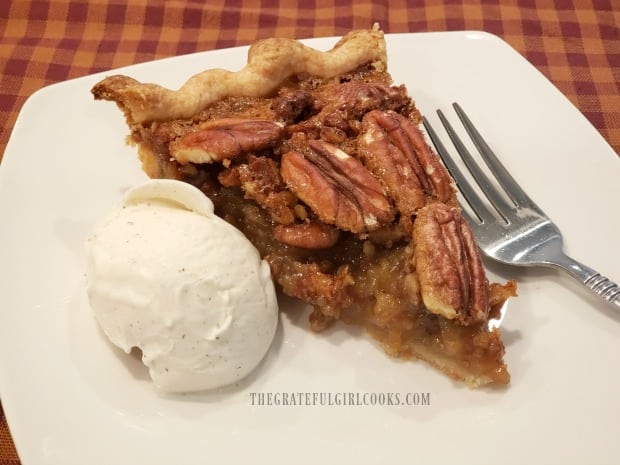
If you want, you can serve it warm with a tiny scoop of vanilla ice cream! The pie is rich and sweet, so we “usually” eat it without ice cream.

Once cooled, the pie can be easily sliced into 12 thin wedges and transferred to individual plates, for serving. Grab a fork, and dig in. I really think you will LOVE this awesome pecan pie!

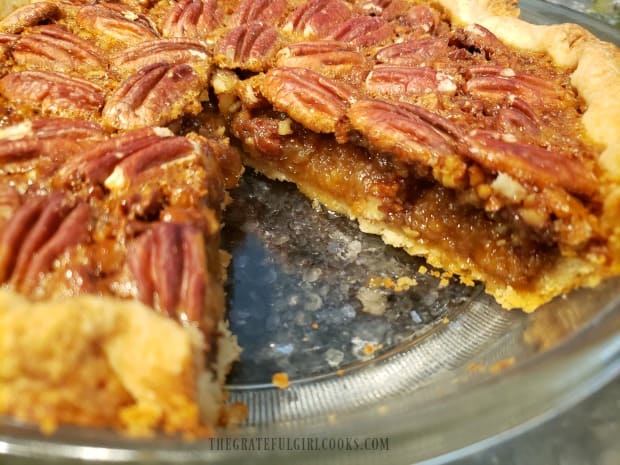
Taking a peek at the inside of the finished pecan pie.A slice of awesome pecan pie, with a scoop of ice cream on the side.

I really hope you enjoy this awesome pecan pie! We absolutely LOVE it, and trust you will find it delicious, too! Thank you for stopping by today. I hope you will come back soon.

Looking For More PIE Recipes?

You can find all my pie recipes in the Recipe Index, located at the top of the page. I have quite a few, including:

Want More Recipes? Get My FREE Newsletter!

I publish a newsletter 2 times per month (1st and 15th) with lots of recipes, tips, etc..
Would you like to join our growing list of subscribers?

There is a Newsletter subscription box on the top right (or bottom) of each blog post, depending on the device you use.
You can submit your e-mail address there, to be added to my mailing list.

Find Me On Social Media:

Facebook page: The Grateful Girl Cooks!
Pinterest:
The Grateful Girl Cooks!
Instagram:
jbatthegratefulgirlcooks

Author's signature

Original recipe source: allrecipes.com/recipe/18433/irresistible-pecan-pie/

↓↓ PRINTABLE RECIPE BELOW ↓↓

0 from 0 votes
Awesome Pecan Pie
Prep Time
30 mins
Cook Time
1 hr
Total Time
1 hr 30 mins
 

Ready for the holidays? Why not bake an awesome pecan pie from scratch? This pie is absolutely delicious, and it's very simple to make.

Category: Dessert
Cuisine: American
Keyword: awesome pecan pie
Servings: 12
Calories Per Serving: 444 kcal
Author: JB @ The Grateful Girl Cooks!
Ingredients
For Crust:
  • cups all purpose flour
  • 2 Tablespoons granulated sugar
  • ½ teaspoon salt
  • ½ cup butter (1 stick) , very cold & cut in chunks
  • 4 Tablespoons ice water
For Pie Filling:
  • 3 large eggs
  • ¾ cup light corn syrup
  • 2 Tablespoons dark corn syrup
  • ¾ cup light brown sugar
  • 3 Tablespoons butter , melted
  • 1 pinch salt
  • ½ cup pecans, finely chopped
  • 1 cup pecan halves, quartered (each half cut in 4 pcs.)
  • 1 cup pecan halves
Instructions
  1. Preheat oven to 350°F.

  2. Make The Crust: Mix flour, sugar and salt in a medium mixing bowl. Cut chunks of cold butter into flour mixture, using two forks or a pastry blender. Continue until butter has been reduced to about the size of peas). Sprinkle dough with ice water, and stir well until the pastry dough is bound together enough to form a dough ball. Tip: You can also do this step in a food processor, if desired. Pulse cold butter chunks into flour mixture until butter is the size of peas. Drizzle in cold water while machine is running, until dough ball is formed.

    Place dough ball on floured work surface. Roll out until it becomes a circle an inch larger than the pie pan. Transfer crust to pan (fold circle in half, lift it up, place it in pie pan, unfold). PLACE PIE CRUST (IN PAN) INTO REFRIGERATOR TO KEEP IT COLD WHILE YOU MAKE THE PIE FILLING!

  3. Make The Filling: Whisk/stir eggs, light and dark corn syrups, melted butter, brown sugar, salt, and finely chopped pecans in medium mixing bowl until fully combined.

  4. Remove crust from refrigerator. Use fork tines to pierce crust in several places (bottom and sides). Spread quartered pecans on bottom of crust in a single layer. Pour pie filling evenly over the quartered pecans. Decoratively arrange remaining pecan halves over the top. Trim excess dough and crimp edges of pie crust.

  5. Bake pie at 350°F (on the middle rack of oven) for 1 hour, or until firm/nicely browned on top. Crust should be golden/flaky. Let pie cool for an hour, before slicing and serving. Enjoy!

Nutrition Facts
Awesome Pecan Pie
Amount Per Serving (1 slice (1/12th of total))
Calories 444 Calories from Fat 243
% Daily Value*
Fat 27g42%
Saturated Fat 8g50%
Cholesterol 74mg25%
Sodium 233mg10%
Potassium 139mg4%
Carbohydrates 50g17%
Fiber 2g8%
Sugar 35g39%
Protein 5g10%
Vitamin A 401IU8%
Vitamin C 1mg1%
Calcium 41mg4%
Iron 2mg11%
* Percent Daily Values are based on a 2000 calorie diet.

Here’s one more to pin on your Pinterest boards!

Ready for the holidays? Why not bake an awesome pecan pie from scratch? This pie is absolutely delicious, and it's very simple to make.

Hot Spiced Apple Cider

Warm up with a mug of “easy-to-make” hot spiced apple cider! It’s a delicious “family-friendly” drink to serve at any gathering or holiday!
Warm up with a mug of "easy-to-make" hot spiced apple cider! It's a delicious "family-friendly" drink to serve at any gathering or holiday!

For about 10 years, I annually hosted several Christmas parties in our home, some with over 100 in attendance, and another cookie exchange with anywhere between 10 and 20 co-workers. The desserts changed each year, but one treat I always made was a huge pot of Hot Spiced Apple Cider.

The first time I made it, I experimented with the ingredients (writing them down). It was such a hit, I made it the same way after that! I would cook a large double batch and leave it simmering on the stove, so guests could ladle up a steaming hot cup of spiced cider whenever they wanted.

Wow… the smell was amazing in our kitchen from the cinnamon sticks and other spices in that big old pot of hot apple cider. It was a popular spot in our kitchen. Today I want to show you how easy it is to prepare scrumptious hot spiced apple cider, whether it is for a small gathering with family OR a large group of friends. Here’s how:

Scroll Down For A Printable Recipe Card At The Bottom Of The Page

Apple Juice or Apple Cider?

For this recipe I recommend using apple CIDER, as opposed to apple juice. Typically (in the U.S.), commercial apple juice is heavily filtered to remove all the pulp from the apples used. When using apple cider, you tend to have a much more dense apple flavor.

Cider is made with crushed or mashed up apples. This mixture is then hard-pressed (through cloth or commercial filters), which allows a little bit more of the flavor-filled pulp to remain in the “juice”, before it is pasteurized.

*My tip: If you only have apple juice… just go ahead and use it, but if you can, get apple cider (that’s the best tasting), to make hot spiced apple cider.

Apple cider is used for this recipe, NOT apple juice.

Making Hot Spiced Apple Cider Is EASY

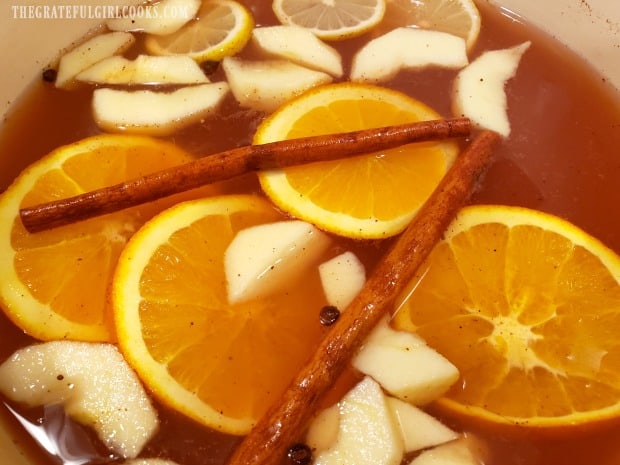
Making this delicious apple cider is very simple! Pour a 64 ounce bottle of apple cider into a large stockpot (or Dutch oven). Add some orange juice, cranberry juice, sliced lemon and oranges, and a peeled/sliced apple to the apple cider. Throw in whole allspice, ground cloves, nutmeg and 2 whole cinnamon sticks to the pan. You can find whole cinnamon sticks online, in craft stores, and many grocery stores.

Stir to combine all the ingredients, and then turn the heat to low under the pan. Let the hot spiced apple cider simmer for 30 minutes or more uncovered, on LOW heat, so the flavors have a chance to “marry” and develop. Your kitchen should begin to smell quite nice as the cider cooks, and you can see just how easy it is to make! The recipe, as written, will make approximately 8-9 servings, and can easily be doubled.

Apple cider, with juices, orange, apple and lemon slices, and cinnamon sticks heating.A package of cinnamon sticks, used to add flavor to the apple cider.

Serving Hot Spiced Apple Cider

Once the cider has simmered for 30 minutes or more (and is steamin’ hot), ladle the liquid into serving mugs. It will be perfect just the way it is, but if you want to “garnish” the drink, add an orange or lemon wedge to the rim of the mug. You can even toss in a few raw cranberries and/or a cinnamon stick, if you want (it’s totally optional).

Hot spiced apple cider, served with cinnamon stick, lemon wedge, and cranberries.

The cider should be served HOT, and I’m confident you will enjoy the warm, cinnamon, citrus and spice flavors in each cup.  It’s a yummy taste of Fall, and is a traditional beverage in our home. 

A mug of hot spiced apple cider, ready to sip!

I hope you enjoy this simple beverage! For me, it just screams “FALL”. If you have leftovers, let the cider cool completely. Strain out the spices, citrus, cinnamon sticks, etc., and pour the leftover cider back into the bottle. Store in refrigerator safely for 3-4 days. Reheat leftover cider in the microwave, or in a pan on the stovetop.

Have a great day, friends. Thank you for stopping by, and I truly hope you will come back again soon.

Looking For A Few More Hot “Family-Friendly” Beverages?

You can find all of my beverage recipes in the Recipe Index, located at the top of the page. I have a few “family-friendly HOT beverages, including:

Interested In More Recipes?

Thank you for visiting this website. I appreciate you using some of your valuable time to do soIf you’re interested, I publish a newsletter 2 times per month (1st and 15th) with all the latest recipes, and other fun info. I would be honored to have you join our growing list of subscribers, so you never miss a great recipe!
There is a Newsletter subscription box on the top right side (or bottom) of each blog post, depending on the device you use, where you can easily submit your e-mail address (only) to be included in my mailing list.

You Can Also Find Me On Social Media:

Facebook page: The Grateful Girl Cooks!
Pinterest:
The Grateful Girl Cooks!
Instagram:
jbatthegratefulgirlcooks

Author's signature

0 from 0 votes
Hot Spiced Apple Cider
Prep Time
10 mins
Cook Time
30 mins
Total Time
40 mins
 

Warm up with a mug of "easy-to-make" hot spiced apple cider! It's a delicious "family-friendly" drink to serve at any gathering or holiday!

Category: Beverage
Cuisine: American
Keyword: spiced apple cider
Servings: 8 (1 cup servings)
Calories Per Serving: 119 kcal
Author: JB @ The Grateful Girl Cooks!
Ingredients
  • 64 ounces apple cider
  • ½ cup orange juice
  • ½ cup cranberry juice
  • 1 medium apple (any variety) , peeled, seeded, thinly sliced
  • 1 medium orange , thinly sliced (leave peel ON)
  • 1 small lemon , thinly sliced (leave peel ON)
  • 2 cinnamon sticks
  • 8-10 pieces whole allspice
  • ¼ teaspoon ground cloves , can substitute 4-5 whole cloves
  • ¼ teaspoon ground nutmeg
Instructions
  1. Place all ingredients in a large stock pot or Dutch oven. Stir to combine.

  2. Cook on LOW heat (uncovered) for 30 minutes (or more) to allow flavors to fully develop. Once hot, ladle into mugs and serve. Garnish mugs of cider with fresh cranberries, orange or lemon wedges, or a cinnamon stick, if desired.

  3. **Storing leftover cider? Strain out spices, citrus etc. Let cool to room temp. Pour liquid back into apple cider bottle, cover, and refrigerate for up to 3-4 days. Microwave or heat on stovetop to re-heat. Enjoy.

Recipe Notes

Note: The caloric content is based on the calories from apple cider, orange and cranberry juices, as all other ingredients are used for flavoring, and not consumption.

Nutrition Facts
Hot Spiced Apple Cider
Amount Per Serving (1 cup)
Calories 119 Calories from Fat 9
% Daily Value*
Fat 1g2%
Saturated Fat 1g6%
Sodium 10mg0%
Potassium 272mg8%
Carbohydrates 29g10%
Fiber 1g4%
Sugar 25g28%
Protein 1g2%
Vitamin A 38IU1%
Vitamin C 11mg13%
Calcium 21mg2%
Iron 1mg6%
* Percent Daily Values are based on a 2000 calorie diet.

Here’s one more to pin on your Pinterest boards!Warm up with a mug of "easy-to-make" hot spiced apple cider! It's a delicious "family-friendly" drink to serve at any gathering or holiday!

Simply-Seasoned Pork Chops

Simply-Seasoned Pork Chops are a cinch to make and bake! These tasty, juicy, boneless or bone-in chops are ready to eat in under 30 minutes!

Have some pork chops and are looking for a quick and EASY way to fix them? May I suggest these simply-seasoned pork chops? They are ridiculously SIMPLE to make, but have great flavor!

If you don’t have much time to fix a fancy dinner, these simply-seasoned pork chops are the way to go! Season them, and toss ’em in the oven until done. BOOM! A delicious main dish is ready to go in under 25 minutes! Here’s how to whip up this recipe:

Scroll Down For A Printable Recipe Card At The Bottom Of The Page

Make The Spice Rub

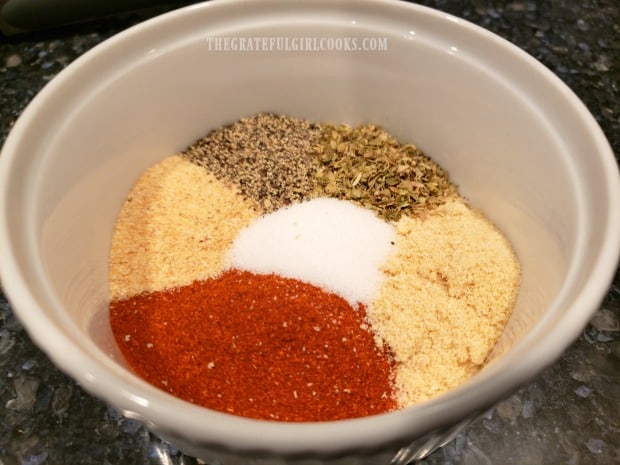
Before making the spice rub, make sure to preheat your oven to 400°F. This recipe comes together quickly, so you want your oven to be ready.  Now… on to the simple seasoning, which is a CINCH to make. Simply mix together paprika, garlic powder, onion powder, salt, pepper and oregano in a small bowl. This is the spice rub for the simply-seasoned pork chops!

Prepare The Simply-Seasoned Pork Chops

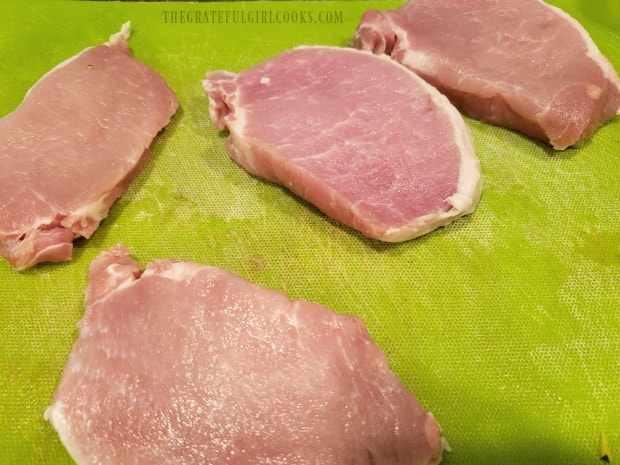
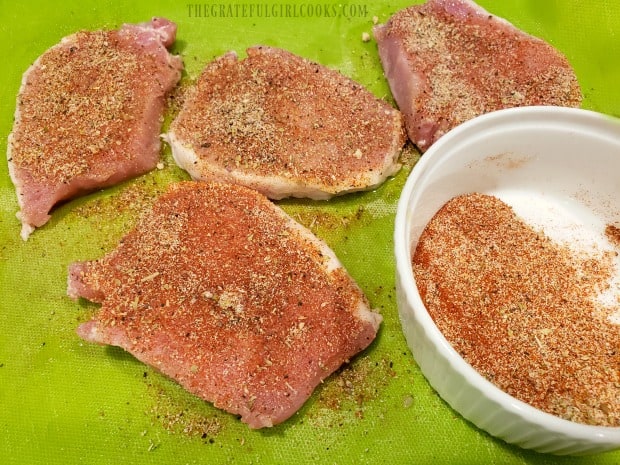
Place the pork chops on a work surface. I use boneless pork chops for this simple recipe, but have included a cooking (timing) tip in the printable recipe card (below) in case you are using bone-in chops. Bone-in will take just a tiny bit longer to cook.

Drizzle HALF (1 Tablespoon) of the olive oil over the chops, on BOTH sides. Rub it in, to cover. Sprinkle the prepared spice mix over both sides of the pork chops. Rub the spice mix into the pork with your fingers and press to ensure it sticks to the meat. Make sure all sides of the meat are covered with spices.

Bake The Simply-Seasoned Pork Chops

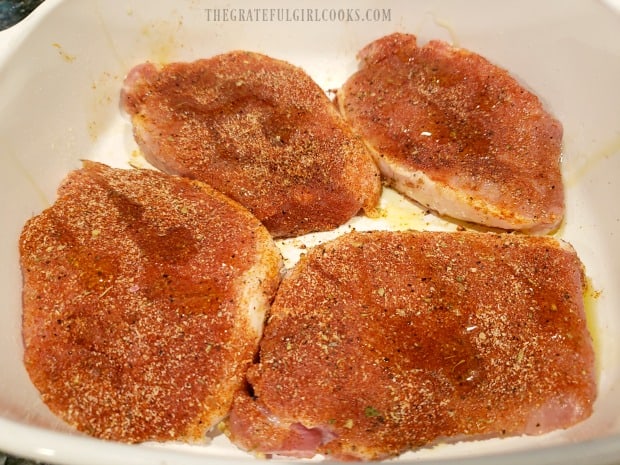
Place the pork chops into a small baking dish that is just big enough to hold the pork chops in a single layer. Juice will tend to accumulate in the pan during baking. You want the meat juices to “pool together” so they don’t evaporate in a larger baking pan while baking. Drizzle the chops with the remaining Tablespoon of olive oil before baking.

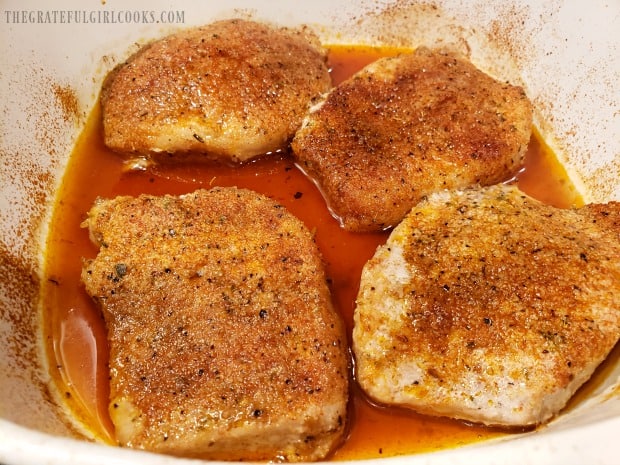
Bake the pork chops at 400°F for 18 minutes, OR until they reach an internal temperature of 140° F. See my note in the printable recipe card below. Make sure to NOT overcook the chops, because that will dry them out!

When done, remove the pork chops from the oven, and let them REST in the baking dish for 5 minutes. They’ll continue to cook as they rest (safe internal temperature for pork chops is 145°F), and the juices in the meat will time to redistribute through the meat, for juicier chops. As you can see from the photos below, some juice from the meat has accumulated in the dish. You can use that, if desired, to drizzle on a veggie side dish OR as the base for a quick gravy, because it has GREAT flavor. 

Time To Eat!

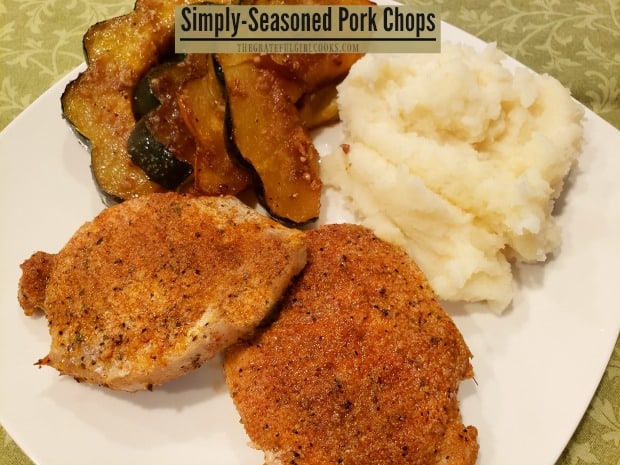
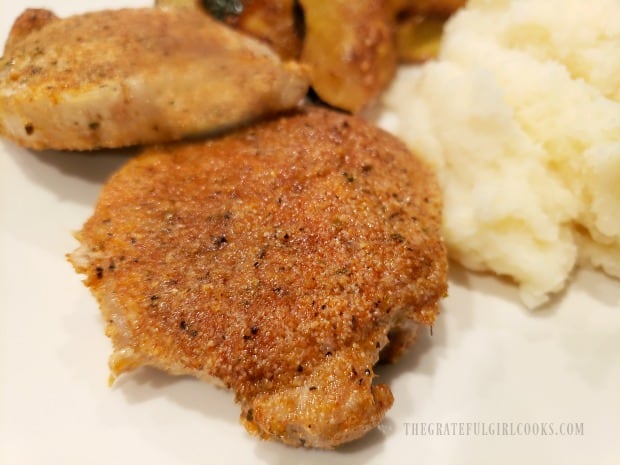
Once the simply-seasoned pork chops have rested for 5 minutes, they are ready to serve. Transfer to individual serving plates and serve with your favorite side dishes. We enjoyed the simply-seasoned pork chops with creamy mashed potatoes and baked praline acorn squash slices.

The pork chops were nice and juicy inside, perfectly baked, and had wonderful flavor. It was nice to enjoy such simple, tasty pork chops that didn’t require a lot of effort to prepare. Hooray!

I truly hope you will have the opportunity to make these delicious pork chops for yourself or those you love. Thank you for stopping by my blog. I sincerely hope you will come back again. Have a blessed day!

Looking For Other Recipes Using PORK CHOPS?

You can find all of my recipes in the Recipe Index, located at the top of the page. I have quite a few pork chop recipes, including:

Interested In More Recipes?

Thank you for visiting this website. I appreciate you using some of your valuable time to do soIf you’re interested, I publish a newsletter 2 times per month (1st and 15th) with all the latest recipes, and other fun info. I would be honored to have you join our growing list of subscribers, so you never miss a great recipe!
There is a Newsletter subscription box on the top right side (or bottom) of each blog post, depending on the device you use, where you can easily submit your e-mail address (only) to be included in my mailing list.

You Can Also Find Me On Social Media:

Facebook page: The Grateful Girl Cooks!
Pinterest:
The Grateful Girl Cooks!
Instagram:
jbatthegratefulgirlcooks

Author's signature

Original recipe source: https://www.theendlessmeal.com/juicy-baked-pork-chops/

0 from 0 votes
Simply-Seasoned Pork Chops
Prep Time
5 mins
Cook Time
18 mins
Total Time
23 mins
 

Simply-Seasoned Pork Chops are a cinch to make and bake! These tasty, juicy, boneless or bone-in chops are ready to eat in under 30 minutes!

Category: Entree
Cuisine: American
Keyword: simply-seasoned pork chops
Servings: 4
Calories Per Serving: 285 kcal
Author: JB @ The Grateful Girl Cooks!
Ingredients
  • 1 Tablespoon paprika
  • 2 teaspoons garlic powder
  • 2 teaspoons onion powder
  • 1 teaspoon salt
  • 1 teaspoon black pepper
  • 1 teaspoon dried oregano
  • 2 Tablespoons extra virgin olive oil, divided
  • 4 boneless pork chops (1¼" thick)
Instructions
  1. Preheat oven to 400°F.

  2. Make Spice Mix: Combine paprika, garlic powder, onion powder, salt, pepper and oregano in a small bowl.

  3. Prepare Chops: Drizzle HALF (1 Tablespoon) of olive oil over chops, on BOTH sides. Rub it in, to cover. Sprinkle spice mix over both sides of chops. Rub spices into pork to ensure it sticks to meat. All sides of the meat should be covered.

  4. Place pork chops into a baking dish just big enough to hold the chops in a single layer. Drizzle chops with remaining Tablespoon of oil. Bake at 400°F for 18 minutes (see note below), OR until they reach an internal temperature of 140° F. Make sure to NOT overcook them, because that will dry them out! When done, remove them from oven; let meat REST in baking dish for 5 minutes. They'll continue to cook as they rest (safe internal temperature for pork chops is 145°F), and the juices in the meat will time to redistribute through the meat, for juicier chops. After resting, they are ready to serve. Enjoy.

Recipe Notes

BAKING NOTE: At 400°F, as a general guide, boneless chops should be baked approx. 6-7 minutes per 1/2" thickness (as thickness of chops will vary). Bone-in chops will require an additional 1 minute of cooking time per 1/2" thickness.

Nutrition Facts
Simply-Seasoned Pork Chops
Amount Per Serving (1 pork chop)
Calories 285 Calories from Fat 153
% Daily Value*
Fat 17g26%
Saturated Fat 4g25%
Cholesterol 90mg30%
Sodium 649mg28%
Potassium 567mg16%
Carbohydrates 3g1%
Fiber 1g4%
Sugar 1g1%
Protein 30g60%
Vitamin A 862IU17%
Vitamin C 1mg1%
Calcium 25mg3%
Iron 1mg6%
* Percent Daily Values are based on a 2000 calorie diet.

Here’s one more to pin on your Pinterest boards!Simply-Seasoned Pork Chops are a cinch to make and bake! These tasty, juicy, boneless or bone-in chops are ready to eat in under 30 minutes!

Lemon Parmesan Orzo

Looking for an easy, light, yummy side dish your family will enjoy? Try Lemon Parmesan Orzo, (serves 4), and it’s ready in under 15 minutes!
Looking for an easy, light, yummy side dish your family will enjoy? Try Lemon Parmesan Orzo, (serves 4), and it's ready in under 15 minutes!

We sure do love orzo. I try to always keep a box of it handy, because it is a simply made side dish that can be enhanced and flavored in many different ways. If you are unfamiliar with this rice-shaped pasta, you can learn more about it here.

Today I want to share with you a recipe I found in an old cookbook of mine from Southern Living (in a Christmas edition from 2006). It features orzo pasta, cooked in broth (for added flavor), then enhanced with lemon juice, lemon zest, butter, pepper and Parmesan cheese.

I adapted the original recipe slightly to make 5 servings. Lemon Parmesan Orzo tastes WONDERFUL, and is a big hit in our home, whether served with beef, chicken, pork or fish. Here’s how to make it:

Scroll Down For A Printable Recipe Card At The Bottom Of The Page.

Prepare The Orzo

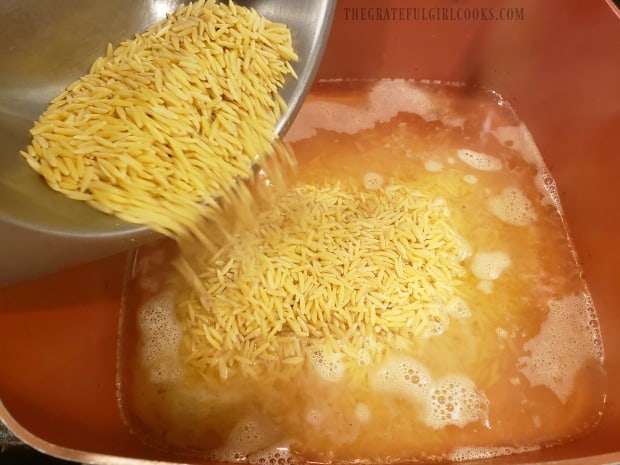
Bring chicken broth to a full boil (on medium heat) in a large saucepan. Once boiling, add the uncooked orzo pasta, and stir it in.

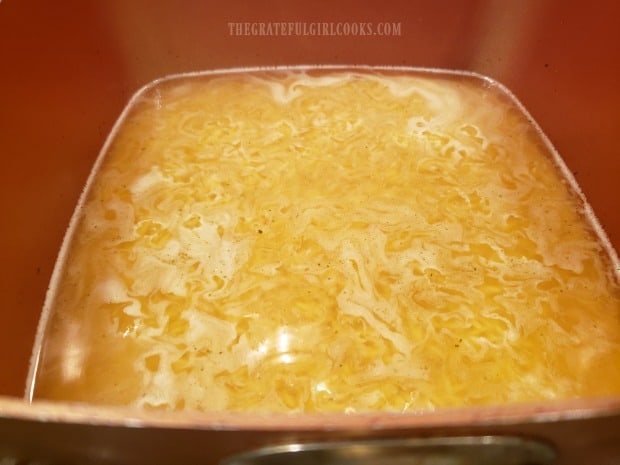
Cook the orzo uncovered on medium-low heat for 9-11 minutes, until the orzo is tender, and the broth has been absorbed into the pasta.

Stir often while it cooks, so the orzo doesn’t “stick” to the bottom of the pan, as the broth is absorbed.

Uncooked orzo pasta is added to boiling chicken broth in pan, to cook.Orzo and chicken broth cook for about 10 minutes in pan.

While The Orzo Cooks

While the orzo pasta cooks, prep the remaining ingredients. Just as soon as the orzo is finished cooking, these ingredients need to be ready to quickly add to the orzo while it is HOT.

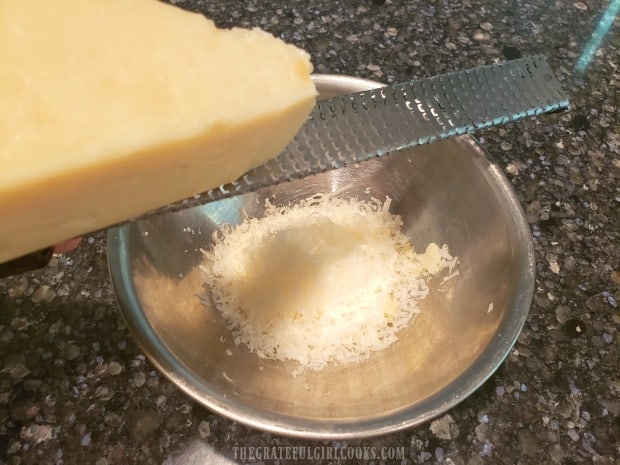
Finely grate Parmesan cheese (fresh is best), melt the butter, and finely grate the lemon peel (zest), and measure out the fresh lemon juice. Have these ingredients close by, so you’ll be ready to roll when the pasta is finished cooking.

**To get the lemon zest: If you don’t have a microplane (seen below), grate the yellow peel of the lemon with the smallest opening on a box grater. Do not grate the white part of the peel, because it can be bitter.

Finely grating Parmesan cheese to add to the cooked orzo, once done.

Add Final Ingredients To The Cooked Orzo

When the orzo is finished cooking, the broth will have been fully absorbed, and it will be tender to the bite. Quickly add the remaining ingredients while the pasta is really hot.

Orzo is done when liquid has been absorbed and pasta is tender.

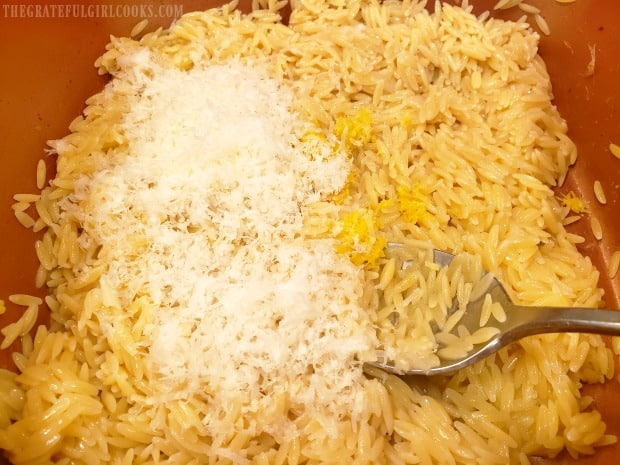
Pour in the melted butter, followed by the lemon juice, finely grated Parmesan cheese, and the lemon zest.

Stir the ingredients in immediately, so the heat from the orzo melts the Parmesan cheese. When it’s fully mixed, and the cheese has melted, it’s ready to serve.

Melted butter is added to the cooked orzo.Finely grated Parmesan cheese, lemon zest, juice and pepper are added to cooked orzo.

Time To Serve The Lemon Parmesan Orzo!

Once all the ingredients are combined, transfer the lemon Parmesan orzo to a serving bowl. Sprinkle the remaining Parmesan cheese on top.

If desired, garnish with a few lemon peel strips and fresh parsley (optional). Serve while hot, and enjoy!

We recently enjoyed lemon Parmesan orzo served as a side dish with grilled halibut with mango peach salsa, and some fresh green beans from our garden.

Lemon Parmesan Orzo, garnished with Parmesan cheese, lemon peel and parsley.The Lemon Parmesan Orzo, served with green beans and grilled halibut with salsa.

I hope you have the opportunity to make this delicious side dish for your family or friends. It really is delicious, and I am confident it will be a wonderful accompaniment to many of your favorite meals.

Thank you for stopping by, and I hope you choose to come back soon. Have a wonderful day friends, and take care.

Looking For More SIDE DISH Recipes?

You can all of my side dish recipes in the Recipe Index, which is located at the top of the page. I have lots of them to choose from, including:

Want More Recipes? Get My FREE Newsletter!

I publish a newsletter 2 times per month (1st and 15th) with lots of recipes, tips, etc..
Would you like to join our growing list of subscribers?

There is a Newsletter subscription box on the top right (or bottom) of each blog post, depending on the device you use.
You can submit your e-mail address there, to be added to my mailing list.

Find Me On Social Media:

Facebook page: The Grateful Girl Cooks!
Pinterest:
The Grateful Girl Cooks!
Instagram:
jbatthegratefulgirlcooks

Author's signature

Original recipe source: The cookbook “Christmas with Southern Living 2006”, published by Oxmoor House, page 28

↓↓ PRINTABLE RECIPE BELOW ↓↓

0 from 0 votes
Lemon Parmesan Orzo
Prep Time
3 mins
Cook Time
11 mins
Total Time
14 mins
 

Looking for an easy, light, yummy side dish your family will enjoy? Try Lemon Parmesan Orzo, (serves 4), and it's ready in under 15 minutes!

Category: Side Dish
Cuisine: American
Keyword: lemon Parmesan orzo
Servings: 4
Calories Per Serving: 210 kcal
Author: JB @ The Grateful Girl Cooks!
Ingredients
  • 2 cups chicken broth
  • 5 ounces uncooked orzo pasta
  • 1 Tablespoon butter , melted
  • 2 teaspoons lemon zest
  • 2 teaspoons fresh lemon juice
  • cup finely grated Parmesan cheese (fresh is best)
  • teaspoon ground black pepper
  • 2 Tablespoons additional Parmesan cheese (for garnish)
Instructions
  1. Bring chicken broth to a full boil (medium heat) in a large saucepan. Once boiling, add uncooked orzo, and stir. Turn heat down to medium-low. Cook uncovered for 9-11 minutes, stirring often to prevent sticking, until the orzo is tender, and broth has been absorbed. *While the orzo cooks, prep remaining ingredients.

  2. When orzo is finished, the broth should be fully absorbed, and orzo will be tender. Quickly add melted butter, lemon zest and juice, grated Parmesan cheese, and black pepper while pasta is hot. Stir to combine, until cheese has melted.

  3. Transfer orzo to a serving bowl. Sprinkle with remaining Parmesan cheese. If desired, garnish with a few lemon peel strips and fresh parsley (optional). Serve hot, and enjoy!

Nutrition Facts
Lemon Parmesan Orzo
Amount Per Serving (1 g)
Calories 210 Calories from Fat 63
% Daily Value*
Fat 7g11%
Saturated Fat 4g25%
Cholesterol 17mg6%
Sodium 623mg27%
Potassium 183mg5%
Carbohydrates 28g9%
Fiber 1g4%
Sugar 1g1%
Protein 9g18%
Vitamin A 181IU4%
Vitamin C 10mg12%
Calcium 135mg14%
Iron 1mg6%
* Percent Daily Values are based on a 2000 calorie diet.

Here’s one more to pin on your Pinterest boards!Looking for an easy, light, yummy side dish your family will enjoy? Try Lemon Parmesan Orzo, (serves 4), and it's ready in under 15 minutes!