Learn how to make traditional Bread and Butter Pickles, (perfect topping for burgers, sandwiches or just for snacking), and can the jars, for long term storage! Do you enjoy pickles? I never really liked Bread and Butter Pickles… until a year ago, when my friend Sandy let me try some of the ones she grew in her garden (pickling cucumbers) and canned.
I’ve been a dill pickle fan since Jr. High School when I ordered HUGE dill pickles to sell to students during our annual Spirit Week. I even used to buy GIANT SIZED dill pickles in the Main Street “General Store” at Disneyland as a kid. But bread and butter pickles? Didn’t like them too much until I tried these homemade ones.
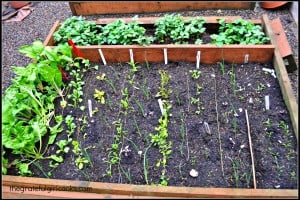
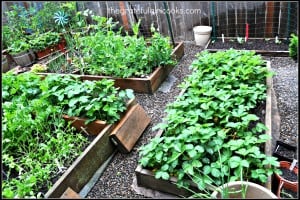
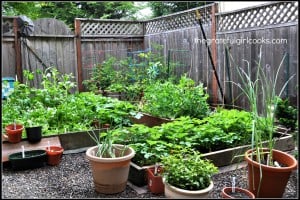
Whoa… they were good! Really changed my opinion of them. So, this year, I decided to make my own with some of the pickling cucumbers I grew in our backyard raised bed garden.
I got the recipe out of my “Ball Complete Book of Home Preserving”, which I bought last year, and found a recipe for Traditional Bread and Butter Pickles. Sounded good, so I thought I would give it a try! And guess what? It was pretty easy, and they are so good!
This recipe makes approximately 5-pint jars, so it’s not a HUGE batch, but it IS more than enough for our needs.
Scroll Down For A Printable Recipe Card At The Bottom Of The Page
How To Make Bread And Butter Pickles
Slice both ends off each of the pickling cucumbers (discard ends), then slice cucumbers into ¼ inch slices. Thinly slice the onions, as well.

Place the sliced pickling cucumbers, onions, and canning salt into a large glass (or stainless steel) bowl.

Mix them up really good, then cover the mixture completely with water and let it stand at room temperature for 2 hours.
TIP: It really helps to put a small salad plate on top to keep the cucumbers submerged.
 Make The Pickling Brine
While the cucumbers are taking a bath, mix up the pickling brine AND get your canning jars and lids prepared for canning (cleaned/heated per USDA canning guidelines).
To make the brine, mix together white vinegar, granulated sugar, mustard seeds, celery seeds, and turmeric (a spice). Bring this mixture to a boil over medium high heat, stirring to dissolve the sugar.
Once combined and the sugar is dissolved, turn off heat (do this if making the brine ahead of time).

Once the cucumber and onion mixture has soaked for 2 hours, pour them into a colander and drain the water off. Rinse them very well, then drain thoroughly.

Bring the brine mixture back up to a full boil, add cucumber mixture, stir to combine, then bring it all to a rolling boil.


Fill The Jars
Remove the pan from the heat. Pack the vegetables into clean, hot prepared jars, leaving a ½ inch headspace at the top of the jar.
Ladle the hot brine in, enough to cover the cucumbers. Remove the air bubbles, and add or remove more brine, if necessary, to keep the headspace at ½ inch.
Wipe the rims of the jars clean, to ensure a good seal, then place heated flat lid on top and screw on the jar band to finger-tip tightness. Now you’re ready to process the jars!

Processing Jars Of Bread And Butter Pickles
Place jars onto a canning rack in the canner full of simmering water. Make sure the jars are completely submerged in water (plus an inch of water over the tops of the jars).
Bring the water to a full boil, then process jars for 10 minutes. When done, remove the canner lid, wait a few minutes, then remove jars with canning tongs to a dish towel on the counter to cool.
Once the jars are completely cool, test them to make sure they were properly sealed. Wipe the jars clean, then label and store jars (upright) in your pantry, to await the big moment when you open and enjoy them.
Enjoy The Bread and Butter Pickles
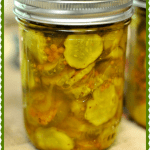
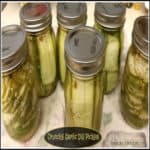
Here is a photo of a couple of the jars of bread and butter pickles, right out of the canner. Now you can safely store them until you are ready to pop a jar of bread and butter pickles open!

Hope you will give these delicious pickles a try! They really are quite good (yes, I snuck a few samples before sealing the jars)!
Update: I served these pickles on the side with our other dishes for Thanksgiving 2015 and they were absolutely delicious! Here’s a picture (below):

Hope you will try this delicious recipe for bread and butter pickles. They taste GREAT and I’m confident you and those you love will enjoy them, too!
Thank you for stopping by, and I invite you to come back again soon for more family friendly recipes. Take care, may God bless you, and have a great day.
Looking For More CANNING Recipes?
You can find ALL of my recipes in the Recipe Index, which is located at the top of the page. I have lots of recipes for canning (water bath and pressure canning, including:
Want More Recipes? Get My FREE Newsletter!
I publish a newsletter 2 times per month (1st and 15th) with lots of recipes, tips, etc.
Would you like to join our growing list of subscribers?
There is a Newsletter subscription box on the top right (or bottom) of each blog post, depending on the device you use.
You can submit your e-mail address there, to be added to my mailing list.
Find Me On Social Media:
Facebook page: The Grateful Girl Cooks!
Pinterest: The Grateful Girl Cooks!
Instagram: jbatthegratefulgirlcooks

Recipe Source: Ball Complete Book of Home Preserving, Published 2006, by Robert Rose, Inc., page 303.
↓↓ PRINTABLE RECIPE BELOW ↓↓
Learn how to make traditional Bread and Butter Pickles, (perfect topping for burgers, sandwiches or just for snacking), and can the jars, for long term storage!
Category: Canning
Cuisine: American
Keyword: bread and butter pickles
Servings: 5 pints (approx. 80 2 Tablespoon servings)
Calories Per Serving: 26 kcal
Author: JB @ The Grateful Girl Cooks!
- 10 cups sliced pickling cucumbers (1/4 inch slices, plus both ends trimmed off each cucumber)
- 4 medium brown onions , thinly sliced
- 1/2 cup canning salt (can also use pickling salt)
- 3 cups white vinegar
- 2 cups granulated sugar
- 2 Tablespoons mustard seeds (found in spice section at store)
- 1 teaspoon celery seeds (found in spice section at store)
- 1 teaspoon ground turmeric (found in spice section at store)
Place the sliced and trimmed cucumbers, sliced onions, and canning salt into a large glass or stainless steel bowl. Stir to combine. Cover the cucumbers completely with water (I used a small plate on top to help keep the cucumbers submerged). Let them sit and soak for 2 hours. When done, pour into a colander, rinse and drain very thoroughly.
While the cucumbers are in the soaking mode, you can prepare the brine, AND prepare your water bath canner, jars and lids (per canning guidelines), so they are ready to go.
In a large saucepan, mix together the vinegar, granulated sugar, mustard and celery seeds, and the turmeric. Bring this brine mixture to a boil, while stirring. Once the sugar has dissolved, pour in the rinsed and drained cucumber/onion mixture. Stir to combine. Return the mixture to a full boil.
Remove saucepan from heat. Pack the pickle/onions mixture into hot canning jars to within 1/2 inch from the top. (I used a slotted spoon to scoop out the veggies). Once the veggies are packed into the jars, Iadle the hot brine into the jars, covering the cucumbers fully. Remove air bubbles from jar, then adjust headspace, if necessary. Wipe the rims of each jar with a clean cloth or wet paper towel. Put hot, flat lid on top of jar, the screw on the band until it is fingertip tight.
Put the filled jars into the simmering water in a water bath canner, adding more boiling water, if necessary, to make sure jars are completely submerged (and have at least an inch of water over the top of the jars). Bring water to a full boil and process pickles for 10 minutes. When done, carefully remove lid (away from you to prevent steam burn), wait a few minutes, then remove jars from canner, using canning tongs. Set hot jars onto a dish towel on counter (not directly on counter), then let jars cool. Test to make sure jars have sealed. Sealed lids will be concave (curving downward), and will show no signs of "give" when you press down in the middle of lid.
Store cooled jars upright in cool dark place.
Recipe makes approx. 5 pint jars. Please refer to official USDA canning guidelines if you are unsure of proper process for preparing jars for canning/sealing.
Nutrition Facts
Bread and Butter Pickles
Amount Per Serving (2 Tablespoons)
Calories 26
% Daily Value*
Sodium 708mg31%
Potassium 33mg1%
Carbohydrates 5g2%
Sugar 5g6%
Vitamin A 10IU0%
Vitamin C 1mg1%
Calcium 6mg1%
Iron 0.1mg1%
* Percent Daily Values are based on a 2000 calorie diet.
Here’s one more to pin on your Pinterest boards!
Save
Save
Save


 Make The Marinade
 Refrigerate And Enjoy Mom’s Marinated Cucumbers!


 to can a few jars of pickles with summer's bounty. / The Grateful Girl Cooks!")


 to can a few jars of pickles with summer's bounty./ The Grateful Girl Cooks!")


