Category: Asian

Thai Turkey Meatballs and Zoodles

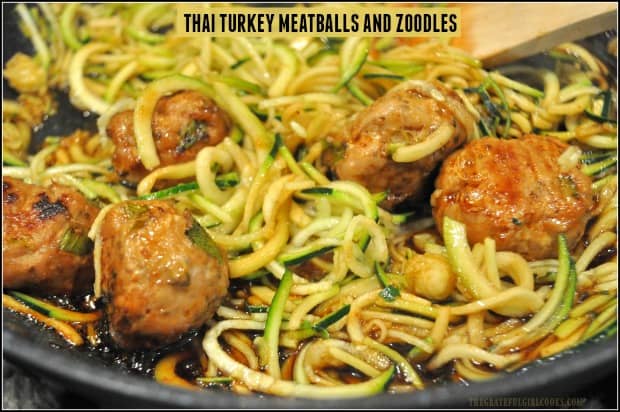
Thai turkey meatballs are baked, then combined with spiralized zucchini noodles, and covered with a soy/sriracha/lime/honey glaze in this yummy dish!

I saw this recipe on Pinterest recently, and though it sounded really good!  Sometimes cooking with ground turkey can be rather “bland”, but these Thai turkey meatballs, zoodles, and glaze were packed with flavor! Hooray! They are delicious, and one serving comes in at about 300 calories!

The turkey meatballs are filled with green onions, garlic, soy sauce, sesame oil, cilantro and fresh grated ginger, so you KNOW they will be good! Knowing these Thai turkey meatballs are baked, not fried, and also accompanied zucchini noodles, helped me decide to try this simple yet delicious recipe!

Scroll Down For A Printable Recipe Card At The Bottom Of The Page

How To Make Thai Turkey Meatballs and Zoodles

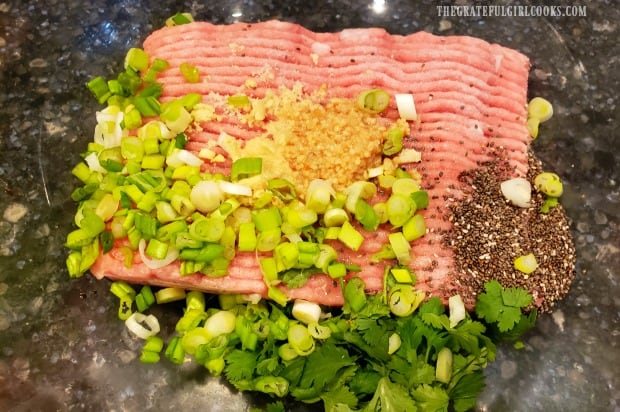
The first thing you will need to do is make the meatballs. Place ground turkey, garlic, ginger, green onions, cilantro, soy sauce, sesame oil, and chia seeds into a large mixing bowl. NOTE: The chia seeds will help the meatballs to hold together (without having to use eggs).

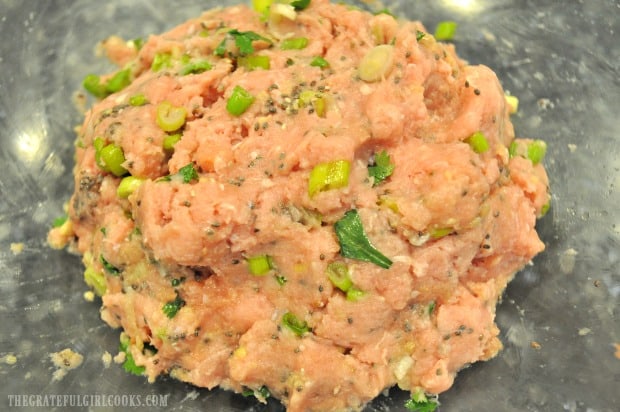
Mix all of the ingredients together using your (clean) hands or a fork. You want this Thai turkey meatballs mixture to be very well combined. Cover the bowl, and refrigerate the mixture for 30 minutes (this helps the chia seeds to work as a gel to firmly hold ingredients together).

Ground turkey with chopped onions, cilantro and spices, ready to make Thai turkey meatballs.

Meat mixture is ready to form Thai turkey meatballs for baking.

Form The Meatballs

Before shaping the Thai turkey meatballs, preheat your oven to 400° F. and line a 13×9 inch baking sheet with parchment paper. To form the meatballs, place a heaping Tablespoon of the turkey mixture into your hands, and gently roll the meat into a meatball.  This recipe will make approximately 18 meatballs.

PLEASE NOTE:  This recipe, as written, yields 3 servings (with 3 meatballs per serving). You, obviously will have leftover meatballs. You can freeze leftover baked meatballs OR you can double the amount of zucchini and sauce used, in order to make 6 servings.

As you finish rolling each meatball, place it onto the parchment paper lined baking sheet. Be sure to leave space between each meatball.

Bake The Thai Turkey Meatballs

Place the meatballs into the preheated 400° F oven.  Set a timer for 10 minutes, and bake.

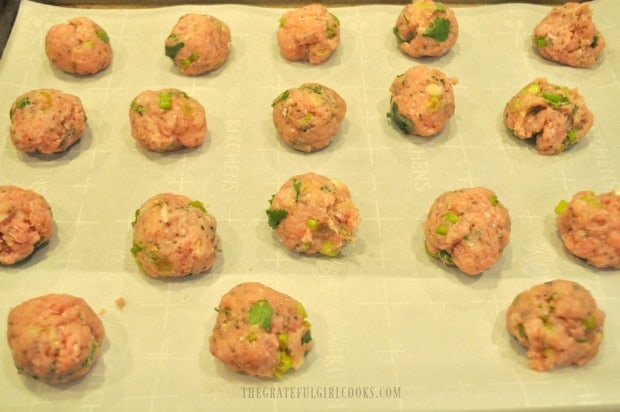
The Thai turkey meatballs on parchment paper lined baking sheet before baking.

Prepare The Glaze and Zoodles While Meatballs Bake

While the meatballs are baking, whisk together the ingredients for the Asian-inspired glaze. These ingredients are soy sauce, fresh squeezed lime juice, honey and sriracha sauce. Set aside.

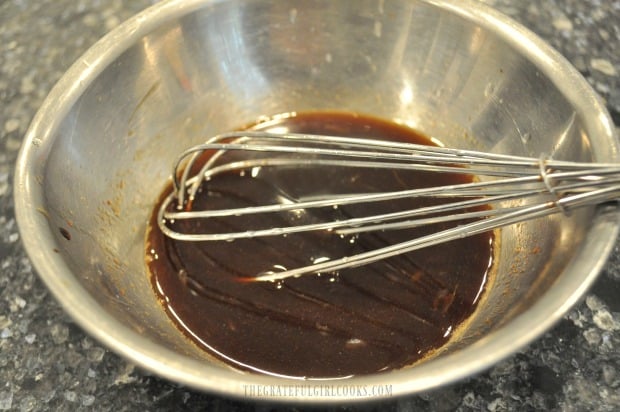
The ingredients for Asian sauce to coat the Thai turkey meatballs after baking is whisked in bowl.

While the meatballs are baking, spiralize the 3 zucchini into spaghetti-style noodles, then “trim” the noodles into smaller lengths. If you don’t own a spiralizer, use a vegetable peeler to peel the length of the zucchini into long strips, then cut into thin strands.

I like to blot the noodles semi-“dry”, using paper towels. This helps to absorb a lot of their natural moisture. When done, set zoodles aside.

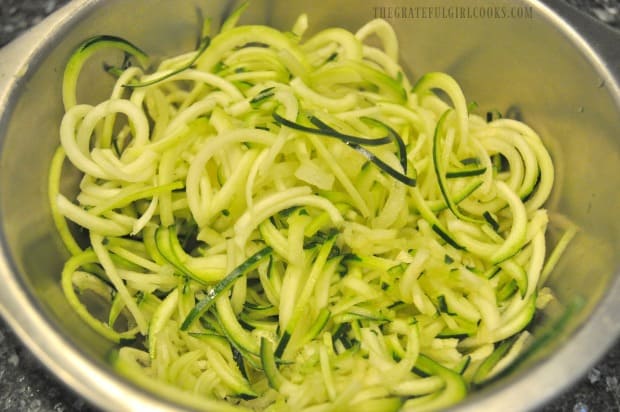
Spiralized zucchini noodles are ready to add to the Thai turkey meatballs and sauce.

Flip Meatballs

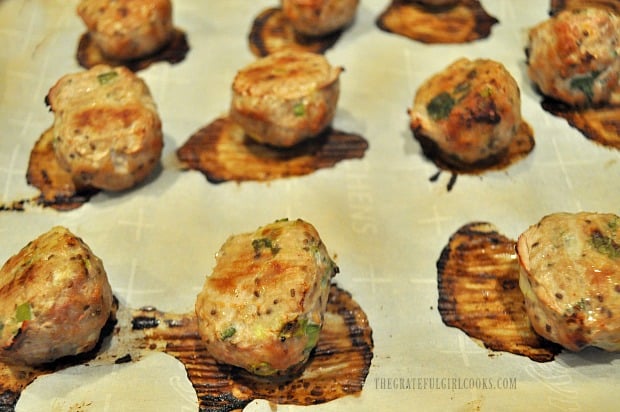
After the Thai turkey meatballs have baked for 10 minutes, remove from oven and quickly flip each one to other side. The first photo below, shows what they looked like after 10 minutes.

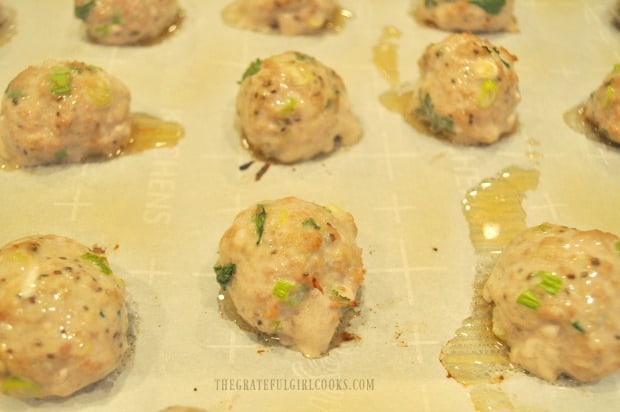
Pop ’em back into the oven and continue baking for another 10 minutes. When done, the meatballs should be cooked all the way through, and will be nice and golden brown on the outside. The second photo below shows what they looked like when done baking.

When the Thai turkey meatballs are halfway through baking, they are flipped to other side.

When the Thai turkey meatballs are done baking, they will be golden brown.

To Finish Making Thai Turkey Meatballs and Zoodles

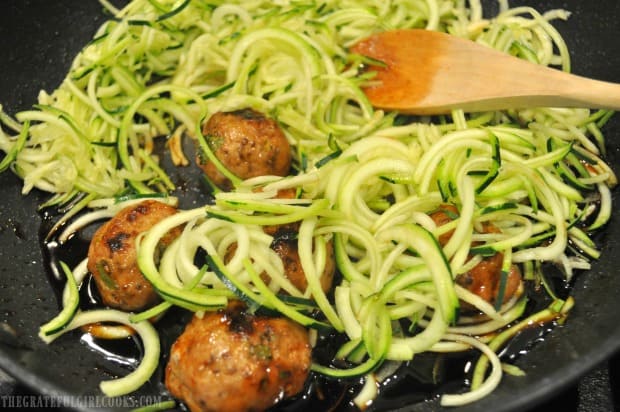
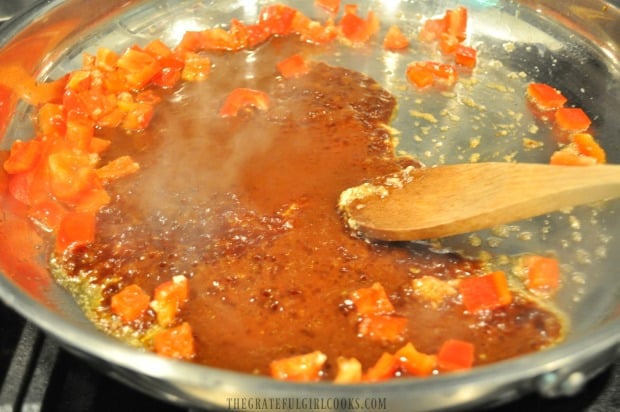
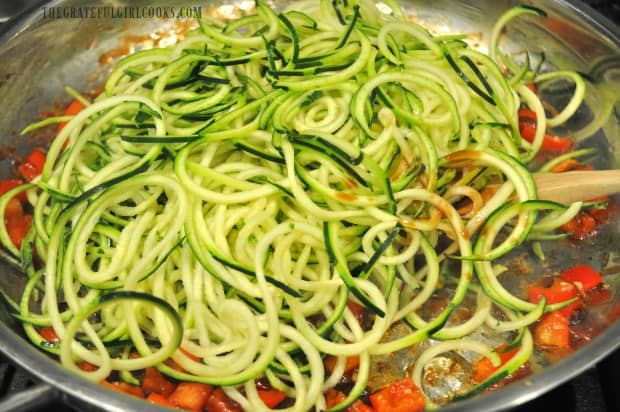
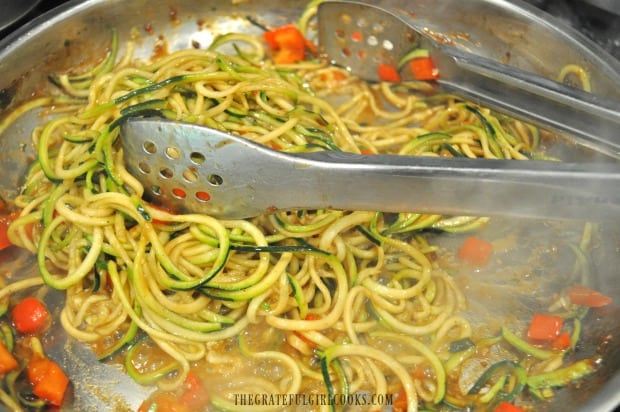
Pour the glaze into a large skillet. Bring the glaze to a boil over medium-high heat. Let it cook until it thickens a bit (usually about a minute), stirring often. Add half of the meatballs (9) to the skillet, and stir to cover them with the glaze. Push the Thai turkey meatballs to one side of skillet, then add the zucchini noodles. Stir to cover with glaze.

Cook for 4-5 minutes (al dente), then the Thai turkey meatballs and zoodles are ready to serve!

Thai turkey meatballs and zucchini noodles are added to glaze in skillet to cook for a few minutes.

To Serve This Dish

This recipe is written to yield THREE servings, with 3 meatballs per serving . Portion out the zucchini onto three individual plates, and top each with three meatballs (or 4, if you’re feeling quite hungry!). Since the recipe only utilizes HALF of the meatballs made, it is very easy to freeze them, to use the next time you make this recipe!

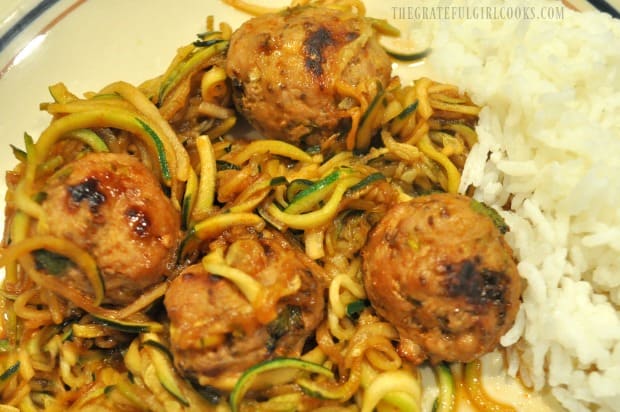
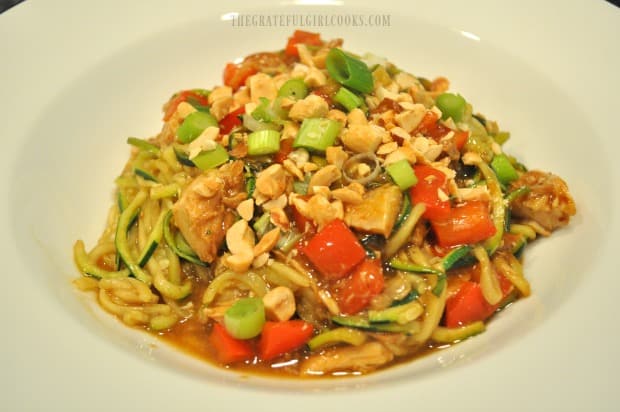
The zucchini noodles, sauce and Thai turkey meatballs are served, along with rice on the side.

I really hope you will try this recipe for Thai turkey meatballs and zucchini noodles. Pretty sure you will really like it! By the way… you can also substitute ground chicken breast for the turkey, too, if you prefer!

Looking For Other MEATBALL Recipes?

You can find all of my recipes in the Recipe Index. located at the top of the page. A few favorite meatball recipes include:

Interested In More Recipes?

Thank you for visiting this website. I appreciate you using some of your valuable time to do soIf you’re interested, I publish a newsletter 2 times per month (1st and 15th) with all the latest recipes, and other fun info. I would be honored to have you join our growing list of subscribers, so you never miss a great recipe!
There is a Newsletter subscription box on the top right side (or bottom) of each blog post, depending on the device you use, where you can easily submit your e-mail address (only) to be included in my mailing list.

You Can Also Find Me On Social Media:

Facebook page: The Grateful Girl Cooks!
Pinterest:
The Grateful Girl Cooks!
Instagram:
jbatthegratefulgirlcooks

Author's signature.

Recipe Adapted From: https://inspiralized.com/thai-chicken-meatballs-with-zucchini-noodles/

0 from 0 votes
Thai Turkey Meatballs and Zoodles
Prep Time
45 mins
Cook Time
30 mins
Total Time
1 hr 15 mins
 
Thai turkey meatballs are baked, then combined with spiralized zucchini noodles, and covered with a soy/sriracha/lime/honey glaze in this yummy dish!
Category: Dinner, Entree
Cuisine: Thai
Keyword: Thai turkey meatballs
Servings: 3 (3 meatballs each)
Calories Per Serving: 303 kcal
Author: JB @ The Grateful Girl Cooks!
Ingredients
For meatballs:
  • 1 pound ground turkey breast
  • 3 cloves garlic , finely minced
  • teaspoons fresh ginger , peeled and grated
  • 3 stems green onions (scallions) , chopped (white/light green parts only)
  • 1/4 cup fresh cilantro leaves , finely chopped
  • 2 teaspoons sesame oil
  • teaspoons low-sodium soy sauce
  • 2 Tablespoons chia seeds
For Zoodles:
  • 3 medium zucchinis
For Glaze:
  • 3 Tablespoons low-sodium soy sauce
  • 1/2 large lime (juice of)
  • 1 Tablespoon honey
  • 1 Tablespoon sriracha sauce
Instructions
  1. Place meatball ingredients into a large mixing bowl. NOTE: Chia seeds help meatball ingredients bind together (without using eggs). Mix all the ingredients together using your hands (or fork), until fully combined. Cover bowl, and refrigerate for 30 minutes, to let chia seeds "gel" ingredients.

  2. Preheat oven to 400° F. and line a 13x9 inch baking sheet with parchment paper. To make meatballs: place a heaping Tablespoon of turkey mixture into your hands, and gently roll between both hands into a meatball. As you finish rolling each meatball, place it onto the parchment paper lined baking sheet. Be sure to leave space between meatballs. This recipe yields about 18 meatballs. PLEASE NOTE:  Recipe, as written, yields 3 servings (with 3 meatballs per serving). You will have leftover meatballs. You can freeze leftover baked meatballs OR you can double the amount of zucchini and glaze used, in order to make 6 servings (3 meatballs each). 

  3. Place the meatballs into preheated 400° F oven.  Set a timer for 10 minutes, and bake. After meatballs have baked for 10 minutes, remove from oven and quickly turn each one to other side. Pop 'em back into oven and continue baking for another 10 minutes. When done, meatballs should be cooked all the way through, and will be nice and golden brown on the outside. Remove from oven.

  4. While meatballs are baking, whisk glaze ingredients in a small bowl. Set aside. While meatballs are baking, spiralize 3 zucchini into spaghetti-style noodles, then "trim" the noodles into smaller lengths. Blot the zoodles semi-"dry", using paper towels. This helps absorb a lot of their natural moisture. Set aside.

  5. Pour glaze into a large skillet. Bring to a boil over medium-high heat. Let it cook until it thickens a bit (about a minute), stirring often. Add half of the meatballs (9) to skillet, and stir gently, to cover with glaze. Push meatballs to one side of skillet, then add zucchini noodles. Stir, to cover with glaze. Cook for 4-5 minutes (al dente), then it's ready to serve!

  6. To serve, divide zucchini noodles onto 3 plates; top each serving with 3 meatballs. ENJOY! 

Recipe Notes

NOTE: Since the recipe only utilizes HALF of the meatballs made, it is very easy to freeze them, to use the next time you make this recipe!

Nutrition Facts
Thai Turkey Meatballs and Zoodles
Amount Per Serving (1 (3 meatballs + 1/3 of zoodles))
Calories 303 Calories from Fat 72
% Daily Value*
Fat 8g12%
Saturated Fat 1g6%
Cholesterol 83mg28%
Sodium 827mg36%
Potassium 1030mg29%
Carbohydrates 18g6%
Fiber 4g17%
Sugar 11g12%
Protein 40g80%
Vitamin A 520IU10%
Vitamin C 41.1mg50%
Calcium 92mg9%
Iron 2.8mg16%
* Percent Daily Values are based on a 2000 calorie diet.

Here’s one more to pin on your Pinterest boards!Thai turkey meatballs are baked, then combined with spiralized zucchini noodles, and covered with a soy/sriracha/lime/honey glaze in this yummy dish!

Sweet and Sour Pork

Who needs takeout when you can make this delicious Sweet and Sour Pork (with pineapple, onions and bell peppers) at home in about 30 minutes?

Recently I was taking an inventory of a freezer we have in our garage and found several thick boneless pork chops. I started searching for a “new” recipe I could make to use them, and stumbled upon this one for sweet and sour pork on Pinterest.

Note: If you don’t have the boneless pork chops, you can use a pork butt to make this dish, as well!

The original recipe came from Sabrina, on the blog “Dinner Then Dessert”, and I thought it sounded wonderful, since I have always LOVED sweet and sour pork!

Off into our kitchen I went, and in no time at all, we had this wonderful meal for dinner! The recipe is straightforward, easy to prepare, and absolutely DELICIOUS!

It’s fun to be able to share this recipe for sweet and sour pork with you today. If you are interested in reading a few legends about the origins of this favorite Chinese dish, you will want to check out this article.

Scroll Down For a Printable Recipe Card At The Bottom Of The Page

Make The Sweet And Sour Pork Sauce

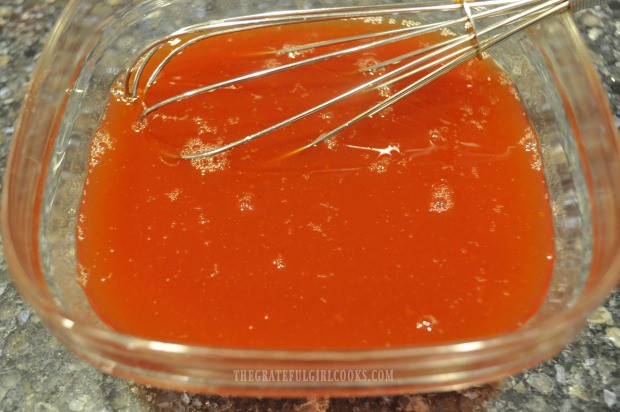
Making the sauce for the sweet and sour pork couldn’t be any easier.  Place pineapple juice, rice vinegar, brown sugar, ketchup, cornstarch, soy sauce and food coloring (if using) in a medium sized dish. Whisk the sauce ingredients together until smooth. Set sauce aside.

NOTE: Notice the color of the sweet and sour pork sauce. I used the recommended 3 drops of food coloring which helped deepen the color of the sauce. If you choose to NOT use food coloring, that is totally okay, but remember… the sauce will have a bit less color to it!

The sauce for sweet and sour pork is easily made by whisking ingredients together in dish.

Preparing The Pork For Cooking

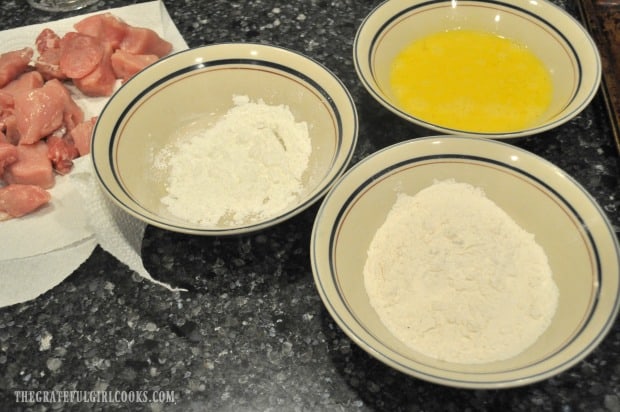
Prepare 3 bowls with the ingredients necessary to coat the pork pieces before cooking. One bowl, has corn starch, one has all purpose flour, and one has slightly beaten eggs.

Pork cubes and bowls with corn starch, eggs, and flour are ready to make sweet and sour pork!

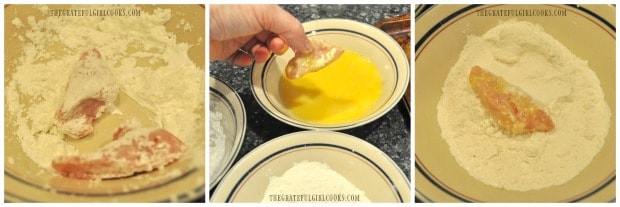
Dredge the pork pieces in cornstarch (a couple pieces at a time), then dip in egg to cover, and then coat the pieces in flour.  As you finish each of the pieces of pork, place them onto a baking sheet.

Note: This step is fairly messy, as you dip each piece. Just keep at it! I try to use the same hand for dipping, and occasionally rinse or wipe some of the coating off that gets stuck on my fingers as I go!

Pieces of pork are coated in corn starch, then egg, and flour to make sweet and sour pork.

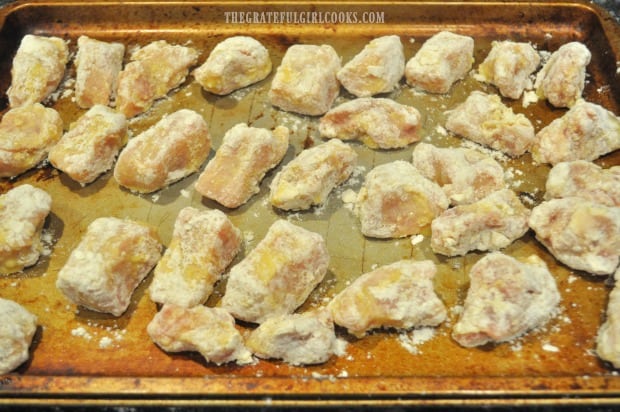
Pieces of pork are fully coated and are now ready to fry, to make sweet and sour pork.

Cooking The Sweet And Sour Pork

Pour oil into a large skillet to a depth of about 2-3 inches. Heat the oil on medium high heat until it is very hot (but not smoking).

TIP: You will need to cook the pork in batches, reheating oil in between batches! Don’t overcrowd the skillet, because you want the pork to cook evenly on all sides.

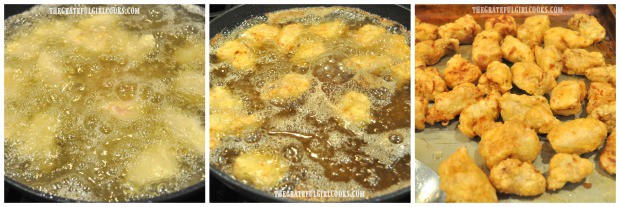
Carefully add the coated pork pieces into the hot oil.  Cook the pieces of pork for 2-3 minutes, turning once, until the meat is cooked through, is golden brown, and crispy on the outside.

Once done, carefully remove the pork with a slotted spoon (so oil drips back into skillet), and place onto a baking sheet.

The pork pieces for sweet and sour pork are fried in hot oil until browned and crispy.

To Finish The Sweet And Sour Pork

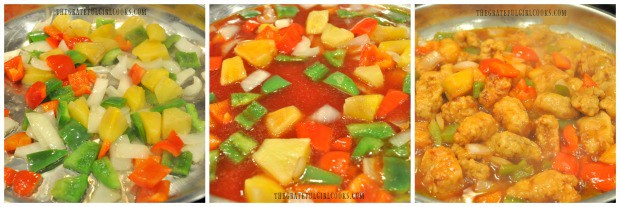
In a separate large skillet, add 2 Tablespoons oil, and heat on medium high. Once oil is hot, add the pineapple, bell peppers, and onion.  Cook the veggies, stirring occasionally for 3 minutes. The veggies should still be tender, but still slightly crisp when done.

Pour the sweet and sour sauce into the skillet. Stir to combine, and continue to heat through.  The sauce will thicken slightly as it cooks.  Right before you are ready to serve, add the pork back into the skillet, and stir to combine.

Heat only until the pork is heated through, and then the sweet and sour pork is ready to serve!

Pineapple, onions, bell peppers and sauce are heated to coat the sweet and sour pork.

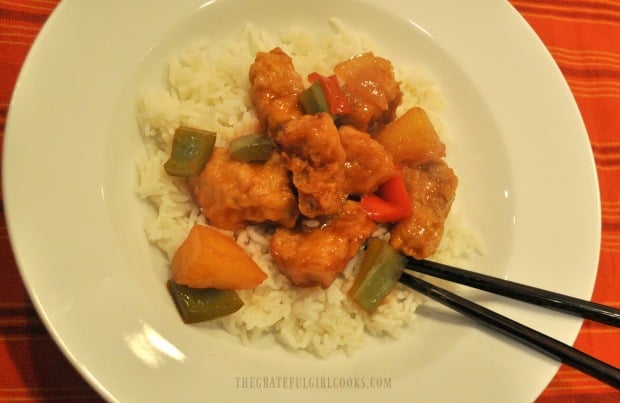
Arrange a bed of rice onto each serving dish, and then top it with some of the sweet and sour pork!

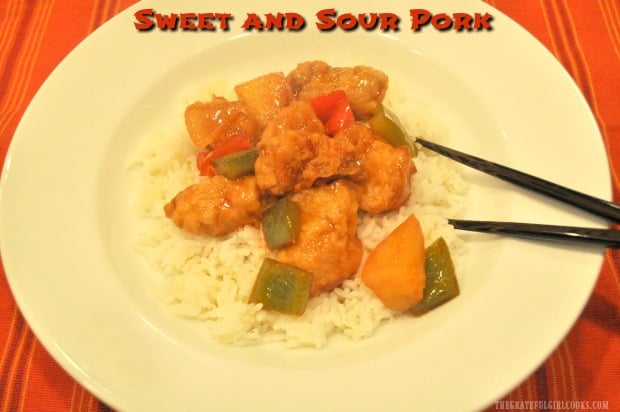
The finished sweet and sour pork is served in a bowl, on rice, with chopsticks on the side.

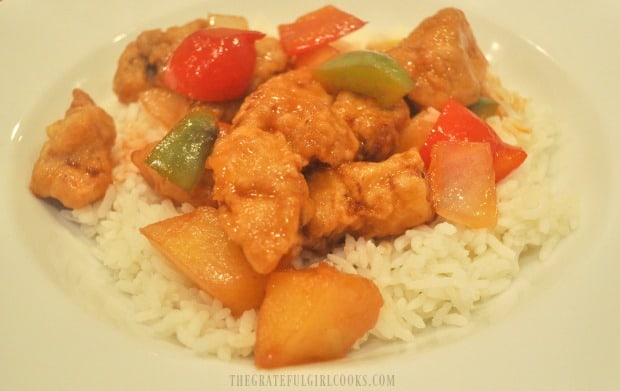
There you have it! Sweet and Sour Pork, for the win!  Sure hope you enjoy this delicious Chinese meal! Grab some chopsticks and dig in! It tastes wonderful!

Sweet and Sour Pork is served on top of rice, and is ready to eat.

My husband and I really enjoy this meal. The Asian-inspired sauce permeates everything with wonderful flavor, and the veggies and pork are so good! Hope you will consider making this delicious classic “takeout” dish for those you love! Have a great day!

Looking For More Asian-Inspired Recipes?

You can find ALL of my recipes in the Recipe Index, which is located at the top of the page. I have many Asian-inspired recipes to choose from, including:

Interested In More Recipes?

Thank you for visiting this website. I appreciate you using some of your valuable time to do soIf you’re interested, I publish a newsletter 2 times per month (1st and 15th) with all the latest recipes, and other fun info. I would be honored to have you join our growing list of subscribers, so you never miss a great recipe!
There is a Newsletter subscription box on the top right side (or bottom) of each blog post, depending on the device you use, where you can easily submit your e-mail address (only) to be included in my mailing list.

You Can Also Find Me On Social Media:

Facebook page: The Grateful Girl Cooks!
Pinterest:
The Grateful Girl Cooks!
Instagram:
jbatthegratefulgirlcooks

Author's signature

Recipe Source: Sabrina, at https://dinnerthendessert.com/sweet-and-sour-pork/

↓↓ PRINTABLE RECIPE BELOW ↓↓

0 from 0 votes
Sweet and Sour Pork
Prep Time
15 mins
Cook Time
15 mins
Total Time
30 mins
 
Who needs takeout when you can make this delicious Sweet and Sour Pork (with pineapple, onions and bell peppers) at home in about 30 minutes?
Category: Main Dish
Cuisine: Asian
Keyword: sweet and sour pork
Servings: 6
Calories Per Serving: 458 kcal
Author: JB @ The Grateful Girl Cooks!
Ingredients
For Sauce:
  • 1 cup pineapple juice
  • 1/2 cup rice vinegar
  • 1/2 cup brown sugar
  • 1/4 cup ketchup
  • 1 Tablespoon cornstarch
  • 1 Tablespoon low sodium soy sauce
  • 3 drops red food coloring (optional-I used it)
For Remainder of Dish:
  • pounds boneless thick cut pork chops (or pork butt) , cut into 3/4" chunks
  • 1/2 cup cornstarch
  • 2 large eggs , slightly beaten
  • 1/4 cup all purpose flour
  • vegetable oil for frying pork (2-3" deep)
  • 2 Tablespoons vegetable oil (for frying veggies)
  • 1 cup pineapple chunks
  • 1 red bell pepper , cut in 1" pieces
  • 1 green bell pepper , cut in 1" pieces
  • 1/2 yellow onion , cut in 1" pieces
Instructions
  1. Make the sauce: Place pineapple juice, rice vinegar, brown sugar, ketchup, cornstarch, soy sauce and food coloring (if using) in a medium sized dish. Whisk ingredients until smooth. Set sauce aside.

  2. Prepare 3 bowls with ingredients to coat the pork pieces. One with corn starch, one with flour, and one with slightly beaten eggs. Dredge the pork pieces in cornstarch (a couple pieces at a time), then dip in egg to cover, and then coat the pieces in flour.  As you finish coating each piece, place onto a baking sheet.

  3. Pour oil into a large skillet to a depth of 2-3 inches. Heat oil on medium high heat until very hot (but not smoking). TIP: You will need to cook the pork in batches, reheating oil in between batches! Don't overcrowd the skillet, because you want the pork to cook evenly on all sides. Carefully add the coated pork pieces into hot oil.  Cook pork for 2-3 minutes, turning once, until cooked through, golden brown, and crispy on the outside. Once done, carefully remove the pork pieces with a slotted spoon (so oil drips back into skillet), and place onto a baking sheet. Repeat until all pork is cooked.

  4. In a separate large skillet, add 2 Tablespoons oil; heat on medium high. Once oil is hot, add pineapple, bell peppers, and onion.  Cook, stirring occasionally for 3 minutes. Veggies should be tender, and slightly crisp when done. Add sauce to skillet. Stir to combine, and heat through.  Sauce will thicken slightly as it cooks.  Right before you're ready to serve, add browned pork back into the skillet; stir to combine. Heat only until the pork is heated through, and then the sweet and sour pork is ready to eat! Serve on top of rice. Enjoy!

Recipe Notes

Caloric calculation made based on the use of pork butt.

Nutrition Facts
Sweet and Sour Pork
Amount Per Serving (1 g)
Calories 458 Calories from Fat 117
% Daily Value*
Fat 13g20%
Saturated Fat 6g38%
Cholesterol 138mg46%
Sodium 290mg13%
Potassium 724mg21%
Carbohydrates 58g19%
Fiber 2g8%
Sugar 39g43%
Protein 25g50%
Vitamin A 895IU18%
Vitamin C 55.2mg67%
Calcium 66mg7%
Iron 2.8mg16%
* Percent Daily Values are based on a 2000 calorie diet.

Here’s one more to pin on your Pinterest boards!Who needs takeout when you can make this delicious Sweet and Sour Pork (with pineapple, onions and bell peppers) at home in about 30 minutes?

Sweet Chili Sesame Shrimp Zoodles

Sweet Chili Sesame Shrimp Zoodles, with shrimp in an Asian-inspired sauce on spiralized zucchini noodles, is a delicious, low calorie dish!

Since receiving a spiralizer appliance with a gift card I was given, it’s been fun to search and try some new recipes using spiralized veggies. We really enjoyed a couple recent meals which featured Kung Pao Zoodles and a delicious Spiralized Carrot Salad in Lemon Ginger Dressing!

This recipe for sweet chili sesame shrimp zoodles was a wonderful experiment for me. Using zucchini noodles instead of pasta cuts down on the carbs, and significantly reduces the total calories of this meal.

The large shrimp are a delicious low calorie source of protein, and the amazing Asian inspired sauce only has three ingredients! This recipe is totally EASY to prepare, and tastes GREAT! Here’s how to make this dish:

Scroll Down For A Printable Recipe Card At The Bottom Of The Page

How To Prepare The Zoodles

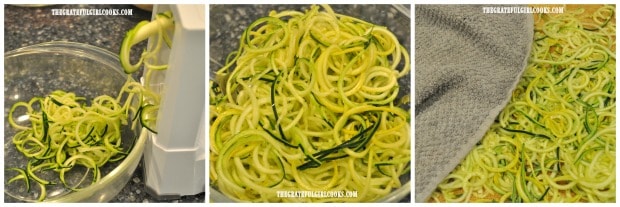
To make this dish, you will first need to spiralize the zucchini to make the noodles. If you have a spiralizer, process the zucchini using a spaghetti blade, for long noodles.  NOTE: If you do not own a spiralizer, you can use a vegetable peeler to peel the length of each zucchini, and slice into thin strands (spaghetti sized), if desired.

Place the “zoodles” into a colander, which is set on top of a large bowl.  Lightly sprinkle the zoodles with salt, and gently mix to combine.  Place the colander of zoodles (and bowl) into a refrigerator. Let the zoodles drain off their excess liquid for about 30 minutes.

When done, remove the zoodles from the fridge. Spread them out on a large dish towel. Blot the zoodles dry with another dish towel (or paper towels), trying to absorb most of the extra moisture. Set aside.

Zucchini is spiralized then patted dry to sweet chili sesame shrimp zoodles.

Make The Sweet Chili Sauce For The Sesame Shrimp Zoodles

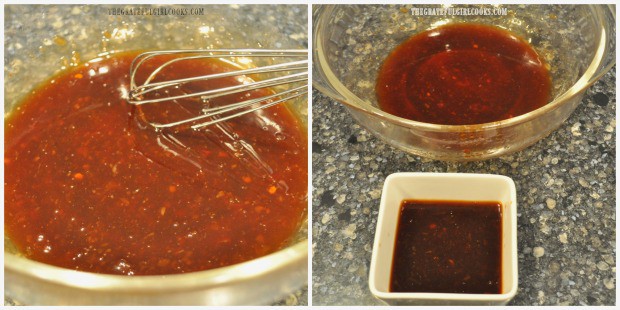
The sweet chili sauce is VERY easy to make!  In a medium sized bowl, combine the sweet chili sauce (I used Mae Ploy), sesame oil, and low sodium soy sauce.

Whisk these 3 ingredients together until fully blended. Measure out 1/2 cup of the sauce, and transfer to another dish, to save for later!

Sweet chili sesame sauce is used to marinate shrimp for sesame shrimp zoodles.

Prepare The Shrimp

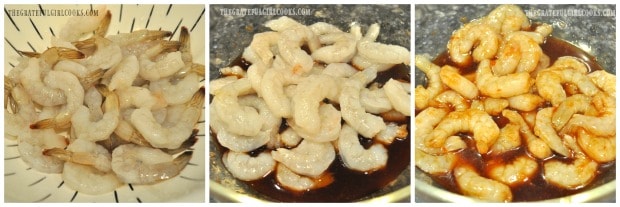
Rinse, peel and de-vein the shrimp (removing tails, as well). Drain well, then add the shrimp to the sweet chili sauce in the medium sized bowl. Toss the shrimp, to ensure they become fully coated with the sweet chili sauce.

Shrimp is cleaned, tails removed, then marinated in sweet chili sesame sauce for zoodles.

Cooking Sweet Chili Sesame Shrimp Zoodles

Spray a large skillet with non-stick spray, and turn heat to medium temperature. When the skillet is hot (but not smoking), add the shrimp in a single layer. NOTE: If making extra quantities of this dish, you can cook the shrimp in batches, re-spraying skillet between each batch.

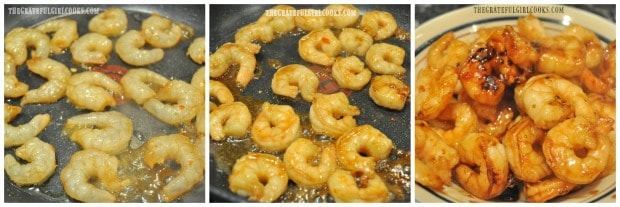
Cook the shrimp on medium heat for 2 minutes, then turn the shrimp over and continue to cook the other side for 1-2 minutes. Spoon some of the sweet chili sauce over the top of each shrimp (the cooked side). Transfer the cooked shrimp to a plate, and cover, to keep warm.

The sesame shrimp is cooked in skillet, then removed from pan.

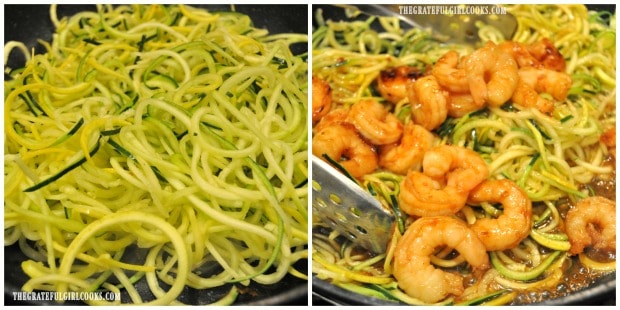
Turn the heat on the stove up to medium-high, and add the spiralized zucchini to the same skillet you cooked the shrimp in.

Cook the zoodles for 1 minute, then add the 1/2 cup of reserved sauce into the skillet. Give the zoodles a toss, to mix the sauce with the zucchini. Cook this mixture for 2 more minutes, tossing occasionally. Add the cooked shrimp to the skillet, and toss, to combine. Cook the sweet chili sesame shrimp zoodles until heated through ( a minute or two).

Zoodles are added to skillet, along with sesame shrimp and Asian sauce.

To Serve Sweet Chili Sesame Shrimp Zoodles

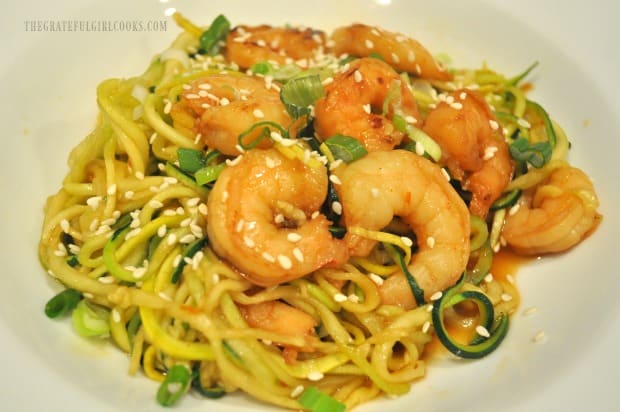
When the sweet chili sesame shrimp zoodles are heated through, they are ready to serve!  Use tongs to place zoodles and shrimp onto individual plates, or into serving bowls. Spoon any of the leftover sauce in the skillet onto the sesame shrimp zoodles, and garnish with sesame seeds and sliced green onions. Serve immediately, and enjoy!

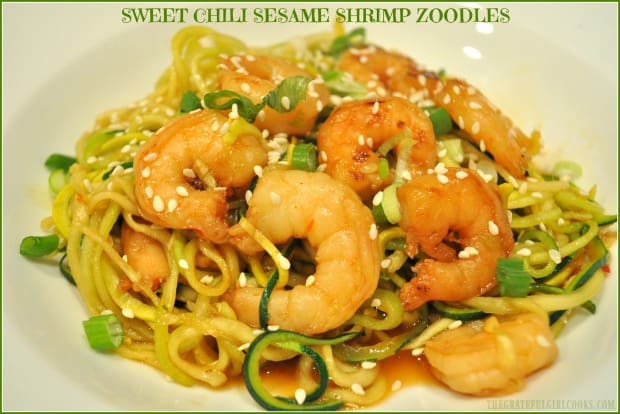
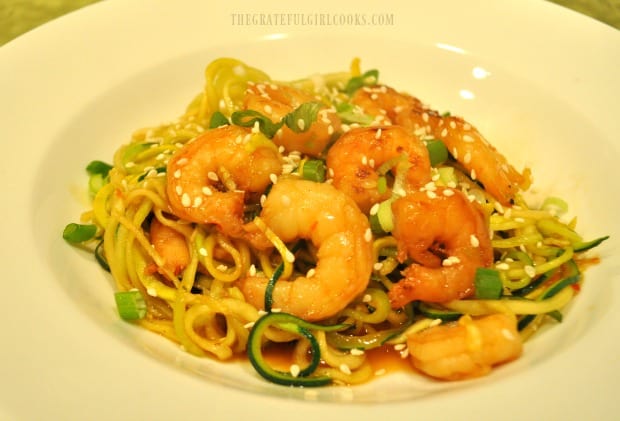
Sweet chili sesame shrimp zoodles, served with green onion garnish, in white bowl.

Sesame seeds and green onions garnish the sweet chili sesame shrimp zoodles.

I really hope you will consider trying this delicious recipe for sweet chili sesame shrimp zoodles! We really enjoyed this meal, and trust you will, too! Have a wonderful day, friends.

Interested In More SHRIMP Recipes?

You can find all my seafood recipe in the Recipe Index, located at the top of the page. A few favorite shrimp recipes include:

Interested In More Recipes?

Thank you for visiting this website. I appreciate you using some of your valuable time to do soIf you’re interested, I publish a newsletter 2 times per month (1st and 15th) with all the latest recipes, and other fun info. I would be honored to have you join our growing list of subscribers, so you never miss a great recipe!
There is a Newsletter subscription box on the top right side (or bottom) of each blog post, depending on the device you use, where you can easily submit your e-mail address (only) to be included in my mailing list.

You Can Also Find Me On Social Media:

Facebook page: The Grateful Girl Cooks!
Pinterest:
The Grateful Girl Cooks!
Instagram:
jbatthegratefulgirlcooks

Author's signature

Recipe Adapted From: https://iowagirleats.com/2017/06/14/sweet-chili-sesame-shrimp-and-zoodles/

↓↓ PRINTABLE RECIPE BELOW ↓↓

0 from 0 votes
Sweet Chili Sesame Shrimp Zoodles
Prep Time
15 mins
Cook Time
12 mins
Total Time
27 mins
 
Sweet Chili Sesame Shrimp Zoodles, with shrimp in an Asian-inspired sauce on spiralized zucchini noodles, is a delicious, low calorie dish!
Category: Dinner, Seafood
Cuisine: Asian
Keyword: sesame shrimp zoodles
Servings: 2
Calories Per Serving: 391 kcal
Author: JB @ The Grateful Girl Cooks!
Ingredients
  • 3 medium zucchini , end trimmed
  • 7 Tablespoons sweet chili sauce , I used Mae Ploy
  • 1/4 cup low sodium soy sauce , or Tamari sauce
  • teaspoons sesame oil
  • 3/4 pound large shrimp , peel, deveined, patted dry
For Garnish (optional):
  • 1 stem green onion (scallion) , sliced
  • 1 teaspoon sesame seeds
Instructions
  1. Spiralize the zucchini to make noodles. If you have a spiralizer, process the zucchini using a spaghetti blade.  NOTE: If you don't own a spiralizer, you can use a vegetable peeler to peel the length of each zucchini, and then slice into thin strands (spaghetti sized). Place zoodles in a colander, set on top of a large bowl.  Lightly sprinkle with salt; gently mix to combine.  Place the colander of zoodles (and bowl) into refrigerator. Let the zoodles drain their extra liquid for about 30 minutes. When done, spread zoodles onto a dish towel. Blot dry with another dish towel (or paper towels), trying to absorb any extra moisture. Set aside.

  2. In a medium sized bowl, combine the sweet chili sauce, sesame oil, and low sodium soy sauce. Whisk them together until fully blended. Measure out 1/2 cup of the sauce, and transfer to another dish, to reserve for later! 

  3. Rinse, peel and de-vein shrimp (removing tails, as well). Drain well, then add them to the sweet chili sauce in the medium sized bowl. Toss the shrimp, to ensure they become fully coated with the sauce.

  4. Spray a large skillet with non-stick spray, and turn heat to medium. When skillet is hot (but not smoking), add the shrimp in a single layer. NOTE: If making extra quantities, you can cook shrimp in batches, re-spraying skillet between each batch. Cook shrimp on medium heat for 2 minutes, then turn shrimp over and continue to cook for 1-2 minutes. Spoon a little bit of the sweet chili sauce over the top of each shrimp while cooking (cooked side). Transfer shrimp to a plate; keep warm.

  5. Turn the heat on stove to medium-high. Add zucchini noodles to the skillet you cooked the shrimp in. Cook for 1 minute, then add the reserved sauce. Give zoodles a toss, to coat with the sauce. Cook for 2 more minutes, tossing occasionally. Add cooked shrimp to the skillet, and toss, to combine. Cook until heated through (1-2 minutes), then transfer to serving plates.  Spoon any leftover sauce in the skillet onto the shrimp, and garnish dish with sesame seeds and sliced green onions. Serve immediately, and enjoy!

Recipe Notes

I used 2 green zucchini, and 1 yellow zucchini for this dish.

Nutrition Facts
Sweet Chili Sesame Shrimp Zoodles
Amount Per Serving (1 g)
Calories 391 Calories from Fat 63
% Daily Value*
Fat 7g11%
Saturated Fat 1g6%
Cholesterol 428mg143%
Sodium 3002mg131%
Potassium 960mg27%
Carbohydrates 41g14%
Fiber 3g13%
Sugar 36g40%
Protein 40g80%
Vitamin A 590IU12%
Vitamin C 59.6mg72%
Calcium 309mg31%
Iron 5.5mg31%
* Percent Daily Values are based on a 2000 calorie diet.

Here’s one more to pin on your Pinterest boards!Sweet Chili Sesame Shrimp Zoodles, with shrimp in an Asian-inspired sauce on spiralized zucchini noodles, is a delicious, low calorie dish!

Kung Pao Zoodles

Kung Pao Zoodles is a low calorie (under 300), low carb dish using spiralized zucchini noodles, cooked in a sweet/spicy Asian sauce, and it can be made with or without chicken.
Kung Pao Zoodles is a low calorie (under 300), low carb dish using spiralized zucchini noodles, cooked in a sweet/spicy Asian sauce, w/or without chicken.

I’ve got to be honest here… this recipe totally surprised me! I purchased a spiralizer recently, to essentially make “noodles” out of a lot of different vegetables. I’d been wanting one for a while, and finally bought a fairly inexpensive one ($29).

Scroll Down For A Printable Recipe Card At The Bottom Of The Page

What If I Do Not Have A Spiralizer?

If you do not have access to a Spiralizer, it IS possible to make zucchini noodles by hand. The best video I’ve seen to describe how to do this is on YouTube, which demonstrates three easy ways to make your own “zoodles” (with box grater, vegetable peeler, or mandoline). I recommend watching it! Here’s the link to the short video, from Kelly Senyei at “Just A Taste”: https://www.youtube.com/watch?v=ETgPaDQh9S4 This was the first recipe I made using it, and my expectations were fairly low for what Kung Pao Zoodles would taste like. Zoodles is a word commonly used to describe Zucchini Noodles!

Whoa! I’m NOT KIDDING… I totally LOVED this dish!  This dish can also be a healthy/delicious meatless meal, by simply omitting the chicken breast.  It only took a couple minutes to turn two medium sized zucchini into gorgeous pasta like strands of veggie goodness!  Once cooked with the amazingly easy Asian inspired sauce, this dish made me GIDDY with excitement with my first bite!

This recipe for Kung Pao Zoodles is very easy to prepare. If there is one tip I can give you, it is to HAVE EVERYTHING PREPPED AND READY TO GO BEFORE BEGINNING COOKING! The dish comes together very quickly once started, so be prepared!

How Do I Make Kung Pao Zoodles?

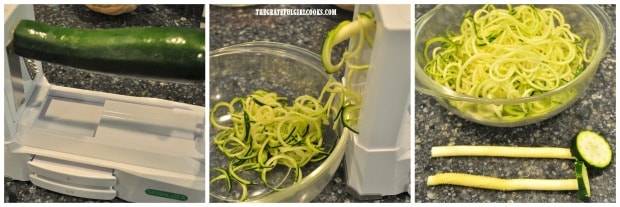
Cut ends off both zucchini, then spiralize them into spaghetti-like noodles, catching them as they come out into a medium sized bowl. If using a Spiralizer, cut the noodles with kitchen shears into 7 or 8 inch strips (cut long zoodles right in the bowl a couple of times- snip, snip!). Set aside.

Zucchini being spiralized into noodles to make Kung Pao zoodles.

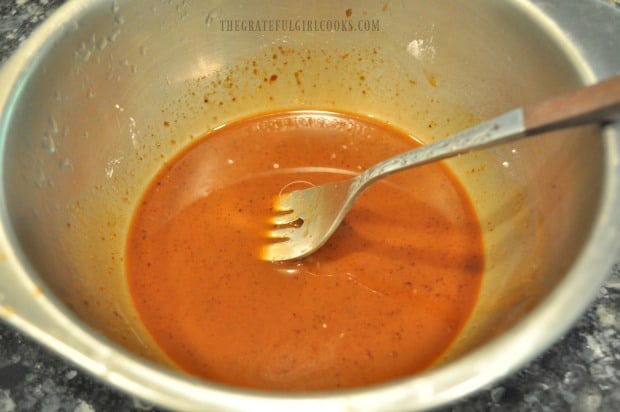
Stir or whisk Asian sauce ingredients together in a small bowl (soy or tamari sauce, balsamic vinegar, hoisin sauce, water, sriracha, sugar and cornstarch). Set sauce aside.

Asian sauce is mixed in bowl for Kung Pao Zoodles.

If You Are Preparing Kung Pao Zoodles WITH Chicken:

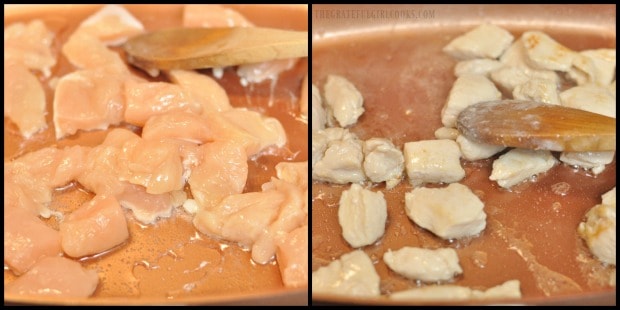
If adding chicken to this dish, season lightly with salt and black pepper. Heat vegetable oil over medium high heat. Place chicken cubes into large skillet; cook until lightly browned on all sides and cooked through. Remove chicken from skillet and set aside (or drain on paper towel).

Chicken breast cubes are cooked for Kung Pao Zoodle dish.

Prepare The Rest of This Dish

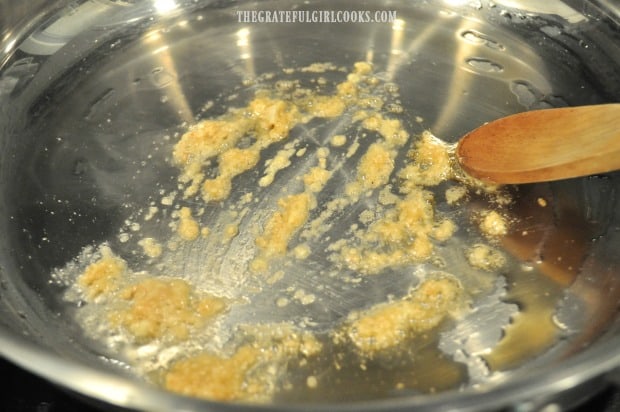
Turn the heat down to medium and add sesame oil, minced garlic and grated fresh ginger to skillet. Stir and cook for 30-45 seconds, being careful to not let the garlic burn.

Sesame oil, garlic and ginger cooking for kung pao zoodles.

Add chopped red peppers, then stir in the Asian sauce. Bring sauce to a quick boil, then turn heat down to LOW, and cook for a minute or so until sauce is bubbling and has thickened.

Asian sauce and red bell peppers are added to skillet for kung pao sauce.

Add zucchini noodles (zoodles) to skillet.  Stir while cooking until the zoodles are coated with sauce.  Cook for two minutes, stirring often. As the zucchini noodles cook, they will release water, which will help to blend the sauce together with the noodles.

Zucchini noodles (zoodles) are added to skillet.

Zoodles (zucchini noodles) are cooked in the Kung Pao sauce.

Time To Eat Some Kung Pao Zoodles!

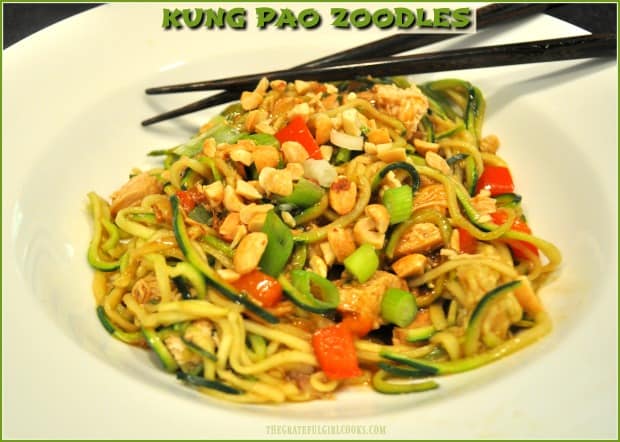
When done, add the cooked chicken pieces (if using) to the skillet, and stir to combine. I found using tongs worked great at getting everything mixed together. Divide Kung Pao zoodles between two serving bowls, and garnish each with chopped dry roasted peanuts and sliced green onions.

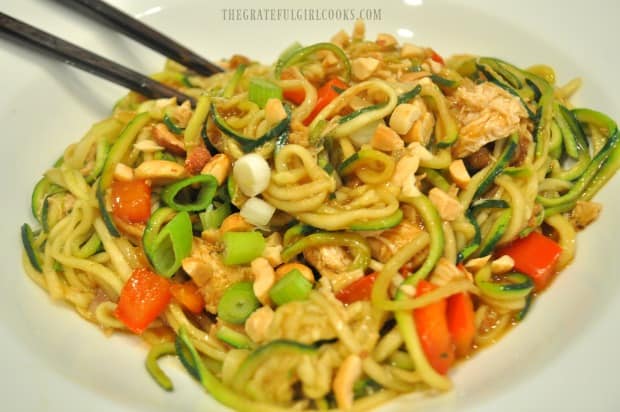
Bowl of Kung Pao Zoodles garnished with chopped peanuts and green onions.

Serve these delicious Kung Pao zoodles and enjoy! I absolutely LOVED this dish…there is so much yummy flavor! This meal is filling (as each serving is about 2 cups), it tastes amazing, and it so low in calories! Winner, winner… ZOODLE dinner!

Kung Pao Zoodles with a pair of chopsticks... ready to serve!

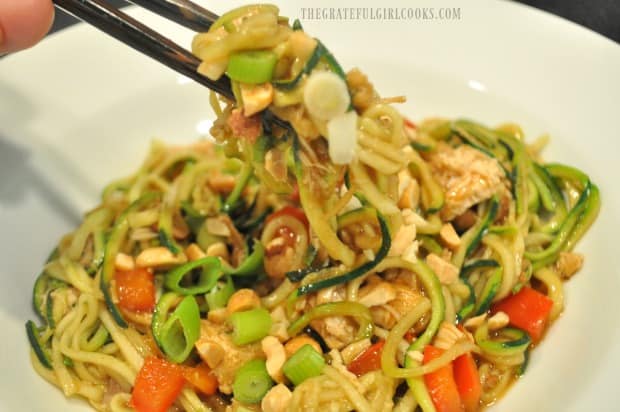
Chopsticks lifting up a bite of Kung Pao Zoodles!

I really hope you will try making these Kung Pao Zoodles!  If you prefer the more traditional version of Kung Pao Chicken, I hope you will check out that recipe, as well.

Looking For More SPIRALIZED FOOD Recipes?

You can find ALL my recipes in the Recipe Index, located at the top of the page. I have a few delicious zoodle recipes, including:

Interested In More Recipes?

Thank you for visiting this website. I appreciate you using some of your valuable time to do soIf you’re interested, I publish a newsletter 2 times per month (1st and 15th) with all the latest recipes, and other fun info. I would be honored to have you join our growing list of subscribers, so you never miss a great recipe!
There is a Newsletter subscription box on the top right side (or bottom) of each blog post, depending on the device you use, where you can easily submit your e-mail address (only) to be included in my mailing list.

You Can Also Find Me On Social Media:

Facebook page: The Grateful Girl Cooks!
Pinterest:
The Grateful Girl Cooks!
Instagram:
jbatthegratefulgirlcooks

Author's signature

Recipe Source: http://recipestotry.ca/kung-pao-chicken-with-zucchini/

0 from 0 votes
Kung Pao Zoodles
Prep Time
10 mins
Cook Time
10 mins
Total Time
20 mins
 
Kung Pao Zoodles is a low calorie (under 300), low carb dish using spiralized zucchini noodles, cooked in a sweet/spicy Asian sauce, w/or without chicken.
Category: Dinner
Cuisine: Asian
Keyword: kung pao zoodles
Servings: 2 (approx. 2 cups per serving)
Calories Per Serving: 281 kcal
Author: JB @ The Grateful Girl Cooks!
Ingredients
For Zoodles:
  • 2 medium zucchini , ends trimmed
  • 1 teaspoon vegetable or canola oil **if adding chicken
  • 6 ounces boneless, skinless chicken breast **cut in 1/2 inch cubes (if adding chicken)
  • 1 pinch salt and pepper , to taste
  • 1/2 medium red bell pepper , cut into 1/2" pieces
  • 1 teaspoon sesame oil
  • 1 teaspoon freshly ground ginger
  • 2 cloves garlic , minced
  • 2 Tablespoons finely chopped dry roasted peanuts (for garnish)
  • 2 Tablespoons thinly sliced green onions (for garnish)
For Asian Sauce:
  • Tablespoons reduced sodium soy sauce (tamari for gluten free)
  • 1 teaspoon hoisin sauce
  • 1 Tablespoon balsamic vinegar
  • Tablespoons water
  • 1/2 Tablespoon Sriracha sauce
  • 2 teaspoons granulated sugar
  • 2 teaspoons cornstarch
Instructions
  1. Cut ends off both zucchini, then spiralize them into spaghetti-like noodles,. Cut noodles with kitchen shears into 8 inch strips. Set aside.

  2. Stir or whisk Asian sauce ingredients together in a small bowl (soy or tamari sauce, balsamic vinegar, hoisin sauce, water, sriracha, sugar and cornstarch). Set sauce aside.
  3. If adding chicken to this dish, season lightly with salt and black pepper. Heat vegetable oil over medium high heat. Place chicken cubes into large skillet; cook until lightly browned on all sides and cooked through. Remove chicken from skillet and set aside (drain on paper towel).

  4. Turn heat down to medium and add sesame oil, minced garlic and grated fresh ginger to skillet. Stir and cook for 30-45 seconds, being careful to not let garlic burn. Add chopped red peppers, then stir in Asian sauce. Bring sauce to a boil, then turn heat to LOW, and cook for a minute or so until sauce is bubbling and has thickened.  Add zucchini noodles to skillet.  Stir while cooking until zoodles are coated with sauce.  Cook for two minutes, stirring often. As the zucchini noodles cook, they will release water, which will help to blend the sauce together with the noodles. When done, add cooked chicken pieces (if using), and stir to combine. I found using tongs worked great at getting everything mixed together.

  5. To serve, divide Kung Pao zoodles between two serving bowls, and garnish with chopped peanuts and sliced green onions. Serve hot, and enjoy!

Recipe Notes

NOTE: Caloric calculation of 281 per serving includes chicken and vegetable oil to cook it in.  If preparing this recipe as a MEATLESS meal, the calorie count would be approximately 167 calories per (2 cup) serving.

**Weight Watchers - Points+ = 7 points (with chicken).

Nutrition Facts
Kung Pao Zoodles
Amount Per Serving (1 g)
Calories 281 Calories from Fat 108
% Daily Value*
Fat 12g18%
Saturated Fat 3g19%
Cholesterol 54mg18%
Sodium 724mg31%
Potassium 976mg28%
Carbohydrates 20g7%
Fiber 3g13%
Sugar 12g13%
Protein 24g48%
Vitamin A 1410IU28%
Vitamin C 78.6mg95%
Calcium 42mg4%
Iron 1.6mg9%
* Percent Daily Values are based on a 2000 calorie diet.

Here’s one more to pin on your Pinterest boards!Kung Pao Zoodles is a low calorie (under 300), low carb dish using spiralized zucchini noodles, cooked in a sweet/spicy Asian sauce, w/or without chicken.

Hoisin Pork with Noodles and Broccoli

You’ll LOVE Hoisin Pork with Noodles and Broccoli, featuring marinated pork with noodles, broccoli and carrots cooked in an Asian inspired sauce!
You'll LOVE Hoisin Pork with Noodles and Broccoli, featuring marinated pork with noodles, broccoli and carrots cooked in an Asian inspired sauce!

I discovered this recipe on Pinterest, and decided to make it for dinner a few weeks ago… wow… it was fantastic!  Don’t let the long ingredient list deter you from making this! Almost all of the ingredients in this recipe are for the delicious Asian flavored sauce which is used to marinate pork strips.

The rest of the ingredients are few, and the recipe is not hard to make, either! Once the meat has been marinated, it is pan-seared, then combined with cooked noodles, broccoli florets, shredded carrots, chopped peanuts, and some additional sauce, mixed together… and BOOM- that’s it!

Scroll Down For A Printable Recipe Card At The Bottom Of The Page

Can I Still Make This Dish If I Have A Peanut Allergy?

If you have a peanut allergy, simply leave the peanut butter out of the marinade sauce (it will still taste fantastic), and leave the chopped peanuts out of the dish.

How To Make Hoisin Pork With Noodles And Broccoli

The recipe itself is very easy to make.  Because the pork needs to marinate for awhile, I highly recommend planning ahead… making the sauce and marinating the pork strips EARLY in the day (or even overnight), for absolute BEST flavor! Here’s how to make this dish:

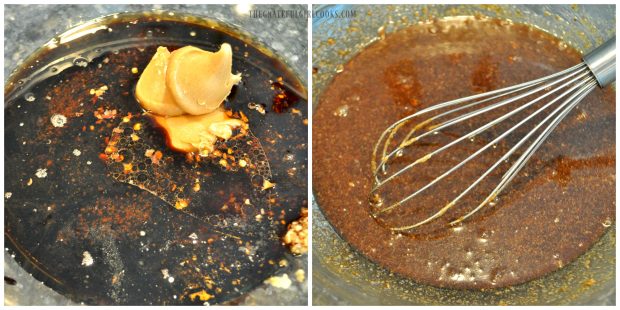
Place all marinade ingredients in large bowl. Whisk together until smooth (or use a food processor, if desired). IMPORTANTOnce marinade is mixed, measure out 6 heaping Tablespoons, and place it in a separate bowl and set aside (reserving it to add to noodles later).

Hoisin marinade sauce for pork

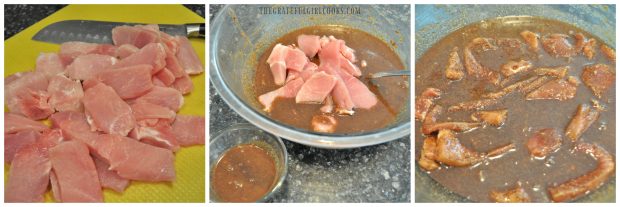
Thinly slice the pork, and add to the marinade still in large bowl. Stir to fully coat pork slices. Cover bowl, and refrigerate at least 4 hours (overnight or 8 hours is best, for flavor saturation).

Slices of pork marinating in hoisin sauce

After Hoisin Pork Has Marinated

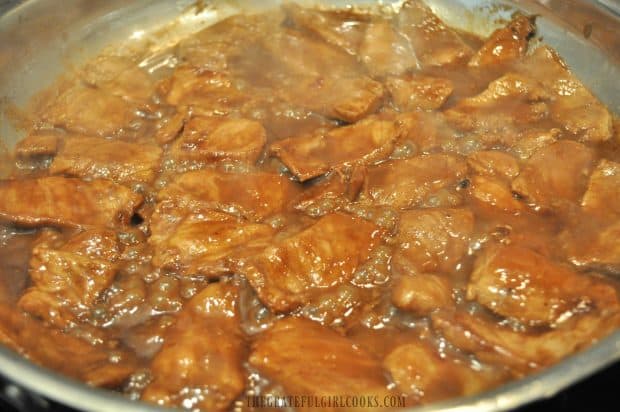
When ready to make this meal, remove pork from refrigerator. Heat a large, non-stick skillet on medium high. Once hot, remove pork strips from bowl with a slotted spoon (to drain off some of the marinade), and place pork into hot skillet (discard the rest of the marinade left in the bowl the pork was in).

Cook the hoisin pork, turning once, until both sides of the meat are browned.  When done, remove the skillet from the heat.

Hoisin pork cooking in large skillet

While the pork is cooking, cook noodles separately, according to package directions (do NOT discard the cooking water).  Lightly steam broccoli florets (or fully thawed, previously frozen chopped broccoli).

Finishing Making This Meal

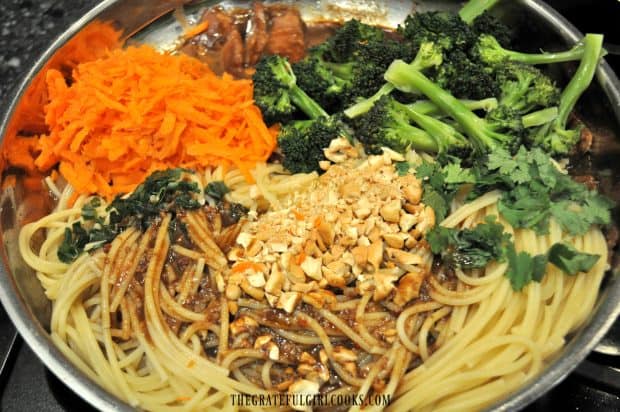
Add the cooked noodles, broccoli, shredded carrots, chopped peanuts, and the 6 Tablespoons RESERVED hoisin sauce mixture to the skillet with the browned pork.

Noodles, hoisin pork, carrots and broccoli in skillet

Add 1/4 cup of the hot water used for cooking the noodles (the starch in the water will help the hoisin sauce stick to the noodles). Mix all the ingredients together, until coated with sauce.  Heat on low, stirring often, to ensure the hoisin pork is heated through before serving.

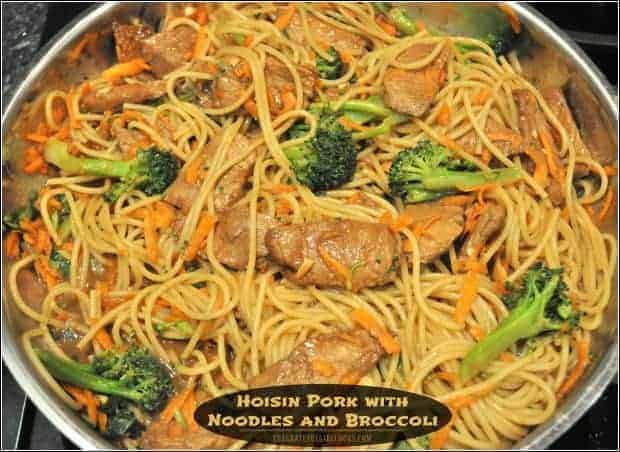
Pork, hoisin sauce, noodles and broccoli mixed in skillet

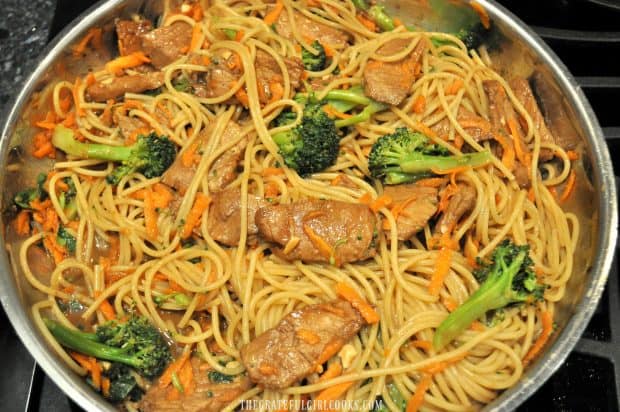
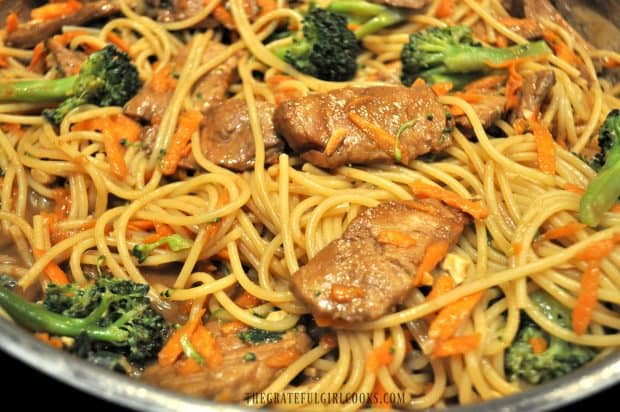
Close up of pork slices, broccoli, carrots and noodles in skillet

Serve the Hoisin Pork

If desired, garnish each serving with chopped cilantro, sliced green onions, and additional chopped peanuts. Serve immediately, and enjoy!

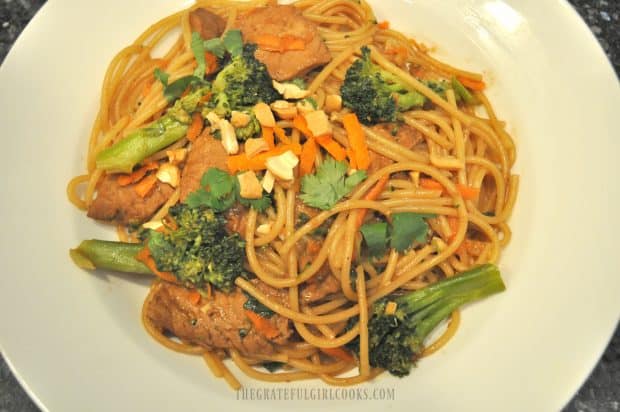
Hoisin pork, noodles and broccoli served in white bowl

I really hope you will consider trying this wonderful pork dish!  The flavors are wonderful, and it is a filling, satisfying “all in one” meal… meat, carbs, and veggies! Have a great day!

Looking For More PORK Recipes?

Interested In More Recipes?

Thank you for visiting this website. I appreciate you using some of your valuable time to do soIf you’re interested, I publish a newsletter 2 times per month (1st and 15th) with all the latest recipes, and other fun info. I would be honored to have you join our growing list of subscribers, so you never miss a great recipe!
There is a Newsletter subscription box on the top right side (or bottom) of each blog post, depending on the device you use, where you can easily submit your e-mail address (only) to be included in my mailing list.

You Can Also Find Me On Social Media:

Facebook page: The Grateful Girl Cooks!
Pinterest:
The Grateful Girl Cooks!
Instagram:
jbatthegratefulgirlcooks

Author's signature

Recipe adapted from: Lindsay, at https://pinchofyum.com/hoisin-pork-with-rice-noodles

0 from 0 votes
Hoisin Pork with Noodles and Broccoli
Prep Time
15 mins
Cook Time
15 mins
Total Time
30 mins
 

You'll LOVE Hoisin Pork with Noodles and Broccoli, featuring marinated pork with noodles, broccoli and carrots cooked in an Asian inspired sauce!

Category: Main Dish
Cuisine: Asian
Keyword: hoisin pork
Servings: 6 servings
Calories Per Serving: 683 kcal
Author: JB @ The Grateful Girl Cooks!
Ingredients
For Pork Marinade
  • 1/3 cup soy sauce , low sodium
  • 1/4 cup water
  • 3.5 Tablespoons sesame oil
  • 2 Tablespoons honey
  • 1 Tablespoon granulated sugar
  • 1 dash fish sauce
  • 3 Tablespoons vinegar
  • 1 teaspoon lime juice
  • 5 cloves garlic , finely minced
  • 2 Tablespoons ginger (fresh) ,finely grated
  • 1/4 teaspoon red pepper flakes
  • 3 Tablespoons hoisin sauce
  • 3 Tablespoons peanut butter
For Rest of Dish
  • 1.5 pounds pork , cut into thin strips
  • 9 ounces spaghetti noodles , or rice noodles
  • 1.5 cups broccoli , chopped
  • 1/2 cup carrots , grated
  • 1/4 cup peanuts , chopped
  • 6 Tablespoons Reserved Hoisin sauce mixture
Optional Garnish (not included in calorie count)- cilantro, additional chopped peanuts, sliced green onions
    Instructions
    1. Place all marinade ingredients in large bowl. Whisk together well, until smooth.  Once mixed, measure out 6 heaping Tablespoons and place it in a small, separate bowl (reserving it to add to noodles later). Thinly slice the pork, and add to the marinade still in large bowl. Stir to fully coat pork slices. Cover bowl; refrigerate at least 4 hours (overnight or 8 hours is recommended, for full flavor saturation). 

    2. Heat a large, non-stick skillet on medium high. Once hot, remove pork strips from bowl with a slotted spoon (to drain off some of the marinade-discard any remaining marinade in bowl), and place pork strips into hot skillet in a single layer. Cook pork, turning once, until both sides are browned. Remove skillet from heat. 

    3. While the pork is cooking, cook noodles in separate pan, according to package directions (do NOT discard the cooking water).  Lightly steam broccoli florets, or thawed (previously frozen) broccoli. Add cooked noodles, broccoli, shredded carrots, chopped peanuts, and the 6 Tablespoons RESERVED hoisin sauce mixture to the skillet with browned pork.

    4. Add 1/4 cup of the hot cooking water used for noodles to skillet (the starch in the water will help the hoisin sauce stick to the noodles). Mix all ingredients together, until  coated with sauce.  Heat on low, stirring often, to ensure dish is heated all the way through before serving. If desired, garnish each serving with chopped cilantro, sliced green onions, or additional chopped peanuts. Serve and enjoy!

    Nutrition Facts
    Hoisin Pork with Noodles and Broccoli
    Amount Per Serving (1 serving)
    Calories 683 Calories from Fat 360
    % Daily Value*
    Fat 40g62%
    Saturated Fat 11g69%
    Cholesterol 81mg27%
    Sodium 736mg32%
    Potassium 678mg19%
    Carbohydrates 50g17%
    Fiber 3g13%
    Sugar 13g14%
    Protein 30g60%
    Vitamin A 1950IU39%
    Vitamin C 22.8mg28%
    Calcium 58mg6%
    Iron 2.5mg14%
    * Percent Daily Values are based on a 2000 calorie diet.

    Here’s one more to pin on your Pinterest boards!You'll LOVE Hoisin Pork with Noodles and Broccoli, featuring marinated pork with noodles, broccoli and carrots cooked in an Asian inspired sauce!

    Hoisin Sriracha Chicken

    Chicken thighs get an easy, Asian-inspired twist with sweet, mildly spicy Hoisin Sriracha Chicken! Chicken is quickly marinated, then pan-seared to finish.
    Chicken thighs get an easy, Asian-inspired twist with sweet, mildly spicy Hoisin Sriracha Chicken! Chicken is quickly marinated, then pan-seared to finish.

    I found this Hoisin sriracha chicken recipe on Pinterest and it sounded quite good, so I decided to try it! YUM! This delicious dish only takes about 25 minutes to cook!

    Hoisin sauce, honey, soy sauce, and Sriracha sauce, garlic and ginger form the base for a slightly sweet, slightly spicy marinade for plump chicken thighs. Once marinated for 15 minutes, chicken is pan-cooked until done. That’s it! See how easy this recipe is? And wow, it sure tastes GOOD!

    Scroll Down for A Printable Recipe Card At the Bottom Of The Page

    How To Make Hoisin Sriracha Chicken

    Bone-in and skin on chicken thighs were used for this recipe, but you are welcome to use boneless, skinless if you want. Usually I remove the skin from chicken, but found that for this particular recipe, the skin crisps up nicely and really added to the flavor!

    If you are using boneless thighs, the cooking time might be a bit less, so keep that in mind while cooking the chicken!

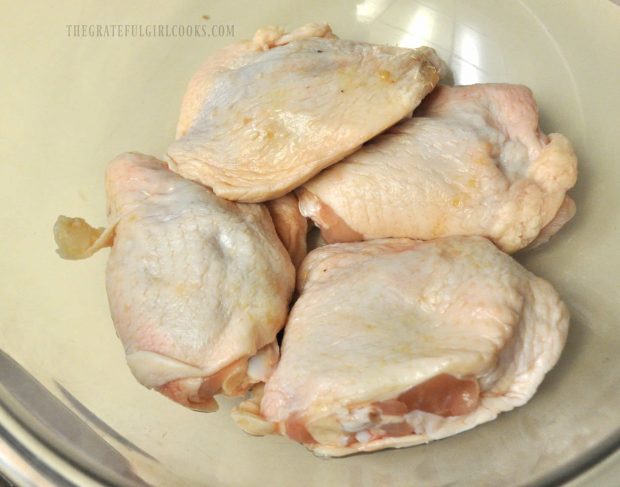
    Chicken thighs are ready to go in marinade for Hoisin Sriracha Chicken.

    Make Marinade For The Chicken

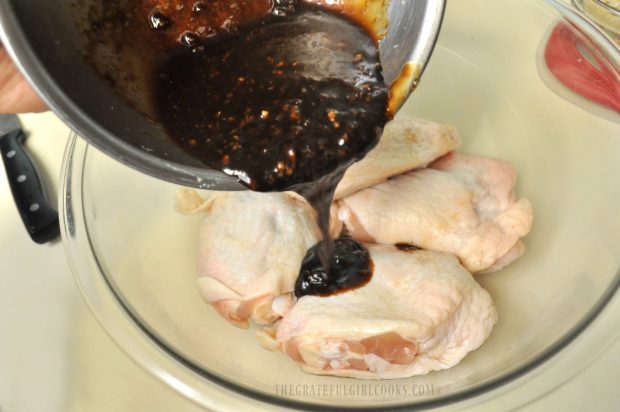
    The Hoisin sriracha marinade is mixed up, and chicken is covered with the sauce.  Let the chicken marinade in the sauce for at least 15 minutes. TIP: Short on time at the end of the day? Mix up the marinade ahead of time. Let hoisin sriracha chicken marinate all day, to make it easier and quicker to prepare this dish at dinner time!

    If you’re interested, you might also want to check out my blog post on how to make Homemade Hoisin Sauce (it’s easy, also!). I used it in this recipe!

    Marinade for Hoisin sriracha chicken is poured over the thighs.

    Cooking Hoisin Sriracha Chicken

    Heat oil on MEDIUM heat in a large skillet. Once oil is very hot, remove the chicken from the  from marinade, and let the excess drain off. NOTE: MAKE SURE TO SAVE THE MARINADE!

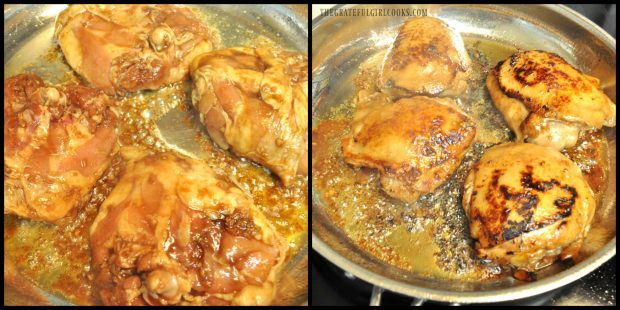
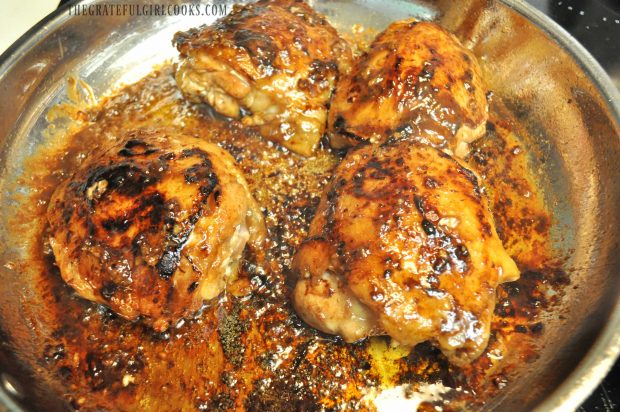
    Add the marinated Hoisin sriracha chicken thighs to the hot skillet, with the skin side facing DOWN. Cook the chicken on both sides, making sure the skin side gets browned very well.

    Hoisin Sriracha Chicken pieces are browned in a large skillet.

    Add Reserved Marinade To the Skillet

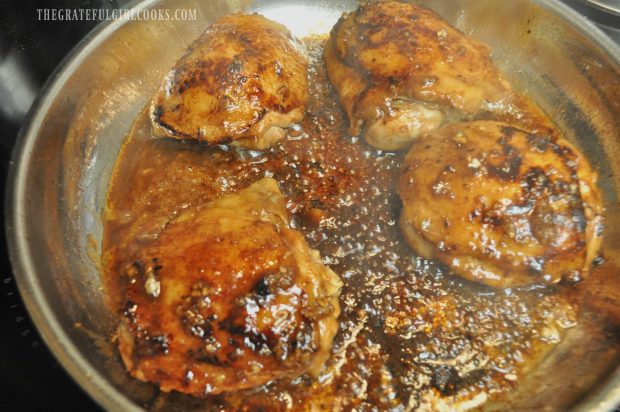
    Once both sides of the hoisin sriracha chicken have browned, turn the heat on stove down to LOW. Pour the reserved marinade back into your skillet. Spoon this sauce over the chicken thighs, and continue to cook. As the hoisin sriracha chicken cooks, the sauce will slightly reduce in volume and thicken up  a bit.

    Hoisin Sriracha Chicken thighs are cooked in sauce in skillet.

    Cook hoisin sriracha chicken until fully cooked through or reaches an internal temp. of 165° F. If using bone-in thighs, the cooking time will be approximately 25 minutes total. The time is slightly less if you’re using boneless thighs. Occasionally spoon some of the sauce over each piece of chicken during the cooking process.

    Hoisin Sriracha Chicken are finished cooking when they reach internal temperature of 165 degrees.

    Serve The Hoisin Sriracha Chicken

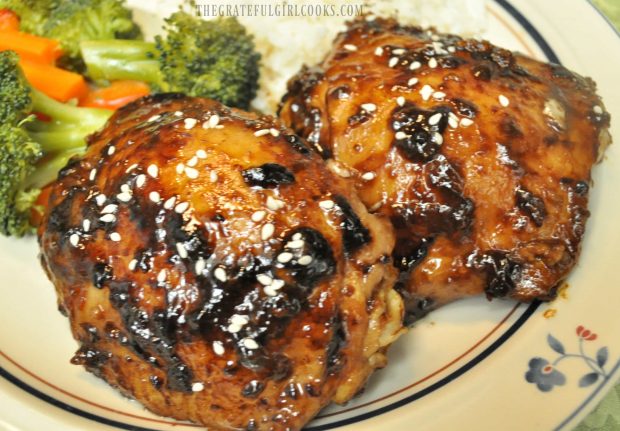
    Once chicken is done, remove the pan from the heat. Transfer the chicken to individual serving dishes.  Sprinkle each piece of chicken with white sesame seeds, to garnish.

    Two pieces of Hoisin Sriracha Chicken, on plate with broccoli on the side.

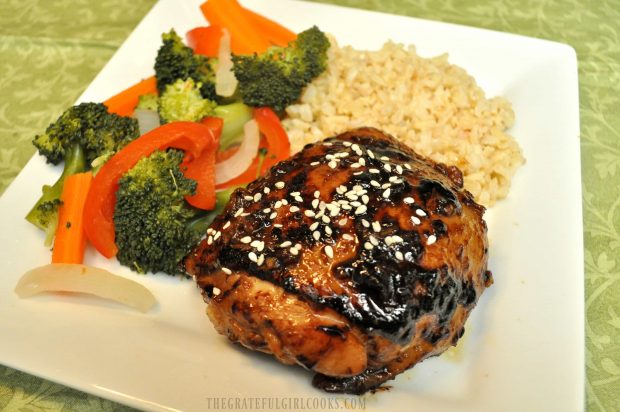
    Serve immediately while hot, and enjoy the wonderful Asian-inspired flavors of this Hoisin Sriracha Chicken! We enjoy it with steamed brown rice and veggies on the side. YUM!

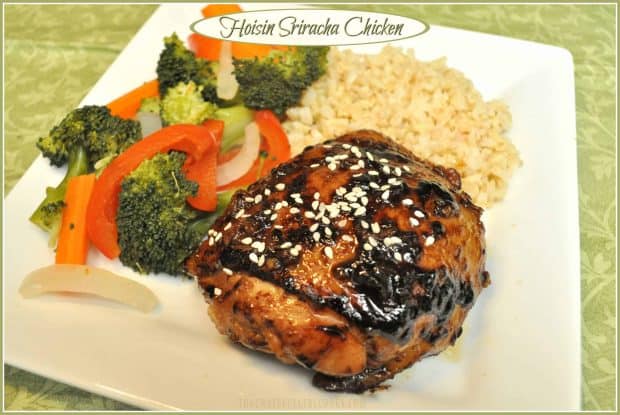
    Hoisin Sriracha Chicken, served on plate with brown rice and steamed vegetables on the side.

    I really hope you will consider making Hoisin Sriracha Chicken. The dish was easy to make and was REALLY tasty! I’ve added the Weight Watcher Smart Points per serving in the Notes section of the printable recipe below, for those following their nutrition plan.

    We really did enjoy this meal!  Hope you and your family do, too! Have a wonderful day.

    Looking For More CHICKEN Recipes?

    You can find ALL my recipes in the Recipe Index, located at the top of the page. I have LOTS of delicious chicken recipes you might enjoy, including:

    Interested In More Recipes?

    Thank you for visiting this website. I appreciate you using some of your valuable time to do soIf you’re interested, I publish a newsletter 2 times per month (1st and 15th) with all the latest recipes, and other fun info. I would be honored to have you join our growing list of subscribers, so you never miss a great recipe!
    There is a Newsletter subscription box on the top right side (or bottom) of each blog post, depending on the device you use, where you can easily submit your e-mail address (only) to be included in my mailing list.

    You Can Also Find Me On Social Media:

    Facebook page: The Grateful Girl Cooks!
    Pinterest:
    The Grateful Girl Cooks!
    Instagram:
    jbatthegratefulgirlcooks

    Author's signature

    Recipe Source:  http://rasamalaysia.com/hoisin-sriracha-chicken/

    0 from 0 votes
    Hoisin Sriracha Chicken
    Prep Time
    15 mins
    Cook Time
    25 mins
    Total Time
    40 mins
     
    Chicken thighs get an easy, Asian-inspired twist with sweet, mildly spicy Hoisin Sriracha Chicken! Chicken is quickly marinated, then pan-seared to finish.
    Category: Entree
    Cuisine: Asian
    Keyword: hoisin sriracha chicken
    Servings: 4 servings
    Calories Per Serving: 314 kcal
    Author: JB @ The Grateful Girl Cooks!
    Ingredients
    • 4 large chicken thighs , with bone in and skin on (optional-see note)
    • Tablespoons hoisin sauce
    • 1 Tablespoon soy sauce
    • 1/2 Tablespoon Sriracha sauce
    • 1 Tablespoon honey
    • 3 cloves garlic (minced)
    • 1 inch piece of fresh ginger (peeled, minced)
    • 1 pinch salt
    • 1 Tablespoon oil
    • White sesame seeds for garnish (optional)
    Instructions
    1. Mix hoisin, soy, sriracha, honey, garlic, ginger and salt in a medium bowl; stir to fully combine ingredients. Add chicken to marinade and turn to fully cover; let chicken marinate for 15 minutes.
    2. Heat oil on MEDIUM heat in a large skillet. Once oil is very hot, remove chicken from marinade (**MAKE SURE TO SAVE THE MARINADE), and add to hot skillet with the skin side facing down. Cook chicken on both sides; make sure the skin side gets browned very well.
    3. Once both sides of the chicken have been browned, turn the heat down to LOW. Pour the reserved marinade into skillet. Spoon sauce over chicken thighs, and continue to cook. As chicken cooks, the sauce will slightly reduce in volume and thicken up a bit. Cook until chicken is fully cooked through, or reaches an internal temperature of 165° F. If using bone-in thighs, cooking time will be approximately 25 minutes total... slightly less if no bone. Occasionally spoon a bit of sauce over each piece of chicken during the cooking process.
    4. Once chicken is done, remove pan from heat, and transfer chicken to individual serving plates. Garnish chicken with white sesame seeds, if desired. Serve, and enjoy!
    Recipe Notes

    Boneless, skinless thighs may be substituted. Cooking time will be slightly less. Cook to internal temperature of 165 degrees (approx. 20 minutes).
    Weight Watchers? Bone in with skin = 11 Smart Points per serving. Boneless skinless = 7 Smart Points

    Nutrition Facts
    Hoisin Sriracha Chicken
    Amount Per Serving (1 piece)
    Calories 314 Calories from Fat 198
    % Daily Value*
    Fat 22g34%
    Saturated Fat 7g44%
    Cholesterol 110mg37%
    Sodium 479mg21%
    Potassium 250mg7%
    Carbohydrates 8g3%
    Sugar 6g7%
    Protein 19g38%
    Vitamin A 90IU2%
    Vitamin C 1.9mg2%
    Calcium 13mg1%
    Iron 0.9mg5%
    * Percent Daily Values are based on a 2000 calorie diet.

    Here’s one more to pin on your Pinterest boards!Chicken thighs get an easy, Asian-inspired twist with sweet, mildly spicy Hoisin Sriracha Chicken! Chicken is quickly marinated, then pan-seared to finish.

    Chicken And Veggie Stir-Fry

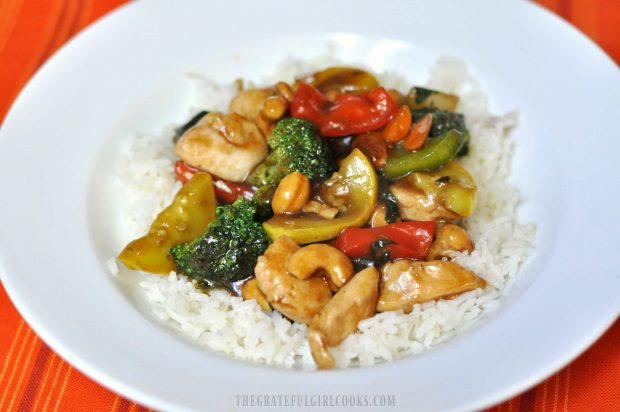
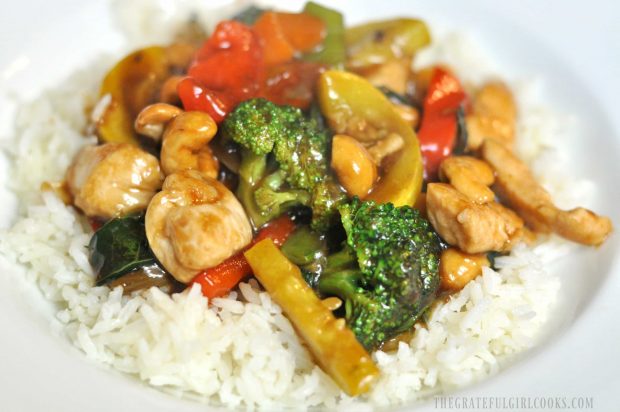
    Chicken Veggie Stir Fry, with broccoli, carrots, bok choy, zucchini, onions,etc. in an Asian-inspired sauce, is served on rice in this delicious, 20 minute dish.Chicken Veggie Stir Fry, with broccoli, carrots, bok choy, zucchini, onions,etc. in an Asian-inspired sauce, is served on rice.
    Do you enjoy stir-fry meals?  We sure do… in fact, I’ve been making this delicious, Asian-inspired Chicken Veggie Stir Fry using the same process and “recipe” for over 20 years.

    This dish couldn’t be simpler to make! I came up with a simple Asian sauce after experimenting years ago, then simply added chicken and fresh veggies, cooked it together, and have been making chicken veggie stir fry like this ever since!

    The process is simple: stir-fry lightly seasoned, cubed chicken breasts and lots of fresh veggies.  Add a homemade Asian flavored sauce (so quick & easy to make), then serve on a bed of rice! The recipe is easy, packed with veggies, and is wonderfully delicious!

    Scroll Down For A Printable Recipe Card At The Bottom Of The Page

    How To Make Chicken Veggie Stir Fry

    TIMESAVING TIP: To save time, I cooked all three parts of this recipe at the same time (it’s easy to do).

    The first thing you will need to do is cook rice according to package directions, and prep the veggies and chicken while the rice is cooking. Make sure the veggies are cut into bite sized pieces. Cut boneless, skinless chicken breasts into 2 inch cubes.

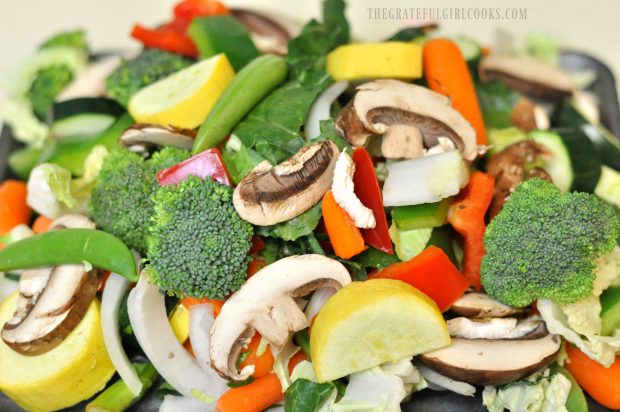
    Fresh veggies are cut and prepped to add to chicken veggie stir fry.

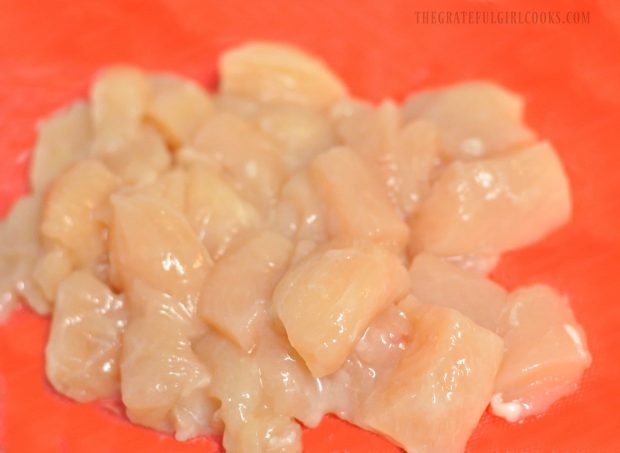
    Chicken breasts are cut into cubes to cook for the chicken veggie stir fry.

    Make The Sauce For Chicken Veggie Stir Fry

    Prepare the stir-fry sauce by combining chicken broth, soy sauce, and ground ginger in a small bowl. Stir in the corn starch and mix well to dissolve any lumps, and set it aside when done.

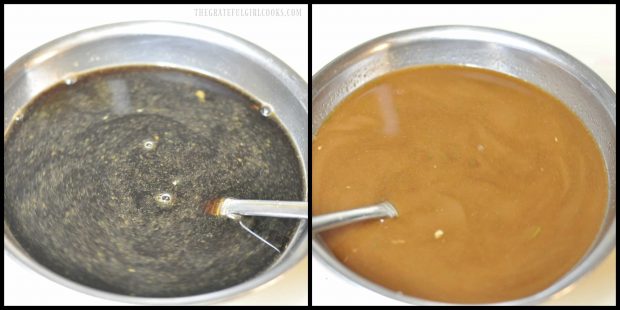
    Asian sauce is made to coat the finished chicken veggie stir fry.

    Cook the Vegetables

    In a large skillet, heat HALF of the oil on medium-high heat until very hot, but not smoking.  Add all the veggies and cook for 6-7 minutes, stirring often until the veggies are crisp-tender.

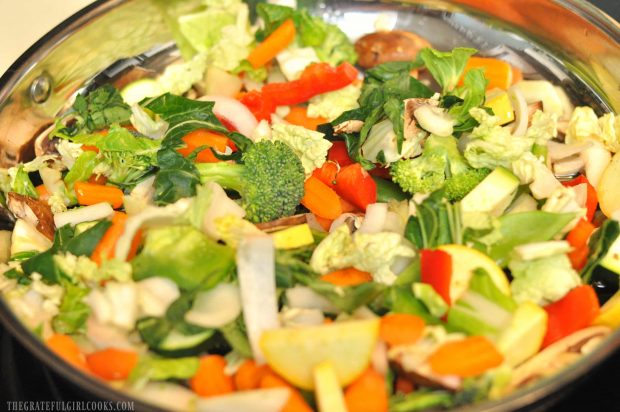
    The veggies are cooked in a large skillet for the chicken veggie stir fry.

    Cook The Chicken

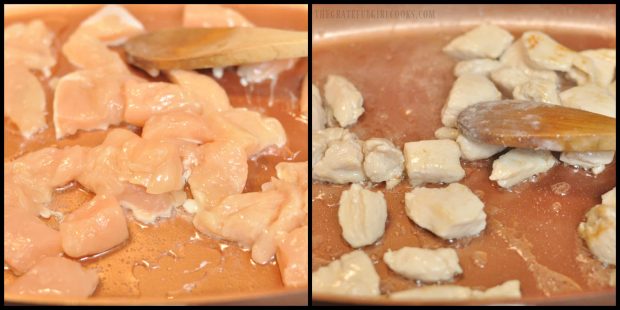
    In a separate medium skillet, heat the remaining half of the oil on medium-high until very hot, but not smoking.  Add the chicken pieces and cook, turning pieces over to cook through on all sides (about 3-4 minutes). To save time, cook the chicken while the veggies are cooking. Multi-tasking at it’s finest!

    Chicken breast is cooked before adding to the chicken veggie stir fry.

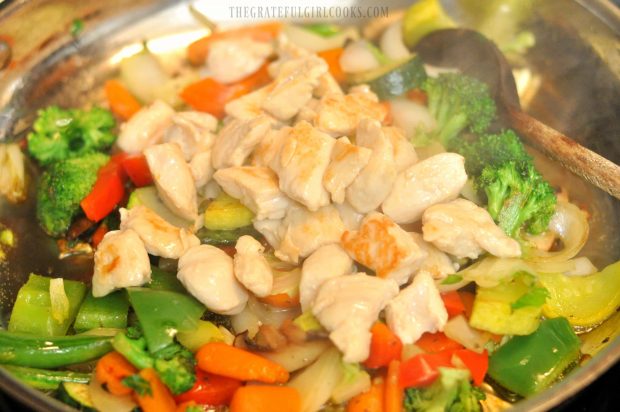
    When the chicken is finished cooking, add the pieces to the cooked veggies in the large skillet.

    The cooked chicken is added to the vegetables in large skillet.

    Add Sauce To Chicken Veggie Stir Fry

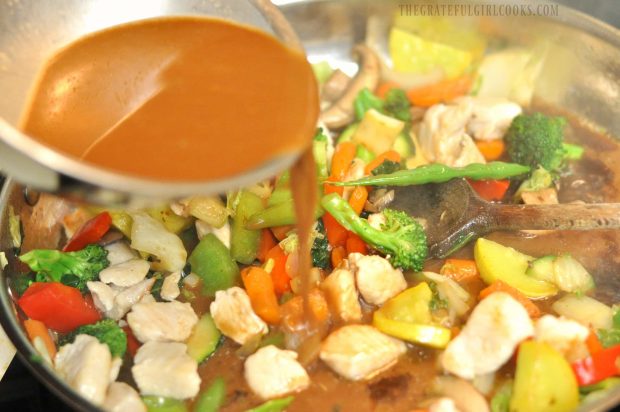
    Give the reserved sauce a good stir, then pour it over the chicken and veggies. Cook on medium-high heat, stirring often for about 2 minutes. The sauce will thicken as it cooks and will coat the chicken and veggies.

    An Asian-inspired sauce is added to the skillet full of chicken veggie stir fry.

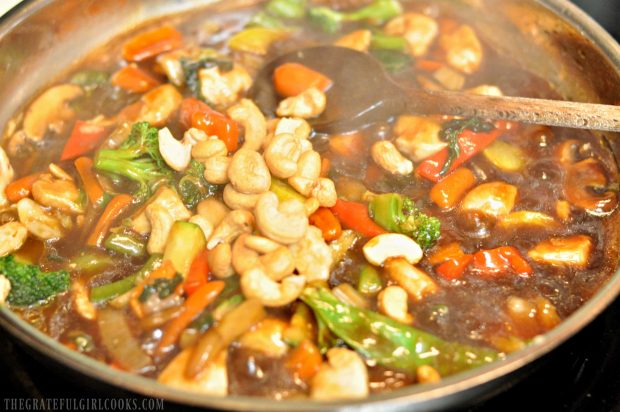
    Once the sauce has thickened and coated everything, add the cashews, and stir to combine. Cook just for a minute, until the chicken veggie stir fry is heated through.

    Cashews are added to the chicken veggie stir fry, after sauce thickens.

    Serve The Chicken Veggie Stir Fry

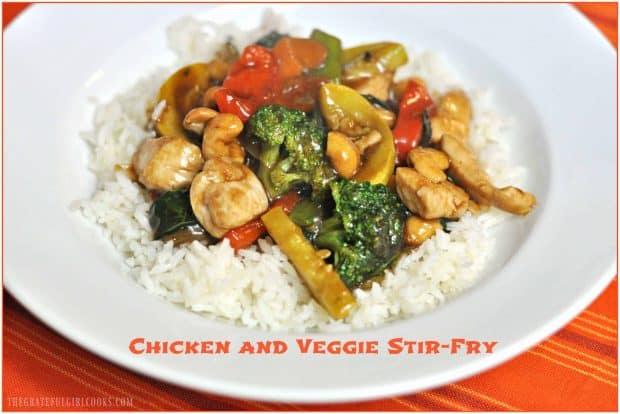
    Serve the chicken veggie stir fry hot, on top of a bed of rice (brown or white).  Grab a fork (or chopsticks) and dig right in! It’s GOOD!

    Chicken veggie stir fry is served on a bed of white rice.White rice serves as the bed for the chicken veggie stir fry.

    Can I Change The Veggies OR Make This Dish Vegetarian?

    While you can adjust the veggies according to your taste and what you have available (I’ve done this many times), the basics you should have in this dish are onion, carrots, broccoli, and red peppers, because they add so much color (and flavor) to the dish. Any other veggies you choose to add will enhance the dish with additional flavor and color!!!

    If you are a Vegetarian, no problem! Simply omit the chicken from the dish!  Be creative… make it your own… and enjoy every bite! Have a wonderful day!

    Looking For More CHICKEN Recipes?

    You can find all of my recipes in the Recipe Index, which is located at the top of the page. I have LOTS of chicken recipes, including:

    Interested In More Recipes?

    Thank you for visiting this website. I appreciate you using some of your valuable time to do soIf you’re interested, I publish a newsletter 2 times per month (1st and 15th) with all the latest recipes, and other fun info. I would be honored to have you join our growing list of subscribers, so you never miss a great recipe! 

    There is a Newsletter subscription box on the top right side (or bottom) of each blog post, depending on the device you use, where you can easily submit your e-mail address (only) to be included in my mailing list.

    You Can Also Find Me On Social Media:

    Facebook page: The Grateful Girl Cooks!
    Pinterest:
    The Grateful Girl Cooks!
    Instagram:
    jbatthegratefulgirlcooks

    Author's signature

    0 from 0 votes
    Chicken And Veggie Stir Fry
    Prep Time
    10 mins
    Cook Time
    10 mins
    Total Time
    20 mins
     
    Chicken Veggie Stir Fry, with broccoli, carrots, bok choy, zucchini, onions,etc. in an Asian-inspired sauce, is served on rice in this delicious dish.
    Category: Entree
    Cuisine: Asian
    Keyword: chicken veggie stir fry
    Servings: 4 servings
    Calories Per Serving: 483 kcal
    Author: JB @ The Grateful Girl Cooks!
    Ingredients
    For Stir-Fry
    • 3 boneless skinless chicken breasts , cut into 2 inch cubes
    • Ground ginger (to lightly season chicken with before cooking)
    • 6 cups fresh vegetables (total) *See NOTES section below.
    • 1/4 cup vegetable oil , divided
    • 1/3 cup roasted cashews
    For Stir-Fry sauce:
    • 1 cup chicken broth
    • 1/4 cup soy sauce
    • 2 Tablespoons corn starch
    • 1 teaspoon ground ginger
    For Serving: Cooked rice (prepared according to package directions)
      Instructions
      1. Cook rice according to pkg. directions.Cut veggies/chicken in bite size pieces while rice is cooking.
      2. Make stir-fry sauce by mixing chicken broth, soy sauce, and ground ginger in small bowl. Stir in corn starch and mix well. Set aside.
      3. In large skillet, heat HALF of the oil on medium-high heat until very hot, but not smoking. Add all veggies; continue cooking for about 6-7 minutes, stirring often until veggies are crisp-tender.
      4. In separate medium skillet, heat remaining half of the oil on medium-high until very hot, but not smoking. Add chicken; cook all sides until it turns white and is cooked through (about 3-4 minutes).
      5. Add cooked chicken to the veggies in large skillet.
      6. Give the sauce a stir, then pour it over chicken and veggies. Cook on medium-high heat, stirring often for about 2 minutes. The sauce will thicken as it cooks and will coat the chicken and veggies.
      7. When done, add the cashews, and stir to combine. Serve over hot cooked rice... and enjoy!
      Recipe Notes

      I used broccoli, onion, carrots, red & green bell peppers, bok choy, mushrooms, sugar snap peas, zucchini and yellow squash. Additional veggie add-ins might also include: fresh chopped asparagus, green onions, fresh green beans, celery, water chestnuts, canned/drained bean sprouts, etc.

      Nutrition Facts
      Chicken And Veggie Stir Fry
      Amount Per Serving (1 serving)
      Calories 483 Calories from Fat 198
      % Daily Value*
      Fat 22g34%
      Saturated Fat 12g75%
      Cholesterol 54mg18%
      Sodium 1253mg54%
      Potassium 1034mg30%
      Carbohydrates 45g15%
      Fiber 11g46%
      Protein 30g60%
      Vitamin A 13890IU278%
      Vitamin C 33.5mg41%
      Calcium 84mg8%
      Iron 4.2mg23%
      * Percent Daily Values are based on a 2000 calorie diet.

      Here’s one more to pin on your Pinterest boards!Chicken Veggie Stir Fry, with broccoli, carrots, bok choy, zucchini, onions, etc. in an Asian-inspired sauce, is served on rice.


      Save

      Save

      Save

      Save

      Save

      Save

      Save

      Save

      Save

      Save

      Save

      Save

      Save

      Save

      Save

      Save

      Save

      Teriyaki Chicken with Homemade Sauce

      Teriyaki Chicken with Homemade Sauce is a simple, yet delicious recipe! Marinate chicken in an Asian-inspired sauce, then grill to perfection!Teriyaki Chicken with Homemade Sauce is a simple, yet delicious recipe! Marinate chicken in an Asian-inspired sauce, then grill to perfection!
      We’re in the middle of a freezing winter in Oregon. However, one cold evening last week, we grilled teriyaki chicken with homemade sauce outside on our BBQ! It was fun, and made us anticipate the hot days of summer which are coming SOON!

      I got this simple recipe for an “enhanced” Teriyaki marinade from my sister Julie many years ago. Typically I cut the chicken into cubes, marinate them, then place the cubes on skewers and grill. This time, I left the chicken breasts whole, marinated then grilled them. It was less prep work (no cubing), but with the same delicious results! Hooray!

      The teriyaki sauce sauce is really easy to make, and the finished chicken pieces is full of flavor. If you’re interested in using the sauce to marinate steak, see the Tips section of my printable recipe. Here’s how to make teriyaki chicken with homemade sauce.

      Scroll Down for A Printable Recipe Card At The Bottom Of The Page

      Make The Teriyaki Sauce To Marinate The Chicken

      Mix teriyaki sauce, sugar, cooking sherry, ground ginger, and minced garlic together in a medium bowl. Stir well, until these ingredients are fully combined. 

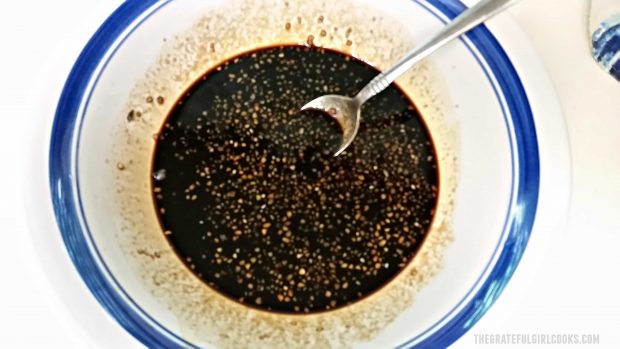
      Ingredients for teriyaki marinade are mixed together in a small bowl.

      Marinate The Chicken

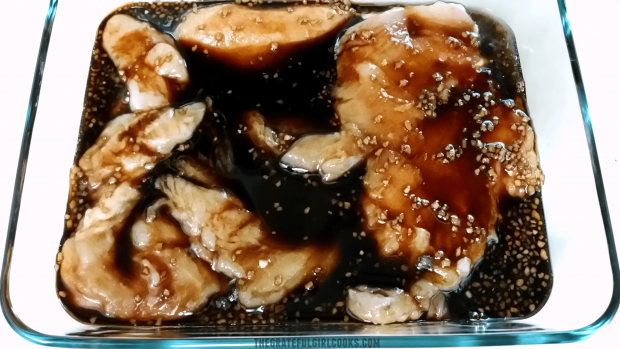
      Lightly season the chicken pieces you are using with salt. Place the chicken into a covered container (or heavy duty gallon-sized resealable bag). Pour the marinade over the chicken.

      Turn the chicken in the bag or container to ensure all pieces are coated with the teriyaki sauce. Cover the container (or seal the bag) and place it in a refrigerator to marinate at least 6 hours for best flavor. Turn chicken over occasionally, so that it remains covered with the sauce.

      Chicken pieces are placed in teriyaki sauce in a dish, then refrigerated while they marinate.

      Time To Grill The Teriyaki Chicken

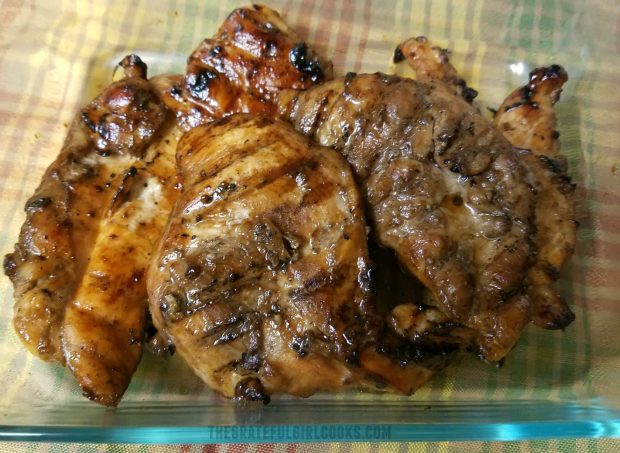
      Once the chicken has finished marinating, remove it from the container. Place the marinated teriyaki chicken onto a hot BBQ grill and cook until done. Chicken is considered fully cooked when it reaches an internal temperature of 165°F.

      If desired, baste the chicken with the sauce while it cooks. Do NOT use the leftover sauce to serve, because it was exposed to raw chicken. Discard it.

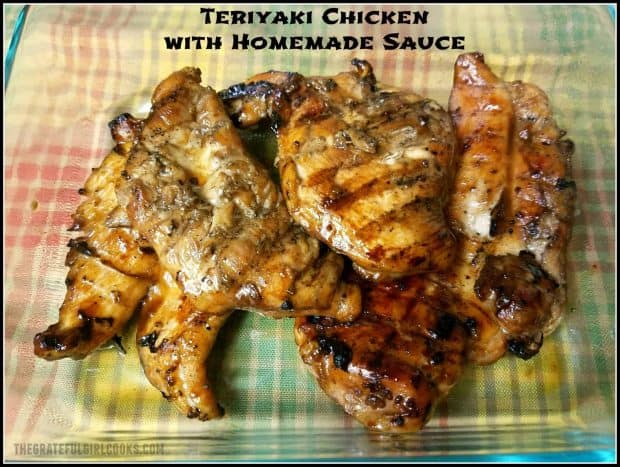
      Grilling the teriyaki chicken with homemade sauce on a BBQ grill.

      Who Wants Some Teriyaki Chicken with Homemade Sauce?

      That’s it! See how very easy it is to prepare this chicken?  The teriyaki chicken with homemade sauce has wonderful flavor, and can be served hot as a main dish.

      You can also use the meat to make teriyaki chicken sandwiches (with grilled pineapple rings). Grilled teriyaki chicken is delicious when used in salads or teriyaki rice bowls. The possibilities are endless, and the chicken flavor is wonderful!

      Teriyaki Chicken with Homemade Sauce is served in a clear glass container.

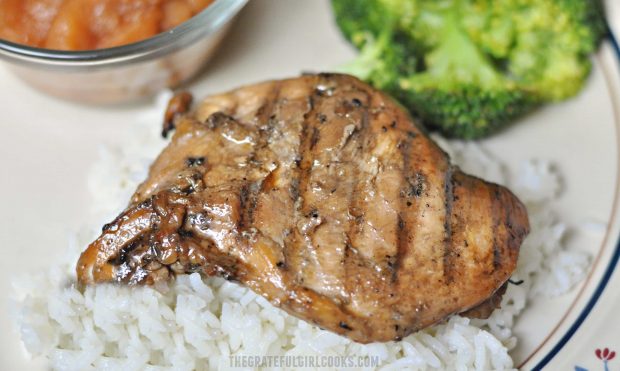
      A piece of teriyaki chicken with homemade sauce is served with rice and broccoli.

      I love recipes like this that can be made up ahead of time (marinating), then cooked at the last minute without a lot of fuss. It sure makes an easy main dish for the family! I hope you enjoy this recipe for teriyaki chicken with homemade sauce as much as we do!

      May you have eyes to see beauty all around as you go through your day. Whether it’s a stunning sunset, a friend or family member, or a kindness shared or observed, be the person that finds beauty in it all.

      Thanks for stopping by today. I invite you to come back again soon for more family-friendly recipes. Take care, and have a GREAT day!

      Looking For More CHICKEN Recipes?

      You can find ALL of my recipes in the Recipe Index, which is located at the top of the page. I have LOTS of delicious chicken recipes to check out, including:

      Want More Recipes? Get My FREE Newsletter!

      I publish a newsletter 2 times per month (1st and 15th) with lots of recipes, tips, etc..
      Would you like to join our growing list of subscribers?

      There is a Newsletter subscription box on the top right (or bottom) of each blog post, depending on the device you use.
      You can submit your e-mail address there, to be added to my mailing list.

      Find Me On Social Media:

      Facebook page: The Grateful Girl Cooks!
      Pinterest:
      The Grateful Girl Cooks!
      Instagram:
      jbatthegratefulgirlcooks

      Author's signature

      Recipe Source:  My sister Julie M.

      ↓↓ PRINTABLE RECIPE BELOW ↓↓

      0 from 0 votes
      Teriyaki Chicken with Homemade Sauce
      Prep Time
      5 mins
      Cook Time
      22 mins
      Marinating (inactive time)
      6 hrs
      Total Time
      6 hrs 27 mins
       

      Teriyaki Chicken with Homemade Sauce is a simple, yet delicious recipe! Marinate chicken in an Asian-inspired sauce, then grill to perfection!

      Category: Dinner, Entree
      Cuisine: Asian
      Keyword: teiyaki chicken with homemade sauce
      Servings: 6 servings
      Calories Per Serving: 226 kcal
      Author: JB @ The Grateful Girl Cooks!
      Ingredients
      • 1 cup teriyaki sauce
      • 1 cup sugar
      • 1/4 cup cooking sherry
      • 1/4 teaspoon ground ginger
      • 4 minced garlic cloves
      • 1 pinch salt (to season meat with)
      • 6 boneless skinless chicken breasts or thighs
      Instructions
      1. In medium bowl, combine teriyaki sauce, sugar, sherry, ginger, and minced garlic. Stir until sugar has dissolved and sauce is fully combined.

      2. Season chicken lightly with salt. Place chicken pieces into a large covered container (or gallon sized resealable plastic bag). Add marinade. Turn to fully cover all pieces of chicken with sauce. Cover container and place in refrigerator for at least 6 hours (overnight is the best!) to marinade.

      3. Once meat is done marinating, grill (on outdoor or indoor grill) until cooked to an internal temperature of 165°F.. Serve, and enjoy!

      Recipe Notes

      NOTE: Caloric content calculated using 6 boneless, skinless breasts.
      TIPS:Chicken can also be cut into 1-2 inch chunks, marinated then placed on skewers for grilling (kebabs).
      Top sirloin steak can also be used if sliced very thin, then marinated. Place strips onto skewers, then grill. If you use round steak, meat must be marinated for a longer amount of time.

      Nutrition Facts
      Teriyaki Chicken with Homemade Sauce
      Amount Per Serving (1 breast)
      Calories 226 Calories from Fat 18
      % Daily Value*
      Fat 2g3%
      Cholesterol 72mg24%
      Sodium 1058mg46%
      Potassium 487mg14%
      Carbohydrates 21g7%
      Sugar 20g22%
      Protein 25g50%
      Vitamin A 35IU1%
      Vitamin C 2mg2%
      Calcium 15mg2%
      Iron 0.9mg5%
      * Percent Daily Values are based on a 2000 calorie diet.

      Here’s one more to pin on your Pinterest boards!Teriyaki Chicken with Homemade Sauce is a simple, yet delicious recipe! Marinate chicken in an Asian-inspired sauce, then grill to perfection!


      Save

      Save

      Save

      Save

      Save

      Save

      Save

      Save

      Save

      Save

      Save

      Save

      Save

      Teriyaki Chicken

      Who needs takeout, when you can easily make this delicious Teriyaki Chicken, with chicken breasts baked in an Asian inspired sauce, served on rice? It’s simple and delicious!Who needs takeout, when you can easily make this delicious Teriyaki Chicken, with chicken breasts baked in an Asian inspired sauce, served on rice?

      Do you enjoy Teriyaki Chicken? I sure do, so I wanted to share an easy and delicious recipe with you today, so you can make your own at home!  The taste is OUTSTANDING!

      This really is one of my favorite dishes! There’s just something about the Asian teriyaki glaze that pushes all my buttons! I enjoy using this recipe (for the Teriyaki Sauce) to also make Teriyaki Chicken Rice Bowls. YUM.  I think you’ll be surprised at just how easy it is to make!

      Scroll Down For A Printable Recipe Card At The Bottom Of The Page

      Make The Teriyaki Sauce

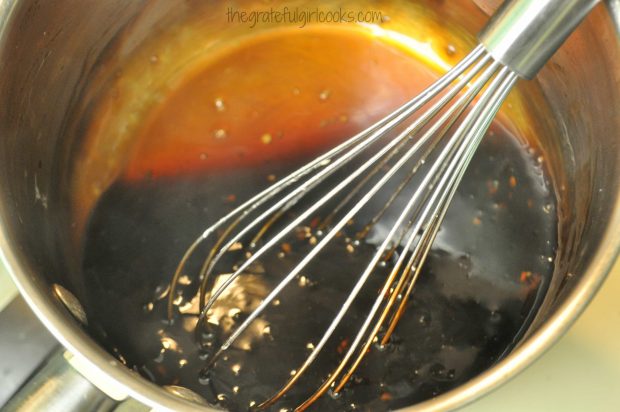
      Here’s what you do:  First make up the teriyaki sauce (don’t worry-it’s EASY). The ingredients are cooked until it becomes a thick and amazing sauce.

      Whisking and cooking homemade teriyaki sauce in saucepan

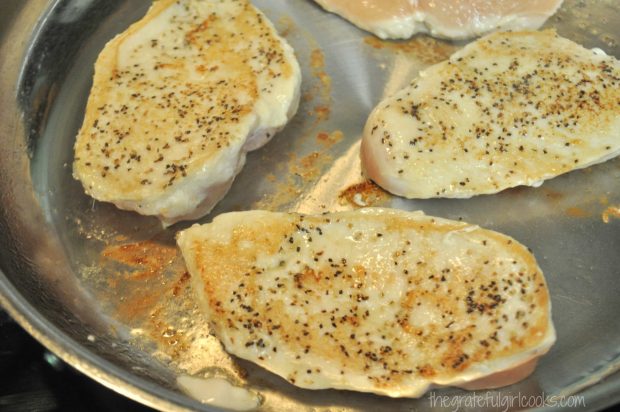
      Heat olive oil in a large skillet until it is hot, but not smoking. Cook the boneless, skinless chicken breasts in the hot oil until they are golden brown. Once the bottom side is golden brown, gently turn them over and continue cooking other side, until the chicken is fully cooked through.

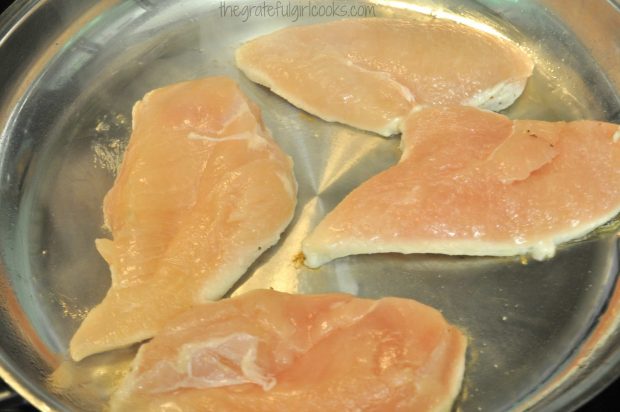
      Four chicken breasts cooking in skilletBrowned chicken breasts cooking in skillet.

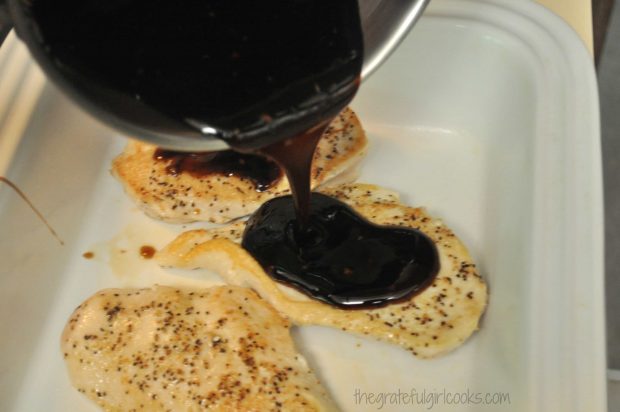
      Place the browned chicken breasts into an oven-proof baking dish. Pour the thickened teriyaki sauce on top and around the chicken breasts, to fully coat them.

      Teriyaki sauce poured over cooked chicken breasts in white baking dish

      Bake The Teriyaki Chicken

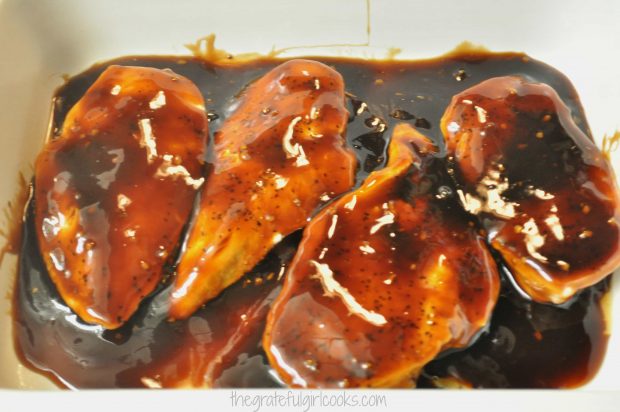
      Once they are covered in that yummy teriyaki sauce, the chicken breasts are baked for 15-20 minutes. See how it gets the name teriyaki chicken? Chicken and teriyaki sauce… easy peasy!

      Teriyaki chicken baked in sauce

      To Serve Teriyaki Chicken

      Once the teriyaki chicken is fully baked, remove the pan from the oven. Transfer the chicken breasts from the pan onto a cutting board. Slice each chicken breast into thin strips.

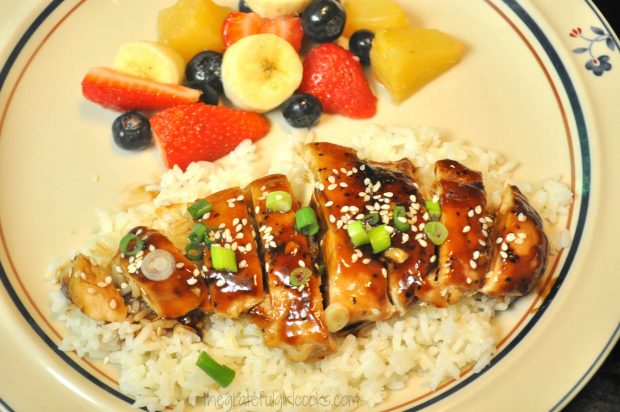
      Serve the teriyaki chicken slices on top of a bed of rice. Drizzle the chicken with additional sauce, and garnish it with sliced green onions and sesame seeds.  That’s it! See how EASY it is to make delicious teriyaki chicken? Well, just wait until you TASTE it, because it’s absolutely delicious!

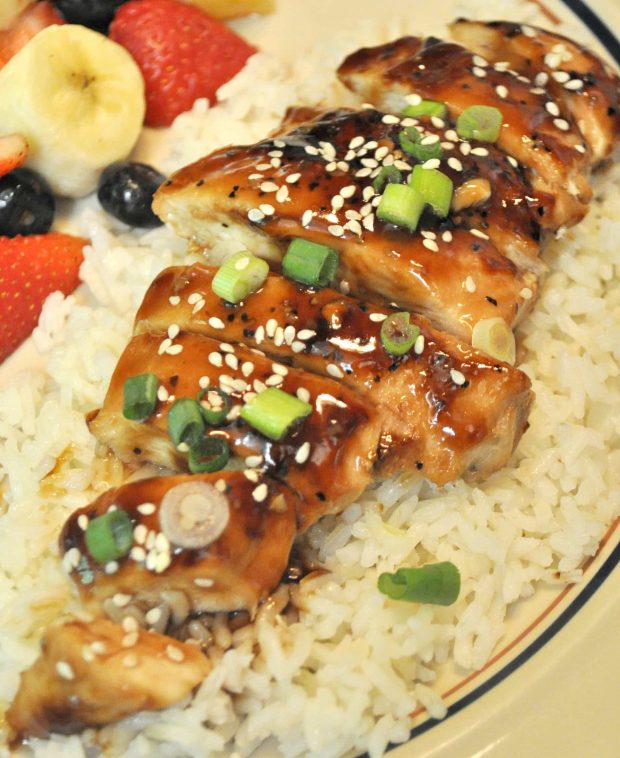
      The teriyaki chicken is sliced and served on rice, with fruit on side.

      A serving of teriyaki chicken with sliced green onions, on top of white rice.

      Hope you’ll give this recipe for teriyaki chicken a try. I think you’re gonna LOVE it! Have a blessed day, and I sincerely hope you will stop by again soon.

      Looking For More CHICKEN Recipes?

      You can find all of my recipes (including chicken) in the Recipe Index, located at the top of the page. A few of these chicken recipes you might be interested in are:

      Interested In More Recipes?

      Thank you for visiting this website. I appreciate you using some of your valuable time to do soIf you’re interested, I publish a newsletter 2 times per month (1st and 15th) with all the latest recipes, and other fun info. I would be honored to have you join our growing list of subscribers, so you never miss a great recipe!
      There is a Newsletter subscription box on the top right side (or bottom) of each blog post, depending on the device you use, where you can easily submit your e-mail address (only) to be included in my mailing list.

      You Can Also Find Me On Social Media:
      Facebook page: The Grateful Girl Cooks!
      Pinterest: The Grateful Girl Cooks!
      Instagram: jbatthegratefulgirlcooks

      Author's signature

      Recipe Source:  http://www.asweetpeachef.com/entrees/teriyaki-chicken/

      ↓↓ PRINTABLE RECIPE BELOW ↓↓

      0 from 0 votes
      Teriyaki Chicken
      Prep Time
      15 mins
      Cook Time
      20 mins
      Total Time
      35 mins
       

      Who needs takeout, when you can easily make this delicious Teriyaki Chicken, with chicken breasts baked in a flavorful Asian inspired sauce, served on rice?

      Category: Main Course
      Cuisine: Asian
      Keyword: teriyaki chicken
      Servings: 4 servings
      Calories Per Serving: 225 kcal
      Author: JB @ The Grateful Girl Cooks!
      Ingredients
      For Teriyaki Sauce:
      • 1/3 cup soy sauce (low sodium)
      • 2 Tablespoons honey
      • 1 Tablespoon brown sugar
      • 2 cloves garlic , minced
      • 1 teaspoon fresh ginger , finely minced
      • 1 teaspoon apple cider vinegar
      • 1/3 cup water
      • 1 Tablespoon cornstarch
      For Chicken:
      • 1 Tablespoon olive oil
      • 4 boneless , skinless chicken breasts
      • Salt & Black Pepper (just a pinch of each)
      For Garnish (optional):
      • sliced green onions and sesame seeds
      Instructions
      To Make The Teriyaki Sauce:
      1. Place soy sauce, honey, brown sugar, garlic, ginger and apple cider vinegar in a medium sized pan. Heat this mixture on medium-high; stir it frequently.
      2. In separate bowl, combine cornstarch and water. Stir until cornstarch has dissolved, then add it to the ingredients in the pan. Stir frequently and cook for 6-7 minutes, until the mixture has thickened. Remove from heat and set aside.
      To Make The Chicken:
      1. Make sure your oven is preheated to 425 degrees F.
      2. Pour Tablespoon of olive oil into a large skillet Heat olive oil on high heat. Season the pieces of chicken with salt and pepper. Put the chicken into hot oil in skillet. Once you put chicken breasts into skillet, don't move them. Cook chicken for 4-5 minutes, then turn to cook other side for 3-4 minutes. Chicken should be golden brown in color. Remove and place in a baking dish that has been sprayed with non-stick spray.
      3. Pour the teriyaki sauce over the top and all around the chicken pieces.
      4. Bake chicken at 425 degrees for 15-20 minutes (or until no longer pink in middle). Sauce will be bubbly.
      5. When done, remove chicken from oven. Serve on top of a bed of rice, and garnish each piece with sliced green onions and sesame seeds. Enjoy!.
      Recipe Notes

      If you want to cook it all in one pan, make sure to cook the chicken in an oven-proof skillet.

      Nutrition Facts
      Teriyaki Chicken
      Amount Per Serving (1 piece)
      Calories 225 Calories from Fat 54
      % Daily Value*
      Fat 6g9%
      Saturated Fat 1g6%
      Cholesterol 72mg24%
      Sodium 1222mg53%
      Potassium 459mg13%
      Carbohydrates 15g5%
      Sugar 11g12%
      Protein 26g52%
      Vitamin A 35IU1%
      Vitamin C 1.8mg2%
      Calcium 12mg1%
      Iron 0.9mg5%
      * Percent Daily Values are based on a 2000 calorie diet.

      Here’s one more to pin on your Pinterest boards!Who needs takeout, when you can easily make this delicious Teriyaki Chicken, with chicken breasts baked in an Asian inspired sauce, served on rice?

      Save

      Save

      Save

      Sweet Chili & Garlic Glazed Salmon

      Sweet Chili Glazed Salmon fillets, marinated in sweet chili sauce, garlic, orange marmalade & soy sauce, is a simple, delicious, broiled seafood dish!Sweet Chili Glazed Salmon fillets, marinated in sweet chili sauce, garlic, orange marmalade & soy sauce, is a simple, delicious, broiled seafood dish!
      As I write this, I am still savoring the memory and taste of the Sweet Chili & Garlic Glazed Salmon I fixed last night for dinner. It ranks right up there as one of the BEST pieces of salmon I’ve ever had (and I make salmon often!). UH-May-ZING!!!!

      The recipe is so simple, yet I was amazed at just how fabulous it really was! My husband and I completely, 100% LOVED it! The recipe comes down to… marinate the salmon, then broil it! I know… EASY, RIGHT? Right.

      Yet… there is so much flavor! Can you tell how excited I am to share this recipe with you today? While we were eating, I kept saying “this is soooo good”! Here’s how to make this delicious dish:

      Scroll Down For A Printable Recipe Card At The Bottom Of The Page

      Make The Sweet Chili Marinade

      Mix up the marinade in a shallow dish. The marinade consists of sweet chili sauce, orange marmalade (I used my homemade jam!), soy sauce, 1 clove of minced garlic and chopped green onion. EASY.

      Making the sweet chili sauce glaze for the salmon.
      In case you’re wondering, here is the sweet chili sauce I used. It can be found in the Asian section of most grocery stores.

      I used this sweet chili sauce to make the recipe.

      Reserve Some Of The Marinade For Later!

      After mixing up the marinade, I reserved a bit of it in a separate container to drizzle over the finished salmon.

      Some of the sweet chili glaze is reserved to add to salmon after cooking.

      Prepare And Marinade The Salmon Fillets

      I seasoned the salmon fillets with salt and pepper. Note: this is “skin on” salmon. Got a large piece for $17 dollars at Costco… cut it into 7 fillets. Each serving will cost about $2.50 each, so it is less expensive (and healthier) than a Big Mac, and cheaper than ordering salmon in a restaurant!

      Salt and pepper are sprinkled on fillet before marinating.

      Place the salmon fillets into the marinade, SKIN SIDE UP.  *(Note: this recipe calls for 4 pieces of salmon; I only cooked 2 fillets, but made the same amount of sauce specified). Let the salmon marinade for at least an hour in the refrigerator. Do not turn salmon over.

      Two salmon fillets are marinating skin side up before cooking.

      Preparing To Cook Sweet Chili Glazed Salmon

      Before cooking the salmon, cover a cookie sheet with aluminum foil, and then spray with non-stick spray. Trust me… you will be glad you did this at the end of the baking time. Clean up is a BREEZE, and the sweet chili glazed salmon will not stick to the pan!

      Spraying a foil covered pan with cooking spray will help fish to not stick.

      Place the marinated salmon fillets SKIN SIDE DOWN onto the foil. You can brush a tiny bit more of the marinade onto the fish, but be careful to NOT let the sauce “pool up” on the foil (cause it will burn!)

      Marinated salmon fillets are placed on pan skin side down for broiling.

      Broiling The Sweet Chili Glazed Salmon

      Preheat your oven broiler. Once it’s hot hot, place the tray of salmon onto a MIDDLE RACK (about 5-6 inches away from the broiler unit). Broil for 7-10 minutes (mine took about 9 minutes), until the salmon is lightly browned and flakes easily. This is what it looked like when I removed the pan from under the broiler.

      The sweet chili glazed salmon fillets are golden brown and flake easily after cooking

      Serving This Dish

      Place each of the salmon fillets onto individual plates. Spoon a little of the reserved chili glaze over the top. Garnish each piece with some toasted sesame seeds and a few chopped green onions for garnish (if desired).

      Sweet Chili Glazed Salmon is topped with sesame seeds, green onions & sauce to serve.
      Add a side dish or two… and BOOM!  It’s ready to eat… and let me tell you… this Sweet Chili Glazed Salmon is FANTASTIC!

      The salmon is served with fruit salad and roasted vegetables.
      Sure hope you will consider making this amazing salmon. The sauce is so good, I could eat it by the spoonful. I am confident you will enjoy this salmon as much as we did! Have a great day, and may God bless you with His presence!

      Looking For More SALMON Recipes?

      You can find all of my seafood recipes in the Recipe Index, located at the top of the page. A few favorite salmon recipes include:

      Interested In More Recipes?

      Thank you for visiting this website. I appreciate you using some of your valuable time to do soIf you’re interested, I publish a newsletter 2 times per month (1st and 15th) with all the latest recipes, and other fun info. I would be honored to have you join our growing list of subscribers, so you never miss a great recipe!
      There is a Newsletter subscription box on the top right side (or bottom) of each blog post, depending on the device you use, where you can easily submit your e-mail address (only) to be included in my mailing list.

      You Can Also Find Me On Social Media:
      Facebook page: The Grateful Girl Cooks!
      Pinterest: The Grateful Girl Cooks!
      Instagram: jbatthegratefulgirlcooks

      Author's signature

      Recipe Source: http://therecipecritic.com/2015/02/sweet-chili-garlic-glazed-salmon/

      ↓↓ PRINTABLE RECIPE BELOW ↓↓

      0 from 0 votes
      Sweet Chili Garlic Glazed Salmon
      Prep Time
      1 hr 10 mins
      Cook Time
      8 mins
      Total Time
      1 hr 18 mins
       

      Sweet Chili Glazed Salmon fillets, marinated in sweet chili sauce, garlic, orange marmalade & soy sauce, is a simple, delicious, broiled seafood dish!

      Category: Dinner, Entree
      Cuisine: Asian
      Keyword: salmon
      Servings: 4 servings
      Calories Per Serving: 317 kcal
      Author: JB @ The Grateful Girl Cooks!
      Ingredients
      • 4 (6 ounce) pieces of salmon
      • 1/4 cup sweet chili sauce (I used Mae Ploy)
      • 2 Tablespoons orange marmalade
      • 3 Tablespoons soy sauce
      • 1 clove Minced garlic
      • 2 Tablespoons green onions , minced
      • Salt and black pepper
      • Additional chopped green onions , for garnish
      • Toasted sesame seeds , for garnish (toast seeds in dry skillet 2-3 minutes on low, stirring often)
      Instructions
      1. Mix the sweet chili sauce, orange marmalade and soy sauce together in a shallow baking dish.
      2. Add the sliced green onions and minced garlic to the sauce. Stir well, to combine. Measure out approximately 1/4 cup of the marinade; set aside (to drizzle over cooked salmon before serving).
      3. Lightly season the salmon fillets with salt and pepper. Place the fillets SKIN SIDE UP in marinade. Let the salmon marinate for at least 1 hour.
      4. Heat your oven broiler. Place an oven rack in the middle of oven (about 5-6 inches from the broiler).
      5. Cover a cookie sheet with aluminum foil; generously spray it with non-stick spray (this will make clean up a breeze!).
      6. Remove salmon from marinade. Let any extra liquid drain off, then put the salmon SKIN SIDE DOWN onto the aluminum foil. It's okay to brush a little extra marinade onto the salmon, but don't let it "pool up" onto the foil, because it will burn under the heat.
      7. Broil the salmon for 6-10 minutes, or until browned and easily flaked in the middle. (Mine took about 8 minutes). When done, remove from oven, and place salmon onto individual serving plates. Spoon some of the reserved marinade over the top of each piece. If desired, garnish with toasted sesame seeds and additional green onion slices Enjoy!.
      Recipe Notes

      Note: Prep time includes the hour of marinating salmon fillets.

      Nutrition Facts
      Sweet Chili Garlic Glazed Salmon
      Amount Per Serving (1 piece)
      Calories 317 Calories from Fat 99
      % Daily Value*
      Fat 11g17%
      Saturated Fat 1g6%
      Cholesterol 93mg31%
      Sodium 993mg43%
      Potassium 871mg25%
      Carbohydrates 15g5%
      Sugar 13g14%
      Protein 35g70%
      Vitamin A 115IU2%
      Vitamin C 1.3mg2%
      Calcium 46mg5%
      Iron 2mg11%
      * Percent Daily Values are based on a 2000 calorie diet.

      Here’s one more to pin on your Pinterest boards!Sweet Chili Glazed Salmon fillets, marinated in sweet chili sauce, garlic, orange marmalade & soy sauce, is a simple, delicious, broiled seafood dish!


      Save

      Save