Category: Asian

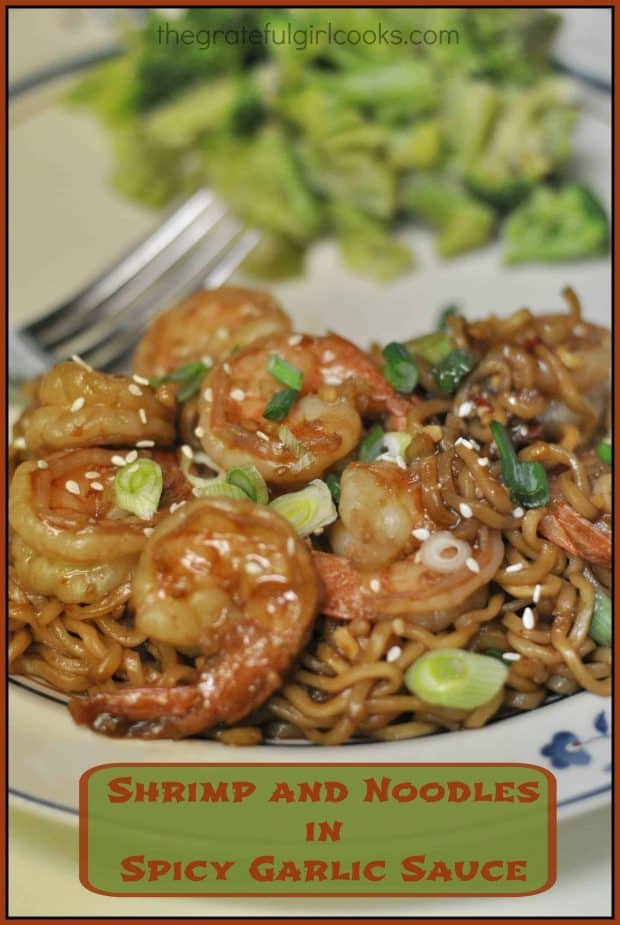
Shrimp and Noodles in Spicy Garlic Sauce

Why order take-out when you can make this delicious Asian shrimp and noodles in spicy garlic sauce in under 20 minutes from start to finish?Why order take-out when you can make this delicious Asian shrimp and noodles in spicy garlic sauce in under 20 minutes from start to finish?
Well… it’s been quite a week. I made Shrimp and Noodles in Spicy Garlic Sauce to cap it off.  This delicious shrimp really hit the spot after such a wild week! Work for my husband and myself was CRAZY busy, a family member is facing very serious medical issues, our phone account was breached (someone fraudulently bought an IPhone using our account and shipped it to YEMEN, of all places!). To top it all off, day before yesterday I got a flat tire AND had the keys to our other car with me (oops), so my husband couldn’t come help me.  Some weeks are like that, right?

Oh well.  I am extremely grateful for the nice gentleman named Mark (a kind stranger) who, in absolutely POURING rain (we were sopping wet) helped me get enough air into the tire to enable me to drive a few miles to a tire store, where a lovely an evil bolt was removed and the tire was patched. There really are wonderful people in this big, old world, who still will go out of their way to help others in need.

At least my husband and I were able to end this crazy week with a great dinner last night… Shrimp and Noodles in a Spicy Garlic Sauce really hit the spot… we were tired and hungry by the time Friday night rolled around. My husband had been up working since 3 AM (remember… crazy busy), so in reality, I could have made cereal for dinner and he probably wouldn’t have noticed as he nodded off into the bowl.

We LOVED This Simple Dish!

BUT I made this great recipe instead! EASY, EASY, EASY, quick, and incredibly delicious. Absolutely perfect is the best way I can describe this dish. The shrimp was so flavorful due to a fantastic Asian-inspired garlic sauce, and the ramen noodles helped make the dish very filling!

I found the recipe for the shrimp and sauce on Pinterest,  and decided to cook some ramen noodles to add to it. YUM! Seriously, I think the entire meal took under 20 minutes to make, from start to finish! I sure hope you’ll give this recipe a try. I know you will really LOVE it! Here’s how to make it:

Scroll Down For A Printable Recipe Card At The Bottom Of The Page

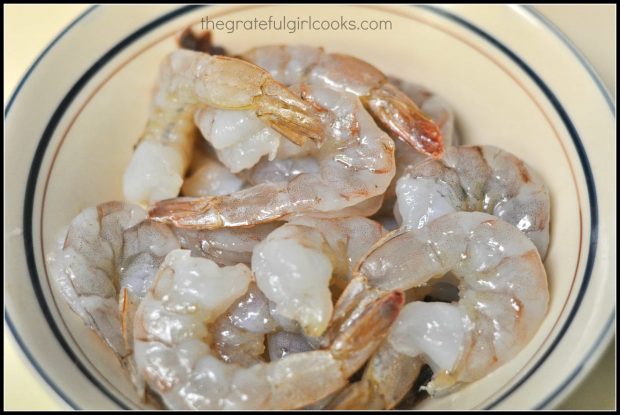
For this recipe, you will need some large shrimp that have been rinsed and deveined, but with the tail left on. Set the cleaned shrimp aside until they are needed later.

Rinsed and de-veined shrimp are left with their tails on for this dish.

Make The Spicy Garlic Sauce

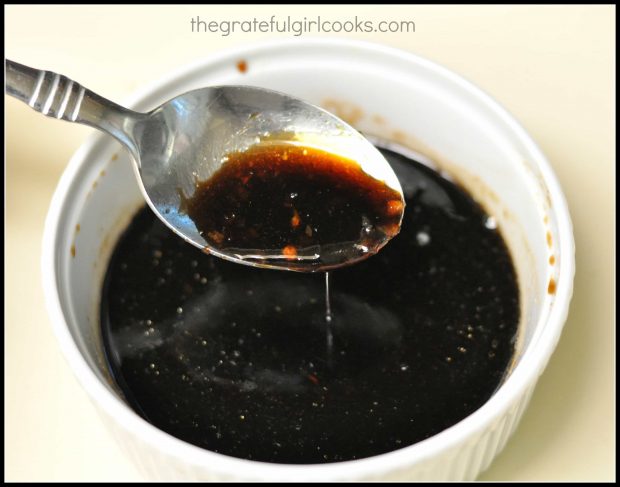
The spicy garlic sauce takes just a minute to make. It’s as simple as stirring the ingredients together… really!

A spicy garlic sauce is quickly made by stirring ingredients together in a bowl.

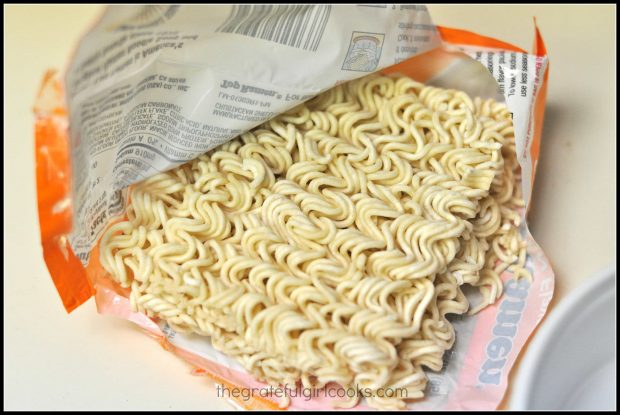
The noodles required for this dish are very easy to find. Yep… you guessed it! You will need one package of good old cheap Ramen noodles, with the sauce packet removed.

A package of Ramen noodles are needed for this recipe, minus the seasoning packet.

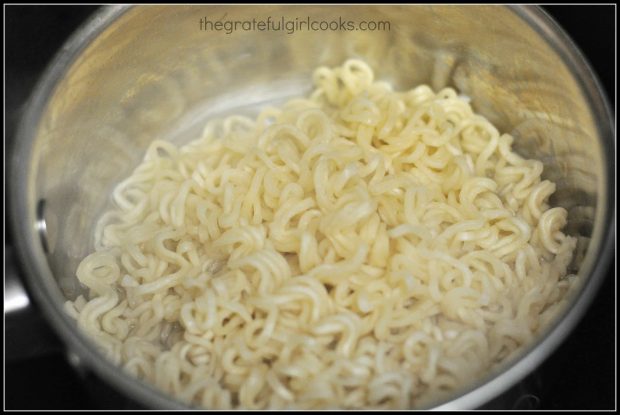
Cook the noodles in boiling water for 3 minutes, then drain off all the water.

Ramen noodles are cooked in boiling water for 3 minutes, then drained.

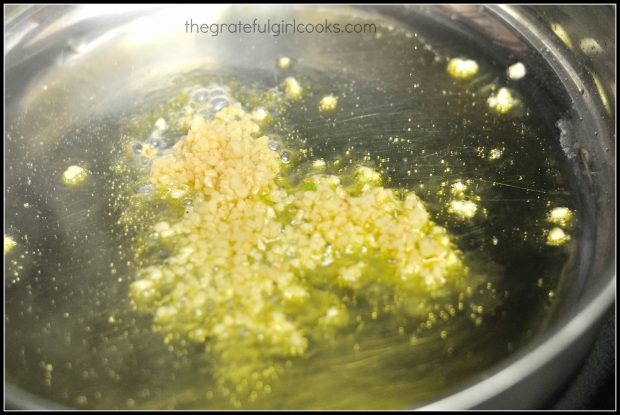
Stir and quickly cook the garlic in olive oil, until fragrant. Be careful NOT to let it burn, or it will become bitter.

Minced garlic is quickly cooked in hot oil before adding other ingredients.

Add The Shrimp

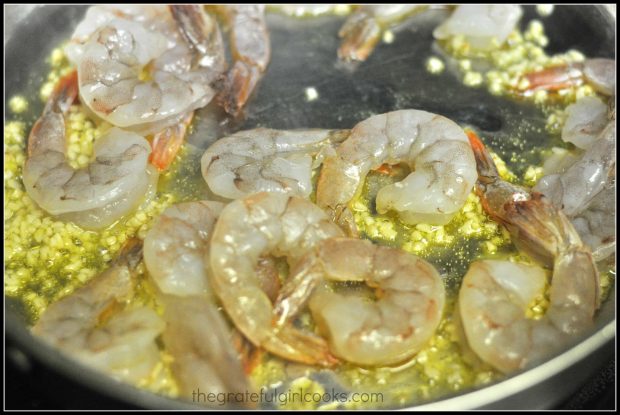
Add the shrimp to the skillet, and cook for just a few minutes, until slightly pink in color and cooked through.

Shrimp is added to the skillet with the cooked garlic and oil.

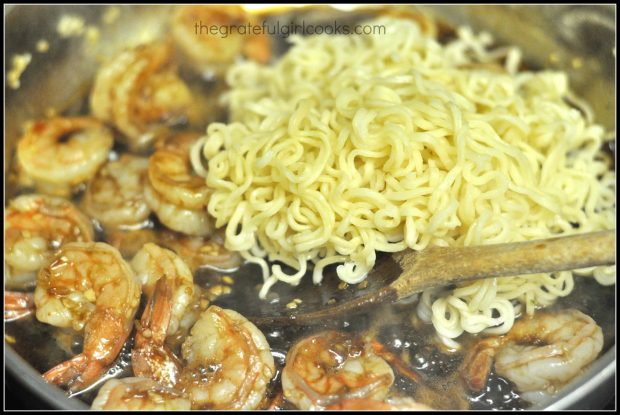
Now add the garlic sauce and cooked noodles into the skillet with the shrimp. Mix together and cook, until all ingredients are heated through.

Ramen noodles are added to the cooked shrimp in the skillet.

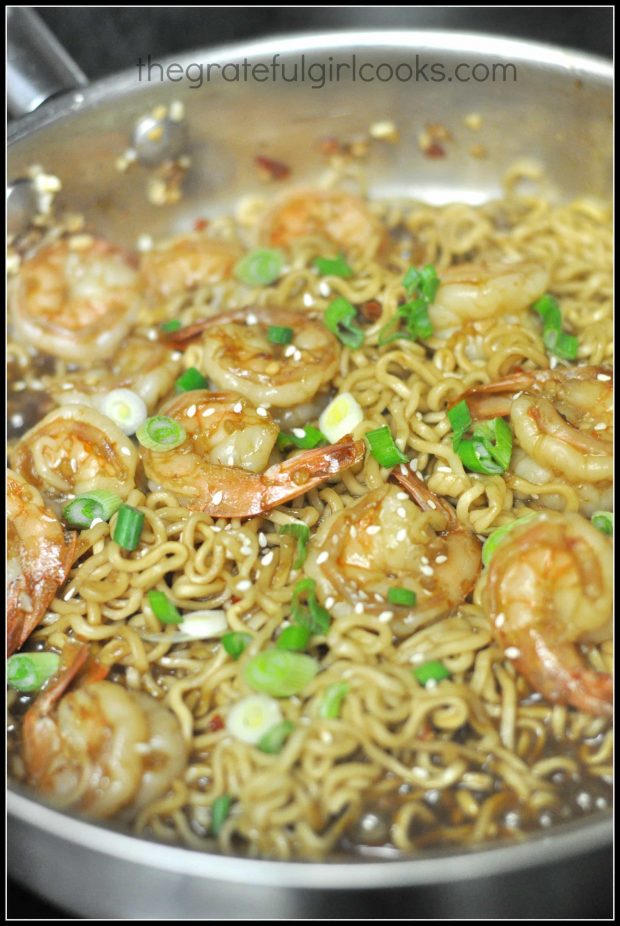
Sprinkle with sliced green onions and sesame seeds. When hot, divide into portions and serve.

The shrimp and noodles in spicy garlic sauce is heated through in the skillet.

Time To Enjoy Some Shrimp And Noodles In Spicy Garlic Sauce

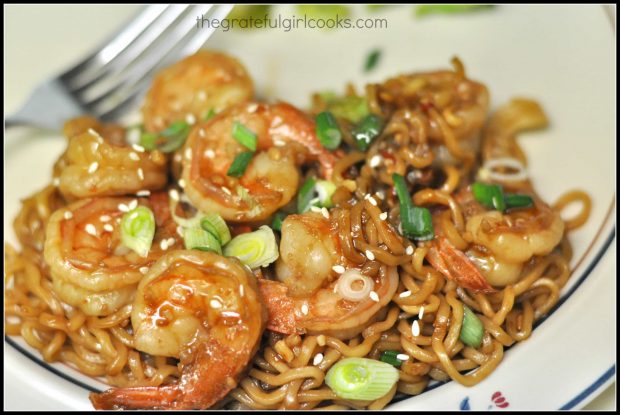
Garnish each serving with a few more sesame seeds and green onion slices. Serve, and enjoy! This shrimp is DELICIOUS!

A serving of shrimp and noodles in spicy garlic sauce on a plate, ready to be enjoyed.

I really hope you will consider trying this recipe for shrimp and noodles in spicy garlic sauce! I’m confident you and those you love will enjoy it. Have a great day!

Looking For More SHRIMP Recipes?

You can find ALL of my recipes in the Recipe Index, located at the top of the page. I have some delicious shrimp recipes for you to enjoy, which include:

Interested In More Recipes?

Thank you for visiting this website. I appreciate you using some of your valuable time to do soIf you’re interested, I publish a newsletter 2 times per month (1st and 15th) with all the latest recipes, and other fun info. I would be honored to have you join our growing list of subscribers, so you never miss a great recipe!

There is a Newsletter subscription box on the top right side (or bottom) of each blog post, depending on the device you use, where you can easily submit your e-mail address (only) to be included in my mailing list.

You Can Also Find Me On Social Media:
Facebook page: The Grateful Girl Cooks!
Pinterest: The Grateful Girl Cooks!
Instagram: jbatthegratefulgirlcooks

Author's signature

Recipe Adapted From: http://appetiteforchina.com/recipes/shrimp-garlic-sauce

↓↓ PRINTABLE RECIPE BELOW ↓↓

0 from 0 votes
Shrimp and Noodles in Spicy Garlic Sauce
Prep Time
15 mins
Cook Time
5 mins
Total Time
20 mins
 

Why order take-out when you can make this delicious Asian shrimp and noodles in spicy garlic sauce in under 20 minutes from start to finish?

Category: Entree
Cuisine: Asian
Keyword: shrimp and noodles
Servings: 2 servings
Calories Per Serving: 565 kcal
Author: JB @ The Grateful Girl Cooks!
Ingredients
  • 3/4 pound uncooked large shrimp , deveined
  • 3 Tablespoons soy sauce
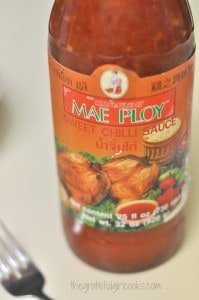
  • 2 Tablespoons chili sauce (I used Mae Ploy)
  • 2 teaspoons sesame oil
  • 2 teaspoons cooking sherry (can also use Chinese rice wine-I used cooking sherry)
  • 1 teaspoon granulated sugar
  • 1 3 ounce package dry ramen noodles (sauce packet removed-don't need it)
  • 2 Tablespoons olive oil
  • 4 cloves garlic , crushed or finely chopped (equals 2 Tablespoons minced garlic)
  • 1 green onion (green and white parts), thinly sliced (for garnish)
  • Sesame seeds (for garnish)
Instructions
  1. Peel the shrimp, but leave the tail intact. (Devein shrimp, if not already done).
  2. Make the sauce: In a little bowl, mix together the soy sauce, chili sauce, sesame oil, cooking sherry (or Chinese rice wine), and granulated sugar until well combined. Set sauce aside.
  3. Bring a small pan of water to a boil on high heat. Add ramen noodles; cook noodles for 3 minutes. Drain noodles. Set aside.
  4. Heat the olive oil on medium-high heat in a large skillet. Add the minced garlic to the hot pan; stir and cook for about 30 seconds (be careful NOT to burn it!).
  5. Add shrimp to skillet. Cook shrimp for about 2 minutes per side, until both sides are pink. Add the sauce mixture and the noodles to the skillet. Mix gently to combine. Cook until heated through (a minute or so). Sprinkle with a bit of the green onions and sesame seeds.
  6. Place shrimp and noodles on individual serving plates. Garnish with additional green onions and sesame seeds. Enjoy!
Recipe Notes

You can also make the shrimp (without the noodles). The original recipe serves 4 (shrimp and sauce only- no noodles). Use 1 1/2 pounds of shrimp, and keep all other ingredient amounts the same.

Nutrition Facts
Shrimp and Noodles in Spicy Garlic Sauce
Amount Per Serving (1 serving)
Calories 565 Calories from Fat 243
% Daily Value*
Fat 27g42%
Saturated Fat 6g38%
Cholesterol 428mg143%
Sodium 3190mg139%
Potassium 334mg10%
Carbohydrates 36g12%
Fiber 2g8%
Sugar 4g4%
Protein 41g82%
Vitamin A 160IU3%
Vitamin C 12.4mg15%
Calcium 270mg27%
Iron 6mg33%
* Percent Daily Values are based on a 2000 calorie diet.

Here’s one more to pin on your Pinterest boards!Why order take-out when you can make this delicious Asian shrimp and noodles in spicy garlic sauce in under 20 minutes from start to finish?
 

Save

Save

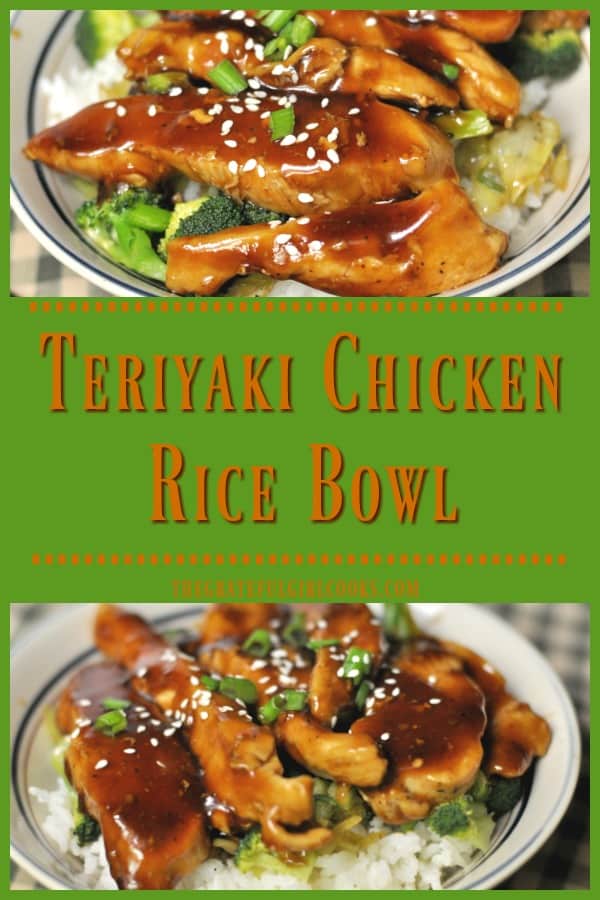
Teriyaki Chicken Rice Bowl

A teriyaki chicken rice bowl is a yummy one dish meal, with chicken, broccoli, cabbage and green onions, in a teriyaki glaze, served on a bed of rice.A teriyaki chicken rice bowl is a yummy one dish meal, with chicken, broccoli, cabbage and green onions, in a teriyaki glaze, served on a bed of rice.
Years ago I loved occasionally buying a teriyaki chicken rice bowl for lunch from a local Japanese restaurant near my office. It was always a delicious meal! I loved the simple goodness of the chicken, rice, veggies, and the delicious teriyaki glaze on top of the whole thing. Scrumptious!
Recently I decided to make a similar dish for dinner for my husband and I to (hopefully) enjoy. I steamed some rice and broccoli, sauteéd some green cabbage with green onion and a little bit of soy sauce, and pan-seared some lightly seasoned chicken strips. These were then coated with a teriyaki glaze, and layered in a bowl with extra teriyaki glaze on top, and presto! A filling, tasty, relatively inexpensive, and healthy Teriyaki Chicken Rice Bowl was cooked and devoured!

The “recipe” I came up with is so simple, I hardly can call it a “recipe”. But for purposes of this little blog, that is, in fact, what I will call it. Okey-dokey?

Scroll Down For A Printable Recipe Card At The Bottom Of The Page

How To Make A Teriyaki Chicken Rice Bowl

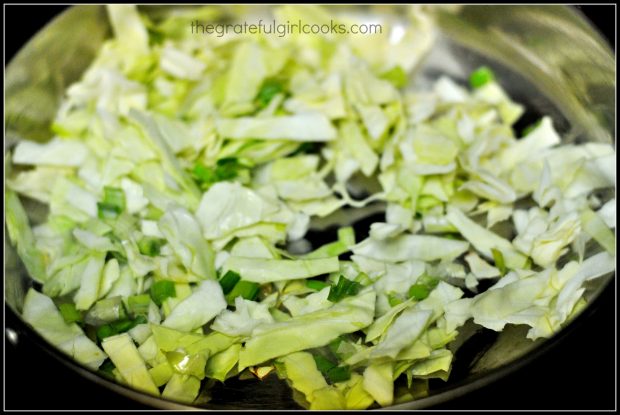
Hope you will give this easy to fix dinner a try. I really think you’re gonna like it! Start by cooking shredded green cabbage with green onion.

Shredded cabbage and green onions are cooked in skillet.

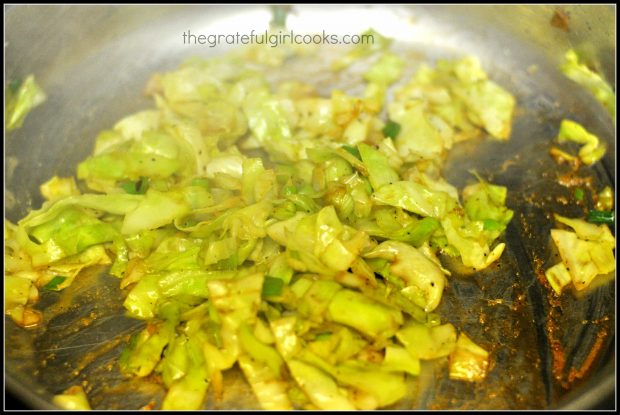
Add a tiny bit of soy sauce, once the cabbage has cooked down.

Soy sauce is added to the cooked down cabbage and green onions.

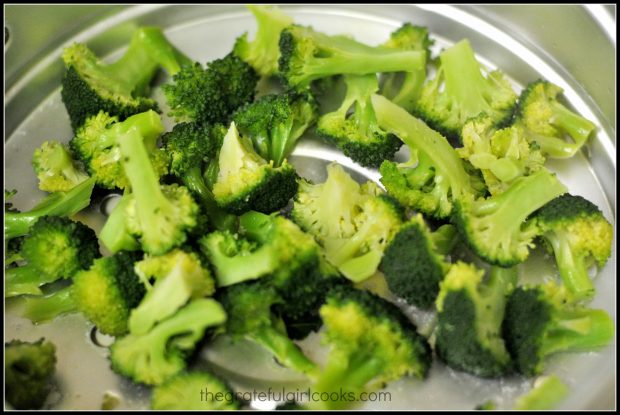
Cook the broccoli, using whatever method you prefer. I steamed the broccoli florets on top of my rice cooker, which was easy-peasy!

Broccoli is cooked to add to the teriyaki chicken rice bowl.

Prepare The Chicken

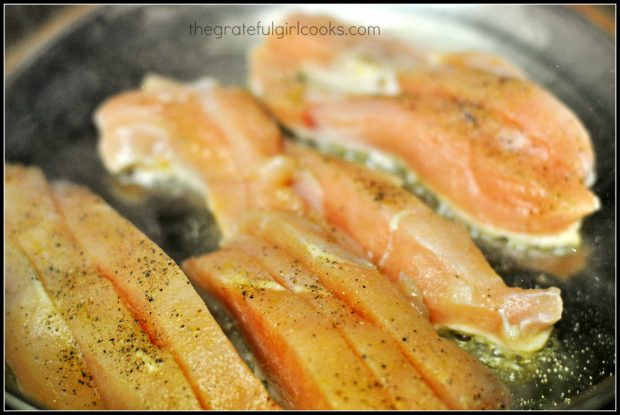
Cut the boneless, skinless chicken breasts into strips.  Season them lightly with salt, pepper, and garlic powder. Pan sear the chicken in hot oil on all sides until light brown and cooked through.

Seasoned chicken strips are pan-seared in skillet.

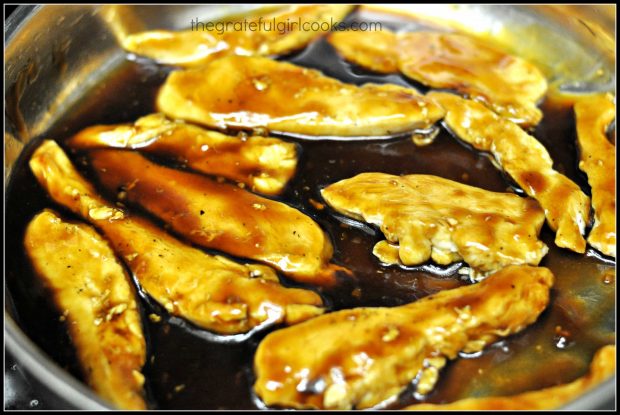
Once the chicken is fully cooked, add the teriyaki glaze to the skillet. Stir often and turn the chicken to coat the pieces with glaze on all sides. Continue cooking until the chicken is heated through.

Teriyaki glaze is added to the skillet full of cooked chicken strips.

Time To Build The Teriyaki Chicken Rice Bowl

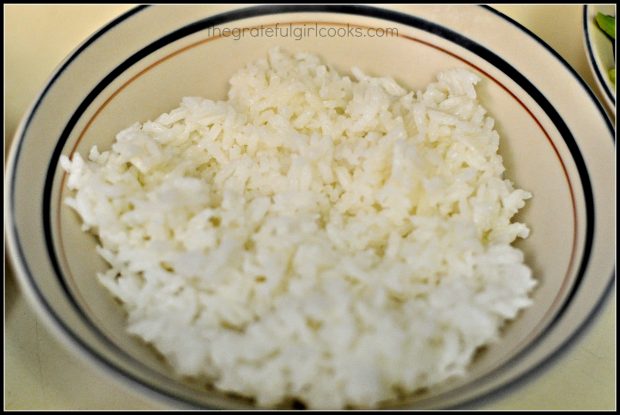
Place steamed white rice on the bottom of the bowl. Divide the rice evenly between both bowls.

Steamed rice goes on the bottom of the teriyaki chicken rice bowl.

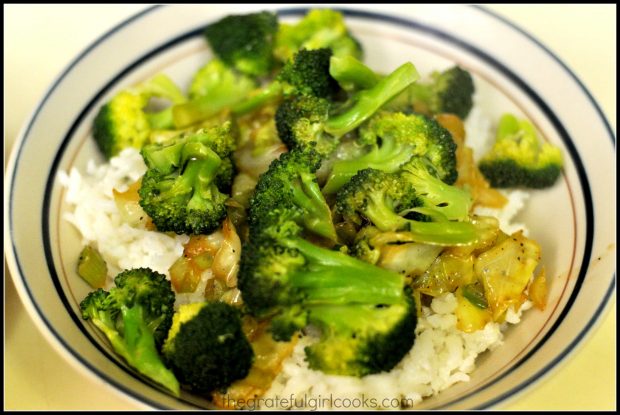
Top the rice with the cabbage and green onion mixture, and then follow that with steamed broccoli.

Cooked cabbage and steamed broccoli is added to the rice bowl.

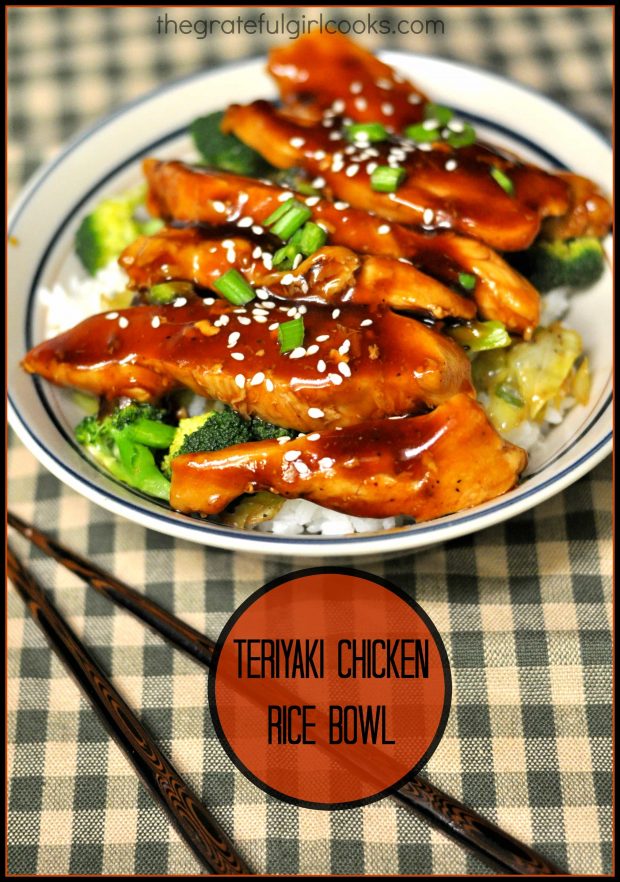
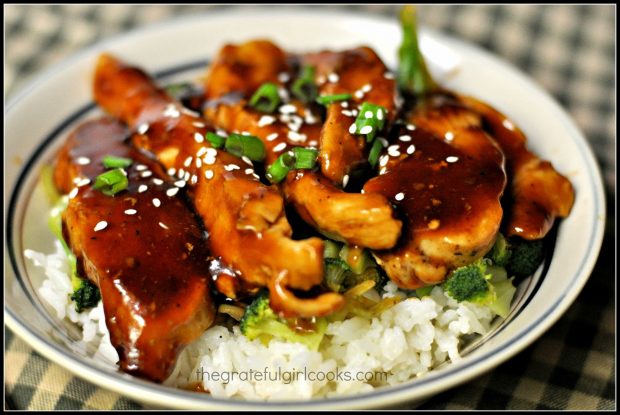
Lay the hot teriyaki chicken strips. I spooned a bit more of the glaze over the teriyaki chicken rice bowl. Sprinkle the chicken strips with sliced green onions and sesame seeds. Ready to eat!

Teriyaki chicken rice bowl is topped with chicken, glaze, green onions and sesame seeds before serving.

Hope you enjoy this delicious, all in one teriyaki chicken rice bowl! Thank you for stopping by… I hope you come back soon. Have a great day!

Looking For More ASIAN-INSPIRED Recipes?

You can find all of my recipes in the Recipe Index, located at the top of the page. A few family favorite Asian-inspired recipes include:

Interested In More Recipes?

Thank you for visiting this website. I appreciate you using some of your valuable time to do soIf you’re interested, I publish a newsletter 2 times per month (1st and 15th) with all the latest recipes, and other fun info. I would be honored to have you join our growing list of subscribers, so you never miss a great recipe!
There is a Newsletter subscription box on the top right side (or bottom) of each blog post, depending on the device you use, where you can easily submit your e-mail address (only) to be included in my mailing list.

You Can Also Find Me On Social Media:

Facebook page: The Grateful Girl Cooks!
Pinterest:
The Grateful Girl Cooks!
Instagram:
jbatthegratefulgirlcooks

Author's signature

↓↓ PRINTABLE RECIPE BELOW ↓↓

0 from 0 votes
Teriyaki Chicken Rice Bowl
Prep Time
20 mins
Cook Time
10 mins
Total Time
30 mins
 

A teriyaki chicken rice bowl is a yummy one dish meal, with chicken, broccoli, cabbage and green onions, in a teriyaki glaze, served on a bed of rice.

Category: Dinner, Entree
Cuisine: Asian
Keyword: teriyaki chicken rice bowl
Servings: 2 servings
Calories Per Serving: 651 kcal
Author: JB @ The Grateful Girl Cooks!
Ingredients
  • 2 cups cooked white rice
  • 2 cups cooked broccoli
  • 1 1/2 cups chopped green cabbage
  • 1 stem green onion (white and green parts), sliced
  • 2 Tablespoons olive oil (for cooking cabbage)
  • 2 Tablespoons water
  • 1 Tablespoon soy sauce
  • 2 boneless , skinless, chicken breasts, sliced lengthwise into thin strips
  • Salt , Pepper, Garlic Powder (to season chicken breasts)
  • 2 Tablespoons olive oil
  • 1 teaspoon sesame oil (optional)
  • 1/2 cup teriyaki glaze (NOT teriyaki sauce... make sure you buy the GLAZE)
  • Additional sliced green onion and sesame seeds , for garnish (optional)
Instructions
  1. Pre-cook the rice. Keep warm.
  2. Steam or precook the broccoli. Keep warm.
  3. In a large skillet, heat 2 Tablespoons olive oil until very hot. Add the chopped cabbage and the green onion. Stir fry the cabbage for several minutes. Add 2 Tablespoons water, some salt and pepper (for seasoning), and continue cooking for a total of about 5 minutes. Cabbage should have cooked down. Add 1 Tablespoon soy sauce to cabbage. Stir well, to combine, then remove skillet from heat.
  4. In separate skillet, heat 2 Tablespoons olive oil and sesame oil until very hot. Lightly season the chicken pieces with salt, pepper, and a little garlic powder. Add chicken strips to the oil once skillet is very hot. Sear the strips for several minutes, then turn over and cook the other side for a few minutes, until chicken is fully cooked. Chicken should be light golden brown. Turn the heat down to low; add the teriyaki sauce to the skillet. Coat chicken with sauce (spoon it over the pieces), then turn each piece over, to fully coat. Heat fully. Once hot, remove pan from heat.
  5. Reheat rice, cabbage or broccoli in microwave, if necessary.
  6. In serving bowl, place 1 cup of cooked rice. Level it out. Place half of the cabbage on top of the rice. Layer half of the broccoli on top of the cabbage. Place half the chicken strips on top of the broccoli. Spoon additional teriyaki glaze over the chicken. Sprinkle with additional sliced green onions, and sesame seeds, if desired. Serve and enjoy!
Nutrition Facts
Teriyaki Chicken Rice Bowl
Amount Per Serving (1 serving)
Calories 651 Calories from Fat 234
% Daily Value*
Fat 26g40%
Saturated Fat 4g25%
Cholesterol 72mg24%
Sodium 3455mg150%
Potassium 1031mg29%
Carbohydrates 65g22%
Fiber 4g17%
Sugar 13g14%
Protein 36g72%
Vitamin A 650IU13%
Vitamin C 101.7mg123%
Calcium 103mg10%
Iron 3.1mg17%
* Percent Daily Values are based on a 2000 calorie diet.

Here’s one more to pin on your Pinterest boards!A teriyaki chicken rice bowl is a yummy one dish meal, with chicken, broccoli, cabbage and green onions, in a teriyaki glaze, served on a bed of rice.


Save

Save

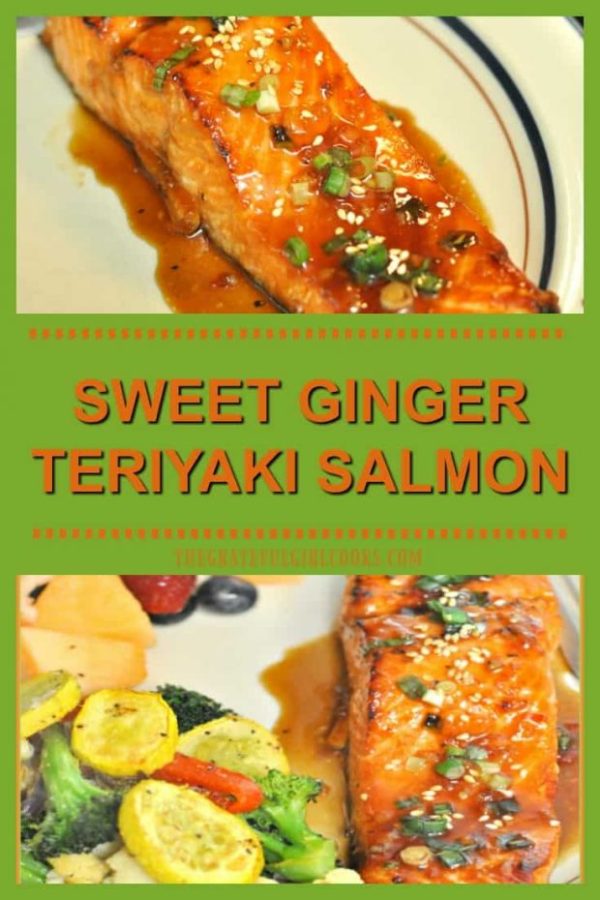
Sweet Ginger Teriyaki Salmon

Teriyaki Salmon is marinated in a ginger, garlic, honey & brown sugar sauce, then baked for 15-30 minutes in this easy, delicious seafood dinner!Salmon is marinated in a teriyaki, ginger, garlic, honey & brown sugar sauce, then baked for 15-30 minutes in this easy to prepare delicious seafood dinner!
Do you enjoy salmon? My husband and I certainly do… and we really enjoyed our dinner a few night’s ago when I made Sweet Ginger Teriyaki Salmon. I found the recipe on Pinterest,  while searching out salmon recipes. I’ve been preparing Pan-Seared Creole Salmon for years and we absolutely LOVE it, but wanted to bust out of my “rut” and try a NEW recipe. Shocking, right?

Anyways, I found this recipe from Monique at Ambitious Kitchen, and gave it a try… I heartily recommend it! The flavor of the salmon was delicious! I served it with a side of garlic quinoa, and my recipe for Sugar Snap Pea Stir Fry, and I gotta be honest, this was an awesome meal. I will definitely be making this dish again!

Scroll Down For A Printable Recipe Card At The Bottom Of The Page

Sweet Ginger Teriyaki Salmon Is EASY To Prepare!

The teriyaki salmon is so easy to prepare. Salmon is marinated in a wonderful ginger teriyaki sauce, then baked (to perfection), garnished with cilantro and sesame seeds and served. I made the sauce early in the day and let the salmon marinade in it all day. In the evening, all I had to do was bake the salmon, sprinkle a garnish on it, and serve it!

Sure hope you will give this a try! I think you’re gonna enjoy some amazing tasting salmon! Here’s how it is prepared: The sauce is really easy (and quick) to make.

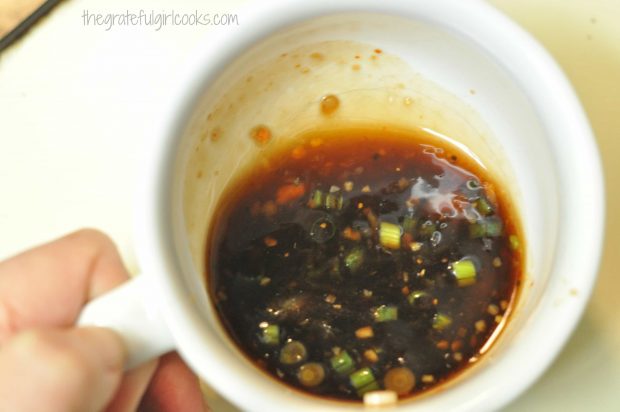
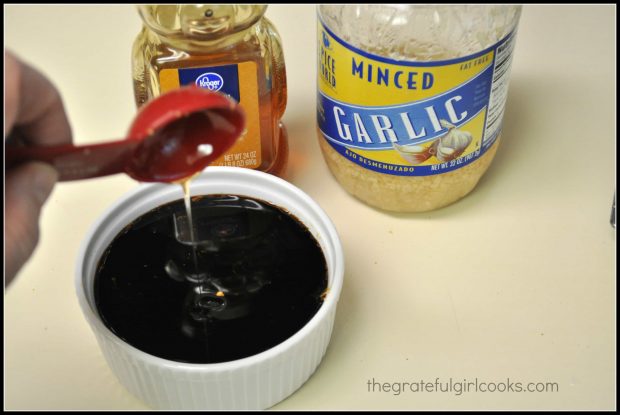
Preparing the marinade for the salmon.

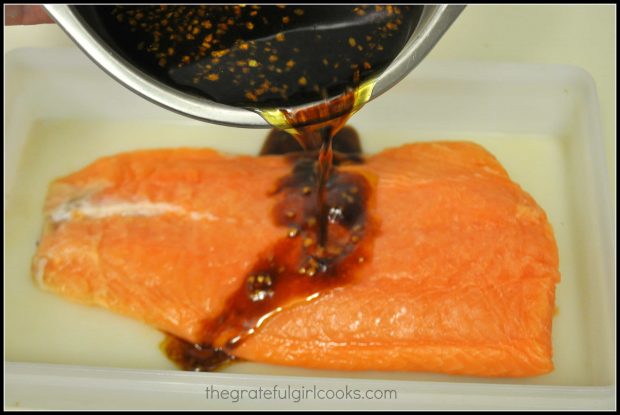
Pouring that sweet ginger teriyaki sauce over the piece of salmon… see how easy the prep is so far???

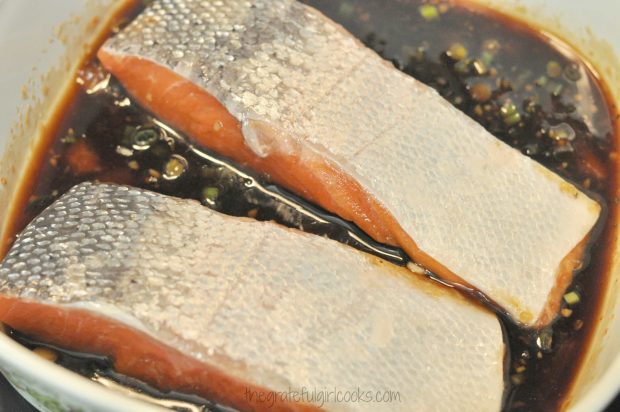
Teriyaki marinade is poured over the salmon to cover.

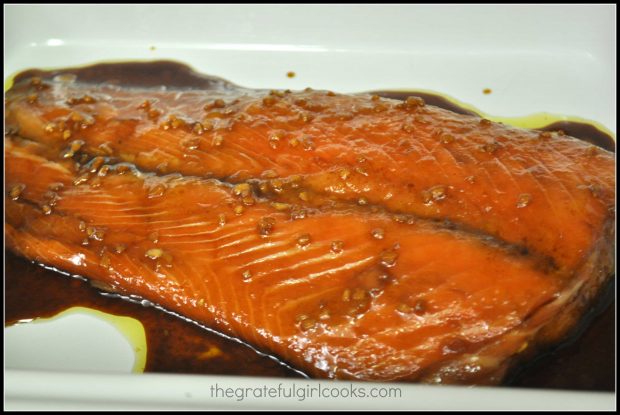
Salmon has marinated… and now it’s ready to bake!

Now the marinated salmon is ready to bake in the oven.

Time To Bake The Sweet Ginger Teriyaki Salmon!

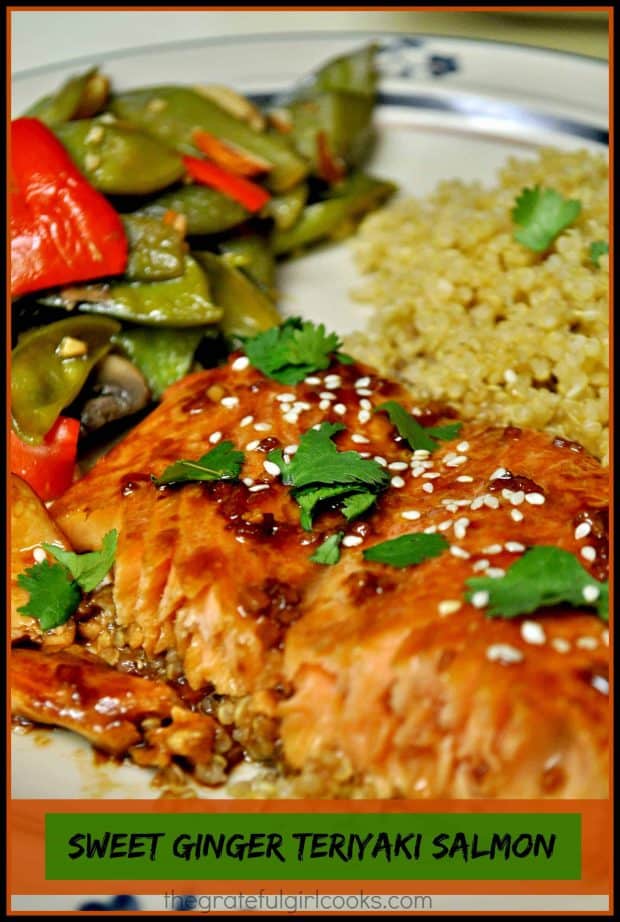
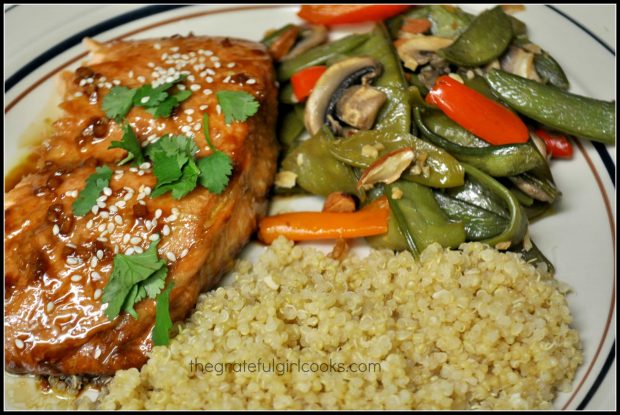
The teriyaki salmon is baked for 15-20 minutes, and then it is removed from oven. Garnish with sesame seeds and cilantro leaves, then serve. This fish tastes delicious!  See how easy that was?

Sweet Ginger Teriyaki Salmon is served with veggies and quinoa on the side.

I truly hope you enjoy this seafood dish. It truly IS easy to prepare, and is incredibly tasty! If you enjoy seafood, be sure to check out some of my other salmon recipes such as Salmon in a Lemon-Butter Herb Sauce, Orange and Rosemary Glazed Salmon, Cedar Plank Grilled Salmon, or Garlic and Herb Baked Salmon (to name a few).

Thanks for stopping by, and I hope you will come back again soon. Be sure to check out ALL my recipes in the Recipe Index, located at the top of the page. Have a wonderful day.

Interested In More Recipes?

Thank you for visiting this website. I appreciate you using some of your valuable time to do soIf you’re interested, I publish a newsletter 2 times per month (1st and 15th) with all the latest recipes, and other fun info. I would be honored to have you join our growing list of subscribers, so you never miss a great recipe!
There is a Newsletter subscription box on the top right side (or bottom) of each blog post, depending on the device you use, where you can easily submit your e-mail address (only) to be included in my mailing list.

You Can Also Find Me On Social Media:

Facebook page: The Grateful Girl Cooks!
Pinterest:
The Grateful Girl Cooks!
Instagram:
jbatthegratefulgirlcooks

Author's signatureRecipe Adapted From: http://www.ambitiouskitchen.com/2012/07/sesame-ginger-sweet-teriyaki-salmon-with-garlic-quinoa-stir-fry/

↓↓ PRINTABLE RECIPE BELOW ↓↓

0 from 0 votes
Sweet Ginger Teriyaki Salmon
Prep Time
10 mins
Cook Time
18 mins
Marinating Time
1 hr
Total Time
1 hr 28 mins
 

Teriyaki Salmon is marinated in a ginger, garlic, honey & brown sugar sauce, then baked for 15-30 minutes in this easy, delicious seafood dinner!

Category: Entree
Cuisine: Asian
Keyword: teriyaki salmon
Servings: 4 servings
Calories Per Serving: 347 kcal
Author: JB @ The Grateful Girl Cooks!
Ingredients
For The Marinade:
  • 1 cup teriyaki sauce
  • 1 teaspoon freshly grated ginger
  • 4 cloves garlic , minced
  • 3 Tablespoons dark brown sugar
  • 2 Tablespoons honey
  • 1/4 cup olive oil
  • 1 pound boneless , skinless salmon (or 4 salmon "steaks")
For Garnish:
  • 1 Tablespoons sesame seeds
  • 1/4 cup fresh cilantro , chopped
Instructions
  1. In a bowl, mix together the teriyaki sauce, grated ginger, garlic cloves, brown sugar, honey and olive oil, until sugar has dissolved and ingredients are well combined.
  2. Put the piece (or pieces) of salmon in a covered container or a large Ziploc bag. Add the marinade to the container, and coat the salmon on both sides. Refrigerate the salmon for at least 1 hour (I marinated mine all day). Turn the salmon over several times during refrigeration (if using a container).
  3. Preheat your oven to 400 degrees. Spray a baking pan with non-stick cooking spray. Remove the salmon from the marinade and place into cooking pan. (If you are using salmon with the skin ON, then place in baking pan, skin side down.
  4. Bake at 400 degrees for 15-20 minutes. Times will vary, due to different thicknesses of salmon. When done, the salmon should flake easily. (Our salmon took 20 minutes to reach that point) Serve, with a side of rice or quinoa, and a great veggie. Enjoy!
Nutrition Facts
Sweet Ginger Teriyaki Salmon
Amount Per Serving (1 fillet)
Calories 347 Calories from Fat 153
% Daily Value*
Fat 17g26%
Saturated Fat 2g13%
Cholesterol 72mg24%
Sodium 825mg36%
Potassium 493mg14%
Carbohydrates 21g7%
Sugar 19g21%
Protein 25g50%
Vitamin A 100IU2%
Vitamin C 2.6mg3%
Calcium 43mg4%
Iron 1.2mg7%
* Percent Daily Values are based on a 2000 calorie diet.

Here’s one more to pin on your Pinterest boards!Teriyaki Salmon is marinated in a ginger, garlic, honey & brown sugar sauce, then baked for 15-30 minutes in this easy, delicious seafood dinner!

Save

Save

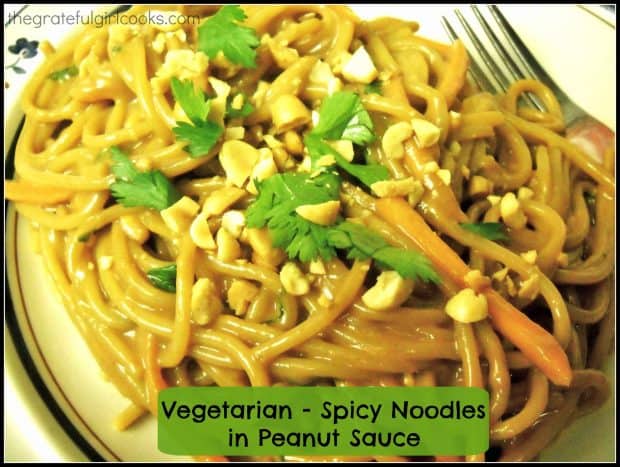
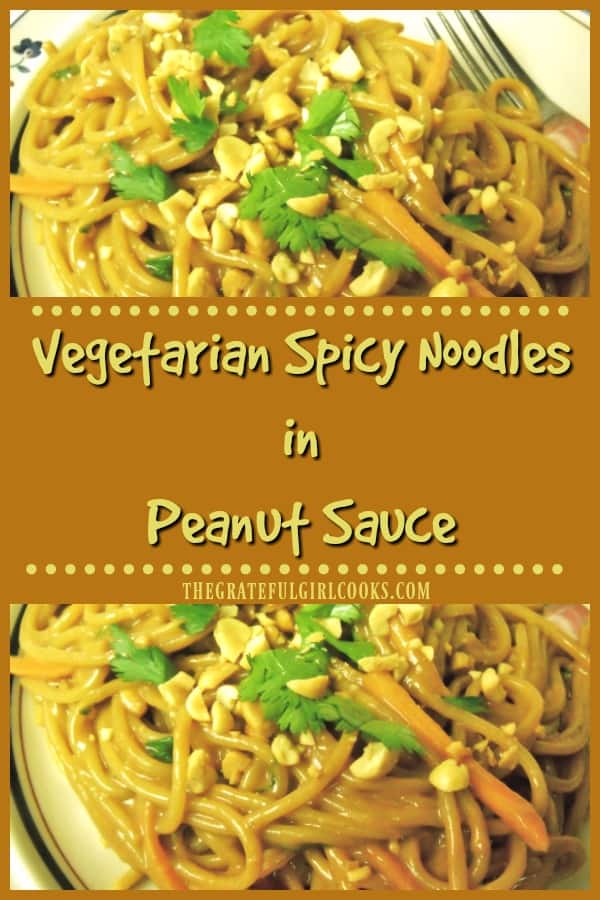
Vegetarian Spicy Noodles in Peanut Sauce

Vegetarian or not, you’ll enjoy these spicy noodles in peanut sauce! Pasta with water chestnuts, peanuts, cilantro and carrots in a creamy Thai sauce!Vegetarian or not, you'll enjoy these spicy noodles in peanut sauce! Pasta with water chestnuts, peanuts, cilantro and carrots in a creamy Thai sauce!
The recipe I am posting today is for Vegetarian Spicy Noodles In Peanut Sauce.  The recipe is yummy, and is SO EASY to make! The plus side is that it is a vegetarian entree, for my friends and family who choose to not eat meat. However, it’s fabulous and filling for meat lovers, also!

A couple of years ago, our youngest son (a big steak and burger loving guy),  decided to become a vegetarian. We were surprised, but respect his right as a grown man to eat or not eat whatever he chooses. I’ve had to adjust my menus when he comes over for a meal, but that’s really no big deal for the most part. Well, THIS recipe for spicy noodles in peanut sauce is one he would LOVE!

Scroll Down For A Printable Recipe Card At The Bottom Of The Page

Spicy Noodles In Peanut Sauce Are EASY To Make!

The Thai-inspired peanut sauce is easy to make, full of flavor and coats the noodles well. This dish is on the table in a flash (20 minutes), and is a cinch to make. The recipe uses angel hair or spaghetti pasta for quick cooking noodles, AND will delight your taste buds, even if you are not a vegetarian.

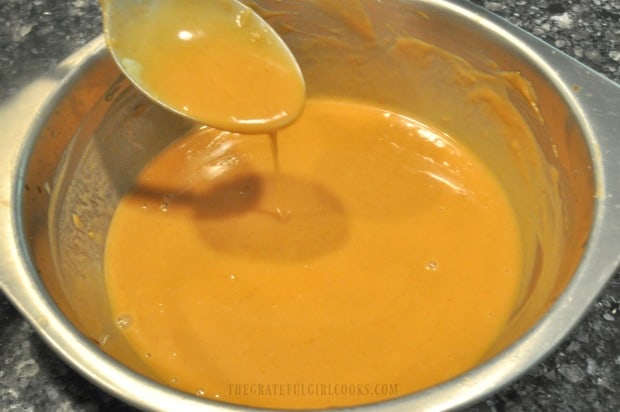
You will make a simple peanut sauce by mixing the ingredients together, and use it to coat cooked pasta noodles, carrots and water chestnuts. Each serving of spicy noodles in peanut sauce is also garnished with chopped peanuts and cilantro. 

Peanut sauce is mixed together in a small bowl before adding to noodles in peanut sauce.

Trust me- even though I don’t have lots of photos, this recipe for spicy noodles in peanut sauce is GOOD! Hope you’ll give it a try, and I bet you will be surprised how very easy it is to make.


Looking For More PASTA Recipes?

You can find ALL my recipes in the Recipe Index, located at the top of the page. I have a variety of yummy pasta recipes you might enjoy, including:

Interested In More Recipes?

Thank you for visiting this website. I appreciate you using some of your valuable time to do soIf you’re interested, I publish a newsletter 2 times per month (1st and 15th) with all the latest recipes, and other fun info. I would be honored to have you join our growing list of subscribers, so you never miss a great recipe!
There is a Newsletter subscription box on the top right side (or bottom) of each blog post, depending on the device you use, where you can easily submit your e-mail address (only) to be included in my mailing list.

You Can Also Find Me On Social Media:

Facebook page: The Grateful Girl Cooks!
Pinterest:
The Grateful Girl Cooks!
Instagram:
jbatthegratefulgirlcooks

Author's signatureSauce recipe source: http://www.singforyoursupperblog.com/pasta/thai-chicken-pasta/

↓↓ PRINTABLE RECIPE BELOW ↓↓

0 from 0 votes
Vegetarian - Spicy Noodles in Peanut Sauce
Prep Time
10 mins
Cook Time
10 mins
Total Time
20 mins
 

Vegetarian or not, you'll enjoy these spicy noodles in peanut sauce! Pasta with water chestnuts, peanuts, cilantro and carrots in a creamy Thai sauce!

Category: Main Course, Vegetarian
Cuisine: Asian
Keyword: noodles in peanut sauce
Servings: 4 servings
Calories Per Serving: 674 kcal
Author: JB @ The Grateful Girl Cooks!
Ingredients
For the Peanut Sauce:
  • 1 cup smooth peanut butter
  • ¼ cup soy sauce
  • 3 tsp. chili paste (also may substitute 2 teaspoons Sriracha sauce)
  • 2 Tablespoons brown sugar
  • 2 limes , juiced
  • ½ cup hot water
  • 1 clove of garlic , minced
  • 1 teaspoon rice wine vinegar
  • 1 teaspoon ground ginger
  • ½ teaspoon sesame oil
For the Pasta,etc.:
  • ½ lb. spaghetti or angel hair pasta
  • 1 large carrot , julienned (matchstick cut)
  • 1 small can water chestnuts , drained
  • Handful of roasted peanuts , chopped for garnish
  • ½ bunch of cilantro , chopped (stems discarded) Save small amount for garnish on top of dish.
Instructions
  1. Make the sauce: Put all sauce ingredients in a medium sized bowl and whisk or mix until fully combined. Cover and store in the refrigerator until needed (can be made ahead).
  2. Blanch the sliced (matchstick) carrots in boiling water for approximately 3 minutes, pulling them out and draining while they are still bright and crisp.
  3. Cook pasta noodles per package directions. Place drained, hot pasta in a large bowl with the carrots, water chestnuts and cilantro (save a bit of cilantro for garnish!).
  4. Pour the peanut sauce over the cooked pasta and toss well, to coat. To serve: Top pasta with additional cilantro and the chopped peanuts. Serve hot, and enjoy!

Nutrition Facts
Vegetarian - Spicy Noodles in Peanut Sauce
Amount Per Serving (1 serving)
Calories 674 Calories from Fat 243
% Daily Value*
Fat 27g42%
Saturated Fat 4g25%
Sodium 1180mg51%
Potassium 795mg23%
Carbohydrates 84g28%
Fiber 8g33%
Sugar 16g18%
Protein 28g56%
Vitamin A 2630IU53%
Vitamin C 12.2mg15%
Calcium 68mg7%
Iron 3.3mg18%
* Percent Daily Values are based on a 2000 calorie diet.

Here’s one more to pin on your Pinterest boards!Vegetarian or not, you'll enjoy these spicy noodles in peanut sauce! Pasta with water chestnuts, peanuts, cilantro and carrots in a creamy Thai sauce!


Save

Save

Save

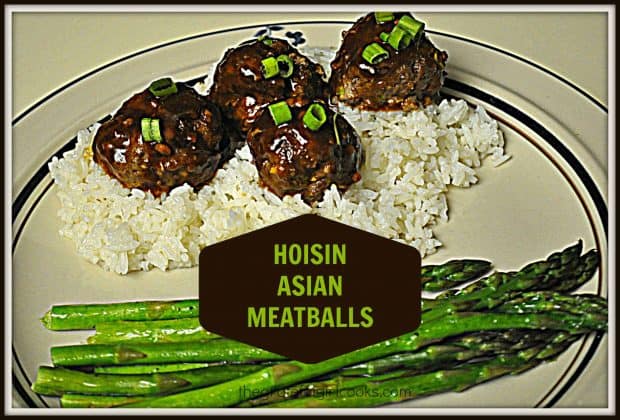
Hoisin Asian Meatballs

Hoisin Asian Meatballs are made using ground beef, baked not fried, and are covered with an Asian-inspired hoisin glaze. They are a great appetizer or main dish.Hoisin Asian Meatballs are made using ground beef, are baked not fried , and are covered with an Asian-inspired hoisin glaze. Great appetizer or main dish.

I found this recipe for Hoisin Asian Meatballs a couple of years ago on Pinterest and thought I’d give it a try. It didn’t disappoint!

The ground beef meatballs are easy to make. To make it even easier, they are cooked in the oven, so they are baked, not fried. The baked hoisin asian meatballs are then coated with a wonderful sweet and mildly spicy Asian-inspired Hoisin glaze before serving.

Scroll Down For A Printable Recipe Card At The Bottom Of The Page

What Is Hoisin Sauce?

Hoisin sauce is a commonly used Asian glaze for meat or as an addition to a stir-fry dish… think “Chinese BBQ Sauce”… a bit sweet and a bit spicy. It is commonly made from soybeans, peppers, garlic and sugar. This sauce is widely used in Chinese cooking. When used in this recipe as a base and combined with a few other Asian-inspired ingredients, creates a pretty tasty sauce for the meatballs.

Hoisin sauce is commonly found in most grocery stores in the Asian foods section.  It is also very easy to make at home. I’ve done it, and posted the recipe for hoisin sauce here.

How To Make Hoisin Asian Meatballs

This recipe could not be any easier!  Basically, you mix up the meatball ingredients, roll into meatballs, then bake them for about 15 minutes. While the meatballs bake, mix up the sauce.  Once the meatballs come out of the oven, you simply drizzle each of the meatballs with the hoisin sauce mix, then serve.

See how easy it is to make hoisin Asian meatballs? About 15 minutes total for the prep time, and 12-15 minutes to bake. That’s it!!

How Many Meatballs Does This Recipe Make?

The recipe yields approximately 18 one and a half inch meatballs. Because of the short cooking time, they can easily be ready to serve in 30 minutes, which is an added bonus, right? Right!

Hoisin Asian meatballs can be used solely as individual appetizers. Just stick a fancy toothpick into each one, and serve them on a pretty platter. You can also serve them as a main course (which is how I served them), paired with some rice and a vegetable.

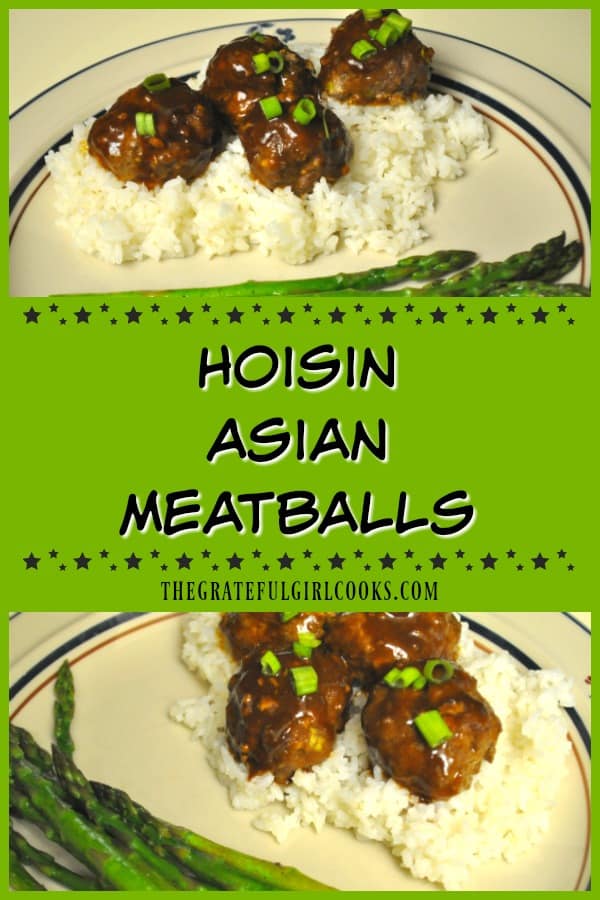
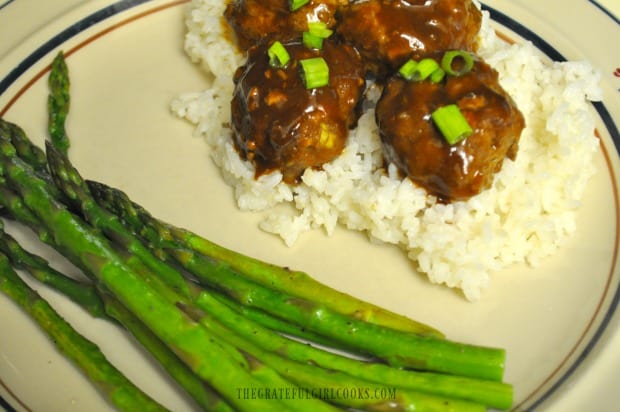
Hoisin Asian Meatballs are served as a main dish, on a bed of rice, with asparagus on the side.

Hope you will give these yummy Hoisin Asian Meatballs a try… I think you will like them! I know we did! Thanks for stopping by, and I hope you will come back soon. Have a great day.

Looking For More Meatball Recipes?

There are several other meatball recipes, using ground beef on this website!  They include:

Interested In More Recipes?

Thank you for visiting this website. I appreciate you using some of your valuable time to do soIf you’re interested, I publish a newsletter 2 times per month (1st and 15th) with all the latest recipes, and other fun info. I would be honored to have you join our growing list of subscribers, so you never miss a great recipe!
There is a Newsletter subscription box on the top right side (or bottom) of each blog post, depending on the device you use, where you can easily submit your e-mail address (only) to be included in my mailing list.

You Can Also Find Me On Social Media:

Facebook page: The Grateful Girl Cooks!
Pinterest:
The Grateful Girl Cooks!
Instagram:
jbatthegratefulgirlcooks

Author's signatureOriginal Recipe Source: http://damndelicious.net/2012/12/16/hoisin-asian-meatballs-sundaysupper/

↓↓ PRINTABLE RECIPE BELOW ↓↓

0 from 0 votes
Hoisin Asian Meatballs
Prep Time
15 mins
Cook Time
15 mins
Total Time
30 mins
 
Hoisin Asian Meatballs are made using ground beef, are baked not fried , and are covered with an Asian-inspired hoisin glaze. Great appetizer or main dish.
Category: Entree
Cuisine: Asian
Keyword: hoisin Asian meatballs
Servings: 18 meatballs
Calories Per Serving: 88 kcal
Author: JB @ The Grateful Girl Cooks!
Ingredients
FOR THE MEATBALLS:
  • 1 pound ground beef
  • 1 teaspoon sesame oil
  • 1/2 cup Panko bread crumbs
  • 1/4 teaspoon ground ginger
  • 1 large egg
  • 2 cloves garlic , finely minced
  • 4 green onions , thinly sliced (stem and bulb), divided (3 for meatballs, 1 for garnish)
  • Sesame seeds , for garnish
FOR THE HOISIN GLAZE:
  • 1/4 cup Hoisin sauce (found in ethnic section at grocery store)
  • 2 Tablespoons rice vinegar
  • 1 Tablespoon soy sauce
  • 1/2 teaspoon sesame oil
  • 2 cloves garlic , finely minced
  • 1/2 teaspoon ground ginger
Instructions
  1. Before making meatballs, preheat your oven to 400 degrees. Place a sheet of parchment paper onto a large baking sheet.
  2. Prepare the meatballs: Mix the ground beef, sesame oil, Panko bread crumbs, ginger, egg, garlic and green onion together in a large bowl. Make sure the ingredients are fully incorporated together. Once combined, use your (clean) hands to form the meat mixture into approximately 18 one and a half inch wide meatballs.
  3. As each meatball is formed, place it on the parchment-lined baking sheet. Bake the meatballs at 400 degrees for 12-15 minutes (meatballs should be browned and cooked through).
  4. Prepare hoisin glaze while meatballs are baking: Mix the glaze ingredients (hoisin sauce, rice vinegar, soy sauce, sesame oil, ginger and garlic) in a small bowl until fully combined.
  5. As soon as meatballs are done, drizzle hoisin glaze over the top of each meatball, garnish with reserved green onions and sesame seeds and serve while hot.
  6. If serving as appetizer, insert toothpicks or small skewers into each meatball on serving tray. If serving as main dish, serve it along with rice and a vegetable. ENJOY!

Nutrition Facts
Hoisin Asian Meatballs
Amount Per Serving (1 meatball)
Calories 88 Calories from Fat 45
% Daily Value*
Fat 5g8%
Saturated Fat 2g13%
Cholesterol 27mg9%
Sodium 124mg5%
Potassium 86mg2%
Carbohydrates 3g1%
Sugar 1g1%
Protein 5g10%
Vitamin A 40IU1%
Vitamin C 0.7mg1%
Calcium 13mg1%
Iron 0.7mg4%
* Percent Daily Values are based on a 2000 calorie diet.

Here’s one more to pin on your Pinterest boards!Hoisin Asian Meatballs are made using ground beef, baked not fried , and are covered with an Asian-inspired hoisin glaze. Great appetizer or main dish.


Save

Save

Asian Lemon Chicken Strips

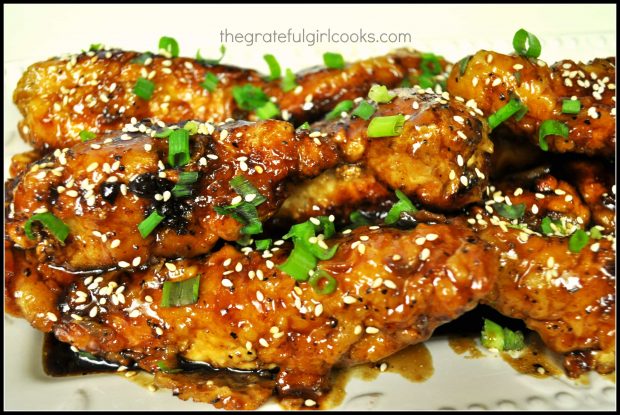
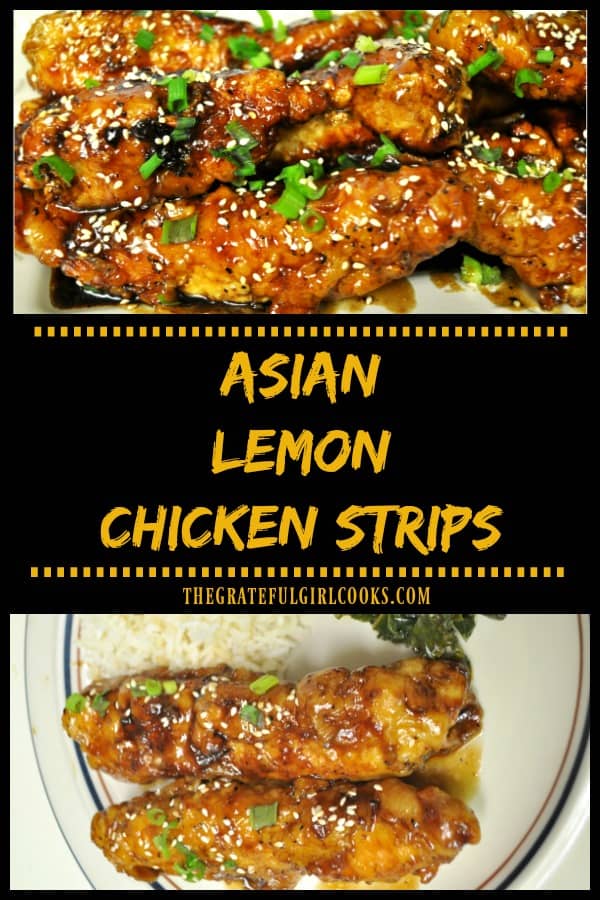
Asian Lemon Chicken Strips are cooked until crispy, then coated in an Asian-inspired, sweet and sticky, lemon glaze in this delicious, restaurant-quality dish!Asian Lemon Chicken Strips are cooked until crispy, then coated in an Asian-inspired, sweet and sticky, lemon glaze in this delicious, restaurant-quality dish!
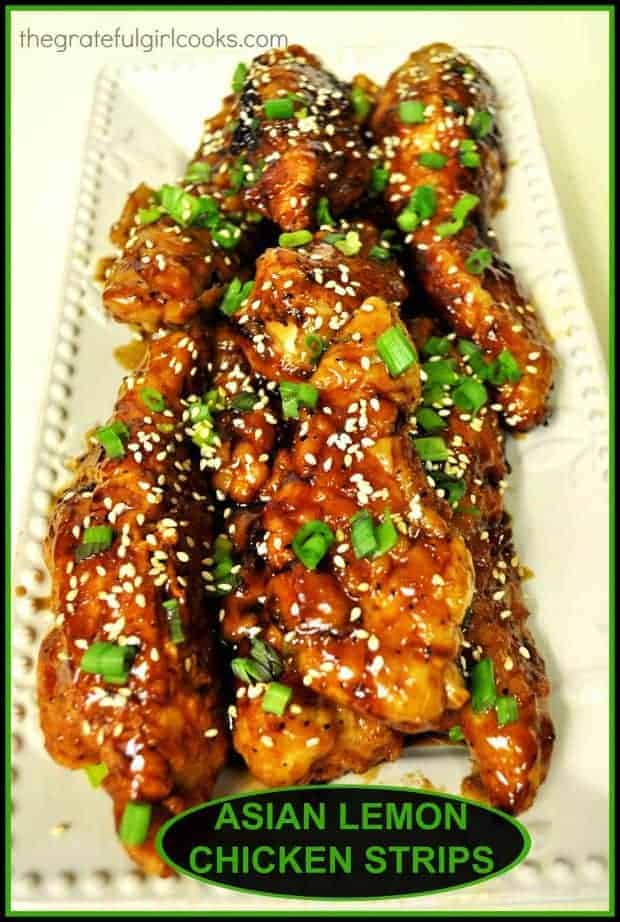
Oh my goodness! I recently found a FANTASTIC recipe for Asian Lemon Chicken Strips on Pinterest, and had to share it with you!  Don’t they look scrumptious???? I made these for my husband and I last night for dinner, and they were fantastic.

WOW, WOW, WOW!! They are absolutely lip-smackin’ delicious! To quote my husband: “Wow, these really look and taste like something you’d order at a Chinese restaurant”.

The recipe itself is pretty straightforward. Directions are easy to follow and can be prepared (4 servings) in as little as 40 minutes! Crispy chicken strips coated in a sweet, sticky, lemon glaze… yet not too lemony, not too sticky, not too sweet. How can you go wrong? And did I mention just how delicious they are (repeat as needed)????  No, seriously…you need to make these. You won’t be sorry!

Scroll Down For A Printable Recipe Card At The Bottom Of The Page

Prepare The Chicken Strips

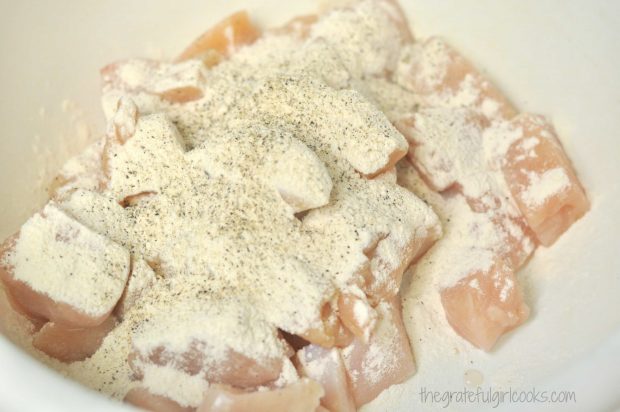
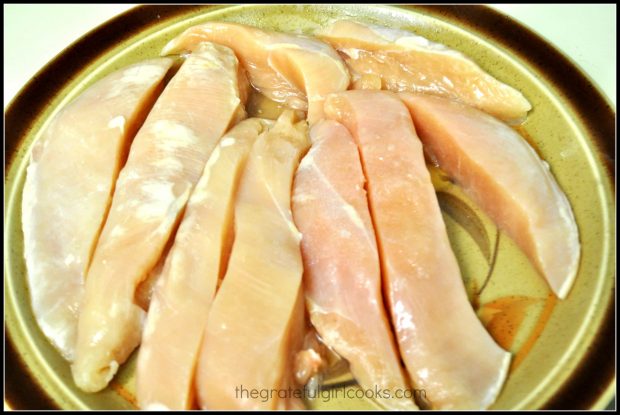
Here’s how easy they are to prepare: I used 3 large chicken breasts and cut them in long strips. Season the chicken strips with salt and pepper.

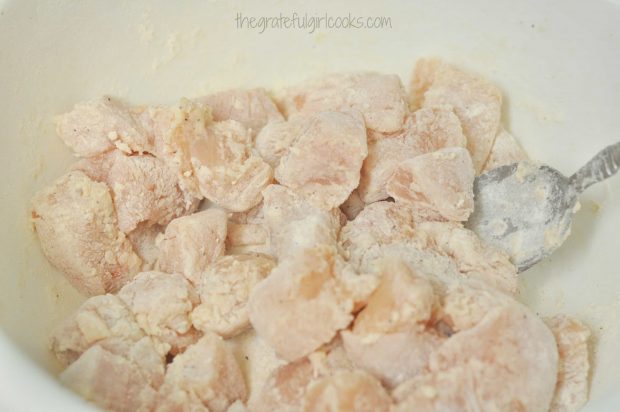
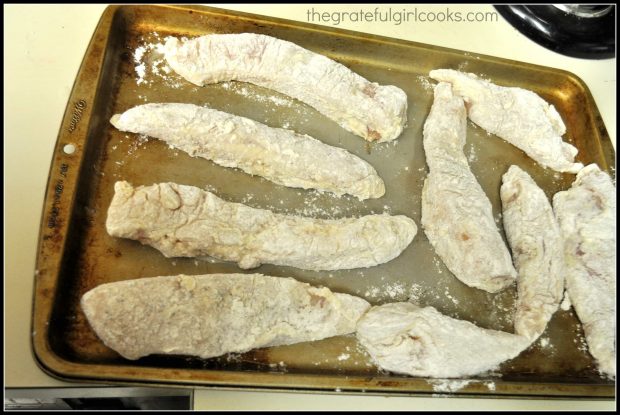
Dredge each of the chicken strips, one at a time into flour to coat, then dip into buttermilk, then back into the flour to coat. Set aside, and continue until all pieces of chicken are coated.

Raw chicken breast strips on platter

Raw, floured chicken strips on cookie sheet

Make The Asian Lemon Glaze For The Chicken Strips

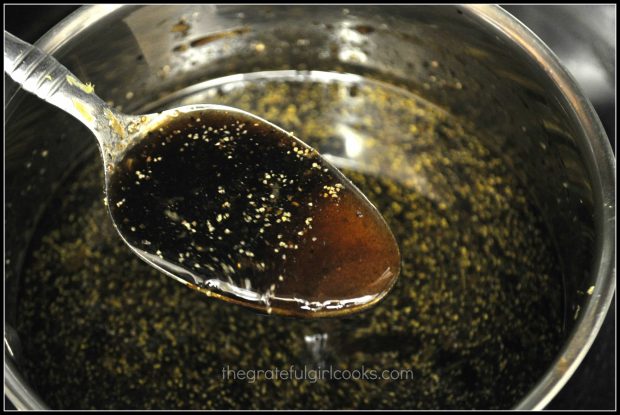
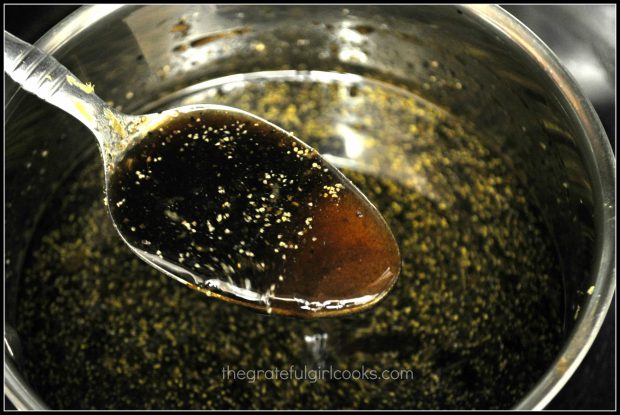
Make up the sauce mixture and heat it in saucepan while you are cooking the chicken strips. It’s as easy as putting the Asian inspired sauce ingredients in a pan, and cooking it for a short time!

Lemon sauce and spoon in small bowl

Cook The Chicken Strips

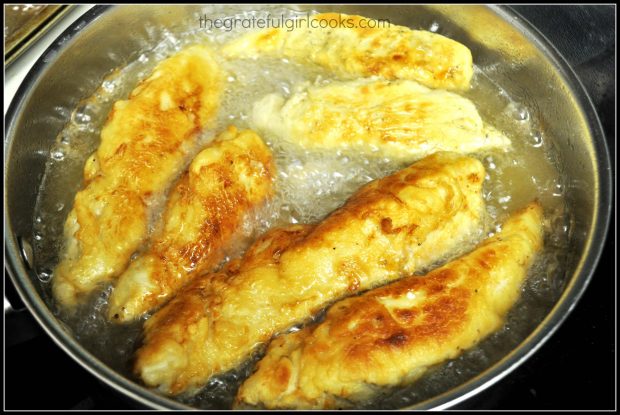
Heat oil in a large skillet until it is very hot (but not smoking). Carefully place the chicken pieces into the hot oil. You should hear them sizzle when they hit the oil.

Cook the chicken strips, turning after a few minutes, until lightly browned on all sides and cooked all the way through.

Strips of chicken frying in oil in skillet

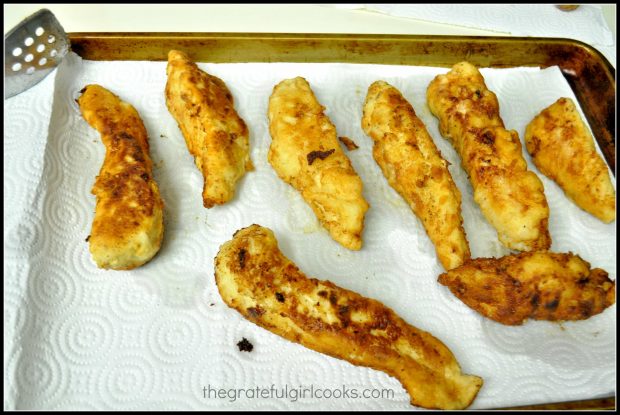
Drain the cooked chicken strips on paper towels.

Fried chicken pieces draining on paper towel

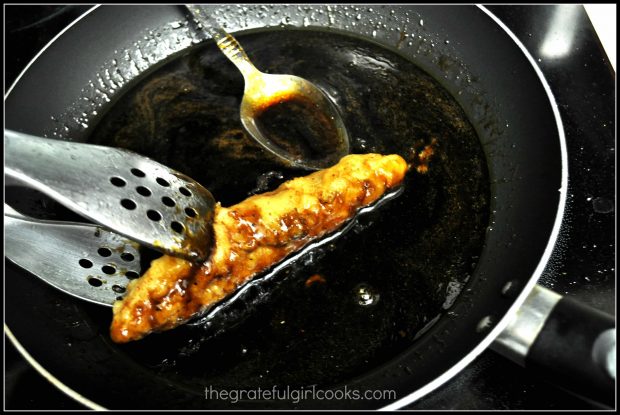
Transfer the hot, thickened Asian lemon glaze to a skillet, then add the chicken strips, one at a time. Gently turn to coat with sauce on all sides. Use a spoon and tongs to fully coat chicken pieces.

Piece of chicken being covered with Asian lemon sauce in skillet

Time To Serve The Asian Lemon Chicken Strips!

Removed Asian lemon chicken strips to serving dish, garnished with toasted sesame seeds and some chopped green onion, and VOILA! Time to eat!

Lemon chicken strips garnished with green onions

I really hope you will give this easy-to-prepare delicious recipe a try…I think you’re gonna LOVE it! Have a great day, and come back soon for more yummy recipes.

Looking For More CHICKEN Recipes?

You can find all of my recipes in the Recipe Index, located at the top of the page. I have LOTS of delicious recipes for chicken, including:

Interested In More Recipes?

Thank you for visiting this website. I appreciate you using some of your valuable time to do soIf you’re interested, I publish a newsletter 2 times per month (1st and 15th) with all the latest recipes, and other fun info. I would be honored to have you join our growing list of subscribers, so you never miss a great recipe!
There is a Newsletter subscription box on the top right side (or bottom) of each blog post, depending on the device you use, where you can easily submit your e-mail address (only) to be included in my mailing list.

You Can Also Find Me On Social Media:

Facebook page: The Grateful Girl Cooks!
Pinterest:
The Grateful Girl Cooks!
Instagram:
jbatthegratefulgirlcooks

Author's signatureOriginal recipe source: http://damndelicious.net/2014/02/15/asian-lemon-chicken-tenders/

↓↓ PRINTABLE RECIPE BELOW ↓↓

0 from 0 votes
Asian Lemon Chicken Strips
Prep Time
15 mins
Cook Time
20 mins
Total Time
35 mins
 

Asian Lemon Chicken Strips are cooked until crispy, then coated in an Asian-inspired, sweet and sticky, lemon glaze in this delicious, restaurant-quality dish!

Category: Entree
Cuisine: Chinese
Keyword: Asian lemon chicken strips
Servings: 4 servings (2 strips per)
Calories Per Serving: 375 kcal
Author: JB @ The Grateful Girl Cooks!
Ingredients
For the chicken strips:
  • 1 cup vegetable oil
  • 4 boneless skinless chicken breasts , cut lengthwise into strips
  • Salt and pepper , to season
  • 1 1/2 cups all-purpose flour
  • 1 cup buttermilk
For the lemon glaze:
  • 1/2 cup honey
  • 1/3 cup soy sauce
  • 1/4 cup pineapple juice
  • 1/4 cup brown sugar , packed
  • Juice of one lemon (I added the zest from the lemon to the sauce, also)
  • 2 Tablespoons apple cider vinegar
  • 2 Tablespoons olive oil
  • 1 teaspoon ground black pepper
  • 1/2 teaspoon garlic powder
For garnish:
  • 1 teaspoon toasted sesame seeds
  • 1 sliced green onion (green stem only)
Instructions
  1. Place all the sauce ingredients in a saucepan. Stir to combine. Heat on medium; bring sauce to a rolling boil, then reduce the heat and simmer, uncovered, for 15-20 minutes, stirring occasionally. The mixture will slightly thicken. Cook the sauce while cooking the chicken strips.
  2. Season the chicken strips with salt and pepper. Dredge the chicken strips, (one at a time) in flour to completely cover. then dip the strip into buttermilk to cover. Let the excess buttermilk drip off, then dredge the chicken strip in the flour again, making sure the flour fully coats the chicken. Set strips aside on a baking sheet, and continue with the remaining strips.
  3. Heat the vegetable oil in a large skillet until very hot (but not smoking). Once the oil is hot, add the chicken strips to the skillet. You may have to cook 3-4 at a time due to space limitations. Cook, then turn chicken after a few minutes on each side, to ensure all sides are golden brown. Once the chicken is golden brown and fully cooked, transfer the chicken strips to paper towels to drain. Continue with rest of chicken until done.
  4. Transfer the sauce into a clean skillet. Carefully (using tongs) place chicken strips (one at a time) into the hot sauce, turning gently to coat all sides. Remove chicken to serving dish. Repeat with next chicken strip. When all chicken strips are done, sprinkle tops with toasted sesame seeds and sliced green onion stems. Serve immediately, and enjoy!
Recipe Notes

Tip:: To "toast" sesame seeds: Place about a teaspoon into a dry skillet. Heat on medium, stirring constantly for a few minutes until the seeds turn a light brown. Remove from skillet to cool.

Nutrition Facts
Asian Lemon Chicken Strips
Amount Per Serving (1 serving)
Calories 375
* Percent Daily Values are based on a 2000 calorie diet.

Here’s one more to pin on your Pinterest boards!Asian Lemon Chicken Strips are cooked until crispy, then coated in an Asian-inspired, sweet and sticky, lemon glaze in this delicious, restaurant-quality dish!


Save

Save

Save

Save

Save

Kung Pao Chicken

Who needs takeout when you can make amazing tasting Kung Pao Chicken in your own home? Serve this classic Chinese dish with rice for a great meal!Who needs takeout when you can make amazing Kung Pao Chicken from the comfort of your own home? Serve this classic Chinese dish with rice for a great meal!
One of my favorite Chinese food entrees is Kung Pao Chicken. I almost always order it when we get take-out, or when I’m enjoying a meal at our favorite Chinese restaurant. What’s not to love? Chicken, roasted peanuts, and the little kick of heat my taste buds get when eating this dish.  I don’t know where this particular recipe originated, but I got it on a 3×5 card from my Dad about 25 years ago.

I recently found the recipe card and was feeling rather nostalgic and missing my Dad (he passed away 8 years ago – I miss him dearly!) He used to love finding new recipes, and always had fun taking a turn at cooking occasionally for my Mom, myself, and my two younger sisters. So I decided to make this dish, in honor of my amazing Dad.

This particular recipe is very easy to prepare and I it tastes GREAT! Who needs take-out when you can just make this recipe (4 servings) for a fraction of the price? Hope you enjoy this recipe for Kung Pao Chicken…I know I sure did… and  you can be certain I will be making this again! Here are a few pictures to show you the process:
Scroll Down For A Printable Recipe Card At The Bottom Of The Page

How To Make Kung Pao Chicken

First, measure out the raw peanuts (no skins).

Kung Pao Chicken / The Grateful Girl Cooks!

Toast the peanuts in a bit of oil in a skillet, stirring often, until golden brown (just a few minutes).

Raw peanuts to add to chicken are cooked in oil until golden brown.

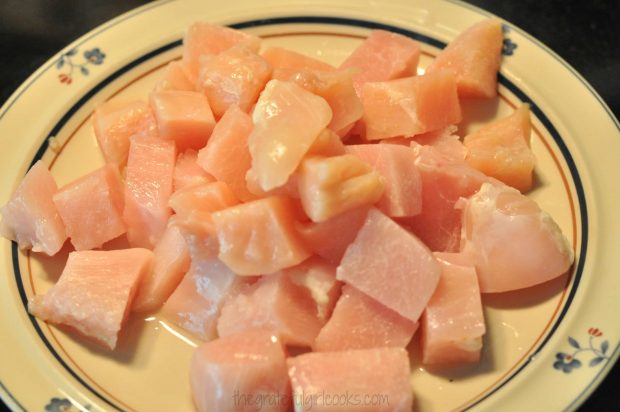
Cut the boneless, skinless chicken breasts into small chunks.

Chicken breasts are cut into cubes to use in making kung pao chicken.

Mix together the marinade ingredients. Marinate the chicken cubes in this sauce for 30 minutes in the refrigerator. I usually use a large plastic resealable bag and pour sauce over chicken.

Marinade is mixed to coat chicken breast cubes with for kung pao chicken.

Put the dried red chili peppers on a cutting surface.

Dried red chili peppers are used in kung pao chicken.

Snip the stem end off of the peppers. Remove all the seeds (they are the HEAT packers). Cut the red chili peppers into 1/2 ” long pieces. Set aside (discard seeds!).

Seeds are separated from red chili peppers before cooking dish.

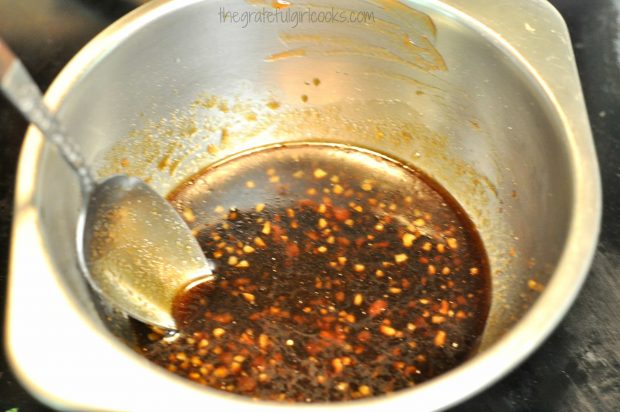
Mix together ingredients for seasoning sauce. Set aside.

Kung Pao seasoning sauce is mixed to add to chicken.

Cooking Kung Pao Chicken

Stir fry chicken in hot oil for a couple of minutes, until light golden brown, and cooked through. Remove chicken to paper towels to drain when done. Wipe skillet clean.

Chicken breast cubes are cooked in hot oil until golden brown.

Stir fry the red chili peppers until dark in color and blistered from the heat.

Red chili pepper slices are cooked for kung pao chicken.

Add fresh grated ginger to the darkened red chili pepper pieces.

Fresh minced ginger is added to skillet with chili peppers.

Building Layers Of Flavor

Add the cooked chicken back into skillet with the red chili peppers and ginger. Add the seasoning sauce to the skillet, and cook until the sauce thickens.

Chicken is cooked with kung pao seasoning sauce and chili peppers.

Add the toasted peanuts to the skillet, and cook until the kung pao chicken is heated through, and then this dish is ready to serve.

Toasted peanuts are added to kung pao chicken in skillet.

Garnish the kung pao chicken with sesame seeds and chopped green onion slices. Serve over rice. Enjoy!

Kung Pao Chicken is garnished with sesame seeds and green onions, and is served on rice.

It’s really not too hard at all to make this great kung pao chicken from the comfort of your own kitchen! Hope you will consider making this yummy dish! Thanks for stopping by today, and I hope you will come back soon.

Looking for More ASIAN-INSPIRED Recipes?

You can find ALL my recipes in the Recipe Index, located at the top of the page. I have some wonderful Asian-inspired recipes you’ll enjoy, including:

Interested In More Recipes?

Thank you for visiting this website. I appreciate you using some of your valuable time to do soIf you’re interested, I publish a newsletter 2 times per month (1st and 15th) with all the latest recipes, and other fun info. I would be honored to have you join our growing list of subscribers, so you never miss a great recipe!
There is a Newsletter subscription box on the top right side (or bottom) of each blog post, depending on the device you use, where you can easily submit your e-mail address (only) to be included in my mailing list.

You Can Also Find Me On Social Media:

Facebook page: The Grateful Girl Cooks!
Pinterest:
The Grateful Girl Cooks!
Instagram:
jbatthegratefulgirlcooks

Author's signature

↓↓ PRINTABLE RECIPE BELOW ↓↓

0 from 0 votes
Kung Pao Chicken
Prep Time
15 mins
Cook Time
15 mins
Total Time
30 mins
 
Who needs takeout when you can make amazing Kung Pao Chicken from the comfort of your own home? Serve this classic Chinese dish with rice for a great meal!
Category: Entree
Cuisine: Chinese
Keyword: kung pao chicken
Servings: 4
Calories Per Serving: 302 kcal
Author: JB @ The Grateful Girl Cooks!
Ingredients
  • 1 pound boneless chicken breasts (about 2 large)
  • 5-6 pieces dry red chili pepper
  • 1/2 cup raw peanuts (no skin)
  • 1 teaspoon ginger , minced
  • 1/4 cup , plus 3 Tablespoons vegetable oil (divided)
For Marinade:
  • 1 egg white , lightly beaten
  • 1 Tablespoon soy sauce
  • 1 Tablespoon cornstarch
For Seasoning Sauce:
  • 2 Tablespoons soy sauce
  • 2 Tablespoons cooking sherry
  • 2 teaspoons white vinegar
  • 4 teaspoons granulated sugar
  • 2 teaspoons sesame oil
  • 2 Tablespoons water
  • 2 teaspoons cornstarch
For Garnish:) optional)
  • 1 teaspoon sesame seeds
  • green onion slices
Instructions
  1. Prepare marinade. Mix well in medium sized bowl.  Cut chicken into 1" cubes. Add to marinade. Marinate chicken for 30 minutes in refrigerator.

  2. On a cutting board, remove stem top and seeds from the dried red chili peppers. Discard stems and seeds. Use scissors to cut each chili pepper into 1/2" long pieces.
  3. Heat a large skillet. Add 1 Tablespoon vegetable oil. Stir fry raw peanuts until they are light brown. Remove from heat,, remove from skillet and let cool.
  4. In a small bowl, mix together ingredients for the Seasoning Sauce. Set aside.
  5. Heat 1/4 cup of vegetable oil in skillet until very hot (but NOT smoking...). Add the chicken. Stir fry chicken for 2 minutes, then remove. Drain oil from skillet and wipe clean with paper towels.
  6. Add 2 Tablespoons oil back into the skillet. Add the dried red chili peppers and stir fry until they turn dark. Add the minced ginger and cook for an additional 30 seconds. Turn heat to high; add chicken back into skillet. Add the Seasoning Sauce, and cook until sauce has thickened and dish is heated through. Turn off heat. Remove skillet from stove. Add toasted peanuts to skillet. Mix to combine.

  7. Garnish with sesame seeds and sliced green onions, if desired. Serve Kung Pao Chicken on a bed of rice. ENJOY!

Nutrition Facts
Kung Pao Chicken
Amount Per Serving (1 g)
Calories 302 Calories from Fat 126
% Daily Value*
Fat 14g22%
Saturated Fat 2g13%
Cholesterol 72mg24%
Sodium 546mg24%
Potassium 589mg17%
Carbohydrates 12g4%
Fiber 1g4%
Sugar 5g6%
Protein 29g58%
Vitamin A 365IU7%
Vitamin C 1.7mg2%
Calcium 16mg2%
Iron 1.2mg7%
* Percent Daily Values are based on a 2000 calorie diet.

Here’s one more to pin on your Pinterest boards!Who needs takeout when you can make amazing Kung Pao Chicken from the comfort of your own home? Serve this classic Chinese dish with rice for a great meal!


Save

Save

Grilled “THAI” PB&J Sandwich

A Grilled “Thai” PB&J Sandwich is a delicious, grown up, gourmet version of the classic peanut butter and jelly sandwich. Sounds strange, but tastes GREAT!A Grilled "Thai" PB & J Sandwich is a delicious, grown up, gourmet version of the classic peanut butter and jelly sandwich. Sounds strange, but tastes GREAT!
Look at this Grilled THAI Peanut Butter & Jelly Sandwich. What kind of crazy, weird sandwich is that anyways? A REALLY GOOD ONE.  YES. It’s really THAT good.

Scroll Down For A Printable Recipe Card At The Bottom Of The Page

How I First Discovered this Amazing Sandwich

The first I ever heard of such a crazy sounding sandwich was when my sister Joni (who was visiting from California) ordered one at our local Farmer’s Market last summer. One of the food vendors were selling these sandwiches, along with a few other gourmet grilled sandwiches.

Truth is, It sounded horrible to me, UNTIL she forced me to try a bite of her sandwich. I didn’t think it would be good a all.  GULP… Here is the actual picture I took of her handing me the grilled Thai PB&J sandwich to taste for the first time (shown below).

My sister offering me a bite of Thai PB & J sandwich from the farmer's market.

May I just tell you truthfully that this grilled “Thai” PB&J sandwich was absolutely 100% AMAZING!!!!! That’s right… you heard me. Who ever would have believed that an ordinary old PB&J sandwich could go from “normal” to “over the top” just by adding a few…interesting…Thai-inspired ingredients!

So What Exactly Is IN This Grilled Thai PB&J Sandwich Sandwich?

Because I was curious, I decided to try and make a copycat grilled Thai PB & J sandwich myself in the comfort of my own kitchen and so I did! We have a WINNER! I have made this sandwich MANY times now, for friends and family, and they have always been surprised at how good it is!

Here’s the partial cast of characters: Peanut Butter, Orange Marmalade, Curry Powder, Sriracha Sauce, and fresh Basil. I know…weird, huh?  Sounds like some definite Thai inspired flavor combos going on. You will also need some good bread and some butter for grilling, of course!

Some of the key ingredients for the Thai PB & J sandwich.
Crazy, huh? But trust me, this is an absolutely delicious “Gourmet Grown Up Version” of the traditional PB&J Sandwich that you will LOVE if you like Thai flavors. You just have to try this at least once. This is definitely NOT YOUR MAMA’S PB&J sandwich!!!!

Making it is super easy (the pictures aren’t glamorous, but how do you class up a peanut butter and jelly sandwich? Here’s how:

How To Make A Grilled Thai PB&J Sandwich

First, spread one piece of bread with butter on one side, then coat the other side of the bread with peanut butter. Spread some of the sriracha sauce on top of the peanut butter. Place the bread, butter side down, in a large skillet on medium heat.

Peanut butter and sriracha sauce are spread on one side of bread.

Lightly sprinkle on some curry powder. I never measure it. Just be careful to sprinkle lightly. You don’t need a lot.

Curry powder is lightly sprinkled onto peanut butter.

Roll up a couple of large fresh basil leaves into a tight roll like this…

Fresh basil leaves are rolled before cutting to add to sandwich.

Then slice the rolled basil into thin strips. The technical term for this is to “chiffonade” the basil.

Basil is sliced into thin strips before adding to sandwich.

Add Basil And Marmalade!

Evenly sprinkle the basil over the peanut butter side. Spread a layer of orange marmalade (I used my own homemade marmalade!) over the basil. The photo below shows the marmalade halfway spread on the sandwich. Spread the entire slice of bread with the marmalade.

Sliced basil leaves and orange marmalade added to PB&J sandwich.

Ready To Grill!

Butter one side of the second piece of bread and place it on top of the sandwich, butter side up. Grill the sandwich on both sides (just like you would a grilled cheese sandwich). I usually grill it on medium-low heat.

Grilled THAI PB&J Sandwich cooking in skillet.

Grill until both sides of the sandwich are toasted and golden brown. Transfer the sandwich from the skillet onto a serving plate.

Grilled THAI PB&J Sandwich is cooked until golden brown on both sides.

Time To Eat!

Slice the Grilled Thai PB&J Sandwich diagonally across to form two triangles. Yes, it might be a bit messy…but that’s great, because the sandwich is so GOOD! Take a bite, and enjoy this delicious sandwich.

Grilled THAI PB&J Sandwich is sliced in half and served. Messy, but good!

It’s still hard to believe that this crazy sounding grilled “Thai” PB&J sandwich is so amazingly GOOD, but it’s true! I’ve made this sandwich at least twenty times since I took that first tentative bite, and it never fails to be ridiculously delicious! I hope you will give it a try. 

Thanks for stopping by today! I hope you will be able to come back again soon for more recipes. Don’t forget to check out the Recipe Index, located at the top of the page to see ALL of my recipes. Have a great day.

Interested In More Recipes?

Thank you for visiting this website. I appreciate you using some of your valuable time to do soIf you’re interested, I publish a newsletter 2 times per month (1st and 15th) with all the latest recipes, and other fun info. I would be honored to have you join our growing list of subscribers, so you never miss a great recipe!
There is a Newsletter subscription box on the top right side (or bottom) of each blog post, depending on the device you use, where you can easily submit your e-mail address (only) to be included in my mailing list.

You Can Also Find Me On Social Media:

Facebook page: The Grateful Girl Cooks!
Pinterest:
The Grateful Girl Cooks!
Instagram:
jbatthegratefulgirlcooks

Author's signature

↓↓ PRINTABLE RECIPE BELOW ↓↓

0 from 0 votes
Grilled "THAI" PB&J Sandwich
Prep Time
5 mins
Cook Time
5 mins
Total Time
10 mins
 
A Grilled "Thai" PB & J Sandwich is a delicious, grown up, gourmet version of the classic peanut butter and jelly sandwich. Sounds strange, but tastes GREAT!
Category: Sandwich
Cuisine: Thai
Keyword: thai pb&j sandwich
Servings: 1 sandwich
Calories Per Serving: 366 kcal
Author: JB @ The Grateful Girl Cooks!
Ingredients
  • 2 slices good quality bread
  • butter (to spread on one side of each piece of bread)
  • peanut butter (enough to cover one piece of bread
  • orange marmalade (enough to cover one slice of bread)
  • 1/2 - 1 teaspoon sriracha sauce (hot chile sauce found in Asian section of grocery store)
  • curry powder (I don't measure...just light sprinkle over one side of bread)
  • 2 large , fresh basil leaves
Instructions
  1. Spread one side of one piece of bread with butter. Place butter side down in skillet.
  2. Spread peanut butter on top of the slice of bread in skillet to cover. Spread sriracha sauce over the peanut butter evenly. Lightly sprinkle with curry powder. Roll and slice the fresh basil leaves. Sprinkle evenly over peanut butter. Carefully spread orange marmalade over sliced basil leaves. Butter one side of the second piece of bread. Put on top of marmalade, butter side up.

  3. Grill sandwich on medium heat, turning during cooking. Grill until each side is toasted and golden brown. Remove hot sandwich to serving plate. Cut on the diagonal, and serve! Enjoy!
Nutrition Facts
Grilled "THAI" PB&J Sandwich
Amount Per Serving (1 sandwich)
Calories 366 Calories from Fat 144
% Daily Value*
Fat 16g25%
Saturated Fat 6g38%
Cholesterol 21mg7%
Sodium 576mg25%
Potassium 222mg6%
Carbohydrates 47g16%
Fiber 3g13%
Sugar 17g19%
Protein 10g20%
Vitamin A 250IU5%
Vitamin C 4mg5%
Calcium 77mg8%
Iron 2.3mg13%
* Percent Daily Values are based on a 2000 calorie diet.

Here’s one more to pin on your Pinterest boards!A Grilled "Thai" PB & J Sandwich is a delicious, grown up, gourmet version of the classic peanut butter and jelly sandwich. Sounds strange, but tastes GREAT!


Save

Save

Save

Tonkatsu Pork

Tonkatsu pork originated in Japan, and is a simple dish to make, with lightly seasoned, panko crumb crusted pork cutlets, pan-fried until crispy. Tonkatsu pork originated in Japan, and is a simple dish to make, with lightly seasoned, panko crumb crusted pork cutlets, pan-fried until crispy.

Did you say Tankatsu Pork…huh? Never heard of it before. Well, I had never heard of it, until I saw a recipe for it while searching the internet for pork recipes.

Wikipedia describes Tonkatsu Pork as a “Japanese food, which consists of a breaded deep-fried pork cutlet, which originated in Japan in the 19th century.” It was originally called Katsu, and is believed to have been served for the first time at the Regatei Restaurant in Tokyo in 1899.  At the time it was thought of as the Japanese version of fine European cuisine.

Scroll Down For A Printable Recipe Card At The Bottom Of The Page

So What Is Tonkatsu Pork ?

Basically, Tonkatsu Pork is a thin pork cutlet, seasoned, and fried with a Panko crumb coating. The panko crumbs give the cutlet a wonderfully crunchy texture. It is ridiculously easy to prepare, and tastes really good.

This entree is really not hard at all to make, and I must say, the pork was wonderful! I served it with a side dish of Orzo With Parmesan, which is a great tasting side dish! This recipe would also be good served with homemade rice pilaf! I sure hope you will give this recipe for tonkatsu pork a try! I really do think you will enjoy it. Have a great day!

Looking For More PORK Recipes?

You can find all of my recipes using pork in the Recipe Index, located at the top of the page. A few of these recipes include:

Interested In More Recipes?

Thank you for visiting this website. I appreciate you using some of your valuable time to do soIf you’re interested, I publish a newsletter 2 times per month (1st and 15th) with all the latest recipes, and other fun info. I would be honored to have you join our growing list of subscribers, so you never miss a great recipe! 

There is a Newsletter subscription box on the top right side (or bottom) of each blog post, depending on the device you use, where you can easily submit your e-mail address (only) to be included in my mailing list.

You Can Also Find Me On Social Media:

Facebook page: The Grateful Girl Cooks!
Pinterest:
The Grateful Girl Cooks!
Instagram:
jbatthegratefulgirlcooks

Author's signatureRecipe Adapted From: http://www.lifesambrosia.com/2010/10/tonkatsu-pork-recipe.html

↓↓ PRINTABLE RECIPE BELOW ↓↓

0 from 0 votes
Tonkatsu Pork
Prep Time
10 mins
Cook Time
10 mins
Total Time
20 mins
 

Tonkatsu pork originated in Japan, and is a simple dish to make, with lightly seasoned, panko crumb crusted pork cutlets, pan-fried until crispy.

Category: Entree
Cuisine: Japanese
Keyword: tonkatsu pork
Servings: 4 servings
Calories Per Serving: 363 kcal
Author: JB @ The Grateful Girl Cooks!
Ingredients
  • 4 boneless pork cutlets (or boneless chops, pounded to 1 1/4 " thick)
  • 1 teaspoon salt
  • 1/2 teaspoon ground black pepper
  • 1/2 teaspoon garlic powder
  • 1/2 cup all-purpose flour
  • 1 large egg , beaten
  • 1 1/2 cups Panko bread crumbs
  • 1 Tablespoon Vegetable or Canola oil , plus more, for frying
Instructions
  1. Lightly season the pork cutlets with salt and pepper (not the measured amounts in ingredient list, just a light sprinkle on both sides to help season the meat)
  2. Set up an "assembly line" for dipping the pork in this order: A bowl with the flour, a bowl with the beaten egg, and a bowl with the Panko crumbs.
  3. Season the flour with 1/2 teaspoon of the salt, 1/4 teaspoon of the flour, and the garlic powder.
  4. Mix the rest of the salt and pepper in with the Panko crumbs.
  5. Dip pork cutlets (one at a time) into the flour (turning to coat both sides), then dip into the egg mixture (fully coating cutlet). Let egg mixture run off of pork, then dip into the Panko crumb coating (fully cover the cutlet on both sides). Set aside and repeat.
  6. Pour oil into large skillet until you have 1/4 " depth covering the bottom. Heat on medium high until hot. You can test the heat...put a couple of panko crumbs into the oil. If they sizzle, the oil is ready.
  7. When oil is hot, carefully add the 4 cutlets (the meat should sizzle). Cook 4-5 minutes on one side, then carefully flip the cutlet over and cook the other side for 4-5 minutes. When done, the coating on the cutlets should be a beautiful golden brown.
  8. When fully cooked, remove from heat, and serve. Enjoy!
Nutrition Facts
Tonkatsu Pork
Amount Per Serving (1 serving)
Calories 363 Calories from Fat 90
% Daily Value*
Fat 10g15%
Saturated Fat 5g31%
Cholesterol 129mg43%
Sodium 827mg36%
Potassium 594mg17%
Carbohydrates 28g9%
Fiber 1g4%
Sugar 1g1%
Protein 36g72%
Vitamin A 60IU1%
Calcium 54mg5%
Iron 2.7mg15%
* Percent Daily Values are based on a 2000 calorie diet.

Here’s one more to pin on your Pinterest boards!Tonkatsu pork originated in Japan, and is a simple dish to make, with lightly seasoned, panko crumb crusted pork cutlets, pan-fried until crispy.


Save

Save

Healthy Kung Pao Chicken

Healthy Kung Pao Chicken is easy to make, and low in calories, with snow peas, fresh ginger, red bell peppers, green onions, and dry roasted peanuts.Healthy Kung Pao Chicken is easy to make, and low in calories, with snow peas, fresh ginger, red bell peppers, green onions, and dry roasted peanuts.

I love Chinese Food, especially Kung Pao Chicken and Sweet and Sour Pork. I do NOT love all the calories those traditional Chinese dishes add to my body, as I eat bite after bite, however!  What’s a girl to do??? How about a recipe for Healthy Kung Pao Chicken?

Scroll Down For A Printable Recipe Card At The Bottom Of The Page

Where Did Kung Pao Chicken Originate?

Wikipedia describes Kung Pao Chicken as “a classic dish in Szechuan cuisine”. The recipe for Kung Pao Chicken is thought to have originated in the Sichuan province of South-Western China.

This classic dish is commonly believed to have been named to honor Ding Baozhen, a governor of Sichuan Province during the Quing Dynasty. “Kung Pao” literally means “palace guardian”, which has absolutely nothing to do with chicken, but… whatever! All I know is it tastes GREAT!

Where I Found The Recipe For Healthy Kung Pao Chicken

I was determined to search for a slightly healthier version of Kung Pao Chicken…and I found one, in an old back issue of Cooking Light Magazine.  A few very minor changes were made to the recipe, then I prepared this “lighter” version for our dinner tonight. It was delicious!!!!

This healthy kung pao chicken version is not as spicy as some other traditional recipes, including my own recipe (here). If you like your kung pao chicken spicy, simply add additional red pepper flakes to the dish.

Why We Enjoy This Recipe

This healthy kung pao chicken is absolutely full of flavor, a cinch to prepare, and easy on the old wallet! You’ll think you are enjoying some good take out, because the sauce is wonderful, but you won’t be piling on those extra calories. Win-Win!!! I would encourage you to give it a try, and hope you enjoy it! We sure did. Here’s a few pics taken while cooking the dish:

Making Healthy Kung Pao Chicken

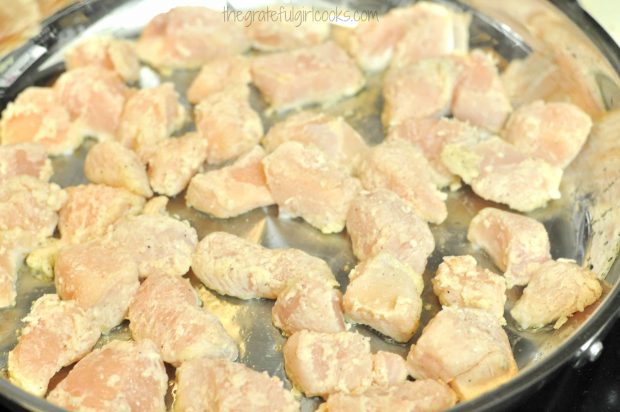
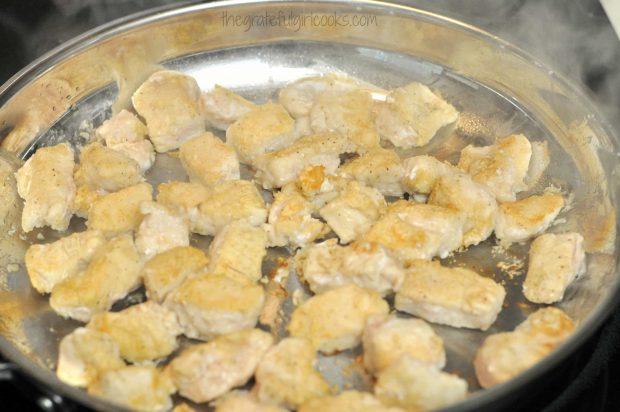
Chicken breast chunks, green onions and garlic are cooked together in a large skillet until fully cooked through.

Chicken, garlic and green onions are cooked through in a large skillet.

Add Veggies, Sauce and Dry Roasted Peanuts To The Skillet

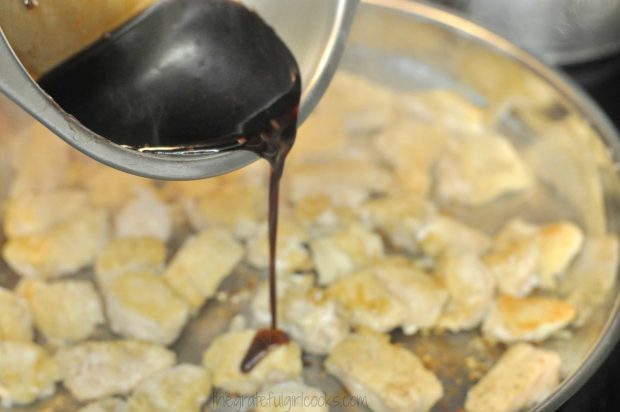
Once the chicken is cooked through, add snow peas, red bell peppers, dry roasted peanuts and a simple Asian sauce to the chicken. Stir well, to fully combine the ingredients.

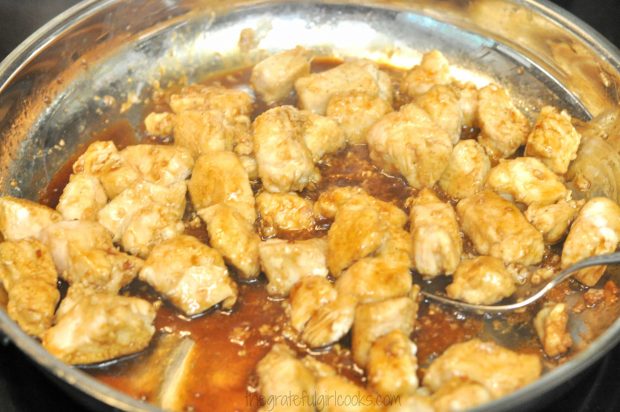
At this point, everything is cooking away, and the healthy kung pao chicken is sure smelling good! Let the chicken, veggies and sauce cook for a few more minutes. The sauce will thicken as it cooks, and will coat everything in it’s deliciousness!

Veggies, sauce, and dry roasted nuts are added to healthy kung pao chicken in skillet.

Time To Serve The Healthy Kung Pao Chicken

Healthy Kung Pao Chicken can be served on a bed of rice (if desired), with additional fresh veggies on the side. Now it’s time to dig in!

Healthy Kung Pao Chicken can be served on a bed of steamed rice.

Hope you enjoy this recipe for healthy kung pao chicken. See the printable recipe below, for all the details! Have a great day, and come back soon!

Looking For More Chinese Food Recipes?

You can find all of my recipes in the Recipe Index, located at the top of the page. A few favorite Chinese food recipes include:

Interested In More Recipes?

Thank you for visiting this website. I appreciate you using some of your valuable time to do soIf you’re interested, I publish a newsletter 2 times per month (1st and 15th) with all the latest recipes, and other fun info. I would be honored to have you join our growing list of subscribers, so you never miss a great recipe!

There is a Newsletter subscription box on the top right side (or bottom) of each blog post, depending on the device you use, where you can easily submit your e-mail address (only) to be included in my mailing list.

You Can Also Find Me On Social Media:
Facebook page: The Grateful Girl Cooks!
Pinterest: The Grateful Girl Cooks!
Instagram: jbatthegratefulgirlcooks

Author's signatureRecipe Adapted From “Cooking Light Magazine”, December 2010 issue and posted at: http://tastykitchen.com/recipes/main-courses/healthy-kung-pao-chicken/

0 from 0 votes
Healthy Kung Pao Chicken
Prep Time
15 mins
Cook Time
20 mins
Total Time
35 mins
 
Here's a healthy version of a favorite Chinese entree: Kung Pao Chicken, with a touch of "spicy" and a lot of "healthy"!
Category: Main Dishes
Cuisine: Chinese
Keyword: healthy kung pao chicken
Servings: 4
Calories Per Serving: 195 kcal
Author: JB @ The Grateful Girl Cooks!
Ingredients
  • 2 Tablespoons sesame oil
  • 4 Tablespoons green onion , sliced (white and green parts)
  • 3 cloves garlic , minced
  • 3 boneless chicken breasts , cut into 1" pieces
  • 3/4 cup water
  • 3 Tablespoons Low Sodium Soy Sauce
  • 1/2 -3/4 teaspoons red pepper flakes (If you like it with more "heat", use 3/4 tsp.)
  • 1 teaspoon granulated sugar
  • 1 Tablespoon cornstarch
  • 1/2 teaspoon fresh ginger , minced (or finely grated with micro-plane)
  • 3/4 cup snow peas
  • 3/4 cup red bell pepper , sliced in thin strips
  • 2 Tablespoon dry roasted peanuts
  • Optional: Toasted sesame seeds and additional sliced green onion , for garnish)
Instructions
  1. In a large skillet, heat the sesame oil on medium heat.
  2. When oil is hot, add the onion and cook for about a minute, then add the garlic and chicken.
  3. Saute until the chicken is cooked through (about 4-5 minutes).
  4. In a separate bowl, whisk together the water, soy sauce, red pepper flakes, sugar, cornstarch and ginger. Whisk this until the sugar has dissolved, then add this sauce to the chicken.
  5. Bring the sauce to a boil, then add the red bell pepper and snow peas.
  6. Cook for an additional 3-4 minutes (the sauce will thicken as it cooks). When chicken is heated through and sauce has thickened, remove it from heat.
  7. Serve this dish on top of white or brown rice.
  8. Garnish (if desired) with additional green onion slices and toasted sesame seeds. ENJOY!!
Nutrition Facts
Healthy Kung Pao Chicken
Amount Per Serving (1 (1/4 of total))
Calories 195 Calories from Fat 99
% Daily Value*
Fat 11g17%
Saturated Fat 1g6%
Cholesterol 36mg12%
Sodium 504mg22%
Potassium 384mg11%
Carbohydrates 9g3%
Fiber 1g4%
Sugar 3g3%
Protein 14g28%
Vitamin A 1190IU24%
Vitamin C 49.2mg60%
Calcium 22mg2%
Iron 1.2mg7%
* Percent Daily Values are based on a 2000 calorie diet.

Here’s one more to pin on your Pinterest boards!Healthy Kung Pao Chicken is easy to make, and low in calories, with snow peas, fresh ginger, red bell peppers, green onions, and dry roasted peanuts.


Save

Save