Looking for a recipe for fantastic tasting black bean burgers, that vegetarians and meat lovers both will LOVE? Look no further – here it is!

I recently saw a recipe for the BEST black bean burgers ever on Pinterest. Being curious, I KNEW I just HAD TO TRY THEM!
So I pinned the recipe, made them, and the rest is history. Oh yeah… they truly just might be the BEST black bean burgers ever. Amen!
Scroll Down For A Printable Recipe Card At The Bottom Of The Page
What’s The Story Behind These Black Bean Burgers?
One of our grown sons is now a vegetarian. He used to be our STEAK eating guy… sigh. He is now a grown man who happens to be vegetarian.
What’s a meat-lovin’ mom supposed to do when he and his girlfriend (also a vegetarian) come over for a burger BBQ?
Well, up to this point, I would just buy those thin little veggie or vegetarian black bean burgers in the frozen section at the grocery store! That way I could offer them a vegetarian burger to eat, along with all of our traditional BBQ sides.
No longer! THIS will now be my new “go to” recipe for veggie burgers, because they’re delicious!
What Makes THESE Black Bean Burgers So “Special”?
These black bean burgers are special, I believe, in part due to one little bitty step that is taken before making the patties, that ensures the burgers will be firm and not MUSHY!
What is this little bitty step, you ask? Popping the rinsed beans into the oven for a few minutes, which helps to partially dry out the canned beans. Yep, you heard that right! Brilliant tip!
The Secret To Making Nice, Firm, Black Bean Burgers
Preheat your oven to 325° F. Rinse, and then drain two cans of black beans in a colander. Pour the drained beans onto a couple layers of paper towels, and pat them dry.
Spread the beans out onto a parchment paper-lined large baking sheet. Bake the beans for 15 minutes, which will help to slightly dry them out. Trust me on this – don’t skip this step! This one little step will help those burger patties to really hold firmly together, and not break down into MUSH!!
Once done, remove the beans from the oven, and set aside.

While the beans are baking, place olive oil, chopped bell peppers, onion, and minced garlic in a skillet. Cook this mixture on medium heat, stirring occasionally, for 5-6 minutes, until the veggies have softened.
Once cooked, pat the veggies gently with a paper towel, to help absorb a bit of their moisture.

Prepare The Patties For Black Bean Burgers
Place the cooked veggies into a large mixing bowl. Add the remaining ingredients, except for the black beans. Give this mixture a good stir to fully combine the ingredients.

Now add the baked black beans to the bowl. Use a potato masher or a fork to really “mash” this patty mixture together, making sure to leave some of the black beans intact.
NOTE: This step can also be done in a food processor. PULSE the ingredients, but do not fully blend.

Form The Patties
For each patty, use 1/3 cup of bean mixture. Scoop out 1/3 cup, then transfer to a parchment paper lined baking sheet.
This recipe makes 6 thick black bean burgers. After placing all 6 scoopfuls on the paper, flatten them down and round out, using your hands.

Cook The Black Bean Burgers
There are TWO ways to cook these burgers. 1) Bake at 375° F., and cook for 10 minutes on each side, OR 2) Lay the patties onto aluminum foil (on your BBQ grill), and grill each side for 8 minutes.
I chose to BAKE the black bean burgers. The photo below shows what the patties look like up close and personal before baking. You can see there are some whole black beans in each one.

After the black bean burgers have cooked for 10 minutes on each side, they are done! They hold together VERY well, and are nice and thick, firm burgers!

Black Bean Burgers Can Be Frozen, Too!
IMPORTANT NOTE: These burgers freeze well, too! Six burgers was way too many for just my hubby and I to eat, so I was able to freeze a few after cooking! You can also freeze the raw patties this way, also.
Once the burgers have cooled, stack the patties between sheets of parchment paper and place in freezer bags or freezer container. Perfect for future use (just thaw and reheat)!

All that is left to do… is EAT one of these delicious, thick, black bean burgers! The burgers were served on a toasted bun, with tomato slices, crisp lettuce, red onion slices and some homemade guacamole (as a condiment)!
That’s it! Oh my goodness, such great flavor… this burger was soooo good! The guacamole was a perfect substitute for mayo, mustard or ketchup…never even missed them!

Believe me when I tell you… these black bean burgers taste fantastic! Hope you will consider trying them, too! This is a perfect dish for “Meatless Mondays” or any other day, for that matter!
If you’re looking for another “healthy” delicious burger recipe, be sure to check out my Turkey, Feta and Spinach Burgers! Have a GREAT day!
Looking for More SANDWICH Recipes?
You can find all of my recipes in the Recipe Index, located at the top of the page. I have some delicious sandwich recipes, including:
- Portobello Bleu Cheese Burger
- Pork Tenderloin Sandwich with Mozzarella and Caramelized Onions
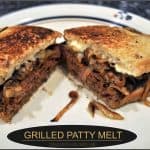
- Grilled Patty Melts
- Air Fryer Bacon Cheeseburgers
Interested In More Recipes?
Thank you for visiting this website. I appreciate you using some of your valuable time to do so. If you’re interested, I publish a newsletter 2 times per month (1st and 15th) with all the latest recipes, and other fun info. I would be honored to have you join our growing list of subscribers, so you never miss a great recipe!
There is a Newsletter subscription box on the top right side (or bottom) of each blog post, depending on the device you use, where you can easily submit your e-mail address (only) to be included in my mailing list.
You Can Also Find Me On Social Media:
Facebook page: The Grateful Girl Cooks!
Pinterest: The Grateful Girl Cooks!
Instagram: jbatthegratefulgirlcooks

Original Recipe Source: https://sallysbakingaddiction.com/best-black-bean-burgers/

- 28 ounces canned black beans (two 14 oz. cans) , drained/rinsed/patted dry
- 1 Tablespoon extra virgin olive oil
- 3/4 cup green bell pepper , finely chopped
- 1 cup yellow onion , finely chopped
- 1 Tablespoon minced garlic cloves (approx. 3 cloves)
- 1½ teaspoons ground cumin
- 1 teaspoon chili powder
- 1/2 teaspoon garlic powder
- 1/4 teaspoon smoked paprika
- 1/2 cup feta cheese , crumbled
- 1/2 cup bread crumbs
- 1 Tablespoon Worcestershire sauce
- 2 large eggs
- 2 Tablespoons ketchup or BBQ sauce
- 1 pinch (each) salt and pepper
Preheat oven to 325° F. Rinse, and drain black beans. Blot the beans dry on paper towels. Spread beans out onto parchment paper-lined large baking sheet. Bake the beans for 15 minutes, to slightly dry them out. Don't skip this step! Once done, remove beans from oven, and set aside. NOTE: If you will be baking the burger patties, turn oven up to 375° once you remove the beans from oven.
While beans bake, place olive oil, chopped bell peppers, onion, and minced garlic in a skillet. Cook on medium heat, stirring occasionally, for 5-6 minutes, until veggies have softened. Once cooked, pat the veggies gently with a paper towel, to absorb a bit of their moisture.
Place cooked veggies into a large mixing bowl. Add remaining ingredients, except for the black beans. Stir to combine. Add the black beans. Use a potato masher or fork to "mash" this together, making sure to leave some black beans intact. NOTE: This step can also be done in a food processor. PULSE the ingredients, but do not fully blend.
For each patty, use 1/3 cup of bean mixture. Scoop out 1/3 cup, then transfer to parchment paper lined baking sheet. After placing 6 scoopfuls on the paper, flatten them down and round out into thick patties, using your hands.
There are TWO ways to cook these burgers. 1) Bake at 375° F., and cook for 10 minutes on each side, OR 2) Place the patties onto aluminum foil (on your BBQ grill), and grill each side for 8 minutes. After the black bean burgers have baked for 10 minutes on each side (or grilled for 8 on each side), they are done! Prepare burgers with your favorite toppings. Enjoy!
NOTE: The caloric calculation is for one black bean burger patty only. Any additions (bun, condiments, etc.) will need to be calculated separately, as they will differ for each person.
Here’s one more to pin on your Pinterest boards!


 tastes amazing right off the smoker, OR as a tasty pulled pork sandwich, coated in BBQ sauce! / The Grateful Girl Cooks!")


 tastes amazing right off the smoker, OR as a tasty pulled pork sandwich, coated in BBQ sauce! / The Grateful Girl Cooks!")


