Month: May 2018

Cajun Tater Tots with Dipping Sauce

Spicy Cajun tater tots (fried OR baked), served with a seasoned Ranch/Sour Cream dipping sauce and BBQ sauce on the side, are the perfect appetizer to munch on at any dinner, get together or party!
Spicy Cajun tater tots (fried OR baked), served with a seasoned Ranch/Sour Cream dipping sauce and BBQ sauce, are the perfect appetizer to munch on at any dinner, get together or party!

My husband and I enjoy eating out at a Pacific Northwest well known restaurant called McMenamins. They have over 55 casual restaurant / brewhouses located in Oregon and Washington (including one about a mile from our home), and are a very popular hangout.

Our favorite appetizer to get (each time we go) is a basket of their Cajun Tater Tots! I love the dipping sauce they’re served with, and my husband loves his tots with BBQ sauce, so we each get our own little cup of sauce to dip the tots into! Perfect!

The deep fried tater tots, seasoned with Cajun-style spices are the perfect little treat to munch on while we wait for our order to be cooked! These little tots are so addictive… once you eat one, it is hard to stay out of them (trust me…I know what I’m talking about here)!

Scroll Down For A Printable Recipe Card At The Bottom Of The Page

Time To Try Making My Own Cajun Tater Tots!

I decided to try and make something similar at home, just for fun, and found a copycat recipe (for the tots only) online.  That particular recipe baked the tater tots, so I adapted the recipe a bit, changed the recipe from baking to deep frying, then created my own sauce, and made them!

The Cajun tater tots turned out really good!  NOTEI am posting pictures of the “deep fried” version, but am including directions for baking them, for your convenience, in the printable recipe below.

Okay… So How Do I Make Them?

The first thing you need to do is make the dipping sauce.  I made a sauce similar to what they serve at the restaurant. A small amount of Cajun spices are added to a simple mixture of Ranch dressing and sour cream.

Ingredients are mixed until smooth, covered, then refrigerated until ready to use. This cooling sauce is a great balance to the slightly spicy tots! It’s easy to make the sauce up early in the day for later use!

Dipping sauce for tater tots, in white bowl

After you’ve made the dipping sauce, it’s time to make the seasoning for the tots. This is done by simply mixing up the dry ingredients in a small bowl, then setting it aside.

Bowl of cajun spice ingredients for cooked tater tots

To Deep Fry Cajun Tater Tots:

Frozen tater tots are carefully deep fried in a basket in a pan half full of hot oil (375 degrees). They cook for 3-4 minutes until they become crispy and the color has changed to golden brown.

Tater tots deep frying in oil in large saucepan with fry basket

Once they are cooked to a golden brown color, the fryer basket and tots are removed from oil, drained slightly (over the pan), then tots are transferred to a large bowl.

Golden brown tater tots are removed from cooking oil

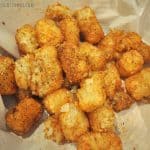
Sprinkle Cajun spice mixture is immediately over hot tater tots, then toss them until the tots are covered with seasoning. The spices will stick to the oil remaining on the drained tots. I serve them hot in a parchment paper lined basket.

Cajun tater tots, served in basket

Serve The Cajun Tater Tots

Serve the hot spiced tater tots with two bowls of dipping sauces. Sauces are the perfect way to enjoy your tots! Dip away! Pictured on the left is the Ranch/Sour cream dipping sauce, and the dish on the right contains bottled BBQ sauce (my hubby’s preferred sauce, straight out of the bottle).

Dipping sauces, served to accompany Cajun tater tots

That’s it! It’s not too hard to make these delicious Cajun tots at home, if you can’t get to a McMenamins to taste the original! They are so good!

You can find ALL of my recipes in the Recipe Index, located at the top of the page. If you’re looking for more appetizers like this one, you might also enjoy Crunchy Homemade Onion Rings , Baked Parmesan Zucchini Fries or Crispy Homemade French Fries.  Each of them is a wonderful, yummy appetizer or side dish!

Interested In More Recipes?

Thank you for visiting this website. I appreciate you using some of your valuable time to do soIf you’re interested, I publish a newsletter 2 times per month (1st and 15th) with all the latest recipes, and other fun info. I would be honored to have you join our growing list of subscribers, so you never miss a great recipe!
There is a Newsletter subscription box on the top right side (or bottom) of each blog post, depending on the device you use, where you can easily submit your e-mail address (only) to be included in my mailing list.

You Can Also Find Me On Social Media:

Facebook page: The Grateful Girl Cooks!
Pinterest:
The Grateful Girl Cooks!
Instagram:
jbatthegratefulgirlcooks

Author's signature

Tot recipe adapted from Sandy, at: http://www.everydaysouthwest.com/recipes/cajun-spiced-tater-tots/

0 from 0 votes
Cajun Tater Tots with Dipping Sauce
Prep Time
10 mins
Cook Time
4 mins
Total Time
14 mins
 
Spicy Cajun tater tots (fried OR baked), served with a seasoned Ranch/Sour Cream dipping sauce and BBQ sauce, are the perfect appetizer to munch on at any dinner, get together or party!
Category: Appetizer
Cuisine: Cajun
Keyword: Cajun tater tots
Servings: 4 servings
Calories Per Serving: 342 kcal
Author: JB @ The Grateful Girl Cooks!
Ingredients
For Tots:
  • 2 teaspoons Cajun seasoning
  • 1/2 teaspoon ground black pepper
  • 1/8 teaspoon cayenne pepper , or more if you like 'em spicy!
  • 1/2 teaspoon dried rosemary
  • 1/4 teaspoon salt , + more to season at finish
  • 1/2 teaspoon garlic powder
  • 1/4 teaspoon onion powder
  • 16 ounces Ore Ida Tater Tots
  • Enough oil to deep fry tater tots (Fill pan HALF full only)
For Dipping Sauces:
  • 1/3 cup bottled Ranch Dressing
  • 2 Tablespoons sour cream
  • 1/8 teaspoon (EACH) Cajun seasoning, cayenne, dried rosemary, salt, garlic and onion powder
  • 1/2 cup bottled BBQ sauce
Instructions
  1. Make dipping sauce by mixing Ranch dressing with sour cream, Cajun seasoning, cayenne pepper, rosemary, salt, garlic powder and onion powder. Stir until fully combined. Cover, then refrigerate until ready to use. 

  2. Make the seasoning for the Cajun tater tots, by simply mixing up the dry ingredients in a small bowl, and set aside.
OPTION #1 - Deep Fried (this is the method I used):
  1. Fill a cooking pot half full of vegetable oil (no more than half full!).  Preheat oil to 375° F. (uncovered). Carefully add frozen tater tots to fryer basket (only fill basket HALF full), and lower into hot oil. IMPORTANT: Be very careful-ice crystals on the frozen tots may splatter when they hit the hot oil.  If this happens, immediately put a lid on pan and reduce heat till splattering stops, then uncover and return oil to cooking temp.  Cook tater tots for 3-4 minutes at temperature, until they turn golden brown. Turn off heat, and carefully lift fryer basket out of oil, letting oil drain out of basket back into the pot.  Once fairly well drained, pour 1/2 of hot tots into a medium mixing bowl.  Immediately sprinkle with 1/2 of the Cajun seasoning mixture and lightly mix or toss to season. Repeat with other half until all tots are seasoned.  Lightly season with additional salt (to taste), if desired, and serve while hot.

OPTION #2 - Baked
  1. Preheat your oven to 425° F.  Melt 3 Tablespoons butter with 1 Tablespoon vegetable oil.  Combine the Cajun season mixture with the butter/oil mixture. Stir until combined.  Pour 1/2 of the sauce into medium mixing bowl; swirl it around to coat sides of bowl. Add 1/2 of the tots. Place plastic wrap over the bowl, seal tightly, then toss the tater tots carefully (keeping bowl tightly sealed) until they are fairly well covered by the spice/butter mixture.  Transfer the seasoned tots onto a 13x9 inch rimmed baking sheet, in a single layer. Repeat process until all tots are coated.  Bake tots at 425° F. for 20-25 minutes, or until crispy and light golden brown. (Note: If doubling recipe, baking time will increase to between 25 and 35 minutes). When done, remove from oven. Lightly season with additional salt (to taste), if desired,  and serve while hot.

  2. To Serve: Place hot, seasoned tots in a parchment paper lined basket or bowl and serve, with little cups of dipping sauce(s) on the side. Enjoy!

Recipe Notes

Note: IF baking (Option #2), you will also need 3 Tablespoons butter, and 1 Tablespoon vegetable oil added to ingredient list.

Nutrition Facts
Cajun Tater Tots with Dipping Sauce
Amount Per Serving (1 serving + Ranch dipping sauce (1/4 of total))
Calories 342 Calories from Fat 216
% Daily Value*
Fat 24g37%
Saturated Fat 4g25%
Cholesterol 8mg3%
Sodium 854mg37%
Potassium 348mg10%
Carbohydrates 31g10%
Fiber 2g8%
Protein 2g4%
Vitamin A 540IU11%
Vitamin C 9.2mg11%
Calcium 29mg3%
Iron 0.9mg5%
* Percent Daily Values are based on a 2000 calorie diet.

Here’s one more to pin on your Pinterest boards!Spicy Cajun tater tots (fried OR baked), served with a seasoned Ranch/Sour Cream dipping sauce and BBQ sauce, are the perfect appetizer to munch on at any dinner, get together or party!

How To Make Bread Crumbs

Did you know it is super easy to make your own bread crumbs?  Yep… that’s right!  All that is needed is some stale bread and a food processor or blender, to save you money and another trip to the grocery store.It's super easy to make your own bread crumbs with some stale bread and a food processor or blender, to save you another trip to the grocery store.

I used to BUY bread crumbs at the grocery store, but a few years ago I started making my own.  It’s so easy to used leftover stale french bread to easily make them at home! Why pay for it, if you can make the same amount with pieces of stale bread in the pantry? 

My husband LOVES french bread (my preferred bread type for making bread crumbs). He often picks up a fresh warm loaf at the grocery store. Since there are only 2 of us in our home, parts of the loaf we don’t eat tend to go stale after a couple days.  Normally people waste stale bread by just throwing it in the garbage, but now you can put it to good use!

To make that old stale bread “go the distance”, why not turn it into something you can use in other recipes?  I add these homemade crumbs to my Really Good Meatloaf, and they’re perfect to stretch out the filling in meatballs, too.  This ends up being a very frugal way to use up inedible stale bread, without wasting it or dumping any of it in the trash.

Scroll Down For A Printable Recipe Card At The Bottom Of The Page

How To Make Bread Crumbs (Options)

OPTION 1: Slice any stale bread you have.  Even if it’s already stale, I leave it out, uncovered on the counter for a couple days, until it is CRISPY stale, very hard and dried out! Another way to do this is to leave the bread in the fridge on a plate or tray, exposed to the air for a day or two. This will remove any moisture left in the bread (and the bread will not grow mold).

4 slices of French bread drying on paper towel

The next thing to do is break or cut the bread up into smaller sized pieces. Place them, several pieces at a time, into a food processor with the blade attachment on. Continue to pulse and process bread chunks until they have broken down into fine crumbs.

Hard, stale bread is placed into food processor to make crumbs

OPTION 2: If you happen to be in a real hurry, and need those bread crumbs STAT use this option. Cut the bread into cubes, spread them onto a cookie sheet, and bake at 350 degrees for about 10 minutes.  You will need to check them and turn them to prevent burning, but this is a solution that might work for you.  Once you are done toasting them until crispy, process them as mentioned above.

How Do I Store Homemade Bread Crumbs?

Once the bread has been reduced to tiny crumbs, pour it into airtight, sealable jars (I like to use canning jars). If desired, use a funnel to fill the jar. You can use a long skinny skewer to clear any clogs in the funnel. Store the bread crumbs in an airtight container in the pantry.

Funnel is used to transfer bread crumbs into jar

See how many bread crumbs I got out of half a loaf of old, stale bread?  This is the perfect size bread crumbs to use if adding to meatballs or meatloaf, etc. A half loaf of French bread will typically yield about 2 cups of crumbs. See? You just learned how to make bread crumbs, very easily.

Canning jar, full of finely ground bread crumbs

Sometimes I leave the bread crumbs a bit larger, as you can see in the jar on the left below. These can be used this to make homemade stuffing, etc.). It’s really up to you how finely you process the bread.  The finely processed crumbs in the jar on the right are typically the size you would find in a grocery store, and is my “normal” size.

What If I Need ITALIAN Bread Crumbs?

By the way, if you need Italian bread crumbs for a recipe, no problem! Once you’ve learned how to make bread crumbs, it’s easy to add a few spices to transform them.

To make Italian flavored crumbs, simply add salt, black pepper, dried parsley, oregano, basil, onion powder and garlic powder. Mix together until the spices are fully combined with the bread crumbs! Exact measurements can be found in the printable recipe below.

2 canning jars, full of homemade bread crumbs

It’s so easy to make this staple pantry ingredient. There’s really no need to spend any extra money buying it!  You can also keep stale pieces of bread in a freezer bag in the freezer until you have time to make bread crumbs! 

Looking For More Simple TIPS?

You can find all my recipes and tips in the Recipe Index, located at the top of the page. I have quite a few you might find helpful, including:

Interested In More Recipes?

Thank you for visiting this website. I appreciate you using some of your valuable time to do soIf you’re interested, I publish a newsletter 2 times per month (1st and 15th) with all the latest recipes, and other fun info. I would be honored to have you join our growing list of subscribers, so you never miss a great recipe!
There is a Newsletter subscription box on the top right side (or bottom) of each blog post, depending on the device you use, where you can easily submit your e-mail address (only) to be included in my mailing list.

You Can Also Find Me On Social Media:

Facebook page: The Grateful Girl Cooks!
Pinterest:
The Grateful Girl Cooks!
Instagram:
jbatthegratefulgirlcooks

Have a wonderful day!

Author's signature

0 from 0 votes
How To Make Bread Crumbs
Prep Time
10 mins
Cook Time
0 mins
Total Time
10 mins
 

It's super easy to make your own bread crumbs with some stale bread and a food processor or blender, to save you another trip to the grocery store.

Category: Condiments
Cuisine: American
Keyword: make bread crumbs
Servings: 2 cups (approx.)
Calories Per Serving: 289 kcal
Author: JB @ The Grateful Girl Cooks!
Ingredients
  • 1/2 loaf STALE french bread , sliced
For ITALIAN Bread Crumbs (optional), Add these ingredients (for every CUP of bread crumbs)
  • 1/4 teaspoon salt
  • 1/2 teaspoon garlic powder
  • 1/4 teaspoon dried oregano
  • 1/4 teaspoon ground black pepper
  • 1/2 teaspoon parsley (dried)
  • 1/4 teaspoon basil (dried)
  • 1/4 teaspoon onion powder
Instructions
  1. Slice up any stale bread you have.  Even if it's already a bit stale, simply leave it out, uncovered on the counter for a couple days, until it is CRISPY stale and very hard and dried out!

  2. Break or cut the bread up into smaller sized pieces, and toss them, several pieces at a time, into a food processor (or heay duty blender) with the blade attachment on. Continue to pulse and process bread chunks until they have broken down into fine crumbs.

  3. Once the bread has been reduced to tiny crumbs, transfer mixture into a jar (or container) with a lid, and store until ready to use.

  4. NOTE: I you wish to make ITALIAN bread crumbs, add the spices to the processed bread crumbs and mix well to fully combine ingredients. Transfer mixture into a jar (or container) with a lid, and store until ready to use.

Nutrition Facts
How To Make Bread Crumbs
Amount Per Serving (1 cup)
Calories 289 Calories from Fat 18
% Daily Value*
Fat 2g3%
Saturated Fat 1g6%
Sodium 513mg22%
Potassium 128mg4%
Carbohydrates 56g19%
Fiber 2g8%
Sugar 3g3%
Protein 12g24%
Calcium 44mg4%
Iron 3.6mg20%
* Percent Daily Values are based on a 2000 calorie diet.

Here’s one more to pin on your Pinterest boards!It's super easy to make your own bread crumbs with some stale bread and a food processor or blender, to save you another trip to the grocery store.

Easy Chile Relleno Casserole

This easy chile relleno casserole (vegetarian) has all the wonderful Southwest flavors of the traditional dish, but is baked not fried, and it’s DELICIOUS!
This scrumptious chile relleno casserole is easy to make, is vegetarian, and has all the Southwest flavors of the traditional dish, but is baked, not fried!

I received this wonderful, meatless chile relleno casserole recipe over 20 years ago from my friend Lanita, who I sang with in a church choir.  She’s an amazing, strong woman, and I love her dearly! I’ve made her recipe for this dish several times over the years, but hadn’t made in quite a while.

So, I decided to make it once again, tweaked her original recipe ever so slightly, made it, devoured it, and am sharing how you can make it, too! Now I’ve made it countless times, and we love it!

Scroll Down For A Printable Recipe Card At the Bottom Of The Page

The Origins of Chile Rellenos

Did you know that the words “chile relleno” actually mean “stuffed chile” in Spanish?  This popular dish had its origins in Puebla, Mexico, and showed up in recipe form over 150 years ago.  If you enjoy Tex-Mex food or enjoy eating chile rellenos at your favorite Mexican food spot, I’m confident you will enjoy this twist on the original in this delicious layered casserole.

This easy to prepare dish has lots of mild flavor from whole green chiles and gooey melted cheese, and all the taste commonly found in the original dish, but guess what? It is BAKED, not FRIED, so there’s much less prep work (and calories), and it’s in casserole form! Did I mention how simple it is to prepare?

So How Do I Make This Casserole?

Start by spraying a 9×9 inch baking dish (bottom and sides) with non-stick spray. Slice whole canned green chiles open; rinse out any seeds, then drain. Using HALF of the chiles, place a first layer of chiles (spread open) on the bottom of an 9×9 inch baking dish.

Slicing and cleaning whole green chiles for casserole

Whole green chiles on bottom of glass baking dish

Sprinkle the chiles with HALF of the grated jack and cheddar cheeses, then add another layer of the remaining green chiles on top of the cheese.

Layers of green chiles and grated cheese for relleno casserole

Top with the remaining jack and cheddar cheeses.

Grated jack and cheddar cheese on top of green chiles in glass baking dish

In a small bowl, whisk together eggs, flour, milk and salt until fully blended.  Pour this mixture over the casserole, distributing evenly.

Mixing flour, milk and salt for casserole

Pouring milk/flour mixture over chile relleno casserole before baking

Time To Bake The Easy Chili Relleno Casserole

This is what the casserole looks like when it is ready to bake.  Bake the casserole at 350 degrees for 30-35 minutes (uncovered), until it’s golden brown on top. I baked mine for a total of 35 minutes.

Casserole with green chiles and cheese is ready to go into oven

When done, the casserole should be golden brown in color on top.  Remove dish from oven and transfer to a wire rack. Let it cool and firm up for a few minutes, then slice the casserole with a sharp knife into 6 equal sized pieces, serve and enjoy!  See how simple it is to prepare?

Easy chile relleno casserole, hot out of the oven!

I took a photo after dinner so you could see what the INSIDE of the casserole looks like (after hungry humans had their fill).  See those chiles peeking out from under the cheese? Ooh- I’m telling you, this is one great tasting MEATLESS casserole! Truth is… it’s not only good for lunch or dinner… it’s even good for breakfast… yep!

A close up look at the inside of chili relleno casserole after baking

I hope you enjoy this recipe.  I have a similar recipe for a layered casserole on this blog that uses tortillas, green chiles and chicken, if you are interested in looking at that one. It’s called Layered Chicken Enchilada Casserole, and it also tastes fantastic.

Looking For More Southwestern-Style Recipes?

You can find ALL of my recipes in the Recipe Index, which is located at the top of the page. I have some delicious Southwest/Mexican-style recipes you might enjoy, including:

Interested In More Recipes?

Thank you for visiting this website. I appreciate you using some of your valuable time to do soIf you’re interested, I publish a newsletter 2 times per month (1st and 15th) with all the latest recipes, and other fun info. I would be honored to have you join our growing list of subscribers, so you never miss a great recipe! 

There is a Newsletter subscription box on the top right side (or bottom) of each blog post, depending on the device you use, where you can easily submit your e-mail address (only) to be included in my mailing list.

You Can Also Find Me On Social Media:

Facebook page: The Grateful Girl Cooks!
Pinterest:
The Grateful Girl Cooks!
Instagram:
jbatthegratefulgirlcooks

Hope to have you visit again soon. Have a GREAT day!

Author's signature

Recipe Adapted From: My sweet friend, Lanita Moen

0 from 0 votes
Easy Chile Relleno Casserole
Prep Time
10 mins
Cook Time
35 mins
Total Time
45 mins
 

This scrumptious chile relleno casserole is easy to make, is vegetarian, and has all the Southwest flavors of the traditional dish, but it is is baked, not fried!

Category: Dinner
Cuisine: Mexican, Southwestern
Keyword: chile, relleno
Servings: 6 servings
Calories Per Serving: 385 kcal
Author: JB @ The Grateful Girl Cooks!
Ingredients
  • 14 ounces whole green chiles , canned (2 -7 ounce cans)
  • 3/4 pound jack cheese , grated
  • 1 cup cheddar cheese , grated
  • 2 eggs
  • 1/2 cup all purpose flour
  • cups milk
  • 1 teaspoon salt
  • 1/2 teaspoon black pepper
Instructions
  1. Spray a 9x9 inch baking dish with non-stick spray. Slice whole canned green chiles wide open; rinse out any seeds, then drain. Arrange half of the chiles  in the bottom of the dish.

  2. Sprinkle chiles with HALF of the grated jack and cheddar cheeses.  Add remaining green chiles in another layer on top of the cheese. Top with remaining jack and cheddar cheeses.

  3. In a small bowl, whisk together eggs, flour, milk and salt until fully blended.  Pour this mixture over the casserole, distributing evenly.
  4. Bake casserole (uncovered) at 350 degrees for 30-35 minutes, until golden brown on top.  Remove dish from oven and transfer to a wire rack.  Let it cool and firm up for a few minutes, then slice casserole with sharp knife into 6 equal sized pieces, serve (a spatula works great) and enjoy!

Nutrition Facts
Easy Chile Relleno Casserole
Amount Per Serving (1 serving)
Calories 385 Calories from Fat 225
% Daily Value*
Fat 25g38%
Saturated Fat 15g94%
Cholesterol 127mg42%
Sodium 1118mg49%
Potassium 259mg7%
Carbohydrates 14g5%
Fiber 1g4%
Sugar 3g3%
Protein 23g46%
Vitamin A 905IU18%
Vitamin C 22.6mg27%
Calcium 665mg67%
Iron 2.2mg12%
* Percent Daily Values are based on a 2000 calorie diet.

Here’s one more to pin on your Pinterest boards!

This scrumptious chile relleno casserole is easy to make, is vegetarian, and has all the Southwest flavors of the traditional dish, but is baked, not fried!

Chocolate Peanut Butter Frosted Krispy Bars

The traditional snack or dessert treat of families everywhere gets an update in this delicious recipe for Chocolate Peanut Butter Krispy Bars!The traditional snack or dessert treat of families everywhere gets an update in this delicious recipe for Chocolate Peanut Butter Krispy Bars!

I made these dessert snack bars about a month ago, while trying to think of a way to make Krispy treats with a twist.  I slightly tweaked a recipe for the bars I found on a box of puffed rice cereal (a generic brand), then came up with a simple, quick and easy chocolate peanut butter topping for the bars, that would add another layer of flavor!

They turned out GREAT!  The addition of chocolate and peanut butter… really yummy! One of my favorite flavor combinations!!!  Even my hubby (who doesn’t typically like plain rice “krispy” treats) kept getting into these treats, once made!  They are really very simple to prepare… here’s how!

Scroll Down for A Printable Recipe Card At The Top Of the Page

How To Make Chocolate Peanut Butter Krispy Bars

Butter bottom and sides of a 9×13 rimmed pan, then set aside.  Measure and pour krispy cereal into large mixing bowl; set aside. Place butter, peanut butter, vanilla and marshmallows in a large saucepan. Cook on low until these ingredients have completely melted, stirring often to prevent sticking (sorry, no picture).

Once completely blended and smooth, remove from stove and pour immediately over krispy cereal. Stir very well, to fully coat cereal with marshmallow mixture.  Pour the mixture into the buttered 9×13 inch rimmed pan. Press down on the mixture with your fingers, spreading it out to cover the entire pan. Press hard to compress the layer. Let cool.

Krispy bars pressed into pan, ready for chocolate peanut butter frosting

While krispy bars are cooling, prepare the frosting. In a medium saucepan, melt together butter, peanut butter, and cocoa powder until completely smooth.

Remove the pan from the heat. Stir in vanilla extract, then add powdered sugar and enough milk (approx 2-3 Tablespoons plus) to make the frosting easily spreadable.

Chocolate peanut butter frosting cooking in saucepan

Pour the frosting over the surface of the krispy bars, then quickly spread to fully cover the entire top.

Chocolate peanut butter frosting poured over krispy treats

Ready To Cut Into Bars

This is how it looks once all the frosting is evenly spread over top surface. This will cover it all with a thin layer of frosting. NOTE: If you want a THICKER layer of frosting, simple double the ingredients! Use a knife to cut into 24 bars. Once cut, let the frosted bars sit for a while to let the frosting firm up a bit.

Chocolate frosted krispy bars in long metal pan

Krispy bars cut into 24 servings

Now We’re Ready To EAT!

All that’s left to do is grab one… and take a big bite! Want one? There’s plenty for everyone, and I enjoy sharing.

Holding krispy bar above platter of goodies

The bars are chewy, and have a wonderful chocolate peanut butter flavor… a perfect after school treat or after dinner dessert bar! Try not to eat them all at one time!

Platter of chocolate peanut butter krispy treats, on blue cloth

Hope you enjoy these simple, delicious treats!  Have a GREAT day… and thank God for each and every breath you have been given – it truly is a gift!

Looking For More BAR COOKIE Recipes?

You can find all of my recipes in the Recipe Index, located at the top of the page. I have quite a few ba cookie recipes, including:

Interested In More Recipes?

Thank you for visiting this website. I appreciate you using some of your valuable time to do soIf you’re interested, I publish a newsletter 2 times per month (1st and 15th) with all the latest recipes, and other fun info. I would be honored to have you join our growing list of subscribers, so you never miss a great recipe!
There is a Newsletter subscription box on the top right side (or bottom) of each blog post, depending on the device you use, where you can easily submit your e-mail address (only) to be included in my mailing list.

You Can Also Find Me On Social Media:

Facebook page: The Grateful Girl Cooks!
Pinterest:
The Grateful Girl Cooks!
Instagram:
jbatthegratefulgirlcooks

Author's signature

Recipe for bars (only) adapted from box of Kroger Crispy Rice Cereal

0 from 0 votes
Chocolate Peanut Butter Krispy Bars
Prep Time
10 mins
Cook Time
5 mins
Total Time
15 mins
 
The traditional snack or dessert treat of families everywhere gets an update in this delicious recipe for Chocolate Peanut Butter Krispy Bars!
Category: Dessert, Snack
Cuisine: American
Keyword: krispy bars
Servings: 24 bars
Calories Per Serving: 110 kcal
Author: JB @ The Grateful Girl Cooks!
Ingredients
For Krispy Bars
  • cups puffed rice cereal (like Rice Krispies)
  • 1/4 cup butter
  • 4 cups miniature marshmallows
  • 1 Tablespoon (heaping) peanut butter
  • 1 teaspoon vanilla extract
For Chocolate Peanut Butter Frosting
  • 2 Tablespoons butter
  • Tablespoons (heaping) unsweetened cocoa powder
  • 1 Tablespoon (heaping) peanut butter
  • 1/4 teaspoon vanilla extract
  • 1 cup powdered sugar
  • 2-3 (or more) Tablespoons milk (enough to make frosting spreadable)
Instructions
To Make Krispy Bars:
  1. Butter bottom and sides of a 9x13 rimmed pan; set aside.  Measure krispy cereal into large mixing bowl; set aside. Place butter, peanut butter, vanilla and marshmallows in a large saucepan. Cook on low until they have completely melted, stirring often to prevent sticking. Once completely blended/smooth, remove from stove; pour immediately over krispy cereal. Stir well, to fully coat cereal.  Pour mixture into buttered 9x13 pan.  Press mixture down with fingers to compress; spread to cover entire pan.  Let cool.

To Make Frosting:
  1. In a medium saucepan, melt butter, peanut butter, and cocoa powder until completely smooth, stirring often until smooth.  Remove from heat. Stir in vanilla extract, then add powdered sugar and enough milk (approx 2-3 Tablespoons +) to make the frosting easily spreadable. Pour frosting over surface of krispy bars, then quickly spread, to fully cover.

  2. Let frosted bars sit for a while to let frosting firm up slightly, then use a knife to cut into 24 equal sized bars. When ready, serve and ENJOY!

Nutrition Facts
Chocolate Peanut Butter Krispy Bars
Amount Per Serving (1 bar)
Calories 110 Calories from Fat 27
% Daily Value*
Fat 3g5%
Saturated Fat 2g13%
Cholesterol 7mg2%
Sodium 77mg3%
Potassium 31mg1%
Carbohydrates 19g6%
Sugar 10g11%
Protein 1g2%
Vitamin A 595IU12%
Vitamin C 4.8mg6%
Calcium 2mg0%
Iron 2.5mg14%
* Percent Daily Values are based on a 2000 calorie diet.

Here’s one more to pin on your Pinterest boards!The traditional snack or dessert treat of families everywhere gets an update in this delicious recipe for Chocolate Peanut Butter Krispy Bars!

Easy Stuffed Beef Rolls

You’ll love these Easy Stuffed Beef Rolls, featuring ground beef with a savory bread crumb, onion and spice stuffing inside, and baked with brown gravy on top!You'll love these Easy Stuffed Beef Rolls, featuring ground beef with a savory bread crumb, onion and spice stuffing inside, and baked with brown gravy on top!

I recently found an old recipe in my old, “practically ancient” recipe box.  This recipe for easy stuffed beef rolls is at least 15-20 years old (probably more than that!).

I used to write recipes down on 3×5 cards (back in the day before computers… ha ha), and came upon this one a couple weeks ago.

Not sure what the original source was (back then I was too ignorant to write it down), but I knew I wanted to modify the recipe slightly and try it.

I made the stuffed beef rolls for my husband and I, and then saved the leftovers for another meal (recipe makes 6!).  The recipe is VERY easy to make, and the results are very good!

Easy stuffed beef rolls are also quite economical to make (especially when it makes 6 servings), so it’s a “good on the ol’ family budget” recipe, as well! Hope you will consider making them for an easy dinner for family or friends.

Scroll Down For A Printable Recipe Card At The Bottom Of The Page

Here’s How To Make Stuffed Beef Rolls

Mix ground beef, slightly beaten eggs, Worcestershire sauce, salt, pepper and garlic powder together in a large bowl until fully combined. Set aside.

Ground beef, eggs and spices in bowl before mixing

Combine the ingredients for stuffing in a small bowl (bread crumbs, onion, sage, pepper, marjoram and chicken broth). Set aside.

Bread crumb, onions and spices for beef roll stuffing, in bowl

Form The Meat Patties

Divide the meat evenly into 6 portions. Place on wax paper, leaving space between each ball of meat.  Lay a piece of wax paper on top of the meat (enough to cover).

Use your hands to flatten out each piece of meat, shaping it into a 4 inch square.

Beef divided into 6 four inch squares

Add The Stuffing And Roll The Patties Up

Place 2 Tablespoons of stuffing mixture onto each meat square. Use your fingers to “spread”  the mixture out to within 1/2″ of each edge. Carefully roll up each square, one at a time, tucking filling in as you go.

If the stuffing falls out, just put it right back in, continuing until all 6 beef rolls are done. Make sure you seal up or tuck in the seam and ends of each roll to hold stuffing in while it bakes.

Bake The Stuffed Beef Rolls

Spray a 13×9 inch baking dish with non-stick spray.  Place beef rolls, SEAM SIDE DOWN onto baking pan, leaving space between each roll. Bake in a preheated 375° oven (uncovered) for 20 minutes.

Stuffing is added to beef, then rolled up to seal it in

Make The Gravy

While the stuffed beef rolls are baking, make the gravy by combining an envelope of brown gravy mix with a cup of water. Bring the gravy mixture to a full boil, then reduce heat and simmer for one minute.

Brown gravy is cooked, to add to stuffed beef rolls

After the beef rolls have baked for 20 minutes, remove pan from oven.  Spoon the gravy over the top and sides of the meat. Place the pan back into the oven and continue cooking for an additional 25 minutes (uncovered).

Partially baked beef rolls are covered with gravy then baked again

When the stuffed beef rolls are done, carefully remove hot pan from oven.

Stuffed beef rolls with gravy, hot out of oven

Serve the Stuffed Beef Rolls!

Using a spatula, transfer a beef roll to individual serving plates.  If desired, you can always have more gravy on hand (by making a second batch) to spoon over meat and/or potatoes (if serving), but it is not necessary!

Easy Stuffed Beef Roll on plate, served with mashed potatoes and peas

You can see some of the filling inside this stuffed beef roll that has been cut in half.

One of the stuffed beef rolls, cut in half to show inside.

This recipe is so simple… and yet it is delicious!  It’s a nice, easy way to present/serve individual beef portions to your family or guests.  If you enjoy this type of “old-school” dinner, you will enjoy this, and you might also love my recipe for Beef Tips And Gravy, or Really Good Meatloaf! YUM.

Have a great day, and remember, as always, to be KIND to those you cross paths with today. You just never know what pain or hurt someone may be going through, and all it takes is a simple kindness extended, to possibly ease the burden a little for them.

Looking For More BEEF Recipes?

You can find all of my recipes in the Recipe Index, located at the top of the page. I have some delicious recipes featuring ground beef you might enjoy, including:

Want More Recipes? Get My FREE Newsletter!

I publish a newsletter 2 times per month (1st and 15th) with lots of recipes, tips, etc..
Would you like to join our growing list of subscribers?

There is a Newsletter subscription box on the top right (or bottom) of each blog post, depending on the device you use.
You can submit your e-mail address there, to be added to my mailing list.

Find Me On Social Media:

Facebook page: The Grateful Girl Cooks!
Pinterest:
The Grateful Girl Cooks!
Instagram:
jbatthegratefulgirlcooks

Author's signature

Original recipe source: Unknown

↓↓ PRINTABLE RECIPE BELOW ↓↓

5 from 1 vote
Easy Stuffed Beef Rolls
Prep Time
10 mins
Cook Time
45 mins
Total Time
55 mins
 
You'll love these Easy Stuffed Beef Rolls, featuring ground beef with a savory bread crumb, onion and spice stuffing inside, and baked with brown gravy on top!
Category: Dinner
Cuisine: American
Keyword: stuffed beef rolls
Servings: 6 servings
Calories Per Serving: 350 kcal
Author: JB @ The Grateful Girl Cooks!
Ingredients
  • pounds ground beef
  • 2 eggs , slightly beaten
  • 1 Tablespoon Worcestershire sauce
  • 1/2 teaspon salt
  • 1/4 teaspoon black pepper
  • 1/4 teaspoon garlic powder
For Stuffing:
  • 1/2 cup dry bread crumbs
  • 2 Tablespoons onion , finely chopped
  • 1/4 teaspoon sage
  • 1/4 teaspoon marjoram , optional
  • 1/8 teaspoon black pepper
  • 1/3 cup chicken broth
For Gravy:
  • 1 envelope brown gravy mix
  • 1 cup water
Instructions
  1. Mix ground beef, slightly beaten eggs, Worchestershire sauce, salt, pepper and garlic powder together in a large bowl until fully combined. Set aside.

  2. Mix ingredients for stuffing in a small bowl (bread crumbs, onion, sage, pepper, and chicken broth). Set aside.
  3. Divide the meat evenly into 6 portions. Place on wax paper, leaving space between each ball of meat.  Lay a piece of wax paper on top of the meat (enough to cover). Use your hands to flatten out each piece of meat, shaping it into a 4 inch square. Place 2 Tablespoons of stuffing mixture onto each meat square. Use your fingers to "spread"  the mixture out to within 1/2" of each edge. Carefully roll up each square, one at a time, tucking filling in as you go (if stuffing falls out, just put it right back in), continuing until all 6 beef rolls are done. Make sure you seal up or tuck in the seam and ends of each roll to hold stuffing in while it bakes.

  4. Spray a 13x9 inch baking dish with non-stick spray. Place beef rolls, SEAM SIDE DOWN onto baking pan, leaving space between each roll. Bake in a preheated 375° oven (uncovered) for 20 minutes.
  5. While beef rolls are baking, make the gravy by combining an envelope of brown gravy mix with a cup of water. Bring the gravy mixture to a full boil, then reduce heat and simmer for one minute. After the beef rolls have baked for 20 minutes, remove pan from oven.  Spoon the gravy over the top and sides of the meat. Place the pan back into the oven and continue cooking for an additional 25 minutes (uncovered). When the stuffed beef rolls are done, carefully remove hot pan from oven. Using a spatula, transfer beef rolls to individual serving plates or a serving platter. Serve and enjoy!

Recipe Notes

*If you want additional gravy to pour over the FINISHED beef rolls (or to use on mashed potatoes, simply DOUBLE the amount of gravy you make, use half to bake beef rolls and the other half to spoon over finished beef rolls (or potatoes on the side)!

Nutrition Facts
Easy Stuffed Beef Rolls
Amount Per Serving (1 beef roll)
Calories 350 Calories from Fat 216
% Daily Value*
Fat 24g37%
Saturated Fat 9g56%
Cholesterol 135mg45%
Sodium 295mg13%
Potassium 356mg10%
Carbohydrates 7g2%
Protein 22g44%
Vitamin A 80IU2%
Vitamin C 1.2mg1%
Calcium 45mg5%
Iron 2.9mg16%
* Percent Daily Values are based on a 2000 calorie diet.

Here’s one more to pin on your Pinterest boards!You'll love these Easy Stuffed Beef Rolls, featuring ground beef with a savory bread crumb, onion and spice stuffing inside, and baked with brown gravy on top!


Apple Raisin Muffins

These moist and delicious apple raisin muffins, full of fresh apples, raisins, cinnamon and pecans, are an easy to make treat for breakfast or brunch!
The recipe makes 18 incredible tasting muffins that you and your family will LOVE!

The recipe makes 18 incredible tasting muffins that you and your family will LOVE! We first tried these delicious apple raisin muffins many years ago, and I recently re-discovered the old battered 3×5 index card with the handwritten recipe, in my old recipe box.

I did not write on the index card where I got the recipe from, so I truly have NO CLUE what the original source was… but I DID write GREAT!!! on the recipe card the very first time I made them, so I could remember how GOOD they were. They really DO taste GREAT, and are also very easy to make!

The recipe is very easy to follow, and seriously, the only “slightly time consuming” thing about is chopping up the apples.  No biggie.

Everything else is really just adding ingredients, stirring, and baking! Oh yeah… and EATING (they are ridiculously delicious)! Here’s how to make a dozen and a half of these fabulous breakfast or brunch treats!

Scroll Down For A Printable Recipe Card At The Bottom Of The Page

How To Make These Apple Raisin Muffins

Start by preheating your oven to 325° F.  The next thing is dicing the apples into small chunks.  You will need a total of 4 cups diced apples.

I used 3 Granny Smith apples and 1 Gala apple (but 4 cups of any firm apple will do just fine!).  Make sure to leave the peel ON the apples!

Apples diced into small pieces for muffins

Place the diced apples in a large mixing bowl.  Add granulated sugar, and stir to combine. Mix slightly beaten eggs, oil and vanilla extract in separate bowl; add to apples, and stir.

Diced apples for muffins are coated with sugar in bowl

Egg, oil and vanilla added to apple muffin mixture in bowl

In a separate bowl, combine flour, baking soda, cinnamon and salt.  Add this dry mixture to the apple mixture; stir well, to combine ingredients.

Once combined, add raisins and chopped walnuts (or pecans), and stir until batter is completely blended.

Flour and spices added to muffin mixture in bowl

Raisins and pecans are added to apple muffin batter in bowl

Coat sides and bottom of muffin tins with non-stick spray; the recipe makes 18 muffins, so you will need two 12-cup muffin tins, (or bake these in two batches if you only have one muffin tin). 

Spoon the batter into muffin tins until each cup is about 3/4 full. Now they are ready to bake.

Apple raisin muffin batter in metal muffin tin

Bake The Apple Raisin Muffins

Bake muffins at 325° F. for approximately 23-25 minutes. Apple raisin muffins should be golden brown on the outside when done, and a toothpick inserted into middle should come out clean.

Remove muffins from muffin tin to a wire rack to cool.  Don’t they look GOOD? See those apple chunks? YUM. These apple raisin muffins taste best at room temperature!

Eighteen baked apple raisin muffins on wire rack

Close up photo of muffins with apples, raisins, and pecans

Time To Eat!

Here’s a close up picture of the INSIDE of one of the muffins… you can see it is filled with raisins, apples and nuts!

Inside photo of muffin with apples inside

Apple raisin muffin cut in half, on a plate

And there you have it! Delicious apple raisin muffins! When baked correctly, the muffins are not dry (due in part to the natural juices released from the apples).

They also freeze very well, so it makes sense to make the whole batch at once, then put a few away in the freezer in a food storage bag or container to save for another day!

Interested In More MUFFIN Recipes?

By the way, if you enjoy muffins as much as we do, I hope you will also check out these muffin recipes from my blog for Apple Crumb, Banana Crumb, Cranberry Orange, Carrot Cake, Dark Chocolate Almond Chia, Chocolate Chip, Blueberry Crumble, and many others. 

A complete list is available to search in the Recipe Index at the top of the page!  Have a GREAT day!

Want More Recipes? Get My FREE Newsletter!

I publish a newsletter 2 times per month (1st and 15th) with lots of recipes, tips, etc..
Would you like to join our growing list of subscribers?

There is a Newsletter subscription box on the top right (or bottom) of each blog post, depending on the device you use.
You can submit your e-mail address there, to be added to my mailing list.

Find Me On Social Media:

Facebook page: The Grateful Girl Cooks!
Pinterest:
The Grateful Girl Cooks!
Instagram:
jbatthegratefulgirlcooks

Author's signature

Original Recipe Source: Unknown

↓↓ PRINTABLE RECIPE BELOW ↓↓

4 from 1 vote
Apple Raisin Muffins
Prep Time
15 mins
Cook Time
25 mins
Total Time
40 mins
 

These moist and delicious apple raisin muffins, full of fresh apples, raisins, cinnamon and pecans, are an easy to make treat for breakfast or brunch!

Category: Breakfast
Cuisine: American
Keyword: apple raisin muffins
Servings: 18 muffins
Calories Per Serving: 235 kcal
Author: JB @ The Grateful Girl Cooks!
Ingredients
  • 4 cups apples diced small (leave peel ON)
  • 1 cup granulated sugar
  • 2 eggs , slightly beaten
  • 1/2 cup vegetable oil
  • 2 teaspoons vanilla extract
  • 2 cups all purpose flour
  • 2 teaspoons baking soda
  • 2 teaspoons cinnamon
  • 1 teaspoon salt
  • 1 cup raisins
  • 1 cup walnuts (or pecans) , chopped
Instructions
  1. Preheat oven to 325° F.  Dice apples into small chunks.  You will need a total of 4 cups diced apples. Make sure to leave the peel ON the apples! Place diced apples in a large mixing bowl.  Add granulated sugar, and stir to combine. Mix slightly beaten eggs, oil and vanilla extract in separate bowl; add to apples, and stir. 

  2. In a separate bowl, combine flour, baking soda, cinnamon and salt.  Add this dry mixture to the apple mixture; stir well, to combine ingredients. Once combined, add raisins and chopped walnuts (or pecans), and stir until batter is completely blended.
  3. Coat sides and bottom of muffin tins with non-stick spray; the recipe makes 18 muffins, so you will need two 12-cup muffin tins, (or bake in two batches if you only have one muffin tin).  Spoon batter in muffin tins until each cup is about 3/4 full.

  4. Bake muffins at 325° F. for approximately 23-25 minutes. Muffins should be golden brown on the outside when done, and a toothpick inserted into middle of muffin should come out clean.  Remove muffins from muffin tin to a wire rack to cool. Best served at room temperature. Enjoy! 

Recipe Notes

These muffins freeze well. Wrap each muffin in plastic wrap, then insert in a freezer storage bag, and freeze until ready to thaw and eat.

Nutrition Facts
Apple Raisin Muffins
Amount Per Serving (1 muffin)
Calories 235 Calories from Fat 90
% Daily Value*
Fat 10g15%
Saturated Fat 5g31%
Cholesterol 18mg6%
Sodium 260mg11%
Potassium 146mg4%
Carbohydrates 33g11%
Fiber 2g8%
Sugar 14g16%
Protein 3g6%
Vitamin A 40IU1%
Vitamin C 1.8mg2%
Calcium 17mg2%
Iron 1.2mg7%
* Percent Daily Values are based on a 2000 calorie diet.

Here’s one more to pin on your Pinterest boards!These moist and delicious apple raisin muffins, full of fresh apples, raisins, cinnamon and pecans, are an easy to make treat for breakfast or brunch!

Peach Cobbler Overnight Oats

Enjoy creamy peach cobbler overnight oats that taste like peach cobbler! Made in 5 minutes, chill overnight, and they’re ready at breakfast!
Enjoy creamy peach cobbler overnight oats that taste like peach cobbler! Made in 5 minutes, chill overnight, and they're ready at breakfast!

Peach Cobbler Overnight Oats are as simple to make as mixing up the ingredients, putting the mixture in a couple jars (in 5 minutes or less), chilling them overnight, and BOOM! They’ll be ready to go for a quick, creamy, filling and delicious breakfast the next morning!

I am having fun trying different flavors of overnight oats… there are so many possibilities! So far I have made and posted the recipes for Apple Cinnamon, Chocolate Banana, Strawberry Coconut, and Banana Coconut.  I love the convenience and taste of this filling breakfast food!

Scroll Down For A Printable Recipe Card At The Bottom Of The Page

Yes, But do You Eat Overnight Oats HOT or COLD?

I recently read a comment on another blog where a visitor was wondering HOW on earth were they supposed to cook the oats once they are in the jar with all the other ingredients, and it made me giggle, but then I realized that someone who has never made overnight oats before actually might want the answer to that question.

Guess what? YOU DON’T COOK THE OATS!  The oats become thick (kind of like a creamy pudding) overnight, and you eat them cold. That’s right! COLD, right outta the fridge, right outta the jar… and they taste wonderful! AMEN… and pass me a spoon!

Cold and creamy peach flavored overnight oats are ready to eat!

There is Flaxseed In These Overnight Oats… What On Earth Is Flaxseed?

This recipe includes flaxseed (which I keep on hand), but isn’t an absolute necessity, in case you don’t have access to it!  However, I heartily recommend it for it’s health benefits!

Did you know that ground flaxseed is touted for being high in Omega 3 essential fatty acids (the “good fats”), is high in fiber (yet easily digestible), and has antioxidants?  Yep… flaxseed apparently been around since as early as 3,000 B.C. (grown in Babylon), and is nice to have handy in the kitchen, and in this yummy recipe!

Here’s a peek at the “cast of characters” used to make peach cobbler overnight oats in the photo below. I even was able to use some of the canned peaches from our pantry, that I had!

Ingredients for peach overnight oats

So HOW Do You Make These Overnight Oats?

If you’ve made overnight oats before, you are probably familiar with the “process”.  You can either dump all ingredients in a bowl and mix, then transfer to individual containers, OR layer the ingredients into resealable containers, then mix them.

I like to layer them (especially for the pictures AND for one less bowl to wash (*cough, cough), so here’s how I assembled them. The oats are on the bottom of the jar, followed by the canned, drained peaches.

Peaches are added to oats in glass jars

Top the peaches with low-fat vanilla yogurt, vanilla extract, salt, chia seeds, flaxseeds, and ground cinnamon. Give them a good stir to mix all together.

Yogurt, chia seeds, cinnamon and flaxseed added to oats in jar

Milk is then poured over all, to cover. I used almond milk, but any milk will do just fine.  Ingredients were stirred again, to thoroughly combine. Check to make sure there is enough milk to cover the top of the oats… if not, add just a bit more milk, and stir again to combine. See those pretty pieces of peaches in the mix? YUM. Good flavor, right there!

Almond milk added to overnight oats and stirred in

Refrigerate The Jars Of Overnight Oats

Once all of the ingredients are fully blended, cover the containers and refrigerate overnight, or for at least 8 hours.

Two jars of peach overnight oats, ready to refrigerate

Time To EAT!

In the morning, you will notice that the oats have thickened considerably. Give them a stir, and dig in, to enjoy this delicious, cold and creamy breakfast treat! If you’ve ever eaten a bite of peach cobbler or crisp the morning after it has been made and refrigerated overnight, you will find an amazing similarity in taste to these oats! YUM!

A spoonful of peach cobbler overnight oats ready to eat!

I hope you will consider making this delicious breakfast treat, and trust you will enjoy them! I know I sure did! Have a wonderful day, and may God bless you in all you do!

Thanks for stopping by, and I sincerely hope you will come back again soon for more delicious recipes. You can find ALL of my recipes in the Recipe Index, which is located at the top of the page. 

Interested In More Recipes?

Thank you for visiting this website. I appreciate you using some of your valuable time to do soIf you’re interested, I publish a newsletter 2 times per month (1st and 15th) with all the latest recipes, and other fun info. I would be honored to have you join our growing list of subscribers, so you never miss a great recipe!
There is a Newsletter subscription box on the top right side (or bottom) of each blog post, depending on the device you use, where you can easily submit your e-mail address (only) to be included in my mailing list.

You Can Also Find Me On Social Media:

Facebook page: The Grateful Girl Cooks!
Pinterest:
The Grateful Girl Cooks!
Instagram:
jbatthegratefulgirlcooks

Author's signature

Recipe Adapted From: https://www.ladybehindthecurtain.com/overnight-peach-cobbler-oatmeal/

0 from 0 votes
Peach Cobbler Overnight Oats
Prep Time
5 mins
Cook Time
0 mins
Total Time
5 mins
 
You'll love the convenience of creamy overnight oats that taste like a peach cobbler! Make them in 5 minutes, chill overnight, and they're ready at breakfast!
Category: Breakfast
Cuisine: American
Keyword: overnight oats
Servings: 2 servings
Calories Per Serving: 254 kcal
Author: JB @ The Grateful Girl Cooks!
Ingredients
  • 2/3 cup old fashioned oats
  • 8 ounces canned sliced peaches , drained and chopped
  • 5.3 ounces vanilla yogurt (I used Oikos Triple Zero)
  • 1/2 teaspoon vanilla extract
  • 1/4 teaspoon salt
  • 1/2 Tablespoon flaxseeds (optional, but recommended)
  • 1/2 Tablespoon chia seeds
  • 1/2 teaspoon ground cinnamon
  • 2/3 cup almond milk
Instructions
METHOD 1
  1. The EASIEST way to make these oats is to combine all ingredients in a medium sized mixing bowl. Stir well, to fully combine.  Transfer the oat mixture into 2 half-pint sized containers (with lids). Cover, and refrigerate overnight. When ready to eat, stir and enjoy!

METHOD 2
  1. To make (with one less bowl to wash!), as shown in photos... Place oats in each jar or container. Add peaches, then top with vanilla yogurt, vanilla extract, salt, flaxseeds, chia seeds and cinnamon. Stir. Top with milk. Stir to fully combine. Add additional milk if necessary, to ensure oats are fully covered. Cover container. Refrigerate overnight; stir, serve and enjoy!

Recipe Notes

NOTE: Overnight oats will keep for 3-4 days (covered), in refrigerator.

Nutrition Facts
Peach Cobbler Overnight Oats
Amount Per Serving (1 serving)
Calories 254 Calories from Fat 45
% Daily Value*
Fat 5g8%
Saturated Fat 1g6%
Cholesterol 3mg1%
Sodium 451mg20%
Potassium 498mg14%
Carbohydrates 42g14%
Fiber 6g25%
Sugar 20g22%
Protein 9g18%
Vitamin A 400IU8%
Vitamin C 8.1mg10%
Calcium 275mg28%
Iron 1.8mg10%
* Percent Daily Values are based on a 2000 calorie diet.

Here’s one more to pin on your Pinterest boards!Enjoy creamy peach cobbler overnight oats that taste like peach cobbler! Made in 5 minutes, chill overnight, and they're ready at breakfast!

Easy German Chocolate Cake with Homemade Frosting

It’s EASY to make an absolutely delicious German Chocolate Cake for dessert, thanks to a simple shortcut (using a box mix) and then topping it with yummy HOMEMADE coconut pecan frosting! SO GOOD!!!!
It's EASY to make a delicious German Chocolate Cake for dessert, thanks to a shortcut using a box mix and topping it with yummy HOMEMADE coconut pecan frosting!

Do you enjoy German chocolate cake? We sure do, but I think my Mom might be the biggest fan of all. She is the one who taught me this quick shortcut which I have used for years to make this delicious dessert!

Scroll Down For A Printable Recipe Card At The Bottom Of The Page

My Mom LOVES German Chocolate Cake

German Chocolate Cake is my Mom’s all-time favorite cake – (she used to make one for herself for her birthday whenever possible).  I recently flew down to see her in Southern California because she was very sick (and it was her birthday), and made her a German chocolate cake as a SURPRISE!

She loved it, and I even froze a few extra slices for her, which she was able to enjoy long after I had returned home to Oregon.

My mom, holding her birthday German Chocolate Cake

My mom has made LOTS of German chocolate cakes over the years. She told me how easy it has NOW become, thanks to using a boxed cake mix for the base.  Her cakes are always good; she cooks most of them from scratch, so I assumed she still made this particular cake from scratch. Nope. She switched because of the time it saved her to make this cake (a box mix can be made lickety split)!

So that’s how I make it now, too. She insists it’s the FROSTING that needs to be made from scratch for a PERFECT TASTING German chocolate cake! I gotta tell you – this frosting is the best – better than a tub of frosting from the store!

How To Make This EASY German Chocolate Cake

So here’s how to make this delicious cake, easily and quickly!  Prepare boxed cake mix using the ingredients and instructions on the box. I made a 9″ two layer cake, but it’s perfectly okay to make a 13×9 sheet cake with this recipe, as well (even EASIER).

When done baking, transfer the cake pans to a wire rack. Let the cake cool for about 10 minutes, then carefully invert cake layers onto wire rack, one at a time. You can do this by placing a wire rack on top of the cake pan. Quickly and carefully turn it over while holding both the wire rack and the cake pan tightly together. This will release the cake from the pan.  Let the cake layers cool to room temperature before frosting.

German chocolate cake mix batter in two pans, ready to bake

Two baked cake layers, cooling on wire rack

Time To Make The Easy German Chocolate Cake Frosting!

Once you put the cake in oven, make the homemade frosting: Cook butter, evaporated milk, sugar, egg yolks and vanilla in medium saucepan over medium-low heat. Cook for a full 12 minutes, stirring often, until mixture thickens. Remove the pan from the heat.

Butter, evaporated milk, eggs, cooking in pan for homemade German chocolate cake frosting

Thickened sauce for homemade cake frosting in saucepan

Stir in shredded coconut and chopped pecans until fully blended. Let this frosting cool to room temperature before frosting cake. You can speed up the cooling process by stirring the frosting often, if desired.

Shredded coconut and chopped pecans added to German chocolate cake frosting

Homemade coconut pecan frosting for German chocolate cake

Frost The Cake

To frost the cake, place one layer onto a serving platter. Spread a thin layer of frosting over the top of this layer.  Place another layer of cake on top of the frosted layer. Carefully spread frosting lightly over the top and sides of cake until fully covered.

Homemade coconut pecan frosting is spread onto and covers cake

Serve The German Chocolate Cake

Once the cake is frosted, all that is left for you to do is… slice cake, serve… and ENJOY! (Insert everyone’s happy face here!!!!!). The frosting is so incredibly good, and you made it from SCRATCH. You don’t have to tell your friends that you used a boxed cake mix for convenience… that will be OUR little secret (wink, wink).

Slice of German chocolate cake served on white plate with fork

Easy German chocolate cake with homemade frosting on white plate

This is a light, moist, absolutely delicious cake… one you will be proud to serve to family and friends, and the homemade frosting is outta this world good! The recipe makes enough frosting to lightly frost a two layer cake or a 13×9 inch cake (see NOTES section in printable recipe for larger quantity ingredient calculations), if additional cake layers or a thicker layer of frosting is desired.

Thank you for stopping by today!  I hope you will check out some of the other cake recipes here, like Apple Cake, Carrot Cake, Hummingbird Cake, Lemon Jello Cake, and several others. They are delicious, and can easily be found in the Recipe Index at the top of this page.  Have a fantastic day, friends.

Interested In More Recipes?

Thank you for visiting this website. I appreciate you using some of your valuable time to do soIf you’re interested, I publish a newsletter 2 times per month (1st and 15th) with all the latest recipes, and other fun info. I would be honored to have you join our growing list of subscribers, so you never miss a great recipe!
There is a Newsletter subscription box on the top right side (or bottom) of each blog post, depending on the device you use, where you can easily submit your e-mail address (only) to be included in my mailing list.

You Can Also Find Me On Social Media:

Facebook page: The Grateful Girl Cooks!
Pinterest:
The Grateful Girl Cooks!
Instagram:
jbatthegratefulgirlcooks

Author's signature

Frosting Recipe Source: My Mom

0 from 0 votes
Easy German Chocolate Cake with Homemade Frosting
Prep Time
10 mins
Cook Time
25 mins
Total Time
35 mins
 
It's EASY to make a delicious German Chocolate Cake for dessert, thanks to a shortcut using a box mix and topping it with yummy HOMEMADE coconut pecan frosting!
Category: Desssert
Cuisine: American
Keyword: German chocolate cake
Servings: 12 servings
Calories Per Serving: 449 kcal
Author: JB @ The Grateful Girl Cooks!
Ingredients
  • 1 German chocolate box cake mix
  • 1/2 cup butter
  • 1 cup evaporated milk
  • 1 cup granulated sugar
  • 3 egg yolks , beaten slightly
  • 1 teaspoon vanilla extract
  • cups shredded coconut
  • 1 cup chopped pecans
Instructions
  1. Prepare boxed cake mix using ingredients and instructions from box.  When done baking, transfer cake pans to wire rack. Let cool for about 10 minutes, then carefully invert cake onto wire rack (place wire rack on top of cake pan, then quickly and carefully turn over, to release cake from pan.  Let cake layers cool to room temperature before frosting.

  2. To make frosting (make while cake is baking): Cook butter, evaporated milk, sugar, egg yolks and vanilla in medium saucepan over medium-low heat. Cook for a full 12 minutes, stirring often, until mixture thickens. Remove pan from heat.

  3. Stir in shredded coconut and chopped pecans until fully blended. Let frosting cool to room temperature before frosting cake layers. (You can speed up the cooling process by stirring the frosting often, if desired).

  4. To frost cake, place one layer onto serving platter. Spread a thin layer of frosting over top of cake layer.  Place another layer of cake on top of frosting. Carefully spread frosting over top and sides of cake until covered. Slice cake, serve... and ENJOY!

Recipe Notes

NOTE: This makes enough frosting for a 13x9 or two layer cake.  If you want more frosting for your cake, use these ingredients: 1 can (12 oz.) evap. milk, 1½ cups sugar, 3/4 cup butter, 4 yolks, 1½ tsp. vanilla, 1 pkg (7 oz.) shredded coconut, and 1½ cups chopped pecans. (this will make 4½ cups total)

Nutrition Facts
Easy German Chocolate Cake with Homemade Frosting
Amount Per Serving (1 serving)
Calories 449 Calories from Fat 234
% Daily Value*
Fat 26g40%
Saturated Fat 11g69%
Cholesterol 75mg25%
Sodium 418mg18%
Potassium 263mg8%
Carbohydrates 51g17%
Fiber 2g8%
Sugar 37g41%
Protein 5g10%
Vitamin A 355IU7%
Vitamin C 0.6mg1%
Calcium 126mg13%
Iron 2.2mg12%
* Percent Daily Values are based on a 2000 calorie diet.

Here’s one more to pin on your Pinterest boards! It's EASY to make a delicious German Chocolate Cake for dessert, thanks to a shortcut using a box mix and topping it with yummy HOMEMADE coconut pecan frosting!

Garlic Focaccia Bread

Garlic Focaccia Bread, with olive oil and fresh herbs, is a great side dish for a variety of meats and salads, can be served as an appetizer with dipping oil and herbs, or simply used to make sandwiches!Garlic Focaccia Bread, with olive oil and fresh herbs, is a great side dish for a variety of meats and salads, can be served as an appetizer with dipping oil and herbs, or simply used to make sandwiches!

Garlic Focaccia Bread is a versatile side dish for a variety of meats or salads, can be served as an appetizer (served with dipping oil and herbs), or simply used to make a great sandwich! The crispy “dimpled” crust of this delicious bread (with olive oil, garlic and fresh thyme topping), is it’s trademark feature!

My friends and I used to frequent a local restaurant that brought baskets of sliced warm focaccia bread and a small bowl of dipping oil (with herbs) to the table before dinner. Oh. My. Goodness. I think that place is where I really fell in love with focaccia bread!

Talk about GOOD!!! I knew I wanted to make something similar at home, so I decided to try an old recipe I had stored in my trusty (and practically dilapidated) file box.

Scroll Down For A Printable Recipe Card At The Bottom Of The Page

Where I Discovered The Original Recipe

Many years ago I found a recipe in a newspaper, cut it out, and taped it to a 3×5 index card. Didn’t even write down what newspaper it was from. It’s now old and yellowed, but I had NEVER tried that particular recipe until recently.  WOW- it was DELICIOUS!

The original recipe was titled “Nona’s Courtyard Cafe Focaccia”, and I THINK (not sure) it might have originated from a restaurant in Ventura, California (which is now closed). I tried to find the recipe online, but no luck… oh well. At least I had this old recipe on file to try. It’s very easy to make… here’s how!

How To Make Garlic Focaccia Bread

Mix yeast with warm water (100 degrees) in a large bowl. Stir, then set the bowl aside for 5 minutes to let yeast fully dissolve. Bubbles will begin to appear on the surface, which tells you the yeast is active, alive, and working.

Yeast is dissolved in warm water to make bread dough.

Add flour, 1 Tablespoon olive oil, Parmesan cheese, honey, salt and cold water to bowl. Mix the ingredients well. I started mixing it with a spoon, then switched to using my (clean) hands to mix it up, because it was easier that way, as it is a thick dough.

Form the dough into a ball, then put it on a lightly floured work surface. Roll the dough out with a rolling pin, smoothing and shaping it into a circle of dough about 10 inches wide.

Focaccia dough is mixed, formed into ball and rolled into 10" circle

In a separate small bowl or measuring cup, mix together 1/3 cup olive oil and crushed garlic.  Set aside to let the flavors “mingle”, while you get the dough ready for it!

Olive oil and minced garlic for bread, in measuring cup

Poking Holes In the Garlic Focaccia Bread Dough

Transfer the dough circle to a large baking sheet with edges (I used a ratty old pizza pan with edges).  Poke holes in the top of the dough using your finger. Make deep holes all over the top of the dough, but don’t go all the way through dough to the bottom.

Holes poked into top of focaccia bread dough with finger

Cover the top and sides of dough with the olive oil/ garlic mixture.  I started off spooning it on top, then used a pastry brush to fully coat top and sides of dough, and to spread the garlic around.

What Should I Do With The Excess Olive Oil?

There is a lot of “excess” oil that will run off the edges of dough onto pan. Just scoop it up with a spoon and fill up all the holes with it. Sprinkle top of dough with chopped fresh thyme (or fresh rosemary, if substituting). There will STILL be excess oil around bottom of dough, as you can see in the photo below. Leave it there! It will absorb into the bread while it bakes, and help to make a nice crispy crust!

Set the pan aside, and let the dough rise a bit (uncovered) for about 30 minutes in a warm place, free from drafts. Preheat oven to 400º F. while dough is rising.

Focaccia dough, covered with olive oil, garlic and thyme before baking

Bake The Garlic Focaccia Bread

After dough has risen, bake it in a 400º F. oven for 23-25 minutes, or until the bread is evenly browned all over.  Remove from oven, transfer the garlic focaccia bread to a wire rack, and let it cool for 20-25 minutes before you serve it.

Doesn’t it look GOOD? See the little pieces of garlic in the “dimples”?  ALL the oil has been absorbed into crust. The 2 photos below show the top and bottom of the bread… nice and crispy on the outside, but soft on the inside!

Top crust of garlic focaccia bread after baking

Bottom crust of baked focaccia bread

If you want to make the garlic focaccia bread ahead of time, you can easily reheat it by covering it tightly with aluminum foil and reheat on low heat (250º F.) in oven for 10-15 minutes. To serve, slice bread in half left to right, then cut into 2″ wide strips from top to bottom.

You can serve it with a (2 to 1) mixture of olive oil and balsamic vinegar or olive oil and fresh herbs (like garlic, thyme and rosemary, etc.) in a little bowl for dipping, if you wish.

Baked garlic focaccia bread, cooling on wire rack

Here’s a close up of a slice of the garlic focaccia bread so you can see what the inside looks like! YUM.

Close up photo of sliced focaccia bread

My husband, oldest son and I enjoyed this bread served with Orange and Rosemary Glazed Salmon, steamed broccoli and rice. It was delicious.  We ended up with a few pieces of focaccia bread left over, so I will serve it on the side with spaghetti, made with Easy Spaghetti Sauce with Italian Sausage for tonight’s dinner!

Hope you will consider making this garlic focaccia bread! It’s a great side dish to compliment a variety of main courses or salads.

It can also be used as an appetizer BEFORE the meal, when served with a mixture of olive oil and fresh herbs (or olive oil/balsamic vinegar). You can also use it to make a delicious sandwich!  Lots of possibilities. Hope you enjoy it… and have a wonderful day!

Looking For More BREAD Recipes?

You can find all of my recipes in the Recipe Index, located at the top of the page. I have lots of delicious bread recipes, including:

Interested In More Recipes?

Thank you for visiting this website. I appreciate you using some of your valuable time to do soIf you’re interested, I publish a newsletter 2 times per month (1st and 15th) with all the latest recipes, and other fun info. I would be honored to have you join our growing list of subscribers, so you never miss a great recipe!
There is a Newsletter subscription box on the top right side (or bottom) of each blog post, depending on the device you use, where you can easily submit your e-mail address (only) to be included in my mailing list.

You Can Also Find Me On Social Media:

Facebook page: The Grateful Girl Cooks!
Pinterest:
The Grateful Girl Cooks!
Instagram:
jbatthegratefulgirlcooks

Author's signature

Adapted from Recipe Source: old newspaper article (original source/newspaper/author unknown)

0 from 0 votes
Garlic Focaccia Bread
Prep Time
15 mins
Cook Time
25 mins
Rising Time
30 mins
Total Time
40 mins
 
Garlic Focaccia Bread, with olive oil and fresh herbs, is a great side dish for a variety of meats and salads, can be used to make sandwiches, or served as an appetizer with dipping oil!
Category: Appetizer, Bread, Side Dish
Cuisine: Italian
Keyword: garlic focaccia bread
Servings: 10 slices
Calories Per Serving: 229 kcal
Author: JB @ The Grateful Girl Cooks!
Ingredients
  • 1/2 ounce dry active yeast
  • 1 cup water heated to 100 degrees
  • 3 cups flour (all purpose)
  • 1 Tablespoon olive oil
  • 1/4 cup cold water
  • 1 teaspoon honey
  • 3/4 teaspoon salt
  • 1/4 cup Parmesan cheese ,freshly grated
  • 1/3 cup olive oil
  • 1 teaspoon garlic (crushed)
  • 1/2 teaspoon fresh thyme (or rosemary) , finely chopped
Instructions
  1. Mix yeast with warm water (100 degrees) in a large bowl. Stir, then set bowl aside for 5 minutes to let yeast fully dissolve. Bubbles will begin appearing on the surface, which tells you the yeast is active and working.

  2. Add flour, 1 Tablespoon olive oil, Parmesan cheese, honey, salt and cold water to bowl. Mix ingredients well. NOTE: I started mixing it with a spoon, then switched to using my (clean) hands to mix it up, because it's easier (it's a thick dough). Form dough into a ball, then place on a lightly floured surface. Roll dough out with a rolling pin, smoothing and shaping it into a circle 10" wide.

  3. In a separate small bowl or measuring cup, mix together 1/3 cup olive oil and crushed garlic.  Set aside to let flavors "mingle" while you get dough ready.

  4. Transfer the dough circle to a large baking sheet or pizza pan (with edges) .  Poke holes in top of the dough using your fingertips. Make deep holes all over the top of the dough, but don't go all the way through to the bottom.

  5. Cover top/sides of dough with olive oil/ garlic mixture using spoon and/or pastry brush.  There will be oil that runs off edges onto pan. Scoop it up with a spoon and fill the holes with it. Sprinkle top with chopped fresh thyme (or rosemary, if using). There will STILL be excess oil on pan around bottom of dough. Leave it there! It will absorb into the bread when it bakes, and help to make a nice crust!  Set bread aside, and let dough rise a bit (uncovered) for 30-40 minutes in a warm place, free from drafts. Preheat oven to 400º F. while dough rises.

  6. After dough has risen, bake in 400º F. oven for 23-25 minutes, or until bread is evenly browned.  Remove from oven, transfer bread to a wire rack, and let cool 20-25 minutes before serving. To serve, slice in half from left to right, then cut into 2" thick slices from top to bottom.  If desired, serve with dipping sauce of (2 to 1 mix) olive oil and balsamic vinegar OR olive oil and fresh herbs, like thyme, garlic, rosemary. ENJOY!

Recipe Notes

NOTE: Yeast used is equivalent of 2 (¼ ounce) packages OR 4½ teaspoons of bulk dry active yeast. 

Nutrition Facts
Garlic Focaccia Bread
Amount Per Serving (1 slice)
Calories 229 Calories from Fat 81
% Daily Value*
Fat 9g14%
Saturated Fat 1g6%
Cholesterol 1mg0%
Sodium 216mg9%
Potassium 53mg2%
Carbohydrates 29g10%
Fiber 1g4%
Protein 5g10%
Vitamin A 20IU0%
Vitamin C 0.1mg0%
Calcium 35mg4%
Iron 1.8mg10%
* Percent Daily Values are based on a 2000 calorie diet.

Here’s one more to pin on your Pinterest boards!Garlic Focaccia Bread, with olive oil and fresh herbs, is a great side dish for a variety of meats and salads, can be served as an appetizer with dipping oil and herbs, or simply used to make sandwiches!