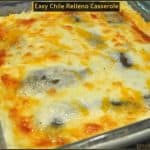
Chicken Enchilada Mole Casserole is an easy to make dinner, with layers of corn tortillas, chicken breast strips, enchilada and mole sauce, onions and cheese, and is ready in 35 minutes!
Ever have one of those days where you know you need to fix something for dinner, but don’t have a clue what that will be? That is how I came up with this simple layered chicken enchilada casserole! I used my recipe for Layered Chicken Enchilada Casserole as inspiration (which uses a creamy green sauce). Then I started pulling things out of the refrigerator and pantry and then just started cooking!
I gathered two leftover grilled chicken breasts, some homemade red enchilada sauce (it was in our freezer, but I thawed it out!), a jar of mole sauce (check out this link to find out what is in this traditional Mexican sauce), onion, a few tortillas and some Mexican blend cheese and got busy creating this easy casserole dish that serves 6.
By the way… don’t worry about using homemade enchilada sauce… a large (28 oz.) can will do just fine… and mole sauce? You can pretty much find small 8.25 oz. jars of it in almost every grocery store in the Mexican Foods section. Mole sauce adds a rich depth of flavor to standard enchilada sauce and partners very well in this recipe.
Scroll Down For A Printable Recipe Card At The Bottom Of The Page
So… How Do I Make This Chicken Enchilada Casserole?
It’s easy. You will just be creating a layer of ingredients, then repeating the layers, etc. Start by thinly slicing two grilled chicken breasts (I used leftovers). A quick and easy substitution would be to use two rotisserie chicken breasts, lightly seasoned with salt and pepper.

Mix enchilada sauce and mole sauce in pan. Stir until blended, then cook on low heat for 5 minutes. This allows the flavors to come together a bit! (Note: I used homemade enchilada sauce, so your version may look slightly different)

Spray an 8×8 inch pan with non-stick cooking spray. Rip two tortillas into large pieces and layer the bottom of the dish, trying to cover as much as possible.

Spread 1/3 of the sauce over the tortilla pieces, spreading to cover.

Cover the sauce with 1/2 of the chicken slices, 1/2 of the chopped onions and top them with 1/3 of the grated Mexican cheese blend.

Repeat Layers
Repeat another layer in the same order: 2 torn tortillas, 1/3 of the sauce, remaining 1/2 of the chicken and onions, then top this second layer with 1/3 of the grated Mexican blend cheese. For the final layer, simply add the remaining two torn tortilla pieces, top with remaining sauce, then top it all off with the remaining grated cheese.

Time To Bake The Chicken Enchilada Mole Casserole
Bake the casserole (uncovered) in a 350° F. preheated oven for 20-25 minutes (mine was done in 20). The cheese and sauce should be bubbly when done. Remove chicken enchilada casserole from oven to a wire rack.

Let the casserole rest for a minute or two to let the cheese firm up, so it will be easier to slice.

Slice the casserole into 6 pieces, and transfer to plates. Serve each piece with a dollop of sour cream and a cilantro leaf garnish, if desired.

And that’s how this casserole came to be made and eaten at our house! Hope you will give it a try! Since this yummy casserole can be on the table in about 35 minutes, it’s a great meal for busy weeknights!
Looking For More Mexican-Inspired Recipes?
You can find ALL of my recipes in the Recipe Index, which is located at the top of the page. I have quite a few Mexican-inspired recipes you might enjoy, including:
- Easy Cheesy Enchiladas
- Pork Enchiladas with Cilantro Lime Sauce
- Grilled Fish Tacos with Baja Sauce
- Chicken Black Bean Quesadilla
Interested In More Recipes?
Thank you for visiting this website. I appreciate you using some of your valuable time to do so. If you’re interested, I publish a newsletter 2 times per month (1st and 15th) with all the latest recipes, and other fun info. I would be honored to have you join our growing list of subscribers, so you never miss a great recipe!
There is a Newsletter subscription box on the top right side (or bottom) of each blog post, depending on the device you use, where you can easily submit your e-mail address (only) to be included in my mailing list.
You Can Also Find Me On Social Media:
Facebook page: The Grateful Girl Cooks!
Pinterest: The Grateful Girl Cooks!
Instagram: jbatthegratefulgirlcooks


- 6 corn tortillas
- 28 ounces Red enchilada sauce
- 1/2 cup Mole sauce (found in Mexican food sections of grocery store)
- 2 chicken breasts (cooked)
- 1/2 cup white onion , finely chopped
- 2 cups Mexican 4 blend cheese (or combo of cheddar/jack)
- 4 Tablespoons sour cream
- 4 cilantro leaves (optional)
Preheat oven to 350° F.
- Thinly slice two grilled chicken breasts for the casserole. A quick and easy substitution would be to use two rotisserie chicken breasts, lightly seasoned with salt and pepper.
- Mix enchilada sauce and mole sauce in pan. Stir until blended, then cook on low heat for 5 minutes.
Spray an 8x8 inch baking dish with non-stick cooking spray. Rip two tortillas into large pieces and layer the bottom of the dish, trying to cover as much as possible. Spread 1/3 of sauce over the tortilla pieces. Cover sauce with 1/2 of the chicken, 1/2 of the onions and top them with 1/3 of the grated Mexican cheese blend. Repeat another layer in the same order: 2 torn tortillas, 1/3 of the sauce, remaining 1/2 of the chicken and onions, then top this second layer with 1/3 of the grated Mexican blend cheese. For the final layer, add remaining two torn tortilla pieces, cover with remaining sauce, then top it all off with the remaining grated cheese.
Bake the casserole (uncovered) in a 350° F. preheated oven for 20-25 minutes (mine was done in 20). The cheese and sauce should be bubbly when done. Remove chicken enchilada casserole from oven to a wire rack. Let the casserole rest for a minute or two to let the cheese firm up, so it will be easier to slice.
Slice the casserole into 6 pieces, and transfer to plates. Serve each piece with a dollop of sour cream and a cilantro leaf garnish, if desired. Enjoy!
Here’s one more to pin on your Pinterest boards!


! / The Grateful Girl Cooks!")


! / The Grateful Girl Cooks!")


 fish tacos, w/ corn tortillas, crisp marinated slaw and avocado, topped with a creamy Southwestern flavored Baja sauce! / The Grateful Girl Cooks!")
 in this delicious, low calorie seafood dish!")


 in this delicious, low calorie seafood dish!")
, a meatless casserole, with cheese tortellini, sauce, zucchini, spinach, & mozzarella! / The Grateful Girl Cooks!")


, a meatless casserole, with cheese tortellini, sauce, zucchini, spinach, & mozzarella! / The Grateful Girl Cooks!")


, then you'll absolutely want to try Chicken Fried CHICKEN with creamy Country Gravy for a tasty dinner! / The Grateful Girl Cooks!")


, then you'll absolutely want to try Chicken Fried CHICKEN with creamy Country Gravy for a tasty dinner! / The Grateful Girl Cooks!")