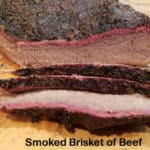
Category: Main Dishes

Garlic Parmesan Rockfish

You will enjoy these delicious Garlic Parmesan Rockfish fillets, coated in well-seasoned bread crumbs & baked until flaky. Only 10 minutes prep time!

A couple years ago, my husband and I discovered rockfish, also known as Pacific Snapper. My husband brought some fillets home from the fish counter at our local grocery store. Since neither of us had tried rockfish before, I had to figure out WHAT to do with it.

Long story short… I found a great recipe, made it, and we loved it! Since that time, I’ve used this mild tasting fish in several recipes, including a few which are mentioned at the bottom of this post. NOTE: The recipe as written makes 4 servings. I cut the recipe in half (for myself and my hubby), so my photos will reflect that!

The recipe I am sharing today is one I found on the internet, and it does not disappoint! This rockfish recipe is really easy to prepare, and tastes delicious! It’s a perfect meal on a busy day, because it has minimal prep, and then into the oven it goes! Here’s how to make it!

Scroll Down For A Printable Recipe Card At The Bottom Of The Page

Prepare The Rockfish Fillets

Season the rockfish fillets on both sides with a little bit of salt and pepper. **Don’t forget to preheat your oven to 425° F. at the same time!

The fish fillets are lightly seasoned with salt and pepper.

Prepare Bread Crumb Coating For Garlic Parmesan Rockfish

The next thing you need to do is prepare the seasoned bread crumb topping that will cover the fish. This step is quick and EASY! I was able to use some of my homemade bread crumbs in this recipe, but any plain bread crumbs will do.

Place grated Parmesan cheese, bread crumbs, minced garlic, and lemon zest, and a pinch or two of salt and pepper onto a large plate. Combine these ingredients well, and then you’ll have seasoned bread crumbs, ready for the rockfish. Spread them out evenly on the plate.

Bread crumbs, lemon zest, garlic, and Parmesan cheese are combined to make topping for fish.

Cover Fish Fillets With The Bread Crumb Coating

Place one fillet at a time on top of the bread crumb topping, and coat the bottom with crumbs, then turn and coat the other side. This is called “dredging” the fish. Use your fingers to help press the bread crumb coating onto the fish.

When done, repeat with the other pieces of fish. If there is any of the bread crumb mixture remaining, press it onto the fish fillets.

Rockfish fillets are coated in the bread crumb topping before baking.

Drizzle 2 Tablespoons of olive oil onto a baking sheet. Place the crumb-coated garlic parmesan rockfish onto the oiled surface. Leave a little space between each of the fillets. Drizzle each fillet with the remaining olive oil, and the lemon juice. Once that step is completed, the garlic parmesan rockfish fillets are ready to bake!

Olive oil and lemon juice are drizzled over crumb-topped fish fillets before baking.

Bake The Garlic Parmesan Rockfish

Bake the garlic parmesan rockfish at 425° F. for approximately 20 minutes. When done, the fish should be golden brown, and should flake easily (with a fork). Remove from the oven, and transfer the fish with a spatula to each plate, for serving.

When done baking, garlic parmesan rockfish are golden brown and flaky.

If desired, garnish the fish with parsley and a thin lemon slice, and serve! We enjoyed our garlic parmesan rockfish served on top of rice, with sautéed green beans (from our garden), fresh corn, and a slice of sweet, cold watermelon on the side! YUM!

Garlic parmesan rockfish fillet on rice, with green beans, corn, and watermelon on the side.

We really did enjoy this meal, featuring garlic parmesan rockfish. My hope is that maybe you will be inspired to try this simple dish, and make it for those you love! Have a blessed day!

Looking For More ROCKFISH Recipes?

You can find all of my seafood recipes in the Recipe Index, located at the top of the page. A few rockfish recipes you might be interested in include:

Interested In More Recipes?

Thank you for visiting this website. I appreciate you using some of your valuable time to do soIf you’re interested, I publish a newsletter 2 times per month (1st and 15th) with all the latest recipes, and other fun info. I would be honored to have you join our growing list of subscribers, so you never miss a great recipe!
There is a Newsletter subscription box on the top right side (or bottom) of each blog post, depending on the device you use, where you can easily submit your e-mail address (only) to be included in my mailing list.

You Can Also Find Me On Social Media:
Facebook page: The Grateful Girl Cooks!
Pinterest: The Grateful Girl Cooks!
Instagram: jbatthegratefulgirlcooks

Original recipe source: https://www.delish.com/cooking/recipe-ideas/a26595710/garlic-parmesan-baked-flounder-recipe/

Author's signature

5 from 8 votes
Garlic Parmesan Rockfish
Prep Time
10 mins
Cook Time
20 mins
Total Time
30 mins
 

You will enjoy these delicious Garlic Parmesan Rockfish fillets, coated in well-seasoned bread crumbs & baked until flaky. Only 10 minutes prep time!

Category: Entree-Seafood
Cuisine: American
Keyword: garlic parmesan rockfish
Servings: 4
Calories Per Serving: 303 kcal
Author: JB @ The Grateful Girl Cooks!
Ingredients
  • ¼ cup extra virgin olive oil , divided use
  • 4 rockfish fillets , approx. 5 ounces each
  • salt and pepper , to season fish
  • ½ cup grated fresh Parmesan cheese
  • ¼ cup bread crumbs
  • 4 cloves garlic , minced
  • 1 lemon (juice and zest)
  • parsley and lemon slices (optional) , for garnish
Instructions
  1. Preheat oven to 425° F. Drizzle 2 Tablespoons of olive oil onto a baking sheet, and set aside.

  2. Season the rockfish fillets on both sides with a little bit of salt and pepper.

  3. Place Parmesan, bread crumbs, garlic, lemon zest, and a pinch or two of salt and pepper onto a large plate. Combine ingredients, and spread them out evenly on the plate. Place one fillet at a time on top of the mixture, and coat the bottom with crumbs, then flip and coat the other side. Use your fingers to help press coating onto fish. When done, repeat with other pieces, using all the crumb mixture.

  4. Place rockfish onto oiled baking sheet., leaving space between each fillet. Drizzle each piece with remaining olive oil, and the lemon juice.

  5. Bake fish at 425° F. for approx. 20 minutes. When done, the fish should be golden brown, and flake easily with a fork. Remove from oven; transfer fish with a spatula to plates, for serving. Garnish each fillet with parsley and a lemon wedge, if desired. Serve, and enjoy!

Nutrition Facts
Garlic Parmesan Rockfish
Amount Per Serving (1 fillet)
Calories 303 Calories from Fat 171
% Daily Value*
Fat 19g29%
Saturated Fat 4g25%
Cholesterol 65mg22%
Sodium 334mg15%
Potassium 474mg14%
Carbohydrates 7g2%
Fiber 1g4%
Sugar 1g1%
Protein 26g52%
Vitamin A 115IU2%
Vitamin C 4mg5%
Calcium 182mg18%
Iron 1mg6%
* Percent Daily Values are based on a 2000 calorie diet.

Here’s one more to pin on your Pinterest boards!You will enjoy these delicious Garlic Parmesan Rockfish fillets, coated in well-seasoned bread crumbs & baked until flaky. Only 10 minutes prep time!

Air Fryer Chicken Parmesan

Air Fryer Chicken Parmesan is a quick and easy way to make this classic Italian dish (cooks in 10 minutes)! Tender inside, & crispy on the outside.

Several months ago I purchased an air fryer (Cosori), using a gift card I received from my family. I’ve sure had fun trying out and experimenting with using this time saving (and calorie cutting) small appliance!

This recipe for an air fryer chicken parmesan is one of my experiments that tastes absolutely fantastic! The dish is delicious, and the cooking time is only 10 minutes! How can you beat that? I wanted to share the recipe for this simple dish with you today. I tweaked one of my own recipes and came up with this one, because it turned out pretty great!

Scroll Down For A Printable Recipe Card At The Bottom Of The Page

Prepare The Chicken Breasts For Cooking

Place a chicken breast between 2 pieces of plastic wrap. Use a meat mallet (flat side), to pound the breast in order to flatten it (this helps chicken to cook faster). When done, repeat process with the other chicken breast. Lightly season each piece of chicken with salt and pepper.

Boneless, skinless chicken breasts are flattened with a meat mallet before cooking.

Prepare The Chicken Parmesan For Cooking

Preheat your air fryer to 400° F.  While the air fryer is preheating, beat a large egg in a small bowl, and coat each of the chicken breasts in it, covering both sides. Let any excess egg mixture drip back into the bowl.

Place the chicken breasts, one at a time, into a small bowl filled with a bread crumb and Parmesan cheese mixture. Dredge the chicken through the bread crumbs, covering both sides of the breast. I used my homemade bread crumbs for this recipe!

Repeat with the other piece of chicken. You can also use your hands to press additional crumbs onto the chicken. You want all pieces for the air fryer chicken parmesan well-covered!

Each chicken breast is covered with a beaten egg mixture.Egg covered chicken breasts are dredged in bread crumbs before cooking.

Cooking The Air Fryer Chicken Parmesan

Once the air fryer is preheated, quickly remove the basket, and gently lay each of the chicken breasts in the basket, leaving some space between each piece. Cook the chicken parmesan for 5 minutes, then turn the chicken over to the other side. You can already see after 5 minutes, how golden brown and crispy the chicken is!

Bread crumb coated chicken breasts cook in an air fryer for 5 minutes.Chicken breasts are flipped over, after cooking in an air fryer for 5 minutes.

Quickly spread the marinara sauce over each piece of chicken. Top the sauce with grated Parmesan cheese, and then add the mozzarella cheese! You can use a whole slice of mozzarella for each piece OR you can thinly slice string cheese pieces to fit. I ended up using 2 string cheeses, thinly sliced, when I made this the first time and took photos.

Place the basket back into the air fryer, and continue to cook at 400° F. for 5 more minutes. When done, the chicken will be nice and crispy, and all that glorious cheese on top should be well-melted and bubbly!

Air fryer chicken parmesan is topped with sauce, Parmesan and mozzarella cheeses.

Time To Eat The Air Fryer Chicken Parmesan

This is what the air fryer chicken parmesan looked like when it was done. Just look at that melted, gooey cheese on top!

The cheese has melted over the air fryer cooked chicken parmesan, and is ready to serve!

Carefully remove the chicken parmesan from the air fryer, serve, and enjoy! This dish goes especially well with a little pasta on the side! The chicken is moist and tender on the inside, crisp on the outside, and tastes wonderful!

Two pieces of air fryer chicken parmesan on a plate, ready to eat!

Hope you have the opportunity to try this wonderful classic Italian air fryer chicken parmesan! We really enjoyed it, and trust you will, too! If you prefer a traditionally cooked chicken parmesan, I hope you will check out my recipe for Mom’s Chicken Parmigiana. It tastes amazing, as well!

Looking For More AIR FRYER Recipes?

You can find all of my recipes in the Recipe Index, located at the top of the page. I have quite a few air fryer recipes you might enjoy, including:

Interested In More Recipes?

Thank you for visiting this website. I appreciate you using some of your valuable time to do soIf you’re interested, I publish a newsletter 2 times per month (1st and 15th) with all the latest recipes, and other fun info. I would be honored to have you join our growing list of subscribers, so you never miss a great recipe!
There is a Newsletter subscription box on the top right side (or bottom) of each blog post, depending on the device you use, where you can easily submit your e-mail address (only) to be included in my mailing list.

You Can Also Find Me On Social Media:
Facebook page: The Grateful Girl Cooks!
Pinterest: The Grateful Girl Cooks!
Instagram: jbatthegratefulgirlcooks

Author's signature

0 from 0 votes
Air Fryer Chicken Parmesan
Prep Time
10 mins
Cook Time
10 mins
Total Time
20 mins
 

Air Fryer Chicken Parmesan is a quick and easy way to make this classic Italian dish (cooks in 10 minutes)! Tender inside, & crispy on the outside.

Category: Main Course
Cuisine: Italian
Keyword: air fryer chicken parmesan
Servings: 2
Calories Per Serving: 325 kcal
Author: JB @ The Grateful Girl Cooks!
Ingredients
  • 2 chicken breasts (boneless, skinless)
  • 1 pinch salt and pepper
  • 1 large egg , beaten
  • ½ cup breadcrumbs
  • 2 Tablespoons grated Parmesan cheese
  • 2 Tablespoons marinara sauce
  • 2 Tablespoons grated Parmesan cheese
  • 2 slices mozzarella cheese (or 2 pieces string cheese, cut into strips)
Instructions
  1. Place a chicken breast between 2 pieces of plastic wrap. Use a meat mallet (flat side), to pound the breast, to flatten it (this helps chicken to cook faster). When done, repeat process with the other chicken breast. Lightly season chicken with salt and pepper.

  2. Preheat air fryer to 400° F.  While it preheats, beat egg in a small bowl; coat each of the chicken breasts in it (one at a time), covering both sides. Let excess egg drip back into the bowl. Mix bread crumbs and 2 T. Parmesan cheese in a separate small bowl. Dredge egg-coated chicken through the bread crumbs, covering both sides. Repeat for remaining chicken, making sure all pieces are well-covered!

  3. Once air fryer is preheated, remove basket, and place each chicken breast in the basket, leaving a space between each piece. Cook the chicken at 400° F. for 5 minutes, then pause machine. Turn chicken over to the other side. Spread marinara sauce over top of each piece of chicken. Top the sauce with grated Parmesan cheese, and then finish with mozzarella cheese! Place the basket back into air fryer, and continue to cook chicken at 400° F. for 5 more minutes. When done, the chicken will be cooked through, nice and crispy, and all that glorious cheese on top should be well-melted and bubbly! Serve hot, and enjoy!

Nutrition Facts
Air Fryer Chicken Parmesan
Amount Per Serving (1 g)
Calories 325 Calories from Fat 90
% Daily Value*
Fat 10g15%
Saturated Fat 4g25%
Cholesterol 187mg62%
Sodium 626mg27%
Potassium 560mg16%
Carbohydrates 21g7%
Fiber 1g4%
Sugar 3g3%
Protein 35g70%
Vitamin A 338IU7%
Vitamin C 2mg2%
Calcium 190mg19%
Iron 2mg11%
* Percent Daily Values are based on a 2000 calorie diet.

Here’s one more to pin on your Pinterest boards!Air Fryer Chicken Parmesan is a quick and easy way to make this classic Italian dish (cooks in 10 minutes)! Tender inside, & crispy on the outside.

Air Fryer Chicken Chimichangas

Enjoy delicious, easy to make air fryer chicken chimichangas, with chicken, salsa, black beans & cheese! They cook in 10 minutes, using an air fryer!

I came up with this delicious recipe for air fryer chicken chimichangas while experimenting with our Cosori air fryer. I bought it using some gift cards I was given this summer, and have been having fun trying recipes using it, ever since!

NOTE: If you don’t have an air fryer, see my note at the bottom of the page for baking directions.

The first time I tried making chimichangas, it did NOT go well! I cooked them too long in the air fryer, and they came out ultra crispy, and hard as bricks! NO GOOD! Needless to say, I kept experimenting, until I got it right with this version, so I want to share it with you.

The chimichangas are very filling, and are stuffed with shredded chicken (homemade or rotisserie), black beans, jack cheese, spices and salsa, mixed with sour cream (or plain Greek yogurt).

Scroll Down for A Printable Recipe Card At The Bottom Of The Page

Prepare The Chimichanga Filling

Stir the shredded cooked chicken, grated jack cheese, salsa, black beans, spices, and sour cream (or plain Greek yogurt) together, in a large bowl. Season the chicken to taste with salt and pepper, and then stir until the ingredients are fully combined.

Shredded chicken, beans, cheese, sour cream and seasonings are mixed together for chimichangas.

Filling The Tortillas

Fill the chimichangas one at a time, by spraying one side of a flour tortilla with non-stick cooking spray. Lay the sprayed side DOWN on a flat surface, and spoon the chicken chimichanga filling down the middle of the tortilla.

Roll the tortilla TIGHTLY around the filling, tucking in the edges, if desired. You MUST roll these tightly, so they don’t unroll during the air frying. Place them seam side DOWN, and repeat process for the remaining tortillas.

Chimichanga filling is placed in middle of a flour tortilla, and then tightly rolled up.

Here are all eight of the air fryer chimichangas, ready to be cooked. Once they are filled and rolled, the cooking oil sprayed side is now on the outside. This cooking spray is what will help the tortillas to crisp up in the air fryer.

Eight rolled chicken chimichangas on pan are ready to cook.

Cook The Chimichangas

Preheat your air fryer to 370° F. This usually takes about 5 minutes. Place 4 chimichangas (seam side down) into the basket of the air fryer.

Cook the air fryer chicken chimichangas in two batches, because you don’t want to overcrowd them.

Let the chimichangas cook for 9-10 minutes, or until they are lightly browned and crispy on the outside. I recommend checking them at 8 minutes, because temps can vary quite a bit in these appliances.

The chimichangas are crispy and browned when done cooking.

Serve The Air Fryer Chicken Chimichangas

Once they are done (to your liking, color-wise), they’re ready to serve! Carefully remove the chimichangas from the air fryer, and add the remaining ones to the basket to cook them, too!

Place the the air fryer chicken chimichangas on individual plates, when you’re ready to eat. Garnish them with some salsa and a dollop of sour cream, for added color and flavor!

Salsa and sour cream garnish one of the air fryer chicken chimichangas.A chimichanga is served, topped with salsa and sour cream, and a side salad.

I sincerely hope that you enjoy these air fryer chicken chimichangas! We’ve had them several times already, and really love them! They are at their best when served immediately (while really crispy), but can be reheated in the air fryer or in a microwave.

NOTE: If you do not own an air fryer, you can still make these! Prepare the chimichangas exactly as written. Bake the chimichangas in a preheated 400° F. oven for about 20-25 minutes, until they are golden brown. Garnish and serve!

Looking For More Mexican Food Recipes?

You can find all of my Mexican food recipes in the Recipe Index, located at the top of the page. Several you might enjoy include:

Interested In More Recipes?

Thank you for visiting this website. I appreciate you using some of your valuable time to do soIf you’re interested, I publish a newsletter 2 times per month (1st and 15th) with all the latest recipes, and other fun info. I would be honored to have you join our growing list of subscribers, so you never miss a great recipe!
There is a Newsletter subscription box on the top right side (or bottom) of each blog post, depending on the device you use, where you can easily submit your e-mail address (only) to be included in my mailing list.

You Can Also Find Me On Social Media:
Facebook page: The Grateful Girl Cooks!
Pinterest: The Grateful Girl Cooks!
Instagram: jbatthegratefulgirlcooks

Author's signature

0 from 0 votes
Air Fryer Chicken Chimichangas
Prep Time
15 mins
Cook Time
10 mins
Total Time
25 mins
 

Enjoy delicious, easy to make air fryer chicken chimichangas, with chicken, salsa, black beans & cheese! They cook in 10 minutes, using an air fryer!

Category: Main Course
Cuisine: Mexican
Keyword: air fryer chicken chimichangas
Servings: 8
Calories Per Serving: 225 kcal
Author: JB @ The Grateful Girl Cooks!
Ingredients
  • cups cooked, shredded chicken breast
  • 1 cup canned black beans , rinsed and drained
  • cups jack cheese, shredded
  • cup salsa
  • cup light sour cream OR plain Greek yogurt
  • ½ teaspoon chili powder
  • ½ teaspoon ground cumin
  • salt/pepper, to taste
  • 8 medium flour tortillas
Instructions
  1. Stir shredded cooked chicken, grated jack cheese, salsa, black beans, chili powder, cumin, and sour cream (or plain Greek yogurt) together in a large bowl. Season filling to taste with salt and pepper, and then stir until ingredients are fully combined.

  2. Fill chimichangas one at a time, by spraying one side of flour tortilla with non-stick cooking spray. Lay sprayed side DOWN on a flat surface, and spoon chimichanga filling down the middle of the tortilla. Roll tortilla TIGHTLY around filling, tucking in edges, if desired. You MUST roll these tightly, so they don't unroll during the air frying. Place seam side DOWN, and repeat process for remaining tortillas.

  3. Preheat air fryer to 370° F. This takes about 5 minutes. Place 4 chimichangas (seam side down) into the basket of the air fryer. Cook the chimichangas in 2 batches, because you don't want to overcrowd them. Cook for 9-10 minutes, or until they are lightly browned and crispy on the outside. I recommend checking them at 8 minutes, because temps can vary in these appliances.

  4. When done, carefully remove chimichangas from the air fryer, and add remaining ones to the basket to cook them, too! To serve, place chimichangas on individual plates. Garnish with some salsa and a dollop of sour cream, for added color and flavor! Enjoy!

Nutrition Facts
Air Fryer Chicken Chimichangas
Amount Per Serving (1 chimichanga)
Calories 225 Calories from Fat 81
% Daily Value*
Fat 9g14%
Saturated Fat 5g31%
Cholesterol 37mg12%
Sodium 501mg22%
Potassium 282mg8%
Carbohydrates 21g7%
Fiber 2g8%
Sugar 2g2%
Protein 15g30%
Vitamin A 265IU5%
Vitamin C 1mg1%
Calcium 189mg19%
Iron 2mg11%
* Percent Daily Values are based on a 2000 calorie diet.

Here’s one more to pin on your Pinterest boards!Enjoy delicious, easy to make air fryer chicken chimichangas, with chicken, salsa, black beans & cheese! They cook in 10 minutes, using an air fryer!

Garlic Butter Grilled Trout

Have an avid fisherman in the family? Here’s a simple recipe for garlic butter grilled trout, with two methods given for preparing this fish on a BBQ.
Have an avid fisherman in the family? Here's a simple recipe for garlic butter grilled trout, with two methods given for preparing this fish on a BBQ.

Scroll Down For A Printable Recipe Card At The Bottom Of The Page

An Unexpected Surprise

Last month one of our neighbors gave us some recently caught trout! The fish had already been cleaned professionally, packaged and frozen. Our friend mentioned that a relative gives him lots of trout, but he’s the only one in his family that likes it, so he has way too much in his freezer. Lucky for us, he decided to bless us with 5 of them!

These are the five beautiful trout we received from our friendly neighbor down the street! What an unexpected, lovely surprise! They had already been cleaned, prepped, and frozen, so all I needed to do was thaw them and cook them!

The trout have been cleaned, gutted, frozen, and packaged before we received them.

Discovering New Ways To Cook Trout

In the past, I have typically dredged whole trout in beaten egg and then covered the fish in a cornmeal spice mixture and pan-fried them. This time, my husband and I came up with a new way (to us) for cooking a couple of the trout on our grill.

Shown below are the two trout we decided to grill on our Weber BBQ the FIRST time. Sometimes I think the only reason I don’t think I will enjoy trout is because of the eyes… just look at ’em. **Shudders.** Once I get past that, I’m good. Kinda.

Two trout are ready to be stuffed and then grilled.

Prepare The Garlic Butter Grilled Trout For Cooking

Anyways, here is how to make this dish. Spread the minced garlic inside the cavity of each fish, and place 2-3 thin slices of butter in there, as well.

Minced garlic and thin slices of butter are added to the fish cavity.

Place a couple thin slices of fresh lemon into the cavity of each trout, on top of the butter. Rub both sides of the trout generously with olive oil or vegetable oil.

Thin lemon slices are added to the garlic and butter in the fish cavity.

Making Sure The Fish Won’t Stick To The Foil Is Important

Place a large sheet of aluminum foil onto a large baking sheet. The baking sheet will hold the weight of the fish, until you slide the foil and fish onto the bbq grill. Spray the aluminum foil very generously all over with non-stick cooking spray or brush with oil, and then carefully transfer each stuffed trout onto the foil.

NOTE: Generously coating the foil with spray or oil is an important step, because you do not want the fish skin to stick to the foil as it cooks.

The trout is stuffed with garlic, lemon and butter before being grilled.

Two Methods For Cooking Garlic Butter Grilled Trout

There are two ways to cook the trout. My photos reflect method #1, but I will also explain how to cook via method #2. We’ve now cooked garlic butter grilled trout BOTH ways, with equally good results!

METHOD #1: Place the aluminum foil with both of the stuffed trout onto the grill grate directly over the hot coals. Cover the BBQ, and let the trout cook for 20 minutes. After 20 minutes, carefully transfer the trout off of the foil and directly onto the bbq grate. Cook 7 minutes (lid closed), and then flip to other side and cook for 7 more minutes (lid closed). Remove the fish from the grill.

METHOD #2: Do not stuff the trout before placing it on the bbq. Place generously oiled aluminum foil (one piece of foil for each trout) with the UNSTUFFED trout onto the grill grate, but NOT DIRECTLY over the hot coals. Cover the BBQ, and let the trout cook on indirect heat for 20 minutes. After 20 minutes, add the garlic, butter and lemon to each fish cavity. Add a top layer of foil, and wrap up each of the fish in foil, sealing foil packets tightly. Let the fish cook for 15 minutes (lid on the grill), then remove the foil packets from the grill.

The garlic butter grilled trout, cooked on foil, directly over hot coals on the bbq.

After Grilling, But Before Eating

This is what the garlic butter grilled trout looked like (below) once we brought it into the house. These trout were cooked using Method #1, as described above.

Once the trout is fully cooked, open it up and slice all the way through the back of the fish, resulting in two pieces. Be sure and pull the bones out by lifting the bone section up and pulling it up and away form the fish. IMPORTANT! Trout is notorious for it’s small bones, so take care when eating, to ensure bones have been removed.

The fish skin is crisp, after removing it from the grill.

Time To Serve the Garlic Butter Grilled Trout!

After de-boning and removing the skin (it pulls right off), the garlic butter grilled trout fillets are ready to serve! Remember to keep an eye out for any sneaky, hideaway, tiny little bones…

The grilled trout, on a plate with side veggies, ready to eat.Garlic butter grilled trout fillet, served with a baked potato and asparagus.

I hope you enjoy this simple recipe for garlic butter grilled trout! It tastes really yummy! Hope you have a great day, friends, and remember to show kindness to those you share this journey of life with. Thanks for reading!

Looking For More Fish Recipes?

You can find all of my fish recipes in the Recipe Index, located at the top of the page. A few you might enjoy include:

Interested In More Recipes?

Thank you for visiting this website. I appreciate you using some of your valuable time to do soIf you’re interested, I publish a newsletter 2 times per month (1st and 15th) with all the latest recipes, and other fun info. I would be honored to have you join our growing list of subscribers, so you never miss a great recipe!
There is a Newsletter subscription box on the top right side (or bottom) of each blog post, depending on the device you use, where you can easily submit your e-mail address (only) to be included in my mailing list.

You Can Also Find Me On Social Media:
Facebook page: The Grateful Girl Cooks!
Pinterest: The Grateful Girl Cooks!
Instagram: jbatthegratefulgirlcooks

Author's signature

0 from 0 votes
Garlic Butter Grilled Trout
Prep Time
10 mins
Cook Time
35 mins
Total Time
45 mins
 

Have an avid fisherman in the family? Here's a simple recipe for garlic butter grilled trout, with two methods given for preparing this fish on a BBQ.

Category: Main Course, Seafood
Cuisine: American
Keyword: garlic butter grilled trout
Servings: 4 (1/2 trout per serving)
Calories Per Serving: 307 kcal
Author: JB @ The Grateful Girl Cooks!
Ingredients
  • 2 trout , cleaned and gutted
  • teaspoons minced garlic
  • 2 Tablespoons butter (each Tablespoon cut into 3 thin slices)
  • 4 slices lemon (thin slices)
  • olive oil or vegetable oil , enough to brush on fish and coat aluminum foil
  • non-stick cooking spray
Instructions
  1. METHOD #1: Spread the minced garlic onto the inside of each fish, and place 2-3 thin slices of butter into the cavity, as well. Place a couple thin slices of fresh lemon into the cavity of each trout, on top of the butter. Brush both sides of the trout generously with olive oil or vegetable oil. Place a large sheet of aluminum foil onto a large baking sheet (the baking sheet helps hold the fish until you slide the foil and fish onto the grill. Spray the aluminum foil very generously all over with non-stick cooking spray or brush with oil, and then carefully transfer each stuffed trout onto the foil. Place the aluminum foil with the stuffed trout onto the grill grate directly over hot coals on the bbq. Cover the BBQ, and let the trout cook for 20 minutes. After 20 minutes, carefully transfer the trout off of the foil and directly onto the bbq grate. Cook 7 minutes (lid closed), then carefully flip trout to the other side and cook 7 more minutes (lid closed). Remove fish from grill. To serve: de-bone and skin the fish. Serve, and enjoy!

    NOTE: Generously coating the foil with spray or oil is an important step, because you do not want the fish skin to stick to the foil as it cooks.

  2. METHOD #2: Do not stuff the trout before placing it on the bbq. Place generously oiled aluminum foil (one piece of foil for each trout) with the UNSTUFFED trout onto the grill grate, but NOT DIRECTLY over the hot coals. Cover the BBQ, and let the trout cook on indirect heat for 20 minutes. After 20 minutes, add the garlic, butter and lemon to each fish cavity. Add a top layer of foil, and wrap up each of the fish in foil, sealing foil packets tightly. Let the fish cook for 15 minutes (lid on the grill), then remove the foil packets from the grill.

    NOTE: Generously coating the foil with spray or oil is an important step, because you do not want the fish skin to stick to the foil as it cooks.

Nutrition Facts
Garlic Butter Grilled Trout
Amount Per Serving (0.5 trout (half of 1 trout))
Calories 307 Calories from Fat 153
% Daily Value*
Fat 17g26%
Saturated Fat 6g38%
Cholesterol 114mg38%
Sodium 139mg6%
Potassium 623mg18%
Carbohydrates 1g0%
Fiber 1g4%
Sugar 1g1%
Protein 36g72%
Vitamin A 272IU5%
Vitamin C 5mg6%
Calcium 76mg8%
Iron 3mg17%
* Percent Daily Values are based on a 2000 calorie diet.

Here’s one more to pin on your Pinterest boards!Have an avid fisherman in the family? Here's a simple recipe for garlic butter grilled trout, with two methods given for preparing this fish on a BBQ.

Easy Chicken Pot Pie

If you enjoy family-friendly comfort food, then you will love this easy chicken pot pie, filled with chicken breast and veggies in a delicious gravy!

My husband and I have a fondness for chicken pot pies. Especially my husband. Nine times out of ten, my hubby will buy Marie Callender’s pot pies when he makes a Costco run. BUT… when I want to make a homemade chicken pot pie, THIS is the recipe I use!

Filled with chicken breast chunks, gravy, and all the standard pot pie veggies like potatoes, carrots, peas, onions and celery, this is one yummy and easy chicken pot pie! Best part is that it doesn’t require too much work to make, especially if you use store-bought pie crusts! Here’s how to make this delicious dinner!

Scroll Down For A Printable Recipe Card At The Bottom Of The Page

How To Make Easy Chicken Pot Pie

Prepare the veggies and chicken, but cutting them into bite-sized pieces (note: the potatoes are not shown in this photo).

Place the prepared celery, carrots, frozen peas, potatoes and chicken into a large saucepan. Add the chicken broth to the pan. Bring this mixture to a rolling boil, and then continue boiling for 15 minutes. Once done, drain the veggies, reserving 1¾ cups of the broth to use later!

Chicken, celery, frozen peas and sliced carrots are part of the filling for this dish.The veggies and chicken pieces cook in chicken both for 15 minutes.

Pre-Bake The Bottom Pie Crust

While the veggies and chicken are being cooked, pre-bake ONE bottom 9″ pie crust in a preheated oven (recipe requires TWO crusts). You can use already made pie crusts OR make homemade crusts like I did.

Prick the crust with the tines of a fork (on bottom and sides of crust). Bake in a preheated 425° F. oven for 5-7 minutes. Try to time this so the crust is done when the chicken pot pie filling is thickened.

Pre-baking the bottom pie crust for a few minutes.

Make The Easy Chicken Pot Pie Filling

Now it is time to make the chicken pot pie filling!  Make sure to have the cooked, drained veggies and chicken in a large saucepan.

Drained veggies and chicken in saucepan, waiting for thickened sauce.

In a separate skillet (or pan), cook the chopped onions in butter (on medium-low heat) for 3-4 minutes until they are translucent in color and cooked through. Add the flour, celery seed, salt and pepper to the skillet, and stir well, to fully combine the ingredients.

Onions are cooked, then flour and spices are added to skillet.

Now stir in the reserved chicken broth (1¾ cup) and milk. Stir or whisk these ingredients into the onion mixture. Continue to cook the creamy filling on medium-low heat, stirring or whisking often. The filling will thicken fairly quickly as it cooks.

Chicken and milk are added to the cooked onions, flour and spices.The sauce has thickened, and is ready to add to the veggies and chicken.

Once the gravy filling has thickened, pour it into the pan with the drained chicken and veggies. Stir gently, to thoroughly combine these ingredients. This is the filling for your easy chicken pot pie (and it really was easy, wasn’t it?).

Finish Making This Easy Chicken Pot Pie

Okay… now take the pie crust you pre-baked out of the oven. Turn the oven down to 375° F. Pour all of the chicken pot pie filling into the pre-baked bottom crust, and spread it out evenly on the crust.

The easy chicken pot pie filling is now ready!The chicken pot pie filling is spread into the pre-baked pie crust.

Place the second pie crust (uncooked) onto the top of the filling. Seal up the edges, and crimp the crusts together. Make a few slits in the top of the chicken pot pie with a sharp knife, because this will let the steam escape from the pie as it bakes! Nobody wants their chicken pot pie to explode, right?

Another pie crust is added to the top of the chicken pot pie and sealed before baking.

Bake The Easy Chicken Pot Pie

Place the chicken pot pie on the middle rack of the oven. Bake it at 375° F. for approximately 30 minutes. Because oven vary greatly in temperature ranges, I recommend checking it at 25 minutes, then continue baking until the pot pie is golden brown on top.

You might also see some of the filling bubbling to the top. I ended up letting mine cook for 35 minutes total. When done, remove the easy chicken pot pie from the oven, and be sure to let it “rest” for 10-12 minutes, before slicing and serving.

A peek at the inside of this easy chicken pot pie after removing a slice.

We really enjoyed this easy chicken pot pie! The leftovers were fantastic, as well! Cover the leftover pot pie with plastic wrap and store in the refrigerator, and it will “keep” for 3-4 days.

The filling really sets up nicely after being refrigerated (for leftovers), which makes slicing into the filling even easier. A quick pop into the microwave oven to reheat, and the leftovers are ready for a quick lunch or another dinner!

A single serving of chicken pot pie on a white plate.

We really enjoyed this simple, but delicious chicken pot pie! I would encourage you to give it a try, and hope you and those you love, will be pleased with the results, like we were! Have a great day!

Looking For More Chicken Recipes?

You can find all of my recipes for chicken in the Recipe Index, located at the top of the page (there are a lot of them!). A few favorites include:

Interested In More Recipes?

Thank you for visiting this website. I appreciate you using some of your valuable time to do soIf you’re interested, I publish a newsletter 2 times per month (1st and 15th) with all the latest recipes, and other fun info. I would be honored to have you join our growing list of subscribers, so you never miss a great recipe!
There is a Newsletter subscription box on the top right side (or bottom) of each blog post, depending on the device you use, where you can easily submit your e-mail address (only) to be included in my mailing list.

You Can Also Find Me On Social Media:
Facebook page: The Grateful Girl Cooks!
Pinterest: The Grateful Girl Cooks!
Instagram: jbatthegratefulgirlcooks

Author's signature

Original recipe source: https://www.iheartnaptime.net/chicken-pot-pie/

0 from 0 votes
Easy Chicken Pot Pie
Prep Time
25 mins
Cook Time
30 mins
Total Time
55 mins
 

If you enjoy family-friendly comfort food, then you will love this easy chicken pot pie, filled with chicken breast and veggies in a delicious gravy!

Category: Main Dish
Cuisine: American
Keyword: easy chicken pot pie
Servings: 8 slices
Calories Per Serving: 444 kcal
Author: JB @ The Grateful Girl Cooks!
Ingredients
  • 1 pound boneless, skinless chicken breasts , cut into bite-sized cubes
  • 1 large potato , peeled and cubed
  • 1 cup sliced carrots
  • ½ cup sliced celery
  • ½ cup frozen green peas
  • cup butter
  • cup chopped onion
  • cup all purpose flour
  • ¾ teaspoon salt
  • ¼ teaspoon black pepper
  • ¼ teaspoon celery seed
  • 32 ounces chicken stock (or broth) , for boiling - (reserving 1¾ cup for filling)
  • cup milk
  • 2 9" unbaked pie crusts (purchased or homemade)
Instructions
  1. Prepare the veggies and chicken. Place the cut, sliced celery, carrots, peas, potatoes and chicken into a large saucepan. Add chicken broth to the pan. Bring this mixture to a rolling boil, and then continue boiling for 15 minutes. Once done, drain the veggies, reserving 1¾ cups of broth to use later!

  2. While veggies and chicken are being cooked, pre-bake the bottom 9" pie crust in a preheated oven (recipe requires TWO crusts). You can use already made pie crusts OR make your own. Prick the crust with the tines of a fork (on bottom and sides of crust). Bake in a preheated 425° F. oven for 5-7 minutes.

  3. In a skillet, cook chopped onions in butter (on medium-low heat) for 3-4 minutes until translucent in color and cooked through. Add flour, celery seed, salt and pepper to skillet, and stir well, to combine ingredients. Stir or whisk in reserved chicken broth (1¾ cup) and milk. Cook on medium-low heat, stirring or whisking as it cooks. The filling will thicken fairly quickly. Once filling has thickened, pour it into the pan with the drained chicken and veggies. Stir gently, to thoroughly combine these ingredients. Take the pre-baked pie crust out of the oven. Turn oven down to 375° F. Pour pot pie filling into pre-baked bottom crust, and spread it out evenly. Place other pie crust (uncooked) on top of the filling. Seal up edges, form crust, and crimp the crusts together. Make a few slits in the top of the pie with a knife, because this lets the steam escape as it bakes!

  4. Place pot pie on the middle rack of the oven. Bake at 375° F. for approximately 30 minutes (mine ended up taking 35 minutes). Because oven temps vary greatly, I recommend checking it at 25 minutes, then continue baking until pie crust is golden brown on top. When done, remove chicken pot pie from the oven, and let it "rest" for 10-12 minutes, before slicing and serving. Enjoy!

Nutrition Facts
Easy Chicken Pot Pie
Amount Per Serving (1 slice (1/8th of pie))
Calories 444 Calories from Fat 198
% Daily Value*
Fat 22g34%
Saturated Fat 9g56%
Cholesterol 62mg21%
Sodium 718mg31%
Potassium 692mg20%
Carbohydrates 39g13%
Fiber 3g13%
Sugar 5g6%
Protein 21g42%
Vitamin A 3057IU61%
Vitamin C 11mg13%
Calcium 65mg7%
Iron 3mg17%
* Percent Daily Values are based on a 2000 calorie diet.

Here’s one more to pin on your Pinterest boards!If you enjoy family-friendly comfort food, then you will love this easy chicken pot pie, filled with chicken breast and veggies in a delicious gravy!

Panko Crusted Rockfish

You’ll enjoy this simple, delicious recipe for panko crusted rockfish! Fish fillets are seasoned, coated with crispy panko crumbs, and pan-seared until done.
You'll enjoy this simple, delicious recipe for panko crusted rockfish! Fish fillets are seasoned, coated with crispy panko crumbs, and pan-seared.

Have you ever eaten rockfish before? It is a mild flavored, medium firm fish that my husband and I started buying over the past couple years. The first time my husband bought some fillets at the grocery store, and brought them home, I wasn’t sure WHAT to do with it, since I’d never tasted it before!

Long story short, I wound up creating a recipe we loved, and have been buying and using rockfish fillets in recipes ever since! We’ve enjoyed Cornmeal Spice-Crusted Rockfish, and Pan-Seared Rockfish with Fresh Herbs, to name a couple!

Scroll Down for A Printable Recipe Card At the Bottom Of The Page

How I Came Up With This Simple Recipe

I came up with this super simple recipe for panko crusted rockfish one evening when my husband was invited out for dinner with a friend at the last minute. I had some rockfish already thawed, so I decided to cook a nice meal just for me! Sure beats cold cereal or a peanut butter and jelly sandwich!

The idea of panko coating to make the fish nice and crispy on the outside sounded good. I made a simple seasoning mix to season the fish with, and boom! A delicious seafood dinner was enjoyed by ME. Here’s how easy this seafood dish is to make!

Make The Seasoning For The Fish

In a small bowl, combine the spices used to season the rockfish. These spices are garlic powder, onion powder, salt and pepper, Italian seasoning, paprika and dried parsley. EASY!

A few common spices are mixed to season the rockfish.

Prepare The Rockfish Fillets

Pat the rockfish fillets dry, using paper towels. Sprinkle one side of the fish with the seasoning mix, dividing it equally between the two pieces.

Each of the fish fillets are seasoned on one side before cooking.

Place the panko crumbs onto a dinner sized plate and spread them out. Place fish, one fillet at a time, onto the panko crumbs. Press down, to cover the bottom with the crumbs. Turn the fillet over and coat the other side with crumbs, as well.

Pat them firmly into the fish with your hands to make the crumbs adhere to the surface as much as possible. Set the fillet aside and repeat with other piece, keeping at it until you get as much of the fillet covered with panko crumbs, as possible.

The rockfish fillets are dredged in panko crumbs to coat both sides before cooking.

Pan-Sear The Panko Crusted Rockfish

Heat oil in a large skillet on medium heat until very hot, but not smoking.  Carefully place the fish into the hot oil, SEASONED SIDE DOWN. You should hear it sizzle when the fish goes into the skillet. Do not move the fish after it hits the skillet.

Cook for approximately 4 minutes, until you see the outside bottom edges of the panko crusted rockfish browning and getting crusty. Carefully turn each fillet to the other side, using a spatula. Cook the second side for about 4 minutes, until fish is cooked through and flakes easily.

Fish is pan-seared in hot oil.Panko custed fish is flipped and other side is cooked, as well.

Time To EAT!

Transfer the finished fish to serving plates, and dig in! I served the panko crusted rockfish with Quick Broccoli in Vinaigrette and a Wild Rice Salad (with pumpkin vinaigrette) on the side. It was a very satisfying and delicious meal!

Broccoli and rice salad were served with the panko crusted rockfish.

See how flaky the rockfish is inside? It sure tastes good, too. Trust me, this was SUCH a simple dish to prepare, in under 20 minutes from start to finish!

The panko crusted rockfish is cooked through, and flakes easily.

Hope you enjoy this recipe for crispy panko crusted rockfish!  I sure did. Be sure and check out the Recipe Index, located at the top of the page for a look at ALL of my Seafood recipes! Have a wonderful day.

Looking for More ROCKFISH Recipes?

You can find ALL my recipes in the Recipe Index, located at the top of the page. I have some other rockfish recipes you might want to check out, including:

Interested In More Recipes?

Thank you for visiting this website. I appreciate you using some of your valuable time to do soIf you’re interested, I publish a newsletter 2 times per month (1st and 15th) with all the latest recipes, and other fun info. I would be honored to have you join our growing list of subscribers, so you never miss a great recipe!
There is a Newsletter subscription box on the top right side (or bottom) of each blog post, depending on the device you use, where you can easily submit your e-mail address (only) to be included in my mailing list.

You Can Also Find Me On Social Media:
Facebook page: The Grateful Girl Cooks!
Pinterest: The Grateful Girl Cooks!
Instagram: jbatthegratefulgirlcooks

Author's signature

0 from 0 votes
Panko Crusted Rockfish
Prep Time
10 mins
Cook Time
8 mins
Total Time
18 mins
 

You'll enjoy this simple, delicious recipe for panko crusted rockfish! Fish fillets are seasoned, coated with crispy panko crumbs, and pan-seared.

Category: Entree-Seafood
Cuisine: American
Keyword: panko crusted rockfish
Servings: 2
Calories Per Serving: 316 kcal
Author: JB @ The Grateful Girl Cooks!
Ingredients
Seasoning For Fish:
  • ¼ teaspoon garlic powder
  • ¼ teaspoon onion powder
  • ¼ teaspoon dried parsley
  • teaspoon salt
  • teaspoon black pepper
  • teaspoon Italian seasoning
  • teaspoon paprika
Remainder of Ingredients:
  • 2 rockfish fillets (approx. 4-5 ounces each)
  • 1 cup Panko bread crumbs (must use panko crumbs for crunchiest crust!)
  • Tablespoons olive oil (or oil of your choice)
Instructions
  1. In a small bowl, combine the garlic powder, onion powder, salt, pepper, Italian seasoning, paprika and dried parsley. Pat the rockfish fillets dry, using paper towels. Sprinkle one side of the fish with the seasoning mix, dividing it equally between both pieces of fish.

  2. Place panko crumbs onto a dinner sized plate and spread them out. Place fish, one fillet at a time, onto the panko crumbs. Press down, to cover the bottom with the crumbs. Turn the fillet over and coat the other side with crumbs, as well. Pat them into the fish with your hands to make the crumbs adhere to the surface as much as possible. Set fish aside and repeat with other fillet.

  3. Heat oil in a large skillet on medium heat until very hot, but not smoking.  Carefully place fish into the hot oil, SEASONED SIDE DOWN. You should hear it sizzle when it goes into the skillet. Do not move the fish after it hits the skillet. Cook for approximately 4 minutes, until you see the outside bottom edges of the rockfish browning. Once well browned and crusty, carefully turn each fillet to the other side, using a spatula. Cook the second side for about 4 minutes, until fish is cooked through and flakes easily. Transfer the fish to serving plate once done, and enjoy!

Nutrition Facts
Panko Crusted Rockfish
Amount Per Serving (1 fillet (4 ounces))
Calories 316 Calories from Fat 126
% Daily Value*
Fat 14g22%
Saturated Fat 2g13%
Cholesterol 57mg19%
Sodium 450mg20%
Potassium 497mg14%
Carbohydrates 22g7%
Fiber 1g4%
Sugar 2g2%
Protein 25g50%
Vitamin A 62IU1%
Calcium 71mg7%
Iron 2mg11%
* Percent Daily Values are based on a 2000 calorie diet.

Here’s one more to pin on your Pinterest boards!You'll enjoy this simple, delicious recipe for panko crusted rockfish! Fish fillets are seasoned, coated with crispy panko crumbs, and pan-seared.


Garlic Butter Pork Chops

Garlic Butter Pork Chops are a simple (20 minute) main dish, made by pan-searing chops, then finishing them in the oven, covered in a savory sauce!

My mom used to make fried pork chops for our family when I was growing up. They were nothing fancy, because she just coated them in flour, seasoned with salt and pepper and fried them in oil. They tasted okay, but were just kind of “plain”!

Now that I’m MUCH OLDER and am the one cooking, I find great delight in finding recipes for OTHER ways to cook pork chops!

Recently I found a recipe for garlic butter pork chops online, and decided to give it a try. You can use bone-in OR boneless chops for this recipe. This recipe is SUPER SIMPLE to make (in hardly any time at all – 20 minutes), and tastes great!

The three ingredient sauce that covers the cooked chops while they bake imparts a lot of flavor, and my husband and I enjoyed this dish. Here’s how to make it!

Scroll Down For A Printable Recipe Card At The Bottom Of The Page

Prep The Pork Chops

Preheat your oven to 375° F.  Pat the pork chops dry with paper towels (I used boneless chops). Lightly season (to your taste) with salt and pepper, on both sides of the meat.

Set the chops aside for a moment while you make the butter garlic sauce.

Boneless pork chops are patted dry with paper towels before seasoning is added.

Making The Butter Garlic Sauce Is A Cinch!

Making the butter garlic sauce for the pork chops is ridiculously EASY! Melt butter and then stir in minced garlic and fresh, chopped thyme leaves.

That’s it… see how easy it is? Set the sauce aside, once blended. This garlic butter sauce will go on the pork chops right before they are baked.

Melted butter, garlic and thyme are combined to make the simple sauce for the meat.

Pan-Sear The Pork Chops

To lightly brown the chops, they must be pan-seared before baking. It’s easy, too! Heat a Tablespoon of olive oil in a skillet. I like using my old faithful cast iron skillet for this, but any non-stick skillet will do!

Heat the oil on medium-high heat until really hot, but not smoking. Carefully place the pork into the hot skillet. It should sizzle when the meat hits the oil!

Don’t move the pork chops once they go into the pan, to ensure a good sear! Sear the pork chops until golden brown on the bottom. This should take about 2-3 minutes.

Turn the pork chops over and sear the other side for 2-3 minutes. Both sides of the pork chops should now have a golden brown “crust” on them.

Seasoned chops are pan-seared in olive oil in a hot skillet.Pork chops are turned to cook other side after turning golden brown.

Bake The Garlic Butter Pork Chops

You can keep the browned pork chops in the same skillet, if it is oven-safe, OR you can place them in an oven-safe baking dish.

Give the garlic butter sauce a stir, and then pour all of it over the top of the chops. In the second photo below, you can see all that yummy minced garlic on the pork chops!

The butter sauce is poured over the top of the chops in a baking pan.Garlic butter pork chops are now ready to bake!

Bake The Garlic Butter Pork Chops

Bake the garlic butter pork chops in a preheated oven at 375° F. for about 10-12 minutes. Your cooking time might vary slightly, because it will depend on the thickness of the pork chops you are using.

The pork chops are done when they reach an internal temperature of 145° F. Remove the meat from the oven, once done, and let it sit for a couple minutes before serving. This helps the juices inside redistribute through the meat.

Meat is cooked until the internal temperature reaches 145° F.

Time To Serve The Garlic Butter Pork Chops!

Now it is time to serve this dish! Transfer the pork chops to serving plates. Spoon the garlic butter sauce over the top; garnish with fresh thyme sprigs (if desired), and serve!

Hope you enjoy these garlic butter pork chops! We enjoyed them, served with fresh cold watermelon slices and corn on the cob! It was a great summer meal!

Garlic butter pork chops, served with corn and watermelon on the side.Fresh thyme sprigs garnish the finished garlic butter pork chops.

Thanks for stopping by the ol’ blog today! I appreciate your time, and hope you have the opportunity to make these yummy (and EASY) pork chops for those you love. Have a wonderful day!

Looking For More PORK CHOP Recipes?

You can find all of my recipes in the Recipe Index, located at the top of the page. I have quite a few pork chop recipes you might enjoy, including:

Want More Recipes? Get My FREE Newsletter!

I publish a newsletter 2 times per month (1st and 15th) with lots of recipes, tips, etc..
Would you like to join our growing list of subscribers?

There is a Newsletter subscription box on the top right (or bottom) of each blog post, depending on the device you use.
You can submit your e-mail address there, to be added to my mailing list.

Find Me On Social Media:

Facebook page: The Grateful Girl Cooks!
Pinterest:
The Grateful Girl Cooks!
Instagram:
jbatthegratefulgirlcooks

Author's signature

Original recipe source: https://www.primaverakitchen.com/garlic-butter-baked-pork-chops/

↓↓ PRINTABLE RECIPE BELOW ↓↓

0 from 0 votes
Garlic Butter Pork Chops
Prep Time
5 mins
Cook Time
15 mins
Total Time
20 mins
 

Garlic Butter Pork Chops are a simple (20 minute) main dish, made by pan-searing chops, then finishing them in the oven, covered in a savory sauce!

Category: Entree
Cuisine: American
Keyword: garlic butter pork chops
Servings: 2
Calories Per Serving: 441 kcal
Author: JB @ The Grateful Girl Cooks!
Ingredients
  • 2 pork chops , boneless or bone-in (approx. 1" thick)
  • salt and pepper , season to taste
  • 1 Tablespoon extra virgin olive oil
  • 4 Tablespoons butter , melted
  • 2 cloves garlic , minced
  • 1 Tablespoon fresh thyme , chopped (+ extra sprigs for garnish, if desired)
Instructions
  1. Preheat oven to 375° F.  Pat pork chops dry with paper towels. Lightly season (to your taste preference) with salt and pepper, on both sides of the meat. Set chops aside.

  2. Melt butter, and then stir in minced garlic and fresh, chopped thyme leaves. Set the sauce aside once blended together.

  3. Heat olive oil (in a cast iron or non-stick skillet) on medium-high heat until really hot, but not smoking. Carefully place the pork into the hot skillet. It should sizzle when the meat hits the oil! Don't move the pork chops once they go into the pan. Sear pork chops until golden brown on the bottom. This takes about 2-3 minutes. Turn pork chops over and sear the other side for 2-3 minutes. Both sides of the pork chops should have a golden brown "crust" on them.

  4. Place browned pork chops in an oven-safe baking dish, or keep it in the same skillet (if oven safe). Pour all of the butter garlic sauce over the top of the chops. Bake at 375° F. for about 10-12 minutes. The cooking time might vary slightly, because it will depend on the thickness of the pork chops you are using. The pork chops are done when they reach an internal temperature of 145° F. Remove from oven, once done, and let chops sit for a couple minutes before serving, to help juices inside redistribute through the meat. Transfer pork chops to serving plates. Spoon the garlic butter sauce over the top; garnish with fresh thyme sprigs, if desired, and serve!

Nutrition Facts
Garlic Butter Pork Chops
Amount Per Serving (1 g)
Calories 441 Calories from Fat 306
% Daily Value*
Fat 34g52%
Saturated Fat 17g106%
Cholesterol 149mg50%
Sodium 267mg12%
Potassium 540mg15%
Carbohydrates 2g1%
Fiber 1g4%
Sugar 1g1%
Protein 31g62%
Vitamin A 866IU17%
Vitamin C 7mg8%
Calcium 33mg3%
Iron 1mg6%
* Percent Daily Values are based on a 2000 calorie diet.

Here’s one more to pin on your Pinterest boards!Garlic Butter Pork Chops are a simple (20 minute) main dish, made by pan-searing chops, then finishing them in the oven, covered in a savory sauce!

Traeger BBQ Baby Back Ribs

Make BBQ baby back ribs in “3-2-1” on a pellet grill. Ribs are smoked 3 hours, cooked in foil 2 hours, & grilled with sauce 1 hour! Easy & delicious.
Make BBQ baby back ribs in "3-2-1" on a pellet grill. Ribs are smoked 3 hours, cooked in foil 2 hours, & grilled with sauce 1 hour! Easy & delicious.

This recipe for BBQ baby back ribs is fairly easy, especially with it’s easy to remember 3-2-1 game plan! My husband and I enjoyed these delicious ribs last month which were smoked, then cooked on our Traeger grill, and decided to share this recipe (also from Traeger) here on the blog.

Summer evenings and hot temperatures seem to pair very nicely with bbq ribs that are sloppy with sauce, and tender to the bite! YUM… BBQ baby back ribs are a definite favorite summer food of ours! Here’s how to make 3-2-1 bbq baby back ribs on a Traeger or pellet grill:

Scroll Down For A Printable Recipe Card At The Bottom Of The Page

Prepare The Baby Back Ribs For Smoking

The first part of Traeger’s 3-2-1- cooking method is to smoke the ribs for 3 hours, after seasoning them. Make sure to remove the silverskin (thin membrane) from the bone side of the ribs (if your grocery store butcher has not already done so). Pat the ribs dry with paper towels.

Two racks of baby back ribs ready for seasoning.

Mix mustard, ¼ cup apple juice, and worcestershire sauce together in a small bowl. Using a pastry brush, brush this sauce onto BOTH sides of each rib rack.

Lightly season (to taste) the racks of pork with your favorite pork and poultry rub spice mix. I used my homemade dry rub spice mix (for pork or chicken), and just sprinkled each rack with a decent covering of spice mix.

Simple sauce with mustard and apple juice, etc. is brushed onto both sides of the ribs.

The racks of ribs are lightly seasoned with pork/poultry spice mix.

Step #1- BBQ Baby Back Ribs In The Smoker

Prepare your pellet grill according to manufacturer instructions. For a Traeger, fill the pellet hopper, and turn the temperature gauge to SMOKE. Leave lid open. Once a fire has been established and grill is smoking (about 4-5 minutes), turn the temperature gauge to 180° F. Let the grill preheat for 15 minutes with the lid closed.

Place the racks of bbq baby back ribs directly onto the grill grate, with the meat side facing up. Smoke the ribs for 3 hours, with the lid closed. Once done, transfer ribs off the grill onto a rimmed baking sheet, and take them into kitchen. Turn temperature setting up to to 225° F.

Smoking the baby back ribs on a Traeger grill for 3 hours.Two racks of smoked ribs ready for the next step.

Prepare The Smoked Baby Back Ribs

Now for the next step! Pull off 4 long sheets of heavy duty foil. Put a rack of smoked ribs on top in the middle. Pull up the sides to surround the meat, because you will be adding liquid in a moment. Evenly distribute HALF of the brown sugar on top of the ribs. Drizzle the brown sugar with HALF of the honey, and HALF of the remaining apple juice (¼ cup).

Put another long piece of aluminum foil on top of the ribs, and close up all the foil, crimping the edges, so the packet is securely sealed. You don’t want it to leak! Repeat the process with the other rack of ribs.

Each rib rack is sprinkled with brown sugar, and drizzled with honey and apple juice.BBQ Baby Back Ribs are covered in brown sugar and honey with apple juice in foil.

Step #2- Put Foil-Wrapped BBQ Baby Back Ribs Back On Grill

Place the foil-wrapped racks of ribs back directly onto the grill grate. Close the lid, and cook the ribs for 2 hours at 225° F. After 2 hours have passed, carefully remove the foil off of the ribs. I did this in our kitchen, because there is a lot of juice in the foil packets. Discard the foil. Keep the ribs (just sayin’).

Foil packets with the ribs are cooked on the grill for two hours.After two hours, the foil is removed from the racks of ribs.

Step #3- Grill The BBQ Baby Back Ribs

Okay, now we’re ready for the final step in the 3-2-1 method. Once you’ve discarded the foil, brush your favorite BBQ sauce on both sides of each rack of ribs.

Place the ribs directly on the grill grate, and grill for 1 hour! They sure do look good right about now, right? Toward the end of the grilling time, we added asparagus (another recipe on the blog) to the grill, as well.

The ribs are coated with BBQ sauce, and grilled for one more hour until done!

When done, transfer the bbq baby back ribs to a cutting board. Let them rest for about 5 minutes, then slice between the bones,  and serve!

BBQ Baby Back Ribs are finished cooking, and rest on cutting board for 5 minutes.The BBQ baby back ribs are sliced into individual portions, and are ready to EAT!

Sure hope you enjoy the ribs, cooked 3-2-1 Traeger style! We sure did. It’s an easy to remember method (smoke/braise/grill), and the bbq ribs were delicious! Have a nice day.

Looking for more TRAEGER Recipes?

You can find all of my recipes in the Recipe Index, located at the top of the page. I have several recipes for grilling meats (and desserts) on a Traeger, including:

Interested In More Recipes?

Thank you for visiting this website. I appreciate you using some of your valuable time to do soIf you’re interested, I publish a newsletter 2 times per month (1st and 15th) with all the latest recipes, and other fun info. I would be honored to have you join our growing list of subscribers, so you never miss a great recipe!
There is a Newsletter subscription box on the top right side (or bottom) of each blog post, depending on the device you use, where you can easily submit your e-mail address (only) to be included in my mailing list.

You Can Also Find Me On Social Media:
Facebook page: The Grateful Girl Cooks!
Pinterest: The Grateful Girl Cooks!
Instagram: jbatthegratefulgirlcooks

Author's signature

Original recipe source: https://www.traegergrills.com/recipes/pork/3-2-1-baby-back-ribs

↓↓ PRINTABLE RECIPE BELOW ↓↓

0 from 0 votes
Traeger BBQ Baby Back Ribs
Prep Time
15 mins
Cook Time
6 hrs
Total Time
6 hrs 15 mins
 

Make BBQ baby back ribs in "3-2-1" on a pellet grill. Ribs are smoked 3 hours, cooked in foil 2 hours, & grilled with sauce 1 hour! Easy & delicious.

Category: Dinner
Cuisine: American
Keyword: bbq baby back ribs
Servings: 6 people
Calories Per Serving: 653 kcal
Author: JB @ The Grateful Girl Cooks!
Ingredients
  • 2 racks baby back ribs
  • cup yellow mustard
  • ½ cup apple juice divided use
  • 1 Tablespoon worcestershire sauce
  • Pork and Poultry Spice Rub (or homemade, to taste)
  • ½ cup dark brown sugar
  • 1 cup BBQ sauce (your favorite)
  • cup honey (warmed)
Instructions
  1. Prepare your pellet grill according to manufacturer instructions. For a Traeger, fill the pellet hopper, and turn the temperature gauge to SMOKE. Leave lid open. Once a fire has been established and grill is smoking (about 4-5 minutes), turn the temperature gauge to 180° F. Let the grill preheat for 15 minutes with the lid closed.

  2. Step #1- BBQ Baby Back Ribs In The Smoker: Remove silverskin from ribs (if your grocery store butcher has not already done so). Pat ribs dry with paper towels. Mix mustard, ¼ cup apple juice, and worcestershire sauce together in a small bowl. Brush sauce onto BOTH sides of each rib rack. Lightly season (to taste) the ribs with your favorite pork and poultry rub spice mix. I used my homemade dry rub spice mix . Place racks of ribs directly onto the grill grate, with meat side facing up. Smoke ribs for 3 hours, with the lid closed. Once done, transfer ribs off of grill onto a rimmed baking sheet. Close lid. Turn temperature setting up to to 225° F.

  3. Step #2- For each rack: Pull off 4 long sheets of heavy duty foil. Stack them on top of each other. Put one rack of smoked ribs on top in the middle. Pull up the sides to surround the meat, because you will be adding liquid. Evenly distribute HALF of the brown sugar on top of the ribs. Drizzle with HALF of the honey, and remaining ¼ cup of apple juice. Put another long piece of aluminum foil on top of the ribs, and tightly close up foil, crimping the edges, so the packet is securely sealed. You don't want it to leak! Repeat the process with the other rack of ribs. Place foil-wrapped ribs back directly onto grill grate. Close lid, and cook ribs for 2 hours at 225° F. After 2 hours, carefully remove foil off of the ribs. Do this in your kitchen, because there is a lot of juice in the foil. Discard foil.

  4. Step #3- Brush your favorite BBQ sauce onto both sides of each rack of ribs. Place the ribs directly on the grill grate, and cook for 1 hour! When done, remove ribs from grill; let meat rest for 5 minutes, then slice, and enjoy!

Recipe Notes

Caloric calculation was based on 1/2 rack per serving (total of 4 servings). If you serve 6 with this recipe, the caloric calculation per serving comes out to approximately 653 calories per serving. These are best estimates, because the weight of each rack of ribs will vary, as well as the type of BBQ sauce used.

Nutrition Facts
Traeger BBQ Baby Back Ribs
Amount Per Serving (1 (1/3 rack))
Calories 653 Calories from Fat 288
% Daily Value*
Fat 32g49%
Saturated Fat 11g69%
Cholesterol 130mg43%
Sodium 845mg37%
Potassium 674mg19%
Carbohydrates 57g19%
Fiber 1g4%
Sugar 51g57%
Protein 37g74%
Vitamin A 158IU3%
Vitamin C 1mg1%
Calcium 101mg10%
Iron 2mg11%
* Percent Daily Values are based on a 2000 calorie diet.

Here’s one more to pin on your Pinterest boards!Make BBQ baby back ribs in "3-2-1" on a pellet grill. Ribs are smoked 3 hours, cooked in foil 2 hours, & grilled with sauce 1 hour! Easy & delicious.

Smoked Chili Rib Eye Steaks

Use a Traeger, pellet smoker or BBQ to make delicious Smoked Chili Rib Eye Steaks. An easy, flavorful spice rub coats the smoked, then grilled steaks.

We really enjoyed these delicious smoked chili rib eye steaks recently! Thick juicy steaks are coated in a spice mixture, and the meat is refrigerated for several hours to let the flavors permeate fully!

Once the steaks are ready, they are first “smoked” on a pellet grill (we used our Traeger), and then cooked over high heat until perfectly done!

Scroll Down For A Printable Recipe Card At The Bottom Of The Page

Can I Still Make These Steaks If I Don’t Have a Smoker Grill?

The simple answer is YES! They will not have the depth of smoky flavor that “smoking” the meat with wood pellets will have, but they’re gonna still taste great! The’re going to taste wonderful because of the chili garlic seasoning mixture that coats the meat!

Make The Spice “Rub” For The Steaks

This spice “rub” or “paste” is very simple to make, and packs a lot of flavor onto the steaks. The ingredients are chili powder, cumin, brown sugar, salt, olive oil, worcestershire sauce, and garlic.

These ingredients plus garlic make the spice rub for the rib eyes.

Mash the minced garlic into the salt in a bowl, until they form a paste like mixture. It’s easy to do, using a fork! Stir in the remaining ingredients until they are fully incorporated. The finished mix will be the consistency of a thin chili sauce.

Minced garlic and salt are mashed together to form a paste.Ingredients are mixed together to form a chili-based sauce rub for the steaks.

Prepare The Steaks And Refrigerate

Brush the chili spice paste mixture over all sides of the steaks. I found using a pastry brush very easy, but you can certainly use your (clean) hands, if desired.

A pastry brush applies the chili rub to the rib eye steaks.

Once all four rib eyes are fully coated with the chili spice mixture, cover, and let them “chill” in the refrigerator for 4 hours. This lets the flavors really permeate the meat. NOTE: The seasoned steaks can be kept in the refrigerator for up to 2 days before cooking.

After the spice rub is applied, the steaks are refrigerated for 4 hours.

Using A Propane or Briquette BBQ Grill?

If using a propane or briquette BBQ, when you are ready to grill the steaks, prepare the grill, according to manufacturer instructions. When grilling the steaks (without smoking them), put the seasoned, marinated steaks on, and grill them to your preferred done-ness.

Time To Put the Smoked Chili Rib Eye Steaks On The Smoker!

If using a Traeger grill or other pellet smoker, turn the heat setting to SMOKE, and let the fire get established with the lid open. This usually takes 4-5 minutes. Once the fire is established and the grill is smoking, turn the temperature setting to 225° F, and close the lid. Let the grill preheat for 10-15 minutes, until temperature has been reached.

Place the steaks on the grill, and smoke them, (with lid closed) at 225° for 45 minutes, or until a probe inserted into the steak reaches an internal temperature of 120°.

Smoked Chili Rib Eye Steaks are smoked for 45 minutes on grill.

When the meat reaches an internal temperature of 120°, remove the steaks from grill. Cover them with foil and keep them warm. See where the temperature probe was in the steak, below?

The smoked chili rib eye steaks are removed to rest while grill is turned up to high grilling temp.

Time To GRILL The Smoked Chili Rib Eye Steaks!

Turn the temperature setting up to High (450° F), and preheat grill with the lid closed until it reaches temperature in about 10 minutes.

Return the smoked chili rib eye steaks back onto the grill. Insert a temperature probe back into one of the steaks. Cook until desired done-ness has been reached, turning them once. Cooking times will vary, depending on the type of grill you are using, hot spots, etc.  Remember that the temperature will continue to rise a bit after taking the steaks off the grill.

How Long Should I Grill The Steaks?

Grill 4-5 minutes on the first side, then flip and finish grilling the other side until temperature is reached. Here are the “recommended” benchmarks:

  • Rare Steaks: Take off grill at 130-135°. Final temp.= anywhere between 130° -140°.
  • Medium-rare steaks:  Take off grill between 135-140° F. Final temp. = 145°.
  • Medium steaks: Take off grill at 155°. Final temp. = 160° F.
  • Well done: Take off grill at 165°. Final temp. = 170°.

Let the smoked chili rib eye steaks rest for about 4-5 minutes after removing them from the grill to let juices redistribute inside the meat. Serve, and enjoy!

Smoked chili rib eye steaks are grilled on high temps after resting, to finish!

The smoked chili rib eye steaks turned out wonderfully, and flavor permeated the meat! These steaks are not too spicy! When my husband cut into his medium-rare steak, he said it was cooked perfectly! Hooray! Hope you will give this delicious recipe a try!

If you’re looking for another steak recipe that is NOT cooked on a pellet grill, check out my quick and simple recipe for Easy Garlic Butter Steak Bites! They’re delicious, too! Have a great day.

Looking For More TRAEGER GRILL Recipes?

You can find all of my recipes in the Recipe Index, located at the top of the page. I have several Traeger grill recipes, including:

Interested In More Recipes?

Thank you for visiting this website. I appreciate you using some of your valuable time to do soIf you’re interested, I publish a newsletter 2 times per month (1st and 15th) with all the latest recipes, and other fun info. I would be honored to have you join our growing list of subscribers, so you never miss a great recipe!
There is a Newsletter subscription box on the top right side (or bottom) of each blog post, depending on the device you use, where you can easily submit your e-mail address (only) to be included in my mailing list.

You Can Also Find Me On Social Media:
Facebook page: The Grateful Girl Cooks!
Pinterest: The Grateful Girl Cooks!
Instagram: jbatthegratefulgirlcooks

Author's signature

Original recipe source: https://www.traegergrills.com/recipes/beef/chili-rib-eye-steaks

0 from 0 votes
Smoked Chili Rib Eye Steaks
Prep Time
5 mins
Cook Time
55 mins
Marinating Time (inactive)
4 hrs
Total Time
5 hrs
 

Use a Traeger, pellet smoker or BBQ to make delicious Smoked Chili Rib Eye Steaks. An easy, flavorful spice rub coats the smoked, then grilled steaks.

Category: Entree
Cuisine: American
Keyword: smoked chili rib eye steaks
Servings: 4
Calories Per Serving: 677 kcal
Author: JB @ The Grateful Girl Cooks!
Ingredients
  • 4 rib eye steaks (10-12 ounces each)
  • 2 cloves garlic (large cloves) , minced
  • 1 teaspoon salt
  • 2 Tablespoons chili powder
  • 1 teaspoon ground cumin
  • 1 teaspoon packed brown sugar
  • 2 Tablespoons olive oil
  • 2 Tablespoons worcestershire sauce
Instructions
Make Spice Mixture:
  1. Place minced garlic and salt in a small bowl. Mash minced garlic into salt with a fork, until it forms a paste like mixture. Add the chili powder, cumin, brown sugar, olive oil, and worcestershire sauce. Stir well, to combine. Use a pastry brush (or clean hands) to fully cover all sides of the steaks with the spice mixture. Cover the steaks, and let them "chill" in the refrigerator for 4 hours. This lets the flavors permeate the meat. NOTE: If making ahead of time, the seasoned steaks can be kept in the refrigerator for up to 2 days before cooking.

Using A Propane Or Briquette BBQ:
  1. Remove seasoned steaks from refrigerator about 15 minutes before grilling. When ready to cook the steaks, prepare your grill, according to manufacturer instructions. Put the seasoned, steaks on, and cook them to your preferred done-ness.

Using A Traeger Grill Or Other Pellet Smoker To Smoke, Then Grill:
  1. Remove steaks from refrigerator while preheating grill. Turn the heat setting to SMOKE, and let the fire get established with the lid open. This usually takes 4-5 minutes. Once fire is established and the grill is smoking, turn temperature setting to 225° F, close the lid, and let the grill preheat for 10-15 minutes, until temperature has been reached. Place steaks on the grill, and smoke them, (with lid closed) at 225° for 45 minutes, or until a probe inserted into the steak reaches an internal temperature of 120°. Remove the steaks from grill. Cover with foil and keep them warm.

  2. Turn temperature setting up to HIGH (450° F), and preheat grill (lid closed) until it reaches temperature ( about 10 minutes). Return steaks to the grill. Insert temperature probe into a steak. Grill 4-5 minutes (lid open) on the first side, then flip and finish grilling the other side until temperature is reached, turning ONCE. Let the steaks rest 4-5 minutes after removing them from the grill to let juices redistribute inside the meat. Remember the temperature will continue to rise a bit after taking the meat off the grill. These are the commonly "recommended" temperatures for grilled steaks:

    Rare: Take off grill at 130-135°. Final temp.= anywhere between 130° -140°.

    Medium-rare:  Take off grill anywhere between 135-140° F. Final temp. = 145°.

    Medium: Take off grill at 155°. Final temp. = 160° F.

    Well done: Take off grill at 165°. Final temp. = 170°.

Nutrition Facts
Smoked Chili Rib Eye Steaks
Amount Per Serving (1 steak)
Calories 677 Calories from Fat 432
% Daily Value*
Fat 48g74%
Saturated Fat 19g119%
Cholesterol 173mg58%
Sodium 879mg38%
Potassium 915mg26%
Carbohydrates 5g2%
Fiber 1g4%
Sugar 2g2%
Protein 58g116%
Vitamin A 1230IU25%
Vitamin C 1.6mg2%
Calcium 50mg5%
Iron 6.4mg36%
* Percent Daily Values are based on a 2000 calorie diet.

Here’s one more to pin on your Pinterest boards!Use a Traeger, pellet smoker or BBQ to make delicious Smoked Chili Rib Eye Steaks. An easy, flavorful spice rub coats the smoked, then grilled steaks.

Baja Fish Tacos (Weight Watchers)

Baja Fish Tacos are a Weight Watchers dish, with seasoned broiled fish pieces in corn tortillas, topped with a crunchy slaw and creamy taco sauce!

Recently I tried a Weight Watchers recipe for baja fish tacos, and was pleasantly surprised! My husband and I both enjoy tacos (of any variety), and this recipe with broiled fish, sounded interesting, so I tried it! Broiling the fish helps cut calories, too, because it’s not fried!

Scroll Down For A Printable Recipe Card At The Bottom Of The Page

Low In WW Smart Points

This recipe for baja fish tacos has a fairly long ingredient list (mostly spices), but is actually VERY easy to prepare. Baked fish, is topped with fresh “slaw”, and creamy dressing, and served in warmed corn tortillas.

The recipe makes 8 tacos, serves 4 people ( 2 tacos per serving), and if following the WW Freestyle plan, is 6 Weight Watchers Smart Points per serving.

How To Make Baja Fish Tacos

First things first. Cover a baking sheet with aluminum foil, and spray with non-stick cooking spray. The spray will help the broiled fish become crispy on the outside!

A baking sheet is covered with foil, and coated with non-stick baking spray.

Prepare Seasoning Mix And The Fish For Broiling

The seasoning mix for baja fish tacos is really easy to make. Simply place the ingredients in a medium bowl, and mix together. The seasonings include corn flour (masa), salt, cayenne pepper, black pepper, cumin, garlic powder, and paprika.

Spices in bowl are combined to make seasoning for the baja fish tacos.

Cut the fish you are using into 2″ pieces. I used rockfish, but you can also use red snapper.  Place the fish, several at a time, into the bowl of seasonings, and toss to coat on all sides.

Place the coated fish pieces onto the sprayed foil on the baking sheet. Leave space between each piece of fish. Continue until all fish pieces are on baking sheet. Set aside, but preheat the broiler on the oven.

Fish is cut into 2" pieces, then tossed in seasoning before broiling.

Make The “Slaw”

In a small bowl, mix together the lettuce (romaine or iceberg), green onions, cherry tomato quarters and cabbage. I used a coleslaw mix for the cabbage, so there are a few carrot shreds in there, also! Set aside.

Topping for the baja fish tacos includes cabbage, lettuce, tomatoes, and green onions.

Make The Sauce For Baja Fish Tacos

Place plain, lowfat yogurt in a blender. Add fresh squeezed lime juice and the chipotle peppers in adobo sauce. Blend these until you have a smooth sauce. Set aside.

A baja style sauce is mixed in a blender to put on finished tacos.

Cook The Fish And Warm The Corn Tortillas

Warm The Tortillas: At the same time you are broiling the fish, wrap the corn tortillas in aluminum foil, and put them in the oven. Place them on a rack that is the furthest away from the source of heat.

Right before you put the fish in the oven, give the pieces a light spray on top with cooking spray. This will help the top of the pieces to get crispy, also. Place the baking sheet under the broiler, and cook the fish for about 4 minutes. Remove sheet, and quickly turn each piece of fish over, and cook the other side for 3-4 minutes.

The pieces of broiled fish are golden brown and crispy when done cooking.

Assemble The Baja Fish Tacos

When ready to serve baja fish tacos, place the warmed corn tortillas onto the serving plates.  Place 2-3 pieces of the cooked fish onto each tortilla.

Top the fish with some of the slaw mixture, and then top with a couple Tablespoons of the baja sauce. Garnish with fresh cilantro and a lime wedge, if desired (optional). Repeat until all of the baja fish tacos are ready to eat.

A few pieces of broiled fish are placed in each corn tortilla.

Baja fish tacos are topped with slaw salad and sauce before serving.

Now all that is left to do, is to pick up one of those big ol’ baja fish tacos, get a good grip on it, and take your first bite. YUM! They are delicious!

Time to eat a couple baja fish tacos!

Hope you will take the opportunity to make these delicious baja fish tacos sometime soon. We really enjoyed them! Have a great day.

Looking For More TACO Recipes?

You can find all of my recipes for Mexican food in the Recipe Index, located at the top of the page. A couple other taco recipes you might enjoy include:

Interested In More Recipes?

Thank you for visiting this website. I appreciate you using some of your valuable time to do soIf you’re interested, I publish a newsletter 2 times per month (1st and 15th) with all the latest recipes, and other fun info. I would be honored to have you join our growing list of subscribers, so you never miss a great recipe!
There is a Newsletter subscription box on the top right side (or bottom) of each blog post, depending on the device you use, where you can easily submit your e-mail address (only) to be included in my mailing list.

You Can Also Find Me On Social Media:
Facebook page: The Grateful Girl Cooks!
Pinterest: The Grateful Girl Cooks!
Instagram: jbatthegratefulgirlcooks

Author's signature

Recipe Adapted From: https://www.weightwatchers.com/us/recipe/baja-style-fish-tacos/5626a5f63d92b3c10eb8a514

0 from 0 votes
Baja Fish Tacos (Weight Watchers)
Prep Time
30 mins
Cook Time
8 mins
Total Time
38 mins
 

Baja Fish Tacos are a Weight Watchers dish, with seasoned broiled fish pieces in corn tortillas, topped with a crunchy slaw and creamy taco sauce!

Category: Entree-Seafood
Cuisine: Mexican, Southwestern
Keyword: baja fish tacos
Servings: 4 (2 tacos per serving)
Calories Per Serving: 332 kcal
Author: JB @ The Grateful Girl Cooks!
Ingredients
  • 1 pound rockfish or red snapper , cut into 2" chunks
  • 8 medium corn tortillas
  • 2 Tablespoons fresh cilantro sprigs (optional, for garnish)
  • 2 sprays cooking spray
For Seasoning Mix:
  • 1/2 cup yellow masa corn flour
  • 1 teaspoon table salt
  • 1/4 teaspoon ground black pepper
  • 1/8 teaspoon cayenne pepper
  • 1/4 teaspoon garlic powder
  • 1/2 teaspoon paprika
  • 1/8 teaspoon ground cumin
For Slaw:
  • 2 cups romaine lettuce or iceberg lettuce , outer leaves removed, cut in 1/4" strips
  • 2 stalks green onions (scallions) , thinly sliced
  • 10 small cherry tomatoes , quartered
  • 1/4 cup coleslaw mix OR purple cabbage , shredded
For Baja Sauce:
  • 3/4 cup plain, lowfat yogurt
  • 2 Tablespoons fresh lime juice
  • 1 teaspoon canned chipotle peppers , in adobo sauce, finely chopped
Instructions
PREP WORK:
  1. A) Cover a baking sheet with aluminum foil, and spray with non-stick cooking spray. The spray helps the fish become crispy! B) Place seasoning mix ingredients in medium sized bowl; stir to combine, and set aside. C) In a small bowl, mix together slaw ingredients. Set aside. D) Place plain, lowfat yogurt in a blender. Add fresh squeezed lime juice and chipotle peppers in adobo sauce. Blend until you have a smooth sauce. Set aside.

Prepare Fish Tacos:
  1. Cut fish into 2" pieces. Place the pieces, several at a time, into the bowl of seasoning mix, and toss to coat fish on all sides. Place the coated fish pieces onto baking sheet. Leave space between each piece. Continue until all pieces are on baking sheet. Set aside, and preheat your oven broiler.

  2. Warm The Tortillas: Wrap corn tortillas in aluminum foil, and put them in the oven to warm while you are broiling the fish. Place them on a rack that is the furthest away from the source of heat.

    Right before you put the fish in the oven, give fish a light spray on top with cooking spray. This helps top of the pieces get crispy, also. Place baking sheet under the broiler, and cook fish for about 3-4 minutes. Remove sheet, and quickly turn each piece of fish over, and cook the other side for 3-4 minutes. When done, remove fish and warmed tortillas from oven.

  3. When ready to serve, place warmed corn tortillas onto serving plates.  Place 2-3 pieces of broiled fish onto each tortilla. Top the fish with some slaw mixture, and then top with a couple Tablespoons of baja sauce. Garnish with cilantro sprigs and lime wedges, if desired. Repeat until all of the tacos are ready to eat. Serve, and enjoy!

Recipe Notes

Optional garnish: sprigs of fresh cilantro and lime wedge.
One serving = 2 tacos. For those following the Weight Watchers freestyle program, the total point value for 2 tacos (prepared as written) is 6 Smart Points.

Nutrition Facts
Baja Fish Tacos (Weight Watchers)
Amount Per Serving (1 2 tacos per serving)
Calories 332 Calories from Fat 45
% Daily Value*
Fat 5g8%
Saturated Fat 1g6%
Cholesterol 45mg15%
Sodium 736mg32%
Potassium 895mg26%
Carbohydrates 42g14%
Fiber 5g21%
Sugar 6g7%
Protein 31g62%
Vitamin A 2775IU56%
Vitamin C 19.4mg24%
Calcium 199mg20%
Iron 2.6mg14%
* Percent Daily Values are based on a 2000 calorie diet.

Here’s one more to pin on your Pinterest boards!Baja Fish Tacos are a Weight Watchers dish, with seasoned broiled fish pieces in corn tortillas, topped with a crunchy slaw and creamy taco sauce!