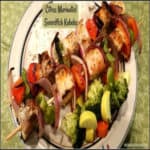
Category: Main Dishes

Cumin-Dusted Pork Cutlets With Citrus Sauce

Cumin dusted pork cutlets are lightly seasoned with Southwestern spices, pan-seared, then served covered in a delicious, fresh citrus sauce.

I recently made some delicious Cumin-Dusted Pork Cutlets with Citrus Sauce for our dinner and wanted to share this very simple recipe with you today. The recipe originated on the Epicurious website and sounded interesting, so I decided to try it, only making a couple tweaks to the original recipe. The pork cutlets are seasoned, then pan-seared.

As soon as they are done, a quick and easy citrus sauce (with orange juice, lemon juice, and garlic) is made and then spooned over the cooked pork cutlets. The cutlets are then served. It really couldn’t be any easier!

Scroll Down For A Printable Recipe Card At The Bottom Of The Page

How To Make Cumin Dusted Pork Cutlets With Citrus Sauce

If you are using thin, small cutlets, a serving size would be 2 cutlets per adult (and you will NOT need to pound them down).  You want to use fairly thin pork cutlets, so they will cook quickly.  Lightly season the pork with salt and pepper, and set aside.

Raw pork cutlets on plate before pan-searing.

**NOTE: I ended up using slightly larger and thicker boneless chops that I already had in my freezer for this meal, so I pounded each piece with a meat mallet between plastic wrap to flatten them out more (to about 1/2 inch). Since they were large pork chops to begin with, we had 1 cutlet per serving.

Pork cutlets can be flattened with a meat mallet.

Prepare Seasoning Mix For The Pork Chops

Mix the flour, ground cumin, chili powder, garlic powder, salt and pepper on a large dinner plate until the ingredients are fully combined.

Flour, cumin and other spices for pork cutlets, in bowl.

Once mixed, coat both sides of each of the pork cutlets with seasoning. Make sure to shake off any excess flour from the pork cutlets.

Pork cutlets are dredged in flour/spice mixture until covered, before cooking.

Heat 1 Tablespoon of olive oil on medium-high heat in a large non-stick skillet. Once oil is very hot (but not smoking), add cutlets. They should sizzle when they hit the hot oil.

Pork cutlets are seared in large skillet with oil.

Cooking the Cumin Dusted Pork Cutlets

Cook 3-4 minutes on first side, then turn over and cook other side for same amount of time (until fully cooked through and golden brown). Transfer the pork cutlets to a serving plate; keep them warm. If your pork cutlets are thicker, be sure to cook them longer. Chops should reach a safe, internal temperature of 145°F.

Cumin dusted pork cutlets are browned on all sides.

Making The Citrus Sauce For The Pork Cutlets

Do not clean out the skillet (the brown bits on bottom of skillet help to flavor citrus sauce!). Add 2 Tablespoons olive oil to skillet; heat on medium.  Add minced garlic to skillet; cook for about 15-30 seconds, stirring constantly (don’t burn it!).

Add fresh orange and lemon juices, and a few orange slices.  Bring this mixture to a boil, stirring occasionally. Cook the sauce until the liquid has reduced in volume and has thickened a bit. This will take about a minute or so. Taste the citrus sauce; add additional salt and pepper, if needed. Remove the sauce from the heat.

Orange juice, garlic and orange slices in skillet for citrus sauce to top pork cutlets.

Spoon the citrus sauce over the pork cutlets. Garnish each serving with thin orange slices and parsley (fresh or dried) if desired. Serve and enjoy!

Cumin dusted pork cutlets on plate with rice, peas, and orange slices.

The pork cutlets have a nice, slightly Southwestern flavor (the cumin does not overpower it).  There is enough sauce for 4 servings (single cutlet). If serving 2 cutlets per person, the recipe as written makes enough sauce for 2 servings.

Hope you will consider making this easy, tasty pork cutlets meal. Have a great day, friends. Thanks for stopping by. I hope you will come back again soon.

Looking For More PORK CHOP Recipes?

You can find all of my recipes in the Recipe Index, located at the top of the page. I have quite a few delicious recipes featuring pork chops, including:

Interested In More Recipes?

Thank you for visiting this website. I appreciate you using some of your valuable time to do soIf you’re interested, I publish a newsletter 2 times per month (1st and 15th) with all the latest recipes, and other fun info. I would be honored to have you join our growing list of subscribers, so you never miss a great recipe!
There is a Newsletter subscription box on the top right side (or bottom) of each blog post, depending on the device you use, where you can easily submit your e-mail address (only) to be included in my mailing list.

You Can Also Find Me On Social Media:
Facebook page: The Grateful Girl Cooks!
Pinterest: The Grateful Girl Cooks!
Instagram: jbatthegratefulgirlcooks

Author's signature

Recipe Adapted From:  http://www.epicurious.com/recipes/food/views/cumin-dusted-pork-cutlets-with-citrus-pan-sauce-105363

0 from 0 votes
Cumin Dusted Pork Cutlets With Citrus Sauce
Prep Time
10 mins
Cook Time
10 mins
Total Time
20 mins
 

Cumin dusted pork cutlets are lightly seasoned with Southwestern spices, pan-seared, then served covered in a delicious, fresh citrus sauce.

Category: Entree
Cuisine: American
Keyword: pork cutlets
Servings: 4 servings (1 per person)
Calories Per Serving: 311 kcal
Author: JB @ The Grateful Girl Cooks!
Ingredients
For Pork:
  • 4 boneless pork cutlets
  • 2 Tablespoons all purpose flour
  • 2 teaspoons ground cumin
  • 1/4 teaspoon garlic powder
  • 1/2 teaspoon chili powder
  • 1/2 teaspoon salt
  • 1/2 teaspoon ground black pepper
  • 1 Tablespoon olive oil
For Citrus Sauce:
  • 2 Tablespoons olive oil
  • 2 garlic cloves , minced
  • 1/3 cup fresh orange juice
  • 3 Tablespoons fresh lemon juice
  • A few orange slices (see below)
For garnish:
  • 1 orange , sliced into thin slices, then cut in half (divided)
  • Chopped fresh parsley or dried parsley
Instructions
  1. Lightly season pork with salt and pepper, and set aside.
  2. On a plate, mix together flour, ground cumin, chili powder, garlic powder, salt and pepper. Once mixed, coat each pork cutlet (on both sides) with seasoning. Shake off excess flour.
  3. Heat 1 Tablespoon of olive oil on medium-high heat in a large non-stick skillet. Once oil is very hot (but not smoking), add cutlets. Cook 3-4 minutes on first side, then flip and cook other side for same amount of time (until cooked through and golden brown). Remove pork to serving plate; keep warm.
  4. Do not clean out the skillet. Add 2 Tablespoons olive oil to skillet; heat oil on medium. Add minced garlic to skillet; cook for about 15-30 seconds, stirring constantly (don't burn it!). Add fresh orange and lemon juices, and a few orange slices. Bring mixture to a boil, stirring occasionally, until liquid has reduced and thickened a bit (this will take about a minute or so). Taste sauce; add additional salt and pepper, if desired. Remove sauce from heat.
  5. Spoon sauce over the pork cutlets. Garnish with thin orange slices and parsley (fresh or dried) if desired. Serve and enjoy!
Recipe Notes

If a slightly sweeter citrus sauce is desired, add 1 teaspoon honey.

Nutrition Facts
Cumin Dusted Pork Cutlets With Citrus Sauce
Amount Per Serving (1 piece)
Calories 311 Calories from Fat 135
% Daily Value*
Fat 15g23%
Saturated Fat 3g19%
Cholesterol 88mg29%
Sodium 363mg16%
Potassium 648mg19%
Carbohydrates 10g3%
Fiber 1g4%
Sugar 5g6%
Protein 31g62%
Vitamin A 200IU4%
Vitamin C 32.6mg40%
Calcium 32mg3%
Iron 1.5mg8%
* Percent Daily Values are based on a 2000 calorie diet.

Here’s one more to pin on your Pinterest boards!Cumin dusted pork cutlets are lightly seasoned with Southwestern spices, pan-seared, then served covered in a delicious, fresh citrus sauce.

Save

Save

Save

Save

Save

Save

Save

Save

Save

Save

Save

Save

Easy Meatballs for Spaghetti

Learn how to make yummy, quick easy meatballs for spaghetti or other pasta (serves 4), using only one pound of ground beef!
I typically use Italian sausage links when I prepare spaghetti and sauce, but we also really enjoy our pasta with a fire roasted garlic marinara sauce and these easy meatballs, too!

Sometimes we just want spaghetti and meatballs- they really hit the spot! It’s completely easy to make 10-12 delicious Italian-seasoned meatballs using only one pound of hamburger meat and a few other readily available ingredients.

I’ve been making these easy meatballs for spaghetti this way for many, many years, and enjoy the minimal prep time involved!  You can even make a double batch of the meatballs and freeze them to use for another meal, which can save you precious time!  Here’s how easy it is to prepare them:

Scroll Down For A Printable Recipe Card At The Bottom Of The Page

Prepare The Easy Meatballs For Spaghetti

In medium sized bowl, combine ground beef, salt, pepper, garlic powder, oregano, diced onion, and freshly grated Parmesan cheese. Mix well, to combine ingredients.

Ground beef is mixed with Parmesan cheese, spices and onions.
Using your (clean) hands, grab a portion of the meat mixture and form it into a ball, rolling it between your hands.  The ones I made were about 2 inches wide, so I was able to get 10 fairly good-sized easy meatballs out of one pound of meat.

If you make ’em just a tad smaller, you should be able to make 12 or more meatballs. Set the meatballs (once formed) onto a plate or wax paper.

Form the ground beef mixture into small balls before cooking.

Brown The Meatballs For Spaghetti

Heat 1 Tablespoon oil (vegetable or olive) in a large non-stick skillet on medium heat until oil and skillet are hot (but not smoking).  Add the meatballs carefully to the skillet. They should sizzle as they hit the hot oil.  Cook the meatballs until browned on the bottom, then carefully turn them over.

Continue to cook the meatballs until all sides are brown. They do NOT have to be completely cooked through – they will finish cooking in the sauce later. When done, transfer the meatballs to paper towels to absorb the grease.

Browning easy meatballs in skillet.The meat is browned on all sides in skillet.
Heat The Meatballs In Sauce

In a separate large saucepan, heat up spaghetti sauce (whatever kind of sauce you have on hand, whether it’s homemade or a purchased jar, just make sure you have enough sauce for 4 servings)!  Heat the sauce on medium-low.

Carefully add the meatballs to the sauce. Spoon sauce over the top of each meatball. Let the meatballs and sauce continue to cook (uncovered) on medium-low for about 25-30 minutes, occasionally spooning sauce over them as they cook.

Meatballs are placed in spaghetti sauce to finish cooking.The easy meatballs are covered with spaghetti sauce in pan to finish cooking.

When meatballs are about halfway through cooking time, cook spaghetti noodles in separate pan, according to package directions. Drain pasta.  When they are done (and pasta is finished cooking), remove meatballs from spaghetti sauce (keep warm).

Serve Easy Meatballs For Spaghetti

Mix the cooked and drained pasta noodles with the hot spaghetti sauce.  Serve the pasta onto individual plates or into bowls. Spoon any leftover sauce onto the top of the pasta.  Top each serving with a few of these easy meatballs.  BOOM! Sprinkle the meatballs with some finely grated Parmesan cheese, and serve!

Easy meatballs for spaghetti are served in white bowl, and are ready to eat.

This really is an economical and delicious classic meal, with 4 healthy sized portions of meatballs for spaghetti using only one pound of ground beef!  Our oldest son popped in for a visit the day after I made this meal, and he enjoyed a big plate of leftover spaghetti and meatballs for lunch!  Yay for leftovers!

Hope you’ll give these delicious, easy meatballs a try! Thank you for stopping by, and I trust you will come back soon. Have a great day.

Looking For More MEATBALL Recipes?

You can find all of my recipes in the Recipe Index, located at the top of the page. I have several recipes featuring meatballs, including:

Interested In More Recipes?

Thank you for visiting this website. I appreciate you using some of your valuable time to do soIf you’re interested, I publish a newsletter 2 times per month (1st and 15th) with all the latest recipes, and other fun info. I would be honored to have you join our growing list of subscribers, so you never miss a great recipe!
There is a Newsletter subscription box on the top right side (or bottom) of each blog post, depending on the device you use, where you can easily submit your e-mail address (only) to be included in my mailing list.

You Can Also Find Me On Social Media:
Facebook page: The Grateful Girl Cooks!
Pinterest: The Grateful Girl Cooks!
Instagram: jbatthegratefulgirlcooks

Author's signature

0 from 0 votes
Easy Meatballs for Spaghetti
Prep Time
10 mins
Cook Time
30 mins
Total Time
40 mins
 

Learn how to make yummy, quick easy meatballs for spaghetti or other pasta (serves 4), using only one pound of ground beef!

Category: Entree
Cuisine: Italian
Keyword: meatballs
Servings: 4 (3 meatballs per serving)
Calories Per Serving: 382 kcal
Author: JB @ The Grateful Girl Cooks!
Ingredients
  • 1 pound ground beef
  • 1/2 teaspoon salt
  • 1/4 teaspoon black pepper
  • 1/4 teaspoon garlic powder
  • 1/4 teaspoon dried oregano
  • 1/2 cup diced white onion
  • 1/2 cup finely grated Parmesan cheese
  • 1 Tablespoon olive oil
  • Spaghetti noodles (enough for 4 servings)
  • Prepared Spaghetti Sauce (enough for 4 servings)
  • Additional finely grated Parmesan cheese , for garnish
Instructions
  1. In medium sized bowl, combine ground beef, salt, pepper, garlic powder, oregano, diced onion, and finely grated Parmesan cheese. Mix well to combine ingredients.
  2. Using clean hands, grab a portion of the meat mixture and form it into a ball, rolling it between your hands. You should be able to make 12 or more small meatballs. Set meatballs (once formed) onto a plate or wax paper.

  3. Heat 1 Tablespoon oil (vegetable or olive) in a large non-stick skillet. Heat on medium until oil and skillet are hot (but not smoking). Add meatballs. They should sizzle as they hit skillet. Cook until brown on bottom, then carefully turn over. Continue to cook until all sides are brown (meatballs do NOT have to be completely cooked through - they will finish cooking in sauce later). Transfer to paper towels to drain.

  4. In a separate large saucepan, heat up spaghetti sauce (enough sauce for 4 servings) on medium-low. Carefully add meatballs to sauce. Spoon sauce over the top of each meatball. Let meatballs and sauce continue to cook on medium-low for about 30 minutes, occasionally spooning more sauce over the meatballs as they cook.

  5. When meatballs are halfway through cooking time, cook spaghetti noodles in separate pan, according to package directions. Drain. When done, remove meatballs from spaghetti sauce (keep warm). Mix cooked, drained noodles with the hot spaghetti sauce. Serve up the pasta onto individual plates or into bowls. Spoon any leftover sauce onto pasta. Top each serving with 3 meatballs. Garnish with grated Parmesan cheese, and serve!

Recipe Notes

*Caloric calculation is for meatballs only (3 per serving). 

Nutrition Facts
Easy Meatballs for Spaghetti
Amount Per Serving (3 meatballs)
Calories 382 Calories from Fat 261
% Daily Value*
Fat 29g45%
Saturated Fat 11g69%
Cholesterol 91mg30%
Sodium 558mg24%
Potassium 351mg10%
Carbohydrates 2g1%
Protein 24g48%
Vitamin A 110IU2%
Vitamin C 1.5mg2%
Calcium 164mg16%
Iron 2.4mg13%
* Percent Daily Values are based on a 2000 calorie diet.

Here’s one more to pin on your Pinterest boards!Learn how to make yummy, quick easy meatballs for spaghetti or other pasta (serves 4), using only one pound of ground beef!


Save

Save

Save

Save

Save

Save

Save

Save

Save

Save

Save

Save

Save

Save

Save

Save

Save

Save

Save

Orange And Rosemary Glazed Salmon

This EASY recipe for orange rosemary glazed salmon (inspired by Cooking Light) is topped with a fresh citrus glaze, and is ready in about 20 minutes!This EASY recipe for orange rosemary glazed salmon (inspired by Cooking Light) is topped with a fresh citrus glaze, and is ready in about 20 minutes!
I tried a new recipe for Orange Rosemary Glazed Salmon the other evening for our dinner. Whoa! It tasted absolutely fantastic, so I want to share the recipe on my blog today. Hopefully you will be inspired to make this salmon for your own dinner… you won’t regret it!

My husband and I love salmon, so I am constantly on the search for new ways to prepare it. I found this recipe on Pinterest, and it is now quite possibly one of my favorite recipes for  salmon.  It’s SOOOO good!

The original recipe was inspired by Cooking Light, and features pan-seared salmon fillets covered with a fresh, thickened citrus glaze. It’s delicious, and so very easy to prepare!  The recipe makes 4 servings.

Scroll Down For A Printable Recipe Card At the Bottom Of The Page

How To Prepare Orange Rosemary Glazed Salmon

I only cooked 2 salmon fillets since only two of us were eating, but I kept the sauce amount the same as written (and saved the extra sauce for another time).  Here’s how to make this delicious orange rosemary glazed salmon:

Heat olive oil on medium-high heat in a large non-stick skillet. Salt and pepper salmon fillets on both sides. When olive oil is really hot (but not smoking), add the salmon to skillet (it should sizzle when it hits the pan).

Two salmon fillets searing in copper skillet

Cook the salmon fillets for 3-4 minutes, then carefully turn salmon over and cook the other side for 3-4 minutes until fully cooked.

When done and golden brown, remove the browned salmon from the skillet (leaving the hot oil in the skillet). Keep the cooked salmon warm.

Two golden brown seared salmon fillets in skillet

Make The Sauce For Orange Rosemary Glazed Salmon

Turn the heat under the skillet to medium-low. Add the minced garlic and rosemary, and cook, stirring often, for about 20-30 seconds.

Minced garlic and rosemary cooking in copper skillet

Pour 1/4 cup (4 Tablespoons) of chicken broth to the skillet. Stir the ingredients, to combine. Cook this on a low simmer until most of the liquid has reduced in volume.

Chicken broth being poured into orange glaze sauce in skillet

The next thing to do is to add the orange zest, lemon juice, honey and orange juice to the skillet. Stir to combine.

Now the orange sauce will begin to smell wonderful!

Orange juice being added to skillet for glaze

In small cup, stir together the remaining Tablespoon of chicken broth with the cornstarch until smooth. 

Pour this mixture into the skillet, stirring well, as it is added.  Season the sauce with salt and pepper, to taste.

Cornstarch and broth being added to orange sauce in pan

Bring the orange sauce to a boil. Boil it for one minute, stirring constantly. The sauce will thicken as it cooks.

Cooking sauce for orange rosemary glazed salmon.

Serve The Orange Rosemary Glazed Salmon

Return the cooked salmon back into the skillet with the sauce. Spoon some of the sauce over each piece to cover the salmon.

Two pieces of salmon with orange slices in skillet with sauce

Carefully remove the orange rosemary glazed salmon from the pan, and transfer to serving plates.  Spoon additional sauce over each piece, if desired (it’s good- highly recommend).

Garnish each orange rosemary glazed salmon fillet with a fresh rosemary sprig, and fresh orange slice, if desired. Serve, and enjoy this wonderful dinner!

Orange rosemary glazed salmon, green beans and rice on a beige plate.

A orange rosemary glazed salmon fillet on plate, with green beans and rice.

I really hope you will try this recipe for orange rosemary glazed salmon. The fresh citrus glaze tastes absolutely delicious on the salmon, and really enhances it. 

We said “this is REALLY good” several times while eating it, and I’m confident you will enjoy it, as well! Have a wonderful day.

Looking For More SALMON Recipes?

You can find all of my salmon recipes in the Recipe Index, located at the top of the page. I have lots of delicious recipes using salmon, including:

Interested In More Recipes?

Thank you for visiting this website. I appreciate you using some of your valuable time to do soIf you’re interested, I publish a newsletter 2 times per month (1st and 15th) with all the latest recipes, and other fun info. I would be honored to have you join our growing list of subscribers, so you never miss a great recipe!
There is a Newsletter subscription box on the top right side (or bottom) of each blog post, depending on the device you use, where you can easily submit your e-mail address (only) to be included in my mailing list.

You Can Also Find Me On Social Media:
Facebook page: The Grateful Girl Cooks!
Pinterest: The Grateful Girl Cooks!
Instagram: jbatthegratefulgirlcooks

Author's signature

Recipe Source:  http://www.cookingclassy.com/orange-rosemary-glazed-salmon/

0 from 0 votes
Orange And Rosemary Glazed Salmon
Prep Time
5 mins
Cook Time
15 mins
Total Time
20 mins
 
This EASY recipe for orange rosemary glazed salmon (inspired by Cooking Light) is topped with a fresh citrus glaze, and is ready in about 20 minutes!
Category: Entree-Seafood
Cuisine: American
Keyword: orange rosemary glazed salmon
Servings: 4 servings
Calories Per Serving: 336 kcal
Author: JB @ The Grateful Girl Cooks!
Ingredients
  • 2 teaspoons olive oil
  • 4 (6 ounce) skinless salmon fillets (about 1 inch thick)
  • Salt and ground black pepper
  • 2 cloves garlic , minced
  • teaspoons minced fresh rosemary
  • 5 Tablespoons chicken broth (divided-4 T. in one cup, 1 T. in another))
  • teaspoons orange zest
  • 2 teaspoons lemon juice
  • Tablespoons honey
  • 2/3 cup fresh squeezed orange juice
  • teaspoons cornstarch
  • 2 Oranges (thinly sliced) and sprigs of fresh rosemary for garnish (if desired)
Instructions
  1. Heat olive oil on medium-high heat in large non-stick skillet. Salt and pepper salmon fillets on both sides. When olive oil is hot (but not smoking), add salmon to skillet (it should sizzle when it hits the pan). Cook salmon for 3-4 minutes, then carefully turn salmon over and cook other side for 3-4 minutes, until fully cooked. When done and golden brown, remove salmon from skillet (leaving hot oil in the skillet). Keep salmon warm.
  2. Turn heat under skillet to medium-low. Add minced garlic and rosemary; stir and cook for about 20 seconds. Add 1/4 cup chicken broth (4 Tablespoons of the original 5). Stir well. Cook on a low simmer until most of liquid has reduced. Add orange zest, lemon juice, honey and orange juice to skillet. Stir.
  3. In small cup, stir together remaining Tablespoon of chicken broth with cornstarch. Pour into skillet, stirring as you add it. Add salt and pepper to taste.
  4. Bring mixture to a boil. Boil for one minute, stirring constantly. The sauce will thicken as it cooks. Return cooked salmon to skillet. Spoon sauce over each piece to cover. Garnish each fillet with a thin orange slice, and a sprig of fresh rosemary (if desired). Carefully remove salmon and transfer to individual serving plates. Spoon additional sauce over each piece. Serve and enjoy!
Nutrition Facts
Orange And Rosemary Glazed Salmon
Amount Per Serving (1 g)
Calories 336 Calories from Fat 108
% Daily Value*
Fat 12g18%
Saturated Fat 1g6%
Cholesterol 93mg31%
Sodium 144mg6%
Potassium 1020mg29%
Carbohydrates 19g6%
Fiber 2g8%
Sugar 15g17%
Protein 34g68%
Vitamin A 285IU6%
Vitamin C 53.6mg65%
Calcium 61mg6%
Iron 1.4mg8%
* Percent Daily Values are based on a 2000 calorie diet.

Here’s one more to pin on your Pinterest boards!This EASY recipe for orange rosemary glazed salmon (inspired by Cooking Light) is topped with a fresh citrus glaze, and is ready in about 20 minutes!


Save

Save

Save

Save

Save

Save

Save

Save

Save

Save

Save

Save

Save

Save

Save

Save

Chicken and Asparagus Risotto

Creamy chicken asparagus risotto, with Arborio rice, Parmesan cheese and mushrooms is a delicious, filling, “all in one” Italian inspired dish!Creamy chicken asparagus risotto, with Arborio rice, Parmesan cheese and mushrooms is a delicious, filling, "all in one" Italian inspired dish!

I recently made Chicken Asparagus Risotto for our dinner. And let me tell you… it tasted GOOD. Lip-smackin’ GOOD. Creamy Arborio rice, chicken breast, Parmesan cheese, asparagus and mushrooms all come together in this flavor-filled, delicious meal! We loved it!

I couldn’t get enough of this chicken asparagus risotto! Even the leftovers for lunch the next day were wonderful! If you love risotto, you might also enjoy my recipe for Mushroom Risotto with Pan-Seared Shrimp!

Scroll Down For A Printable Recipe Card At The Bottom Of The Page

What Kind Of Rice Is Used To Make Chicken Asparagus Risotto?

Did you know that risotto is made with Arborio rice, which is shorter and fatter than most grains of rice?  Arborio rice is almost exclusively used to make risotto, which is a Northern Italian classic dish.

To put it into very basic terms, risotto is rice which has been cooked in broth or stock with other ingredients to a creamy consistency.  It is one of the most common ways of cooking rice, and let me tell you, risotto is DELICIOUS!

The recipe for making chicken asparagus risotto is pretty straightforward. If you do the prep work right at the beginning, then this chicken asparagus risotto is a breeze to put together.  I used some baked chicken leftovers, which also saved some prep time!

Prepare The Asparagus

The first thing you will need to do is remove the woody ends of the asparagus stalks, and discard. Cut each of the stalks into 2″ pieces.

Place asparagus pieces into 1 inch of simmering water in skillet, and cook on medium high heat until asparagus is fork-tender, adding more water, if needed (about 10 minutes). Once cooked, you will need to drain the asparagus.

Prepare the Mushrooms And The Chicken

While the asparagus cooks, lightly sauté sliced the mushrooms in butter until tender, in a separate pan.

Cut the chicken into small bite sized pieces and cook. You can boil, broil, or grill it OR use rotisserie chicken or  leftovers. I used leftover chicken from my recipe for Homemade Shake And Bake Chicken). Set aside the cooked asparagus, mushrooms and chicken pieces. See NOTES section of printable recipe (below)for a quick way to cook chicken for this recipe.

Asparagus is cooked for risotto

Make The Risotto

Start the risotto by melting butter and olive oil in large saucepan over medium heat. Add chopped onion. Cook for 5 minutes, stirring the onions frequently.

Chopped onion is cooked in butter and olive oil for risotto

Add the Arborio rice to the cooked onions; stir frequently and continue cooking until the rice begins to turn a light golden brown color.

Arborio rice is added to cooked onions for risotto

Pour the white wine into the pan. Let this liquid come to a boil, then cook, stirring occasionally, until it has been absorbed into the rice.

White wine is added to risotto mixture in skillet

“Building In The Flavor” To The Risotto

Yes… the flavor is slowly “built in” to the risotto! Pour 1 cup of chicken stock (or broth) into the pan. Stir the risotto frequently, and keep the heat at a medium simmer.  Continue cooking the risotto until almost all of the liquid has been absorbed, then add 1/4 cup more of the broth, stirring well.

Repeat this process (rice absorbs liquid, add 1/4 cup more liquid) until all the broth is gone.  This should take between 20 and 25 minutes. (By adding the broth a little bit at a time then cooking until it has been absorbed, it allows the rice to get really creamy. Don’t rush this step!)

Chicken broth is added to risotto mixture cooking in the skillet

Finishing The Chicken Asparagus Risotto

After you’ve added the last portion of broth, but just before it is fully absorbed, add the cooked asparagus and mushrooms to the risotto. Continue cooking the risotto, letting the liquid finish being absorbed into the rice. When finished, the risotto should be creamy and tender.

Cooked asparagus and mushrooms added to risotto in skillet
Remove the pan from the heat.  Add the cooked chicken pieces to the creamy risotto. Now the chicken asparagus is looking good, and is close to being done!

Chicken breast chunks added to asparagus in creamy risotto
Add the freshly grated Parmesan cheese to the chicken asparagus risotto. Stir well, to combine all the ingredients fully.  Take a bite, and lightly season with salt and pepper, to suit your taste.

Fresh grated Parmesan cheese is added to risotto

Serve The Chicken Asparagus Risotto!

Make sure everything is fully heated through, then dish up the chicken asparagus risotto onto individual plates or into bowls. Garnish each serving with some finely grated Parmesan cheese and chopped fresh chives (or parsley), if desired. There you have it… a nice serving of chicken asparagus risotto!

Grab a fork, and prepare to be delighted! I really think you will love this creamy, flavor-filled chicken asparagus risotto!

Chicken asparagus risotto is served in white bowl

Chicken and asparagus risotto is garnished with Parmesan cheese and chives

Enjoy the creamy rice, chunks of chicken, Parmesan cheese, and the fresh asparagus in this comforting, filling dish. It truly tastes wonderful!  Sure hope you will consider trying this recipe for chicken asparagus risotto. We LOVE it, and hope you will, too!

Be sure to check out ALL of my recipes in the Recipe Index, which is located at the top of the page. Have a great day, and come back soon!

Interested In More Recipes?

Thank you for visiting this website. I appreciate you using some of your valuable time to do soIf you’re interested, I publish a newsletter 2 times per month (1st and 15th) with all the latest recipes, and other fun info. I would be honored to have you join our growing list of subscribers, so you never miss a great recipe!
There is a Newsletter subscription box on the top right side (or bottom) of each blog post, depending on the device you use, where you can easily submit your e-mail address (only) to be included in my mailing list.

You Can Also Find Me On Social Media:

Facebook page: The Grateful Girl Cooks!
Pinterest:
The Grateful Girl Cooks!
Instagram:
jbatthegratefulgirlcooks

Have a great day!

Author's signatureRecipe Adapted From: http://www.thegratefulgirlcooks.com/mushroom-risotto-with-pan-seared-shrimp/

0 from 0 votes
Chicken and Asparagus Risotto
Prep Time
15 mins
Cook Time
30 mins
Total Time
45 mins
 
Creamy chicken asparagus risotto, with Arborio rice, Parmesan cheese and mushrooms is a delicious, filling, "all in one" Italian inspired dish!
Category: Entree
Cuisine: Italian
Keyword: chicken asparagus risotto
Servings: 3 -4 servings
Calories Per Serving: 539 kcal
Author: JB @ The Grateful Girl Cooks!
Ingredients
For Add-ins:
  • 6-8 asparagus stalks (woody ends discarded, cut into 2 inch pieces), cooked until crisp-tender.
  • 2 pre-cooked lightly seasoned chicken breasts (baked, boiled, grilled,rotisserie), cut in 1-2" cubes.
  • 8 oz. package sliced mushrooms , (sautéed in 2 teaspoons butter)
For risotto:
  • 2 Tablespoons butter
  • 2 Tablespoons olive oil
  • 1 cup diced white onion
  • 1 cup Arborio rice (no substitutes)
  • 1/3 cup dry white wine
  • cups chicken stock (or broth)
  • 3/4 cup finely grated Parmesan cheese
  • Salt and Pepper , to taste
For garnish:
  • Additional Parmesan cheese
  • Fresh chives , sliced thin (may substitute chopped parsley, if desired)
Instructions
Do prep work first:
  1. Remove woody ends of the asparagus and discard. Cut remaining stalks into 2 inch pieces. Place asparagus pieces into 1 inch of simmering water in skillet, and cook on medium high heat until asparagus is fork-tender (about 10 minutes). Drain.
  2. While cooking asparagus, in separate pan lightly sauté sliced mushrooms in 2 teaspoons butter until tender.
  3. Cut and cook chicken into small bite sized pieces (boil, broil, grill OR use rotisserie chicken or leftovers. Set aside asparagus, mushrooms and cooked chicken.
To Prepare Risotto:
  1. Melt olive oil and butter in large saucepan over medium heat. Add chopped onion. Cook for 5 minutes, stirring frequently. Add Arborio rice to onions; stir constantly and cook until rice turns a light golden brown color. Add white wine. Let the liquid come to a boil, then cook until it has been absorbed into rice.
  2. Pour 1 cup of chicken stock (or broth) into pan. Stir frequently, and keep heat at a medium simmer. Continue cooking until almost all of the liquid has been absorbed, then add 1/4 cup more broth, stirring well. Continue this process (rice absorbs liquid, add 1/4 cup more liquid) until all broth is gone. This will take between 20 and 25 minutes. (By adding the broth a little bit at a time then cooking until it has been absorbed, it allows the rice to get really creamy. Don't rush this step!)
  3. After you've added the last portion of broth, but just before it's fully absorbed, add cooked asparagus and mushrooms and stir. Continue cooking, letting liquid finish being absorbed into rice. When finished, rice should be tender.
  4. Remove pan from the heat. Add cooked chicken to rice. Add freshly grated Parmesan cheese to rice. Stir to combine all ingredients. Taste, and lightly season with salt and pepper.
  5. Make sure everything is warm, then serve onto individual plates or bowls. Garnish with additional finely grated Parmesan cheese and chopped fresh chives (or parsley), if desired. Enjoy this chicken asparagus risotto!

Recipe Notes

If you do not have pre-cooked or leftover chicken, a quick way to get this done is to cut chicken breast into cubes, lightly season with salt and pepper, then quickly cook in a hot skillet (with a Tablespoon of olive oil) on medium-high heat. Will only take a few minutes.

Nutrition Facts
Chicken and Asparagus Risotto
Amount Per Serving (1 serving)
Calories 539 Calories from Fat 189
% Daily Value*
Fat 21g32%
Saturated Fat 8g50%
Cholesterol 72mg24%
Sodium 623mg27%
Potassium 729mg21%
Carbohydrates 52g17%
Fiber 3g13%
Sugar 6g7%
Protein 29g58%
Vitamin A 535IU11%
Vitamin C 6.4mg8%
Calcium 230mg23%
Iron 3.7mg21%
* Percent Daily Values are based on a 2000 calorie diet.

Here’s one more to pin on your Pinterest boards!Creamy chicken asparagus risotto, with Arborio rice, Parmesan cheese and mushrooms is a delicious, filling, "all in one" Italian inspired dish!


Save

Save

Save

Save

Save

Save

Save

Save

Save

Save

Save

Save

Save

Save

Save

Save

Save

Save

Trout In Lemon Garlic Butter Sauce

Fresh trout fillets are pan-seared and served with a light lemon, garlic, butter, and wine sauce for a delicious main course!Fresh trout fillets are pan-seared and served with a light lemon, garlic, butter, and wine sauce for a delicious main course!
If you or someone in your family had a great day fishing and you’re looking for a new recipe to cook all that fish, why not try this recipe for Trout In Lemon Garlic Butter Sauce?!

There are so many ways to cook trout. I decided to try this recipe I found on Pinterest, after my hubby bought a few trout at Costco. Ha Ha!  No fishing for him, except to fish through the seafood section, looking for fresh seafood.

Once home, he had to fillet the fish, debone them and chop their little heads off for me— ugh. There are just some things I will NOT do. Ha Ha! The method for preparing this recipe is simple. Here’s how to make the trout:

Scroll Down For A Printable Recipe Card At The Bottom Of The Page

Prepare The Trout

  NOTE: You will want to use boneless trout fillets (with the skin on one side) for this recipe. With the skin side down, lightly season the trout with salt and Italian seasoning (only on one side). 

Cook The Trout Fillets

Heat olive oil on medium heat in a LARGE skillet until hot, but not smoking.  Add the trout fillets, skin side UP to the hot oil.

The fish fillets are lightly seasoned before cooking.

Cook the trout for 4-5 minutes on medium heat, then carefully flip the fillets over to skin side DOWN. You might need to add a little bit more oil before turning them over, because you don’t want them to stick to skillet.  Cook an additional 3-4 minutes.

Let The Cooked Fish “Rest”

Once the fish is cooked, remove your skillet from the heat source. Cover the skillet with a lid, and let the cooked trout “rest” for 5-10 minutes. Leave the lid on the skillet.

Once the fish is done resting, carefully lift up each piece of trout and remove the skin from the bottom. It should peel off nicely. 

Discard skin, and carefully place fillets on a piece of foil and keep warm.  Do not clean out the skillet, because you want all the little tidbits and oils left in there!

Cooking the trout in oil, in a large skillet.

The fish fillets are turned over, halfway through cooking time.

Make A Lemon Garlic Butter Sauce For The Trout

To the oils left in the skillet, add minced garlic, fresh lemon juice and white wine. Cook this liquid for 1 minute on medium-low heat, stirring occasionally. Turn off the heat.

Add the butter and chopped fresh parsley to the skillet. Stir well, to combine, and continue cooking on low heat until the butter has melted.

Garlic, lemon juice and white wine are added to skillet to make sauce for the fish.

Butter and fresh parsley is added to the sauce in skillet.

Add The Cooked Trout To The Lemon Butter Garlic Sauce

Once the butter has melted and the sauce is creamy, gently add the trout fillets back into the skillet.  Spoon sauce over the top of the fish.

If necessary, reheat on low, just until fish reaches serving temperature.

Trout In Lemon Garlic Butter Sauce cooking in skillet.

Serve The Trout In Lemon Garlic Butter Sauce

Place the cooked trout onto individual serving plates.  Spoon a bit more of the sauce over each piece of fish. Sprinkle with the remaining chopped parsley for garnish… and serve!

A piece of Trout In Lemon Garlic Butter Sauce on a plate, with peas.

That’s it!  So now, whether you are fishing some of the great lakes in the United States OR fishing the seafood counter at a grocery store, you have a new way to prepare trout in lemon garlic butter sauce! 

If you have a smoker or Traeger grill, be sure to check out my recipe for Traeger Grill Smoked Trout. You might also enjoy my recipe for Pan-Seared Steelhead Trout, because it is delicious, too!

Thanks for stopping by today. I invite you to come back soon for more yummy recipes. Have a great day!

Looking For More SEAFOOD Recipes?

You can find all of my recipes in the Recipe Index, located at the top of the page. I have many recipes, including:

Interested In More Recipes?

Thank you for visiting this website. I appreciate you using some of your valuable time to do soIf you’re interested, I publish a newsletter 2 times per month (1st and 15th) with all the latest recipes, and other fun info. I would be honored to have you join our growing list of subscribers, so you never miss a great recipe!
There is a Newsletter subscription box on the top right side (or bottom) of each blog post, depending on the device you use, where you can easily submit your e-mail address (only) to be included in my mailing list.

You Can Also Find Me On Social Media:
Facebook page: The Grateful Girl Cooks!
Pinterest: The Grateful Girl Cooks!
Instagram: jbatthegratefulgirlcooks

Author's signature

Recipe Source: http://juliasalbum.com/2015/10/trout-with-garlic-lemon-butter-herb-sauce/

↓↓ PRINTABLE RECIPE BELOW ↓↓

0 from 0 votes
Trout In Lemon Garlic Butter Sauce
Prep Time
10 mins
Cook Time
20 mins
Total Time
30 mins
 

Fresh trout fillets are pan-seared and served with a light lemon, garlic, butter, and wine sauce for a delicious main course!

Category: Entree
Cuisine: American
Keyword: trout
Servings: 4 servings
Calories Per Serving: 379 kcal
Author: JB @ The Grateful Girl Cooks!
Ingredients
  • 3-4 Trout fillets (3-4 medium sized fillets, with skin on bottom or 2 LARGE)
  • 2 Tablespoons olive oil
  • Salt (to generously season fish)
  • teaspoons Italian seasoning
  • 4 cloves garlic , minced
  • 3 Tablespoons fresh squeezed lemon juice
  • 2-3 Tablespoons white wine
  • 2 Tablespoons butter (room temp)
  • 2 Tablespoons parsley (finely chopped), divided
Instructions
  1. With skin side down, lightly season the trout with salt and Italian seasoning (only on one side). Heat olive oil on medium heat in a LARGE skillet until hot, but not smoking. Add trout fillets, skin side UP, flesh side DOWN to hot oil. Cook for 4-5 minutes on medium, then carefully flip fillets over to skin side DOWN. You might need to add a little bit more oil before turning them over (you don't want them to stick to skillet). Cook an additional 3-4 minutes. Once fish is cooked, remove skillet from the heat source, cover the skillet with a lid, and let trout rest for 5-10 minutes (leaving cover on).
  2. Once the fish is done resting, carefully lift up each piece of fish and remove the skin from the bottom of the fish. It should peel off easily. Discard skin, and carefully place fillets on a piece of foil and keep warm. Do not clean out the skillet (you want all the little tidbits and oils left in there!)
  3. To the oils left in the skillet, add minced garlic, fresh lemon juice and white wine. Cook this for 1 minute on medium-low heat, stirring occasionally. Turn off heat. Add butter and 1 Tablespoon chopped fresh parsley. Stir to combine, and continue cooking on low until butter has melted.
  4. Once the butter has melted and the sauce is creamy, gently add trout fillets back into skillet. Spoon sauce over the top of fish. If necessary, reheat in skillet, until fish reaches serving temp (on low).
  5. Place trout onto individual serving plates. Spoon a bit more sauce over fish, sprinkle with remaining chopped parsley for garnish... and serve!
Nutrition Facts
Trout In Lemon Garlic Butter Sauce
Amount Per Serving (1 serving)
Calories 379 Calories from Fat 216
% Daily Value*
Fat 24g37%
Saturated Fat 6g38%
Cholesterol 113mg38%
Sodium 150mg7%
Potassium 657mg19%
Carbohydrates 2g1%
Protein 35g70%
Vitamin A 455IU9%
Vitamin C 8.8mg11%
Calcium 93mg9%
Iron 3mg17%
* Percent Daily Values are based on a 2000 calorie diet.

Here’s one more to pin on your Pinterest boards!Fresh trout fillets are pan-seared and served with a light lemon, garlic, butter, and wine sauce for a delicious main course!


Save

Save

Save

Save

Save

Save

Save

Save

Save

Save

Save

Homemade Shake And Bake Chicken

Homemade Shake and Bake Chicken is an EASY, flavorful chicken entree using a quick copycat spice mixture. Chicken pieces are coated with spices, then baked!Homemade Shake and Bake Chicken is an EASY, flavorful chicken entree using a quick copycat spice mixture. Chicken pieces are coated with spices, then baked!

Anyone remember the catch-phrase “It’s Shake n’ Bake… and I helped!”?  I sure remember those TV commercials for shake and bake chicken. Years ago, I used this mixture for baked chicken.

Today I’d like to share with you a copycat version of how to easily make your own Homemade Shake and Bake Chicken! This copycat recipe for the spice mixture uses ingredients you probably already have in your kitchen! The original shake and bake chicken mix was a packet you could buy to help season chicken or pork.  All you needed to do was shake it on the chicken, then bake it! Talk about convenience!

Well, why not make it yourself, and save some money?  The spice mix is so easy to throw together, the chicken pieces are coated with it, then it’s baked until done. That’s it!

Scroll Down For A Printable Recipe Card At The Bottom Of The Page

Make The Spice Mix

To make the spice mix, flour, paprika, salt, garlic powder, thyme, and black pepper are mixed in a small bowl  until combined. The shake and bake chicken mix, as written, will coat 8 pieces of chicken. Once mixed, place the spice mixture in a gallon sized, resealable bag.

Spices are mixed together in bowl, for shake and bake chicken.

Prepare Homemade Shake And Bake Chicken For Cooking

Take the skin off the chicken (optional, but healthier). When I make the shake and bake chicken for these photos, I used chicken thighs and legs. Dip each of the chicken pieces, one at a time, in milk. Cover all sides with the milk.

Shake and bake chicken is first dipped in milk.

After dipping the chicken piece in milk, shake the excess off.  Place the chicken (one piece at a time) into the large resealable bag with the spice mix. Close and shake until the piece of chicken is coated on all sides. Repeat this process for each piece of chicken.

Shake and bake chicken is then tossed in the dry spice mixture to cover.

Spray a 13×9 inch baking sheet with non-stick spray. Place each of the coated shake and bake chicken pieces onto the pan. Be sure to leave a bit of space between each of the pieces.

Pieces of shake and bake chicken are placed onto baking sheet.

Time To Cook the Shake And Bake Chicken!

Cook the shake and bake chicken in a preheated 375 degree oven for 40 minutes. Large chicken breasts will need to cook a little bit longer to be fully cooked through.

Shake and bake chicken turns a golden brown color while baking.

Shake and bake chicken has finished cooking and is served, hot from the oven!

When the chicken is finished cooking, remove the pan from oven.  If any of the spice mix is still “dry” on top of the shake and bake chicken, simply brush some of the pan drippings onto the mix. This should wet the spice mix enough for a uniform look.

Serve, and enjoy this delicious shake and bake chicken with a side dish you enjoy!  It’s a completely SIMPLE and flavorful way to serve those you love a tasty dinner without a lot of fuss! Have a wonderful day, and may God bless you!

Looking For More CHICKEN Recipes?

You can find all my recipes in the Recipe Index, located at the top of the page. I have LOTS of delicious chicken recipes, including:

Interested In More Recipes?

Thank you for visiting this website. I appreciate you using some of your valuable time to do soIf you’re interested, I publish a newsletter 2 times per month (1st and 15th) with all the latest recipes, and other fun info. I would be honored to have you join our growing list of subscribers, so you never miss a great recipe!
There is a Newsletter subscription box on the top right side (or bottom) of each blog post, depending on the device you use, where you can easily submit your e-mail address (only) to be included in my mailing list.

You Can Also Find Me On Social Media:

Facebook page: The Grateful Girl Cooks!
Pinterest:
The Grateful Girl Cooks!
Instagram:
jbatthegratefulgirlcooks

Author's signature

Recipe Source: unknown (found on 3×5 index card written on years and years ago)

5 from 1 vote
Homemade Shake And Bake Chicken
Prep Time
5 mins
Cook Time
40 mins
Total Time
45 mins
 
Homemade Shake and Bake Chicken is an EASY, flavorful chicken entree using a quick copycat spice mixture. Chicken pieces are coated with spices, then baked!
Category: Entree
Cuisine: American
Keyword: shake and bake chicken
Servings: 8 servings
Calories Per Serving: 60 kcal
Author: JB @ The Grateful Girl Cooks!
Ingredients
For Spice Mixture:
  • 1 cup all purpose flour
  • 2 teaspoons paprika
  • 1 teaspoon salt
  • 1/2 teaspoon black pepper
  • 1 teaspoon garlic powder
  • 1 teaspoon dried thyme
For Chicken:
  • 8 pieces chicken (thighs and legs)
  • 1/2 cup milk
Instructions
  1. Preheat oven to 375 degrees F.
  2. Combine spice mix ingredients; stir well. Place into a plastic, gallon sized resealable bag.
  3. Dip one piece of chicken in milk at a time, and fully coat on all sides. Let excess drip off.
  4. Place piece of chicken into resealable bag with spice mix. Close top of bag and shake until chicken piece is completely coated. Place coated chicken onto a 13x9 inch baking sheet that has been sprayed with non-stick spray.
  5. Repeat process for rest of chicken, leaving a bit of space between each piece on baking sheet.
  6. Bake chicken at 375 degrees for 40 minutes (a bit longer if using chicken breasts-bone in). When done, remove from oven, and serve immediately.
Recipe Notes

NOTE: Caloric calculation is only for spice mix, since there are different pieces of chicken that may be used, all with differing caloric counts.

Nutrition Facts
Homemade Shake And Bake Chicken
Amount Per Serving (1 portion spice mix)
Calories 60
% Daily Value*
Sodium 291mg13%
Potassium 32mg1%
Carbohydrates 12g4%
Protein 1g2%
Vitamin A 245IU5%
Calcium 5mg1%
Iron 1mg6%
* Percent Daily Values are based on a 2000 calorie diet.

Here’s one more to pin on your Pinterest boards!Homemade Shake and Bake Chicken is an EASY, flavorful chicken entree using a quick copycat spice mixture. Chicken pieces are coated with spices, then baked!


Save

Save

Save

Save

Save

Save

Save

Save

Save

Save

Chicken, Parmesan & Spinach Gnocchi

Chicken Parmesan Spinach Gnocchi is an easy to make, 30 minute Italian dish with chicken, fluffy potato dumplings, Parmesan cheese sauce and spinach! Chicken Parmesan Spinach Gnocchi is an easy to make, 30 minute Italian entree with chicken, fluffy potato dumplings, Parmesan cheese sauce and spinach!
What do you get when you combine chicken, fluffy Italian potato dumplings, Parmesan cheese sauce and spinach into an easy meal? This recipe for Chicken Parmesan Spinach Gnocchi, that’s what… a simple, yet absolutely delicious entree!  If you’re a Vegetarian, you can simply leave the chicken out and still enjoy this wonderful dish!

I found the original recipe on Pinterest, and decided to fix it for dinner recently.  It was sooooo good!  This chicken parmesan spinach gnocchi recipe serves 4, and only takes about 30 minutes to prepare, from start to finish!

Talk about Italian comfort food! Whoa… the potato gnocchi are a classic Italian pasta, and the chicken breast chunks provide protein. In addition, the creamy Parmesan sauce is amazing, and the fresh spinach used in the recipe would make Popeye proud!

Scroll Down For A Printable Recipe Card At The Bottom Of the Page

How To Make Chicken Parmesan Spinach Gnocchi

Here’s how simple this recipe is to prepare:  Cut 2 boneless, skinless chicken breasts into bite sized pieces. Lightly season with salt, pepper, and garlic powder.  Heat olive oil in skillet on medium high heat.

Once oil is hot, add chicken and cook 3-4 minutes, turning occasionally until cooked through.  Remove chicken from skillet; keep warm.

Chicken, Parmesan & Spinach Gnocchi / The Grateful Girl Cooks!Chicken, Parmesan & Spinach Gnocchi / The Grateful Girl Cooks!Cook The Gnocchi

Prepare gnocchi according to package directions. Basically, you add them to boiling water, cook, and when they float to the surface they are done. This typically takes only a few minutes.  Drain the gnocchi. Set aside.

Chicken, Parmesan & Spinach Gnocchi / The Grateful Girl Cooks!Chicken, Parmesan & Spinach Gnocchi / The Grateful Girl Cooks!Prepare The Sauce

Place the empty pan back on the stove. Add butter to pan and heat on medium until melted. Add minced garlic and cook for 1 minute, stirring well.  Add flour; stir well to remove lumps and form a roux (thick paste).

Cook and stir for 30 seconds, just to “cook out” the raw flour taste. Add milk slowly to roux; stir or whisk it well to remove any remaining lumps. Cook this for 2-3 minutes only until the sauce has begun to thicken.

Chicken, Parmesan & Spinach Gnocchi / The Grateful Girl Cooks!
This is what the creamy sauce will look like, as it begins to thicken while cooking.

Chicken, Parmesan & Spinach Gnocchi / The Grateful Girl Cooks!
Time For Some “Add-Ins”

Stir in the chopped fresh spinach.  Cook for 3-4 minutes until the sauce has thickened and spinach has wilted.  Add Parmesan cheese and the cooked chicken into sauce. Stir well to combine.

You can add a bit more milk if the sauce is too thick. Taste the finished sauce, then season with additional salt and pepper, if necessary, to suit your personal taste preference.

Chicken, Parmesan & Spinach Gnocchi / The Grateful Girl Cooks!

Add The Gnocchi And Serve

Remove the pan from the heat, and add cooked, drained gnocchi. Gently stir until all ingredients are combined.  If necessary, reheat through on low. Serve the chicken parmesan spinach gnocchi immediately once it reaches the desired heat.

Chicken, Parmesan & Spinach Gnocchi / The Grateful Girl Cooks!
Serving Chicken, Parmesan & Spinach Gnocchi

I dish up the gnocchi onto individual serving plates, then garnish with a bit more grated Parmesan cheese (can never have too much Parmesan, right?). Serve, and enjoy this wonderful chicken dish! It’s creamy, has great flavor, and is delicious and filling!

If you enjoy this chicken parmesan spinach gnocchi, you will LOVE my “copycat” recipe for Olive Garden’s Chicken Gnocchi Soup or a recipe for Creamy Italian Sausage Gnocchi. They are both delicious, also!

Chicken, Parmesan & Spinach Gnocchi / The Grateful Girl Cooks!
I really hope you will consider making this chicken parmesan spinach gnocchi recipe. I think you will be surprised at just how simple it is to make, in such a short time.  Have a wonderful day… and be KIND as you journey through this 24 hours you’ve been given!

Be sure and check out ALL my recipes in the Recipe Index, which is located at the top of the page. I have a LOT of delicious, family-friendly recipes I’m confident you will enjoy

Interested In More Recipes?

Thank you for visiting this website. I appreciate you using some of your valuable time to do soIf you’re interested, I publish a newsletter 2 times per month (1st and 15th) with all the latest recipes, and other fun info. I would be honored to have you join our growing list of subscribers, so you never miss a great recipe!
There is a Newsletter subscription box on the top right side (or bottom) of each blog post, depending on the device you use, where you can easily submit your e-mail address (only) to be included in my mailing list.

You Can Also Find Me On Social Media:
Facebook page: The Grateful Girl Cooks!
Pinterest: The Grateful Girl Cooks!
Instagram: jbatthegratefulgirlcooks

Author's signature

Recipe Adapted From:  http://www.lifeasastrawberry.com/parmesan-spinach-gnocchi/

0 from 0 votes
Chicken, Parmesan & Spinach Gnocchi
Prep Time
10 mins
Cook Time
20 mins
Total Time
30 mins
 

Chicken Parmesan Spinach Gnocchi is an easy to make, 30 minute Italian entree with chicken, fluffy potato dumplings, Parmesan cheese sauce and spinach!

Category: Entree
Cuisine: Italian
Keyword: chicken parmesan spinach gnocchi
Servings: 4 servings
Calories Per Serving: 478 kcal
Author: JB @ The Grateful Girl Cooks!
Ingredients
  • 2 chicken breasts (boneless, skinless)
  • Salt , pepper and garlic powder (to lightly season chicken)
  • 1 Tablespoon olive oil
  • 16 ounces potato gnocchi (found in pasta section)
  • 2 Tablespoons butter
  • 1 clove garlic , minced
  • 2 Tablespoons all purpose flour
  • cups milk
  • 3 cups fresh spinach , chopped
  • Additional salt/pepper and milk , if necessary
  • 1 cup finely shredded Parmesan cheese (plus more for garnish, if desired)
Instructions
  1. Cut chicken into bite sized pieces. Lightly season with salt, pepper, and garlic powder. Heat olive oil in skillet on medium high heat. Once oil is hot, add chicken and cook 3-4 minutes, turning occasionally until cooked through. Remove chicken from skillet and keep warm.
  2. Prepare gnocchi according to pkg. directions (add to boiling water, cook, and when they float to surface they're done - 3-4 minutes). Drain gnocchi. Set aside. Place empty pan back on stove.
  3. Add butter to pan; heat on medium until melted. Add minced garlic; cook for 1 minute, stirring well. Add flour; whisk well to remove lumps and form a roux (thick paste). Cook and stir for 30-60 seconds to "cook out" flour taste. Add milk slowly to roux; stir well. Cook for 2-3 minutes only until sauce has begun to thicken.
  4. Add chopped spinach; stir well. Cook for 3-4 minutes until sauce has thickened and spinach has wilted. Add Parmesan cheese, then add cooked chicken to sauce. Stir well. Add a bit more milk if sauce is too thick. Taste sauce; season with additional salt and pepper, if necessary.
  5. Remove pan from heat; add cooked and drained gnocchi. Gently stir until all ingredients are combined. If necessary, reheat through on low. Serve immediately upon reaching desired heat.
  6. Serve, garnishing each portion with grated Parmesan cheese. Enjoy!
Nutrition Facts
Chicken, Parmesan & Spinach Gnocchi
Amount Per Serving (1 serving)
Calories 478 Calories from Fat 162
% Daily Value*
Fat 18g28%
Saturated Fat 9g56%
Cholesterol 71mg24%
Sodium 950mg41%
Potassium 468mg13%
Carbohydrates 48g16%
Fiber 3g13%
Sugar 4g4%
Protein 29g58%
Vitamin A 2640IU53%
Vitamin C 7.3mg9%
Calcium 436mg44%
Iron 5.3mg29%
* Percent Daily Values are based on a 2000 calorie diet.

Here’s one more to pin on your Pinterest boards!Chicken Parmesan Spinach Gnocchi is an easy to make, 30 minute Italian entree with chicken, fluffy potato dumplings, Parmesan cheese sauce and spinach!

Save

Save

Save

Save

Save

Save

Save

Save

Save

Save

Save

Save

Save

Save

Save

Save

Grilled Pork Tenderloin Sandwich with Mozzarella and Caramelized Onions

Have leftover pork roast and need a tip on how to use it up? Make a delicious grilled pork tenderloin sandwich with mozzarella and caramelized onions!Have leftover pork roast and need a tip on how to use it up? Make a delicious grilled pork tenderloin sandwich with mozzarella and caramelized onions!
Ever have leftover pork roast or pork tenderloin and wonder what you can do to use it up creatively?  Recently I had leftover pork from dinner, so I made a Grilled Pork Tenderloin Sandwich with Mozzarella and Caramelized Onions for lunch!  It tasted wonderful!

I enjoy having leftovers in the fridge, unlike my little sister Joni, who hates having them around. My personal theory is it’s awesome when you can cook once, then take some of the leftovers and “morph” them into a completely different meal.  That was how this sandwich came into existence.

I was looking for something in our refrigerator for lunch, but didn’t want to have leftover pork… unless I could transform it into something else! 

So… I put my thinking cap on and came up with the idea for this pork tenderloin sandwich!  Here’s how to make it:

Scroll Down For A Printable Recipe Card At The bottom Of The Page

Caramelize The Onions

Cook the sliced onions slowly in a skillet with a bit of olive oil for several minutes. Continue to cook until the onions have browned and caramelized.

Sliced onions are caramelized in skillet before adding to sandwich.

“Build” The Pork Tenderloin Sandwich

Melt the butter in a large skillet on medium-low heat.  Butter one side of a large piece of sourdough bread and place it butter side DOWN in skillet.

Generously layer the bread with thin slices of leftover cooked pork tenderloin. If necessary, lightly season the pork slices with salt and pepper.

Thin slices of pork tendeloin are arranged on buttered bread in skillet.
Arrange the caramelized onions on top of the pork slices.

Caramelized onion slices are added to the pork tenderloin sandwich.
Spread a thin layer of sliced mozzarella (or grated) on top of the onions.

Mozzarella cheese slices are placed on top of the caramelized onions.

Butter one side of the other pieces of sourdough bread, and place them on top of the sandwich, butter side UP.

Time To Cook The Grilled Pork Tenderloin Sandwich

Cook the sandwich on medium-low heat until the bottom side of the bread has lightly browned.

The pork tenderloin sandwich is grilled in a skillet.
Carefully turn sandwich over and cook the other side (like a grilled cheese sandwich).  See how nice and golden brown the sourdough bread is now?

Continue cooking slowly until cheese has melted. You want the grilled pork tenderloin sandwich to be heated all the way through (low and slow!).

The pork tenderloin sandwich is flipped to other side once golden and toasted.

When the sandwich is done cooking, remove it from the skillet. Transfer it to a plate, and get ready to enjoy this sandwich!

It’s Time To Eat The Grilled Pork Tenderloin Sandwich!

Carefully cut the grilled sandwich in half… and enjoy!  The tender pork slices, crunchy buttery sourdough bread, gooey melted mozzarella cheese and slight sweetness of the caramelized onions really make this sandwich special.

An entire grilled pork tenderloin sandwich is very filling! A half of this sandwich was all I could eat! If you don’t want to eat a whole sandwich, you can get 4 servings when you make two sandwiches.

The grilled pork tenderloin sandwich, cut in half to serve.

Hope you will consider creating a delicious pork tenderloin sandwich when you have leftover pork roast or tenderloin!  The sandwich was very good!

Looking For More SANDWICH Recipes?

You can find all of my sandwich recipes in the Recipe Index, located at the top of the page. A few of them include:

Interested In More Recipes?

Thank you for visiting this website. I appreciate you using some of your valuable time to do soIf you’re interested, I publish a newsletter 2 times per month (1st and 15th) with all the latest recipes, and other fun info. I would be honored to have you join our growing list of subscribers, so you never miss a great recipe!
There is a Newsletter subscription box on the top right side (or bottom) of each blog post, depending on the device you use, where you can easily submit your e-mail address (only) to be included in my mailing list.

You Can Also Find Me On Social Media:
Facebook page: The Grateful Girl Cooks!
Pinterest: The Grateful Girl Cooks!
Instagram: jbatthegratefulgirlcooks

Author's signature

5 from 1 vote
Grilled Pork Tenderloin Sandwich w/ Mozzarella & Caramelized Onions
Prep Time
10 mins
Cook Time
10 mins
Total Time
20 mins
 

Have leftover pork roast and need a tip on how to use it up? Make a delicious grilled pork tenderloin sandwich with mozzarella and caramelized onions!

Category: Sandwich
Cuisine: Sandwich
Keyword: pork tenderloin sandwich
Servings: 2 servings
Calories Per Serving: 666 kcal
Author: JB @ The Grateful Girl Cooks!
Ingredients
  • 4 slices sourdough bread
  • 1 Tablespoon butter (for skillet)
  • 2 Tablespons enough butter to spread on bread (for grilling)
  • 8 thin slices precooked pork tenderloin (enough to cover each sandwich)
  • 1/2 onion , thinly sliced
  • 1 Tablespoon olive oil
  • thin slices mozzarella cheese (enough to cover sandwich)
Instructions
  1. Heat olive oil in skillet on medium heat. Add sliced onions; cook slowly, stirring occasionally, for several minutes, until they have browned and caramelized.
  2. Melt butter in a skillet on medium-low heat. For each sandwich, butter one side of bread and place it butter side DOWN in skillet.
  3. Cover bread with thin slices of leftover cooked pork tenderloin. Lightly season pork with salt and pepper. Divide and spread caramelized onions on top of pork. Spread a thin layer of sliced mozzarella (or grated) on top of onions. Butter one side of remaining pieces of sourdough bread, and place on top of the sandwich, butter side UP.

  4. Cook on medium-low until bottom side has lightly browned.Carefully turn sandwich over. Continue cooking slowly until cheese has melted and sandwich is heated through (low and slow!). When sandwiches are done cooking, remove from skillet. Slice sandwich in half... and enjoy!

Nutrition Facts
Grilled Pork Tenderloin Sandwich w/ Mozzarella & Caramelized Onions
Amount Per Serving (1 sandwich)
Calories 666 Calories from Fat 207
% Daily Value*
Fat 23g35%
Saturated Fat 9g56%
Cholesterol 88mg29%
Sodium 932mg41%
Potassium 524mg15%
Carbohydrates 75g25%
Fiber 3g13%
Sugar 4g4%
Protein 37g74%
Vitamin A 365IU7%
Vitamin C 2.1mg3%
Calcium 206mg21%
Iron 5.5mg31%
* Percent Daily Values are based on a 2000 calorie diet.

Here’s one more to pin on your Pinterest boards!Have leftover pork roast and need a tip on how to use it up? Make a delicious grilled pork tenderloin sandwich with mozzarella and caramelized onions!


Save

Save

Save

Save

Save

Save

Save

Veggie Lasagna Rollups

Veggie Lasagna Rollups are a simple, but delicious meatless dish. Noodles are filled with 4 cheeses, veggies, rolled and topped with marinara sauce.Veggie Lasagna Rollups are a simple, but delicious meatless dish. Noodles are filled with 4 cheeses, veggies, rolled and topped with marinara sauce.

I am occasionally on the lookout for ideas for “meatless” meals, since one of our sons is a vegetarian.  It’s fun finding new recipes we can enjoy together when he comes for dinner. Recently I came up with this simple recipe for Veggie Lasagna Rollups, after raiding my pantry and refrigerator for ingredients.

The recipe I came up with has lots of veggies and cheeses inside a rolled up lasagna noodle, then top with an Italian flavored pasta sauce, and bake. Veggie lasagna rollups sounded simple enough, and the recipe I ended up with had lots of flavor and tasted great!

Scroll Down For A Printable Recipe Card At The Bottom Of The Page

Here’s How To Make Veggie Lasagna Rollups

Melt butter in large skillet. Add chopped veggies (yellow and green bell peppers, onion, spinach, and mushrooms). Saute until crisp-tender, then set the skillet aside.

Chopped vegetables are cooked to add to veggie lasagna rollups.

Cook the lasagna noodles according to package instructions. When done cooking, remove noodles carefully and drain, then lay pasta flat on work surface and blot dry with a paper towel.

Lasagna noodles for veggie lasagna rollups are cooked according to package directions.

Cooked lasagna noodles are drained then laid in strips.

Filling The Veggie Lasagna Rollups

In a bowl, stir together cream cheese, ricotta, Parmesan cheese, and garlic powder until fairly smooth. Reserve and set aside 1/4 of the cheese mixture to add to the top of the lasagna noodles prior to baking.

Spoon a layer of remaining cheese mixture down the middle of each noodle, lengthwise. Try to leave about a half inch on either side of noodle clear. Once the noodles have a cheese layer, evenly divide the cooked veggies down each noodle.  Top with a bit of grated Mozzarella cheese.  Repeat the process for each lasagna noodle.

Filling for veggie lasagna rollups is placed onto each lasagna noodle.

Prepare The Rollups For Baking

Spread Italian pasta sauce on the bottom of a large baking dish (enough to lightly cover bottom of dish).  Roll each one of the lasagna noodles up, beginning at the short end. Place lasagna rollups seam side down in the baking dish. Spoon reserved cheese mixture over tops of lasagna rollups.

Veggie Lasagna Rollups are rolled, then placed on sauce, and topped with more sauce.

Pour pasta sauce over tops and sides of rollups until covered (I used a can of Italian spaghetti sauce for simplicity). Top the sauce with additional grated Mozzarella cheese and grated Parmesan cheese.

Veggie Lasagna Rollups are covered with marinara sauce and grated Parmesan cheese.

Bake The Veggie Lasagna Rollups

Bake the lasagna rollups in a preheated 350 degree oven for approximately 20-25 minutes, or until cheese and sauce are bubbly, and the rollups are fully heated through.

Veggie Lasagna Rollups are baked in oven before serving.
Time To EAT!

Remove the baking pan from the oven. Let it cool for just a minute, then carefully lift each rollup out of dish with a spatula and place onto individual serving plates.  Here’s a sideview of what it looked like once cooked and on the plate.

It’s a simple, meatless yet tasty veggie and cheese filled Italian lasagna treat.  The recipe makes 8 veggie lasagna rollups. Depending on how hungry you are, you can either get 4 servings (2 per person) or 8 servings (1 per person).

Each of the Veggie Lasagna Rollups are served hot, on a plate.

Hope you will consider trying this recipe for veggie lasagna rollups. Make it your own by adding any other veggies of your choice to the mix, as well. If you want to add meat, simply brown some crumbled Italian sausage and add to the veggie mixture. Use whatever works best for you!  Have a great day, friends.

Looking For More MEATLESS Recipes?

You can find ALL my recipes in the Recipe Index, located at the top of the page. I have some delicious meatless dishes you might be interested in, including:

Interested In More Recipes?

Thank you for visiting this website. I appreciate you using some of your valuable time to do soIf you’re interested, I publish a newsletter 2 times per month (1st and 15th) with all the latest recipes, and other fun info. I would be honored to have you join our growing list of subscribers, so you never miss a great recipe! 

There is a Newsletter subscription box on the top right side (or bottom) of each blog post, depending on the device you use, where you can easily submit your e-mail address (only) to be included in my mailing list.

You Can Also Find Me On Social Media:

Facebook page: The Grateful Girl Cooks!
Pinterest:
The Grateful Girl Cooks!
Instagram:
jbatthegratefulgirlcooks

Author's signature

↓↓ PRINTABLE RECIPE BELOW ↓↓

0 from 0 votes
Veggie Lasagna Rollups
Prep Time
25 mins
Cook Time
25 mins
Total Time
50 mins
 

Veggie Lasagna Rollups are a simple, but delicious meatless dish. Noodles are filled with 4 cheeses, veggies, rolled and topped with marinara sauce.

Category: Entree
Cuisine: Italian
Keyword: veggie lasagna rollups
Servings: 8 rollups
Calories Per Serving: 419 kcal
Author: JB @ The Grateful Girl Cooks!
Ingredients
  • 4 ounces cream cheese (at room temp)
  • 16 ounces ricotta cheese
  • 1/2 cup grated Parmesan cheese
  • 1 teaspoon garlic powder
  • 2 Tablespoons butter
  • 1 cup yellow bell pepper , chopped
  • 1 cup green bell pepper , chopped
  • 1 cup yellow onion , chopped
  • 1 small package frozen spinach , thawed and drained really well
  • 7-8 mushrooms , chopped
  • 8 uncooked lasagna noodles
  • cups grated mozzarella cheese
  • 2 cups spaghetti sauce (prepared canned marinara)
  • Additional grated mozzarella and Parmesan (for sprinkling on top of rollups before baking)
Instructions
  1. Melt butter in large skillet. Add chopped veggies (yellow and green bell peppers, onion, spinach, and mushrooms). Saute until crisp-tender. Set skillet aside.
  2. Cook lasagna noodles according to package instructions. When done, remove noodles carefully and drain; lay pasta flat on work surface and blot dry with a paper towel.
  3. In a bowl, stir together cream cheese, ricotta, Parmesan cheese, and garlic powder until fairly smooth. Reserve and set aside 1/4 of cheese mixture to add to top of lasagna noodles prior to baking. Spoon a layer of remaining cheese mixture down the middle of each noodle, lengthwise, leaving about a half inch clear around edges of noodle.
  4. Evenly distribute cooked veggies down each noodle. Top with a bit of grated Mozzarella cheese. Repeat process for each lasagna noodle.
  5. Spread Italian pasta sauce on bottom of a large baking dish (enough to lightly cover bottom of dish). Roll each of the lasagna noodles up, beginning at short end. Place seam side down in baking dish. Spoon reserved cream cheese mixture over top of each rollup.
  6. Pour marinara sauce over tops and sides of rollups until covered. Top with additional grated Mozzarella cheese and Parmesan cheese (as much as you wish).
  7. Bake in preheated 350 degree oven for approximately 20-25 minutes, or until cheese and sauce are bubbly, and dish is heated through.
  8. Remove dish from oven. Let cool for 1-2 minutes, then carefully lift each rollup out of dish with a spatula and place onto individual serving plates.
Recipe Notes

The recipe makes 8 rollups, so depending on how hungry you are, you can either get 4 servings (2 per person) or 8 servings (1 per person).
Fresh baby spinach can be substituted for frozen (I was using what I had on hand).

Nutrition Facts
Veggie Lasagna Rollups
Amount Per Serving (1 rollup)
Calories 419 Calories from Fat 189
% Daily Value*
Fat 21g32%
Saturated Fat 12g75%
Cholesterol 70mg23%
Sodium 785mg34%
Potassium 560mg16%
Carbohydrates 33g11%
Fiber 2g8%
Sugar 6g7%
Protein 24g48%
Vitamin A 1055IU21%
Vitamin C 55.3mg67%
Calcium 495mg50%
Iron 1.7mg9%
* Percent Daily Values are based on a 2000 calorie diet.

Here’s one more to pin on your Pinterest boards!Veggie Lasagna Rollups are a simple, but delicious meatless dish. Noodles are filled with 4 cheeses, veggies, rolled and topped with marinara sauce.


Save

Save

Save

Save

Save

Save

Save

Save

Save

Save

Save

Save

Save

Save

Save

Save

Save

Save

Save

Save

Save

Save

Save

“Old School” Tuna Cashew Casserole

“Old School” Tuna Cashew Casserole is a simple dish w/ cashews, chow mein noodles, tuna & celery- a recipe from a high school cooking class!
"Old School" Tuna Cashew Casserole is a simple dish w/ cashews, chow mein noodles, tuna & celery- a recipe from a high school cooking class!
When I was in High School (MANY years ago), I took a Gourmet Foods class. This recipe for “Old School” Tuna Cashew Casserole was one of the recipes we learned to prepare. 

If you’re like me, you see the ridiculous humor in a simple tuna casserole being called “gourmet food”, but hey… back then, maybe it was?

I’ve made this recipe for tuna cashew casserole many times over the years, but I still giggle to think it is anything even remotely compared to gourmet food. 

Nowadays I think of it as a “fairly economical way to feed a family of 4 casserole”, because it only uses one can of tuna as the main ingredient.

This tuna noodle casserole is really easy to prepare, and can be served “as is”, straight from the oven, or on top of rice or noodles. Here’s how to make it:

Scroll Down For A Printable Recipe Cad At the Bottom Of The Page

How To Make “Old School” Tuna Cashew Casserole

Set aside 1/2 of the chow mein noodles before beginning (you will need them for crunchy topping later!). 

Place the remaining ingredients (tuna *I used albacore*, celery, chow mein noodles, cashews, onion, seasonings, water, and cream of mushroom soup) in large bowl.

Celery, tuna, cashews, chow mein noodles in bowl for casserole.

Stir well until all ingredients have been combined (see how easy it is?).  Pour into a 2 quart baking dish that has been sprayed with non-stick spray. 

Sprinkle the top of casserole with the reserved chow mein noodles.

Tuna Cashew Casserole ready to cook in baking dish.

Tuna cashew casserole with noodles on top of dish

Bake The Casserole

Bake, uncovered, at 325 degrees for 40 minutes. The tuna noodle casserole should be lightly browned and slightly bubbly around the edges when done. 

When done, remove the casserole from the oven. Let the casserole cool for a minute or two, then serve as is, or on top of hot rice or noodles.

Casserole hot out of oven, topped with chow mein noodles.

Here’s what the tuna cashew casserole looks like right after placing it on a serving plate.  The recipe, as written, makes 4 servings, and is easily doubled.  This casserole has good flavor and crunch from the celery, cashews, and chow mein noodles.

It’s unusual that this casserole does not have pasta noodles in it (which is fairly common), but this is how we were taught to make it back then!

I would classify this simple casserole as “comfort food”, rather than “gourmet food”, but am still glad to have kept this recipe since making it in High School.

When I cooked it this time, it was to have around for a quick lunch, rather than as a main course meal. Either way, it’s a quick and easy way to get tasty food on the table!

One serving of "Old School" Tuna Cashew Casserole on plate with a fork.

Thanks for checking out this simple tuna cashew casserole recipe, and I hope you (and those you love) enjoy it, because it’s quite tasty!

Glad you stopped by today, and I invite you to come back again soon for more family-friendly recipes. Take care, may God bless you, and have a GREAT day!

Looking For More CASSEROLE Recipes?

You can find ALL of my recipes in the Recipe Index, which is located at the top of the page. I have some wonderful casserole recipes you’ll enjoy, including:

Want More Recipes? Get My FREE Newsletter!

I publish a newsletter 2 times per month (1st and 15th) with lots of recipes, tips, etc..
Would you like to join our growing list of subscribers?

There is a Newsletter subscription box on the top right (or bottom) of each blog post, depending on the device you use.
You can submit your e-mail address there, to be added to my mailing list.

Find Me On Social Media:

Facebook page: The Grateful Girl Cooks!
Pinterest:
The Grateful Girl Cooks!
Instagram:
jbatthegratefulgirlcooks

Author's signatureOriginal recipe source: unknown (had recipe written on 3×5 card since High School MANY years ago)

↓↓ PRINTABLE RECIPE BELOW ↓↓

5 from 1 vote
"Old School" Tuna Cashew Casserole
Prep Time
5 mins
Cook Time
40 mins
Total Time
45 mins
 

"Old School" Tuna Cashew Casserole is a simple casserole with cashews, chow mein noodles, tuna and celery... the way we made it in high school cooking class!

Category: Casserole
Cuisine: American
Keyword: tuna cashew casserole
Servings: 4 servings
Calories Per Serving: 175 kcal
Author: JB @ The Grateful Girl Cooks!
Ingredients
  • 3 ounces chow mein noodles , dry, in can-found in Asian section, divided
  • 10.5 ounces cream of mushroom soup (1 "regular" sized can)
  • 1/2 cup cashews , chopped coarsely
  • 1 cup celery , finely diced
  • 6 Tablespoons water
  • 1 can tuna , 6 oz., in water, drained
  • 4 Tablespoons onion , minced
  • Salt & pepper , to lightly season
Instructions
  1. Preheat oven to 325 degrees.
  2. Set aside 1/2 of the chow mein noodles (reserved for topping).
  3. Place remaining ingredients in large mixing bowl; gently stir until fully combined. Pour into a 2 quart casserole dish that has been sprayed with non-stick cooking spray. Evenly spread.
  4. Top casserole with reserved chow mein noodles.
  5. Bake casserole, uncovered, at 325 degrees for 40 minutes, until lightly browned and slightly bubbly around the edges.
  6. Remove from oven, let cool for a minute or two, then serve.
Nutrition Facts
"Old School" Tuna Cashew Casserole
Amount Per Serving
Calories 175 Calories from Fat 63
% Daily Value*
Fat 7g11%
Saturated Fat 1g6%
Sodium 156mg7%
Potassium 186mg5%
Carbohydrates 21g7%
Fiber 2g8%
Sugar 2g2%
Protein 6g12%
Vitamin A 115IU2%
Vitamin C 1.5mg2%
Calcium 16mg2%
Iron 1.8mg10%
* Percent Daily Values are based on a 2000 calorie diet.

Here’s one more to pin on your Pinterest boards!"Old School" Tuna Cashew Casserole is a simple casserole with cashews, chow mein noodles, tuna and celery... the way we made it in high school cooking class!


Save

Save

Save

Save

Save

Save

Save

Save

Save

Save

Save

Save