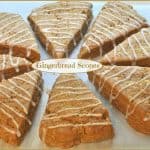
Gingerbread Scones flavored with cinnamon and molasses and drizzled with vanilla glaze are a delicious family treat during the holidays or any time!
I made Gingerbread Scones recently (trying a new recipe). If you know me, you KNOW I love a good scone. It felt weird… like it “should” be Christmas time when I made them, but it was 90+ degrees outside and the middle of summer! Who cares if it’s hot or cold outside… when you’ve got a tasty breakfast treat in one hand and a mug of coffee in the other!
Scroll Down for A Printable Recipe Card At The Bottom Of The Page
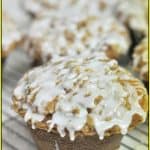
We Sure Do Enjoy Our Scones
Do YOU enjoy a good scone? If you like scones (that aren’t dry and crumble like sawdust), then I hope you will check out my Recipe Index for all my other delicious scone recipes.
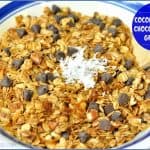
I’ve posted the recipes for Cinnamon Chip Scones, Cranberry Orange Scones, and Banana Nut Scones, to name a few. Here’s a photo of just some of the delicious scones you can find on this blog.

How To Make Gingerbread Scones
Place flour, brown sugar, ginger, baking soda, baking powder, salt and cinnamon in mixing bowl. Cut in the COLD butter with a pastry blender (or two forks), until the mixture is the size of small peas.

Mix together the molasses, egg yolk, and milk in a small bowl, until combined.

Pour the molasses mixture into the flour mixture. Stir until dough is moistened and has come together.

The mixture will be slightly crumbly. Place the dough onto a lightly floured work surface. Knead the dough 6-7 times, incorporating the crumbles into dough, and it forms a solid ball.

Roll The Dough Into Circle And Slice
Pat or roll the dough ball out into an 8 inch circle, then slice evenly into 8 pieces.


Put the gingerbread scones onto a parchment paper lined baking sheet; keep them about an inch apart from each other. Whisk an egg white until it becomes frothy. Using a pastry brush, evenly brush the egg white over the top of each scone wedge. Sprinkle the top of each scone with coarse sugar (I used raw sugar).

Bake The Gingerbread Scones
Bake the gingerbread scones in a preheated 400 degree oven for 12-15 minutes. Mine took the entire 15 minutes to turn golden brown. When done, remove baking sheet from oven. Transfer the scones to a wire rack (including the parchment paper). Let cool.

I moved the scones near our open kitchen window to cool in the morning air. See the raw sugar glistening on the top of the scones?
 Drizzle The Scones With Icing
It’s not necessary to garnish the scones once they’ve cooled off, but I wanted to add a bit of pretty icing to each one to make them look even better! To do this, simply mix up powdered sugar, water, and a bit of cinnamon into a glaze-like consistency.
Pour the glaze into a squeeze bottle (you can also use a resealable bag, then snip a little corner off the bottom) and decorate the scones with the icing.

Let the glaze firm up just a bit, and then the gingerbread scones are all done! Ready to eat… so where’s my huge mug of coffee?

Hope you will consider trying this recipe! It certainly doesn’t have to be the Holiday season to enjoy a good scone now, does it? Have a fantastic day!
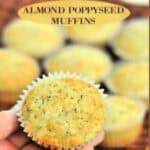
Looking For More Gingerbread-Inspired Recipes?
You can find all of my recipes in the Recipe Index, located at the top of the page. I have some wonderful gingerbread-inspired recipes, including:
Interested In More Recipes?
Thank you for visiting this website. I appreciate you using some of your valuable time to do so. If you’re interested, I publish a newsletter 2 times per month (1st and 15th) with all the latest recipes, and other fun info. I would be honored to have you join our growing list of subscribers, so you never miss a great recipe!
There is a Newsletter subscription box on the top right side (or bottom) of each blog post, depending on the device you use, where you can easily submit your e-mail address (only) to be included in my mailing list.
You Can Also Find Me On Social Media:
Facebook page: The Grateful Girl Cooks!
Pinterest: The Grateful Girl Cooks!
Instagram: jbatthegratefulgirlcooks

Recipe source: http://heritageschoolhouse.blogspot.com/2009/11/gingerbread-scones-8-servings-2-cups.html
- 2 cups all purpose flour
- 3 Tablespoons brown sugar
- 2 teaspoons baking powder
- 1/2 teaspoon baking soda
- 1 teaspoon ground ginger
- 1/2 teaspoon salt
- 1/2 teaspoon ground cinnamon
- 1/4 cup COLD butter (1/2 a cube)
- 1/3 cup molasses
- 1/4 cup milk
- 1 egg , separated
- Coarse sugar (for dusting tops of scones prior to baking)
- Powdered Sugar (approx. 1 cup)
- Few dribbles of water
- 1/2 teaspoon vanilla extract
- In medium bowl, mix together flour, brown sugar, baking powder and baking soda, ginger, salt and cinnamon. Using a pastry blender (or two forks), cut in COLD butter until mixture is about the size of small peas.
- In separate bowl, combine molasses, milk and egg yolk until fully mixed. Pour this into the dry ingredients in other bowl. Stir until just moistened. (Mixture was fairly crumbly. I added just a smidge more milk).
- Turn dough out onto a lightly floured work surface, then knead dough about 7-8 times. Shape dough into an 8 inch circle (using your hands). Using a sharp knife, cut into 8 equal sized pieces.
- Place scones onto a greased (or parchment paper covered) baking sheet. Place the dough wedges about an inch apart (but still in a circle shape).
- In a small dish, beat the egg white until it is frothy. Brush the egg white over the top of each scone using a pastry brush. Sprinkle scones with coarse sugar.
- Bake scones in preheated 400 degree oven for 12-15 minutes, or until they are light, golden brown in color. When done, remove to wire rack. Let cool.
- To add decorative icing to the scones, mix together powdered sugar, vanilla extract and a teaspoon of water. Stir well. Continue to add a couple drops of water at a time until you have an icing that is "drizzle-able" (not too thick... not too thin). Place icing into a plastic squeeze bottle and decoratively drizzle over cooled scones OR place icing into a resealable plastic storage bag, snip a little piece off the bottom corner, and decorate.
Here’s one more to pin on your Pinterest boards!


