Category: Breakfast

Lemon Coffee Cake Muffins

Enjoy one of these jumbo lemon coffee cake muffins with lemon glaze, and start the day with a smile! Make 6 JUMBO muffins or 12 regular muffins.Enjoy one of these jumbo lemon coffee cake muffins with lemon glaze, and start the day with a smile! Make 6 JUMBO muffins or 12 regular muffins.
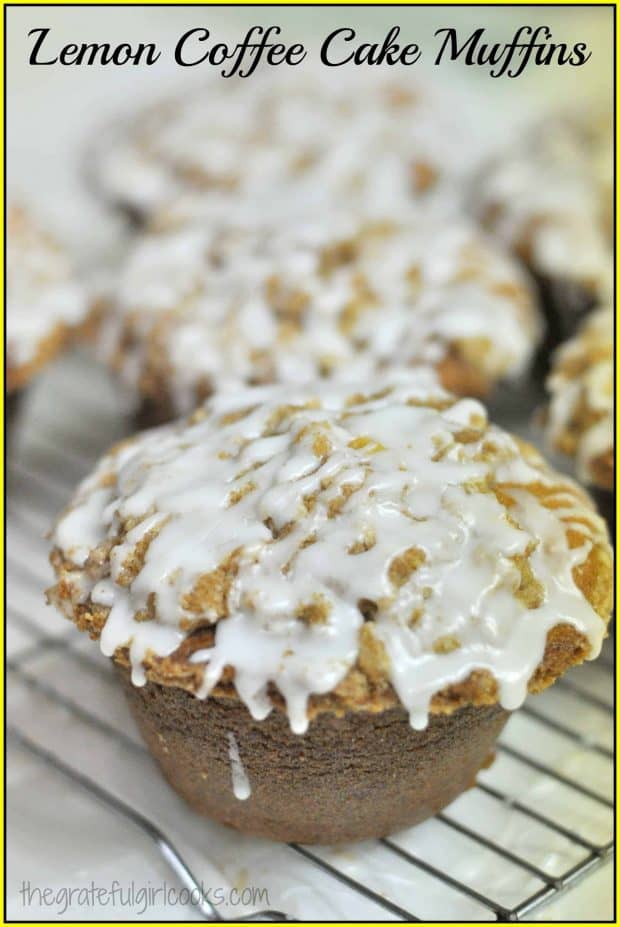
Anyone out there want a JUMBO sized Lemon Coffee Cake Muffin for breakfast? Here’s a recipe I found on Pinterest that makes 6 tasty jumbo sized (or 12 small) muffins!

I tried this recipe because it looked good, and I love lemon flavored muffins, cupcakes, scones, etc.).  Anyways, I received a jumbo muffin pan (6 cups) as a gift, and was aching to give it a “test drive”, so this is the recipe I chose.

I made these muffins several months ago, but am just now getting around to posting the recipe. It’s fairly straightforward and easy to make these lemon coffee cake muffins. Because I chose to make JUMBO muffins, the calorie count is high, but you can easily make 12 “normal” sized muffins (for less calories).

Scroll Down For A Printable Recipe Card At The Bottom Of The Page

Make The Streusel Topping

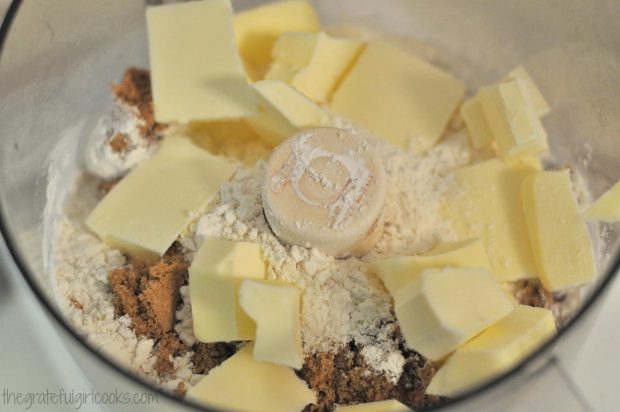
Mix up the flour, brown sugar, salt and cold butter for the streusel with a pastry cutter. You could also use a food processor and give it a few pulses.

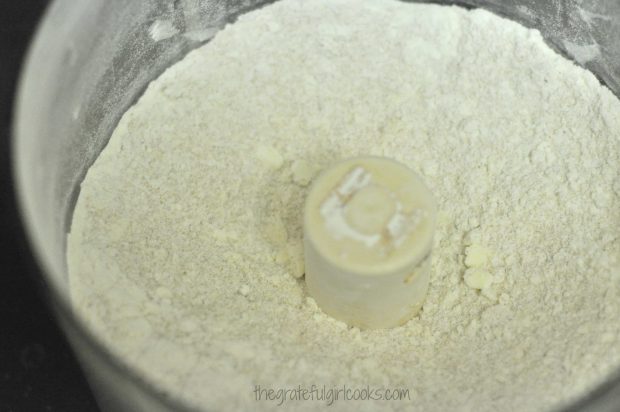
Making the streusel topping for the muffins in a food processor.

Once mixed, the butter in the streusel should be about the size of small peas. When the streusel is done, refrigerate it until ready to add to the muffin tops.

The streusel topping is ready to add to the muffin batter on top.

Make The Lemon Muffin Batter

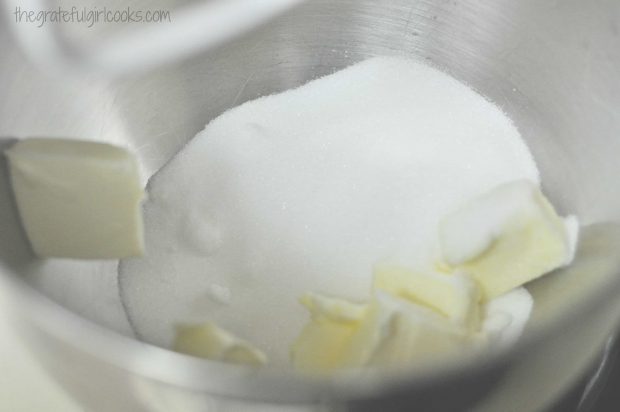
To make the muffin batter, combine flour, baking powder, baking soda, and salt in a large bowl, and then set aside.  In a mixing bowl (or stand mixer), beat the butter and granulated sugar on medium low power until creamy.

Butter and sugar is mixed to begin making the muffin batter.

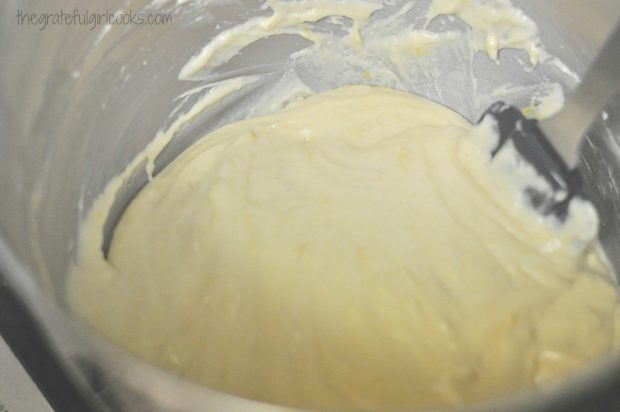
Stir in lemon zest, then add one egg at a time (while beating on LOW). Add the vanilla, and blend well (making sure to scrape down sides of bowl). Pour in 1/3 of the buttermilk, then 1/3 of flour mixture, and continue beating on low. Add the rest of the  buttermilk and flour in 1/3 increments until all have been incorporated..

Batter for the lemon coffee cake muffins is finished mixing.

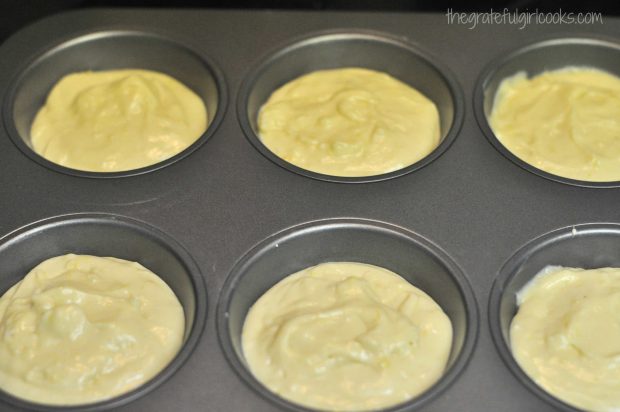
Evenly divide the batter into 6 large greased or buttered muffin cups (or 12, for smaller muffins).

The batter is evenly divided into muffin tins.

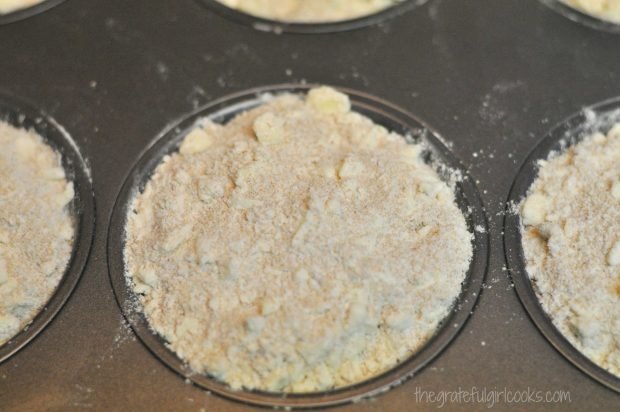
Top each muffin with the streusel topping. Completely cover the top of each muffin.

Streusel topping is added to the top of the lemon coffee cake muffins before baking.

Bake The Lemon Coffee Cake Muffins

Bake the muffins at 350 degrees for 45-55 minutes or until done. Stick a toothpick into the center of a muffin to test for doneness. If it comes out clean (without batter), then the lemon coffee cake muffins are done. Remove the muffin tin to a wire rack to let the muffins cool when they are finished baking. Let the muffins cool completely in the muffin tin.

Make The Lemon Glaze While Muffins Cool

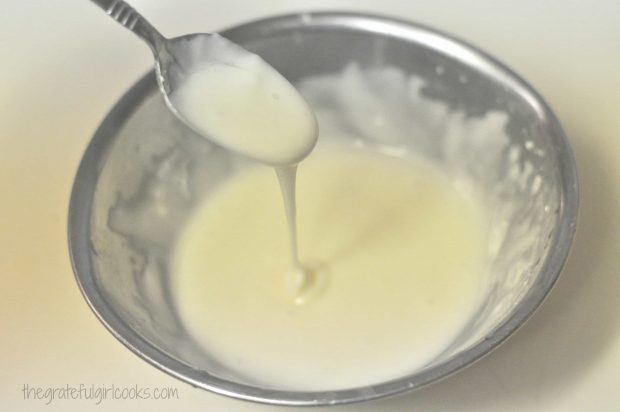
While muffins are cooling, make the lemon glaze, by mixing powdered sugar and fresh squeezed lemon juice until smooth.

A lemon glaze is mixed to drizzle on the finished muffins.

Time To Glaze The Lemon Coffee Cake Muffins!

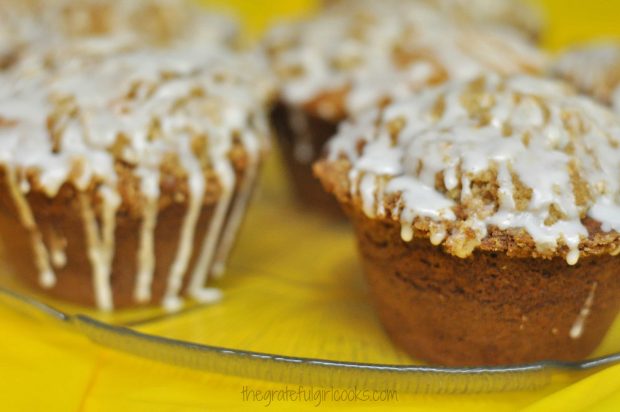
Once the muffins have cooled, gently transfer them out of the muffin tin to a wire rack. Place aluminum foil under the rack to catch any drips from the glaze! When the lemon coffee cake muffins are at room temperature, drizzle the lemon glaze over the top of each one. I even let it run down the sides! Let the glaze firm up, then serve, and enjoy!

Once glaze has been drizzled on the lemon coffee cake muffins, they are ready to eat.

Hope you enjoy these lemon coffee cake muffins! Have a great day. The JUMBO muffins have lots of calories, so I’ve also included the caloric count for standard sized muffins in the printable recipe below, as well. Have a good day!

Looking For More MUFFIN Recipes?

You can find all of my muffin recipes in the Recipe Index, located at the top of the page. I have quite a few muffin recipes, including:

Interested In More Recipes?

Thank you for visiting this website. I appreciate you using some of your valuable time to do soIf you’re interested, I publish a newsletter 2 times per month (1st and 15th) with all the latest recipes, and other fun info. I would be honored to have you join our growing list of subscribers, so you never miss a great recipe!
There is a Newsletter subscription box on the top right side (or bottom) of each blog post, depending on the device you use, where you can easily submit your e-mail address (only) to be included in my mailing list.

You Can Also Find Me On Social Media:
Facebook page: The Grateful Girl Cooks!
Pinterest: The Grateful Girl Cooks!
Instagram: jbatthegratefulgirlcooks

Author's signature

Recipe Source:  http://www.simplyscratch.com/2011/07/jumbo-lemon-coffee-cake-muffins.html
0 from 0 votes
Lemon Coffee Cake Muffins
Prep Time
15 mins
Cook Time
45 mins
Total Time
1 hr
 

Enjoy one of these jumbo lemon coffee cake muffins with lemon glaze, and start the day with a smile! Make 6 JUMBO muffins or 12 regular muffins.

Category: Breakfast
Cuisine: American
Keyword: lemon coffee cake muffins
Servings: 6 huge muffins
Calories Per Serving: 985 kcal
Author: JB @ The Grateful Girl Cooks!
Ingredients
For The Muffin Batter:
  • 2 cups all purpose flour
  • 1 teaspoon baking powder
  • 1 teaspoon baking soda
  • 1 teaspoon salt
  • 1/2 cup butter , room temperature
  • 1 cup granulated sugar
  • 1 1/2 Tablespoons Lemon Zest
  • 2 large eggs
  • 1 teaspoon vanilla extract
  • 1 cup buttermilk
For The Streusel Topping:
  • 1 3/4 cup all purpose flour
  • 3/4 cup brown sugar
  • 1 teaspoon salt
  • 3/4 cup butter , chilled
For The Glaze:
  • 1 cup powdered sugar
  • 3 Tablespoons fresh squeezed lemon juice
Instructions
  1. Preheat your oven to 350 degrees. Butter or spray a jumbo (6 cup) muffin pan OR a regular 12 cup muffin pan.
  2. Make the streusel by combining flour, brown sugar and salt. Cut in chilled butter with a pastry cutter OR pulse in a food processor until butter is size of small peas and evenly distributed. Refrigerate mix.
  3. To make muffins: Whisk the flour, baking powder, baking soda, and salt together in large bowl; set this aside. In a separate bowl (or stand mixer), beat the butter and sugar on medium low until mixture is creamy. Add the lemon zest, then slowly add one egg at a time (while beating on low and scraping down edges), until fully combined. Add vanilla extract and blend.
  4. Alternate adding 1/3 of buttermilk and 1/3 of the flour mixture, blending together until all has been added and mixed into batter. Divide batter into 6 greased jumbo muffin cups (or 12 regular muffin cups). Distribute the streusel over the entire surface of each muffin.
  5. Bake muffins (jumbo sized) in 350 preheated oven for 45-55 minutes, or until done. (If you are making 12 regular sized muffins, make sure to reduce the cooking time!). You can test for doneness by inserting a toothpick into center of muffin. If it comes out clean, muffins are done. Let muffins cool completely in the pan, then remove muffins to a wire rack (with a piece of aluminum foil underneath to catch drips from glaze).

  6. To make glaze, whisk the powdered sugar and fresh lemon juice together. Drizzle the glaze over the tops of the cooled muffins. Let sit until glaze firms up, then serve and enjoy!
Recipe Notes

NOTE: If making 12 muffins (standard size), the calories per muffin is 492. Remember to reduce cooking time if you are preparing 12 muffins instead of 6 jumbo sized muffins. 

Nutrition Facts
Lemon Coffee Cake Muffins
Amount Per Serving (1 muffin)
Calories 985 Calories from Fat 378
% Daily Value*
Fat 42g65%
Saturated Fat 26g163%
Cholesterol 161mg54%
Sodium 1369mg60%
Potassium 276mg8%
Carbohydrates 143g48%
Fiber 2g8%
Sugar 82g91%
Protein 12g24%
Vitamin A 1325IU27%
Vitamin C 4.9mg6%
Calcium 131mg13%
Iron 4.1mg23%
* Percent Daily Values are based on a 2000 calorie diet.

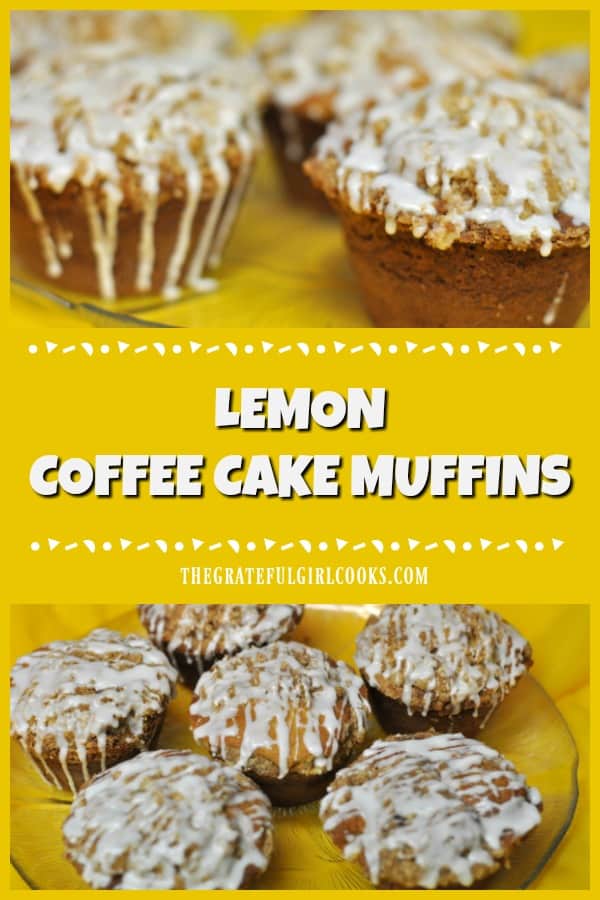
Here’s one more to pin on your Pinterest boards!Enjoy one of these jumbo lemon coffee cake muffins with lemon glaze, and start the day with a smile! Make 6 JUMBO muffins or 12 regular muffins.


Save

Save

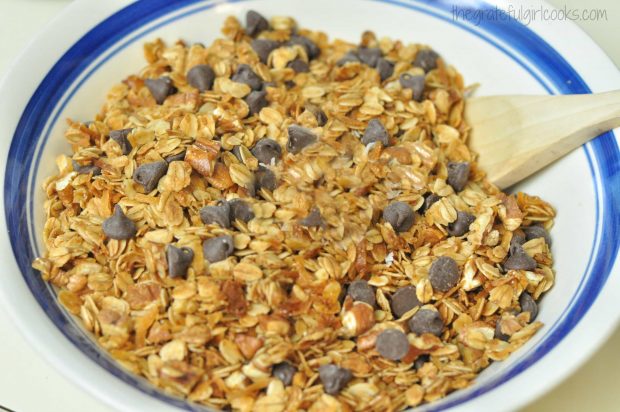
Coconut Pecan Chocolate Chip Granola

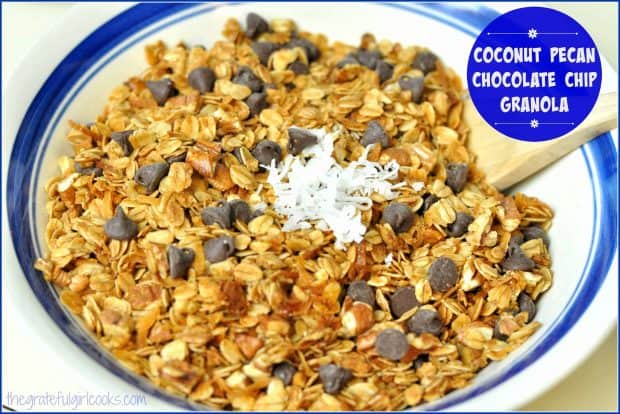
It’s easy to bake up a batch of Coconut Pecan Chocolate Chip Granola to have around for a delicious, family-friendly breakfast treat!Coconut Pecan Chocolate Chip Granola / The Grateful Girl Cooks!
I recently saw a recipe on Pinterest for Coconut Pecan Chocolate Chip Granola. Because I love to make (and eat) granola, I decided to give this slightly decadent sounding recipe a try! I love to sprinkle granola on top of vanilla Greek yogurt as a breakfast treat, so I was all over this recipe when I saw it. Guess what? It’s even good sprinkled on top of a scoop of ice cream (at least that’s the word on the street).

Granola with coconut and pecans and chocolate chips? Be still my heart. Did I also mention that the coconut and pecans are slightly toasted by the end of the baking time (which makes them even more delicious!)? Yes, please.

The recipe is a cinch to make with only a few ingredients. The prep time is 5 minutes, and the coconut pecan granola is baked for only 30 minutes. That’s it!! Before you have time to think about it, the granola is done… and your home will smell wonderfully “coconut-y”! Here’s what you do:

Scroll Down For A Printable Recipe Card At the Bottom Of the Page

How To Make Coconut Pecan Granola

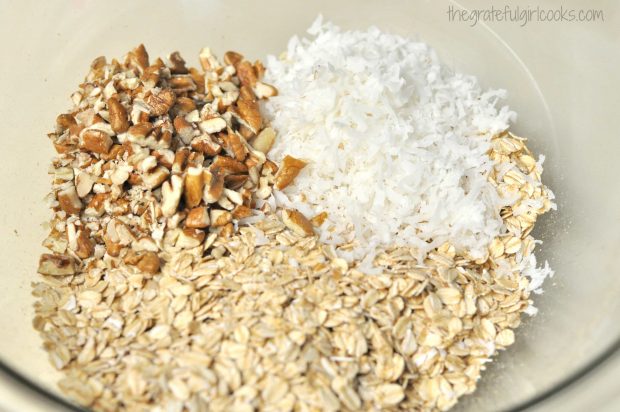
Preheat your oven to 300 degrees. Place the oats, coconut and chopped pecans in a large mixing bowl.

Coconut Pecan Chocolate Chip Granola / The Grateful Girl Cooks!

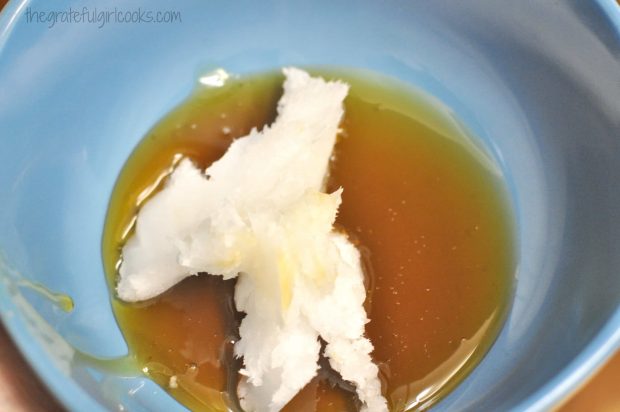
In a separate microwave safe bowl, combine the coconut oil and honey. Cook in microwave on high for about 25-30 seconds to melt the honey and coconut oil.

Coconut Pecan Chocolate Chip Granola / The Grateful Girl Cooks!

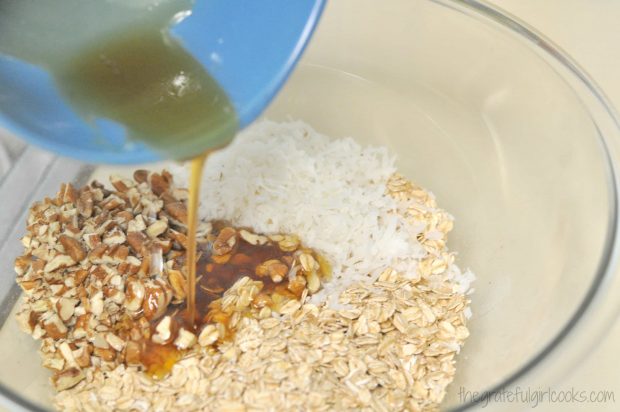
Remove the bowl from the microwave, and stir until smooth.  Pour the honey and oil mixture into the bowl with the oats, etc. Stir well to combine ingredients.

Coconut Pecan Chocolate Chip Granola / The Grateful Girl Cooks!

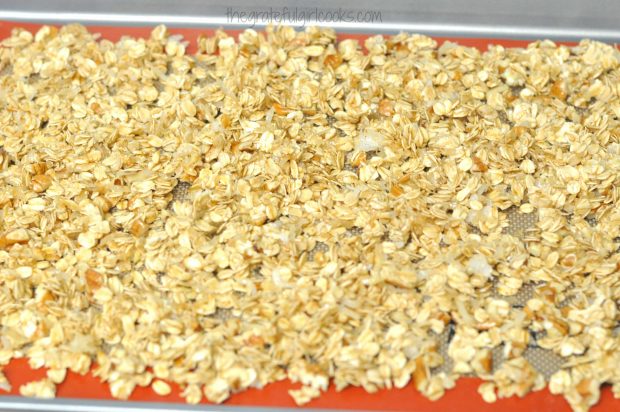
Once the mixture is evenly coated, spread the granola out on silicone baking mat or parchment paper lined baking sheet.

Bake The Coconut Pecan Chocolate Chip Granola

Bake the coconut pecan chocolate chip granola at 300 degrees for 30 minutes. Halfway though the baking time, give the mixture a quick little stir and re-distribute the granola on sheet.

Coconut Pecan Chocolate Chip Granola / The Grateful Girl Cooks!

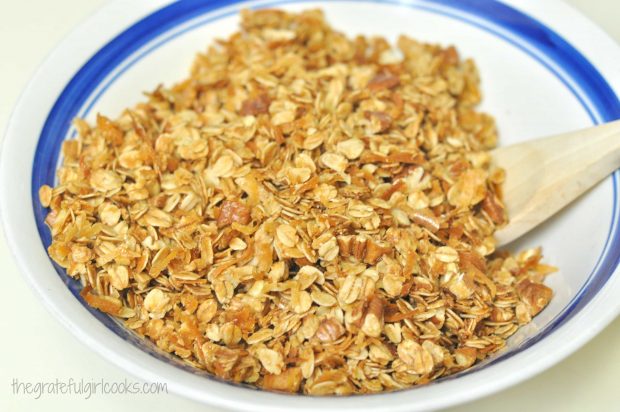
Once the granola is done, let it cool (it will be soft, but will become firmer and crunchier as the mixture cools down). Let the coconut pecan granola cool completely on the baking sheet, then pour into a bowl.

Coconut Pecan Chocolate Chip Granola / The Grateful Girl Cooks!

Add Chocolate Chips To The Cooled Granola

Once the granola is completely cool, add the chocolate chips; stir to combine. Your granola is now ready to enjoy as a breakfast treat, a snack, or a topping for ice cream, etc.

Coconut Pecan Chocolate Chip Granola / The Grateful Girl Cooks!

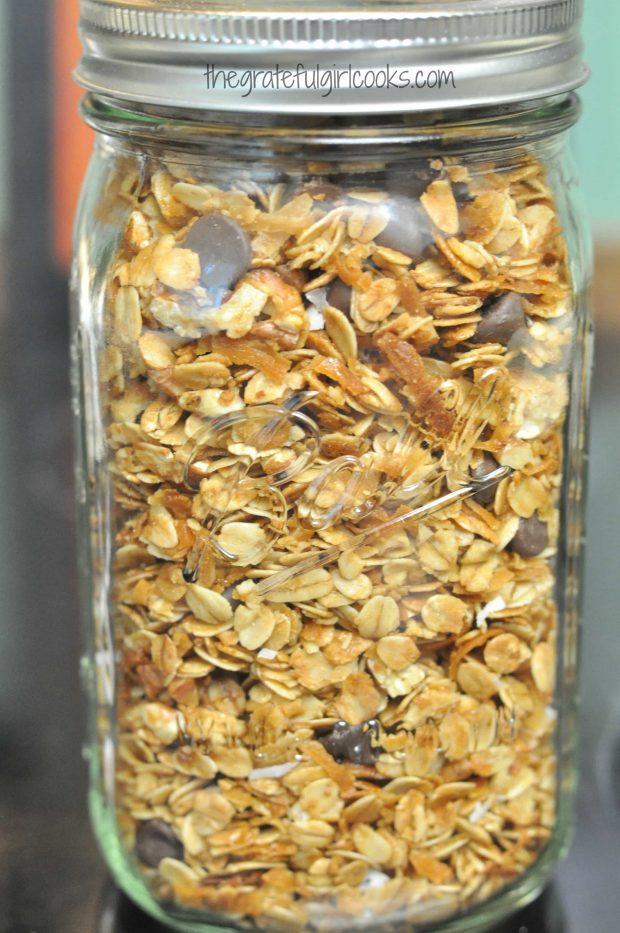
Store the coconut pecan chocolate chip granola in a covered container. I found that the recipe as written makes exactly a quart of granola, so I stored it in a quart sized canning jar. I wanted to try this granola before increasing the quantity, but now that I’ve tasted just how yummy it is, NEXT TIME I will make a DOUBLE batch, so we will have more!

Coconut Pecan Chocolate Chip Granola / The Grateful Girl Cooks!

If you like granola, I’m sure you’ll enjoy this recipe. You might also like to try my recipes for Gingerbread Granola and  Cranberry Almond Granola.  Sure hope you will give either these recipes a try! I sincerely wish for you a wonderful day… filled with hope and encouragement for your heart and soul!

Looking For More BREAKFAST Recipes?

You can find all my recipes in the Recipe Index, located at the top of the page. I have a large variety of delicious breakfast recipes, including”

Interested In More Recipes?

Thank you for visiting this website. I appreciate you using some of your valuable time to do soIf you’re interested, I publish a newsletter 2 times per month (1st and 15th) with all the latest recipes, and other fun info. I would be honored to have you join our growing list of subscribers, so you never miss a great recipe!
There is a Newsletter subscription box on the top right side (or bottom) of each blog post, depending on the device you use, where you can easily submit your e-mail address (only) to be included in my mailing list.

You Can Also Find Me On Social Media:
Facebook page: The Grateful Girl Cooks!
Pinterest: The Grateful Girl Cooks!
Instagram: jbatthegratefulgirlcooks

Coconut Pecan Chocolate Chip Granola / The Grateful Girl Cooks!

Recipe Source: http://chefsavvy.com/recipes/coconut-pecan-chocolate-chip-granola/

0 from 0 votes
Coconut Pecan Chocolate Chip Granola
Prep Time
5 mins
Cook Time
30 mins
Total Time
35 mins
 

It's easy to bake up a batch of Coconut Pecan Chocolate Chip Granola to have around for a delicious, family-friendly breakfast treat!

Category: Breakfast
Cuisine: American
Keyword: coconut pecan granola
Servings: 16 (1/4 cup each)
Calories Per Serving: 154 kcal
Author: JB @ The Grateful Girl Cooks!
Ingredients
  • 1/4 cup coconut oil
  • 1/4 cup plus 2 Tablespoons honey
  • 2 cups old fashioned oats
  • 1/2 cup shredded coconut
  • 1/2 cup chopped pecans
  • 1/2 cup semi-sweet chocolate chips
Instructions
  1. Preheat your oven to 300 degrees while preparing granola.
  2. Place oats, coconut, and chopped pecans in a large mixing bowl. Set aside.
  3. In a microwave safe bowl, cook the honey and coconut oil for 25-30 seconds in microwave on high.
  4. Remove from microwave and stir until smooth. Pour the honey/oil mixture over the oats/coconut/pecan mixture. Stir well until well combined and coated.
  5. Evenly distribute the oat mixture onto a baking sheet that is lined with either a silicone mat, or parchment paper. Bake granola for 30 minutes, stirring it a bit and redistributing it half way through the cooking time. The granola will be golden brown when done. It will firm up as it cools, and get crunchy. Let the granola cool completely.
  6. Once granola is completely cooled down, add the chocolate chips and stir.
  7. Granola is now ready to enjoy! Store in a covered container.
Recipe Notes

Recipe makes approximately 4 cups granola total.

Nutrition Facts
Coconut Pecan Chocolate Chip Granola
Amount Per Serving (0.25 cup)
Calories 154 Calories from Fat 81
% Daily Value*
Fat 9g14%
Saturated Fat 5g31%
Sodium 8mg0%
Potassium 94mg3%
Carbohydrates 15g5%
Fiber 1g4%
Sugar 7g8%
Protein 2g4%
Calcium 11mg1%
Iron 1mg6%
* Percent Daily Values are based on a 2000 calorie diet.

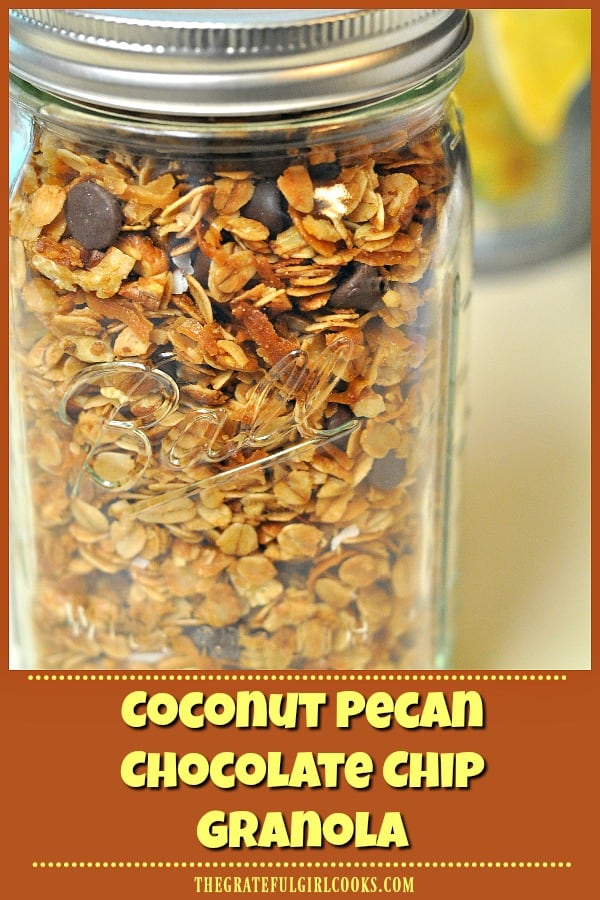
Here’s one more to pin on your Pinterest boards!It's easy to bake up  a batch of Coconut Pecan Chocolate Chip Granola to have around for a delicious, family-friendly breakfast treat!


Save

Save

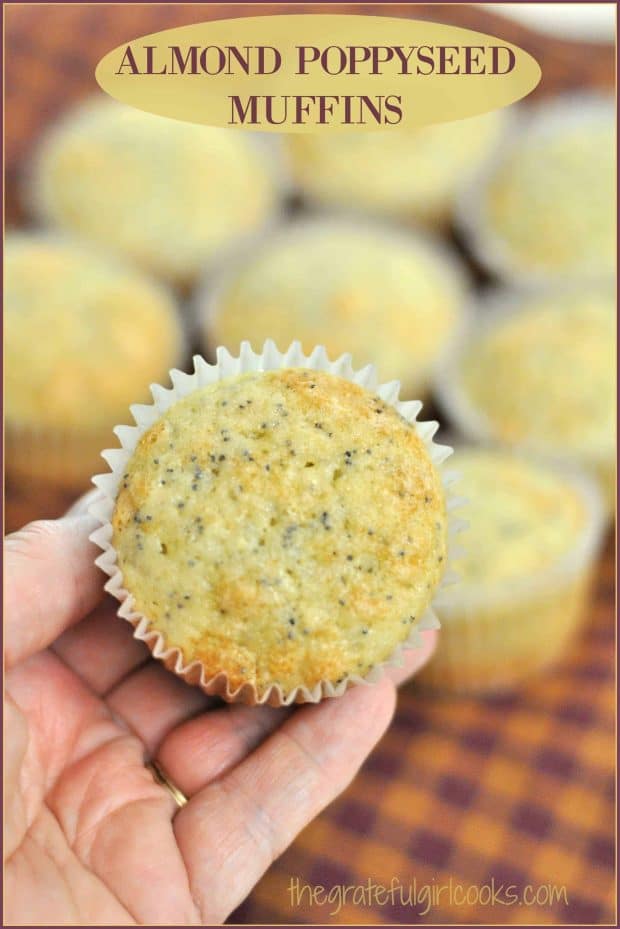
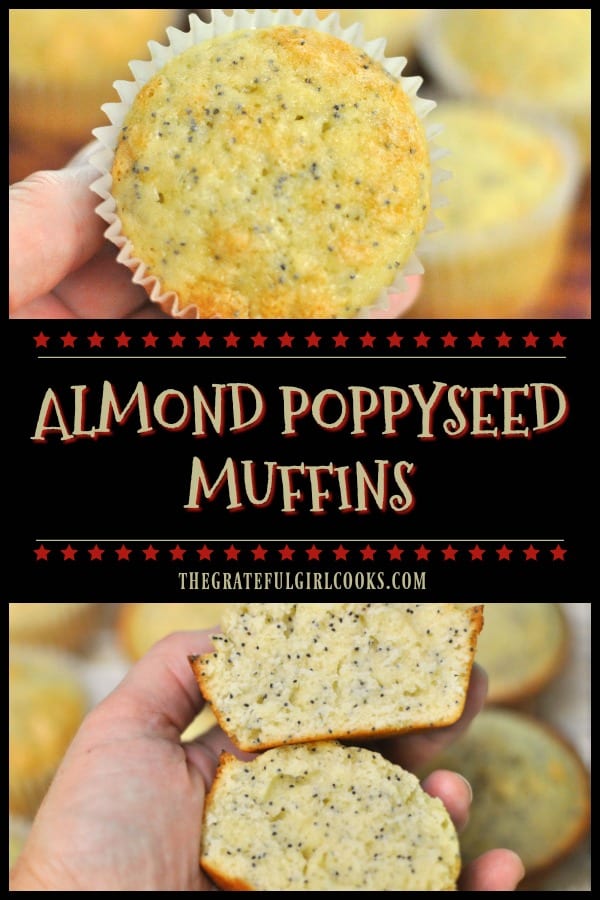
Almond Poppyseed Muffins

Almond Poppyseed Muffins are incredibly EASY to make, taste wonderful, and are a perfect breakfast treat or snack for those you love. Recipe makes 18.Almond Poppyseed Muffins are incredibly EASY to make, taste wonderful, and are a perfect breakfast treat or snack for those you love. Recipe makes 18.

I tried a new recipe for Almond Poppyseed Muffins recently, and thought I’d share the recipe for these easy and delicious breakfast treats with you today!

These almond poppyseed muffins are incredibly EASY to make, and have a delicious light almond flavor.  In about 30 minutes total time, I had 18 of these tasty muffins out of the oven and waiting to be eaten… not too shabby!  They are the perfect muffins to grab on the way out the front door for work, school, etc.

Scroll Down For A Printable Recipe Card At the Bottom Of The Page

How To Make Almond Poppyseed Muffins

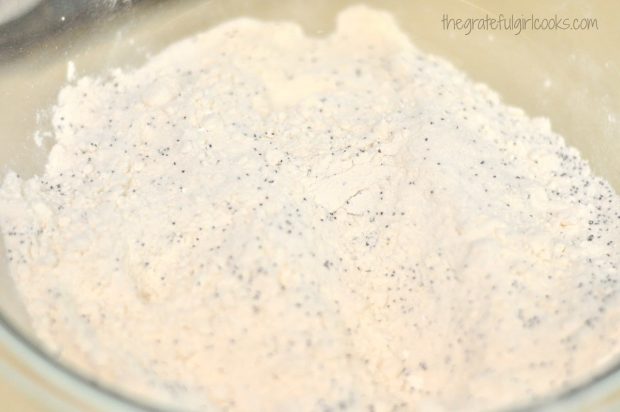
Mix the dry ingredients (flour, sugar, poppyseeds, baking powder, and salt) in a large mixing bowl.  Set aside.

Dry ingredients for muffins in mixing bowl

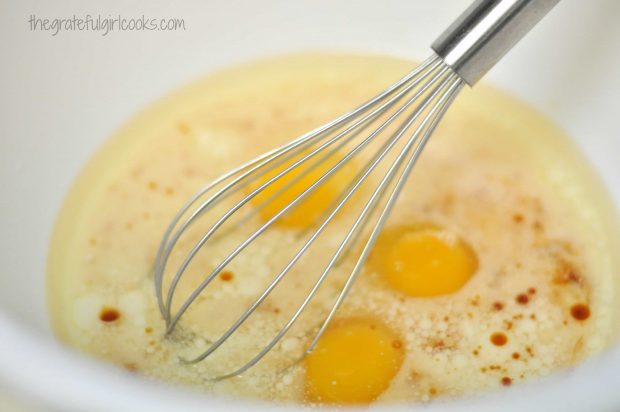
In a separate bowl, whisk together eggs, milk, oil, vanilla and almond extracts.

Whisking wet ingredients (oil, eggs, extract, etc.) in bowl

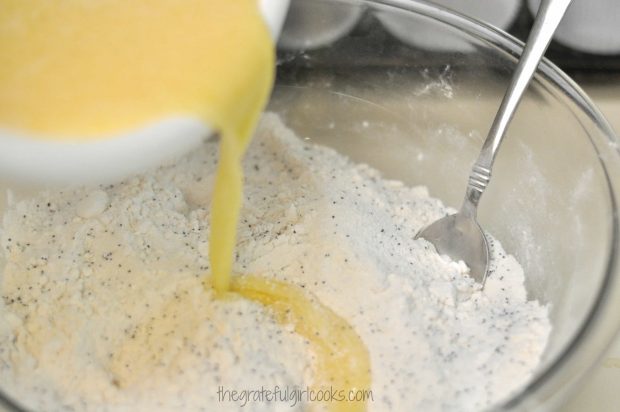
Pour the egg mixture into the dry ingredients, and stir only until just mixed together.

Pouring egg mixture into dry ingredients in bowl

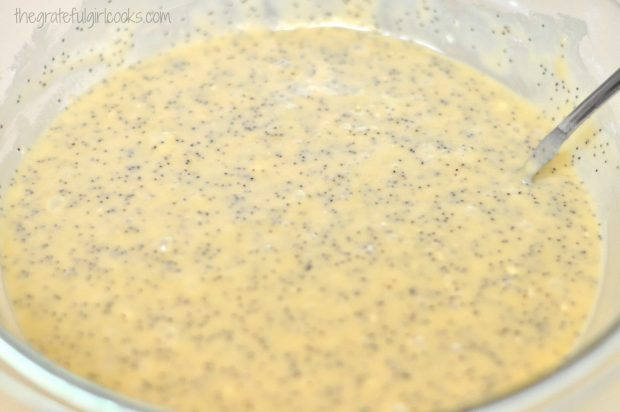
Poppyseed muffin batter in large glass mixing bowl

Bake The Almond Poppyseed Muffins

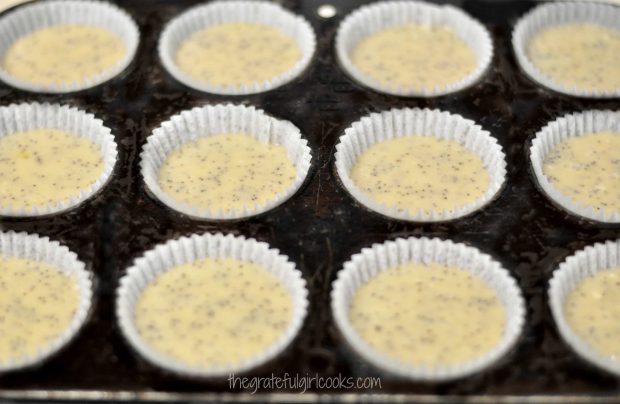
Divide the batter evenly into greased or paper-lined muffin cups. Fill them 2/3 of the way full. Bake in a pre-heated oven at 350 degrees for 20-25 minutes, or until done.

To test for doneness, stick a toothpick into center of muffin. If toothpick comes out clean, muffins are done.  The muffins should be light golden brown, as well.

Batter in paper-lined muffin cup holders

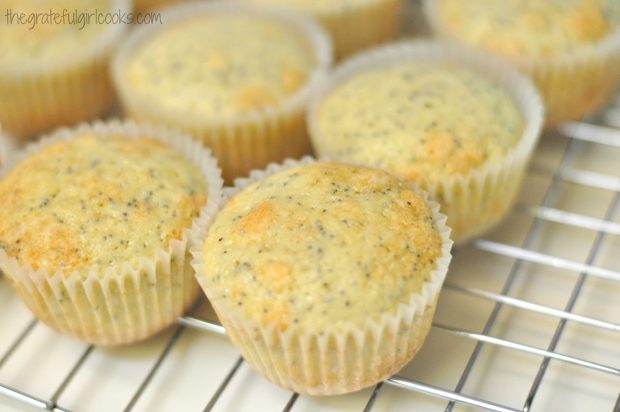
When done, let the muffins cool for about 10 minutes in the muffin pans, then remove them to a wire rack to finish cooling.

Muffins on wire rack cooling

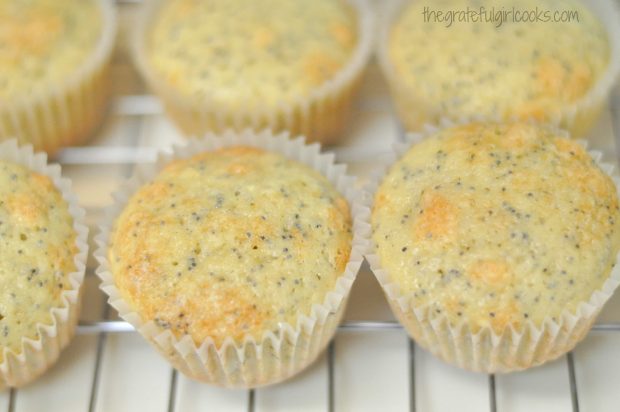
That’s it!!! Now you can serve and enjoy these tasty muffins!  Hope you enjoy these simple almond poppyseed muffins. In no time at all, you can make a dozen and a half of these! They also are freezable, if wrapped well.

Almond Poppyseed Muffins cooling on a wire rack

If you enjoy these almond poppyseed muffins, be sure and check out my other muffin recipes for Apple Crumb, Cranberry Orange, Chocolate Chip, Blueberry Crumble, Banana Crumb, Apple Raisin, and many others, all found in the Recipe Index at the top of each blog post.

Have a great day – my sincere prayer is that you will know and sense the amazing, unconditional love of God.  He loves you and me so very much… for THAT I am forever grateful.

Interested In More Recipes?

Thank you for visiting this website. I appreciate you using some of your valuable time to do soIf you’re interested, I publish a newsletter 2 times per month (1st and 15th) with all the latest recipes, and other fun info. I would be honored to have you join our growing list of subscribers, so you never miss a great recipe! 

There is a Newsletter subscription box on the top right side (or bottom) of each blog post, depending on the device you use, where you can easily submit your e-mail address (only) to be included in my mailing list.

You Can Also Find Me On Social Media:

Facebook page: The Grateful Girl Cooks!
Pinterest:
The Grateful Girl Cooks!
Instagram:
jbatthegratefulgirlcooks

Author's signature

Recipe Source: http://chefronlock.com/recipes/almond-poppyseed-muffins/ (domain has expired)

0 from 0 votes
Almond Poppyseed Muffins
Prep Time
10 mins
Cook Time
20 mins
Total Time
30 mins
 

Almond Poppyseed Muffins are incredibly EASY to make, taste wonderful, and are a perfect breakfast treat or snack for those you love. Recipe makes 18.

Category: Breakfast
Cuisine: American
Keyword: almond poppyseed muffins
Servings: 18 muffins
Calories Per Serving: 220 kcal
Author: JB @ The Grateful Girl Cooks!
Ingredients
  • 3 cups all purpose flour
  • 2 1/2 cups granulated sugar
  • 2 Tablespoons poppy seeds
  • 1 1/2 teaspoons baking powder
  • 1 1/2 teaspoons salt
  • 3 large eggs
  • 1 1/2 cups milk
  • 1 cup vegetable or canola oil
  • 1 1/2 teaspoons vanilla extract
  • 1 1/2 teaspoons almond extract
Instructions
  1. Before beginning, preheat oven to 350 degrees. Grease muffin pan or fill it with paper-lined muffin cups.
  2. Mix the dry ingredients together in a large bowl.
  3. In a separate bowl, whisk the eggs, milk, oil, vanilla and almond extracts together until combined.
  4. Stir the wet ingredients into the bowl with the dry ingredients. Stir mixture only until ingredients are moist and mixed together.
  5. Fill the prepared muffin cups 2/3 full of batter. Bake muffins at 350 degrees for 20-25 minutes or until light golden brown and tested for doneness (I use a toothpick into the middle of the muffin).
  6. Remove from oven. Let muffins cool in the muffin tin for 10 minutes, then remove them to a wire rack to finish cooling. Serve and enjoy!
Nutrition Facts
Almond Poppyseed Muffins
Amount Per Serving (1 muffin)
Calories 220 Calories from Fat 18
% Daily Value*
Fat 2g3%
Saturated Fat 1g6%
Cholesterol 28mg9%
Sodium 214mg9%
Potassium 102mg3%
Carbohydrates 45g15%
Sugar 28g31%
Protein 3g6%
Vitamin A 80IU2%
Calcium 61mg6%
Iron 1.2mg7%
* Percent Daily Values are based on a 2000 calorie diet.

Here’s one more to pin on your Pinterest boards!Almond Poppyseed Muffins are incredibly EASY to make, taste wonderful, and are a perfect breakfast treat or snack for those you love. Recipe makes 18!


Save

Save

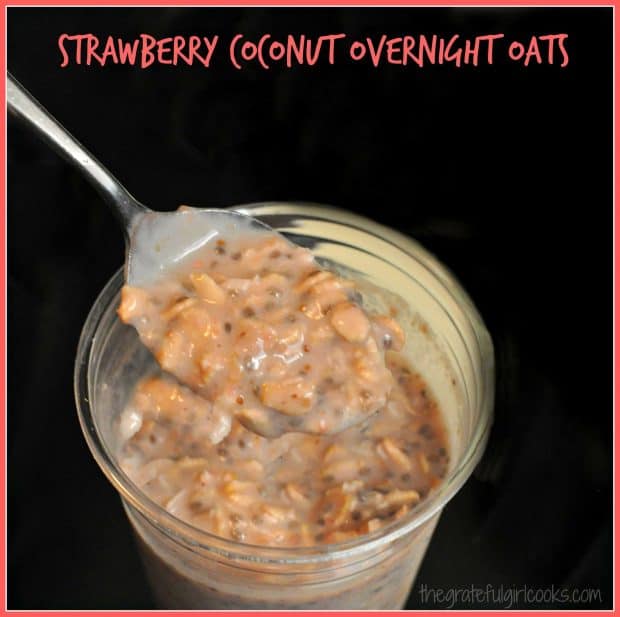
Strawberry Coconut Overnight Oats

It’s easy to make Strawberry Coconut Overnight Oats with this recipe that uses almond milk, rolled oats, chia seeds, and maple syrup for a sweetener! It's easy to make Strawberry Coconut Overnight Oats with this recipe that uses almond milk, rolled oats, chia seeds, and maple syrup for a sweetener!

Recently I tried a new recipe for Strawberry Coconut Overnight Oats, and they were wonderful. This breakfast treat is flavorful and full of filling, healthy chia seeds for a tasty breakfast with an extra nutritional boost. A friend of mine posted this recipe on a Facebook page, and I thought it looked promising, and very simple.

In this recipe, rolled oats are combined with strawberry puree, coconut, almond milk, pure maple syrup (for sweetness), chia seeds (which help fill you up!), vanilla extract and lemon juice. The oats are then refrigerated overnight. By breakfast the next day, the oats will have absorbed quite a bit of the liquid and flavor, and will be waiting for you in your refrigerator!

Most of the time I put the oats into individual containers with lids and then refrigerate. I also do this with my Apple Cinnamon Steel Cut Oats With Pecans.  Single serving containers are very convenient to grab, while running out the front door. Here’s how simple it is to make these tasty oats:

Scroll Down For A Printable Recipe Card At The Bottom Of The Page

Puree The Strawberries

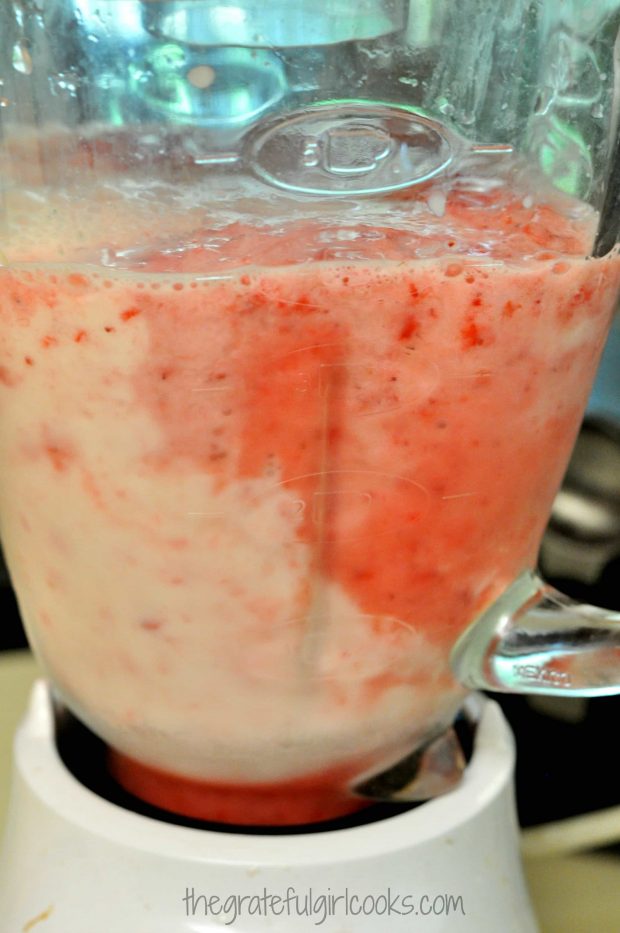
Puree fresh or frozen strawberries, whichever ones you have handy. You can add a tiny bit of the almond milk to help with the blending. You want this strawberry mixture to be very smooth and fully mixed once done.

Strawberries and a bit of almond milk are pureed in a blender.

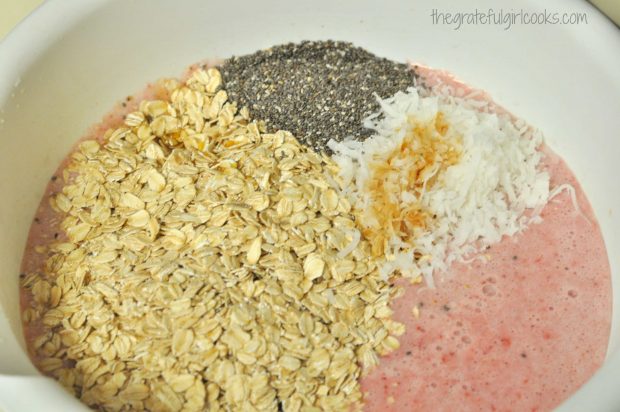
Pour the blended strawberries into a large bowl. Add the rest of the ingredients to the bowl.

The ingredients for the overnight oats are combined in a large mixing bowl.

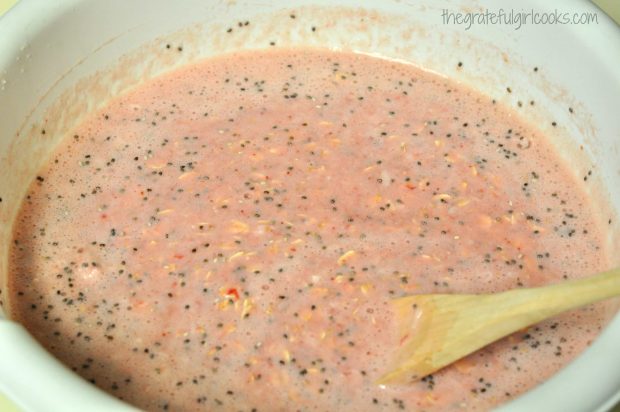
Stir well, to completely mix and combine the ingredients together. The maple syrup gives the mixture enough sweetness for my taste, but you might prefer it a little sweeter. Taste the oats and add more maple syrup, if you want them sweeter.

All f the ingredients for the strawberry coconut overnight oats are ready for refrigerator.

Refrigerate The Strawberry Coconut Overnight Oats

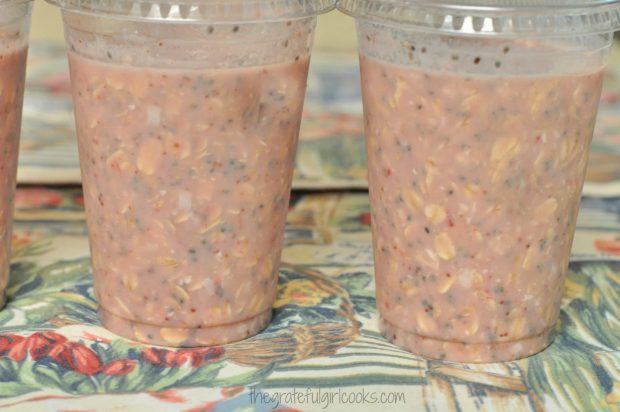
Pour the strawberry coconut overnight oats into a large container (with a lid) or several smaller containers. I usually divide the oat mixture into small, plastic containers that have lids. It’s not necessary to do that, but I really like the convenience of individual servings ready to go in the fridge. That way, I can just “grab and go”, even taking them in the car if necessary to eat a quick meal on the go.

You can also leave the oats in large covered bowl overnight, and dish it up from there. Whatever works best for you is certainly okay with me. Refrigerate the strawberry coconut overnight oats overnight, The oat mixture will firm up, and be ready to eat first thing in the morning, nice and chilled! YES… the overnight oats are not heated, but are eaten chilled. I tell you that because I once had a reader ask me that question.

Strawberry Coconut Overnight Oats in individual covered cups are ready to enjoy.

That’s it! These strawberry coconut overnight oats are incredibly easy to make, and they taste good, too. You can store the covered oats in the refrigerator for up to 3-4 days. I like not having to think about what I’m going to fix for breakfast, because I know there’s a little container of overnight oats waiting for me in the fridge! Hope you will consider giving this recipe a try.

Looking For More OVERNIGHT OATS recipes?

You can find all of my recipes in the Recipe Index, located at the top of the page. I have several overnight oats recipes, including:

Interested In More Recipes?

Thank you for visiting this website. I appreciate you using some of your valuable time to do soIf you’re interested, I publish a newsletter 2 times per month (1st and 15th) with all the latest recipes, and other fun info. I would be honored to have you join our growing list of subscribers, so you never miss a great recipe!
There is a Newsletter subscription box on the top right side (or bottom) of each blog post, depending on the device you use, where you can easily submit your e-mail address (only) to be included in my mailing list.

You Can Also Find Me On Social Media:
Facebook page: The Grateful Girl Cooks!
Pinterest: The Grateful Girl Cooks!
Instagram: jbatthegratefulgirlcooks

Author's signatureRecipe Source (Adapted Slightly): http://www.eatgood4life.com/strawberry-coconut-overnight-oats/

0 from 0 votes
Strawberry Coconut Overnight Oats
Prep Time
10 mins
Cook Time
0 mins
Total Time
10 mins
 

It's easy to make Strawberry Coconut Overnight Oats with this recipe that uses almond milk, rolled oats, chia seeds, and maple syrup for a sweetener!

Category: Breakfast
Cuisine: American
Keyword: strawberry coconut overnight oats
Servings: 6 servings
Calories Per Serving: 390 kcal
Author: JB @ The Grateful Girl Cooks!
Ingredients
  • 4 cups rolled oats
  • 12 ounces fresh or frozen strawberries , pureed
  • 5 1/2 cups almond milk
  • 1/2 cup shredded unsweetened coconut
  • 1/3 cup chia seeds
  • 1/4 cup pure maple syrup
  • 1 teaspoon vanilla extract
  • 1 teaspoon fresh lemon juice (optional, but I like the freshness it adds!)
Instructions
  1. Puree strawberries with a tiny bit of the almond milk (just enough to fully blend the strawberries), and place in large mixing bowl.

  2. Add remaining ingredients and stir thoroughly, to fully combine. Place oat mixture into a large covered bowl or into individual serving cups (with lids), and refrigerate overnight. Remove from refrigerator when ready to eat. Serve chilled.

  3. Mixture will keep for up to 3-4 days (covered) in refrigerator.

Recipe Notes

This should be made the day before you wish to eat them and refrigerated overnight. The overnight refrigeration time allows the liquid, etc. to be absorbed more into the oats.

Nutrition Facts
Strawberry Coconut Overnight Oats
Amount Per Serving (1 serving)
Calories 390 Calories from Fat 126
% Daily Value*
Fat 14g22%
Saturated Fat 5g31%
Sodium 307mg13%
Potassium 392mg11%
Carbohydrates 56g19%
Fiber 11g46%
Sugar 12g13%
Protein 10g20%
Vitamin C 33.8mg41%
Calcium 388mg39%
Iron 3.5mg19%
* Percent Daily Values are based on a 2000 calorie diet.

Here’s one more to pin on your Pinterest boards!It's easy to make Strawberry Coconut Overnight Oats with this recipe that uses almond milk, rolled oats, chia seeds, and maple syrup for a sweetener!


Save

Save

Cinnamon Crunch Bagels

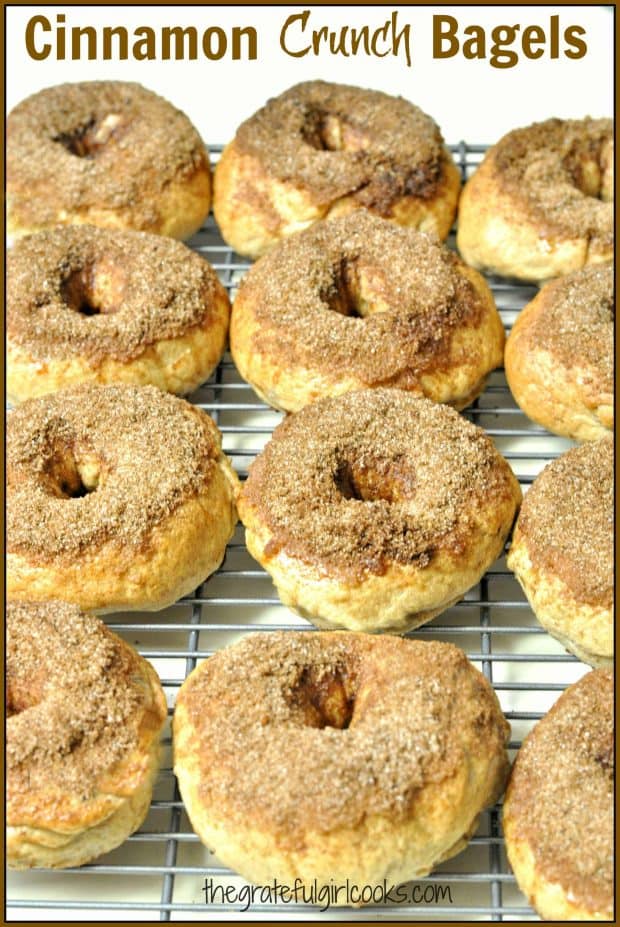
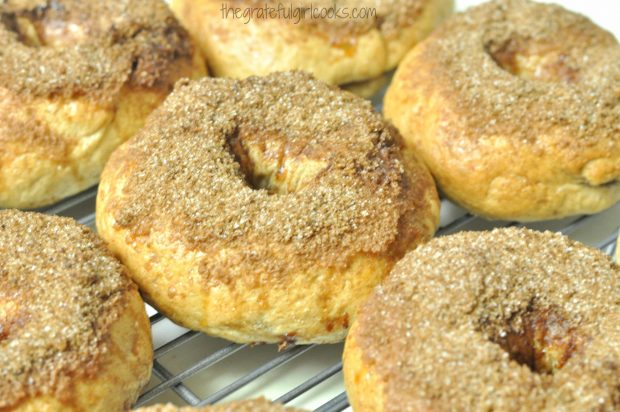
Cinnamon crunch bagels are New York-style chewy bagels, easily made from scratch, with a cinnamon-sugar crunchy top, and are a tasty breakfast treat!Cinnamon crunch bagels are New York-style chewy bagels, easily made from scratch, with a cinnamon-sugar crunchy top, and are a tasty breakfast treat!

Well, I tried a new bagel recipe this past weekend… Cinnamon Crunch Bagels! Oh my goodness – they were absolutely delicious!!!

I love the Cinnamon Crunch Bagels (my favorite!) at Panera Bread, and love the cinnamon-sugar coating on top of the bagels that crisps up as they bake, AND the cinnamon flavor that permeates the bread dough. Recently I found this recipe on Pinterest and decided to make my own! I’m so glad I tried this recipe… these “cinnamon-y” bagels are amazing!

Scroll Down For A Printable Recipe Card At The Bottom Of The Page

I Enjoy Making Bagels From Scratch

I enjoy making bagels. They’re easy to prepare, and this recipe for cinnamon crunch bagels makes a dozen! I’ve already made New York Style Blueberry Bagels, Gingerbread Bagels, Cranberry Orange Bagels, Everything Bagels, and Jalapeño Cheddar Bagels, so I was excited to try a new variety. And, wow… these were so good!

Basically, the process for making bagels is: dough is mixed, rises, bagels formed, boiled, then baked, and the result is a chewy New York style bagel, for the fraction of the cost of buying them.  Here’s how you make them:

How To Make Cinnamon Crunch Bagels

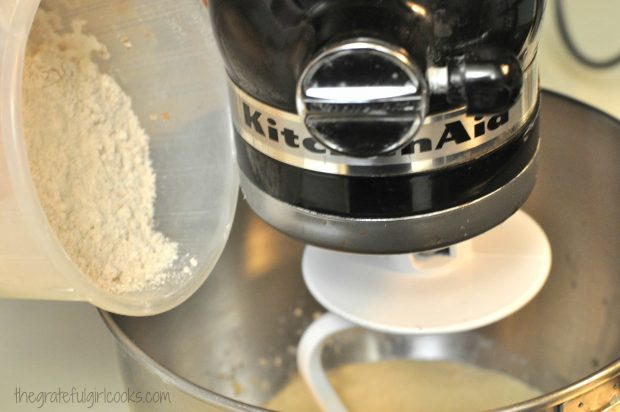
Combine yeast, warm water and brown sugar in  the bowl of a stand mixer, and let it rest for 10 minutes, to activate the yeast. Once the yeast is bubbly, add cinnamon, salt and flour.

Mixing up the dough for cinnamon crunch bagels in a stand mixer.

Knead the dough (with a dough hook) on low speed, and and additional flour slowly. Knead the dough for approximately 10 minutes, until a smooth, slightly elastic ball of dough is formed.

Place the dough ball in a large, greased bowl, and turn the dough over to make sure all sides are lightly coated (so it won’t dry out). Cover the bowl and leave it in a warm place (for the dough to rise) for an hour, or until the dough has doubled in size.

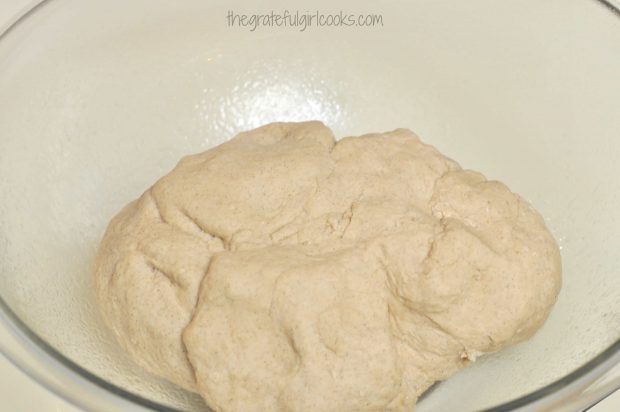
The dough for cinnamon crunch bagels in oiled bowl, waiting to rise.

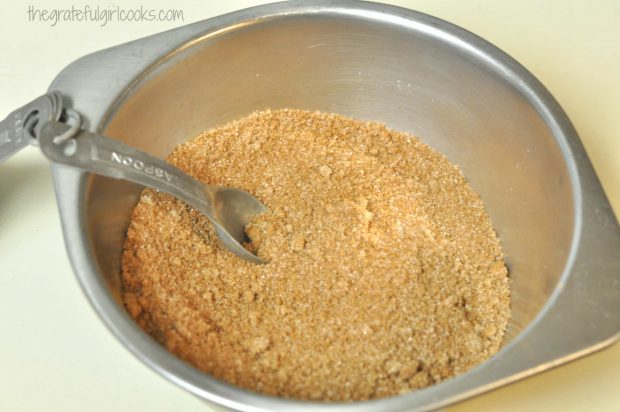
While the dough is rising, mix up the ingredients for the cinnamon sugar topping in a small bowl, and set aside. Easy.

Cinnamon sugar topping for cinnamon crunch bagels is combined in small bowl.

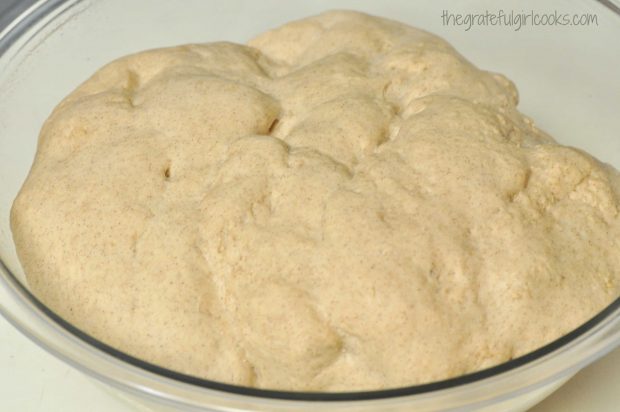
Once the dough for the cinnamon crunch bagels has doubled in size, it’s ready to go!

The dough for the cinnamon crunch bagels has risen, and doubled in size.

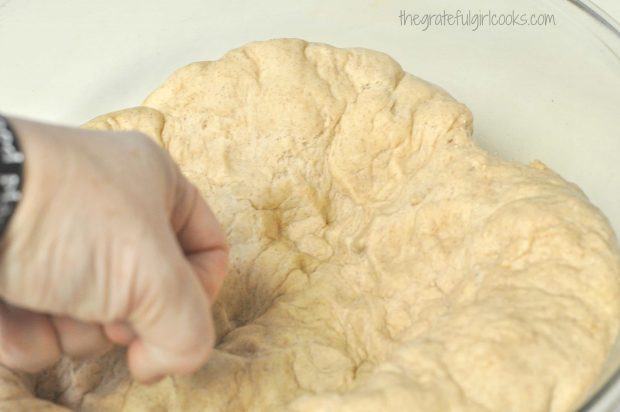
Give the dough a good punch with your fist, which helps to “deflate” the dough. “BOOM”.

Risen dough is punched down to deflate, before forming cinnamon crunch bagels.

Shaping The Cinnamon Crunch Bagels

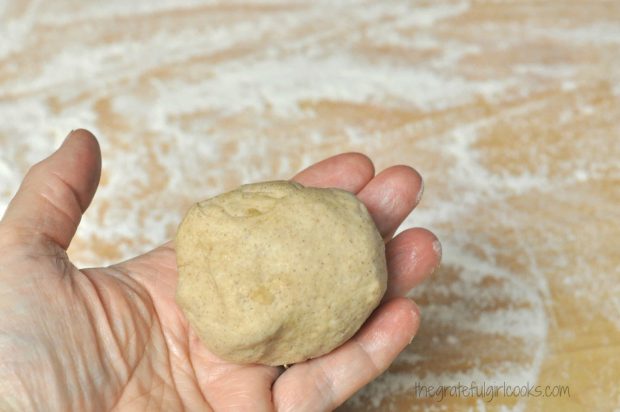
Divide the bagel dough into 12 equal sized dough balls. Smooth the dough by pulling the edges (with your hands) toward the bottom of the dough ball. This will make for a more rounded, uniform appearance on top. Place the 12 dough balls on a lightly floured work surface, with the seam side down.

Cinnamon Crunch Bagels dough is formed into 12 balls.

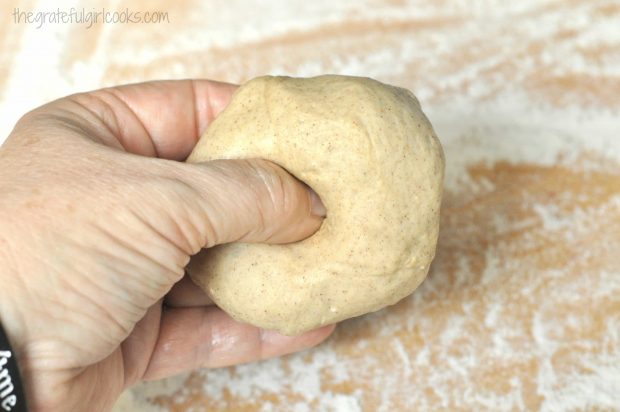
Working on one bagel at a time, use your thumb to make a hole in the center of the dough ball. Open the hole up through the bottom of the dough, and slightly pull on the dough to expand the hole a bit.

Repeat process for all 12 bagels. By the way… can you see all the little specks of cinnamon in dough? I can, and love the extra flavor the cinnamon provides.

A hole is punched into the bagel dough ball, using a thumb.

Let The Formed Cinnamon Crunch Bagels REST

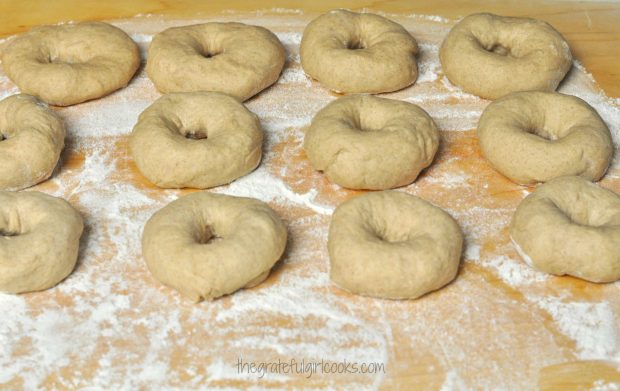
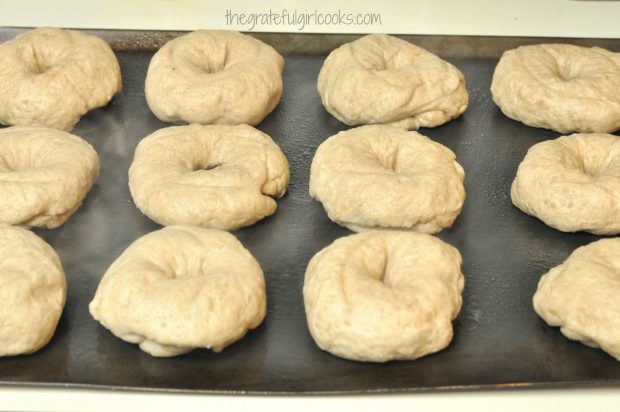
Here they are after all the holes have been formed, in the photo below, so you can see what they will look like. Let the formed bagels rest for 10 minutes, undisturbed.

The dough for the cinnamon crunch bagels has been formed, and the bagels "rest".

Boil the Cinnamon Crunch Bagels

While the cinnamon crunch bagels are resting (for 10 minutes), bring a LARGE pan of water to a full boil. Add a Tablespoon of brown sugar to the water.

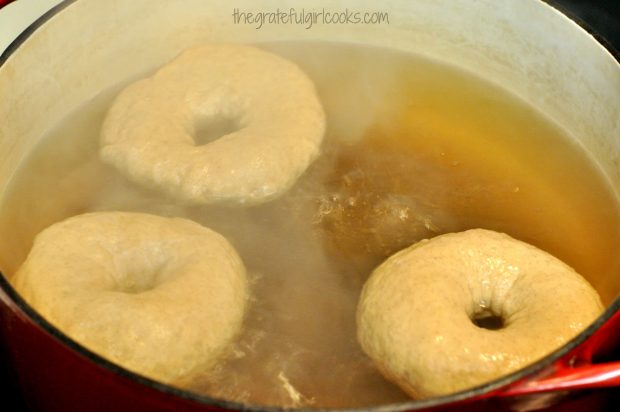
Once the water in pan is boiling, add 2-3 bagels at a time. Boil for 45 seconds, then flip them to the other side and boil for an additional 45 seconds. I use 2 chopsticks to flip them (one in the middle of hole and one on the outside).

Once done, remove the cinnamon crunch bagels with a slotted spoon (to drain), and place on a paper towel to absorb any extra water. Place the drained bagels seam side down onto a greased baking sheet. Repeat process until all the bagels are boiled and on the baking sheet.

Cinnamon Crunch Bagels are boiled for a few minutes before baking.

Here are the cinnamon crunch bagels on the greased baking sheet after boiling. Not too glamorous, right? Just wait! By the way, boiling the bagels helps ensure a nice chewy bagel!

The cinnamon crunch bagels are drained then placed on baking sheet to cook in oven.

Topping The Bagels Before Baking

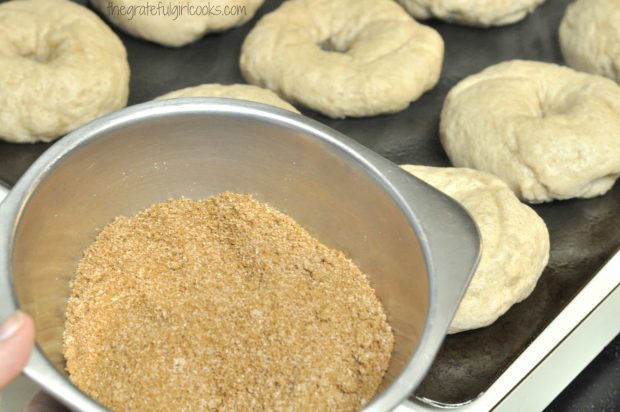
Grab the cinnamon topping mixture and evenly sprinkle it over the tops of the bagels. It’s a bit messy, because the topping will fall onto the baking sheet, but just keep going. Use all the topping mixture!

Before they bake the bagels are topped with cinnamon sugar mixture.

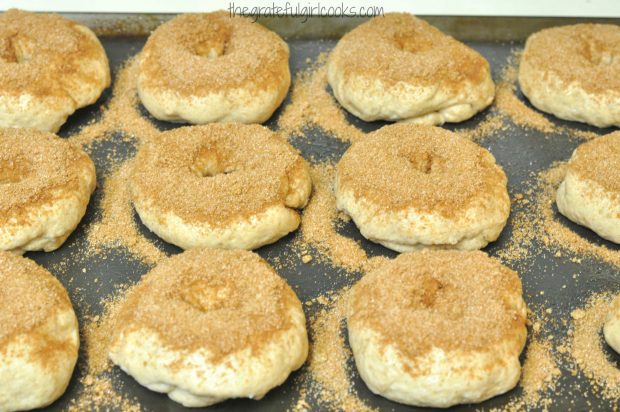
See how much topping fell onto the baking sheet below? I used a pastry brush to brush as much of it as I could get onto a plate, then simply added it back onto the tops of the bagels.

Cinnamon Crunch Bagels are topped with cinnamon sugar mix before they bake.

Bake The Cinnamon Crunch Bagels

The bagels are baked in a 400° F. oven for 18-20 minutes (mine took a bit longer to get them the golden brown color I desired). Check on them around the 18 minute mark, and don’t hesitate to cook them a few minutes longer until they’re a golden brown color.

After baking, the cinnamon crunch bagels cool on a wire rack.

Let the bagels cool on a wire rack. They taste great broiled, with cream cheese! NOTE: Do NOT put these bagels into a toaster or you will be sorry, as the sugar will melt into the appliance.

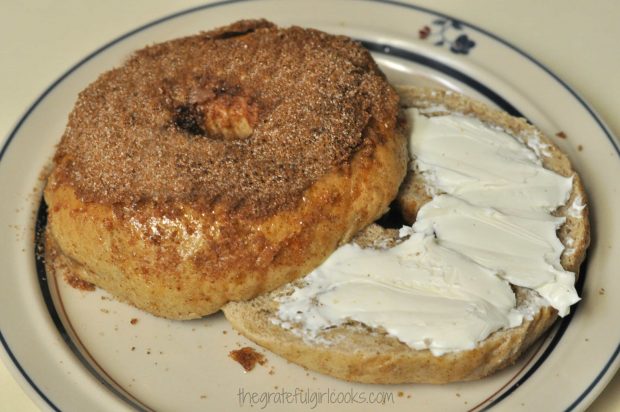
If you are going to broil them (which is what I do), gently slice them in half with a serrated knife. Place them, topping side down, on a baking sheet to broil. Please note that a bit of the topping will probably crumble or melt a bit when broiling, but no worries. Just scoop it right back up onto the bagel once it’s done, slap some cream cheese on it… and ENJOY these amazing bagels!

A cinnamon crunch bagel, sliced and topped with cream cheese, on a plate.

I am thrilled with the way these cinnamon crunch bagels turned out. They are so GOOD!  I took several bagels and some cream cheese over to my friend Stephanie’s home as a surprise, and her family ate them for Valentines Day breakfast. She told me they really enjoyed them.

Don’t be afraid to try making bagels at home… be FEARLESS!  These cinnamon crunch bagels are fairly easy and FUN to make, and even better to EAT! Hope you’ll give these a try! Have a GREAT day, and don’t forget to check out ALL of my recipes in the Recipe Index, located at the top of the page.

Interested In More Recipes?

Thank you for visiting this website. I appreciate you using some of your valuable time to do soIf you’re interested, I publish a newsletter 2 times per month (1st and 15th) with all the latest recipes, and other fun info. I would be honored to have you join our growing list of subscribers, so you never miss a great recipe!
There is a Newsletter subscription box on the top right side (or bottom) of each blog post, depending on the device you use, where you can easily submit your e-mail address (only) to be included in my mailing list.

You Can Also Find Me On Social Media:

Facebook page: The Grateful Girl Cooks!
Pinterest:
The Grateful Girl Cooks!
Instagram:
jbatthegratefulgirlcooks

Author's signature

Recipe Source:  http://www.bunsinmyoven.com/2014/03/31/cinnamon-crunch-bagels/

0 from 0 votes
Cinnamon Crunch Bagels
Prep Time
1 hr 30 mins
Cook Time
20 mins
Total Time
1 hr 50 mins
 
Cinnamon crunch bagels are New York-style chewy bagels, easily made from scratch, with a cinnamon-sugar crunchy top, and are a tasty breakfast treat!
Category: Breakfast
Cuisine: American
Keyword: cinnamon crunch bagels
Servings: 12 bagels
Calories Per Serving: 249 kcal
Author: JB @ The Grateful Girl Cooks!
Ingredients
For Bagels:
  • 2 teaspoons active dry yeast
  • 1 1/2 cups warm water (110-120 degrees)
  • 1/4 cup brown sugar , divided
  • 3 teaspoons cinnamon
  • 1 1/2 teaspoons salt
  • 5 cups all purpose flour
For Topping:
  • 1/4 cup granulated white sugar
  • 1/4 cup brown sugar
  • 3 teaspoons cinnamon
Instructions
  1. Place yeast, warm water and 3 Tablespoons brown sugar into the bowl of a stand mixer. Stir gently, then let rest for 10 minutes for yeast to activate. Yeast should be foamy and bubbly when ready.
  2. Stir in cinnamon, salt, and 2 cups of the all purpose flour. Turn the mixer onto LOW and begin kneading the dough (using the dough hook attachment). Slowly add in the rest of the flour, a little at a time, until the dough begins form a ball. (You may or may not need to use all of the remaining 3 cups cups of the flour-I used it all). Continue to knead the dough on low for approximately 10 minutes or until a dough ball has formed that is both smooth and elastic in texture.
  3. Place the dough into a greased or sprayed large bowl. Flip the dough over to ensure it is coated with the grease or spray, enough to ensure dough doesn't dry out. Cover the bowl with a dish towel or plastic wrap, and set in a warm place. Let dough rise for an hour or until it has doubled in size.
  4. While dough is rising, make the topping by mixing granulated sugar, brown sugar and cinnamon in small bowl. Set aside.
  5. Once dough has doubled in size, punch the dough down; divide evenly into 12 dough balls. Using your thumb, push down into the center of each one, breaking through the bottom. Use your fingers to gently spread the hole a bit more. Repeat process for all 12, then let the bagels rest for 10 minutes on a lightly floured surface.
  6. While bagels are "resting", bring a large pan full of water to a boil. Add the last Tablespoon of brown sugar to the water. Once the bagels have rested and water is boiling, gently place 2-3 bagels at a time into the boiling water. Boil for 45 seconds, then carefully flip each to the other side, and cook for another 45 seconds. Remove bagels, using a slotted spoon. Place on paper towel (to absorb water). Repeat process with remaining bagels. Put all boiled bagels onto a greased baking sheet about 2 inches apart. Evenly distribute the cinnamon sugar topping over the tops of the bagels.
  7. Bake bagels at 400 degrees for 18-20 minutes (or more) until lightly golden brown. Remove to wire rack to cool.
Nutrition Facts
Cinnamon Crunch Bagels
Amount Per Serving (1 bagel)
Calories 249
% Daily Value*
Sodium 295mg13%
Potassium 87mg2%
Carbohydrates 54g18%
Fiber 2g8%
Sugar 13g14%
Protein 6g12%
Calcium 25mg3%
Iron 2.6mg14%
* Percent Daily Values are based on a 2000 calorie diet.

Here’s one more to pin on your Pinterest boards!Cinnamon crunch bagels are New York-style chewy bagels, easily made from scratch, with a cinnamon-sugar crunchy top, and are a tasty breakfast treat!


Save

Save

Banana Nut Waffles

Make gourmet tasting Banana Nut Waffles for breakfast, by simply adding common ingredients like bananas, toasted pecans and cinnamon! Delicious!Make gourmet tasting Banana Nut Waffles for breakfast, by simply adding common ingredients like bananas, toasted pecans and cinnamon! Delicious!

If you’re looking for a delicious twist on an ordinary breakfast waffle that takes it from “good” to “great”, how about making Banana Nut Waffles? By simply adding a few common ingredients to the batter and the top of “regular” waffles you can create a truly gourmet waffle!

The added ingredients makes it taste like you’re eating a warm piece of Banana Nut Bread. These banana nut waffles are incredibly delicious! Here’s how to make them:

Scroll Down For A Printable Recipe Card At The Bottom Of The Page

How To Make Banana Nut Waffles

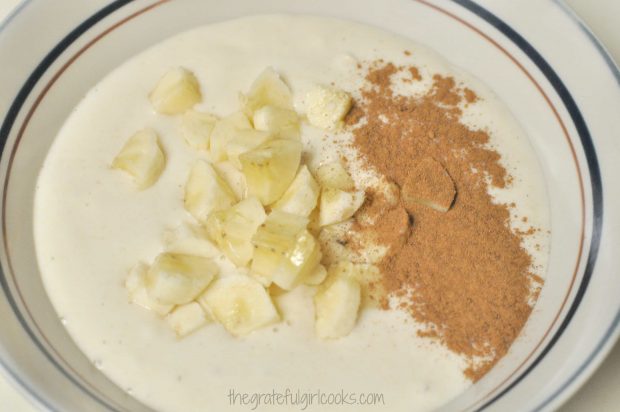
It’s so easy to “morph” a simple homemade waffle into something extraordinary.  Mix up your favorite waffle batter (homemade or store-bought mix). For each of the banana nut waffles, add a half of a banana (chopped into small pieces), and 1/2 teaspoon ground cinnamon to the batter. Stir to combine these ingredients.

Waffle batter in bowl with bananas and cinnamon

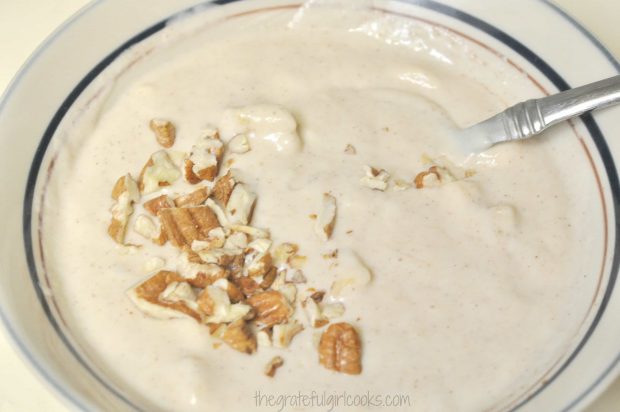
Add 2 Tablespoons of chopped pecans and 1/4 teaspoon vanilla extract to walnuts to the batter. Mix it all together, and pour batter into an oiled, preheated waffle iron. Cook the banana nut waffles until they’re fully done and crispy (about 3 1/2 minutes)!

Chopped pecans added to waffle batter in bowl

Serving The Banana Nut Waffles

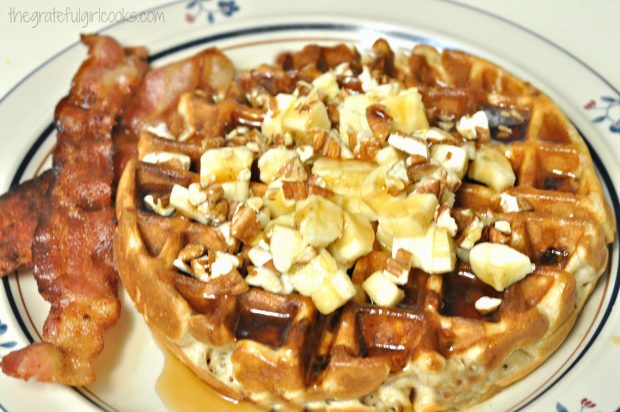
Once each waffle has finished cooking, place it on serving plate. Drizzle with maple syrup (and butter, if desired). Add the other half of the banana (chopped), and additional pecans for garnish (see TIP below).  Repeat process for each additional waffle; serve and enjoy!

TIP: The pecans are especially tasty if they are lightly toasted in a dry skillet for 3-4 minutes before adding to waffle.

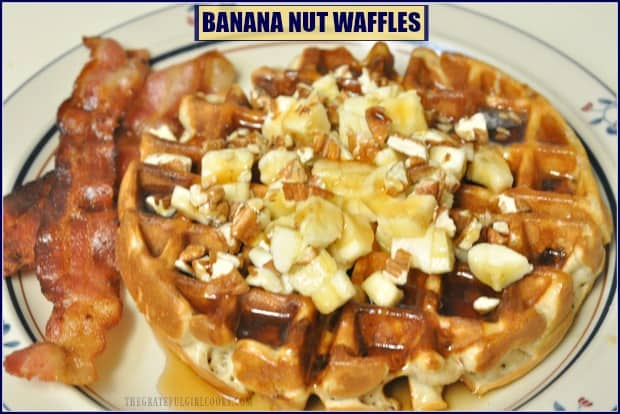
Banana Waffle with pecans and bananas, with bacon on side of plate

By simply adding a couple common, fresh ingredients to the batter and the cooked waffle, you’ll end up with a “gourmet” tasting banana nut waffles! These waffles are similar to what some well-known restaurants serve, but made for a fraction of the price!!!

Why not treat yourself to a decadent breakfast every now and then? Sure hope you’ll give these banana nut waffles a try! If you enjoy them, be sure to check out my recipes for Pumpkin Spice Waffles and  Waffles with Homemade Peach Topping. You can also find ALL of my recipes in the Recipe Index, located at the top of the page.

Interested In More Recipes?

Thank you for visiting this website. I appreciate you using some of your valuable time to do soIf you’re interested, I publish a newsletter 2 times per month (1st and 15th) with all the latest recipes, and other fun info. I would be honored to have you join our growing list of subscribers, so you never miss a great recipe!
There is a Newsletter subscription box on the top right side (or bottom) of each blog post, depending on the device you use, where you can easily submit your e-mail address (only) to be included in my mailing list.

You Can Also Find Me On Social Media:

Facebook page: The Grateful Girl Cooks!
Pinterest:
The Grateful Girl Cooks!
Instagram:
jbatthegratefulgirlcooks

Banana Nut Waffles / The Grateful Girl Cooks!

0 from 0 votes
Banana Nut Waffles
Prep Time
5 mins
Cook Time
3 mins
Total Time
8 mins
 

Make gourmet tasting Banana Nut Waffles for breakfast, by simply adding common ingredients like bananas, toasted pecans and cinnamon! Delicious!

Category: Breakfast
Cuisine: American
Keyword: banana nut waffles
Servings: 1 waffle
Calories Per Serving: 495 kcal
Author: JB @ The Grateful Girl Cooks!
Ingredients
  • Waffle Mix
  • 1 Banana , cut into small pieces, divided
  • 1/2 teaspoon ground cinnamon
  • 4 Tablespoons chopped pecans , divided
  • 1/4 teaspoon vanilla extract
  • Maple syrup (as desired-not included in calories)
Instructions
  1. Prepare waffle batter per package instructions and oil and preheat waffle iron.
  2. Add 1/2 of the chopped banana and cinnamon to the waffle batter. Stir to combine.
  3. Stir in 2 Tablespoons (half) of the chopped pecans, and the vanilla extract. Stir to combine.
  4. Cook waffle according to instructions for your waffle iron (usually about 3 -4 minutes)
  5. When waffle is fully cooked, remove to serving plate.
  6. Add maple syrup (and butter, if desired). Top waffle with remaining 1/2 of chopped banana and the remaining 2 Tablespoons of chopped pecans. (see note on dry toasting these pecans). Serve, and enjoy!

Recipe Notes

The quantity listed for ingredients in recipe are for EACH large waffle.  Amount of waffle mix/quantity of waffles used/made is up to you.
*The pecans for the top of the waffles taste great toasted (optional). To do this, put the chopped pecans in a dry skillet, and cook on medium-low, stirring occasionally for 3-4 minutes or until lightly toasted and aromatic.

Nutrition Facts
Banana Nut Waffles
Amount Per Serving (1 4" waffle)
Calories 495
* Percent Daily Values are based on a 2000 calorie diet.

Here’s one more to pin on your Pinterest boards!Make gourmet tasting Banana Nut Waffles for breakfast, by simply adding common ingredients like bananas, toasted pecans and cinnamon! Delicious!


Save

Save

Save

Save

Save

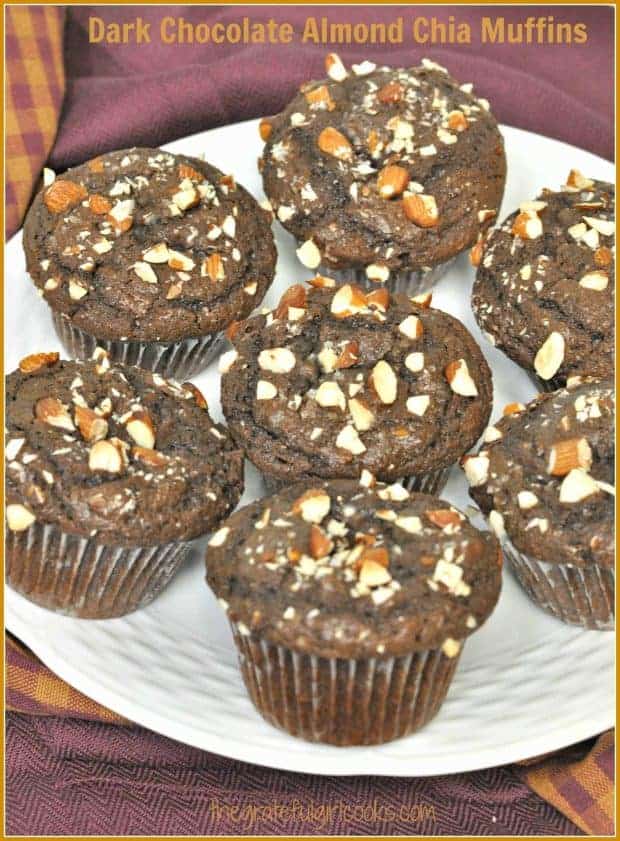
Dark Chocolate Almond Chia Muffins

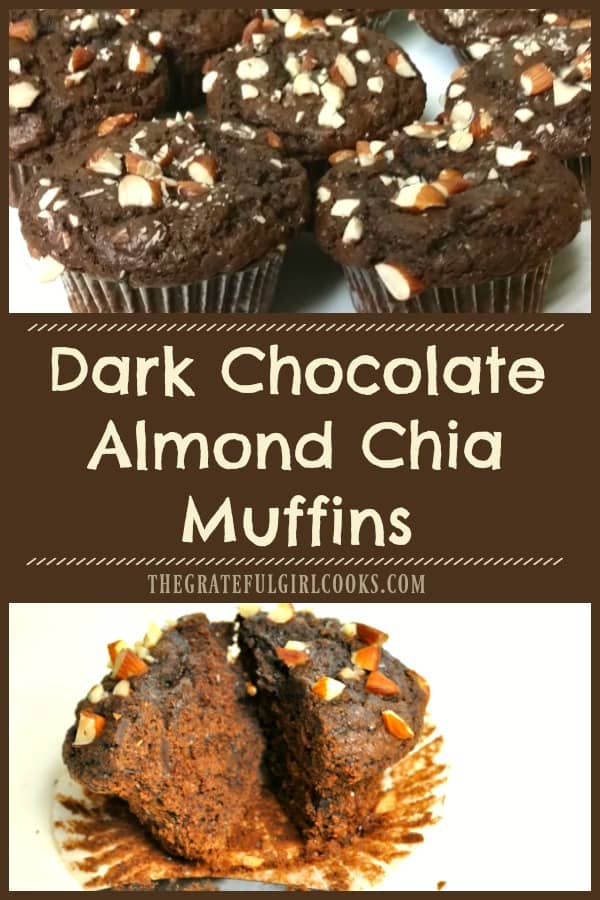
You will LOVE these easy and absolutely delicious dark chocolate almond chia muffins, loaded with dark chocolate, almonds, chia seeds, and sea salt!You will LOVE these easy and absolutely delicious dark chocolate almond chia muffins, loaded with dark chocolate, almonds, chia seeds, and sea salt!

It’s always fun when a friend gives me a recipe to try, one they really enjoy. What a great way to find NEW recipes, and get an “insider tip” from someone saying “you’ve got to try this!”. Such is the case with this AMAZING recipe for Dark Chocolate Almond Chia Muffins! I was at a Bible Study last week, and our teaching leader (my friend Fran) gave me a sticky note with the name of this recipe written on it, plus the name of the source.

The dark chocolate almond chia muffins sounded good, so less than 24 hours later, I was making these delicious muffins in my little ol’ kitchen. Let me tell you, folks… they are FABULOUS! How can you go wrong with dark chocolate, almonds, chia seeds, etc.? I’d never used chia seeds (an ancient grain) in a recipe prior to this, but did a bit of research and found out how nutritious/filling they are when added to food.

I am thrilled my friend Fran was kind enough to share this recipe with me, and I’m impressed by how ridiculously tasty these muffins are! From start to finish, it only took about 30 minutes to make a dozen. Here’s what you do:

Scroll Down For A Printable Recipe Card At The Bottom Of The Page

How To Make Dark Chocolate Almond Chia Muffins

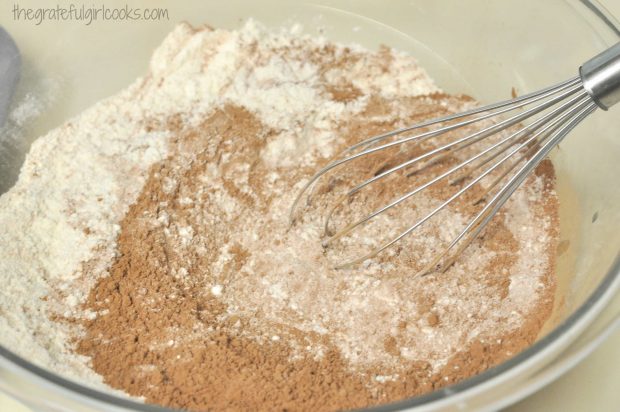
First, preheat your oven to 400° F. While the oven is preheating, put paper liners into a standard sized 12 cup muffin tin. Whisk the flour, sugar, cocoa powder, baking soda and salt together in a large mixing bowl.

Flour and cocoa for chocolate muffins in mixing bowl with whisk

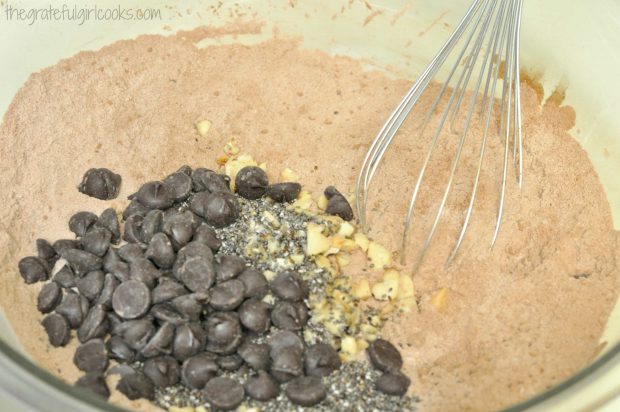
Add chia seeds to the dry ingredients (see those little bitty black seeds? So many nutritional benefits to adding these to foods). Also add 1/2 cup of the chopped almonds (reserving the rest for later), and dark chocolate chips to the flour mixture. Stir to combine.

Chocolate chips and almonds added to dry ingredients for chocolate almond chia muffins.

Make The “Wet Ingredients”

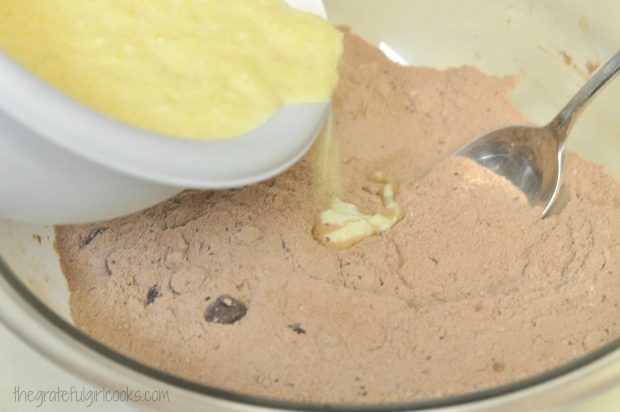
In a separate bowl, mix together buttermilk, melted butter (important – make sure melted butter has cooled to room temp. before adding, or you will get scrambled eggs!), egg, and almond extract. Add these wet ingredients to the dry ingredients in the large mixing bowl. Mix them together, only until just combined. Do not over-mix the batter.

Butter, egg and buttermilk added to chocolate almond chia muffins mix in bowl.

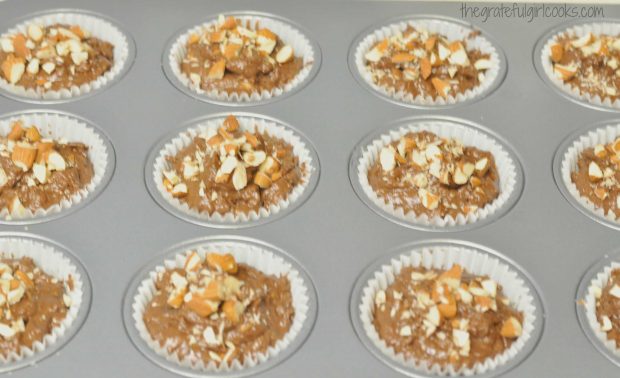
Evenly distribute the chocolate almond chia muffins batter between the 12 muffin cups. Top each of the muffins with 1½ – 2 teaspoons of the reserved chopped almonds.

Chocolate almond chia muffins batter in muffin cups, are ready to bake!

Sprinkle With Sea Salt And Then Bake

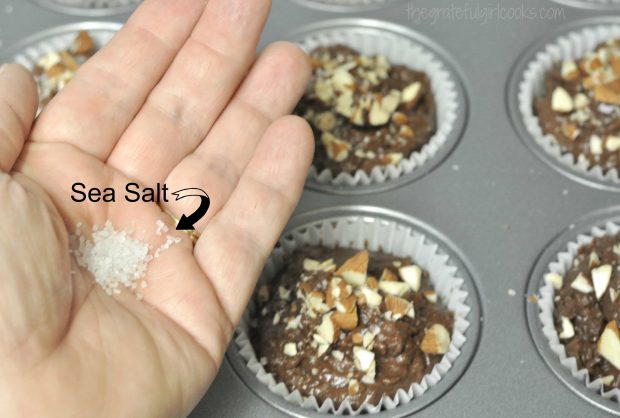
Sprinkle the top of each muffin with a pinch of coarse sea salt (trust me, this is GOOD). Bake the dark chocolate almond chia muffins at 400° F. for 18 minutes, or until the muffins spring back slightly when lightly pressed in the center.

Sea salt is sprinkled on top of chocolate almond chia muffins before baking.

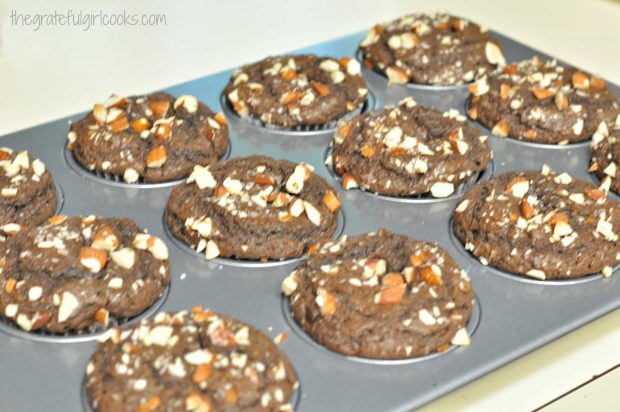
Let the baked chocolate almond chia muffins cool down (still in the pan), after removing them from oven.

A dozen chocolate almond chia muffins cooling down in pan, after baking.

Time To Enjoy A Muffin!

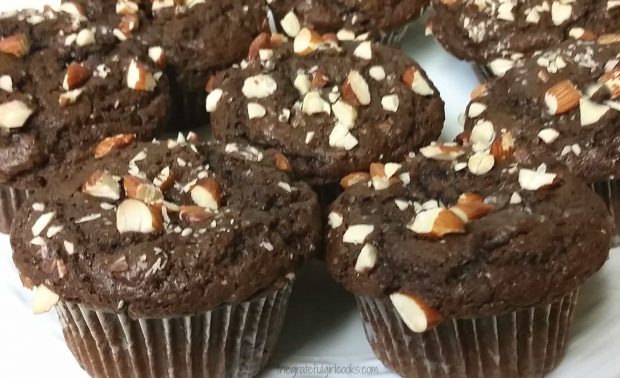
The dark chocolate almond chia muffins taste wonderful, served warm or at room temperature. Be sure to store them in an airtight container. They can also be frozen, if wrapped well and stored in a plastic freezer bag.

Close up of dark chocolate almond chia muffins, with almonds on top

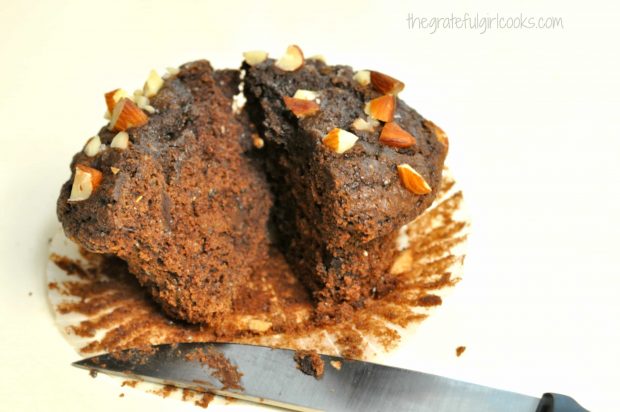
Here’s an inside peek at one of the chocolate almond chia muffins. You can see the dark chocolate chips and hints of chopped almonds inside. When warmed slightly, the chocolate chips get nice and “gooey”, which is a code word for “oh my goodness!”.

Inside look at one of the dark chocolate almond chia muffins, cut in half.

So, just as my friend passed this recipe to me, I now pass it on to you, friends. May you receive as much enjoyment out of these muffins as we did. Then… pass it on! Have a great day.

Looking For More MUFFIN Recipes?

You can find all of my recipes in the Recipe Index, located at the top of the page. I have LOTS of delicious muffin recipes, including:

Interested In More Recipes?

Thank you for visiting this website. I appreciate you using some of your valuable time to do soIf you’re interested, I publish a newsletter 2 times per month (1st and 15th) with all the latest recipes, and other fun info. I would be honored to have you join our growing list of subscribers, so you never miss a great recipe!
There is a Newsletter subscription box on the top right side (or bottom) of each blog post, depending on the device you use, where you can easily submit your e-mail address (only) to be included in my mailing list.

You Can Also Find Me On Social Media:

Facebook page: The Grateful Girl Cooks!
Pinterest:
The Grateful Girl Cooks!
Instagram:
jbatthegratefulgirlcooks

Author's signature

Recipe Source: Heather Meldrom at  http://www.realsimple.com/food-recipes/browse-all-recipes/dark-chocolate-almond-chia-muffins

0 from 0 votes
Dark Chocolate Almond Chia Muffins
Prep Time
15 mins
Cook Time
18 mins
Total Time
33 mins
 

You will LOVE these easy and absolutely delicious dark chocolate almond chia muffins, loaded with dark chocolate, almonds, chia seeds, and sea salt!

Category: Breakfast
Cuisine: American
Keyword: chocolate almond chia muffins
Servings: 12 muffins
Calories Per Serving: 383 kcal
Author: JB @ The Grateful Girl Cooks!
Ingredients
  • 2 cups all purpose flour
  • 1 cup granulated sugar
  • 1/2 cup unsweetened cocoa powder
  • 1 teaspoon baking soda
  • 1/4 teaspoon salt (table salt)
  • 5 teaspoons chia seeds (found with grains (ie. rice, quinoa) in most grocery stores)
  • 2/3 cup chopped almonds (divided)
  • 3/4 cup dark chocolate chips
  • 1 cup buttermilk
  • 3/4 cup (one and a half cubes) unsalted butter, melted and cooled to room temp.
  • 1 large egg
  • 1 teaspoon almond extract
  • Coarse sea salt , for sprinkling onto muffins before baking
Instructions
  1. Preheat oven to 400 degrees (F). Insert paper liners into a 12 cup standard sized muffin tin.
  2. Whisk the flour, sugar, cocoa powder, baking soda and table salt together in a large bowl. Add chia seeds, 1/2 cup of almonds (reserve the rest for garnish), and chocolate chips. Stir to combine.
  3. In a separate bowl, mix together the buttermilk, melted butter (at room temp!!!), egg, and almond extract. Once combined, add the wet ingredients to the bowl with the dry ingredients. Stir only until ingredients are fully combined (do not over-mix).
  4. Distribute batter equally between the 12 muffin cups. Sprinkle each muffin with 1 1/2 to 2 teaspoons of the reserved chopped almonds. Sprinkle each muffin with a pinch of coarse sea salt.
  5. Bake muffins at 400 degrees for 18 minutes, or until the muffins spring back when lightly pressed in the center. Remove pan from oven, but let muffins cool in the pan. Store in an airtight container.
Nutrition Facts
Dark Chocolate Almond Chia Muffins
Amount Per Serving (1 muffin)
Calories 383 Calories from Fat 189
% Daily Value*
Fat 21g32%
Saturated Fat 11g69%
Cholesterol 46mg15%
Sodium 374mg16%
Potassium 246mg7%
Carbohydrates 44g15%
Fiber 3g13%
Sugar 21g23%
Protein 6g12%
Vitamin A 405IU8%
Calcium 102mg10%
Iron 2.1mg12%
* Percent Daily Values are based on a 2000 calorie diet.

Here’s one more to pin on your Pinterest boards!
You will LOVE these easy and absolutely delicious dark chocolate almond chia muffins, loaded with dark chocolate, almonds, chia seeds, and sea salt!


Save

Save

Save

Waffles With Homemade Peach Topping

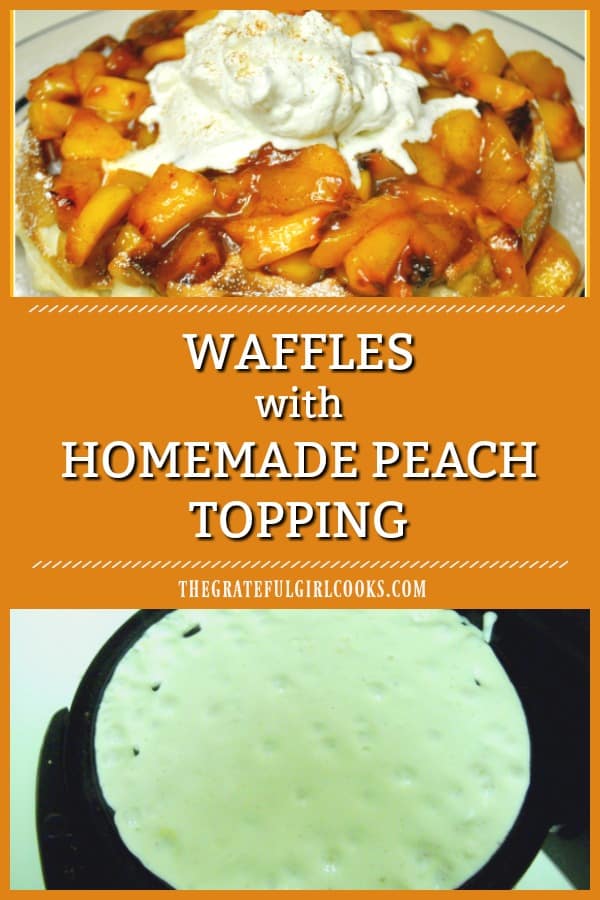
Waffles with Peach Topping are a delicious breakfast treat! Use fresh or frozen peaches to make a quick and EASY topping for your favorite waffle!
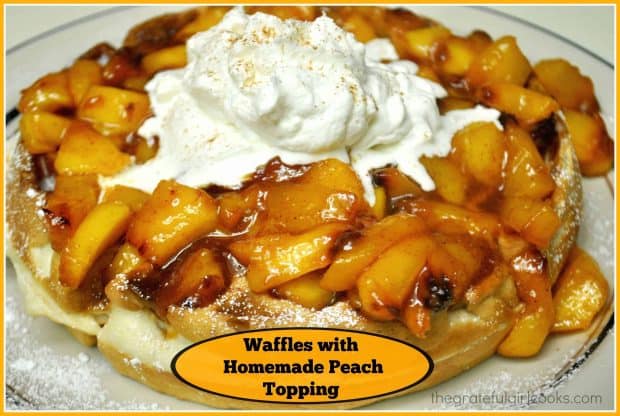
Every now and then, I enjoy waffles as a breakfast treat. By every now and then, I mean every couple of months. I WISH I could eat waffles more often, but that would not help me keep my “girlish figure” (**snort, snort, cough, cough) BUT… when I do have one, I sure enjoy Belgian waffles with homemade peach topping and a giant dollop of whipped cream.

If you enjoy waffles, be sure to try my recipes for Banana Nut Waffles or Pumpkin Spice Waffles. They’re equally yummy, easy to prepare, and I am confident you will enjoy them, as well!

Scroll Down For A Printable Recipe Card At The Bottom Of The Page

Is It Difficult To Make The Peach Topping?

The quick answer to this question is No! It’s really easy to make a delicious peach topping for waffles! It’s as simple as peeling and slicing peaches, and gently cooking them with the other ingredients for about 5 minutes.

Once heated and sauce is thickened, pile it (or delicately spoon it) onto a cooked waffle! If you’re feeling rather adventurous, dollop it with some whipped cream. YUMMO! There’s nothing better than breakfast waffles with peach topping!

What Kind Of Waffles?

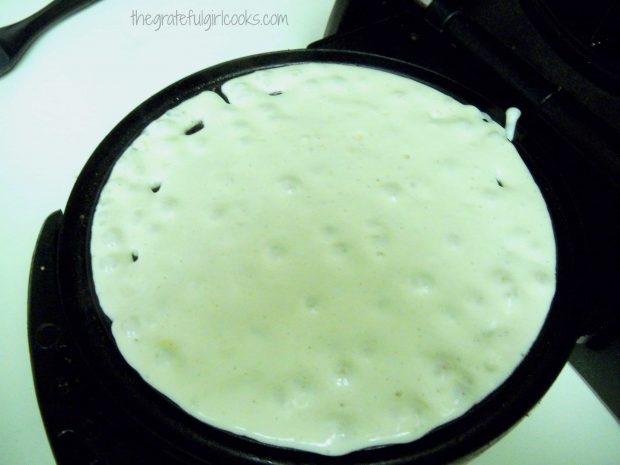
The type of waffle you use truly doesn’t matter. Use a favorite prepared mix to make your own, or use frozen waffles, if that’s easiest for you on a busy morning. I like to use my Belgian waffle maker and almost always use a prepared mix. In the time it takes to mix the batter, and cook a couple waffles, the peach topping is basically cooked and ready to go!

Cooking a waffle in a waffle maker.

Can You Use FROZEN Peaches To Make This Topping?

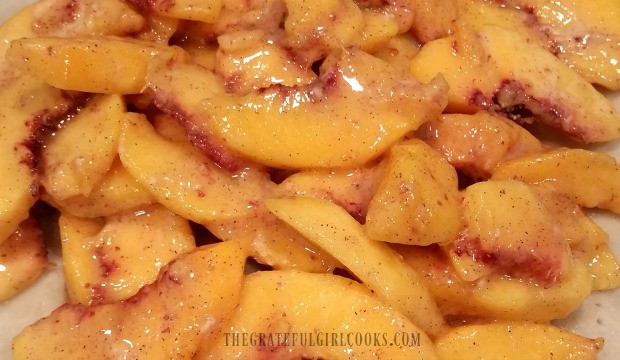
I prefer to use fresh, ripe summer peaches to make the topping, but if they are out of season, YES, you can substitute frozen peaches. If you’re going to use FROZEN peaches, be sure to slightly decrease the water amount called for in the recipe.

Fresh peach slices and seasonings ready to make waffles with peach topping.

PLEASE NOTE: The caloric calculation in the printable recipe below is for the peach topping only (per serving), since there is no way to know what kinds of waffles people will be using (frozen/homemade, etc.)

Try This Peach Topping On Cake – YUM!

By the way… this peach topping is also WONDERFUL over slices of pound cake or angel food cake.  I’ve been making this topping for years and years, and think you will LOVE it! Hope you will consider trying this recipe for waffles with peach topping.

Looking For Other BREAKFAST Recipes?

You can find all of my breakfast recipes in the Recipe Index, located at the top of the page. A few favorites include:

Interested In More Recipes?

Thank you for visiting this website. I appreciate you using some of your valuable time to do soIf you’re interested, I publish a newsletter 2 times per month (1st and 15th) with all the latest recipes, and other fun info. I would be honored to have you join our growing list of subscribers, so you never miss a great recipe!
There is a Newsletter subscription box on the top right side (or bottom) of each blog post, depending on the device you use, where you can easily submit your e-mail address (only) to be included in my mailing list.

You Can Also Find Me On Social Media:

Facebook page: The Grateful Girl Cooks!
Pinterest:
The Grateful Girl Cooks!
Instagram:
jbatthegratefulgirlcooks

Author's signature

Recipe Source: my brain AFTER my morning coffee

↓↓ PRINTABLE RECIPE BELOW ↓↓

5 from 1 vote
Waffles With Homemade Peach Topping
Prep Time
5 mins
Cook Time
10 mins
Total Time
15 mins
 

Waffles with Peach Topping are a delicious breakfast treat! Use fresh or frozen peaches to make a quick and EASY topping for your favorite waffle!

Category: Breakfast
Cuisine: American
Keyword: waffles with peach topping
Servings: 4 servings
Calories Per Serving: 212 kcal
Author: JB @ The Grateful Girl Cooks!
Ingredients
  • 1/2 cup water
  • 3/4 cup granulated sugar
  • 1 Tablespoon fresh lemon juice
  • 1 Tablespoon cornstarch
  • 4-5 large peaches (peeled, pitted and thinly sliced - a total of about 4 cups of sliced fruit)
  • 3/4 teaspoon ground cinnamon
Instructions
  1. Whisk the water, granulated sugar, lemon juice and cornstarch together in a large saucepan (or large skillet). Bring these ingredients to a full boil on medium heat, stirring often. (If using frozen peaches, do not thaw, but remember to slightly decrease the amount of water used). Mixture should thicken slightly.
  2. Add the peach slices and cinnamon. Stir to combine; cook on low for approximately 4-5 minutes, until heated through, and peaches have softened up slightly. Remove from heat.
  3. Prepare waffles (using mix or your own recipe). Sprinkle cooked waffle with sifted powdered sugar, if desired.
  4. Spoon peach topping over the top of waffle. Garnish with whipped cream, if desired.
Recipe Notes

PLEASE NOTE: The caloric calculation is for the peach topping only. This is because there are so many kinds of waffles (homemade/frozen) that may be used, that it would be impossible to accurately report. This topping is also delicious over slices of pound cake or angel food cake.

Nutrition Facts
Waffles With Homemade Peach Topping
Amount Per Serving (1 serving peach topping)
Calories 212
% Daily Value*
Sodium 2mg0%
Potassium 285mg8%
Carbohydrates 54g18%
Fiber 2g8%
Sugar 50g56%
Protein 1g2%
Vitamin A 490IU10%
Vitamin C 11.4mg14%
Calcium 13mg1%
Iron 0.4mg2%
* Percent Daily Values are based on a 2000 calorie diet.

Here’s one more to pin on your Pinterest boards!Waffles with Peach Topping are a delicious breakfast treat! Use fresh or frozen peaches to make a quick and EASY topping for your favorite waffle!


Save

Save

Breakfast Burritos

Breakfast burritos, with scrambled eggs, bacon, cheddar cheese and salsa rolled in a flour tortilla are easy to prepare! You’ll enjoy this delicious breakfast!Breakfast burritos, with scrambled eggs, bacon, cheddar cheese and salsa rolled in a flour tortilla are easy to prepare! You'll enjoy this delicious breakfast!
Have you ever eaten or made breakfast burritos?  I tasted my first one about 8 years ago when called in to work overtime on a Saturday morning by my former boss. He bought breakfast burritos for all of us, and that was my first taste of one, but not my last!

They are very easy to make at home, so thought I would share a quick “how to” in case you would like to try making them yourself! This is a simple version… eggs, bacon, cheese and salsa… but add whatever additional ingredients you would like… to make it your own!

Scroll Down For A Printable Recipe Card At The Bottom Of The Page

How To Make Breakfast Burritos

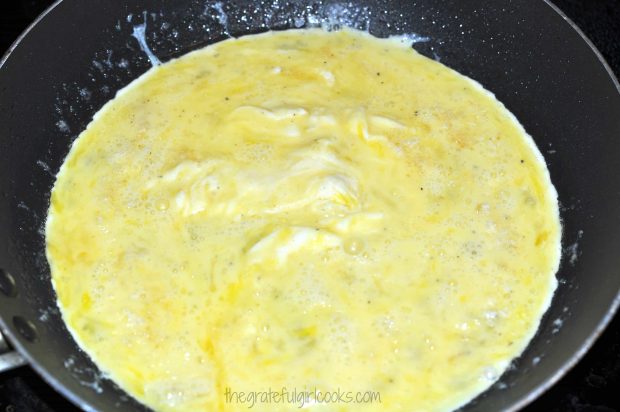
Mix together a couple eggs with a bit of milk. Add mixture to non-stick skillet that has been sprayed or buttered. Season eggs with salt and pepper (to taste).

Scrambling eggs for breakfast burritos.

Add pre-cooked, crumbled bacon to the eggs. Mix together; scramble eggs on medium low heat until eggs are fully cooked.

Cooked, crumbled bacon is added to eggs for breakfast burritos.

Prepare The Burrito

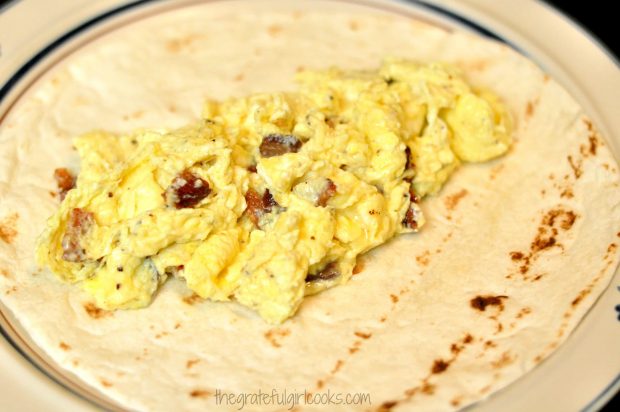
Place a medium sized flour tortilla between two paper towels and microwave for 20 seconds.  Remove the warm tortilla and place scrambled egg/bacon mixture down the center of tortilla. Leave a little bit of the tortilla uncovered at each end (to help with rolling the burrito).

Scrambled eggs with bacon is placed in center of warm flour tortilla for breakfast burritos.

Add grated cheddar cheese to top the eggs (can also use pepper jack, if desired), and then spoon some salsa on top.

If NOT Eating right Away

TIP: If you are not eating these right away, I would suggest putting the salsa on top of the eggs, THEN covering the salsa with the grated cheese. This will help the salsa not to soak the tortilla too much while waiting for someone to come eat it.

You can also wrap the breakfast burritos in aluminum foil once done, to keep warm.

Breakfast Burritos are filled with eggs, bacon, cheddar cheese and salsa before rolling.

Roll up tortilla (burrito style), by first turning up one end of the tortilla. Repeat with other end of tortilla.

Once ends are turned up, tightly roll the tortilla up and over the filling. Place burrito on serving plate. Repeat with other breakfast burritos.

Rolling up the tortilla around the filling, to make breakfast burritos.

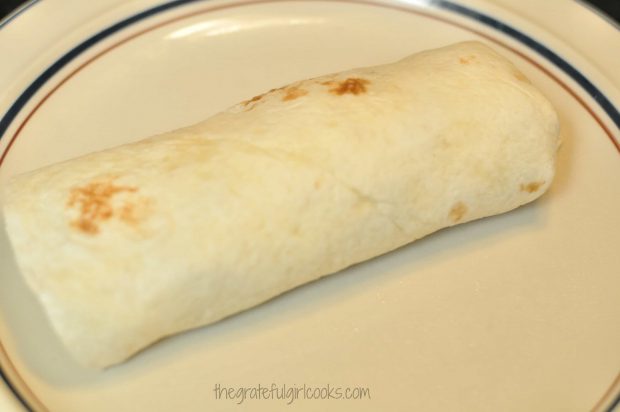
One of the breakfast burritos, rolled up, on a plate.

Serve Breakfast Burritos With Salsa On The Side

Serve with additional salsa on the side (for dipping) for an extra kick. I don’t normally cut them in half, but did for the photo, so you could see the inside of the Breakfast Burritos.

Breakfast Burritos are served with salsa on the side.

This is simply a very easy way to make a quick, delicious breakfast burrito. The best part is how easy it is to add ingredients you enjoy to make it your own. Add some cilantro, green onion slices, spinach, or avocado, etc. if you wish.  You really can’t hurt these burritos!

Hope you enjoy your breakfast burritos! Have a wonderful weekend, friends. Be kind to each other out there!

Looking For More BREAKFAST Recipes?

You can find all of my recipes in the Recipe Index, located at the top of the page. I have a nice variety of breakfast recipes, including:

Interested In More Recipes?

Thank you for visiting this website. I appreciate you using some of your valuable time to do soIf you’re interested, I publish a newsletter 2 times per month (1st and 15th) with all the latest recipes, and other fun info. I would be honored to have you join our growing list of subscribers, so you never miss a great recipe!
There is a Newsletter subscription box on the top right side (or bottom) of each blog post, depending on the device you use, where you can easily submit your e-mail address (only) to be included in my mailing list.

You Can Also Find Me On Social Media:

Facebook page: The Grateful Girl Cooks!
Pinterest:
The Grateful Girl Cooks!
Instagram:
jbatthegratefulgirlcooks

Author's signature

0 from 0 votes
Breakfast Burritos
Prep Time
5 mins
Cook Time
4 mins
Total Time
9 mins
 

Breakfast burritos, with scrambled eggs, bacon, cheddar cheese and salsa rolled in a flour tortilla are easy to make! Enjoy this delicious breakfast!

Category: Breakfast
Cuisine: Mexican
Keyword: breakfast burritos
Servings: 2 burritos
Calories Per Serving: 442 kcal
Author: JB @ The Grateful Girl Cooks!
Ingredients
  • 4 large eggs
  • 2 Tablespoons milk
  • 1 pinch salt and pepper , to season
  • 2 slices bacon , precooked
  • 2 medium flour tortillas
  • 4 Tablespoons cheddar cheese , or more, if desired
  • 2 Tablespoons salsa , plus more for serving on side
Instructions
  1. Whisk eggs with milk in a small bowl. Add mixture to non-stick skillet that has been sprayed with non-stick spray or buttered. Season eggs with salt and pepper (to taste).

  2. Add pre-cooked, crumbled bacon to the eggs. Mix together; scramble eggs on medium low heat until eggs are fully cooked.
  3. For burritos, place medium sized flour tortillas between two paper towels and microwave for 20 seconds. Remove the warm tortillas and evenly distribute scrambled egg/bacon mixture down the center of each tortilla. Add a handful of grated cheddar cheese (can also use pepper jack, if desired), and then spoon salsa on top (approx. 1 Tablespoon of salsa per burrito).

  4. Roll up tortilla (burrito style), by first turning up one end of the tortilla. Once end is turned up, tightly roll the tortilla over the filling and place on serving plate. Serve with additional salsa on the side (for dipping) for an extra kick. Enjoy!

Nutrition Facts
Breakfast Burritos
Amount Per Serving (1 burrito)
Calories 442 Calories from Fat 261
% Daily Value*
Fat 29g45%
Saturated Fat 12g75%
Cholesterol 374mg125%
Sodium 801mg35%
Potassium 305mg9%
Carbohydrates 18g6%
Sugar 3g3%
Protein 24g48%
Vitamin A 855IU17%
Calcium 314mg31%
Iron 2.7mg15%
* Percent Daily Values are based on a 2000 calorie diet.

Here’s one more to pin on your Pinterest boards!Breakfast burritos, with scrambled eggs, bacon, cheddar cheese and salsa rolled in a flour tortilla are easy to prepare! You'll enjoy this delicious breakfast!

Save

Save

Save

Cranberry Orange Muffins

Cranberry Orange Muffins are easy to make, loaded with orange zest and juice, and drizzled with a sweet citrus glaze! They’re a delicious breakfast treat, especially during the holidays!Cranberry Orange Muffins are easy to make, loaded with orange zest and juice, and drizzled with a sweet citrus glaze! They're a delicious breakfast treat!
Do you enjoy the flavor combination of cranberries and oranges? I sure do! I’ve been making cranberry orange muffins for almost 40 years now with the same recipe.

Recently I found a new recipe, tried it… and loved these delicious muffins even more than my trusty old recipe!

The cranberry orange muffins are really easy to make, and I think you will love them, too!

They are loaded with cranberries and the flavor of orange in the cupcakes AND the glaze make them “practically perfect in every way” (to quote good old Mary Poppins)! Here’s how to make them.

Scroll Down For A Printable Recipe Card At The Bottom Of The Page

How To Make Cranberry Orange Muffins

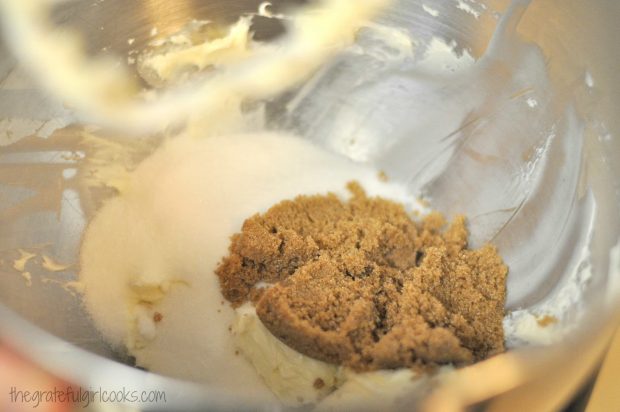
The first thing you will need to do is beat the butter until creamy. Add the granulated and brown sugars, and beat them using an electric mixer until they are well combined.

Beginning to mix batter for cranberry orange muffins.

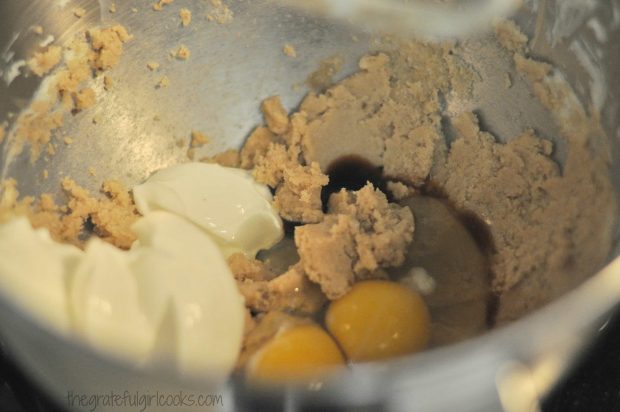
Add eggs, plain yogurt, and vanilla to the mixture. Beat these until the batter is creamy and well combined.

Eggs, yogurt and vanilla added to cranberry orange muffins batter

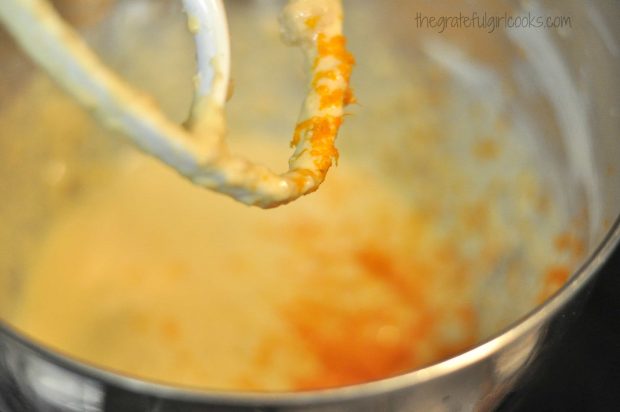
Add in the finely grated zest from 2 oranges. Wow, the orange zest sure smells good!.

Zest from an orange is added to cranberry muffin batter.

Mix The Dry Ingredients

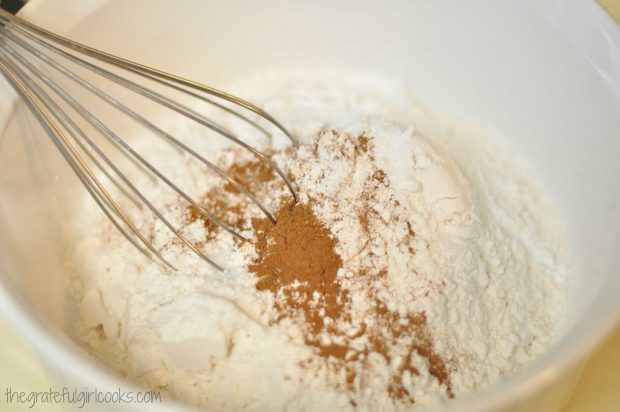
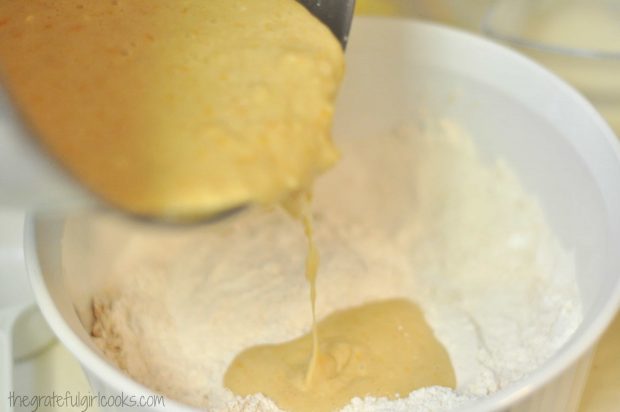
In a large separate bowl, whisk together the dry ingredients, and then pour the wet ingredients into the dry ingredients.

Dry ingredients are whisked together for cranberry orange muffins.

Wet muffin batter is added to dry ingredients for cranberry orange muffins.

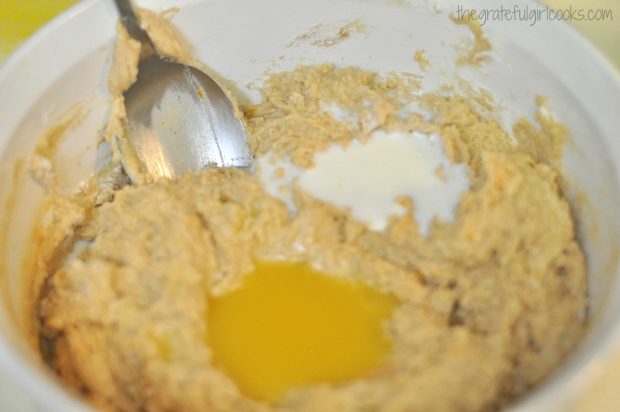
Stir the milk and orange juice into the batter. Mix them well. The batter will be fairly thick after they have been added.

Milk and orange juice is added to muffin batter.

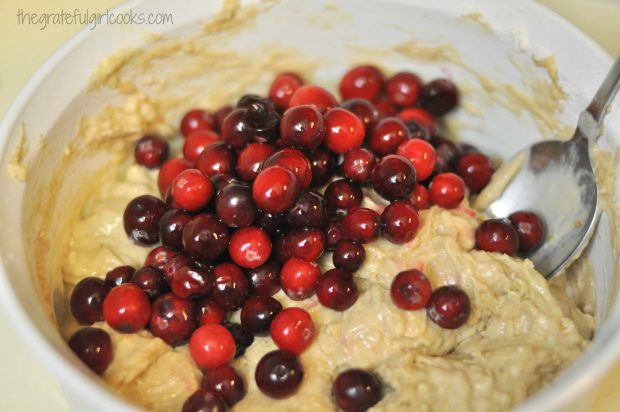
Add fresh or frozen cranberries to the batter. Be sure to set enough aside (24) to put on TOP of the muffin batter for garnish later.

Fold the cranberries in gently, to combine them with the thick batter.

Fresh cranberries are added to orange flavored muffin batter.

Fill the Muffin Cups

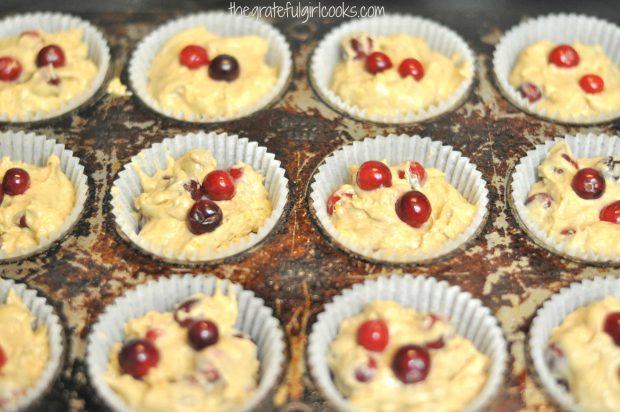
Spoon batter into a sprayed and paper lined muffin pan, filling them almost up to the top.

Please ignore my really old and dingy muffin pan. It works great, but looks horrible (Dear Santa… what would I like for Christmas?).

TIP:**Spray the paper muffin cup holders with non-stick spray (an old secret I learned from a friend whose hubby was a professional baker).

Put a couple cranberries on top of each of the cranberry orange muffins for garnish before baking.

Cranberry orange muffins batter is placed into paper liners in pan before baking.

Bake The Cranberry Orange Muffins

Bake the cranberry orange muffins in a preheated 425 degree oven for 5 minutes.

Reduce the heat to 350 degrees and continue baking for 18-20 minutes (or until done/light golden color).

Remove from oven, once done. Let the cranberry orange muffins cool for a minute or two, then remove them from the pan onto a wire rack to cool.

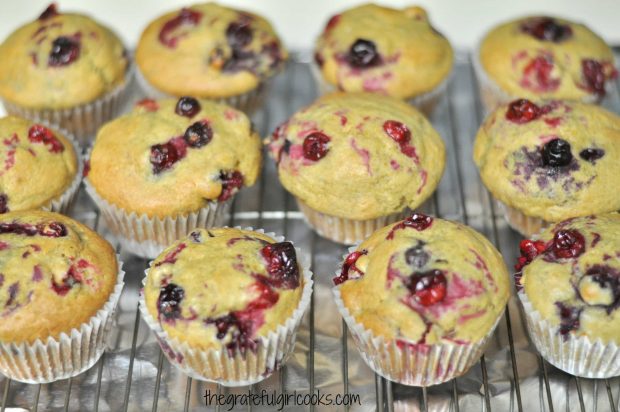
Cranberry orange muffins, cooling on wire rack after baking.

Prepare The Icing For The Muffins

While the cranberry orange muffins are cooling off a bit, make the orange glaze by mixing orange juice and powdered sugar together in a bowl.

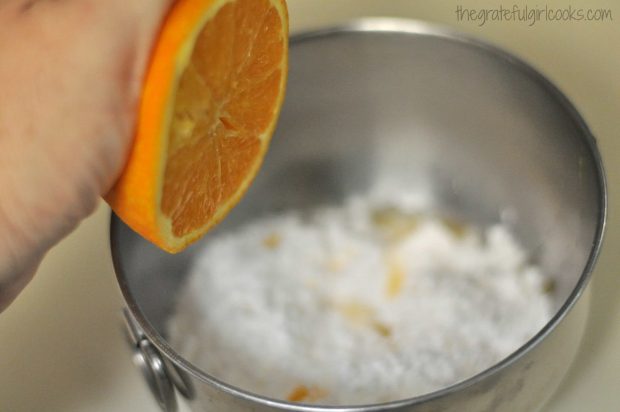
Squeezing orange juice into glaze mixture for icing cranberry orange muffins.

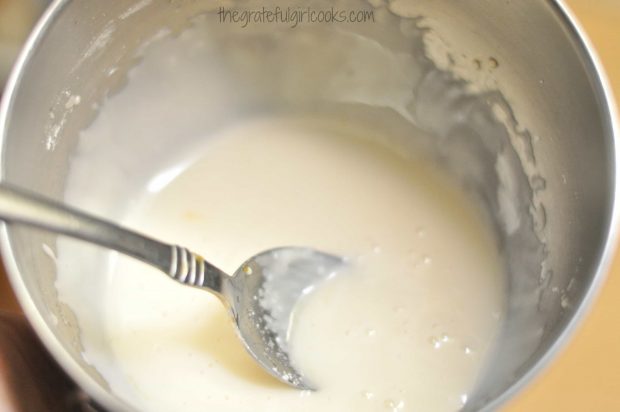
Orange glaze is ready to drizzle on top of cranberry orange muffins.

Glaze The Cooled Muffins 

TIP: Put a sheet of aluminum foil under the rack, to help catch any drips while glazing the muffins.

Once muffins have cooled off, it’s time to glaze them. Drizzle the glaze over the top of each muffin, going side to side.

Turn the rack one quarter turn and drizzle the muffins again, going the opposite direction (side to side, then top to bottom).

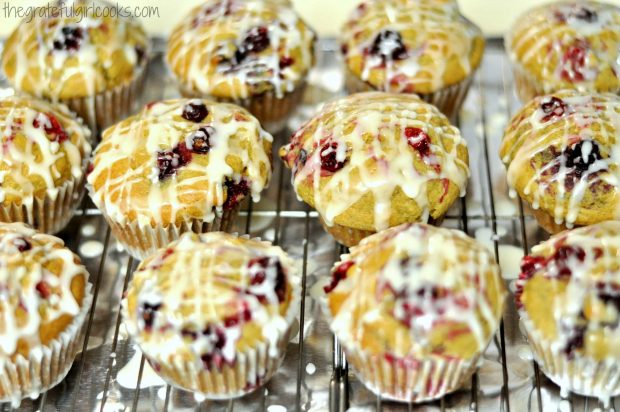
Cranberry orange muffins, drizzled with orange flavored glaze, before serving.

Time To Enjoy A Cranberry Orange Muffin!

Let the glaze firm up, and then these absolutely yummy cranberry orange muffins are ready to enjoy!

Hope you will give these delicious muffins a try. They are really packed with lots of wonderful citrus flavor!

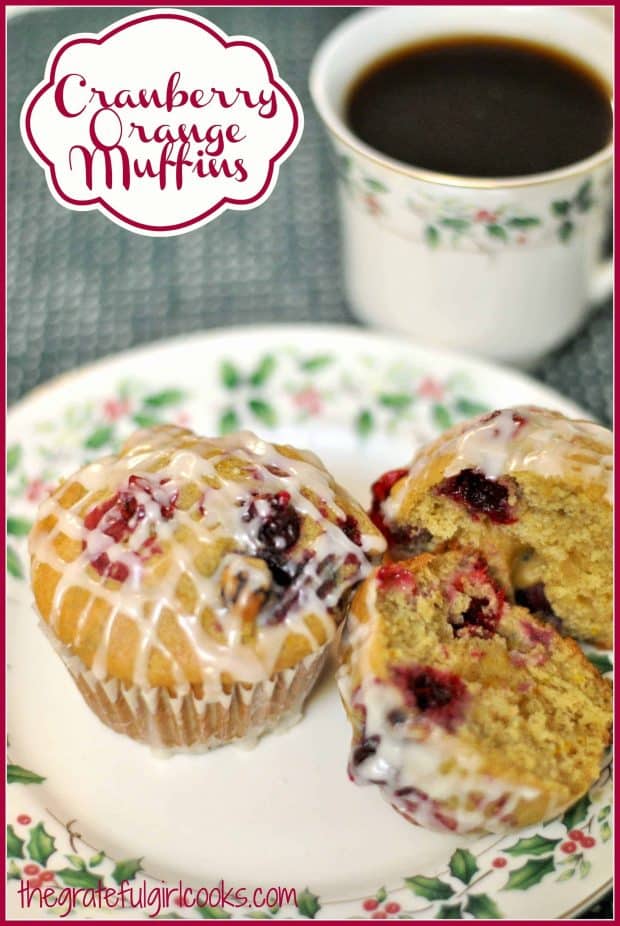
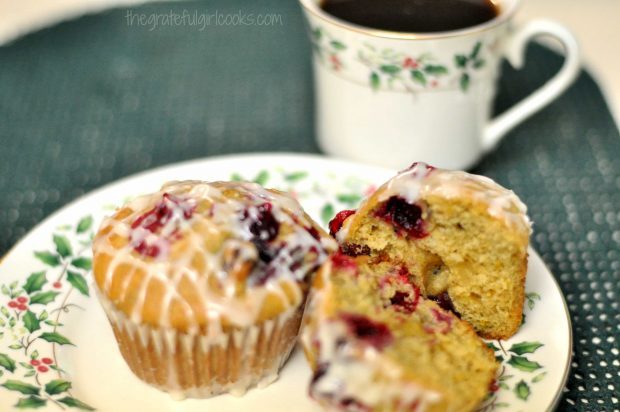
Two cranberry orange muffins on a plate, with a cup of coffee on the side.

I hope you have the opportunity to try these cranberry orange muffins. They’re fabulous, and I’m confident you (and those you love) will enjoy them.  

Thanks for stopping by, and I hope you will come back soon for more great family-friendly recipes. Have a great day, and may God bless you in all you do!

Looking For More MUFFIN Recipes?

You can find ALL my recipes in the Recipe Index, which is located at the top of the page. I have lots of delicious muffin recipes to check out, including:

Want More Recipes? Get My FREE Newsletter!

I publish a newsletter 2 times per month (1st and 15th) with lots of recipes, tips, etc..
Would you like to join our growing list of subscribers?

There is a Newsletter subscription box on the top right (or bottom) of each blog post, depending on the device you use.
You can submit your e-mail address there, to be added to my mailing list.

Find Me On Social Media:

Facebook page: The Grateful Girl Cooks!
Pinterest:
The Grateful Girl Cooks!
Instagram:
jbatthegratefulgirlcooks

Author's signatureRecipe Source: http://sallysbakingaddiction.com/2014/11/06/cranberry-orange-muffins/

↓↓ PRINTABLE RECIPE BELOW ↓↓

0 from 0 votes
Cranberry Orange Muffins
Prep Time
15 mins
Cook Time
25 mins
Total Time
40 mins
 
Cranberry Orange Muffins are easy to make, loaded with orange zest and juice, and drizzled with a sweet citrus glaze! They're a delicious breakfast treat!
Category: Breakfast
Cuisine: American
Keyword: cranberry orange muffins
Servings: 12 muffins
Calories Per Serving: 255 kcal
Author: JB @ The Grateful Girl Cooks!
Ingredients
For the muffins:
  • 1/2 cup unsalted butter (room temperature/soft)
  • 1/2 cup granulated sugar
  • 1/4 cup light or brown sugar , packed
  • 2 large eggs (room temp. is best)
  • 1/2 cup plain yogurt (I used Greek)
  • 2 teaspoons vanilla extract
  • zest from 2 oranges
  • 1 3/4 cups all purpose flour
  • 1 teaspoon baking soda
  • 1 teaspoon baking powder
  • 1/2 teaspoon ground cinnamon
  • 1/2 teaspoon salt
  • 2 Tablespoons orange juice
  • 2 Tablespoons milk
  • 1 1/2 cups fresh or frozen cranberries (if frozen, do not thaw!)
For citrus drizzle:
  • 1 cup powdered sugar
  • 3 Tablespoons orange juice
Instructions
  1. Line a 12 count muffin pan with paper liners. Spray each liner with non-stick spray. If not using liners, spray pan with non-stick spray. Set muffin pan aside.
  2. Preheat your oven to 425 degrees F.
  3. In the bowl of a stand mixer (or in a medium sized bowl using a handheld mixer), beat soft butter until smooth (on high speed), for about one minute. Add the granulated and brown sugars and continue beating for approximately 1-2 minutes, until fully combined. Add eggs, yogurt, and the vanilla extract; beat until combined. Scrape down the sides of the bowl, if needed. Add the orange zest and combine. Remove bowl and set aside.
  4. In a large mixing bowl, whisk together all purpose flour, baking powder, baking soda, cinnamon and salt. Pour the wet ingredients into the bowl of dry ingredients and mix well. Add the orange juice and the milk; stir until fairly smooth (you might have some little lumps (that's okay).
  5. Fold in the fresh or frozen cranberries (saving 24 to garnish muffins with), only until mixed in. Do not overmix.
  6. Distribute the batter into the muffin cups (they will almost be filled to the top). Add a couple of cranberries to the top of each muffin.
  7. Bake muffins at 425 degrees for 5 minutes, then reduce heat in oven to 350 degrees, and bake for an additional 18-20 minutes, until done and golden in color. Remove pan from oven. After muffins have cooled a couple minutes, remove them to a wire rack (with aluminum foil or wax paper underneath to completely cool.
  8. While muffins are cooking or cooling, make the citrus drizzle by mixing orange juice and powdered sugar together in a small bowl. Decoratively drizzle the glaze over warm muffins. Let muffin drizzle cool and firm up before serving! Enjoy!
Recipe Notes

If you wrap the muffins really well with plastic wrap and aluminum foil, you should be able to freeze them for up to 2 months.

Nutrition Facts
Cranberry Orange Muffins
Amount Per Serving (1 muffin)
Calories 255 Calories from Fat 72
% Daily Value*
Fat 8g12%
Saturated Fat 5g31%
Cholesterol 48mg16%
Sodium 207mg9%
Potassium 101mg3%
Carbohydrates 40g13%
Fiber 1g4%
Sugar 24g27%
Protein 4g8%
Vitamin A 310IU6%
Vitamin C 7.9mg10%
Calcium 45mg5%
Iron 1.1mg6%
* Percent Daily Values are based on a 2000 calorie diet.

Here’s one more to pin on your Pinterest boards!
Cranberry Orange Muffins are easy to make, loaded with orange zest and juice, and drizzled with a sweet citrus glaze! They're a delicious breakfast treat!


Save

Save

Save