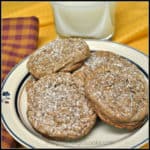
Category: Cookies

Chocolate Peanut Butter Grahams

Craving chocolate? Make yummy chocolate peanut butter grahams easily and quickly to satisfy those cravings, using only a few simple ingredients!Craving chocolate? Make yummy chocolate peanut butter grahams easily and quickly to satisfy those cravings, using only a few simple ingredients!
Okay… have you ever had one of those nights when you craved chocolate so bad… and there was nothing to be found in the house, and it was too late to head to the store?  UGH. Well, I experienced that several months ago, and these delicious & easy Chocolate Peanut Butter Grahams were the result!

Scroll Down for A Printable Recipe Card At The Bottom Of The Page

How I Came Up With this Recipe

After opening every kitchen cabinet and drawer hoping I would find some old piece of chocolate just waiting to be found and devoured, I gave up the search. Tragic. But then… miracle of miracles, I remembered I had a small amount of chocolate chips… and peanut butter… and some graham crackers.

I put my thinking cap on (I guess most of the time I don’t have my thinking cap ON… which might explain a lot!), and decided to make these yummy little snacks. No recipe to use… only my brain and chocolate cravings (a dangerous combo, I might add) created these little munchies.

Anyways, they ended up tasting fantastic. I got my chocolate fix, and thankfully I survived. The ingredients are so simple, but these babies are good. Really good. The crunch of the graham crackers, combined with a peanut butter/chocolate combo = YUM!

Here’s How To Make Chocolate Peanut Butter Grahams:

1) Grab some graham crackers. Break them in half, carefully until they are in squares. Go crazy. Use as many as you like. (I only made 8). I won’t tell you how many of them I personally ate… wouldn’t be prudent.

2) Spread creamy or crunchy peanut butter (whatever floats your boat) fairly thick on one half all the way to edges. Put another half graham cracker on top. Are you tired yet? I know this is physically demanding….if you feel like you need to sit down and rest after one or two are “sandwiched” together, go ahead. I feel your pain..

3) In a small microwave safe bowl, melt 1 1/2 cups of chocolate chips plus 2 Tablespoons of vegetable shortening in the microwave. Cook on high for 30 seconds. Stir well.  If not all the way melted and smooth, put it back in the microwave for 30 seconds. Remove. Stir well. By now the chocolate and shortening should be completely melted. If not, put it back in for only 10 seconds. Stir until smooth. (Do not overcook or it will BURN…bad news if you’re hungry!)

Heating chocolate for dipping peanut butter filled graham crackers.

Dipping The Chocolate Peanut Butter Grahams

Put some foil or a cookie sheet on the counter (to catch drips). Place a second sheet of foil on counter (to place the dipped cookies on) Carefully dip the filled graham crackers into the melted chocolate (spoon chocolate onto crackers, if necessary).

I held and dipped the grahams with one hand, and used a spoon in the other to help cover grahams with the chocolate. Coat all sides of the graham crackers completely. If you run out of chocolate, just follow step 3 again.

Place chocolate coated grahams onto aluminum foil and do not move them until chocolate has completely hardened (in about 1/2 hour or so). If you’re desperate, you can put them in the refrigerator to speed the firming up process along. Once the chocolate has hardened, remove from foil and serve. I store them, covered, in the refrigerator to keep the chocolate firm.

The chocolate covered graham crackers have a peanut butter filling inside!
That’s it! “Late Night Chocolate Deprivation Catastrophe Averted”! Hope you will give these chocolate peanut butter grahams a try… they are so good! If you like these, be sure and try my chocolate covered BACON! It’s also amazing! Have a great day!

Looking for More BAR COOKIE Recipes?

You can find all of my recipes in the Recipe Index, located at the top of the page. I have quite a few bar cookie recipes you might enjoy, including:

Interested In More Recipes?

Thank you for visiting this website. I appreciate you using some of your valuable time to do soIf you’re interested, I publish a newsletter 2 times per month (1st and 15th) with all the latest recipes, and other fun info. I would be honored to have you join our growing list of subscribers, so you never miss a great recipe! 

There is a Newsletter subscription box on the top right side (or bottom) of each blog post, depending on the device you use, where you can easily submit your e-mail address (only) to be included in my mailing list.

You Can Also Find Me On Social Media:

Facebook page: The Grateful Girl Cooks!
Pinterest:
The Grateful Girl Cooks!
Instagram:
jbatthegratefulgirlcooks

Author's signature

0 from 0 votes
Chocolate Peanut Butter Grahams
Prep Time
10 mins
Cook Time
0 mins
Total Time
10 mins
 
Craving chocolate? Make yummy chocolate peanut butter grahams easily and quickly to satisfy those cravings, using only a few simple ingredients!
Category: Cookies
Cuisine: American
Keyword: chocolate peanut butter grahams
Servings: 8 grahams
Calories Per Serving: 346 kcal
Author: JB @ The Grateful Girl Cooks!
Ingredients
  • 8 graham crackers (rectangle sized)
  • 1/3 cup creamy peanut butter (or more as needed)
  • cups semi-sweet chocolate chips
  • 2 Tablespoons vegetable shortening
Instructions
  1. Break graham crackers (rectangle size) in half, carefully until they are in squares.

  2. Spread creamy peanut butter fairly thick on one half all the way to edges. Put another half graham cracker on top. 

  3. In a small microwave safe bowl, melt 1 1/2 cups of chocolate chips plus 2 Tablespoons of vegetable shortening in the microwave. Cook on high for 30 seconds. Stir well.  If not all the way melted and smooth, put it back in the microwave for 30 seconds. Remove. Stir well. By now the chocolate and shortening should be completely melted. If not, put it back in for only 10 seconds. Stir until smooth. (Do not overcook or it will BURN)

  4. Put some foil or a cookie sheet on the counter (to catch drips). Place a second sheet of foil on counter (to place the dipped cookies on) Carefully dip the filled graham crackers into the melted chocolate (spoon chocolate onto crackers, if necessary). I held and dipped the grahams with one hand, and used a spoon in the other to help cover grahams with the chocolate. Coat all sides of the graham crackers completely. If you run out of chocolate, just follow step 3 again. 
  5. Place chocolate coated grahams onto aluminum foil and do not move them until chocolate has completely hardened (in about 1/2 hour or so). If you're desperate, you can put them in the refrigerator to speed the firming up process along. Once chocolate has hardened, remove from foil and serve. Store extras, covered, in the refrigerator to keep the chocolate firm.

Recipe Notes

As written, this recipe made a total of 8 chocolate covered grahams, but obviously, you can adapt this to make any quantity you desire.

Nutrition Facts
Chocolate Peanut Butter Grahams
Amount Per Serving (1 g)
Calories 346 Calories from Fat 198
% Daily Value*
Fat 22g34%
Saturated Fat 9g56%
Cholesterol 2mg1%
Sodium 145mg6%
Potassium 285mg8%
Carbohydrates 30g10%
Fiber 3g13%
Sugar 16g18%
Protein 5g10%
Vitamin A 15IU0%
Calcium 37mg4%
Iron 2.9mg16%
* Percent Daily Values are based on a 2000 calorie diet.

Here’s one more to pin on your Pinterest boards!Craving chocolate? Make yummy chocolate peanut butter grahams easily and quickly to satisfy those cravings, using only a few simple ingredients!

Save

Save

Spring Flower Sugar Cookies

Celebrate the season with this easy recipe for absolutely delicious Spring Flower Sugar Cookies, decorated with Royal Icing.Celebrate the season with this easy recipe for absolutely delicious Spring Flower Sugar Cookies, decorated with Royal Icing.

Springtime in the Pacific Northwest means flowers blooming everywhere… what a wonderful re-awakening, after a cold, barren Winter! What better way to celebrate the beginning of this new season than these delicious, frosted Spring Flower Sugar Cookies!

I’ve never been a great cookie decorator, but am trying to learn more tips and tricks necessary to make pretty cut-out sugar cookies. I’ve made Fall and Christmas decorated cookies since that time, using this same recipe. They’re always great!

Scroll Down for a Printable Recipe Card At The Bottom Of The Page

These Cookies Are Great To Take To A Party

I made these cookies last year for an Easter potluck we were invited to. They were a big hit! As you can see in the photo below, I also made Lemon Curd Filled Won Ton Cups, Chocolate Dream Cups with Raspberry Mousse, and Chocolate Chip Cheesecake-Swirl Brownie Bites!

Spring flower sugar cookies on table with other Easter desserts,

I found the recipe for the cookies and icing on a website called Glorious Treats. The website has lots of tips (and good info. for people who want to learn “how” to decorate cookies), including the recipe for these cookies and icing.

These spring flower sugar cookies are absolutely delicious, especially when cut into pretty designs and decorated with Royal Icing!  The cookies are very easy to prepare… you can use ANY cookie cutter you have available to create your very own masterpieces!

For me the hardest part was learning “how” to outline the cookies, then flooding them with different colors. It takes a steady hand and practice (and believe me… I am a work in progress!) All in all, I was pleased with how these decorated cookies (one of my first attempts) turned out.

How To Make Spring Flower Sugar Cookies

First, stir the flour and baking powder together in a bowl and set aside. EASY.

Flour and baking soda in bowl, for dough to make Spring flower sugar cookies.
Beat the butter and sugar together for a few minutes (using an electric mixer), until mixture is thoroughly creamed and fluffy. Add the egg and vanilla, and beat again. Once blended, the flour mixture is added to the batter. The dough is then mixed until all ingredients have been incorporated.

Butter in mixer with sugar, used to make dough for Spring flower sugar cookies.
Once the dough is done, it is kneaded, then refrigerated for 2 hours to get really cold!

The dough for Spring flower sugar cookies is resting on parchment paper.
Rolling And Cutting Spring Flower Sugar Cookies

The dough for the Spring flower sugar cookies is placed onto a lightly floured work surface and rolled out to about a 1/3 inch thickness.

Dough for the Spring flower sugar cookies is rolled out before cutting.
Use a cookie cutter to cut out the shapes you desire. I used the flower cookie cutter shown below, but you can use any flower shaped cookie cutter you wish.

Place the cut out cookie dough onto lined baking sheets, then refrigerate for a few minutes. This quick refrigeration will help the Spring flower sugar cookies hold their shape while cooking. Once chilled, bake the cookies for for 8-10 minutes, but do not let them get browned.

Flower shaped cookie cutter used to cut dough for Spring flower sugar cookies.

Make The Royal Icing For The Spring Flower Sugar Cookies

While the cookies were baking, I prepared the royal icing. To make this icing, beat meringue powder, powdered sugar and warm water until stiff peaks formed. This is the meringue powder I used for the icing. I bought it at a local craft store (Michael’s). A lot of grocery stores carry this product, as well.

Meringue powder used for icing to decorate Spring flower sugar cookies.
Once the icing was the right consistency, I divided it out into bowls, then added food coloring (I used gel food coloring), until it was the color I wanted.

Yellow and green royal icing in bowls, to decorate Spring flower sugar cookies.

Decorating Spring Flower Sugar Cookies

I used a thicker consistency icing to pipe (using a pastry bag) the edges on the flowers like shown in the photo below. The icing has to be thick enough not to run, because it will be the “barrier” that holds the thinner icing that will fill the flowers later.

Yellow Royal icing is piped on edges of Spring flower sugar cookies on rack.
Let the icing dry (about 30 minutes), then thin the icing out a bit more. A teensy drop of red coloring was added to turn the icing slightly darker yellow (toward orange color). This thinner consistency icing was “flooded” in between all the thicker outlines (I used a toothpick to help fill in all the nooks and crannies) like shown in the photo below:

Light orange icing added to the Spring flower sugar cookies.
The cookies were set aside to let the icing dry. Once dry, I added the green center portion right in the middle of the flower cookie, then let that dry, also.

Green icing added to center of one of the Spring flower sugar cookies.
Time To Eat Spring Flower Sugar Cookies

Once all the cookies were dry (the icing will get hard after a couple hours-that is a good thing!), the cookies are ready to eat. Trust me- these cookies are GOOD!

Decorated Spring Flower Sugar cookies, on wire rack.
Wouldn’t a basket of sweet Spring Flower Sugar Cookies brighten someone’s day?

Basket of Spring flower sugar cookies.

I hope you will try making these delicious Spring flower sugar cookies. Enjoy using your own cookie cutters and imagination to create wonderful cookies for any celebration! Have a GREAT day!

Looking For More COOKIE Recipes?

You can find all of my recipes in the Recipe Index, located at the top of the page. A few favorite cookie recipes include:

Interested In More Recipes?

Thank you for visiting this website. I appreciate you using some of your valuable time to do soIf you’re interested, I publish a newsletter 2 times per month (1st and 15th) with all the latest recipes, and other fun info. I would be honored to have you join our growing list of subscribers, so you never miss a great recipe! 

There is a Newsletter subscription box on the top right side (or bottom) of each blog post, depending on the device you use, where you can easily submit your e-mail address (only) to be included in my mailing list.

You Can Also Find Me On Social Media:

Facebook page: The Grateful Girl Cooks!
Pinterest:
The Grateful Girl Cooks!
Instagram:
jbatthegratefulgirlcooks

Author's signatureRecipe Source for Cookies: http://www.glorioustreats.com/2010/03/making-sugar-cookies-recipe-and-tips.html
Recipe Source for Royal Icing: http://www.glorioustreats.com/2010/10/decorating-sugar-cookies-from-start-to-finish-part-2.html

0 from 0 votes
Spring Flower Sugar Cookies
Prep Time
2 hrs 30 mins
Cook Time
8 mins
Total Time
2 hrs 38 mins
 

Celebrate the season with this easy recipe for delicious Spring Flower Sugar Cookies, decorated with Royal Icing.

Category: Cookies
Cuisine: American
Keyword: spring flower sugar cookies
Servings: 30 - 2 1/2 inch cookies)
Calories Per Serving: 190 kcal
Author: JB @ The Grateful Girl Cooks!
Ingredients
For cookie dough:
  • 3 cups all purpose flour
  • 1 teaspoon baking powder
  • 1 cup (2 cubes) unsalted butter (at room temperature)
  • 1 cup granulated sugar
  • 1 large egg
  • 1 teaspoon vanilla extract
  • Parchment paper
For the Royal Icing:
  • 4 Tablespoons meringue powder
  • 4 cups powdered sugar
  • 6 Tablespoons warm water
  • Food coloring , as desired
Instructions
To make cookies:
  1. Stir flour and baking powder together in bowl, then set aside.
  2. Using an electric mixer, cream the butter and sugar together for about 3 minutes. Add the egg and vanilla extract; continue to beat for an additional minute.
  3. Slowly add the flour mixture (a bit at a time) to the butter mixture; mix this until all the flour is mixed in, and the dough begins to form ball and pull away from the side of the bowl.
  4. Remove dough ball from mixer bowl and put it on parchment paper. Knead the dough with your hands 3-4 times. Put the dough into a sealed bag or container; refrigerate it for 2 hours (or into freezer for 25 minutes)
  5. A few minutes before you get the chilled dough out of refrigerator, preheat your oven to 350 degrees.
  6. Remove HALF of the dough (let the rest stay in fridge). Put dough on lightly floured work surface. Roll dough out to 1/3 inch thickness.
  7. Cut the dough out with your favorite cookie cutters. Place cookies on prepared baking sheet (I bake these on parchment paper). Try to get same-sized cookie shapes on each sheet to ensure even cooking. Put the baking sheet (with cookies) into refrigerator for 3-5 minutes (this will help them keep their shape).
  8. Bake cookies at 350 degrees for 8-10 minutes. Bake just until they just start to look golden. Remove from oven; let cookies cool for a minute or two on the pan, then carefully remove to a wire rack to finish cooling. Once the cookies are totally cooled, they can be decorated.
For the royal icing:
  1. Measure meringue powder and powdered sugar into mixing bowl. Add 6 Tablespoons warm water. Beat until stiff peaks form. Divide icing out into bowls; add food coloring, as desired. Add additional water (1 teaspoon at a time) until you get the right consistency.
  2. FOR OUTLINING/EDGING: thin with warm water until icing reaches a "corn syrup" thickness (or slightly thicker). Pipe the icing around the border of your design. Let icing dry (half an hour) before flooding the inside of the outlined area.
  3. FOR FLOODING INSIDE THE OUTLINE: Add additional water to thin icing out. Pipe icing inside outline borders. It should slowly thin out inside border. Use a toothpick to help fill in the space.
  4. Let icing completely dry before serving (let dry several hours!). ENJOY!
Recipe Notes

Cookie baking times may vary slightly, depending on the size of the cookie.
This recipe makes approximately 30, 2 1/2 inch cookies or 16 3 1/2 inch cookies.
FYI-The prep time is the time necessary to make the cookies. It does not include decorating time. Sometimes I bake the cookies one day and decorate the next.

Nutrition Facts
Spring Flower Sugar Cookies
Amount Per Serving (1 cookie)
Calories 190 Calories from Fat 54
% Daily Value*
Fat 6g9%
Saturated Fat 3g19%
Cholesterol 21mg7%
Sodium 3mg0%
Potassium 30mg1%
Carbohydrates 32g11%
Sugar 22g24%
Protein 1g2%
Vitamin A 195IU4%
Calcium 10mg1%
Iron 0.6mg3%
* Percent Daily Values are based on a 2000 calorie diet.

Here’s one more to pin on your Pinterest boards!Celebrate the season with this easy recipe for delicious Spring Flower Sugar Cookies, decorated with Royal Icing.


Save

Save

Save

Save

Oatmeal Raisin Cookies

This traditional recipe for soft, chewy Oatmeal Raisin Cookies is easy to prepare. The cookies are absolutely delicious, and the recipe makes 4 dozen. You’re gonna LOVE ’em!This traditional recipe for soft, chewy Oatmeal Raisin Cookies is easy to prepare. The cookies are absolutely delicious, and the recipe makes 4 dozen.
I love good old-fashioned Oatmeal Raisin Cookies. Do you? In the past couple years I’ve realized that I don’t make as many cookies as I used to when our sons were young and living in our home.

All that said… every now and then, a delicious cookie is a perfect little munchie my husband and I love to snack on! Sometimes we go a little crazy and eat 2 or 3! Ha Ha!

These classic oatmeal raisin cookies are a cinch to make, and I’m confident you’ll enjoy them, too!

Scroll Down For A Printable Recipe Card At The Bottom Of The Page

Yummy Old-Fashioned Oatmeal Raisin Cookies

These Oatmeal Raisin Cookies are some of my favorites. I’ve seen a lot of “updated” recipes over the years for this simple cookie. Some versions use egg whites, applesauce, bananas, artificial sugar or agave, etc..

Those new variations may be absolutely delicious, but I find we still like the old-fashioned version for these oatmeal raisin cookies the best!

I started making oatmeal raisin cookies over 30 years ago when I tried a recipe that was printed on a container of oatmeal. The real stars of this show are the old fashioned oats and chewy raisins! They were an instant family favorite!

I’ve been using the same old recipe I wrote down on a 3×5 card ever since then (and that’s a long time!). It is definitely tried and true!

The stars of this cookie recipe: old fashioned oats and raisins!

How Many Oatmeal Raisin Cookies Will this Recipe Make?

The recipe is very simple to make, and will yield about 4 dozen of these delicious oatmeal raisin cookies. They’re golden-brown, chewy, and taste wonderful.

I hope you enjoy these oatmeal raisin cookies as much as I do, too! They’re a tasty snack that are sure to please almost everyone.

Oatmeal raisin cookies on wire rack, ready to eat!

Looking For More Cookie Recipes?

If you like these oatmeal raisin cookies, perhaps you would be interested in some of my other cookie recipes! Hint… I have a lot. Can you tell we love cookies?

You can find ALL of my recipes in the Recipe Index, which is located at the top of the page. I have quite a few delicious cookie recipes for you to check out, including:

Want More Recipes? Get My FREE Newsletter!

I publish a newsletter 2 times per month (1st and 15th) with lots of recipes, tips, etc..
Would you like to join our growing list of subscribers?

There is a Newsletter subscription box on the top right (or bottom) of each blog post, depending on the device you use.
You can submit your e-mail address there, to be added to my mailing list.

Find Me On Social Media:

Facebook page: The Grateful Girl Cooks!
Pinterest:
The Grateful Girl Cooks!
Instagram:
jbatthegratefulgirlcooks

Author's signature

↓↓ PRINTABLE RECIPE BELOW ↓↓

0 from 0 votes
Oatmeal Raisin Cookies
Prep Time
15 mins
Cook Time
8 mins
Total Time
23 mins
 
This traditional recipe for soft, chewy Oatmeal Raisin Cookies is easy to prepare. The cookies are absolutely delicious, and the recipe makes 4 dozen.
Category: Cookies
Cuisine: American
Keyword: oatmeal raisin cookies
Servings: 48 cookies (approx.)
Calories Per Serving: 95 kcal
Author: JB @ The Grateful Girl Cooks!
Ingredients
  • 14 Tablespoons butter (1 cube + 6 Tablespoons) , softened
  • 3/4 cup brown sugar , packed
  • 1/2 cup granulated sugar
  • 2 eggs
  • 1 teaspoon vanilla extract
  • 1 1/2 cups all-purpose flour
  • 1 teaspoon baking soda
  • 1 1/4 teaspoons cinnamon
  • 1/2 teaspoon salt
  • 3 cups old fashioned oats , uncooked
  • 1 cup raisins
Instructions
  1. Preheat oven to 350 degrees.
  2. In a large bowl, using electric beaters, mix together softened butter, brown sugar and granulated sugar until smooth and creamy. Add eggs and the vanilla extract to the butter mixture.

  3. In a medium sized bowl, whisk together the flour, baking soda, cinnamon, and salt. Once combined, add the flour mixture to the butter mixture. Mix well, to combine. Stir in oats and raisins. Mix all ingredients well, until thoroughly combined. Drop cookie dough by rounded Tablespoonfuls onto an ungreased baking sheet, leaving about an inch between cookies.

  4. Bake cookies for 8-10 minutes, or until light brown. Remove cookies from oven, but leave on cookie sheet for 1 minute to slightly cool, then remove cookies to a wire rack to completely cool. Store cookies in a covered container. Enjoy!

Nutrition Facts
Oatmeal Raisin Cookies
Amount Per Serving (1 cookie)
Calories 95 Calories from Fat 27
% Daily Value*
Fat 3g5%
Saturated Fat 2g13%
Cholesterol 15mg5%
Sodium 81mg4%
Potassium 55mg2%
Carbohydrates 14g5%
Sugar 5g6%
Protein 1g2%
Vitamin A 110IU2%
Vitamin C 0.2mg0%
Calcium 9mg1%
Iron 0.5mg3%
* Percent Daily Values are based on a 2000 calorie diet.

Here’s one more to pin on your Pinterest boards!This traditional recipe for soft, chewy Oatmeal Raisin Cookies is easy to prepare. The cookies are absolutely delicious, and the recipe makes 4 dozen.


Save

Save

Chocolate Crinkle Cookies

Chocolate Crinkle Cookies- How can you go wrong with easy to make chocolate, chocolate chip cookies that get all cute and “crinkly” when you bake ’em?Chocolate Crinkle Cookies- How can you go wrong with easy to make chocolate, chocolate chip cookies that get all cute and "crinkly" when you bake 'em?

I found a recipe for Chocolate Crinkle Cookies in a used cookbook I bought while on vacation last summer in Washington. I had to spend a whopping $2 dollars on it (great deal, right?), and found some great recipes in it, including this one for a simple, fudgy, chewy cookie.

If you like chocolate chip cookies, then you will enjoy this cookie! I love chocolate chip cookies AND finding great cookbooks at bargain basement prices to add to my ever increasing cookbook collection!

These cookies are very easy to make. Melted chocolate chips give the batter it’s dark brown color. The dough also contains whole chocolate chips, so basically it’s a 2 in 1 chocolate cookie. That’s why you will like these! Seriously…how can you go wrong with chocolate, chocolate chip cookies that get all cute and “crinkly” when you bake ’em?

Scroll Down for A Printable Recipe Card At The Bottom Of The Page

How To Make Chocolate Crinkle Cookies

These cookies are so easy to make. The first thing you will need to do is cream the butter and sugar, with an electric mixer.

Butter and granulated sugar are mixed to begin batter for chocolate crinkle cookies.

Next, melt the chocolate chips. I melted mine in the microwave. Cook on high for 30 seconds, stir well. If necessary, place back into microwave and cook and additional 30 seconds. Give them a good stir, and they should be fully melted.

Chocolate chips are melted to add to batter for chocolate crinkle cookies.

The next thing to do is mix in the melted chocolate with the batter. This is where the dough for these chocolate crinkle cookies starts to get GOOD!!!

Melted chocolate is added to batter for chocolate crinkle cookies.

The Batter For Chocolate Crinkle Cookies Is Starting To Come Together

The melted chocolate gives the batter a beautiful color. It is nice and brown in color. Now it’s time to add the remaining ingredients to the cookie batter.

After chocolate is added to cookie dough, the batter for chocolate crinkle cookies turns brown.

Now add the flour, a little at a time, to the batter. Mix the dough on slow, and continue adding flour until gone. Blend all the ingredients together.

Flour is added to chocolate crinkle cookies batter a little at a time, and mixed.

Now add the chocolate chips to the dough for chocolate crinkle cookies. The cookie dough batter is stirred, to combine.

Chocolate chips are added to the batter for the chocolate crinkle cookies.

Refrigerate the cookie dough for about 15 minutes. After you refrigerate the dough for a few minutes, the dough is much easier to roll into balls.

Shaping The Chocolate Crinkle Cookies

Shae the dough into 1½ inch balls, by rolling teaspoons of dough between your clean hands to shape into balls.. Place the balls of dough onto a large baking sheet, a couple inches apart, because they will spread out while cooking.

The dough for the chocolate crinkle cookies is rolled into small balls before baking.

Baking The Chocolate Crinkle Cookies

Bake the cookies for about 10-12 minutes at 350 degrees.  Here is one of the cookies straight out of the oven. Do you see how cute and crinkly they are? Let the cookies cool a bit before transferring them from the pan to a wire rack to finish cooling..

Chocolate crinkle cookies come out of the oven nice and wrinkly, and ready to eat!

To finish the chocolate crinkle cookies, sift a little bit of powdered sugar on top of each one!

Chocolate Crinkle Cookies are topped with sifted powdered sugar, to finish them off before eating.

Ready To Eat Some Chocolate Crinkle Cookies!

Once the cookies have a light dusting of sifted powdered sugar, they are ready to eat!  Pour yourself a cold glass of milk, and grab a couple delicious, chocolate crinkle cookies!

Chocolate Crinkle Cookies on a plate, ready to eat, with a cup of cold milk on the side.

Look at the inside of that cookie… YUM!!! I took one for the team and bit into one just so you could see the chocolate chips on the inside. You’re welcome!

The inside of the Chocolate Crinkle Cookies is chewy and fudgy!

I sure hope you will give this recipe for chocolate crinkle cookies a try. The recipe yields about 2 1/2 dozen cookies. They are scrumptious! Thank you for stopping by, and I hope you will come back soon for more recipes.

Looking For More Cookie Recipes?

If you enjoy these chocolate crinkle cookies, you might want to check out a few of my other cookies recipes. These include Butter Pecan Crisps, Flourless 3 Ingredient Peanut Butter, Butterscotch Chip, Oatmeal Raisin, Cinnamon Chip, Dipped Gingersnaps, Cranberry Orange Pinwheel, Chocolate Chip,Holiday Spritz, and many others. All of my cookie recipes can be found in the Recipe Index at the top of the page.

Interested In More Recipes?

Thank you for visiting this website. I appreciate you using some of your valuable time to do soIf you’re interested, I publish a newsletter 2 times per month (1st and 15th) with all the latest recipes, and other fun info. I would be honored to have you join our growing list of subscribers, so you never miss a great recipe! 

There is a Newsletter subscription box on the top right side (or bottom) of each blog post, depending on the device you use, where you can easily submit your e-mail address (only) to be included in my mailing list.

You Can Also Find Me On Social Media:

Facebook page: The Grateful Girl Cooks!
Pinterest:
The Grateful Girl Cooks!
Instagram:
jbatthegratefulgirlcooks

Author's signatureRecipe Source: The cookbook “Company’s Coming-Christmas Gifts From the Kitchen”, by Jean Paré, pg.31. Published by Company’s Coming Publishing Unlimited, 2006

↓↓ PRINTABLE RECIPE BELOW ↓↓

0 from 0 votes
Chocolate Crinkle Cookies
Prep Time
15 mins
Cook Time
12 mins
Total Time
27 mins
 
Chocolate Crinkle Cookies- How can you go wrong with easy to make chocolate, chocolate chip cookies that get all cute and "crinkly" when you bake 'em?
Category: Cookies
Cuisine: American
Keyword: chocolate crinkle cookies
Servings: 30 cookies (2.5 dzn)
Calories Per Serving: 145 kcal
Author: JB @ The Grateful Girl Cooks!
Ingredients
  • 6 Tablespoons butter , softened
  • 1 cup granulated sugar
  • 2 large eggs
  • 1 1/2 teaspoons vanilla extract
  • 1 cup semi-sweet chocolate chips
  • 1 1/2 cups all-purpose flour
  • 1 1/2 teaspoons baking powder
  • 1/4 teaspoon salt
  • 1 cup semi-sweet chocolate chips
  • 2 Tablespoons powdered sugar (for dusting finished cookies)
Instructions
  1. Preheat oven to 350 degrees.
  2. In a large bowl or base of a stand mixer, cream butter and granulated sugar until smooth. Add eggs, one at a time. Beat well after each egg. Add vanilla and beat until batter is smooth.

  3. In a microwave safe bowl, place 1 cup chocolate chips. Heat on high in microwave for 30 seconds. Stir well. Put back in microwave for another 30 seconds. Remove, and stir until chocolate is smooth. (You can also melt chocolate chips in saucepan over low heat). Add melted chocolate to batter mixture. Continue beating until smooth.

  4. In separate bowl, whisk together flour, baking powder and salt. Add this to batter, in small increments, until flour is fully incorporated. Stir in remaining 1 cup of chocolate chips. Mix dough well. Set dough in refrigerator for 10 minutes (to slightly firm up).

  5. Roll cookie dough into 1 1/2 inch balls. Place dough balls on a greased cookie sheet, about 1 inch apart. Bake at 350 degrees for 10-12 minutes, or until edges are firm. The centers may still be a bit soft, but that's okay. Remove cookies from oven. Let them stay on cookie sheets and cool for about 5 minutes before attempting to remove them. Place cookies on wire racks to cool completely. Using a sieve or sifter, sift powdered sugar over the top of cooled cookies. Serve, and enjoy!

Nutrition Facts
Chocolate Crinkle Cookies
Amount Per Serving (1 cookie)
Calories 145 Calories from Fat 63
% Daily Value*
Fat 7g11%
Saturated Fat 4g25%
Cholesterol 17mg6%
Sodium 45mg2%
Potassium 98mg3%
Carbohydrates 18g6%
Fiber 1g4%
Sugar 11g12%
Protein 1g2%
Vitamin A 90IU2%
Calcium 19mg2%
Iron 1.1mg6%
* Percent Daily Values are based on a 2000 calorie diet.

Here’s one more to pin on your Pinterest boards!Chocolate Crinkle Cookies- How can you go wrong with easy to make chocolate, chocolate chip cookies that get all cute and "crinkly" when you bake 'em?

Save

Save

Save

Cranberry-Orange Pinwheel Cookies

Enjoy these festive looking and delicious cranberry-orange pinwheel cookies, filled with swirled cranberry, orange and pecans.Enjoy these festive looking and delicious cranberry-orange pinwheel cookies, filled with swirled cranberry, orange and pecans.

Every time Christmas rolls around, I prepare lots of our family’s “traditional” must-have cookies and goodies. I also try a new recipe or two each year. This year I tried a new recipe I found (on Pinterest!) for Cranberry-Orange Pinwheel Cookies. I think they’re so festive looking! And here’s the good news… they are delicious! A big shout out goes to Rachel at bakedbyrachel.com for the recipe for this yummy batch of Christmas cookies!

The cookies not only look good… they smell good, too. They have a light citrus aroma from the orange zest; and the filling in the middle is made from chopped cranberries, brown sugar and pecans, for extra flavor.

These are wonderful little holiday cookies! I gave away lots of them on plates of Christmas goodies given to our neighbors and friends this year. Sure hope you will give them a try!

Scroll Down For A Printable Recipe Card At The bottom Of The Page

How To Make Cranberry-Orange Pinwheel Cookies

Begin by chopping up the cranberries, pecans and brown sugar. This is very easy to do in a food processor or blender.

Cranberries, brown sugar and pecans are chopped in a food processor, for cranberry-orange pinwheel cookies.

The next thing to do is mix up the dough. The dough for these cranberry-orange pinwheel cookies sure smells good, because of the fresh orange zest!

The dough is mixed for the cranberry-orange pinwheel cookies.

Roll Out the Dough And Add The Filling

Roll the dough out on a large piece of wax paper, and then add the cranberry/pecan mixture to the top. Spread the cranberry brown sugar and pecan filling over the entire surface of the dough, leaving just a little space around the edges.

The dough for cranberry-orange pinwheel cookies is covered with cranberry pecan filling.

Roll the dough for the cranberry orange pinwheel cookies carefully into a log shape (starting with the long side). You can use the wax paper to help roll it. Cover the cookie dough log tightly, and refrigerate it overnight.

Cranberry-Orange Pinwheel Cookies dough is rolled into a log, then refrigerated.

Prepare The Cranberry Orange Pinwheel Cookies For Baking

After refrigerating it overnight, slice the dough for the cranberry-orange pinwheel cookies into 1/4″ slices, using a sharp knife. See how pretty they look in the photo below? The festive looking pinwheel cookies are then baked on a parchment paper lined baking sheet.

Cranberry-Orange Pinwheel Cookies, cut into 1/4" slices on baking sheet.

Bake the cookies at 375 degrees for 8-10 minutes. They will NOT be browned, but will be fairly soft once done. Voila! Here are the cranberry-orange pinwheel cookies, right after they were taken out of the oven. 

Cranberry orange pinwheel cookies need to cool on the baking sheet for 1-2 minutes before removing (this helps them firm up a bit). Transfer the cookies to a a wire rack to finish cooling, and then they are ready to eat!

Baked Cranberry-Orange Pinwheel Cookies, cooling on wire racks.

I hope you will consider making these cranberry-orange pinwheel cookies. The cranberry and orange filling tastes amazingly fresh and wonderful! They are always a big hit! Thanks for stopping by, and have a great day. Come back soon.

Looking For More COOKIE Recipes?

You can find all of my recipes in the Recipe Index, located at the top of the page.  A few favorite cookie recipes you might enjoy include:

Interested In More Recipes?

Thank you for visiting this website. I appreciate you using some of your valuable time to do soIf you’re interested, I publish a newsletter 2 times per month (1st and 15th) with all the latest recipes, and other fun info. I would be honored to have you join our growing list of subscribers, so you never miss a great recipe!
There is a Newsletter subscription box on the top right side (or bottom) of each blog post, depending on the device you use, where you can easily submit your e-mail address (only) to be included in my mailing list.

You Can Also Find Me On Social Media:

Facebook page: The Grateful Girl Cooks!
Pinterest:
The Grateful Girl Cooks!
Instagram:
jbatthegratefulgirlcooks

Author's signatureOriginal Recipe Source: http://www.bakedbyrachel.com/a-tradition-cranberry-orange-pinwheels/

↓↓ PRINTABLE RECIPE BELOW ↓↓

0 from 0 votes
Cranberry-Orange Pinwheel Cookies
Prep Time
1 hr 15 mins
Cook Time
10 mins
Chilling Time Overnight
8 hrs
Total Time
9 hrs 25 mins
 
Enjoy these festive looking and delicious cranberry-orange pinwheel cookies, filled with swirled cranberry, orange and pecans.
Category: Cookies
Cuisine: American
Keyword: cranberry orange pinwheel cookies
Servings: 48 cookies
Calories Per Serving: 108 kcal
Author: JB @ The Grateful Girl Cooks!
Ingredients
  • 1 cup cranberries (fresh or frozen)
  • 1 cup pecans
  • 1/4 cup brown sugar (light or dark)
  • 1 cup butter (2 cubes), softened
  • 1 1/2 cups granulated sugar
  • 1/2 teaspoon baking powder
  • 1/2 teaspoon salt
  • 2 eggs
  • 2 teaspoons grated orange zest
  • 3 cups all-purpose flour
Instructions
  1. Place cranberries, pecans and brown sugar in a food processor (or high-powered blender/chopper). Process until ingredients become small pieces. Set aside.

  2. In a large mixing bowl (or stand mixer), cream the butter and granulated sugar together until well combined. Add baking powder, salt, eggs, and orange zest. Beat on low/medium for one minute. Add flour (by spoonfuls) to the mixture, while mixing on medium speed, until all ingredients have been thoroughly combined. Once combined, cover bowl and refrigerate dough for 1 hour.

  3. Divide chilled dough in half. Place one half in between sheets of wax or parchment paper. Roll dough out into a rectangle, approximately 1/4 inch thick. Remove the top layer of paper. Spread half of the cranberry-pecan mixture evenly over the top of the dough to within 1/2 inch of all edges. Roll up dough (begin with the SHORT side of dough). Guide the dough with your hands and use the wax or parchment paper to pull the dough up as you form a "log-shaped" roll. Pinch dough to seal ends. Repeat with other half of dough. Transfer each "dough log" onto a clean sheet of wax or parchment paper. Seal dough in paper. Tape shut. Refrigerate overnight. (Dough must be thoroughly chilled to cut clean, nice even slices).

  4. When ready to bake cookies, preheat oven to 375 degrees. Using a very sharp knife, cut cookie dough into 1/4 inch slices. Place slices 1-2 inches apart on a parchment paper lined baking sheet. Bake cookies for 8-10 minutes, or just until bottoms of the cookies begin to turn golden brown. Remove from oven. Let cookies "rest" a few minutes before removing from baking sheet. Let cookies cool completely on wire racks. Enjoy!

Recipe Notes

Don't be scared away from making these due to the long refrigeration time. I made the dough up the day before I wanted to bake them. Then I baked them up the next day... no trouble!

Nutrition Facts
Cranberry-Orange Pinwheel Cookies
Amount Per Serving (1 cookie)
Calories 108 Calories from Fat 45
% Daily Value*
Fat 5g8%
Saturated Fat 2g13%
Cholesterol 16mg5%
Sodium 61mg3%
Potassium 27mg1%
Carbohydrates 13g4%
Sugar 7g8%
Protein 1g2%
Vitamin A 130IU3%
Vitamin C 0.4mg0%
Calcium 8mg1%
Iron 0.5mg3%
* Percent Daily Values are based on a 2000 calorie diet.

Here’s one more to pin on your Pinterest boards!Enjoy these festive looking and delicious cranberry-orange pinwheel cookies, filled with swirled cranberry, orange and pecans.


Save

Save

Snickerdoodles

It’s easy to make these absolutely DELICIOUS snickerdoodles! These classic cookies are soft and puffy, and are coated with a cinnamon sugar topping!It's easy to make these absolutely DELICIOUS snickerdoodles! These classic cookies are soft and puffy, and are coated with a cinnamon sugar topping!
I recently tried a new recipe for Snickerdoodles. I’ve been baking snickerdoodle cookies for years and years with the same old recipe, and love them!

Recently I saw a “new” recipe on a website I love that looked interesting, so I gave it a try. The blogger I got this snickerdoodles recipe from is Chris Scheuer, at The Cafe Sucré Farine. She found this recipe in a cookbook from a famous bakery in London, England.

Bakeries tend to get things right in the cookie baking department, so I knew THESE snickerdoodles just HAD to be delicious, so I made a batch. The result? Outstanding! Do you know the story behind the humble snickerdoodle cookie? It’s pretty interesting. Find out here. It’s become such a well loved American classic cookie!

Scroll Down For A Printable Recipe Card At The Bottom Of The Page

Typical Recipes For Snickerdoodles Produce A FLAT Cookie

My tried and true recipe for snickerdoodles are delicious, but usually come out fairly flat in appearance, like these pictured below.  They’re absolutely wonderful, but flat in shape.

Snickerdoodles, cooling on a wire rack.

These Snickerdoodles Are Soft And PUFFY!

Not these NEW beauties! The snickerdoodles puffed up quite nicely! These cookies have a delicious cinnamon/sugar topping. The inside of the cookies are soft and fluffy, making these the perfect snickerdoodles, in my humble opinion.

I am glad I found this recipe and will happily make these yummy cookies again. Snickerdoodles would be perfect for gift-giving over the holidays or for a special occasion! They are easy to make… and let’s be honest here… who doesn’t love to eat cookies over the holidays? Wait, wait… who doesn’t like a good cookie ANYTIME???

Once the dough is made, the snickerdoodles are rolled into balls, coated with cinnamon and sugar, and then are ready to bake!

Snickerdoodles dough balls on parchment paper covered cookie sheet, ready to bake.Baked Snickerdoodles Are Nice And PUFFY!

Once the cookies have baked, they look like THIS!  Behold… the humble little snickerdoodle! Can you tell that it is puffy? They are light and airy, and absolutely wonderful.

Snickerdoodles are baked with a cinnamon sugar topping.

Maybe you can see how puffy and “pillowy” these snickerdoodle cookies are in the photo below.  Yum. You’re gonna need to run and grab a cup of coffee, and help me eat these cute snickerdoodles! I would love to share a few with you!

Snickerdoodles are piled up on a plate, ready to eat!

Hope you will give these delicious cookies a try.  I know you’re gonna LOVE them!

Would You Like More Cookie Recipes?

Here are a few cookie recipes on my blog. You can find these and other yummy cookie recipes in the Recipe Index, located at the top of the page.

Interested In More Recipes?

Thank you for visiting this website. I appreciate you using some of your valuable time to do soIf you’re interested, I publish a newsletter 2 times per month (1st and 15th) with all the latest recipes, and other fun info. I would be honored to have you join our growing list of subscribers, so you never miss a great recipe! 

There is a Newsletter subscription box on the top right side (or bottom) of each blog post, depending on the device you use, where you can easily submit your e-mail address (only) to be included in my mailing list.

You Can Also Find Me On Social Media:

Facebook page: The Grateful Girl Cooks!
Pinterest:
The Grateful Girl Cooks!
Instagram:
jbatthegratefulgirlcooks

Author's signatureRecipe Source: http://thecafesucrefarine.com/2012/06/snicker-doodles-from-londons-famous/#_a5y_p=1383068

↓↓ PRINTABLE RECIPE BELOW ↓↓

0 from 0 votes
Snickerdoodles
Prep Time
15 mins
Cook Time
12 mins
Total Time
27 mins
 
It's easy to make these absolutely DELICIOUS snickerdoodles! These classic cookies are soft and puffy, and are coated with a cinnamon sugar topping!
Category: Cookies
Cuisine: American
Keyword: snickerdoodles
Servings: 18 (approx.)
Calories Per Serving: 213 kcal
Author: JB @ The Grateful Girl Cooks!
Ingredients
For the cookies:
  • 4 oz. butter , softened
  • 1 1/2 cups granulated sugar
  • 2 teaspoons vanilla extract
  • 2 large eggs
  • 3 1/4 cups all purpose flour
  • 1 1/2 teaspoons cream of tartar
  • 1 teaspoon baking soda
  • 1 teaspoon salt
  • 1/2 teaspoon ground cinnamon
For coating the dough balls:
  • 1/4 cup granulated sugar
  • 1 1/2 Tablespoons ground cinnamon
Instructions
  1. Preheat your oven to 325 degrees.
  2. In a large mixing bowl, cream together the butter, granulated sugar, and vanilla extract until mixture is light and fluffy.
  3. Add eggs to the mixture. Mix well until combined.
  4. Add the rest of the cookie ingredients to this mixture a little at a time. Mix until well combined.
  5. In a separate small bowl, mix the sugar and cinnamon together for the coating.
  6. Form cookies. Use approximately a 2 Tablespoon size scoop of cookie dough, and roll it between your (clean) hands to form a ball. Place the dough ball into the cinnamon-sugar mixture, and roll it in the mixture until all sides of the dough ball are coated.
  7. Place each coated dough ball onto parchment paper (or wax paper) lined baking sheets, about 2 inches apart from each other.
  8. Bake in 325 degree oven for about 12 minutes (or until the cookies are a light brown color). When done, let cookies cool on pan for a couple of minutes, then remove cookies and place them on a wire rack to cool. Cookies will crack a bit... don't worry... it's ALL GOOD.
Nutrition Facts
Snickerdoodles
Amount Per Serving (1 cookie)
Calories 213 Calories from Fat 45
% Daily Value*
Fat 5g8%
Saturated Fat 3g19%
Cholesterol 31mg10%
Sodium 242mg11%
Potassium 75mg2%
Carbohydrates 37g12%
Sugar 19g21%
Protein 3g6%
Vitamin A 185IU4%
Calcium 14mg1%
Iron 1.2mg7%
* Percent Daily Values are based on a 2000 calorie diet.

Here’s one more to pin on your Pinterest boards!It's easy to make these absolutely DELICIOUS snickerdoodles! These classic cookies are soft and puffy, and are coated with a cinnamon sugar topping!


Save

Save

Save

Holiday Spritz Cookies

It’s easy to make a LOT of small, buttery holiday spritz cookies for eating or gift giving, using an inexpensive cookie press to make festive shapes!It's easy to make a LOT of small, buttery holiday spritz cookies for eating or gift giving, using an inexpensive cookie press to make festive shapes!

Well… it’s THAT time of year once again… time to make some Holiday Spritz Cookies! Making spritz cookies every year during the Christmas season has become one of my baking traditions.

Years ago my family gave me a spritz cookie press, and I’ve been using it ever since, to whip up batches of these little buttery Christmas cookies.

We eat quite a few of them, but what I enjoy most is giving most of them to friends and family! Plates are piled high with holiday spritz cookies and other homemade treats. It’s what I LOVE to do at Christmas time!

Scroll Down For A Printable Recipe Card At The Bottom Of The Page

Do I Need Special Equipment To Make Holiday Spritz Cookies?

Yes. You will need a spritz cookie press to make these holiday spritz cookies, but they are fairly inexpensive, and available in stores or online.

This recipe makes oodles of these delicious holiday spritz cookies. You can see in the picture how many patterns there are available to design these yummy treats.

A cookie press is used to make holiday spritz cookies.
Here’s mine… been using it for years!

Typically a cookie press comes with several disc inserts which the cookie dough is pressed through to form different shapes. All you do is make the dough, color the dough with food coloring as desired, insert dough into cookie press, press, and voila! Holiday Spritz Cookies!

Out comes these perfectly shaped little holiday spritz cookies, which are then baked for a very short time. That’s it. See how easy it is to make holiday spritz cookies?

Different colors and shapes of holiday spritz cookies.

Happy holiday baking… sure hope you will give these holiday spritz cookies a try! Thank you for stopping by, and I hope you will come back again soon.

Looking For More COOKIE Recipes?

You can find ALL my recipes in the Recipe Index, located at the top of the page. I have lots of yummy cookie recipes, including:

Want More Recipes? Get My FREE Newsletter!

I publish a newsletter 2 times per month (1st and 15th) with lots of recipes, tips, etc..
Would you like to join our growing list of subscribers?

There is a Newsletter subscription box on the top right (or bottom) of each blog post, depending on the device you use.
You can submit your e-mail address there, to be added to my mailing list.

Find Me On Social Media:

Facebook page: The Grateful Girl Cooks!
Pinterest:
The Grateful Girl Cooks!
Instagram:
jbatthegratefulgirlcooks

Author's signatureRecipe Source: An old box that my first cookie press came in. Box long gone. Recipe on index card survives…source unknown.

↓↓ PRINTABLE RECIPE BELOW ↓↓

0 from 0 votes
Holiday Spritz Cookies
Prep Time
15 mins
Cook Time
6 mins
Total Time
21 mins
 
It's easy to make a LOT of small, buttery holiday spritz cookies for eating or gift giving, using an inexpensive cookie press to make festive shapes!
Category: Cookies
Cuisine: American
Keyword: holiday spritz cookies
Servings: 6 dozen (approx. 72)
Calories Per Serving: 71 kcal
Author: JB @ The Grateful Girl Cooks!
Ingredients
  • 1 1/2 cups butter (3 cubes)
  • 1 cup granulated sugar
  • 1 large egg
  • 2 Tablespoons milk
  • 1 teaspoon vanilla extract
  • 1/2 teaspoon almond extract
  • 4 cups all purpose flour
  • 1 teaspoon baking powder
  • food coloring (if desired, to create a variety of colors!)
Instructions
  1. Preheat your oven to 400 degrees.
  2. In a large bowl, or stand mixer bowl, cream the butter and sugar thoroughly. Add the egg, milk, vanilla and almond extract. Beat these in very well.

  3. In a large bowl, stir the flour and baking powder together until well combined. Add the flour mixture to the creamed mixture a little at a time. Continue mixing until the dough becomes smooth and all flour has been incorporated. Do not chill the dough. NOTE: If you want to color the dough, add food coloring to various quantities of dough and mix thoroughly until color you desire has been achieved.

  4. Place dough into the cookie press canister, and press cookies out onto an ungreased cookie sheet. (This is easiest if you put the nozzle directly onto the cookie sheet). Change discs to make different shapes, as desired. It's even fun to place pieces of different colored dough into the canister and get multi-colored cookies!
  5. Bake cookies at 400 degrees for 6-8 minutes... do not brown. Remove cookies from baking sheet and place on wire rack to cool. Enjoy!

Nutrition Facts
Holiday Spritz Cookies
Amount Per Serving (1 cookie)
Calories 71 Calories from Fat 27
% Daily Value*
Fat 3g5%
Saturated Fat 2g13%
Cholesterol 12mg4%
Sodium 35mg2%
Potassium 15mg0%
Carbohydrates 8g3%
Sugar 2g2%
Vitamin A 120IU2%
Calcium 5mg1%
Iron 0.3mg2%
* Percent Daily Values are based on a 2000 calorie diet.

Here’s one more to pin on your Pinterest boards!It's easy to make a LOT of small, buttery holiday spritz cookies for eating or gift giving, using an inexpensive cookie press to make festive shapes!


Save

Save

Flourless, 3 Ingredient Peanut Butter Cookies

Easy and DELICIOUS is how I would describe these flourless peanut butter cookies, with only 3 ingredients! I admit, I was a skeptic… until I tried them!
Easy and DELICIOUS is how I would describe these flourless peanut butter cookies, with only 3 ingredients! I admit, I was a skeptic... until I tried them!These peanut butter cookies were wonderful… (how did I not know this all these years????)  I saw this recipe pop up on my Pinterest feed, and thought there was no way these could be truly tasty, but I was completely WRONG.

The recipe makes between 15 and 18 flourless peanut butter cookies, and took only 20 minutes from start to finish! Not bad for a kitchen experiment! I’ve posted some photos of the whole process, but trust me… it all boils down to this: mix the ingredients, place by spoonfuls onto baking sheet, flatten with sugar-dipped fork, bake, and EAT!

Scroll Down For A Printable Recipe Card At The Bottom Of The Page

How To Make These Yummy Flourless Peanut Butter Cookies

Here you go… some quick pics of the “process”… so easy! Here are the three ingredients for flourless peanut butter cookies ready to mix: peanut butter, egg, and sugar. THAT’S IT!

Ingredients for cookies (peanut butter, eggs, and sugar), in white bowl

The dough for the peanut butter cookies is mixed up using a spoon… then is ready to drop by spoonfuls onto baking sheet.

Peanut butter cookie dough is mixed in white bowl

The cookie dough balls are rounded off, then scored criss-cross with a sugar-dipped fork, and then are ready to put into the preheated oven…

The flourless cookies, on baking sheet, ready to put in oven

Who Wants Some Flourless Peanut Butter Cookies To Eat?

When the peanut butter cookies are golden brown and finished baking, they are transferred to a wire rack to cool, then they are ready to eat! YES!

Close up of baked peanut butter cookies

See? Even the bottoms of the peanut butter cookies look good. I’m not kidding… they are really quite tasty!

Bottom, browned side of flourless peanut butter cookie

That’s it! Trust me, these peanut butter cookies are ridiculously EASY and seriously GOOD. You won’t even miss the flour. Hope you’ll give these simple cookies a try. I’m confident you’ll be as surprised as I was at how good they are!

If you enjoy these flourless peanut butter cookies, be sure to also check out my recipe for flourless chocolate cake! It is really delicious, too!

Looking For More COOKIE Recipes?

If you enjoy these peanut butter cookies, you might also be interested in some of my other cookie recipes, including a Giant Chocolate Chip Cookie Pizza, Butterscotch Chip, Butter Pecan Crisps,Chocolate Crinkle, Cinnamon Chip, Date Roll, Peanut Butter Chocolate Chip n’ Nut Cookies, or Giant Sugar Cookies, to name a few. All of my cookie recipes can be found in the Recipe Index, located at the top of the page.

Interested In More Recipes?

Thank you for visiting this website. I appreciate you using some of your valuable time to do soIf you’re interested, I publish a newsletter 2 times per month (1st and 15th) with all the latest recipes, and other fun info. I would be honored to have you join our growing list of subscribers, so you never miss a great recipe!
There is a Newsletter subscription box on the top right side (or bottom) of each blog post, depending on the device you use, where you can easily submit your e-mail address (only) to be included in my mailing list.

You Can Also Find Me On Social Media:

Facebook page: The Grateful Girl Cooks!
Pinterest:
The Grateful Girl Cooks!
Instagram:
jbatthegratefulgirlcooks

Author's signatureOriginal Recipe source: http://www.aroundmyfamilytable.com/2010/10/flourless-peanut-butter-cookies/

↓↓ PRINTABLE RECIPE BELOW ↓↓

0 from 0 votes
Flourless, 3 Ingredient Peanut Butter Cookies
Prep Time
5 mins
Cook Time
14 mins
Total Time
19 mins
 
Easy and DELICIOUS is how I would describe these flourless peanut butter cookies, with only 3 ingredients! I admit, I was a skeptic... until I tried them!
Category: Cookies
Cuisine: American
Keyword: flourless peanut butter cookies
Servings: 18 cookies
Calories Per Serving: 130 kcal
Author: JB @ The Grateful Girl Cooks!
Ingredients
  • 1 cup peanut butter (creamy or crunchy- I used crunchy)
  • 1 cup granulated sugar (reserve 1 teaspoon)
  • 1 egg
Instructions
  1. Preheat oven to 350 degrees. Spray a large baking sheet with non-stick spray.
  2. Mix the peanut butter, sugar and egg together in a large bowl. Combine thoroughly.
  3. Drop the dough by rounded teaspoons onto prepared baking sheet. Slightly round out the dough with your fingers, once on baking sheet.

  4. Lightly moisten a fork with water. Dip it into a tiny bit of sugar, and press the tines of the fork crosswise (two different directions) into top of each dough ball to flatten. Repeat for each cookie.

  5. Bake cookies at 350 degrees for about 14 minutes. Do not let cookies overbake or get too brown. When done, transfer cookies to a wire rack to cool. Enjoy!

Nutrition Facts
Flourless, 3 Ingredient Peanut Butter Cookies
Amount Per Serving (1 cookie)
Calories 130 Calories from Fat 63
% Daily Value*
Fat 7g11%
Saturated Fat 1g6%
Cholesterol 9mg3%
Sodium 69mg3%
Potassium 96mg3%
Carbohydrates 13g4%
Sugar 12g13%
Protein 3g6%
Vitamin A 15IU0%
Calcium 8mg1%
Iron 0.3mg2%
* Percent Daily Values are based on a 2000 calorie diet.

Here’s one more to pin onto your Pinterest boards!Easy and DELICIOUS is how I would describe these flourless peanut butter cookies, with only 3 ingredients! I admit, I was a skeptic... until I tried them!


Save

Save

Chocolate-Dipped Coconut Macaroons

You’ll enjoy chocolate-dipped coconut macaroons! Easy to make, with chocolate bottoms and drizzle, they’re a delicious chewy treat for eating and gift giving!You'll enjoy chocolate-dipped coconut macaroons! Easy to make, with chocolate bottoms and drizzle, they're a delicious chewy treat for eating and gift giving!

The holidays are coming… the holidays are coming! Hope that fact doesn’t stress anyone out! This is the time of year I begin planning out the goodies I will make for my family and friends during the holiday season.

Do you plan your Christmas goodies, too? My list this year will include these easy and delicious Chocolate-Dipped Coconut Macaroons!

Scroll Down For A Printable Recipe Card At The Bottom Of The Page

Do You Like Chocolate-Dipped Coconut Macaroons?

I really like the slightly crisp outside on these wonderful, sweet cookies. The inside is chewy coconut and tastes amazing. The taste of these chocolate-dipped coconut macaroons is complemented by dipping the bottoms of each treat in melted chocolate, then drizzling some on top. Yum!

If you like coconut and chocolate, you’re going to love these chocolate-dipped coconut macaroons! They are very easy to make, and taste great any time of the year.

I tend to make these yummy treats each December for the holidays. They are easy to plate up and are fun to give to friends and neighbors for Christmas. A lot of love is shown to those you care for, when you give them a homemade food gift!

Chocolate-dipped coconut macaroons, ready to eat, on a Christmas plate.

They Are Fairly Simple to Make

The recipe makes approximately 2 dozen of these beautiful macaroons, and they are pretty simple to make. The coconut cookie mixture is mixed, formed into balls, then baked.

Once done, the bottoms of the macaroons are coated with melted chocolate, then more melted chocolate is drizzled over the tops. EASY!

Chocolate-dipped coconut macaroons are full of flavor! Go ahead and grab one from the plate below. There’s enough to share, so I saved you one. Yum.

Chocolate-dipped coconut macaroons, on a Christmas plate, ready to eat!

These chocolate-dipped coconut macaroons are a great treat to add to your homemade food gift list to bless family or friends with over the holidays, or ANY TIME during the year.

I hope you will give them a try! They’re fun to make them during the holidays, but since when do we need a special holiday to eat a great cookie, right? I really hope you enjoy these delicious macaroons!

Looking For More Christmas Goodies To Make?

You can find ALL of my recipes in the Recipe Index, which is located at the top of the page.  I have LOTS of recipes for yummy Christmas goodies, including:

Want More Recipes? Get My FREE Newsletter!

I publish a newsletter 2 times per month (1st and 15th) with lots of recipes, tips, etc.
Would you like to join our growing list of subscribers?

There is a Newsletter subscription box on the top right (or bottom) of each blog post, depending on the device you use.
You can submit your e-mail address there, to be added to my mailing list.

Find Me On Social Media:

Facebook page: The Grateful Girl Cooks!
Pinterest:
The Grateful Girl Cooks!
Instagram:
jbatthegratefulgirlcooks

Author's signature

Recipe Source: http://www.bakerita.com/black-bottomed-coconut-macaroons/

↓↓ PRINTABLE RECIPE BELOW ↓↓

0 from 0 votes
Chocolate-Dipped Coconut Macaroons
Prep Time
50 mins
Cook Time
13 mins
Total Time
1 hr 3 mins
 
You'll enjoy chocolate-dipped coconut macaroons! Easy to make, with chocolate bottoms and drizzle, they're a delicious chewy treat for eating and gift giving!
Category: Cookies
Cuisine: American
Keyword: macaroons
Servings: 24
Calories Per Serving: 184 kcal
Author: JB @ The Grateful Girl Cooks!
Ingredients
For cookies
  • 5 cups shredded , sweetened coconut (20 oz.)
  • 6 large egg whites
  • 1/2 cup granulated sugar
  • 1/2 teaspoon salt
  • 1 teaspoon vanilla extract
  • 1/2 teaspoon almond extract
For chocolate base and drizzle
  • 6 oz. semi-sweet chocolate
  • 1 Tablespoon vegetable shortening
Instructions
  1. In a large bowl, place the egg whites, sugar, salt, vanilla and almond extract. Whisk these ingredients together until they are fully incorporated; mixture will be a bit foamy. Add the coconut to the egg mixture, and stir until well combined. Cover the bowl with plastic wrap; refrigerate for approximately 30 minutes. This mixture will thicken.

  2. While mixture is refrigerating, preheat your oven to 375 degrees. Make sure your oven racks are set in the middle and lower positions. Place parchment paper on the bottoms of two large baking sheets. Spray the parchment paper with a non-stick spray or grease the paper.

  3. With wet (clean) hands, roll 1 Tablespoonful of the macaroon mixture into a round ball. (You can also use a cookie scoop if desired, but find it easier to use my hands). Place each of the "dough" balls onto the prepared baking sheets, spacing them 1 inch apart. You should have approximately 24 macaroons.
  4. Bake macaroons at 375 degrees for 13-15 minutes. Halfway through baking time, rotate baking sheets (from one rack to the other for even baking). When done, the macaroons should be light golden brown on top. Remove from oven. Keep macaroons on the baking sheets while they cool, for about an hour. They need to be completely cooled before removing from baking sheets or dipping in chocolate glaze. Once macaroons have completely cooled, lay a clean piece of parchment paper on counter, then make the chocolate glaze.

  5. To make glaze: Melt the semi-sweet chocolate and 1 Tablespoon shortening in a microwave. Cook on high for 45 seconds. Stir, then continue to cook in 30 second increments, stirring after each increment, until chocolate is smooth. Be careful not to overcook and burn the chocolate.
  6. Carefully (macaroons are delicate) dip the bottom of each macaroon into the melted chocolate (just enough to cover), then place macaroon on clean parchment paper to let chocolate harden. Repeat with remaining macaroons. Use remaining chocolate to decoratively drizzle over tops of macaroons.

  7. Let macaroons cool, at room temperature, until the chocolate is completely "set". This will take about 30-45 minutes. Keep macaroons stored in an air-tight container for best results! Hope you enjoy them!

Recipe Notes

Note: If you do not want to use vegetable shortening when you make the chocolate glaze, simply omit it, and proceed per instructions. I use it, because I it thins out the chocolate slightly, and makes the chocolate a bit shinier, but choose your own preference!

Nutrition Facts
Chocolate-Dipped Coconut Macaroons
Amount Per Serving (1 macaroon)
Calories 184 Calories from Fat 99
% Daily Value*
Fat 11g17%
Saturated Fat 9g56%
Sodium 123mg5%
Potassium 132mg4%
Carbohydrates 19g6%
Fiber 1g4%
Sugar 17g19%
Protein 1g2%
Vitamin A 5IU0%
Vitamin C 0.2mg0%
Calcium 8mg1%
Iron 0.9mg5%
* Percent Daily Values are based on a 2000 calorie diet.

Here’s one more to pin on your Pinterest boards!You'll enjoy chocolate-dipped coconut macaroons! Easy to make, with chocolate bottoms and drizzle, they're a delicious chewy treat for eating and gift giving!


Save

Save

Date Roll Cookies

Date roll cookies are sweet, soft and chewy slice and bake cookies, featuring a simple rolled cookie dough with a cooked date and pecan filling.  Date roll cookies are sweet, soft and chewy slice and bake cookies, featuring a simple rolled cookie dough with a cooked date and pecan filling.

UPDATED 12/9/2025

My Mother-In-Law Elsie made these delicious, soft and chewy Date Roll Cookies all the time, and in her memory, I decided to make them and post the recipe!

She always made them for her family, and she made them for her friends! Elsie traditionally made her date roll cookies for us at Christmas and mailed them from whatever state she lived in at the time. These cookies are THE cookie I will always associate with her.  When I see them, I cannot help but think of her.

She’s been in heaven for a couple of years now, but I still make these date roll cookies occasionally (usually at Christmas, in her honor). They are soft, chewy and delicious… and my husband and I love them. I hope you will, also!

Scroll Down For A Printable Recipe Card At The Bottom Of The Page

Prepare The Filling

In a medium saucepan on medium-low heat, cook the filling ingredients until soft and thick (the dates will break down as you cook).

Stir the mixture constantly as you cook, so the filling won’t burn. Remove from heat but keep the mixture “warm” until ready to spread onto dough.

The date and nut filling for the cookies is cooked into a thick spread.

Make The Cookie Dough

In a large bowl, mix the eggs with the melted, room temperature butter. Add the dry ingredients; mix well to combine thoroughly. Divide the dough evenly in half.

On a lightly floured work surface, roll each half of the dough (one at a time) into a rectangle. The dough should be about ¼ inch thick. Your dough should end up being between 6-7 inches wide, as well. Shape the dough into a distinct rectangle, using your fingers to shape it as you go.

Dry ingredients for the cookie dough are mixed together.The cookie dough is split in half then each half is rolled into a rectangle shape.

Add The Date Nut Filling And Roll

Spread half of the warm (not hot!) date filling over the entire surface of the dough. Roll the dough up tightly starting from the long side of the dough.

Once rolled into a log shape, carefully place the roll onto a baking sheet. Repeat process with other half of dough. Cover the two rolls with saran wrap or foil and chill them in the refrigerator for an hour and a half.

TIP: At this point, if you want to save one of the rolls of dough for another time, wrap it tightly in saran wrap and foil. Place the wrapped dough log back in refrigerator (will last for a couple weeks) or the freezer (longer storage). This dough freezes well.

Date filling is added to the dough rectangles, then spread over the surface.

TIP: At this point, if you want to save one of the rolls of dough for another time, wrap it tightly in saran wrap and foil. Place the wrapped dough log back in refrigerator (will last for a couple weeks) or the freezer (longer storage). This dough freezes well.

Each rectangle of filled dough is rolled up into "logs", starting with the long side.

Bake The Date Roll Cookies

When you’re ready to bake, preheat your oven to 350°F. Slice the dough rolls into thin slices (between ¼”-½” thick). Place slices 2 inches apart on ungreased or silpac lined baking sheets.

Date roll cookies are sliced into portions and placed on cookie sheet for baking.

Bake the date roll cookies at 350°F. for 8-10 minutes. Don’t overbake these cookies! They should be golden brown and fairly soft. they will firm up slightly as they cool.

When done, remove the cookies from the oven and place the baking sheets on wire racks. Let the cookies cool for 5 minutes (still on the baking sheets).

The date roll cookies are baked and golden brown.

After the cookies have slightly cooled for 5 minutes (and begun to firm up, carefully transfer the cookies off the baking sheets and onto wire racks to finish cooling completely.

Once they have cooled completely, they are ready to serve and enjoy! Place them on a pretty platter and watch how fast they disappear!

Wire racks are full of cooling, baked Date Roll Cookies.

I hope you will consider making these delicious date roll cookies. They are easy to make, and are really delicious, soft and chewy! I’m confident you will love them.

Thank you for stopping by today, and I hope you will come back again soon. Take care, may God bless you, and have a GREAT day!

Looking For More COOKIE Recipes?

You can find ALL of my recipes in the Recipe Index, which is located at the top of the page. I have lots of cookie recipes to choose from, including:

Want More Recipes? Get My FREE Newsletter!

I publish a newsletter 2 times per month (1st and 15th) with lots of recipes, tips, etc.
Would you like to join our growing list of subscribers?

There is a Newsletter subscription box on the top right (or bottom) of each blog post, depending on the device you use.
You can submit your e-mail address there, to be added to my mailing list.

Find Me On Social Media:

Facebook page: The Grateful Girl Cooks!
Pinterest:
The Grateful Girl Cooks!
Instagram:
jbatthegratefulgirlcooks

Author's signatureRecipe Source: My mother-in-law (don’t have a clue where she got the recipe many, many years ago)

↓↓ PRINTABLE RECIPE BELOW ↓↓

5 from 1 vote
Date Roll Cookies
Prep Time
2 hrs
Cook Time
10 mins
Total Time
2 hrs 10 mins
 
Date roll cookies are sweet, soft and chewy slice and bake cookies, featuring a simple rolled cookie dough with a cooked date and pecan filling.
Category: Cookies
Cuisine: American
Keyword: date roll cookies
Servings: 36 cookies (approx.)
Calories Per Serving: 215 kcal
Author: JB @ The Grateful Girl Cooks!
Ingredients
For the cookie dough:
  • 1 cup butter , melted, cooled to room temp
  • 4 cups all purpose flour
  • 2 cups brown sugar
  • 2 teaspoons baking soda
  • 1 teaspoon salt
  • 1/2 teaspoon cinnamon
  • 3 eggs , beaten slightly
For the filling:
  • 1 pound dates , chopped
  • 1 cup granulated sugar
  • 1/2 cup water
  • 1/2 cup chopped walnuts or pecans
Instructions
  1. To prepare the filling: In a medium saucepan on medium-low heat, cook the filling ingredients until soft and thick (the dates will break down as you cook). Stir the mixture constantly as you cook, so the filling won't burn. Remove from heat but keep the mixture "warm" until ready to spread onto dough.

  2. To prepare the cookie dough: In a large bowl, mix the eggs with the melted, room temperature butter. Add the dry ingredients; mix well to combine thoroughly. Divide the dough in half. On a lightly floured work surface, roll each half of the dough (one at a time) into a rectangle. Dough should be about 1/4 inch thick. Your dough will end up being 6-7 inches wide, as well. Shape into a distinct rectangle, using your fingers to shape the dough.

  3. Spread half of the warm (not hot!) date filling over the entire surface of the dough. Roll the dough up tightly starting from the long side of the dough. Once rolled into a log shape, carefully place the roll onto a baking sheet. Repeat process with other half of dough. Cover the two rolls with saran wrap or foil, and chill them in the refrigerator for an hour and a half. (At this point, if you want to save one of the rolls of dough for another time, simply wrap it in saran and foil; place back in refrigerator (will last for a couple weeks) or freezer (longer storage). This dough freezes well)

  4. When ready to bake, preheat oven to 350 degrees. Slice the dough roll into thin slices (1/4 - 1/2 inch). Place slices 2 inches apart on ungreased baking sheet. Bake at 350 degrees for 8-10 minutes. Don't overbake. When done, carefully remove baking sheet to a wire rack. Let cookies cool for 5 minutes, then remove from pan to the wire rack. Enjoy!

Recipe Notes

**The long prep times included chilling the dough time.These only take a few minutes to make once dough is chilled.
Make as many or as few of these delicious cookies as you wish. If you want to make a few at a time, cut as many slices as you want; put the rest of the dough back in freezer or refrigerator. If freezing the dough, remember to thaw completely before baking, but slice dough while partially frozen for best results.

Nutrition Facts
Date Roll Cookies
Amount Per Serving (1 cookie)
Calories 215 Calories from Fat 54
% Daily Value*
Fat 6g9%
Saturated Fat 3g19%
Cholesterol 27mg9%
Sodium 179mg8%
Potassium 127mg4%
Carbohydrates 37g12%
Fiber 1g4%
Sugar 25g28%
Protein 2g4%
Vitamin A 175IU4%
Vitamin C 0.1mg0%
Calcium 22mg2%
Iron 1mg6%
* Percent Daily Values are based on a 2000 calorie diet.

Here’s one more to pin on your Pinterest boards!Date roll cookies are sweet, soft and chewy slice and bake cookies, featuring a simple rolled cookie dough with a cooked date and pecan filling.


Save

Save