Category: Main Dishes

Creamy Lemon Tarragon Chicken

Creamy Lemon Tarragon Chicken features pan-seared chicken breasts, topped w/ a buttery lemon cream sauce with tarragon & green onions, served on rice.
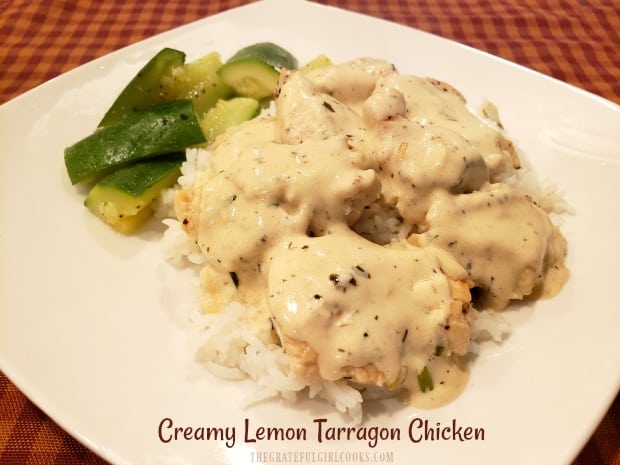

Looking for an easy to prepare, super yummy chicken recipe? Well then, you should give this recipe for creamy lemon tarragon chicken a try. It’s delicious, and is super simple to make, without a ton of ingredients! The sauce has lots of flavor, thanks to fresh lemon juice, lemon zest, dried tarragon, cream, butter, and sliced green onions. It is soooo good.

When I took the photos for this blog post, I had my husband do the cooking. We changed it up a bit so we could BOTH be in the kitchen cooking together (I did some of the prep work and plated it). He did a fabulous job cooking the creamy lemon tarragon chicken, and we both LOVED this dish. Here’s how to make it:

Scroll Down For a Printable Recipe Card At The Bottom Of The Page

Prepare The Chicken Breasts

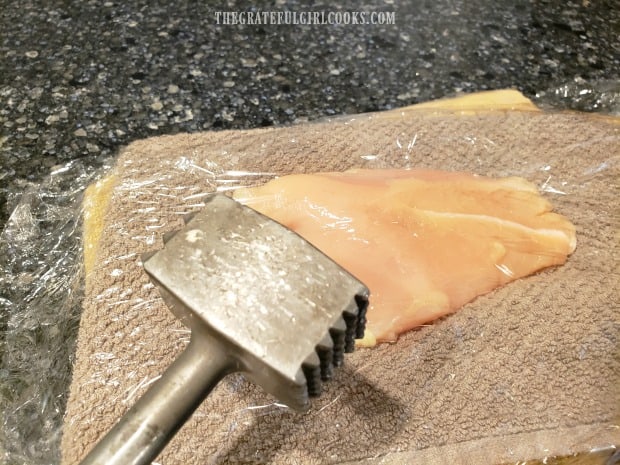
The recipe calls for boneless, skinless chicken breasts. You will need to “pound them” with a meat mallet (or heavy skillet like cast iron) until they are about 1/4″ thick. To do this, place plastic wrap on a surface. Lay one chicken breast on the plastic, then cover with another sheet of plastic wrap, and seal edges.

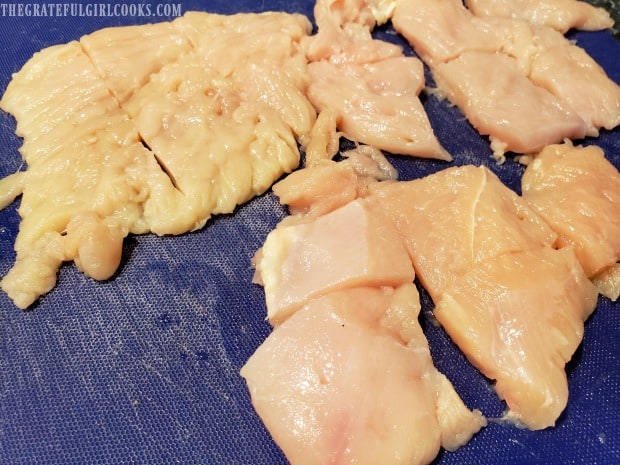
Use the flat side of a meat mallet or the bottom of a heavy skillet to pound the chicken out. Once the chicken is flattened out to 1/4″ thickness, set it aside. Repeat with the other chicken breasts. Once all have been flattened, slice each piece of chicken in half, length-wise, then cut each half into 3 pieces.

Chicken breasts are pounded until 1/4" thick between pieces of plastic wrap.Pieces of chicken breast are cut into halves, then into thirds before cooking.

Cook The Chicken

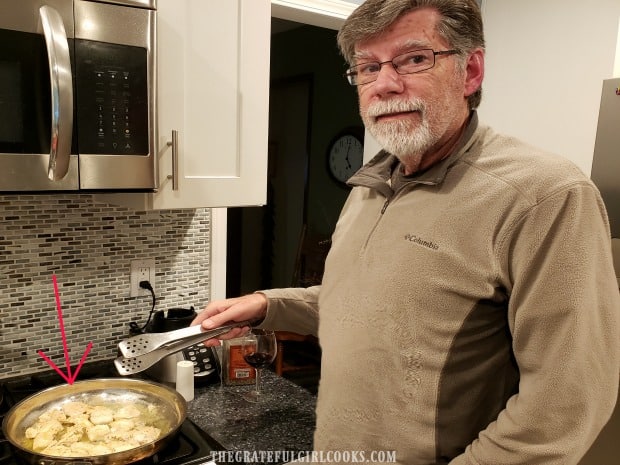
Sprinkle the chicken pieces lightly with salt and pepper. Melt butter in a large skillet, and then add the chicken pieces in a single layer. Cook for 2-3 minutes on medium-high heat. When the bottom of the chicken is golden brown, turn chicken to the other side, and cook 2-3 more minutes, until the chicken is fully cooked through.

The photo below is the only picture I got of this step, but you can see my hubby busy cooking the chicken. Once the chicken is done, remove the chicken pieces from the skillet to an oven-proof dish, cover with foil, and keep the pieces warm.

TIP: We put the covered, cooked chicken in a 200 degree oven to keep warm. The chicken needs to stay warm while you make the sauce. **DO NOT CLEAN OUT THE SKILLET (you will use the leftover butter and little browned bits in it to make the sauce!).

Pan-searing the chicken breast portions in butter.

Make The Creamy Lemon Tarragon Sauce

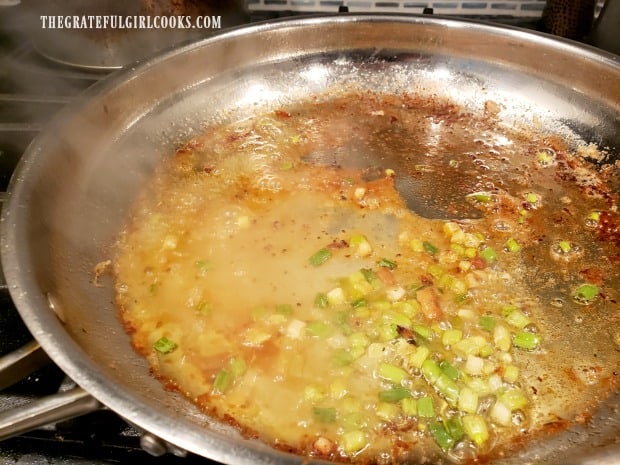
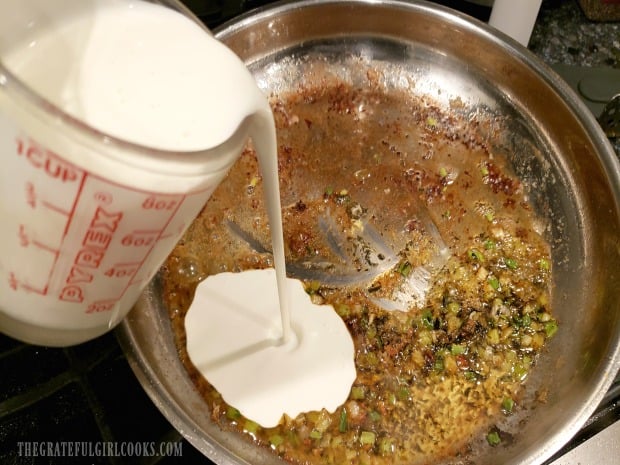
Now it’s time to make the creamy sauce that will cover the chicken. Sauté the green onions on medium-low heat in the leftover butter in the skillet until they become tender (a couple minutes). Add freshly squeezed lemon juice, lemon zest, and dried tarragon to the skillet and stir, to combine. Measure and pour the whipping cream into the skillet.

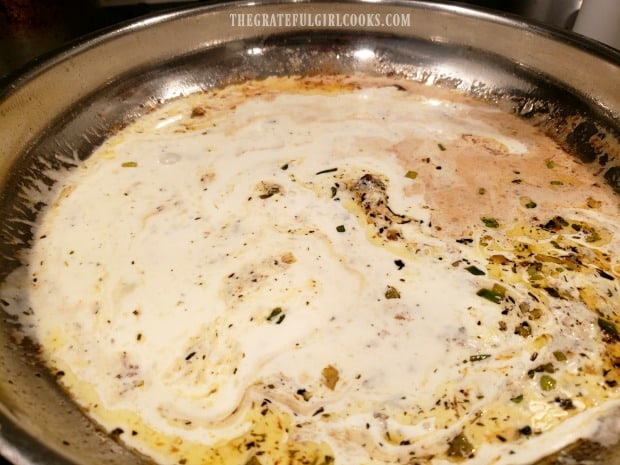
Lemon juice, zest, green onions and seasonings are cooked in skillet.Heavy cream is added to the sauce for creamy lemon tarragon chicken.

Whisk or stir the sauce well, while continuing to cook on medium-low heat. Cook the sauce until it comes to a boil. Reduce heat to low and cook sauce 4-5 more minutes, or until sauce has thickened slightly, and is fully heated through. Remove the sauce from the heat.

The creamy lemon sauce is stirred and cooked until slightly thickened.

Serve The Creamy Lemon Tarragon Chicken

Once the sauce if fully heated through, your creamy lemon tarragon chicken dinner is ready to be plated for serving! Place a portion of cooked white or brown rice onto each dinner plate. Spread the rice out so it becomes the base for the chicken and sauce.

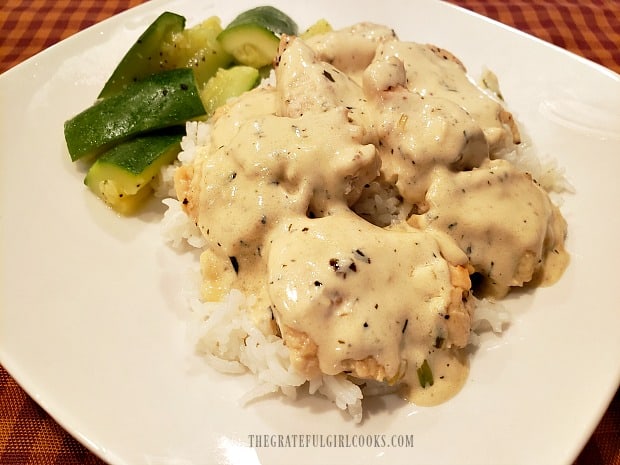
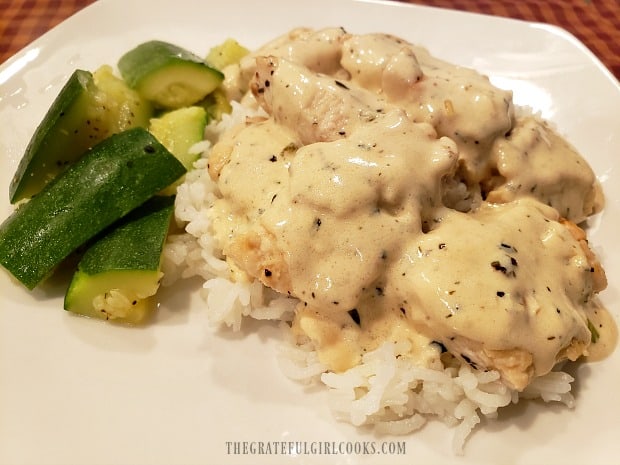
Place 3-4 pieces of warm chicken on top of the rice, and then spoon the hot creamy sauce over each piece to cover. You should have enough yummy sauce to cover all the chicken pieces, so be generous with the sauce. And that’s it… see how simple it was to make this creamy lemon tarragon chicken dish? Hope you enjoy it! It really is quite delicious.

Creamy Lemon Tarragon Chicken is served on rice, with zucchini on the side.Thick creamy lemon sauce covers the pan-seared chicken pieces on top of rice.

Thanks for visiting. I hope you will come back again soon, and trust you will have consider making this creamy lemon tarragon chicken recipe for yourself and those you love. Take care, and have a great day.

Looking For More CHICKEN Recipes?

You can find all of my chicken recipes in the Recipe Index, located at the top of the page. I’ve got LOTS of them, including:

Interested In More Recipes?

Thank you for visiting this website. I appreciate you using some of your valuable time to do soIf you’re interested, I publish a newsletter 2 times per month (1st and 15th) with all the latest recipes, and other fun info. I would be honored to have you join our growing list of subscribers, so you never miss a great recipe!
There is a Newsletter subscription box on the top right side (or bottom) of each blog post, depending on the device you use, where you can easily submit your e-mail address (only) to be included in my mailing list.

You Can Also Find Me On Social Media:
Facebook page: The Grateful Girl Cooks!
Pinterest: The Grateful Girl Cooks!
Instagram: jbatthegratefulgirlcooks

Author's signature

Original recipe source: unknown (found written on 3×5 card in one of my really old recipe boxes)
0 from 0 votes
Creamy Lemon Tarragon Chicken
Prep Time
15 mins
Cook Time
6 mins
Total Time
21 mins
 

Creamy Lemon Tarragon Chicken features pan-seared chicken breasts, topped w/ a buttery lemon cream sauce with tarragon & green onions, served on rice.

Category: Entree
Cuisine: American
Keyword: creamy lemon tarragon chicken
Servings: 4
Calories Per Serving: 505 kcal
Author: JB @ The Grateful Girl Cooks!
Ingredients
  • pounds chicken breasts (boneless, skinless) , about 3 large
  • Salt & black pepper , to lightly season chicken
  • ¼ cup butter (= 4 Tablespoons)
  • 2 Tablespoons green onions (scallions) , thinly sliced
  • 2 Tablespoons lemon juice (fresh)
  • 1 teaspoon lemon zest , finely grated
  • 1 teaspoon dried tarragon
  • 1 cup heavy whipping cream
  • white or brown rice , pre-cooked, hot
Instructions
  1. Prepare Chicken: Flatten chicken breasts by placing one chicken breast at a time between sheets of plastic wrap. Use the flat side of a meat mallet or the bottom of a heavy skillet to pound the chicken out. Once the chicken is flattened to about 1/4"thickness, set it aside; Slice each flattened piece of chicken in half length-wise, then cut each half into 3 pieces. Season chicken with salt/pepper.

  2. Cook Chicken: Melt butter in large skillet on medium-high heat. Add chicken pieces in single layer. Cook for 2-3 minutes until bottom side is golden brown; turn chicken over; cook for 2-3 minutes, or until cooked through. Remove chicken to oven-proof plate, cover, keep pieces warm (we used 200°F. oven). **DO NOT CLEAN THE SKILLET OUT (will use it to make sauce)

  3. Make Sauce: Sauté sliced green onions in leftover butter in skillet on medium-low heat until they become tender (about 2 minutes). Add lemon juice, lemon zest, and dried tarragon to skillet and stir, to combine. Pour whipping cream into skillet. Whisk or stir the sauce well, while continuing to cook on medium-low heat. Cook the sauce until it comes to a boil. Reduce heat to low and cook sauce 4-5 more minutes, or until sauce has thickened slightly, and is fully heated through. Remove the sauce from the heat.

  4. To Serve: Place prepared rice onto each dinner plate. Spread the rice out, so it becomes the base for the chicken and sauce. Place 3-4 pieces of warm chicken on top of rice, and spoon hot creamy sauce over each piece to cover. Enjoy!

Recipe Notes

NOTE: The caloric calculation does NOT include the rice, as different types or portion sizes might be used.

Nutrition Facts
Creamy Lemon Tarragon Chicken
Amount Per Serving (1 (1/4 of total))
Calories 505 Calories from Fat 342
% Daily Value*
Fat 38g58%
Saturated Fat 22g138%
Cholesterol 221mg74%
Sodium 322mg14%
Potassium 689mg20%
Carbohydrates 3g1%
Fiber 1g4%
Sugar 1g1%
Protein 38g76%
Vitamin A 1331IU27%
Vitamin C 7mg8%
Calcium 56mg6%
Iron 1mg6%
* Percent Daily Values are based on a 2000 calorie diet.

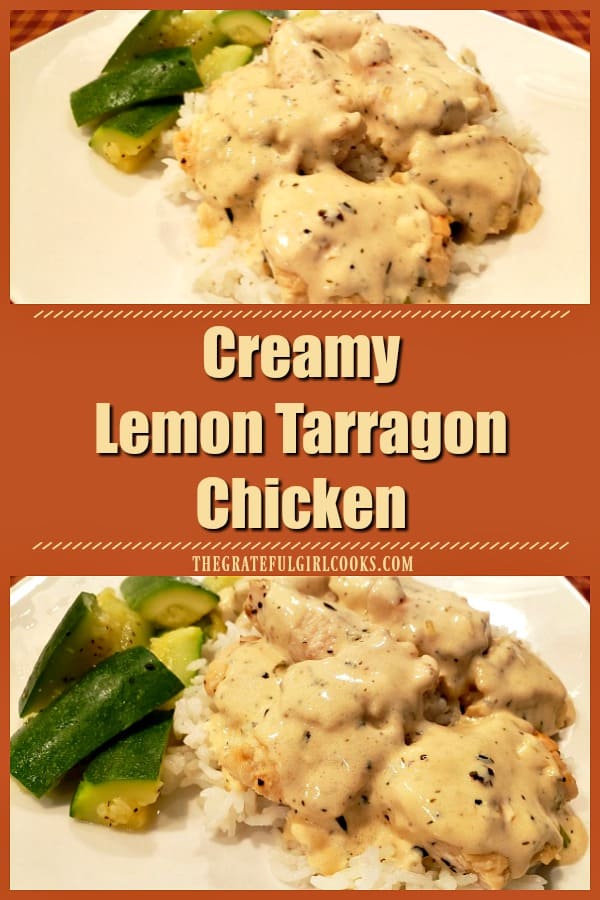
Here’s one more to pin on your Pinterest boards!Creamy Lemon Tarragon Chicken features pan-seared chicken breasts, topped w/ a buttery lemon cream sauce with tarragon & green onions, served on rice.


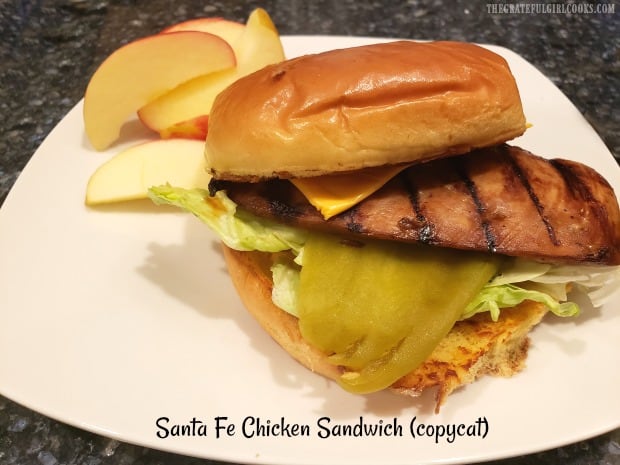
Santa Fe Chicken Sandwich (copycat)

Enjoy a tasty copycat Carl’s Jr. Santa Fe Chicken Sandwich. Marinated chicken, cheese, Southwest sauce, green chile, & lettuce on a toasted bun. YUM!
Enjoy a tasty copycat Carl's Jr. Santa Fe Chicken Sandwich. Marinated chicken, cheese, Southwest sauce, green chile & lettuce on a toasted bun. YUM!

Well… we’ve entered another week of “stay-at-home”, due to current coronavirus guidelines. I made my husband and I delicious chicken sandwiches for dinner last week, using a recipe I was given many years ago.

The recipe is a copycat for one of Carl’s Jr. restaurants chicken sandwiches, which we used to order! Honestly, I’m not even sure if they still have this sandwich on their menu. All I know is… it’s GOOD, and we really enjoy these sandwiches!

I knew I had 99% of the ingredients in our kitchen, so I decided to make these sandwiches again (it’s been a while!). The recipe calls for teriyaki sauce (and that was the ONE thing I was out of)! Since we are trying NOT to go to the grocery store too much (social distancing), I used my recipe for homemade teriyaki marinade (easy) to marinate the chicken! Problem solved. HOORAY!

The sandwiches were (as always) a big hit, so I’m sharing the recipe here, so you can enjoy it, too. Here’s how to make Santa Fe Chicken Sandwiches:

Scroll Down For A Printable Recipe Card At The Bottom Of The Page

First – Marinate The Chicken

The recipe (as written in printable recipe below) makes 4 sandwiches, but since I was only making them for my husband and I, my photos reflect the fixings for TWO! Place boneless, skinless chicken breasts into a resealable plastic bag or container (with a lid).

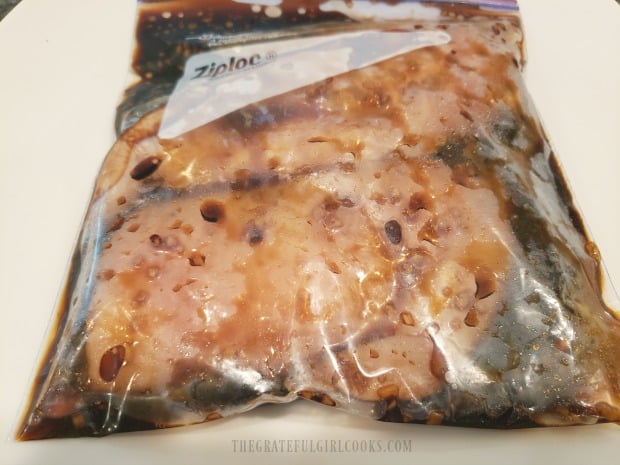
Add teriyaki sauce to the chicken, and turn to fully cover the chicken with the sauce. Let the chicken marinate (covered or sealed) in the refrigerator for thirty minutes, so the flavors can permeate the meat. Use the time the chicken is marinating to prepare other parts of the recipe.

Boneless, skinless chicken breasts are marinated in teriyaki sauce.

Prepare The Southwestern Sauce – EASY!

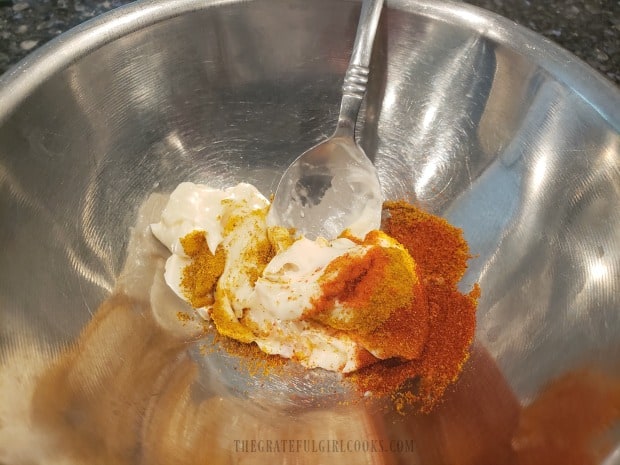
Making the Southwestern sauce for the sandwich is incredibly simple.  Measure the mayonnaise, cayenne pepper, paprika, onion powder, salt, pepper, and curry powder into a small bowl.

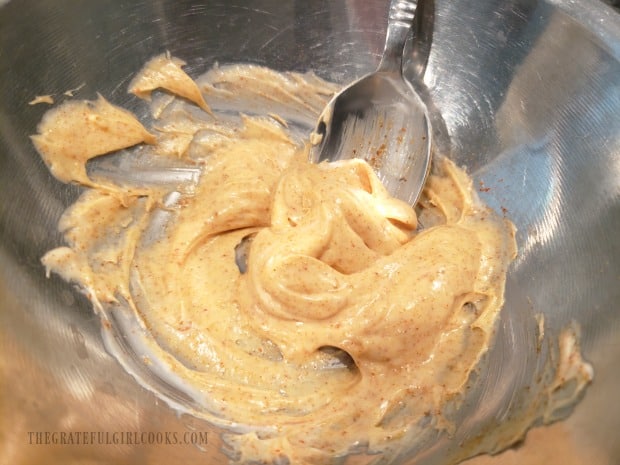
Stir well, until the ingredients are fully incorporated. Set the bowl aside. This will be the sauce you put on the sandwich! See how EASY that was?

Southwest-inspired spices are mixed together with mayonnaise to make sauce.The sauce for the sandwich is mixed, and is ready to spread on.

Prepare The Canned Green Chiles- EASY!

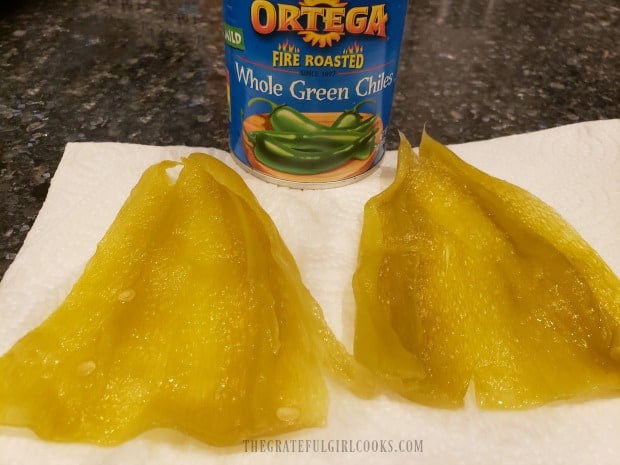
Open and drain the green chiles. Below you can see the type of chiles I used. There should be 4 whole ones in the can. Carefully slice them open, and remove the seeds with a butter knife or spoon. Each sandwich requires one of these mild chiles. Pat the chiles dry with a paper towel. Now you can set them aside until you’re ready to build the sandwiches.

Whole green chiles are split open and seeds are removed before adding to sandwich.

Cook The Marinated Chicken

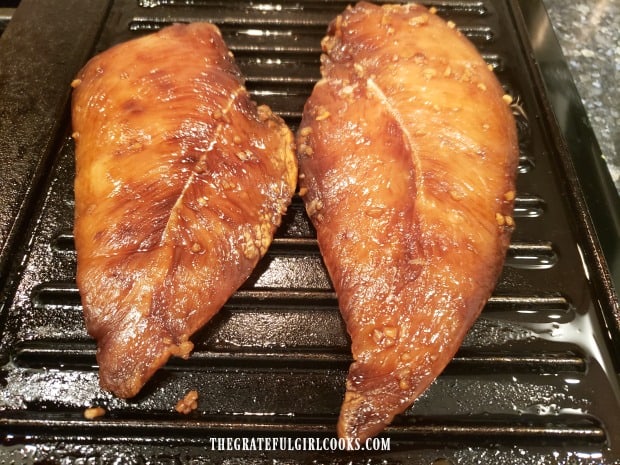
Once the chicken breasts have marinated for 30 minutes, remove them from the container (or bag), and let the excess sauce drip off the chicken. Discard the sauce. Grill the chicken on an outdoor grill, or in a lightly oiled pan or indoor grill on medium-high heat. I use a cast iron grill on my stove top to cook the chicken (see photo below).

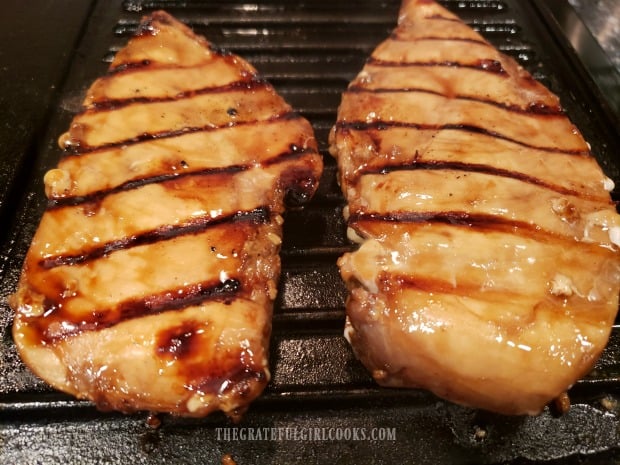
When the chicken is nicely browned on the bottom after 6-7 minutes, carefully turn the chicken over, and continue grilling the other side for an additional 6-7 minutes. The time it will take to cook the chicken will vary, depending on the thickness of the chicken you use, of course. When done, the chicken should be cooked all the way through (internal temp of 165°F.), and be nicely browned on all sides.

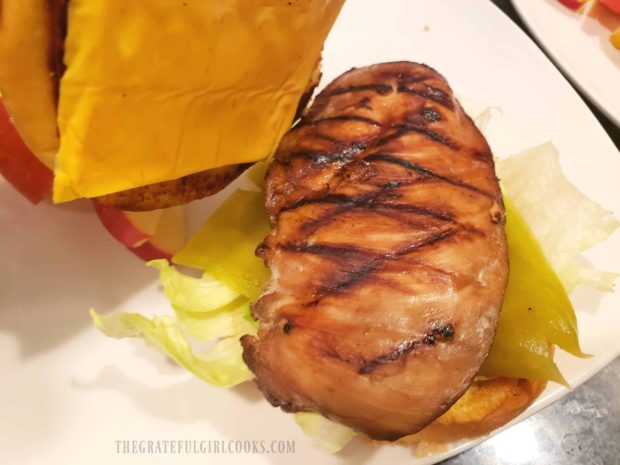
Marinated chicken breasts are grilled for the sandwich.The marinated chicken breasts are grilled on both sides until done.

Time To Build Your Santa Fe Chicken Sandwich!

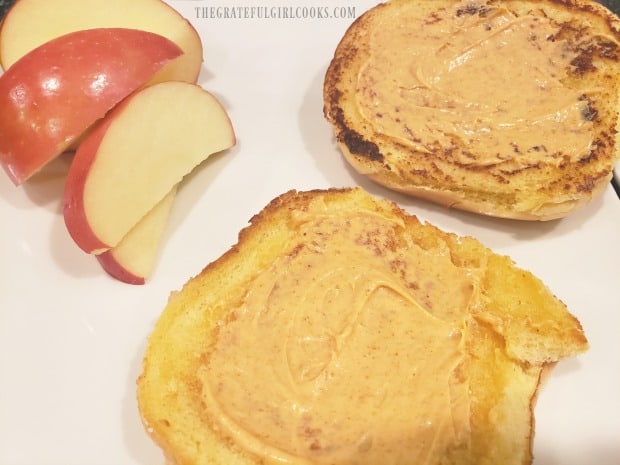
Okay… now it’s time to put the sandwiches together. Lightly toast the hamburger buns. I’ve found the easiest way is to lay them open on a lightly buttered skillet or griddle, and let them “toast” on low heat for a minute or two.

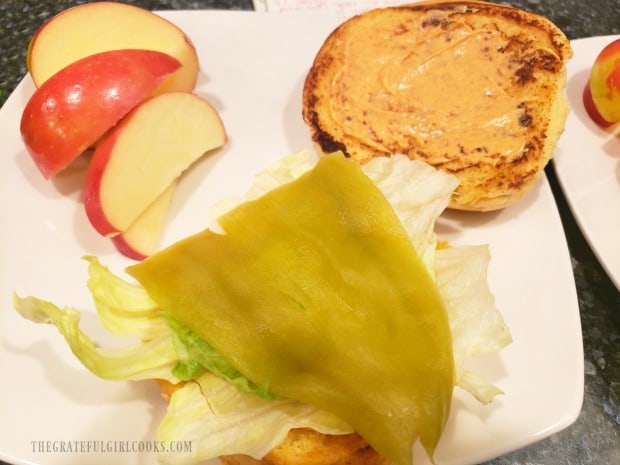
Spread the Southwestern sauce onto both sides of each of the toasted buns. Place a lettuce leaf on the bottom bun, and then top it with one of the green chiles.

Southwestern sauce is spread on both top and bottom of toasted bun.Lettuce and a whole green chile is added to the toasted buns with sauce.

Now lay the warm marinated, grilled chicken breast on top of the chile. Add a slice of American cheese (or thin cheddar, if using) to the top bun, and place it on the chicken.

Now your Santa Fe Chicken Sandwich is completely ready to enjoy! The heat from the toasted bun and the chicken will help to slightly melt the cheese, too!

Repeat the steps for each Santa Fe Chicken Sandwich. All that is left for you to do after that is serve and enjoy these delicious, flavorful chicken sandwiches. Hope you enjoy them… we sure do!

Marinated grilled chicken and cheese are added to the Santa Fe Chicken Sandwich.

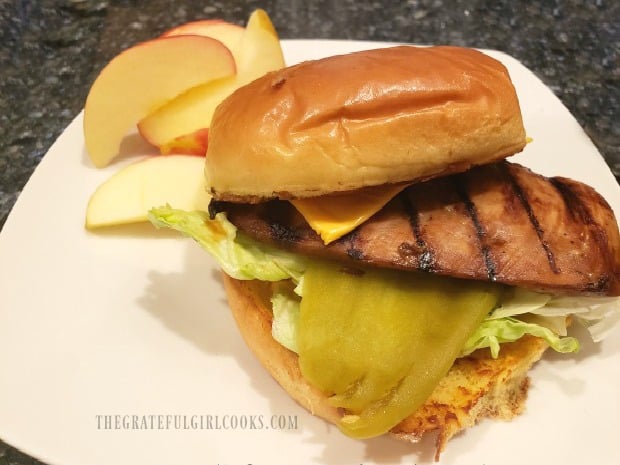
A Santa Fe Chicken Sandwich is served on a plate, with sliced apples on the side.

Thank you for stopping by. The printable recipe is shown below, in case you would like to make these at home. Stay safe, and be an encouraging friend and family member to those around you who might be hurting.

God bless you, and I sincerely hope you have a GREAT day. There is ALWAYS something to be thankful for, right?

Looking For Other SANDWICH Recipes?

You can find all of my recipes in the Recipe Index, located at the top of the page. I have several sandwich recipes there, including:

Want More Recipes? Get My FREE Newsletter!

I publish a newsletter 2 times per month (1st and 15th) with lots of recipes, tips, etc..
Would you like to join our growing list of subscribers?

There is a Newsletter subscription box on the top right (or bottom) of each blog post, depending on the device you use.
You can submit your e-mail address there, to be added to my mailing list.

Find Me On Social Media:

Facebook page: The Grateful Girl Cooks!
Pinterest:
The Grateful Girl Cooks!
Instagram:
jbatthegratefulgirlcooks

Author's signature

Original recipe source: unknown (I received it many years ago from a friend and wrote it down- original source unknown)

↓↓ PRINTABLE RECIPE BELOW ↓↓

0 from 0 votes
Santa Fe Chicken Sandwich
Prep Time
5 mins
Cook Time
14 mins
Marinating Time (Inactive-included in total time)
30 mins
Total Time
49 mins
 

Enjoy a tasty copycat Carl's Jr. Santa Fe Chicken Sandwich. Marinated chicken, cheese, Southwest sauce, green chile & lettuce on a toasted bun. YUM!

Category: Dinner, Lunch, Sandwich
Cuisine: Southwestern
Keyword: Santa Fe Chicken Sandwich
Servings: 4 sandwiches
Calories Per Serving: 441 kcal
Author: JB @ The Grateful Girl Cooks!
Ingredients
For Chicken:
  • 4 medium chicken breasts (boneless, skinless) (the thinner, the better!)
For Teriyaki Marinade: (can also use purchased teriyaki sauce or marinade instead of making homemade sauce)
  • ½ cup low sodium soy sauce
  • 2 Tablespoons honey
  • 2 Tablespoons water
  • 1 Tablespoon brown sugar light or dark
  • 2 cloves garlic minced
  • 1 teaspoon fresh ginger finely grated
  • 1 teaspoon apple cider vinegar
For Southwest Sauce:
  • ¼ cup mayonnaise (regular or light)
  • ¼ teaspoon sweet paprika
  • ¼ teaspoon onion powder
  • ¼ teaspoon curry powder
  • teaspoon cayenne pepper
  • 1 pinch kosher salt
  • 1 pinch ground black pepper
For Sandwich:
  • 4 hamburger buns lightly toasted
  • 4 lettuce leaves
  • 7.5 ounces canned whole green chiles (1 can has about 4 chiles)
  • 4 slices American cheese or thin sliced cheddar
Instructions
  1. MAKE TERIYAKI SAUCE: Combine teriyaki marinade ingredients in medium bowl; whisk together until combined.

  2. MARINATE CHICKEN: Place boneless, skinless chicken breasts into resealable plastic bag or a container (with lid). Add teriyaki sauce; turn to fully cover chicken with sauce. Let chicken marinate in refrigerator for 30 minutes.

  3. PREP #1-MAKE SAUCE: Measure mayonnaise, cayenne pepper, paprika, onion powder, salt, pepper and curry powder into a small bowl. Stir well, then set bowl aside. PREP #2-PREPARE CHILES: Open can; drain green chiles. Carefully slice chiles open. Remove seeds. Pat chiles dry with a paper towel. Set aside.

  4. COOK CHICKEN: After marinating 30 minutes, remove chicken breasts from bag (or container); let excess sauce drip off the chicken. Discard sauce. Cook chicken on an outdoor grill, or in a lightly oiled pan or on indoor grill pan on medium-high heat. Cook for approximately 6-7 minutes. Turn chicken over; continue grilling other side for an additional 6-7 minutes. The time it takes to cook depends on the thickness of chicken you use, of course. When done, chicken should be cooked all the way through (internal temp of 145-150°F), and be nicely browned on all sides. Remove from pan or grill. Keep chicken warm.

  5. TOAST THE BUNS: Lightly toast the hamburger buns. Easiest way is to split and lay them open on a lightly buttered skillet. Let them "toast" for 1-2 minutes on low heat, until golden brown.

  6. TO BUILD EACH SANDWICH: Spread sauce onto both sides of each toasted bun. Place lettuce leaf on bottom bun; add a green chile, followed by the chicken breast. Add a slice of American (or cheddar) cheese to the top bun, and place it on the chicken. Repeat with other sandwiches, serve warm, and enjoy!

Recipe Notes

Caloric calculation was made using light mayonnaise and 1/4th of the marinade's total calories, as marinade is only used to flavor meat and total amount of marinade is not fully consumed.

Nutrition Facts
Santa Fe Chicken Sandwich
Amount Per Serving (1 sandwich)
Calories 441 Calories from Fat 135
% Daily Value*
Fat 15g23%
Saturated Fat 5g31%
Trans Fat 0.3g
Polyunsaturated Fat 3g
Monounsaturated Fat 4g
Cholesterol 96mg32%
Sodium 2187mg95%
Potassium 748mg21%
Carbohydrates 41g14%
Fiber 2g8%
Sugar 16g18%
Protein 36g72%
Vitamin A 2176IU44%
Vitamin C 25mg30%
Calcium 333mg33%
Iron 4mg22%
* Percent Daily Values are based on a 2000 calorie diet.

Here’s one more to pin on your Pinterest boards!Enjoy a tasty copycat Carl's Jr. Santa Fe Chicken Sandwich. Marinated chicken, cheese, Southwest sauce, green chile & lettuce on a toasted bun. YUM!

Creamy Mushroom Chicken Thighs

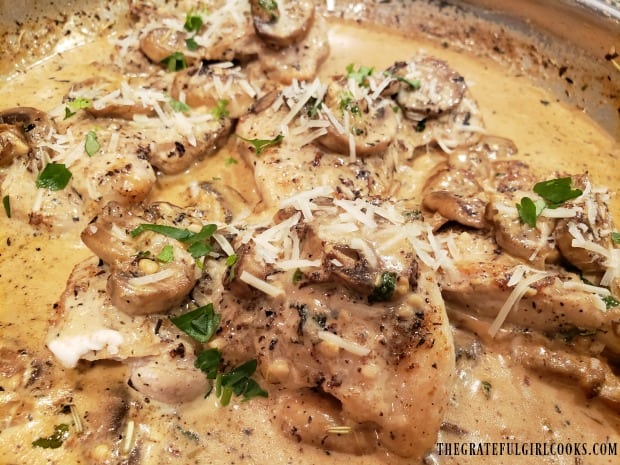
Delicious Creamy Mushroom Chicken Thighs are pan-seared, then covered in a cream sauce with garlic, mushrooms, herbs, and Parmesan cheese to serve!

If you’re looking for a delicious chicken recipe, may I suggest THIS ONE? It is so good! In a nutshell, you brown seasoned chicken thighs, make a quick sauce with milk or cream, mushrooms, garlic, herbs and cheese, then cover the chicken with sauce, and serve! We LOVE this dish!

The sauce is creamy, thanks in part to using either whipping cream, half and half OR canned evaporated milk. It’s your choice! I use evaporated milk for less calories, but if calories don’t matter, go for the whipping cream or half and half. YUM! Several of the spices used double up, meaning the same spices are used to season the chicken AND the sauce.

The recipe is easy to follow, and I recommend serving the finished chicken on top of brown or white rice, or egg noodles, for a filling main course! Hope you enjoy it! Here’s the “play by play” on how to make this wonderful dish:

Scroll Down for A Printable Recipe Card At The Bottom Of The Page

Season The Chicken Thighs

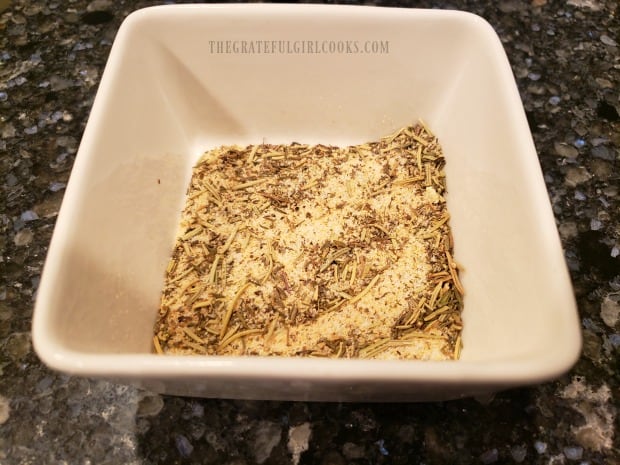
The first thing you will need to do is make the seasoning mix for the chicken. It’s EASY! Simply stir together garlic powder, onion powder, dried thyme and rosemary, along with salt and black pepper.

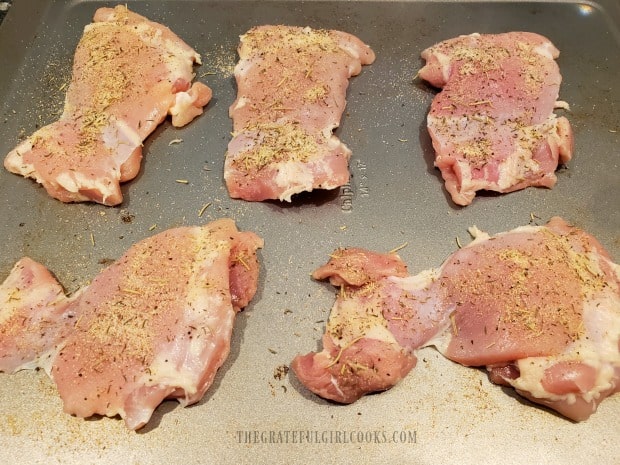
Pat the boneless, skinless chicken thighs dry with paper towels, and trim off any extra fat. Sprinkle the spice mixture evenly over the chicken thighs, and pat gently to adhere the spices.

A dry spice mix is made to season chicken thighs.Boneless, skinless chicken thighs are seasoned with spices and are ready to cook.

Brown The Chicken

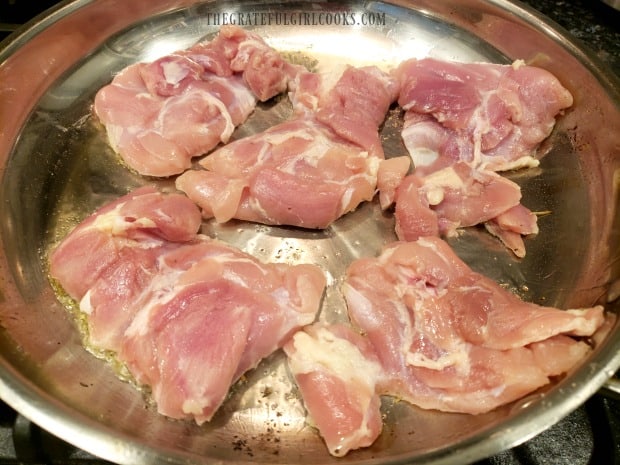
Measure 2 Tablespoons of olive oil into a large skillet. Heat on medium-high heat. Once oil is hot, but not smoking, carefully add the chicken spice side down, in a single layer. Once they are in the skillet, do not move the chicken. Sear the thighs in the hot oil about 7-8 minutes, or until browned.

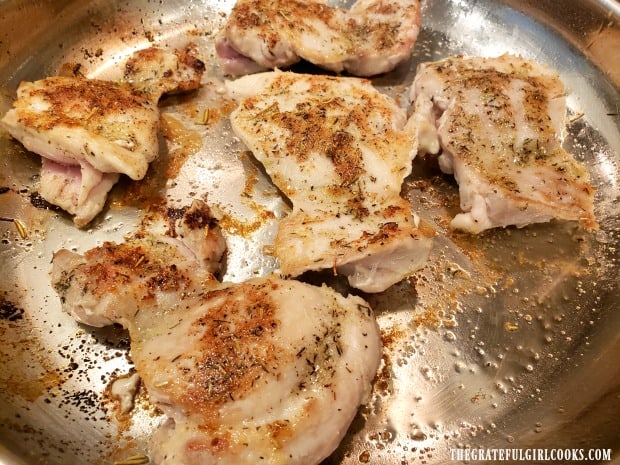
Carefully turn the chicken to the other side, and cook for an additional 7-8 minutes. Depending on the thickness of the chicken thighs used, this may take a minute or two longer. Cook until second side is browned, and the center of the chicken is no longer pink. Once the chicken is cooked, remove thighs from the skillet, transfer to a plate, and cover to keep them warm while you make the sauce.

NOTE: If you have to cook the chicken in batches, due to skillet size, cook each batch in 1 Tablespoon oil (half of the total amount).

Seasoned chicken thighs are pan-seared in hot olive oil in skillet.The chicken thighs are cooked on both sides until golden brown.

Prepare The Creamy Mushroom Garlic Sauce

Now it’s time to make the creamy sauce. Use the same skillet you used to cook the chicken in, but do NOT clean it. All the brown bits on the bottom will help to flavor your creamy mushroom garlic sauce!

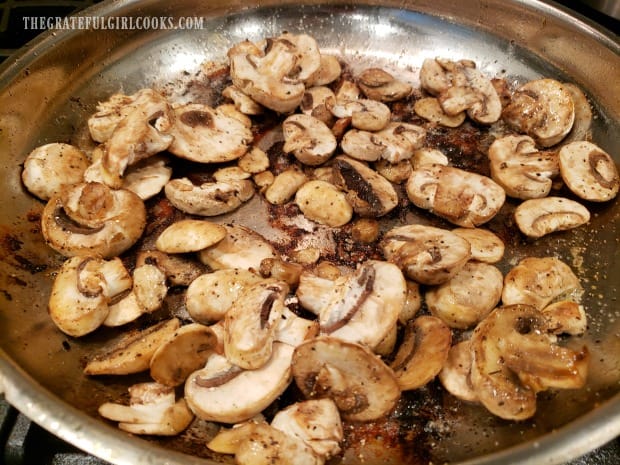
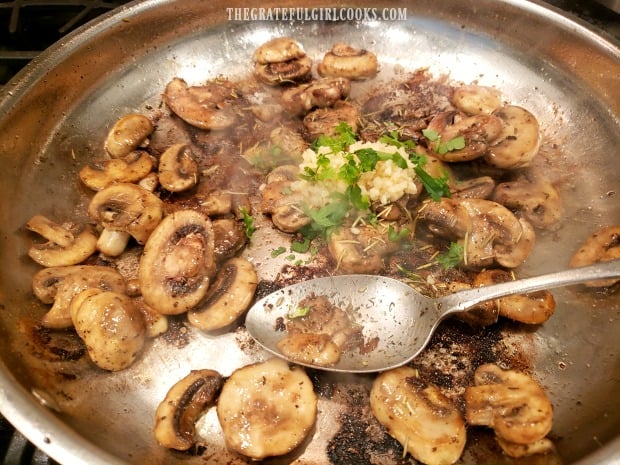
Melt the butter in the skillet (medium heat), and then add the sliced mushrooms. Cook the mushrooms for about 2-3 minutes until they soften. Now add minced garlic, thyme, rosemary, and parsley to the skillet. Stir to combine, and cook for one more minute, stirring often, so the garlic doesn’t burn.

Sliced mushrooms are first cooked in skillet to begin creating a sauce.Garlic and herbs are added to the cooked mushrooms in skillet

Finish The Creamy Sauce

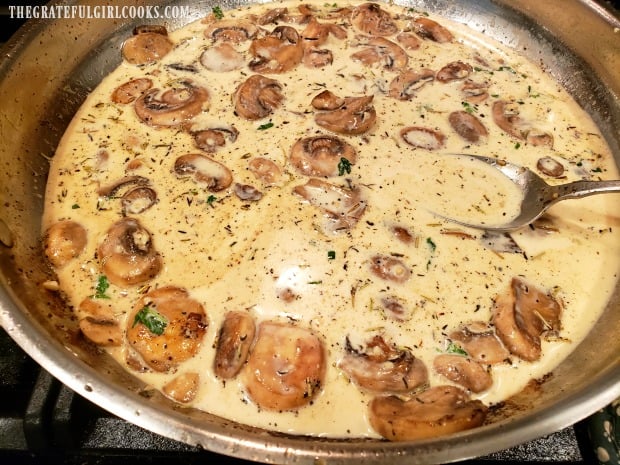
Pour in the whipping cream, half and half, OR evaporated milk (your choice). Any of those three will work perfectly. NOTE: I used evaporated milk (less calories) in the sauce, and it was delicious! Bring the liquid to a simmer (on medium heat). Once it is simmering (but NOT boiling), reduce the heat to LOW.

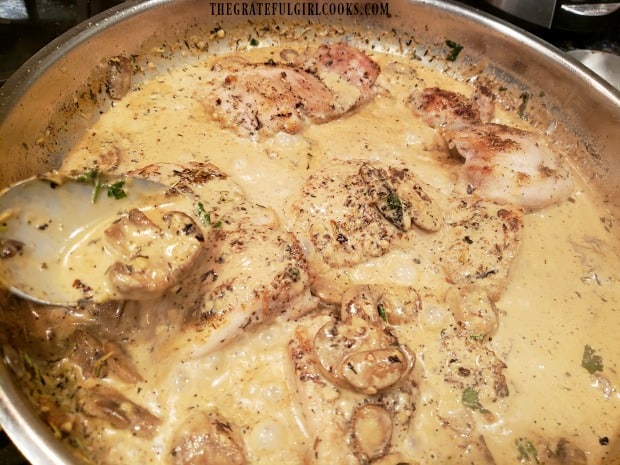
Keep on cooking the sauce until the liquid has reduced in volume a bit, and has thickened slightly. Add freshly grated Parmesan cheese, and stir to combine. Continue cooking for about 1-2 minutes, or until the cheese has melted. Add the chicken thighs back into the skillet and spoon sauce over the top of each piece.

Cream or evaporated milk is added to the mushrooms to make a sauce.Cooked chicken thighs are added back into sauce and covered.

Finish The Creamy Mushroom Chicken Thighs!

Cook the chicken and sauce until heated through (this will take a couple minutes). Stir and spoon sauce over the chicken while it reheats. Taste test the sauce, and add additional salt and pepper, to suit your taste.

Right before serving, sprinkle the top of the creamy mushroom chicken thighs with grated Parmesan and chopped fresh parsley, if desired. This is optional, but it sure looks great!

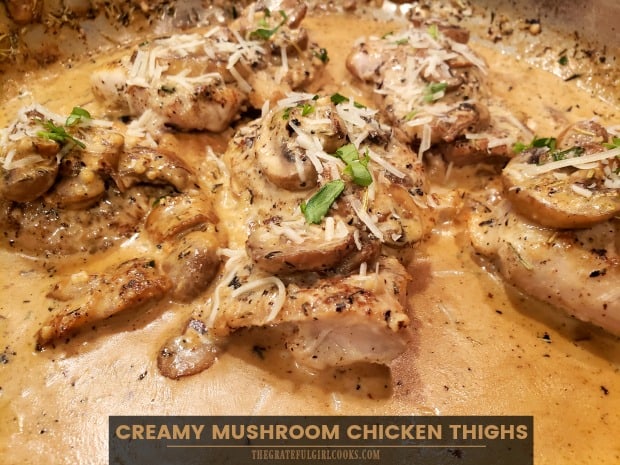
Grated Parmesan cheese and parsley are added to garnish creamy mushroom chicken thighs.

Ready To Serve Creamy Mushroom Chicken Thighs

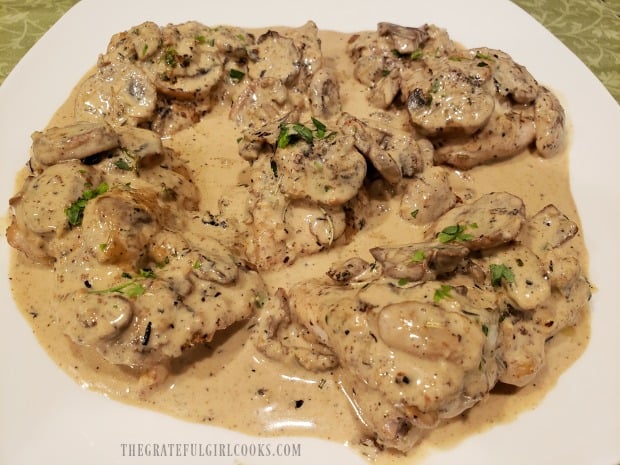
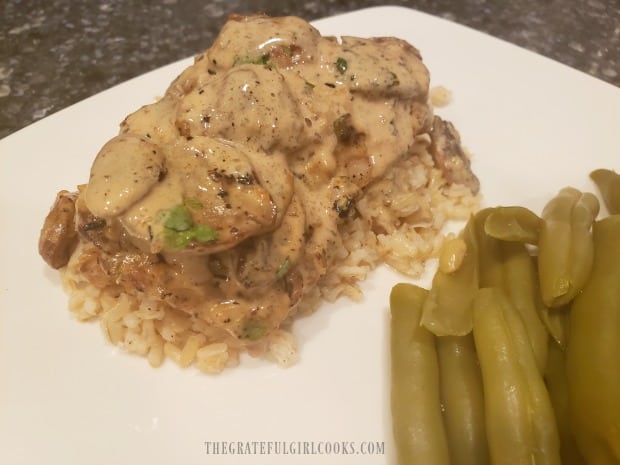
Transfer the chicken thighs to a serving platter and spoon any of the sauce left in the skillet over the pieces. Serve each piece of chicken on top of a bed of white or brown rice (or egg noodles), top with sauce, and enjoy!

Creamy Mushroom Chicken Thighs are served on a white platter.The chicken thighs were served on brown rice, with green beans on the side.

I really hope you will consider trying this delicious recipe for creamy mushroom chicken thighs! The sauce is delicious, and the chicken tastes WONDERFUL! May you find moments of great joy as you go throughout your day. God Bless You.

Looking For More CHICKEN Recipes?

You can find all of my recipes in the Recipe Index, located at the top of the page. I have a lot of chicken recipes you’ll enjoy, including:

Interested In More Recipes?

Thank you for visiting this website. I appreciate you using some of your valuable time to do soIf you’re interested, I publish a newsletter 2 times per month (1st and 15th) with all the latest recipes, and other fun info. I would be honored to have you join our growing list of subscribers, so you never miss a great recipe!
There is a Newsletter subscription box on the top right side (or bottom) of each blog post, depending on the device you use, where you can easily submit your e-mail address (only) to be included in my mailing list.

You Can Also Find Me On Social Media:
Facebook page: The Grateful Girl Cooks!
Pinterest: The Grateful Girl Cooks!
Instagram: jbatthegratefulgirlcooks

Author's signature

Original recipe source: Karina, at cafedelites.com/chicken-thighs/

0 from 0 votes
Creamy Mushroom Chicken Thighs
Prep Time
10 mins
Cook Time
20 mins
Total Time
30 mins
 

Delicious Creamy Mushroom Chicken Thighs are pan-seared, then covered in a cream sauce with garlic, mushrooms, herbs, and Parmesan cheese to serve!

Category: Dinner, Entree
Cuisine: American
Keyword: creamy mushroom chicken thighs
Servings: 6
Calories Per Serving: 327 kcal
Author: JB @ The Grateful Girl Cooks!
Ingredients
For Chicken/Spice Mix:
  • 6 medium chicken thighs (boneless, skinless)
  • 1 teaspoon garlic powder
  • 1 teaspoon onion powder
  • ½ teaspoon dried thyme
  • ½ teaspoon dried rosemary
  • ½ teaspoon salt
  • ¼ teaspoon black pepper
  • 2 Tablespoons olive oil
For Mushroom Sauce:
  • 1 Tablespoon butter
  • 8 ounces sliced mushrooms (button)
  • 4 cloves garlic (minced) (or 1 Tablespoon minced)
  • 1 Tablespoon parsley (fresh, chopped)
  • ½ teaspoon dried rosemary
  • ½ teaspoon dried thyme
  • cups evaporated milk (canned)* *can substitute whipping cream/half and half)
  • ½ cup Parmesan cheese , grated
Instructions
  1. Stir together garlic powder, onion powder, thyme, rosemary, salt and pepper in a small bowl. Pat chicken thighs dry with paper towels, and trim off any extra fat. Sprinkle spice mixture evenly over chicken, and pat gently, to adhere spices.

  2. Heat olive oil in a large skillet on medium-high heat. Once oil is hot, but not smoking, carefully add chicken (spice side down), in a single layer. Once in skillet, do not move chicken. Sear the thighs for 7-8 minutes, until browned on bottom. Carefully turn chicken to other side; cook another 7-8 minutes. Depending on chicken thickness used this may take 1-2 minutes longer. Cook until second side is browned, and center of chicken is no longer pink. Once done, remove thighs from skillet, transfer to a plate, and cover them to keep warm. NOTE: If you have to cook chicken in batches, due to skillet size, cook each batch in 1 Tablespoon oil (half of the total amount).

  3. Make sauce: Use the same skillet, but do NOT clean it. All the brown bits in the skillet will help flavor sauce! Melt butter (medium heat), and then add mushrooms. Cook 2-3 minutes until they soften. Add minced garlic, thyme, rosemary, and parsley. Stir to combine; cook for 1 minute, stirring often so garlic doesn't burn.

  4. Pour in evaporated milk, whipping cream, OR half and half (your choice). Bring liquid to a simmer (medium heat). Once simmering (but NOT boiling), reduce heat to LOW. Continue cooking until liquid has reduced in volume and thickened slightly (1-2 minutes). Add grated Parmesan cheese; stir to combine. Cook 1-2 minutes, or until cheese melts. Add chicken thighs back into skillet and spoon sauce over each piece. Cook until chicken is heated through (2-3 minutes).

  5. Serve chicken on a bed of steamed rice or egg noodles, topped with additional sauce. Serve and enjoy!

Nutrition Facts
Creamy Mushroom Chicken Thighs
Amount Per Serving (1 thigh + sauce)
Calories 327 Calories from Fat 162
% Daily Value*
Fat 18g28%
Saturated Fat 7g44%
Cholesterol 137mg46%
Sodium 516mg22%
Potassium 613mg18%
Carbohydrates 9g3%
Fiber 1g4%
Sugar 7g8%
Protein 31g62%
Vitamin A 360IU7%
Vitamin C 4mg5%
Calcium 279mg28%
Iron 2mg11%
* Percent Daily Values are based on a 2000 calorie diet.

Here’s one more to pin on your Pinterest boards!Delicious Creamy Mushroom Chicken Thighs are pan-seared, then covered in a cream sauce with garlic, mushrooms, herbs, and Parmesan cheese to serve!


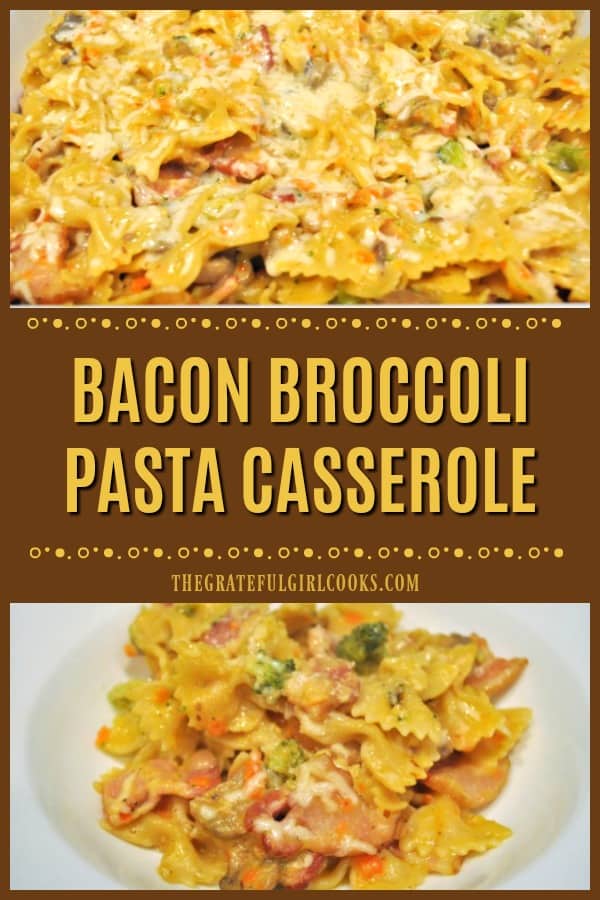
Bacon Broccoli Pasta Casserole

Enjoy bacon broccoli pasta casserole, a cheesy, family-friendly baked dish with bacon, Parmesan, mozzarella, mushrooms, carrots, onions and broccoli.

Do you enjoy casseroles? We do, and I especially enjoy having leftovers, which are fantastic to have around for lunches or another dinner. Today I want to share with you a recipe I came up with “on the fly”. I simply used food items I found in my pantry and refrigerator, and experimented with, until I ended up with a wonderful tasting dish!

The casserole is fully prepped on the stove top in a large saucepan (or Dutch Oven), and then it is finished by baking for 15 minutes. It has great flavor, and is fairly simple to prepare. Here’s how:

Scroll Down For A Printable Recipe Card At The Bottom Of The Page

Cook the Bacon, Carrot And Onions

The first thing you will need to do is to cook the bacon, chopped onions and grated carrots. Stack the bacon slices on top of each other, and then cut into 1″ wide pieces. This will allow the bacon to cook faster.

Place the sliced bacon in a large saucepan (or Dutch Oven), and cook it on medium-high heat, stirring often to separate bacon pieces.  Once the bacon has cooked for a 2-3 minutes, add the butter, chopped onions and grated carrots to the pan. Stir to combine, and continue to cook until bacon is cooked through (approx. 5 minutes).

Bacon pieces, chopped onions, are grated carrots are prepped then cooked together.

Add Liquids, Mushrooms And Pasta

Pour a can of cream of mushroom soup, a can of mushroom slices (drained), and water into the saucepan with the bacon, etc. Season with salt and pepper, and stir to combine. Bring this to a boil on medium heat.

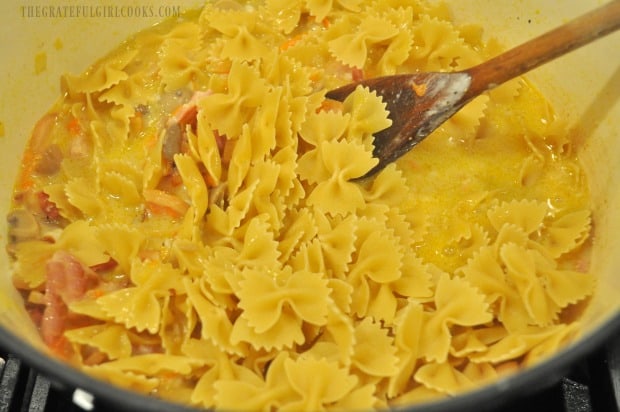
Once the liquid is boiling in the pan, add four cups of dry bowtie pasta, and stir to combine. Once the pasta has been added, turn down the heat to LOW, and cover the pan. Cook for approximately 15 minutes, or until pasta is fully cooked. Stir occasionally.

Mushrooms, cream of mushroom soup, water and seasoning cook in large saucepan.Bow tie pasta noodles are added, to cook in the liquid in saucepan.

Add Broccoli And Cheeses

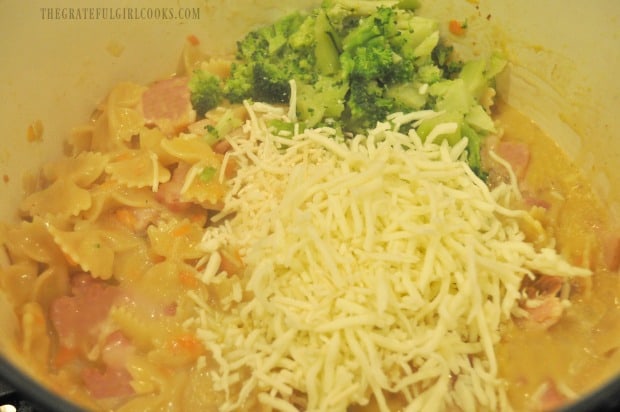
After the pasta is fully cooked, add cooked broccoli, mozzarella and part of the Parmesan cheese (1/4 cup) to the pan. Stir and cook for 4-5 more minutes, so the cheeses will melt into the pasta.

Cooked broccoli, mozzarella and Parmesan cheeses are added to the saucepan.

Time To Bake The Bacon Broccoli Pasta Casserole!

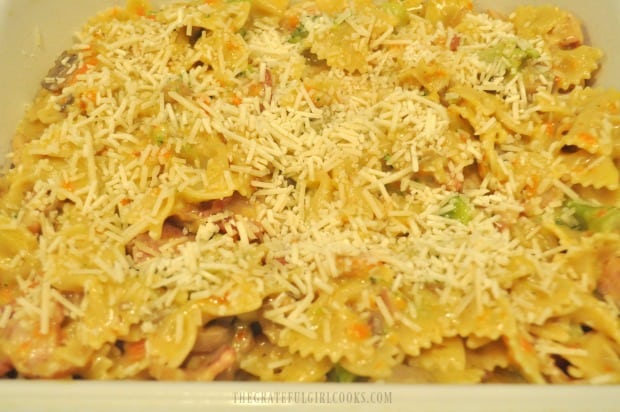
Spray a casserole dish with non-stick baking spray. Pour the bacon pasta casserole into the dish, and spread to cover. Sprinkle the top with the remaining grated Parmesan cheese, and then cover the pan with aluminum foil.

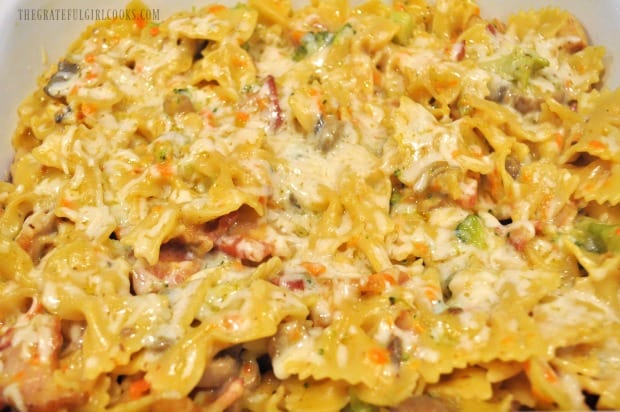
Bake the bacon broccoli pasta casserole in a preheated 350°F oven for 15 minutes. When done, remove the casserole from the oven, and serve.

Bacon broccoli pasta casserole is placed in baking dish and topped with Parmesan to bake.Here is the hot casserole after being removed from the oven.

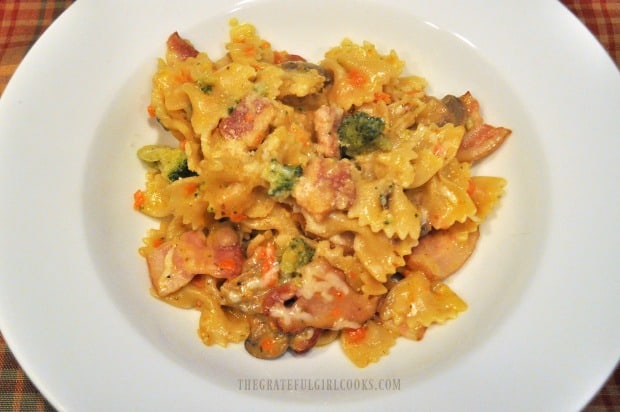
Portion out the bacon broccoli pasta casserole into individual serving bowls or onto plates, and then dig in! There are a lot of flavors to enjoy in this tasty dish!

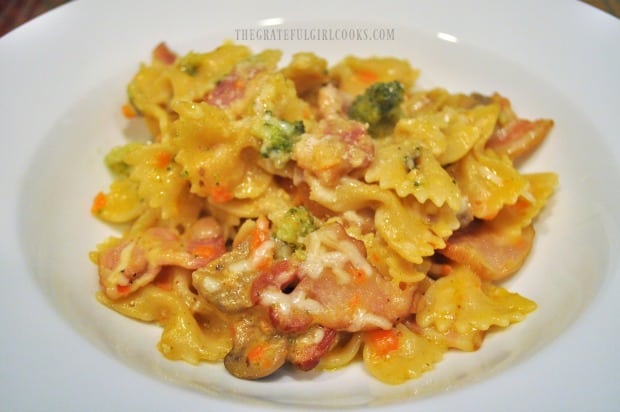
A bowl of the bacon broccoli pasta casserole, ready to eat.A close-up look at the pasta casserole, before it is eaten.

I really hope you enjoy this bacon broccoli pasta casserole. Yes, there are a few prep steps involved, but the end result is a lovely pasta casserole you (and those you love) can enjoy! Have a wonderful day.

Looking for More CASSEROLE RECIPES?

You can find all of my recipes in the Recipe Index, located at the top of the page. I have several casserole dishes you might enjoy, including:

Interested In More Recipes?

Thank you for visiting this website. I appreciate you using some of your valuable time to do soIf you’re interested, I publish a newsletter 2 times per month (1st and 15th) with all the latest recipes, and other fun info. I would be honored to have you join our growing list of subscribers, so you never miss a great recipe!
There is a Newsletter subscription box on the top right side (or bottom) of each blog post, depending on the device you use, where you can easily submit your e-mail address (only) to be included in my mailing list.

You Can Also Find Me On Social Media:

Facebook page: The Grateful Girl Cooks!
Pinterest: The Grateful Girl Cooks!
Instagram: jbatthegratefulgirlcooks

Author's signature

0 from 0 votes
Bacon Broccoli Pasta Casserole
Prep Time
30 mins
Cook Time
15 mins
Total Time
45 mins
 

Enjoy bacon broccoli pasta casserole, a cheesy, family-friendly baked dish with bacon, Parmesan, mozzarella, mushrooms, carrots, onions and broccoli.

Category: Casserole, Main Course
Cuisine: American
Keyword: bacon broccoli pasta casserole
Servings: 6
Calories Per Serving: 386 kcal
Author: JB @ The Grateful Girl Cooks!
Ingredients
  • 6 slices bacon
  • 1 Tablespoon butter
  • cup brown onion chopped
  • 3 medium carrots grated
  • 10½ ounces cream of mushroom soup (canned)
  • 4 ounces canned mushrooms (sliced) , drained
  • cups water
  • ½ teaspoon salt and pepper ( ½ tsp. each)
  • 4 cups bow-tie pasta (12 ounce box)
  • 1 cup broccoli , pre-cooked and cut into small florets
  • cup shredded mozzarella cheese
  • ¾ cup grated Parmesan cheese divided (reserve ½ C. for topping)
Instructions
  1. Stack bacon slices on top of each other, and cut into 1" wide pieces. Place bacon in a large saucepan (or Dutch Oven); cook for 2-3 minutes on medium-high heat, stirring often to separate pieces.  Add butter, chopped onions and grated carrots to pan. Stir to combine, and continue to cook until bacon is cooked through (approx. 5 minutes).

  2. Add cream of mushroom soup, mushroom slices (drained), and water into the saucepan with bacon, etc. Season with salt and pepper; stir to combine. Bring to a boil on medium heat. Once boiling, dry pasta; stir to combine. Turn down heat to LOW, and cover pan. Cook (covered) for approx. 15 minutes, or until pasta is fully cooked. Stir occasionally. While this is cooking, preheat oven to 350°F.

  3. Add cooked broccoli, mozzarella and 1/4 cup of the Parmesan cheese to the pasta. Cook 3-4 minutes on low, stirring often, until cheese has melted.

  4. Spray an oven-proof casserole dish with non-stick baking spray. Pour pasta casserole into dish. Sprinkle with remaining Parmesan cheese, and cover dish with aluminum foil.

  5. Bake the bacon broccoli pasta casserole at 350°F for 15 minutes. When done, remove casserole from oven, remove foil, and serve.

Nutrition Facts
Bacon Broccoli Pasta Casserole
Amount Per Serving (1 (1/6 of total))
Calories 386 Calories from Fat 162
% Daily Value*
Fat 18g28%
Saturated Fat 8g50%
Cholesterol 38mg13%
Sodium 1047mg46%
Potassium 394mg11%
Carbohydrates 39g13%
Fiber 3g13%
Sugar 4g4%
Protein 18g36%
Vitamin A 5398IU108%
Vitamin C 16mg19%
Calcium 202mg20%
Iron 1mg6%
* Percent Daily Values are based on a 2000 calorie diet.

Here’s one more to pin on your Pinterest boards!Enjoy bacon broccoli pasta casserole, a cheesy, family-friendly baked dish with bacon, Parmesan, mozzarella, mushrooms, carrots, onions and broccoli.

Easy Potato Chowder

Make four servings of yummy, filling, easy potato chowder in about 30 minutes, from start to finish, using a few simple and common ingredients!

My mom used to make this easy potato chowder for our family as I was growing up. The recipe is incredibly EASY, inexpensive, and can be made fairly quickly (about 30 minutes) with common pantry items. It is a delicious, filling soup, which tastes wonderful on a chilly day!

The end result is a creamy chowder with cubes of tender potatoes, celery, and onions, seasoned with salt, pepper, butter, and a few green onions for garnish. These simple ingredients, along with milk, make up this delicious potato chowder! Here’s how easy it is to make!

Scroll Down For A Printable Recipe Card At The Bottom Of The Page

Prepare The Veggies

First things first… prepare the veggies! Chop onions, thinly slice celery, and peel and cut the potato into small 1″ cubes. Don’t make the cubes of potato too big, so they will cook fairly quickly. NOTE: I used Russet potatoes, but other varieties can be easily substituted.

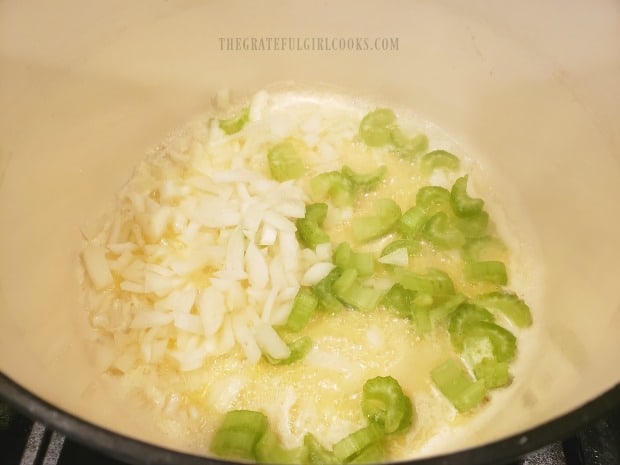
Melt butter in a large saucepan, and then add the chopped onions and sliced celery. Cook on medium heat, stirring often, for 4-5 minutes, until the onions and celery have softened.

Chopped onions and celery are cooked in butter to tenderize.

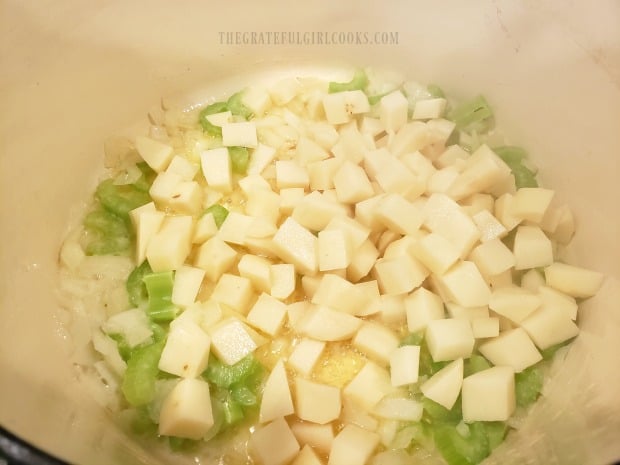
Add the cubed raw potatoes to the saucepan, and stir to combine. Continue to cook on medium heat for 10 minutes, stirring often. The small cubes of potato will begin to soften as they cook.

Cubed raw potatoes are added to onions, celery and butter in pan to cook and soften.

Season Veggies And Add Flour To Thicken Chowder

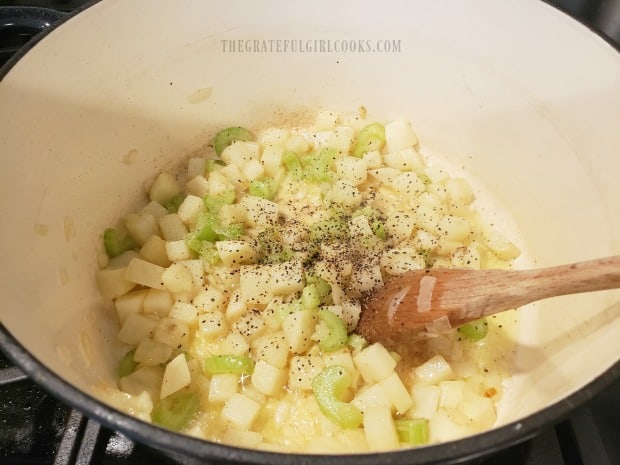
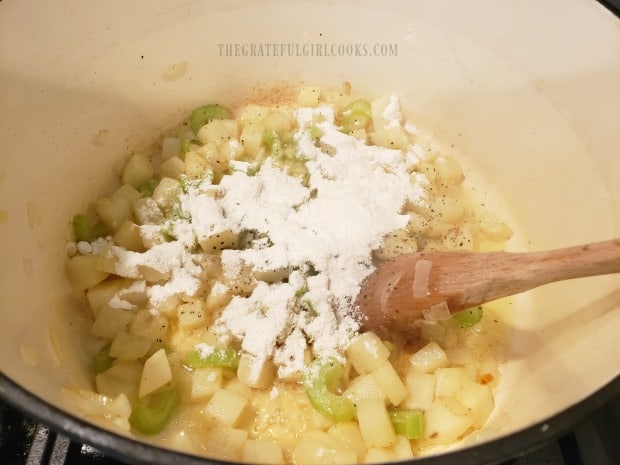
After the potatoes have cooked for 10 minutes (and have become tender), remove the pan from the heat. Season the veggies with salt and black pepper. Add the all purpose flour to the pan, and stir to fully combine. The flour coats the vegetables, and will act as a thickener for the chowder, once the milk has been added.

The potatoes are seasoned with salt and pepper.Flour is added into the potatoes to thicken soup as it cooks.

Time To Turn This Into Easy Potato Chowder!

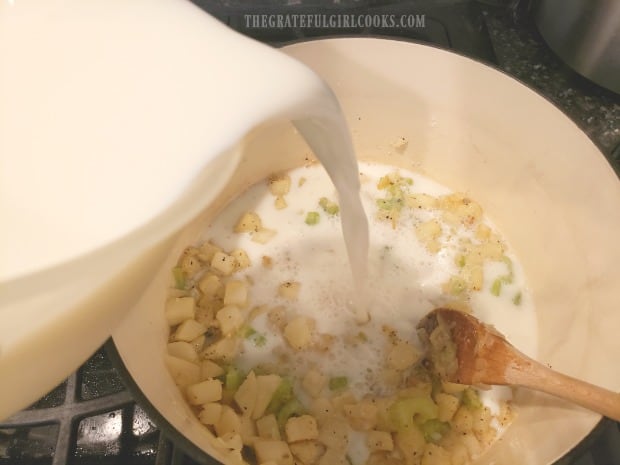
Now it is time to add the milk to the saucepan! Slowly pour 4 cups of milk into the saucepan. I used 1% milk, but feel free to use any kind you prefer. Stir well, once all the milk is in, to fully combine the ingredients.

Return the pan to the stove top and cook on medium, bringing it up to heat slowly. Be careful to not let the soup boil after adding the milk. Just bring it up to a very hot serving temperature slowly. As it cooks, the soup will thicken.

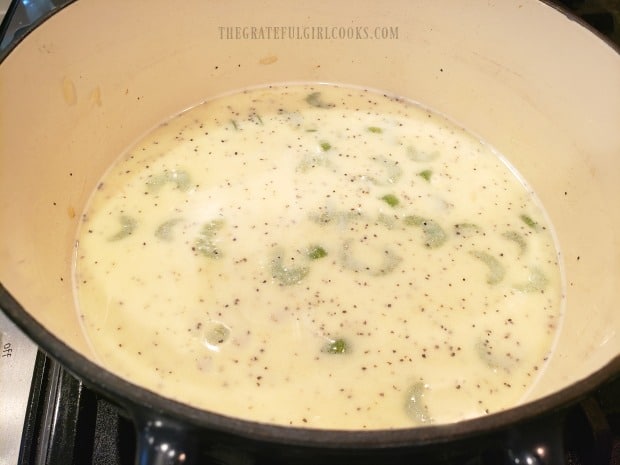
Milk is added to the pan to thicken and cook into the soup.

When the easy potato chowder has thickened and is very hot (but not boiling), taste test a potato cube to make sure they are tender. At this point, adjust the seasoning to your taste by adding more salt and pepper, if desired.

Want Your Chowder Even Thicker?

If at the last minute you decide you want the chowder to be even thicker (a personal choice), here’s a little secret tip I’ve used a couple of times to do that: Once the chowder is at serving temp, simply stir in about 1/2 cup of instant potato flakes! Yep… give them a stir into the soup, and instant thickener! This is completely OPTIONAL, but it does work!

The potato chowder has thickened, is heated through, and is ready to serve.

Serve The Easy Potato Chowder

Once the soup is heated to serving temp, ladle it out into individual serving bowls. Sprinkle some thinly sliced green onions over the top, if desired, and grab a spoon! Go ahead… dig in!

The easy potato chowder is delicious, and we love to serve it with warm bread or rolls on the side. We usually get about 4 good sized bowls of chowder from this recipe (as written), but it can EASILY be doubled! Hope you enjoy it!

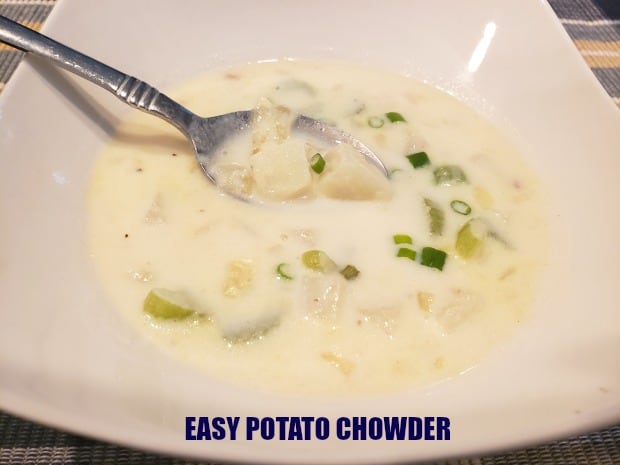
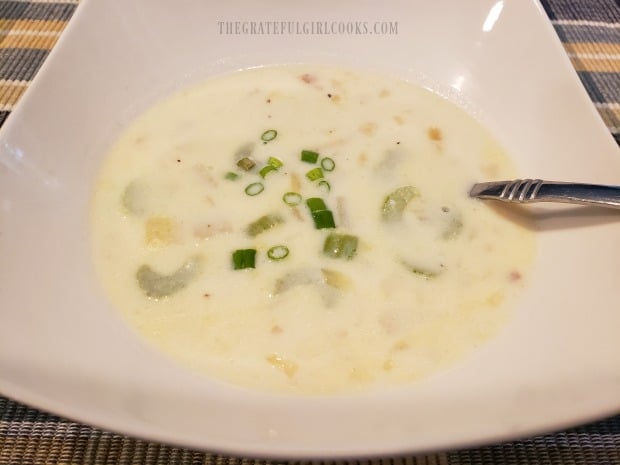
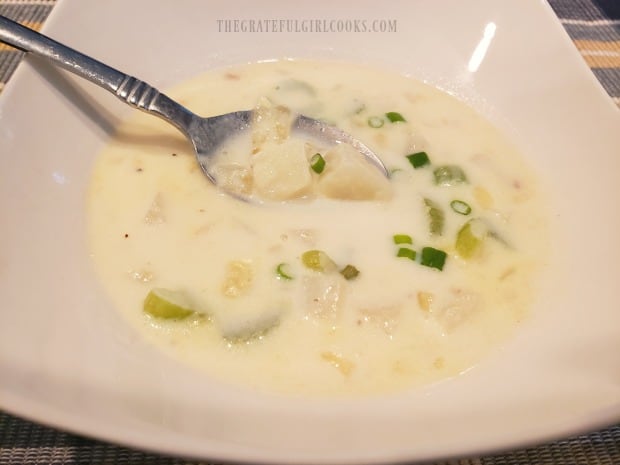
Sliced green onions are added to the easy potato chowder, right before serving.You can see the chunks of potatoes in the finished chowder.

Well, this really is an easy soup to make for lunch OR dinner! Sure hope you have the opportunity to try it soon, and trust you will enjoy it, too. Have a wonderful day, and thank you for visiting.

Looking For More Potato SOUP Recipes?

You can find all of my soup recipes in the Recipe Index, located at the top of the page. A few of our favorite soups that include potatoes are:

Interested In More Recipes?

Thank you for visiting this website. I appreciate you using some of your valuable time to do soIf you’re interested, I publish a newsletter 2 times per month (1st and 15th) with all the latest recipes, and other fun info. I would be honored to have you join our growing list of subscribers, so you never miss a great recipe!
There is a Newsletter subscription box on the top right side (or bottom) of each blog post, depending on the device you use, where you can easily submit your e-mail address (only) to be included in my mailing list.

You Can Also Find Me On Social Media:
Facebook page: The Grateful Girl Cooks!
Pinterest: The Grateful Girl Cooks!
Instagram: jbatthegratefulgirlcooks

Author's signature

Original recipe source: My Mom

0 from 0 votes
Easy Potato Chowder
Prep Time
15 mins
Cook Time
15 mins
Total Time
30 mins
 

Make four servings of yummy, filling, easy potato chowder in about 30 minutes, from start to finish, using a few simple and common ingredients!

Category: Dinner, Soup
Cuisine: American
Keyword: easy potato chowder
Servings: 4
Calories Per Serving: 309 kcal
Author: JB @ The Grateful Girl Cooks!
Ingredients
  • ¼ cup butter (½ stick or 4 Tablespoons)
  • 1 cup brown onion , finely chopped
  • ½ cup celery , thinly sliced
  • cup potatoes (approx. 2 medium) , peeled and cut into 1" cubes-I used russets.
  • teaspoons salt ( + more to taste as desired)
  • ½ teaspoon black pepper
  • cup all purpose flour
  • 4 cups milk
  • ½ cup instant potato flakes (OPTIONAL) (if desired for thicker soup)
  • 1 stem green onion (green part) (OPTIONAL GARNISH) , thinly sliced
Instructions
  1. Chop onions, thinly slice celery; peel/ cut potato into small 1" cubes. Small potato cubes are important, so they cook quickly. Melt butter in a large saucepan; add the onions and celery. Cook on medium heat, stirring often, for 4-5 minutes, until onions/celery have softened.

  2. Add potato cubes to the pan; stir to combine. Cook on medium for 10 minutes, stirring often. Remove pan from heat. Season with salt and pepper. Add flour to the pan; stir to combine.

  3. Add 4 cups of milk into the pan. Stir well, to fully combine ingredients. Return pan to the heat and cook on medium, bringing it up to serving temperature slowly. Don't let soup boil after adding milk. As it cooks, the soup will thicken. Taste test a potato cube to make sure they are tender (if not tender, let chowder cook a couple more minutes). Adjust seasonings to your taste by adding additional salt and pepper, if desired.

  4. Once chowder is heated to serving temp (and potatoes are tender), ladle it into individual bowls. Sprinkle thinly sliced green onions over the top, if desired. Serve, and enjoy!

  5. OPTIONAL TIP: Want Your Chowder Even Thicker? When chowder has thickened and is very hot , if you decide you want the chowder to be even thicker (a personal choice), here's a little tip I've used a couple of times: Simply stir in about 1/2 cup of instant potato flakes! Yep... give them a stir into the soup, and instant thickener! This is completely OPTIONAL, but it does work!

Recipe Notes

NOTE: Caloric calculation was made using 1% milk, and NO instant potato flakes.

Nutrition Facts
Easy Potato Chowder
Amount Per Serving (1 g)
Calories 309 Calories from Fat 126
% Daily Value*
Fat 14g22%
Saturated Fat 9g56%
Cholesterol 42mg14%
Sodium 1092mg47%
Potassium 730mg21%
Carbohydrates 36g12%
Fiber 2g8%
Sugar 15g17%
Protein 11g22%
Vitamin A 874IU17%
Vitamin C 7mg8%
Calcium 321mg32%
Iron 1mg6%
* Percent Daily Values are based on a 2000 calorie diet.

Here’s one more to pin on your Pinterest boards!Make four servings of yummy, filling, easy potato chowder in about 30 minutes, from start to finish, using a few simple and common ingredients!

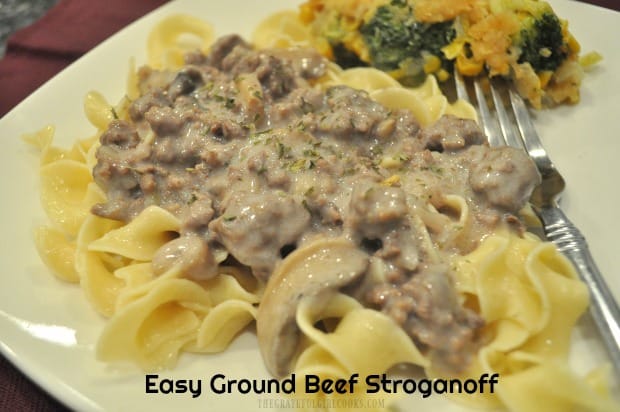
Easy Ground Beef Stroganoff

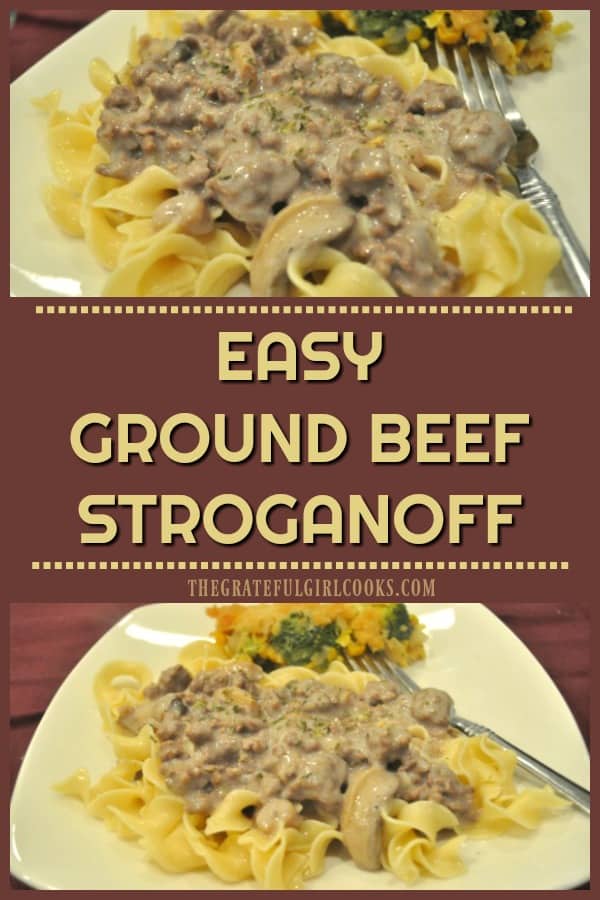
Looking for a quick, inexpensive dinner that tastes good? Easy Ground Beef Stroganoff can be made in about 25 minutes from start to finish!

My husband and I love beef stroganoff. Most of the time I make classic beef stroganoff, with beef tenderloin (or occasionally stew meat), which needs to cook longer, to fully tenderize the meat.

Occasionally when I want the taste of the original recipe, but am pressed for time, or want to take the easy way out, I make this EASY ground beef stroganoff! Today I want to share this simple recipe with you.

This recipe can be cooked and on the table in under 30 minutes, and has great flavor! It’s also very easy to make, which is always a win-win! Using ground beef tends to be a fairly inexpensive way to feed 4 people. Here’s how to make this easy ground beef stroganoff!

Scroll Down For A Printable Recipe Card At The Bottom Of The Page

Cook The Ground Beef And Onions

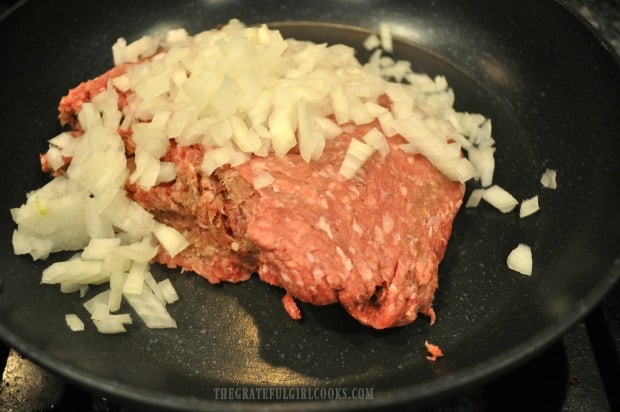
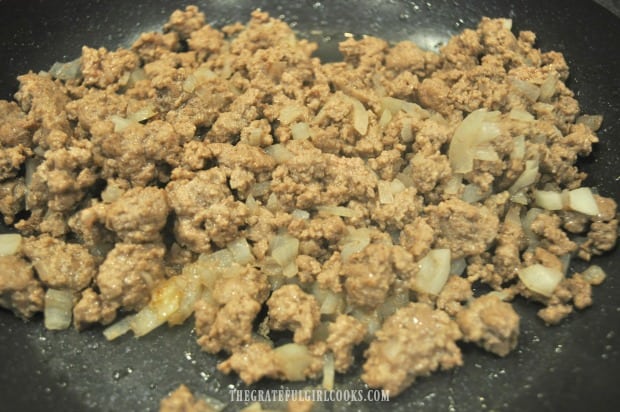
Sauté the ground beef and chopped onions on medium heat in a large skillet. Continue to cook until meat is browned and cooked through. This will only take a few minutes. Once the meat is fully cooked, remove the skillet from the heat, and drain any accumulated grease from the pan.

Ground beef and chopped onions are pan-seared until fully cooked.Browned ground beef and onions have cooked, and grease has been drained.

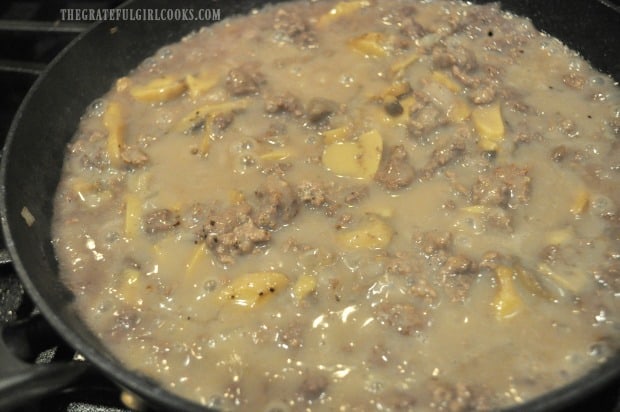
Stir in the mushroom pieces, cream of mushroom soup, red wine (or beef broth or water), salt, pepper, and garlic powder. Cover the skillet and simmer on low for 15 minutes.

Mushrooms, red wine, and mushroom soup are added to ground beef stroganoff mixture.

While Stroganoff Cooks, Prepare Egg Noodles In Separate Pan

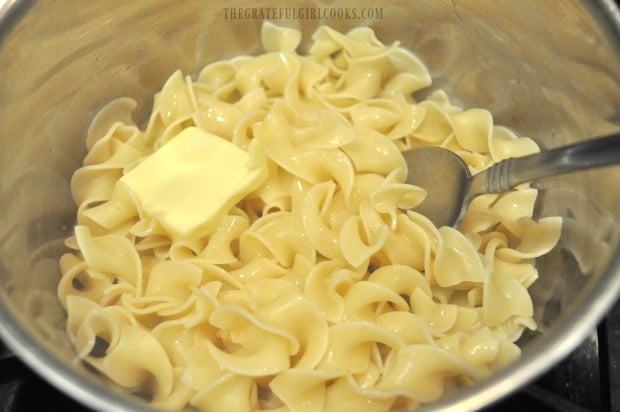
While the stroganoff is cooking, prepare the egg noodles in a separate saucepan, according to the package instructions. When the noodles are done cooking, drain, stir in butter, and keep the noodles warm.

Egg noodles are cooked, drained, then buttered before topping with stroganoff.

Hot, buttered noodles are a wonderful classic base for this dish, but you can also substitute steamed rice under the stroganoff, if you prefer.

Finish The Ground Beef Stroganoff

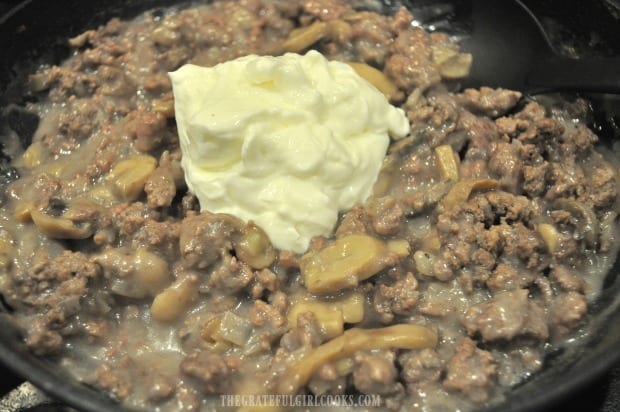
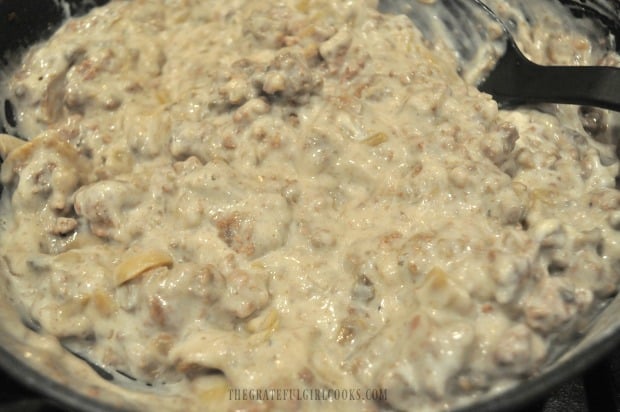
After the ground beef stroganoff has cooked (covered) for 15 minutes, remove the lid from the skillet. Add the sour cream, and stir this mixture well, to fully blend it in. Heat this meat mixture, uncovered, on medium-low heat until heated through. DO NOT LET IT BOIL AFTER ADDING SOUR CREAM.

Sour cream is added to the ground beef stroganoff.The ground beef stroganoff is heated through before serving.

Time To Serve Ground Beef Stroganoff

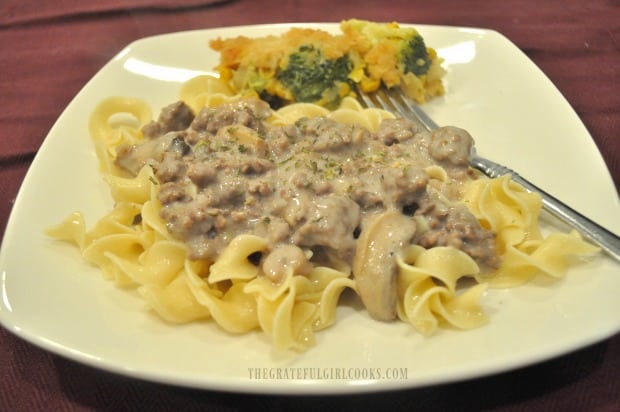
Divide the hot, buttered egg noodles on each plate . Top the noodles with some of the beef stroganoff. You can sprinkle the dish with fresh or dried parsley for garnish, if desired.

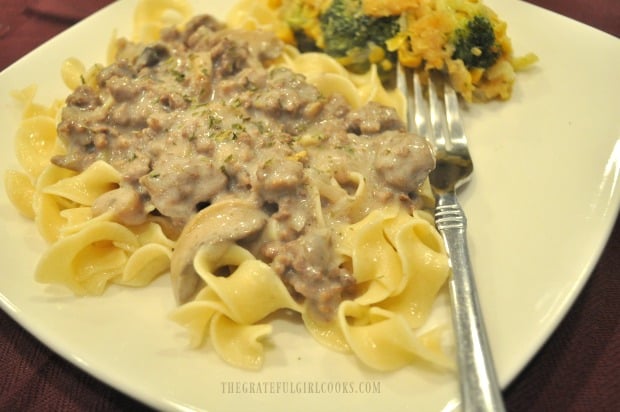
Hot, buttered egg noodles are topped with the ground beef stroganoff to serve.

We enjoyed my yummy broccoli corn casserole alongside the stroganoff. The ground beef stroganoff, hot buttered noodles, and a veggie dish made this a well-rounded and filling meal.

Easy ground beef stroganoff on noodles, with broccoli casserole on the side.

Thanks for visiting my blog today. I appreciate your time, and hope you have the opportunity to try this simple, but delicious recipe! It is really good, and I hope you enjoy it. Don’t forget to check out my yummy recipes for classic beef stroganoff or meatballs stroganoff! Have a wonderful day, and may God bless you!

Looking For More Recipes Using GROUND BEEF?

You can find all of my recipes in the Recipe Index, located at the top of the page. A few favorites include:

Interested In More Recipes?

Thank you for visiting this website. I appreciate you using some of your valuable time to do soIf you’re interested, I publish a newsletter 2 times per month (1st and 15th) with all the latest recipes, and other fun info. I would be honored to have you join our growing list of subscribers, so you never miss a great recipe!
There is a Newsletter subscription box on the top right side (or bottom) of each blog post, depending on the device you use, where you can easily submit your e-mail address (only) to be included in my mailing list.

You Can Also Find Me On Social Media:
Facebook page: The Grateful Girl Cooks!
Pinterest: The Grateful Girl Cooks!
Instagram: jbatthegratefulgirlcooks

Author's signature

Original recipe source: unknown (found handwritten on a recipe card in a very old recipe box)

0 from 0 votes
Easy Ground Beef Stroganoff
Prep Time
10 mins
Cook Time
15 mins
Total Time
25 mins
 

Looking for a quick, inexpensive dinner that tastes good? Easy Ground Beef Stroganoff can be made in about 25 minutes from start to finish!

Category: Entree
Cuisine: American
Keyword: ground beef stroganoff
Servings: 4
Calories Per Serving: 454 kcal
Author: JB @ The Grateful Girl Cooks!
Ingredients
  • 1 pound ground beef
  • 1 small brown onion , chopped
  • 4 ounces mushroom pieces (canned) , drained
  • 10.5 ounces cream of mushroom soup , one small can
  • ¼ cup red wine, water or beef broth , whichever you prefer (I used red wine)
  • ½ teaspoon salt
  • ¼ teaspoon (each) black pepper and garlic powder
  • ½ cup sour cream (regular or low-fat)
  • 2 cups dry egg noodles , cooked according to pkg. directions
  • 1 Tablespoon butter
Instructions
  1. Sauté ground beef and onions on medium heat in large skillet. Cook until meat is browned and cooked through. Remove skillet from heat, and drain accumulated grease from pan.

  2. Stir in mushrooms, cream of mushroom soup, red wine (or beef broth or water), salt, pepper, and garlic powder. Cover skillet and simmer on low heat for 15 minutes.

  3. **While the stroganoff is cooking, prepare egg noodles in a separate saucepan, according to package instructions. When noodles are done cooking, drain, and stir in butter. Keep warm.

  4. After it has cooked (covered) for 15 minutes, remove lid. Add sour cream, and stir well, to fully blend it in. Cook on medium-low heat (uncovered), until heated through. DO NOT LET IT BOIL AFTER ADDING SOUR CREAM. To Serve: Place egg noodles on plates. Top with beef stroganoff. Sprinkle with fresh or dried parsley, if desired. Enjoy!

Recipe Notes

NOTE: Recipe caloric calculation was calculated using red wine, and light sour cream. 

Nutrition Facts
Easy Ground Beef Stroganoff
Amount Per Serving (1 (1/4 of total))
Calories 454 Calories from Fat 234
% Daily Value*
Fat 26g40%
Saturated Fat 11g69%
Cholesterol 114mg38%
Sodium 1064mg46%
Potassium 617mg18%
Carbohydrates 23g8%
Fiber 2g8%
Sugar 2g2%
Protein 29g58%
Vitamin A 182IU4%
Vitamin C 2mg2%
Calcium 74mg7%
Iron 4mg22%
* Percent Daily Values are based on a 2000 calorie diet.

Here’s one more to pin on your Pinterest boards!Looking for a quick, inexpensive dinner that tastes good? Easy Ground Beef Stroganoff can be made in about 25 minutes from start to finish!

Hearty Minestrone Soup

Hearty Minestrone Soup is filling and DELICIOUS! This classic Italian soup, with meat, veggies, tomatoes, beans, and macaroni is sure to please.

The first time I had this hearty minestrone soup was when my Father-in-Law died over 40 years ago. A friend of the family was there for his memorial, and fixed a massive pot of this soup for the family at my in-laws home after the service.

The day of his memorial service was very cold and snowy (January), so this hot, delicious, filling meal was a God-send, as well as a sweet, thoughtful “gift” to our family!  A long-time family friend named Veda Quatro made the soup, gave me her recipe, and we’ve enjoyed this hearty, flavor-packed soup ever since that day!

The recipe makes 12 servings, and is CRAZY DELICIOUS. It takes a bit of time and prep work to make, but honestly, the results are wonderful, and will be worth your time! If you will only be serving a few people, you will enjoy having the leftovers for lunches or a quick meal! YUM!

Four Steps To Making Hearty Minestrone Soup!

There are basically 4 steps to making this soup. Cook the stew meat in broth, cook ground beef, onions and spices, cook the veggies, and add the final batch of veggies and pasta to the soup 30 minutes before serving!

It’s really not that hard to make… honest! Here’s how to cook a large batch of this yummy soup:

Step #1 – Cooking The Stew Meat

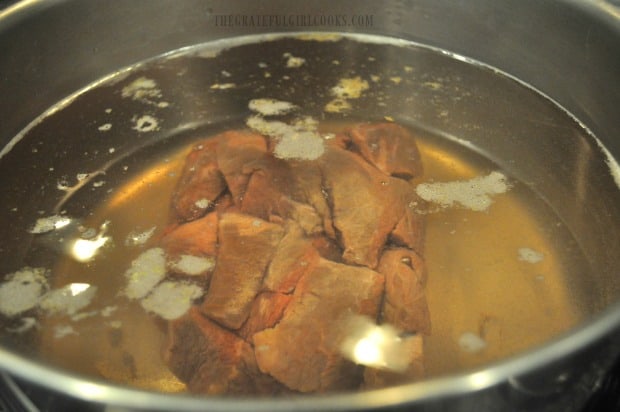
Place 5 quarts of water into a HUGE soup pot. Add the beef bouillon cubes and the stew meat. NOTE: You can substitute 5 quarts beef broth for water and bouillon, if more convenient. Cook on high for about 20 minutes, or until the stew meat is cooked through. Once done, turn off heat, and transfer the stew meat with a slotted spoon to a plate to rest.

NOTE: Trust me… you will want to use a LARGE soup pot or divide the recipe between two standard sized soup pots for this recipe, because it makes a LOT of soup, once completed!

Stew meat is cooked in beef broth in a large stock pot.

Step #2

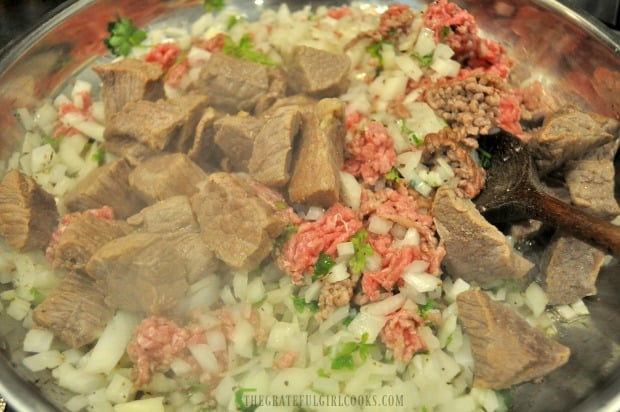
Heat the oil in a large skillet on medium heat. Add the ground beef, drained stew meat, chopped onion, pepper, and chopped parsley. Cook this mixture until the ground beef is browned and fully cooked through.

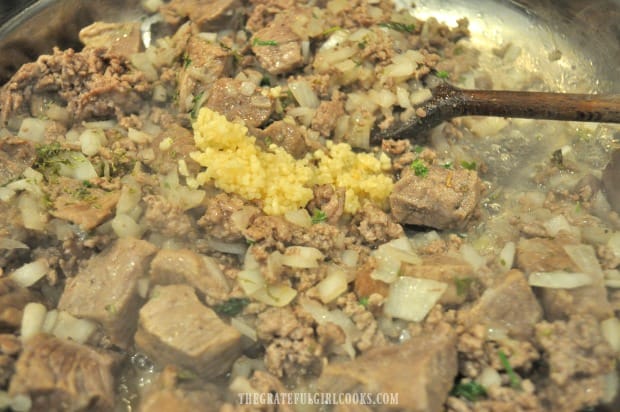
As soon as the ground beef is fully cooked, add the minced garlic, and continue to cook, stirring often, for one minute.

Stew meat, ground beef, onions, and parsley are browned in skillet.

Minced garlic is added to the browned meat mixture.

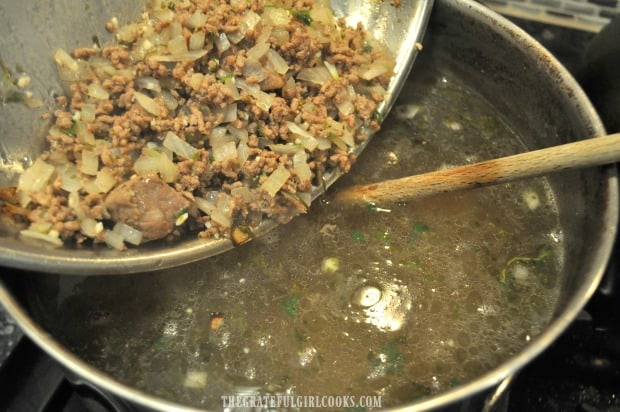
Drain the grease from the skillet (discard) and then add the cooked beef and onion mixture into the broth and stir, to combine.

Cooked beef and onion mixture is added to beef broth.

Step #3

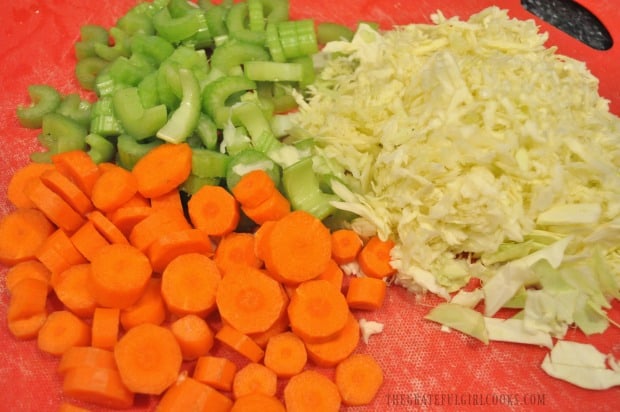
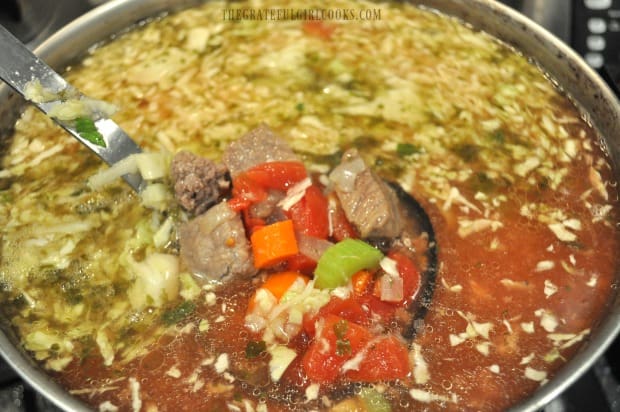
On to the next step! Gather the sliced celery, carrots and shredded cabbage, and add them to the pot of hearty minestrone soup! Pour in the canned diced tomatoes, Italian seasoning, and then give everything a good stir, to combine. Add the salt, stir then taste the soup, and add  additional salt, if desired, to suit your personal taste.

Continue to cook the hearty minestrone soup (uncovered) on medium heat for about 30 minutes, or until the veggies become tender. The soup liquid will reduce in volume slightly as the mixture cooks.

NOTE: If making soup ahead for serving later in the day… turn off the heat after this step, and let soup sit until 30 minutes before you want to serve, then go to Step #4.

Carrots, celery and green cabbage are prepped for the minestrone soup.Hearty minestrone soup is cooking away in a large stock pot.

Step #4 – The FINAL Step Before Serving

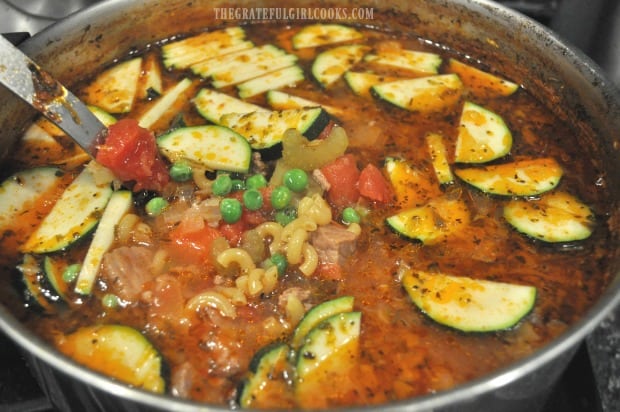
About 30 minutes BEFORE serving, add the uncooked macaroni noodles, frozen peas, kidney beans and zucchini slices to the pot of soup.

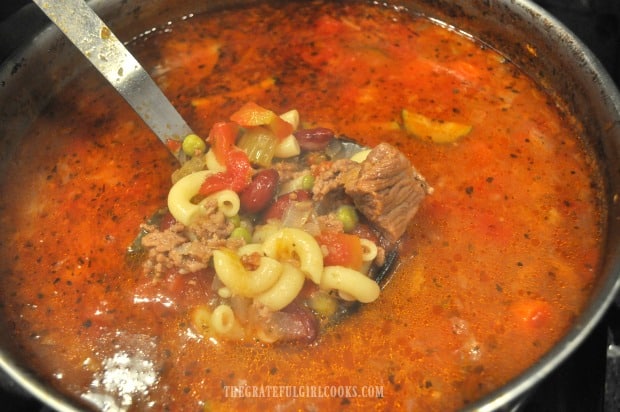
Cook the hearty minestrone soup on medium heat (still uncovered) for 30 minutes, and then it will be ready to serve! The broth will slightly reduce as it continues to cook, and the macaroni will fully cook in the soup!

Zucchini, peas, and uncooked macaroni noodles are added to the soup.The macaroni noodles cook fully in the hot minestrone soup.

Time To Serve Hearty Minestrone Soup!

After 30 minutes your huge pot of homemade, hearty minestrone soup is ready to serve! Give it a final taste, and add additional salt, if desired. Ladle the steaming soup into bowls, sprinkle with grated Parmesan cheese, and serve!

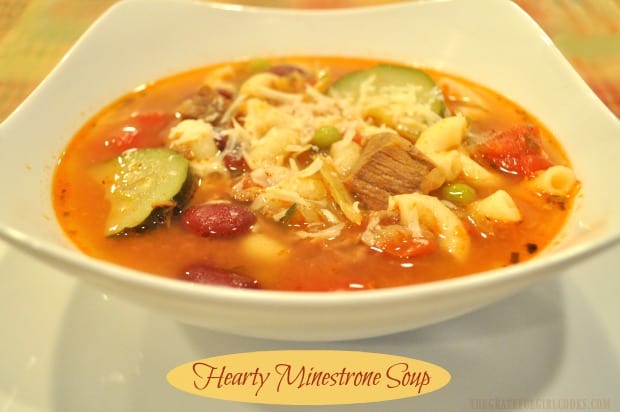
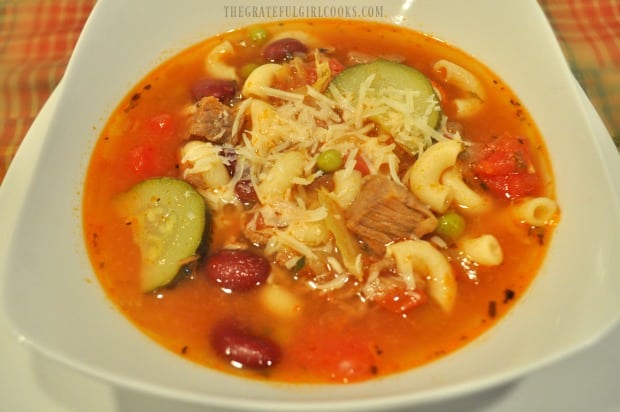
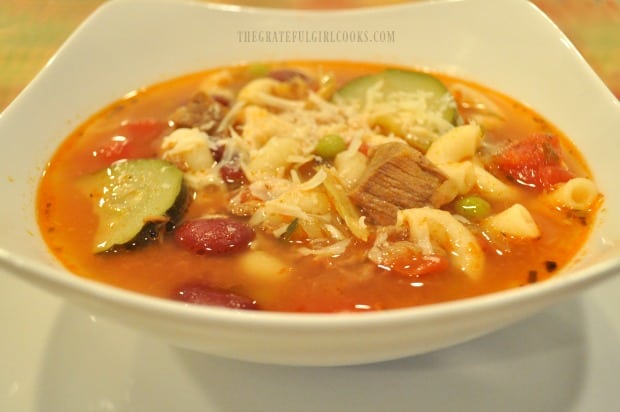
A bowl of hearty minestrone soup, topped with grated Parmesan cheese.Beef, veggies macaroni, tomatoes and beans are featured in hearty minestrone soup.

I really hope you will give this hearty minestrone soup a try! It is fabulous, and feeds a small village, or provides you with quite a few leftover bowls of delicious soup! YUM!!! Have a great day.

Looking For More SOUP Recipes?

You can find all of my soup recipes in the Recipe Index, located at the top of the page. I have many soup recipes on the blog, including:

Interested In More Recipes?

Thank you for visiting this website. I appreciate you using some of your valuable time to do soIf you’re interested, I publish a newsletter 2 times per month (1st and 15th) with all the latest recipes, and other fun info. I would be honored to have you join our growing list of subscribers, so you never miss a great recipe!
There is a Newsletter subscription box on the top right side (or bottom) of each blog post, depending on the device you use, where you can easily submit your e-mail address (only) to be included in my mailing list.

You Can Also Find Me On Social Media:
Facebook page: The Grateful Girl Cooks!
Pinterest: The Grateful Girl Cooks!
Instagram: jbatthegratefulgirlcooks

Author's signature

Recipe adapted from: Family friend Veda Quatro’s original recipe (1979)

0 from 0 votes
Hearty Minestrone Soup
Prep Time
30 mins
Cook Time
1 hr
Total Time
1 hr 30 mins
 

Hearty Minestrone Soup is filling and DELICIOUS! This classic Italian soup, with meat, veggies, tomatoes, beans, and macaroni is sure to please.

Category: Entree, Soup
Cuisine: Italian
Keyword: hearty minestrone soup
Servings: 12
Calories Per Serving: 241 kcal
Author: JB @ The Grateful Girl Cooks!
Ingredients
  • 5 quarts water
  • pounds beef stew meat , cut into cubes
  • 4 large beef bouillon cubes
  • 2 Tablespoons vegetable oil
  • ½ pound ground beef
  • 1 medium brown onion , chopped
  • ¼ teaspoon ground black pepper
  • ½ cup fresh parsley , finely chopped
  • 2 cloves garlic , minced
  • 1 cup celery , sliced
  • 2 cups green cabbage , shredded
  • cups carrots , sliced or diced
  • 43.5 ounces diced, canned tomatoes (=three 14.5 ounce cans)
  • teaspoons Italian seasoning
  • 2 teaspoons salt , plus additional, to desired taste
  • 1 cup zucchini , sliced thin, then cut slices in half
  • 1 cup frozen peas , do not thaw
  • 15.5 ounces kidney beans (canned) , rinsed and drained
  • 2 cups elbow macaroni , uncooked
  • grated Parmesan cheese for garnish (optional)
Instructions
  1. STEP #1: Place 5 quarts of water into a HUGE soup pot. Add the beef bouillon cubes and the stew meat. NOTE: Substitute 5 quarts beef broth for water and bouillon, if more convenient. Cook on high for 20 minutes, or until stew meat is cooked through. Once done, turn off heat, and transfer stew meat with a slotted spoon to a plate to rest.

  2. STEP #2: Heat oil in a large skillet on medium heat. Add ground beef, drained stew meat, chopped onions, black pepper, and parsley. Cook until ground beef is browned and cooked through. Add minced garlic, and cook, stirring often, for one minute. Drain grease from skillet (discard) and then add this mixture to the broth and stir to combine.

  3. STEP #3: Add celery, carrots and cabbage to the pot of soup. Pour in canned diced tomatoes and Italian seasoning; stir, to combine. Add salt, stir then taste the soup, and add additional salt, if desired. Continue to cook soup (uncovered) on medium heat for 30 minutes, or until the veggies become tender. The soup liquid will reduce in volume slightly as the mixture cooks. NOTE: If making soup ahead for serving later in the day -turn off heat after this step, and let soup sit until 30 minutes before you want to serve, then go to Step #4.

  4. STEP #4: 30 minutes BEFORE serving, add the uncooked macaroni noodles, frozen peas, kidney beans and zucchini slices to the soup. Cook on medium high heat (still uncovered) for 30 minutes, stirring occasionally, and then it's ready to serve! Give it a final taste; add additional salt, if desired. Ladle soup into bowls, sprinkle with grated Parmesan cheese, and serve! Enjoy!

Recipe Notes

TIP: The original author of this recipe (Veda) told me this tip: If you need to stretch out any leftover soup, just add another can of diced tomatoes or kidney beans, to make it go further!

Nutrition Facts
Hearty Minestrone Soup
Amount Per Serving (1 g)
Calories 241 Calories from Fat 54
% Daily Value*
Fat 6g9%
Saturated Fat 3g19%
Cholesterol 13mg4%
Sodium 974mg42%
Potassium 689mg20%
Carbohydrates 36g12%
Fiber 7g29%
Sugar 9g10%
Protein 12g24%
Vitamin A 3271IU65%
Vitamin C 26mg32%
Calcium 82mg8%
Iron 3mg17%
* Percent Daily Values are based on a 2000 calorie diet.

Here’s one more to pin on your Pinterest boards!Hearty Minestrone Soup is filling and DELICIOUS! This classic Italian soup, with meat, veggies, tomatoes, beans, and macaroni is sure to please.

Chicken Veggie TexMex Skillet

Southwest flavors shine in this deliciously seasoned, low-calorie Chicken Veggie TexMex Skillet, with zucchini, onion, yellow squash, & bell peppers!

Anybody out there enjoy fajitas? I sure do, and chicken fajitas (in flour tortillas) are my favorite. This recipe for chicken veggie TexMex skillet is one I came up with while trying to cut out some carbs from my diet a few years ago. I wanted to enjoy the TASTE of fajitas, but with far less calories from tortillas, sour cream and guacamole!

Well… here’s a tasty solution! Southwestern-inspired spices, chicken breast strips, onions, peppers and green and yellow zucchini squash are featured in this simple dish! Everything can be eaten as is (no tortillas), for a “healthier” yet delicious TexMex meal!

It’s REALLY GOOD, and you get your protein (chicken) AND veggies, without a lot of extra calories! Here’s how to make a chicken veggie TexMex skillet:

Scroll down For A Printable Recipe Card At The Bottom Of The Page

Prepare The Chicken

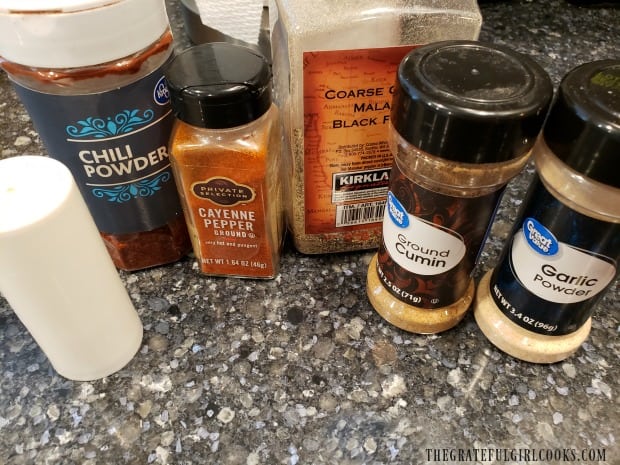
Pat two large boneless, skinless chicken breasts dry with paper towels. Slice into strips, about 2″ long and 1″ wide. Mix together the Southwest-inspired spices and sprinkle lightly over the chicken pieces. The spices used are ground cumin, garlic powder, chili powder, salt, pepper, and cayenne pepper.

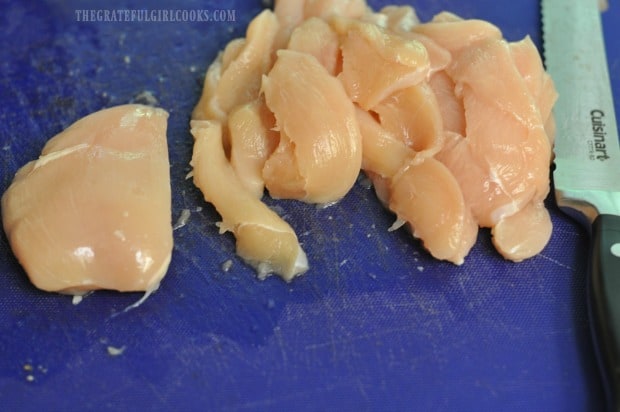
Boneless, skinless chicken breasts are cut into strips before cooking.Salt, chili powder, cayenne pepper, pepper, cumin and garlic powder are the seasonings for chicken.

Pan-Sear The Seasoned Chicken

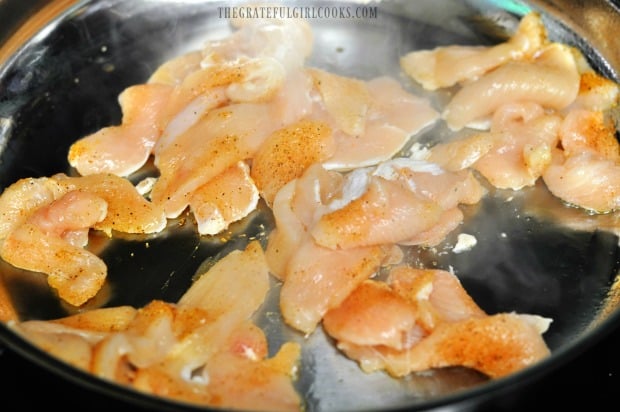
Heat 1½ Tablespoons vegetable oil in a large skillet, over medium-high heat. Once the oil is very hot (but NOT smoking), add the chicken pieces. They should sizzle when they hit the pan.

TexMex seasoned chicken is pan-seared in hot oil in a skillet.

Cook the chicken until the pieces are lightly browned on the bottom. This will take 2-3 minutes, depending on how hot the oil in the skillet is.

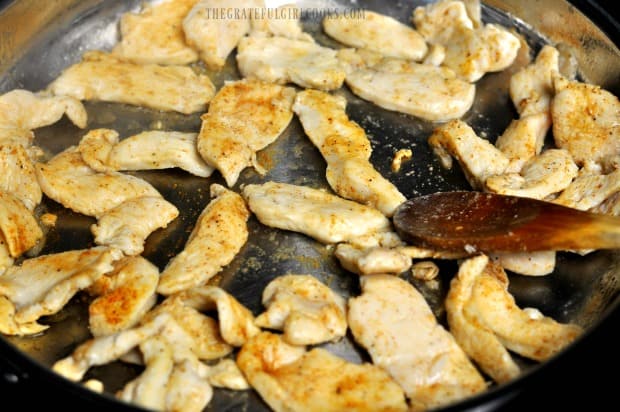
Turn each piece of chicken over, and finish cooking on the second side (a minute or two). Once the chicken is cooked all the way through and golden brown, remove the skillet from the heat, and set aside.

The chicken strips are turned halfway through cooking to brown the other side.

Prepare And Cook The Veggies

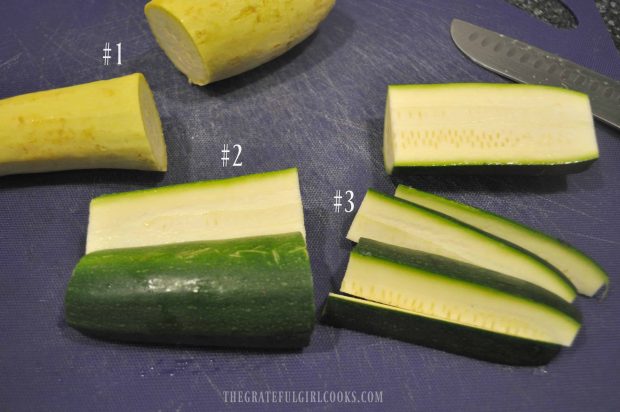
Prepare the veggies by slicing the onion and the red and green bell peppers into thin strips. Cut the squash into “planks”, as shown below, and then combine the all the veggies.

To cut the zucchini and yellow squash, remove both ends. Cut the squash in half, as shown in Step #1 below.  Now cut the half portion in half (step #2- below). Finally (step #3-below), slice each piece into planks, about 1/2″ wide.

Zucchini and yellow squash are cut into plank shapes using 3 steps, as shown.

Cook The Veggies

Heat the remaining 1½ Tablespoons of oil on medium-high heat in a large skillet. Once the oil is hot, but not smoking, add the prepared veggies, and stir. Lightly season with additional salt and pepper (if desired).

Continue to cook the veggies, stirring often, for 5-6 minutes, or until they have softened, and are fully heated through.

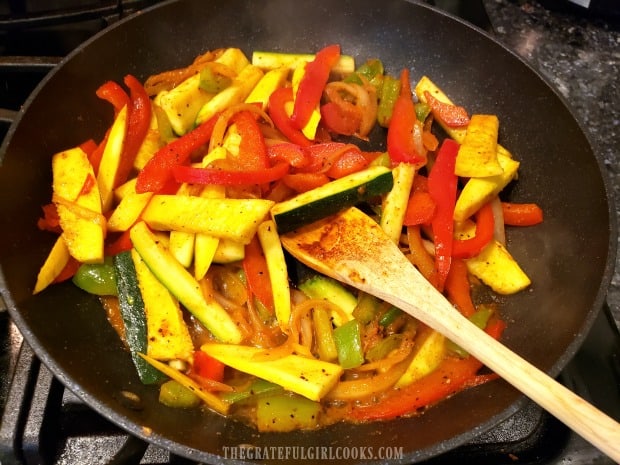
Veggies are cooked to add to the chicken veggie TexMex skillet.

Last Step For The Chicken Veggie TexMex Skillet!

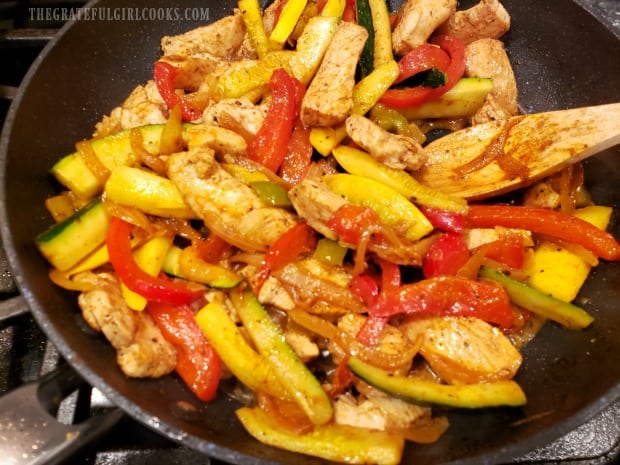
Once the veggies have cooked through, add the seasoned chicken pieces back into the pan. Stir to combine all the ingredients in the chicken veggie TexMex skillet, and cook until the entire dish is heated through. When ready to serve, portion out the chicken and veggies onto plates.

We enjoy eating it, as is, as a delicious low-calorie dish of meat and veggies. HOWEVER, if you really want something else to go with it, place it on top of steamed rice, or throw it in a warmed tortilla!

You can even go crazy and top it with grated cheese, sour cream or guacamole, if calories aren’t a concern! .

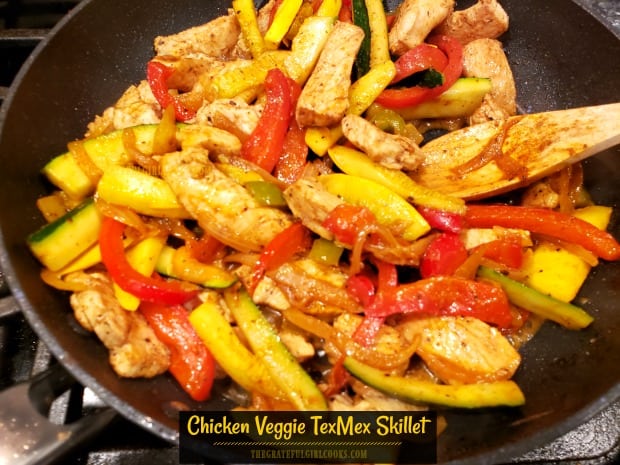
Chicken Veggie TexMex Skillet is fully cooked and ready to eat!

 I truly hope you enjoy this dish. Thank you for spending a bit of your valuable time on this blog today, friends. I appreciate it, and hope you have the opportunity to make this meal for those you love.

Have a wonderful day, take care, and may God bless you!

Looking For More CHICKEN Recipes?

You can find ALL of my recipes in the Recipe Index, located at the top of the page. I have LOTS of recipes featuring chicken, including:

Interested In More Recipes?

Thank you for visiting this website. I appreciate you using some of your valuable time to do soIf you’re interested, I publish a newsletter 2 times per month (1st and 15th) with all the latest recipes, and other fun info. I would be honored to have you join our growing list of subscribers, so you never miss a great recipe!
There is a Newsletter subscription box on the top right side (or bottom) of each blog post, depending on the device you use, where you can easily submit your e-mail address (only) to be included in my mailing list.

You Can Also Find Me On Social Media:
Facebook page: The Grateful Girl Cooks!
Pinterest: The Grateful Girl Cooks!
Instagram: jbatthegratefulgirlcooks

Author's signature

0 from 0 votes
Chicken Veggie TexMex Skillet
Prep Time
15 mins
Cook Time
15 mins
Total Time
30 mins
 

Southwest flavors shine in this deliciously seasoned, low-calorie Chicken Veggie TexMex Skillet, with zucchini, onion, yellow squash, & bell peppers!

Category: Entree
Cuisine: Southwestern
Keyword: chicken veggie texmex skillet
Servings: 3
Calories Per Serving: 245 kcal
Author: JB @ The Grateful Girl Cooks!
Ingredients
  • 2 large chicken breasts (boneless skinless) , cut into 2" strips
  • Tablespoons vegetable oil , for cooking chicken
  • ¼ teaspoon ground cumin
  • ¼ teaspoon chili powder
  • ¼ teaspoon salt and pepper (¼ tsp. EACH)
  • teaspoon cayenne pepper
  • teaspoon garlic powder
  • Tablespoons vegetable oil , for cooking veggies
  • 3 cups zucchini and yellow squash (1½ cups EACH) , cut into 2" long x 1" wide planks
  • ½ medium red bell pepper , seeded and cut in thin strips
  • ¼ medium green bell pepper , seeded and cut in thin strips
  • ½ medium brown onion , thinly sliced
Instructions
  1. Pat two large boneless, skinless chicken breasts dry with paper towels. Slice into strips approx. 2" long by 1" wide. Mix spices together and sprinkle lightly over chicken, to season. Mix by hand, to distribute spices onto chicken.

  2. Heat 1½ Tablespoons vegetable oil in a large skillet, on medium-high heat. Once oil is very hot (but NOT smoking), add chicken. Chicken should sizzle when it hits the pan. Cook until lightly browned on the bottom (approx. 2-3 minutes). Turn each piece of chicken over, and finish cooking for and additional 1-2 minutes. Once chicken is fully cooked through and golden brown, remove skillet from heat, and set aside.

  3. Slice onion and red and green bell peppers into thin strips. Cut squash into "planks", and then combine all veggies. Heat 1½ Tablespoons of oil on medium-high heat in large skillet. Once oil is hot, but not smoking, add veggies, and stir. Lightly season with additional salt and pepper (optional- if desired). Continue to cook, stirring often, for 5-6 minutes, or until veggies have softened, and are fully cooked through.

  4. Once the veggies have cooked, add the seasoned chicken pieces to the veggies. Stir to combine all ingredients, and cook on medium heat until heated through. To serve, portion out chicken and veggies onto plates. Enjoy!

Nutrition Facts
Chicken Veggie TexMex Skillet
Amount Per Serving (1 (1/3 of total))
Calories 245 Calories from Fat 153
% Daily Value*
Fat 17g26%
Saturated Fat 12g75%
Cholesterol 48mg16%
Sodium 296mg13%
Potassium 688mg20%
Carbohydrates 8g3%
Fiber 2g8%
Sugar 5g6%
Protein 18g36%
Vitamin A 1012IU20%
Vitamin C 58mg70%
Calcium 28mg3%
Iron 1mg6%
* Percent Daily Values are based on a 2000 calorie diet.

Here’s one more to pin on your Pinterest boards!Southwest flavors shine in this deliciously seasoned, low-calorie Chicken Veggie TexMex Skillet, with zucchini, onion, yellow squash, & bell peppers!


Cajun Chicken Strips

Making these yummy Cajun Chicken Strips couldn’t be easier! Dry spice seasoned chicken is pan-seared in butter for this EASY, quick lunch or dinner!
Making these yummy Cajun Chicken Strips couldn't be easier! Dry spice seasoned chicken is pan-seared in butter for this EASY, quick lunch or dinner!

Do you enjoy chicken strips, or tenders, as they are often called? We sure do, and today I want to share a ridiculously EASY way to make CAJUN chicken strips! There’s no long prep time, and before you know it, you can be munching on this delicious chicken!

Whether you prefer to call them chicken strips, chicken planks, or chicken tenders, these “pieces of chicken” are really yummy, and are a quick dish to whip up for lunch or dinner!

In this simple recipe, chicken breasts are cut into strips, coated in a mild Cajun spice mix, and then pan-seared and browned in butter until done. BOOM! Talk about EASY!!!! This is a GREAT recipe to have in your “bag of tricks”. Here’s how to make this dish:

Scroll Down For A Printable Recipe Card At The Bottom Of The Page

Prepare The Chicken

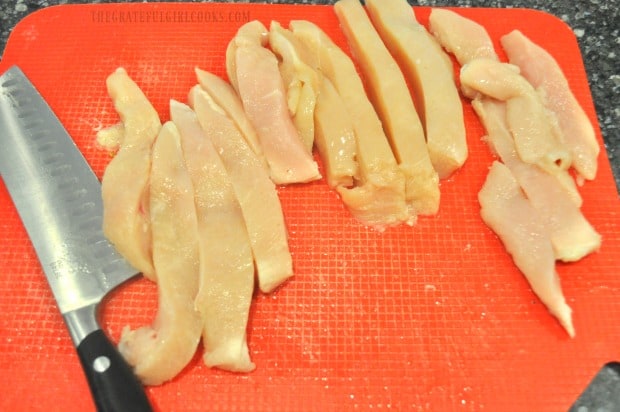
Place boneless, skinless chicken breasts on a cutting mat or board. Slice the chicken into strips, about 3/4″ wide. Pat the chicken pieces dry, using paper towels, to absorb some of the moisture.

Boneless chicken breasts are cut into strips before adding spices.

Season The Chicken Strips

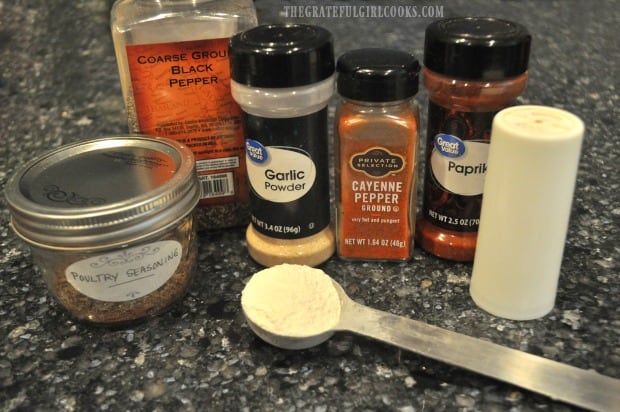
Measure the spices for the seasoning mix into a resealable container or plastic bag. The spices you will need are flour, poultry seasoning (mine’s homemade), garlic powder, paprika, cayenne pepper, salt and pepper.

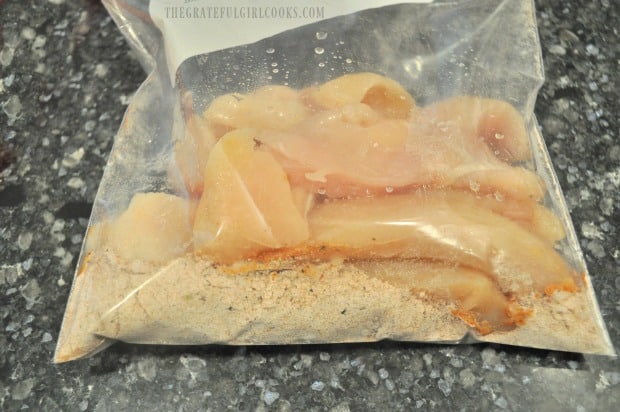
Once the spices are mixed, add the chicken strips, and mix together until the chicken is well coated. You “might” need to do this in batches, depending on the amount of chicken strips you will be making.

The spices for the chicken strips seasoning are ready to mix.

Chicken strips are added to spice mix in plastic bag, and combined to coat.

Time To Cook The Cajun Chicken Strips!

Once the chicken is seasoned, it’s time to cook the strips! You might need to cook the chicken in a couple batches, depending on the size skillet you are using.

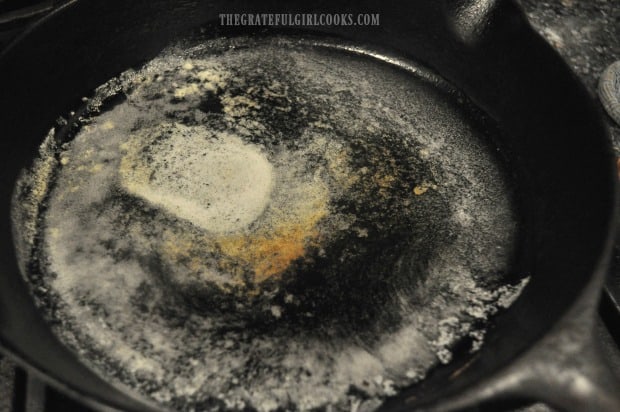
Melt the butter in a large skillet, and let the skillet get very hot (but not smoking). Add the Cajun chicken strips in a single layer, but be sure to not overcrowd the skillet. Cook the chicken strips for about 4 minutes without moving them.

Butter is melted and heated in skillet before adding seasoned chicken strips.Cajun chicken strips are added to the hot skillet to brown.

Carefully flip the chicken strips to the other side after about four minutes. The chicken should be well-browned on the bottom before you turn them over.

Continue to sear the chicken for 4-5 minutes, or until the chicken is cooked all the way through. Remove the chicken from the skillet, once done. If your chicken strips are really thick, it may take a couple minutes longer to cook all the way through.

The chicken strips are flipped to cook the other side after browning.

Time To Eat Some Cajun Chicken Strips!

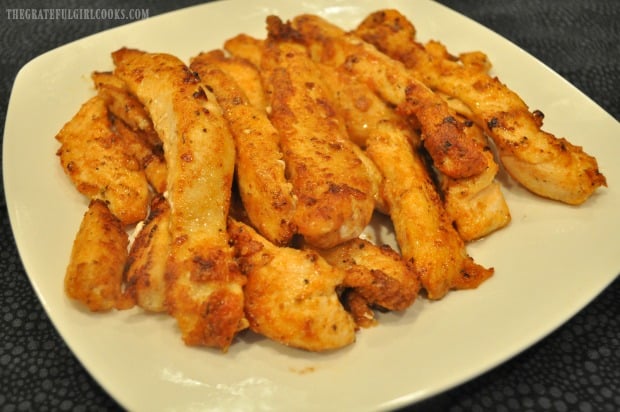
Once the chicken is cooked through and is golden brown on all sides, these yummy chicken strips are ready to serve! They have a very mild kick to them (but not too much), and taste wonderful served as is, or with a dipping sauce (Ranch dressing or Bleu cheese).

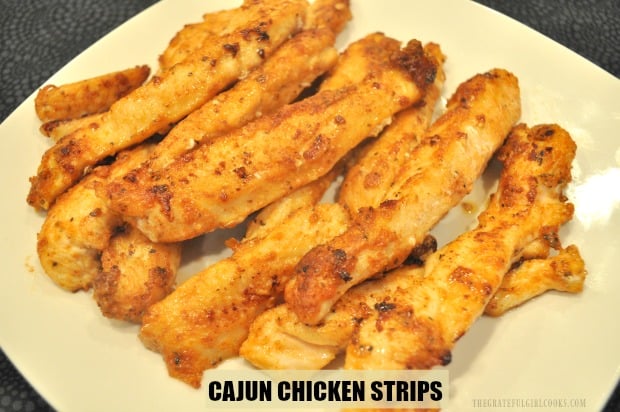
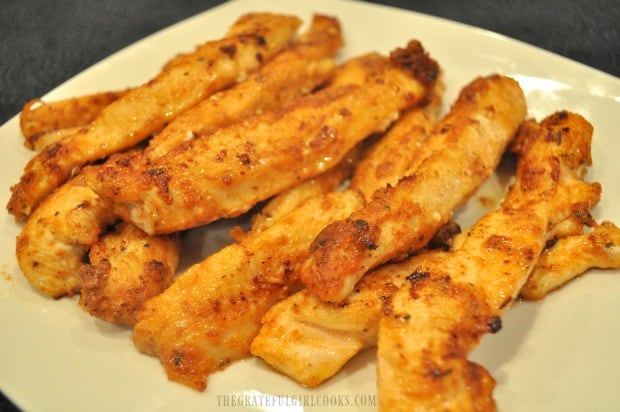
A plate full of cajun chicken strips, cooked and ready to eat!Close up of browned chicken strips with cajun seasoning on a plate.

We have even had these served alongside a delicious broccoli corn casserole (so we could get our veggies in, too!). The chicken is tender, seasoned nicely, and was a super simple twist on plain chicken strips!

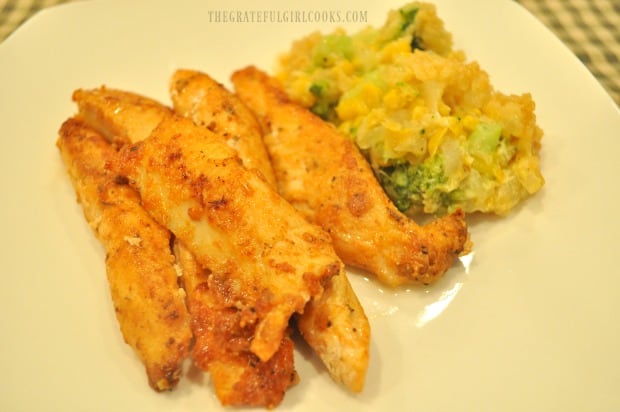
A few Cajun chicken strips, served with broccoli corn casserole on the side.

Hope you will consider trying out this really easy recipe for Cajun chicken strips. They are flavorful, but mild enough for kids and adults who don’t like things too spicy! Thank you for stopping by and spending some of your valuable time on this blog. I hope you enjoy a wonderful day!

Looking For More CHICKEN Recipes?

You can find all of my recipes in the Recipe Index, located at the top of the page. I have many chicken recipes for you to enjoy, including:

Interested In More Recipes?

Thank you for visiting this website. I appreciate you using some of your valuable time to do soIf you’re interested, I publish a newsletter 2 times per month (1st and 15th) with all the latest recipes, and other fun info. I would be honored to have you join our growing list of subscribers, so you never miss a great recipe!
There is a Newsletter subscription box on the top right side (or bottom) of each blog post, depending on the device you use, where you can easily submit your e-mail address (only) to be included in my mailing list.

You Can Also Find Me On Social Media:
Facebook page: The Grateful Girl Cooks!
Pinterest: The Grateful Girl Cooks!
Instagram: jbatthegratefulgirlcooks

Author's signature

Original recipe source: unknown. Found handwritten on a 3×5 card in one of my old recipe boxes.

0 from 0 votes
Cajun Chicken Strips
Prep Time
10 mins
Cook Time
8 mins
Total Time
18 mins
 

Making these yummy Cajun Chicken Strips couldn't be easier! Dry spice seasoned chicken is pan-seared in butter for this EASY, quick lunch or dinner!

Category: Dinner
Cuisine: Cajun
Keyword: cajun chicken strips
Servings: 4
Calories Per Serving: 255 kcal
Author: JB @ The Grateful Girl Cooks!
Ingredients
  • pounds boneless, skinless chicken breasts , cut into 3/4" strips
  • 1 teaspoon poultry seasoning
  • ¼ teaspoon cayenne pepper
  • ½ teaspoon paprika
  • 1 Tablespoon flour
  • ¾ teaspoon garlic powder
  • ¼ teaspoon salt and pepper (¼ tsp. each)
  • 2 Tablespoons butter
Instructions
  1. Place boneless, skinless chicken breasts onto a cutting mat or board. Slice chicken into long strips, about 3/4" wide. Pat chicken pieces dry, using paper towels, to absorb some of the moisture. Set aside.

  2. Measure spices into a resealable container or plastic bag, and stir, to combine. Once mixed, add chicken strips; mix until chicken is well coated. You "might" need to do this in batches, depending on the amount of chicken you make.

  3. Melt butter in a large skillet. Once skillet is very hot, add chicken strips in a single layer. Don't overcrowd skillet. Cook for 4 minutes without moving them. Once bottom is well-browned, carefully flip chicken to the other side. Continue to cook for 4-5 minutes, until chicken is cooked through. Note: If your chicken strips are really thick, it may take a couple minutes longer to cook all the way through. Remove chicken from skillet, once done. Serve chicken strips as is, or with a dipping sauce! Enjoy!

Nutrition Facts
Cajun Chicken Strips
Amount Per Serving (1 (1/4 of total))
Calories 255 Calories from Fat 90
% Daily Value*
Fat 10g15%
Saturated Fat 5g31%
Cholesterol 124mg41%
Sodium 393mg17%
Potassium 629mg18%
Carbohydrates 2g1%
Fiber 1g4%
Sugar 1g1%
Protein 37g74%
Vitamin A 414IU8%
Vitamin C 2mg2%
Calcium 13mg1%
Iron 1mg6%
* Percent Daily Values are based on a 2000 calorie diet.

Here’s one more to pin on your Pinterest boards!Making these yummy Cajun Chicken Strips couldn't be easier! Dry spice seasoned chicken is pan-seared in butter for this EASY, quick lunch or dinner!

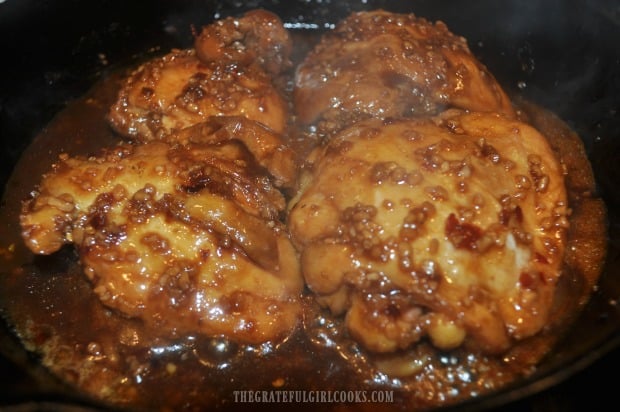
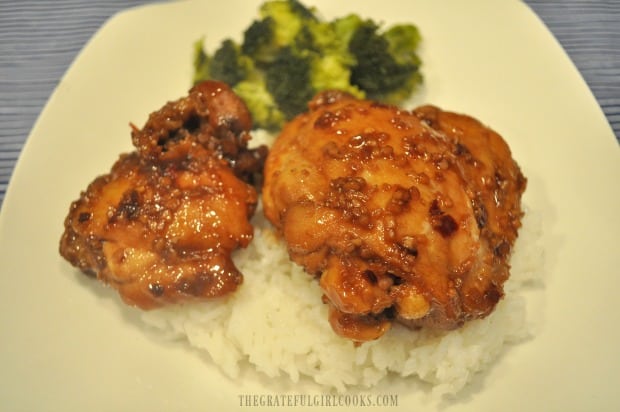
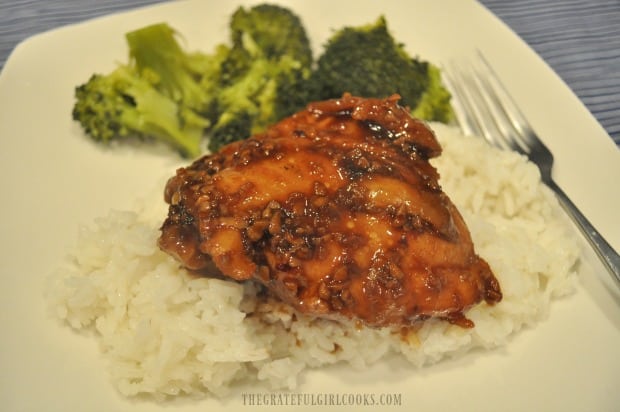
Asian Chicken Thigh Skillet

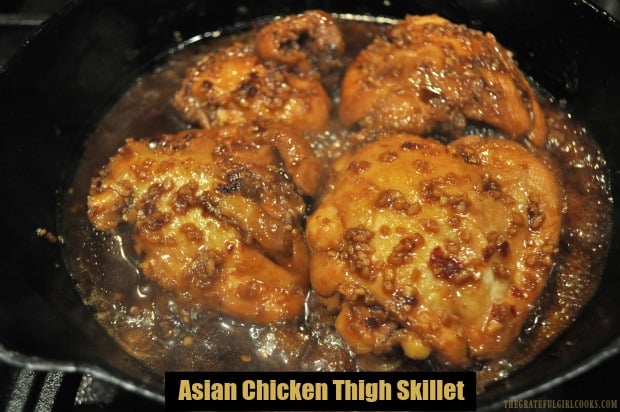
Asian Chicken Thigh Skillet is a delicious, EASY dish to make. Chicken thighs are pan-seared, then covered and cooked in a simple Asian garlic sauce!

If you’re looking for a simple, yet DELICIOUS way to cook chicken thighs, may I suggest this dish? It truly is a simple dish to make, and is packed with flavor!

Skinless chicken thighs (bone-in or no-bone) are pan seared, then are cooked for a short time in a 4-ingredient Asian sauce, along with minced garlic and red pepper flakes. The result is perfectly cooked chicken thighs, covered in an amazing tasting sauce, and then served on a bed of rice!

The Asian Chicken Thigh Skillet only takes about half an hour to make, and requires very few ingredients. **NOTE: The recipe calls for using SIX chicken thighs, but as you will see, I only made four thighs, so my photos will reflect that!

Scroll Down For A Printable Recipe Card At The Bottom Of The Page

Make The Asian Sauce

The first thing you will need to do is make a quick, Asian-inspired sauce. Easy! Simply mix together soy sauce, vinegar, honey and ground ginger in a small bowl. Once fully combined, set the bowl of Asian sauce aside.

A sauce is made with soy sauce, vinegar, honey and ground ginger.

Brown The Chicken Thighs

The next step is to brown the chicken thighs! To do this, first heat the oil on medium-high heat in a large skillet. I used a cast iron skillet, but it really doesn’t matter. Once the oil is very hot, but NOT smoking, carefully add the skinless chicken thighs to the hot oil.

Let the chicken cook (without disturbing) for 5 minutes, and then carefully turn each piece to the other side. The chicken thighs should be lightly browned before turning them over. Continue to cook for 5 more minutes on the second side.

Skinless chicken thighs are browned in hot oil in skillet.The chicken thighs are flipped over once browned.

Add Seasonings And Sauce To The Asian Chicken Thigh Skillet

At this point, you need to add the minced garlic and red pepper flakes to the skillet, and stir, to combine. Continue to cook for about 2 minutes, stirring often, to keep the garlic from burning.

Garlic, red pepper flakes and sauce are added to the Asian Chicken Thigh Skillet.

Pour the Asian sauce you previously set aside into the skillet. Stir well, to combine. Cover the skillet, turn the heat down to medium and let the chicken cook, undisturbed, for 15 minutes.

Asian Chicken Thigh Skillet is covered to let meat cook in sauce for 15 minutes.

Time To Finish The Asian Chicken Thigh Skillet!

After the 15 minutes of covered cooking time, carefully remove the cover on the skillet. Let the chicken and sauce cook uncovered for about 2 minutes, stirring occasionally. While cooking, spoon the sauce on top of each piece of chicken several times.

The sauce will slightly thicken as it cooks, and the chicken will become beautifully browned, thanks to the flavor-filled sauce. When done, the chicken should have an internal temperature of 165°F, and then it is ready to serve!

Some of the Asian sauce is spooned on top of chicken thighs before serving.

Time To Enjoy This Asian Chicken Thigh Skillet!

Once the chicken is cooked through to the proper temperature, and the sauce has slightly thickened, it is time to eat!

We enjoy this chicken best when served on top of some steamed rice! Spoon some of the sauce over each piece of chicken when serving, for an added flavor boost! Can you see all that minced garlic on top of the chicken? That’s some GOOD flavor there, friends!
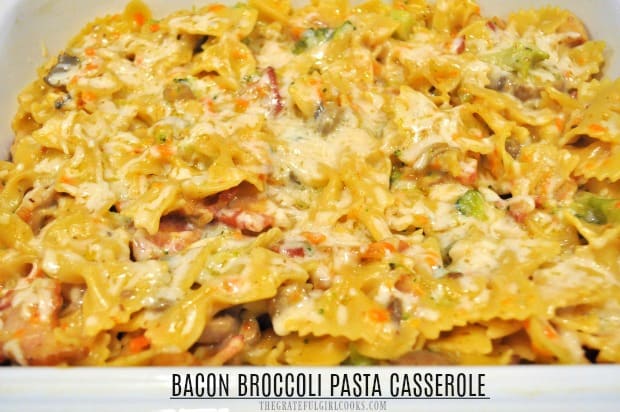
Finished Asian chicken thigh skillet dish is served on top of steamed rice.Chicken thigh with sauce is served on steamed rice, with broccoli on the side.

I really hope you will consider trying this simple recipe for Asian Chicken Thigh Skillet! We truly enjoy this meal, and trust you will, too! Have a wonderful day, and thank you for visiting!

Looking For Other CHICKEN Recipes?

You can find all of my recipes in the Recipe Index, located at the top of the page. I have many chicken recipes, including:

Interested In More Recipes?

Thank you for visiting this website. I appreciate you using some of your valuable time to do soIf you’re interested, I publish a newsletter 2 times per month (1st and 15th) with all the latest recipes, and other fun info. I would be honored to have you join our growing list of subscribers, so you never miss a great recipe!
There is a Newsletter subscription box on the top right side (or bottom) of each blog post, depending on the device you use, where you can easily submit your e-mail address (only) to be included in my mailing list.

You Can Also Find Me On Social Media:
Facebook page: The Grateful Girl Cooks!
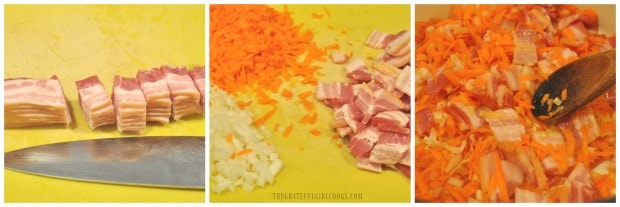
Pinterest: The Grateful Girl Cooks!
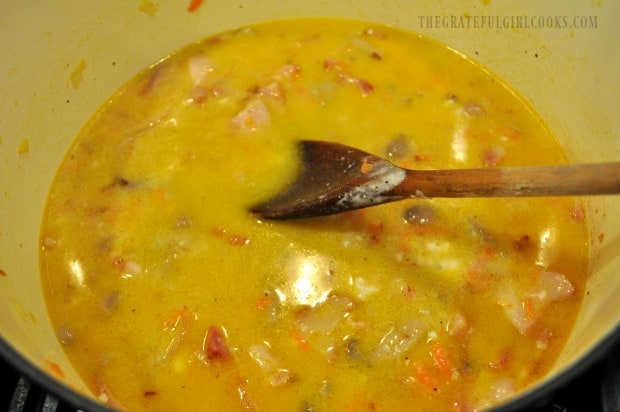
Instagram: jbatthegratefulgirlcooks

Author's signature

Original recipe source: unknown (recipe found written on a 3×5 card from many, many years ago)

3 from 1 vote
Asian Chicken Thigh Skillet
Prep Time
15 mins
Cook Time
17 mins
Total Time
32 mins
 

Asian Chicken Thigh Skillet is a delicious, EASY dish to make. Chicken thighs are pan-seared, then covered and cooked in a simple Asian garlic sauce!

Category: Entree
Cuisine: Asian
Keyword: Asian chicken thigh skillet
Servings: 6
Calories Per Serving: 325 kcal
Author: JB @ The Grateful Girl Cooks!
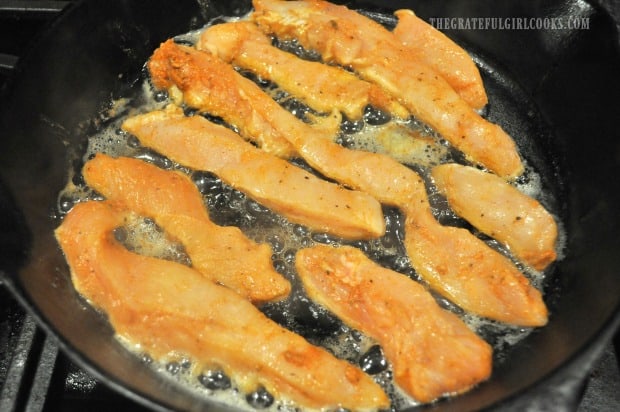
Ingredients
  • 6 medium chicken thighs , skin removed
  • ¼ cup vinegar
  • 3 Tablespoons soy sauce
  • 2 Tablespoon honey
  • 2 Tablespoons peanut oil (or veg. oil)
  • 10 cloves garlic , coarsely chopped
  • 1 teaspoon dried red pepper flakes
  • cooked rice (optional-for serving)
Instructions
  1. In a small bowl, mix together soy sauce, vinegar, honey and ground ginger. Set aside.

  2. Heat oil on medium-high heat in a large skillet. Once oil is very hot, but NOT smoking, carefully add skinless chicken thighs. Let cook (without disturbing) for 5 minutes, and then carefully turn them to the other side. The chicken thighs should be lightly browned before turning them over. Continue to cook 5 more minutes on second side.

  3. Add minced garlic and red pepper flakes to skillet, and stir, to combine. Cook for 1-2 minutes, stirring often, to keep garlic from burning. Pour reserved sauce into skillet. Stir well, to combine. Cover skillet, turn heat down to medium and let chicken cook, undisturbed, for 15 minutes.

  4. After 15 minutes, carefully remove cover from skillet. Let chicken and sauce cook uncovered for 2 minutes, stirring occasionally. While cooking, spoon sauce over top of chicken thighs several times. Sauce will slightly thicken as it cooks, and will become beautifully browned, thanks to the flavor-filled sauce. When done, chicken should have an internal temperature of 165°F, and then it is ready to serve! Serve over steamed rice, spoon some sauce over the top of the chicken, and enjoy!
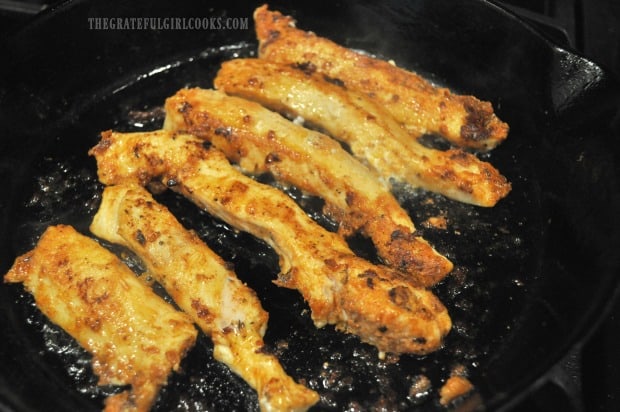
Nutrition Facts
Asian Chicken Thigh Skillet
Amount Per Serving (1 thigh)
Calories 325 Calories from Fat 216
% Daily Value*
Fat 24g37%
Saturated Fat 6g38%
Cholesterol 111mg37%
Sodium 360mg16%
Potassium 273mg8%
Carbohydrates 9g3%
Fiber 1g4%
Sugar 6g7%
Protein 19g38%
Vitamin A 187IU4%
Vitamin C 2mg2%
Calcium 18mg2%
Iron 1mg6%
* Percent Daily Values are based on a 2000 calorie diet.

Here’s one more to pin on your Pinterest boards!Asian Chicken Thigh Skillet is a delicious, EASY dish to make. Chicken thighs are pan-seared, then covered and cooked in a simple Asian garlic sauce!