Month: April 2018

Slow Cooker Carne Asada

You’re gonna love delicious slow cooker carne asada style Mexican shredded beef! An easy filling for tacos, burritos, nachos, and enchiladas! The possibilities for using this tasty shredded beef are endless!You're gonna love this delicious slow cooker carne asada style Mexican shredded beef, an easy, perfect filling for tacos, burritos, nachos, and enchiladas!

Traditional carne asada (which means “grilled meat”) is typically made using flank steak or skirt steak.  I stumbled upon this variation recipe on Pinterest which uses stew meat (a less expensive type of beef). Since I had some already in our freezer, I decided to try this particular recipe.

Oh. My. Goodness. The Southwestern flavor of the meat is incredible, and the beef turns out so tender it shreds easily! The recipe is very easy to prepare and only involves a couple of simple “prep” steps.

After that, turn on your crock pot and let it do all the rest of the work for you, while you go about your day! Here’s how to make slow cooker carne asada.

Scroll Down for A Printable Recipe Card At The Bottom Of The Page

How To Make Slow Cooker Carne Asada

Heat a large skillet on medium-high heat (I lightly sprayed my skillet with non-stick spray before heating).  Cook the stew meat cubes on all sides.  This will usually take about 8-10 minutes.

If you need to, cook the beef in two batches, to not overcrowd the pan. Once beef is browned nicely, transfer it to slow cooker.

3 pictures of stew meat for carne asada, browning in skillet

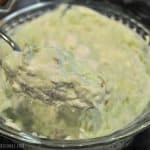
Once the meat has cooked, your skillet will probably look like the first photo below, with lots of remaining little bits of charred meat. Add 1/3 cup of water to skillet. Cook on medium heat for a couple minutes, to help de-glaze the skillet.

Be sure to scrape all the browned bits up off the bottom of the skillet into the water. It will blend into the water, to make a thin flavor-filled sauce.

Pour all of this liquid over the meat in the slow cooker. Stir well to combine. Set aside.

Skillet is de-glazed with water, then poured into slow cooker over beef

Make The Sauce

Mix up the carne asada sauce ingredients in a medium bowl with a fork or whisk until thoroughly combined and the brown sugar has dissolved. Pour the marinade over the beef. 

The meat should be almost completely submerged. If not, you can add a little bit more water to slow cooker. Stir the ingredients until they are combined.

Time For The Slow Cooker

Put lid on slow cooker, turn to the HIGH setting, and cook the meat for 4 hours, with the slow cooker covered.

TIP: Do not open lid of slow cooker during the cooking time, so you don’t lose any heat! Your kitchen should start to smell really good about halfway through the cooking time!

Marinade mixed for carne asada in bowl, then into slow cooker over beef

Shred The Slow Cooker Carne Asada

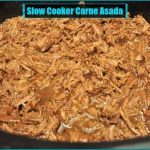
After meat has fully cooked, remove the lid of the slow cooker. Shred the meat (it should shred VERY easily) using two forks to pull the meat apart. Leave the shredded beef in the juices in the slow cooker.

Shredding beef for carne asada with two forks

The meat is now ready to serve!  Whatever you don’t eat right away can be frozen in food storage bags (once it’s cooled down), to save for other meals.

What Else Can The Shredded Meat Be Used For?  

I’ve prepared several dishes with the meat (it went a long way since there are only two of us at home these days). I made shredded carne asada enchiladas (below). They were a HUGE hit with my husband and I.

The meat turns out so tender and it’s totally packed with flavor.  I also used the last bit of meat to make a big plate of nachos for my husband, myself and our son.

Nachos are another great way to use the shredded beef (sorry, no pics, they were eaten too fast)! YUMMO!

Carne asada meat used to make shredded beef enchiladas

We also use the carne asada to make simple street tacos with chopped onion, cilantro, freshly made guacamole… and lime slices!

They are absolutely fantastic! I’m telling you, the flavor of this slow cooker carne asada is wonderful!

Shredded carne asada meat used to make tacos

There are so many ways to use this meat!  I’ve already bought more stew meat to make this recipe again.  I’m planning to make some shredded beef burritos and possibly a couple tostadas with it this time! I can hardly wait!

I hope you try this delicious version of carne asada.  The flavor is OUTSTANDING, and I think you will LOVE it. You may also enjoy my recipe for Easy Slow Cooker Pulled Pork too, because it’s really delicious!

Have a great day, and please come back soon for more great recipes.

Looking For More Mexican-Style Recipes?

You can find all of my recipes in the Recipe Index, located at the top of the page. I have quite a few Mexican-inspired recipes there, including:

Want More Recipes? Get My FREE Newsletter!

I publish a newsletter 2 times per month (1st and 15th) with lots of recipes, tips, etc..
Would you like to join our growing list of subscribers?

There is a Newsletter subscription box on the top right (or bottom) of each blog post, depending on the device you use.
You can submit your e-mail address there, to be added to my mailing list.

Find Me On Social Media:

Facebook page: The Grateful Girl Cooks!
Pinterest:
The Grateful Girl Cooks!
Instagram:
jbatthegratefulgirlcooks

Author's signature

Original recipe source: https://lifecurentsblog.com/crock-pot-carne-asada/

↓↓ PRINTABLE RECIPE BELOW ↓↓

0 from 0 votes
Slow Cooker Carne Asada
Prep Time
15 mins
Cook Time
4 hrs
Total Time
4 hrs 15 mins
 

You're gonna love this delicious slow cooker carne asada style Mexican shredded beef, an easy, perfect filling for tacos, burritos, nachos, and enchiladas!

Category: Dinner
Cuisine: Mexican
Keyword: carne asada
Servings: 12
Calories Per Serving: 244 kcal
Author: JB @ The Grateful Girl Cooks!
Ingredients
  • 3 pounds stew meat , cut in 2" cubes
  • 1 cup water , divided
Carne Asada Sauce
  • 2/3 cup soy sauce
  • 4 green onions , cut in thin slices
  • 2 limes (juice only)
  • 6 Tablespoons dark brown sugar
  • 1 teaspoon red pepper flakes , or more, if you like it spicy!
  • 1 teaspoon ground cumin
  • 1 teaspoon garlic powder
Instructions
  1. Heat a large skillet on medium-high heat (I lightly sprayed my skillet with non-stick spray before heating).  Cook the stew meat cubes on all sides.  This took about 10 minutes. If you need to, cook the beef in two batches, to not overcrowd the pan. Once beef is browned nicely, remove and transfer it to slow cooker.

  2. Add 1/3 cup of water to skillet you cooked the beef in. Cook on medium heat for a couple minutes, to de-glaze the skillet. Be sure to scrape all the browned bits up off the bottom of the skillet into the water. It will make a thin flavor-filled sauce. Pour this over the meat in the slow cooker. Stir well to combine. Set aside.

  3. Mix up the carne asada sauce ingredients in a medium bowl with a fork or whisk until thoroughly combined and the brown sugar has dissolved. Pour the marinade over the beef.  The meat should be almost completely submerged. If not, add a little bit more water to slow cooker. Stir to combine.
  4. Put lid on slow cooker, turn to the HIGH setting, and cook the meat for 4 hours, covered. After meat has fully cooked, remove lid. Shred the meat (it should shred VERY easily) using two forks to pull the meat apart. The meat is now ready to serve, and can be used for tacos, enchiladas, burritos, nachos, etc. Enjoy!!!

Recipe Notes

Caloric calculation is only for carne asada. Any other additions (tortillas, etc.) are not included.

Nutrition Facts
Slow Cooker Carne Asada
Amount Per Serving (1 serving (1/12th of total))
Calories 244 Calories from Fat 72
% Daily Value*
Fat 8g12%
Saturated Fat 3g19%
Cholesterol 88mg29%
Sodium 519mg23%
Potassium 311mg9%
Carbohydrates 8g3%
Sugar 6g7%
Protein 31g62%
Vitamin A 90IU2%
Vitamin C 2.2mg3%
Calcium 19mg2%
Iron 3.2mg18%
* Percent Daily Values are based on a 2000 calorie diet.

Here’s one more to pin on your Pinterest boards!You're gonna love this delicious slow cooker carne asada style Mexican shredded beef, an easy, perfect filling for tacos, burritos, nachos, and enchiladas!

Pistachio Pineapple Fluff Salad

This sweet, creamy and delicious pistachio pineapple fluff salad is incredibly easy to make in 5 minutes or less, serves 8, and is a great side dish or dessert your family will LOVE!This sweet, creamy pistachio pineapple fluff salad is incredibly easy to make (5 minutes), serves 8, and is a great side dish or dessert your family will LOVE!

We LOVE this simple salad, too!  The best part is that it’s so EASY to make, in 5 minutes or less… and tastes so yummy!  It’s so easy – if you can stir, you can make this!  Last Fall, I made a scrumptious Piña Colada Fluff Salad (which we devoured, by the way!), so the thought of making a different recipe that had pistachio pudding in it sounded wonderful!

Seriously, if you need a quick, last minute item to add to your table as a side dish, or even a simple dessert, you can literally have this one in the fridge in 5 minutes or less!

Scroll Down For A Printable Recipe Card At The Bottom Of The Page

True Story

True story – the day I made this salad I was headed out to the doctor for my annual physical.  For certain I knew I wanted to make it, and decided to do so exactly 5 minutes before leaving my home. I glanced at the clock, then decided it would be great to have this salad made up already when I returned home and fixed dinner. So I quickly grabbed the ingredients from our pantry, “dumped” it all together, gave it a good sir… and boom! Made a salad, took photos of it, AND made it to my appointment on time!  Yee Haw!

Okay… So HOW Do I Make Pistachio Pineapple Fluff Salad?

Here’s how easy it is to make:  Place pistachio pudding mix, mini marshmallows, chopped walnuts or pecans, and a can of crushed pineapple (including the juice!) into a large bowl. I made this up in the same bowl I was gonna serve it in later!

Pineapple, pecans, mini marshmallows and pistachio pudding mix in bowl

Stir all ingredients well, until thoroughly blended. At this point, it looks like something The Grinch would like, right? This would also be a fun GREEN colored salad to whip up for St. Patrick’s Day! And what an EASY potluck dish this would be to make… in no time at all!

Ingredients stirred together for fluff salad in glass bowl

The last thing to do is add a thawed (8 ounce) container of whipped topping. I used Light Cool Whip, in order to cut out a few calories from this salad.  Blend the whipped topping into the pistachio pineapple fluff salad until fully combined.

Whipped topping is stirred into fluff salad ingredients

Refrigerate The Pistachio Pineapple Fluff Salad Before Serving

This is what it will look like once fully blended (see photo below).  Cover the dish, and refrigerate the pistachio pineapple fluff salad salad until you are ready to serve it.  I prefer it really cold and thick, so when possible, I prepare this at least a couple hours before serving.

Fluff salad with pineapple and pistachio pudding is ready to refrigerate!

When ready to serve, you can add chopped pistachios or mini marshmallows to the top as a garnish, grab a big spoon, and enjoy this creamy, fluffy DELICIOUS pistachio pineapple fluff salad!  It’s so good, I’ll bet once you take one bite, you will want another… and another. YUM!

A big spoonful of pistachio pineapple fluff salad, ready to eat!

Sure hope you will give this pistachio pineapple fluff salad a try!  I like to think of it as a QUICK way to add another great tasting dish to any meal!  It would be a perfect side dish to take to a potluck, or holiday gathering, and the recipe can be easily doubled or tripled for large crowds. Your friends and family will enjoy it, and they don’t have to know that it ONLY TOOK YOU 5 MINUTES TO MAKE! We’ll keep that our little secret, okay? (wink, wink).

Thank you for visiting- I appreciate you taking time out of your busy day to stop by. Be sure to check out all the recipes I’ve posted (with direct links) using the Recipe Index at the top of this page!  I sincerely trust you will find some delicious recipes to make and serve, with love, to those you cherish! Have a wonderful day!

Looking For More SALAD Recipes?

I have lots of great salad recipes on the blog you might be interested in, including:

Interested In More Recipes?

Thank you for visiting this website. I appreciate you using some of your valuable time to do soIf you’re interested, I publish a newsletter 2 times per month (1st and 15th) with all the latest recipes, and other fun info. I would be honored to have you join our growing list of subscribers, so you never miss a great recipe!
There is a Newsletter subscription box on the top right side (or bottom) of each blog post, depending on the device you use, where you can easily submit your e-mail address (only) to be included in my mailing list.

You Can Also Find Me On Social Media:

Facebook page: The Grateful Girl Cooks!
Pinterest:
The Grateful Girl Cooks!
Instagram:
jbatthegratefulgirlcooks

Author's signature

Original recipe source: Trish, at https://www.momontimeout.com/pistachio-dessert-salad-pistachio-fluff-recipe/

0 from 0 votes
Pistachio Pineapple Fluff Salad
Prep Time
5 mins
Cook Time
0 mins
Total Time
5 mins
 

This sweet, creamy and delicious pistachio pineapple fluff salad is incredibly easy to make (in 5 minutes), and is a great side dish or dessert your family will LOVE!

Category: Dessert, Salad
Cuisine: American
Keyword: pistachio pineapple fluff salad
Servings: 8 servings
Calories Per Serving: 197 kcal
Author: JB @ The Grateful Girl Cooks!
Ingredients
  • 3.4 ounces pistachio instant pudding mix (1 small box)
  • 1 cup miniature marshmallows
  • 20 ounce can crushed pineapple
  • 1/2 cup walnuts or pecans , chopped
  • 8 ounces lite whipped topping (Cool Whip), thawed
Instructions
  1. Place pudding mix, mini-marshmallows, crushed pineapple (including juice), and chopped walnuts or pecans in a large bowl. Stir these ingredients very well, to fully combine.

  2. Fold in container of thawed whipped topping until fully blended into salad.  Cover bowl, and refrigerate until you are ready to serve (I recommend at least an hour or two, if possible).

  3. When ready to serve, grab a spoon and dig into this salad (or dessert). It's scrumptious!

Nutrition Facts
Pistachio Pineapple Fluff Salad
Amount Per Serving (1 serving)
Calories 197 Calories from Fat 54
% Daily Value*
Fat 6g9%
Saturated Fat 1g6%
Cholesterol 4mg1%
Sodium 199mg9%
Potassium 150mg4%
Carbohydrates 35g12%
Fiber 1g4%
Sugar 29g32%
Protein 2g4%
Vitamin A 85IU2%
Vitamin C 6.7mg8%
Calcium 51mg5%
Iron 0.4mg2%
* Percent Daily Values are based on a 2000 calorie diet.

Here’s one more to pin on your Pinterest boards!This sweet, creamy and delicious pistachio pineapple fluff salad is incredibly easy to make (in 5 minutes), serves 8, and is a great side dish or dessert your family will LOVE!

Mediterranean Chicken Sandwich

Enjoy this flavorful Mediterranean chicken sandwich, with tomato, lettuce, red onion, and creamy sauce (feta cheese, yogurt, dill, garlic, & oregano)!Enjoy this flavorful Mediterranean chicken sandwich, with tomato, lettuce, red onion, and creamy sauce (feta cheese, yogurt, dill, garlic, & oregano)!

I ended up making this sandwich as a way to use a couple of thawed chicken breasts in our refrigerator. Ever have those moments when you look at raw chicken breasts, and wonder what on earth you are going to do with them?

Yeah. That was me… one day at lunch, so I put on my thinking cap, and came up with this sandwich. I chose to grill the chicken right then, but by ALL MEANS, if you’ve got it, use warmed leftover grilled chicken or a 1″ thick slice of store bought rotisserie chicken (per sandwich) and save even more time!

Guess what? This simple Mediterranean chicken sandwich ended up being fairly low in calories and very tasty, if I may say so myself!  I knew where I wanted to end up when trying to create this (i.e. a yummy chicken sandwich), and the rest was just figuring out WHAT to put ON that sandwich! Ha Ha. Decided to go the “Greek” route, as I love the flavor combinations.

Scroll Down For A Printable Recipe Card At the Bottom Of The Page

Make The Mediterranean Sauce

The Mediterranean inspired sauce was easy to make. I racked my brain for inspiration, then picked out some traditional Greek seasonings from my spice rack, and added a couple other ingredients to make a simple, creamy “condiment” sauce to compliment the chicken on the sandwich.

I mixed together crumbled feta cheese, non-fat plain Greek yogurt, milk (just a bit to make it even creamier), dried dill (from my garden-yay!), garlic powder and oregano in a small bowl until fairly smooth, then seasoned it with a little salt and pepper, to taste.

Ingredients for Mediterranean inspired sauce for chicken sandwich

Once the sauce was done, I covered and refrigerated it for 30 minutes, to give the ingredients a chance to blend and incorporate their unique flavors. That is not completely necessary, if you’re in a hurry to eat, but I do recommend it, for best flavor!  Here’s what the sauce looks like.

Mediterranean inspired sauce to go on chicken sandwich, in bowl

While the sauce was chilling in the fridge, I grilled thin chicken breasts on an indoor cast iron grill until done, using my Mom’s easy grilled chicken basting sauce.

NOTE: You can cook the chicken breast any way that is easiest that you prefer (or even use leftover grilled chicken or rotisserie chicken breast slices, if desired). Whatever is easiest and most convenient for you works… just make sure the chicken is seasoned well, at least with salt and pepper!

Prepare The Mediterranean Chicken Sandwich

When ready to make the sandwiches, get all the ingredients together. You need thinly sliced red onion, tomatoes, lettuce, chicken breasts and “toasted” kaiser rolls.

Lightly butter the rolls, then “toast”, cut sides down, in a hot skillet until golden brown. Remove sauce from the refrigerator, and then you’re ready to build your Mediterranean chicken sandwich!

Ingredients to make a grilled chicken sandwich, Mediterranean style

To assemble, spread Mediterranean sauce generously on both sides of the toasted bun.  A warm, grilled chicken breast goes on top of the sauce on the bottom half. Top it with a few thin red onion slices, a thin slice of tomato, and finish off with a great big lettuce leaf (I used romaine). Put the two halves together, and the sandwich is ready to eat!

Mediterranean sauce, with chicken, lettuce, tomatoes & onion on sandwich bun

Time to EAT!

I cut one of the sandwiches in half so you can see the inside.  The creamy, delicious Greek sauce oozes out from the top and bottom bun and coats the whole thing, bringing LOTS of traditional Mediterranean flavors to this simple sandwich. Take a big bite, then grab a napkin to wipe all that yummy sauce from your face! Ha Ha.

Chicken sandwich with sauce, cut in half, on plate
I hope you will consider making this yummy and flavorful sandwich.  It’s even easier (and more time-saving) to make if you already have leftover grilled chicken or rotisserie chicken to use. This recipe is a perfect way to use up that chicken for a quick lunch time treat! Have a wonderful day. thank you for stopping by, and I hope you will come back again soon.

Looking For More SANDWICH Recipes?

You can find ALL my recipes in the Recipe Index, located at the top of the page. I have a nice variety of sandwich recipes, including:

Interested In More Recipes?

Thank you for visiting this website. I appreciate you using some of your valuable time to do soIf you’re interested, I publish a newsletter 2 times per month (1st and 15th) with all the latest recipes, and other fun info. I would be honored to have you join our growing list of subscribers, so you never miss a great recipe!
There is a Newsletter subscription box on the top right side (or bottom) of each blog post, depending on the device you use, where you can easily submit your e-mail address (only) to be included in my mailing list.

You Can Also Find Me On Social Media:

Facebook page: The Grateful Girl Cooks!
Pinterest:
The Grateful Girl Cooks!
Instagram:
jbatthegratefulgirlcooks

Author's signature

Recipe Source: My brain… in hungry mode.

0 from 0 votes
Mediterranean Chicken Sandwich
Prep Time
10 mins
Cook Time
15 mins
Total Time
25 mins
 
Enjoy this flavorful Mediterranean chicken sandwich, with tomato, lettuce, red onion, and creamy sauce (feta cheese, yogurt, dill, garlic, & oregano)!
Category: Sandwich
Cuisine: Mediterranean
Keyword: Mediterranean chicken sandwich
Servings: 2 sandwiches
Calories Per Serving: 371 kcal
Author: JB @ The Grateful Girl Cooks!
Ingredients
For Mediterranean Sauce
  • 1/4 cup feta cheese crumbles
  • 1/3 cup plain Greek yogurt , non-fat
  • 1 teaspoon milk
  • 1/4 teaspoon dried dill
  • 1/4 teaspoon oregano
  • 1/4 teaspoon garlic powder
  • 1 pinch salt and pepper , to taste
For Sandwich
  • 2 Kaiser rolls (or hamburger buns)
  • 2 teaspoons butter , for toasting kaiser rolls
  • 2 thin chicken breasts (boneless, skinless) , grilled/pre-cooked (can use 1" thick slices rotisserie chicken breast)
  • 2 slices tomato
  • 2 slices red onion
  • 2 leaves romaine lettuce
Instructions
Make Sauce
  1. Combine all ingredients for sauce in medium bowl. Stir well, to fully blend ingredients into creamy sauce. Cover; refrigerate for 30 minutes.

Toast Buns
  1. Lightly butter kaiser roll halves. "Toast" them lightly by placing them cut side down, in a dry skillet on medium heat. Cook until golden brown and crispy. Remove from heat; set aside.

Assemble Sandwich
  1. Generously spread sauce on top/bottom halves of  the toasted sides of rolls or buns.  Place cooked chicken breast (or 1" thick slice of rotisserie chicken breast, if using) onto bottom half of bun.  Add red onion slices, tomato slice, and a large lettuce leaf.  Place top half of toasted bun onto sandwich (make sure it has sauce on it!). Repeat process for other sandwich. Serve, and enjoy.

Recipe Notes

TIP: If using previously cooked chicken breasts or rotisserie chicken, the time it takes to make this sandwich will be considerably shortened.

If using a LARGE, thick chicken breast, simply slice it in half horizontally and use the two halves (a total of one whole breast) for two sandwiches.

Nutrition Facts
Mediterranean Chicken Sandwich
Amount Per Serving (1 sandwich)
Calories 371 Calories from Fat 108
% Daily Value*
Fat 12g18%
Saturated Fat 6g38%
Cholesterol 101mg34%
Sodium 628mg27%
Potassium 673mg19%
Carbohydrates 27g9%
Fiber 2g8%
Sugar 6g7%
Protein 35g70%
Vitamin A 2900IU58%
Vitamin C 7.8mg9%
Calcium 218mg22%
Iron 2.4mg13%
* Percent Daily Values are based on a 2000 calorie diet.

Here’s one more to pin on your Pinterest boards!Enjoy this flavorful Mediterranean chicken sandwich, with tomato, lettuce, red onion, and creamy sauce (feta cheese, yogurt, dill, garlic, & oregano)!

Grilled Fish Tacos with Baja Sauce

You’re gonna absolutely LOVE these grilled (no batter) fish tacos, with soft corn tortillas, crisp marinated slaw and avocado slices, topped with a creamy Southwestern flavored Baja sauce!
You're gonna LOVE these grilled fish tacos, w/ corn tortillas, crisp marinated slaw and avocado, topped with a creamy Southwestern flavored Baja sauce!

I recently searched for, and found several fish taco recipes on Pinterest that looked promising, and decided to try this one because the seafood is GRILLED, not dipped in batter (although those are good, too!).  I wanted to go with a slightly healthier option this time!  Wow!!! Let me tell you… this might be my new, absolute favorite recipe for fish tacos!

My husband and son RAVED about them! They LOVED them and said they were some of the best fish tacos they had ever tasted (and they’re both avowed fish taco connoisseurs!). Today I want to share the recipe with you, so you can enjoy them, too! Here’s how to make the:

Scroll Down For A Printable Recipe Card At The Bottom Of The Page

What Kind Of Fish Can Be Used?

I used fresh rockfish for our tacos, but any mild flavored white fish will work just fine. Cooking times will vary slightly, based on the thickness of fish used.

Rockfish fillets, used to make Grilled Fish Tacos

TIP: The tacos are really easy to prepare… ESPECIALLY if you make the slaw and the Baja sauce ahead of time (best for infusing flavors, too!).  Then when you are ready to make dinner, all you need to do is grill the fish on the stove top, and assemble the tacos. EASY PEASY! Here’s how to make this absolutely DELICIOUS dish!

Make The Slaw

The slaw for the fish tacos is very simple to make.  All the slaw ingredients are mixed together in a bowl, then covered and refrigerated for at least 30 minutes to let the flavors combine and become infused with great flavor (Note: do not let slaw marinade for longer than 8 hours, to ensure it stays crisp).

Ingredients for cabbage slaw for fish tacos

Mixed cabbage slaw for fish tacos, in a white bowl

Make Baja Sauce For The Fish Tacos

The Baja sauce is also very easy to make. Place the ingredients in a small bowl, then stir or whisk well, to fully combine.  Cover, and refrigerate for 1-2 hours, for best flavor.

I found it easy to make the Baja sauce and Slaw ahead of time, so they were ready to go when it was time to fix dinner! The recipe makes more than enough sauce for 8 tacos, so you can use the extra for other recipes (nachos, burritos, quesadillas, etc.), or another batch of tacos, if desired.

Ingredients for Baja sauce for tacos, in a clear bowl

Mixed Baja sauce for fish tacos, in a clear dish

Prepare And Grill The Fish

When you are ready to fix the tacos, here’s what you do: Cut fish into 8 pieces (approx. 4 ounces each). Pat each piece of fish dry (with paper towels).  Season BOTH sides of the fish with lime juice, cumin, salt and pepper.

Seasoned pieces of fish to grill for tacos

Heat oil in a large skillet on medium-high heat.  Once oil is hot, carefully place the pieces of fish in skillet.  Be careful to leave space between the pieces of fish (you may need to cook fish in two batches, so you don’t overcrowd the skillet).

Cooking fish for tacos in oil in skillet

Cook fish for about 3 minutes, without moving pieces, until you can see the bottom turning golden brown, and the edges begin to turn white as they cook.  If you have thick pieces of fish, you might have to cook them a bit longer. Once the bottom side of the fish is “done”, it will be easy to move the fish in the skillet.

Using a spatula, carefully turn each piece of fish to other side and continue cooking an additional 3-4 minutes.  The fish will flake easily when done, and have a nice golden brown seared color to it! Transfer fish to a plate or platter, and keep it warm while you assemble tacos!

Fish pieces are grilled until lightly browned

Put The Fish Tacos Together

To put these delicious tacos together, here’s what you do… put a warmed corn tortilla onto plate (I warmed tortillas by wrapping the stack of 8 tortillas in paper towels and heating in microwave). Place 2 avocado slices down the middle of each tortilla. Now add a couple heaping Tablespoons of the slaw on top of the avocado slices.

Place a piece of warm, grilled fish on top of the crunchy slaw, then spoon some of the creamy Baja sauce over the top. Garnish each taco with cilantro and a lime slice (optional), and serve.

Grilled fish in tortilla with Baja sauce, slaw and cilantro, on plate

Take a look at that good looking piece of fresh, grilled fish in that taco!  Makes my mouth water just looking at it! Perfectly pan-seared fish, crunchy marinated slaw, cool avocado slices, and a creamy Southwestern sauce to top it all off… amazing and outrageously GOOD!

Close up photo of homemade grilled fish taco, with sauce

Two grilled fish tacos, with slaw and Baja sauce, on plate.

These truly were some of the best fish tacos I’ve ever had! The slaw and sauce taste amazing on the GRILLED fresh fish! YUM!  Our son and my husband have already asked me to make them again… SOON!

They went out to dinner recently, ordered fish tacos, and proudly came home and announced to me that my fish tacos were better than the ones they had at the restaurant!  Aw, shucks… (blushing).  I loved their compliments… and am only happy to oblige! Sure hope you will consider making these amazing, delicious tacos!  I think you will absolutely LOVE them! Have a wonderful day!

Looking For More Mexican Or Southwest-Inspired Recipes?

You can find all of my recipes in the Recipe Index, located at the top of the page. I have many Mexican or Southwest-inspired recipes you might enjoy, including:

Interested In More Recipes?

Thank you for visiting this website. I appreciate you using some of your valuable time to do soIf you’re interested, I publish a newsletter 2 times per month (1st and 15th) with all the latest recipes, and other fun info. I would be honored to have you join our growing list of subscribers, so you never miss a great recipe!
There is a Newsletter subscription box on the top right side (or bottom) of each blog post, depending on the device you use, where you can easily submit your e-mail address (only) to be included in my mailing list.

You Can Also Find Me On Social Media:

Facebook page: The Grateful Girl Cooks!
Pinterest:
The Grateful Girl Cooks!
Instagram:
jbatthegratefulgirlcooks

Author's signature

Recipe Source: www.thekitchenwhisperer.net/2015/03/12/grilled-fish-soft-tacos-with-baja-cream-sauce/

0 from 0 votes
Grilled Fish Tacos with Baja Sauce
Prep Time
15 mins
Cook Time
8 mins
Marinating
1 hr
Total Time
1 hr 23 mins
 
You're gonna LOVE these grilled (no batter) fish tacos, w/ corn tortillas, crisp marinated slaw and avocado, topped with a creamy Southwestern flavored Baja sauce!
Category: Dinner
Cuisine: Mexican, Southwestern
Keyword: fish tacos
Servings: 8 tacos
Calories Per Serving: 295 kcal
Author: JB @ The Grateful Girl Cooks!
Ingredients
For Fish:
  • 2 pounds white fish (I used rockfish) , cut into 4 ounce pieces (8 total)
  • 2 Tablespoons lime juice
  • 1 teaspoon ground cumin
  • teaspoons salt
  • 1 teaspoon black pepper
  • 3 Tablespoons olive oil
  • 8 corn tortillas (8" round) , warmed
For Slaw:
  • cups green cabbage , finely shredded
  • cups red cabbage , finely shredded
  • 2 teaspoons honey
  • 1 Tablespoon lime juice
  • 2 teaspoons jalapenos , minced
  • 1 Tablespoon (heaping) shallot , minced
  • 3 teaspoons cilantro , chopped
  • 1 teaspoon salt
  • 1/2 teaspoon black pepper
For Baja Sauce:
  • 3/4 cup light sour cream
  • 1/2 cup light mayonnaise
  • 3 Tablespoons lime juice
  • 1 teaspoon garlic powder
  • 2 teaspoons sriracha sauce
  • 1/4 cup (lightly packed) cilantro leaves , minced
  • 1 teaspoon salt
  • 1/2 teaspoon black pepper
  • 1/2 teaspoon ground cumin
  • 1/4 teaspoon cayenne pepper
  • teaspoons adobo sauce
Extra ingredients:
  • 2 large avocado , peeled, halved, sliced into 16 pieces
  • 8 teaspoons cilantro , chopped (for garnish)
Instructions
  1. Combine slaw ingredients in large bowl, then cover and refrigerate for at least 30 minutes to let it become infused with flavor. (Note: do not let slaw marinade for longer than 8 hours, to ensure slaw stays crisp).

  2. To make Baja sauce, place ingredients in a small bowl, then stir or whisk to fully blend.  Cover, and refrigerate 1-2 hours, for optimal flavor.

  3. When you are ready to prepare tacos, pat each piece of fish dry (with paper towels).  Season BOTH sides of the fish with lime juice, cumin, salt and pepper. Heat oil in a large skillet on medium-high heat.  Once oil is hot, carefully place pieces of fish in skillet.  Leave space between pieces of fish (might need to cook fish in two batches, so you don't overcrowd skillet). Cook fish portions for approx. 3 minutes, without moving them, until you can see the edges start to turn white as they cook (if using thick pieces of fish, you might have to cook them a bit longer). Once bottom side of the fish is "done", it will be easy to move in the skillet. Using a spatula, carefully turn fish to other side; continue cooking for another 3-4 minutes.  The fish will flake easily when done, and have a nice golden brown sear to it! Transfer fish to a plate; keep it warm while you assemble tacos!

  4. To assemble taco, put a warmed corn tortilla onto plate, then place 2 avocado slices in middle of tortilla. Add 2 heaping Tablespoons of slaw on top of the avocados.  Place a piece of grilled fish on top of slaw, then spoon some Baja sauce over the top. Garnish each taco with cilantro (and a small lime slice, if desired), and serve.  ENJOY!

Nutrition Facts
Grilled Fish Tacos with Baja Sauce
Amount Per Serving (1 taco)
Calories 295 Calories from Fat 117
% Daily Value*
Fat 13g20%
Saturated Fat 3g19%
Cholesterol 66mg22%
Sodium 1431mg62%
Potassium 654mg19%
Carbohydrates 20g7%
Fiber 2g8%
Sugar 3g3%
Protein 24g48%
Vitamin A 840IU17%
Vitamin C 22.3mg27%
Calcium 87mg9%
Iron 1.3mg7%
* Percent Daily Values are based on a 2000 calorie diet.

Here’s one more to pin on your Pinterest boards!You're gonna LOVE these grilled (no batter) fish tacos, w/ corn tortillas, crisp marinated slaw and avocado, topped with a creamy Southwestern flavored Baja sauce!

Chocolate Caramel Pecan Scones

Grab some hot coffee, tea or a cold glass of milk… and enjoy these absolutely delicious chocolate caramel pecan scones, filled with milk chocolate chips, caramel and pecans, for a special treat at breakfast or a simple snack in the middle of the day!Grab some coffee or tea and enjoy these absolutely delicious scones, filled with milk chocolate chips, caramel and pecans, for breakfast or a simple snack.
I LOVE scones! Do you?  I’ve been making them for years, and have included many of my favorite recipes on my blog.

The scones I’ve made include Apple Cinnamon, Cinnamon Chip, White Chocolate Raspberry, Blackberry, Banana Nut, Chocolate Chip Orange, Lemon Cream, Gingerbread, Cranberry Orange, and several others.

Collage showing 9 different scones from The Grateful Girl Cooks!

When I saw a recipe recently for these chocolate caramel pecan scones, I just KNEW I wanted to try them… I couldn’t help myself!  I made a batch for Easter this year, and guess what? They are GOOD, and easy to prepare, even if you’ve never made scones before! Here’s how:

Scroll Down For A Printable Recipe Card At The Bottom Of The Page

How To Make Chocolate Caramel Pecan Scones

Preheat oven to 400 degrees before beginning.  Place parchment paper or a silicone mat onto a large cookie sheet.  Place flour, baking powder, granulated sugar, and salt into a large mixing bowl.  Cut VERY COLD butter into small chunks and add to the flour.

Cut the butter into the dry ingredients, using a pastry cutter (shown), or 2 forks, or by using your fingers to pinch the ingredients together. Do this until crumbs resemble small peas, and butter is incorporated into mixture. Add the egg and whipping cream to the bowl. Stir to combine.

Butter is cut into flour for scone doughEgg and whipping cream is added to dry ingredients for scones
Continue mixing with spoon or lightly knead the dough in the bowl (with clean hands) until a soft dough ball is formed. Add chocolate chips, caramel pieces, and chopped pecans (or walnuts) to dough.

Scone dough, in a ball in glass mixing bowlChocolate chips, caramel pieces and pecans added to scone dough
Mix the chocolate chips, caramels and pecans gently into dough, until fully blended. Place the dough ball onto a lightly floured work surface, and form dough into a circle, by pressing down and shaping with hands.

Circle should be about 8-9 inches wide and about 2 inches high (approx.). Once formed, cut dough into 8 equal sized wedges using a sharp knife or a pizza cutter.

Scone dough is filled with chocolate, pecans and caramel pieces
Scone dough is shaped into a circle on floured surface
Bake The Chocolate Caramel Pecan Scones

Place wedges onto a parchment paper lined baking sheet (or onto a silicone mat). Place them in a circle, but separate each piece slightly from the others (as shown below). Bake at 400 degrees for 18-10 minutes (check them at 18 minutes- mine were done!).  The scones should be golden brown.

Remove baking sheet from oven. Let scones rest for a couple minutes, then transfer them to a wire rack to finish cooling.

Eight baked chocolate caramel scones, cooling on wire rack
Ready To Serve!

Let the scones cool to room temperature so the chocolate can firm up. Transfer to a serving platter, serve and enjoy!

Baked chocolate caramel pecan scones on green serving plate
See all that chocolate, caramel, and pecan yumminess? Yep. These scones are GOOD! Make sure to store any leftover scones in an airtight container, or wrap them really well in plastic wrap.

Baked scones, with one sitting on top
Now all that’s left to do is grab a cold glass of milk, or a hot mug of tea or coffee, and enjoy a tasty treat!  Be sure to check out ALL of my recipes in the Recipe Index, located at the top of the page. Have a great day!

Interested In More Recipes?

Thank you for visiting this website. I appreciate you using some of your valuable time to do soIf you’re interested, I publish a newsletter 2 times per month (1st and 15th) with all the latest recipes, and other fun info. I would be honored to have you join our growing list of subscribers, so you never miss a great recipe!
There is a Newsletter subscription box on the top right side (or bottom) of each blog post, depending on the device you use, where you can easily submit your e-mail address (only) to be included in my mailing list.

You Can Also Find Me On Social Media:

Facebook page: The Grateful Girl Cooks!
Pinterest:
The Grateful Girl Cooks!
Instagram:
jbatthegratefulgirlcooks

Author's signature

Recipe Source: http://justaboutbaked.com/turtle-scones/

0 from 0 votes
Chocolate Caramel Pecan Scones
Prep Time
10 mins
Cook Time
20 mins
Total Time
30 mins
 
Grab some coffee or tea and enjoy these absolutely delicious scones, filled with milk chocolate chips, caramel and pecans, for breakfast or a simple snack.
Category: Breakfast, Snack
Cuisine: American
Keyword: chocolate caramel pecan scones
Servings: 8 scones
Calories Per Serving: 447 kcal
Author: JB @ The Grateful Girl Cooks!
Ingredients
  • 2 cups flour (all purpose)
  • 1 Tablespoon baking powder
  • 2 Tablespoons granulated sugar
  • 1/4 teaspoons salt
  • 5 Tablespoons butter , VERY cold
  • 1 large egg
  • 1/2 cup heavy whipping cream
  • 12 caramels , chopped into small pieces
  • 3/4 cup milk chocolate chips
  • 3/4 cup pecans (or walnuts) , chopped
Instructions
  1. Preheat oven to 400 degrees before beginning.  Place parchment paper or a silicone mat onto a large cookie sheet.  

  2. Place flour, baking powder, granulated sugar, and salt into a large mixing bowl. Cut VERY COLD butter into small chunks and add to the flour. Cut the butter into the dry ingredients, using a pastry cutter, 2 forks, or by using your fingers to pinch the ingredients together. Do this until crumbs resemble small peas in size, and butter is incorporated into mixture. Add egg and whipping cream to the bowl. Stir with spoon, or lightly knead the dough in the bowl (with clean hands) until a soft dough ball is formed.

  3.  Add chocolate chips, caramel pieces, and chopped pecans (or walnuts) to dough.  Mix well (using your hands is easiest), until fully blended.

  4. Place the dough ball onto a lightly floured work surface, and form dough into a circle, by pressing down and shaping with hands. Circle should be about 8-9 inches wide and about 2 inches high (approx.). Once formed, cut dough into 8 equal sized wedges using a sharp knife or a pizza cutter.

  5. Place wedges onto a parchment paper or silicone mat lined baking sheet . Place wedges in a circle, separating each piece slightly from the others. Bake at 400 degrees for 18-10 minutes (check them at 18 minutes- mine were done!).  The scones should be golden brown.  Remove baking sheet from oven. Let scones rest for a couple minutes, then transfer them to a wire rack. Let scones cool to room temperature so chocolate can firm up. Serve... and enjoy!

Nutrition Facts
Chocolate Caramel Pecan Scones
Amount Per Serving (1 scone)
Calories 447 Calories from Fat 216
% Daily Value*
Fat 24g37%
Saturated Fat 11g69%
Cholesterol 42mg14%
Sodium 191mg8%
Potassium 266mg8%
Carbohydrates 52g17%
Fiber 2g8%
Sugar 23g26%
Protein 5g10%
Vitamin A 480IU10%
Calcium 128mg13%
Iron 2mg11%
* Percent Daily Values are based on a 2000 calorie diet.

Here’s one more to pin on your Pinterest boards!Grab some coffee or tea and enjoy these absolutely delicious scones, filled with milk chocolate chips, caramel and pecans, for breakfast or a simple snack.

Pan-seared Rockfish with Fresh Herbs

Pan-seared rockfish is cooked in seasoned browned butter, and topped with fresh herbs in this delicious, low calorie seafood dish!
Rockfish fillets are pan-seared in seasoned browned butter, and topped with fresh herbs (dill, rosemary and thyme) in this delicious, low calorie seafood dish!

I don’t know about you, but when my husband volunteers to do our grocery shopping, I happily let him take on that task for the week, even if I know some things NOT on my grocery list will find their way into the shopping cart (funny how that always happens)!

Scroll Down For A Printable Recipe Card At The Bottom Of The Page

True Story

Such was the case a few weeks ago! My husband Ken, came home and proudly told me about some great seafood he sampled at the grocery store. He told me he bought some of the fish, and how cool it was that the seafood manager even tucked in fresh herbs to cook with it.

I asked him what KIND of fish he bought and he said ROCKFISH.  Wait- what?  ROCKFISH? I had NEVER EVER heard of it before, and now I have a couple “mystery fish” fillets in my refrigerator that need cooking? So I did what any befuddled person would do in this situation and looked it up online.

What Is Rockfish?

Turns out “rockfish” is also called Pacific Red Snapper, Striped Bass or Rock Cod in North America (there are a LOT of varieties). Most types of this mild-flavored fish are typically found in the Northern Pacific ocean.

A simple 5 ounce serving provides nearly 2/3 of a typical adult’s daily protein requirements, and is very low in calories!

So, I thought about it for a bit, then decided on a simple plan as to how to cook it for our dinner (similar method I use for cooking pan-seared creole salmon). Guess what? It was fantastic!  Low calorie, very light in flavor, and it was a big hit! Who knew?

Pan-seared fish with dill, rosemary and lemon slices, on plate with asparagus.

I tend to take photos of any new recipes I try (or make up as I go), in case it is so good I want to share it! Well, this is one of those kind of recipes, and I’m glad I have the pics to show you!  Here’s how easy it is to make this seafood dish, in under 15 minutes!

How To Make Pan-Seared Rockfish with Fresh Herbs

Start with the fish. Duh. Here are the rockfish fillets, freshly unwrapped.  The seafood manager generously tucked in some fresh dill, rosemary and thyme, and a couple pads of butter for free, too!

First thing you will need to do is lightly season the fish on one side with salt, pepper, and  a tiny bit of garlic powder.

Raw rockfish fillets with butter and herbs

Melt butter and olive oil in a large skillet on medium heat. Add a couple sprigs of rosemary, thyme and dill to the butter as it melts to help infuse a little bit of the fresh herb flavor.

Add the fish, and place the herbs on top of each piece while they cook. It takes about 3-4 minutes to pan-sear the bottom of the fish to a golden brown color. Move the herbs over to the side of skillet, and carefully turn the fish over, and continue cooking.

Pan-searing fish with fresh herbs in skillet

While the pan-seared rockfish cooks, occasionally spoon some of the melted butter over the pieces of fish. This adds so much flavor to the fish. Don’t skip this step!

Spooning melted butter over golden brown rockfish fillets in skillet

After spooning butter over fish, place the herbs back on top. Continue cooking the rockfish 3-4 additional minutes until done, or it flakes easily. Discard the cooked pieces of rosemary, thyme and dill.

Transfer the fish to serving plates (I used two spatulas to make sure the long fillet didn’t break in the middle).

Rockfish fillets cooking, with rosemary and other fresh herbs on top

Time To EAT!

Your pan-seared rockfish is now ready to eat! To serve, I garnish each piece of rockfish with a couple lemon slices and a FRESH twig of rosemary and dill. The fresh herbs make it look really nice on the plate. 

We also had some fresh asparagus with the fish, and totally enjoyed our simple, healthy meal!

Pan-seared rockfish with lemon and herbs on plate with asparagus

If you’ve never had rockfish before, I would urge you to check out the seafood counter at your local grocery store and see if they carry it! 

This rockfish dish is quite delicious, hardly takes any time at all to cook, and is so easy to prepare! Have a great day, and please come back again soon.

Looking For More ROCKFISH Recipes?

You can find ALL my recipes in the Recipe Index, located at the top of the page. I have some wonderful recipes for rockfish, including:

Interested In More Recipes?

Thank you for visiting this website. I appreciate you using some of your valuable time to do soIf you’re interested, I publish a newsletter 2 times per month (1st and 15th) with all the latest recipes, and other fun info. I would be honored to have you join our growing list of subscribers, so you never miss a great recipe! 

There is a Newsletter subscription box on the top right side (or bottom) of each blog post, depending on the device you use, where you can easily submit your e-mail address (only) to be included in my mailing list.

You Can Also Find Me On Social Media:

Facebook page: The Grateful Girl Cooks!
Pinterest:
The Grateful Girl Cooks!
Instagram:
jbatthegratefulgirlcooks

Author's signature

0 from 0 votes
Pan-seared Rockfish with Fresh Herbs
Prep Time
5 mins
Cook Time
8 mins
Total Time
13 mins
 
Rockfish fillets are pan-seared in seasoned browned butter, and topped with fresh herbs (dill, rosemary and thyme) in this delicious, low calorie seafood dish!
Category: Dinner, Entree
Cuisine: American
Keyword: rockfish
Servings: 2 servings
Calories Per Serving: 265 kcal
Author: JB @ The Grateful Girl Cooks!
Ingredients
  • 2 rockfish fillets , approx. 5 ounces each
  • 1 pinch salt, pepper and garlic powder , to lightly season each fish fillet
  • 3 Tablespoons butter
  • 1/2 Tablespoon olive oil
  • 4 sprigs fresh dill
  • 4 sprigs fresh rosemary
  • 4 sprigs fresh thyme
For Garnish:
  • 2 sprigs fresh dill , 1 for each fillet
  • 2 sprigs fresh rosemary , 1 for each fillet
  • 4 slices lemon , thinly sliced
Instructions
  1. Lightly season the fish on one side with salt, pepper, and  a teensy bit of garlic powder.

  2. Melt butter and olive oil in a large skillet on medium heat. Add rosemary, thyme and dill to the butter as it melts to help infuse a little fresh herb flavor. Add the fish to skillet, and place the herbs on top of each piece while they cook (takes about 3-4 minutes to pan-sear the bottom of the fish to a golden brown color). Transfer herbs to side of skillet, and carefully turn fish to the other side, and continue cooking. While the fish cooks, spoon some of the melted butter over the pieces of fish. After spooning butter over fish, place the herbs back on top, and continue cooking fish approximately 3-4 additional minutes until done, and fish flakes easily. 

  3. Transfer fish to individual serving plates (I used two spatulas so the long fillets wouldn't break in the middle). Garnish each fillet with two lemon slices and a fresh twig of rosemary and dill, if desired (they make the fish look really nice on the plate!). Serve, and enjoy!

Recipe Notes

Can't find rockfish? Substitute red snapper or striped bass fillets.

Nutrition Facts
Pan-seared Rockfish with Fresh Herbs
Amount Per Serving (1 fillet (5 ounces))
Calories 265 Calories from Fat 144
% Daily Value*
Fat 16g25%
Saturated Fat 8g50%
Cholesterol 100mg33%
Sodium 496mg22%
Potassium 566mg16%
Carbohydrates 1g0%
Protein 26g52%
Vitamin A 475IU10%
Vitamin C 10.6mg13%
Calcium 28mg3%
Iron 0.8mg4%
* Percent Daily Values are based on a 2000 calorie diet.

Here’s one more to pin on your Pinterest boards!Rockfish fillets are pan-seared in seasoned browned butter, and topped with fresh herbs (dill, rosemary and thyme) in this delicious, low calorie seafood dish!

Apple Cinnamon Overnight Oats

You’ll love this easy, delicious recipe for creamy apple cinnamon overnight oats, with cinnamon and pecans! Make them in 10 minutes, refrigerate the filled jars overnight, and enjoy a wonderfully creamy breakfast treat waiting for you in the morning!
You'll enjoy these easy, delicious Apple Cinnamon Overnight Oats with pecans! Make them in 10 minutes, refrigerate, and enjoy in the morning!

I’ve been really having fun trying different flavor combinations for overnight oats recently, and have already made Banana Coconut, Strawberry Coconut, and Chocolate Banana.  All of them are so good! I love the convenience of taking a few minutes at night to mix them up, and then waking up to, and eating, a creamy jar of deliciously flavored apple overnight oats that’s ready first thing in the morning!

I decided to make one of my favorite combinations… apple overnight oats with cinnamon (the TYPICAL way I eat oatmeal)! YUM.  This recipe was adapted from a few of the other oatmeal recipes I’ve made, and just added the ingredients I wanted to it.

I also added a few chopped pecans (you can substitute walnuts), for extra crunch, and some chia seeds which really help to fill you up… and they turned out REALLY good! Here’s how easy it is to make them:

Scroll Down For A Printable Recipe Card At The Bottom Of The Page

How To Make Apple Cinnamon Overnight Oats

Start by cooking diced apples in a bit of water, brown sugar, and cinnamon in a skillet on medium heat, until apples have slightly softened, and the liquid has reduced slightly in volume (about 5 minutes). Stir occasionally.

During the last minute of cooking, add the chopped pecans. Once apples have softened slightly, remove skillet from heat.

Diced apples cooking with brown sugar, cinnamon and water in skillet

Apples, pecans, cinnamon and brown sugar, in skillet

Time To Fill the Jars!

Divide rolled oats, vanilla, and chia seeds evenly into two containers (I used canning jars). Divide and add apple cinnamon overnight oats evenly (plus any syrup left in skillet) into jars.

Fill the jars with almond milk (or milk of your choice), until oat mixture is covered.

Oats, apples, chia seeds added to canning jars

Almond milk added to overnight oats in two jars

Stir each jar well, to fully incorporate all of the ingredients. Place a cover on each jar, and place jars in refrigerator and chill overnight.

Two covered jars with overnight oats inside

After refrigerating the apple cinnamon overnight oats while you slept, remove them from the refrigerator when ready to eat.

Grab a spoon, and dig into this creamy, flavor-filled, filling breakfast! Unopened jars of apple cinnamon overnight oats will keep for up to 3-4 days in refrigerator.

Two jars of overnight oats with a spoon and three apples in front
Hope you will consider making these delicious apple cinnamon overnight oats for a quick breakfast! The recipe is easily doubled or tripled, and I am confident you’ll enjoy this yummy treat. Have a GREAT day!

Looking For More Recipe Using Oatmeal?

If you enjoy oatmeal in other forms, you might also enjoy trying my recipes for Peach Cobbler Overnight Oats, Banana Bread Baked Oatmeal, Healthy Chocolate Oatmeal, Maple Nut Oatmeal, or Apple Cinnamon Steel Cut Oats with Pecans! Have a great day!

Interested In More Recipes?

Thank you for visiting this website. I appreciate you using some of your valuable time to do soIf you’re interested, I publish a newsletter 2 times per month (1st and 15th) with all the latest recipes, and other fun info. I would be honored to have you join our growing list of subscribers, so you never miss a great recipe!
There is a Newsletter subscription box on the top right side (or bottom) of each blog post, depending on the device you use, where you can easily submit your e-mail address (only) to be included in my mailing list.

You Can Also Find Me On Social Media:

Facebook page: The Grateful Girl Cooks!
Pinterest:
The Grateful Girl Cooks!
Instagram:
jbatthegratefulgirlcooks

Author's signature

0 from 0 votes
Apple Cinnamon Overnight Oats
Prep Time
10 mins
Cook Time
0 mins
Total Time
10 mins
 
You'll enjoy these easy, delicious Apple Cinnamon Overnight Oats with pecans! Make them in 10 minutes, refrigerate, and enjoy in the morning!
Category: Breakfast
Cuisine: American
Keyword: apple cinnamon overnight oats
Servings: 2
Calories Per Serving: 304 kcal
Author: JB @ The Grateful Girl Cooks!
Ingredients
  • 1/2 large apple , peeled, diced
  • Tablespoons brown sugar
  • 3/4 teaspoon cinnamon
  • 6 pecans , chopped
  • Tablespoons water
  • 1 cup old fashioned rolled oats , (not instant)
  • 1/2 teaspoon vanilla extract
  • 2 teaspoon chia seeds
  • 1 cup unsweetened almond milk , (approximate)
Instructions
  1. Cook diced apples in water, brown sugar, and cinnamon in a skillet on medium heat, until apples have slightly softened, and the liquid has reduced slightly in volume (about 5 minutes). Stir occasionally. During the last minute of cooking, add the chopped pecans. Once apples have softened slightly, remove skillet from heat.

  2. Divide rolled oats, vanilla, and chia seeds evenly into two containers (I used canning jars). Divide and add apple mixture evenly (plus any syrup left in skillet) into jars. Fill jars with almond milk, until oat mixture is covered. Stir each jar well, to fully incorporate ingredients. 

  3. Place a cover on each jar, and place jars in refrigerator overnight. In morning, serve and enjoy! Unopened jars can be stored in refrigerator for 3-4 days.

Nutrition Facts
Apple Cinnamon Overnight Oats
Amount Per Serving (1 serving)
Calories 304 Calories from Fat 72
% Daily Value*
Fat 8g12%
Sodium 170mg7%
Potassium 215mg6%
Carbohydrates 51g17%
Fiber 7g29%
Sugar 20g22%
Protein 7g14%
Vitamin C 2.1mg3%
Calcium 216mg22%
Iron 2.3mg13%
* Percent Daily Values are based on a 2000 calorie diet.

Here’s one more to pin on your Pinterest boards!You'll enjoy this easy, delicious breakfast of creamy Apple Cinnamon Overnight Oats with pecans! Make them in 10 minutes, refrigerate, and enjoy in the morning!

Tortellini Marinara and Zucchini Bake

Enjoy Tortellini Marinara Zucchini Bake (Wt. Watchers), a meatless casserole, with cheese tortellini, sauce, zucchini, spinach, & mozzarella!

You’re gonna enjoy this Italian, layered, vegetarian baked casserole, with cheese tortellini, marinara sauce, zucchini, onions and baby spinach, topped with mozzarella cheese! It’s a flavorful, meatless (you won’t miss it), lightened up dinner, (under 400 calories), for the win!

I found this recipe last Fall on the Weight Watchers website, thought it sounded good, and decided to give it a try.  I tweaked the recipe a bit, to serve 4 instead of 8, added a couple ingredients and changed the cooking method. The casserole is baked, but if you prefer, instructions for using a slow cooker (and frozen tortellini) are available below, in the printable recipe notes.

We enjoyed our meal very much (lots of Italian flavor in the marinara sauce, cheese tortellini, and yummy fresh veggies in this meal!), and wanted to share the recipe with you. Here’s how to make this dish:

Scroll Down For A Printable Recipe Card At The Bottom Of The Page

Cook the Veggies

Diced fresh zucchini and chopped onions are cooked in olive oil on medium high heat for about 5 minutes (the veggies will be very lightly browned).  Minced garlic is added to the skillet, stirred in, and cooked for another minute.

Zucchini, onion and garlic cooked for tortellini sauce

Add fresh baby spinach leaves, 1 cup of marinara sauce, and seasonings to the skillet. Stir well.  The spinach can be added in small batches. It looks like a LOT of spinach going in the skillet, but it will definitely wilt down!

Cove the skillet and simmer the veggies for 2-3 minutes, until the spinach has fully wilted.  At this point, you can add additional salt and pepper, if you wish, to suit your taste.

Fresh spinach is added to zucchini marinara sauce to wilt down

Assemble The Tortellini Marinara Zucchini Bake

I use a 2 quart casserole dish for the casserole (for 4 servings).  To assemble this meal, build it in layers.  Spoon 1/2 cup of marinara sauce over bottom of dish.  Add HALF of the cooked cheese tortellini to cover the sauce (photo shows only half of the sauce covered). Top the tortellini with HALF of the veggie mixture.

Layer of tortellini added to baking dish, then zucchini and spinach sauce.Add the rest of the tortellini to top of the veggies.  Top with the rest of the veggie mixture. For the final layer, pour 1/2 cup of reserved marinara sauce over top of veggies, then sprinkle with grated mozzarella  and Parmesan cheese.

Tortellini with marinara, veggies, and grated cheese on top, ready to bake

Bake The Casserole

Cover the dish loosely with aluminum foil (try not to let the foil touch the top of the cheese, if possible).  Bake in a 350 degree oven for 20 minutes, then remove foil and bake for 10 more minutes, or until cheese is melted and bubbly.

Remove casserole from oven. Here’s what the casserole looked like when ready to serve. Looks pretty good, huh? Smells good, too!

Tortellini, marinara, and zucchini baked casserole out of oven

Time To EAT!

All that’s left to do is grab a big spoon or spatula, and serve this delicious pasta dish up, while hot!

Tortellini and zucchini baked casserole in white serving bowl

Cheese tortellini, marinara sauce and zucchini, in white serving bowl.

Hope you will consider trying this tasty, filling Italian pasta and vegetable dish (don’t think you’ll even miss not having meat in it).  Have a wonderful day. Thank you for stopping by, and I hope you will come back soon.

Looking For More TORTELLINI Recipes?

You can find ALL my recipes in the Recipe Index, which is located at the top of the page. I have some delicious pasta recipes there, including these using tortellini:

Interested In More Recipes?

Thank you for visiting this website. I appreciate you using some of your valuable time to do soIf you’re interested, I publish a newsletter 2 times per month (1st and 15th) with all the latest recipes, and other fun info. I would be honored to have you join our growing list of subscribers, so you never miss a great recipe!
There is a Newsletter subscription box on the top right side (or bottom) of each blog post, depending on the device you use, where you can easily submit your e-mail address (only) to be included in my mailing list.

You Can Also Find Me On Social Media:

Facebook page: The Grateful Girl Cooks!
Pinterest:
The Grateful Girl Cooks!
Instagram:
jbatthegratefulgirlcooks

Author's signature

Recipe Adapted From: https://cmx.weightwatchers.com/nui/explore/details2/WWRECIPE:59ce95dd03c03049fd3f55db

↓↓ PRINTABLE RECIPE BELOW ↓↓

0 from 0 votes
Tortellini Marinara and Zucchini Bake
Prep Time
20 mins
Cook Time
30 mins
Total Time
50 mins
 
Enjoy this Weight Watchers Italian (vegetarian) casserole, with cheese tortellini, marinara sauce, zucchini, and baby spinach, topped with mozzarella cheese!
Category: Dinner
Cuisine: Italian
Keyword: tortellini
Servings: 4 servings
Calories Per Serving: 385 kcal
Author: JB @ The Grateful Girl Cooks!
Ingredients
  • 1 teaspoon olive oil (extra virgin)
  • 3 zucchini (uncooked, small)
  • 1/2 onion (chopped)
  • teaspoons minced garlic
  • 2 cups marinara sauce , divided (store bought)
  • 4 cups fresh baby spinach
  • 1/4 teaspoon salt
  • 1/4 teaspoon black pepper
  • 1/4 teaspoon crushed red pepper flakes
  • 3 cups cheese tortellini (without sauce-cooked and drained)
  • 1/2 cup part-skim mozzarella cheese , shredded
  • 1/4 cup Parmesan cheese (+ additional for garnish, if desired)
Instructions
  1. Cook tortellini according to package instructions. Once cooked, drain and rinse with cold water. Set aside. TIP: I found it easy (and a timesaver) to cook the tortellini at the same time the zucchini/sauce mixture was cooking.

  2. Heat olive oil in large skillet on medium high heat.  Add diced zucchini and chopped onions, stir often, and cook on medium high heat for about 5 minutes (the veggies will be very lightly browned).  Add the minced garlic to the skillet, stir to combine, and cook for another minute (be careful to stir and not let the garlic burn, or it will taste bitter).

  3. Add baby spinach leaves, 1 cup (reserve the rest) of marinara sauce, red pepper flakes, salt and pepper to the skillet. Stir well, to combine. TIP: The spinach can be added in small batches... it looks like a LOT of spinach going in the skillet, but it will definitely wilt down!  Once it has wilted, add more to skillet. Once all spinach has been added, cover the skillet, and simmer on low heat for 2-3 minutes, until the spinach has fully wilted.  At this point, additional salt and pepper can be added, to suit your taste.

  4. Layer the casserole this way:  Spoon 1/2 cup of the reserved marinara sauce over bottom of dish.  Add HALF of the cooked/drained tortellini on top of the sauce. Cover the tortellini with HALF of the veggie/sauce mixture. Cover that with the rest of the tortellini.  Cover that with the rest of the veggie mixture. Pour remaining 1/2 cup of marinara sauce over top of veggies, then sprinkle with grated mozzarella  and Parmesan cheese.

  5. Cover the dish loosely with aluminum foil (try not to let the foil touch the top of the cheese, if possible).  Bake in a 350 degree oven for 20 minutes, then remove foil and bake for 10 more minutes, or until cheese is melted and bubbly.  Remove casserole from oven. Serve, and enjoy!

Recipe Notes

TIP: If desired, recipe can be made using FROZEN tortellini (packaged without sauce) in a SLOW COOKER, following same process as detailed above (except for pre-cooking the tortellini). Tortellini can be layered in while still frozen. Casserole should be cooked on LOW (covered) until tortellini are tender and fully heated through, (approximately 5 hours). I have not personally tried this, but Weight Watchers recipe utilized this cooking method.

Nutrition Facts
Tortellini Marinara and Zucchini Bake
Amount Per Serving (1 serving (1½ cups))
Calories 385 Calories from Fat 108
% Daily Value*
Fat 12g18%
Saturated Fat 4g25%
Cholesterol 43mg14%
Sodium 1357mg59%
Potassium 988mg28%
Carbohydrates 49g16%
Fiber 7g29%
Sugar 12g13%
Protein 22g44%
Vitamin A 3790IU76%
Vitamin C 44.7mg54%
Calcium 368mg37%
Iron 4.7mg26%
* Percent Daily Values are based on a 2000 calorie diet.

Here’s one more to pin on your Pinterest boards!Enjoy Tortellini Marinara Zucchini Bake (Wt. Watchers), a meatless casserole, with cheese tortellini, sauce, zucchini, spinach, & mozzarella!